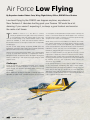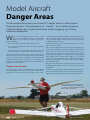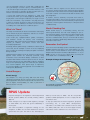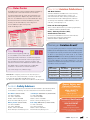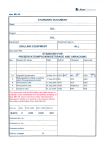
1
May/June 2014 POINTING TO SAFER AVIATION Laser Pointers – New Legislation Landing iCockpit Considerations Air Force Low Flying In this issue... 4 7 10 14 Laser Pointers – New Legislation New regulations became effective on 1 March 2014, limiting the acquisition and supply of laser pointers with an output of more than one milliwatt. Any such device is now classed as a “high-power laser pointer”. Check NOTAMs and AIP Supplements 3 Laser Pointers – New Legislation 4 Part 115 Flight and Duty Times 6 Maintenance Controller Course – Enrol Now 6 Landing7 iCockpit Considerations 10 Personal Preflight – AvKiwi Safety Seminar 13 Aviation Safety Coordinator Course 13 Air Force Low Flying 14 Managing Wire Hazards 16 Model Aircraft Danger Areas 18 RPAS Update 19 Eye Surgery 20 Call for Nominations 22 Final Reminder on Cessna SIDs Compliance 22 New Rules Poster 23 New Met Blog 23 Aviation Safety Advisers 23 Air Force Low Flying How to Get Aviation Publications 23 Low-level flying by the RNZAF can happen anytime, anywhere in New Zealand. A Hercules hurtling past your Cessna 152 could be a bit alarming if you weren’t expecting it, so keep a good lookout and monitor the radio at all times. Planning an Aviation Event? 23 Accident Briefs 24 GA Defects 26 What’s New? 28 Landing Your landings can be improved by remembering some of that stuff you were taught originally but that may now have faded with time. Using some discipline in planning and executing your everyday landings will help you cope when the situation goes abnormal, such as in an engine failure. iCockpit Considerations iPads and tablet computers are becoming popular equipment in the cockpit, but like anything new, some understanding is required before you can make the leap from paper charts to pixels. Cover: Lasers are a new threat to aviation safety but recent legislation limits their availability. See the article on page 4. Background: ©istockphoto.com/Nicemonkey Published by Safety Promotion Unit of the Civil Aviation Authority of New Zealand, PO Box 3555, Wellington 6140. Tel: +64 4 560 9400, Fax: +64 4 569 2024, Email: info@caa.govt.nz. Published six times a year, in the last week of every odd month. Manager Safety Promotion Bill Sommer. Editor Peter Singleton. The Vector Team Charlie Brimmicombe, Alister Buckingham, Lakshmi Guda, Rose Wood. Design Gusto. 2 vector May/June 2014 Publication Content Unless expressly stated as CAA policy, the views expressed in Vector do not necessarily reflect the policy of the Civil Aviation Authority. Articles are intended to stimulate discussion, and nothing in Vector is to be taken as overriding any New Zealand civil aviation legislation, or any statements issued by the Director of Civil Aviation, or the Civil Aviation Authority of New Zealand. Reader comments and contributions are welcome and may be published, but the Editor reserves the right to edit or abridge them, and not to publish those that are judged not to contribute constructively towards safer aviation. Reader contributions and correspondence regarding the content of Vector should be addressed to: Vector Editor, PO Box 3555, Wellington 6140, or email: info@caa.govt.nz. Free Distribution Vector is distributed automatically to all New Zealand flight crew, air traffic controllers, aircraft maintenance engineer licence holders, aircraft owners, most organisations holding an aviation document, and to certain other persons and organisations interested in promoting safer aviation. In the case of flight crew and air traffic controllers, a current aviation medical certificate must be held, and a current New Zealand address given, to ensure magazine entitlement. Holders of Pilot Certificates issued by Part 149 certificated organisations can also apply to receive a free Vector (see the CAA web site for details). Vector also appears on the CAA’s web site: www.caa.govt.nz. Change of Address Readers receiving Vector free of charge should notify info@caa.govt.nz of any change of address, quoting your CAA Client Number. Paying subscribers should notify Vertia. Paid Subscriptions Vector is available on subscription only from Vertia, www.vertia.co.nz, email: info@vertia.co.nz, or freephone 0800 GET RULES (0800 438 785). Copyright Reproduction in whole or in part of any item in Vector, other than material shown to be from other sources or named authors, is freely permitted, providing that it is intended solely for the purpose of promoting safer aviation, and providing that acknowledgment is given to Vector. ISSN 1173-9614 Check NOTAMs and AIP Supplements Checking NOTAMs and AIP Supplements is just as important as checking the weather, charts, fuel, the aircraft and preflighting yourself. As the following examples show, your life and your passengers' lives can depend on having the information advised by NOTAMs and AIP Supplements. NOTAM Refresher Location identifier. NOTAM can relate to an aerodrome, airspace or chart. Date and time in UTC at which the NOTAM becomes effective. Date and time at which the NOTAM ceases. LOCATION (NZXX): A0181/14 FROM: 31 JAN 2014 00:09 TO: 30 APR 2014 00:00 EST AD CLSD TO ALL FIXED WING ACFT DUE WIP Each NOTAM is allocated a series type. Either A (Domestic – distributed to NZ only) or B (International). This is followed by the serial number and year of issue. A t the annual aerobatics competitions this year, operations at Waipukurau were running to a tight schedule because Cyclone Lusi was forecast to hit the next day. The aerobatics box was in constant use. During one display, as a Giles G200 was recovering from a loop, a Tomahawk appeared and flew through the aerobatics box right at the Giles’s recovery height. No radio calls were made by the Tomahawk pilot. Other recent airspace infringements include an aircraft flying through a Military Operating Area during a live-ammunition exercise, and another aircraft flying through a Danger Area where an Unmanned Aerial Vehicle was operating. To avoid similar incidents, your flight planning should always include a check of the current NOTAMs (www.ifis.airways.co.nz) and AIP Supplements (www.aip.net.nz). These are provided free of charge. NOTAMs NOTAMs advise you about the status of aeronautical facilities, services, procedures, or hazards. Also note that some Danger Areas, Military Operating Areas, and Restricted Areas are active only when advised by NOTAM – see AIP New Zealand ENR 5 for further details. An example of the Visual Navigation Chart depiction of a Danger Area activated by NOTAM can be found on page 19. Marc Brogan, CAA Aviation Examiner, stresses that often pilots are being too casual when checking NOTAMs. NOTAM text – standard abbreviations are listed in AIP New Zealand GEN 2.2. “There have even been issues with dual instructional flights operating into aerodromes where the runways have been NOTAMed as closed. You need to be careful when decoding NOTAMs – don’t just skim-read them. For example, there’s a big difference between RWY CLSD and GRASS RWY CLSD. “You also need to think practically. If you are uncertain about the contents of an airfield NOTAM, contact the aerodrome operator,“ says Marc. AIP Supplements AIP Supplements are issued every 28 days. They contain information that is of a temporary nature not urgent enough to warrant a NOTAM, or where a NOTAM wouldn’t be suitable due to the extensive text or graphics required. Project Deepwave An unusual activity that will be advised by Supplement and NOTAM is coming up in June. Project Deepwave is an atmospheric research project that involves two specially-equipped jet aircraft operating by day and night, lasers, radiosonde deployments, and balloon launches. Project Deepwave is described in AIP Supplement 59/14, effective from 5 June to 21 July 2014. Day to day activity will be advised by NOTAM, listing the type of operation and the areas affected. vector May/June 2014 3 Laser Pointers – New Legislation New regulations became effective on 1 March 2014, limiting the acquisition and supply of laser pointers with an output of more than one milliwatt. Any such device is now classed as a “high-power laser pointer”. T he Health (High-power Laser Pointers) Regulations 2013 also define “authorised recipient” and “authorised supplier”. “Authorised” means authorised by the Director-General of Health, who may also declare classes of persons as authorised if they have a bona fide reason for using these devices. These include astronomical societies, and persons who would use laser pointers in the course of their work. Pilot reporting of laser incidents added impetus to the development of the new legislation. The regulations can be downloaded from the New Zealand Legislation web site, www.legislation.govt.nz. Also relevant, and available on the same web site, is the Customs Import Prohibition (High-power Laser Pointers) Order 2013. The Order basically bans the importing of high-power laser pointers without the consent of the Director-General of Health. Information on applying for possession, supply or import can be found on the Ministry of Health web site, www.health.govt. nz/our-work/environmental-health/high-power-laser-pointers. New Amendment Act There is a related Bill going through the legislative process at the moment, which is likely to become the Summary Offences (Possession of High-power Laser Pointers) Amendment Act 2012. This would add a new section 13B to the Summary Offences Act 1981, making it illegal to possess a high-power laser pointer in public without reasonable excuse; with penalties of up to three months’ imprisonment, or a fine up to $2000. Background: ©istockphoto.com/Nicemonkey Effect on Misuse 4 It will be some time before any measurable effect on the number of aircraft laser strikes is apparent, as a result of these new legislative provisions. From a reported 20 incidents in 2007, the numbers have climbed steadily to over 100 in 2013. The difficulty with aircraft strikes is locating and apprehending the offenders, particularly when the target aircraft is established on approach and cannot deviate to search. In one recent event, however, a person targeted a helicopter in the Auckland area, only to find that it was the Police helicopter. It had the means to locate the offender and direct ground units to the address. The alleged offender was arrested and charged under the Crimes Act 1961. vector May/June 2014 What Are the Hazards? The red laser pointers commonly seen in classrooms and conference venues are low-powered devices of less than one milliwatt (mW), emitting light in the wavelength range of 630 to 670 nanometres (nm, or 10-9 m). These are ‘Class 2’ laser devices (the higher the class number, the greater the hazard), with insufficient power to cause actual harm, but still requiring care in operation. Green pointers with a power rating of 5 mW, commonly used for astronomy classes, are classified ‘3R’ (more hazardous than Class 2). They emit light at a wavelength of 532 nm, perceived by the human eye as green. The eye’s maximum sensitivity to visible light is around this wavelength, and the eye will interpret a green laser light as being up to 30 times brighter than a red laser of the same power. Direct eye exposure to one of these laser beams can result in momentary ‘flash blindness’ with possible after-images, the duration depending on the relative brightness. As these incidents invariably occur at night, a pilot’s eyes would be at least partially dark-adapted, and thus more susceptible to dazzling. The human eye has a natural blinking reflex that activates after about 0.25 seconds’ exposure, limiting the amount of light reaching the retina. Nevertheless, the dazzling effect on the eye can be a major distraction, particularly in high-workload situations. Some of the reported incidents took place immediately after takeoff, and probably before the crew had fully transitioned on to instruments. A 2013 incident involving an air ambulance aircraft at New Plymouth resulted in both pilots and a crewman suffering dazzle after-effects for about an hour afterwards. To inflict actual eye damage with a 5 mW green laser pointer would require some effort, as both the low power and the eye’s natural defence would combine to limit potential damage. So, one might think, these devices can be written off as little more than a nuisance. Not so. Some vendors advertise higher-powered (from 10 to 400 mW) green or blue laser pointers – these are definitely harmful, and can cause permanent eye damage. Price may put these out of the reach of normal users, but not necessarily for someone with malicious intentions. These devices are definitely targeted by the new legislation. The example in this photo is a 30 mW laser pointer – well above the legal threshold. Criminal Acts In the Event of Exposure In the USA, the targeting of aircraft by lasers is taken very seriously, as some offenders have discovered. Cases can be taken under anti-terrorist legislation with its inherent severe penalties. A recent prosecution saw one offender sentenced to 14 years’ imprisonment. »» Do not stare directly into the beam – avert or shield the eyes if possible. Australia has legislation under which laser misuse can be prosecuted, and some Australian states and the UK restrict the public sale of laser pointers to Class 2 or lower. In Victoria, pointers more powerful than 1 mW are classified as ‘prohibited weapons’. As well as the new legislation described at the beginning of this article, other relevant laws are the Civil Aviation Act 1990, section 44 Dangerous activity involving aircraft... and the Crimes Act 1961, section 270 Endangering Transport. The latter two have been used by New Zealand enforcement agencies for prosecutions relating to the misuse of laser pointers. Tracking Down the Source Another difficulty in locating the culprit is a pilot’s natural reaction to look away from the light source, making it difficult to pinpoint its actual origin. A characteristic of the green laser beam, however, is its visibility even on a clear night. It shows up clearly as a shaft of green light, and this can make it easy for a ground-based observer to track it down without being exposed to its direct glare. Prompt reporting of any instances of aircraft being targeted by a laser beam will assist police in locating the source. »» If your vision is affected, hand over control (assuming a twopilot crew, and that the other pilot has not been affected). »» Turning up cockpit lighting may assist in overcoming the ‘flash’ after-effects (peripheral vision may still be effective). »» Do not rub the eyes after exposure. »» If any lingering effect is experienced, seek medical attention after landing. »» Report the occurrence (immediately to ATC, and as soon as possible through your normal reporting channel). »» Additionally, please take the time to submit a Form CAA800, Laser Beam Exposure Questionnaire, available on the CAA web site. Laser Pointer Precautions »» Never aim a laser pointer at persons, vehicles or aircraft, no matter how far away they are. »» Keep these devices out of the reach of children. »» Never look directly into a laser beam, especially not through an optical instrument such as binoculars. »» Do not aim a laser beam at a mirror or similar surface. »» Do not use a pointer explanatory labels. that lacks warning and/or »» If you know somebody with a green ‘astronomy’ type pointer, caution them specifically against targeting aircraft. vector May/June 2014 5 Part 115 Flight and Duty Times Concerns have been raised that Part 115 operators aren’t following their flight and duty exposition requirements. Smaller operations with fewer staff need to manage their flight and duty responsibilities well ahead of time. Use every bit of information you have available: check your advance bookings and take weather forecasts into account. Make sure you have enough staff available to manage sick days and leave. Pilots have raised concerns about unreasonable overwork that breaches Civil Aviation Rules and exposition requirements. “In some Part 115 businesses, pilots employed part-time may also have employment elsewhere. It’s extremely important to communicate when they are needed,” says Jeanette. Jeanette Lusty, CAA Team Leader Flight Operations Adventure Aviation, gives Part 115 operators a heads-up. “During ongoing audits, we will be checking flight and duty times and pilot logbooks as normal procedure for safe operations. “Take care to ensure Part 115 flight and duty times are not exceeded,” says Jeanette. Rostering It’s important to maintain good working relationships with your employees. Those responsible for setting the roster sometimes need to involve the people being rostered. Maintenance Controller Course – Enrol Now If you are responsible for the maintenance of your organisation’s aircraft, or even if you own your own aircraft, the CAA’s Maintenance Controller Course will give you the building blocks you need to understand the planning and direction of maintenance. Part 115 and 119 organisations are required to have a designated Maintenance Controller. The role of the Maintenance Controller is to ensure that all the rule requirements are met for maintenance of the aircraft. They are not the engineer carrying out the work. They are acting on behalf of the aircraft owner to make sure their obligations are met. The course is in two parts: Phase one is a pre-workshop self-paced learning module that explores the Civil Aviation Rules. You can complete it from the comfort of your own couch – it can take up to 10 hours. Access to the Internet is required. Phase two is a two-day workshop that focuses on helping you acquire practical experience. 6 vector May/June 2014 Also note that when wet weather prevents flying, it may not be acceptable to roster off staff at short notice. A wet weather day should be used for other things, such as paperwork and hangar maintenance. The Rules The following Civil Aviation Rules limit duty periods and provide roster guidelines for operators: »» Civil Aviation Rules, Part 115, Subpart G – Fatigue of Flight Crew »» Advisory Circular AC119-2 Air Operations – Fatigue of Flight Crew. Courses for 2014 Palmerston North 25 to 26 June Hotel Coachman Tauranga 12 to 13 August Oceanside Resort and Twin Towers Auckland 14 to 15 October Sudima Auckland Airport Hotel Register Online It’s easy to register and pay for a Maintenance Controller Course. An enrolment form with payment options is on the CAA web site, www.caa.govt.nz, “Seminars and Courses – Maintenance Controller Course”. Payment must be made in full to guarantee your place on the course. Enrolments close three weeks before the course date as pre-course training notes need to be distributed and completed. If you successfully pass the end of course exam, you may wish to register with Service IQ and pursue a further qualification, the National Certificate in Aeronautical Engineering (Maintenance Control). The Maintenance Controller Course accounts for 18 of the 43 credits required for the National Certificate. The remaining credits can be achieved through a workplace assessment. NZQA certificate details are available on the NZQA web site, www.nzqa.govt.nz – search using the reference number 1132. Landing Your landings can be improved by remembering some of that stuff you were taught originally but now may have faded with time. Using some discipline in planning and executing your everyday landings will help you cope when the situation goes abnormal, such as in an engine failure. I n general, every successful landing has an element of pre-planning, followed by actually getting the aeroplane to a point from where a landing can be made. Stabilised Approach The key to any good landing is a stabilised approach – this means simply that you are at the right height, the right speed, and on the right approach path (ideally on the runway extended centreline) by a predetermined point. The larger the aircraft, the further from touchdown that predetermined point will be. For example, a large transport aircraft should be on a stabilised approach by 1000 feet (agl) in IMC, or by 500 feet in VMC. On the three-degree glidepath used by these aircraft, these heights correspond respectively to 3.3 and 1.6 NM from touchdown. Lower figures usually apply to light aircraft, and may vary between operators or training organisations. Possibly the lowest stabilised approach point you will see is on an agricultural operation. These pilots are well-practised, making many landings per hour, and have the ‘arrival’ down to a fine art. The rollout on to final may blend smoothly into the round-out, closely followed by touchdown. The keyword here of course is ‘practice’. Back to the Basics Getting to the stabilised-approach point is probably best achieved by flying an accurate circuit, and completing all pre-landing checks early so that you can focus on accuracy and finesse. By circuit, we mean at least three legs of the standard circuit, ie, the downwind leg, base leg and final. Learning the cues for joining on base or final takes time and practice, and these aspects can be explored when you’ve mastered the basics. to an unfamiliar aerodrome, check the data on the relevant AIP aerodrome chart beforehand. Training organisations, depending on the type of aircraft used, will teach runway spacing on the downwind leg by reference to some feature on the wing, be it a paint line, fuel cap, or a certain point on the strut of a high-wing aircraft. Using the wing itself as a virtual T-square can help you fly parallel with the runway, applying drift corrections as required if there is a crosswind at circuit height. Once you’ve got that sorted, note the heading and/or the wing/runway angle, and use these next time round if on repetitive circuits. After you’ve completed your pre-landing checks, the remainder of the downwind leg is a good opportunity for some practice on accurate altitude control. Maintain a good lookout, and keep a mental picture of where any other traffic is. Make your own radio calls clear and concise, and at the correct time or position. Base Turn The turn on to base leg is usually begun when the landing threshold is in your half-past-seven position (on a left-hand circuit). That’s 45 degrees back over your left shoulder, in other words. For a right-hand circuit, read half-past-four position and right shoulder respectively. Starting the base turn, apply carb heat if applicable, and smoothly reduce power to the setting that you estimate will carry you to the threshold without any huge variations. Many organisations use 1500 rpm as a start point, and this can be varied as spacing and anticipated headwind on final dictate. Downwind Maintain height initially, allowing airspeed to reduce into the flap operating range (white arc on the airspeed indicator). Select approach flap, lower the nose to maintain the desired initial approach speed, and trim. The standard height for the downwind leg is normally 1000 feet agl, but some aerodrome operators specify different heights for terrain or mixed-traffic reasons. If you are flying In nil wind conditions, roll out of the turn when the aircraft is at right angles to the runway extended centreline. If there is wind present, a suitable allowance for drift should be made. Photo courtesy of Kaye Nairn. vector May/June 2014 7 Base Leg The descent on base leg is adjusted with power, so as to complete the turn on to final by about 500 feet agl. If the downwind leg has been extended to accommodate other traffic, or at ATC request, this will mean that the aircraft will be further out from the runway threshold at 500 feet if no compensating action is taken. In this case, the descent can be delayed so that the turn on to final can be completed at a height appropriate to the distance from the runway. Using the three-degree glidepath as an example again, 500 feet agl puts the aircraft about 1.6 NM from touchdown; and if the aircraft were established on final at 800 feet, the corresponding distance would be about 2.4 NM. Lookout is equally important on the base leg, particularly for any unannounced traffic on a long final. Also beware of the situation where a low-wing aeroplane is on approach with a high-wing aeroplane slightly ahead and lower – in this case the pilots’ view of the other aircraft is blocked by the wing, and the risk of collision increases. Final Once the aircraft is established on final, select landing flap as required, adjust approach speed if necessary, and trim. Check your sight picture to verify that you are on the desired glidepath, and nominate your aim point if you don’t already have one. This could be the ‘piano keys’, the ‘numbers’ or the 1000-foot (300 m) markers if you’re landing on a sealed runway. The aim point is where you want the wheels to gently kiss 8 vector May/June 2014 Mother Earth on arrival, so the task from here on in is to make that happen. Airspeed is controlled by attitude, and rate of descent by power. Large power changes shouldn’t be needed, except perhaps to compensate for unexpected sink or lift on final. If the aircraft is maintaining the correct glideslope, the aim point should remain static in your field of view. If you are getting low on the approach, it will appear to move up the windshield; conversely, if you are getting high, it will appear to move down. Adjust power as soon as you spot the trend, but be prepared to readjust as soon as you’ve achieved your correct sight picture. Airspeed Depending on how you were taught, you will either make the approach at a constant speed, or progressively reduce to your pre-calculated target threshold speed on short final. The latter method is necessary when your performance calculations show that there’s just enough runway length for you to land comfortably. In a gusting wind situation, it’s normal to add half the gust spread to your approach speed. Say the wind is 20 knots gusting 32, take the difference of 12 knots, halve it (6) and add the result to your approach speed. Decisions We mentioned the stabilised approach earlier in the article. If at any stage on final, it appears that the approach is diverging from optimum – for example, 150 feet too high or 12 knots too fast and this will result in a long landing, go around. There’s no shame in doing this, and one day this action may save your life. The key to any good landing is a stabilised approach. Full power, carb heat off, climb attitude and airspeed set, and flap raised in stages. From there, perform another circuit and once back on final, apply the lessons learnt on the first attempt. here.) Lower the nose wheel gently to the ground while you still have elevator effectiveness, and concentrate on keeping straight. Another decision point you should identify is the end of the touchdown zone, ie, the point at which you will go around if the wheels aren’t on the ground. This is particularly critical where there is limited runway length. That fence at the other end can come up really quickly sometimes! Brake as required, raise flap when it is safe to do so, and taxi clear of the runway. Complete after-landing checks as appropriate, and don’t forget to terminate your flight plan or cancel SARTIME. Nearly on the Ground On very short final, you cross the fence and the runway threshold, and now it’s time to slow down the rate of descent to a point where it’s close to zero as the wheels touch the runway. Further Reading This article assumed a basic training aircraft, a private pilot building experience, and a benign surface wind environment. For pilots seeking to improve and hone their skills, Flying New Zealand’s regional and national competitions are a good forum in which to benchmark your performance. This phase is the ‘round-out’ or ‘flare’, and is begun around 50 feet, more or less depending on the size of the aircraft. The throttle is closed – gently – at this point. Remembering back to the effects of controls lesson, watch for and counteract the tendency of the nose to drop when power is reduced. A range of guidance material is available on the CAA web site, www.caa.govt.nz, or for GAP booklets or posters, on request to info@caa.govt.nz: Judging height above the runway takes practice, and a hint is to look ahead to the far end of the runway. In the flare, progressively raise the nose to ‘meet the end of the runway’ as the runway appears to flatten out, also using the far end as your directional reference. Your peripheral view of the area to the left of the nose will also help your height perception. Keep your eyes scanning, however, and don’t fixate on a single point. »» The “Standard Overhead Join” poster. Ideally, you should ‘hold off’ until just before the wing reaches the stalling angle, then allow the aircraft to settle gently on to the main wheels. (We’re assuming a tricycle-gear aeroplane »» “Wind Shear for the Light Aircraft Pilot” (January/February 2013). »» The GAP booklet Takeoff and Landing Performance Vector articles: »» “Short-Field Landings” (November/December 2007) »» “Taildraggers 101” (September/October 2009) »» “Runway Excursions” (September/October 2011) »» “Crosswind Landings” (March/April 2007) vector May/June 2014 9 iCockpit Considerations iPads and tablet computers are becoming popular equipment in the cockpit, but like anything new, some understanding is required before you can make the leap from paper charts to pixels. A Portable Electronic Device (PED) is any piece of equipment capable of storing, processing, or transmitting information. If a PED is used to carry aeronautical information in flight, it’s called an Electronic Flight Bag (EFB). The benefits of using an EFB, such as reducing clutter in the cockpit, can make it an attractive alternative to using paper charts. There isn’t any specific authorisation for EFB operation under Part 91, provided you follow the requirements in rule 91.221 Flying equipment and operating information by having the “appropriate aeronautical charts” available as a backup. For most situations this will mean the VNCs and Vol 4. For operations under IFR, rule 91.7 Portable electronic devices restricts the use of PEDs to the cruise phase of the flight, at or above 10,000 feet. Additionally, any transmitting functions, such as Wi-Fi and Bluetooth, must be disabled during flight – enable flight mode before you take off. See also AC91.5 Operation of Portable Electronic Devices (PEDs) During Flight Under IFR. Keep in mind that the majority of PEDs are mass-produced and designed for the general public – not the general aviation pilot. Just because your PED is functioning normally on the ground, doesn’t mean it will at 10,000 feet. Also consider your device’s limitations. When you need to view multiple charts in quick succession, is using an EFB really the best option? Kiran Parbhu, a flight instructor from Massey University’s School of Aviation, discusses EFB preflight preparation. “Careful planning should be conducted before introducing any new equipment into the cockpit, the EFB is no different. Familiarisation with the EFB is good airmanship and can save a lot of strife in the air. “Before flying with the EFB, do some 'armchair flying'. In other words, try sitting in the aircraft on the ground and using the EFB. This will help give an idea of how well it will integrate into your flying. Knowledge of how your device performs under a range of situations will be built up over time. Don’t overlook the small things like where you will write down clearances or other information,” says Kiran. Reach for your iPad, but make sure you have the appropriate aeronautical and aerodrome charts for your planned flight, including contingencies. 10 vector May/June 2014 10 Tips 1 Read the User Manual It’s common for PEDs to be sold without a printed user manual. Most manufacturers choose to provide a web-based user guide as this allows them to update the user information when the device’s operating system is upgraded. The user guide is essential reading – you need to know your PED’s features and understand how to use its interface effectively. Make sure you do a refresher when the operating system changes. 2 Preflight It Is your EFB fit to fly? It’s worthwhile creating an EFB preflight checklist. This will help you identify any issues that need troubleshooting while you’re on the ground with access to the Internet. Here are a couple of basic checklists to get you started. Device Checklist: »» Is the battery fully charged? »» Make sure you have all the required equipment, such as: charging cables, battery add-on packs, mounting gear, and any other accessories. »» Clean the screen to reduce glare. »» You may want to lock the screen orientation so it doesn’t rotate. The auto-rotating feature can be a problem in flight. »» When flying IFR, turn off transmitting functions before departure. This is a good idea for VFR flight as well. App Checklist: »» Make sure you have the latest updates for each app. »» Open each application to make sure it doesn’t crash or lock. This is especially important if you have recently updated it. »» Download the required charts and AIP information before departure to avoid heads-down time in the cockpit. 3 Rehearse Your Plan B What will you do if the battery dies? Consider how you will transition back to paper charts and regain situational awareness. 4 Do a Readability Check Kiran comments that screen protectors can help protect your device screen. “A matt screen protector will also help reduce glare and reflections – especially in a bright environment. “When using your EFB at night, it can be useful to invert the colours of the screen. This means that instead of displaying a chart as black lines on a white page, it will display as white lines on a black background. This works great for AIP charts as it reduces the brightness of the display and can help maintain night vision,” says Kiran. 5 Maximise Battery Life Get into the habit of making sure your EFB is fully charged before takeoff. The screen is the largest consumer of energy for most tablets. Putting the device to ‘sleep’ while it’s not in use will greatly increase battery life. Adjusting the brightness setting also affects battery usage. On later iPad models, lowering the brightness by 20 per cent can add over an hour to the battery life. If your device has an auto-brightness feature, make sure it’s enabled. In addition, you can disable the connectivity functions you don’t need, such as: Wi-Fi, Bluetooth, or 3G, and close any unneeded apps that are running in the background. This will also free up processing power. 6 Prevent Overheating Don’t leave your EFB exposed to direct sunlight for an extended period of time as the black screen rapidly absorbs heat. The majority of PEDs use lithium batteries which can become a fire hazard when overheated. To reduce the risk of the battery overheating, most modern PEDs have a heat protection feature. If the device gets too hot, it powers down to protect the battery – not ideal when you’re using it to navigate. Trish Stephens, well-known Tauranga Aero Club pilot with many accomplishments in aerobatic and club competitions, has learnt how to prevent her iPad overheating. “I’ve used an iPad for almost two years when flying the RV. It’s a great addition to the cockpit and I take it with me whenever I fly – along with the paper charts. The AIP New Zealand web site is free and it’s easy to download and transfer the landing charts so they are readily available enroute. “The only issue I’ve had with the iPad is occasional overheating. To manage this, when I notice it’s starting to get hot, I take the cover of and move it near the RV’s air vent. This helps it to cool down faster,” says Trish. 7 Beware of Automatic Update Features As an example, Apple’s operating system, iOS 7, introduced a feature that updates apps automatically when new versions are released. This can cause issues in flight as some apps require an Internet connection when restarting after an update. To avoid this situation in flight, disable the automatic update feature and download app updates manually. Also make sure you read the AIP amendments on the AIP New Zealand web site, www.aip.net.nz, if your app doesn’t give you AIP amendment notifications. 8 Mount It or Stow It In turbulent conditions, an unsecured EFB has the potential to become a striking hazard. Using the touch screen also becomes frustrating. Ideally, the EFB should be mounted for use throughout flight and stowed during periods of high workload. Before mounting, consult AC43.14 Avionics, Installations – Acceptable technical data. vector May/June 2014 11 9 Don’t Let it Distract You Carlton Campbell, CAA Standards Development and Training Officer, reminds EFB users not to get distracted from the priority of flying the aircraft. “Make sure you maintain situational awareness. This is especially true in busy congested airspace – it’s no time to have your head down,” says Carlton. It’s also wise to turn off app notifications so they don’t pop up and distract you during critical flight phases. 10 Choose Your Apps Wisely Airways have licensed four mobile application providers. Their details can be found on the CAA web site, www.caa.govt.nz, “Links”. If you choose to use an unlicensed third party application, it’s your responsibility to make sure the information provided is accurate and up to date. EFB Authorisation You need an authorisation from the CAA to fly under Part 91 without paper charts as a backup, for commercial operations, or to use your EFB in all flight phases while operating IFR. Wayne Thomas, CAA Airworthiness Engineer (Avionics), discusses the authorisation process. “If you want to replace paper charts in the aircraft with a second EFB, then your EFBs are considered to be aeronautical devices as the safety of the aircraft and its occupants rely on them – that's when you need to get in contact with the CAA. “Advisory Circular AC91-20 Guidelines for the Approval and Use of Electronic Flight Bag Devices details the authorisation requirements and human factor considerations – useful information, regardless of whether an authorisation is needed. “Fulfilling the authorisation recommendations in AC91-20 isn’t as simple as having a second independent tablet as a backup. There are a myriad of other conditions and formal testing is required,” says Wayne. AC91-20 can be found on the CAA web site, www.caa.govt.nz, “Advisory Circulars”. Questions about EFBs and the authorisation process can be directed to: info@caa.govt.nz. George Minors and McKenzie Lewis during Massey’s evaluation of the iPad. Photo courtesy of Massey University’s School of Aviation. 12 vector May/June 2014 Personal Preflight Gisborne Monday 9 June, 7:00 pm Gisborne Aero Club Are you ready to fly? Tauranga Tuesday 10 June, 7:00 pm You’ve completed your planning, the aircraft is ready, but have you completed your Personal Preflight? Tauranga Aero Club You would never fly an unsafe aircraft, but are you in top condition? The safety of every flight hinges on the competency of the pilot. If you’re off your game, whether it be a cold, new medication, you’re tired, got a hangover or worse, then your ability to make important decisions is compromised. Taupo Wednesday 11 June, 7:00 pm Suncourt Hotel and Conference Centre – 14 Northcroft St Come along and get the truth about what you are putting into your body, and how you can get yourself as sharp as possible before flight. At the seminar, you will have access to supporting material such as online tools to check your readiness for flight. AvKiwi Safety Seminars are free to attend. Hastings Thursday 12 June, 7:00 pm Aerial Mapping Hangar Hastings Aerodrome (Bridge Pa) Dannevirke Friday 13 June, 7:00 pm This concludes the 2014 seminar series, but check out our web site for AvKiwi news, apps, and more learning tools. Followed by refreshments at Hawke’s Bay and East Coast Aero Club Fountain Theatre 2 Ward St www.caa.govt.nz/avkiwi Aviation Safety Coordinator Course The number one function of any company is business success – safety is critical to business success. Palmerston North 26 to 27 June 2014 Travelodge Palmerston North 175 – 185 Cuba Street Palmerston North If your organisation operates commuter services, general aviation scenic operations, flight training, sport aviation, or engineering, you need an Aviation Safety Coordinator. Attend this free two-day course to train new aviation safety coordinators, and to refresh and re-inspire existing ones – »» you will get a comprehensive safety manual; »» access to all of the latest CAA safety resources and support; and »» lunch is provided (accommodation, transport and other meals are not provided). vector May/June 2014 13 Air Force Low Flying By Squadron Leader Robert Cato, Wing Flight Safety Officer, RNZAF Base Ohakea Low-level flying by the RNZAF can happen anytime, anywhere in New Zealand. A Hercules hurtling past your Cessna 152 could be a bit alarming if you weren’t expecting it, so keep a good lookout and monitor the radio at all times. T he RNZAF’s mission is to be able to conduct military air operations in any part of the world, sometimes in circumstances that may require flight at low level. This can include having to fly in bad weather when no IFR options are available, or when the tactical situation requires that aircraft are flown low enough to not be seen or targeted by ‘the bad guys’. As part of their initial training at Ohakea, RNZAF pilots are taught basic low-flying skills at 250 ft agl, and develop them by flying low-level cross-country navigation sorties. As there is more risk with low-level flight, one of the principles is to fly no lower than necessary to complete the mission. Navigation sorties are therefore flown at heights varying from 250 ft to 1000 ft agl – well within the height range of other airspace users. Challenges Flying at low level is challenging and hard work, mentally and physically. Constant attention is necessary to actively fly the aircraft, look ahead to anticipate terrain, and look out for hazards. Below 1000 feet, aircraft are exposed to hazards that aren’t applicable at higher levels. Charted structures such as aerials 14 vector May/June 2014 or wire spans can be planned around, but there is always the threat of unmarked obstacles. Birds appear from nowhere throughout the country – it seems you can never get far enough away from the coast to avoid seagulls! Wind can be much more noticeable at low altitude. The overall flow will be modified by local terrain effects, making it harder to plan for. Drift is much more apparent, but compensating takes constant attention. The terrain will also cause mechanical turbulence, which can vary from uncomfortable to outright hazardous, and generally gets worse the lower you go. There is a natural tendency for any pilot at low level to avoid high terrain or obstacles, and follow features such as valleys. Transit lanes and corridors have increased traffic density, as do the entry and exit areas. All of these factors can be exacerbated by weather, such as a low cloud base, which reduces the amount of ‘sky’ available. Cross-country navigation, a skill in itself, is made more difficult in this environment. Interpreting the chart is much harder; rather than terrain just being laid out below, looking quite a lot like it does on the map, it is all around you, and subtle relief depictions on the map are exaggerated. Not nearly as much of the terrain is visible and the horizon is sometimes as little as just a couple of minutes' flying time away. Timely and accurate position reports by all airspace users help everyone. Being surrounded by terrain can also make communication much more difficult. Terrain shadowing can block calls from other aircraft and ground stations, even when within theoretical range. Despite this, the radios remain vital for situational awareness and safety. By making radio calls, there is at least a chance that it will be heard by affected traffic. Preparation The maxim “Prior Preparation Prevents Poor Performance” is never better applied than to low-level navigation. By thoroughly planning and studying the route to be flown, the students spend the minimum amount of time looking at the map while flying. This allows them to keep their eyes outside, monitoring the flight path, looking for navigational features and, of course, hazards, both expected and unexpected. Lookout is drummed into the students throughout their training, but at low level it is essential to be actively scanning outside the cockpit as much as possible. Where is the Low-Level Flight Training? The majority of training takes place to the north of the Ohakea-Wanganui line, north to the Central Plateau and Waiouru area, and as far west as New Plymouth. If weather to the west of the ranges is poor, sorties will be flown on the east coast between Hawke’s Bay and Wairarapa. In the Airtrainer, there is also a week-long exercise in the South Island, combining mountain flying and low-level navigation. Exactly when the phase of training will take place is hard to forecast, as it depends on a number of variables and requires reasonably good weather. Flights usually occur in clusters, so if you become aware of one aircraft operating at low level, there will probably be more around, and possibly on subsequent days as well. To help all airspace users be aware of their presence, crews will make the aircraft as detectable as possible through radio calls and lighting. To help their own situational awareness, they will be listening out on local traffic and information frequencies. Timely and accurate position reports by all airspace users help everyone to see, hear, and avoid each other, especially in areas of high traffic density. All Types, Whole Country Low flying is a skill that is continued and developed throughout an Air Force career, and almost all RNZAF aircraft conduct low-level training at 250 ft agl (or below for helicopters) in almost any part of the country. NOTAMs or SUPs will be issued for particular exercises that will involve intensive low flying, but individual training flights can occur at any time, anywhere in New Zealand. Aircraft may also be operating in formations. A formation at low level will be quite loose, and depending on the number of aircraft, could be spread out over hundreds of metres. Radio transmissions will include the fact that it is a formation, to make traffic aware that they could be looking for several aircraft. You can also tell a military formation by its call sign. A single aircraft will be its type followed by a tail number (eg, Trainer 88), whereas a formation call sign will be the aircraft type followed by an identifier such as a colour or metal, eg, Trainer Gold or Iroquois Red. Be aware of Military Operating Areas, with particular hazards which may include aircraft operating with reduced lighting and minimal communications, and live firing which may send rounds through airspace from low level to thousands of feet. The RNZAF will not plan to fly through Restricted Areas or Low Flying Zones except when operationally required, such as Search and Rescue tasks. If you wish to be notified, when possible, of planned low level flights, please email Low.Level.Flight.Advice@nzdf.mil.nz, or for inquiries related to RNZAF low flying, contact the nearest RNZAF Base Operations: Ohakea Tel: 06 351 5442 AucklandTel: 09 417 7000 ext 7442 Photo courtesy of the RNZAF. vector May/June 2014 15 Managing Wire Hazards Working alongside wire hazards requires careful planning and communication between the parties involved. When the ‘get here ASAP’ jobs arise, don’t cut corners – the consequences can be disastrous. A recent Health and Safety investigation into a wirestrike incident identified a lack of communication between the pilot and the client as a contributing factor. During the investigation, a number of wires were discovered that the pilot was not advised about. Fortunately in this instance, the pilot was unharmed and the aircraft sustained only minor damage. Shared Responsibility Time constraints, weather limitations, and client demands – there’s always pressure to get the job done. Pressure increases the temptation to take shortcuts when planning a job and assessing the risks. Complacency can be a shortcut to catastrophe. If you take shortcuts, you are accepting avoidable risk and compromising your situational awareness. You need to view every job with a fresh set of eyes. If it’s a repeat job, don’t rely on old information. Also realise that you are only one component in the safety equation. A large amount of responsibility rests on the client’s shoulders. Clearly communicate the nature of the job, the risks you face, and let the client know they bear some of the responsibility. Alan Beck, President of the New Zealand Agricultural Aviation Association, comments on the risks faced by pilots working in the agricultural industry. “For reasons of expediency, farmers have traditionally pulled the wire from one side of a gully to the other and then stretched it tight. These 16-gauge wires are hard to see, and there isn’t always a pole to alert the pilot that a wire is present. “Because of the tensile strength, the wire doesn’t break easily. It tends to wrap itself around drive shafts and rotor masts until control rods break, or the helicopter is ‘winched’ to the ground. This happened to me in my only accident in over 20,000 hours. It resulted in a fractured spine, and damage to the helicopter. “Many pilots have spent decades trying to get farmers to understand the risks. To their credit, a lot of farmers have taken wires down, or strung them on top of the fence line. However, the vast majority just left them where they are, with the excuse that the pilot has been told about them, or ‘he knows they are there’. “Unfortunately, it is usually a momentary distraction that causes a pilot to forget about the hazard, such as a blocked nozzle, or the phone ringing in his ear, or the loader driver calling during a spray run to verify something,” says Alan. Health and Safety in Employment Act The client is required by the Health and Safety in Employment Act 1992 to take all practicable steps to ensure the safety of contractors and their employees while they work. In other words, if a wire left by the client causes injury to a pilot, this is an offence under the Act and the client can be prosecuted. Ed Randell, CAA Manager Health and Safety, discusses hazard management. “If you have a concern about the location or visibility of a particular wire, then raise it with the client. In most cases, they can reposition a wire along a pre-existing fence. If this can’t be done, we recommend that the wire is removed during the job,” says Ed. 16 vector May/June 2014 Complacency can be a shortcut to catastrophe. This 11 kV powerline, one of three wires, was severed by a Eurocopter EC 120 B. A safety investigation cited complacency as a contributing factor. Mapping the Hazards Aerial Reconnaissance To help safeguard yourself and your company against a potential wirestrike, you should formalise the communication process. Make sure that any exchange of information is well documented. Don’t rely solely on the information the client provides. Complete a full 360-degree reconnaissance of the area you are about to operate in from the air and from the ground. To assist you with the process, there’s a Contract Relationship Management guide on the CAA web site, www.caa.govt.nz, “Health and Safety”. »» Take note of any structures that use power. Power is often supplied by an underground cable – but not always. Be especially careful of single wires strung across farm buildings. They are particularly hard to see, and can also be attached to hidden structures. The client needs to provide a detailed map showing wires, high fences, and other hazards. Be positive in how you ask about wires or hazards. Use phrases like, “where are the wires around here?” and, “How do these structures get their power?” Make sure clients survey their property before an operation, rather than giving you a sketchy hazard rundown from memory. Stress that hazards in the surrounding areas must also be identified. In an emergency, you may need to fly outside the intended operating area. Your hazard map needs to be comprehensive. For further insight, you can talk to neighbouring landowners, or other operators who have experience working in the area. When conducting reconnaissance: »» Look for poles. If there is a pole, it’s highly likely there is a wire, even if you can’t see it. Also be mindful of earth wires which run between the tops of pylons. They are thinner and much harder to see than the actual conductors. »» Assume that all rivers strung somewhere. and streams have wires »» To aid your situational awareness, try to get an idea of how the wires look from different angles. For further information see the Vector “Avoiding Wirestrikes”, January/February 2009. To contact the CAA email: hsu@caa.govt.nz. Health and Safety article: Unit, Wirestrike Avoidance Course The “CRM in the Wire and Obstruction Environment” course will be held in New Zealand again this year by Bob Feerst, an internationally renowned safety expert specialising in wirestrike avoidance. The course aims to give pilots the specialised skills needed to fly in the wire environment and the knowledge to help them forecast the presence of wires before they can actually be seen. The dates, times and venues were not available at the time Vector went to print, but details will be available from: www.totalaviationquality.co.nz. vector May/June 2014 17 Model Aircraft Danger Areas Dotted around the country are at least 27 danger areas in which model flying takes place. The emphasis is on “danger”, as a collision between a light aeroplane and a high-performance model weighing up to 25 kg could be catastrophic. W ithin their prescribed danger areas, model aircraft can be operating right to the published upper limit, and their very nature poses some significant hazards: to 1200 feet), plus an adjacent symbol to indicate the activity. They are typically 1000 or 1500 feet in vertical extent, but the surface elevation may result in the upper limit being as high as 3000 feet above sea level. »» Their small relative size makes them difficult to see; Model-flying danger areas are distinguished by a stylised radio-control box symbol. »» Some modern jet-propelled models can achieve speeds of up to 160 knots; »» The combination of size and speed may make it impossible for a pilot to sight a model in time to take avoiding action. While a manned aircraft has the right of way according to rule 101.213, this isn’t a licence to disregard a model aircraft danger area. You could still suffer a catastrophic collision without any warning at all. Evasive action on the part of the model pilot can be difficult, as relative height and rate of closure can be hard to distinguish from the ground. Many of these danger areas are active during daylight hours, and it may prove difficult to determine if flying is actually taking place. Activity at the actual site is a giveaway, but only if you know where to look. There is the option of phoning the contact listed in AIP Table ENR 5.1 – 2 in advance, but if you are flying below 1000 ft agl in less than ideal weather, you could find yourself in one of these areas without realising. Model flyers may still be operating in low-cloud conditions with visibility down to 3000 metres. Danger Area Symbols Also, be aware that models can operate almost anywhere up to 400 feet agl, and higher in the case of special events notified by NOTAM. Danger areas are marked on Visual Navigation Charts (VNCs) by a red-bordered circle or polygon, and annotated with the number, name and vertical extent (eg, D326, Levin, surface Jonathan Shorer, President of Model Flying New Zealand, flies with the Levin Club, and watches the occasional light aeroplane or helicopter cruise through D326 while model flying is in progress. This is a combination you could encounter in a model aircraft danger area. The Pawnee is one-third scale, and the wingspan of the ESM Minimoa glider is four metres. 18 vector May/June 2014 Photo courtesy of Hazel Fish “I’m the registered contact for our DA, and I maybe get one call a year asking if our area is active,” Jonathan points out. “I do wonder if light aircraft pilots are aware that they could meet a 15-kilogram jet travelling at 300 kilometres per hour, with the cross-sectional area of a dinner plate.” “I know that models have an obligation to keep clear of full-size, but when you are flying legally at 1000 feet, and a light plane comes through at 500 feet, it’s tough to know what to do for the best,” says Jonathan. “Stay high, descend, or hope for the best. At speed, a model can travel from one side of one’s limit of visibility to the other in a few seconds, so heading off in a safe direction is a difficult option.” What’s in There? The range of aircraft that can be encountered at a model flying site is limited only by the imagination, and also as one pilot remarked, by the size of your wallet. Scale model jets, high-performance gliders, helicopters, and aerobatic aircraft all feature, and increasingly, ‘quadcopters’ and similar vehicles. Powerplants include piston engines, jet turbines, and electric motors with their accompanying batteries. Amazingly realistic glider and tug combinations can be seen at some sites, and an example is shown in the accompanying photo. Imagine the challenge of keeping the glider in formation during the climb. High-performance gliders, known as ‘hotliners’, are becoming popular. These aircraft are electrically powered, using a brushless motor and lithium battery combination to drive a propeller that folds back when the power is shut off. They are launched under power, and climb rapidly at about a 70-degree angle to their operating height, from where they are operated as a normal sailplane. Their speed range is impressive, as some are capable of achieving speeds of around 180 knots under power, albeit briefly. Fire Fuel tanks and hot engines are an obvious fire source in a collision, and an Internet search will find several examples of spectacular model crashes with a resulting fireball. Add this to the tank contents of a full-size aircraft and the results need little imagination. A ‘hotliner’, with its extremely low profile from head on, would be impossible to spot in time for a pilot to avoid, and could also pose a fire risk. If the lithium battery is ruptured, and fragments come through the windscreen, it is likely that these could be burning. Worth Checking Out Model aircraft flying is a fascinating activity, and the technological advances are well worth keeping an eye on. For interested readers, the Model Flying New Zealand web site, www.modelflyingnz.org, is a good place to start. There are links to affiliated clubs, and you can download the latest association magazine, Model Flying World. There’s a wealth of information to be found. Remember the Symbol Look out for the model flying symbol on the VNCs, both in your preflight planning and when you’re map reading your way across country. Contact details for users of the model flying danger areas are listed in the AIP, in Table ENR 5.1 – 2. If you need to fly into or close to one of these areas, a courtesy call to the listed user is a sensible precaution. Example of Danger Area Depiction Actual Dangers Kinetic Energy The example of a 15-kg jet doing 300 km/h (162 knots) represents a significant amount of kinetic energy, and certainly has the potential to bring down a light aircraft in a collision. The point of impact would probably not make a great deal of difference to the outcome. This example DA is activated by NOTAM, but many others are active all the time during daylight hours. RPAS Update Proposed changes for the regulation of Remotely Piloted Aircraft Systems (RPAS) are currently awaiting Cabinet approval. Advisory Circular (AC) for RPAS. This AC will provide guidance to RPAS participants on how to comply with the civil aviation rules. These changes are to improve CAA regulatory oversight of civilian RPAS use, which has grown substantially in recent years. To stay up to date with the interim regulation, proposed rule-making, AC, or other RPAS developments, subscribe to the CAA’s free notification service using the “RPAS, UAV, UAS” link on the home page. Existing subscribers need to add this list to their selection. The CAA will publish a longer-term strategy for the integration of RPAS into the New Zealand civil aviation system later this year. The CAA is also developing an vector May/June 2014 19 Eye Surgery Before scheduling laser eye or cataract surgery, you should be aware of the CAA’s approach to medical recertification. I f you have laser eye or cataract surgery, you need to ground yourself and notify the CAA. These procedures may affect your ability to fly safely for a number of weeks or months. Astigmatism Laser Eye Surgery Hypermetropia Several laser eye surgery methods have been used in recent years to improve uncorrected visual performance, providing an alternative to glasses and contact lenses. Hypermetropia results from having a shorter eye that cannot accommodate for near vision, as the majority of its perceptive ability is used for distant vision – also known as being long-sighted. The following information relates to LASIK (Laser-Assisted in situ Keratomileusis) surgery, as well as other forms of laser eye surgery. These surgical procedures use a laser to reshape the cornea. The results of laser eye surgery are generally good, but it’s not without risk. Your treating ophthalmologist should be your first port of call to discuss these risks, since they are specific to the interventions planned and vary between procedures. You need to be aware that occasional complications may affect your eligibility for medical certification. Refractive Errors Laser eye surgery is commonly used for the correction of myopia, astigmatism, and hypermetropia. Despite having laser surgery, recipients will usually need spectacles by the age of 45 to 50 for their near vision, as the accommodation capabilities of the eye diminish with age. Eye Cross Section Stand-down Period Following surgery, the refraction of the eye takes time to stabilise. You are not permitted to fly while there is still any potential for the refraction to change, or complications to occur. The stand-down period is normally three months. However, in some cases where only mild correction was necessary, this period can be reduced to a minimum of six weeks. Most pilots who undergo laser eye surgery do return to unrestricted flying status. Subsequent Assessment Following laser eye surgery, the medical certificate holder will be required to undergo periodic surveillance for a few years. This normally requires a CAA special eye report to be completed by an accredited optometrist at intervals of six to 12 months. A Pilot’s Perspective Iris Retina Astigmatism normally results from irregular curvature of the cornea or lens and the eye’s inability to project a sharp focused image onto the retina at all distances. Cornea Rob Hoult, a private pilot, gives his insight into laser eye surgery and the recovery period. “Since I received my PPL in 2003, I’ve done a mix of aerobatic flying at Christchurch and cross-country trips around the upper South Island. "I've used contacts and glasses to correct for shortsightedness over the last 20 years. Over the last 18 months, I noticed that while wearing contacts or glasses, my near vision was deteriorating. This led me to try progressive lenses, however they didn't suit my lifestyle. Lens Optic Nerve Myopia Those with myopia are commonly referred to as being shortsighted. It results from having a long eye shape which causes the light coming in to focus in front of the retina, rather than on it. This makes distant objects seem out of focus. 20 vector May/June 2014 "This is what prompted me to have eye surgery – a desire to reduce the occasions when I need to wear corrective lenses or contacts. “I made the decision to undertake LASIK eye surgery on the rationale that I would sacrifice my very good near vision in order to get better distance vision. As a consequence, I would probably need to wear glasses for near vision. “I’m now one month post-surgery and have unbelievably crisp distance vision. I can read the bottom line of a vision chart quite easily. To my surprise, I haven’t needed to wear reading glasses as much as I’d expected. I do need them for up-close vision if the text is very small, but in terms of flying, reading a navigation chart or a flight log, I am fine. “The recovery period from surgery is an interesting matter. My vision was crisp the day following surgery, although the surgeon’s advice is that it can take up to three months for the eyes to stabilise,” says Rob. Cataract Surgery A cataract is a clouding of the lens which obstructs light from passing through to the retina at the back of the eye. Once cataract development begins, vision can deteriorate below the standard required for Medical Certification in as little as six to 12 months. Further Information Medical Information Sheet, “Laser Eye Surgery – Refractive”, on the CAA web site, www.caa.govt.nz, “Medical – Medical Information Sheets”. There’s a new email notification service that will let you know when new information is added to the medical web pages. See the back cover for details. For your medical certification inquiries, email: med@caa.govt.nz If your contact and address details change, remember to notify the CAA. This is required by the Civil Aviation Act 1990. Claude Preitner, CAA Senior Medical Officer, describes how vision is affected. “Those with a cataract may experience difficulty in visual performance, including colour perception, contrast sensitivity, and the ability to withstand glare from bright light. “The development of a cataract is common with aging and more common in those who have experienced significant exposure to ultraviolet light,” says Claude. Surgery usually involves extraction of the cataract and implantation of an Intra Ocular Lens (IOL). Intra Ocular Lens Implants A variety of IOL types are available, but not all are compatible with aviation. Monofocal IOLs Monofocal IOLs are acceptable to use in the aviation environment. To get recertified after implantation, send the CAA an ophthalmologist report detailing the surgery undertaken, and a special eye report. The examination relating to the special eye report must be conducted at least three weeks post-surgery. The special eye report needs to demonstrate that a full recovery free of complications has been made and that the vision meets the required standards. This will often require a new spectacle prescription. Multifocal IOLs Modern surgery allows for multifocal lens implants which provide the ability to see near and distance without the need to use spectacles. However, such lenses reduce the contrast sensitivity, may create halos, and generally do not provide well for intermediate distance vision (around one metre). They may also prove difficult to adjust to. Currently, these lenses are not generally acceptable. Don’t Risk It All applicants, particularly commercial pilots, should be aware that the implantation of multifocal IOLs may affect their ability to hold an unrestricted Medical Certificate. The CAA may require specialised testing. Depending on results, a restricted certificate may be considered. ©istockphoto.com/stokkete vector May/June 2014 21 22 23 24 30 1 June Call for Nominations The Director of Civil Aviation is now calling for nominations for this year’s Director’s Awards and Flight Instructor Award. These awards are presented to an individual, an organisation, and a flight instructor, who have led by example and raised safety awareness. Owners of Cessna Legacy 100-series (pre-1986) aircraft have until 30 June this year to get their aircraft compliant with the Supplementary Inspection Documents (SIDs) programme. If aircraft are not made compliant by that date, they cannot be operated. Errol Burtenshaw, Manager Operational Integrity and Safety with Air New Zealand, says winning the 2013 individual award was a significant event for him and his family. Inspection Times “It only took me 50 years, but it was worth the wait! I’d like to encourage the identification of people or organisations that you believe meet the award criteria. This is a means to ensure we collectively raise safety awareness collaboratively and by example, across the industry.” If a specific airframe component has been replaced, the component should be inspected on the basis of total component hours or calendar time requirements, whichever is lesser. Brett Nicholls of Strikemaster Limited says he and his staff are still thrilled about receiving the award last year. It is important to read the applicable aircraft service manual Supplemental Inspection Document section thoroughly. “Winning the Director’s Award for Operator of the Year has meant a lot to us. It has also given potential customers the confidence that we know what we are doing.” For example, the 1977-1986 Cessna 172 Manual D2065-3-13-3TR7 has the following note in the Section 8 (B) relating to Principal Structural Element repeat inspections: So take this opportunity to recognise and reward a remarkable person or organisation, that has made a noteworthy contribution to aviation safety. NOTE: Inspection intervals are given in both hour and calendar time. After the completion of each initial SID inspection, repeat inspections may be completed based on hour time if the Corrosion Prevention and Control Program (CPCP) in Section 2A-30-00 is included in the airplane maintenance program. There is no entry form. Just email or send in a few paragraphs on why your nominee should be considered, to CAA’s Manager Safety Promotion, Bill Sommer. Email: Bill.Sommer@caa.govt.nz Fax: +64 4 569 2024 Post: PO Box 3555, Wellington 6140 Nominations close Monday 16 June 2014. 22 29 The SIDs inspection times are based on total airframe hours or calendar times in service. Any attachment structure that was not replaced with the component must be inspected on the basis of the total airframe hours or calendar time requirements, whichever is less. Therefore, if the CPCP programme has been implemented, the inspection time reverts to hours flown, not calendar time. More Information See the CAA web site, www.caa.govt.nz for: The awards will be presented at the Aviation Leadership Summit in Wellington on 21 July. Continuing Airworthiness Notice Cessna SID Compliance 05-003. Go to “Airworthiness Directives – Continuing Airworthiness Notices”. The first Director’s Award was presented in 1995, and the first CAA Flight Instructor Award in 2005. Vector article: “Revision to Cessna Service Manuals”, March/April 2012, available under “Publications – Vector”. vector May/June 2014 ©istockphoto.com/rsmolens Final Reminder on Cessna SIDs Compliance New Rules Poster How to Get Aviation Publications An updated version of the Civil Aviation Rules and Advisory Circulars poster is enclosed with this issue of Vector. AIP New Zealand You can put this poster up on the office or briefing room wall for easy reference. Replace any older versions with this one – it’s a different colour to make identification easy. The latest information on Rules and Advisory Circulars is always on the CAA web site, www.caa.govt.nz. For free additional copies of this poster, email: info@caa.govt.nz. AIP New Zealand is available free on the Internet, www.aip.net.nz. Printed copies of Vols 1 to 4 and all aeronautical charts can be purchased from Aeronautical Information Management (a division of Airways New Zealand) on 0800 500 045, or their web site, www.aipshop.co.nz. Pilot and Aircraft Logbooks These can be obtained from your training organisation, or 0800 GET RULES (0800 438 785). Rules, Advisory Circulars (ACs), Airworthiness Directives All these are available free from the CAA web site. Printed copies can be purchased from 0800 GET RULES (0800 438 785). Planning an Aviation Event? If you are planning any aviation event, the details should be published in an AIP Supplement to warn pilots of the activity. For Supplement requests, email the CAA: aero@caa.govt.nz. New Met Blog A new meteorology blog (web log) is now available on the CAA web site. The blog provides information on CAA’s development of New Zealand’s aeronautical meteorological system. This includes met services, systems, products, and education within the New Zealand civil aviation system. The dated entries contain references to applicable web sites or documents for further reference. See www.caa.govt.nz, “Meteorology”. Correction: In “Register your ELT” in the last Vector, there were errors in the contact information, for which we apologise. It should read: Email: 406registry@maritime.govt.nz Tel: +64 4 577 8030 (from outside New Zealand or satellite phone) To allow for processing, the CAA needs to be notified at least one week before the Airways published cut-off date. Applying to the CAA for an aviation event under Part 91 does not include applying for an AIP Supplement – the two applications must be made separately. For further information on aviation events, see AC91-1. CAA Cut-off Date Airways Cut-off Date Effective Date 9 Jun 2014 16 Jun 2014 21 Aug 2014 7 Jul 2014 14 Jul 2014 18 Sep 2014 4 Aug 2014 11 Aug 2014 16 Oct 2014 See www.caa.govt.nz/aip to view the AIP cut-off dates for 2014. Aviation Safety Advisers Aviation Safety Advisers are located around New Zealand to provide safety advice to the aviation community. You can contact them for information and advice. Don Waters (North Island) Tel: +64 7 376 9342 Fax: +64 7 376 9350 Mobile: +64 27 485 2096 Email: Don.Waters@caa.govt.nz John Keyzer (Maintenance, North Island) Tel: +64 9 267 8063 Fax: +64 9 267 8063 Mobile: +64 27 213 0507 Email: John.Keyzer@caa.govt.nz Murray Fowler (South Island) Tel: +64 3 349 8687 Fax: +64 3 349 5851 Mobile: +64 27 485 2098 Email: Murray.Fowler@caa.govt.nz Bob Jelley (Maintenance, South Island) Tel: +64 3 322 6388 Fax: +64 3 322 6379 Mobile: +64 27 285 2022 Email: Bob.Jelley@caa.govt.nz Report Safety and Security Concerns Available office hours (voicemail after hours). 0508 4 SAFETY (0508 472 338) isi@caa.govt.nz For all aviation-related safety and security concerns Accident Notification 24-hour 7-day toll-free telephone 0508 ACCIDENT (0508 222 433) www.caa.govt.nz/report The Civil Aviation Act 1990 requires notification “as soon as practicable”. vector May/June 2014 23 Accident Briefs More Accident Briefs can be seen on the CAA web site, www.caa.govt.nz, “Accidents and Incidents”. Some accidents are investigated by the Transport Accident Investigation Commission, www.taic.org.nz. ZK-FJT Piper PA-28-181 ZK-EMX NZ Aerospace FU24A-954 Date and Time: 05-Apr-13 at 12:16 Date and Time: 08-Dec-12 at 14:00 Location: Foxpine Location: Waikite Valley POB: 2 POB: 1 Injuries: 0 Injuries (Fatal): 1 Damage: Substantial Damage: Destroyed Nature of flight: Training dual Nature of flight: Training solo Pilot Licence: Commercial Pilot Licence (Aeroplane) Pilot Licence: Commercial Pilot Licence (Aeroplane) Age: 28 yrs Age: 26 yrs Flying Hours (Total) 2902 Flying Hours (on Type) 1000 Last 90 Days: 126 As the aircraft was climbing out after a touch-and-go landing, the engine stopped about 100 feet agl. The instructor took control and made a forced landing in the paddock ahead. There was insufficient space in which to stop, and the aircraft collided with trees on the far side of the paddock. Subsequent testing found that the engine ran rough below about 1500 rpm, and when the carburettor was examined by the manufacturer, a “blockage in the middle hole for idle transition” was found. Whether this contributed to the engine stoppage is unknown. No other cause was identified. CAA Occurrence Ref 13/1674 ZK-MBU Piper PA-46-310P A full report is available on the CAA web site. CAA Occurrence Ref 12/5532 ZK-THA Tecnam P92 Echo Super Date and Time: 07-Jun-13 at 14:10 Location: Hastings POB: 1 Injuries: 0 Damage: Substantial Nature of flight: Training solo Date and Time: 12-Aug-12 at 14:45 Flying Hours (Total) 10 Location: Pauanui Beach Flying Hours (on Type) 10 POB: 2 Last 90 Days: 6 Injuries: 0 Damage: Substantial Nature of flight: Private other Pilot Licence: Private Pilot Licence (Aeroplane) Age: 70 yrs Flying Hours (Total) 6600 Flying Hours (on Type) 42 Last 90 Days: 50 The aircraft ran into a soft patch of ground as it started its takeoff roll. As a result of getting bogged in the soft ground, the nose wheel retracted and caused the propeller to strike the ground. The aerodrome operator issued a NOTAM after this accident and carried out remedial work in the soft area. CAA Occurrence Ref 12/3494 24 The pilot was conducting solo agricultural flight training under the supervision of an E-Category flight instructor. The instructor, who was operating another aircraft nearby, saw the aircraft perform a left turn and climb at approximately 400 ft agl, followed by a departure from controlled flight from which the pilot did not recover. vector May/June 2014 While the aircraft was taxiing, the right main undercarriage leg collapsed, and the aircraft dropped on to the right wingtip and came to a stop. The operator advised that a 250-hour inspection had been carried out a week before the accident, and that there were no problems noted with the undercarriage. Post-accident inspection discovered unrelated damage to the left main and nose undercarriage, and the tail skid. This was attributed to previous heavy or abnormal landings. During repair, the 8-mm main undercarriage attachment bolts were to be replaced by 5/16-inch AN bolts, as approved by the manufacturer. CAA Occurrence Ref 13/2836 ZK-FGY Cessna 182P ZK-HZE Bell 206B Date and Time: 29-Jan-13 at 17:58 Date and Time: 02-Nov-13 at 9:00 Location: Mt. Earnslaw Station Location: Tennyson Inlet POB: 2 POB: 1 Injuries: 0 Injuries (Minor): 1 Damage: Substantial Damage: Minor Nature of flight: Private other Nature of flight: Aerial application/dropping Pilot Licence: Private Pilot Licence (Aeroplane) Pilot Licence: Commercial Pilot Licence (Helicopter) Age: 67 yrs Age: 47 yrs Flying Hours (Total) 494 Flying Hours (Total) 9850 Flying Hours (on Type) 327 Flying Hours (on Type) 8900 Last 90 Days: 3 Last 90 Days: 73 About 50 ft agl on short final, the aircraft encountered windshear, dropped suddenly onto the nose wheel, bounced, and overturned. The pilot stated that his airspeed was too slow when he encountered the windshear, and it is likely that the aircraft stalled. This happened so fast that the pilot did not have time to check forward or apply power. CAA Occurrence Ref 13/330 ZK-HCG Robinson R22 Beta Date and Time: 08-Nov-12 at 20:38 Location: Cardrona Valley POB: 1 Injuries (Fatal): 1 Damage: Destroyed Nature of flight: Private other Pilot Licence: Private Pilot Licence (Helicopter); Commercial Pilot Licence (Aeroplane) Age: 52 yrs Flying Hours (Total) 9134 Flying Hours (on Type) 65 Last 90 Days: 2 The helicopter was in transit between Wanaka and Queenstown Aerodromes. A witness familiar with the R22 observed it approaching, and his impression was that it was being flown fast with the sound of high rotor rpm. He looked away but then heard an unusual noise or bang. When he looked back at the helicopter, he saw it descending at a high rate with the main rotor stationary. The helicopter struck the hillside on a neighbouring property in the Cardrona Valley. First responders to the scene found the pilot deceased. The CAA safety investigation found that the main rotor had struck the airframe due to main rotor divergence in flight, leading to a catastrophic loss of control. The investigation could not positively determine the cause of the main rotor divergence, but the two most likely causes were considered to be a loss of main rotor rpm or an excessive forward cyclic input leading to a low-g flight situation. The pilot had considerable experience in fixed-wing aircraft but low experience in the R22 helicopter. A full report is available on the CAA web site. CAA Occurrence Ref 12/4957 During a 1080 drop, the loaded bucket had an uncommanded release from the cargo hook. As the bucket fell away, one of the broken pneumatic control lines flicked up and struck the pilot in the eye. He made a precautionary landing on a nearby beach and after shutting down, found that the line had also contacted the OAT gauge probe and cracked the windscreen. The pilot sustained a small cut to his right eye, but was able to fly back to base for a medical check. The operator's investigation found no fault with the cargo hook or its electrical system. The manual release system, however, had recently been tested during a 100-hour check, by pulling the cockpit handle up, then pushing it back down. The most likely reason for the release was that the release cable had not returned the manual release latch on the hook to its closed position. The cable operates in tension, not in compression, and resetting of the latch on the hook itself is required after it is operated from the cockpit. Other issues identified were the need for two persons to carry out an effective preflight check of the manual release, and that the position of the manual release latch is not readily visible to the person connecting a load to the cargo hook. Without any weight on it, the hook is held in a semi-retracted position by bungee cords, with the latch on the 'up' side. The operator is also fitting breakaway connectors to the pneumatic lines on their buckets, so the lines cannot flick up in a similar event. CAA Occurrence Ref 13/5547 ZK-HRY Robinson R44 II` Date and Time: 14-Apr-12 at 11:20 Location: Whirinaki Park POB: 4 Injuries: 0 Damage: Substantial Nature of flight: Transport passenger A to B Pilot Licence: Commercial Pilot Licence (Helicopter) Age: 38 yrs Flying Hours (Total) 420 Flying Hours (on Type) 70 Last 90 Days: 45 About 30 ft agl during takeoff, the helicopter encountered sudden sink, which the pilot was unable to arrest before the machine struck the ground heavily, damaging the skids. CAA Occurrence Ref 12/1785 vector May/June 2014 25 GA Defects GA Defect Reports relate only to aircraft of maximum certificated takeoff weight of 9000 lb (4082 kg) or less. More GA Defect Reports can be seen on the CAA web site, www.caa.govt.nz, “Accidents and Incidents”. Aerospatiale AS 350BA Key to abbreviations: AD = Airworthiness Directive \ TIS = time in service z NDT = non-destructive testing TSI = time since installation P/N = part number TSO = time since overhaul SB = Service Bulletin TTIS = total time in service Aerospatiale AS 350B2 z Input pinion Part Manufacturer: Eurocopter Part Number: 350A32 0300 04 ATA Chapter: 6300 TSI hours: 93.9 TSO hours: 2886 TTIS hours: 6591 On lowering the collective, the pilot noticed a 'chattering' noise. After the helicopter was landed at the maintenance provider, a small amount of oil was seen coming out of the main transmission input shaft seal. Fuel quantity probe Part Manufacturer: Eurocopter Part Number: 64751-003-3 ATA Chapter: 2840 TTIS hours: 6912 During scheduled maintenance the fuel gauge was found to be “sticky”, with the gauge remaining at 20% after the helicopter was defuelled. No low-fuel warning light illuminated, as this is driven by the same shaft as the fuel gauge. Further investigation revealed that the rubber cap at the top of the fuel quantity probe appeared to have been reattached with an epoxy resin. The epoxy had broken down in the fuel and become gummy, entering the upper bearing and preventing smooth rotation. The probe was cleaned, the epoxy removed, the rubber cap refitted using approved sealant, and the probe tested. Further examination revealed that the input pinion/transmission nut tension had decreased, causing internal damage to the input pinion bearings. The transmission was removed and overhauled. These potentiometer-type fuel sender units are known to be unreliable, and the manufacturer recommends replacing these with a capacitance-type fuel quantity indication system. Continuing Airworthiness Notice 28-009 refers (available on the CAA web site, www.caa.govt.nz/Airworthiness_Directives/ Continuing_Airworthiness_Notices/. CAA Occurrence Ref 13/5663 CAA Occurrence Ref 13/3666 Cessna 208B Hughes 369D Electrical connectors ATA Chapter: z 3400 The pilot returned the aircraft to the departure gate after noticing smoke coming from the grille under the compass area. Engineers discovered that electrical connectors in the main avionics electrical circuit between the Avionics Master switches and the instrument panel had failed. The location was just forward of the main circuit breaker panel. The failure was due to overheating, caused by excessive resistance between the plug terminals. This would have happened over time due to a loosening of the female connector, causing fretting and oxidation. The wiring and connectors on the C208 are subjected to general visual inspections as part of the maintenance programme. The problem occurred at the individual pin/socket connection within the Molex-style connector, resulting in arcing, heating up, and finally melting if there is enough current draw. This is not detectable by the general visual inspection and is common to aircraft with similar connectors. CAA Occurrence Ref 14/894 Attachment pin ATA Chapter: 6200 TTIS hours: 24347.1 During preflight inspection, a main rotor blade attachment pin was found to have failed at the beginning of the threaded portion. The pin was replaced. It was determined that the fracture was due to fatigue, and the location of the origin was at the beginning of the threads. An engineering memo in 1993 from the manufacturer indicated that they were going to change their process from “cut” threads to “rolled” threads to eliminate the “irregular” machine-cut threads. Additionally, the maintenance manual was changed to allow 1/2 to 1 thread protrusion, which could have contributed to too much torque on the bolt when operators installed a new bolt. Another evaluation was done in October 2009, as result of a report from an Australian operator of a 369E (VH-SUV), concerning a failed pin in the same location. The FAA reports that there is a history of failures of these pins dating back to 1993, and is now investigating to decide if any action is needed on their part. CAA Occurrence Ref 14/555 26 vector May/June 2014 Diamond DA 42 z Diamond DA20-C1 Engine ATA Chapter: z 7200 The pilot made a PAN PAN call, indicating engine problems. A local standby was declared as the aircraft got closer to the aerodrome. The aircraft subsequently landed safely. The engineering inspection found that the gearbox input shaft was shorn off completely. The engine manufacturers reviewed FADEC data and confirmed that the pilot did not use starter to restart. The manufacturer highly recommends restarting engines in flight by use of the starter, not by windmilling. There is a flight manual supplement to this effect. CAA Occurrence Ref 13/5354 Diamond DA20-C1 z Part Model: Slick Magneto Part Manufacturer: Champion Aerospace Part Number: 4309 ATA Chapter: 7410 TSI hours: 284.6 TTIS hours: 1433 The magneto driveshaft was found to have sheared at the oil seal position. Although the cause not positively determined, it was believed to be possible torsional vibration induced by the propeller. The engine accessory section was removed and inspected, with new crankshaft and camshaft gears installed. New left and right magnetos and magneto drive gears were also installed. Magneto rotor shaft CAA Occurrence Ref 13/3863 Part Model: Slick Magneto Part Manufacturer: Champion Aerospace Part Number: 4310 ATA Chapter: 7410 TSI hours: 284.6 TTIS hours: 1873 Robinson R44 II z The magneto shaft centre locating tang was found sheared. The magneto had been removed for inspection following failure of the aircraft's other magneto (see Occurrence 13/3863). The engine accessory section was removed and inspected, with new crankshaft and camshaft gears installed. New left and right magnetos and magneto drive gears were also installed. CAA Occurrence Ref 13/3862 Hughes 369E z Magneto rotor shaft Tail rotor blade Part Manufacturer: Robinson Helicopter Part Number: C029-3 ATA Chapter: 6410 TTIS hours: 234.3 A crack was found in the leading edge of one tail rotor blade. The blade was sent to the helicopter manufacturer for further investigation. The blade was inspected and cut chordwise through the crack for further analysis. It is the opinion of the helicopter manufacturer that the blade has suffered an impact with a small object, cracking the blade, and creating a stress riser. Communication is continuing with the operator and the helicopter manufacturer to establish if FOD has or could have occurred. Pitch control duplex bearing CAA Occurrence Ref 13/2392 Part Manufacturer: MD Helicopters Part Number: 369D21820 ATA Chapter: 6720 Pacific Aerospace 750XL z The pilot noticed a spongy feeling from the pedals, followed by a complete loss of tail rotor control. A run-on landing was performed without damage to the helicopter. Maintenance staff discovered a complete failure of the duplex bearing of the tail rotor pitch control assembly. Inspection found a high level of wear on the duplex faying surface of the lock washer, with heavy grooving on the lock washer tangs from the locknut face. A comparison was performed of the removed locknut installed on an independent pitch control unit versus another new assembly, revealing that the face of the removed nut was exactly 0.060 inch larger than the max dimension specified for MS172244 nut. The maintainer believed that this nut would have been incorrectly seating on the lock washer, ultimately allowing the nut to unscrew, the inner races to separate and the bearing balls to exit the assembly. Elevator trim torque tube Part Manufacturer: Pacific Aerospace Ltd Part Number: 11-45409-4 ATA Chapter: 2732 TSI hours: 79.1 TTIS hours: 7313 The aircraft's elevator trim failed during a parachute jump run. The pilot applied nose-down trim as the load moved rearwards, and although the indicator moved, the trim tab itself did not move as expected. The skydivers exited, and the aircraft landed without incident. Maintenance investigation found that the rear section of the elevator trim torque tube had failed. The failure was due to a phenolic fairlead wearing to the extent that the torque tube was contacting the airframe, which then wore through the tube. The failed assembly was sent to the manufacturer who could not determine a definitive reason for the separation of the tail rotor pitch control bearing set. The torque tube was replaced and the fairlead repositioned to ensure that the torque tube does not contact the airframe. The manufacturer was also advised. CAA Occurrence Ref 13/3635 CAA Occurrence Ref 13/3302 vector May/June 2014 27 What’s New? Get Updates by Email Subscribe to our free notification service to receive an email when various topics on the CAA web site are updated. New topics: » Remotely Piloted Aircraft Systems » Medical Matters » Aviation Community Advisory Group » Safety Management Systems If you’re already a subscriber and want these emails, you need to add them to your selection. www.caa.govt.nz/subscribe