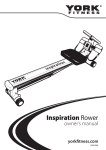
1
MONZA SERIES
TREADMILL
RISK WARNING
ALWAYS READ THESE INSTRUCTIONS AND USE THIS PRODUCT STRICTLY IN ACCORDANCE WITH THIS SAFETY
INFORMATION - KEEP THIS NEAR OR ON THE PRODUCT AT ALL TIMES FOR EASE OF REFERENCE. WHILST USING
THE PRODUCT THERE ARE RISKS AND THE PRODUCT MUST ONLY BE USED AFTER READING AND THEN ONLY IN
ACCORDANCE WITH THESE SAFETY INSTRUCTIONS.
FAILURE TO FOLLOW THE PROCEDURES BELOW MAY RESULT IN SERIOUS INJURY DUE TO THE OPERATION OF THE
PINCH POINT AREA BETWEEN THE RUNNING GEAR AND THE UPRIGHT FRAMES.
•
•
•
•
DO NOT TIP THE BOX ON ITS SIDE WITH THE TREADMILL STILL IN IT.
DO NOT MOVE THE TREADMILL OUT OF THE BOX UNTIL THE UNIT HAS BEEN ASSEMBLED
1. LAY BOX ON A STABLE, FLAT SURFACE AND ENSURING THE TOP SIDE IS FACING UP.
2. COLLAPSE ALL FOUR SIDES OF THE BOX BEFORE COMMENCING UNIT ASSEMBLY IN ACCORDANCE WITH THE ASSEMBLY
INSTRUCTIONS.
3. ONCE ASSEMBLED, ONLY MOVE THE TREADMILL OUT OF THE BOX ON ITS WHEELS WHILE THE DECK IS IN THE FOLDED AND
LOCKED POSITION.
DO NOT REMOVE THE SAFETY PIN THAT IS CONNECTED TO THE SIDE FRAME AND UPRIGHT POST UNTIL YOU HAVE READ
AND FOLLOWED THE ASSEMBLY INSTRUCTIONS.
ONCE ASSEMBLED AND REMOVED FROM THE BOX DO NOT TIP THE TREADMILL ON ITS SIDE.
O W N E R ’ S
G U I D E
JAN18/2010
SAFETY INSTRUCTIONS
Risk warning
Always read these instructions and use this Equipment strictly in accordance with this safety information - Keep
this near or on the equipment at all times for ease of reference. Whilst using the equipment there are risks and the
equipment must only be used after reading and then only in accordance with these safety instructions. THIS LIST IS NOT
EXHAUSTIVE / SAVE THESE INSTRUCTIONS.
Disclaimer
Safety Key:
While every effort has been made to ensure that the
information contained in this guide is accurate and
complete, no liability can be accepted for any errors
or omissions. Inspiration Fitness reserves the right to
change the specifications of the hardware and software
described herein at any time without prior notice.
• This treadmill is provided with a safety key. The treadmill
will not operate without the safety key inserted.
• A safety key is fitted in case of need for an emergency
stop.
• The safety key should be attached to the user via the cord
and clip. If for any reason the user falls, the cord will pull
the safety key from the treadmill and the treadmill will
begin to decelerate.
No part of this guide may be reproduced, transmitted,
transcribed, stored in a retrieval system, or translated
into any language in any form, by any means, without
the prior written permission of Inspiration Fitness.
Inspiration Fitness makes no warranties for damages
due to mistaken operation or malfunction of the
equipment.
Assembly Precautions:
Failure to follow the procedures below may result in
serious injury due to the operation of the pinch point area
between the running gear and the upright frames.
• Do not tip the box on its side with the treadmill still in it.
• Do not move the treadmill out of the box until the unit
has been assembled:
1. Lay box on a stable, flat surface and ensuring the top
side is facing up.
2. Collapse all four sides of the box before commencing
unit assembly in accordance with the assembly
instructions.
3. Once assembled, only move the treadmill out of the
box on its wheels while the deck is in the folded and
locked position.
• Once assembled and removed from the box do not tip
the treadmill on its side.
• Do not remove the safety pin that is connected to the
side frame and side post until you have read and followed
assembly instructions.
• Only fold and move the treadmill strictly in accordance
with the Operation Instructions.
2
Operation Precautions:
• Before use, always ensure that the treadmill is positioned
on a solid, flat surface. Always allow a clear space
measuring 1 metre wide by 2 metres long directly behind
the treadmill.
• Regularly check to see that all nuts, bolts and fittings are
securely tightened. Periodically check all moving parts for
obvious signs of wear or damage.
• The safety level of the treadmill can only be maintained
only if it is regularly examined for wear and tear.
• Replace defective components immediately. If you are in
any doubt, do not use the treadmill. Contact CUSTOMER
SUPPORT.
• Use this treadmill only for its intended use as described in
this manual. Do not use attachments not recommended
by the manufacturer.
• Always check that any pins / fixings are tight and secure
before use and / or after adjustment.
• In an emergency, take hold of the handrails and place
your feet on the side platforms provided. Once you are
stable, pull out the safety key. The treadmill will begin to
decelerate until it stops.
• Never overload the treadmill (See Maximum User Weight
on next page).
• Never use the treadmill in any manner other than the way
explained in these instructions and / or any wall-chart
supplied.
• Do not put the treadmill on its side - injury could result
by the closing of its base to the arms.
• To prevent possible damage of the electronics from
lightning strikes or electrical surges this equipment needs
to be kept switched off and unplugged when not in use.
• It is recommended that a surge protector is used.
SAFETY INSTRUCTIONS
Other Precautions:
• Parents and others in charge of children should be aware
of their responsibility. The playful instinct of children can
lead to situations and behavior for which this equipment
is not intended.
• If children are allowed to use this equipment, their
mental and physical development and above all their
temperament should be taken into account. They should
be instructed, controlled and supervised at all times
so that the equipment is only used correctly and in
accordance with this safety information.
• This equipment is under no circumstances suitable as a
children’s toy.
• Please keep all children away from this equipment when
in use. Do not in any circumstances allow children to
climb on or play with the equipment when it is not in
use.
• This equipment is not intended for use by persons
(including children) with reduced physical, sensory
or mental capabilities, or lack of experience and
knowledge, unless they have been given supervision or
instruction concerning use of this equipment by a person
responsible for their safety.
• This equipment is intended for use in clean dry
conditions. You should avoid storage in excessively
cold or damp places as this may lead to corrosion and
other related problems that are outside our control. FOR
INDOOR USE ONLY.
• Clean only with a damp cloth. Do not use solvent
cleaners.
• Keep young children away from this machine at all times.
Contact with the moving surface may result in severe
friction burns.
Fitness Precautions:
Exercise Precautions:
• Wear proper workout clothing: Do not wear loose
clothing.
• Do not wear shoes with leather soles or high heels.
• Tie all long hair back.
• Remove all personal jewelry before exercising.
• Ensure you warm-up well before using the equipment as
this will help to prevent muscle strain.
• After eating, allow 1-2 hours before exercising as this will
help to prevent muscle strain.
• Injuries may result from incorrect or excessive training
and using the equipment otherwise than as directed or
recommended by your doctor.
Maximum user weight
The maximum user weight of this equipment is 130kg.
Safety Standards
This equipment meets the requirements of the EU’s EMC and
Low Voltage directives (where applicable), ISO20957 1 & 6 CLASS HC / BSEN60335 - 1. Therefore the equipment carries
the following marks:
Protect the environment by not disposing of this
product or batteries with household waste. Check
your local authority for recycling advice and
facilities.
Before you undertake any program of exercise that will
increase cardiovascular activity, please be sure to consult
with your doctor. Frequent strenuous exercise should be first
approved by your doctor and then the equipment used strictly
in accordance with any directions or recommendations from
your doctor.
If you feel any pain or abnormal symptoms, STOP YOUR
WORKOUT IMMEDIATELY. Consult your physician immediately.
3
TABLE OF CONTENTS
Thank you for choosing
You have chosen a high quality, safe and innovative piece of
equipment as your training partner and we are certain it will
keep you motivated on the way to achieving your personal
fitness goal.
The precautions noted within this guide are intended to
instruct you in the safe and correct use of the equipment and
to prevent injuries or damage to yourself, other persons and
property. Please read and ensure that you understand them
before proceeding to other sections of this guide.
Table of contents
Safety Instructions 02
Table of Contents 04
Customer Support 05
Assembly Instructions 06
•
•
•
Getting Started Assembly Instructions Final Check 06
07 - 08
08
Operational Instructions 09
•
•
•
•
•
•
•
•
•
•
•
•
•
•
•
09
10
10
10
11
12
13
13
13
14
14
14
14
15
15
Programs 16
Troubleshooting 21
Fitness Guide 22
•
•
•
•
4
Adjusting Running Mat Tension / Alignment Safety Key Quick Start Major Function Keys York Proximity Sensor Displays Operational Instructions Monitoring Your Heart Rate How the HRC program works
MP3 Player Input Handlebar Controls Storage / Cleaning
Lubrication Fold Up / Fold Down Instructions
Moving the Treadmill
Starting / Finishing Your Workout Correct Running Form
Suggested Stretches
Heart Rate Training 22
22
23
24
Warranty 25
Part List / Exploded Drawing 26
CUSTOMER SUPPORT
Customer Support
Contact Information
Should you require any assistance regarding this product
please gather the following information and then contact
us using the details below:
• Serial No. - This can be found on the sticker below,
located as indicated. For future reference, please
write down your serial number in the space provided
below.
• Original purchase date
• Place of purchase
• Information about the place and conditions of use
• Precise description of the issue / defect
York Fitness U.K. Ltd. (England)
York Way, Daventry, Northants, NN11 4YB, England
Tel: (01327) 701800
Help desk Tel: (01327) 701824
Fax: (01327) 706704
Email: helpdesk@yorkfitness.co.uk
York Fitness (Australia) Pty. Ltd.
Unit 1, Lot 2, Swaffham Road, Minto, N.S.W. 2566, Australia
Tel: (02) 9603 8444
Help desk Tel: 1800 730 149
Fax: (02) 9603 8555
Email: service@yorkfitness.com.au
Please Retain
We suggest you record the serial, original purchase date,
and place of purchase below:
Serial no.
This can be found on the sticker located as indicated.
Original purchase date.
Place of purchase.
Should you require any assistance regarding this product
please gather the following information:
• Information about the place and conditions of use.
• Precise description of the issue / defect.
5
ASSEMBLY INSTRUCTIONS
Risk warning
DO NOT MOVE TREADMILL OUT OF THE BOX UNTIL UNIT IS ASSEMBLED AND DO NOT TIP THE BOX ON ITS SIDE WITH THE TREADMILL IN
IT. ALSO ONCE THE ASSEMBLED TREADMILL HAS BEEN REMOVED FROM THE BOX DO NOT TIP THE TREADMILL ON ITS SIDE. COLLAPSE BOX
BOTTOM AND LAY SIDES DOWN BEFORE ASSEMBLY. WHEN MOVING ASSEMBLED TREADMILL OUT OF THE BOX, MOVE IT OUT OF THE BOX ON
ITS WHEELS WHILE THE DECK IS IN THE FOLDED AND LOCKED POSITION. do not remove the safety pin connected to the side frame
and upright post until you have read and followed the assembly instructions. FAILURE TO FOLLOW THIS PROCEDURE MAY
RESULT IN SERIOUS INJURY DUE TO PINCH POINT AREA BETWEEN THE RUNNING GEAR AND THE UPRIGHT FRAMES.
Contents
Getting Started
Part No. C x 6
Screw (M8 x 20L)
Part No. D x 2
Washer (Ø8 x Ø18)
Part No. E x 4
Washer (Ø10 x Ø25)
Part No. F x 10
Screw (M4 x 8L)
Part No. G x 1
Allen Key
Part No. H x 1
Screwdriver
Part No. I x 1
Safety Key
Part No. J x 1
Speaker Wire
Part No. K x 1
Book Rack
Collapse box bottom and lay sides down
before assembly. Do not dispose of the packing
materials until assembly is completed. Read
each step carefully before beginning. If you are
missing a part, please contact our technical
support.
After unpacking the unit, open the hardware bag
and make sure that you have all the following
items. Some hardware may be already attached
to the part.
Part No. B x 2
Upright Side Cap
6
Part No. A x 1
Main Frame
ASSEMBLY INSTRUCTIONS
Step 1
1. Lift the uprights.
2. Attach at the base using 4 x bolts (C), 2 x washers (D) and
2 x washers (E) - use the allen key to tighten them well.
Part 1 - Fixings
Part No. C x 4
Screw (M8 x 20L)
Part No. D x 2
Washer (Ø8 x Ø18)
Part No. E x 2
Washer (Ø10 x Ø25)
Step 2
1. Rotate the computer until it’s in the position shown.
2. Attach to the top of the uprights using 2 x bolts (C) and
2 x washers (E) - use the allen key to tighten them well.
3. Remove the safety pin connected from the side frame
and upright post as shown.
IMPORTANT: The safety pin helps prevent serious injury
during assembly and must not be removed prior to this
step. The safety pin must be removed at the end of this
step for the folding and incline features to function
properly.
Part 2 - Fixings
Part No. C x 4
Screw (M8 x 20L)
Part No. E x 2
Washer (Ø10 x Ø25)
7
ASSEMBLY INSTRUCTIONS
Step 3
1. Using 10 x screws (F) attach the plastic cover to the base
of the uprights - use the screwdriver to tighten them well.
2. Install magazine rack to the computer.
3. Follow “Easy-lift Fold Up” and “Moving The Treadmill”
instructions to remove treadmill from the box.
Part 3 - Fixings
Part No. F x 10
Screw (M4 x 8L)
Final Check
Your Monza Equipe Treadmill is now assembled. Please make
the following final checks:
• Make sure all screws / bolts are tightened.
• Make sure the equipment is on a flat, level surface.
POWER UP
• Plug one end of power cable into the treadmill as shown.
• Plug the other end into a suitable AC outlet (220-240 volt,
50Hz).
• Switch the treadmill on using the on/off switch.
• Attach the safety key to the console.
NOTE: Before you run on the treadmill for the first time,
use the Quick Start instruction and allow the treadmill
to run independently for 10 minutes. Check the running
mat is tightened correctly and runs smoothly. If you think
the mat needs adjusting please see next page for more
details.
8
OPERATIONAL INSTRUCTIONS
Adjusting Running Mat Tension
Note: Check lubrication before adjusting the mat as symptoms can be similar.
The tension of the mat has been pre-set at the factory; however, with use the mat can stretch slightly and become loose. If the
mat is too loose you will find it starts to slip during use. To tighten the mat:
1. Set the treadmill to run at 3km/h.
2. Locate the adjustment screws at the end of the treadmill (One on each side).
3. Using the allen key provided, adjust both screws by 1/2 turn clockwise.
4. Re-test the mat tension. If the mat still slips, repeat step 3.
TIP: When correctly tensioned you should be able to lift the edge of the mat about 5 - 7cm - please only check this when the
power is turned off.
NOTE: If the mat is too tight, turn the screws anti-clockwise. Do not over tighten the mat - only turn the screws 1/2 turn before
re-checking the mat.
Adjusting Running Mat Alignment
The alignment of the mat has been pre-set at the factory, however, the mat can be caused to run out-of-line by a user’s running
style (eg. more weight on one foot), or if it’s placed on an uneven surface - so it may need adjusting from time to time. If the mat
is running out of alignment it will track towards either the left or right hand side of the running deck. To re-align:
1. Set the treadmill to run at 3km/h.
2. Locate the adjustment screws at the end of the treadmill (One on each side).
3. If your mat moves to the right, using the allen key provided, adjust the right screw by 1/2 turn clockwise. (If it tracks to the
left, perform the same operation on the left screw)
4. Let the treadmill run for a minute to see if it re-aligns to the centre. If more adjustment is needed repeat step 3.
9
OPERATIONAL INSTRUCTIONS
Safety Key
The treadmill will only operate when the safety key is in position - if the safety key is removed while the treadmill is in operation,
it will stop immediately. Before every workout session please make sure you attach the safety key to the console and the clip at
the other end to your clothing. When the treadmill is not in use, you should remove the safety key and store it somewhere safe,
out of the reach of children.
Before Starting
Straddle the belt and stand on the plastic side rails. Place the safety key onto the circle on the overlay and attach the clip to
your clothing. Do not stand on the walking belt while starting or stopping the treadmill. If you are a new user, stay at a slow
speed and hold onto the handrails until you feel more comfortable.
Ensure the safety pin that is connected to the side frame and side post are removed during the assembly
instruction. The machine incline features will not operate if the safety pin is not removed.
Quick Start
Make sure the treadmill is plugged in, switched on, and the safety key is in position.
1. Press the “POWER” button.
2. Press the “+ / -” buttons to input your weight (in kg).
3. Press the “START/STOP” button.
4. The treadmill mat will slowly begin to move (0.8 km/h).
5. Use the “+ / -” buttons to change the speed and incline.
NOTE: Entering your weight allows a more accurate “Calorie burned” figure to be displayed when you workout.
Major Function Keys
Power
Power ON / OFF treadmill.
Start / Stop
•
When power on, press to begin workout at the default speed of 0.8kph / 0.5mph.
•
During workout, press again to stop.
Enter
•
Press to confirm a selection in program selection mode.
SELECT
•
Press to browse through preset and user programs.
•
During workout, press this key to switch displays through Calories to Elevation Gain.
speed + / -
INCLINE + / -
Control the speed of your workout.
•
Press the button once to change the speed level value by 0.2kph (0.1mph).
•
Hold down the button for over two seconds to increase / decrease the value faster.
Control the incline of your workout.
•
Press the button once to change the incline level value by 1%.
•
Hold down the button for over two seconds to increase / decrease the value faster.
speed quick keys
Press these keys will set the speed directly to the corresponding value.
Incline quick keys
Press these keys will set the incline directly to the corresponding level.
10
OPERATIONAL INSTRUCTIONS
11
OPERATIONAL INSTRUCTIONS
DISPLAYS
DOT MATRIX
•
Displays the incline during one of the ELEVATION programs and INCLINE & SPEED combination
programs.
•
Displays the speed during one of the SPEED programs and USER programs.
•
Displays a heart symbol during one of the HRC programs.
•
Displays a 0.4km running track during the MANUAL program, TARGET programs and a BODY
FAT programs.
Prompt Text
•
Displays the workout program and operational instructions to begin a workout.
Pulse
To get a pulse rate, place both of your hands on the hand pulse sensor or use a heart rate chest
strap. (For more information, please see the “MONITORING YOUR HEART RATE” section.)
Time / body fat
Speed / AGE
INCLINE / SEX
CAL / ELEVGAIN / HEIGHT
Distance / weight
12
•
Displays the pulse rate during a workout when pulse rate signal is received from the hand
pulse sensor or the wireless heart rate receiver.
•
During a HRC program workout, it will display the TARGET HEART RATE (THR) value.
•
Displays the workout time during a workout.
•
Displays the BODY FAT result in percentage during a BODY FAT PROGRAM.
•
Displays the speed during a workout.
•
Displays the age value during up a HRC and BODY FAT PROGRAM.
•
Displays the incline level during a workout.
•
Displays the sex options during a BODY FAT PROGRAM. (0 = Male, 1 = Female)
•
Displays the calories consumed during a workout.
•
Press SELECT KEY TO display the elevation gain during a workout.
•
Displays the height value during a BODY FAT PROGRAM.
•
Displays the distance in kilometers or miles travelled during a workout.
•
Displays the weight value during a BODY FAT PROGRAM.
OPERATIONAL INSTRUCTIONS
Operational instructions
1. POWER ON - Press the POWER button to turn on the machine. The treadmill will not operate unless power is ON.
2. ENTER WEIGHT - After the treadmill is turn on, the prompt text will display “INPUT WEIGHT” and the dot matrix will display
“WT” along with the preset weight of 60kg. Adjust the weight value by using the SPEED & INCLINE + / - keys. Press ENTER
to confirm.
3. PROGRAM SELECTION - There are 23 programs in total (Please see the next section for program modes). Use the “SELECT”
or “INCLINE & SPEED + / -” keys to select a program mode and press ENTER to confirm a selection.
4. BEGIN WORKOUT - Press “START” to begin the program. All programs have a ten one-minutes segments. The program
repeats the ten one-minute segments until the user ends the workout.
5. STOP WORKOUT - Press “STOP” anytime to stop workout.
Other instructions
Odometer
The computer will displays the accumulated distance in the TIME and SPEED displays for three
seconds after the SAFETY KEY is placed on the monitor.
TOTAL HOURS
The computer will displays the accumulated speed in the prompt text display for three seconds after
the SAFETY KEY is placed on the monitor.
TIME-OUT
The monitor will shut off after 5 minutes of inactivity.
RE-START
•
Press START button to re-start the computer from pause status.
•
If the treadmill is in TIME-OUT status, press POWER button to wake treadmill from TIME-OUT
status.
Monitoring Your Heart Rate
The treadmill is fitted with 2 hand pulse sensors. To obtain a pulse
reading you must have both your left and right hands on the
sensors at the same time. Do not grip the hand sensors too tight
and allow the computer a few seconds to display the reading.
NOTE: Some people may not be able to obtain an accurate
hand pulse reading due to variations in circulation.
Wireless heart rate receiver
This treadmill features a built in receiver meaning it will pick up the signal from a chest strap. A chest strap will give a heart rate
reading to ECG accuracy. We recommend a chest strap is worn when using HRC programs. To purchase one, please see the
“CUSTOMER SUPPORT” section at the start of this manual or visit www.yorkfitness.com.
How The HRC Program works
The program works by automatically adjusting the incline to keep you working out at your target heart rate. To do this the
treadmill will need your pulse reading throughout the exercise (we recommend you use a chest strap for this).
•
If your heart rate is too high the incline is decreased, at a rate of 1% every 30 seconds.
•
If your heart rate is too low the incline is increased, at a rate of 1% every 30 seconds.
•
The user is free to change to speed settings at any point during the workout.
NOTE: The HRC program has a 3 1/2 minute warm-up phase. During this time the treadmill won’t automatically adjust
the incline.
13
OPERATIONAL INSTRUCTIONS
MP3 PLAYER INPUT
To use the built-in audio speaker, connect your MP3 player to the computer
console with the audio cable supplied with the treadmill. Adjust the volume
with your MP3 player.
HANDLEBAR CONTROLS
The handlebar controls are an alternative access to control the speed and
incline of your workout. They function the same as the “+ / -” buttons on the
main console.
Storage / CLEANING
Keep the treadmill in a dry place with as little temperature variation as possible. Try to protect from dust and always unplug
when not in use.
Use a warm, damp cloth to wipe the treadmill surface. Mild detergent may be used if necessary. Do not clean between the mat
and the running board, silicone lubricant is placed here to keep the mat running smoothly.
Lubrication
An insufficiently lubricated deck will cause the running mat, running deck and motor to wear out much quicker. Keeping the
deck lubricated is the most important activity you can carry out to prolong the life of your treadmill. How often you
should lubricate depends on usage, we recommend the following:
• Light use (less than 3 hours a week) - every 8 months.
• Medium use (3 to 5 hours a week) - every 4 months.
• Heavy use (more than 5 hours a week) - every 2 months.
You can check for proper lubrication levels at any time by doing the following:
1. Disconnect the treadmill from the power supply.
2. Fold up the running deck, so the treadmill is in the storage position.
3. Put your hand underneath the mat and feel along the running deck, as close to the centre of the deck as you can.
• If your hand gets a light coating of lubricant then no further lubrication is required.
• If the surface feels dry and your hand feels clean, then apply more lubricant.
NOTE: If in doubt apply a little lubricant.
Your treadmill comes ready supplied with a bottle of lubrication oil - to use, apply a liberal amount to a lint free cloth and run
cloth along the length of the running deck (underneath the mat). It’s important to try and get the lubricant as close to the
centre of the deck as possible. Check the lubrication level as detailed above and re-apply with the cloth if necessary.
If you need more lubricant, we recommend you use the Lube-N-Walk Treadmill Lubrication Kit, it can be obtained from local
York distributors - see the Contact Us details at the front of this manual or visit www.yorkfitness.com.
14
OPERATIONAL INSTRUCTIONS
Easy-lift fold up
To make storage simple, quick and easy, this treadmill features a hydraulic folding
system. Simply lift the running deck to fold. Make sure you hear the sound of the
deck locking into position - this ensures the deck is locked in place and will not fall
back down.
NOTE: Make sure the treadmill incline is at the lowest position before
attempting to fold. If the incline is not in the lowest position, folding will
damage the mechanism.
Ensure the safety pin that is connected to the side frame and side post are
removed during the assembly instruction. The machine will not fold up if
the safety pin is not removed.
Soft Drop Fold Down
An additional feature that allows the deck to gently lower itself to the floor:
1. Whilst taking the weight of the deck with your left hand, use your foot to push
on the deck release level to unlock.
2. Let the deck slowly guide itself down to the floor.
NOTE: Make sure there is nothing obstructing the deck as it lowers.
MOVING THE TREADMILL
This treadmill features 2 non marking wheels to help manoeuvrability:
3. Fold-up the deck as explained above.
4. Stand in front of the treadmill, square on.
5. Put one hand on each of the handrails and tilt the treadmill towards
you to engage the wheels.
6. Use the handrails to push the treadmill to the desired location.
NOTE: Before moving the treadmill, ensure the power cable is
unplugged from the wall and the treadmill.
15
PROGRAMS
16
PROGRAMS
17
PROGRAMS
Manual (P1)
MANUAL MODE allows the user to control the speed and incline level manually.
• Press START immediately after the treadmill is turn on. After a 3-2-1 count down, the treadmill will begin at the default
speed (0.8kph / 0.5mph).
• During the workout, user may adjust the speed and incline by using the SPEED & INCLINE + / - keys or quick keys.
Incline Programs (P2 - P5)
P2 Rolling Hills / P3 Mountain Pass / P4 Mountain Peak / P5 Calorie Burn
These are the incline programs. The incline is preset in each segment, and the speed is controlled by the user.
• Select one of the incline programs and press START to begin workout. After a 3-2-1 count down, the treadmill will begin at
the present speed and incline.
• During the workout, user may adjust the speed by using the SPEED + / - keys or quick keys.
• User may also adjust the preset incline by using the INCLINE + / - key or quick keys. Press the INCLINE + / - keys once to
raise or lower every segment of the incline level by 1%, all the segments of the program will raise or lower together until it
reaches the maximum or minimum level.
SPEED Programs (P6 - P9)
P6 Walking / P7 Walking II / P8 Jogging / P9 Jogging Interval
These are the speed programs. The speed is preset in each segment, and the incline is controlled by the user.
• Select one of the speed programs and press START to begin workout. After a 3-2-1 count down, the treadmill will begin at
the present speed and incline.
• During the workout, user may adjust the incline by using the INCLINE + / - keys or quick keys.
• User may also adjust the preset speed by using the SPEED + / - key or quick keys. Press the SPEED + / - keys once to raise
or lower every segment of the speed by 0.2kph / 0.1mph, all the segments of the program will raise or lower together
until it reaches the maximum or minimum level.
SPEED & incline combination Programs (P10 - P12)
P10 Cardio Burn / P11 Hill Interval / P12 Mountain Interval
These are the speed & incline combination programs. The speed and incline are preset in each segment.
• Select one of the speed & incline programs and press START to begin workout. After a 3-2-1 count down, the treadmill will
begin at the present speed and incline.
• User may also adjust the preset speed and incline by using the SPEED or INCLINE + / - key or quick keys. Press the SPEED
or INCLINE + / - keys once to raise or lower every segment of the speed by 0.2kph / 0.1mph and incline level by 1%, all the
segments of the program will raise or lower together until it reaches the maximum or minimum level.
18
PROGRAMS
TARGET PROGRAMS (P13 - P16)
P13 Target Distance / P14 Target Calories / P15 Target Time / P16 Target Elevation Gain
These are the target programs. During the workout, the console will counts down from a targeted value set by the user.
1. Select one of the target programs and user the SPEED or INCLINE + / - keys to select a target value.
• P13 TARGET DISTANCE (0.5 - 99.50 km / mile)
• P14 TARGET CALORIES (10 - 9990 kcal)
• P15 TARGET TIME (10:00 - 99:00 minutes)
• P16 TARGET ELEVATION GAIN (10 - 9990 meters)
2. Press ENTER to confirm setting.
3. Press START to begin workout.
• During workout, the user may adjust the speed and incline level by using the SPEED or INCLINE + / - keys.
• The targeted value will counts down in the correspondent display until the goal has been reached. “END” will appear in
the dot matrix display and the machine will stop.
• If the user doesn’t set any targeted value, the machine will operate as in MANUAL program.
HRC Programs (P17 - P19)
P17 WEIGHT LOSS PROGRAM / P18 CARDIO HEART PROGRAM / P19 INTERVAL FAT BURN PROGRAM
These are the heart rate control programs. The treadmill will adjust the default value every 30 to 40 seconds until target heart
rate zone is reached:
• P17 WEIGHT LOSS PROGRAM - SPEED
• P18 CARDIO HEART RATE PROGRAM - INCLINE
• P19 INTERVAL FAT BURN PROGRAM - SPEED & INCLINE
The user must wear a heart rate chest strap or grip the hand pulse sensor to use these programs.
1. Select one of the HRC programs.
2. The prompt text bar will display “INPUT AGE”. Use the SPEED or INCLINE + / - keys to input user’s age. Press “ENTER” to
confirm.
3. The default TARGET HEART RATE (THR) is displayed at 60%. Use the SPEED or INCLINE + / - keys to change the value.
4. Press “START” to begin workout.
• The treadmill will start at 0.8kph / 0.5mph speed and 0% incline. After 3 minutes of warm-up, the incline and / or speed
(Depends on which HRC program is selected) will adjust every 30 - 40 seconds until target heart rate zone is reached.
• The dot matrix will displays “?” if there is no heart rate input for 10 seconds. If there are no signal input for 30 seconds, the
machine will stop and dot matrix will displays “END”.
USER Programs (P20 - P22 / U1, U2, U3)
The user programs allow users to program their own workout program.
1. Select one of the USER program and press ENTER to confirm.
2. Adjust the speed and incline by using the SPEED and INCLINE + / - keys and press “ENTER” to confirm each segment.
3. Press “START” to begin workout.
• If a speed and incline value is changed during usage, the monitor will retain the value of the speed and incline at the end
of each segment.
• When the LCD power is off, hold SELECT until the computer beeps twice to reset the value set by the user.
19
PROGRAMS
BODY FAT PROGRAM (P23 / F001)
The body fat program calculates the body fat percentage from the value you put in the computer for your reference, so that you
can plan your training. When selecting this program, the user can follow the steps showed on the dot matrix and LCD prompt
text as below:
1. Input Age: Press SPEED or INCLINE + / - keys to adjust the age, press ENTER to confirm. (Preset: 40, range: 10 ~ 99 years
old)
2. Input Sex: Press SPEED or INCLINE + / - keys to choose, 1 represents Female and 0 represents Male, press ENTER to confirm.
(Preset: 0)
3. Input Height: Press SPEED or INCLINE + / - keys to adjust the height, press ENTER to confirm. (Preset: 160cm, range: 100 ~
240cm)
4. Input Weight: Press SPEED or INCLINE + / - keys to adjust the weight, press ENTER to confirm. (Preset: 60kg, range: 10 ~
250kg)
5. After finishing the input, the dot matrix will shows “Check Pulse”. Please hold the heart rate sensor with two hands for a
while, when the computer received the heart rate value, the LCD shows “BODY FAT RESULT” and shows the BODY FAT value
within 10 seconds.
• If the computer received no signal of heart rate for 20 seconds, the LCD will shows “END” & “E5” with beeps at the same
time.
20
Troubleshooting
If you have a problem with your treadmill, before you do anything else please check that all the cables have been
connected correctly. Loose cables are very common and many problems can be solved by making sure the cables are
properly connected.
The following table details the most common problems and how to fix them. If you still have a problem after going through the
troubleshooting guide please call your local YORK distributor for advice.
Error Code
CAUSE
CORRECTION
e1 - The console has
not received a signal
from the motor / speed
sensor within certain
time.
•
Wiring jack has a poor connection.
•
•
There is too great a distance between the
speed sensor and the magnet on the front
roller pulley.
Re-insert the wiring jack and ensure that a firm
connection is made.
•
Adjust the speed sensor so that it sits 3mm (+
/ - mm) from the magnet.
Sensor is faulty and / or wiring has been
damaged.
•
Replace the sensor.
•
Replace the magnet.
•
Magnet on the front roller pulley is loose /
fallen / missing.
•
Replace the controller.
•
Controller is burnt.
•
Damage to IC chipset or IC base.
•
•
Static electricity interference (static electricity
may transfer through hand pulse receiver and
damage the IC)
Check if any cracks and tilt can be seen on IC
base or broken pins/leads on IC.
•
Ensure the grounding wire is firmly fixed in
place with the screw.
•
Examine if there is any damage to the small PCB
beneath the hand pulse receiver plastic cover.
•
Check if LCD / LED works properly.
E2 - No readout or
abnormal message
on display / Buttons
not working / Beeping
sounds
•
•
e3 - The console could
not obtain the incline
•
value within certain
time / The incline motor
is working outside its
•
parameters
•
Data jack has a poor connection.
•
Incline motor has become damaged (Internal
damage may be evident by excessive motor
case heat).
Re-insert the wiring jack and ensure that a firm
connection is made.
•
Reset the height of the incline nut and restart
the machine.
Data cable has been damaged.
•
Replace the incline motor.
Controller is burnt.
•
Replace the controller.
E5 - No heart rate
signals within 20
seconds when using
body fat program
•
Misplaced gesture on hand pulse sensors.
•
Try again with appropriate gesture.
•
Hand pulse sensors are faulty or damaged.
•
Replace the hand pulse sensors.
Problems
CAUSE
CORRECTION
treadmill will not
start
•
Not plugged in.
•
Plug into suitable outlet.
•
Safety key not attached correctly.
•
Insert safety pull pin.
•
Treadmill circuit breaker tripped.
•
Reset circuit breaker.
•
On / Off Switch not turned on.
•
Turn on On / Off Switch.
•
Auto Shut Down Timed Out.
•
Unplug and re-plug electrical cord.
•
Walking belt too loose.
•
Tighten walking belt.
•
Deck needs lubrication.
•
Lubricate belt and deck.
•
Loose hardware.
•
Tighten visible screws, nuts and bolts.
•
Motor straining.
•
Check belt tension - 3 finger test.
•
Clicking sound - roller knocking.
•
Adjust rear rollers - check the tension.
•
Too much hand movement.
•
•
Palms too wet.
Stand on side rails to obtain accurate pulse
reading.
•
Gripping hand grips too tight.
•
Dry palms.
Wearing rings.
•
Grip using moderate pressure.
•
Remove all rings.
Treadmill Belt Slipping
Treadmill Noisy
Inaccurate pulse rate
•
21
Fitness guide
Starting Your Workout
ALWAYS CONSULT YOUR DOCTOR BEFORE UNDERTAKING A NEW EXERCISE REGIME. IF YOU EXPERIENCE NAUSEA,
DIZZINESS OR OTHER ABNORMAL SYMPTOMS DURING EXERCISE, STOP AT ONCE AND CONSULT YOUR DOCTOR.
Begin each workout with a warm up session - a few minutes of stretching to help prevent strains, pulls and cramps:
1. Get onto the treadmill, using the handrails for support, and place your feet on the side rails. (Either side of the running
mat)
2. Activate the treadmill. (Using the details found in the Operation Instructions)
3. The treadmill will start at the lowest speed, step onto the mat and walk at the same speed.
4. Continue the rest of your workout.
Finishing Your Workout
1.
2.
3.
4.
5.
6.
7.
Turn the treadmill to the lowest speed and incline settings.
Using the handrails for support place your feet on the side rails. (Either side of the running mat)
Stop the treadmill.
Turn the treadmill off at the main power switch and remove the plug from the electrical outlet.
Remove the safety key.
If necessary, wipe the treadmill down with a damp cloth.
End each workout with a cool down session - a few minutes of stretching to help prevent strains, pulls and cramps.
Correct Running Form
•
•
•
•
Run in the centre of the running mat.
Keep your head up and look straight ahead.
Shoulders should be square and level, don’t round your shoulder or swing them forwards or backwards.
Keep your torso straight with the chest up so there’s plenty of room for the diaphragm to move for proper breathing
actions.
• Do not lean forwards, backwards or slouch, as all of these posture deviations can place a lot of stress on the lower back,
interfering with proper running mechanics and possibly causing lower back injury.
• Feet should be pointed straight ahead and land directly under the hips.
How long should i exercise for?
That really depends on your current level of fitness. If you’re just starting out on a new exercise program, you should start
gradually and build up - do not try to do too much too quickly. 30 minutes, 3 times a week should be enough. Don’t push
yourself too hard - you should never feel exhausted during or following exercise.
22
Fitness guide
Suggested Stretches
The correct form for several basic stretches is shown at the
right. Move slowly as you stretch—never bounce.
1. Hamstring Stretch
Sit with one leg extended. Bring the sole of the opposite
foot toward you and rest it against the inner thigh of your
extended leg. Reach toward your toes as far as possible.
Hold for 15 counts, then relax. Repeat 3 times for each leg.
Stretches: Hamstrings, lower back and groin.
2. Calf/Achilles Stretch
With one leg in front of the other, reach forward and place
your hands against a wall. Keep your back leg straight and
your back foot flat on the floor. Bend your front leg, lean
forward and move your hips toward the wall. Hold for 15
counts, then relax. Repeat 3 times for each leg. To cause
further stretching of the achilles tendons, bend your back leg
as well. Stretches: Calves, achilles tendons and ankles.
3. Quadriceps Stretch
With one hand against a wall for balance, reach back and
grasp one foot with your other hand. Bring your heel as close
to your buttocks as possible. Hold for 15 counts, then relax.
Repeat 3 times for each leg. Stretches: Quadriceps and hip
muscles.
4. Inner Thigh Stretch
Sit with the soles of your feet together and your knees
outward. Pull your feet toward your groin area as far as
possible. Hold for 15 counts, then relax. Repeat 3 times.
Stretches: Quadriceps and hip muscles.
23
Fitness guide
Heart Rate Training
To get the most out of your new equipment and see the best results from your training you should exercise at the right level of
effort, and that means listening to your heart! Working out to a target heart rate means you can direct your workout to achieve
different goals:
GOOD HEALTH - For those wishing to improve quality of life and general well being. Your session will need to be done at an
intensity of between 50 - 60% of your estimated maximum heart rate, should last about 30 minutes and can be done on most
days of the week.
WEIGHT LOSS - To see a significant reduction in body fat, your sessions must be a little more intense - between 60 and 70% of
your estimated maximum heart rate. These sessions can also be performed on most days of the week for up to 30 minutes.
IMPROVING FITNESS LEVELS - These sessions should be performed at 70- 80% of your estimated maximum heart rate and
can also involve bouts of interval training that would have your heart rate peaking for short times near your maximum heart rate
level. These are intense sessions and will require at least a 48 hours rest between sessions.
Calculating Your Target Heart Rate
First, you need to find your estimated maximum heart rate using the formula “220 minus your age in years”. If you are 35 years
old, your estimated maximum heart rate is: 220 - 35 = 185 beats per minute (bpm)
Next, to calculate your target heart rate, simply multiply your estimated maximum heart rate (185 bpm) by the applicable
percentage. So, if your goal is better heart: 185 x 60% = 111bpm
TIP: Heart rate training requires you to monitor your heart rate throughout the workout. For this we recommend using a chest
strap (If your machine has a wireless receiver) or a heart rate monitor.
Target Heart Rate Zone Estimated by Age*
AGE
TARGET HEART RATE ZONE
(55% - 90% OF MAXIMUM HEART RATE)
AVERAGE MAXIMUM
HEART RATE 100%
20 YEARS
110-180 BEATS PER MINUTE
200 BEATS PER MINUTE
25 YEARS
107-175 BEATS PER MINUTE
195 BEATS PER MINUTE
30 YEARS
105-171 BEATS PER MINUTE
190 BEATS PER MINUTE
35 YEARS
102-166 BEATS PER MINUTE
185 BEATS PER MINUTE
40 YEARS
99-162 BEATS PER MINUTE
180 BEATS PER MINUTE
45 YEARS
97-157 BEATS PER MINUTE
175 BEATS PER MINUTE
50 YEARS
94-153 BEATS PER MINUTE
170 BEATS PER MINUTE
55 YEARS
91-148 BEATS PER MINUTE
165 BEATS PER MINUTE
60 YEARS
88-144 BEATS PER MINUTE
160 BEATS PER MINUTE
65 YEARS
85-139 BEATS PER MINUTE
155 BEATS PER MINUTE
70 YEARS
83-135 BEATS PER MINUTE
150 BEATS PER MINUTE
*For cardiorespiratory training benefits, the American College of Sports Medicine recommends working out within a heart rate
range of 55% to 90% of maximum heart rate. To predict the maximum heart rate, the following formula was used:
220 - Age = predicted maximum heart rate
24
Warranty
This equipment is supplied with a standard warranty as follows:
• Lifetime frame
• 12 months other parts
• 12 months labour
This equipment is warranted for use in a home, personal, family or household environment.
Please Note: Warranty details may vary from one market area to another.
Warranty Terms
York Fitness warrants that the Equipment you have purchased from an authorized York Fitness reseller is free from defects in
materials and workmanship. The Warranty is valid subject to normal and reasonable use in the environment as described above,
and correct assembly of the equipment during the warranty period. The warranty period extends to the original purchaser only.
It is not transferable to anyone who subsequently purchases the Equipment from you.
The warranty excludes normal wear and tear on parts.
Your sales receipt, showing the date of purchase of the equipment, is your proof of the date of purchase.
This warranty becomes valid only if the Equipment is assembled / installed according to the instructions / directions included
with the equipment. This warranty does not extend to any equipment that has been damaged or rendered defective: (a) as
a result of accident, misuse, abuse or lack of reasonable care; (b) by the use of parts not manufactured by York Fitness or sold
by York Fitness; (c) by modification of the equipment; (d) as a result of service by anyone else other than York Fitness or an
authorized York Fitness warranty service provider; (e) Direct or Indirect Damage from Natural Causes (hurricane, tornado, hail,
lightning, flood, explosion, mudslide).
During the warranty period, York Fitness will at no additional charge provide replacement part(s) or repair the equipment (at
York Fitness’s option) if it becomes defective, malfunctions or otherwise fails to conform with this warranty under normal, noncommercial, personal, family or household use. In repairing the equipment, York Fitness may replace defective parts or at the
option of York Fitness, use serviceable used parts that are equivalent to new parts in performance. All exchanged parts and
equipment replaced under this warranty will become the property of York Fitness. York Fitness reserves the right to change
manufacturers of any part to cover any existing warranty.
If the equipment must be returned, you must return the Equipment or defective part to York Fitness in its original container
(or equivalent) with Proof of Purchase. Any evidence of alteration, erasing or forgery of proof of purchase documents will be
cause to void this warranty. You must prepay any shipping charges and you are responsible for insuring any equipment or part
that is returned. Should any equipment submitted for warranty service be found to be ineligible, an estimate of repair cost will
be furnished and the repair will be made if requested, upon York Fitness’s receipt of payment or acceptable arrangement of
payment. Under no circumstances will returns be accepted without return authorization by our Customer Service department.
To obtain warranty service you must provide the following information:
• Name of Equipment, Equipment Code, Batch No, Date Purchased, and Nature of fault or part number required.
• Neither dealer of this equipment nor any retail establishment selling this equipment has any authority to make any
warranties or to promise remedies in addition to, or inconsistent with, those stated above. This warranty does not affect
your statutory rights
Regular serving of this equipment is recommended every 12 months. Failure to do this may void your warranty.
25
Part List
KEY
A01
A02
A03
A04
A05
A06
A07
A08
A09
A10
A11
A12
A13
A14
A15
A16
B01
B02
B03
B04
B05
B06
B07
B08
B09
B10
B11
B12
B13
B14
B15
B16
B17
B18
B19
B20
B21
B22
B23
B24
B25
B26
B27
B28
B29
B30
B31
B32
B33
B34
B35
B36
B37
B38
B39
B40
B41
B42
B43
B44
B45
B46
B47
B48
B49
B50
B51
B52
B53
B54
B55
26
PART NO.
A01
A02
A03
A04
A05
A06
A07
A08
A09
A10
A11
A12
A13
A14
A15
A16
B01
B02
B03
B04
B05
B06
B07
B08
B09
B10
B11
B12
B13
B14
B15
B16
B17
B18
B19
B20
B21
B22
B23
B24
B25
B26
B27
B28
B29
B30
B31
B32
B33
B34
B35
B36
B37
B38
B39
B40
B41
B42
B43
B44
B45
B46
B47
B48
B49
B50
B51
B52
B53
B54
B55
DESCRIPTION
Console support & Handlebar
Handlebar
Left upright
Right upright
Front roller
Rear roller
Power switch mount bracket
Main frame
Arc bracket
Incline frame
Base frame
Locking device latch
Left wheel bracket
Right wheel bracket
Folding retaining tube
Sensor wire tube
Computer / Console (center)
Lower console cover
Side console cover - Left
Side console cover - Right
Left side cover bezel
Right side cover bezel
Cup holder
Left speaker cover
Right speaker cover
Hande pulse sensor
Safety key base
Infotainment cradle
Handlebar endcap
Safety key
Front motor cover
Drive motor
Pulley belt
Incline motor
Circuit breaker module
Power socket
Power cable
ON/OFF switch
Speed sensor
Plastic Grommit
Motor cover mount bracket
Non-slip pad
Foot rail
Running deck
Running belt
Rear endcap - Left
Rear endcap - Right
Transport wheel (50mm)
Microwave proximity sensor
Shock gauge clear cover
Shock gauge cover frame
Shock gauge indicator
Belt guide
Rubber deck mount 25*22*6mm
Rubber deck mount 25*20*6mm
Arc bracket cover - Left
Arc bracket cover - Right
Rubber pad 45*36*10
Incline wheel 60
Base corner cover - Left
Base corner cover - Right
Gas strut - left
Gas strut - Right
Transport wheel (50mm)
Earth wire
Earth wire
Upper wire
Lower wire
Sensor connecting wire
Sensor connecting wire
Controller PCB
QTY
1
1
1
1
1
1
1
1
2
1
1
1
1
1
1
1
1
1
1
1
1
1
1
1
1
2
1
1
2
1
1
1
1
1
1
1
1
1
1
1
4
2
2
1
1
1
1
4
2
2
2
2
2
6
2
1
1
4
2
1
1
1
1
2
1
1
1
1
1
1
1
KEY
B56
B57
B58
B59
B60
B61
B62
B63
B64
B65
B66
B67
B68
B69
B70
B71
B72
B73
B74
B75
B76
B77
B78
B79
C01
C02
C03
C04
C05
C06
C07
C08
C09
C10
C11
C12
C13
C14
C15
C16
C17
C18
C19
C20
C21
C22
C23
C24
C25
C26
C27
C28
C29
C30
C31
C32
C33
C34
C35
C36
C37
C38
C39
C40
C41
C42
PART NO.
B56
B57
B58
B59
B60
B61
B62
B63
B64
B65
B66
B67
B68
B69
B70
B71
B72
B73
B74
B75
B76
B77
B78
B79
C01
C02
C03
C04
C05
C06
C07
C08
C09
C10
C11
C12
C13
C14
C15
C16
C17
C18
C19
C20
C21
C22
C23
C24
C25
C26
C27
C28
C29
C30
C31
C32
C33
C34
C35
C36
C37
C38
C39
C40
C41
C42
DESCRIPTION
Filter
Choke / Transformer
Earth wire
Connecting wire
Connecting wire
Connecting wire
Connecting wire
Connecting wire
Sensor mount UC-9/16
Sensor mount UC-0.5
Cable tie
Ferit core
Handlebar foam grip
Foam handgrip 36*3*165
Foam grip 36*3*70
Handlebar mounted control - top
Handlebar mounted control - bottom
Storage insert - Left
Storage insert - Right
Book rack plug
Book rack tube
Bookrack - 1
Bookrack - 2
Fan bezel
Philips screw 4*12mm
Philips screw 4*16mm
Hex head screw M8*35L
Nut M8
Hex head screw M8*20L
Curved washer
Philips screw 4*20mm
Machine screw M6*25L
Round washer 8*16*1.5
Hex head screw 8*55
Screw cap M10
Hex head Bolt 10*40
Self-tapping screw 4*12
Plastic washer 4.5MM*5MM
Hex head screw M8*37L
Round washer 8*18*1.5
Hex head Bolt 8*55
Self-tapping screw M3*10
Star washer
Bush 12.3L*17*10.2
Hex head screw M10*32L
Bush 21.5L*18*10.2
Self-tapping 4*12L
Hex head Bolt 10*12
Hex head Screw M10*25L
Bush 13.5L*17*10.2
Round washer 10*20*2.0t
Hex head screw M10*70L
Star washer
Hex head screw
Philips screw M6*12L
Hex head screw M8*40L
Plastic washer19*8*10L
Hex head screw 8*55
Hex head screw M8*25L
Hex head screw 8*15
Spring
Self-tapping screw4*8L
Self-tapping screw4*6L
Self-tapping screw3*23
Nut M8
Self-tapping 4*16L
QTY
1
1
1
1
1
1
2
1
2
7
5
2
1
2
2
2
2
1
1
4
1
1
1
1
46
27
2
11
10
4
2
10
3
3
11
1
8
8
4
9
1
2
3
2
2
2
4
2
2
2
2
2
2
2
2
2
2
1
2
2
1
12
7
2
2
4
Exploded Drawing
27