Download User`s Manual - HearMore.com
Transcript
One Year Manufacturer's Limited Warranty
WARRANTY TERMS:
1. This unit is covered for one year from the date of purchase for
manufacturer's defects only.
2. The following are not covered:
A) damage due to improper handling or use
B) normal wear and tear
C) accessories: power transformers, cords, etc.
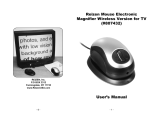
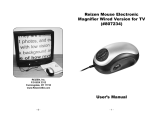
Reizen Mouse Electronic
Magnifier Wireless Version: USB
(#807566)
3. If repairs are needed after the warranty period expires or in case of
improper use or handling of the item, the customer will be
responsible for paying the appropriate parts and labor costs.
4. In case repair is necessary in the future, please record the date of
purchase below for your own records:
Date of Purchase:
REIZEN, Inc.
P.O BOX 3312
Farmingdale, NY 11735
www.ReizenUSA.com
-6-
User’s Manual
-1-
Congratulations on your purchase of the Reizen Mouse Electronic
Magnifier. This magnifier was designed to enable those with low vision
to read comfortably and easily. By simply rolling the mouse magnifier
over reading material, you’ll be able to view text magnified on your PC.
Video Sampling Card Functions:
With adjustable 2x to 32x magnification, variable viewing modes and an
Image Lock (Freeze Frame) feature, you’ll have the flexibility and functionality you need to make reading easier than ever. With the USB version you can also save screen images and share them with family and
friends via email.
C. Photo frame and save: take picture (JPG or BMP format)
Important Safety Precautions
To keep the unit in good condition and to ensure safe usage, please
refer to the following guidelines:
A. Date & Time display
B. Camera timer: take picture every 5 seconds (Refer to item D for
save direction path)
D. Document save direction path: Set up camera timer and
document path
E. About software version information and developer information
F. Advanced settings: set up video parameters, digital camera focus
and stunts
G. Video image resolution settings
H. Video record button
• Read the instructions in this user’s guide before starting to use the unit.
I. Video record settings: select coder and set up video
• Do not attempt to repair the unit or open its case. This product contains
no user serviceable parts.
J. File save direction path
• Keep the unit away from wet areas, rain, and other sources of liquids
or high humidity. Do not submerge the unit.
• Always operate the unit in a place where the temperature is between
10° and 40° C (50° and 104° F).
• Always store where the temperature is between -20° and 65° C
(-4° and 149° F).
• Always use the unit on a stable, level, hard surface such as a desk
or table.
• Never force connectors into the unit’s ports. All appropriate connectors
should fit easily into the ports. If the connector does not fit, turn it
around, and try again.
• Use only the power cable that came with your unit. Other adapters
may damage unit.
• When cleaning the unit, make sure it is unplugged. To clean it, lightly
dampen a soft, clean cloth with water or mild detergent.
• Do not bend or twist the cable excessively as this could cause fatigue
and lead to unit failure.
• Do not leave the power cable or product cable where someone might
trip over it.
-2-
K. Video display interface
Note: In order to get the best image quality, please refer to following instructions:
1. Select desired image resolution (refer to G.)
2. Save documents to a direction path that is easy to find (Refer to D)
3. Adjust mouse camera to get the best image display
Technical Specifications:
Item
Display Resolution
Display Mode
Image Sensor
Power Output
Battery Life
Battery Type
Weight
Dimensions: Mouse
Description
Multiple Options
Full Color, B/W, W/B, High Contrast
CMOS, VGA resolution
5V DC; 250ma (Max)
3-4 hours
Lithium
100 grams adapter excluded
5" x 2.75" x 2.50"
Dimensions: Video Card
4" x 1.5" x 0.625"
Magnification Range:
32 times depending on screen size
-5-
Mouse Magnifier Button Functions:
What’s in the Box?
1. "M": Mode selection button (Full Color - Black on White - White on
Black - High Contrast)
• Reizen Mouse Electronic Magnifier
2. "+": Zoom in
• Video sampling card (Receiver w/USB connector)
• Software installation disc
3. "-": Zoom out
• Charger & Adapter
4. "*": Image Lock (Freeze Frame)
• Drawstring Carry/Storage Pouch
5. Camera On/Off Switch
• User's Manual
Installing & Using the Mouse Electronic Magnifier
(Wireless USB Version for Computer)
Main Features of Mouse Electronic Magnifier:
• 8 adjustable magnification levels (2x-32x) to accommodate varying
user needs
1. First, charge the wireless mouse magnifier using the supplied cable
(Disconnect AC cable near yellow Video Out plug and connect to jack
on mouse.) Mouse fully charges in 3-4 hours. After mouse is
charged, re-connect cable.
• Multiple viewing modes: full color, black on white, white on black,
high contrast
2. Unplug any existing camera devices and insert the CD in your
computer, then Launch “smartvideo.exe”
• Built-in LED lighting system allows for operation in different lighting
environments
3. Click “Next” as necessary and then “Finish”
• Ergonomically designed and easy to use
4. Simply plug your video sampling card into any USB 2.0 port on your
computer. The hardware will install automatically and a notification
will appear confirming your device is ready to use.
• Stable, reliable wireless receiver and transmitter ensure strong
signal quality
5. To use the magnifier, launch the multi video software (it will be in your
programs folder under smartvideo direction path), then move the
Mouse Magnifier over the material you wish to read and it will be
displayed on the main menu of the software main interface window.
• Image Lock/Freeze Frame: Freeze images on screen for
extended viewing
• Record and replay video
• Share saved files with friends and family members via email
6. Use "Plus" & "Minus" keys to adjust the magnifying power (2x to 32x)
7. Use "M" to choose Color, Black on White, White on Black or High
Contrast mode
Zoom Button
Freeze/UnFreeze
Button
ON/OFF Button
8. Use the "*" (Image Lock) button to 'freeze' an image for extended viewing
Mode Button
-4-
A/C Adapter
-3-
USB
Connector


