1
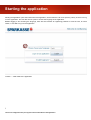
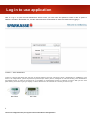
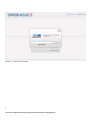
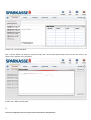
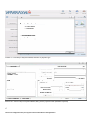
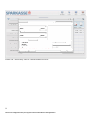
User manual for
NetBanking service
1
Note: Your configuration may not support some functionalities of the application.
CONTENT
Starting the application ...................................................................................................................................................... 1
Log in to use application.................................................................................................................................................... 1
Global Application Menu.................................................................................................................................................... 1
Information Overview Module ........................................................................................................................................... 1
Module for working with accounts..................................................................................................................................... 1
Module for working with cards........................................................................................................................................... 1
Payments Module .............................................................................................................................................................. 1
Operational Application Menu ........................................................................................................................................... 1
Transfer Module ................................................................................................................................................................. 1
Status Application Menu.................................................................................................................................................... 1
Other Options Module........................................................................................................................................................ 1
Important information ......................................................................................................................................................... 1
2
Note: Your configuration may not support some functionalities of the application.
Starting the application
Starting the application opens the initial mask of the application, which offers the user a few options, primary of which is to log
in to the application. The user also has an option to choose the language of the application.
Besides logging in and choosing the language, there are also modules for registering problems in case the user, for some
reason, is not able to log in to the application.
Picture 1 – Initial mask of the application
3
Note: Your configuration may not support some functionalities of the application.
Log in to use application
Click on “Log in” to open the user identification window. Enter your user name and password. There is also an option to
select the checkbox “Remember me”, and the username will be remembered for easier and faster future logging in.
Picture 2 – User identification
Token is a device that allows the safe use of internet banking services, serving the login / identification in netBanking. The
token is an independent, personal password-protected (KC Token) device, designed for Internet banking user identification
and digital signing of orders so that there is no possibility of unauthorized access to customer accounts. With just one click
(Mini Token), the token is going to display numbers that have to be entered as a security check for login.
Mini Token
KC Token
4
Note: Your configuration may not support some functionalities of the application.
Picture 3 – Choose account owner
5
Note: Your configuration may not support some functionalities of the application.
Global Application Menu
Picture 4 shows the Global Application Menu, which contains various options and tools that make the application easy to use
and navigate.
Picture 4 – Global Menu
Options of this menu are:
LOG OUT – allows the user to log out when finished with the application
HELP – allows the user the access to application documents
LOCK – allows the user to temporarily lock the application and pause the work. Reactivation of the application requires
password of the user who locked the application, as shown on the picture below.
Picture 5 – Module for locking the application
SETTINGS – module that allows the user to review personal information and change the password.
Additionally, the user has an option to overview his/her rights over accounts. An account may be assigned an alias, as well
set as the default (the most often used) account, which is useful when, i.e. making payments and/or transfers from the
account.
6
Note: Your configuration may not support some functionalities of the application.
Pictures 6 and 7 – General Settings / Accounts Settings
7
Note: Your configuration may not support some functionalities of the application.
Information Overview Module
The Information Module can be very useful, and can be opened by clicking on icon with letter “i” next to the tab “Accounts”.
This module allows the user to get to many information immediately upon log in, such as:
•
Information on the last log in
•
News interesting to the user
•
User’s last transactions
•
User’s last orders
Picture 8 – Module for overview of information relevant to the user
Besides the above stated possibilities, a very interesting feature of this module is the news. The user can find here public
information of promotional or informational character. If the news have attachments, they can be downloaded by clicking on
the button “Download attachment”, as shown bellow.
8
Note: Your configuration may not support some functionalities of the application.
Picture 9 – Window with an overview of details and attachment download
9
Note: Your configuration may not support some functionalities of the application.
Module for working with accounts
Following successful log in to the application, the user is forwarded to the module for user accounts. Just as its name
suggests, this module serves as an overview of and for working with user accounts, and shows all the accounts for which the
logged user has rights to work with.
In the module for working with accounts, on the left side are shown all the accounts that the user has access to and can
operate with. On the right side of the mask the additional details about the selected account are shown. At the very bottom of
the mask there are buttons that allow execution of operations, from making payments and/or transfers from a selected
account, to review of transactions and/or statements of a given account. Each of these operations is described in detail in
following chapters.
Picture 10a – module for overview of user accounts
10
Note: Your configuration may not support some functionalities of the application.
Annuity schedule and payments of loan installments
Picture 10b – Module for overiew of user accounts, annuity schedule
If the user has a loan, then the mask with accounts allows the user to review the annuity schedule according to which loan
installments are paid. As shown on the picture above, one loan account is selected on the left, and on the bottom the button
“Annuity schedule” can be clicked for a table overview of all annuities to be paid (picture 10c below, records in the table
intentionally left empty). The table shows the date of rate, interest, the capital and the total amount of the loan payment.
11
Note: Your configuration may not support some functionalities of the application.
Picture 10c – Annuity Schedule
Click on button “Make Loan Payment” (see picture 10b) and a new window opens where the account and the currency are
chosen for the payment to be processed.
Picture 10d – Make Loan Payment
12
Note: Your configuration may not support some functionalities of the application.
Following selection of the account and the currency, click on button “Next” and the selected payment will be shown (Picture
10e). If everything is all right, the last step is confirmation by clicking on the button “Finish”. There is always an option to go
back and change the account or currency, or to close the window for cancelling the payment of the loan installment.
Picture 10e – overview of payment before confirmation
NOTE: If “Sign” is selected before clicking on “Finish”, then this payment order will have the status “Signed order”.
If this option is not selected, then the order will be in status “Opened order”.
13
Note: Your configuration may not support some functionalities of the application.
Module for working with cards
Netbanking also offers card support. The user has the option to review all his/her cards related to any of his/her accounts.
There are two ways to get information about the cards. The first is to select the account, as shown on the picture below.
Therefore, select the account on the left side, and if there are cards connected to it, they will be shown in the card table.
Click on any card shown in the table for a detailed overview of the card.
Picture 10f – Overview of cards through the account
The second way to view cards is to click directly on the link “CARDS” in the main menu, and the mask shown below will
open. The mask has details about the account and the card, as well as statement to review card transactions.
14
Note: Your configuration may not support some functionalities of the application.
Picture 10g – Overview of all cards
Enter the amount and/or time period and all transactions will be shown in the table below. To select another card, just click on
the desired card name in the Status Menu on the left.
15
Note: Your configuration may not support some functionalities of the application.
Payments Module
The picture below shows the modlule for making payment transactions. The user has the possibility to review all his/her
orders, which can be in different statuses, which is indicated in the menu on the left. It is also possible to make various
operations with orders in different statuses by using the icon menu directly above the order, such as view details of every
order, cancel the order, copy it, import it, export it or group orders together.
Picture 11 –Payments Module
Creating a new payment order
To make a new payment, click on “New Payment” (see Picture 12), and the wizard will pop up to help you define all the
payment details. The following pictures show the steps of the payment wizard. The first step defines the type of payment,
while the second step fills out the payment order. It is also possible to create a new payment order based on a previously
created template or a set of templates, which is a new feature of netBanking. In the second step, when a payment order is
filled out, it can also be saved as:
-
A tamplate, which will speed up future payment orders.
-
An incomplete order with a status of Opened Order, and will be saved on the list of opened orders
16
Note: Your configuration may not support some functionalities of the application.
Picture 12 – First step of Payment Wizard, selection of payment type
Picture 13a – Second step of Payment Wizard, filling out the payment order (Domestic Payment)
17
Note: Your configuration may not support some functionalities of the application.
Picture 13b – Second step of Payment Wizard, filling out the pmt. order (Abroad Payment)
Picture 14 – Third step of Payment Wizard, scheduling the payment order
Payment orders can be scheduled to be paid immediately, once, or repeated periodically, ie. if a payment should be repeated
on the same date of every month (monthly installments). If option ‘Once’ or ‘Repeat’ is selected, additional controls for
selection of exact time of payment appear in the upper right corner.
Additional payment rules can also be set, such as order cannot be paid before or after a set time, or depending on the
account balance. The number and intervals of subsequent payments attempts can also be set, in case the first payment
order is not successful. For example, maybe there were insufficient funds on the account, and a rule can be set that the order
should be processed once every day in case that the account balance changes in the meantime. The fourth and final step of
the Payment Wizard is for order confirmation, after which the order will be visible on the list of Opened Orders. All scheduled
orders can be viewed in the module “Scheduled Orders” in the menu “Other”. Details on this option follow in further
chapers.
18
Note: Your configuration may not support some functionalities of the application.
Picture 15 and 16 – Fourth step of Payment Wizard, confirming the payment order
19
Note: Your configuration may not support some functionalities of the application.
Operational Application Menu
Operational Menu is the application element that the user will use mainly when working with the already created orders
(payments, transfers, requests). As shown below, Operational Menu consists of a series of buttons and is located directly
above the order on which the user is currently working. Operational Menu depends on the status menu, ie. order status,
which means that some options exist only for orders in a specific status, not for all statuses.
Selecting Orders – orders can be selected in more than one way. For selecting multiple orders, which are not located next
to each other, then hold CTRL + click on the desired orders:
Picture 17a – Operational Menu, selecting individual orders
In order to select multiple orders located next to each other, select the first order, hold SHIFT key and click on the last
order. The result is selection of the first, the last and all the orders between them.
20
Note: Your configuration may not support some functionalities of the application.
Picture 17b – Operational Menu, selecting consecutive orders
If orders are grouped, clicking on the name of the group selects all the orders in the group:
Picture 17c – Operational Menu, selecting grouped orders
21
Note: Your configuration may not support some functionalities of the application.
"Select all" selects all orders at once, "Deselect all" does the opposite
Picture 17d – Operational Menu, selecting all orders
22
Note: Your configuration may not support some functionalities of the application.
Searching orders (Search option) - orders can be searched by any column. Select the Search form (see picture below)
and enter search parameters. Click on “Search” and search results will show, which can immediately be continued by
adding additional parameters, in case that not all the parameters were used during the first search. In any case, this option
allows easy search through orders. When the search is successfully completed, and we wish to have the orders overview,
which we had before performing the search, it is MANDATORY to click on “Reset” button. If, during some phase of the
order, a filter was selected, which was not reset through the search form, then the labels of those phases will have an
indication (funnel) that results in those phases are filtered (ie. incomplete).
Picture 17e – Operational Menu, searching orders
23
Note: Your configuration may not support some functionalities of the application.
Order Details (option Details) - each order, no matter of its status, can be viewed in detail by either double clicking on it, or
selecting the order and clicking on button “Details”, following which the below form appears (picture below).
Picture 17f – Operational Menu, Order Details
24
Note: Your configuration may not support some functionalities of the application.
Completing the order (option Done) – Orders in status “Open” are incomplete or work in process orders, which the user
plans to complete subsequently. After you are sure that the order is complete, select it and click on button “Done”, as shown
below:
Picture 17g – Operational Menu, Completing the order
25
Note: Your configuration may not support some functionalities of the application.
Grouping the order – orders that were created can also be grouped. Select the desired orders and click on button “Group”.
A new window will appear, where, if a new group is being created, the name of the group and the description are entered.
The selected orders can also be moved to one of existing groups. All orders that are not grouped into one of user’s groups
are located in the group without a name (only the total number of ungrouped orders is next to the group icon). The advantage
of grouping orders is definitely easier work with and overview of the orders. All orders that have been grouped can also be
ungrouped, ie. removed from the group. Select the orders that should be removed and click “Group”. The window
appears with option “Ungroup”, then click on button “Ungroup”. This ungrouping process can also be used when
ungrouping all orders of one group. If all orders of one group are removed from the group, the group will remain on the list of
groups, but will be empty, which means it can be used again in the future. Please see the examples below:
Picture 17h and 17i – Operational Menu, Grouping and Ungrouping Orders
26
Note: Your configuration may not support some functionalities of the application.
Signing orders – this option is available for unsigned orders only. Orders are signed by selecting orders and clicking on
icon “Sign”.
Picture 17j – Operational Menu, Signing Orders
27
Note: Your configuration may not support some functionalities of the application.
Cancelling an order – in case you need to cancel one or more orders, select order(s) and click on button “Cancel”.
Cancellation of orders is possible only for orders in status: Opened, Unsigned, and Signed.
Picture 17k – Operational Menu, Cancelling an Order
28
Note: Your configuration may not support some functionalities of the application.
Copying an order – in case you wish to copy one or more orders, select the order(s) and click on button “Copy”.
Regardless if you selected grouped or ungrouped orders, and regardless of their status, the new, copied, orders will appear
as new ungrouped orders in status “Opened”.
Picture 17l – Operational Menu, Copying an Order
29
Note: Your configuration may not support some functionalities of the application.
Transfer Module
The picture below shows the Transfer Module, which allows the user to transfer funds between own accounts, which is also a
new feature vs. the last version of netBanking. The method of work is identical to making a payment order – there is the
Status Menu on the left, Operations Menu directly above (Details, Group, Cancel, etc.), as well as the New Transfer Wizard.
There is also the conversion option for transfer orders that imply currency purchase/sale.
Picture 18 – Transfer Module
30
Note: Your configuration may not support some functionalities of the application.
Creating a new transfer order
To make a new transfer, click on button “New Transfer”, and the Wizard will pop up to help with defining transfer details. The
following pictures show the steps of the Transfer Wizard.
The wizard for creating a new transfer order is almost identical to the wizard for new payment orders. The difference is in the
actual orders that are filled out, while the rest of the process, scheduling the order and its confirmation, is completely the
same as for Payment Module.
Picture 19a – First step, New Transfer
31
Note: Your configuration may not support some functionalities of the application.
Picture 19b – Second step, order for a transfer between accounts
32
Note: Your configuration may not support some functionalities of the application.
Status Application Menu
Status Menu is an application component that the user will use quite often, mostly during the work with already created
orders, regardless if they are payments, transfers or requests. As shown on the picture below, the status menu contains
seven elements (statuses). Each element of the menu represents a set of orders in a specific status. The exception is the
module for Western Union orders, which has one additional status for order validation.
Status Application Menu: set of all orders grouped by their statuses
Picture 20 – Application Status Menu
•
Opened orders – incomplete orders that are prepared, but not finished in the last phase of the wizard for
creating a new order. Each order in status “Opened” can be subsequently finished directly from the datagrid
simply by selecting an order and clicking on button “Finish” in the Operational Menu, following which the order is
automatically moved to the next phase – unsigned order.
•
Unsigned orders – orders that are created and waiting to be signed (by one or more signatures). When an order
has 100% signature, it is moved to the next phase – signed order.
•
Signed orders – orders waiting to be processed by the bank, but still have not been taken over by the bank.
•
Orders in process by bank – orders which the bank has taken over from ELBA and are being processed by the
Bank
•
Orders approved by bank – orders that have been successfully taken over and processed by the bank
•
Orders rejected by bank – orders that were not successfully processed by the bank
•
Orders cancelled by user – orders which the user cancelled during one of the first three phases
Operational Menu changes in terms of number of options depending on the status of the order. Option for importing orders
is available only for first phase, while export of orders is available on all other phases except first. Order cancelation is
possible only in the first three phases.
33
Note: Your configuration may not support some functionalities of the application.
Other Options Module
The picture below shows the mask that offers the user additional options, the most interesting of which are the options that
allow the user to view his/her account statements and/or transactions. Click on button “Statements” or “Transactions” in order
to view them.
Picture 21 – Other Options Module
34
Note: Your configuration may not support some functionalities of the application.
Pictures 22 and 23 are an overview of Statement and Transaction modules. Both modules are very similar by the way they
are used. Therefore, for both modules the account and the currency are to be selected, the desired dates entered, followed
by click on button “Search” for results (Statements or Transactions). Modules are opened by clicking on icons
“Transactions” and “Statements”.
Picture 22 and 23 – Modules for Search and Overview of Statements and Transactions
35
Note: Your configuration may not support some functionalities of the application.
STATEMENTS: Statement overview tool is very simple to use. Select the account, currency and the time period, click on
“Search”, and the statement will be shown in the table. Double click on any statement opens a detailed view of the statement.
Statements are available only for certain types of accounts, which depends on the bank and its internal organization. As
shown on the picture, statements can be saved in PDF format, as well as exported.
TRANSACTIONS: Transaction overview tool is similar to the above tool. Select the account, currency and time period, or
even enter a transaction description for a more precise search. After clicking on “Search”, the table will list all the transactions
that fulfill the search criteria. Double click on any statement in the table opens a detailed view of the statement. Below the
table there are controls that show how many transactions will be shown (50-1.000), as well as navigation for search results.
SCHEDULED ORDERS: When creating a new payment and/or transfer order, the user has the option to “schedule” the
order. In other words, while creating an order, many criteria are selected according to which the order is processed, such as
time of payment, schedule or funds on the account. These orders are called “scheduled orders” and they can be done once,
or be repeated periodically. For an easier overview, these orders are separated and located on the list that is selected by
clicking on icon “Schedule Overview”. After clicking on it, a window with a table pops up and shows all currently scheduled
orders. Every order can be overviewed by selecting it and clicking on option “Details”, or it can also be cancelled by selecting
it and clicking on “Cancel”.
Picture 24 – Module for overview of scheduled orders
36
Note: Your configuration may not support some functionalities of the application.
TOOLS – allows the user to use various useful tools, such as:
•
Conversion calculator – tool for calculation when performing conversion
•
Exchange rates – shows the exchange rates for a desired date
Picture 25 – Conversion Calculator module
Picture 26 – Exchange Rates overview module
37
Note: Your configuration may not support some functionalities of the application.
Communicate With Your Banker module - allows e-mail contact with a Banker who may be responsible for the given
account/Client.
Picture 27 – Communicate With Your Banker module
PROBLEM – allows sending an error report by entering into the application a description of a problem and an attachment.
Picture 28 – Error Report Module
38
Note: Your configuration may not support some functionalities of the application.
Important information
NetBanking is the product designed to protect the privacy of your information by using internationally recognized standards in
the area of coding and protecting data from unauthorized access. It is your responsibility to keep confidentiality of your user
name, password and one-time token password. If someone gets an access to your user name, password and token
password, he/she will have all the rights given to you.
Therefore, it is important:
•
•
•
•
•
•
•
•
•
•
•
Do not write down your user name, password and one-time token password, and especially do not leave them in
places accessible to other people.
When choosing password, select terms that others cannot connect wit you.
Password should contain both letters and numbers.
Do not give out the password, user name and one-time token password to anyone, not even the bank employees!
In case that bank employees have to check problems you are experiencing, they will temporarily change the
password and notify you of the new password. In these cases, you must select a new password again.
Upon first log in to netBanking, you must select a new password.
When finished using netBanking, exit by loggin off.
Do not ever leave netBanking application without your supervision. If you are leaving your work place, lock the
application by selecting Tools in the main menu and Lock application in the sub-menu.
Do not install programs of unknown and unverified authors on your PC.
Do not install unverified hardware on your PC.
Install an antivirus program.
39
Note: Your configuration may not support some functionalities of the application.