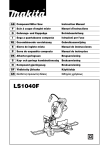
1
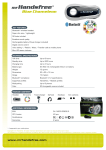
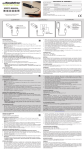
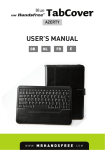
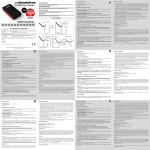
SH100
SELF’IT
USER’S MANUAL
GB
NL
F
ILLUSTRATIONS
DECLARATION OF CONFORMITY
We, the undersigned
Company:
TE-GROUP nv
Address:
Kapelsestraat 61, 2950 Kapellen - BELGIUM
ILLUSTRATION I
A
ILLUSTRATION II declare, that the following equipment:
D
Product Name:
Product Type:
mr Handsfree Self’It SH100
Selfie Maker
1
2
ILLUSTRATION III
3
ILLUSTRATION IV
Is in conformity with the Directions of the European Union EC R&TTE
Directive 1999/5/EC.
This product has been tested against following standards and specifications:
EN60950-1+A11+A1+A12
EN62479
ETSI EN 301 489-1 V1.9.2
ETSI EN 301 489-17 V2.2.1
ETSI EN 300 328 V1.8.1
Joseph van Oosterum, CEO TE-Group NV
B
7
5
C
4
6
QRG/Self’It SH100/09-14/V01
Copyright © mr Handsfree
PACKAGE CONTENTS & PARTS (SEE ILL. I)
A. Extendable monopod with holder
1. Metal clasp
2. Monopod attachment point
3. Adjustment knob
B. Remote Shutter
4. On/OFF Switch
5. Apple iOS Button
6. Android Button
7. LED Indicator
C. Button battery 200mAH – CR2032 for Remote Shutter
PLACE THE BATTERY (SEE ILL. II)
Insert the button battery (C) with the positive (+) side facing up.
Slide the battery tray back onto the remote shutter until it clicks.
USE REMOTE SHUTTER WITH SMARTPHONE OR TABLET
Remote shutter can be used with tablet and smartphone
(iOS & Android compatible).
STEP 1: TURN REMOTE SHUTTER ON
Slide the ON/OFF Switch (4) to ‘ON’ . The blue LED indicator
(7) will light.
STEP 2: CONNECT REMOTE SHUTTER TO PHONE OR TABLET
The remote shutter is now ready for pairing → Let your
phone or tablet search for other BT-devices (please refer to
the manual of your phone or tablet for more information).
→ Select ‘MHfree SH100’ out of the list and enter PIN code
0000 (if requested) to connect both devices.
STEP 3: SHOOT!
Make sure your phone or tablet is in camera mode!
Press the Apple iOS button (5) or the Android button (6)
depending on which type of phone or tablet you have to
make a photo or a video.
GB
To turn the remote shutter OFF: Slide the ON/OFF Switch
(5) to ‘OFF’.
HOW TO PLACE SMARTPHONE INTO HOLDER (SEE ILL. III)
Make sure that you push/slide your smartphone right in
and that it is firmly seated within the metal clasp (1)!
Use the adjustment knob (3) to adjust the position of the phone
according to the desired shooting angle. Fasten the knob (3)
firmly after adjusting the camera to your preferred angle.
YOU CAN ALSO USE THE MONOPOD WITH A COMPACT,
LIGHTWEIGHT CAMERA (SEE ILL. IV)
Use the monopod attachment point (2) to attach a compact,
lightweight camera onto the monopod.
ATTENTION: HANDLE WITH CARE!
Always make sure your smartphone or camera is placed
firmly and securely on the monopod and that the adjustment
knob (3) of the holder is firmly fastened. Be careful and DO
NOT make sudden movements with the monopod, while
shooting. The guarantee of this selfie-fun-pack does NOT
cover damage caused by improper use by the user!
CUSTOMER SUPPORT
For more information, technical questions and return
requests concerning this product, you should contact
support@mrhandsfree.com.
GUARANTEE
Mr Handsfree is a registered trademark of TE-Group NV. The
mr Handsfree brand stands for superior product quality and
outstanding customer service. That is why mr Handsfree
warrants this product against all defects in material and
workmanship for a period of two (2) years from the date
of original purchase of the product. The conditions of this
guarantee and the extent of responsibility of mr Handsfree
under this guarantee can be downloaded from our website:
www.mrhandsfree.com.
INHOUD DOOS & ONDERDELEN (ZIE ILL. I)
A. Uitschuifbare monopod met houder
1. Metalen klem
2. Monopod statiefbevestigingspunt
3. Spanschroef
B. Afstandsbediening (shutter)
4. AAN/UIT schakelaar
5. Apple iOS Toets
6. Android Toets
7. LED Indicator
C. Knoopcel batterij 200mAH – CR2032 voor afstandsbediening (shutter)
PLAATS DE BATTERIJ (ZIE ILL. II)
Plaats de knoopcel batterij (C) met de positieve zijde (+) opwaarts. Schuif de batterijcover terug op de afstandsbediening (B) totdat deze vastklikt.
GEBRUIK AFSTANDSBEDIENING (SHUTTER) MET SMARTPHONE OF TABLET
Afstandsbediening (C) kan gebruikt worden met tablet en
smartphone (iOS & Android compatibel).
STAP 1: SCHAKEL AFSTANDSBEDIENING AAN
Schuif de AAN/UIT Schakelaar (4) naar ‘ON’ . De blauwe LED
indicator (7) zal oplichten.
STAP 2: VERBIND AFSTANDSBEDIENING MET SMARTPHONE
OF TABLET
De afstandsbediening is nu klaar voor verbinding → laat
je smartphone of tablet zoeken naar andere BT-apparaten
(raadpleeg de handleiding van je smartphone of tablet voor
meer informatie). → Selecteer ‘MHfree SH100’ uit de lijst en
geef de PIN code 0000 in (indien gevraagd) om beide apparaten te verbinden.
STAP 3: SHOOT!
Zorg ervoor dat je smartphone of tablet zich in cameramodus bevindt! Druk op de Apple iOS toets (5) of de Android
toets (6) afhankelijk van uw type smartphone of tablet om
een foto of een video te maken.
NL Om de afstandsbediening (shutter) UIT te schakelen:
Schuif de AAN/UIT Schakelaar (4) naar ‘OFF’.
HOE EEN SMARTPHONE IN DE HOUDER PLAATSEN (ZIE ILL. III)
Zorg ervoor dat je de smartphone correct in de houder
plaatst/schuift zodat deze zich stevig in de metalen klem (1)
bevindt! Gebruik de spanschroef (3) om de positie van de
telefoon aan te passen aan de gewenste opnamehoek. Zet
de spanschroef (3) vast nadat de camera zich in de gewenste
opnamehoek bevindt.
JE KAN DE MONOPOD OOK GEBRUIKEN MET EEN COMPACTE, LICHTGEWICHT CAMERA (SEE ILL. IV)
Gebruik het statiefbevestigingspunt (2) om een compacte,
lichtgewicht camera op de monopod te bevestigen.
LET OP: VOORZICHTIG!
Zorg er iedere keer opnieuw voor dat je de smartphone of
camera goed en veilig op de monopod plaatst en dat de
spanschroef (3) van de houder goed en stevig vastzit. Wees
voorzichtig en maak geen plotselinge bewegingen met de
monopod terwijl je aan het filmen bent.
De garantie van deze “selfie-fun-pack” dekt geen schade
veroorzaakt door oneigenlijk gebruik door de gebruiker!
KLANTENONDERSTEUNING
Voor meer informatie, technische vragen of retouraanvragen met betrekking tot dit product dient u rechtstreeks contact op te nemen met support@mrhandsfree.com.
GARANTIE
Mr Handsfree is een gedeponeerd handelsmerk van TEGroup NV. Het merk mr Handsfree staat voor producten
van superieure kwaliteit en een uitstekende klantenservice.
Daarom garandeert mr Handsfree dat dit product vrij is
van materiaal- en fabricagefouten gedurende een periode
van twee (2) jaar na de oorspronkelijke aankoopdatum
van het product. De voorwaarden van deze garantie en de
omvang van de verantwoordelijkheid van mr Handsfree
onder deze garantie kunt u downloaden vanaf de website:
www.mrhandsfree.com.