Download Shedding Light on Solar
Transcript
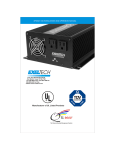
EXPERIENCE TOTAL FREEDOM SHEDDING LIGHT ON SOLAR By Emily Fagan #99408 “Since we started full-time RVing in 2007, we have lived in total freedom. With wheels under our feet and solar panels overhead, we can go anywhere, anytime.” I n our travels, we have met countless people who were intrigued by solar but didn’t have it on their rig. We heard every reason under the sun for not installing it: it is too expensive; it’s “rocket science”; it works only as a backup to a generator; it won’t work with my six-volt batteries; it won’t work on cloudy days or parked under the trees or in Northern states. None of these things are true, and if you are like so many RVers we have met, I hope this article will encourage you to install solar on your RV. Silence of the Charge The greatest benefit of a solar setup is that, once installed, you never have to think about it again. Unlike a generator, it silently charges the batteries from dawn to dusk, with no smell, no fuel cost and no storage issues. Whether our trailer is parked or being towed, whether we are hiking, biking, shopping or napping, the batteries are charging all day, every day. Mark Fagan installs a solar panel on the roof of his Lynx trailer while parked on the northern California coast. Photo by Emily Fagan #99408 32 ESCAPEES March/April 2009 www.escapees.com We have had two solar setups: a $972 minimal system on our 27-foot travel trailer that we used full-time for one year, and now a $3,869 robust system on our 36-foot fifth-wheel. Each system was sized to suit the quality and comfort level of its trailer. We boondock or dry-camp in each rig almost every night. The small system was sufficient for us to watch two to three hours of TV or DVDs at night on a 19-inch LCD TV, listen to the radio or CDs during the day, recharge the laptop, toothbrush, razor, cordless drill and/or camera batteries, turn on a light for two to three hours each night, vacuum with a Dirt Devil and run the battery-hog 35,000-BTU furnace for half an hour each morning in the winter. We didn’t conserve much during the summer, but in the winter we did pick and choose our activities, and we supplemented our lighting at night with oil lamps. The robust system is like having electrical hookups everywhere we go. We don’t conserve at all. We watch a 26-inch LCD TV with surround-sound and subwoofer as much as we want (15 hours one day during the Olympics!), run the laptop for five to seven hours many days, use the microwave, hair dryer and toaster and turn on as many lights as we need at night. Following is a little bit of theory, and later in the article are blueprints of our mini- and robust-systems. System Components There are two independent subsystems in a solar setup: SUBSYSTEM #1—A three-part charging system consists of batteries, solar panel(s) installed on the roof and charge controller mounted in a storage compartment near the batteries. The solar panel(s) pass electrical current to the charge controller which, in turn, charges the batteries, while the batteries function as a temporary holding area for electricity. The amount of electricity you take out of the batteries cannot be greater than the amount of electricity the panels can store in them, or they will become discharged. The 12-volt deep-cycle “marine” batteries found in most towable trailers are designed with a dual purpose: to start an engine and to provide power storage. In contrast, six-volt golf-cart batteries are built strictly for deep-cycle use, not engine starting. RVs don’t use their house batteries to start engines the way boats often do, so 12-volt batteries are not the best choice. To put some numbers behind that idea, batteries are rated by amp-hour storage capacity (“Ah”). Most trailers are sold with one or two 12-volt Group 24 batteries, which have a rating of 70 to 85 amp-hours per battery, or 140 to 170 Ah per parallel pair. Two six-volt batteries in series are functionally the same as a single 12volt battery and will typically provide 220 amp-hours per pair of batteries, 30 percent more! (Putting them in series does not double the amp-hours.) Six-volt batteries have the same footprint as 12-volt Group 24 batteries but are taller, an important consideration when upgrading. Racist, Age-ist, Altruistic Batteries are racist, age-ist and altruistic. They prefer to be grouped with other batteries of the same make, model and age. Six-volt and 12-volt batteries don’t mix well, and newer batteries will spend all their energy trying to help the older batteries keep up. Solar panels come in many sizes. Nowadays, a common basic size is 120 to 130 watts. Charge controllers also vary greatly, but they all prevent the panels from overcharging (and ruining) the batteries. SUBSYSTEM #2—A system to transform 12-volt DC battery power into 120-volt AC power for AC appliances: better known as an Inverter(s). An inverter attaches to a 12-volt battery circuit at one end and has one or more three-prong AC outlets at the other end. Plug your appliance into the AC outlet, turn on the inverter and poof! the appliance works. Inverters vary in size: tiny ones that plug into a cigarette lighter at the 12-volt end and have a single AC outlet, and huge ones weighing over 10 pounds that are permanently attached to the 12-volt batteries at one end and provide power to all the existing AC outlets and appliances in the RV via the other end. Little cigarette lighter inverters can run everything in an RV except the air conditioner, microwave, hair dryer, coffeemaker, toaster, ceiling fan and vacuum cleaner. Continued on next page www.escapees.com March/April 2009 ESCAPEES 33 Larger inverters (over 150 watts) are installed near the batteries, connected directly to them and, depending on size, can operate the bigger appliances. Sizing the System As a rule of thumb, it is best to use just a quarter to one-third of the battery bank’s storage capacity (Ah) in one night of electricity use. Appliance usage is measured in amphours. The number of Ah an appliance uses is the number of amps the appliance requires to run times the number of hours it is used. DC appliances give their amp rating in the user manual. AC appliances give their watts rating in the user manual instead, so you must convert to amps. A rough estimate of an AC appliance’s amp rating (when operated on an inverter) is the watts rating divided by 10. So, using a 1.5 amp DC light for two hours will take three Ah. Watching a 19-inch LCD TV at max volume (65 watts rating) for two hours will take 13 Ah (lower volume will use much less: 65w/10 = 6.5A. 6.5A * 2 = 13Ah). Solar panels are rated in watts, but do your calculations in Ah instead. One 120-watt solar panel will provide about 25 Ah charge to the batteries per day in the winter and 40 Ah per day in the summer. Two panels will double that, three will triple it, etc. Therefore, to size the system, approximate your nightly use in Ah; get at least three times as much battery capacity Ah as that number, and get enough panels to provide that much Ah of charge each day. Comparisons In both systems, Mark installed the panels flat on the roof without tilting brackets. This reduces the overall capacity of the system by up to 11 percent but MINIMAL-SYSTEM COST Our small solar setup, purchased in 2007: • Two six-volt (Sam’s Club) batteries with 220-Ah capacity ($130) • One Kyocera 130-watt solar panel, providing 25–40 Ah of charge per day ($609) • One Morningstar Sunsaver 10 amp charge controller ($55) • One Radio Shack 150/350-watt inverter ($59) • One Pro One 800-watt inverter ($75) Total cost: $972, including $44 for cables and connectors. We were quoted $150–$320 for the installation. Although my husband, Mark, is not an electrician, he was able to do the installation. We plugged the small inverter into the cigarette lighter outlet inside the trailer and used it to run everything except the vacuum cleaner (we did not use the microwave or have other big appliances). The large inverter was connected to the batteries, with a regular extension cord running into the interior of the trailer. We used it for the vacuum cleaner. We used the inverters for two to eight hours a day. Photos courtesy of: RadioShack, Morningstar, and Kyocera. ROBUST-SYSTEM COST Large solar setup, purchased in 2008: • Four Trojan T105+ six-volt batteries with 450 Ah capacity ($315) • Three Mitsubishi 120-watt solar panels ($1,755) • One Kyocera 130-watt solar panel ($609, purchased in 2007). The four panels provide about 75 to160 Ah of charge per day. • One Outback MX60 60-amp charge controller ($495) • One Exeltech 1100-watt true sine wave inverter ($545) Total cost: $3,869, including $150 for cables and connectors A rough guess for installation is $500, but again Mark volunteered. The inverter is permanently connected to the batteries and is wired into the trailer’s AC wiring, making all the AC outlets in the trailer “live.” We run it 15 to 24 hours a day. It operates all the AC appliances in the trailer (except the air conditioner). To obtain detailed product information on the equipment described in this article, go to the manufacturer’s Websites. Trojan batteries: www.trojan-battery.com • Mitsubishi solar panels: http://global.mitsubishielectric.com/bu/solar/index.html • Kyocera solar panels: http://global.kyocera.com/prdct/solar/ • Outback charge controller: www.outbackpower.com • Morningstar charge controller: www. morningstarcorp.com • Exeltech inverter: www.exeltech.com 34 ESCAPEES March/April 2009 www.escapees.com eliminates the risk of driving off with the panels tilted up or worrying about them in sudden high winds. Our “minimal system” is the smallest system I would install on an RV; however, I’d recommend it for every RV used for dry-camping during spring, summer and fall! It is comparable to a Honda 2000i generator in cost and charging ability, providing a daily charge similar to running the generator, which charges at eight amps, for three to five hours every day. The robust system has made our lives comfortable. It is comparable to an onboard Onan generator. The system can charge at 30 amps, and we have watched it charge at 10 amps in downpours and in full shade. Regardless of weather, the batteries are always fully charged by nightfall. It can run everything in the rig except the air conditioner. Try It! If you work with a qualified solar retailer, you don’t need to know anything technical to upgrade your RV with solar, and the cost is comparable to a similarly sized generator. For us, the money we spent on solar was our best investment in the full-time RV lifestyle besides the truck and trailer themselves. In addition to the thrill of total independence on the road, our nightly camping cost is now averaging just over $1 per night. Resources There are many resources on the internet. Here are a few that I found useful: • www.amsolar.com: (See ad page 73.) An RV-specific resource for purchasing all the components that go into an RV solar solution. • Boondockers Birds of a Feather (BOF) group: For more information about boondocking opportunities, check out the Boondockers BOF on page 62. • roadslesstraveled.us: For more details on the solar solutions described in this article, including wiring, a list of common appliance amperages that we measured in our trailer, the different functions of converters and inverters, types of inverters and specifics on performance in rain and shade, see the “Solar Setup” page. For a discussion of the many easy ways to conserve electricity, check the “Boondocking” page. • www.rvsolarelectric.com (CM 28): (See ad this page.) An excellent resource for buying all the solar equipment an RV needs. • www.starlightsolar.com: (See ad page 81.) • www.windsun.com: We purchased both solar setups through Northern Arizona Wind and Sun in Flagstaff, Arizona, a retailer for homes and commercial buildings. We knew nothing about solar at first. With each system, they sold us a complete kit that included all necessary parts. We did not specify anything beyond general performance and budget. • www.windsun.com/Batteries/Battery_FAQ.htm: A terrific explanation of the many battery types that are available. IFBUFS TPMBS!QBOFMT TIFMM!TPMBS!JOEVTUSJFT Tpmbs!tztufnt!xpsl!tjmfoumz!up!sfdibshf!zpvs!SW cbuufsz!bvupnbujdbmmz!xjui!op!gvfm!boe!op!gvnft/ SW!TPMBS!TZTUFN!LJU Jodmveft;!Tpmbs!qbofm-!npvou-!sfhvmbups!boe ipplvq!qbdlbhf!xjui!xjsf!'!jotusvdujpot/ Lffq!xbsn xjuipvu vtjoh!cbuufsz qpxfs/ Fbtz!ipplvq!ljut Tpmbs!Cpptu!3111 Q/P/!Cpy!36424-!Tdpuutebmf-!B[!!96366 Nz!qbdlbhf!jodmveft!uif!frvjqnfou!/!B dpnqmfuf!BD!'!ED!qpxfs!tztufn!gps!zpvs!SW/ 911.:::.9631 SWFST!HVJEF!UP!TPMBS Xf!qspwjef!FMFDUSJDBM!JOEFQFOEFODF SW!TPMBS!FMFDUSJD!JOD/ SWTpmbsFmfdusjd/dpn OPFMT!Tpmbs.Jowfsufs!QBDLBHF!LJU Pvs!cppl!jt!xsjuufo!jo!tjnqmf-!opo. ufdiojdbm!ufsnt!up!ifmq!zpv!voefstuboe SW!fmfdusjdjuz/!Dbmm!UPMM.GSFF!gps!npsf ifmqgvm!jogpsnbujpo Bo!JOWFSUFS nblft!dbnqjoh jo!zpvs!SW!b!kpz/ Vtf!b!njdspxbwfdpnqvufs-!WDS-!tbufmmjuf!UWps!wjsuvbmmz!boz!bqqmjbodf!ebz!ps ojhiu!xjuipvu!b!hfofsbups/ B!SFNPUF!DPOUSPM!QBOFM!pggfst dpowfojfodf-!fggjdjfodz!boe!dpouspm gspn!jotjef!uif!SW/ Dbo!jodsfbtf!tpmbs pvuqvu!xjui!gfxfs tpmbs!qbofmt/ Ejsfdu;!591.554.9631 GSFF!Tpmbs!Dbubmph!'!Qmboofs Tff!vt!bu!bo!FTDBQBEF!tfnjobs Epvh!boe!Kbof!Ljslcz!TLQ!$925 ZPVS!TLQ!TPMBS!TQFDJBMJTU www.escapees.com March/April 2009 ESCAPEES 35


