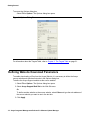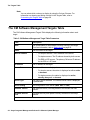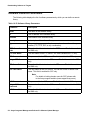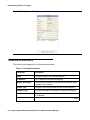
1
Avaya Integrated Management
Release 5.0
Software Update Manager
14-300168
Issue 6
January 2008
© 2008 Avaya Inc.
All Rights Reserved.
Notice
While reasonable efforts were made to ensure that the information in this
document was complete and accurate at the time of printing, Avaya Inc. can
assume no liability for any errors. Changes and corrections to the information
in this document may be incorporated in future releases.
For full legal page information, please see the complete document, Avaya
Legal Page for Software Documentation, Document number 03-600758.
To locate this document on the website, simply go to
http://www.avaya.com/support and search for the document number in the
search box.
Documentation disclaimer
Avaya Inc. is not responsible for any modifications, additions, or deletions to
the original published version of this documentation unless such modifications,
additions, or deletions were performed by Avaya. Customer and/or End User
agree to indemnify and hold harmless Avaya, Avaya's agents, servants and
employees against all claims, lawsuits, demands and judgments arising out of,
or in connection with, subsequent modifications, additions or deletions to this
documentation to the extent made by the Customer or End User.
Link disclaimer
Avaya Inc. is not responsible for the contents or reliability of any linked
websites referenced elsewhere within this documentation, and Avaya does not
necessarily endorse the products, services, or information described or offered
within them. We cannot guarantee that these links will work all of the time and
we have no control over the availability of the linked pages.
Warranty
Avaya Inc. provides a limited warranty on this product. Refer to your sales
agreement to establish the terms of the limited warranty. In addition, Avaya’s
standard warranty language, as well as information regarding support for this
product, while under warranty, is available through the following website:
http://www.avaya.com/support
Copyright
Except where expressly stated otherwise, the Product is protected by copyright
and other laws respecting proprietary rights. Unauthorized reproduction,
transfer, and or use can be a criminal, as well as a civil, offense under the
applicable law.
Avaya support
Avaya provides a telephone number for you to use to report problems or to ask
questions about your product. The support telephone number
is 1-800-242-2121 in the United States. For additional support telephone
numbers, see the Avaya website:
http://www.avaya.com/support
Contents
Preface
. . . . . . . . . . . . . . . . . . . . . . . . . . . . . . . . . .
7
The Purpose of This Manual . . . . . . . . . . . . . . . . . . . . . . . . . . . . .
7
Who Should Use This Manual. . . . . . . . . . . . . . . . . . . . . . . . . . . . .
7
Organization of This Manual . . . . . . . . . . . . . . . . . . . . . . . . . . . . .
7
Chapter 1: Introduction . . . . . . . . . . . . . . . . . . . . . . . . . . .
9
Avaya Software Update Manager Overview . . . . . . . . . . . . . . . . . . . . .
9
Using Avaya Software Update Manager . . . . . . . . . . . . . . . . . . . . . . .
10
The User Interface .
Toolbar . . . . .
View Tabs . . .
Dialog Area . . .
Status Line . . .
.
.
.
.
.
11
12
13
13
13
Using Tooltips . . . . . . . . . . . . . . . . . . . . . . . . . . . . . . . . . . . . .
14
Using Avaya Software Update Manager Help . . . . . . . . . . . . . . . . . . . .
Opening the Help to the Contents Page . . . . . . . . . . . . . . . . . . . . .
Opening the Help to a Topic of Interest . . . . . . . . . . . . . . . . . . . . .
14
15
15
What’s New in This Release. . . . . . . . . . . . . . . . . . . . . . . . . . . . . .
15
Chapter 2: Getting Started . . . . . . . . . . . . . . . . . . . . . . . . .
17
Starting Avaya Software Update Manager . . . . . . . . . . . . . . . . . . . . . .
17
Defining Website Download Parameters . . . . . . . . . . . . . . . . . . . . . . .
Defining Download Intervals . . . . . . . . . . . . . . . . . . . . . . . . . . .
18
19
Defining Server Proxy Settings . . . . . . . . . . . . . . . . . . . . . . . . . . . .
19
SFAP Login Parameters . . . . . . . . . . . . . . . . . . . . . . . . . . . . . . . .
20
Chapter 3: The Targets Table . . . . . . . . . . . . . . . . . . . . . . . .
21
.
.
.
.
.
.
.
.
.
.
.
.
.
.
.
.
.
.
.
.
.
.
.
.
.
.
.
.
.
.
.
.
.
.
.
.
.
.
.
.
.
.
.
.
.
.
.
.
.
.
.
.
.
.
.
.
.
.
.
.
.
.
.
.
.
.
.
.
.
.
.
.
.
.
.
.
.
.
.
.
.
.
.
.
.
.
.
.
.
.
.
.
.
.
.
Targets Table Views . . . . . . . . . . . . . . . . . . .
Gateways, Data Switches, and Circuit Packs View
IP Phones View . . . . . . . . . . . . . . . . . . .
CM Software Management View . . . . . . . . . .
Status Icons . . . . . . . . . . . . . . . . . . . . .
.
.
.
.
.
.
.
.
.
.
.
.
.
.
.
.
.
.
.
.
.
.
.
.
.
.
.
.
.
.
.
.
.
.
.
.
.
.
.
.
.
.
.
.
.
.
.
.
.
.
.
.
.
.
.
.
.
.
.
.
.
.
.
.
.
.
.
.
.
.
.
.
.
.
.
.
.
.
.
.
.
.
.
.
.
.
.
.
.
.
.
.
.
.
.
.
.
.
.
.
.
.
.
.
.
.
.
.
.
.
.
.
.
.
.
.
.
.
.
.
.
.
.
.
.
.
.
.
.
.
.
.
.
.
.
.
.
.
.
.
.
.
.
.
.
21
22
22
22
23
The Gateways, Data Switches, and Circuit Packs Targets Table . . . . . . . . . .
24
The IP Phones Targets Table . . . . . . . . . . . . . . . . . . . . . . . . . . . . .
25
The CM Software Management Targets Table . . . . . . . . . . . . . . . . . . . .
26
Sorting the Targets Table . . . . . . . . . . . . . . . . . . . . . . . . . . . . . . .
27
Customizing the Targets Table . . . . . . . . . . . . . . . . . . . . . . . . . . . .
28
Filtering the Targets Table. . . . . . . . . . . . . . . . . . . . . . . . . . . . . . .
29
Issue 6 January 2008
3
Contents
Filtering the Targets Table - Gateways, Data Switches, and Circuit Packs View
Filter Criteria - Gateways, Data Switches and Circuit Packs View . . . . . . .
Filtering the Targets Table - IP Phones View . . . . . . . . . . . . . . . . . .
Filter Criteria - IP Phones View . . . . . . . . . . . . . . . . . . . . . . . . . .
Filtering the Targets Table - CM Software Management View . . . . . . . . .
Filter Criteria - CM Software Management View . . . . . . . . . . . . . . . . .
Filtering by Device Type. . . . . . . . . . . . . . . . . . . . . . . . . . . . . .
29
30
31
33
33
35
36
Printing the Targets Table . . . . . . . . . . . . . . . . . . . . . . . . . . . . . . .
36
Saving the Targets Table . . . . . . . . . . . . . . . . . . . . . . . . . . . . . . .
36
Chapter 4: Detecting Targets . . . . . . . . . . . . . . . . . . . . . . . .
37
Starting the Detection Process . . . . . . . . . . . . . . . . . . . . . . . . . . . .
37
Detecting All Targets . . . . . . . . . . . . . . . . . . . . . . . . . . . . . . . . .
38
Detecting New Targets. . . . . . . . . . . . . . . . . . . . . . . . . . . . . . . . .
39
Updating Information for Selected Targets (Refresh) . . . . . . . . . . . . . . . .
39
Detecting Targets Using Filters . . . . . . . . . . . . . . . . . . . . . . . . . . . .
Using Wildcards and Ranges in an IP Address . . . . . . . . . . . . . . . . .
40
41
Chapter 5: The Log File . . . . . . . . . . . . . . . . . . . . . . . . . . .
43
Viewing the Log . . . . . . . . . . . . . . . . . . . . . . . . . . . . . . . . . . . .
43
Saving the Log . . . . . . . . . . . . . . . . . . . . . . . . . . . . . . . . . . . . .
44
Clearing the Log . . . . . . . . . . . . . . . . . . . . . . . . . . . . . . . . . . . .
44
Closing the Log . . . . . . . . . . . . . . . . . . . . . . . . . . . . . . . . . . . .
44
Chapter 6: The ASCA Reporting Tool . . . . . . . . . . . . . . . . . . .
45
Avaya Software Compatibility Audit Report Overview . . . . . . . . . . . . . . .
45
Downloading and Installing the Inventory Collection Script (R2.x and R3.x)
Downloading the Service Pack to your Computer. . . . . . . . . . . . .
Copying the Service Pack to the Communication Manager . . . . . . .
Installing the Service Pack onto the Communication Manager . . . . .
Setting up a Telnet Session for accessing the CLI . . . . . . . . . .
Setting up a secure shell (SSH) for accessing the CLI . . . . . . . .
Installing the Service Pack . . . . . . . . . . . . . . . . . . . . . . .
.
.
.
.
.
.
.
46
46
47
49
49
49
51
Running the Inventory Script on the Communication Manager . . . . . . . . . .
52
Downloading the Inventory File to your Computer . . . . . . . . . . . . . . . . .
53
Generating and Filtering an ASCA Report . . . . . . . . . . . . . . . . . . . . . .
Filtering the ASCA Report. . . . . . . . . . . . . . . . . . . . . . . . . . . . .
53
54
4 Avaya Integrated Management Release 5.0 Software Update Manager
.
.
.
.
.
.
.
.
.
.
.
.
.
.
Contents
Chapter 7: Downloading Software to Targets . . . . . . . . . . . . . . .
55
Download Files Overview . . . . . . . . . . . . . . . . . . . . . . . . . . . . . . .
55
Configuring Software Libraries . . . . . .
Defining a Remote Software Library .
Software Libraries Parameters . . . .
Viewing Files Available to Download.
Adding, Editing, or Deleting a File . .
.
.
.
.
.
56
57
58
59
60
Configuring Download Parameters . . . . . . . . . . . . . . . . . . . . . . . . .
Download Parameters . . . . . . . . . . . . . . . . . . . . . . . . . . . . . . .
61
62
Configuring the Media Server Software Repository .
Media Server Release Management . . . . . . .
Managing Software Releases . . . . . . . . .
Media Server Operations . . . . . . . . . . .
Media Server Updates . . . . . . . . . . . . . . .
Media Server License and Authorization Files .
.
.
.
.
.
.
.
.
.
.
.
.
.
.
.
.
.
.
.
.
.
.
.
.
.
.
.
.
.
.
.
.
.
.
.
.
.
.
.
.
.
.
.
.
.
.
.
.
.
.
.
.
.
.
.
.
82
.
.
.
.
.
.
.
.
.
.
.
.
.
.
.
.
Setting Product Defaults . . . . . . . . . . . . . . . . . . . . . . . . . . . . . . .
.
.
.
.
.
.
.
.
.
.
.
.
.
.
.
.
81
.
.
.
.
.
.
.
.
.
.
.
.
.
.
.
.
Resetting Modules . . . . . . . . . . . . . . . . . . . . . . . . . . . . . . . . . . .
.
.
.
.
.
.
.
.
.
.
.
.
.
.
.
.
77
77
78
79
80
.
.
.
.
.
.
.
.
.
.
.
.
.
.
.
.
.
.
.
.
.
.
.
.
.
.
.
.
.
.
.
.
.
.
.
.
.
Scheduling Downloads . . . . . . . . . . . . . .
Opening the Schedule Download Dialog Box
Viewing Schedule Download Information . .
Scheduling Software Downloads . . . . . . .
Cancelling A Scheduled Download. . . . . .
.
.
.
.
.
.
.
.
.
.
.
.
.
.
.
.
69
69
70
71
71
72
73
73
74
74
74
75
75
.
.
.
.
.
.
.
.
.
.
.
.
.
.
.
.
.
.
.
.
.
.
.
.
.
.
.
.
.
.
.
.
.
.
.
.
.
.
.
.
.
.
.
.
.
Downloading . . . . . . . . . . . . . . . . . . . . . . . . . . . . . . . . . . . . .
The Download Process - Gateways, Data Switches, and Circuit Packs View
The Download Process - CM Software Management View . . . . . . . . . .
Upgrades and Updates to the Communication Manager . . . . . . . . . . .
Upgrading or Updating Media Server Releases . . . . . . . . . . . . . .
Installing a CM Service Update . . . . . . . . . . . . . . . . . . . . . . .
Installing a Platform/Security Update . . . . . . . . . . . . . . . . . . .
Assigning License and Authentication Files . . . . . . . . . . . . . . . . .
Viewing Assigned License and Authentication Files . . . . . . . . . . .
Assigning License and Authentication Files to a Device . . . . . . . . .
Adding a file to the License & Authentication Files Table . . . . . . . .
Deleting Files From the License & Authentication Files Table . . . . . .
Download Process Status Messages. . . . . . . . . . . . . . . . . . . . . .
.
.
.
.
.
.
.
.
.
.
.
.
.
.
.
.
64
65
65
66
66
68
.
.
.
.
.
.
.
.
.
.
.
.
.
.
.
.
.
.
.
.
.
.
.
.
.
.
.
.
.
.
.
.
.
.
.
.
.
.
.
.
.
.
.
.
.
.
.
.
.
.
.
.
.
.
.
.
.
.
.
.
.
.
.
.
.
.
.
.
.
.
Issue 6 January 2008
5
Contents
Chapter 8: Analyzing and Retrieving from the Web . . . . . . . . . . . .
85
Requirements for Retrieving Software from the Web . . . . . . . . . . . . . . . .
85
Performing Web Analysis . . . . . . . . . . . . . . . . . . . . . . . . . . . . . . .
86
Retrieving New Versions from the Web . . . . . . . . . . . . . . . . . . . . . . .
86
Manually Adding Files . . . . . . . . . . . . . . . . . . . . . . . . . . . . . . . . .
90
Chapter 9: Managing IP Phone Software . . . . . . . . . . . . . . . . .
93
The IP Phones Interface . . . . . . . . . . . . . . . . . . . . . . . . . . . . . . . .
94
Downloading Software . . . . . . . . . . . . . . . . . . . . . . . . . . . . . . . .
Downloading Software to Selected Devices . . . . . . . . . . . . . . . . . . .
Viewing Log Files . . . . . . . . . . . . . . . . . . . . . . . . . . . . . . . . .
95
96
98
Importing Files to the Local Software Library . . . . . . . . . . . . . . . . . . . .
98
Appendix A: Remote Library Index File . . . . . . . . . . . . . . . . . .
101
Appendix B: Menus . . . . . . . . . . . . . . . . . . . . . . . . . . . . .
103
File Menu . . . . . . . . . . . . . . . . . . . . . . . . . . . . . . . . . . . . . . . .
103
Edit Menu. . . . . . . . . . . . . . . . . . . . . . . . . . . . . . . . . . . . . . . .
103
View Menu . . . . . . . . . . . . . . . . . . . . . . . . . . . . . . . . . . . . . . .
104
Actions Menu . . . . . . . . . . . . . . . . . . . . . . . . . . . . . . . . . . . . .
104
Tools Menu . . . . . . . . . . . . . . . . . . . . . . . . . . . . . . . . . . . . . . .
105
Help Menu . . . . . . . . . . . . . . . . . . . . . . . . . . . . . . . . . . . . . . .
105
Appendix C: Troubleshooting . . . . . . . . . . . . . . . . . . . . . . .
107
Index
109
. . . . . . . . . . . . . . . . . . . . . . . . . . . . . . . . . .
6 Avaya Integrated Management Release 5.0 Software Update Manager
Preface
This chapter provides an introduction to the structure and assumptions of this manual. It
includes the following sections:
●
The Purpose of This Manual - A description of the goals of this manual.
●
Who Should Use This Manual - The intended audience of this manual.
●
Organization of This Manual - A brief description of the subjects contained in the various
chapters of this manual.
The Purpose of This Manual
The Avaya Software Update Manager User’s Manual contains information needed to use Avaya
Software Update Manager efficiently and effectively.
Who Should Use This Manual
This manual is intended for network managers familiar with network management and its
fundamental concepts.
Organization of This Manual
This manual is structured to reflect the following conceptual divisions:
●
Preface - Describes the manual’s purpose, intended audience, and organization.
●
Chapter 1: Introduction - Provides an introduction to the Avaya Software Update Manager,
and a description of the user interface.
●
Chapter 2: Getting Started - Explains how to start Avaya Software Update Manager and
how to define the authorization information and parameters required to download software
from the Avaya Website.
●
Chapter 3: The Targets Table - Explains how to use the Targets Table, which lists all
detected targets.
Issue 6 January 2008
7
Preface
●
Chapter 4: Detecting Targets - Explains how to add targets to the Targets Table.
●
Chapter 5: The Log File - Explains how to view, save, clear, and close the log file.
●
Chapter 6: The ASCA Reporting Tool - Explains how to enable users without access to
Avaya Software Update Manager to view inventory reports using the ASCA reporting tool.
●
Chapter 7: Downloading Software to Targets - Explains how to download software to
targets for Gateways, Data Switches, Circuit Packs, and the Communication Manager.
●
Chapter 8: Analyzing and Retrieving from the Web - Explains how to use the Avaya
Software Update Manager Analyzer, which compares software versions currently in use
against the newest releases available on the Avaya website and lets you download new
releases to your hard disk.
●
Chapter 9: Managing IP Phone Software - Explains how to manage firmware and
configuration scripts for IP phones.
●
Appendix A: Remote Library Index File - Provides an example of the structure of an index
file to be used in the remote software libraries accessed by Avaya Software Update
Manager.
●
Appendix B: Menus - Provides the full structure of the menus in Avaya Software Update
Manager.
●
Appendix C: Troubleshooting - Explains how to identify and find solutions for errors that
may occur when downloading.
8 Avaya Integrated Management Release 5.0 Software Update Manager
Chapter 1: Introduction
This chapter provides an introduction to the Avaya Software Update Manager. It includes the
following sections:
●
Avaya Software Update Manager Overview - An overview of Avaya Software Update
Manager.
●
Using Avaya Software Update Manager - An outline of the tasks required to effectively use
Avaya Software Update Manager.
●
The User Interface - Describes the Avaya Software Update Manager user interface.
●
Using Tooltips - Explains the Avaya Software Update Manager tooltip feature.
●
Using Avaya Software Update Manager Help - Explains the options for accessing on-line
help in Avaya Software Update Manager.
Avaya Software Update Manager Overview
Avaya Software Update Manager is an application that downloads software to managed Avaya
devices. Avaya Software Update Manager can also check the software versions currently in use
against the latest versions available from Avaya and recommend updates when a newer
version is available. In this guide, the word target is used to define any device to which software
can be downloaded.
Avaya Software Update Manager can download a new release from Avaya’s website and store
it on your hard disk for subsequent downloading to the appropriate devices.
Avaya Software Update Manager includes a server hosted on the workstation running Avaya
Network Manager in Standalone Mode. The server stores all the software retrieved from the
web and can download the software to appropriate devices. Files containing embedded
software can also be copied to the server.
The server can be reached locally or via remote access. This provides the ability to update the
software on your devices from anywhere in the world.
Issue 6 January 2008
9
Introduction
Using Avaya Software Update Manager
Avaya Software Update Manager is used to retrieve software from the web and download it to
appropriate devices in your network. Using Avaya Software Update Manager, you can perform
the following tasks:
●
Starting Avaya Software Update Manager. For instructions on starting Avaya Software
Update Manager, refer to Starting Avaya Software Update Manager on page 17.
●
Detecting the download targets associated with devices in the network. For instructions on
detecting targets, refer to Chapter 4: Detecting Targets on page 37.
●
Analyzing the software on the network devices to determine if there are new versions. For
instructions on analyzing device software, refer to Performing Web Analysis on page 86.
●
Retrieving new versions of software from the Web. For instructions on retrieving software
from the web, refer to Retrieving New Versions from the Web on page 86.
●
Downloading the new software to the relevant devices in your network. For instructions on
downloading software to devices, refer to Downloading on page 69.
●
Resetting devices in the network as necessary. For instructions on resetting devices, refer
to Resetting Modules on page 81.
To start Avaya Software Update Manager, refer to Starting Avaya Software Update Manager on
page 17.
10 Avaya Integrated Management Release 5.0 Software Update Manager
The User Interface
The User Interface
The user interface consists of the following elements:
●
Menu Bar - Menus for accessing Avaya Software Update Manager’s functions. For a list of
menu items, refer to Appendix B: Menus.
●
Toolbar - Toolbar buttons for accessing Avaya Software Update Manager’s main functions.
●
View Tabs - Tabs for switching between the different Targets Table views.
●
Dialog Area - An area where all dialog boxes are displayed. When no dialog box is open,
the Dialog Area disappears and the Targets Table expands to take its place.
●
Log File Area - Log file detailing all activities performed in Avaya Software Update
Manager. For information on the Log File area, refer to Chapter 5: The Log File.
●
Status Line - The status line displays the currently logged in user name, indicates when the
Targets Table is filtered, and shows progress during discovery.
Figure 1: Avaya Software Update Manager User Interface
Menu Bar
Toolbar
ViewTabs
Targets
Table
Log File
Area
Dialog
Area
Status
Bar
Issue 6 January 2008
11
Introduction
Toolbar
The Toolbar provides shortcuts to the main Avaya Software Update Manager functions.
The table below describes the buttons on the Toolbar and gives the equivalent menu options for
the relevant view:
Table 1: Toolbar Buttons
Button
Description
Menu Item
Displays the Download Targets Detection dialog box.
Actions > Download
Targets Detection
From Gateways, Data Switches, and Circuit Packs
view: Displays the Target Details dialog box.
From IP Phones view: Displays the Files Inventory
for Selected Device dialog box.
From CM Software Management view: Displays the
Target Details dialog box.
Actions > Target Details
From Gateways, Data Switches, and Circuit Packs
view: Displays the Schedule Download dialog box.
From IP Phones view: Displays the Manage IP
Phones Software on Gateway dialog box.
From CM Software Management view: Displays the
Media Software Management dialog box.
Actions > Schedule
Download
From Gateways, Data Switches, and Circuit Packs
view: Resets the selected modules.
From IP Phones view: Resets all connected IP
Phones (AM110 models only).
Actions > Reset
From Gateways, Data Switches, and Circuit Packs
view: Performs web analysis on targets in the Targets
Table.
From CM Software Management view: Performs
web analysis on targets in the Targets Table.
Tools > Image Analyzer
From Gateways, Data Switches, and Circuit Packs
view: Displays the Retrieve From the Web dialog box.
From CM Software Management view: Displays the
Retrieve From the Web dialog box.
Tools > Retrieve Image
From the Web
From Gateways, Data Switches, and Circuit Packs
view: Displays the Software Libraries dialog box Files tab.
From CM Software Management view: Displays the
Software Libraries dialog box - Files tab.
Tools > Add Image File
1 of 2
12 Avaya Integrated Management Release 5.0 Software Update Manager
The User Interface
Table 1: Toolbar Buttons (continued)
Button
Description
Menu Item
From Gateways, Data Switches, and Circuit Packs
view: Displays the Software Libraries dialog box Software Libraries tab.
From IP Phones view: Displays the IP Phones
Software Libraries dialog box.
From CM Software Management view: Displays the
Software Libraries dialog box - Software Libraries tab.
Tools > Software
Libraries
Activates context-sensitive help.
Help > Help ON
2 of 2
View Tabs
The Targets Table has the following viewing options:
●
Gateways, Data Switches, and Circuit Packs View
●
IP Phones View
●
CM Software Management View
To display a specific view, click the appropriate view tab. The selected view opens. For
information regarding the information provided and actions performed in the different views,
refer to Chapter 3: The Targets Table.
Dialog Area
The area to the right of the Targets Table is where all dialog boxes open. This area can be
resized by dragging the vertical splitter bar with the mouse. When a dialog box opens, it
replaces the current dialog box in the Dialog Area. When no dialog box is open, the Dialog Area
disappears and the Targets Table expands to take its place.
Status Line
The Status Line displays the name of the currently logged in user. In addition, it displays and
discovery progress, and shows when the Targets Table is filtered.
Issue 6 January 2008
13
Introduction
Using Tooltips
Avaya Software Update Manager includes a tooltip feature which enables you to display
additional information about targets and software versions. Tooltips are available in the Targets
Table.
To display additional information about a target, place the cursor on the target’s row. After about
one second, a tooltip appears with information about the target (for example, see Figure 2
below).
Figure 2: Tooltip - (CM Software Management view)
Note:
Note:
Tooltips are not available in the IP Phones view.
Tooltips are disabled by default. To toggle the tooltips feature, select View > ToolTip.
Using Avaya Software Update Manager Help
This section explains how to use the on-line help in the Avaya Software Update Manager. The
on-line help can be opened to the contents page or directly to a topic of interest.
14 Avaya Integrated Management Release 5.0 Software Update Manager
What’s New in This Release
Opening the Help to the Contents Page
To open the help to the contents page, select Help > Contents. The on-line help opens to the
contents page.
Opening the Help to a Topic of Interest
To open the help directly to a topic of interest:
1. Click
.
Or
Select Help > Help ON. The cursor changes to the shape of an arrow with a question mark.
2. Click a point of interest in the Avaya Software Update Manager. The help opens to a topic
explaining the feature that was clicked.
What’s New in This Release
Avaya Software Update Manager Release 5.0 introduces the following enhancements:
●
Ability to upgrade Avaya Communication Manager Release 5.0 systems.
●
Ability to upgrade the S8300C (Avaya Communication Manager/SES co-residency).
●
Support for the G450 branch gateway.
●
Support for the S8730.
●
Enhanced support the IG550 Integrated Gateway:
- Inventory reporting for J2320, J2350, J4350, and J6350.
- Inventory reporting for all TIM modules.
- Inventory of DSP resources.
- Inventory and upgrade capability for TGM550.
- Report includes hardware and software versions, serial number, license, and part
number.
●
ASCA enhancements:
- SES versions reported and analyzed.
- Inventory support for 96xx and 16xx IP phones.
Issue 6 January 2008
15
Introduction
- Display of latest available firmware vintage for TN circuit packs takes into account
compatibility with release of Avaya Communication Manager.
- Ability for you to change the Target CM Release field and view the updated “Latest
Available” recommendation. If the particular hardware vintage for the TN board can not
be supported by the target CM release, this information will be highlighted.
●
The ability to download IP Office firmware R4.1.
●
The ability to edit file size, file name, version number and hardware compatibility fields for
an existing entry the Software Library.
16 Avaya Integrated Management Release 5.0 Software Update Manager
Chapter 2: Getting Started
This chapter explains how to define the authorization information and parameters required to
gain access to download software from the Avaya Website. It contains the following sections:
●
Starting Avaya Software Update Manager - Explains how to access Avaya Software
Update Manager from your management platform.
●
Defining Website Download Parameters - Describes how to specify the download source
website and download intervals.
●
Defining Server Proxy Settings - Describes how to specify the Proxy settings for your
server.
●
SFAP Login Parameters - Describes how to define the SFAP Login download parameters
required to begin downloading software from the Avaya Website.
Starting Avaya Software Update Manager
This section describes how to start Avaya Software Update Manager.
To start Avaya Software Update Manager:
From Avaya Network Management Console, select
Tools > Avaya Software Update Manager.
The Avaya Software Update Manager Targets Table opens.
To begin working in Avaya Software Update Manager, and to be able to download software, you
need to do the following from the Options dialog box:
●
Define a Source Website - refer to Defining Website Download Parameters on page 18.
●
Define Proxy Settings - refer to Defining Server Proxy Settings on page 19.
●
Define SFAP Login Parameters - refer to SFAP Login Parameters on page 20.
Issue 6 January 2008
17
Getting Started
To access the Options dialog box:
Select File > Options. The Options dialog box opens.
Figure 3: Options Dialog Box
For information about the Targets Table, refer to Chapter 3: The Targets Table on page 21.
Defining Website Download Parameters
To enable downloading of files from the Avaya Website, it is necessary to define the Avaya
source website and download intervals in the Options dialog box.
To define the Avaya Support website as the source website:
1. Select File > Options. The Options dialog box opens.
2. Select Avaya Support Web Site in the Web Site area.
Or
To define another website as the source website, select Other and type the web address of
the source website you want to use in the text box.
3. Click Apply.
18 Avaya Integrated Management Release 5.0 Software Update Manager
Defining Server Proxy Settings
Defining Download Intervals
You can configure Avaya Software Update Manager to automatically retry downloading files in
the event of a download failure.
To define the download intervals parameter:
1. Select File > Options. The Options dialog box opens (see Figure 3).
2. In the Maximum Download Retries field, enter the maximum number of download retries
you want Avaya Software Update Manager to attempt. (The maximum number is 10.)
3. In the Delay Between Retries (seconds) field, enter the number of seconds delay you
require between download attempts. (The maximum time delay is 600 seconds.)
4. Click Apply.
Defining Server Proxy Settings
If you use a proxy server to connect to the internet, you must define your server proxy settings
in the Options dialog box before you can begin downloading software from the Avaya Website.
To define your server proxy settings:
1. Select File > Options. The Options dialog box opens (see Figure 3).
2. In the Server Proxy Settings area, click the Use Proxy checkbox to enable server proxy
settings.
3. In the Host field, specify the proxy host.
4. In the Port field, specify the proxy port number.
5. Click OK. The changes are applied and the dialog box closes.
Or
Click Apply. The changes are applied and the dialog box remains open.
Issue 6 January 2008
19
Getting Started
SFAP Login Parameters
The Avaya website displays all software, firmware, and security downloads for Avaya supported
devices. To retrieve the files you are entitled to, SFAP authorization information for your account
must be defined in Avaya Software Update Manager.
To define SFAP login information:
1. Select File > Options. The Options dialog box opens (see Figure 3).
2. Click the Use SFAP checkbox.
3. Enter the following parameters:
a. User Name
b. Password
c. Confirm Password
4. Click Retrieve Sold To’s. A list of Sold To’s appears in the Sold To drop-down list.
A Sold To represents the location at which a device is installed. The association between
device and location is taken into consideration when checking entitlements to install
software onto that device. You will only be able to download software for devices associated
with the selected Sold To.
5. From the Sold To’s drop-down list, select the Sold To you want to use.
6. Click OK. The changes are applied and the dialog box closes.
Or
Click Apply. The changes are applied and the dialog box remains open.
Note:
Note:
For more information regarding SFAP login parameters, go to:
http://support.avaya.com/japple/css/japple?PAGE=OpenPage&temp.template.name=SFAP
20 Avaya Integrated Management Release 5.0 Software Update Manager
Chapter 3: The Targets Table
This chapter explains how to use the Targets Table. The Targets Table lists detected download
targets and displays information about them. It includes the following sections:
●
Targets Table Views - Describes the different views of the Targets Table.
●
The Gateways, Data Switches, and Circuit Packs Targets Table - Describes the
information displayed in the various columns of the Gateways, Data Switches, and Circuit
Packs Targets Table.
●
The IP Phones Targets Table - Describes the information displayed in the various columns
of the IP Phones Targets Table.
●
The CM Software Management Targets Table - Describes the information displayed in the
various columns of the CM Software Management Targets Table.
●
Sorting the Targets Table - Describes how to sort the order of targets listed in the Targets
Table.
●
Customizing the Targets Table - Describes how to show and hide columns in the Targets
Table.
●
Filtering the Targets Table - Describes how to filter targets in the Targets Table.
●
Printing the Targets Table - Describes how to print the Targets Table.
●
Saving the Targets Table - Describes how to save the Targets Table as a text file.
Targets Table Views
The Targets Table has the following viewing options:
●
Gateways, Data Switches, and Circuit Packs View - From this view you can manage
software related to Gateways, Data Switches, and Circuit Packs.
●
IP Phones View - From this view you can manage firmware related to IP phones.
●
CM Software Management View - From this view, you can manage software related to the
Communication Manager.
Issue 6 January 2008
21
The Targets Table
Gateways, Data Switches, and Circuit Packs View
From the Gateways, Data Switches, and Circuit Packs view you can detect and download
software to targets associated with Gateways, Data Switches, and Circuit Packs.
When you open Avaya Software Update Manager for the first time, the Gateways, Data
Switches, and Circuit Packs Targets Table appears with no entries until you detect targets from
the network. The table is populated during the detection process. Each row of the table displays
information about a target to which software can be downloaded. A separate row in the Targets
Table appears for each type of software that can be downloaded to a specific device. For more
information on detecting targets, refer to Chapter 4: Detecting Targets.
Use the Gateways, Data Switches, and Circuit Packs view to check the software versions
currently used by the listed targets against the newest releases on Avaya’s website and on your
hard disk. For information on checking software status and downloading new software from
Avaya’s website, refer to Chapter 8: Analyzing and Retrieving from the Web.
IP Phones View
From the IP Phones view you can manage firmware images and configuration scripts to be
placed on IP Telephony gateways for distribution to IP phones.
When you open Avaya Software Update Manager for the first time, the Targets Table appears
with no entries until you detect targets from the network. The table is populated by the detection
process. Each row of the table displays information about a device from which software can be
downloaded. For more information on detecting targets, refer to Chapter 4: Detecting Targets.
For more information on managing software for IP Phones, refer to Chapter 9: Managing IP
Phone Software.
CM Software Management View
From the CM Software Management view you can detect and download software to targets
associated with the Communication Manager (also referred to as the Media Server).
When you open Avaya Software Update Manager for the first time, the CM Software
Management Targets Table appears with no entries until you detect targets from the network.
The table is populated by the detection process. Each row of the table displays information
about a target to which software can be downloaded. A separate row in the Targets Table
appears for each type of software that can be downloaded to a specific device. For more
information on detecting targets, refer to Chapter 4: Detecting Targets.
Use the CM Software Management view to check the software versions currently used by listed
targets against the newest releases on Avaya’s website and on your hard disk. For information
on checking software status and downloading new software from Avaya’s website, refer to
Chapter 8: Analyzing and Retrieving from the Web.
22 Avaya Integrated Management Release 5.0 Software Update Manager
Targets Table Views
Status Icons
The Targets Table displays a status icon for each target to indicate the update status of the
software currently running in the target. The table below displays the icons and explains what
they indicate.
Table 2: Software Version Status Icons
Icon
Description
The software version displayed in the target is the newest version available.
A newer software version is available on your server.
A newer software version is available on Avaya’s website, but not available on
your local server.
The selected row contains read-only information. No action or operation can be
performed on this row.
An upgrade for this target is available, but you are not entitled to access it.
No information is available for this target.
Issue 6 January 2008
23
The Targets Table
The Gateways, Data Switches, and Circuit Packs Targets
Table
The Gateways, Data Switches, and Circuit Packs Targets Table displays the following
information about each target:
Table 3: Gateways, Data Switches, and Circuit Packs Target Table Parameters
Field
Description
State
The update status of the software currently running in the target. For
more information, refer to Status Icons on page 23.
Name
The host name of the target.
IP Address
The IP address of the target.
Module #/Location
The number and location of the slot that the module occupies in the
target. For stackable devices, this is the module’s position in the
stack.
Device Type
The type of device associated with the target.
Software Type
The software entity to be downloaded to the target. Options are:
- Image - An executable file for running the device.
- Boot Loader - A low-level executable for starting up the
device.
- Web Management - An executable file providing web
management capability to the device.
Status
Displays the date and time of the scheduled download. During a
download, this column displays download process messages.
Current Version
The software version currently running on the target.
Available Version
The latest version of the software available from Avaya’s website.
This field is updated each time you run a web analysis. For more
information on web analysis, refer to Chapter 8: Analyzing and
Retrieving from the Web.
Entitled Version
The latest version of software available on the Avaya website that you
have the authority to install.
Download
Progress
During a download, this column displays the percentage of the file
which has been downloaded to the target.
1 of 2
24 Avaya Integrated Management Release 5.0 Software Update Manager
The IP Phones Targets Table
Table 3: Gateways, Data Switches, and Circuit Packs Target Table Parameters (continued)
Field
Description
File Size
During a download, this column displays the number of bytes that
have been downloaded to the target.
Port Network
The port network associated with the TN Board. This applies to TN
Boards only.
Serial Number
The serial number of the target.
Hardware Version
The device hardware version or vintage.
Last Refresh Time
The last time the row in the Targets Table was refreshed.
2 of 2
Note:
Note:
You can select which columns to display by using the Column Chooser. For
information on showing and hiding columns in the Targets Table, refer to
Customizing the Targets Table on page 28.
The IP Phones Targets Table
The IP Phones Targets Table displays the following information about each target:
Table 4: IP Phones Target Table Parameters
Field
Description
Name
The host name of the target.
Device Type
The type of device associated with the target.
IP Address
The IP address of the target.
Location
The physical location of the selected gateway.
Status
The communication status between the Avaya Software Update
Manager and the target during the upgrade process.
Last Refresh Time
The last time the row in the Targets Table was refreshed.
Download Progress
During a download, this column displays the percentage of the file
which has been downloaded to the target.
Issue 6 January 2008
25
The Targets Table
Note:
Note:
You can select which columns to display by using the Column Chooser. For
information on showing and hiding columns in the Targets Table, refer to
Customizing the Targets Table on page 28.
The CM Software Management Targets Table
The CM Software Management Targets Table displays the following information about each
target:
Table 5: CM Software Management Target Table Parameters
Field
Description
State
The update status of the software currently running in the target.
For more information, refer to Status Icons on page 23.
Name
The host name of the target.
Main IP Address
- For simplex servers: The IP address of the server.
- For duplex servers: The IP address shared by both servers.
- For ESS or LSP servers: The primary CM server IP address
for the ESS or LSP listed.
IP Address
The IP address of the target.
Server Status
The status of the server displayed.
- For simplex servers the status is displayed as either active
or dormant.
- For duplex servers, the status is displayed as active,
standby, busy out, or dormant.
Server Type
The type of server selected. The internal server name is displayed
in parentheses.
Server Config
The configuration of the server (Main, ESS, or LSP).
Software Version
The software version, including details of the release and load
number.
Available Service
Pack
The latest service pack update currently available on the Avaya
website.
1 of 2
26 Avaya Integrated Management Release 5.0 Software Update Manager
Sorting the Targets Table
Table 5: CM Software Management Target Table Parameters (continued)
Field
Description
Entitled Service
Pack
The service pack update that you have the authorization to install.
Available Platform/
Security Update
The latest platform/security update currently available on the Avaya
website.
Entitled Platform/
Security Update
The platform/security update that you have the authorization to
install.
R1 on Hard Drive
The first release available to install on the Media Server.
R2 on Hard Drive
The second release available to install on the Media Server.
R3 on Hard Drive
The third release available to install on the Media Server.
CD-ROM
Software releases available to copy to the hard drive from the
CD-ROM.
Status
The communication status between the Avaya Software Update
Manager and the target during the upgrade process.
Last Refresh Time
The last time the row in the Targets Table was refreshed.
Available SES
Service Pack
The latest SES service pack available on the Avaya website.
Entitled SES Service
Pack
The latest SES service pack that you can download from the Avaya
website.
2 of 2
Note:
Note:
You can select which columns to display by using the Column Chooser. For
information on showing and hiding columns in the Targets Table, refer to
Customizing the Targets Table on page 28.
Sorting the Targets Table
To sort the Targets Table, click the column title of the information by which you want to sort. An
arrow appears in the heading of the column by which the Targets Table is being sorted. An
arrow pointing up indicates that the Targets Table is being sorted in ascending order. An arrow
pointing down indicates that the Targets Table is being sorted in descending order. Click the
column title again to toggle between ascending and descending order.
You can sort by any column in the Targets Table.
Issue 6 January 2008
27
The Targets Table
Customizing the Targets Table
The Targets Table can be customized to show and hide columns. This enables you to view only
relevant columns. You can customize columns in the Targets Table at any time, without having
to re-detect download targets.
To customize columns in the Targets Table:
1. Click the view in which you want to customize the columns (either Gateways, Data
Switches, and Circuit Packs view or CM Software Management view). The Target Table for
the selected view opens.
2. Right-click any column in the Targets Table. The Column Chooser dialog box for that view
opens.
Figure 4: Column Chooser Dialog Box (CM Software Management View)
3. Select the columns you want to display.
4. Click OK. The dialog box closes and the selected columns are displayed.
28 Avaya Integrated Management Release 5.0 Software Update Manager
Filtering the Targets Table
Filtering the Targets Table
You can filter the Targets Table in order to reduce the number of targets currently displayed in
the selected view. This makes it easier to work by eliminating targets from the display. You can
later add these targets back to the list by running the filter again, without having to re-detect the
targets.
Filtering the Targets Table - Gateways, Data Switches, and Circuit
Packs View
To filter the Targets Table from the Gateways, Data Switches, and Circuit Packs view:
1. Select the Gateways, Data Switches, and Circuit Packs tab.
2. Select View > Filter from the menu. The Filter Devices dialog box opens (see Figure 5).
Figure 5: Filter Devices Dialog Box - Gateways, Data Switches, and Circuit Packs View
3. Select the criteria for the targets you want to display. For more information on filter criteria,
refer to Filter Criteria - Gateways, Data Switches and Circuit Packs View on page 30.
Issue 6 January 2008
29
The Targets Table
4. Click OK. The filtering criteria are activated and the dialog box closes.
Or
Click Apply. The filtering criteria are activated and the dialog box remains open.
Note:
Note:
The Targets Table only displays targets that meet all the selected criteria.
To deactivate filtering:
1. Click Clear. All filtering criteria are cleared.
2. Click OK. Filtering is deactivated and the dialog box closes.
Note:
Note:
When filtering is active,
appears in the Status Line.
Filter Criteria - Gateways, Data Switches and Circuit Packs View
The following table displays the list of fields you can use to filter the information displayed in the
Targets Table from the Gateways, Data Switches, and Circuit Packs view. You can filter by any
combination of these fields:
Table 6: Filter Criteria Fields - Gateways, Data Switches and Circuit Packs View
Field
Description
Device Name
In the Enter matching pattern field, enter the name of the target you want to
display. The name can contain only one wildcard (*).
IP Address
In the Enter matching pattern field, enter the IP address of the target you
want to display. The IP address can contain a wildcard (*), or a range
(0-255), or a number in the range (0-255).
Main IP Address
In the Enter matching pattern field, enter the main IP address of the target
you want to display. The IP address can contain a wildcard (*), or a range
(0-255), or a number in the range (0-255). (Only available in CM Software
Management view.)
Communication
Manager
In the Select Communication Manager field, select the communication
manager used for the targets you want to display. (Only available in
Gateways, Data Switches, and Circuit Packs view.)
Select PIM Group
In the Select PIM Group field, select the PIM group to filter. This enables
filtering devices by device groups defined in the Avaya Provisioning and
Installation Manager.
1 of 2
30 Avaya Integrated Management Release 5.0 Software Update Manager
Filtering the Targets Table
Table 6: Filter Criteria Fields - Gateways, Data Switches and Circuit Packs View (continued)
Field
Description
Select DOCM
Group
In the Select Group field, you can show the AM 110 devices that belong to a
specific DOCM group. Select the DOCM group used for the devices you want
to display from the drop-down box (AM110 devices only).
Device Type
In the Device Type section, select the product categories and sub-categories
you want to display. For more information on filtering by device type, refer to
Filtering by Device Type on page 36.
Software Version
In the Sw version section, select the software version used for the target you
want to display.
Hardware Version
In the Hw version section, select the hardware version currently running the
target you want to display. (Only available in the Gateways, Data Switches,
and Circuit Packs view.)
Port Network
In the Port Network section, select the port network number for the TN
boards you want to display. (Only available in the Gateways, Data Switches,
and Circuit Packs view.)
Software Type
In the Software Type section, select the software entity (Boot Loader,
Image, or Web Management) to display targets using that type of software.
(Only available in the Gateways, Data Switches, and Circuit Packs view.)
Server Status
In the Server Status section, select the status of the server that you want to
display. (Only available in the CM Software Management view.)
Analyzer State
In the Analyzer State section, select the icon or icons representing the
version update status of targets you want to display.
2 of 2
Filtering the Targets Table - IP Phones View
To filter the Targets Table from the IP Phones view:
1. Select the IP Phones tab.
2. Select View > Filter from the menu. The Filter Devices dialog box opens for the IP Phones
view (see Figure 7).
Issue 6 January 2008
31
The Targets Table
Figure 6: Filter Devices Dialog Box - IP Phones View
3. Select the criteria for the targets you want to display. For more information on filter criteria,
refer to Filter Criteria - Gateways, Data Switches and Circuit Packs View on page 30.
4. Click OK. The filtering criteria are activated and the dialog box closes.
Or
Click Apply. The filtering criteria are activated and the dialog box remains open.
Note:
Note:
The Targets Table only displays targets that meet all the selected criteria.
To deactivate filtering:
1. Click Clear. All filtering criteria are cleared.
2. Click OK. Filtering is deactivated and the dialog box closes.
Note:
Note:
When filtering is active,
appears in the Status Line.
32 Avaya Integrated Management Release 5.0 Software Update Manager
Filtering the Targets Table
Filter Criteria - IP Phones View
The following table displays the list of fields you can use to filter the information displayed in the
Targets Table. You can filter by any combination of these fields:
Table 7: Filter Criteria Fields
Field
Description
Device Name
In the Name matching pattern field, enter the name of the target
you want to display. The name can contain only one wildcard (*).
IP Address
In the IP address matching pattern field, enter the IP address of
the target you want to display. The IP address can contain a wildcard
(*), or a range (0-255), or a number in the range (0-255).
Communication
Manager
In the Select Communication Manager field, select the
communication manager used for the targets you want to display.
Select Group
In the Select Group field, select the PIM group to filter. This enables
filtering devices by device groups defined in the Avaya Provisioning
and Installation Manager.
Device Type
In the Device Type section, select the product categories and
sub-categories you want to display. For more information on filtering
by device type, refer to Filtering by Device Type on page 36.
Filtering the Targets Table - CM Software Management View
To filter the Targets Table from the CM Software Management view:
1. Select the CM Software Management tab.
2. Select View > Filter from the menu. The Filter Devices dialog box opens for the CM
Software Management view (see Figure 7).
Issue 6 January 2008
33
The Targets Table
Figure 7: Filter Devices Dialog Box - CM Software Management View
3. Select the criteria for the targets you want to display. For more information on filter criteria,
refer to Filter Criteria - Gateways, Data Switches and Circuit Packs View on page 30.
4. Click OK. The filtering criteria are activated and the dialog box closes.
Or
Click Apply. The filtering criteria are activated and the dialog box remains open.
Note:
Note:
The Targets Table only displays targets that meet all the selected criteria.
To deactivate filtering:
1. Click Clear. All filtering criteria are cleared.
2. Click OK. Filtering is deactivated and the dialog box closes.
Note:
Note:
When filtering is active,
appears in the Status Line.
34 Avaya Integrated Management Release 5.0 Software Update Manager
Filtering the Targets Table
Filter Criteria - CM Software Management View
The following table displays the list of fields you can use to filter the information displayed in the
Targets Table. You can filter by any combination of these fields:
Table 8: Filter Criteria Fields
Field
Description
Device Name
In the Enter matching pattern field, enter the name of the target you
want to display. The name can contain only one wildcard (*).
IP Address
In the Enter matching pattern field, enter the IP address of the
target you want to display. The IP address can contain a wildcard (*),
or a range (0-255), or a number in the range (0-255).
Main IP Address
For simplex servers - the Main IP Address represents the
address of the server.
● For duplex servers - the Main IP Address represents the
shared IP address that represents both servers.
● For ESSs and LSPs - the Main IP Address represents the IP
address of the CM that the ESS or LSP is backing up.
In the Enter matching pattern field, enter the main IP address of the
target you want to display. The IP address can contain a wildcard (*),
or a range (0-255), or a number in the range (0-255).
Device Type
In the Device Type section, select the product categories and
sub-categories you want to display. For more information on filtering
by device type, refer to Filtering by Device Type on page 36.
Software Version
In the Sw version section, select the software version used for the
target you want to display.
Available on Media
Server
In the Available on Media Server section, select the release that
you want to display from the list of releases available for installation
on the Media Server hard drive or CD-ROM drive.
Server Status
In the Server Status section, select the status of the server that you
want to display. Options are active, standby, busy out or dormant.
Server
Configuration
In the Server Config section, select the type or types of server that
you want to display. Options are main, LSP, ESS or ICC.
Analyzer State
In the Analyzer State section, select the icon or icons representing
the version update status of targets you want to display.
●
Issue 6 January 2008
35
The Targets Table
Filtering by Device Type
When filtering by device type, you can select families of devices and specific module types.
Under each device family name, one or more module types are listed. To display module types,
select the device family or click its name.
When you select a device family, all the module types are automatically selected. You can then
clear any module types that you do not want to select.
Printing the Targets Table
To print the Targets Table:
1. Select File > Print. A standard print dialog box opens.
2. Select a printer.
3. Click OK. The Targets Table is printed.
Saving the Targets Table
To save the information in the Targets Table as a text file:
1. Select File > Save As. A file browser dialog box opens.
2. Enter the path and filename.
3. Click Save. The information in the Targets Table is saved in the specified file.
36 Avaya Integrated Management Release 5.0 Software Update Manager
Chapter 4: Detecting Targets
This chapter describes how to add targets to the Targets Table. You can use Avaya Software
Update Manager to download software only to targets listed in the Targets Table. For more
information about the Targets Table, refer to Chapter 3: The Targets Table.
This chapter includes the following sections:
●
Starting the Detection Process - Describes how to start the detection process.
●
Detecting All Targets - Describes how to detect all targets associated with devices from the
management platform.
●
Detecting New Targets - Describes how to detect targets associated with devices added to
the network map.
●
Updating Information for Selected Targets (Refresh) - Describes how to detect targets
selected in the Targets Table.
●
Detecting Targets Using Filters - Describes how to detect targets using a set of filters
based on device type and IP address.
Starting the Detection Process
When you open Avaya Software Update Manager for the first time, the Targets Table appears
with no entries. In order to populate the Targets Table, you need to detect new targets.
To start the detection process:
1. Select the view in which you want to work.
2. Click
.
Or
Select Actions > Download Targets Detection. The Download Targets Detection dialog
box opens.
Issue 6 January 2008
37
Detecting Targets
Figure 8: Download Targets Detection Dialog Box
Detecting All Targets
The Software Update Manager server regularly detects the targets from the management
platform. When you detect targets using Software Update Manager, the targets list is
automatically retrieved from the server.
To detect all targets:
1. In the Download Targets Detection dialog box, select Detect all the devices in the
network map.
38 Avaya Integrated Management Release 5.0 Software Update Manager
Detecting New Targets
2. Click OK. Targets associated with all managed devices in the selected view are detected
and added to the Targets Table, and the Download Targets Detection dialog box closes.
Or
Click Apply. Targets associated with all managed devices in the selected view are detected
and added to the Targets Table, and the Download Targets Detection dialog box remains
open.
Detecting New Targets
Avaya Software Update Manager enables you to detect targets associated with new devices.
This ensures that if devices were added to the Network Management Console either while you
were working or since the last detection was performed, the targets associated with the new
devices are added to the Targets Table.
To detect targets associated with new devices:
1. In the Download Targets Detection dialog box, select Detect only new devices in the
network map.
2. Click OK. Targets associated with new devices are detected and added to the Targets
Table, and the Download Targets Detection dialog box closes.
Or
Click Apply. Targets associated with new devices are detected and added to the Targets
Table, and the Download Targets Detection dialog box remains open.
Updating Information for Selected Targets (Refresh)
To update or refresh information for selected targets in the Targets Table:
1. Select the targets in the Targets Table that you want to update.
2. In the Download Targets Detection dialog box, select Detect selected download targets.
3. Click OK. The targets selected in the Targets Table are detected, the information in the
Targets Table is updated, and the Download Targets Detection dialog box closes.
Or
Click Apply. The targets selected in the Targets Table are detected, information in the
Targets Table is updated, and the Download Targets Detection dialog box remains open.
Issue 6 January 2008
39
Detecting Targets
Detecting Targets Using Filters
You can use filters to determine which targets should be detected. You can filter the targets
based on:
●
Product Type
●
IP Address
●
Both Product Type and IP Address
To detect targets using filters:
1. In the Download Targets Detection dialog box, select Detect using filter. An IP Address
Filter section and a Product Filter section appear.
Figure 9: Download Targets Detection - Filters Dialog Box
2. To filter by IP address, enter the IP address of the target you want to detect in the IP
Address Filter section. You can use the asterisk (*) wildcard or enter a range of values to
define a group of targets. For details, refer to Using Wildcards and Ranges in an IP
Address on page 41.
3. To filter by product type, select the types of products you want to detect in the Product
Filter section.
40 Avaya Integrated Management Release 5.0 Software Update Manager
Detecting Targets Using Filters
4. Click OK. The targets that meet the filter criteria are added to the Targets Table, and the
Download Targets Detection dialog box closes.
Or
Click Apply. The targets that meet the filter criteria are added to the Targets Table, and the
Download Targets Detection dialog box remains open.
Using Wildcards and Ranges in an IP Address
You can use an asterisk (*) wildcard in the IP address. The asterisk must replace an entire
octet, rather than individual digits. For example, 149.49.50.* and 149.49.*.* are valid entries.
However, 149.49.40.1* and 149.49.* are not valid entries.
You can use a range to represent the last octet. For example, 149.49.48.101-110 is a valid
range. However, 149.49.48.101-9 and 149.49.35-40.101 are not valid ranges. The IP address
must be written without any spaces.
Issue 6 January 2008
41
Detecting Targets
42 Avaya Integrated Management Release 5.0 Software Update Manager
Chapter 5: The Log File
This chapter describes the Avaya Software Update Manager log. Avaya Software Update
Manager keeps a log of all activity. New log information is appended to the end of the existing
log.
This chapter includes the following sections:
●
Viewing the Log - Explains how to open the log, and describes the information contained in
the log.
●
Saving the Log - Explains how to save the log.
●
Clearing the Log - Explains how to clear the log.
●
Closing the Log - Explains how to close the log.
Viewing the Log
To open the log:
1. Select the view in which you want to work.
2. Select View > Log Report. The log opens underneath the Targets Table.
You can resize the log by dragging the horizontal splitter bar. When a dialog box is open, you
can also resize the log by dragging the vertical splitter bar.
Figure 10: Log File
Issue 6 January 2008
43
The Log File
The log contains the following information about significant system events:
Table 9: Log Information
Item
Description
Severity
The severity of the event, as follows:
●
Normal - A successful action, such as a completed download.
●
Warning - An unsuccessful action, such as failure to detect a target.
●
Major - An event relating to a failure to download to a target.
Date/Time
The date and time the event occurred.
Source
The IP address or the full identification of the target to which the event occurred.
Message
The nature of the event, such as a successful download to a target or retrieval
from the web or an aborted or failed download or retrieval from the web.
Saving the Log
To save the log as a text file:
1. Click
to the left of the log area.
Or
Select File > Save Log File.
The Save dialog box opens.
2. Enter the path and filename.
3. Click Save. The log is saved as a text file.
Clearing the Log
To clear the contents of the log, click
to the left of the log area.
Closing the Log
Select View > Log to toggle the log window open or closed.
44 Avaya Integrated Management Release 5.0 Software Update Manager
Chapter 6: The ASCA Reporting Tool
This chapter describes how to generate an inventory file from the Communication Manager and
how to generate an HTML ASCA report using the inventory file. This chapter includes the
following sections:
●
Avaya Software Compatibility Audit Report Overview - Provides an overview of the
process of generating an inventory file and outputting it to an HTML report using the ASCA
reporting tool.
●
Downloading and Installing the Inventory Collection Script (R2.x and R3.x) - Explains how
to download and install the inventory script required for Release 2.x and 3.x of the
Communication Manager.
●
Running the Inventory Script on the Communication Manager - Explains how to run the
Inventory script on the Communication Manager to create the inventory file.
●
Downloading the Inventory File to your Computer - Explains how to download the
Inventory file to your computer, once it has been created on the Communication Manager.
●
Generating and Filtering an ASCA Report - Explains how to generate an ASCA HTML
report from the inventory file and how to filter the HTML report.
Avaya Software Compatibility Audit Report Overview
The Avaya Software Compatibility Audit (ASCA) Report enables users without access to Avaya
Software Update Manager to generate inventory reports. A script is run on the Communication
Manager to generate an inventory file. ASCA then outputs the inventory file to an inventory
report in HTML format. The information in the HTML report can be filtered, to display only the
information you require.
The script that the Communication Manager uses to generate the inventory file can be found on
Communication Manager release 4.0 or later. For Communication Manager release 2.x and 3.x,
it is necessary to upload a service pack update containing the script and install it onto the
Communication Manager.
This chapter describes the following:
●
Downloading and Installing the Inventory Collection Script (R2.x and R3.x) - How to
download and install the inventory script onto your Communication Manager for Release
3.x and 2.x.
●
Running the Inventory Script on the Communication Manager - How to run the inventory
script on the Communication Manager to generate the ASCA inventory file.
Issue 6 January 2008
45
The ASCA Reporting Tool
●
Downloading the Inventory File to your Computer - How to download the inventory file from
the Communication Manager to your computer.
●
Generating and Filtering an ASCA Report - How to generate and filter the ASCA HTML
report.
Downloading and Installing the Inventory Collection Script
(R2.x and R3.x)
In order to generate the HTML report using ASCA, you must first run a script to generate an
inventory file on the Communication Manager server.
On Communication Manager 4.0 release or later, the script can be found on the server. To run
the script, refer to Running the Inventory Script on the Communication Manager on page 52.
For earlier models, you must upload and install a service pack (or patch) containing the script to
your Communication Manager. The service pack can be copied to your computer from the
Avaya Support website and uploaded to the Communication Manager server from your
machine. This section describes how to upload and install the service pack.
Downloading the Service Pack to your Computer
If your Communication Manager is 3.x release or older, you need to download a service pack
containing the inventory script from the Avaya support website.
To download the service pack to your computer:
1. Follow the link below to the avaya support website:
https://support.avaya.com/japple/asca/help/patches.jsp
2. Click Download Inventory Collection Patches.
3. Choose the correct service pack for your version of Communication Manager and click
Download.
4. Save the file to your computer.
Note:
Note:
Do not change the name of the service pack file when saving it to your computer.
You are now ready to copy and install the service pack to the Communication Manager.
Refer to Copying the Service Pack to the Communication Manager on page 47.
46 Avaya Integrated Management Release 5.0 Software Update Manager
Downloading and Installing the Inventory Collection Script (R2.x and R3.x)
Copying the Service Pack to the Communication Manager
Once the relevant service pack has been downloaded to your computer, you need to copy it to
the Communication Manager.
To copy a service pack from your computer to the Communication Manager:
1. Log into the Maintenance Web Interface on the Communication Manager (see Figure 11).
Figure 11: Communication Manager Maintenance Web Interface Login Window
Issue 6 January 2008
47
The ASCA Reporting Tool
2. From the Maintenance Web Interface menu, select Miscellaneous > Download Files (see
Figure 12).
Figure 12: Maintenance Web Interface Menu
3. From the list of download methods, select Files to download from the machine I’m using
to connect to the server.
4. Click Browse to get to the directory on the computer that contains the service pack.
5. Select the service pack and click Download.
You are now ready to install the service pack to the Communication Manager. Refer to
Installing the Service Pack onto the Communication Manager on page 49.
48 Avaya Integrated Management Release 5.0 Software Update Manager
Downloading and Installing the Inventory Collection Script (R2.x and R3.x)
Installing the Service Pack onto the Communication Manager
Once the service pack has been copied to the Communication Manager, you need to install it on
the Communication Manager. This is done using the command line interface (CLI) on the
Communication Manager. For Communication Manager Release 3.x and above, you must set
up a telnet session and use a secure shell (SSH) to access the CLI on the Communication
Manager.
Setting up a Telnet Session for accessing the CLI
When using Communication Manager older than version 3.0, you must set up a telnet session
to access the CLI.
To set up a telnet session:
1. From the MS Windows start menu, click Start > Run. The Run dialog box opens.
2. From the Run dialog box, type telnet 192.11.13.6 and press Enter to access the
communication server.
Note:
Note:
For Communication Manager 3.0 and newer, you should set up a secure shell
(SSH) for accessing the CLI. Do not use a Telnet session.
Setting up a secure shell (SSH) for accessing the CLI
When using Communication Manager 3.0 or newer, you need to set up a secure shell (SSH) to
access the CLI. To use SSH, a third party client, such as PuTTY, must be installed on your
computer. To download PuTTY, point your browser to http://www.putty.nl/download.html
To log on to the CLI using PuTTY:
1. Click Start > Programs > PuTTY > PuTTY. The PuTTY Configuration dialog box opens
with the Basic Options for your PuTTY Session category displayed by default (see
Figure 13).
Issue 6 January 2008
49
The ASCA Reporting Tool
Figure 13: PuTTY Configuration - Basic Options For Your PuTTY Session Dialog Box
2. In the Host Name (or IP address) field:
- If access is directly through the Services port, enter the IP address 192.11.13.6.
Or
- If access is via LAN or WAN, enter the IP address or Host Name of the server.
3. In the Port field, enter 22.
4. In the Connection Type field, click SSH.
5. In the Category area, click Connection > SSH. The Options controlling SSH connections
category is displayed (see Figure 14).
Figure 14: PuTTY Configuration - Options Controlling SSH Connections Dialog Box
50 Avaya Integrated Management Release 5.0 Software Update Manager
Downloading and Installing the Inventory Collection Script (R2.x and R3.x)
6. In the Preferred SSH Protocol Version field of the Protocol options area, select 2.
7. In the Encryption options area, use the Up and Down buttons to set AES (SSH-2 only) as
the first option and 3DES as the second option.
8. Click Open.
9. Click Yes to accept the host key. The PuTTY dialog box opens.
Note:
Note:
Note:
The first time you connect to the server, SSH prompts you to accept the server’s
host key. Save the host key to ensure you are not prompted for the host key in
the future.
Note:
Many Avaya products support access with SSH. However, Avaya does not
provide support for third party clients used for SSH access. Problems with SSH
client, including PuTTY, are the responsibility of the user or the SSH client
vendor.
Installing the Service Pack
Once you have started a telnet session or an SSH session you can begin installing the service
pack to the Communication Manager.
Note:
Note:
The service pack must be copied to the /var/home/ftp/pub directory before
starting the installation.
To install the service pack on the Communication Manager:
1. From the telnet or SSH session, type 192.11.13.6 if access is directly through the
Services port.
Or
Type the IP address or the host name of the server if access is over the LAN or WAN.
2. Log in using the appropriate Login ID and password.
3. Type update_unpack <update filename> and press Enter.
4. Select the number corresponding to the service pack file and press Enter.
For example, 00.339.4-xxxx.tar.gz.
5. To list Communication Manager files, and verify that the new service pack file was
unpacked, type update_show and press Enter.
Issue 6 January 2008
51
The ASCA Reporting Tool
6. Type update_activate <update name>, where update name is the file name without
the .tar.gz release or issue number of the service pack file and press Enter.
For example, update_activate 00.0.339.4-xxxx.
The Communication Manager may reboot. If the server reboots, you must wait until the
restart or reset completes before entering additional commands. The Communication
Manager displays a message that the service pack was applied.
Note:
Note:
If during a system reboot, you receive the message opt/ecs/sbin/drestart
2 4 command failed, no action is required.
7. To list the Communication Manager files, and verify that the service pack file was activated,
type update_show and press Enter.
8. At the prompt commit this software?, type y.
9. To close the telnet window, type q.
Running the Inventory Script on the Communication
Manager
The inventory script generates the inventory file that the ASCA reporting tool uses to generate
an HTML ASCA report.
To generate the inventory file on the Communication Manager:
1. From a telnet or SSH session, log into the active Communication Manager server using an
account with root privileges.
2. From the CLI, change the directory to /opt/ecs/sbin.
3. To run the script, type asca_poll_script.
The inventory file is generated and saved to the /var/opt/platform/ASCA folder. The
script will automatically log into each gateway using root/root.
Note:
Note:
Note:
If you have changed passwords on any gateway, you will need to manually log
into those gateways. To do this, you must execute the script with the -u option,
i.e. asca_poll_script -u.
Note:
It is possible to run a more specific inventory when you run the script on the
Communication Manager. Type man asca_poll_script for a complete guide
to running the script.
52 Avaya Integrated Management Release 5.0 Software Update Manager
Downloading the Inventory File to your Computer
Downloading the Inventory File to your Computer
Once the inventory file has been generated on the Communication Manager, you can download
it onto your computer.
To download the inventory file to your computer:
1. From your computer, use FTP or SSH to navigate to the file.
2. Go to the /var/opt/platform/ASCA folder on the Communication Manager.
3. Copy the file ASCA_Inventory.txt to your computer.
You are now ready to generate the ASCA report. Refer to Generating and Filtering an ASCA
Report on page 53).
Generating and Filtering an ASCA Report
The ASCA report displays information relating to all the elements of the CM, including the
following groups: main servers, ESS’s, LSPs, H.248 Gateways, TN Circuit Packs, DCP
Endpoints, and IP Endpoints. For each element that has a version, you can display the currently
installed version, and the latest available version. Installed versions that are not the latest
version are highlighted in red.
To generate an ASCA Report:
1. From Avaya Software Update Manager, select Tools > Generate ASCA Report. The
ASCA Report dialog box opens.
Figure 15: ASCA Report Dialog Box
2. Click the ASCA input file Browse... button. The Open dialog box opens, enabling you to
select the input inventory file.
3. Click the ASCA output directory Browse... button. The Open dialog box opens. Select the
directory in which you want the ASCA HTML report file to be saved.
4. Click Generate report to create the report. A confirmation dialog box opens.
Issue 6 January 2008
53
The ASCA Reporting Tool
5. Click OK in the confirmation dialog box. The ASCA HTML report opens.
Figure 16: Avaya Software Compatibility Audit (ASCA) Report Dialog Box
6. Click Close to close the ASCA Report dialog box.
Filtering the ASCA Report
You can filter the information contained in the ASCA report by hardware type, using the Group
filter or by software version using the Version filter.
To filter the ASCA report:
1. To filter the report by group, select or clear the checkbox of the group or groups you want to
display or hide.
2. To filter the report by version, select the checkbox of the version type you want to display.
54 Avaya Integrated Management Release 5.0 Software Update Manager
Chapter 7: Downloading Software to Targets
This chapter describes how to download software to the targets in the Targets Table in the
Gateways, Data Switches, and Circuit Packs view and CM Software Management view. It
includes the following sections:
●
Download Files Overview - Provides a short overview about download files and where
they are located.
●
Configuring Software Libraries - Describes how to configure the library for downloading
software.
●
Configuring Download Parameters - Describes how to view and configure download
parameters.
●
Configuring the Media Server Software Repository - Describes how to manage the
software repository on the Media Server. Includes information on how to install license and
authentication information and manage updates to a single CM Server.
●
Downloading - Describes how to download software from both the Gateways, Data
Switches, and Circuit Packs view and the CM Software Management view.
●
Scheduling Downloads - Describes how to schedule a download for a later time or date.
●
Resetting Modules - Describes how to reset devices after a download.
●
Setting Product Defaults - Describes how to view and change default filenames.
Download Files Overview
Download files contain embedded software for Avaya modules. When a file is downloaded to a
module, it affects the capabilities of the module. There are three types of download files:
Note:
●
Image - An executable file for running the device.
●
Boot Loader - A low-level executable for starting up the device.
●
Web Management - An executable file providing web management capability to the
device.
Note:
Not all download file types can be downloaded to all devices.
Issue 6 January 2008
55
Downloading Software to Targets
All download files are stored in the x:\Avaya_dir\mode_dir\userver\backup directory
of the server station, where:
Note:
●
x:\Avaya_dir is the directory in which Avaya Network Manager was installed.
●
mode_dir is CVS if you are running Avaya Network Configuration Manager in Standalone
Mode.
Note:
Do not modify or delete the directory in which download files are stored.
The server station is the station running Avaya Network Manager in Standalone Mode. If you
are running Avaya Software Update Manager remotely, all files retrieved from the Web and
added manually are saved on the server, and only files on the server can be downloaded to
modules.
You can copy files from the remote station to the server. For instructions on copying files to the
server, refer to Manually Adding Files on page 90.
Configuring Software Libraries
This section explains how to configure the software libraries for downloading files from different
locations. The local library is the NMS library. You can have many remote libraries, but only one
local library.
To configure the software libraries:
1. Select the view in which you want to work (Gateways, Data Switches, and Circuit Packs
view or CM Software Management view only).
2. Click
.
Or
Select Tools > Software Libraries. The Software Libraries dialog box opens. The NMS
(Network Management Server) local software library is selected by default.
56 Avaya Integrated Management Release 5.0 Software Update Manager
Configuring Software Libraries
Figure 17: Software Libraries Dialog Box - Software Libraries Tab
Defining a Remote Software Library
To define a remote software library:
1. From the Software Libraries dialog box, select the Software Libraries tab.
2. Click Add to insert a new line in the Software Libraries Properties Table. A new line appears
and the software parameters become available to edit.
3. Edit the software parameters (see Figure 17). For more information on software
parameters, refer to Software Libraries Parameters on page 58.
4. Click Apply. The selected software library is updated with the new parameters.
Issue 6 January 2008
57
Downloading Software to Targets
Software Libraries Parameters
The following table displays the list of software parameters by which you can define a remote
library:
Table 10: IP Software Library Parameters
Parameter
Description
Name
The name of the software library.
IP
The IP address of the software library.
Location
The location of the software library.
Description
A description of the software library.
Type
The protocol type supported by the server where the software library
resides (FTP, TFTP, SCP, or any combination).
TFTP Server Secure
Path
The path of the file to download on the TFTP server. This field is enabled
for NMS only.
FTP User Name
The user name for the FTP server. This field is enabled for FTP only.
FTP Password
The password for the FTP server. This field is enabled for FTP only.
Retype FTP Password
Password confirmation for the FTP server. This field is enabled for FTP
only.
FTP Server Path
The path of the file to download on the FTP server. This field is enabled
for NMS only.
SCP User Name
The user name for the SCP server. This can be a local or domain user
name. This field is enabled for SCP only.
Note:
Note:
For details of setting domain users for SCP, please refer
to the Avaya support website (www.support.avaya.com).
SCP Password
The password for the SCP server. This field is enabled for SCP only.
Retype SCP
Password
Password confirmation for the SCP server. This field is enabled for SCP
only.
SCP Server Path
The path of the file to download on the SCP server. This field is enabled
for NMS only.
58 Avaya Integrated Management Release 5.0 Software Update Manager
Configuring Software Libraries
Viewing Files Available to Download
In the Files tab of the Software Libraries dialog box, you can view the files available for
download.
To view the files available for download from the selected software library:
1. From the Software Libraries dialog box, click the Files tab.
2. From the Software Library drop-down list, select the software library whose files you want
to view. The files in the selected software library are displayed in the table.
Figure 18: Software Libraries Dialog Box - Files Tab
Issue 6 January 2008
59
Downloading Software to Targets
Adding, Editing, or Deleting a File
To add a file to the NMS (local) Software Library:
1. From the Software Libraries dialog box, click the Files tab.
2. From the Software Library drop-down list, select the NMS Software Library. A table of files
available in that library is displayed. File Details parameters appear below the table in
read-only format.
3. Click New to enter new file details. The File Details Parameters now appear in read-write
format.
4. From the Product Family drop-down list, select the relevant Product Family for the file.
5. From the Device Type drop-down list, select the relevant Device Type for the file.
6. From the Software Type drop-down list, select the relevant Software Type for the file.
7. To the right of the File field, click
opens.
to select the file you want to add. The Open dialog box
8. Select the file you want to add and click Open. The file path appears in the File field.
9. In the Version field, enter the version of the file. (Avaya Software Update Manager
populates this field when you choose the file from the local file system.)
10. In the File Length field, specify the length of the file. (Avaya Software Update Manager
populates this field when you choose the file from the local file system.)
11. In the Notes field, add any notes you want. (This parameter is optional.)
12. Click Apply to add the file to the Software Library. The progress of the file download is
displayed in the Progress Information bar (refer to Figure 19).
Figure 19: Software Libraries File Download - Progress Information Bar
You can add file details to a Remote Software Library. Avaya Software Update Manager cannot
add/delete files in remote libraries.
To modify file details in the Software Library:
1. From the Software Libraries dialog box, click the Files tab.
2. From the Software Library drop-down list, select the Software Library. A table of files
available in that library is displayed. The File Details parameters appear below the table in
read-only format.
3. Select the file entry you want to modify.
4. Click Modify to enter file details. The File Details parameters appear in read-write format.
60 Avaya Integrated Management Release 5.0 Software Update Manager
Configuring Download Parameters
5. From the Product Family drop-down list, select the relevant Product Family for the file.
6. From the Device Type drop-down list, select the relevant Device Type for the file.
7. From the Software Type drop-down list, select the relevant Software Type for the file.
8. In the File field, enter the full path name.
9. In the Version field, enter the version of the file.
10. In the File Length field, specify the length of the file. (This parameter is optional.)
11. Click Apply to update the file details in the Software Library. The progress of the file
download is displayed in the Progress Information bar (refer to Figure 19).
To delete a file from the Software Library:
1. From the Files tab of the Software Library dialog box, select the file you want to delete from
the Devices Table.
2. Click Delete. The file is deleted from the library. Avaya Software Update Manager cannot
delete files in remote libraries.
Configuring Download Parameters
This section explains how to view and configure the download parameters from the Gateways,
Data Switches, and Circuit Packs view or the CM Software Management view.
To configure the download parameters:
1. Select the view for which you want to configure the download parameters (Gateways, Data
Switches, and Circuit Packs view or CM Software Management view).
2. In the Targets Table, select the target or targets you want to configure.
Note:
Note:
When you open Avaya Software Update Manager for the first time, the Targets
Table appears with no entries. To populate the Targets Table with data, see The
Targets Table on page 21.
3. Click
.
Or
Select Actions > Target Details. The Target Details dialog box opens. If you selected
multiple targets, only the fields which are the same for all the selected targets appear with
data. All other fields appear empty.
4. Specify the download parameters. (For more information on download parameters, refer to
Download Parameters on page 62.)
Issue 6 January 2008
61
Downloading Software to Targets
Figure 20: Target Details Dialog Box
Download Parameters
The following table displays a list of download parameters:
Table 11: Download Parameters
Parameter
Description
Name
The logical name of the selected target(s).
IP Address
The IP address of the selected target(s).
Module #/Location
The number and location of the slot that the selected target
occupies in the device(s).
Device Type
The type of device associated with the selected target(s).
Software Type
The type of software downloaded to the selected target(s).
Port Network
The port network associated with the TN Board. Only applies
to TN Boards.
1 of 2
62 Avaya Integrated Management Release 5.0 Software Update Manager
Configuring Download Parameters
Table 11: Download Parameters (continued)
Parameter
Description
Hardware Version
The device hardware version or vintage.
Software Library
The location from where to download the new file.
File on USB Flash
Drive
The name of the USB flash drive file associated with the
selected target.
Software Version
The software version of the new file.
Download Proxy
The IP address of the CM to use when downloading files to
TN Boards.
2 of 2
Note:
Note:
If multiple targets are selected, only parameters whose value is the same for all
selected targets are displayed.
Issue 6 January 2008
63
Downloading Software to Targets
Configuring the Media Server Software Repository
This section explains how to manage the software repository on the Media Server. From the
Media Server Details dialog box, you can manage updates and install license or authentication
files to the software repository on a single Media Server.
Note:
Note:
The Media Server Details dialog box is only accessible from the CM Software
Management tab.
To access the Media Server Details dialog box:
1. From the Avaya Software Update Manager User Interface, select the CM Software
Management tab.
2. Click
.
Or
Select Actions > Target Details. The Media Server Details dialog box opens.
Figure 21: Media Server Details Dialog Box - Release Management Tab
64 Avaya Integrated Management Release 5.0 Software Update Manager
Configuring the Media Server Software Repository
Media Server Release Management
The Release Management tab enables you to copy a release from an HTTP server to the hard
drive. It lists the currently installed versions of Media Server software for both the active and
standby partitions. In addition, it lists up to three newer versions available for installation on the
Media Server and the functions required to install or delete a release to the hard disk.
The currently installed versions of the Media Server software for both the active and standby
partitions appear in the Installed Versions area of the dialog box.
Managing Software Releases
A table of up to three versions available for installation on the Media Server and their current
location (Hard Disk, CDROM or URL) is displayed in the Versions Available for Installation on
Media Server area (see Figure 21).
To delete a software release from the table:
1. From the Versions Available for Installation on Media Server Table, click the checkbox of the
version you want to delete.
2. Select Delete selected releases from Hard Disk.
3. Click Apply.
To copy a release from a CD-Rom to the hard disk:
1. From the Versions Available for Installation on Media Server Table, click the checkbox of the
version you want to install.
2. Select Copy release from CD to Hard Disk.
3. Click Apply.
To copy a release from a URL to the Hard Disk:
1. From the Versions Available for Installation on Media Server Table, click the checkbox of the
version you want to install.
2. Select Copy release from URL.
3. Specify the address of the URL in the Copy release from URL field.
4. Specify the software version you want from the drop-down list adjacent to the Copy release
from URL field.
5. Click Apply.
Issue 6 January 2008
65
Downloading Software to Targets
Media Server Operations
The Media Server Operations area of the Release Management Tab enables you to perform a
number of functions on the Media Server.
To perform one of the Media Server Operations:
1. In the Media Server Operations area, click the operation that you want to perform from
those listed.
The following options are available:
- Update tripwire database - Clears all changes following an upgrade.
- Reboot to standby partition - Reboots the system to the standby partition.
- Make boot permanent (Commit) - Makes the active partition the boot partition.
- Save Translation - Saves all translations configured through SAT.
- Reset - Resets the Media Server.
- Release server - Releases a server currently in busy out service.
- Busy-out server - Switches server from standby to busy out service. (Only duplex
servers.)
- Interchange servers - Switches between active and standby servers. (Only duplex
servers.)
- Force interchange
2. Click Apply.
Media Server Updates
The Manage Updates tab displays a table with the updates available for installation and their
current status (packed, unpacked, or activated). You can install or remove a service update from
the Media Server.
The table of installed updates provides the following information - Update ID (containing the
release version and service update number), Status, and Type.
66 Avaya Integrated Management Release 5.0 Software Update Manager
Configuring the Media Server Software Repository
Figure 22: Media Server Details Dialog Box - Manage Updates Tab
To unpack, activate, or remove a service update:
1. Select the service update that you want to use from the List of installed updates table.
2. Click the operation you want to perform from the options listed below the List of installed
updates table.
The operations that may be performed on a selected service update depend on the status
of the update. The following list describes the service update status and the operations that
may be performed on a service update with the status described:
- Packed - The service update file is located on the media server. You may choose to
unpack the patch or remove it from the /var/home/ftp/pub directory.
- Unpacked - The service update file was unpacked. You may choose to activate the
service update or remove the extracted files from the opt/updates directory.
- Activated - The service update was unpacked and activated. You may choose to
deactivate the service update. When you deactivate the service update, the status
reverts to Unpacked.
3. Click Apply.
4. Click Close. The dialog box closes.
To install a service update from a library:
1. Select the library from the drop-down list. A list of available updates is displayed.
2. Select the service update you want to install.
Issue 6 January 2008
67
Downloading Software to Targets
3. Click Unpack from the options listed below the List of installed updates table.
4. Click Apply. The service update is copied and unpacked. Its status appears as Unpacked.
5. To activate the service update, select Activate.
6. Click Apply. The status changes to Activated.
7. Click Close. The dialog box closes.
Media Server License and Authorization Files
The License & Auth Files tab displays license status information for the Media Server. It also
enables you to install license and authorization files.
Figure 23: Media Server Details Dialog Box - License & Auth Files Tab
To install a license file:
1. Click
in the License File row of the License & Auth File tab in the Media Server Details
dialog box. The Open dialog box opens.
2. Select the license file you wish to install and click Open. The path of the selected file is
displayed in the License File field.
68 Avaya Integrated Management Release 5.0 Software Update Manager
Downloading
3. Click Apply.
4. Click Close to close the dialog box.
To install an authorization file:
1. Click
in the Authorization File row of the License & Auth File tab in the Media Server
Details dialog box. The Open dialog box opens.
2. Select the authorization file you wish to install and click Open. The path of the selected file
is displayed in the Auth File field.
3. Click Apply.
4. Click Close to close the dialog box.
Downloading
This section describes how to download software to targets, and explains the download status
messages that are displayed while the files are downloading. This section includes:
●
The Download Process - Gateways, Data Switches, and Circuit Packs View - Describes
the download process from the Gateways, Data Switches, and Circuit Packs view.
●
The Download Process - CM Software Management View - Describes the download
process from the CM Software Management view
●
Download Process Status Messages - Lists and explains the download status messages.
The Download Process - Gateways, Data Switches, and Circuit
Packs View
To start the download process for Gateways, Data Switches, and TN Boards:
1. Select the Gateways, Data Switches, and Circuit Packs tab.
2. In the Targets Table, select the target or targets to which you want to download.
Note:
Note:
When you open Avaya Software Update Manager for the first time, the Targets
Table appears with no entries. To populate the Targets Table with data, see The
Targets Table on page 21.
3. Click
.
Or
Select Actions > Download Now. The download process begins.
Issue 6 January 2008
69
Downloading Software to Targets
Note:
Note:
Once the download process begins, it cannot be stopped.
The Download Process - CM Software Management View
The CM Software Management dialog box is used to install and upgrade CM Server (Media
Server) software and install license or authentication files to the software repository on the CM
Server. You can perform upgrades on multiple servers at the same time.
Note:
Note:
The CM Software dialog box is only accessible from the CM Software
Management tab.
To access the CM Software Management dialog box:
1. Select the CM Software Management tab.
2. Click
.
Or
Select Actions > Target Details. The CM Software Management dialog box opens.
Figure 24: CM Software Management Dialog Box - CM Software Upgrade/Update Tab
70 Avaya Integrated Management Release 5.0 Software Update Manager
Downloading
Upgrades and Updates to the Communication Manager
The CM Software Upgrade/Update tab enables you to copy a release from an HTTP server to
the hard drive of one or more CM Servers. You can choose the source location of the release
you want to download, copy and/or install a release, and install associated updates, license
files, and authentication files.
Upgrading or Updating Media Server Releases
To install a release on one or more Media Servers:
1. Click the CM Software Upgrade/Update tab in the CM Software Management dialog box
(see Figure 24).
2. Select one or more of the targets that you want to upgrade in the Targets Table.
3. Click the CM Release Location checkbox.
4. Click one of the following sources from which you want to download the software release:
- NMS CD
- Media Server Hard Disk
- Media Server CD
- URL - specify the URL from which you want to download the software.
5. From the drop-down list next to the selected media source, choose the software version you
require.
6. Select one of the following actions to perform:
- Install Release - installs the release to the selected Media Server(s).
- Copy Release - copies the release to the selected Media Server(s).
- Copy & Install - copies the release to the selected Media Server(s) and unpacks and
installs it.
7. Click Download to begin. The Job Summary window opens in the CM Software
Management dialog box, displaying a summary of the download currently being performed
(see Figure 25).
Issue 6 January 2008
71
Downloading Software to Targets
Figure 25: CM Software Management - Job Summary Window
Note:
Note:
The Cancel Job button is disabled during a download. It is not possible to cancel
a job after the download has started.
8. Click Close to close the dialog box.
Installing a CM Service Update
To install a CM service update:
1. Click the CM Software Upgrade/Update tab in the CM Software Management dialog box.
2. Select one or more of the targets that you want to upgrade in the Targets Table.
3. Click the CM Service Packs checkbox. A list of CM Service Packs appears in the CM
Service Packs table.
4. Select the service update you want to install.
5. Click Download. The Job Summary window opens in the CM Software Management dialog
box, displaying a summary of the download currently being performed (see Figure 25).
6. Click Close to close the dialog box.
72 Avaya Integrated Management Release 5.0 Software Update Manager
Downloading
Installing a Platform/Security Update
To install a platform/security update:
1. Click the CM Software Upgrade/Update tab in the CM Software Management dialog box.
2. Select one or more of the targets in the Targets Table that you want to upgrade.
3. Click the Platform/Security Update checkbox.
4. Select the service update you want to install.
5. Click Download. The Job Summary window opens in the CM Software Management dialog
box, displaying a summary of the download currently being performed (see Figure 25).
6. Click Close to close the dialog box.
Assigning License and Authentication Files
The License and Authentication tab of the CM Software Management dialog box enables you to
view, add, assign or delete license and authentication files for devices selected. The
Assignment Table lists the licenses and authentication files assigned to the devices selected in
the Targets Table. The License & Authentication files Table displays files available to assign.
Figure 26: CM Software Management Dialog Box - License & Auth Files Tab
Issue 6 January 2008
73
Downloading Software to Targets
Viewing Assigned License and Authentication Files
To view license and authentication files currently assigned to devices in the Targets Table:
1. In the Targets Table, select the devices you want to view.
2. Click the License & Auth Files tab in the CM Software Management dialog box. The
Devices Table (upper table) displays licensing and authentication file information for the
devices selected.
Assigning License and Authentication Files to a Device
The License & Authentications Files Table (lower table) lists the license and authentication files
available for installation.
To assigning a file from the License & Authentication Files Table to a device:
1. Click the License & Auth Files tab in the CM Software Management dialog box.
2. Select the file that you want to assign from the License & Authentication Files Table.
3. In the Devices Table, click the row of the device to which you want to assign the file. A
drop-down list with available files opens.
Note:
Note:
If you click the Authentication file row when trying to assign a License file, or click
the License file row when trying to assign an Authentication file, the option to
assign the file is not available and the Assign tab is disabled.
4. To assign the file to the selected device, select the appropriate file from the drop-down list.
5. In the CM Software Upgrade/Update tab, click the Install License & Auth Files checkbox.
This ensures that the file is assigned when the software upgrade is performed.
Note:
Note:
A License or Authentication file can only be assigned once.
Adding a file to the License & Authentication Files Table
To add a file to the License & Authentication Files Table:
1. Click the License & Auth Files tab in the CM Software Management dialog box.
2. Click Add. The Open dialog box opens.
3. Select the file you want to add.
4. Click Open. The selected file now appears in the License & Auth Files Table.
74 Avaya Integrated Management Release 5.0 Software Update Manager
Downloading
Deleting Files From the License & Authentication Files Table
To delete files from the License & Authentication Files Table:
1. Click the License & Auth Files tab in the CM Software Management dialog box.
2. From the License & Authentication Files Table, select the file that you want to delete.
3. Click Delete. The selected file is removed from the License & Authentication Files Table.
This action also deletes any assignments to devices in the Targets Table associated with
the deleted file.
Download Process Status Messages
During the download process, Avaya Software Update Manager displays the download
progress for each target in the Download Progress and File Size columns of the Targets Table.
Avaya Software Update Manager also displays the download status in the Status column of the
Targets Table. The statuses that are displayed vary from device to device. The table below lists
the different statuses, with a description of each status and the device types to which the status
is applicable. For more information about the Targets Table, refer to Chapter 3: The Targets
Table. For a list of errors that can occur during download, refer to Appendix C: Troubleshooting.
Table 12: Download Status Messages
Status
Description
Devices
Ready
The target is idle and downloading can
begin. Only displayed before the first
download for the target after the target
was added to the Targets Table, or after
a delayed download was cancelled.
All.
Waiting
Download process is waiting while
software is being downloaded to other
targets.
All.
Waiting for download
on [time and date]
User requested download to begin later.
All.
Setting Parameters
Configuration details are being sent to
the agent.
Only for Avaya P330
Devices.
Testing
The agent is testing whether download is
possible.
Only for Avaya P330
Devices.
Erasing Flash
The agent is erasing flash memory.
Only for Avaya P330
M400, Devices.
1 of 2
Issue 6 January 2008
75
Downloading Software to Targets
Table 12: Download Status Messages (continued)
Status
Description
Devices
Downloading
The software is being downloaded.
All Devices.
Rebooting After
Download
The device associated with the target is
rebooting.
All except for Avaya
P330, Devices.
Data Connection
Established
The software is being downloaded.
All.
Download
Successful
The download was completed
successfully.
All.
Download Failed
The download failed.
All.
Download Failed
with error: Error
description
The download failed due to the listed
error. For more information about error
messages, refer to Appendix
C: Troubleshooting.
All.
Setting Default Flash
The version that was downloaded was
made into the default version.
All.
Downloading Boot
Image
A Boot Image is being downloaded.
All.
Downloading Image
to APP1
The Image is being downloaded to Bank
A of the device.
All.
Downloading Image
to APP2
The Image is being downloaded to Bank
B of the device.
All.
Synchronizing
Standby Supervisor
After a successful download, the files are
being copied to the backup agent, if it
exists.
All.
2 of 2
76 Avaya Integrated Management Release 5.0 Software Update Manager
Scheduling Downloads
Scheduling Downloads
This section explains how to schedule a download for a later time or date.
Opening the Schedule Download Dialog Box
To open the Schedule Download dialog box from the Gateways, Data Switches, and Circuit
Packs view:
1. Select the Gateways, Data Switches, and Circuit Packs tab.
2. Select the target or targets to which you want to download from the Targets Table.
3. Select Actions > Schedule Download. The Schedule Download dialog box opens (see
Figure 28).
To open the Schedule Download dialog box from the CM Software Management view:
1. Select the CM Software Management tab.
2. Click
.
Or
Select Actions > Schedule Download. The CM Software Management dialog box opens.
3. From the CM Software Upgrade/Update tab in the CM Software Management dialog box,
click Schedule (see Figure 24). The Schedule Download dialog box opens (see Figure 28).
Issue 6 January 2008
77
Downloading Software to Targets
Figure 27: Schedule Download Dialog Box
Viewing Schedule Download Information
The Schedule Download dialog box enables you to view schedule information and target details
for the targets you have selected. Select the target you want to view from the Schedule
Download Table.
The Schedule Download dialog box displays the following information about the selected target:
Table 13: Schedule Download Parameters
Parameter
Description
Maximum Download
Retries
The maximum number of times for Avaya Software
Update Manager to retry downloading in the event of a
download failure.
Delay Between Retries
(Seconds)
The number of seconds delay between download
retries, in the event of a download failure.
Job Date
The date the download is to be executed for the selected
target.
Job Owner
The owner of the scheduled job.
1 of 2
78 Avaya Integrated Management Release 5.0 Software Update Manager
Scheduling Downloads
Table 13: Schedule Download Parameters (continued)
Parameter
Description
Reset After Download
Resets the device following a successful download if this
checkbox is selected.
Software Library
The Software Library from which the software is
downloaded.
Software Version
The Software Version of the selected target.
2 of 2
Scheduling Software Downloads
To schedule downloads:
1. In the Retry Download area, specify the Maximum Download Retries and the Delay
Between Retries in the event of a download failure.
2. Click the Reset after download checkbox to automatically reset the device after a
successful download.
3. Click Download to download immediately.
Or
Click Schedule to schedule the download to take place at a later date. The Schedule
Calendar opens (see Figure 28).
Figure 28: Schedule Calendar
Issue 6 January 2008
79
Downloading Software to Targets
4. From the Schedule Calendar, set the time, date, and month at which you want the download
to begin, as follows:
- Use the change hour buttons to set the hour.
- Use the change minute buttons to set the minute.
- Use the change year buttons to set the year.
- Use the change month buttons to set the month.
- In the calendar section, click the day of the month to set the day.
5. Click Apply. In the Targets Table, the Status column for the device set for scheduled
download displays Waiting for download on [time and date of download]
until the download begins.
Cancelling A Scheduled Download
To cancel a scheduled download, from the relevant view:
1. Select the device or devices for which you want to cancel a scheduled download.
2. Select Actions > Schedule Download. The Schedule Download dialog box opens.
3. Select the targets for which you want to cancel the scheduled download.
4. Click Remove. The scheduled downloads are cancelled.
Note:
Note:
This option is only available if all the devices you selected are configured for
scheduled download.
80 Avaya Integrated Management Release 5.0 Software Update Manager
Resetting Modules
Resetting Modules
Some device modules need to be reset before a change to their software takes effect. Avaya
Software Update Manager provides the ability to reset selected modules on your network.
! CAUTION:
Resetting an individual module in a device may cause the entire device to reset.
For example, if you reset the module which is currently the device’s master
agent, the entire device resets. This may disrupt traffic on your network.
CAUTION:
To reset modules on your network:
1. Click the view that you require (Gateways, Data Switches, and Circuit Packs view or CM
Software Management view).
2. Select targets for the modules you want to reset in the Targets Table.
Note:
Note:
Each type of software for a module is represented by a row in the Targets Table.
Some modules may have more than one entry in the table.
3. Click
.
Or
Select Actions > Reset. The selected modules are reset.
Issue 6 January 2008
81
Downloading Software to Targets
Setting Product Defaults
This section explains how to view and change the default filenames for the software files that
are downloaded to targets.
To view and change default filenames:
1. Select Tools > Product Defaults. The Product Defaults dialog box opens.
Figure 29: Product Defaults Dialog Box
2. Click on the name of a product family to display a list of product types belonging to that
family underneath the family name.
3. Select a product type. The default filename for each relevant download file type appears in
the appropriate field.
4. Click Browse... to look for a different default file. The Software Version Selection dialog box
opens. The Software Version Selection dialog box lists the files on the server.
82 Avaya Integrated Management Release 5.0 Software Update Manager
Setting Product Defaults
Figure 30: Software Version Selection Dialog Box
5. Select a file version. A version number that appears in green is present in all of the
displayed libraries. A version number that appears in red is present in only some of the
displayed libraries.
6. Click OK. The Software Version Selection dialog box closes.
7. Click Apply to apply the new filename. Click OK to apply the new filename and close the
Product Defaults dialog box.
Issue 6 January 2008
83
Downloading Software to Targets
84 Avaya Integrated Management Release 5.0 Software Update Manager
Chapter 8: Analyzing and Retrieving from the Web
This chapter explains how to check software currently loaded in devices against the latest
release of the software on the Avaya website. It also describes how to manually add files to the
Avaya Software Update Manager server. If a device is not using the newest software, you can
use Avaya Software Update Manager to retrieve and download the relevant software for the
device.
This chapter includes the following sections:
●
Requirements for Retrieving Software from the Web - Describes the information you need
to begin retrieving software from the web using Avaya Software Update Manager.
●
Performing Web Analysis - Explains how to check the update status of currently loaded
software versions against the newest versions on the Avaya website.
●
Retrieving New Versions from the Web - Explains how to retrieve new software versions
from the Avaya website.
●
Manually Adding Files - Explains how to add files from other sources to the Avaya
Software Update Manager server.
Requirements for Retrieving Software from the Web
In order to be able to use the downloading tools in Avaya Software Update Manager, you need
to define the SFAP Login Parameters, the website through which to download software, and
your proxy server information. You will be unable to begin the download process in any view in
Avaya Software Update Manager until you have completed these steps.
If you attempt to retrieve software versions from the web before defining SFAP Login
parameters, you will receive the following error message:
Figure 31: Error Message - SFAP Login Parameters not defined
For information on how to define SFAP Login Parameters, refer to Chapter 2: Getting Started on
page 17.
Issue 6 January 2008
85
Analyzing and Retrieving from the Web
Performing Web Analysis
Avaya Software Update Manager analyzes the Avaya website and compares the software
versions currently loaded in devices against the newest versions available on the web.
To perform web analysis:
1. Click the view within which you want to work (Gateways, Data Switches, and Circuit Packs
view or CM Software Management view only).
2. Click
.
Or
Select Tools > Image Analyzer. Avaya Software Update Manager analyzes the software
versions available on Avaya’s website and updates the State column in the Targets Table.
For information on the status icons used in the Targets Table, refer to Status Icons on
page 23.
Retrieving New Versions from the Web
You can use Avaya Software Update Manager to retrieve software versions from Avaya’s
website. Avaya Software Update Manager places the retrieved version in your default directory.
You can then download the versions to targets. For information on downloading software to
targets, refer to Chapter 7: Downloading Software to Targets.
Note:
Note:
To be able to retrieve software from the web, SFAP Login Parameters must be
defined in Avaya Software Update Manager. If you have not already defined
SFAP Login Parameters, refer to Chapter 2: Getting Started on page 17.
To retrieve new versions from the web:
1. Click the view within which you want to work (Gateways, Data Switches, and Circuit Packs
view or CM Software Management view only).
2. Click
.
Or
Select Tools > Retrieve Image From the Web. The Retrieve From the Web dialog box
opens.
86 Avaya Integrated Management Release 5.0 Software Update Manager
Retrieving New Versions from the Web
Figure 32: Retrieve From the Web Dialog Box
Note:
Note:
Note:
If you have already performed a web analysis, device types for which newer
software is available on the website (but not on your hard disk) are automatically
selected. If you have not performed a web analysis, or if the Targets Table is
empty, you must manually select the device types for which you want to retrieve
new software.
Note:
You can display information about the new software version by placing the cursor
on a row in the Targets Table. For further information, refer to Using Tooltips on
page 14.
3. Select the defaults option you want use for downloading in the Defaults section of the
Retrieve From the Web dialog box.
Issue 6 January 2008
87
Analyzing and Retrieving from the Web
Figure 33: Retrieve From the Web Dialog Box
The following table lists the available options.
Table 14: Retrieve From the Web Defaults Options
Option
Description
Update product defaults with
the downloaded image versions
Select this option to update the product default with the
downloaded version.
Update product defaults with
the downloaded image versions
only for the latest available
versions (default operation)
Select this option to update the product default only if the
downloaded version is the latest version available for this
product.
This is the default option selected.
Do not update product defaults
Select this option to leave the product default unchanged.
4. Click OK. The Retrieve From the Web dialog box closes.
Or
Click Apply. The Retrieve From the Web dialog box remains open.
The Retrieve From the Web status is displayed in the status window (see Figure 34). It
shows the name of the file currently being retrieved and the progress of the current retrieval.
88 Avaya Integrated Management Release 5.0 Software Update Manager
Retrieving New Versions from the Web
Figure 34: Retrieve from the Web - Status Window
In the event of a download failure, Avaya Software Update Manager will generate an error
message to inform you that the selected files were not downloaded (see Figure 35).
Figure 35: Retrieve from the Web - Download Failure Message Window
Note:
Note:
Files retrieved from the web are placed in the local software library directory on
the Network Management Station (NMS). The local software library is the
directory x:\Avaya_dir\mode_dir\userver\backup\library\ directory
of the server station, where:
x:\Avaya_dir is the directory in which Avaya Network Manager was installed.
mode_dir is CVS if you are running Avaya Network Configuration Manager in
Standalone Mode.
Note:
Note:
Do not modify or delete the directory in which download files are stored.
5. To abort the current retrieval and go on to the next file, click Skip. To abort the current
retrieval and cancel all the remaining retrievals, click Cancel.
Issue 6 January 2008
89
Analyzing and Retrieving from the Web
Manually Adding Files
You can manually copy image files to the software library.
To copy a download file to the server:
1. Click
.
Or
Select Tools > Add Image File. The Software Libraries dialog box opens.
Figure 36: Software Libraries Dialog Box - Files Tab
2. Select the software library where the new file is located.
3. Select the product family, device type, and software type of the new file in the Image File
Name to upload section.
4. Click
in the File field to browse to the location of the file and click Open.
5. Enter the file’s version number in the Version field (for Remote Mode only).
Note:
Note:
If you are not running Software Update Manager in Remote Mode, the Version
field is populated automatically when the image from the NMS server is selected.
90 Avaya Integrated Management Release 5.0 Software Update Manager
Manually Adding Files
6. Enter the file’s size in the File Length (optional) field.
7. Click OK. The file is copied to the server, and the Software Libraries dialog box closes.
Or
Click Apply. The file is copied to the server, and the Software Libraries dialog box remains
open.
Note:
Note:
For a remote software library, the file is registered at the specified location for the
device and file type entered.
Issue 6 January 2008
91
Analyzing and Retrieving from the Web
92 Avaya Integrated Management Release 5.0 Software Update Manager
Chapter 9: Managing IP Phone Software
This chapter explains how to manage IP phone software distribution and IP phone configuration
updates to gateway devices. IP phones receive their firmware updates and configuration scripts
from the gateways through a TFTP or HTTP server selected by the DHCP server function.
Each gateway device contains a TFTP or HTTP server which stores firmware files and script
files. Firmware files are stored in device RAM and phone scripts (composed of a settings script
with phone configuration and an upgrade script with instructions for software upgrade) are
stored in device NVRAM.
Avaya Software Update Manager can manage IP Phone scripts on the following devices only:
●
G250 devices
●
G350 devices
●
G450 devices
●
IP Office devices
●
AM110 devices
AM110 devices are able to store up to 16 firmware images and 40 script files (including
language files) per device. The G250, G350, and G450 devices are able to store up to six
firmware files and four setting script files per device.
The IP Phones view includes facilities for detecting gateways, managing software images and
settings scripts, and transferring configuration files to IP phones.
This chapter includes the following sections:
●
The IP Phones Interface - An overview of the IP Phones Software Libraries user interface.
●
Downloading Software - Procedures for downloading IP phone software to Avaya gateway
devices.
●
Importing Files to the Local Software Library - Procedures for creating a software library to
be stored locally on a gateway or Network Management Server.
Issue 6 January 2008
93
Managing IP Phone Software
The IP Phones Interface
To view the IP Phones Interface, click the IP Phones tab in the View Tabs section of Avaya
Software Update Manager User Interface.
Figure 37: IP Phones Software Libraries Interface
Menu Bar
Toolbar
View Tabs
Targets Table
Dialog Area
Log File
Area
Status Line
The IP Phones Software Libraries interface includes the following areas:
●
Toolbar - Toolbar buttons for accessing Avaya Software Update Manager’s main
functions.
●
View Tabs - Enables you to switch views between the IP Phones view and views for
managing software distribution on other devices.
●
Targets Table - Displays information on available gateways, software images, scripts, and
software libraries. For information about the Targets Table and the IP Phones view in
particular, refer to The Targets Table on page 21.
●
Log File Area - Displays error and status messages from the system. For information
about the log file area, refer to The Log File on page 43.
94 Avaya Integrated Management Release 5.0 Software Update Manager
Downloading Software
Note:
●
Dialog Area - An area where all dialog boxes are displayed. When no dialog box is open,
the Dialog Area disappears and the Devices Table expands to take its place.
●
Status Line - Displays the currently logged in user, filter indication and discovery
progress.
Note:
Only the Help On option is available in the Toolbar for the IP Phones tab.
Downloading Software
The IP Phones view enables you to download firmware and configuration scripts for IP phones
to any supported Avaya gateway device from the Software Update Manager server. The Targets
Table displays a list of available gateway devices. The Files inventory for selected device dialog
box provides information about the software and script files residing on each device, when
accessed from the IP Phones view.
To view the software and script files residing on a device:
1. Select the IP Phones tab.
2. Select the device you want to view in the Targets Table.
Note:
Note:
When you open Avaya Software Update Manager for the first time, the Targets
Table appears with no entries. To populate the Targets Table with data, see The
Targets Table on page 21.
3. Click
.
Or
Select Actions > Target Details. The Files inventory for selected device dialog box opens.
Issue 6 January 2008
95
Managing IP Phone Software
Figure 38: Files Inventory For Selected Device Dialog Box
The Phones Software Table displays an entry for each type of software residing on the selected
device. The Script File Table displays a entry for each available upgrade script and
configuration settings script for the selected device.
Perform the following steps to upload software to a device:
●
Downloading Software to Selected Devices - Select the software from an NMS library or
directory and download it to the device or devices you wish to upgrade.
●
Viewing Log Files - View the file transfer logs for upload success status.
Downloading Software to Selected Devices
IP phone firmware images and configuration settings scripts to be uploaded to devices can be
located either in a file on the client workstation or on the Network Management Server. Software
for upload is selected from the Manage IP Phones Software on the gateway dialog box.
To access the Manage IP Phones Software on the gateway dialog box, from the IP Phones tab:
1. Click
.
Or
Select Actions > Download Now. The Manage IP Phones Software on the gateway dialog
box opens.
96 Avaya Integrated Management Release 5.0 Software Update Manager
Downloading Software
Figure 39: Manage IP Phones Software on the Gateway Dialog Box
To select files for upload:
1. From the Targets Table, select one or more devices to which you want to upload the files.
2. Click Select IP phone software release.
3. From the drop-down lists in the Select release for phone family area, select the releases
for the phone families applicable to the IP Phones connected to the selected device(s).
Note:
Note:
If the selected device is an AM110 device, the release(s) applicable to the phone
families connected to the device are automatically selected.
4. Select the phone models that you wish to update. For firmware files, select the firmware
files you wish to update from the list of checkboxes appearing in the select firmware
versions area. The list only displays firmware versions applicable to the phone releases for
the phone families selected in the Select IP phone software release area.
To upload the setting scripts:
1. Select select settings scripts. A list of scripts appears.
2. Choose the scripts you require from the files listed.
Issue 6 January 2008
97
Managing IP Phone Software
To begin or schedule selected files for download:
1. In the Download area, select Do not overwrite files if you do not want files that already
exist on the gateway to be overwritten.
2. In the Download area, select reset phones after download to reset phones automatically
after copying the file to the gateway.
Note:
Note:
This option is only available for AM110 gateways.
3. Click Download to begin uploading software to targeted gateways immediately.
Or
Click Schedule to schedule software upload in the future. For more information about the
scheduler, refer to Scheduling Downloads on page 77.
4. Click Close to close the dialog box.
Viewing Log Files
You can review the results of your uploads in the Log File area. For more information on the Log
Files in Software Update Manager, refer to The Log File on page 43.
Note:
Note:
There is no unique log file for IP Phone software distribution functions. Upload
activity appears as a normal log entry and is included in all log events. New
entries appear at the top of the log file.
Importing Files to the Local Software Library
You can use the Network Management Server software library to store IP phone software and
configuration files, enabling you to view files distributed to gateways and to initiate file
distribution to gateways from the Update Manager client without storing the files on the client
workstation. Software images can be obtained directly from Avaya. Refer to Retrieving New
Versions from the Web on page 86 for instructions on retrieving files from Avaya.
The IP Phones Software Libraries dialog box provides a tree view of available software releases
and settings scripts contained in the Network Management Server software library and enables
you to import them.
98 Avaya Integrated Management Release 5.0 Software Update Manager
Importing Files to the Local Software Library
To open the IP Phones Software Libraries dialog box:
1. Click
.
Or
Select Tools > Software Libraries. The IP Phones Software Libraries dialog box opens.
Figure 40: IP Phones Software Libraries Dialog Box
To Import new files into the IP Phones software library:
1. Click Import. The Import window opens.
2. Select the file you want to import from the client workstation and click Import. The selected
file is imported into the IP Phones Software Library.
3. View log files to confirm the import, if desired. For more information on log files, refer to
Viewing Log Files on page 98.
To delete files from the IP Phones Software Library:
1. Select the file or files that you want to delete in the Server Library tree.
2. Click Delete. The files are deleted from the tree.
Issue 6 January 2008
99
Managing IP Phone Software
100 Avaya Integrated Management Release 5.0 Software Update Manager
Appendix A: Remote Library Index File
This appendix provides an example of the structure of an index file you can create for use in the
remote software libraries accessed by Avaya Software Update Manager.
An index file is an XML file that you create and maintain with the information of the different
software update files stored on the remote server.
When an index file is present on a remote directory, the Avaya Software Update Manager reads
the index file and displays its contents to the Avaya Software Update Manager user. This
enables the user to view information on the software update files currently stored on the remote
server. With this list, the user can determine which files to download to update the specific
devices in the network.
The following is an example of the structure of an XML index file. You can use this example and
insert the relevant information for the files stored on your remote server.
<?xml version="1.0" ?>
<!-FileServer contains File elements.
Attributes:
===========
description - The software library description.
-->
<FileServer description="1.0.0 - 01/26/04">
<!-File element:
Contains information for a specific file
Attributes:
===========
name
- The name of the file.
In case it is not in the root, add the relative path in
the beginning (e.g. name="p330/p330tweb_1.2.3")
version
- The version of the file.
contentLength - The size of the file in bytes.
contentType
- The type of the file (Image/Web Management/Boot Loader/
)
-->
<File name="p330tweb_4.5.2" version="4.5.2" contentLength="1491847"
contentType="Web Management">
<!--
Issue 6 January 2008
101
Remote Library Index File
DeviceClassification element:
Attributes:
===========
deviceFamily - The family of the device (P330/W310/...).
deviceType
- The type of the device (Avaya P333T/Avaya P333T-PWR/
Avaya G700).
-->
<DeviceClassification deviceFamily="P330" deviceType="Avaya P334T" />
<DeviceClassification deviceFamily="P330" deviceType="Avaya P333T" />
<DeviceClassification deviceFamily="P330" deviceType="Avaya P333T-PWR" />
<DeviceClassification deviceFamily="P330" deviceType="Avaya G700" />
</File>
<File name="G350.web" version="2.0.2" contentLength="2441403" contentType="Web
Management">
<DeviceClassification deviceFamily="G350" deviceType="Avaya G350" />
</File>
<File name="w310web_1.0.03" version="1.0.03" contentLength="6051" contentType="Web
Management">
<DeviceClassification deviceFamily="W310" deviceType="Avaya W310" />
</File>
<File name="W310_1.0.2.web" version="1.0.2" contentLength="6051" contentType="Web
Management">
<DeviceClassification deviceFamily="W310" deviceType="Avaya W310" />
</File>
<File name="c360_4.3.19" version="4.3.19" contentLength="16051" contentType="Image">
<DeviceClassification deviceFamily="W310" deviceType="Avaya W310" />
</File>
</FileServer>
102 Avaya Integrated Management Release 5.0 Software Update Manager
Appendix B: Menus
This appendix provides the full structure of the menus in Avaya Software Update Manager.
File Menu
Table 15: File Menu
Item
Description
Save As
Saves the current table as a text file.
Save Log File
Saves the current log file as a text file.
Options
Opens the Options dialog box
Print
Prints the Targets Table.
Exit
Exits Avaya Software Update Manager. This option is unavailable
in Remote Mode.
Edit Menu
Table 16: Edit Menu
Item
Description
Select All
Selects all rows in the current table.
Issue 6 January 2008
103
Menus
View Menu
Table 17: View Menu
Item
Description
Filter
Opens the Filter Devices dialog box.
Log Report
Toggles the Log Report below the Main window.
ToolTip
Enables tool tips in the Targets Table. (This menu item is disabled
by default.)
Actions Menu
Table 18: Actions Menu
Item
Description
Download Targets
Detection
Opens the Download Targets Detection dialog box for
detecting targets on the network.
Target Details
Opens the Target Details dialog box for configuring target
parameters.
Download Now
Initiates downloading of software to the targets selected in
the Targets Table.
Schedule Download
Opens the Schedule Download dialog box for scheduling a
software download to the targets selected in the Targets
Table.
Reset
Resets the selected module(s).
104 Avaya Integrated Management Release 5.0 Software Update Manager
Tools Menu
Tools Menu
Table 19: Tools Menu
Item
Description
Software Libraries
Opens the Software Libraries dialog box for selecting the location
from which to download an image.
Image Analyzer
Analyzes the software versions available on Avaya’s website.
Retrieve Image From
the Web
Opens the Retrieve From the Web dialog box for retrieving the
latest software versions for selected targets from the Avaya
website.
Add Image File
Opens the Software Libraries dialog box.
Generate ASCA
Report
Opens ASCA Reporting dialog box.
Product Defaults
Opens the Product Defaults dialog box for viewing or changing the
default software filenames.
Help Menu
Table 20: Help Menu
Item
Description
Contents
Opens the help module contents page for information.
Help ON
Activates context-sensitive help.
About Avaya Software
Update Manager
Opens a window containing:
● Copyright information about Avaya Software Update
Manager.
● Version information about updates for specific devices.
Issue 6 January 2008
105
Menus
106 Avaya Integrated Management Release 5.0 Software Update Manager
Appendix C: Troubleshooting
This chapter contains a list of common Avaya Software Update Manager error messages, an
explanation of each message, and some possible solutions.
Table 21: Download Error Messages
Error Message
Cause
Possible Solutions
Access Violation
Access to file denied.
Check file permissions.
Cannot Start TFTP
Server
The TFTP server
cannot be started.
This error may be caused by Windows socket
problems. Try restarting your computer.
Failed to activate
download
The device is in
another download
session.
Wait a few minutes and try the download
again.
Failed to activate
download process
monitoring
The device did not
respond to SNMP or
the read community is
invalid.
Check the community and try the download
again.
Failed to copy file
The application was
incapable of creating
a temporary copy of
the software.
Check disk space and directory permissions.
Failed to erase
flash
Device internal error.
Failed to get new
version
The download was
completed
successfully, but
failed to retrieve the
new software version
from the device. This
can be the result of a
long rebooting
timeout or the device
still rebooting.
Insert the target into the table using
Download Targets Detection.
Failed to open local
file or filename is
empty
The download file
does not exist or
cannot be opened.
Check the download filename, path, and
permissions.
Failed to set TFTP
parameters.
The application could
not set the TFTP
parameters when
trying to download.
Check the write community.
1 of 2
Issue 6 January 2008
107
Troubleshooting
Table 21: Download Error Messages (continued)
Error Message
Cause
Possible Solutions
File Format
Unknown
Wrong download file.
Check the download filename and path.
File Not Found
The agent cannot
connect to the TFTP
server or cannot get
the download file.
Check if the file exists.
File Too Big
Wrong download file.
Check the download filename and path.
Flash Erasure Error
Device internal error.
Flash Write Error
Device internal error.
I/O Error While
Reading Local File
An error occurred
while reading from the
local download file.
Out Of Memory
Device internal error.
Server is
Unreachable
Device can not reach
the server.
Check the device’s routing parameters.
SNMP Error
Agent is not
responding to SNMP.
1. Check if the device responds to ping.
2. Check the SNMP community.
Note: This error may be the result of a long
network delay. Try the download again.
SNMP Error After
Download
The device did not
respond to SNMP
after the download
was completed.
This error may be the result of a long network
delay. Try to insert the device again and
check that the version matches the one
downloaded.
The file is not
accessible
according to TFTP
server
configuration
The file is not located
in a subdirectory of
the TFTP secure
server path.
Check file, path, and product defaults.
If the problem persists replace the download
file on your local machine.
2 of 2
108 Avaya Integrated Management Release 5.0 Software Update Manager
Index
Index
A
Actions menu . . . . . . . . . . . . . .
Adding targets . . . . . . . . . . . . . .
Adding, license an authentication files . . .
Analyzer State, Filtering By . . . . . . . .
ASCA Reporting
downloading inventory file to your PC .
downloading inventory script. . . . . .
filtering report. . . . . . . . . . . . .
generating report . . . . . . . . . . .
installing inventory script . . . . . . .
overview . . . . . . . . . . . . . . .
running inventory script . . . . . . . .
Assigning, license and authentication files .
Authentication Files
adding . . . . . . . . . . . . . . . .
assigning . . . . . . . . . . . . . . .
deleting . . . . . . . . . . . . . . .
viewing. . . . . . . . . . . . . . . .
Avaya Software Compatibility Audit (ASCA)
filtering . . . . . . . . . . . . . . . .
generating . . . . . . . . . . . . . .
overview . . . . . . . . . . . . . . .
Avaya Software Update Manager
starting . . . . . . . . . . . . . . . .
toolbar . . . . . . . . . . . . . . . .
user interface . . . . . . . . . . . . .
using. . . . . . . . . . . . . . . . .
Avaya Software Update Manager Overview
.
.
.
.
. . . . 104
. . . . 37
. . . . 74
. 30, 33, 35
.
.
.
.
.
.
.
.
.
.
.
.
.
.
.
.
.
.
.
.
.
.
.
.
. . 53
. . 46
. 53, 54
. . 53
. . 49
. . 45
. . 52
. . 74
.
.
.
.
.
.
.
.
.
.
.
.
.
.
.
.
.
.
.
.
74
74
75
74
. . . . . 53
. . . . . 53
. . . . . 45
.
.
.
.
.
.
.
.
.
.
.
.
.
.
.
.
.
.
.
.
.
.
.
.
.
.
.
.
.
.
.
.
.
.
.
.
.
.
.
.
.
.
.
.
.
.
.
.
.
.
.
.
.
.
.
.
.
.
.
.
.
.
.
.
.
.
.
.
.
.
.
.
.
.
.
.
. . 80
. . 44
. . 72
. . 22
. 28, 29
. . 37
. . 69
. . 73
. . 68
. . 65
. . 64
. . 66
. . 36
. . 77
. . 27
. . 70
. . 70
17
12
.11
10
. 9
C
Cancelling a delayed download . . . .
Clearing the log file . . . . . . . . .
CM Service Pack, installing . . . . . .
CM Software Management View . . .
customizing table . . . . . . . . .
detecting targets . . . . . . . . .
downloading . . . . . . . . . . .
license and authentication files . .
license and authorization files . . .
media server release management
media server software repository .
media server updates . . . . . . .
printing table . . . . . . . . . . .
schedule download . . . . . . . .
sorting table . . . . . . . . . . .
updating . . . . . . . . . . . . .
upgrading . . . . . . . . . . . .
.
.
.
.
.
.
.
.
.
.
.
.
.
.
.
.
.
.
.
.
.
.
.
.
.
.
.
.
.
.
.
.
.
.
Communication Manager
upgrading and updating . . .
Comparing software versions . .
Configuring download parameters
Configuring software library . . .
Copying files to the server . . . .
Customizing the Targets Table .
.
.
.
.
.
.
.
.
.
.
.
.
.
.
.
.
.
.
.
.
.
.
.
.
.
.
.
.
.
.
.
.
.
.
.
.
.
.
.
.
.
.
.
.
.
.
.
.
.
.
.
.
.
.
.
.
.
.
.
.
71
86
61
56
90
28
D
Defining, server proxy settings. . . . . .
Delayed download, cancelling . . . . . .
Deleting, license and authentication files .
Detecting
all targets . . . . . . . . . . . . . .
new targets . . . . . . . . . . . . .
selected targets . . . . . . . . . . .
targets . . . . . . . . . . . . . . .
using filters . . . . . . . . . . . . .
Device Type, filtering . . . . . . . . . .
Devices, update modules . . . . . . . .
Dialog
area . . . . . . . . . . . . . . . .
boxes . . . . . . . . . . . . . . . .
Download
defining source website . . . . . . .
intervals . . . . . . . . . . . . . .
retries . . . . . . . . . . . . . . .
Download files
configuring software library . . . . . .
manually adding . . . . . . . . . . .
overview . . . . . . . . . . . . . .
viewing . . . . . . . . . . . . . . .
Downloading
later . . . . . . . . . . . . . . . .
software . . . . . . . . . . . . . .
software to targets . . . . . . . . . .
status messages . . . . . . . . . .
. . . . . . 19
. . . . . . 80
. . . . . . 75
.
.
.
.
.
.
.
.
.
.
.
.
.
.
.
.
.
.
.
.
.
.
.
.
.
.
.
.
.
.
.
.
.
.
.
.
.
.
.
.
.
38
39
39
37
40
36
105
. . . . . . 13
. . . . . . 13
. . . . . . 18
. . . . . . 19
. . . . . . 19
.
.
.
.
.
.
.
.
.
.
.
.
.
.
.
.
.
.
.
.
.
.
.
.
56
90
55
59
.
.
.
.
.
.
.
.
.
.
.
.
.
.
.
.
.
.
.
.
.
.
.
.
77
95
69
75
E
Edit menu . . . . . . . . . . . . . . . . . . . . 103
Error Messages . . . . . . . . . . . . . . . . . 107
Issue 6 January 2008
109
Index
install media server updates . . . . . . .
manage software releases . . . . . . . .
manually add files to the server. . . . . .
print the Targets Table . . . . . . . . . .
reset modules . . . . . . . . . . . . . .
retrieve new versions from the web . . . .
run the ASCA inventory script . . . . . .
save the log file . . . . . . . . . . . . .
save the Targets Table . . . . . . . . .
schedule a download . . . . . . . . . .
set product defaults . . . . . . . . . . .
sort the Targets Table . . . . . . . . . .
specify software library . . . . . . . . .
start Avaya Software Update Manager . .
upgrade or update media server releases .
use on-line help . . . . . . . . . . . . .
use tool tips . . . . . . . . . . . . . . .
view download parameters . . . . . . . .
view files to download . . . . . . . . . .
view the log file . . . . . . . . . . . . .
F
File menu . . . . . . . .
File names, viewing . . .
Filter Criteria, targets table
Filter, ASCA Report . . .
Filtering
product type . . . . .
the Targets Table . . .
Filters
IP address . . . . . .
product type . . . . .
to detect targets . . .
.
.
.
.
.
.
.
.
.
.
.
.
.
.
.
.
.
.
.
.
.
.
.
.
.
.
.
.
.
.
.
.
.
.
.
.
. . . . 103
. . . . 59
. 30, 33, 35
. . . . 54
. . . . . . . . . . . . . 36
. . . . . . . . . . . . . 29
. . . . . . . . . . . . . 40
. . . . . . . . . . . . . 40
. . . . . . . . . . . . . 40
G
Gateways, Data Switches, and Circuit Packs View . .
customizing table . . . . . . . . . . . . . . . 28,
downloading . . . . . . . . . . . . . . . . . .
printing table . . . . . . . . . . . . . . . . . .
schedule download . . . . . . . . . . . . . . .
sorting table . . . . . . . . . . . . . . . . . .
Gateways, Data Switches, and Circuit packs View
detecting targets . . . . . . . . . . . . . . . .
Generate, ASCA Report . . . . . . . . . . . . . .
22
29
69
36
77
27
37
54
H
Help . . . . . . . . . . . . . . . . . . .
Help menu . . . . . . . . . . . . . . . .
How to
add targets to the Targets Table . . . . .
assign license and authentication files . .
cancel a delayed download . . . . . . .
check software update status . . . . . .
clear the log file . . . . . . . . . . . . .
compare software versions . . . . . . .
configure download parameters . . . . .
copy files to the server . . . . . . . . .
customize the Targets Table. . . . . . .
define download intervals . . . . . . . .
define remote software library . . . . . .
define server proxy settings . . . . . . .
define SFAP login parameters . . . . . .
define source website . . . . . . . . . .
download ASCA inventory file to your PC.
download ASCA inventory script . . . . .
download software . . . . . . . . . . .
Filter ASCA Report . . . . . . . . . . .
filter the Targets Table . . . . . . . . .
generate ASCA HTML Report . . . . . .
generate ASCA report . . . . . . . . .
import files to a software library . . . . .
install ASCA inventory script . . . . . . .
. . . . 14
. . . . 105
.
.
.
.
.
.
.
.
.
.
.
.
.
.
.
.
.
.
.
.
.
.
.
.
.
.
.
.
.
.
.
.
.
.
.
.
.
.
.
.
.
.
.
.
.
.
.
.
.
.
.
.
.
.
.
.
.
.
.
.
.
.
.
.
.
.
.
.
.
.
.
.
.
.
.
.
.
.
.
.
.
.
.
.
.
.
.
.
.
.
.
.
37
74
80
86
44
86
61
90
28
19
57
19
20
18
53
46
69
54
29
53
45
98
49
.
.
.
.
.
.
.
.
.
.
.
.
.
.
.
.
.
.
.
.
.
.
.
.
.
.
.
.
.
.
.
.
.
.
.
.
.
.
.
.
.
.
.
.
.
.
.
.
.
.
.
.
.
.
.
.
.
.
.
.
.
.
.
.
.
.
.
.
.
.
.
.
.
.
.
.
.
.
.
.
66
65
90
36
81
86
52
44
36
77
82
27
56
17
71
14
14
61
59
43
I
Icons, status icons . . . . . . . .
Importing Files to a Software library
Importing targets . . . . . . . . .
Installing
CM service update . . . . . .
platform/security update . . . .
IP Phones Software Libraries
downloading . . . . . . . . .
importing files . . . . . . . . .
IP Phones Software Libraries View
IP Phones View . . . . . . . . .
. . . . . . . . . 23
. . . . . . . . . 98
. . . . . . . . . 37
. . . . . . . . . 72
. . . . . . . . . 73
.
.
.
.
.
.
.
.
.
.
.
.
.
.
.
.
.
.
.
.
.
.
.
.
.
.
.
.
.
.
.
.
.
.
.
.
95
98
94
22
L
License and Authentication Files
adding . . . . . . . . . . . . . . . .
deleting . . . . . . . . . . . . . . . .
viewing . . . . . . . . . . . . . . . .
License and Authentication files
assigning . . . . . . . . . . . . . . .
installation . . . . . . . . . . . . . .
management . . . . . . . . . . . . .
License and authorization file management
Log file
clearing . . . . . . . . . . . . . . . .
saving . . . . . . . . . . . . . . . .
viewing . . . . . . . . . . . . . . . .
Login Parameters, SFAP . . . . . . . . .
110 Avaya Integrated Management Release 5.0 Software Update Manager
. . . . . 74
. . . . . 75
. . . . . 74
.
.
.
.
.
.
.
.
.
.
.
.
.
.
.
.
.
.
.
.
.
.
.
.
.
.
.
.
.
.
.
.
. . 44
. . 44
43, 98
. . 20
74
73
73
68
Index
M
Manually adding files to the server . . . . .
Media Server
configuring software repository . . . . .
license and authentication files . . . . .
license and authorization file management
release management . . . . . . . . . .
service update installation . . . . . . . .
updating . . . . . . . . . . . . . . . .
upgrading . . . . . . . . . . . . . . .
Media Server Operations . . . . . . . . . .
. . . . 90
.
.
.
.
.
.
.
.
.
.
.
.
.
.
.
.
.
.
.
.
.
.
.
.
.
.
.
.
.
.
.
.
64
73
68
65
66
70
70
66
O
On-line help . . . . . . . . . . . .
Overview
ASCA Reporting . . . . . . . .
Avaya Software Update Manager
download files . . . . . . . . .
. . . . . . . . 14
. . . . . . . . 45
. . . . . . . . . 9
. . . . . . . . 55
Software
checking update status . . . . . . .
comparing versions . . . . . . . . .
retrieving versions . . . . . . . . . .
Software Downloads, scheduling . . . .
Software Library
parameters . . . . . . . . . . . . .
Software library
add file . . . . . . . . . . . . . . .
configuring . . . . . . . . . . . . .
define remote library . . . . . . . . .
delete file . . . . . . . . . . . . . .
Software Releases, managing . . . . . .
Software Type, Filtering By . . . . . . .
Sorting the Targets Table . . . . . . . .
Starting Avaya Software Update Manager
Status
downloading messages . . . . . . .
icons . . . . . . . . . . . . . . . .
Status Line . . . . . . . . . . . . . . .
.
.
.
.
.
.
.
.
.
.
.
.
.
.
.
.
.
.
.
.
.
.
.
.
86
86
86
79
. . . . . . 58
.
.
.
.
.
.
.
.
.
.
.
.
.
.
.
.
.
.
.
.
.
.
.
.
.
.
.
.
.
.
.
. 60
. 56
. 57
. 60
. 65
30, 33, 35
. . . . 27
. . . . 17
. . . . . . 75
. . . . . . 23
. . . . . . 13
T
P
Parameters
download . . . . . . . . . .
software libraries . . . . . . .
Platform/Security Update, installing
Printing the Targets Table . . . .
Product Defaults, setting . . . . .
Product type, filtering by . . . . .
Proxy Settings, Defining . . . . .
.
.
.
.
.
.
.
.
.
.
.
.
.
.
.
.
.
.
.
.
.
.
.
.
.
.
.
.
.
.
.
.
.
.
.
.
.
.
.
.
.
.
.
.
.
.
.
.
.
.
.
.
.
.
.
.
.
.
.
.
.
.
.
62
58
73
36
82
36
19
R
Remote library, XML index file . . . . . . . . . . . 101
Resetting modules . . . . . . . . . . . . . . . . . 81
Retrieving, Software from the Web . . . . . . . . . 86
S
Saving
the log file . . . . . . . . .
the Targets Table . . . . . .
Scheduled Downloads . . . . .
cancelling . . . . . . . . .
Scheduling, Software Downloads
Server Proxy Settings, defining .
Service Packs
cm software management . .
installation . . . . . . . . .
SFAP
defining . . . . . . . . . .
login parameters . . . . . .
.
.
.
.
.
.
.
.
.
.
.
.
.
.
.
.
.
.
.
.
.
.
.
.
.
.
.
.
.
.
.
.
.
.
.
.
.
.
.
.
.
.
.
.
.
.
.
.
.
.
.
.
.
.
.
.
.
.
.
.
44
36
77
80
79
19
Table
of targets . . . . . . . . . . . . . . . . . . 24, 26
views . . . . . . . . . . . . . . . . . . . . 24, 26
Tabs . . . . . . . . . . . . . . . . . . . . . . . . 13
Targets
adding to the Targets Table . . . . . . . . . . . 37
detecting . . . . . . . . . . . . . . . . . . . . 37
downloading software to . . . . . . . . . . . . . 69
importing . . . . . . . . . . . . . . . . . . . . 37
viewing parameters . . . . . . . . . . . . . . . 61
Targets Table . . . . . . . . . . . . . . . . . 24, 26
adding targets . . . . . . . . . . . . . . . . . . 37
cm software management view . . . . . . . . 22, 26
customizing . . . . . . . . . . . . . . . . . . . 28
filter criteria . . . . . . . . . . . . . . . 30, 33, 35
filtering . . . . . . . . . . . . . . . . . . . . . 29
gateways, data switches, and circuit packs view 22, 24
parameters . . . . . . . . . . . . . . . . . 24, 26
printing . . . . . . . . . . . . . . . . . . . . . 36
saving . . . . . . . . . . . . . . . . . . . . . 36
sorting . . . . . . . . . . . . . . . . . . . . . 27
views . . . . . . . . . . . . . . . . . . . . . . 21
Toolbar . . . . . . . . . . . . . . . . . . . . . . 12
Tools menu . . . . . . . . . . . . . . . . . . . 105
Tooltips . . . . . . . . . . . . . . . . . . . . . . 14
Troubleshooting . . . . . . . . . . . . . . . . . 107
. . . . . . . . . . 70
. . . . . . . . . . 66
. . . . . . . . . . 17
. . . . . . . . . . 20
Issue 6 January 2008
111
Index
U
Update modules . . . . . . . . . . . . . . . . . . 105
Updates, Communication Manager . . . . . . . . . 71
Upgrading, Communication Manager . . . . . . . . 71
User interface . . . . . . . . . . . . . . . . . . . .11
cm software management targets table . . . . . 26
cm software management view . . . . . . . . . 22
dialog area . . . . . . . . . . . . . . . . . . . 13
gateways, data switches, and circuit packs targets table
24
gateways, data switches, and circuit packs view . 22
IP phones software libraries view . . . . . . . . 94
IP phones view . . . . . . . . . . . . . . . . . 22
on-line help. . . . . . . . . . . . . . . . . . . 14
table tabs . . . . . . . . . . . . . . . . . . . 13
table views . . . . . . . . . . . . . . . . . . 24, 26
Targets Table . . . . . . . . . . . . . . . . 24, 26
toolbar . . . . . . . . . . . . . . . . . . . . . 12
tooltips . . . . . . . . . . . . . . . . . . . . . 14
V
View
CM software management view
IP phones software libraries . .
View menu . . . . . . . . . . .
View tabs . . . . . . . . . . . .
Viewing
download parameters . . . . .
license and authentication files
log file . . . . . . . . . . . .
.
.
.
.
.
.
.
.
.
.
.
.
.
.
.
.
.
.
.
.
.
.
.
.
.
.
.
.
. . 22
. . 22
. . 104
. 13, 21
. . . . . . . . . 61
. . . . . . . . . 74
. . . . . . . . 43, 98
W
Website, defining download website . . . . . . . . . 18
Wildcards . . . . . . . . . . . . . . . . . . . . . 41
X
XML index file . . . . . . . . . . . . . . . . . . . 101
112 Avaya Integrated Management Release 5.0 Software Update Manager