1
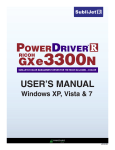
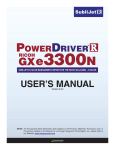
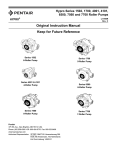
77
77
USER’S MANUAL
Windows 8
v20130425
Ricoh GXe 7700N
PowerDriver-R User’s Manual - Windows 8
PowerDriver-R is equipped with a user-friendly software interface that allows individuals to access and
customize driver configuration settings for optimal printing performance. As an added bonus, PowerDriver-R
is also outfitted with several resource and utility features to bring additional help and support for customers looking to bolster their printing experience. Through these powerful features, users are able to
gain complete control over their image quality, color output and print options.
1)
To view the PowerDriver-R configuration settings, hold down the Windows logo key on your keyboard,
then press the letter “x”. This will open the screen below. Select Control Panel (see FIGURE 1A). Then
select Devices and Printers in the Control Panel window (see FIGURE 1B).
FIGURE 1A
FIGURE 1B
2) In the Devices and Printers folder, right-click on the PowerDriver-R GXe 7700N icon and select Printing Preferences (see FIGURE 2). This will open the PowerDriver-R Printing Preferences window (see FIGURE 3).
NOTE: You can also access the PowerDriver printing Preferences window by clicking “Print
Properties” or “Print Preferences” within the print window of your graphic design software.
PowerDriver R
GXe7700N
A
B
FIGURE 2
PAGE 1 of 9 >>
SubliJet-R: Ricoh GX e7700N
PowerDriver-R User’s Manual - Windows 8
3)
With the PowerDriver-R GXe7700N Printing Preference window open, click the Virtual Printer Driver
tab. Here you will find five different SECTIONS to utilize: (see FIGURE 3)
FIGURE 3
SECTION 1 Paper Configuration Choose Paper Size and Type, Copies and Substrate
SECTION 2 Driver Configuration Select OEM printer intended for use
SECTION 3 Output Adjust Color, Create Palette and Mirror Image
SECTION 4 Resources Access Documentation, Help and Online Support
SECTION 5 Utilities Access Resources intended for Printer Maintenance
PAGE 2 of 9 >>
SubliJet-R: Ricoh GX e7700N
PowerDriver-R User’s Manual - Windows 8
SECTION 1
Copies
Sets the number of prints needed per image. Use this feature when multiple prints of
the same image are needed.
Paper Size
Sets the desired output paper size used in the printer. Adjust this to match the size of
the transfer paper in the paper tray.
Substrate
Sets the desired substrate being used. Match this to the type of material on to which
you will be transferring your printed image. Because PowerDriver’s color management is optimized for each substrate listed, it is important to choose the substrate that
most closely matches the substrate being used.
Paper Type
Sets the desired paper type being used. Match this to the type of transfer paper you
will be printing on. Because PowerDriver’s color management is optimized for each
paper type listed, it is important to choose the paper type that most closely matches
the transfer paper being used.
SECTION 2
OEM
Sets the OEM printer intended for use with PowerDriver-R. This feature is particularly
useful when printing to multiple printers of the same ink set or multiple printers that
require multiple drivers. For instance, if you have two GXe7700N’s and one is for
printing ChromaBlast-R while the other is for printing SubliJet-R, you are able to set
the printer loaded with SubliJet-R as the default printer in the PowerDriver-R or vice
versa. On the other hand, if you have two GXe7700N’s and both are for printing with
SubliJet-R, you can choose between each printer per print job.
PAGE 3 of 9 >>
SubliJet-R: Ricoh GX e7700N
PowerDriver-R User’s Manual - Windows 8
SECTION 3
Realistic
This setting is intended as a photographic color management solution. It is most
suitable for photographic images containing landscapes or portraits.
Saturated
This setting is intended as a business graphics color management solution. It is
most suitable for business logos and designs that require a more vivid color output.
Intense
This setting is similar to “Saturated”, but has a deeper/more vivid output. It is most
suitable when the “Saturated” setting does not output the desired amount of “pop” or
color needed.
Grayscale
This setting is intended for printing monochromatic or black and white images. It
allows you to print images using varying shades of gray only.
Mirror
Check this box to “flip” or reverse your image. The image becomes reversed when
transferring from paper to substrate. Therefore, you will need to “flip” or reverse the
image before printing to paper.
ColorSure
Check this box if you want to use the ColorSure color palette. ColorSure is a method for reproducing exact spot colors. By picking colors from the ColorSure Palette,
you will be able to consistently reproduce colors in a reliable manner.
Custom Palette Here you can add your own unique colors to the ColorSure palette. ColorSure must
be checked in Color Options in order to use this feature.
Print Palette
Click here to print the default ColorSure Palette. This feature allows you to see how
colors will look once transferred to your desired substrate. Before you print the
ColorSure Palette, be sure to choose the paper size, paper type and substrate that
most closely resemble those which you are using. The default ColorSure Palette will
also contain custom colors once you have added and saved them using the Custom
Palette utility.
Classic 7000
Specifically developed to replicate the image quality and color output of the Ricoh
GX7000. Classic 7000 provides continuity and compatibility for legacy images
when upgrading to or adding Ricoh GXe7700N platforms. Also provides higher print
speed for potentially higher productivity.
High Res.
When compared to the Classic 7000 setting, High Resolution provides higher
quality, smoother gradients and more vivid color for sublimation images.
Photo
Provides ultra-high resolution prints with professional image quality for critical hotographic and high resolution sublimation applications.
p
PAGE 4 of 9 >>
SubliJet-R: Ricoh GX e7700N
PowerDriver-R User’s Manual - Windows 8
SECTION 4
Help
Click here to access general information about PowerDriver-R. The help dialog
menu also contains a direct links to our website, where you can find the latest
driver updates, literature and educational resources offered by Sawgrass Technologies, Inc.
Documentation
Click here to view and/or download the latest documentation which will guide you
through the installation, registration and setup of your printer, driver and software.
Register
Click here to register your product. Registration is required to unlock all product
features and functions that PowerDriver-R has to offer. You must register PowerDriver-R for every PC on which it is installed.
Sawgrassink.com
Click here to access the Sawgrass Technologies, Inc. website. You will find the
absolute latest information and updates on all products, materials, processes,
and/or procedures relative to all offerings by or through Sawgrass Technologies,
Inc.
SECTION 5
Nozzle check
Click here to print a test pattern to check nozzle condition. If any of the nozzle
patterns are missing or incomplete, then a head cleaning is required.
Head Cleaning
Click here to initiate the head cleaning process. This feature is necessary when
nozzles are missing thus causing color shift or “banding” in your printed images.
You should print a nozzle check to confirm missing nozzles before performing
a head cleaning. Repeat the Head Cleaning until a complete nozzle check has
been achieved. Cartridge users should only perform two (2) head cleanings,
while users of bulk ink systems can try up to five (5). Contact technical support
if you fail to achieve a good / complete nozzle check after the recommended
amount of cleanings.
Print Primary
Click here to print a primary ink chart. This chart contains a series of blocks
which represent each ink channel on the print head. It can be useful when attempting to troubleshoot or trying to clear clogged nozzles.
File Spooler
Click here to launch the File Spooler Utility. This feature is solely intended for
advanced users and technical support for troubleshooting. It allows you to print
jobs that were previously processed and saved to disk as text files or print ready
files, also known as PRN files.
PAGE 5 of 9 >>
SubliJet-R: Ricoh GX e7700N
PowerDriver-R User’s Manual - Windows 8
4)
At the top of the PowerDriver-R GXe7700N Printing Preference window, click the Layout tab. Here you
will find four different SECTIONS to utilize: (see FIGURE 4).
FIGURE 4
SECTION 6 Orientation Choose the direction in which an image is printed
SECTION 7 Page Order Sets the chronological order when printing images
SECTION 8 Page Format Adjust the number of pages per sheet
SECTION 9 Advanced…Access the current Document Settings
PAGE 6 of 9 >>
SubliJet-R: Ricoh GX e7700N
PowerDriver-R User’s Manual - Windows 8
SECTION 6
Portrait
With this selection the page height is longer than the width. In other words, the
image is printed vertically from top to bottom.
Landscape
With this selection the page width is longer than the height. In other words, the
image is printed horizontally from left to right.
SECTION 7
Front to Back
Using this setting will print the first image first and the last image last. For instance, if 4 different images are printed at the same time, they will print in the
following order: 1, 2, 3 and 4.
Back to Front
Using this setting will print the last image first and the first image last. For instance, if 4 different images are printed at the same time, they will print in the
following order: 4, 3, 2 and 1.
SECTION 8
Pages per Sheet
Allows you to fit multiple pages on a single sheet of paper. The default value 1
should be used when printing one image/page per sheet.
Draw Borders
Prints frames around the pages printed on each sheet.
SECTION 9
Document Settings Click here for an overview of the default advanced document settings. These
settings have been specifically engineered per printer platform and should not
be adjusted by the end user.
PAGE 7 of 9 >>
SubliJet-R: Ricoh GX e7700N
PowerDriver-R User’s Manual - Windows 8
5)
At the top of the PowerDriver-R GXe7700N Printing Preference window, click the Paper/Quality tab. Here you will find three different SECTIONS to utilize: (see FIGURE 5).
FIGURE 5
SECTION 10 Tray Selection Allows you to select the printer’s paper source
SECTION 11 Color This default is locked and controlled by PowerDriver-R
SECTION 12 Advanced…Access the current Document Settings
PAGE 8 of 9 >>
SubliJet-R: Ricoh GX e7700N
PowerDriver-R User’s Manual - Windows 8
SECTION 10
Automatically Select
Use this setting if you would like the printer driver to select the appropriate tray
as your paper source.
Tray 1
Use this setting if you plan to use the primary paper tray as your paper source.
It is recommended to use this as your default paper source.
Bypass Tray
Use this setting if your printer is equipped with an additional tray which you
would like to use as your primary paper source.
SECTION 11
Black & White
This setting has been specifically engineered per printer platform and should not
be adjusted by the end user.
Color
This setting has been specifically engineered per printer platform and should not
be adjusted by the end user.
SECTION 12
Document Settings Click here for an overview of the default advanced document settings. These
settings have been specifically engineered per printer platform and should not
be adjusted by the end user.
PAGE 9 of 9 >>