1
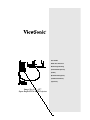
User Guide Guide de l’utilisateur Bedienungsanleitung (International Spanish) (Italian) (Brazilian Portuguese) (Traditional Chinese) (Japanese) Image Size 17” – 217” Super Bright SVGA DMD Projector AC PLUG CORD PRECAUTIONS FOR THE UNITED KINGDOM FOR YOUR SAFETY PLEASE READ THE FOLLOWING TEXT CAREFULLY. IF THE FITTED MOULDED PLUG IS UNSUITABLE FOR THE SOCKET OUTLET THEN THE PLUG SHOULD BE CUT OFF AND DISPOSED OF SAFELY. THERE IS A DANGER OF SEVERE ELECTRICAL SHOCK IF THE CUT OFF PLUG IS INSERTED INTO AN APPROPRIATE SOCKET. If a new plug is to be fitted, please observe the wiring code as shown below. If in any doubt, please consult a qualified electrician. WARNING: THIS APPLIANCE MUST BE EARTHED. IMPORTANT: The wires in this mains lead are coloured in accordance with the following code: Green-and-Yellow: Earth Blue: Neutral Brown: Live If the coloured wires of the mains lead of this appliance do not correspond with the coloured markings identifying the terminals in your plug, proceed as follows: The wire which is coloured GREEN-AND-YELLOW must be connected to the terminal in the plug which is marked by the letter E or by the Earth symbol or coloured GREEN or GREENAND-YELLOW. The wire which is coloured BLUE must be connected to the terminal in the plug which is marked with the letter N or coloured BLACK. The wire which is coloured BROWN must be connected to the terminal in the plug which is marked with the letter L or coloured RED. FCC Information This equipment has been tested and found to comply with the limits for a Class B digital device, pursuant to part 15 of the FCC Rules. These limits are designed to provide reasonable protection against harmful interference in a residential installation. This equipment generates, uses, and can radiate radio frequency energy, and if not installed and used in accordance with the instructions, may cause harmful interference to radio communications. However, there is no guarantee that interference will not occur in a particular installation. If this equipment does cause harmful interference to radio or television reception, which can be determined by turning the equipment off and on, the user is encouraged to try to correct the interference by one or more of the following measures: • Reorient or relocate the receiving antenna. • Increase the separation between the equipment and receiver. • Connect the equipment into an outlet on a circuit different from that to which the receiver is connected. • Consult the dealer or an experienced radio/TV technician for help. FCC Warning To assure continued FCC compliance, the user must use grounded power supply cord and the provided shielded video interface cable with bonded ferrite cores. If a BNC cable is going to be used, use only a shielded BNC(5) cable. Also, any unauthorized changes or modifications not expressly approved by the party responsible for compliance could void the user's authority to operate this device. CE Conformity The device complies with the requirements of the EEC directive 89/336/EEC as amended by 92/31/EEC and 93/68/EEC Art.5 with regard to “Electromagnetic compatibility,” and 73/23/EEC as amended by 93/68/EEC Art.13 with regard to “Safety.” Copyright © ViewSonic Corporation, 2000. All right reserved. Macintosh, Mac and Power Macintosh are registered trademarks of Apple Computer, Inc. Microsoft, Windows, Windows NT, and the Windows logo are registered trademarks of Microsoft Corporation in the United States and other countries. ViewSonic, the three birds logo and OnView are registered trademarks of ViewSonic Corporation. VESA is a registered trademark of the Video Electronics Standards Association. DPMS and DDC are trademarks of VESA. Disclaimer: ViewSonic Corporation shall not be liable for technical or editorial errors or omissions contained herein; nor for incidental or consequential damages resulting from furnishing this material, or the performance or use this product. In the interest of continuing product improvement, ViewSonic Corporation reserves the right to change product specifications without notice. Information in this document may change without notice. No part of this document may be copied, reproduced, or transmitted by any means, for any purpose without prior written permission from ViewSonic Corporation. Electronic Warranty Registration To meet your future needs, and to receive any additional product information as it becomes available, please register your projector's warranty on the Internet at: http://www.viewsonic.com For Your Records Product Name: ViewSonic PJ875 Model Number: VPROJ22277-1W Document Number: PJ875_UG_93 Serial Number: _______________________ Purchase Date: _______________________ Customer Support Country/Region T = Telephone, F = FAX United States T: Email Canada i LIMITED WARRANTY What the warranty covers: VIEWSONIC Projector ViewSonic® warrants its products to be free from defects in material and workmanship during the warranty period. If a product proves to be defective in material or workmanship during the warranty period, ViewSonic will at its sole option repair or replace the product with a like product. Replacement product or parts may include remanufactured or refurbished parts or components. How long the warranty is effective: ViewSonic projectors are warranted for two (2) years for all parts excluding the lamp, two (2) years for all labor, and ninety (90) days for the lamp from the date of the first consumer purchase. Who the warranty protects: This warranty is valid only for the first consumer purchaser. What the warranty does not cover: 1. 2. Any product on which the serial number has been defaced, modified or removed. Damage, deterioration or malfunction resulting from: a. Accident, misuse, neglect, fire, water, lightning, or other acts of nature, unauthorized product modification, or failure to follow instructions supplied with the product. b. Repair or attempted repair by anyone not authorized by ViewSonic. c. Any damage of the product due to shipment. d. Removal or installation of the product. e. Causes external to the product, such as electric power fluctuations or failure. f. Use of supplies or parts not meeting ViewSonic’s specifications. g. Normal wear and tear. h. Any other cause which does not relate to a product defect. 3. Removal, installation, and set-up service charges. How to get service: 1. 2. 3. 4. For information about receiving service under warranty, contact ViewSonic Customer Support. You will need to provide your product’s serial number. To obtain warranted service, you will be required to provide (a) the original dated sales slip, (b) your name, (c) your address, (d) a description of the problem, and (e) the serial number of the product. Take or ship the product freight prepaid in the original container to an authorized ViewSonic service center or ViewSonic. For additional information or the name of the nearest ViewSonic service center, contact ViewSonic. Limitation of implied warranties: THERE ARE NO WARRANTIES, EXPRESS OR IMPLIED, WHICH EXTEND BEYOND THE DESCRIPTION CONTAINED HEREIN INCLUDING THE IMPLIED WARRANTY OF MERCHANTABILITY AND FITNESS FOR A PARTICULAR PURPOSE. Exclusion of damages: VIEWSONIC’S LIABILITY IS LIMITED TO THE COST OF REPAIR OR REPLACEMENT OF THE PRODUCT. VIEWSONIC SHALL NOT BE LIABLE FOR: 1. DAMAGE TO OTHER PROPERTY CAUSED BY ANY DEFECTS IN THE PRODUCT, DAMAGES BASED UPON INCONVENIENCE, LOSS OF USE OF THE PRODUCT, LOSS OF TIME, LOSS OF PROFITS, LOSS OF BUSINESS OPPORTUNITY, LOSS OF GOODWILL, INTERFERENCE WITH BUSINESS RELATIONSHIPS, OR OTHER COMMERCIAL LOSS, EVEN IF ADVISED OF THE POSSIBILITY OF SUCH DAMAGES. 2. ANY OTHER DAMAGES, WHETHER INCIDENTAL, CONSEQUENTIAL OR OTHERWISE. 3. ANY CLAIM AGAINST THE CUSTOMER BY ANY OTHER PARTY. Effect of state law: This warranty gives you specific legal rights, and you may also have other rights which vary from state to state. Some states do not allow limitations on implied warranties and/or do not allow the exclusion of incidental or consequential damages, so the above limitations and exclusions may not apply to you. Sales outside the U.S.A. and Canada: For warranty information and service on ViewSonic products sold outside of the U.S.A. and Canada, contact ViewSonic or your local ViewSonic dealer. Projector Warranty (V2.0) Release Date: 10-15-1999 ii 1 English Table of Contents Usage Notice Precautions .......................................................................................... 2 Introduction Product Features .................................................................................. 3 Package Overview ............................................................................... 4 Product Overview ................................................................................. 5 Installation Connecting the Projector to Desktop Computer ................................... Connecting the Projector to Portable Computer ................................... Connecting the Projector to Other Video Sources ............................... Powering On/Off the Projection Display ............................................... Adjusting the Projected Image .............................................................. 8 9 10 12 14 User Controls Panel Control & Remote Control .......................................................... 16 On-Screen Display Menus ................................................................... 18 Appendices Troubleshooting .................................................................................... Changing the Lamp ............................................................................... Specifications ....................................................................................... Compatibility Modes ............................................................................. 22 25 26 27 2 English Usage Notice Warning- Do not look into the lens. The bright light may hurt your eyes. Warning- To reduce the risk of fire or electric shock, do not expose this product to rain or moisture. Warning- Please do not open or disassemble the product as this may cause electric shock. Warning- When changing the lamp, please allow unit to cool down, and follow all changing instructions. Warning- This product will detect the life of the lamp itself. Please be sure to change the lamp when it shows warning messages. Warning- After changing a new lamp, please reset the lamp life from OSD menu. Warning- Before switching off the product, please keep the cooling fan running for a few minutes. Precautions Follow all warnings, precautions and maintenance as recommended in this user’s manual to maximize the life of your unit. Do: q q q Turn off the product before cleaning. Use a soft cloth moistened with mild detergent to clean the display housing. Disconnect the power plug from AC outlet if the product is not being used for a long period of time. Don’t: q q q Block the slots and openings on the unit provided for ventilation. Use abrasive cleaners, waxes or solvents for your cleaning. Use under the following conditions: - Extremely hot, cold or humid environment. - In areas susceptible to excessive dust and dirt. - Near any appliance generating a strong magnetic field. - Place in direct sunlight. 3 English Introduction Product Features This product, is an SVGA single chip 0.7”DLPä Projector. The outstanding features of it are listed as follows: q True SVGA, 800 x 600 addressable pixels q 5 lbs (2.3 kgs) lightweight compact design q Single chip DLPä technology q XGA compression and VGA re-sizing q 150 Watts user replaceable P-VIP lamp q Mac/NEC PC-98/FM Towns compatible q NTSC/NTSC4.43/PAL/PAL-N/PAL-M/SECAM Video compatible q Full function wireless remote controller q One touch auto image function for easy setup q User friendly Multilingual on-screen display menu q Advanced electronic keystone correction and picture in picture function q Luxurious carrying case included 4 English Package Overview This projection display comes with all the items shown below. Check to make sure your unit is complete. Contact your dealer immediately if anything is missing. Projection Display S-Video Cable Audio Cable Remote Control Power Cord VGA Cable Audio-In Cable for Computer Composite Video Cable User’s Manual Carrying Case Warranty Card 5 English 6 English Connection Ports Composite Video Connector S-video Connector COMPUTER IN IN S-VIDEO VIDEO Power Connector OUT AUDIO Computer Input Connector Audio Iuput Connector Audio Output Connector Power Switch Panel Control Four Directional Select Keys Menu Power / Standby Reset Temperature Source Lamp Enter 7 English Remote Control Source Reset Freeze/CLR Power / Standby Resync Mute Picture in Picture Menu Keystone Correction Volume ( + / - ) Four Directional Select Keys Enter Zoom In / Zoom Out 8 English Installation Connecting the Projector to Desktop Computer 1. Make sure the projector and your computer are turned off. 2. Connect one end of the projector signal cable to the projector; connect the other end to the VGA connector on the computer and tighten the screws. 3. Connect one end of the power cord into the back of projector; connect the other end to an electrical outlet. Computer Output VGA Cable Power Cord v To ensure the projection display works well with your computer, please configure the display mode of your graphic card to make it less than or equal to 800 X 600 resolution. Make sure timimg of the display mode is compatible with the projection display. Refer to the“Compatibility Modes”section on page 27. 9 English COMPUTER IN S-VIDEO VIDEO IN OUT AUDIO 10 English Connecting the Projector to Other Video Sources v If your video player uses a round, one-prong composite video connector, you’ll need the video cable. If your video player uses a round, four-prong s-video connector, you’ll need the s-video cable ( See page 11 for detail information). Both cables are shipped with the projector. If you use the video cable: 1. Plug the video cable connector into the “Video out”port on your video player; plug the other end into the “Video”port on your projector. 2. Plug the audio cable white connector into the left “Audio out” port on your video player; plug the cable’s red connector into the right “Audio out” port on the video player; plug the other end into the “Audio in” port on your projector. 3. If you need to use an external speaker (built in amplifier), plug the audio cable white connector into the “Audio in” port on your speaker; plug the cable’s red connector into the red “Audio in” port on the speaker; plug the other end into the “Audio out” port on the projector. 4. Connect one end of the power cord into the back of projector; connect the other end to an electrical outlet. Video Output Audio Output Audio In Port Audio Cable Audio Cable Video Cable Power Cord Video Port Audio Out Port 11 English If you use the s-video cable: 1. Plug the s-video cable connector into the “S-Video”port on your video player; plug the other end into the “S-Video” port on your projector. 2. Plug the audio cable white connector into the left “Audio out” port on your video player; plug the cable’s red connector into the right “Audio out” port on the video player; plug the other end into the “Audio in” port on your projector. 3. If you need to use an external speaker (built in amplifier), plug the audio cable white connector into the white “Audio in” port on your speaker; plug the cable’s red connector into the red “Audio in” port on the speaker; plug the other end into the “Audio out” port on your projector. 4. Connect one end of the power cord into the back of projector; connect the other end to an electrical outlet. S-Video Output Audio Output Audio in port Audio Cable Audio Cable COMPUTER IN S-Video Cable S-VIDEO S- Video port Power Cord VIDEO IN OUT AUDIO Audio out port 12 English Power On/Off the Projection Display u Powering On the Projection Display 1. Remove the lens cap. 2. Ensure that the power cord and signal cable are securely connected. 3. Turn on the main power switch on the back of the projector and allow the projector to warm up for 1-2 minutes. 4. Turn on the lamp by pressing “Power/Standby” button on the Panel Control. The startup screen will display for 30 seconds and the Power/Standby indicator will light solid green. 5. Turn on your source (computer, notebook, or video player ,etc.). The projector will detect your source automatically. * If the screen displays “No Signal” , please make sure the signal cables are securely connected. * If you connect multiple sources at the same time, use the “Source” button on the Remote Control or Panel Control to switch. Power/ Standby Lens cap Power Switch 13 English u Powering Off the Projection Display 1. Press the “Power/Standby” button to turn off the projector lamp. 2. After pressing the “Power/Standby” button, you will see a message “ Power off the lamp? ” on the on-screen display. Press the “Power/Standby” button again to confirm. Otherwise the message will disappear after 5 seconds. 3. “LAMP “ LED indicator will flash amber for about one minute. After the “LAMP” LED indicator stops flashing , you can turn off the main power switch on the back of the projector. *If you want to turn on the main power switch immediately, you must allow about 10 minutes for thermal dissipation. 4. Disconnect the power cord from the electrical outlet and the projector. * When the “LAMP” indicator lights solid amber; please change the lamp module immediately. * When the “TEMP” indicator lights solid amber, it indicates the display has been overheated. The display will automatically shut itself down. Under normal conditions, the display can be switched on again for your presentation. If the problem persists, you should contact your local dealer or our service center. 14 English Adjusting the Projected Image u Adjusting the Projector Height The projector is equipped with an elevator foot for adjusting the projector height. To raise the projector: 1. Press and hold the elevator button . 2. Raise the projector to the desired display angle , then release the button to lock the elevator foot into position. To lower the projector: 1. Press and hold the elevator button. 2. Lower down the projector, then release the button to lock the elevator foot into position. Elevator Button Elevator Foot * When you adjust the projector height; please place the projector on a flat surface and avoid falling down of the projector. * For safety purpose, when you adjust the projector height; please loosen the wheels under the elevator foot and pull the stands out . 15 English u Adjusting the Projector Focus To focus the image, rotate the focus ring until the image is clear. The projector will focus at distances from 3.3 feet to 32.8 feet (1m to 10m). Zoom Ring Focus Ring u Image Size Adjustment 16 English User Controls Panel Control & Remote Control There are two ways for you to control the functions: Remote Control and Panel Control. Remote Control Power / Standby 4 Power the lamp on and off when the main power switch is turned on. Menu 4 Press “Menu” to open the on-screen display (OSD) menus and to switch among different menus. To exit OSD, press the “Freeze/CLR” button or select the “ Exit Menu” icon and press “Enter” button. The projector saves any changes you made automatically. Source 4 Press “Source” to choose between video and computer sources. Reset 4 When you press the “Reset” button, the OSD menus displays a message “Reset All Yes/NO ? ”. Select “Yes” to confirm or select “ No” to cancel.This function will reset all user adjustable parameters to factory default settings. Mute 4 Silences the speaker. 17 English Enter 4 Press “Enter” to confirm your selection. Four Directional Select Keys 4 Use Volume or to select items. Use or to make adjustments for your selection. 4 To increase the volume, press 4 To decrease the volume, press 4 To mute the volume, press “Mute” Resync 4 Automatically synchronizes the projector to the input source. Freeze/CLR 4 Press the “Freeze/CLR” button to still the screen image. 4When the OSD is displayed, press the “Freeze/CLR” button to exit the OSD. PIP (Picture in Picture) 4 Display a video source image on a small screen. (Computer mode only). Please refer to “Page 20” for more information. Zoom In (Computer mode only) 4 Magnifies an image up to a factor of 32 times on the projection screen. 4 When the “Zoom” icon is displayed, you can use the four directional select keys to change the vertical or horizontal positioning of the image. Zoom Out (Computer mode only) 4 Diminishes the zoom in image. 4 When the “Zoom” icon is displayed, you can use the four directional select keys to change the vertical or horizontal positioning of the image. Keystone 4 Adjusts image distortion caused by tilting the projector. 18 English On-Screen Display Menus How to operate 4 The Projector has a multilingual On-Screen Display(OSD) menu that allows you to make image adjustments and change a variety of settings. In computer source, the OSD will be the “Computer OSD”. In video source, the OSD will be the “ Video OSD”. The projector will detect the source automatically. 4To open the OSD menu, press the “menu” button on the Remote Control or Panel Control. 4 To select among different menus, press the” Menu” button again. Then use to select different items and use to adjust your selection. 4 To exit the OSD, choose the “Exit Menu” and press the enter button. 4When the OSD is displayed, press the “Freeze/CLR” button to exit the OSD. Language 4Language You can display the multilingual OSD menu . Use the “ Up” and “ Down” key to select the language you prefer. The menus redrew immediately. Display 4Brightness Adjusting the brightness of the image. l Press the left key to darken the image. l Press the right key to lighten the image. 4Contrast The contrast controls the degree of difference between the lightest and darkest parts of the picture. Adjusting the contrast changes the amount of black and white in the image. l Press the left key to decrease the contrast. l Press the right key to increase the contrast 4Keystone Correction Adjusts image distortion caused by tilting the projector. 4Color Temperature Adjusts the color temperture. The range is from 6500K to 7700K . The factory default is 7100K . With the higher temperature, the screen looks colder; with the lower temperature, the screen looks warmer. 19 English 4Tint (Video mode only) The tint adjusts the red-green color balance in the projected image. l l Press the left key to increase the amount of green in the image. Press the right key to increase the amount of red in the image. 4Color (Video mode only) The color setting adjusts a video image from black and white to fully saturated color. l Press the left key to decrease the amount of color in the image. l Press the right key to increase the amount of color in the image. Image (Computer mode only) 4Tracking Choose “ Tracking” item to synchronize the signal timing of the display with that of the graphic card. When you experience an unstable or flickering image, use this function to correct it. 4Frequency “Frequency” is for changing the display data frequency to match the frequency of your computer’s graphic card. When you experience a vertical flickering bar, use this function to make an adjustment. 4Horizontal Position l Press the left button to move the image left. l Press the right button to move the image right. 4Vertical Position l Press the left button to move the image up. l Press the right button to move the image down. 4Auto-Image The projector automatically adjusts tracking, frequency and vertical and horizontal position for most computers. * The image options are available only for computer sources. The projector sets these options automatically for video sources. Audio 4Volume l Press the left button to decrease the volume. l Press the right button to increase the volume. 4 Bass The Bass setting controls the lower frequencies of your audio source. l Press the left button to decrease the bass. l Press the right button to increase the bass. 20 English 4Treble The treble setting controls the higher frequencies of your audio source. l Press the left button to decrease the treble. l Press the right button to increase the treble. 4Mute l Choose the left icon to make the volume function ineffective. l Choose the right icon to make the volume function effective. 4Mono / Stereo / Stereo-enhance l Mono: Mono sound effect. l Stereo: Stereo sound effect. Stereo-enhance: Stereo-enhance sound effect. l Projection 4Front-Desktop The factory default setting. 4Rear-Desktop When you select this function, the projector reverses the image so you can project behind a translucent screen. 4Front-Ceiling When you select this function, the projector turns the image upside down for ceiling-mounted projection. 4Rear-Ceiling When you select this function, the projector reverses and turns the image upside down at same time. You can project from behind a translucent screen with ceiling mounted projection. 416:9 (Video mode only) You can select this function to fit your DVD aspect ratio type. 44:3 (Video mode only) You can select this function to fit your DVD aspect ratio type. 4PIP (Computer mode only) Choose “On” to turn on the PIP screen. When the PIP screen displayed, use the four directional select keys to change the PIP screen position. Choose “Off” to trun off the PIP screen. 21 English Lamp 4Lamp Warning Choose this function to show or hide the warning message when the lamp changing warning message is displayed. 4Lamp Reset Reset the lamp setting only when the lamp changing is done. Exit Menu 4Exit Menu When you want to close the OSD menu, choose this item and select “ Yes” to exit menu. 4Reset All Choose “ Yes” to return the display parameters of the current mode to its factory default settings. 22 English Appendices Troubleshooting If you are experiencing trouble with the projection display, refer to the following. If the problem persists, please contact your local dealer or our service center. Problem: No image appears on screen. 4 Ensure all the cables and power connections are correctly and securely connected as described in the “Installation” section. 4 If the projector is plugged into a power strip, make sure the power strip is turned on. 4 Ensure the pins of connectors are not crooked or broken. 4 Check if the projection lamp has been securely installed. Please refer to the “Changing the lamp” section. 4 Make sure you have removed the lens cap and the projector is switched on. Problem: Partial, scrolling or incorrectly displayed image. 4Press the “Resync”button on the Remote Control. 4 If you are using a PC: If the resolution of your computer is higher than 800 x 600. Follow the steps outlined below to reset the resolution. For Windows 3.x: 1. In the Windows Program Manager, click the “Windows Setup” icon in the Main group. 2. Verify that your display resolution setting is less than or equal to 800 x 600. For Windows 95: 1. Open “My Computer” icon, the “Control Panel” folder, and then double click the “Display” icon. 2. Select the “Setting” tab. 3. In the “Desktop Area” you will find the resolution setting. Verify that the resolution setting is less than or equal to 800 x 600 resolution. If the projection display is still not projecting the whole image, you will need to also change the monitor display you are using. Refer to the following steps. 23 English 4. Follow above steps 1~2. Click on the “Advanced Properties ” button. 5. Select the “Change” button under the “Monitor” tab . 6. Click on “ Show all devices ”. Then select “ Standard monitor types ” under the “ Manufactures ” box; choose the resolution mode you need under the “ Models” box. 7. Verify that the resolution setting of the monitor display is less than or equal to 800 x 600. 4 If you are using a Notebook PC: 1. You are required to implement above steps of resolution setting of computer first. 2. Switch the Notebook PC display to the “external display only” or “CRT only” mode. 4 If you are experiencing difficulty in changing resolutions or your monitor freezes, restart all the equipment and the projection display. Problem: The screen of the Notebook or PowerBook computer is not displaying your presentation. 4 If you are using Notebook PC: Some Notebook PCs may deactivate their own computers’ screens when a second display device is in use. Each of them has different way to be reactivated. Refer to your computer’s documentation for detailed information. 4 If you are using an Apple PowerBook: In Control Panels, open the PowerBook Display to select Video Mirroring “On”. Problem: Image is unstable or flickering 4 Use “Tracking” to correct it. 4 Change the monitor color setting from your computer. Problem: Image has vertical flickering bar 4 Use “Frequency” to make an adjustment. 4 Check and reconfigure the display mode of your graphic card to make it compatible with the product. Problem: Image is out of focus 4 Adjust the Focus Ring on the projector lens. 4 Make sure the projection screen is between the required distance 3.3ft.(1m)~ 32.8ft. (10m) from the projector. 24 English Problem: The screen is outstretched when displaying 16:9 DVD The projector itself will automatically detect 16:9 DVD and adjust the aspect ratio by digitization to full screen with 4:3 default setting. If the projection display is still outstretched, you will also need to adjust the aspect ratio by referring to the following: 4Please select 4:3 aspect ratio type on your DVD player if you are playing a 16:9 DVD. 4If you can not select 4:3 aspect ratio type on your DVD player, please select 4:3 OnScreen-Display (OSD) function of the projector for your display. English 25 English Changing the lamp The projection display will detect the lamp life itself. It will show you a warning message “ Lamp is running out of standard lifetime. Be sure to replace the lamp as soon as possible.”. When you see this message, change the lamp as soon as possible. Make sure the projection display has been cooled for at least 30 minutes before changing the lamp. Warning: Lamp compartment is hot! Allow it to cool before changing lamps! 4 Lamp Changing Procedure: 1. 2. 3. 4. 5. 6. 7. Turn off the power to the projector by pressing the Power/Standby button. Allow the projector to cool down at least 30 minutes. Turn off the main power switch. Disconnect the power cord. Use screwdriver to remove the screw from the cover. Remove the cover. On the left side of the lamp module, push the electrical connector up to disengage it from the projector base. 8. Remove the three screws from the lamp module. 9. Pull out the lamp module. To replace the lamp module, reverse the previous steps. Warning: To reduce the risk of personal injury, do not drop the lamp module or touch the lamp bulb. The bulb may shatter and cause injury if it is dropped. 26 English Specifications Light Valve Contrast Ratio - Single Chip DLPTM Technology - 450:1 (Full On / Full Off) - 150:1 (ANSI Contrast) Lamp - 150W User Replaceable P-VIP Lamp Number of Pixels - 800 pixels(H) X 600 lines(V) Displayable Color - 16.7M colors Projection Lens - F2.8~3.1 f=31~40mm with 1.3 x Zoom & focus Projection Screen Size - 17”~ 217” Diagonal Projection Distance - 3.3~32.8 ft (1m~10m) Computer Compatibility - IBM & VESA VGA 640 x 350, 70/85 Hz 640 x 480, 60/70/72/75/85 Hz VGA 720 x 400, 70/85 Hz SVGA 800 x 600, 56/60/72/75/85 Hz VESA XGA 1024 x 768, 43/60/70/75/85 Hz Compressed - APPLE Macintosh LC 13” 640 x 480, 66.66 Hz APPLE Macintosh II 13” 640 x 480, 66.68 Hz APPLE Macintosh 16” 832 x 624, 74.55 Hz APPLE Macintosh 19” 1024 x 768, 75 Hz Compressed - NEC PC-98 SERIES 640 x 400, 56.42 Hz 640 x 480, 70/60 Hz - FUJITSU FM-TOWN 640 x 480, 55.37/60 Hz Video Compatibility - NTSC/NTSC4.43/PAL/PAL-N/PAL-M/SECAM compatible H. Frequency - 15kHz~69kHz horizontal scan (15kHz for TV mode) V. Frequency - 43Hz~85Hz vertical refresh Multimedia Audio - One internal speaker with 3 watt output Power Supply - AC input 110~240V Auto-Switching Power Supply Power Consumption - 210 watts at normal operation - Composite video & S-Video capability - Audio Line Output I/O Connectors - Power: AC Power Input Socket - Computer Input: One 15-pin D-sub Computer Input - Video Input: One Composite Video RCA Input One S-Video Input - Audio Input: One Phone Jack for Audio Input - Audio Output: One Phone Jack for Audio Line out Weight - 5 lbs. / 2.3 kgs Dimensions (W x H x D) - 3.54 x 8.58 x 9.9 inches / 90 x 218 x 252 mm Environmental - Operating Temperature: Humidity: - Storage Temperature: Humidity: Safety Regulation o o o o 10 ~ 40 C/50 ~104 F 80% maximum o o o o -20 ~60 C/ -4 ~140 F 80% maximum - FCC, CE , VCCI, UL, CUL, TUV, BCIQ 27 English 09/2000 ViewSonic Corporation 381 Brea Canyon Road Walnut, CA 91789 Tel (909) 869-7976 Tel (800) 688-6688 Fax (909) 468-1202