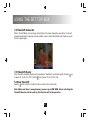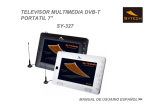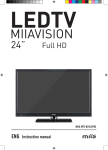
1
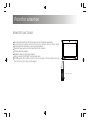
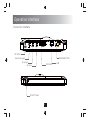
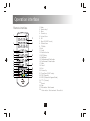
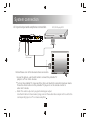
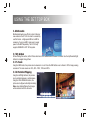
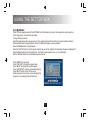
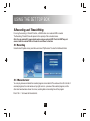
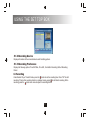
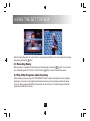
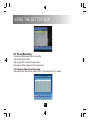
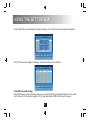
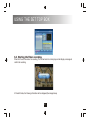
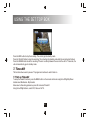
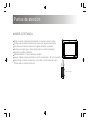
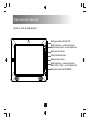
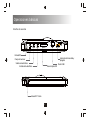
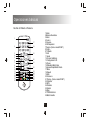
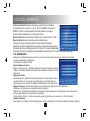
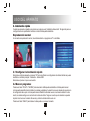
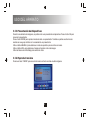
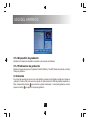
SAFETY INFORMATION
Warning: for safety we advise that it is not allowed to watch
video during driving!
Point for attention
REMOTE FUNCTIONS
Aim the remote directly at the receiver on the unit while operating.
Do not drop the remote control on the floor or bang it with any other object.
Do not place the remote in a hot or moist location.
Do not let any water or other liquid fall on the remote.
Do not open the remote.
Distance max 7m from the receiver.
Angle about 30 left/right from the axle wire.
Do not expose the remote control to direct sunlight or other heating sources.
The remote control may get damaged.
From 3 to 7 meters
Features
Features
9 inch TFT LCD display
resolution: 16:9 or 4:3 aspect ratio
Built in stereo speakers. Earphone output.
Three kinds of power supply:Power Adapter,Lithium Ion polymer chargeable battery and car adapter.
Lithium Ion polymer rechargeable battery. When fully charged, the battery can last for 2 hours.
Intelligent charging function.
Possibility of charging the battery while playing a movie or watching TV.
75 ohms antenna jack
Antenna for DVB-T
Remote control
Audio/Video cable
Earphones (3,5 mm jack)
Digital DVB-T TV tuner
Support AUTO-search and MANUAL search.
Support EPG(Electronic Program Guide).
Support Multi-language OSD.
Support CHANNEL CONTROL, EDIT, TIMER, HIDEN SUBTITLE.
Support TELETEXT function.
USB/SD input with possibility to record DVB-T programs and play files: MP3/WMA/JPEG/MPEG.
Contents
Operation Interface -------------------------------------------------------------------------------- 1-3
System Connection -------------------------------------------------------------------------------- 4
Using The Set Top Box --------------------------------------------------------------------------- 5-25
Set Up ------------------------------------------------------------------------------------------------- 5-7
Quick Installation ----------------------------------------------------------------------------------
8
Normal Play ----------------------------------------------------------------------------------------- 8-10
Multimedia ------------------------------------------------------------------------------------------- 11-14
TV Guide EPG -------------------------------------------------------------------------------------- 15
Recording And Timeshiftting--------------------------------------------------------------------- 16-17
Recording ------------------------------------------------------------------------------------------- 17-23
Timeshift ---------------------------------------------------------------------------------------------
23-25
Trouble Shooting ----------------------------------------------------------------------------------- 26-27
Specifications --------------------------------------------------------------------------------------- 28-30
Operation interface
Mainbody operation interface
Switch DVB-T/AV button
Direction function in setup condition,
Change channel DOWN in DVB-T
Volume up button
Channel list / OK(Enter)
Volume down button
Direction function in setup condition/
Change channels "UP" in DVB-T
Switch PCB/MENU button
1
Operation interface
Connection interface
DC INPUT
POWER BUTTON
Earphone output
AV output
AV input
SD CARD
RF ANT 75ohm
2
USB
Operation interface
Remote interface
1
17
2
18
3
4
5
6
7
19
8
9
10
11
12
13
14
15
16
20
21
22
LIST
23
24
25
26
27
28
1. Mode
2.“Number keys”.
3. Menu
4. Channel up
5. Volume Down
6. OK
7. Page UP (DVB-T mode)
8. Channel down
9. TV/Radio
10. Info
11. Audio
12. Subtitle function
13. LCD Setup
14. Play/Pause
15. Fast backward / Red button
16. Fast forward / Green button
17. Mute
18. Recall
19. Exit
20. Volume Up
21. Page Down (DVB-T mode)
22. FAV. (Favorite)
23. EPG. (Electronic Program Guide)
24. TTX. (Teletext)
25. Record
26. Stop
27. Blue button / Fast forward
28. Yellow button / Fast backward / Record List
3
System connection
AV input/output and earphone connection
VCD, DVD play/VCR
Yellow Red white
AV connect
Ye llo w Re d wh it e
Notice:Please turn off all devices before connection.
As per the picture, use the A/V cable to connect the portable TV
player to a TV or other devices.
Turn on the portable TV player and the other unit to which connection has been made.
Press the mode button on the portable TV player or on the remote control to
enter in A/V mode.
Note: The audio output only supports Analogue output.
Use the AV cable in the accessory bag,connect the audio/video output on this unit to the
corresponding Input on TV or stereo amplifier.
4
USING THE SET TOP BOX
1. SET UP
Press the “MENU” key to activate the main menu, Select the “Setup” option and press”OK” to enter to the
system Setup
1.1 Installation
The installation menu includes the following features.
Country Setting: This option allows you to set the country location, by using the Left/Right buttons.
OSD Language: This option allows you to set the language of the On Screen Display. The SY-329 includes 6 languages:
English, Spanish, Italian, Portuguese, French and German.
Audio Language: This option allows you to set your preferred hearing language. If the channel contains the option of different
languages, it will emit the audio in the set language.
Subtitle Language: This option lets you set your preferred subtitle language.
The channel will emit subtitles when and where available.
LCN: LCN stands for "Logical Channel Number". If the LCN option is set to ON, the channel s will be sorted out according to
the logical sequence, starting from the number 0 to the letter Z. Set the LCN option to OFF if you wish to arrange or move
the channels to your desired position.
GMT Usage: Using the Left/Right buttons set the desired options.
Selecting By Region sets the unit to Auto Time and Auto Date.
Summer time allows the unit to automatically change the time when it is summer.
Time display will display the time on screen.
Time Zone: Lets you set the time zone you are located in.
Set Date: Lets you set the current date
Set Time: Lets you set the current time
Auto Scan:This option lets you search channels automatically
Manual Scan: This option lets you search the channels manually.
Note: Auto and Manual scan is shown on the bottom bar of
the menu. Press the RED or GREEN buttons to select the
desired option.
1.2 TV Setup
The TV Setup menu includes the following features:
TV Format: 4:3 PS/16:9/4:3 LB
TV Mode: PAL/NTSC/AUTO
OSD Transparency: 1-8
5
USING THE SET TOP BOX
Banner Display Time
Set the timeout for the Banner display. There are 6 options - 1s, 3s, 5s, 10s, 30s
and ALWAYS. When set to ALWAYS the banner display never dissappears.
When a value has been set the banner display will dissappear at the time set.
Video Output
Select the video output type. There is only one option - CVBS.
Video Enhancement
Set the Video Enhancmenet desired.
(1) Select the Video Enhancement Option using the Up/Down buttons.
(2) Press the Left/Right buttons to enter the parameters of Video Enhancement
(3) Press the Up/Down Button to select Flesh Tone or Black/White Extension.
(4) Use the Left/Right buttons to select the Flesh Tone and the Black/White Extension parameters.
1.3. Password
Set the passwords for Menu Lock, Channel Lock, or Censorship Lock. All the passwords can be changed in this section.
The default password is 0000.
Setup Menu Lock
Choose between two options - ON or OFF. If set to ON, when accessing the
Menu, the password must be entered. If set to OFF there is no restrictions.
Channel Lock
Choose between ON or OFF. If set to ON, the user can block a channel from the
TV list and when accessing the blocked channel, the password must be entered
to view the channel. If set to OFF there is no restrictions.
Censorship Lock
This function allows the user to block a program in 3 different ways:
No Block - The program will not be blocked when trying to access it.
Total Block - The program will be totally blocked when trying to access it. This means that no one will be able to view the
program until a password is entered.
Age 2 - 18: Allows the user to block programs that are for over 18 years old.
Change Password
To change the password, select this option and change the password using the numeric keys on your remote control.
6
USING THE SET TOP BOX
1.4 Advance Timer
In this section, the user can set a timer for viewing a program on the date and time desired and how often should this occur.
This can be done from the EPG (Electronic Program Guide).
When the scheduled time and date has arrived, the channel will automatically show up on screen and a message will be
displayed if the user wishes to continue
viewing the scheduled program or to abort it.
Pre-set timers from programs can be
cancelled from the Advanced Timer menu.
1.5 SW Update
Update the software by USB. Enter this section
and select the Update by USB option. Select the
folder which contains the SW update file (File
with .ssu extension) and press OK to start the
update. Once this is completed, a message will
be displayed indicating that the SW has been
updated correctly.
1.6 Set Default
In this option the SY-329 can be reset to its factory default settings. All changes and settings made by the user will be
discarded. When selecting this option, a message will be displayed. Press YES (RED button) to proceed or EXIT to abort.
Note: Once YES has been selected everything will be lost and the previous settings will not be restored.
7
USING THE SET TOP BOX
2. Quick Installation
When the Setup Box is switched on for the first time, a "Welcome Page" will be displayed. The next step is to
set all the correct parameters and start the Automatic search.
Normal Play
When the SY-329 is in normal playing mode, TV channels and Radio programs will be shown/played normally.
(See image below)
2.1 Set Quick Installation
When the Setup page shows up on screen, move the highlight bar using the Up/Down buttons to "Idioma OSD". Using the
Left/Right buttons, select the desired language and confirm with OK.
Move the highlight bar using the Up/Down buttons to Configuracion de Pais and select, using the Left/Right buttons the
country located.
2.2 Source Programs
Press the "RED" or "GREEN" buttons to select Automatic search or Manual search.
Auto scan will erase all the channels stored and then will search for the new channels according to your
Country setting. Manual Scan will add the new channels into your database. In this mode the old channels
are not erased from the database. Please note that channels can be duplicated if the same frequency and
bandwidth are scanned more than once.
Press the "EXIT" button to stop scanning at any moment.
8
USING THE SET TOP BOX
2.3 Information
This feature allows the user to see information about the program they are viewing.
Press the "INFO" button to display the banner indicating program information.
Press the "INFO" button twice to display EPG information.
Pres the "INFO" button three times to display the detailed information of the program being viewed.
Note: in the detailed information, there is a yellow circle with a cross. This symbol represents sound signal strength.
Press the YELLOW button to test the sound signal strenght. Press the YELLOW button again to disactivate it.
2.4 Switch Program
To change between the TV channels, use the UP/DOWN/0-9/OK buttons.
To increase or decrease volume use the Left/Right buttons.
Use the MUTE button to completely turn off the volume. Resume volume by pressing the RIGHT button or the MUTE
button once again
2.5 Program List
Press the OK button to display the program list. In this list the channels will be shown indicating Number, Name,
Lock/Skip/scrambled status.
Press "YELLOW" to view your favorite channels.
Press “BLUE” to change the Group.
2.6 TV/RADIO
There are two types of Programs: TV & Radio. The operation in both the functions are the same. See the
below example for TV.
TV List
-TV List
In this option all the TV channels are shown with the option to Sort,Favorite, Lock, Delete, Hide, Edit, Move and Search.
Select the desired program from the TV list using the Up/Down buttons. Choose the desired function (Sort, Edit, etc...)
using the Left/Right buttons and follow the on screen instructions.
9
USING THE SET TOP BOX
*Favorites - It is possible to sort the programs into 8 different groups which then allow the user to search them easily.
The 8 groups are: News, Sports, Movies, Music, Shopping, Travel, Boy and Girl.
*Lock: Lock a program which then needs a password to view it.
*Edit: Edit the program name. Upto 16 characters.
*Move: Move the program to your desired position
*Sort: Sort the programs in 3 different ways - A-Z, Pay-Free and TP asc.
*Invisible: Hide a program
*Delete: Delete a program which is then restorable from the recycled channels list.
*Search: Search for a program by entering the name.
-Switching between TV list and FAV list
To switch between the two lists, press the BLUE button when entering the TV list and use the Left/Right buttons to see the FAV lists.
2.7 Pause
Press the PAUSE button to pause any video or audio file. To exit paused state, press any button.
2.8 Audio
Press the AUDIO button to set the sound mode to LR (stereo), LL (Left) or RR (Right).
2.9 Teletext
Use the "TTX" button to activate the Teletext function and the teletext subtitles. The teletext format may differ
according to the channel provider.
2.10 Subtitle
Use the "SUB-T" button to turn ON/OFF the subtitle language and the Teletext subtitle. The teletext format
may differ according to the channel provider
2.11 Quick Return
Press the "RECALL" button to go back to the last viewed channel.
10
USING THE SET TOP BOX
3. Multimedia
Multimedia allows to view Photo, Listen to Music or
view videos on the SY-329. In order to successfully
use this feature a high speed USB or an HDD is
necessary. If using an HDD, make sure to supply
power to the HDD seperately. The SY-329 only
supports USB/HDD in FAT 32 file system.
3.1 My Album
When entering this section, all the Photos which are in the USB/HDD will be shown on screen. Use the Up/Down/Left/right
buttons to navigate through them.
3.1.1 Zoom
Using the RED button, the pictures can be zoomed in or out. Press the RED button once to Zoom to 150%. Keep pressing
as desired. The zoom levels are: 25%, 50%. 100%, 150% and 200%.
3.1.2 Rotation/Flipping
Using the Left/Right buttons, the pictures
can be rotated clockwise or anticlockwise.
Using the YELLOW/BLUE buttons, the
picture can be flipped vertically/horizontally.
Note: when rotating/flipping the changes
will be restored once the user exits.
11
USING THE SET TOP BOX
3.1.3 Slide show
When viewing pictures, it is possible to start a slide show. Press the OK button to begin viewing the slide show.
Press the GREEN button to playback a music file while viewing the slide show. It is also possible to listen to music while
browsing pictures without a slide show.
Use the YELLOW button to set the repeat mode for the music file.
Press the BLUE button to establish the transition time between each picture.
Use the Up/Down buttons to change pictures.
3.1.4 Play Music
Press the "GREEN" button to listen background music while browsing pictures.
12
USING THE SET TOP BOX
3.2 My Music
The SY-329 can playback most of the MP3/WMA files. While listening to music, the elapsed time, audio spectrum,
current playing time, and total time are shown.
To begin listening to music:
Select the folder where the songs are stored. Then select the desired file from the list using the Up/Down buttons.
Press the RED button to begin playback. Press the RED button again to pause playback.
Press the GREEN button to stop playback.
Press the YELLOW button to set the repeat mode for the current file - Repeat All, Repeating, Random and Repeat off.
Press the BLUE button to fast forward the file. The Fast Forward speeds are: x2, x3, x4 and Normal.
Use the Left/Right buttons to increase/Decrease the Volume.
Press “GREEN” to stop music
Press ”YELLOW” to change the repeat mode.
Press “BLUE” to Change the playback speed.
Press “LEFT/RIGHT” to adjust volume while playing
Press "MUTE" button to turn off the sound.
While playing the music, there is a bar to display the
progress, current playing time and total time
13
USING THE SET TOP BOX
3.3 My Movie
The SY-329 can playback most of the MPEG2/4 files (DVD/MPEG4 v4/5, 3.11 v. is not supported).
Press the INFO button to select the device where the movie is stored.
When playing a movie, on the top left corner the file name, time elapsed and total time of the file will be displayed.
Select the desired file to playback and press OK.
While watching a video, press the Up/Down buttons to change to the next/previous video. Use the Left/right buttons to
increase/decrease the volume.
Press the RED button to play or pause during playback.
Press the GREEN button to play each frame individually during playback
Press the YELLOW button to rewind during playback.
Rewind speeds: x2, x4, x8, x16, x32 and Normal.
Press the BLUE button to fast forward during playback.
Fast forward speeds: x2, x4, x8, x16, x32 and Normal.
3.4 My Recorder
See Recording and Timeshift section for full details.
3.5 Others
In this section there are 3 options - Gomoku, Calendar and Calculator.
Gomoku (game) - Enter the option and select the Play Mode first. Use the Up/Down buttons to select the Play Mode and
set the play mode using the Left/Right buttons. There are 3 play modes - Move First, Move Later and Human. Move down
to select the difficulty level with the Up/Down buttons and use the Left/Right buttons to set the difficulty level. There are 2
levels - Easy and Normal.
To begin playing, press OK after setting the playing mode and difficulty level. Use the Up/Down/Left/Right/OK buttons to play.
Calendar - This function displays the Date, Year and Month.
To switch months press the Up/Down buttons. To switch years press the Left/Right buttons.
Calculator- This feature can be used for basic calculations. Use the Left/Right/Up/Down keys to move between the keypad
shown on screen. Press the INFO button to select the number/function desired. Press OK to solve the calculation.
RED button -> +
GREEN button -> YELLOW button -> x BLUE button -> /
OK -> =
INFO -> select
14
USING THE SET TOP BOX
4. TV Guide EPG(Electronic Program Guide)
To view the Electronic Program Guide while watching TV, press the EPG button on the remote control.
The TV Guide EPG (Electronic Program Guide) shows the channel content during the whole day. To view the channel content,
select a channel using the Up/Down buttons.
Use the Left/Right buttons to view the content on a specific date. To go back to selecting a channel, press EXIT.
To get more information about a program, press OK when selected.
To book the program, press the RED button and it will redirect you to the Advanced Timer (Refer to section 6)
Press “OK ”to show more information and data of the program
Press “BLUE” to change the group.
Press “RED” to go to Advance Timer.
15
USING THE SET TOP BOX
5.Recording and Timeshiftting
For using the recording or Timeshift function, a USB Pendrive or an external HDD is needed.
The Recording / Timeshift time will depend on the capacity of the connected device.
Note: Use an external AC power adaptor when using an external HDD. If not the DVBT may not
connect with the external HDD as it needs its own Power to function.
5.1 Recording
Under Normal Playback mode, press Menu and select "My Recorder" to enter the Multimedia folder.
5.1.1Recorded List
You can play, browse and delete the recorded programs in recorded list.The window on the left is the list of
recorded programs, the small window on top right corner is a preview of the selected program, and the
other small window below shows the name, recording date and recording time of the program.
Press“ CH +/ -” to browse the Recorded List.
16
USING THE SET TOP BOX
5.1.2 Recording Device
Displays information of the connected device and formatting options.
5.1.3 Recording Preference
Displays the following options: Time Shift Size, Time shift, One Button Recording, Default Recording
Period.
6. Recording
Under Normal Play or Timeshift mode, press the
button to set the recording time. Press "OK" to start
recording. If One button recording function is activated, simply press
to start direct recording. When
recording, press the
button once more to adjust the recording time
17
USING THE SET TOP BOX
When the Recording ends, the unit will return to normal play automatically. You can also stop the recording
manually by pressing the button.
6.1 Recording Replay
While recording, it is possible to fast backward or fast forward by pressing the
button. You can select
up to 5 different speeds: X2, X4, X8, X16, X32.Press the
button to return to Normal View mode.
6.2 Play Other Programs while Recording
While recording a program, press the "UP/DOWN/OK" buttons to select and playback any other program
displayed on the screen. Only programs with the same frequency as the one being recorded will appear
on screen. Other programs with different frequencies will not be shown. The channel being recorded will
appear with a RED dot on the side.
18
USING THE SET TOP BOX
6.3 Pre-set Recording
There are two different ways to pre-set a recording.
1) By using the Advance Timer
2) By using the EPG - Electronic Program Guide.
Both ways are further explained in the following sections.
6.3.1 Advancer Timer Pre-set Recording
When entering into "Menu->Setup->Advance Timer" it is possible to set up to 10 presets.
19
USING THE SET TOP BOX
Using the RED button, add and adjust the settings accordingly. the Time Mode needs to be changed to Recording.
Press "OK" to save these settings. At this stage, the preset recording is now established.
6.3.2 EPG Pre-set Recording
Using the EPG way to preset a recording, firstly you must access the EPG by pressing the EPG button on the remote
control. Select the TV channel and program in the TV guide and press the RED button to book the program.
20
USING THE SET TOP BOX
6.4 Starting the Timer recording.
When the Pre-set Time is due for recording, The Unit will return to normal play and will display a message to
confirm the recording.
In Timeshift mode, the following information will be displayed.(See image below)
21
USING THE SET TOP BOX
=
▲
6.5 Using Timeshift during a scheduled recording
=
▲
When pressing the“ ”button, the playback stops but the recording still continues.
Press“ ”one more time to restart the playback. At this time a bar will pop up at the bottom of the screen
showing the recording time on the right and the time difference on the left.
Press the RED button to go backwards
Press the GREEN button to advance forward
Press the "Play/Pause" button to play or pause
Press the "Stop" button to exit playback, at this point the recording still continues.
6.6 Stop Recording in a Schedule
Press the STOP button to stop recording.
Press the "Power" button and a bar will appear with 3 different options. Choose the desired option as shown below.
22
USING THE SET TOP BOX
Press the RED button to stop the recording. The unit will go into standby mode.
Press the YELLOW button to stop the recording. The unit will go into standby mode after the recording has finished.
Press the GREEN button to exit the recording. If there is no activity between the user and the unit for 15 seconds, the
unit will automatically go into standby mode.
7. Timeshift
This function allows users to pause a TV program and continue to watch it later on.
7.1 Set up Timeshit
To setup the timeshift functions, press the MENU button on the remote control and using the Left/Right/Up/Down
buttons select Multimedia - My Recorder.
Move down to Recording preference, press OK and select Timeshift.
Using the Left/Right buttons, select OFF, Pause or AUTO.
23
USING THE SET TOP BOX
When the time shift is setting to OFF, this function is closed.
When the time shift is setting to Pause, then users can use this function.The operation steps is as below,
1) The TV program is under display;
2) Insert into a USB disk or some other storage device and make sure there are enough space(at least 512MB);
3) Then press the Pause button on the RC, the program picture will be paused and starts to record the program
from this point;
4) When you back to the TV, you can press PLAY button on the RC to watch the recorded TV program, and it will
also continue to record the program at the same time;
5) During you watch the recorded program, you can press REW and FWD button to watch the program backwards
or forwards;
6) If you press STOP button, the timeshift will be stopped, and it will change to the realtime TV program, and the
recorded program will be deleted automatically from the storage devices at the same time.
When the timeshift is setting to AUTO, when you insert a storage device, it will start to timeshift automatically.
The program will continue to display as realtime, but users can press REW button to watch the programs backwards.
Note: Timeshift function will work at its best when the connected device is a full speed
USB / HDD. Lower speed may cause pauses during playback. make sure the Access
speed is High before proceeding to record.
24
USING THE SET TOP BOX
7.2 Timeshift Status Bar
While in Timeshift Mode, a bar will appear at the bottom of the screen showing the exact status. The bar will
automatically dissapear if a program includes subtitles or when entered into teletext mode. Press any key for
the bar to appear again.
7.3 Timeshift Replay
When Timeshift is activated, programs can be rewinded or forwarded in five different speeds: Press the
to rewind: X2, X4, X8, X16, X32 Press the key to forward: X2, X4, X8, X16, X32.
key
7.4 Stop Timeshift
Press the
button to stop the Timeshift function and return to the normal mode.
Note: Make sure there is enough memory space in your USB / HDD before activating the
Timeshift function. On the contrary this function will not be operative.
25
Trouble shooting
when facing problem with the unit, please check this list for a possible solution before
asking for service.
Reasons
Solutions
The unit does not connect to the current
The unit fails to
start
power
The battery power is weak
Recharge the battery
Forgotten channel
lock code
Key do not
function
Remote control
does not work
No signal found
Delete locked channel and scan channels again
Power wave orother abnormal
phenomena (such as static) is disturbing
the normal condition
Remote control is not aimed at
sensor directly
Remote control is not aimed at
sensor directly
Batteries are exhausted
Switch on/off power or unplug/replug the power
cord
Point remote control at the remote sensor
directly
Operate remote control within 7 meters
Replace the batteries
Check aerial lead
Check aerial
Check with dealer
Aerial is disconnected
Aerial is damaged/misaligned
Out of digital signal area
Contact help line
Try the super code”0000”
Forgotten menu
lock code
Scrambled channel
message
Connect the power
Channel is scrambled
Select altemative channel
26
Trouble shooting
No response to
Remote control
Forgotten c hannel
lock code
Forgotten c hannel
lock code
After m oving the STB
to another room you
find you are no long
er able to receive d
ig ital reception
Plug in and turn on plug
Aim handset at front panel
Chec k for obstructions
Replace handset batteries
Rec eiver off
Handset not aimed c orrectly
Front panel obstruc ted
Hand set batteries exhausted
Delete loc ked channel and
scan c hannels a g ain.
Contact help line
Try the super c ode :"0000"
Try a direc t feed from the antenna
The aerial feed former new point
m ay c om e through a distribution
system whic h m ay reduc e the
digital signal now received by the
box.
27
Specifications
Specifications
USB 2.0 Full speedx1 SD CARD slotx1
MEDIA PLAYER: JPEG,BMP,MP3,MPG(MPEG2)
VIDEO OUTPUT: CVBS
AUDIO FORMAT: MPEG LAYER I & II 32/44.1/48KHZ
INPUT RATE: MAX 15MBIT/S
28
Specifications
DVB-T
Tuner:
Frequency range: VHF 174MHz to 230MHz
UHF 470MHz to 862MHz
Band width: 7/8MHz
Antenna input: 75 ohms
Modulation:
modulation scheme: COFDM – 2k/8k
modulation OFDM: QPSK/QAM16,QAM64
Decoding: MPEG-2MP@ML
Aspect ratio: 4:3 - 16:9
Functions: Epg/Lcn/Teletext/Fav/Timer/parental lock/multi audio /subtitle
Conformity: EN 300744
Display: LCD TFT 9”
AC/DC adaptor: AC 100 - 240V-50/60Hz 0.45A Max
DC 9.0V – 1A
29
Specifications
Consumption: <13.5W
Lithium battery : 7,4V / 1800mA
Fast charge (OFF): 3 / 4 hours
Slow charge (ON): 7 / 8 hours
AV input/output: CVBS video 2 channels
Earphones output: 5mW (3.5mm jack)
Dimensions: 25.4 (L) x 2.2 (P) x 16.2 (H) cm
30
“CE” marking states that the product is compliant to European Directives:
2006/95/EC Low Voltage Directive
2004/108/EC EMC Directive
2002/95/EC RoHS Directive
2009/125/EC Eup Directive Regulation (EC) n° 278/2009
It is possible to request a full copy of Declaration of compliance to:
New Majestic S.p.A. Via Rossi Martini,41 – 26013 Crema (CR) Italy
DECLARATION OF CONFORMITY
All company, brand and product names are trademarks or registered trademarks of their respective
companies.
DECLARATION OF CONFORMITY
Manufacturer name: Sytech. Satyatrade S.L
Address: Pol. Ind. La Raya – C/ Guadalquivir, 2 – 28816 Camarma de Esteruelas - Madrid - SPAIN.
Tel: 902 430967
Fax: 91-886-42-85
C.I.F: B83254763
We declare under our own exclusive responsibility that the product:
Sytech® Portable TV
is in compliance with the essential directives, norms and standards of the European Union 89/336/
EEC (EMC Directive).
manufacturing country: China
INFORMACIÓN DE SEGURIDAD
PARA REDUCIR EL RIESGO DE INCENDIO Y CORTO CIRCUITO, NO EXPONGA ESTA UNIDAD A LA
LLUVIA O HUMEDAD.
PRECAUCIÓN: Para reducir el riesgo de
incendio y electroshock, no quite la cubierta
(o parte trasera) de la unidad. Lleve el
aparato a personal de reparaciones
cualificado,
El símbolo de rayo con punta de flecha dentro de un triángulo
equilátero está indicado para alertar al usuario de la presencia de “
voltaje peligroso" sin aislar dentro del producto que puede tener
magnitud suficiente para constituir un riesgo de electroshock.
El signo de exclamación dentro de un triángulo equilátero está
indicado para alertar al usuario de la presencia de instrucciones de
uso y de mantenimiento importantes en los documentos que
acompañan al aparato.
ADVERTENCIA: PARA REDUCIR EL RIESGO DE INCENDIO O CORTO
CIRCUITO, NO EXPONGA EL APARATO A LLUVIA O HUMEDAD.
PRECAUCIÓN: PARA EVITAR ELECTROSHOCK, HAGA COINCIDIR LAS
CLAVIJAS DEL ENCHUFE CON LA TOMA DE CORRIENTE E INTRODUZCA
EL ENCHUFE TOTALMENTE.
El aparato no se debe exponer a goteos o salpicaduras y no se deben colocar
encima del mismo objetos lleno de líquido, como jarrones.
ADVERTENCIAS IMPORTANTES
Además de la atención a los estándares de calidad en la fabricación de su
producto de vídeo, la seguridad es el factor más importante en el diseño de
cada instrumento. Sin embargo, la seguridad también es responsabilidad suya,
este documento contiene información importante que le ayudará a asegurar
su disfrute y a utilizar el producto de vídeo y cualquier accesorio de forma
apropiada. Lea este documento atentamente antes del uso de su producto
de vídeo.
No sobrecargue los enchufes de pared, los cables extensores o los
receptáculos integrales más allá de su capacidad, ya que esto puede
provocar un riesgo de incendio o electroshock.
No utilice una toma de corriente no apta (desprotegida), puede ser
peligroso.
Compruebe la conexión de forma regular. Si se produce un fallo en el
aislamiento del cable y de la unidad, desconecte inmediatamente y lleve la
unidad a un técnico cualificado.
No conecte el cable de alimentación cerca de agua u otros líquidos, como
un baño, fregadero, piscina, lavadora o dentro de un lugar mojado o
húmedo, etc.
No coloque la unidad sobre objetos inestables. El aparato se puede caer,
provocando lesiones graves a niños o adultos y también graves daños a la
unidad.
Nunca coloque la unidad cerca o sobre un aparato que irradie calor, como
radiadores, hornos, estufas, calentadores, amplificadores, etc. Tampoco
exponga la unidad a luz solar directa ya que se puede sobrecalentar.
Desconecte la unidad de la toma de corriente antes de limpiarla. No utilice
limpiadores líquidos o en aerosol, alcohol u otros sprays de limpieza. Utilice
sólo un paño suave y seco para limpiar el exterior de la unidad.
No coloque objetos pesados encima de la unidad.
No pase por alto el propósito de seguridad del enchufe. Si el enchufe
proporcionado no se ajusta a su toma, consulte a un electricista para que
cambie la toma obsoleta. No fuerce el enchufe dentro de la toma.
Proteja el cable de alimentación de pisadas o pliegues especialmente en
el enchufe, receptáculos y en el punto en el que sale del aparato.
Desconecte este aparato durante las tormentas eléctricas o cuando no lo
vaya a utilizar durante largos períodos de tiempo.
Consulte todas las operaciones a personal cualificado. Es necesario
reparar el aparato cuando se ha dañado de cualquier modo.
Apague la corriente principal cuando no utilice la unidad. (Desconecte el
cable de alimentación de la toma de corriente cuando no vaya a utilizar la
unidad durante un largo tiempo.) Quite el disco antes de mover o apagar
la unidad.
No cubra ni toque los componentes del interior de la unidad.
Instale la unidad sobre una superficie plana con buena ventilación.
Asegúrese de que no cubre las ranuras de ventilación para no
sobrecalentar la unidad.
Lea atentamente este manual antes de la instalación y uso.
Doble aislamiento
Este es un aparato de clase II
El enchufe principal se usa como dispositivo de desconexión. El
dispositivo de desconexión debe permanecer enchufado en todo
momento.
Para desconectar completamente la entrada de corriente, el enchufe
principal del aparato debe desconectarse de la red electrica.
El enchufe del aparato no debe ser obstruido, el acceso al mismo
debe ser sencillo durante el uso del dispositivo.
Advertencia: Las pilas (batería o pilas instaladas) no se deben
exponer a calor excesivo, como luz solar, fuego o similares.
Puntos de atención
MANDO A DISTANCIA
Dirija el mando a distancia directamente al receptor cuando lo utilice.
No deje caer el mando a distancia al suelo o que golpee otros objetos.
No coloque el mando a distancia en lugares calientes o húmedos.
No deje que caiga agua u otros liquidos sobre el mando a distancia.
No abra el mando a distancia.
Máxima distancia: 7 metros desde el receptor.
Angulo: Maximo angulo permitido es de 30º a la derecha o 30º a la izquierda.
No exponga el mando a distancia a la luz solar u otras fuentes de calor.
Puede dañar el mando a distancia.
From 3 to 7 meters
Características
Características
Pantalla LCD TDT de 9 pulgadas
Formato aspecto ratio: 16:9 o 4:3
Altavoces estéreos integrados; Conexión para auriculares.
posibilidad de 3 modos de alimentación: Cargador de red, Batería recargable de Ion Litio polímero y Cargador
de coche.
Batería de Litio Ion polímero integrada. Duración de la batería totalmente cargada es aprox. de 2 horas.
Función de carga inteligente.
Utiliza el cargador de red y la batería recargable de Ion-Litio, para cargar y la vez reproducir un video o ver la tele.
Clavija de antena de 75 Ohmio.
Antena externa para TDT.
Mando a distancia.
Cable de Audio / Video.
Conexión para auriculares. (3.5mm).
Sintonizador TDT integrado.
Función de búsqueda automática o manual.
Función EPG. (Guía de programación electrónica)
Menú OSD en varios idiomas.
Posibilidad de controlar los canales, editar, programar, ver subtitulos.
Función de Teletexto.
Puerto USB y ranura SD para reproducir archivos Multimedia: MP3 / WMA / JPEG / MPEG o grabar programas
de televisión respectivamente.
Contenido
Operaciones básicas -------------------------------------------------------------------------------- 1-3
Configuración de sistema -------------------------------------------------------------------------- 4
Uso del aparato --------------------------------------------------------------------------------------- 5-25
Configuración ------------------------------------------------------------------------------------------ 5-7
Instalación rápida ------------------------------------------------------------------------------------- 8
Reproducción normal -------------------------------------------------------------------------------- 8-10
Multimedia ---------------------------------------------------------------------------------------------- 11-14
Guía de TV EPG -------------------------------------------------------------------------------------- 15
Grabación y emisión diferida ---------------------------------------------------------------------- 16-17
Grabación ---------------------------------------------------------------------------------------------- 17-23
Diferido-Timeshift ------------------------------------------------------------------------------------- 23-25
Resolucion de problemas -------------------------------------------------------------------------- 26-27
Especificaciones -------------------------------------------------------------------------------------- 28-30
Operaciones básicas
Interfaz de uso de la unidad principal
Botón para cambiar entre DVB-T/AV
Botón de dirección – en modo configuración
Botón de avance rápido – en modo reproducción
Botón para subir volumen
Lista de Canales/OK (enter)
Botón para bajar volumen
Botón de dirección – en modo configuración
Botón “Arriba” o “Abajo” – en modo reproducción
Botón para cambiar entre PCB/MENÚ
1
Operaciones básicas
Interfaz de conexión
Entrada DC
Clavija de Auricular
Salida de Audio/Video
Entrada de Audio/Video
Ranura tarjeta SD
Antena RF 75 ohm
2
Interruptor de Encendido y
Apagado
Puerto USB
Operaciones básicas
Interfaz del Mando a Distancia
1.Modo
2.Botones Numéricos
3.Menú
4.Canal +
5.Volumen 6.OK/Reproducir
7.Pagina+ (Solo en modo DVB-T)
8.Canal –
9.TV/Radio
10.Info
11.Audio
12.Función Subtítulos
13.Configuración LCD
14.Pausa
15.Rebobinar/Botón Rojo
16.Avance Rápido/Botón Verde
17.Mute
18.Repetir
19.Salir
20.Volumen +
21.Pagina – (Solo en modo DVB-T)
22.Favoritos
23.EPG
24.Teletexto
25.Grabar
26.Stop
27.PVR/Botón Azul
28.Botón Amarillo
1
17
2
18
3
4
5
6
7
19
8
9
10
11
12
13
14
15
16
20
21
22
LIST
23
24
25
26
27
28
3
Configuración de sistema
Reproductor VCD, DVD, VCR
Conexión de entrada/salida de AV y de auriculares
Amarillo, Rojo, Blanco
Amarillo, Rojo, Blanco
Conexión AV
Nota: Por favor, apague todos los dispositivos antes de conectarlos.
Como se muestra en la imagen, utilice el cable AV para conectar el DVB-T portátil a un TV u otros
dispositivos.
Encienda el DVB-T portátil y la otra unidad a la que se ha conectado.
Presione el botón Modo en el reproductor DVB-T portátil o en el mando a distancia para entrar en el modo
AV.
Nota: La salida de audio sólo admite salida analógica.
Utilice el cable AV de la bolsa de accesorios, conecte la salida de audio /vídeo de esta unidad a la entrada
correspondiente del TV o amplificador estéreo.
4
USO DEL APARATO
1. Configuración
Presione el botón “MENÚ” para activar el menú principal, seleccione la opción "Configuración" y presione
"OK" para entrar en la Configuración de sistema.
1.1 Instalación
El menú de instalación incluye las siguientes características.
Configuración de País: esta opción le permite seleccionar el país en el que se encuentra usando los botones Izquierda/Derecha.
Idioma OSD: Esta opción le permite seleccionar el idioma del menú. El SY-329 incluye 6 idiomas diferentes: Ingles, Español,
Italiano, Portugués, Frances e Alemán.
Idioma de Audio: Esta opción le permite seleccionar el idioma de audio de las programas. Si un canal contiene la opción de
varios idiomas de audio, el canal emitirá el idioma seleccionado.
Idioma de Subtítulos: Esta opción le permite seleccionar el idioma de los subtítulos. El canal emitirá subtítulos solo si están disponibles.
LCN: LCN significa “numero de canal lógico”. Si la opción LCN esta en “ON”, los canales se clasificaran por secuencia lógica,
comenzando por el numero 0 hasta la letra Z. Seleccione LCN “OFF” si desea colocar o mover los canales a la posición que usted desee.
Uso de GMT: Usando los botones Izquierda/Derecha seleccione la
opción deseada. Seleccionando “ACTIVADO” establece la unidad
en hora y fecha automático. El horario de verano permite la unidad
cambiar automáticamente la hora durante el verano.
Visualización de la hora en la pantalla.
Zona Horaria: Permite establecer la zona horaria en el que se
encuentra cuando el GMT esta activado.
Fijar Fecha: Permite establecer la fecha
Fijar Hora: Permite establecer la hora.
Búsqueda Automática: Esta opción le permite buscar los canales automáticamente.
Búsqueda Manual: Esta opción le permite buscar los canales manualmente.
Nota: Búsqueda Automática/Manual se muestra en la barra inferior del menú. Pulse el botón Rojo o Verde para acceder
a la opción que usted desee.
1.2 Configuración de TV
El menú de configuración de TV incluye las siguientes características.
Formato de TV: 4:3 PS/16:9/4:3 LB
Modo de TV: PAL/NTSC/AUTO
Transparencia de OSD: 1-8
5
USO DEL APARATO
Tiempo ver banda info: Establezca el tiempo que durara la barra de información
en la pantalla. Existen 6 opciones – 1s, 3s, 5s, 10s, 30s y SIEMPRE. Al seleccionar
SIEMPRE, el banner nunca desaparecerá. Cuando se establezca un tiempo de
duración, el banner desaparecerá en el tiempo seleccionado.
Salida de Video: Seleccione el formato de salida de video. Existe una opción – CVBS.
Mejora de Video: Esta opción le permite mejorar la calidad de video
1) Seleccione la opción de Mejora de Video usando los botones Arriba/Abajo.
2) Utilizando los botones Izquierda/Derecha para entrar en la opción de mejora de video.
3) Utilizando los botones Arriba/Abajo seleccione “Tono de Piel” o “Extensión Blanco/Negro”
4) Utilizando los botones Izquierda/Derecha para establecer los parámetros de Tono de Piel o Extensión Blanco/Negro
1.3. Contraseña
Establece las contraseñas de bloqueo del menú, bloqueo de canal, o bloqueo de censura. Todas las contraseñas
pueden ser cambiadas en esta sección.
La contraseña por defecto es 0000.
Ajuste de bloqueo de menú
Elegir entre dos opciones – Activado o Desactivado. Si está en Activado, al acceder
al Menú, la contraseña debe ser introducida. Si se establece en Desactivado no hay
restricciones.
Bloqueo de canales
Elija entre Activado y Desactivado. Si está en Activado, el usuario puede bloquear
un canal de la lista TV y al acceder al canal bloqueado, la contraseña debe ser
introducido para ver el canal. Si se establece en Desactivado no hay restricciones.
Bloqueo de Censura Esta función permite al usuario bloquear un programa de 3 formas diferentes:
Sin Bloqueo – El programa no se bloquea al intentar acceder a él.
Bloqueo Total – El programa será totalmente bloqueado al intentar acceder a él. Esto significa que nadie será capaz de
ver el programa hasta que se introduzca una contraseña.
2 años de edad - 18 años - Permite al usuario bloquear los programas que son para entre 2 y 18 años de edad.
Cambiar contraseña
Para cambiar la contraseña, seleccione esta opción y cambie la contraseña con las teclas numéricas del mando a distancia.
6
USO DEL APARATO
1.4 Temporizador
Los programas se pueden reservar configurando la fecha, hora y frecuencia. Presione el botón “ROJO” para
configurar los detalles de la reserva. Cuando llegue la fecha y hora configurada, el DVB-T se encenderá
automáticamente en ese programa.
1.5 Actualizar sistema
Actualice la aplicación mediante el USB.
Presione el botón “OK” para entrar en el navegador de archivos.
Presione los botones “IZQUIERDA/DERECHA/ARRIBA/ABAJO/OK” para cambiar de carpeta e ir al archivo
de extensión *.ssu.
Presione “OK” para iniciar la actualización.
1.6 Configuración predeterminada
Al reiniciar el DVB-T se volverá a la configuración de fábrica. La base de datos se borrará tras confirmar la
operación.
7
USO DEL APARATO
2. Instalación rápida
Cuando se enciende el aparato por primera vez, aparece una “pantalla de bienvenida”. El siguiente paso es
configurar todos los parámetros correctos e iniciar la Búsqueda automática.
Reproducción normal
En el modo de reproducción normal, la unidad mostrará un programa de TV o de Radio.
2.1 Configurar la Instalación rápida
Seleccione el idioma deseado y presione “OK” para confirmar. La configuración de idioma también se puede
modificar en el Menú principal - Instalación - Idioma OSD.
Seleccione el país en el que se encuentra.
2.2 Buscar programas
Presione el botón "ROJO" o "VERDE" para seleccionar la Búsqueda automática o la Búsqueda manual.
La búsqueda automática borrará todos los canales guardados y buscará los nuevos canales de acuerdo con
la configuración de su país. La búsqueda manual añadirá los canales nuevos a su base de datos. En este
modo, los canales antiguos no se borran de la base de datos. Tenga en cuenta que los canales se pueden
duplicar si se busca en la misma frecuencia y ancho de banda más de una vez.
Presione el botón “SALIR” para detener la búsqueda en cualquier momento.
8
USO DEL APARATO
2.3 Información
Presione “INFO” para mostrar la barra que indica la información del programa.
Presione “INFO” dos veces para mostrar la información EPG.
Presione “INFO” tres veces para mostrar la información detallada del programa.
Nota: En la información detallada, aparece un círculo amarillo con una cruz en la esquina inferior derecha
que muestra la fuerza de la señal de sonido. Presione el botón “AMARILLO” para activar la fuerza de señal
de sonido. Vuelva a presionar el botón amarillo para desactivar la fuerza de señal.
2.4 Cambiar de programa
Presione “CH + / CH - / 0~9 / OK” para cambiar y seleccionar programas.
2.5 Lista de programas
Presione “OK” para mostrar la lista de programas con el nº, el nombre y el estado.
Presione “AMARILLO” para ver sus canales favoritos.
Presione “AZUL” para cambiar de grupo.
2.6 TV/RADIO
Hay dos tipos de programas: TV y Radio. El funcionamiento en ambas funciones es el mismo. Consulte el
ejemplo siguiente para TV.
Lista de TV
Presione “IZQUIERDA/DERECHA” para seleccionar la operación en la barra de herramientas.
Presione “ARRIBA/ABAJO” para seleccionar el programa
Presione “ROJO/VERDE/AMARILLO/AZUL/1~8” para activar la selección relativa.
9
USO DEL APARATO
*Favoritos: Puede encontrar los programas favoritos rápidamente mediante el filtro de favoritos. El usuario
puede configurar 8 tipos de favoritos. Noticias, Deportes, Música, Tiendas, Viajes, Chicos y Chicas.
*Bloqueo: Bloquea el programa
*Editar: Edita el nombre del programa con un máximo de 16 caracteres
*Mover: Mueve el programa como deseemos
*Clasificar: Clasifica los programas de acuerdo con 3 tipos de secuencias.
*Invisible: Oculta el programa
*Borrar: Borra el programa permanentemente de la base de datos
*Buscar: Busca el programa mediante el teclado numérico o por los caracteres.
2.7 Pausa
Presione “PAUSA” para pausar el vídeo y el audio.
Presione cualquier botón para cancelar la función de pausa.
2.8 Audio
Presione “AUDIO” para configurar el modo de sonido a LR/L/R/ y Audio PID. Si configura el idioma del audio,
entre y trabaje en el menú “MENÚ ->Instalación ->Idioma de audio”.
2.9 Teletexto
Utilice el botón "TTX" para activar la función de teletexto y los subtítulos de teletexto. El formato de teletexto
puede diferir de acuerdo con el proveedor de canal.
2.10 Subtítulos
Utilice el botón "SUB-T" para encender/apagar el idioma de subtitulado y el subtitulado del Teletexto.
El formato de teletexto puede diferir de acuerdo con el proveedor de canal.
2.11 Rápido Retorno
Pulse el botón "Recall" para volver al último canal visto.
10
USO DEL APARATO
3. Multimedia
El multimedia se debe utilizar con un USB o Disco duro/HDD.
Asegúrese de que utiliza una fuente de alimentación externa
para el suministro eléctrico del disco duro. El receptor sólo
admite USB/HDD en sistema de archivos FAT 32.
3.1 Mi Álbum
Cuando quite el dispositivo durante la reproducción de fotos, aparecerá una ventana que dice “Dispositivo
quitado” y la unidad volverá al Menú principal. Utilice ARRIBA / ABAJO / IZQUIERDA / DERECHA / OK, y
las diferentes opciones posibles aparecerán en un botón de color de la barra de herramientas.
3.1.1 Zoom
Utilice el botón “ROJO” para aumentar y disminuir las fotos al 25%, 50%, 100%, 150% y 200%.
3.1.2 Girar / Voltear
Usando los botones Izquierda/Derecha, las
imágenes se pueden girar en sentido
horario o antihorario.
Con los botones Azul/Amarillo la imagen
puede ser volteado verticalmente u
horizontalmente.
Nota: Al Girar/Voltear el imagen, los
cambios se restauraran una vez que el
usuario salga de la opción.
11
USO DEL APARATO
3.1.3 Presentación de Diapositivas
Durante la visualización de imágenes, es posible iniciar una presentación de diapositivas. Pulse el botón OK para
comenzar la presentación.
Pulse el botón VERDE para reproducir música durante una presentación. También es posible escuchar música
mientras se navega por las fotos sin la necesidad de una presentación.
Utilice el botón AMARILLO para establecer el modo de repetición para el archivo de música.
Utilice el botón AZUL para establecer el tiempo de transición entre cada imagen.
Utilice los botones de Arriba/Abajo para cambiar de fotos.
3.1.4 Reproducir música
Presione el botón “VERDE” para escuchar la música de fondo mientras visualiza imágenes.
12
USO DEL APARATO
3.2 Mi Música
Cuando quite el dispositivo, aparecerá una ventana que dice “Dispositivo quitado” y la unidad volverá al
Menú principal.
Presione “ARRIBA/ABAJO/IZQUIERDA/DERECHA/OK” para navegar en las carpetas y archivos.
Presione “OK” para reproducir música
Presione “ROJO" para reproducir o pausar
Presione “VERDE” para detener la música
Presione “AMARILLO” para cambiar el modo de repetición.
Presione “AZUL” para cambiar la velocidad de reproducción.
Presione “IZQUIERDA/DERECHA” para ajustar el volumen
mientras reproduce.
Presione “SILENCIO” para silenciar el sonido.
Mientras reproduce la música, hay una barra que muestra
el progreso, el tiempo reproducido actual y el tiempo total.
13
USO DEL APARATO
3.3 Películas
El SY-329 puede reproducir la mayoria de los archivos MPEG2/4 (V4 DVD/MPEG4/5 v 3.1.1 no son compatibles)
Pulse el botón INFO para seleccionar el dispositivo donde esta guardado la película.
Seleccione el archivo que desea reproducir y pulse OK.
Al reproducir una película, en la esquina superior al lado izquierda se mostrara el nombre de la película, el tiempo
transcurrido y el tiempo total del archivo.
Mientra ve un video, pulse el botón Arriba/Abajo para cambiar al video siguiente o anterior.
Utilice los botones Izquierda/Derecha para aumentar o disminuir el volumen.
Pulse el botón ROJO para reproducir o pausar la reproducción
Pulse el botón VERDE para reproducir cada fotograma individualmente durante la reproducción.
Pulse el botón AMARILLO para rebobinar durante la reproducción
Velocidades: x2, x4, x8, x16, x32 y Normal
Pulse el botón AZUL para avanzar durante la reproducción
Velocidades: x2, x4, x8, x16, x32 y Normal
3.4 Mi Grabadora
Los detalles de grabación están en el punto 6.
3.5 Otros
En esta sección hay 3 opciones – Gomoku, Calendario y Calculadora
Gomoku (Juego) – Entra en la opción de Gomoku y seleccione el modo de jugar. Utilice los botones de Arriba/Abajo para
seleccionar la opción de modo de juego. Establezca el modo de juego utilizando los botones Izquierda/Derecha. Existen 3
modos de juego – Mover Primero, Mover Ultimo y humano. Utilizando los botones de Arriba/Abajo mueve hacia abajo para
seleccionar el nivel de dificultad. Ajuste el nivel usando los botones de Izquierda/Derecha. Existen 2 niveles de dificultad –
Fácil y Normal. Para empezar a jugar, pulse OK después de haber establecido todo. Utilice los botones Arriba/Abajo/
Izquierda/Derecha/OK para jugar.
Calendario – Esta función muestra la fecha, mes y año. Para cambiarlos meses, pulse los botones Arriba/Abajo. Para
cambiar de año pulse los botones Izquierda/Derecha.
Calculadora – Esta función se puede utilizar para realizar cálculos básicos. Utilice las teclas de Izquierda/Derecha/
Arriba/Abajo para mover entre el teclado que aparece en pantalla. Pulse el botón INFO para seleccionar el
numero/función deseada. Pulse OK para resolver el cálculo.
Botón ROJO -> +
Botón VERDE -> Botón AMARILLO -> x
Botón AZUL -> /
OK -> =
Botón INFO -> seleccionar
14
USO DEL APARATO
4. Guía de TV EPG (Guía de programas electrónica)
Presione EPG para mostrar la guía de programas electrónicos directamente.
Muestra la información y programas de TV y Radio.
Presione "ARRIBA/ABAJO" para seleccionar el programa.
Presione "IZQUIERDA/DERECHA” para cambiar de fecha
Presione “OK” para mostrar más información y la fecha del programa
Presione “AZUL” para cambiar de grupo.
Presione “ROJO” para ir al temporizador.
15
USO DEL APARATO
5. Grabación y Emisión diferida
Para utilizar la función de grabación o de emisión diferida, se necesita un dispositivo de almacenamiento
USB o un disco duro. El tiempo de grabación / emisión diferida dependerá de la capacidad del dispositivo
conectado.
Nota: Utilice un adaptador de energía AC cuando utilice un disco duro externo. Si no, el DVB-T no
podrá conectar con el disco duro externo, ya que necesita su propia energía para funcionar.
5.1 Grabación
En el modo de reproducción normal, presione Menú y seleccione "Mi Grabadora" para entrar en la carpeta
multimedia.
5.1.1 Lista de grabaciones
Puede reproducir, navegar y borrar los programas grabados en la lista de grabaciones. La ventana de la
izquierda es la lista de los programas grabados, la ventana pequeña de la esquina superior derecha es una
pequeña imagen del programa seleccionado y la otra ventana pequeña de abajo muestra el nombre, la fecha
de grabación y el tiempo de grabación del programa.
Presione “CH +/ CH -” para navegar en la Lista de grabaciones.
16
USO DEL APARATO
5.1.2 Dispositivo de grabación
Muestra la información del dispositivo conectado y las opciones de formatear.
5.1.3 Preferencias de grabación
Muestra las siguientes opciones: Capacidad Timeshift (Diferido), Timeshift Grabación pulsando un botón y
Tiempo de grabación
6. Grabación
En el modo de reproducción normal o en modo diferido, presione el botón
para configurar el tiempo de
grabación. Presione “OK” para comenzar a grabar. Si está activada la función de grabación mediante un
botón, simplemente presione
para comenzar a grabar directamente. Cuando esté grabando, vuelva a
presionar el botón
para ajustar el tiempo de grabación.
17
USO DEL APARATO
Cuando termine la grabación, la unidad vuelve a la reproducción normal automáticamente. También puede
detener la grabación manualmente presionando el botón .
6.1 Reproducción de la grabación
Mientras graba, puede retroceder o avanzar rápidamente presionando los botones .
Puede seleccionar
hasta 5 velocidades diferentes: X2, X4, X8, X16, X32. Presione el botón
para volver al modo de
visualización normal.
6.2 Reproducir otros programas mientras graba
Mientras graba un programa, presione los botones "ARRIBA/ABAJO/OK" para seleccionar y reproducir
cualquier otro programa mostrado en la pantalla. Los programas que aparecerán en la pantalla tienen la
misma frecuencia que el programa grabado. Otros programas con frecuencias diferentes no aparecerán en
la lista. Aparecerá un punto rojo junto al programa grabado.
18
USO DEL APARATO
6.3 Grabación preconfigurada
Hay dos formas diferentes de establecer una grabación preconfigurada.
1: Mediante el Temporizador. 2: Mediante la Guía de programas electrónica “EPG”.
6.3.1 Grabación preconfigurada mediante temporizador
En el “Menú -> Configuración -> Temporizador”, puede realizar 10 grupos de configuraciones.
19
USO DEL APARATO
Utilice el “ROJO" para añadir y ajustar la configuración. El modo de temporizador se debe cambiar a
Grabación.
Presione “OK” para guardar la configuración. En este momento, se ha programado la grabación
preconfigurada.
20
USO DEL APARATO
6.3.2 Grabación preconfigurada mediante EPG
En EPG, la grabación preconfigurada se realiza de acuerdo con la información proporcionada por la EPG.
Seleccione el canal y el programa en la Guía de TV. Presione “ROJO” para reservar el programa.
6.4 Inicio de grabación temporizada
Cuando se ha pasado el tiempo de la grabación, la unidad volverá a la reproducción normal y aparecerá un
mensaje para confirmar la grabación.
21
USO DEL APARATO
En el modo de Reproducción diferida, se mostrará la siguiente información.
6.5 Detener la reproducción en diferido dentro de una programación
=
▲
=
▲
Cuando presiona el botón “ ”, la reproducción se detiene, pero la grabación continúa.
Vuelva a presionar “ ” para reiniciar la reproducción. En este momento, aparecerá una barra en la parte
inferior de la pantalla mostrando el tiempo de grabación a la derecha y la diferencia de tiempo a la izquierda.
=
▲
Presione “ROJO” para ir hacia atrás.
Presione “VERDE” para avanzar.
Presione “ ” para pausar o reproducir.
Presione “ ■” para salir del tiempo de la barra, la grabación continuará.
6.6 Detener la grabación de una programación
Presione el botón
para detener la grabación.
Presione el botón de “ENCENDIDO” y aparecerá una barra para que seleccione la función deseada.
22
USO DEL APARATO
Presione “ROJO" para detener la grabación y volver la unidad al modo standby.
Presione “AMARILLO” para detener la grabación y volver la unidad al modo standby tras terminar la
grabación. Presione el botón “VERDE” para salir del modo de grabación. Si no se realizan operaciones en
los 15 segundos siguientes, la unidad volverá al modo standby automáticamente.
7. Diferido-Timeshift
La función de diferido le permite ver un programa minutos u horas antes, mientras que el programa real aún
se está emitiendo en directo.
7.1 Configurar el diferido
Seleccione la configuración de diferido en el menú “Mi Grabadora -> Preferencias de grabación ->Diferido”
23
USO DEL APARATO
AUTO: Cuando se selecciona, en la barra de Timeshift, la unidad graba automáticamente el período de
tiempo de grabación por defecto en un búfer. Ejemplo: Si el tiempo de grabación por defecto se establece
en 1 hora.Cuando visualice un programa en directo, siempre puede rebobinar 1 hora y ver el mismo
programa desdeese tiempo antes. La unidad graba automáticamente el programa en el USB o disco duro y
le permite repetir cualquier escena.
PAUSA: Cuando se presiona el botón “PAUSA” mientras se visualiza un programa en directo, la unidad
guarda automáticamente el contenido siguiente en el USB/disco duro. Esto le permite pausar un programa,
por ejemplo, para recibir una llamada de teléfono y volver a su asiento para ver el programa desde el
momento en el que lo pausó.
APAGADO: Cuando el diferido se establece en el modo “OFF”, no se activará la función de diferido y, por lo
tanto, no se guardará ningún contenido en la memoria del USB/ disco duro.
Nota: La función de diferido funcionará mejor cuando el dispositivo conectado sea un
USB/disco duro de alta velocidad. Una velocidad inferior causa pausas durante la
reproducción. Asegúrese de que la velocidad de acceso es alta antes de proceder a la
grabación.
24
USO DEL APARATO
7.2 Barra de estado de diferido
Cuando el diferido está funcionando, aparece una barra en la parte inferior de la pantalla que muestra el
estado exacto. La barra desaparecerá automáticamente si un programa incluye subtítulos o cunado se entra
en el modo de teletexto. Presione cualquier botón para que vuelva a aparecer la barra.
7.3 Reproducción de diferido
Cuando el diferido está activado, los programas se pueden rebobinar o avanzar en cinco velocidades
diferentes: Presione el botón
para avanzar: X2, X4, X8, X16, X32 Presione el botón
para rebobinar:
X2, X4, X8, X16, X32.
7.4 Detener el diferido
Presione el botón
para detener la función de Diferido y volver al modo normal.
Nota: Asegúrese de que hay espacio suficiente en su USB/Disco duro antes de activar
la función de Diferido. De lo contrario, esta función no estará operativa.
25
Resolucion de Problemas
Síntoma
La unidad no
enciende
Razones
Soluciones
La unidad no está conectada al suministro eléctrico
Conecte la corriente
La batería está agotada
Recargue la batería
Olvidé el código
de bloqueo de
canales
Borre los canales bloqueados
y vuelva buscarlos
Hay ondas de energía u otros fenómenos anormales
estática) molestando
(como la electricidad
Los botones no
funcionan
El mando a
distancia no
funciona
Encienda/apague la corriente
o desconecte/vuelva a
conectar el cable de
alimentación
Apunte con el mando a
El mando a distancia no está apuntando directamente al
distancia directamente hacia
sensor
el sensor remoto.
El mando a distancia no está apuntando directamente al
sensor
Utilice el mando a distancia a
una distancia máxima de 7
metros
Las pilas están agotadas
Cambie las pilas
La antena aérea está desconectada
No se encuentra
señal
La antena aérea está dañada /desviada
Fuera de zona de señal digital
26
Compruebe el cable de la
antena Compruebe la antena
Resolucion de Problemas
Contacte con el teléfono de
ayuda
Olvidé el código
de bloqueo del
menú
Mensaje de canal
codificado
No hay respuesta
al mando a
distancia
Intente el código: "0000"
Seleccione un canal
alternativo
El canal está codificado
El receptor está apagado
El mando no se dirige correctamente Panel delantero
obstruido Pilas del mando agotadas
Conecte y encienda. Dirija el
mando a distancia hacia el
panel delantero de la unidad.
Compruebe que no hay
obstrucciones. Cambie las
pilas
Borre los canales bloqueados
y vuelva buscarlos
Olvidé el código
de bloqueo de
canales
Contacte con el teléfono de
ayuda
Intente el código: "3330"
Tras mover el
aparato a otra
habitación no se
puede recibir
señal digital
El cable de antena desde el punto nuevo puede que pase a
Intente un punto de antena
través de un sistema de distribución, lo que puede reducir
directo de la antena
la señal digital
27
Especificaciones
Especificaciones
USB 2.0 Alta velocidad x1
Reproductor de Medios: JPEG, BMP, MP3, MPG (MPEG2)
Salida Video: CVBS
Formato Audio: MPEG LAYER | & || 32/44, 1/48KHZ
Tasa de Bits: max 15 MBIT/S
28
Especificaciones
DVB-T
Sintonizador:
Rango de frecuencia:
VHF 174MHz a 230MHz
UHF 470MHz a 862MHz
Ancho de banda: 6/7/8MHz
Entrada de antena: 75 ohmios
Modulación:
Esquema de modulación: COFDM – 2k/8k
modulación OFDM: QPSK/QAM16,QAM64
Descodificado MPEG-2MP@ML
Ratio de aspecto: 4:3 - 16:9
Funciones: Epg/Lcn/Teletexto/Fav/Temporizador/bloqueo paterno/multi audio /subtitulado
Conformidad: EN 300744
Pantalla: LCD TFT 9”
Alimentador AC/DC: AC100-240V-50/60Hz,0.45A Max
DC 9.0V – 1.0A
29
Especificaciones
Adaptador AC/DC: AC 100 - 240V-50/60Hz 0,45A DC 9,0V – 1,0A
Consumo máximo: <13,5W
Batería de Litio: 7,4V / 1800mA
Carga rápida (OFF): 3 / 4 horas
Carga lenta (ON): 7 / 8 horas
Entrada/salida AV: 2 canales de vídeo CVBS
Salida de auriculares: 5mW (clavija de 3,5mm)
Dimensiones: 25,4(L) x 2,2(D) x 16,2(H) cm
30
DECLARACIÓN DE CONFORMIDAD
Todos los nombres de la empresa, marcas y productos son marcas comerciales registradas de
sus empresas respectivas.
DECLARACIÓN DE CONFORMIDAD
Nombre del fabricante: Sytech. Satyatrade S.L
Dirección: Pol. Ind. La Raya – C/ Guadalquivir, 2 – 28816 Camarma de Esteruelas - Madrid – ESPAÑA.
Tel: 902 430967
Fax: 91-886-42-85
C.I.F: B83254763
Declaramos bajo nuestra única responsabilidad que el producto:
Sytech® Reproductor portátil de Portable TV
cumple las directivas, normas y estándares esenciales de la Unión Europea 89/336/EEC (Directiva EMC).
País de fabricación: China