Download CHRONOMÈTRE NUMÉRIQUE Model: SL110
Transcript
SL110
STOPWATCH MODE
FCC STATEMENT
To operate stopwatch:
This device complies with Part 15 of the FCC Rules.
Operation is subject to the following two conditions: (1) This
device may not cause harmful interference, and (2) This
device must accept any interference received, including
interference that may cause undesired operation.
1.
Navigate to stopwatch mode.
2.
Press START / STOP to start and stop timer.
3.
Press SPLIT / RESET to reset timer when paused and
to split time measurements while timer is still running.
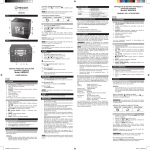
FIG. 1
1
4
5
2
6
3
ALARM
To set alarm:
1.
Navigate to Alarm Mode.
2.
Press SPLIT / RESET to select between hour / minute.
3.
Press START / STOP to scroll up and set the desired
time. A indicates am and P indicates pm.
4.
Press MODE to return to clock mode.
To toggle alarm ON / OFF:
1.
2.
7
Press SPLIT / RESET to display alarm time in clock
mode.
To toggle the alarm ON / OFF press START / STOP
while pressing and holding SPLIT / RESET. When
activated
indicates alarm is ON.
To silence alarm:
•
WARNING
Changes or modifications not expressly
approved by the party responsible for compliance could void
the user’s authority to operate the equipment.
NOTE
This equipment has been tested and found to
comply with the limits for a Class B digital device, pursuant
to Part 15 of the FCC Rules. These limits are designed to
provide reasonable protection against harmful interference
in a residential installation.
This equipment generates, uses and can radiate radio
frequency energy and, if not installed and used in accordance
with the instructions, may cause harmful interference to
radio communications. However, there is no guarantee
that interference will not occur in a particular installation. If
this equipment does cause harmful interference to radio or
television reception, which can be determined by turning the
equipment off and on, the user is encouraged to try to correct
the interference by one or more of the following measures:
•
Reorient or relocate the receiving antenna.
•
Increase the separation between the equipment and
receiver.
Press START / STOP to silence it for 5 minutes.
•
Connect the equipment into an outlet on a circuit different
from that to which the receiver is connected.
Press SPLIT / RESET to turn the alarm off. It will reactivate after 24 hours.
•
Consult the dealer or an experienced radio / TV
technician for help.
OR
DIGITAL STOPWATCH
Model: SL110
•
•
Do not subject the unit to excessive force, shock, dust,
temperature or humidity.
•
Do not cover the ventilation holes with any items such as
newspapers, curtains etc.
•
Do not immerse the unit in water. If you spill liquid over
it, dry it immediately with a soft, lint-free cloth.
EN
INTRODUCTION
Thank you for selecting this Oregon ScientificTM Stopwatch.
Please keep this manual for instructions and information you
should know about.
1.
SPLIT / RESET: Split / reset stopwatch; toggle setting
options
2.
Day icon
3.
AM / PM icon
4.
MODE: Toggle between options
5.
START / STOP: Start / stop stopwatch; set values
6.
7.
MODE SEQUENCE
Stopwatch Mode
Alarm Mode
CLOCK MODE
FACE AVANT (FIG. 1)
1.
SPLIT / RESET (FRACTURER / REINITIALISER) :
Fracturez / réinitialisez le chronomètre; basculez les
options de réglage
2.
Icône du jour de la semaine
3.
Icône AM / PM
4.
MODE: Basculez entre les options
5.
START / STOP (COMMENCE / ARRETE): Commencez
/ arrêtez le chronomètre; réglez les valeurs
6.
7.
: Indique que l’alarme est activée
Gardeur de bride
SEQUENCE DE MODE
Appuyez MODE pour naviguer entre les modes:
The following information is not to be used as contact for
support or sales. Please call our customer service number
(listed on our website at www.oregonscientific.com, or on the
warranty card for this product) for all inquiries instead.
Mode Horloge
Mode Chronomètre
Mode de rglage heur / date
Mode d’Alarme
We
Name:
Oregon Scientific, Inc.
Address:
19861 SW 95th Ave.,
Tualatin, Oregon 97062 USA
1-800-853-8883
Do not tamper with the unit ’s internal components. This
invalidates the warranty.
Telephone No.:
•
Only use fresh batteries. Do not mix new and old
batteries.
Product No.:
SL110
•
Images shown in this manual may differ from the actual
display.
Product Name:
Digital Stopwatch
Manufacturer:
IDT Technology Limited
Appuyez START / STOP pour visualiser la date.
•
When disposing of this product, ensure it is collected
separately for special treatment.
Address:
Pour régler l’heur et la date:
•
Placement of this product on certain types of wood
may result in damage to its finish for which Oregon
Scientific will not be responsible. Consult the furniture
manufacturer’s care instructions for information.
Block C, 9/F, Kaiser Estate,
Phase 1,41 Man Yue St., Hung
Hom, Kowloon, Hong Kong
declare that the product
is in conformity with Part 15 of the FCC Rules. Operation is
subject to the following two conditions: 1) This device may
not cause harmful interference. 2) This device must accept
any interference received, including interference that may
cause undesired operation.
MODE HORLOGE
1.
Naviguez jusqu’au mode de réglage heur / date.
2.
Appuyez START / STOP pour changer les valeurs.
Appuyez et maintenez enfoncé pour rapidement
parcheminer entre les valeurs.
3.
Appuyez SPLIT / RESET pour aller jusqu’au prochain
réglage. La séquence des réglages est: réglez les
secondes à zéro, minute, heur / mode horaire 12 / 24,
date, moi / jours de la semaine.
Appuyez MODE pour retourner au mode horloge
•
The contents of this manual may not be reproduced
without the permission of the manufacturer.
•
Do not dispose old batteries as unsorted municipal
waste. Collection of such waste separately for special
treatment is necessary.
4.
•
Please note that some units are equipped with a
battery safety strip. Remove the strip from the battery
compartment before first use.
REMARQUE Appuyez et maintenez enfoncé START /
STOP pour parcheminer entre les valeurs horaires et entre
les modes horaires 12 / 24.
NOTE The technical specifications for this product and the
contents of the user manual are subject to change without
notice.
SPECIFICATIONS
Time / date setting Mode
VUE D’ENSEMBLE DE L’HORLOGE
•
Press MODE to navigate between modes:
Clock Mode
Merci d’avoir choisi ce chronomètre (SL110) d’Oregon
ScientificTM. Conservez ce manuel car il contient instructions
et des informations qui peuvent vous être utiles.
Do not clean the unit with abrasive or corrosive materials.
: Indicates alarm is on
Strap Keeper
FR
INTRODUCTION
•
CLOCK OVERVIEW
FRONT VIEW (FIG. 1)
MODE D’EMPLOI
DECLARATION OF CONFORMITY
PRECAUTIONS
USER MANUAL
CHRONOMÈTRE NUMÉRIQUE
Model: SL110
TYPE
DESCRIPTION
LxWxH
60 x 23 x 70 mm (2.4 x 0.9 x 2.8 in)
Weight
50 g (1.8 oz)
Clock
HH:MM:SS
MODE CHRONOMETRE
Pour fonctionner le chronomètre:
1.
Naviguez jusqu’au mode chronomètre.
2.
Appuyez START / STOP pour commencer et arrêter le
chronomètre.
3.
Appuyez SPLIT / RESET pour réinitialiser le chronomètre
quand il est mit sur pause et pour fracturer les mesures
du chronomètre pendant qu’il est toujours en marche.
Hour Format
12 / 24 hour format
MODE ALARME
Calendar
Day / month-date
To set time and date:
Alarm
5-minute snooze function
1.
Navigate to time / date setting mode.
Power
1 x LR44 1.5V battery
2.
Press START / STOP to set the value. Press and hold to
quickly scroll through the settings.
ABOUT OREGON SCIENTIFIC
3.
Press SPLIT / RESET to move to the next setting. The
setting sequence is: set seconds to zero, minute, hour /
12 / 24 hour mode, date, month and weekday.
Visit our website (www.oregonscientific.com) to learn more
about Oregon Scientific products.
Pour régler l’alarme:
1. Naviguez jusqu’au mode d’alarme.
2. Appuyez SPLIT / RESET pour sélectionner entre heure
/ minute.
3. Appuyez START / STOP pour parcheminer
progressivement jusqu’aux réglages désirés. A indique
le matin et P l’après midi.
4. Appuyez MODE pour confirmer.
4.
Press MODE to return to Clock mode.
To view the date press START / STOP.
NOTE Press and hold START / STOP to scroll through hour
settings and 12 / 24 hour formats.
If you’re in the US and would like to contact our Customer
Care department directly, please visit:
www2.oregonscientific.com/service/support.asp
OR Call 1-800-853-8883.
For international inquiries, please visit:
www2.oregonscientific.com/about/international.asp.
SL110_M_USA_OP.indd 1
Pour basculer l’alarme sur ON / OFF:
1. Appuyez SPLIT / RESET pour afficher l’heure de l’alarme
pendant que vous êtes dans le mode d’horloge.
2. Pour mettre l’alarme sur ON / OFF appuyez START /
STOP pendant que vous maintenez enfoncé SPLIT /
RESET. Lorsque l’alarme fut activée
indiquera que
l’alarme est sur ON.
5/8/07 10:12:12 AM
Pour couper le son de l’alarme :
•
Appuyez START / STOP pour couper la sonnerie
pendant 5 minutes.
OU
•
Appuyez SPLIT / RESET pour éteindre la sonnerie. Elle
se réactivera après 24 heures.
•
MANUAL DE USUARIO
•
ES
INTRODUCCIÓN
•
Ne pas soumettre le produit à une force excessive, au
choc, à la poussière, aux changements de température
ou à l’humidité.
Gracias por elegir el cronómetro de Oregon ScientificTM
Sírvase guardar este manual para disponer de las
instrucciones y la información que debería conocer.
•
Ne pas couvrir les trous de ventilation avec des journaux,
rideaux etc…
•
Ne pas immerger le produit dans l’eau. Si vous renversez
du liquide sur l’appareil, séchez-le immédiatement avec
un tissu doux.
•
Ne pas nettoyer l’appareil avec des matériaux corrosifs
ou abrasifs.
•
Ne pas trafiquer les composants internes. Cela invalidera
votre garantie.
N’utilisez que des piles neuves. Ne pas mélanger des
piles neuves et usagées.
•
Les images de ce manuel peuvent différer de l’aspect
réel du produit.
•
Lorsque vous désirez vous débarrasser de ce produit,
assurez-vous qu’il soit collecté séparément pour un
traitement adapté.
•
Le poser sur certaines surfaces en bois peut endommager
la finition du meuble, et Oregon Scientific ne peut en
être tenu responsable. Consultez les mises en garde du
fabricant du meuble pour de plus amples informations.
•
Le contenu du présent manuel ne peut pas être reproduit
sans la permission du fabriquant.
•
Ne pas jeter les piles usagées dans les containers
municipaux non adaptés Veuillez effectuer le tri de ces
ordures pour un traitement adapté si nécessaire.
•
Veuillez remarquer que certains appareils sont
équipés d’une bande de sécurité. Retirez la bande du
compartiment des piles avant la première utilisation.
RESUMEN RELOJ
1.
SPLIT / RESET: Distribuir / reiniciar cronómetro; alternar
opciones de ajuste
2.
Icono del día
3.
Icono AM / PM
4.
MODE: Alternar entre funciones
5.
START / STOP: Iniciar / detener cronómetro; ajustar
valores
7.
Indica que la alarma está activada.
Modo de cronómetro
CHARATERISTIQUES TECHNIQUES
MODO RELOJ
TYPE
SYGNIFICATION
Pulse START / STOP para ver la fecha.
LxExH
60 x 23 x 70 mm
(2.4 x 0.9 x 2.8 pouces)
Para ajustar fecha y hora:
Poids
50 g (1.8 onces)
Horloge
HH:MM:SS
Format horaire
Format horaire 12 / 24
Calendrier
Jour / moi-date
Alarme
5 minutes fonction répétition
Alimentation
1 x LR44 1.5V pile
Modo Alarma
1.
Acceder al modo de ajuste de hora / fecha.
2.
Pulse START / STOP para ajustar el valor. Pulse y
manténgalos pulsados para desplazarse rápidamente
por los ajustes.
3.
4.
Pulse SPLIT / RESET para pasar al siguiente ajuste. La
secuencia de configuración es: ajustar segundos a cero,
minuto, hora, modo de hora 12 / 24h, fecha, mes y día
de la semana.
•
No sumerja el dispositivo en agua. Si se vertiera
líquido en la unidad, límpiela con un paño suave y sin
electricidad estática.
•
No limpie la unidad con materiales abrasivos o
corrosivos.
•
No manipule los componentes internos. De hacerlo se
invalidaría la garantía.
•
Use siempre pilas nuevas. No mezcle pilas viejas con
pilas nuevas.
•
Las imágenes de esta guía para el usuario puede ser
distintas al producto en sí.
•
Cuando elimine este producto, asegúrese de que no
vaya a parar a la basura general, sino separadamente
para recibir un tratamiento especial.
•
La colocación de este producto encima de ciertos tipos
de madera puede provocar daños a sus acabados.
Oregon Scientific no se responsabilizará de dichos
daños. Consulte las instrucciones de cuidado del
fabricante para obtener más información.
•
Los contenidos de este manual no pueden reproducirse
sin permiso del fabricante.
•
No elimine las pilas gastadas con la basura normal.
Es necesario desecharlo separadamente para poder
tratarlo.
•
Tenga en cuenta que algunas unidades disponen de
una cinta de seguridad para las pilas. Retire la cinta de
compartimiento para pilas antes de usarlo por primera
vez.
NOTA Pulse START / STOP y manténgalo pulsado para
desplazarse por los ajustes de hora y formato 12 / 24h.
MODO CRONÓMETRO
Para manejar el cronómetro:
OU
1.
Acceda al modo cronómetro.
par téléphone au: 1-800-853-8883
2.
Pour des renseignements internationaux, rendez vous sur le
site: www2.oregonscientific.com/about/international.asp.
Pulse START / STOP para poner en marcha el
cronómetro y detenerlo.
3.
Pulse SPLIT / RESET para reiniciar el cronómetro
cuando está en pausa, y para distribuir las mediciones
de tiempo mientras el cronómetro funcione.
EUROPE - DÉCLARATION DE CONFORMITÉ
NOTA La ficha técnica de este producto y los contenidos de
este manual de usuario pueden cambiarse sin aviso.
FICHA TÉCNICA
TIPO
DESCRIPCIÓN
LxAxH
60 x 23 x 70 mm
(2.4 x 0.9 x 2.8 pulgadas)
Peso
50 g
Reloj
HH:MM:SS
horas Formato
12/24 horas Formato
Calendario
Dia / mes-fecha
Alarma
Función snooze de 5 minutos
Alimentación
1 x LR44 pilas
Pulse MODE para volver al Modo Reloj.
A PROPOS D’OREGON SCIENTIFIC
Par la présente, Oregon Scientific déclare que Chronomètre
Model: SL110 est conforme à la directive européenne
89/336/CE. Une copie signée et datée de la déclaration
de conformité est disponible sur demande auprès de notre
Service Client.
No cubra los orificios de ventilación con objetos como
periódicos, cortinas, etc.
Pulse MODE para pasar de un modo a otro:
Modo de ajuste de hora
/ fecha
Si vous êtes aux Etats-Unis, vous pouvez contacter notre
support consommateur directement : sur le site
www2.oregonscientific.com/service/support.asp
•
SECUENCIA DE MODO
REMARQUE Les caractéristiques techniques de ce produit
et le contenu de ce manuel peut être soumis à modifications
sans préavis.
Pour plus d‘informations sur les produits Oregon Scientific
France, rendez-vous sur notre site www.oregonscientific.fr.
No exponga el producto a fuerza extrema, descargas,
polvo, fluctuaciones de temperatura o humedad.
Orificio para la correa
Modo reloj
Pulse SPLIT / RESET to para apagar la alarma. Se
reactivará al cabo de 24 horas.
•
VISTA FRONTAL (FIG. 1)
6.
Pulse START / STOP para silenciarla durante 5 minutos.
O bien
PRECAUCIÓN
PRECAUTIONS
•
Para apagar la alarma:
CRONÓMETRO Digital
Modelo: SL110
SOBRE OREGON SCIENTIFIC
Visite nuestra página web (www.oregonscientific.com) para
conocer más sobre los productos de Oregon Scientific. Si
está en EE.UU y quiere contactar directamente con nuestro
Departamento de Atención al Cliente, por favor visite www2.
oregonscientific.com/service/support.asp o llame al 1-800853-8883.
Si está en España y quiere contactar directamente con
nuestro Departamento de Atención al Cliente, por favor
visite www.oregonscientific.es o llame al 902 338 368
Para consultas internacionales, por favor visite www2.
oregonscientific.com/about/international.asp.
ALARMA
EU - DECLARACIÓN DE CONFORMIDAD
Para configurar la alarma:
Por medio de la presente Oregon Scientific declara que
el Cronómetro (Modelo: SL110) cumple con los requisitos
esenciales de la directiva EMC 89/336/CE. Tiene a su
disposición una copia firmada y sellada de la Declaración
de Conformidad, solicítela al Departamento de Atención al
Cliente de Oregon Scientific.
1.
Acceda al Modo Alarma.
2.
Pulse SPLIT / RESET para elegir hora o minuto.
3.
Pulse START / STOP para subir y configurar la hora
deseada. La A indica AM y la P indica PM.
4.
Pulse MODE para volver al Modo Reloj.
Para activar / desactivar la alarma:
1.
Pulse SPLIT / RESET para mostrar la hora de la alarma
en modo reloj.
2.
Para encender o apagar la alarma, pulse START /
STOP mientras pulse SPLIT / RESET y lo mantenga
indicará que la alarma está
pulsado. Una vez activo,
activada.
© 2007 Oregon Scientific. All rights reserved.
086L004826-029
SL110_M_USA_OP.indd 2
5/8/07 10:12:20 AM


