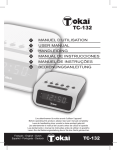
1
TCP-124
2
MANUEL D’UTILISATION
12
USER MANUAL
22
HANDLEIDING
32
MANUAL DE INSTRUCCIONES
43
MANUEL DE INSTRUÇÕES 53
BEDIENUNGSANLEITUNG
Lire attentivement la notice avant d’utiliser l’appareil
Before operating this product, please read user manual completely
Lees de handleiding door voordat u deze eenheid gebruikt
Lea atentamente el manual del usuario antes de utilizar el aparato
Lea atentamente o manual de instruções antes de utilizar ol aparelho
Lesen Sie die Bedienungsanleitung bevor Sie das Gerät gebrauchen
Français - English - Dutch
Español - Portugués - Deutsch
TCP-124
AVERTISSEMENT
Ce symbole indique qu’une tension
dangereuse représentant un risque
d’electrocution est présente dans cet
appareil.
ATTENTION
RISQUE D’ÉLECTROCUTION
NE PAS OUVRIR
ATTENTION: POUR RÉDURE LE RISQUE D’ÉLECTROCUTION,
NE PAS RETIRER LE COUVERCLE L’INTÉRIEUR DE L’APPAREIL
NE COMPORTE AUCUNE PIÉCE UTILE À L’UTILISATEUR
CONFIEZ-EN L’ENTRETIEN A DU PERSONNEL QUALIFIE
Ce symbole indique que les documents
fournis avec cet appareil contiennent
des instructions importantes relatives au
fonctionnement et à l’entretien
REMARQUE: nous nous réservons le droit d’apporter des
changements techniques sans préavis dans un but d’amélioration.
CONSIGNES DE SECURITE
1. Ne placez aucune flamme, telle qu’une bougie, sur l’appareil.
2. Ne placez pas l’appareil dans un endroit clos, tel qu’une
bibliothèque fermée ou étagère sans une ventilation adéquate.
3. Lorsque le dispositif de mise hors tension est la fiche secteur,
celle-ci doit rester accessible et opérationnelle.
4. N’obstruez pas les grilles de ventilation avec des objets tels que
journaux, nappes de table, rideaux, etc.
5. N’exposez pas l’appareil à des projections de liquides et assurez vous qu’aucun objet contenant de l’eau, tel qu’un vase, ne soit
placé sur l’appareil.
6. Ne branchez pas l’antenne FM sur une antenne extérieure.
7. N’exposez pas l’appareil au rayonnement direct du soleil, aux
extrêmes de températures, à l’humidité, aux vibrations ou à un
environnement poussiéreux.
8. Ne nettoyez pas la surface de l’appareil à l’aide de produits
abrasifs, de benzène, de diluants ou d’autres solvants. Nettoyez la avec une solution de détergent doux et non-abrasif et un
chiffon propre et doux.
9. Ne tentez jamais d’insérer des fils de fer, aiguilles ou autres objets
similaires dans les grilles de ventilation ou autres orifices de
l’appareil.
10.Avertissement concernant la mise hors tension de l’appareil : la
mise hors tension s’effectue en débranchant la fiche secteur. De
ce fait, celle-ci doit toujours rester accessible et opérationnelle.
2
11.N’exposez pas les piles à une chaleur extrême, telle que le
rayonnement direct du soleil, le feu etc.
12.Produit LED Classe 1
ALIMENTATION SECTEUR & SYSTEME DE SAUVEGARDE
Connectez le cordon d’alimentation AC à la prise de courant
domestique AC. Cet appareil est équipé d’un système de pile de
sauvegarde. Il faut insérer une pile lithium plate CR2032 de 3V
(non fournie). Insérez la pile dans le compartiment à pile en veillant
à ce que les bornes positive et négative (+et-) correspondent aux
bornes illustrées dans le compartiment à pile. S’il y a une coupure de
courant, l’horloge passe automatiquement en mode alimentation sur
pile ; l’heure de l’horloge ainsi que la mémoire de la minuterie sont
conservées. Lorsque le courant est rétabli, l’horloge se remet sur
l’alimentation secteur.
3
Description de l’appareil & emplacement des commandes
Fonctions et contrôles
1. Permet d’augmenter l’intensité lumineuse des veilleuses
2. Permet de réduire de l’intensité lumineuse des veilleuses
3. Permet d’activer et désactiver l’éclairage
4. (MEM.SET/M+/NAP) Mémorisation / Mémoire +/ Fonction SIESTE/
Désactivation auto de l’affichage
5. Veilleuses ‘Simulateur d’aube’
6. (SNOOZE/SLEEP/DIMMER) Alarme à répétition / Fonction Arrêt différé / Variateur de luminosité
7. Réglage / Température
8. << / Recherche de stations précédentes / ANNÉE - MOIS - JOUR
9. (AL1) Régler / Activer-Désactiver l’Alarme 1
10. Afficheur LED
11. Allumer/Eteindre l’appareil ( )
12. >> / Recherche de stations suivantes / Heure d’été / C°- °F
13. (AL2) Régler / Activer-Désactiver l’Alarme 2
14. Augmenter le VOLUME + / Activer- désactiver l’affichage en
boucle (DISPLAY)
15. Réduire le VOLUME 16. Inverser la projection de l’heure à 180° / Heure -Température
(180° FLIP / TIME / TEMP)
17. Activer /Désactiver le projecteur
18. Réglage du projecteur : Molette d’ajustement
19. Haut-parleur
20. Antenne FM
21. Capteur de température (intérieure)
22. Compartiment à pile
23. Cordon d’alimentation secteur
24. Plaque signalétique
4
Description de l’affichage et indicateurs
Indicateur Mise en veille
Indicateur HEURE
Indicateur PM
Indicateur MHz
Indicateur ALARME 1
Indicateur ALARME 2
FONCTIONNEMENT DE BASE
REGLAGE DE L’HEURE ET DE LA DATE
Appuyez sur la touche réglage SET (7) en mode veille et maintenezla enfoncée pendant plus de 2 secondes pour accéder au mode de
réglage de l’heure. Une fois en mode réglage, appuyez sur la touche
réglage SET (7) pour modifier le cycle comme suit :
Normal g Année g Mois g Jour g 12/24H g Heure en temps Réel g
Min en temps Rée g Normal
Manipulations pour le réglage :
- Appuyez sur la touche << (8) pour diminuer la valeur.
- Appuyez sur la touche >> (12) pour augmenter la valeur.
- Maintenez pendant 2 sec les touches << ou >> pour accélérer le
réglage.
- Utilisez la touche réglage SET (7) pour valider chaque réglage.
REGLAGE DE L’ALARME 1 & 2
En mode veille, appuyez une fois sur la touche AL1 / AL2 (9/13) pour
passer en mode alarme et visualiser l’heure de l’alarme.
L’heure de l’alarme s’affiche, appuyez longuement (environ 3
secondes) sur la touche AL1 / AL2 (9/13) pour entrer en mode
réglage de l’alarme (1 et 2). Les chiffres de l’heure clignotent. Une
fois dans le réglage, appuyez de nouveau sur la touche AL1 / AL2
pour afficher les champs à régler dans la séquence suivante :
Normal g HEURE AL 1 g Minutes AL 1 g JOUR AL 1 g REVEIL
avec SONNERIE AL 1 g REVEIL avec RADIO AL 1 g VOLUME
RADIO AL 1 g Luminosité g Intensité lumineuse g Normal.
5
Normal g HEURE AL 2 g Minutes AL 2 g JOUR AL 2 g REVEIL
avec SONNERIE AL 2 g REVEIL avec RADIO AL 2 g VOLUME
RADIO AL 2 g Luminosité g Intensité lumineuse g Normal.
Sélectionnez la récurrence de l’alarme comme suit:
1-5 : Du lundi au vendredi
1-7 : Toute la semaine
6-7 : Samedi et dimanche
1-1: Un jour de la semaine
Manipulation pour le réglage :
- Appuyez sur la touche << (8) pour ajuster les valeurs en sens
décroissant.
- Appuyez sur la touche >> (12) pour ajuster les valeurs en sens
croissant.
- Maintenez les touches << ou >> enfoncées pendant 2 secondes
pour activer l’avance automatique.
- Utilisez les touches AL1 / AL2 pour valider chaque réglage
REVEIL AVEC SIMULATEUR D’AUBE
Les veilleuses s’allument 5 minutes avant l’heure de réveil. La lumière
s’allume progressivement jusqu’ à atteindre sa luminosité maximum à
l’heure précise du réveil.
DURÉE DE L’ALARME
L’alarme par la sonnerie ou par la radio continuera de sonner pendant
30 minutes si vous n’appuyez sur aucune touche puis elle s’arrêtera
automatiquement et se déclenchera à la même heure le lendemain.
FONCTION SNOOZE (ALARME A REPETITION)
- Pendant que l’alarme sonne, appuyez sur le bouton Snooze (6)
pour activer la fonction Snooze (l’alarme à répétition vous
permettra de dormir un peu plus), l’alarme s’éteindra.
- L’intervalle de temps de la fonction Snooze est de 9 minutes
(n’inclut pas la seconde de compensation).
- L’alarme à répétition reste activée tant que vous n’appuierez pas
sur la touche ON/OFF (11).
- Si vous n’appuyez sur aucune touche, l’alarme sonnera pendant 30
6
minutes puis s’arrêtera automatiquement.
L’icône de l’alarme AL.1 ou AL.2 clignote tant que la fonction Snooze
est toujours activée et l’icône reste fixe lorsque l’alarme s’arrête.
FONCTION « ALLUMER / ETEINDRE L’AFFICHAGE
AUTOMATIQUEMENT »
- En mode veille, appuyez longuement (environ 3 secondes) sur la
touche « MEM. SET / M+ / NAP » (4), pour activer cette
fonction. L’indicateur s’affiche sur l’écran LED, et après 15
secondes l’afficheur s’éteint automatiquement.
Appuyez sur n’importe quelle touche pour activer l’affichage
pendant 15 secondes.
- Pour désactiver la fonction, appuyez une nouvelle fois pendant 3
secondes sur la touche « MEM. SET / M+ / NAP » (4), l’afficheur
reste allumé.
AFFICHAGE EN BOUCLE
En mode veille, appuyez longuement (2 sec) sur le bouton VOLUME
+/ DISPLAY (14) pour entrer en mode multi affichage en boucle.
L’afficheur indique « ON » pour indiquer que cette fonction est
activée. L’écran affiche les informations suivantes dans l’ordre :
ANNEE–MOIS-JOUR et la TEMPERATURE. Après 5 secondes, il
affichera de nouveau l’heure. Puis le cycle d’affichage en boucle
continuera.
Appuyez de nouveau longuement sur le bouton VOLUME+ / DISPLAY
(14) pour désactiver cette fonction, l’afficheur indique « OFF ».
Indicateur ANNEE
Indicateur MOIS
Indicateur JOUR
ECOUTER LA RADIO
Appuyez sur la touche ‘ON/OFF’ (11) pour allumer la radio.
Réglez la station FM à l’aide des touches de syntonisation ‘<< /
Recherche de stations précédentes’ (8) ou ‘>> / Recherche de
stations suivantes’ (12).
7
Si vous appuyez plus d’une seconde sur l’une des touches de
syntonisation ‘<<’ ou ‘‘>>’ l’appareil recherchera la prochaine station
de radio disponible.
Pour éteindre la radio appuyez sur la touche ‘ON/OFF’ (11).
Mémoriser et rappeler les stations de radio présélectionnées.
Appuyez sur la touche ‘ON/OFF’ (11) pour allumer l’appareil.
Réglez la station FM désirée à l’aide des touches de syntonisation
‘<< / Recherche de stations précédentes’ (8) ou ‘>> / Recherche de
stations suivantes’ (12).
Appuyez sur la touche ‘MEM SET/ M+’ (4) & “P02” clignote à
l’écran.
Appuyez une nouvelle fois sur la touche ‘MEM SET/ M+’ pour
mémoriser la station radio.
Répéter les étapes 2 à 4 afin de mémoriser jusque 10 stations de
radio FM.
Lorsque “P01 à P10” clignote, sélectionnez le numéro de préréglage
à l’aide des touches << (8) ou >> (12).
Pour rappeler une station préréglée, appuyez sur ‘MEM SET/ M+’
(4) pour sélectionner le numéro de présélection.
REMARQUE:
Assurez-vous que l’antenne FM est complètement déroulée pour
assurer une meilleure réception FM.
Fonction SOMMEIL (SLEEP)
Lorsque vous écoutez la radio, appuyez sur le bouton « Snooze/
Sleep » (6) pour entrer en mode « Arrêt différé ». Appuyez plusieurs
fois sur le bouton «Snooze/Sleep» (6) pour programmer l’arrêt
différé de 90 minutes, 60, 30, 15 minutes à éteint. L’appareil s’éteint
automatiquement une fois le temps écoulé.
FONCTION SIESTE (NAP)
Cette fonction sert à définir la durée d’une sieste sans modifier le
réglage de l’alarme déjà programmée pour le lendemain.
Lorsque l’appareil est en mode veille, appuyez sur la touche « MEM.
SET / M+/NAP » (4) pour entrer en mode SIESTE. Appuyez
8
plusieurs fois sur la touche « MEM. SET / M+/NAP » (4) pour
programmer la minuterie de 90 minutes à 10 minutes. Une fois le
temps écoulé la sonnerie retentit.
Pour arrêter la sonnerie d’alarme, appuyez sur la touche ON/OFF
(11) (si vous appuyez sur le bouton “ MEM. SET / M+/NAP” (1)
cela n’aura aucun effet).
Si aucune touche n’est actionnée la sonnerie d’alarme retentira
pendant 30 minutes puis s’arrêtera automatiquement.
TEMPERATURE INTERIEURE
• Un fil capteur de la température intérieure de la pièce est situé à
l’arrière de l’appareil.
• Pour obtenir l’affichage de la température intérieure en °Celsius ou
°Fahrenheit, activez en premier la fonction Affichage en boucle (voir
le paragraphe sur cette fonction avec la touche 14).
• Lorsque la température apparaît sur l’afficheur, appuyez sur la
touche >> (12) pour basculer entre l’affichage de la température
en Celsius (C°) à l’affichage de la température en Fahrenheit (°F).
• Les plages de température pour une utilisation intérieure sont
comprises entre 0 et 50°C ou 32 et 122°F.
MODE Heure d’été
Pour les pays introduisant l’heure d’été (Une heure de différence entre
l’heure d’été et l’heure d’hiver), ce radio réveil offre l’option ‘ heure
d’été’ et vous permet de régler automatiquement l’heure d’été.
En mode veille, maintenez enfoncé la touche >> (12) pendant 2
sec, l’heure avance automatiquement d’une heure. Pour désactiver
la fonction ‘Heure d’été’ répétez l’opération en maintenant enfoncé la
touche >> (12).
PROJECTEUR
REMARQUE :
L’heure doit être projetée sur le mur dans une pièce obscure. La
distance maximum de projection est de 0.90 m ~ 2,70 m.
Réglage de la mise au point : Réglez l’intensité de l’image et la
mise au point en tournant la molette (18) jusqu’à ce que l’heure,
affichée sur le mur ou au plafond, apparaisse de façon nette.
9
-
-
-
Ajuster la direction de projection.
Pour inverser le sens de l’’affichage à 180°, appuyez sur la touche
d’inversion 180° (16).
Pour passer de la projection de l’heure à celle de la température,
appuyez longuement sur la touche ‘Inversion de la projection à
180°/Heure –Température’ (16)
Variateur de luminosité (DIMMER)
Le bouton de variateur de luminosité « DIMMER » (6) vous permet
de régler la luminosité de l’écran LED à 3 niveaux (faible, medium,
élevé).
Réglage de l’intensité de la luminosité des veilleuses
Appuyez sur le bouton (1) pour augmenter l’intensité de la lumière
des veilleuses.
Appuyez sur le bouton (2) pour réduire l’intensité de la lumière des
veilleuses.
REMISE A ZERO
Le fonctionnement normal de l’appareil peut-être gêné par de fortes
interférences électromagnétiques ou à une surtension, dans de cas
réinitialiser l’appareil pour reprendre un fonctionnement normal.
Il suffit de débrancher le cordon d’alimentation secteur et retirez la
batterie de sauvegarde, attendez au moins 3 minutes, puis configurer
l’appareil de nouveau en suivant le manuel d’utilisation.
Caractéristiques techniques
Référence Modèle Alimentation Réserve pour pile de secours Consommation en mode marche
Consommation en mode veille Puissance de sortie AUDIO Fréquence Radio Poids de l’appareil Dimensions (Lx P x H)
•
•
•
•
•
•
•
•
•
TCP-124
AC 230 ~ 50 Hz
Lithium CR-2032-3V (non fournie)
5W
1W
120MW
FM: 87.5MHz - 108 MHz
0.450 g
126 x 100 x 140 mm
10
IMPORTANT :
En raison de la révision et de l’amélioration constante quant à
la conception de nos produits, les spécifications sont sujettes à
modification sans préavis.
Mise au rebut en fin de vie
Attention ! Ce logo apposé sur le produit indique qu’il s’agit d’un
appareil dont le traitement en tant que déchet rentre dans le cadre de
la directive 2002/96/CE du 27 janvier 2003, relative aux déchets
d’équipements électriques et électroniques (DEEE).
Ce symbole signifie que les produits électriques et électroniques
usagées ne doivent pas être mélangés avec les déchets ménagers
généraux. Un système de collecte séparé est prévu pour ces produits.
Si vous souhaitez mettre cet appareil au rebut, ne le jetez pas
dans une poubelle ordinaire !
-
-
-
-
-
La présence de substances dangereuses dans les équipements électriques
et électroniques peut avoir des effets potentiels sur l’environnement et la
santé humaine dans le cycle de retraitement de ce produit.
Ainsi, lors de la fin de vie de cet appareil, celui-ci ne doit pas être jeté avec
les déchets municipaux non triés. Les appareils électriques et électroniques
doivent être traités séparément et conformément aux lois en vigueur en
matière de traitement, de récupération et de recyclage adéquats de ces
appareils.
Des systèmes de reprise et de collecte sont mis à votre disposition par les
collectivités locales (déchetteries) et les distributeurs. Veuillez contacter
votre administration locale pour plus de renseignements. Vous avez
l’obligation d’utiliser les systèmes de collecte sélective mise à votre
disposition.
Si votre appareil électrique et électronique usagé comporte des piles ou
des accumulateurs, veuillez les mettre séparément et préalablement au rebut
conformément à la législation locale en vigueur.
En veillant à la mise au rebut correcte de ce produit, vous contribuerez à
assurer le traitement, la récupération et le recyclage nécessaires de ces
déchets, et préviendrez ainsi les effets néfastes potentiels de leur mauvaise
gestion sur l’environnement et la santé humaine.
Cet appareil est conforme aux exigences imposées par la
Directive Européenne 2006 / 95 CE (Directives sur la
Compatibilité Electromagnétique et Basse Tension)
11
WARNING
The lightning flash is intended to alert the user to the presence of dangerous
voltage within the product’s enclosure, and touching the inner parts may result in
a risk of electric shock to persons.
The exclamatory mark is intended to alert the user to the presence of important
operating instructions.
CAUTION To reduce the risk of electric shock or fire, do not open the cover. Refer servicing
RISK OF ELECTRIC SHOCK
DO NOT OPEN to qualified service personnel.
NOTE:
We reserve the right to make technical changes without notice in the
interest of improvement.
1. No naked flame sources, such as lighted candles, should be placed
on the apparatus.
2. Do not place the product in closed bookcases or racks without
proper ventilation.
3. Where the mains plug is used as the disconnect device, the
disconnect device shall remain readily operable.
4. The ventilation should not be impeded by covering the ventilation
openings with items, such as newspapers, table-cloths, curtains,
etc.
5. It shall not be exposed to dripping or splashing and that no
objects filled with liquids, such as vases, shall be placed on the
apparatus.
6. Do not connect FM antenna to outside antenna.
7. The unit should not be exposed to direct sunlight, very high or
low temperature, moisture, vibrations or placed in dusty
environment.
8. Do not use abrasive, benzene, thinner or other solvents to
clean the surface of the unit. To clean, wipe it will mild non abrasive detergent solution and clean soft cloth.
9. Never attempt to insert wires, pins or other such objects into the
vents or opening of the unit.
10.Disconnect device warning: Mains plug is used as the connection,
so it should always remain ready operate.
12
11.Batteries shall not be exposed to excessive heat such as sunshine,
fire or the like.
12.Class 1 LED product.
POWER CONNECTION
Plug the AC power cord to a household outlet AC source. This unit
is equipped with a battery backup system, it requires a 3V CR2032
flat lithium battery (not included). Insert the battery in the battery
compartment, making certain that the positive and negative (+ and -)
battery terminals are attached to the corresponding terminals on the
plate in the battery compartment. If an AC power failure occurs, the
clock automatically switches to the battery power supply, the clock
and timer memory continue running. When the AC power resumes,
the clock switches back to AC again.
13
Description of the product & locations of controls
FUNCTION AND CONTROLS
1. TO SET THE LIGHT INTENSITY HIGH of the Lamp Shade
2. TO SET THE LIGHT INTENSITY LOW of the Lamp Shade
3. LIGHT ON/OFF
4. MEM.SET/M+/NAP/AUTO OFF DISPLAY
5. LAMP SHADE
6. SNOOZE / SLEEP / DIMMER
7. SET/ TEMPERATURE
8. << / TUNE - / YEAR/MONTH/DAY
9. (AL1) ALARM 1 ON / OFF SET
10. DISPLAY
11. ON / OFF
12. >> / TUNE + / DST/C-F
13. (AL2) ALARM 2 ON / OFF SET
14. VOLUME UP / DISPLAY AUTO CHANGE ON/OFF
15. VOLUME DOWN
16. PROJECTION TIME 180° FLIP/TIME-TEMPERATURE
17. PROJECTION ON/OFF
18. FOCUS ADJUSTMENT FOR PROJECTION UNIT
19. SPEAKER
20. FM ANTENNA
21. TEMPERATURE SENSOR (IN DOOR)
22. BATTERY COMPARTMENT
23. AC POWER CORD
24. RATING LABEL
14
DISPLAY DESCRIPTION AND INDICATORS
STANDBY Indicator
TIME Indicator
PM Indicator
MHz Indicator
ALARM 1 Indicator
ALARM 2 Indicator
BASIC OPERATIONS
TIME AND CALENDAR MANUAL SETTING
Setting Time and Calendar
Press SET (7) button in standby mode and keep depress over 2
seconds to enter time set mode, after enter the setting mode, press
SET button (7) to change the mode cycle as follows :
Normal g Year g Month g Day g 12/24 H format g Real time Hour
g Real time Min g Normal
Action (during data adjustment):
- Press << / Tune - button (8) to adjust data backward.
- Press >> / Tune + button (12) to adjust data forward.
- Keep depressed << or >> button for 2 seconds to enable auto
forward.
- Use SET (7) button to confirm each setting.
ALARM SETTING
Setting Alarm 1 and Alarm 2
In standby mode, press the ALARM 1 (9) or ALARM 2 (13) button
once to preview the alarm time.
The alarm time is displayed, press & hold the AL1 / AL2 button for 3
seconds and the hours will blink. Press AL1 / AL2 button (9/13) and
keep depress over 2 seconds to enter alarm set mode. Once in the
setting mode, press alarm set button (9/13) to change the mode cycle
as follows:
15
Normal g AL 1 Hour g AL 1 Min g AL 1 weekday Alarm g AL
1 wake beep g AL 1 wake radio g AL 1 wake radio volume g
Light g Light intensity g Normal.
Normal g AL 2 Hour g AL 2 Min g AL 2 weekday Alarm g AL
2 wake beep g AL 2 wake radio g AL 2 wake radio volume g
Light g Light intensity g Normal.
Select alarm weekday mode as follows:
1-5: Monday to Friday
1-7: Whole week
6-7: Saturday & Sunday
1-1: One day of week
Action (during data adjustment):
- Press << / Tune - (8) button to adjust data backward.
- Press >> / Tune + (12) button to adjust data forward.
- Keep depressed << or >> button for 2 seconds to enable auto
forward.
- Use AL1 / AL2 set button to confirm each setting.
Wake-up with Alarm light
The light will come on 5 minutes before the set alarm time. The light
will start out at a low level and increase gradually to the set max level.
ALARM DURATION
Beep alarm or radio alarm will ring for 30 minutes if no key is pressed,
then it will stop automatically and wait for same alarm time on next
day.
SNOOZE FUNCTION
- When Alarm rings, press Snooze button (6) to suspend the alarm
& to activate the snooze function, Beep or Radio alarm will stop.
9 minutes later the alarm will ring again. Press SNOOZE key again,
alarm will be suspended again, another 9 minutes later the alarm
will ring again and so on until the next alarm rings.
Note: The interval time of the Snooze function is 9 minutes.
- If you want to disable the SNOOZE function and stop alarm
16
-
completely, press ON/OFF button (11). If you don’t press any
button, the alarm will ring during 30 minutes & stop automatically.
Icon of AL1 and AL2 will blink as long as Snooze function is still
operating. Once Snooze is turned off icon of AL1 / AL2 stop
blinking and lights on the display.
DISPLAY LIGHT ON/OFF FUNCTION
- Press MEM. Set / M+ / display light auto on-off /NAP
button (4) for 3 seconds, the LED display indicator will light on,
the LED display will turn off after 15 seconds automatically.
Press any button to maintain the LED display for 15 seconds.
- Press MEM. Set / M+ / display light auto on-off /NAP (4)
button for 3 seconds, the LED display
indicator will light off to
cancel this function.
AUTO CHANGE DISPLAY CONTENT
In radio off mode, press the VOLUME UP / DISPLAY AUTO
CHANGE ON/OFF (14) button and keep depressed over 2 seconds
to enter time AUTO CHANGE DISPLAY mode ( “ON” will appear on
the display).
the Year will be displayed and press again to display Month/Day/
Temperature, the display returns to time display after 5 seconds, and
will display again the same info in cycle.
Press and keep depressed over 2 seconds again to turn off AUTO
CHANGE DISPLAY mode (« OFF » will appear on the display).
YEAR Indicator
MONTH Indicator
DAY Indicator
RADIO MODE
Note: Ensure that the FM antenna is completely unrolled and
extended to have the best FM reception.
Press the ON/OFF button (11) to turn the unit on.
17
Use the Tune - (8) or Tune + (12) button to select the desired
radio station. If you press and hold the Tune – (8) or Tune + (12)
button for one second, then release, the unit will automatically scan
to the next broadcasting station.
Press the ON/OFF button (11) to turn the radio OFF.
To preset radio station
Press the ON/OFF button (11) to turn the unit ON.
Use the Tune - (8) or Tune + (12) button to select the desired
radio station.
Press the MEM.SET/M+ (4) button; “P02” will blink in the display.
Press the MEM.SET/M+ (4) button again to set the preset.
Repeat steps 2 through 4 to set more presets.
The unit can preset 10 stations totally for FM.
When “P01-P10” blinks, press Tune – (8) or Tune + (12) button
to select the preset number.
To recall the radio preset
To recall a preset station, press MEM.SET/M+/NAP (4) button to
select the desired preset number.
SLEEP OPERATION
When you listen to the radio, press the SNOOZE/SLEEP/DIMMER
(6) button to enter into the sleep mode. You can adjust the sleep
timer from 90 minutes to (60, 30 to 15 minutes) to OFF, by pressing
repeatedly the SNOOZE/SLEEP/DIMMER button (6). When sleep
timer is selected, the unit will automatically turn off once time is up.
NAP FUNCTION (count down timer)
In radio off mode, press MEM.SET/M+/NAP (4) button to enter
into the NAP mode, the NAP time 90 will be displayed during 5
seconds. In the meantime, press repeatedly MEM.SET/M+/NAP (4)
button to set the duration time from 90 min to 10 min.
Once time is up, the alarm buzzer will sound for 30 min and then shut
off automatically. To stop the alarm buzzer, press the ON/OFF button
(11).
Press the MEM.SET/M+/NAP (4) button has no effect during alarm
operation.
18
Press ON/OFF button (11) to cancel the NAP function.
Note: When using the NAP alarm the wake up light function is
inactive.
INDOOR TEMPERATURE
• Indoor temperature sensor is at the back of the unit. The unit
detects the current environment temperature.
• In order to display the indoor temperature in °C or °F, first
turn ON the “AUTO CHANGE DISPLAY CONTENT” (refer to the
corresponding paragraph above).
• During Auto Change display content mode, when temperature is
displayed, press on >> (12) key to toggle between temperature
in Celsius to Fahrenheit.
• The detection range of indoor temperature is between 0°C & 50°C
or 32°F & 122°F.
PROJECTION UNIT
Note: project time image on the ceiling or wall of a darkened room.
The maximum projection distance is 0,90 M ~ 2,70 M.
Focus setting:
- Adjust the brightness & focus of the projected clock by turning the
adjustable focus wheel (18) until the projected time is clearly
shown on the ceiling or wall.
- Adjust projected direction thanks to the angle adjustment.
- Flip the projected image by 180° by pressing 180° FLIP (16)
button.
- To switch from the time projection to the temperature projection,
keep depressed over 2 seconds PROJECTION TIME 180° FLIP/
TIME-TEMPERATURE (16) button.
DIMMER CONTROL
The dimmer switch (6) allows you to set the brightness of the LED
display to high, medium and low 3 levels.
19
SET THE LIGHT INTENSITY OF THE LAMP SHADE
Press the Light Intensity High button (1) to increase the intensity of
the light.
Press the Light Intensity Low (2) button to decrease the intensity of
the light.
DAYLIGHT SAVING TIME (DST) MODE
For countries with daylight saving time (DST) (one hour of difference
between summer time and winter time), this clock radio offers you
DST option to adjust summer time.
In standby mode press and hold for 2 seconds the >>/TUNE+/DST
button (12).
The clock advances by one hour. To exit DST mode, repeat the above
operation.
RESET
If the system does not respond or exhibits erratic or intermittent
operation, you may have experienced an electrostatic discharge (ESD)
or a power surge that triggered the internal microcontroller to shut
down automatically. If this occurs, simply disconnect the ac power
cord and remove the system backup battery, wait at least 3 minutes
and then setup the unit again by following the manual.
TECHNICAL SPECIFICATIONS
Model Number Power Supply Power consumption Standby power consumption
Battery backup Radio Frequency Coverage
Audio output power
Net Weight Dimensions Temperature range for Indoor
•
•
•
•
•
TCP-124
AC 230 ~ 50 Hz
5W
1W
3V (CR2032 Flat Lithium battery x 1)
not included
• FM: 87.5MHz - 108 MHz
• 120MW
• 0.430 g
• 126×100×140 mm
• 0 to + 50°C or 32 to 122 °F
20
IMPORTANT:
Due to continual revision and improvement on our products
design, specifications are subject to change without further
notice.
End of Life Disposal
Warning ! This logo set on the product means that the recycling of
this apparatus comes within the framework of the Directive 2002/96/
CE of January 27, 2003 concerning the Waste of Electrical and E
lectronic Equipment (WEEE).
This symbol means that used electrical and electronic products should
not be mixed with general household waste. There is a separate
collection system for these products.
If you want to dispose of this equipment, please do not use
the ordinary dust bin!
-
-
-
-
-
The presence of dangerous substances in the electrical and electronic
equipments can have potential consequences on the environment and
human health in the cycle of reprocessing this product.
Therefore, at the end of its lifetime, this product shall not be disposed with
other non-recycled waste. Used electrical and electronic equipment must be
treated separately and in accordance with legislation that requires proper
treatment, recovery and recycling of used electrical and electronic
equipment.
Local authorities and resellers have set special procedures for the purpose of
collecting and recycling this product (please contact your local authority for
further details). You have the obligation to use the selective waste collection
systems put in place by your local authority.
If you’re used electrical or electronic equipment has batteries or
accumulators, please dispose of these separately beforehand according to
local requirements.
By disposing of this product correctly you will help ensure that the waste
undergoes the necessary treatment, recovery and recycling and thus prevent
potential negative effects on the environment and human health which could
otherwise arise due to inappropriate waste handling.
This unit complies with European Council Directive 2006 / 95
CE (Electromagnetic Compatibility & Low Voltage Directives)
21
WAARSCHUWING
De bliksemschicht is bedoeld om de gebruiker te waarschuwen voor de
aanwezigheid van gevaarlijke spanning binnenin de behuizing van dit product; het
aanraken van de onderdelen binnenin kan leiden tot elektrische schokken bij
mensen.
Het uitroepteken is bedoeld om de gebruiker erop te wijzen dat belangrijke
bedieningsinstructies bij dit apparaat zijn meegeleverd.
CAUTION
RISK OF ELECTRIC SHOCK
DO NOT OPEN
Om een risico op elektrische schokken of brand te voorkomen mag de behuizing
niet worden geopend. Laat alle onderhoud over aan een gekwalificeerde
elektricien.
OPMERKING:
In het belang van verbetering behouden wij ons het recht voor om
zonder voorafgaande kennisgeving technische aanpassingen te doen.
1.
2.
3.
4.
5.
6.
7.
8.
9.
Zet geen naakte vlam zoals van brandende kaarsen bovenop het
apparaat neer.
Zet dit apparaat niet in een gesloten boekenkast of rek waardoor
de ventilatie belemmerd wordt.
De stekker doet dienst als hoofdmiddel om dit apparaat van de
netvoeding los te koppelen en dient te allen tijde bereikbaar te
zijn.
De ventilatie mag niet belemmerd worden door de
ventilatieopeningen van het apparaat af te dekken met
bijvoorbeeld kranten, tafelkleden, gordijnen enz.
Dit apparaat mag niet worden blootgesteld aan druppelende of
spattende vloeistof en voorwerpen die met water gevuld zijn,
zoals vazen, mogen niet op dit apparaat worden neergezet.
Sluit de FM-antenne niet aan op een buitenantenne.
Dit apparaat mag niet worden blootgesteld aan rechtstreeks
zonlicht, extreem hoge of lage temperaturen, vochtigheid, trilling
of omgevingen met veel stof.
Gebruik geen schuurmiddelen, benzeen, thinner of andere
chemische producten om de behuizing van dit apparaat te
reinigen. Veeg de behuizing schoon met een mild sopje en een
zachte, schone doek.
Probeer in geen geval kabels, pinnen of andere voorwerpen in de
openingen of ventilatiesleuven van dit apparaat te stoppen.
22
10.Waarschuwing betreffende het ontkoppelen van dit apparaat:
de stekker doet dienst als hoofdmiddel om het apparaat van de
netvoeding los te koppelen en dient daarom te allen tijde
bereikbaar te zijn.
11.De batterijen mogen niet worden blootgesteld aan overmatige
hitte zoals van zonneschijn of vuur.
12.LED-apparaat van de Categorie 1.
AANSLUITING OP HET ELEKTRICITEITSNET
Stop de stekker van het wisselstroom netsnoer in een wisselstroom
stopcontact. Dit apparaat is uitgerust met een back-upsysteem met
een batterij, waarvoor een platte lithiumbatterij van het type 3V
CR2032 (niet meegeleverd) nodig is. Zet de batterij in het batterijvak,
erop lettend dat de positieve en negatieve (+ en -) batterijcontacten
op de overeenkomstige contacten in het batterijvak zijn aangesloten.
In geval van stroomonderbreking schakelt de wekkerradio automatisch
over op de voeding van de batterij, zodat de klok en de timer
blijven lopen. Het apparaat schakelt weer over op de wisselstroom
netvoeding zodra deze is hersteld.
23
Beschrijving van het product & plaats van de
bedieningsknoppen
BEDIENINGSKNOPPEN EN FUNCTIES
1. OM DE LICHTINTENSITEIT HOGER IN TE STELLEN
2. OM DE LICHTINTENSITEIT LAGER IN TE STELLEN
3. LICHT AAN/UIT
4. GEHEUGEN/GEHEUGEN+/DUTTEN/DISPLAY AUTOMATISCH
UITSCHAKELEN (MEM-SET/M+/NAP)
5. LAMPKAP
6. SLUIMER/SLAAP/DIMMER (SNOOZE/SLEEP/DIMMER)
7. INSTELLEN/TEMPERATUUR
8. << /AFSTEMMEN-/JAAR/MAAND/DAG
9. WEKKER 1 AAN/UIT INSTELLEN (AL1)
10.LED DISPLAY
11. AAN/UIT
12. >> /AFSTEMMEN+/DST/C-F
13. WEKKER 2 AAN/UIT INSTELLEN (AL2)
14. VOLUME OP/AUTOMATISCH DISPLAY WISSELEN AAN/UIT
(DISPLAY)
15. VOLUME NEER
16. PROJECTIETIJD 180° OMDRAAIEN/TIJD- TEMPERATUUR (180°
FLIP / TIME / TEMP)
17. PROJECTIE AAN/UIT
18. SCHERPSTELLING VOOR PROJECTOR
19. LUIDSPREKER
20. FM-ANTENNE
21. TEMPERATUURSENSOR (BINNEN)
22. BATTERIJCOMPARTIMENT
23. WISSELSTROOM NETSNOER
24. TYPEPLAATJE
24
DISPLAY: BESCHRIJVING EN INDICATOREN
Indicator STAND-BY
TIJD-indicator
PM-indicator
MHz-indicator
Indicator WEKKER 1
Indicator WEKKER 2
BASISBEDIENING
HANDMATIG DE TIJD EN KALENDER INSTELLEN
Tijd en kalender instellen
Houd in de normale modus de toets INSTELLEN (7) minstens 2
seconden lang ingedrukt om de instelmodus voor de tijd binnen te
gaan. Druk daarna op de toets INSTELLEN (7) om achtereenvolgens
te verrollen doorheen de onderstaande opties:
Normaal g Jaar g Maand g Dag g 12/24 uuraanduiding g Uur van
huidige tijd g Min. van huidige tijd g Normaal
Manipulaties voor het instellen van de tijd
- Druk op de toets << /AFSTEMMEN- (8) om achteruit te gaan.
- Druk op de toets >> /AFSTEMMEN+ (12) om vooruit te gaan.
- Houd de toets << of >> 2 seconden lang ingedrukt om
automatisch vooruit te gaan.
- Gebruik de INSTELLEN-toets (7) om elke instelling te bevestigen.
DE WEKKER INSTELLEN
Wekker 1 en Wekker 2 instellen
In de standby-modus, drukt u op de WEKKER 1 (9) of WEKKER 2
(13) om te gaan in alarm mode en om de wekkertijd op de display te
zien.
De wekker tijd op de display is aangegeven, de toets WEKKER (1 /
2) 3 seconden lang ingedrukt, zodat de uurcijfers gaan knipperen.
In de instelmodus, drukt u op de knop drukt AL1 / AL2 (9/13) om
de velden in te stellen in de volgende volgorde weer te geven:
25
Normaal g WEK 1 uur g WEK 1 min. g WEK 1 weekdag
wekker g WEK 1 pieptoonwekker g WEK 1 radiowekker
g WEK 1 radiowekker volume g Licht g Lichtintensiteit g
Normaal.
Normaal g WEK 2 uur g WEK 2 min. g WEK 2 weekdag
wekker g WEK 2 pieptoonwekker g WEK 2 radiowekker
g WEK 2 radiowekker volume g Licht g Lichtintensiteit g
Normaal.
Selecteer als volgt een weekdagmodus voor de WEKKER:
1-5: maandag tot vrijdag
1-7: hele week
6-7: zaterdag & zondag
1-1: één dag van de week
Manipulaties voor het instellen van de wekker :
- Druk op de toets << /AFSTEMMEN- (8) om achteruit te gaan.
- Druk op de toets >> /AFSTEMMEN+ (12) om vooruit te gaan.
- Houd de toets << of >> 2 seconden lang ingedrukt om
automatisch vooruit te gaan.
- Gebruik de WEKKER-toetsen AL1 / AL2 om elke instelling te
bevestigen.
Wakker worden met de lichtwekker
Het licht begint 5 minuten voor de ingestelde wekkertijd te branden.
Het licht begint heel zacht te branden en neemt geleidelijk in sterkte
toe tot de ingestelde maximumintensiteit is bereikt.
DUUR VAN DE WEKKER
De pieptoon- of radiowekker luidt gedurende 30 minuten als geen
enkele toets wordt ingedrukt. Daarna stopt hij automatisch en luidt
opnieuw op dezelfde wekkertijd van de volgende dag.
DE SLUIMERFUNCTIE (SNOOZE)
- Druk terwijl de wekker luidt op de toets SNOOZE (6) om de
wekker tijdelijk uit te schakelen & de sluimerfunctie te activeren. De
pieptoon- of radiowekker stopt dan en gaat 9 minuten later
26
opnieuw luiden. Druk nogmaals op de toets SNOOZE (6) om de
wekker opnieuw te stoppen, zodat hij opnieuw 9 minuten later
weer luidt, enzovoort, tot de volgende wekker activeert.
Opmerking: de tussentijd van de sluimerfunctie is 9 minuten.
- Druk op de toets AAN/UIT (11) om de sluimerfunctie en de
wekker volledig uit te schakelen. Als u op geen enkele toets drukt
luidt de wekker gedurende 30 minuten & stopt daarna automatisch.
De WEKKER indicator 1 of 2 knippert terwijl de sluimerfunctie is altijd
geactiveerd en de indicator blijft branden wanneer het alarm afgaat.
DE FUNCTIE DISPLAYLICHT AUTOMATISCH AAN/UIT
- In de standby-modus, houd de toets (MEM-SET/M+/NAP) (4) 3
seconden lang ingedrukt. De indicator gaat op de LED-display
branden en de LED-display schakelt 15 seconden later automatisch
uit. Druk op eender welke toets om de LED-display 15 seconden
langer te verlichten.
- Houd de toets (MEM-SET/M+/NAP) (4) 3 seconden lang
ingedrukt, zodat de indicator op de LED-display dooft om deze
functie te annuleren. Het LED-display blijft AAN.
DE DISPLAY-INHOUD WISSELEN
In de standby-modus, houd uit de toets VOLUME +/ DISPLAY (14)
minstens 2 seconden lang ingedrukt om weer te geven display-inhoud
in aansluitnet.
“ON” verschijnt op het display om aan te geven dat de functie is
geactiveerd Het scherm geeft de volgende informatie: jaar - maand dag en temperatuur. Na 5 seconden zal het weer de tijd weergeven.
Op het display aansluitnet hervat.
Druk opnieuw en houd de VOL+/DISPLAY-toets (14) om deze functie
uitschakelen.
“OFF” verschijnt op het display.
JAAR-indicator
Maand-indicator
27
Dag-indicator
RADIOMODUS
Opmerking: zorg ervoor dat de FM-antenne volledig is ontrold en
uitgestrekt voor een optimale FM-ontvangst.
Druk op de toets AAN/UIT (11) om het apparaat in te schakelen.
Gebruik de toets AFSTEMMEN- (8) of AFSTEMMEN+ (12) om de
gewenste radiozender te selecteren. Houd de toets AFSTEMMEN–
(8) of AFSTEMMEN+ (12) één seconde lang ingedrukt om het
apparaat automatisch te laten scannen tot op de eerstvolgende
radiozender.
Druk op de toets AAN/UIT (11) om de radio UIT te schakelen.
Om een zender als voorkeuzezender in te stellen
Druk op de toets AAN/UIT (11) om het apparaat IN te schakelen.
Gebruik de toets << /AFSTEMMEN- (8) of >> /AFSTEMMEN+
(12) om op de gewenste radiozender af te stemmen.
Druk op de toets Geheugen (MEM-SET/M+/NAP) (4), zodat
“P02” op de display gaat knipperen.
Druk nogmaals op de toets Geheugen (MEM-SET/M+/NAP) (4),
om de voorkeuzezender in te stellen.
Herhaal de stappen 2 tot 4 om andere voorkeuzezenders in te stellen.
U kunt op dit apparaat tot 10 FM-zenders als voorkeuzezender
instellen.
Druk terwijl “P01-P10” knippert op de toets AFSTEMMEN– (8)
of AFSTEMMEN+ (12) om een cijfer voor de voorkeuzezender te
selecteren.
Een voorkeuzezender oproepen
Druk om een voorkeuzender op te roepen op de toets Geheugen
(MEM-SET/M+/NAP) (4), om het gewenste cijfer te kiezen.
DE SLAAPFUNCTIE
Terwijl u naar de radio luistert druk herhaaldelijk op de SLEEP (6)
knop om de slaaptimer in te stellen: 90 min, 60, 30, 15 minuten op
OFF (uit).
Het apparaat schakelt automatisch uit wanneer de tijd van de
slaaptimer is bereikt.
28
DUT-FUNCTIE (middagdutje)
Deze functie wordt gebruikt om de duur van een middagdutje te
definiëren zonder de alarminstellingen reeds geprogrammeerd.
In de standby-modus druk uit op de toets (MEM-SET/M+/NAP) (4)
om de DUT-modus te activeren. De DUT-tijd is 90 en blijft gedurende
5 seconden op de display aangegeven. Druk herhaaldelijk op de toets
(MEM-SET/M+/NAP) (4) om de tijdsduur in te stellen tussen 90
min. en 10 min.
De wekkerzoemer luidt gedurende 30 min. wanneer de ingestelde tijd
is verstreken en schakelt daarna automatisch uit. Druk op de toets
AAN/UIT (11) om de wekkerzoemer te stoppen.
Drukken op de toets (MEM-SET/M+/NAP) (4) haalt niets uit terwijl
de wekker luidt.
Druk op de toets AAN/UIT (11) om de DUT-functie te annuleren.
Opmerking: de functie wekkerlicht is inactief wanneer de DUTwekker wordt gebruikt.
PROJECTOR
Opmerking: projecteer de tijd op een zoldering of wand van een
verduisterde kamer. De reikwijdte van de projectieafstand bedraagt
0,90 m ~ 2,70 m.
Scherpstelling:
- Stel de helderheid & scherpstelling (18) van de geprojecteerde tijd
in door het projectiewiel te draaien tot de geprojecteerde tijd helder
en scherp op de wand of zoldering te zien is.
- Stel de richting van het geprojecteerde beeld in met behulp van de
hoekinstelling.
- Draai het geprojecteerde beeld 180° door te drukken op de toets
180° OMDRAAIEN (16).
- Houd de toets PROJECTIETIJD 180° /TIME/TEMP (16)
minstens 2 seconden lang ingedrukt om af te wisselen tussen de
projectie van de tijd en temperatuur.
29
BEDIENING VAN DE DIMMER
U kunt met de dimmerschakelaar (6) de helderheid van de LEDdisplay instellen op 3 niveaus, namelijk hoog, medium en laag.
DE LICHTINTENSITEIT INSTELLEN
Druk op de toets Lichtintensiteit hoog (1) om de intensiteit van
het licht te verhogen.
Druk op de toets Lichtintensiteit laag (2) om de intensiteit van het
licht te verlagen.
DE MODUS ZOMER/WINTERTIJD (DST)
Voor landen waar een zomer- en wintertijd van kracht is (DST, met
één uur verschil tussen de winter- en zomertijd), is deze wekkerradio
uitgerust met een DST-optie die de zomertijd instelt.
Houd in de modus stand-by de toets >>/TUNE+/DST (12) 2
seconden lang ingedrukt.
De klok gaat één uur vooruit. Herhaal de bovenstaande bewerking om
de DST-modus uit te schakelen.
BINNENTEMPERATUUR
• Binnentemperatuur sensor is aan de achterzijde van het apparaat.
Het apparaat detecteert de huidige omgeving temperatuur.
• Om de binnentemperatuur in ° C of ° F, zet u eerst de VOLUME
+/ DISPLAY (14) (zie de betreffende paragraaf hierboven).
• Tijdens Auto Change weergave inhoudsmodus, wanneer de
temperatuur wordt weergegeven, drukt u op >> /
AFSTEMMEN+ (12)-toets om tussen de temperatuur schakelen
in Celsius naar Fahrenheit.
• Het detectiebereik van binnen temperatuur tussen 0 ° C en 50 ° C
of 32 ° F & 122 ° F.
TERUGSTELLEN
Wanneer het systeem vastloopt of er een probleem met de werking
is, is het mogelijk dat het apparaat aan elektrostatische ontlading
onderhevig is geweest of dat een spanningspiek de interne
microcontroller automatisch heeft uitgeschakeld. In dit geval haalt u
eenvoudig de stekker uit het stopcontact en verwijdert u de back-up
batterij van het systeem, wacht ten minste 3 minuten en volg daarna
de gebruiksaanwijzing om het apparaat opnieuw in te stellen.
30
TECHNISCHE GEGEVENS
Modelnummer Voeding
Stroomverbruik Stroomverbruik in stand-by
Back-up batterij Bereik radiofrequentie
Audio uitgangsvermogen Netto gewicht
Afmetingen Temperatuurbereik binnenshuis
•
•
•
•
•
TC-124
230 ~ 50 Hz wisselstroom
5W
1W
3 V (CR2032 platte lithiumbatterij x
1) niet meegeleverd
• FM: 87.5 MHz - 108 MHz
• 120MW
• 0,430 g
• 126x100x140 mm
• 0° tot + 50°C of 32° tot 122 °F
BELANGRIJK: omdat wij onze productdesign voortdurend
herzien en verbeteren, kunnen de uiteindelijke technische
gegevens zonder voorafgaande kennisgeving gewijzigd zijn.
31
Wegdoen na het einde van de levensduur
Let op : Dit symbool geeft aan dat elektrische en
elektronische apparatuur, aan het eind van hun levensduur,
niet mag worden gedeponeerd bij het normale huishoudelijk
afval Uw product is van dit merkteken voorzien. Dit betekent
dat en elektronische apparatuur niet samen met afgedankte
elektrische het normale huisafval mogen worden weggegooid.
Er bestaat een afzonderlijk inzamelingssysteem voor deze
producten. (Afgedankte Electrische & Electronische
Apparatuur (WEEE).
- Uw product is ontworpen en vervaardigd met hoge kwaliteit
materialen en componenten welke kunnen worden gerecycled en
opnieuw gebruikt. (WEEE aanwijzing).
- Afgedankte elektrische en elektronische apparatuur moet
gescheiden worden ingezameld conform de wetgeving inzake de
verantwoorde verwerking, terugwinning en recycling van afgedankte
elektrische en elektronische apparatuur.
- In de Europese Unie zijn er afzonderlijke verzamelsystemen voor
gebruikte elektrische en elektronische producten. Help ons om het
milieu waar we in leven te behouden! Deponeer het product bij het
afvalinzamelingbedrijf van uw gemeente.
- Als uw elektrische of elektronische apparatuur batterijen of
accumulatoren bevat dan moet u deze afzonderlijk conform de
plaatselijke voorschriften weggooien.
- Door dit product op een verantwoorde manier weg te gooien,
zorgt u ervoor dat het afval de juiste verwerking, terugwinning en
recycling ondergaat en potentiële negatieve effecten op het milieu
en de menselijke gezondheid worden voorkomen die anders zouden
ontstaan door het verkeerd verwerken van het afval.
Dit apparaat voldoet aan de Europese veiligheid en EMC &
LVD richtlijnen 2006 / 95 CE
32
ADVERTENCIA
La imagen del rayo tiene por objetivo alertar al usuario de la presencia de voltaje
peligroso dentro del producto y tomar contacto con partes internas podría resultar en riesgo de shock eléctrico a las personas.
El símbolo de exclamación tiene por objetivo alertar al usuario de la presencia de
importantes instrucciones de manejo.
CAUTION Para reducir el riesgo de shock eléctrico o incendio, no abra la cubierta. Refiera el
RISK OF ELECTRIC SHOCK
DO NOT OPEN servicio del producto a personal calificado.
NOTA:
Nos reservamos el derecho de efectuar cambios técnicos sin aviso, en
el interés de la mejora.
1. No debe colocarse sobre el aparato ninguna fuente inflamable o
encendida, tales como velas.
2. No coloque el producto en una biblioteca cerrada o estanterías sin
ventilación apropiada.
3. A pesar de desconectar el aparato de la corriente, el mismo
quedará activado para su funcionamiento.
4. La ventilación no debe ser impedida bloqueando las aberturas
específicas de ventilación, con elementos tales como periódicos,
manteles, cortinas, etc.
5. No deberá ser expuesto a goteos o salpicaduras y no deberán
colocarse sobre el aparato elementos llenos de líquidos, tales
como floreros.
6. No conecte la antena FM a una antena de exterior.
7. La unidad no debe ser expuesta a luz solar directa, muy altas o
bajas temperaturas, humedad, vibraciones o colocada en
ambientes con polvo.
8. No utilizar solventes abrasivos, benzina, thinner u otros para
limpiar la superficie de la unidad. Para limpiarla, pase un paño con
detergente suave no abrasivo y seque con otro paño suave.
9. Jamás intente insertar cables, alfileres u objetos similares en las
ventilaciones u otras aberturas de la unidad.
10.Advertencia sobre la desconexión de la unidad: El enchufe
principal es usado para la conexión, de manera que debe
permanecer siempre listo para funcionar.
33
11.Las pilas no deberán se expuestas a calor excesivo tales como luz
solar, fuego o similares.
12.producto de LED Clase 1.
CONEXIÓN ELECTRICA
Enchufe el cable de alimentación al tomacorrientes. Esta unidad está
equipada con un sistema de resguardo a pila, el cual requiere una
pila plana de litio de 3V CR2032 (no incluida). Inserte la pila en su
compartimiento, asegurándose que los bornes de la pila, positivo y
negativo (+ y -) sean conectados a las terminales correspondientes
de la placa en el compartimiento. En caso de falla de la corriente
eléctrica, el reloj automáticamente cambiará a la alimentación a pila, y
así el reloj y memoria del temporizador seguirán funcionando. Cuando
se restaure la corriente eléctrica, el reloj cambiará nuevamente a
alimentación por corriente eléctrica.
34
Descripción del producto y ubicación de los controles
FUNCIONES Y CONTROLES
1. PARA AUMENTAR LA INTENSIDAD DE LA LUZ
2. PARA DISMINUIR LA INTENSIDAD DE LA LUZ
3. LUZ ENCENDIDA / APAGADA
4. MEMORIA/MEMORIA+/SIESTA/PANTALLA AUTO APAGADA (MEM.
SET/M+/NAP)
5. TULIPA DE LAMPARA
6. SNOOZE / DORMIR (SLEEP) / DIMMER
7. AJUSTAR / TEMPERATURA
8. << / SINTONIA - / AÑO / MES / DIA
9. AJUSTAR ALARMA 1 ACTIVADA / APAGADA (AL1)
10. PANTALLA LED
11. ENCENDIDO / APAGADO
12. >> / SINTONIA + / DST / C-F
13. AJUSTAR ALARMA 2 ACTIVADA / APAGADA (AL2)
14. SUBIR VOLUMEN / CAMBIO AUTOMATICO DE PANTALLA
ACTIVADO / DESACTIVADO (VOL+/DISPLAY)
15. BAJAR VOLUMEN
16. SISTEMA DE PROYECCION DE LA HORA EN 180° / HORA TEMPERATURA (180° FLIP / TIME / TEMP)
17. PROYECCION ACTIVADA / DSACTIVADA
18. AJUSTE DE ENFOQUE PARA LA UNIDAD DE PROYECCION
19. PARLANTE
20. ANTENA FM
21. SENSOR DE TEMPERATURA (INTERIOR)
22. COMPARTIMIENTO DE PILA
23. CABLE DE LA CORRIENTE
24. ETIQUETA DE CLASIFICACION
35
DESCRIPCION DE LA PANTALLA E INDICADORES
Indicador STANDBY
Indicador de HORA
Indicador PM
Indicador de MHz
Indicador de ALARMA 1
Indicador de ALARMA 2
FUNCIONAMIENTO BASICO
AJUSTE MANUAL DE LA HORA Y CALENDARIO
Ajuste de la Hora y del Calendario
Presione el botón AJUSTAR (7) en el modo standby y manténgalo
presionado por más de 2 segundos para entrar al modo de ajuste de
hora; tras entrar al modo de ajuste, presione el botón de ajuste (7)
para cambiar el modo en la secuencia siguiente:
Normal g año g Mes g Día g formato de 12/24 Hs. g Hora Real g
Min. Reales g Normal
Acción (al ajustar la hora)
- Presione el botón << / Sintonía - (8) para ajustar los datos hacia
atrás.
- Presione el botón >> / Sintonía + (12) para ajustar los datos
hacia adelante.
- Mantenga presionado el botón << o >> por 2 segundos para
activar el auto avance.
- Utilice el botón AJUSTAR (7) para confirmar cada ajuste.
AJUSTE DE LA ALARMA
Juste de la Alarma 1 y Alarma 2
En el modo standby, presione una vez el botón de AL1 (9) o AL2
(13) para previsualizar la hora de alarma.
La hora de alarma aparecerá en pantalla, presione y sostenga el
botón ALARMA por 3 segundos y las horas titilarán. Presione el botón
AJUSTE DE ALARMA (9/13) y mantenga presionado por más de
2 segundos para entrar al modo de ajuste de alarma. Una vez en el
modo de ajuste, presione el botón de ajuste de alarma (9/13) para
36
cambiar el modo en la secuencia siguiente:
Normal g AL 1 Hora g AL 1 Min. g AL 1 día de semana
Alarma g AL 1 pitido despertador g AL 1 radio despertador g
AL 1 volumen de radio despertador g Luz g Intensidad de la
luz g Normal.
Normal g AL 2 Hora g AL 2 min. g AL 2 día de semana
Alarma g AL 2 pitido despertador g AL 2 radio despertador g
AL 2 volumen de radio despertador g Luz g Intensidad de la
luz g Normal.
Seleccione el modo de día de semana de la alarma de la siguiente
manera:
1-5: Lunes a Viernes
1-7: Toda la semana
6-7: Sábado y Domingo
1-1: Un día de la semana
Acción (al ajustar la Alarma)
- Presione el botón << / Sintonía - (8) para ajustar los datos hacia
atrás.
- Presione el botón >> / Sintonía + (12) para ajustar los datos
hacia adelante.
- Mantenga presionado el botón << o >> por 2 segundos para
activar el auto avance.
- Utilice los botones AL1 y AL2 para confirmar cada ajuste.
Despertar con luz de Alarma
La luz se encenderá 5 minutos antes de ajustar la hora de alarma. La
luz comenzará con nivel bajo y gradualmente se incrementará hasta
alcanzar su máximo nivel.
DURACION DE LA ALARMA
El pitido de alarma o la radio alarma sonará por 30 minutos si no
presiona tecla alguna, luego se detendrá automáticamente y esperará
la misma hora de alarma al día siguiente.
37
FUNCION DE SNOOZE
- Cuando suene la Alarma, presione el botón Snooze (6) para
suspender la alarma y activar la función de snooze; se detendrán
el pitido o la radio alarma. 9 minutos después la alarma sonará
nuevamente. Presione nuevamente la tecla SNOOZE, la alarma
se suspenderá nuevamente, y tras 9 minutos la alarma sonará
nuevamente y así sucesivamente hasta que suene la siguiente
alarma.
Nota: El tiempo de intervalo de la función de Snooze es de 9 minutos.
Si desea desactivar la función de SNOOZE y detener
completamente la alarma, presione el botón ENECENDIDO /
APAGADO (11). Si no presiona botón alguno, la alarma sonará
durante 30 minutos y se detendrá automáticamente.
AL1 o AL2 LED parpadea mientras la función de repetición está
siempre activada, el LED permanece iluminado en la pantalla cuando
se active la alarma.
FUNCION ACTIVADA / DESACTIVADA DE ILUMINACION
AUTOMATICA DE LA PANTALLA
- Presione el botón MEMORIA/M+/SIESTA/PANTALLA AUTO
APAGADA (MEM.SET/M+/NAP) (4) por 3 segundos, se
iluminará el indicador de pantalla LED , la pantalla LED se
apagará tras 15 segundos automáticamente.
Presione cualquier botón para mantener la pantalla LED por 15
segundos.
- Presione el botón MEMORIA/M+/SIESTA/PANTALLA AUTO
APAGADA (4) por 3 segundos, el indicador de pantalla LED
se apagará para cancelar esta función.
CAMBIO DEL CONTENIDO DE PANTALLA
En el modo standby desconectada, presione el botón VOL+ /
DISPLAY (14) y mantenga presionado por más de 2 segundos
para entrar al modo de hora de CAMBIO DEL CONTENIDO DE
PANTALLA - “ON” aparece no visor quando esta função é ativada
- informação é mostrada na seguinte ordem: el Año y el Mes/Día/ y
Temperatura, la pantalla volverá al modo de hora a los 5 segundos.
Presione otra vez el botón VOL+/DISPLAY (14) para desactivar
38
esta función. El display muestra OFF.
Indicador de AÑO
Indicador de MES
Indicador de DIA
MODO DE RADIO
Nota: Asegúrese que la antena de FM esté completamente extendida
y desenrollada para obtener la mejor recepción de FM.
Presione el botón ENECENDIDO / APAGADO (11) para encender
la unidad.
Use el botón Sintonía - (8) o Sintonía + (12) para seleccionar la
estación de radio deseada. Si presiona y sostiene el botón Sintonía
- (8) o Sintonía + (12) por un segundo y luego suelta, la unidad
escaneará automáticamente la siguiente estación emisora.
Presione el botón ENECENDIDO / APAGADO (11) para apagar la
radio.
Para guardar una estación emisora de radio
Presione el botón ENCENDER / APAGAR (11) para encender la
unidad.
Use el botón Sintonizar + (8) o Sintonizar – (12) para seleccionar
la estación de radio deseada.
Presione el botón AJUSTAR MEM / M + (4); “P02” titilará en la
pantalla.
Presione el botón AJUSTAR MEM / M + (4) nuevamente para
grabar la estación prefijada.
Repita los pasos 2 al 4 para ajustar más estaciones.
La unidad puede guardar 10 estaciones en total de FM.
Cuando titile “P01-P10”, presione el botón Sintonizar + (8)
o Sintonizar – (12) para seleccionar la el número de estación
prefijada.
39
Para llamar una radio prefijada
Para llamar una estación de radio prefijada, presione el botón
Memoria/M + (4) para seleccionar el número deseado de estación
prefijada.
FUNCION DORMIR (SLEEP)
Cuando escuche la radio, presione el botón ‘SNOOZE/ SLEEP/
DIMMER (6) para entrar al modo dormir. Puede ajustar el
temporizador de auto desactivación desde los 90 minutos a los 15
minutos, presionando repetidamente el botón ‘SNOOZE / DORMIR
/ DIMMER (6). Cuando ha sido seleccionado el temporizador para
dormir, la unidad se apagará automáticamente cuando se ha cumplido
el tiempo programado.
FUNCIÓN SIESTA (temporizador de cuenta regresiva)
Esta función se utiliza para definir la duración de la siesta sin cambiar
el ajuste de la alarma ya programadas para el día siguiente.
En el modo standby apagada, presione el botón MEMORIA /
M+/NAP (4) para entrar al modo de SIESTA, el tiempo SIESTA
90 aparecerá en pantalla por 5 segundos. Entretanto, presione
repetidamente el botón MEMORIA/M+/NAP (4) para ajustar la
duración del tiempo de los 90 min. a los 10 min.
Una vez transcurrido el tiempo, la campana de alarma sonara por
30 min. y se apagara automáticamente. Para detener el sonido de
alarma, presione el botón ENECENDIDO / APAGADO (11).
Presionar el botón MEMORIA/M+/NAP (4) no tiene efecto durante
el funcionamiento de la alarma.
Presione el botón ENECENDIDO / APAGADO (11) para cancelar la
función de SIESTA.
Nota: Cuando use la alarma de SIESTA, la función de luz para
despertar estará inactiva.
TEMPERATURA INTERIOR
• Sensor de temperatura interior es en la parte posterior de la
unidad. La unidad detecta la temperatura ambiente actual.
• Para visualizar la temperatura interior en ° C o ° F, primero debe
activar el “ CAMBIO DEL CONTENIDO DE PANTALLA “ (14).
40
•
•
Durante el modo de cambio contenido de la pantalla, cuando la
temperatura en la pantalla, pulse en >> (12) para alternar entre
la temperatura en grados Celsius a Fahrenheit.
El rango de detección de la temperatura interior es de entre 0 ° C y
50 ° C o 32 ° F y 122 ° F.
UNIDAD DE PROYECCION
Nota: proyecte la imagen de la hora sobre el techo o pared de una
habitación a oscuras. La distancia máxima de proyección es de 0,90 m
~ 2,70 m.
Ajuste de enfoque:
- Ajuste el brillo y enfoque (6) del reloj proyectado haciendo girar la
rueda de enfoque ajustable hasta que la hora proyectada se
muestre claramente en el techo o pared.
- Ajuste la dirección de proyección con el ángulo de ajuste.
- Tuerza la imagen proyectada en 180° presionando el botón GIRAR
180° (16).
- Para cambiar de proyección de la hora a la proyección de
temperatura, mantenga presionado por más de 2 segundos el
botón SISTEMA DE PROYECCION DE LA HORA EN 180° /
HORA- TEMPERATURA (16).
CONTROL DE DIMMER
La llave dimmer (6) le permite ajustar el brillo de la pantalla LED en 3
niveles, alto, medio y bajo.
AJUSTE DE LA INTENSIDAD DE LA LUZ
Presione el botón para aumentar la intensidad de la luz (1) para
aumentar la intensidad de la luz.
Presione el botón Intensidad baja de luz (2) para disminuir la
intensidad de la luz.
MODO DE HORARIO DE VERANO (DST)
Para países con horario de verano (DST) (una hora de diferencia entre
los horarios de verano e invierno), este reloj le ofrece la opción DST
para ajustar la hora de verano.
41
En el modo standby presione y sostenga por 2 segundos el botón
>>/SINTONIA+/DST (12).
El reloj avanzará de a una hora. Para salir del modo DST, repita la
operación anterior.
RESETEO
Si el sistema no responde o exhibe funcionamiento errático
o intermitente, puede haber experimentado una descarga
electrostática o una suba de corriente que apagó automáticamente el
microcontrolador interno. Si ésto ocurriera, simplemente desconecte
el cable de la corriente y remueva la pila de resguardo del sistema,
espere al menos por 3 minutos y vuelva a iniciar la unidad siguiendo
el manual.
ESPECIFICACIONES TECNICAS
Número de Modelo Alimentación Consumo eléctrico Consumo eléctrico en espera Pila de resguardo Cobertura de radio frecuencia
Potencia de salida de audio
Peso neto Dimensiones Rango de temperatura en interior
•
•
•
•
•
•
•
•
•
•
TC-124
AC 230 ~ 50 Hz
5W
1W
3V (pila plana CR2032 x 1)
no incluida
FM: 87.5MHz - 108 MHz
120MW
0.430 g
126 x 100x 140mm
0 a + 50 °C o 32 a 122 °F
IMPORTANTE: Debido a la continua revisión y mejoras en el
diseño de nuestros productos, las especificaciones quedan
sujetas a cambio sin aviso previo.
42
Desecho del producto
Atencion ! Este juego de logo sobre el producto quiere decir
que el reciclaje de este aparato viene dentro del marco de la
Directiva 2002/96/CE del 27 de enero de 2003 concernir la
Basura(el Gasto) de Equipo Eléctrico y Electrónico (WEEE).
Su producto esta marcado con este simbolo. Significa que los
productos electricos y electronicos usados no deberian
mezclarse con los residuos domesticos generales.
Existe un sistema de recogida independiente para estos
productos.
Si quiere desechar este equipo, ¡por favor no utilice el cubo
de la basura habitual !
Los equipos electricos y electronicos usados deberian tratarse
por separado de acuerdo con la legislacion que requiere un
tratamiento, una recuperacion y un reciclaje adecuados de los
equipos electricos y electronicos usados. Tras la puesta en practica
por parte de los estados equipos electricos y electronicos usados.
Tras la puesta en practica por parte de los estados miembros, los
hogares de pariculares dentro de los estados de la Union Europea
pueden devolver sus equipos electricos y electronicos a los centros
de recogida designados sin coste alguno. (Por favor, pongase en
contacto con su autoridad local para obtener mas detalles).
Si sus equipos electricos o electronicos usados tienen pilas o
acumuladores, por favor desechelos por separado con antelacion
segun los requisitos locales.
Al desechar este producto correctamente, ayudara a asegurar que
los residuos reciban el tratamiento, la recuperacion y el reciclaje
necesarios, previniendo de esta forma posibles efectos negativos
en el medio ambiente y la salud humana que de otra forma podrian
producirse debido a una manipulacion de residuos inapropiada.
Esta unidad cumple con el Consejo europeo la Directiva 2006
/ 95 CE (la Compatibilidad Electromagnética y Directivas de
Voltaje Bajas)
43
AVISO
O relâmpago é para avisar o usuário sobre a presença de voltagem perigosa
dentro do produto. E que tocar as parte internas do mesmo pode ser um risco de
choque elétrico às pessoas.
O signo de exclamação é para alertar sobre a presença de instruções de
fucionamento importantes.
CAUTION
RISK OF ELECTRIC SHOCK
DO NOT OPEN
Para reduzir o risco de choque elétrico ou de fogo, não abra a tampa. Leve para
ser consertado por pessoal qualificado.
NOTA:
A empresa reserva-se o direito de fazer mudanças técnicas sem prévio
aviso no interesse de melhorar o produto.
1. Nenhuma fonte de fogo vivo, como velas acesas, devem ser
colocados sobre o aparelho.
2. Não coloque o produto em estantes fechadas ou sem a correta
ventilação.
3. Quando a tomada é utilizada para desligar o aparelho, esta deve
estar em lugar de fácil acesso.
4. A ventilação não deve ser impedida ao se cobrir as aberturas de
ventilação com itens como jornais, panos de mesa, cortinas, etc.
5. O produto não deve ser exposto à gotas ou jatos d´água, e
objetos com líquidos, como vasos, não devem ser colocados sobre
o mesmo.
6. Não conecte a antena FM à uma antena externa.
7. Esta unidade não deve ser exposta à luz direta do sol,
temperaturas muito altas ou baixas, umidade, vibrações ou estar
em lugares com poeira.
8. Não utilize produtos abrasivos, benzina, removerdor ou solventes
para limpar a superficie da unidade. Para limpar, utilize um pano
macio e limpo e um detergente não abrasivo.
9. Nunca tente colocar fios, pregos ou outros objetos nas aberturas
da ventilação ou em outras aberturas da unidade.
10.Aviso para desligar o aparelho: A tomada principal é utilizada
como conexão, por isso deve ser de fácil acesso sempre.
11.As baterias não devem ser expostas ao calor em excesso como a
luz do sol, fogo ou outros.
12.Produto classe LED 1.
44
CONEXÃO DA ENERGIA
Ligue o cabo de energia AC à fonte de energia AC. Esta unidade
está equipada com um sistema de bateria de apoio. Precisa uma
bateria pequena de lítio de 3V CR2032 (não incluida). Coloque a
bateria no compartimento da bateria, controlando que as terminais
positiva e negativa (+ e -) da bateria estejam conectadas às terminais
correspondentes na placa do compartimento da bateria. Se houver
uma falha na energia AC, o relógio mudará automáticamente para a
fonte de energia da bateria. O relógio e a memória do cronômetro
continuarão a funcionar. Quando a energia AC voltar, o relógio mudará
para a energia AC novamente.
45
Descrição do produto e Localização dos controles
FUNÇÃO E CONTROLES
1. PARA AJUSTAR A INTENSIDADE DA LUZ ALTA
2. PARA AJUSTAR A INTENSIDADE DA LUZ BAIXA
3. LIGAR/DESLIGAR LUZ
4. MEMÓRIA/MEMÓRIA+/SONECA/AUTO DESLIGAR DISPLAY (MEM.
SET/M+/NAP)
5. PROTETOR DA LUZ
6. SNOOZE / DORMIR / REDUTOR DA LUZ (SNOOZE/SLEEP/
DIMMER)
7. AJUSTAR/ TEMPERATURA
8. << / SINTONIA - / ANO/MÊS/DIA
9. AJUSTE ALARME 1 LIGAR / DESLIGAR (AL1)
10. DISPLAY LED
11. LIGAR / DESLIGAR
12. >> / SINTONIA + / DST/C-F
13. AJUSTE ALARME 2 LIGAR / DESLIGADO (AL2)
14. AUMENTAR VOLUME / LIGAR/DESLIGADO DISPLAY MUDANÇA
(VOL+/DISPLAY)
15. DIMINUIR VOLUME
16. GIRAR 180° PROJEÇÃO DA HORA/HORA - TEMPERATURA
(180°FLIP / TIME/TEMP)
17. LIGAR/DESLIGAR PROJEÇÃO
18. AJUSTE DO FOCO PARA PROJEÇÃO DA UNIDADE
19. ALTO FALANTE
20. ANTENA FM
21. SENSOR DA TEMPERATURA (DENTRO DE CASA)
22. COMPARTIMENTO DA BATERIA
23. CABO DE POTÊNCIA AC
24. ETIQUETA DE ESPECIFICAÇÕES
46
DISPLAY DAS DESCRIÇÕES E INDICADORES
Indicador STANDBY
Indicador da HORA
Indicador PM
Indicador MHz
Indicador ALARME 1
Indicador ALARME 2
OPERAÇÕES BÁSICAS
AJUSTE MANUAL DA HORA E DO CALENDÁRIO
Ajuste da hora e do calendário
Pressione a tecla AJUSTE (7) no modo standby por mais de 2
segundos para entra no modo de ajuste da hora. Após ter entrado
neste modo, pressione a tecla de ajuste (7) para mudar o ciclo do
modo da seguinte maneira:
Normal g Ano g Mês g Dia g Formato 12/24 hrs g Hora Atual g
Minutos Atuais g Normal
Ação (durante a configuração de tempo)
- Pressione a tecla << / Sintonia – (8) para ajustar a data para trás.
- Pressione a tecla >> / Sintonia + (12) para ajustar a data para
adiante
- Mantenha a tecla << ou >> pressionada por 2 segundos para
habilitar o adiantamento automático
- Pressione o botão AJUSTAR (7) para confirmar cada configuração.
AJUSTE DO ALARME
Ajuste do Alarme 1 e Alarme 2
No modo standby, pressione a tecla ALARME 1 (9) ou ALARME 2
(13) uma vez para ver a hora do alarme.
Quando a hora do alarme estiver na tela, mantenha pressionada a
tecla ALARME por 3 segundos e as horas vão piscar. Mantenha
pressionada a tecla AJUSTE DO ALARME (9/13) por mais de 2
segundos para entrar no modo de ajuste do alarme. Quando estiver
nesse modo, pressione a tecla de ajuste do alarme (9/13) para mudar
o ciclo do modo da seguinte maneira:
47
Normal g Hora do Alarme 1 g Minutos do Alarme 1 g Alarme
do dia da semana do Alarme 1 g Bipe para acordar do Alarme
1 g Rádio para acordar do Alarme 1 g Volume do rádio para
acordar do Alarme 1 g Luz g Intensidade da Luz g Normal.
Normal g Hora do Alarme 2 g Minutos do Alarme 2 g Alarme
do dia da semana do Alarme 2 g Bipe para acordar do Alarme
2 g Rádio para acordar do Alarme 2 g Volume do rádio para
acordar do Alarme 2 g Luz g Intensidade da Luz g Normal.
Selecione o modo de alarme do dia da semana da seguinte maneira:
1-5: Segunda à sexta-feira
1-7: Toda a semana
6-7: Sábado e Domingo
1-1: Um dia da semana
Ação (durante o ajuste do Alarme):
- Pressione a tecla << / Sintonia – (8) para ajustar a data para trás
- Pressione a tecla >> / Sintonia + (12) para ajustar a data para
adiante
- Mantenha a tecla << ou >> pressionada por 2 segundos para
habilitar o adiantamento automático.
- Use as teclas AL1 e AL2 para confirmar cada configuração.
Acordar com a Luz do Alarme
A luz acenderá 5 minutos antes da hora do alarme. A luz começará
num nível baixo e aumentará gradualmente até o nível máximo.
DURAÇÃO DO ALARME
O bipe do alarme ou o rádio alarme vão soar por 30 minutos se
nenhuma tecla for pressionada, depois parará automáticamente e se
ativará no dia seguinte na mesma hora.
FUNÇÃO SNOOZE
- Quando o alarme soar, pressione a tecla SNOOZE (6) para
desativar o alarme e para ativar a função snooze. O Bipe ou o rádio
alarme pararão. 9 minutos mais tarde o alarme se ativará
novamente. Pressione a tecla SNOOZE de novo, o alarme parará
48
mais uma vez, outros 9 minutos mais tarde soará novamente e
assim por diante até o próximo alarme.
Nota: O intervalo de tempo da função Snooze é de 9 minutos
- Se quiser desativar a função SNOOZE e parar o alarme
completamente, pressione a tecla LIGAR/DESLIGAR (11). Se
nenhuma tecla for pressionada, o alarme soará durante 30
minutos e parará automáticamenete.
O indicator alarme AL1 e AL2 pisca quando a função soneca está
sempre ativado. A luz permanece acesa e constante quando o alarme
dispara.
FUNÇÃO LIGAR/DESLIGAR A LUZ DO DISPLAY AUTOMATICO
- Pressione a tecla Memória / M +/AUTO DESLIGAR DISPLAY
(MEM.SET/M+/NAP) (4) por 3 segundos.
O indicador LED do display se iluminará. O display LED apagará
automáticamente após 15 segundos.
Pressione qualquer tecla para manter o display LED por 15
segundos.
- Pressione Memória / M +/AUTO DESLIGAR DISPLAY (MEM.
SET/M+/NAP) (4) por segundos. O indicador LED do display
apagará para desativar esta função.
MUDANÇA DO CONTEÚDO DO DISPLAY
No modo de standby, mantenha pressionada a tecla Vol+ /
Mudança Ligar/Desligar (VOL+/DISPLAY) (14) por mais de 2
segundos para entrar no modo Alterar o conteúdo da Display, o
display mostra “ON” quando esta função é ativada. Ano/Mês/Dia/
Temperatura. O display volta ao display da hora após 5 segundos.
Pressione novamente e segure o VOL + / DISPLAY (14) para
desligar esta função, o Display mostra OFF.
Indicador do ANO
Indicador do MÊS
49
Indicador do DIA
MODO RÁDIO
Nota: Verifique que a antena FM esteja completamente desenrolada
e estique para obter a melhor recepção FM.
Pressione a tecla LIGAR/DESLIGAR (11) para ligar a unidade.
Utilize a tecla Sintonia - (8) ou Sintonia + (12) para selecionar
a estação de rádio desejada. Se mantiver a tecla Sintonia - (8)
ou Sintonia + (12) pressionada por um segundo e depois soltar, a
unidade vai escanear automáticamente para a seguinte estação.
Pressione a tecla LIGAR/DESLIGAR (11) para desligar o rádio.
Para memorizar uma estação de rádio
Pressione a tecla LIGAR/DESLIGAR (11) para ligar a unidade.
Utilize a tecla Sintonia – (8) ou Sintonia + (12) para selecionar a
estação de rádio desejada.
Pressione a tecla Memória/Memória + (4). ‘P02’ vai piscar no
display.
Pressione a tecla Memória/Memória + (4) novamente para ajustar
a memória.
Repita os passos 2 a 4 para ajustar mais memorizações.
A unidade pode memorizar 10 estações de FM.
Quando ‘P01-P10’ piscarem, pressione a tecla Sintonia – (8) ou
Sintonia + (12) para selecionar o número memorizado.
Para sintonizar uma estação memorizada
Para sintonizar uma estação memorizada, pressione a tecla
Memória/Memória +/SONECA (4) para selecionar o número
memorizado desejado.
OPERAÇÃO DORMIR (SLEEP)
Ao escutar o rádio, pressione a tecla SNOOZE/SLEEP (6) para
entrar no modo dormir. Pode-se ajustar o cronômetro de dormir de
90 a 15 minutos pressionando-se repetidamente a tecla SNOOZE/
SLEEP (6). Quando o horário de dormir estiver selecionado, a
unidade desligará automáticamente quando o tempo acabar.
50
FUNÇÃO SONECA (contagem regressiva)
No modo de standby, pressione a tecla (MEM.SET/M+/NAP)
SONECA (4) para entrar no modo SONECA. O tempo de soneca
de 90 será mostrado por 5 segundos. Nesse tempo, pressione
repetidamente a tecla (MEM.SET/M+/NAP) SONECA (4) para
ajustar o tempo entre 90 e 10 minutos. Quando o tempo tiver
acabado, o alarme soará
por 30 min e depois parará automáticamente. Para parar o alarme,
pressione a tecla LIGAR/DESLIGAR (11).
Pressione a tecla (MEM.SET/M+/NAP) SONECA (4) não tem
nenhum efeito durante a operação do alarme.
Pressione a tecla LIGAR/DESLIGAR (11) para cancelar a função
SONECA.
Nota: Quando o alarme SONECA estiver sendo utilizado, a função da
luz para acordar estará desativada.
TEMPERATURA INTERIOR
• sensor de temperatura interior é na parte de trás da unidade. O
aparelho detecta a temperatura ambiente atual.
• A fim de mostrar a temperatura interna em ° C ou ° F, primeiro
turno sobre o “ MUDANÇA DO CONTEÚDO DO DISPLAY”
(consulte o parágrafo correspondente acima).
• Durante modo de conteúdo altera o display, quando a temperatura
é exibida, pressione >> (12) para alternar entre a temperatura em
Celsius para Fahrenheit.
• A gama de detecção de temperatura interna entre 0 ° C e 50 ° C ou
32 ° F e 122 ° F.
UNIDADE DE PROJEÇÃO
Nota: Projete a imagem da hora no teto ou parede de um quarto
escuro. A distância máxima de projeção é de 0,90 mts – 2,70 mts.
Ajuste do Foco:
- Ajuste a intensidade e o foco (18) da projeção do relógio girando
a roda ajustável do foco até que a hora projetada seja vista com
claridade no teto ou na parede.
51
Ajuste a direção da projeção utilizando o ângulo de ajuste.
Gire a imagem projetada em 180° pressionando a tecla GIRE 180°
(16).
Para mudar da projeção da hora para a projeção da temperatura,
mantenha a tecla GIRAR 180° PROJEÇÃO DA HORA (180°FLIP
/ TIME/TEMP) (16).
CONTROLE DO REDUTOR DA LUZ (DIMMER)
A tecla do redutor da luz “DIMMER” (6) permite ajustar a intensidade
do brilho do display LED em alto, médio e baixo – 3 níveis.
AJUSTE DA INTENSIDADE DA LUZ
Pressione a tecla da Intensidade Alta da Luz (1) para aumentar a
intensidade da luz.
Pressione a tecla da Intensidade Baixa da Luz (2) para diminuir a
intensidade da luz.
MODO DA ECONOMIA DE LUZ DO DIA (DST)
Para países com economia de luz do dia (DST) (uma hora de diferença
entre a hora de verão e a de inverno), este rádio relógio oferece a
opção DST para ajustar-se à hora de verão.
No modo standby, mantenha pressionada por 2 segundos a tecla >>/
SINTONIA +/DST (12).
O relógio adiantará uma hora. Para sair do modo DST, repita a
operação acima mencionada.
REAJUSTAR
Se o sistema não responder ou tiver um funcionamento errático ou
intermitente, pode ser que haja havido uma descarga elétrostatica
ou um aumento na energia que tenha causado que o microcontrole
interno tenha desligado automáticamente. Se isso acontece,
simplesmente desligue da tomada e remova a bateria de apoio,
espere pelo menos 3 minutos e depois ajuste a unidade novamente
de acordo com o manual.
52
ESPECIFICAÇÕES TÉCNICAS
Número do modelo Fonte de Energia Consumo de Energia
Consumo de Energia em Standby
Bateria de apoio Cobertura da Rádio Frequência Potência de Saída do áudio
Peso Neto Dimensões •
•
•
•
•
•
•
•
•
TC-124
AC 230 ~ 50 Hz
5W
1W
3V (bacteria Fina de Litio CR2032
x 1) não incluída
FM: 87,5MHz - 108 MHz
120MW
0,430 g
126 x 100x 140mm
IMPORTANTE:
Devido à revisão e aos melhoramentos contínuos no desenho
de nossos produtos, as especificações estão sujeitas à
mudanças sem aviso prévio.
53
Eliminacão no fim de fida
Atençao : Este logotipo anexado no produto indica que
é sobre um dispositivo de qual o tratamento como perda traz
a colocação da diretriz 2002/96/CE de 27 de janeiro de 2003,
relativo ao lixo de instalações elétricas e eletrônicas (DEEE)
O seu produto esta identificado com este simbolo. Significa
que os produtos electricos e electronicos nao devem ser
misturados com o lixo domestico comum. Existe um sistema
de recolhas especifico para Estes produtos.
Se quiser eliminar este equipamento, nao o deve fazer juntamente
com o lixo domestico comum !
- O equipamento electrico e electronico deve ser tratado
separadamente e ao abrigo da legislacao aplicavel que obriga a um
tratamento, recuperacao e reciclagem adequados de quipamentos
electricos e electronicos usados.
- Apos a implementacao desta legislacao por parte dos Estados membros, todos os cidadaos residentes na Uniao Europeia poderao
entregar o seu equipamento electrico e electronico usado em
estaçoes de recolha especificas a titulo gratuito. (Contacte as
entidades locais para mais informacoes).
- Se o seu equipamento eléctrico e electrónico usado funcionar
a pilhas ou baterias, deverá eliminá-las em separado, conforme a
legislação local, e antes de entregar o seu equipamento.
- Ao eliminar este produto correctamente estara a contribuir para
que o lixo seja subetido aos processos de tratamento, recuperacao
e reciclagem adequados. Desta forma e possivel evitar os efeitos
nocivos que o tratamento inadequado do lixo poderia provocar no
ambiente e na saude.
Este dispositivo está em conformidade com as exigências
impostas pela Diretriz europeu 2006 / 95 EC (Ordens em
Compatibilidade Tensão Eletromagnética e Baixa)
54
WARNUNG
Das Blitzsymbol soll den Benutzer auf die Gegenwart gefährlicher Spannung im
Inneren des Gerätes hinweisen, und dass sich der Benutzer durch Berühren
der inneren Teile der Gefahr lebensbedrohlicher Stromschläge und
Personenverletzungen aussetzt.
Das Ausrufezeichen weist den Benutzer auf wichtige Betriebshinweise in dieser
Bedienungsanleitung hin.
CAUTION Um der Gefahr von elektrischen Stromschlägen und Feuer vorzubeugen, sollten
SHOCK
RISK OFDOELECTRIC
Sie niemals die Gehäuseabdeckung entfernen. Übergeben Sie das Gerät zur
NOT OPEN
Wartung stets nur einem qualifizierten Service-Fachmann.
HINWEIS:
Im Interesse der Produktverbesserung behalten wir uns Änderungen
technischer Daten und anderer Leistungsmerkmale ohne
Vorankündigung vor.
1.
2.
3.
4.
5.
6.
7.
8.
Halten Sie offenes Feuer, wie z.B. Kerzen von dem Gerät fern, und
stellen Sie diese niemals auf das Gerät.
Platzieren Sie das Gerät niemals in geschlossenen Bücherregalen
oder anderen Regalen wo keine ausreichende Belüftung des
Gerätes gewährleistet ist.
Das Netzkabel dient zum Abtrennen des Gerätes von der
Netzstromversorgung, und das von der Stromversorgung
abgetrennte Gerät kann auch in abgetrenntem Zustand betrieben
werden.
Die Belüftungsöffnungen im Gehäuse des Geräte sollten nicht
durch Gegenstände, wie z.B. Zeitungen, Tischdecken, Vorhänge,
etc. abgedeckt oder verschlossen werden.
Setzen Sie das Gerät niemals Tropf- oder Spritzwasser aus, und
achten Sie darauf, dass niemals mit Wasser gefüllte Gegenstände,
wie z.B. Blumenvasen auf dem Gerät abgestellt werden.
Schließen Sie niemals eine externe UKW-Antenne an der Antenne
des Gerätes an.
Das Gerät sollte möglichst nicht direkter Sonneneinstrahlung,
extrem hohen oder niedrigen Temperaturen, Feuchtigkeit,
Vibrationen oder Staub ausgesetzt werden. Vermeiden Sie die
Aufstellung an solchen Orten.
Verwenden Sie niemals scharfe Reiniger wie z.B. Benzin,
55
Verdünner oder andere Lösungsmittel zur Reinigung der
Oberflächen des Gerätes. Reinigen Sie die Oberflächen des
Gerätes nur mit einem milden, nicht scheuernden Reinigungsmittel
und einem sauberen, leicht feuchten Tuch.
9. Versuchen Sie niemals Kabel, Stifte oder andere Gegenstände in
die Belüftungsschlitze des Gerätes einzuführen.
10.Warnhinweis zum Abtrennen von der Stromversorgung: Der
Netzstecker trennt das Gerät von der Netzstromversorgung, und
Sie sollten stets darauf achten, dass der Netzstecker leicht
erreichbar ist.
11.Batterien sollten niemals heiß werden, und vermeiden Sie es diese
direkter Sonneneinstrahlung, Feuer oder der Wärme von anderen
Wärmequellen auszusetzen.
12.LED-Produkt der Klasse 1.
STROMVERSORGUNG
Verbinden Sie den Netzstecker des Gerätes mit einer AC-Netzdose.
Dieses Gerät ist mit einer Stützbatterie ausgerüstet, und benötigt
eine 3V Lithiumbatterie (nicht mitgeliefert) des Typs CR2032.
Legen Sie die Batterie in das Batteriefach ein, und achten Sie auf
die korrekte Ausrichtung der Angaben für die Batteriekontakte für
Plus und Minus (+ and -) im Batteriefach. Wenn ein Stromausfall
während der Nacht auftritt, dann schaltet das Gerät automatisch die
Stromversorgung auf die Stützbatterie um, und die Zeit und der Timer
werden korrekt erhalten. Sobald die Netzstromversorgung wieder
hergestellt ist, schaltet das Gerät automatisch wieder auf die ACNetzstromversorgung um.
56
Beschreibung des Gerätes & Lage der Bedienungselemente
FUNKTIONEN UND BEDIENUNGSELEMENTE
1. EINSTELLEN DER ANZEIGEHELLIGKEIT - HOCH
2. EINSTELLEN DER ANZEIGEHELLIGKEIT - NIEDRIG
3. LICHT EIN/AUS
4. SPEICHER/SPEICHER+/NICKERCHEN/AUTO AUS ANZEIGE (MEM.
SET/M+/NAP)
5. LAMPENSCHIRM
6. SCHLUMERN / EINSCHLAFEN / DIMMER (SNOOZE/SLEEP/
DIMMER)
7. SET/ TEMPERATUR
8. << / SENDERSUCHE - / JAHR/MONAT/TAG
9. ALARM 1 EIN / AUS SET (AL1)
10. ANZEIGE
11. EIN / AUS
12. >> / SENDERSUCHE + / DST/C-F
13. ALARM 2 EIN / AUS SET (AL2)
14. LAUTSTÄRKE AUF / ANZEIGE LOOP EIN/AUS (DISPLAY)
15. LAUTSTÄRKE ABWÄRTS
16. PROJEKTION ZEIT 180° KIPPEN/ZEIT-TEMPERATUR (180°FLIP /
TIME/TEMP)
17. PROJEKTION EIN/AUS
18. FOKUS-EINSTELLUNG FÜR PROJEKTION
19. LAUTSPRECHER
20. UKW-ANTENNE
21. TEMPERATUR-SENSOR (IN GESCHLOSSENEN RÄUMEN)
22. BATTERIEFACH
23. AC-NETZKABEL
24. TYPSCHILD
57
ANZEIGE BESCHREIBUNG UND INDIKATOREN
BEREITSCHAFT-Indikator
ZEIT-Indikator
PM VORMITTAG-Indikator
MHz Indikator
ALARM 1 Indikator
ALARM 2 Indikator
GUNDFUNKTIONEN UND BEDIENUNGSABLÄUFE
ZEIT UND KLENDER - MANUELLE EINSTELLUNG
Einstellung der Zeit und des Kalenders
Betätigen Sie die SET-Taste (7) im standbybetrieb und halten Sie die
Taste länger als 2 Sekunden gedrückt, um den Einstellmodus für die
Normalzeit aufzurufen; betätigen Sie die SET-Taste (7) nachdem Sie
den Einstellmodus ausgeführt haben, um durch die Anzeige für die
Einstellung wie folgt durchzuschalten:
Normalzeitanzeige g Jahr g Monat g Tag g 12/24H Stundenformat
g Normalzeit Stunden g Normalzeit Minuten g Normalzeitanzeige
Tastenfunktionen (während Ausführung der Einstellungen):
- Betätigen Sie die Taste << / Sendersuche (-) (8), um
Anzeigewerte abwärts einzustellen.
- Betätigen Sie die Taste >> / Sendersuche (+) (12), um
Anzeigewerte aufwärts einzustellen.
- Halten Sie die Tasten << oder >> für ca. 2 Sekunden gedrückt,
um die Einstellungen schnell aufwärts auszuführen.
- Benutzen Sie die Taste SET (7), um jede Einstellung zu bestätigen.
ALARM EINSTELLEN
Einstellen von Alarm 1 und Alarm 2
Betätigen Sie die Tasten ALARM 1 (9) oder ALARM 2 (13) einmal
im Standby zeitmodus, um die eingestellte Alarmzeit anzuzeigen.
Die Alarmzeit wird nun angezeigt, und wenn Sie die ALARM-Taste
ca. 3 Sekunden drücken & halten, dann blinkt die Stundenanzeige.
Betätigen Sie nun die Tasten ALARM SET (9/13) mindestens
58
2 Sekunden, um den Einstellmodus für den Alarm zu aktivieren.
Betätigen Sie die SET-Tasten für den Alarm (9/13), um durch die
Anzeige für die Einstellungen wie folgt zu schalten:
Normal g AL 1 Std. g AL 1 Min. g AL 1 Wochentag Alarm g
AL 1 Aufwachen Piepton g AL 1 Aufwachen mit Radio g AL 1
Radio Lautstärke g Licht g Licht Helligkeit g Normal.
Normal g AL 2 Std. g AL 2 Min. g AL 2 Wochentag Alarm g
AL 2 Aufwachen Piepton g AL 2 Aufwachen mit Radio g AL 2
Radio Lautstärke g Licht g Licht Helligkeit g Normal.
Wählen Sie den Wochentag für den Alarm wie folgt aus:
1-5: Montag bis to Freitag
1-7: Ganze Woche
6-7: Samstag & Sonntag
1-1: Ein Tag der Woche
Tastenfunktionen (während Ausführung der Einstellungen):
- Betätigen Sie die Taste << / Sendersuche (-) (8), um
Anzeigewerte abwärts einzustellen.
- Betätigen Sie die Taste >> / Sendersuche (+) (12), um
Anzeigewerte aufwärts einzustellen.
- Halten Sie die Tasten << oder >> ca. 2 Sekunden gedrückt, um
die Einstellungen schnell aufwärts auszuführen.
- Benutzen Sie die tasten AL1 und AL2, um jede Einstellung zu
bestätigen.
Aufwachen mit Lichtalarm
Das Licht wird 5 Minuten vor der eingestellten Alarmzeit eingeschaltet.
Das Licht leuchtet erst nur schwach und wird langsam heller bis die
eingestellte, maximale Helligkeitsstufe erreicht ist.
ALARM EINSCHALTDAUER
Der Summeralarm oder der Radioalarm ertönen jeweils 30 Minuten
lang, wenn diese nicht durch Betätigen einer beliebigen Taste
abgeschaltet werden; nach Ablauf des Zeitintervalls schaltet sich die
Alarmfunktion automatisch ab, und der Alarm ertönt zur eingestellten
Alarmzeit am nächsten Tag erneut.
59
SCHLUMMERN-FUNKTION (SNOOZE)
- Betätigen Sie die Schlummern-Taste (Snooze) (6) sobald der
Alarm ertönt, um den Alarmton abzuschalten & um die
Schlummern-Funktion zu aktivieren. Der Summeralarm oder das
Radio werden nun abgeschaltet. Nach 9 Minuten ertönt der
Alarm erneut. Betätigen Sie die SCHLUMMERN-Taste (SNOOZE)
(6) nochmals, und der Alarm kann erneut 9 Minuten lang pausiert
werden; Sie können diesen Vorgang beliebig oft wiederholen bis die
eingestellte Alarmzeit wieder erreicht ist.
Hinweis: Das Zeitintervall für die Schlummern-Funktion beträgt 9
Minuten..
- Betätigen Sie die EIN/AUS-Taste (11), wenn Sie die SNOOZE Funktion und den Alarm vollständig abschalten möchten; falls keine
Tastenbetätigung erfolgt, dann schaltet sich der Alarmton nach 30
Minuten ab & die Alarmfunktion wird automatisch abgeschaltet.
Die LED Indikator von Alarm AL1 und AL2 blinkt, wenn die SnoozeFunktion noch aktiv ist, hört die Anzeige auf zu blinken und leuchtet,
wenn der Alarm stoppt.
AUTOMATISCHE BELEUCHTUNG DER ANZEIGE- EIN/AUS
- Im Standby zeitmodus Betätigen Sie die Anzeigebeleuchtung
Auto Ein-Aus /NAP Taste (MEM.SET/M+/NAP) (4) ca. 3
Sekunden lang, und der LED-Anzeige-Indikator leuchtet nun
auf; die LED-Anzeige wird nun automatisch nach 15 Sekunden
ausgeschaltet.
Betätigen Sie eine beliebige Tate, um die LED-Anzeige jeweils 15
Sekunden lang einzuschalten.
- Betätigen Sie die Taste Anzeigebeleuchtung Licht Auto Ein Aus /NAP (MEM.SET/M+/NAP) (4) ca. 3 Sekunden lang, und
der LED Anzeige-Indikator erlischt, wodurch angezeigt wird dass
die Funktion wieder deaktiviert ist.
ANZEIGE-UMSCHALTUNG
Im Standby zeitmodus Betätigen Sie die Taste LAUTSTÄRKE AUF
/ ANZEIGE LOOP EIN/AUS (DISPLAY) (14) mindestens 2
Sekunden lang, um den MultiAnzeigemodus einzustellen. Wenn diese
Funktion aktiviert ist, zeigt das Display “ON”.
Das Display zeigt die folgenden Informationen in dieser Reihenfolge:
60
Jahr/Monat/Tag/Temperatur; die Anzeige schaltet nun nach 5
Sekunden wieder zur Anzeige der Zeit zurück.
Drücken Sie erneut und halten Sie die VOL + / DISPLAY (14), um
diese Funktion auszuschalten. Das Display zeigt “OFF”.
JAHR-Indikator
MONAT-Indikator
TAG-Indikator
RADIO-MODUS
Hinweis: Stellen Sie sicher, dass die UKW-Antenne vollständig
abgewickelt und zur vollen Länge ausgerollt ist, um einen optimalen
UKW-Empfang zu gewährleisten.
Betätigen Sie die Taste EIN/AUS (11), um das Gerät einzuschalten.
Verwenden Sie die Tasten Sendersuche- (8) oder Sendersuche+
(12) , um eine gewünschte Sendestation einzustellen.
Halten Sie die Tasten Sendersuche- (8) oder Sendersuche+ (12)
ca. 1 Sekunde gedrückt und geben Sie die Taste anschließend frei,
um die gewünschte Sendestation einzustellen; das Gerät sucht nun
automatisch die nächste Sendestation.
Betätigen Sie die Taste EIN/AUS (11), um das Radio wieder AUS zu
schalten.
Sendestationen fest programmieren
Betätigen Sie die Taste EIN/AUS (11), um das Gerät ‘EIN’ zu
schalten.
Verwenden Sie die Tasten Sendersuche- (8) oder Sendersuche+
(12) , um eine gewünschte Sendestation einzustellen.
Betätigen Sie die Taste Speicher/Speicher+ (4); “P02” blinkt nun
in der Anzeige.
Betätigen Sie die Taste ‘Speicher / Speicher+’ (4) nochmals, um
die Station fest im Speicher zu programmieren.
Wiederholen Sie die Schritte 2 bis 4 wie oben beschrieben, um weitere
Sendestationen fest zu programmieren.
61
Das Gerät kann bis zu 10 UKW Sendestationen speichern.
Wenn “P01-P10” in der Anzeige blinkt, dann betätigen Sie
die Tasten Sendersuche- (8) oder Sendersuche+ (12), um
eine Speicherposition für eine fest programmierte Sendestation
auszuwählen.
Aufrufen einer fest programmierten Sendestation
Betätigen Sie die Taste Speicher/Speicher+/NAP (4), um eine
gewünschte Sendestation auszuwählen und einzustellen.
EINSCHLAFTIMER-FUNKTION (SLEEP)
Betätigen Sie die Einschlaf-Taste (SLEEP) (6), um den
Einschlaftimer-Modus zu aktivieren. Sie können das EinschlaftimerIntervall nun in einem Bereich von 90 bis 15 Minuten einstellen, indem
Sie wiederholt die Taste SLEEP (6) betätigen. Das Gerät schaltet sich
automatisch nach Ablauf des gewünschten Zeitintervalls aus, wenn die
Funktion aktiviert ist.
MITTAGSRUHE-FUNKTION (Countdown-Timer)
Betätigen Sie die Taste SPEICHER.SET/SPEICHER+/NAP (4)
im Standby zeitmodus, um die NAP-Funktion zur Einstellung des
Kurzalarms aufzurufen; das voreingestellte Kurzalarm-Intervall (NAP)
von 90 Minuten wird nun 5 Sekunden lang angezeigt. Betätigen
Sie während dieser Zeit wiederholt die Taste SPEICHER.SET/
SPEICHER+/NAP (4) , um ein gewünschtes Zeitintervall zwischen
90 bis 10 Minuten einzustellen.
Sobald das eingestellte Zeitintervall abgelaufen ist, ertönt der
Summer-Alarm 30 Minuten lang, und der Alarm schaltet sich
anschließend automatisch ab. Betätigen Sie die Taste EIN/AUS (11),
um den Alarm jederzeit abzuschalten.
Die Taste SPEICHER.SET/SPEICHER+/NAP (4) funktioniert nicht
während ein Alarm ertönt.
Betätigen Sie die Taste EIN/AUS (11), um die MITTAGSRUHEFunktion (NAP) wieder zu deaktivieren.
Hinweis: Während die MITTAGSRUHE-Funktion (NAP) aktiviert ist,
ist die Funktion des Aufwachlichtes vor der Auslösung eines Alarms
deaktiviert.
62
RAUMTEMPERATUR
• Innentemperatur Sensor ist auf der Rückseite des Gerätes. Das
Gerät erkennt die aktuelle Umgebungstemperatur.
• Um die Innentemperatur im Display ° C oder ° F, schalten Sie
zuerst die “ ANZEIGE LOOP EIN/AUS (DISPLAY) (14)” (siehe
den entsprechenden Absatz oben).
• Während der Display-Inhalt-Modus, wenn die Temperatur angezeigt
wird, auf >> (12), um zwischen Temperatur in Celsius in Fahrenheit
umzuschalten drücken.
• Die Reichweite der Innentemperatur liegt zwischen 0 ° C und 50 °
C oder 32 ° F & 122 ° F.
ZEIT-PROJEKTOR
Hinweis: Die Zeit kann an die Wand oder die Decke eines
abgedunkelten Raumes projiziert werden. Die maximale Entfernung
des Projektors von der Wand oder der Decke beträgt 0,90 ~ 2,70
Meter.
Fokus Einstellung:
- Stellen Sie die Helligkeit & die Bildschärfe (Fokus) (18) der
Zeitprojektion ein, indem Sie den verstellbaren Fokussierring
drehen, bis die Zeit deutlich lesbar an der Decke oder an der Wand
erscheint.
- Stellen Sie den Projektionswinkel wie gewünscht ein.
- Sie können das projizierte Bild um 180° kippen, indem Sie die
Taste 180° KIPPEN (16) betätigen.
- Halten Sie die Taste PROJEKTION ZEIT 180° KIPPEN/ZEIT TEMPERATUR (16) mindestens 2 Sekunden lang gedrückt, um
zwischen der Zeitanzeige und der Temperaturanzeige des
projizierten Bildes umzuschalten.
DIMMER-SCHALTER
Der Dimmer-Schalter (6) ermöglicht die Einstellung der Helligkeit der
Anzeige in 3 Stufen für ‘Hoch’, ‘Normal’ und ‘Niedrig’.
63
EINSTELLEN DER HELLIGKEIT
Betätigen Sie die Taste EINSTELLEN DER ANZEIGEHELLIGKEIT HOCH (1), um die Helligkeit aufwärts einzustellen.
Betätigen Sie die Taste EINSTELLEN DER ANZEIGEHELLIGKEIT NIEDRIG (2), um die Helligkeit abwärts einzustellen.
SOMMERZEIT-MODUS (DST)
Für Länder die auf die Sommerzeit (DST) (eine Stunde Zeitdifferenz
zwischen Sommerzeit und Winterzeit) umschalten, ermöglicht diese
Uhr die einfache Zeitumstellung auf die DST Sommerzeit.
Betätigen Sie die Taste >>/SENDERSUCHE +/DST (12) im
Bereitschaft-Modus mindestens 2 Sekunden. Die Uhr stellt die
Zeitanzeige nun automatisch 1 Stunde vorwärts ein. Wiederholen Sie
den Vorgang, um den Anzeigemodus für die Sommerzeit (DST) wieder
zu verlassen.
RÜCKSETZUNG
Falls das Gerät nicht mehr auf Tastebefehle reagiert oder
Fehlfunktionen auftreten, dann kann es sein, dass dieses
elektrostatischer Elektrizität ausgesetzt war, oder eine Stromspitze
aufgetreten ist, durch die der Mikroprozessor im Gerät automatisch
abgeschaltet wurde. Falls dieser Fall eintritt, dann trennen Sie
das Gerät einfach von der Netzstromversorgung und nehmen Sie
die Stützbatterie aus dem Gerät heraus; warten Sie anschließend
3 Minuten, und führen Sie dann erneut die in dieser Anleitung
beschriebenen Einstellungen aus.
64
TECHNISCHE DATEN
Modellnummer Stromversorgung Leistungsaufnahme Leistungsaufnahme in Bereitschaftmodus
Stützbatterie
Frequenzbereich
Ausgangsleistung Nettogewicht Abmessungen
Temperaturanzeigebereich für geschlossene Räume
•
•
•
•
•
•
•
•
•
•
TC-124
AC 230 ~ 50 Hz
5W
1W
3V (CR2032
Lithiumflachzelle x 1)
nicht mitgeliefert
FM: 87.5MHz - 108 MHz
120MW
0.430 g
126 x100x140 mm
0 bis + 50°C
oder 32 bis 122°F
WICHTIG: Im Interesse der fortlaufenden
Produktverbesserung behalten wir uns Änderungen
technischer Daten und anderer Leistungsmerkmale
ohne Vorankündigung vor.
65
Entsorgung am Ende der Lebensdauer
Achtung ! Ihr Produkt trägt dieses Symbol. Es besagt, dass
Elektro-und Elektronikgeräte nicht mit dem Haushaltsmüll
entsorgt, sondern einem getrennten Rücknahmesystem
zugeführt werden sollten.
Dieses Symbol auf dem Produkt bedeutet, dass die
Wiederverwendung dieses Apparates innerhalb des Gerüstes
der Direktive 2002/96/CE vom 27. Januar 2003 bezüglich der
Vergeudung der Elektrischen und Elektronischen Ausrüstung
(WEEE) kommt.
Werfen Sie dieses Gerät zur Entsorgung bitte nicht in den
normalen Hausmüll!
- Gemäß einer neuen EU-Richtlinie, die die ordnungsgemäße
Rücknahme, Behandlung und Verwertung von gebrauchten
Elektro-und Elektronikgeräten vorschreibt, müssen elektrische und
elektronische Altgeräte getrennt entsorgt werden.
- Nach der Einführung der Richtlinie in den Eu-Mitgliedstaaten können
Privathaushalte ihre gebrauchten Elektro- und Elektronikgeräte nun
kostenlos an ausgewiesenen Rücknahmestellen abgeben. (Weitere
Einzelheiten erhalten Sie von Ihrer Gemeindeverwaltung.).
- Wenn Ihre gebrauchten Elektro- und Elektronikgeräte Batterien
oder Akkus enthalten, sollten diese vorher entnommen und gemäß
örtlich geltenden Regelungen getrennt entsorgt werden.
- Durch die ordnungsgemäße Entsorgung tragen Sie dazu bei, dass
Altgeräte angemessen gesammelt, behandelt und verwendet
werden. Dies verhindert mögliche schädliche Auswirkungen auf
Umwelt und Gesundheit durch eine unsachgemäße Entsorgung.
Dieses Gerät erfüllt Europäische Rat-Direktive 2006 / 95 CE
(Elektromagnetische Vereinbarkeit und Niedrige
Spannungsdirektiven)
66
968L-T003
TCP-124
www.tokai.fr