1
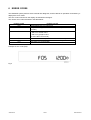
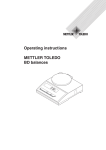
SERVICE MANUAL
COOKING
Built-in ovens
© Electrolux Home Products Italy
S.p.A.
Corso Lino Zanussi, 30
I - 33080 Porcia -PNTel. +39 0434 394850
Fax +39 0434 394096
Publication no.
599 38 86-47
EN
Basic Italy 2 Version
Touch Control ENV06
New Demo
SOI
Edition: 05.2007
2007-05 FV
SPECIFIC MANUAL
KRONOS LEVEL 2
(OVC1000)
1/16
599 38 86-47
CONTENT
1
INTRODUCTION ....................................................................................................................................... 3
1.1 Purpose of this Manual ...................................................................................................................... 3
1.2 ESD - Electrostatic Discharge and its effect on the components ...................................................... 3
2
TECHNICAL CHARACTERISTICS............................................................................................................ 4
2.1
2.2
2.3
2.4
SOFTWARE ......................................................................................................................................
TIMES................................................................................................................................................
AUTOMATIC SWITCH-OFF ..............................................................................................................
DIMENSIONS ....................................................................................................................................
2.4.1MINIMUM INTERNAL DIMENSIONS OF KITCHEN CABINET.................................................
2.4.2NET DIMENSIONS OF OVEN CAVITY.....................................................................................
2.5 POWER RATINGS ............................................................................................................................
2.5.1Power ratings oven ....................................................................................................................
3
4
4
4
4
4
4
5
5
CONTROL PANEL..................................................................................................................................... 6
3.1 CONTROLS....................................................................................................................................... 6
3.2 DISPLAY............................................................................................................................................ 7
4
COOKING FUNCTIONS ............................................................................................................................ 8
5
SPECIAL FUNCTIONS............................................................................................................................ 11
5.1 RAPID HEATING............................................................................................................................. 11
5.2 FUNCTION REQUIRING A TWO-KEY COMBINATION ................................................................. 11
5.3 OVEN LIGHT FUNCTION ............................................................................................................... 11
6
ERROR CODES ...................................................................................................................................... 12
7
INTERFACE WITH TOUCH SENSORS .................................................................................................. 13
8
BUTTON TEST DIRECTLY ON THE CONTROL UNIT........................................................................... 15
9
OVEN BASIC WIRING DIAGRAM........................................................................................................... 16
2007-05 FV
2/16
599 38 86-47
1
INTRODUCTION
1.1 Purpose of this Manual
The purpose of this Manual is to integrate the information provided in the Kronos Theory Manual OVC1000
599371483, the Troubleshooting Manual 599371484 and the Accessibility Manual 599359640.
As well as the technical characteristics, this specific Manual also contains specific information relative to this
version of the electronic control system
1.2 ESD - Electrostatic Discharge and its effect on the components
The interface for the control unit is not fitted with an internal device to protect against electrostatic discharge.
When effecting repairs, therefore, the service engineer must check for stabilization of the potential on the oven
casing (i.e. discharge any static electricity by touching the oven casing) in order to prevent the possibility of
overload, which might damage the control unit.The same care is necessary when handling control units supplied as spare parts (i.e. not yet fitted to the oven), which must be removed from the protective bag in ESD only
after stabilizing the potential (i.e. discharging any static electricity) and only then installed in the appliance.
Important!The theory behind the process of electrostatic charge and discharge is not discussed in this Manual.The tangible effects are considered to be more important.However, the effects are felt frequently when
touching a metal handle and feeling the electrostatic discharge in the form of a minor shock.
But what happens when stabilization of the potential takes place with semi-conductor components (i.e. components on a circuit board, such as integrated circuits, microprocessors etc.)?
Stabilization of the potential takes place across the internal structure of the component.This does not necessarily lead to the immediate destruction of the component;Subsequent malfunctions across damaged internal
connections may be more harmful, and these occur only as a result of overheating or current overloads.
It is true that almost all sensitive semi-conductor components (such as
MOS circuits) have been improved by the addition of protective measures, but the internal structures of these
components are today smaller than, for example, ten years ago, which tends to increase their sensitivity to the
previous levels).
IMPORTANT!
Which components are susceptible to damage by static electricity during repairs?
All circuit boards featuring control and command accesses (door switches, food probes etc.), bare tracks and
microprocessors, as well as any other circuits with free access.
EXAMPLES:
•
•
•
•
•
•
•
Programmers with access to the food probe and the door switch.
Programmers whose control processors are accessible (due to their high costs, the protective systems are
only partial).
W.O.E.C. control units.
S.O.E.C. control units.
C.H.E.C. control units.
KRONOS control units
R.H.E.A. control units.
2007-05 FV
3/16
599 38 86-47
2
TECHNICAL CHARACTERISTICS
2.1 SOFTWARE
This level 2 version of "Kronos" - Basic Italy 2 Touch - features the software version k2c56165, which is indicated as shown below:
C56 0165
N.B.: The last three digits of the software code (the number shown on the display), in this case "165", indicate
the level of modification, and may vary; however the control units remain interchangeable with the previous
having same number.
2.2 TIMES
Time indication
Maximum cooking time
Minute-minder
24 hours
23 hours 59 minutes
23 hours 59 minutes
2.3 AUTOMATIC SWITCH-OFF
The automatic switch-off function operates as follows:
Temperature setting
30-115°C
120-195°C
200-245°C
250-280°C
Automatic switch-off
After 12 hours
After 8 hours 30 minutes
After 5 hours 30 minutes
After 3 hours
2.4 DIMENSIONS
2.4.1 MINIMUM INTERNAL DIMENSIONS OF KITCHEN CABINET
Column height
Undercounter height
Width
Depth
580 mm
593 mm
560 mm
550 mm
2.4.2 NET DIMENSIONS OF OVEN CAVITY
Height
Width
Depth
Net volume
2007-05 FV
335 mm
395 mm
400 mm
53 l
4/16
599 38 86-47
2.5 POWER RATINGS
2.5.1 Power ratings oven
Upper heating element
Lower heating element
Upper + lower heating element
Single grill heating element
Double grill heating element
Rear heating element (circular)
Oven light
Cooling fan (tangential)
Oven fan (convection)
Oven maximum power rating
Voltage (50Hz)
2007-05 FV
800 W
1000 W
1800 W
1650 W
2450 W
2000 W
25 W
25 W
25 W
2500 W
230 V
5/16
599 38 86-47
3
CONTROL PANEL
3.1 CONTROLS
Fig. 1
1 - Button
“ON/OFF” to switch the oven ON and OFF
2 - Button
“FUNCTION” to select the cooking functions of the oven
3 - Button
“RAPID HEATING” to select the rapid oven heating function
4 - Button
“BACK” to decrease the temperature and time
5 - Button
“FORWARD” to increase the temperature and time
6 - Button
“CLOCK” to set the "minute-minder", "end of cooking", "cooking time" functions and
the time of day
S1 - Cooking function / Demo indication
S3 - Cooking function indication
S3 - Temperature indication
S4 - Degrees centigrade symbol
S5 - Time indication
2007-05 FV
6/16
599 38 86-47
3.2 DISPLAY
Fig. 2
1 - Oven functions
2 - Degrees centigrade symbol
3 - Cooking time symbol
4 - End of cooking symbol
5 - Clock symbol
6 - Clock arrow
2007-05 FV
7 - Time
8 - Minute-minder
9 - Thermometer
10 - Temperature
11 - Cooking function / Demo indication
7/16
599 38 86-47
4
COOKING FUNCTIONS
Fan cooking
Elements activated:
Oven light
Circular heating element
Convection fan
Pre-set temperature: 175°C
Temperature range: 30-250°C
Traditional cooking
Elements activated:
Oven light
Upper heating element
Lower heating element
Pre-set temperature: 200°C
Temperature range: 30-250°C
Grill
Elements activated:
Oven light
Grill heating element
Pre-set temperature: 250°C
Temperature range: 200-250°
Grill + Fan
Elements activated:
Oven light
Grill heating element
Convection fan
Pre-set temperature: 180°C
Temperature range: 30-250°C
2007-05 FV
8/16
599 38 86-47
Pizza
Elements activated:
Oven light
Circular heating element
Lower heating element
Convection fan
Pre-set temperature: 175°C
Temperature range: 30-250°C
Large grill
Elements activated:
Oven light
Grill heating element
Upper heating element
Pre-set temperature: 250°C
Temperature range: 200-250°C
Bottom panel
Elements activated:
Oven light
Lower heating element
Pre-set temperature: 250°C
Temperature range: 30-250°C
Top panel
Elements activated:
Oven light
Upper heating element
Pre-set temperature: 250°C
Temperature range: 30-250°C
2007-05 FV
9/16
599 38 86-47
Defrosting
Elements activated:
Oven light
Convection fan
2007-05 FV
10/16
599 38 86-47
5
SPECIAL FUNCTIONS
5.1 RAPID HEATING
Elements activated:
Oven light
Grill heating element
Lower heating element
Convection fan
FHU
The figure illustrates the elements that are effectively in operation when the RAPID HEATING function has
been selected, although the display indicates only the first function selected.
5.2 FUNCTION REQUIRING A TWO-KEY COMBINATION
FUNCTION
1° KEY
Child safety function
KEY COMBINATION
POSITION
2° KEY
(Ref. Fig. 1)
(2)
"Beep" when key is
pressed
(2)
Demo Function 1st step (*)
(6)
Demo Function 2nd step (*)
(6)
(*) NOTE: The Demo function activates firstly pushing button
simultaneously button
and button
POSITION
(Ref. Fig. 1)
(4)
(5)
--
-(4)
for 2 seconds and then pushing
. The action of the first button and the
action of the key-combination are confirmed by an acoustic signal.
5.3 OVEN LIGHT FUNCTION
Automatic switch-off: after 3 minutes
2007-05 FV
11/16
599 38 86-47
6
ERROR CODES
The KRONOS system performs some internal auto-diagnosis, and if it detects an operation inconsistency, it
displays the error codes.
The error code is showed on the display as indicated in the figure.
The various error codes are listed in the table below:
ERROR CODE
F03
F04
F05
F08
F09
F10
ERROR CAUSE
EEPROM Memory on control unit
Temperature range of oven sensor exceeded (for more than 5
seconds)
Temperature safety level exceeded
> 350°C on normal ovens
> 530°C on pyrolytic ovens
(for more than 10 seconds)
Communication interrupted between control unit and power board
Software compatibility between control unit and power board
Triac faulty (on power board)
Example of error code (F05):
Fig. 3
2007-05 FV
12/16
599 38 86-47
7
INTERFACE WITH TOUCH SENSORS
This oven is provided with a touch sensor control device.
To insert the controls in the oven, a sensors interface electronic PCB is used in place of the normal buttons
which control the switches placed in the control unit.
The system consists of a sensor PCB placed under the glass which recognises the presence of a finger at a
distance of about 4 mm from the sensors (glass thickness).
The sensor PCB includes 10 control units with touch sensors used on the basis of the control software of the
different models (see Fig. 4 and 5).
Fig. 4
Fig. 5
2007-05 FV
13/16
599 38 86-47
When one of the sensors is activated, the PCB sends the control to the control unit through 2 cables with connectors (see Fig. 6 and 7).
Fig. 6
1 - KRONOS CONTROL UNIT
2 - FRONT PIEECE ASSEMBLY
Fig. 7
1 - CONTROL UNIT
2 - CONNECTORS
3 - CONNECTION WIRING
2007-05 FV
4 - CONNECTORS
5 - SENSOR INTERFACE PCB
6 - FRONT PIECE GLASS
14/16
599 38 86-47
8
BUTTON TEST DIRECTLY ON THE CONTROL UNIT
It is possible to check the control actions by means of the microswitches on the Control unit. After demounting
the front piece and removing the connectors of the sensor board, test the various functions of the buttons pushing the microswitches of the Control unit using a screwdriver or a button with part no. 355 02 93-02/5.
Fig. 8
N.B.: For the various functions of the microswitches see fig. 1 page. 6
Fig. 9
1 - KRONOS CONTROL UNIT
2 - MICROSWITCHES ON THE CONTROL UNIT
3 - ACTIVATION OF THE MICRO THROUGH A BUTTON
BUTTON PART NO. 355 02 9302 / 5
Fig. 10
2007-05 FV
15/16
599 38 86-47
9
OVEN BASIC WIRING DIAGRAM
Fig. 11
KEY
DISPLAY L2
- CONTROL UNIT KRONOS LEVEL 2
REL1
Ground
- MAINS (EARTH)
REL2
- SAFETY MAIN RELAY
- CONVECTION HEATING ELEMENT CONTROL
RELAY
MG1
- CONVECTION FAN
MG2
- COOLING TANGENTIAL FAN
REL3
REL4
REL5
MG3
- TURNSPIT MOTOR
SENSOR
Neutral
- MAINS (NEUTRAL)
OVC1000
- POWER BOARD OVC1000
TO1
- OVEN LIGHT CONTROL TRIAC
Phase
- MAINS (PHASE)
TO2
- CONVECTION FAN CONTROL TRIAC
L1
- OVEN LIGHT
- UPPER HEATING ELEMENT CONTROL RELAY
- SENSOR INTERFACE PCB
- GRILL HEATING ELEMENT CONTROL RELAY
- LOWER HEATING ELEMENT CONTROL RELAY
PCB
TC1
- SAFETY THERMOSTAT
R1
- GRILL HEATING ELEMENT
TO3
- COOLING TANGENTIAL FAN CONTROL TRIAC
R2
- LOWER HEATING ELEMENT (BOTTOM)
TO4
- TURNSPIT MOTOR CONTROL TRIAC
R3
- UPPER HEATING ELEMENT (TOP)
TO5
R4
- CONVECTION HEATING ELEMENT (CIRCULAR) TR01
2007-05 FV
16/16
- DOOR LOCK CONTROL TRIAC
- LOW VOLTAGE TRANSFORMER
599 38 86-47