1
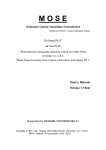
PepSlide® Analyzer 2.0
User’s Guide
17 February 2015 - Rev 10
PepSlide® Analyzer is only intended for research and not intended or approved for diagnosis
of disease in humans or animals.
Copyright 2009-2014 SICASYS Software GmbH. All Rights Reserved.
SICASYS Software GmbH
Im Neuenheimer Feld 583
D-69120 Heidelberg
Germany
Phone
+49 (62 21) 7 28 50 40
Fax
+49 (62 21) 7 28 48 94
Email
info@sicasys.de
Web
www.sicasys.de
Table of contents
1
2
3
4
5
Introduction ..................................................................................................................................... 1
1.1
Installation ............................................................................................................................... 1
1.2
Product Activation ................................................................................................................... 1
1.3
Software Concepts .................................................................................................................. 2
1.4
Software User Interface .......................................................................................................... 4
1.5
Peptide Array Data Analysis .................................................................................................... 5
Preparation of Array Data ............................................................................................................... 6
2.1
Loading Data ............................................................................................................................ 6
2.2
Array Alignment....................................................................................................................... 7
2.3
PepSlide® Analyzer Project File ............................................................................................... 8
Image and Array Processing ............................................................................................................ 8
3.1
Image Processing ..................................................................................................................... 8
3.2
Image and Array Rotation ....................................................................................................... 9
Quantification of Array Data ......................................................................................................... 10
4.1
Quantifying Array Data .......................................................................................................... 10
4.2
Change of Intensity Values .................................................................................................... 11
4.3
Spot Detection Methods ....................................................................................................... 12
4.4
Spot Detection Options ......................................................................................................... 13
4.5
Background Correction.......................................................................................................... 15
Analysis of Peptide Libraries.......................................................................................................... 16
5.1
Overlapping Peptide Library Analysis .................................................................................... 17
5.2
Random Peptide Library Analysis .......................................................................................... 19
5.3
Substitution Peptide Library Analysis .................................................................................... 19
5.4
Peptide Library Analysis with GAL Files ................................................................................. 20
6
Batch Processing............................................................................................................................ 22
7
Data Mining Tools.......................................................................................................................... 24
8
9
7.1
Dataset .................................................................................................................................. 24
7.2
Principal Component Analysis (PCA) ..................................................................................... 25
7.3
Hierarchical Clustering Analysis (HCA) .................................................................................. 26
Utilities .......................................................................................................................................... 27
8.1
Search for Antigens and Proteins .......................................................................................... 27
8.2
Scatter Plot ............................................................................................................................ 29
Product Activation ......................................................................................................................... 31
PepSlide® Analyzer User’s Guide
Version 2.0
Page i
10
Sample Datasets ........................................................................................................................ 33
11
End-User License Agreement .................................................................................................... 35
12
Index .......................................................................................................................................... 37
PepSlide® Analyzer User’s Guide
Version 2.0
Page ii
1 | Introduction
1 Introduction
PepSlide® Analyzer (abbreviated PSA) software supports microarray data analysis and is particularly
suited for peptide arrays and peptide microarrays. In addition, the software provides statistical data
mining tools for discovering parameters influencing the study and their relationship.
Furthermore, PSA facilitates analysis of peptide libraries. The software can refer the quantified data
to the peptide library design and the intended application, thus it is able to provide meaningful
information with respect to the application. If e.g. a target protein or antigen is translated into
overlapping peptides for epitope mapping, PSA can suggest a grouped list of peptides which
represent an epitope or consensus motif of an antibody or serum sample.
1.1 Installation
PSA is natively supported on Windows and Mac OS X platforms, thus the software is able to run with
high performance and native look. Installation of PSA requires rights of a system administrator.
Hardware Requirement
Minimum hardware: 1.5 GHz Processor, 1GB RAM.
Recommended hardware: 2.0 GHz Dual-Core or faster Processor, 2 GB or more RAM.
Windows Platforms
PSA works on Windows XP, Windows 7, and Windows 8. Simply run the PSA setup. If the current
account is not administrator, you will be asked to input an administrative account and password.
Mac OS X platforms
The software runs on Mac OS X 10.7 and 10.8. Unzip the package and double-click on the .pkg file to
launch the installer. During installation you will be prompted to provide a system administrator’s
account and password. Upon completion, PSA is installed in folder /Applications/PepSlide/Analyzer.
1.2 Product Activation
After installing PSA® on Windows, you need to activate the software with a trial serial number
obtained from the software provider or its distributor. This enables the use of PSA® with full
functionality for 14 days. The trial use for PSA® on Mac OS X platforms is handled automatically and
does not require this step.
PepSlide® Analyzer User’s Guide
Version 2.0
Page 1
1 | Introduction
When the free trial time has expired, you can buy a software license to continue using PSA®. Upon
the purchase, you receive a serial number and use it to activate the license. Please refer to the
product activation steps in Section 9 or the online help here.
1.3 Software Concepts
Peptide Arrays
In the remaining of this manual, the term array is used to mean both array and microarray, unless
otherwise stated.
The diagram of a typical peptide array analyzed by PepSlide® is outlined in Figure 1.
Figure 1: Peptide Array Diagram.
A spot represents a single peptide spot located in one cell on the array. It can also be a control spot
made of e.g. a known epitope. In the diagram, the spots are drawn as squares for the explanation
purpose. Depending on the peptide array synthesizer, they may have rectangular or circular shape,
as images of some actual spots shown in Figure 2.
PepSlide® Analyzer User’s Guide
Version 2.0
Page 2
1 | Introduction
A spot family (abbreviated SF) consists of spots generated from the same source. For peptide arrays
an SF can be a peptide library or a control. A block is a group of spots located next to each other, just
like its definition in GAL files. The distinction between a block (contains only spots and their
annotation) and an SF (a peptide library and may consist of multiple blocks) enables a convenient use
of GAL files.
A marker control is a group of control spots arranged on either the same row or the same column of
the array. It is used for the purpose of marking or orientation. A background control is used for the
background correction during the data quantification. Its elements are virtual spots, i.e. neither
peptide spot nor control spots, being used solely for defining the image regions from which the signal
for background values is obtained.
Array Image Analysis
The binding signals of an array are converted by an array scanner into a digital array image
containing a matrix of pixels. Each pixel has a gray value representing pixel intensity. Array images are
often saved in the TIFF format1. In 8-bit grayscale images, the gray value ranges from 0 to 255. This
value can be from 0 up to 65535 in 16-bit grayscale images. Since they contain a broader range of
signal levels than the 8-bit format, 16-bit grayscale images are recommended for array image
analysis.
Quantification is the procedure that estimates the true binding signal for each spot and represents its
signal value in terms of statistic measurement of pixel intensities within that spot. Obviously, the
quantification quality depends on the spot finding procedure which determines pixels in the array
image that belong to a spot in the array. Background correction also contributes to the quantification
quality. It estimates signals caused by non-specific binding and removes them from the spot’s signal.
For each spot in the array, the median and the mean of its raw, background, and foreground values
are calculated. Raw represents the intensity value of the spot’s signal. Background is the estimated
value of the signal caused by non-specific binding. The value of interest is foreground; it is computed
by subtracting the background value from the raw value.
Array alignment is the process of associating spots in the array with their signal in the image. The
software illustrates spots in the array by white rectangles or squares (Figure 2). Within each spot, the
spotted region is bounded by a dashed rectangle or a dashed circle depending on peptide array
1
http://partners.adobe.com/public/developer/en/tiff/TIFF6.pdf
PepSlide® Analyzer User’s Guide
Version 2.0
Page 3
1 | Introduction
synthesizer. The spots’ signal is shown in red, green, or a color different from white; the larger the
value the brighter the signal. The spot’s signal is presumably due to the binding of peptide in the
spotted region with the sample. Therefore, before quantification we will reallocate the array such
that the spotted regions are as close to the spots’ signal as possible.
(a) Rectangular Spot
(b) Circular Spot
Figure 2: Spot Images in PepSlide® Analyzer.
1.4 Software User Interface
Related software controls are grouped in labeled components as shown in Figure 3. We refer to a
software component using the name listed in Table 1.
Figure 3: The Software User Interface.
PepSlide® Analyzer User’s Guide
Version 2.0
Page 4
1 | Introduction
Area
Referred Name
The menu
The canvas toolbar
The main toolbar
The control panel
The canvas
The Spot Image widget
The table of quantified data
Table 1: Area Names.
The main toolbar enables quick access to a group of related functions summarized in Table 2. Clicking
a button on the main toolbar opens the control panel containing controls for these functions and the
sheet that displays the data and the processed results.
Button
Functions
Images
Select image channel. Change image’s intensity. Rotate images.
Arrays
View properties of SFs, blocks, and spots. Rotate and move SF or blocks.
Quantify
Quantify the array data and browse the quantified data.
Scatter Plot
Display quantified data in a scatter plot.
PLA
Peptide Library Analysis
HC
Hierarchical Clustering Analysis
PCA
Principal Component Analysis
Batch
Setup and execute a batch
Table 2: The Main Toolbar and Related Functions.
1.5 Peptide Array Data Analysis
From the software perspective, typical tasks of peptide array data analysis include:
1. Quantification of array data
Load the scanned array images and the array file.
Align the array to the images.
Quantify the array data.
2. Analysis of peptide libraries to find peptides of interest.
3. If possible, batch processing of multiple array images, i.e. the automation of step 1.
4. Discovery of parameters influencing the study and their relationship with data mining tools.
The following sections explain how to do these tasks with PSA.
PepSlide® Analyzer User’s Guide
Version 2.0
Page 5
2 | Preparation of Array Data
2 Preparation of Array Data
2.1 Loading Data
Two input data are required for analyzing a peptide array:
Scanned images of the array in TIFF format.
The array file: Either a GAL file (*.gal) or a PepSlide® Designer (PSF) file (*.psf).
Supported Image Format
PSA supports 8-bit or 16-bit grayscale images or 24-bit color images. For the best image quality 16-bit
grayscale TIFFs are recommended.
Please note that compressed images are not supported. Therefore, please disable image
compression when saving the scanned images with your microarray scanner software. If you are
using GenePix Pro software, uncheck the Use TIFF LZW compression (lossless) option in the Save
Images dialog.
Loading Input Data
Click the Images > Open Image menu and select the array image file. For grayscale images,
select to display each image with either the Red channel or the Green channel.
Click the Arrays > Open Array menu and select the array file.
After being loaded, the images and the array are shown in the graphical canvas (Figure 3). To obtain
an appropriate view, you can use the Zoom In and Zoom Out buttons on the canvas toolbar or select
a predefined zoom level in the Zoom combo-box. Alternatively, an arbitrary value can be entered
directly into the Zoom combo-box.
Viewing Array Data
In the Array Object section of the Arrays control panel, you can view properties of a spot family, a
block, or a spot.
If a PSF array file is loaded, you find three expandable pages in the section: Spot Family, Spot, and
Array Configuration. To view properties of a spot family (SF), first click on the Spot Family page if it is
not yet open, and then click on the SF in the canvas (Figure 4-a). Similarly, you can open the Spot
page and then points the mouse to a spot to view its properties (Figure 4-b). The Array Configuration
page shows the size and the printed region configuration of the array’s spots.
PepSlide® Analyzer User’s Guide
Version 2.0
Page 6
2 | Preparation of Array Data
(a) Spot Family Properties
(b) Spot Properties
Figure 4: Properties of an Array Object from a PSF file.
The pages are Spot Family, Block, and Spot for array files of GAL format. To view a block’s properties
(Figure 5-a), open the Block page and then click on the block in the canvas. The Spot page is used
similarly to view a spot’s properties (Figure 5-b). If some blocks have been assigned to a SF to contain
a peptide library design, you can view name and type of the SF in the Spot Family page.
(a) Block Properties
(b) Spot Properties
Figure 5: Properties of an Array Object from a GAL file.
2.2 Array Alignment
As mentioned in Section 1.3, the array needs to be aligned with the image before quantifying the
array data.
PepSlide® Analyzer User’s Guide
Version 2.0
Page 7
3 | Image and Array Processing
You can manually align the array with the image, if necessary after processing the image or the array,
e.g. rotating a block or increasing the spot’s visibility. Please refer to Section 3 for image and array
processing functions.
Array alignment can be done automatically if the array file is of GAL format, the spots have circular
shape, and the spots’ signal is sufficient for the array positioning. This version does not yet support
automatic array alignment for PSF array files.
Aligning Array Automatically
Click the Align Array button in the Arrays control panel.
Aligning Array Manually
Click Ctrl-A to select all SFs or blocks in the array. To select individual SFs or blocks, click on
them while pressing the Ctrl key.
Click on the selection and drag the corresponding blocks to the intended position.
The aligned position of the SFs or blocks in the array can be saved with the Arrays > Save Array menu.
In addition, you can save the array to another array file using the Array > Save Array As menu.
2.3 PepSlide® Analyzer Project File
It is recommended that the analysis of each array image be saved to a PepSlide® Analyzer project file
(*.psa) using the Project > Save Project menu. This contains the path to the image, the aligned array,
and the quantified data. When later opening the project file with the Project > Open Project menu,
the software will load all the data. The paths to the array image, the array file, and the project file are
shown in the Data Files section of the Quantification control panel.
Not only does this contain all analyzed data for an array image in one file, but you can also use these
project files directly with data mining tools later.
3 Image and Array Processing
3.1 Image Processing
You can change the image intensity (Figure 6) for the convenience of array alignment.
PepSlide® Analyzer User’s Guide
Version 2.0
Page 8
3 | Image and Array Processing
Improving spot visibility
Adjusting brightness and contrast can make the spots more visible and that eases the array
alignment. These functions are available in the Image Intensity section of the Images control panel.
Choose the Enhance contrast automatically option to maximize the spot visibility. You can manually
adjust the image’s brightness and contrast by moving the slider. Alternatively, a value between -99
and 99 can be entered directly.
Noise Filtering
Noise in the loaded image(s) can be reduced by selecting the
Noise Filtering check-box.
Inversing
The negative image of the current image can be created by
Figure 6: Image Processing.
selecting the Inversion check-box.
3.2 Image and Array Rotation
Rotating images
You can flip and/or rotate images at angles of 90°, 180°, or 270°. These functions are located in the
Image Rotation section of the Images control panel (Figure 7-a).
(a) Image Rotation
(b) Array Rotation
Figure 7: Rotation of Images and Arrays.
Rotating Array
If the array slightly deviates from the image at a small angle, it is recommended that the array (i.e.
related SFs or blocks) be rotated, since image rotation may change the image data. You can select SFs
PepSlide® Analyzer User’s Guide
Version 2.0
Page 9
4 | Quantification of Array Data
or blocks and rotate them at an arbitrary angle. These functions are located in the Array Rotation
section of the Arrays control panel (Figure 7-b). The degree change can be as small as 0.01°.
Selected SFs or blocks can be rotated in clockwise or counterclockwise direction, with the rotation
center defined as follows:
Global: the top-left of the image.
Local: the top-left of each SF or block.
4 Quantification of Array Data
4.1 Quantifying Array Data
Click the Quantify button in the main toolbar to activate the Quantification control panel.
Click the Quantify Array button to get the data quantified for the entire array.
To quantify some SFs or blocks, select them and then click on the Quantify Selection button.
For each spot in the array, the median and the mean of its raw, background, and foreground values
in each channel (Red and/or Green) are calculated. If the raw value of a spot is smaller than its
background value, the spot is flagged Error and its foreground value is set to zero. (Section 4.3 details
the methods used to calculate the raw value and the background value.)
Figure 8: Quantified Data.
PepSlide® Analyzer User’s Guide
Version 2.0
Page 10
4 | Quantification of Array Data
In the Imaging sheet, you can view the spots and their quantified data simultaneously (Figure 8). The
signals corresponding to the selected spot and its neighbors are displayed in the Spot Image widget.
In addition, selecting a row in the table of quantified data highlights the corresponding spot in the
canvas. This also opens the Spot page in the Array Object section in the Arrays control panel and
shows the spot’s properties there. Similarly, when the Spot page is opened, clicking on a spot in the
canvas will highlight its quantified data in the table.
You can also browse the spots’ quantified data in the Quantified Data sheet, which shows only the
table of quantified data and the Spot Image widget. In both Imaging and Quantified Data sheets, you
can export the quantified data to a CSV file for further analysis.
Aggregating results of replicas
When a spot is replicated the software also provides the intensity value of the spot calculated by
aggregating signals from its replicas. Suppose that P1 and P2 are the replicas of peptide P. The
quantified results then include the intensity values for P, in addition to those for P1 and P2. Taking
the raw median value of P for example, it is the median value of signals from both spots P1 and P2,
which cannot be calculated based on the median values of P1 and P2.
This provides an additional view to the replicated data. To control whether the aggregated data is
calculated and shown, use the Aggregate results of replicas check-box.
Customizing the Quantified Data
Click the Configurations menu and choose Imaging Result Values to show the setup dialog. Here, you
can add or remove values to be calculated during the data quantification.
4.2 Change of Intensity Values
During the array alignment, you may have adjusted the contrast and/or the brightness of the images
to make the spots visible. This changes the image data and alters the analysis results. It is
recommended that the original image data be used for the quantification. Therefore, by default the
quantification procedure uses the original image’s data, i.e. it excludes changes made to the image by
inversion, noise filtering, and adjustment of contrast and/or brightness.
This option can be intentionally changed as follows. In the Quantification Options section of the
Quantification control panel, select Yes for the Include change of the images’ intensity value option
(Figure 9). To use the original image data for the data quantitation again, select the No option. Please
PepSlide® Analyzer User’s Guide
Version 2.0
Page 11
4 | Quantification of Array Data
note that when the No option is chosen, the Spot Image widgets in the Imaging, Quantified Data,
Scatter Plot, and Peptide Library Analysis sheets show the spot’s signal using the original image’s
data, even though the image’s contrast or brightness has been changed.
4.3 Spot Detection Methods
In the Quantification Options section of the Quantification control panel, the Spot detection method
option defines how the raw value and the background value of a spot are calculated (Figure 9).
Fixed-Spot: The software always uses the pixels in the spotted region to compute the raw
value. The background value is calculated based on the pixels in the remaining region within
the spot.
Flex-Spot: This method can flexibly detect the spot’s signals in the image even though their
shape and position are not in accordance with spotted region. The detected spot border is
shown in blue. Calculation of the raw value is based on pixels within the blue border. Pixels in
the remaining region within the spot are used to calculate the background value.
The Flex-Spot method is recommended because it does not require the spots’ signal in the image to
rigidly match with their spotted regions, as specified in the GAL file. Figure 10 illustrates such a case.
Here, within a spot (the white square) the spotted
region is depicted by the white dashed circle. The
spots’ signal, shown in red, has different shape and
position from those of their spotted region. Despite
that fact, the Flex-Spot method can still precisely find
the spots and highlight their border in blue.
Please note that the above described mechanism for
background calculation uses only the background
pixels within the spot. Therefore, it is called the Local
method or local background correction. By means of
Figure 9: Quantification Options.
background controls, you can have background values
based on pixels from any region of the image.
PepSlide® Analyzer User’s Guide
Version 2.0
Page 12
4 | Quantification of Array Data
Figure 10: The Flex-Spot Method.
4.4 Spot Detection Options
Process Noise
The images may contain noises that mislead the spot detection procedure and result in wrong
quantified data. The noise can be background noise that span across the whole slide (Figure 11). It
can also be foreground noise like the two large red bands shown in Figure 12. In the case of
background noise, we want to “remove” the background layer so that only the meaningful signal
remains. Foreground noise like the two red bands in Figure 12 should not be part of a valid spot’s
signal. The software can effectively handle this task. The results can be seen in Figure 11 and Figure
12; only meaningful spots are highlighted with a blue border (by the Flex-Spot method).
Figure 11: Processing Background Noise.
Since processing noise during quantification efficiently removes background signal, it can be
regarded as an (implicit) background correction method. You can choose whether noise is processed
during quantification with the Process noise option (Figure 9). Please note that you can process noise
during quantification with both Fixed-Spot and Flex-Spot methods.
PepSlide® Analyzer User’s Guide
Version 2.0
Page 13
4 | Quantification of Array Data
Figure 12: Processing Foreground Noise.
Smallest Spot Size
You can set the size limit of a “valid” spot by means of the Smallest spot size (%) option (Figure 9).
Suppose that this value is 50% and the array file is a GAL file (*.gal). Imagine a virtual square whose
side length being 50% or half of the spot diameter. If the spot signal is smaller than or can be
contained in that virtual square, the Flex-Spot method will reject this spot. The software will then use
the Fixed-Spot method to compute the raw value for that spot.
If the array file is of PSF format (*.psf) and suppose that the smallest spot size is still 50%, the
software would use a virtual rectangle whose width and length being half of those of the spotted
region (the dashed rectangle in Figure 2a). The Flex-Spot method will reject a spot whose signal can
be contained in that virtual rectangle, and the Fixed-Spot method will be used instead.
The spots shown in Figure 10 and Figure 11 are detected by the Flex-Spot method with the Smallest
spot size (%) parameter being 50%. It can be observed that small spots do not have a blue border.
Show Border
After data quantification, you can turn the detected spot border on and off using the Show border
option (Figure 9). The software supports saving the border information in the project file (*.psa).
Therefore, you can still observe the detected spot border when reopening the project file. This is
particularly useful for reviewing the quantified data generated by batch processing.
Undetectable by Flex-Spot
If the Flex-Spot method cannot detect a spot due to e.g. being smaller than the size limit, weak
signal, or noisy data, the software employs the Fixed-Spot method to compute the raw value. No blue
border is shown within the spot if the Fixed-Spot method is used.
PepSlide® Analyzer User’s Guide
Version 2.0
Page 14
4 | Quantification of Array Data
4.5 Background Correction
Background correction methods can be selected in the Quantification Options section of the
Quantification control panel. By default, the Local method is employed.
Local Method
PSA supports different levels of local background
correction (Figure 13). The default level is Block for GAL
files and Spot Family for PSF files.
With block level, all spots in a block will have the same
background value. It is computed as follows. First, a list
Figure 13: Background Correction Options.
of background pixels of all spots in the block is created.
The mean and the median of the pixels’ intensity value
in this list are then used as the background value.
If spot family level is chosen, all spots in an SF have the same mean and median background values,
being computed from background pixels of all spots in the SF.
You can choose to have a global background value for the entire array by selecting the global level.
The calculation is based on the background pixels of all spots in the array. At the spot level, a spot’s
background value is based on its background pixels only. Therefore, it is likely that the background
values are different between spots.
Background Controls
Instead of having the background values locally calculated, you can use a background control to
explicitly specify the image region from which the background value is calculated. You can define a
global background value for the entire array of PSF format using a background control as follows.
Open the Spot Family page in the Array Object section of the Arrays control panel.
Right-click at a point in the image where the signals represent the background for the spots.
Choose Create Background Control. Specify the shape and the number of spots.
Perform data quantification. All spots in the array now have the same background value
which is obtained from the background control. We call that an “association” between the
SFs and the background control.
PepSlide® Analyzer User’s Guide
Version 2.0
Page 15
5 | Analysis of Peptide Libraries
In addition to having a global background value for the entire array, you can flexibly choose an
individual background value for each SF. This is done by creating a background control just for the SF
and establishing the association between them.
Right-click on the SF to popup the context menu. Choose Background Control > Remove
Association to release the SF from the first background control.
Right-click on the block again and choose Background Control > Establish Association. Then
click on the background control with which you want to associate this SF. You can check this
association using the Highlight Associated Control context menu (Figure 14).
Figure 14: Associated Background Control.
For GAL files, having a global background value or an individual background value for a block can be
done similarly; you create a background control for the blocks and associate them.
Please note that the background correction method is automatically set to Controls after the creation
of the first background control. In the Quantification Options section of the Quantification control
panel, you can select Local method again for the Background correction option (Figure 13).
5 Analysis of Peptide Libraries
After having the peptide array data quantified, you may want to examine it and select peptides of
interest with respect to the peptide array application. E.g. if an antigen is translated into overlapping
peptides for epitope mapping, you may be interested in a list of peptides which represent an
epitope. This can be done conveniently with PSA’s peptide library analysis tools. By referencing the
quantified data to the peptide library design, which keeps the antigen’s amino acid sequence and the
overlapping step, PSA is able to locate the peptides representing the epitope.
PepSlide® Analyzer User’s Guide
Version 2.0
Page 16
5 | Analysis of Peptide Libraries
The software supports analysis of peptide library of the following types:
Overlapping library: Overlapping peptides translated from a protein.
Random library: Peptides generated stochastically.
Substitution (also called permutation or positional scanning) library: Variants of a known
peptide created by replacing its residues with other amino acids.
As mentioned, PSA represents a peptide library as a spot family (SF). If the array file is of PSF format,
you can start peptide library analysis simply by clicking on the PLA button in the main toolbar. The
software analyzes all SFs in the array if none is selected. Otherwise only the selection is analyzed. The
results are shown in the Peptide Library Analysis sheet.
Analysis of a peptide library cannot be performed with GAL files in the first place. However, you can
easily specify the peptide library design for related GAL blocks. The analysis can then be preceded as
with SFs. These steps are detailed in Section 5.4.
5.1 Overlapping Peptide Library Analysis
This analysis aims at selecting peptide spots with strong signals. It is also able to detect a consensus
motif shared by overlapping peptides.
A two-dimensional chart in the center of the sheet depicts the peptide spots (Figure 15). Their
coordinates can be selected among the quantified intensity values. By moving the lower and upper
threshold bars, the chart facilitates the selection of spots whose intensity values being within the two
thresholds. Selected spots are then populated into the table below the chart.
By clicking on a spot in the chart or selecting the corresponding row in the table, you can view the
spot information such as the peptide and its counterpart image. The information is shown in the Spot
Details widget located on the right of the sheet. The chart, the table, and the Spot Details widget
thus provide different angles to the data of the peptide library.
PepSlide® Analyzer User’s Guide
Version 2.0
Page 17
5 | Analysis of Peptide Libraries
Figure 15: Overlapping Peptide Library Analysis.
You can export the data in the table to a CSV file. The chart can also be saved to an image file.
Identifying Consensus Motifs
In the table below the chart, overlapping peptides sharing a consensus motif are highlighted with
individual colors. In Figure 15, rows corresponding to these peptides are in grey. Among them, the
selected row is highlighted in blue; its information is shown in the Spot Details widget.
Right-click on the highlight and choose
Show Consensus Motif to view the
information (Figure 16). Data in this
dialog can be copied and pasted into
other software, e.g. a word processing
program.
Figure 16: Consensus Motif.
In the sample data package, the overlapping1 folder contains a test dataset for this analysis.
PepSlide® Analyzer User’s Guide
Version 2.0
Page 18
5 | Analysis of Peptide Libraries
5.2 Random Peptide Library Analysis
This analysis facilitates browsing and selecting peptide spots with strong signals for further
optimization. Except for the detection of consensus motifs, the user interface and functions of this
analysis are the same as those in the analysis for overlapping peptide libraries.
In the sample data package, the random1 folder contains a test dataset for this analysis.
5.3 Substitution Peptide Library Analysis
Peptides of a substitution peptide library are created by replacing residues of a known peptide, the
so-called parent peptide, with some other amino acids. The purpose of this analysis is thus to
examine all variants of the parent peptide and select those of your interest. Figure 17 displays the
analysis results of a substitution peptide library whose parent peptide is NYGKYE.
The variants of the parent peptide and their intensity value are simultaneously shown in a threedimensional chart. Here, the (P)-Axis lists residues of the parent peptide and the (S)-Axis contains
amino acids for replacing, thus a “point” in the (PS)-plane features a variant. The intensity value of a
variant is represented by the height of the corresponding bar along the Z-Axis. You can choose to
evaluate another quantified value in the Z-Axis section in the control panel. The perspective of the
chart can be changed by holding-down the left-button of the mouse and moving it.
Figure 17: Substitution Peptide Library Analysis.
PepSlide® Analyzer User’s Guide
Version 2.0
Page 19
5 | Analysis of Peptide Libraries
Spots can be are selected by entering the lower and/or upper threshold values in the Spots between
Thresholds section in the control panel. The selection will be populated into the table below the
chart. Similar to other analyses, you can view information about a spot in the Spot Details widget.
Selecting a spot in the table highlights its version in the chart and vice versa.
The chart can be saved to an image file. In addition, the data in the chart and the table can be
exported to a CSV file.
Quality Control with Parent
Peptide Spots
You can choose to display only spots having
the same amino acid sequence as those of the
parent peptide. Since these spots are the
same peptide, their intensity values should
not be considerably different (Figure 18). This
is handled with Quality Control > Show spots
with parent peptide option in the control
panel.
Figure 18: Parent Peptide Spots.
In the sample data package, the substitution1 folder contains a test dataset for this analysis.
5.4 Peptide Library Analysis with GAL Files
You can conveniently use array files of GAL format, even for the analysis of peptide library. Whether
the peptides of a peptide library (PL) are spotted into one block or different blocks, you can easily
reconstruct the PL and then analyze it as explained in the previous sections. The reconstruction can
be done in two steps:
Specify a peptide library design for the blocks. This creates a PL consisting of these blocks.
If the GAL file does not contain the peptide in the spots’ ID, import the peptide mapping file.
Each step is described in detail below. For reading convenience, we assume that an overlapping PL is
being reconstructed. The procedure is the same for substitution peptide libraries.
Specify a Peptide Library Design for GAL Blocks
Hold down the Ctrl key while clicking on the blocks to select them simultaneously.
PepSlide® Analyzer User’s Guide
Version 2.0
Page 20
5 | Analysis of Peptide Libraries
Right-click on the selection and choose Type > Overlapping Peptide Library.
Enter the design of the peptide library (Figure 19) including the protein, the shift step, and
the peptide length.
Figure 19: Overlapping Peptide Library Design.
An overlapping peptide library consisting of these blocks, represented by PSA as a spot family, has
been created. You can activate the Spot Family page and review the information of the PL.
Import the Peptide Mapping File
Please note that this step is only necessary if the spots’ ID field in the GAL file does not contain the
peptide yet, as illustrated in Figure 22(a).
Activate the Spot Family page to work on peptide libraries.
In the canvas, select the PL by clicking on one of its blocks. Right-click on the selection and
choose Import Peptide Mapping File from the context menu (Figure 20).
Specify the linker which will be excluded from the peptides. Leave it blank if no linker is used.
Select the file which maps the peptides of the PL to their spot ID in the blocks.
Spot_ID
Peptide
1
CxMGPGIAAVLLSLAVA
2
CxGIAAVLLSLAVALAR
3
CxAVLLSLAVALARVPA
…
106
CxPPNWHVPEASDVTIQ
…
Figure 20: Import the Mapping File.
PepSlide® Analyzer User’s Guide
Version 2.0
Figure 21: The Peptide Mapping File.
Page 21
6 | Batch Processing
The peptide mapping file is a Tab-delimited text file or CSV file. It has two columns; the first one
contains the ID of the peptides in the blocks and the second column contains the peptides. The first
line of the file is reserved for the column headers and will be skipped. An example of the file’s
content is shown in Figure 21. In this example, the linker is Cx.
(a) Spot ID from the Original GAL File
(b) Spot ID with the Peptide
Figure 22: Assigning the Peptide to a Spot.
After importing the peptide mapping file, open the Spot page again. Now, you can view the peptide
in the ID field when clicking on a spot in the canvas, as illustrated in Figure 22(b). The overlapping
peptide library has been completely reconstructed and can be analyzed as described in Sections 5.1
to 5.3. Please note that saving the GAL file also keeps the information about the peptide library
design.
In the sample data package, the overlapping3 folder contains a test dataset for this function.
6 Batch Processing
You can setup a batch to process a number of array images automatically. Suppose that the
experiment is to screen a peptide array with k samples. The array design is annotated by the socalled template array. From the screening result you have k scanned images and would like to
quantify their data. To this end, for each scanned image the batch aligns the template array with the
image, creates the array file that contains the aligned layout, and generates the quantified data.
Batch processing employs automatic array alignment. As mentioned in Section 2.2, this only works
with array files of GAL format, the spots have circular shape, and the spots’ signal is sufficient for the
array positioning. This version does not yet support batch processing for PSF array files.
PepSlide® Analyzer User’s Guide
Version 2.0
Page 22
6 | Batch Processing
Click the Batch button in the main toolbar to create a batch (Figure 23). In the Batch control panel:
Click the Add button and select the array images for processing. They will be added to the
scheduling table. Use the Add, Remove, Up, and Down buttons to modify the table.
Double-click on the Template array edit-box to browse to the template array file.
Specify the folder to store generated files and the running mode.
Finally, save the batch to a file using the Batch > Save Batch menu. The batch log is created
automatically and named after the batch file.
We recommend using a separate folder for each batch to store the batch file and generated data
files. Since the dot character (“.”) is used for file extensions such as .gal or .csv, please do not name
folders or files used in a batch with dot characters (except for the file extension) to avoid errors.
Figure 23: Batch Setup.
After creating a batch, click the Run button to execute it (Figure 24). Please note the running modes:
Process all images continuously: The batch processes continuously without stopping.
Stop and review after each image: You can view the batch results for one image before
proceeding to process the next one.
Suppose that sample001.tif is an image in the batch. The software creates three data files for it:
sample001.gal: the array file whose spot layout is aligned with the image sample001.tif,
sample001.csv: the CSV file containing only the quantified data, and
sample001.psa: the PepSlide® Analyzer project file containing the analysis data for this
image. Note that this project file can be used directly with data mining tools.
PepSlide® Analyzer User’s Guide
Version 2.0
Page 23
7 | Data Mining Tools
Figure 24: Batch Execution.
7 Data Mining Tools
Data mining tools assist you to find useful information from the microarray study. You can employ
Principal Component Analysis to discover features and samples that influence the study and then
Hierarchical Clustering Analysis to find their relationship. The batch processing results, i.e. the list of
generated PepSlide® Analyzer project files, can be used directly for data mining.
7.1 Dataset
A dataset can be compiled from a list of PepSlide® Analyzer project files. Consider the example in
Section 6 in which the peptide array is screened with k samples. After running the batch we obtained
k project files containing the quantified data. If the dataset is created from these k project files, it can
be regarded as the table in Table 3, where V1k is a screening value of Feature 1 when the peptide
array is screened against Sample k and so on. The screening value can be chosen among the
quantified values, e.g. log2 (Green Foreground Mean / Red Foreground Mean).
Block
Row
Column
ID
Name
Sample 1
Sample 2
…
Sample k
Feature 1
V11
V12
…
V1k
…
…
…
…
…
Feature n
Vn1
Vn2
…
Vnk
Table 3: A Sample Dataset.
PepSlide® Analyzer User’s Guide
Version 2.0
Page 24
7 | Data Mining Tools
Please note that the first five columns in Table 3 contain the spot’s properties specified in the GAL
file - Block, Row, Column, ID, and Name – of an individual feature. For simplicity we only write
Feature 1 instead of its five property values.
In addition to PepSlide® Analyzer project files, you can create a dataset from a list of GenePix Result
(*.gpr) files. The third alternative is to manually prepare your dataset as a CSV file, having the data
formatted in columns and rows like Table 3.
7.2 Principal Component Analysis (PCA)
PCA simplifies a complex microarray study to a simpler one with only three samples or features, thus
you can easily observe the study’s data and its trends. To start with, click the PCA button in the main
toolbar. In the PCA control panel:
Click the Load Data button and select the dataset. Please refer to Section 7.1 for the
preparation of the dataset.
Select a quantified value in the Data Column list-box.
Choose to have the simplified dataset with three either Features or Samples.
Click the Start Analysis button. Suppose that that you chose the Samples option. Take the screening
in the previous section again as example. As shown in Table 3, the original dataset represents the
features’ screening value against k samples, where k is much larger than 3. PCA will simplify it to a
dataset with only 3 samples, as illustrated in Table 4.
Block
Row
Column
ID
Name
Sample x
Sample y
Sample z
Feature 1
V1x
V1y
V1z
…
…
…
…
Feature n
Vnx
Vny
Vnz
Table 4: The Simplified Dataset.
The PCA chart (Figure 25) then depicts the features according to their values in the simplified
dataset, whose data is shown in the table below the chart. You can select 2D or 3D view. By
observing the charts you can find the trends of the data. For example, features that have common
characteristics locate near each other on the chart. On the other hand, those that are distinct are far
from the others. The simplified dataset can be exported to a CSV file for further analysis.
PepSlide® Analyzer User’s Guide
Version 2.0
Page 25
7 | Data Mining Tools
Similarly, you can discover such information about the samples by choosing the Features option
before starting the analysis. By combining the results of these two analyses, you may be able to
discover features and samples that influence the variance of the study.
Figure 25: Principal Component Analysis in 2D View.
In the sample data package, the schroeder2010 folder contains a test dataset for this analysis.
7.3 Hierarchical Clustering Analysis (HCA)
You can group features or samples that are related using HCA. The relationship can be e.g. having
similar effect in the study, represented by close screening values. Click the HC button in the main
toolbar to setup the analysis.
Click the Load Data button and select the dataset. Please refer to Section 7.1 for the
preparation of the dataset.
Select a quantified value in the Data Column list-box.
Choose to construct the clustering tree for features, or samples, or both.
Select the distance metric and the type of linkage. You can keep the default options.
Click the Start Analysis button.
PepSlide® Analyzer User’s Guide
Version 2.0
Page 26
8 | Utilities
Figure 26: Hierarchical Clustering Analysis.
The clustering tree(s) are then constructed (Figure 26). Two features considered being related are
grouped into one cluster. Their relationship is represented by a line connecting them. A cluster might
be related with a feature or another cluster. The relationship between samples and clusters of
samples are represented similarly.
The values in the dataset, each representing the screening value of a feature with a sample, are
graphically represented by means of a heat map. You can save the clustering trees with the heat map
to an image file using the Export to Image context menu.
In the sample data package, the schroeder2010 folder contains a test dataset for this analysis.
8 Utilities
8.1 Search for Antigens and Proteins
It is helpful to know if a generated peptide is part of an antigen or a protein. PSA assists you to do
that easily, for either the entire peptide array or only selected peptides. You first need to setup the
list of antigens and proteins that might be related to you study. Then during quantification of peptide
array data or analysis of peptide libraries, you can conveniently search for antigens or proteins that
contain a peptide. The list can be easily imported and updated.
Setting up the List of Antigens and Proteins
PepSlide® Analyzer User’s Guide
Version 2.0
Page 27
8 | Utilities
Use the Configurations > Antigen & Protein List menu to launch the setup dialog (Figure 27). An
antigen or a protein is stored in one row in the table. Its data is contained in five columns:
Nr.: A numeric ordering number.
ID: Unique identification of the item. It will be shown in the search result of a peptide if the
antigen or protein contains the peptide.
Name: The item name.
Description: Further information about the item.
Amino Acid Sequence: The item’s sequence of amino acids.
Figure 27: List of Antigens and Proteins.
If you already have a list of antigens and/or proteins contained in a spreadsheet file, you can export
that list to a CSV file and then conveniently import that list into PSA. Alternatively, you can manually
add an item to your list with the Add button. Use the Remove button to delete an existing item.
Figure 28 shows an example CSV file containing a list of proteins. The CSV file format can be either
Tab delimited or Semicolon delimited. This option can be chosen during the export with your
spreadsheet software. The first line of the file is the header and will not be processed. PSA will
import items from the second line of the CSV file. If you import another list, the new items will be
appended to the current list. Please note that the current version of PSA does not check if items’ ID is
duplicated. Therefore, please prepare the list with unique IDs.
Figure 28: A List of Antigens and Proteins in the CSV File
You can export the current list to a CSV file for backup purpose or using that list on another
computer. To do that, launch the setup dialog again and click the Export to CSV File button.
PepSlide® Analyzer User’s Guide
Version 2.0
Page 28
8 | Utilities
Please note that there are two example CSV files in the antigenProteinList folder in the sample data
package. They contain the same list of proteins but are stored in two different formats. You can use
them to test the function or as a template to create your own list.
Searching for Antigens & Proteins
In the Quantified Data sheet, you can perform the search for the entire array. Alternatively, in the
Peptide Library Analysis sheet the search is only applied to selected peptides. In either cases, click on
the Find Antigen/Protein button to start the search. The Search for Antigen & Protein dialog (Figure
29) determines how PSA carries out the search for a peptide:
Stop at the first finding: The search is finished
as soon as an antigen or a protein in the list is
found containing the peptide.
Search for all matches: The entire list will be
scanned. The search returns the ID of all
antigens or proteins that contain the peptide.
Figure 29: Search Options.
The search results are shown in the Antigen/Protein ID columns of the table of quantified data or the
table of selected peptides. Figure 30 illustrates the latter case. You can export the table’s data,
including the peptide and the antigen/protein ID columns, to a CSV file.
Figure 30: Search for Antigens and Proteins.
8.2 Scatter Plot
In addition to peptide analysis methods described in Section 5, you can depict the array’s spots on a
two-dimensional chart according to their intensity values. Scatter plots look like the chart of
overlapping peptide library analysis (Figure 15). The difference is that scatter plots can be used for
any type of array files, no matter if it is of PSF or GAL format, or if a block or a spot family already has
a peptide library design or not. This is particularly useful to quickly check the spots’ signal of an array
before further analysis.
PepSlide® Analyzer User’s Guide
Version 2.0
Page 29
8 | Utilities
Figure 31: Scatter Plot.
To start this examination after data quantification, click on the Scatter Plot button in the main
toolbar. Figure 31 shows the scatter plot of an antibody microarray image. You can use the threshold
bars to select spots and export data in the table to CSV files. However, since this is not peptide library
analysis, you cannot use specific features such as finding consensus motif or searching for antigen
and protein here.
PepSlide® Analyzer User’s Guide
Version 2.0
Page 30
9 | Product Activation
9 Product Activation
The product activation requires an internet connection. You need to have a serial number obtained
from the software provider or its distributor.
(1) In the Evaluation Time Has Expired dialog, click the Next button.
Figure 32: Starting the Product Activation.
(2) Enter the serial number and the licensee information in the Product Activation dialog. Click Next.
Figure 33: Entering the licensee information.
PepSlide® Analyzer User’s Guide
Version 2.0
Page 31
9 | Product Activation
(3) If the internet connection is ready, click the Activate button and wait for the activation to finish.
Figure 34: Product Activation in Progress.
Please check the internet connection in the case PSA could not reach the activation server. If
your system uses a proxy server to connect, specify it using the Proxy setting link. Otherwise,
contact the software provider for support.
(4) A completion message is shown when the product is successfully activated. Click Next to use PSA
immediately or End to use it later.
Figure 35: Completion of the Product Activation.
Please note that licenses can be reviewed, or renewed in the case of a term license, by clicking
on the Help menu and choosing License Information.
PepSlide® Analyzer User’s Guide
Version 2.0
Page 32
10 | Sample Datasets
10 Sample Datasets
The sample data package consists of sample datasets that can be used to get familiar with PepSlide®
Analyzer software.
The overlapping1, random1, and substitution1 folders contain the data of peptide arrays whose array
file is of PSF format. The overlapping3 folder also contains peptide array data, but the array file is
prepared in the GAL format. You can perform data quantification (Sections 2-4) as well as analysis of
peptide library (Section 5) on these datasets.
A dataset for testing data mining tools (Section 7) is stored in the schroeder2010 folder.
Further information of the datasets is described below.
overlapping1
The peptide array consists of overlapping peptide libraries. The signals are recorded in a 16-bit
grayscale TIFF image.
Reference to Analysis Functions: Section 5.1.
random1
The peptide array consists of random peptide libraries. The array’s scanned image is a 24-bit color
TIFF file, having the control signals in the green channel and the peptide signals in the red channel.
Reference to Analysis Functions: Section 5.2.
substitution1
The peptide array contains a substitution peptide library. The signals are recorded in an 8-bit
grayscale TIFF image.
Reference to Analysis Functions: Section 5.3.
PepSlide® Analyzer User’s Guide
Version 2.0
Page 33
10 | Sample Datasets
overlapping3
This peptide array contains an overlapping peptide library. Since the array file is of GAL format, you
can try creating a peptide library for GAL blocks with this dataset.
In this folder, file overlapping3_design.txt stores the design information of the peptide library, while
file PeptideMappingFile.txt contains the peptide mapping data. The signals are recorded in a 16-bit
grayscale TIFF image.
Reference to Analysis Functions: Section 5.4 and Section 5.1.
schroeder2010
This folder contains a dataset compiled from this work2. The original GenePix Result (GPR) files can
be downloaded here.
You can test the Hierarchical Clustering Analysis and Principal Component Analysis with this dataset.
In this folder, file schroeder2010.csv stores the Log Ratio (549/649) values of the GPR files. The same
data is stored in file schroeder2010_filtered.csv, excepted that positional controls (starting with ps_)
have been filtered out.
Reference to Analysis Functions: Section 7.
antigenProteinList
This folder contains two example CSV files which can be used to test the Search for Antigens &
Protein function. You can also use them a template to create your own list. The files contain the
same list of proteins but are stored in two different formats:
Tab delimited: antigenProteinList_tab.csv.
Semicolon delimited: antigenProteinList_semicolon.csv.
References to Utilities: Section 8.1.
2
Schröder et al. (2010): Dual-color proteomic profiling of complex samples with a microarray of 810 cancer-related antibodies,
Molecular & Cellular Proteomics 9(6): 1271.
PepSlide® Analyzer User’s Guide
Version 2.0
Page 34
11 | End-User License Agreement
11 End-User License Agreement
PEPSLIDE ANALYZER IS THE PROPERTY OF SICASYS SOFTWARE GMBH ("SICASYS"). THE USE OF THIS
SOFTWARE IS GOVERNED BY THE TERMS AND CONDITIONS OF THE END-USER LICENSE AGREEMENT
("AGREEMENT") SET FORTH BELOW. THE TERM “SOFTWARE” ALSO INCLUDES RELATED
DOCUMENTATION (WHETHER IN PRINT OR ELECTRONIC FORM) AND ANY UPDATES OR UPGRADES
OF THE SOFTWARE PROVIDED BY SICASYS.
BY INSTALLING THE SOFTWARE, AND/OR BY USING THE SOFTWARE, YOU AGREE TO BE BOUND BY
THE TERMS AND CONDITIONS OF THIS END-USER LICENSE AGREEMENT.
License. SICASYS grants to you (“USER”) a non-exclusive, non-transferable license to use the
SOFTWARE on the number of computers stated in the license contract. A separate license is required
for use on any additional computer.
Copy Restriction. The SOFTWARE may not be copied either in full or part by USER, with the exception
of making copy for security or backup purpose. Copies must include all copyright and trademark
notices.
Use Restrictions. This SOFTWARE is licensed to USER for internal use only. USER shall not (and shall
not allow any third party to):
(i)
(ii)
(iii)
decompile, disassemble, reverse engineer or attempt to reconstruct, identify or discover any
source code, underlying ideas, underlying user interface techniques or algorithms of the
SOFTWARE by any means whatever, or disclose any of the foregoing;
modify, incorporate into or with other software, or create a derivative work of any part of
the SOFTWARE;
attempt to circumvent any user limits, or other license, timing or use restrictions that are
built into the SOFTWARE.
Ownership of the SOFTWARE. SICASYS retains all titles of ownership, all ownership rights, and all
intellectual property rights of the SOFTWARE. SICASYS reserves all rights not expressly granted to
USER.
Termination. SICASYS may terminate this Agreement immediately if USER breaches any provision.
Upon notice of termination by SICASYS, all rights granted to USER under this Agreement will
immediately terminate, and USER shall cease using the SOFTWARE and return or destroy all copies of
the SOFTWARE.
Limited Warranty and Disclaimer. USER is aware of the fact that technical errors in the program in
accordance with the accompanying documentation cannot be excluded. If USER claims deviations in
the program from the specification/description, USER has the right to request a fix, patch, workaround, or replacement of the SOFTWARE that does not meet such limited warranty. If a rectification
of the errors is not possible or if such rectification is not successful, USER has the right to request a
rescission of the contract, where USER must destroy all copies of the SOFTWARE.
PepSlide® Analyzer User’s Guide
Version 2.0
Page 35
11 | End-User License Agreement
EXCEPT AS EXPRESSLY SET FORTH ABOVE, NO OTHER WARRANTIES OR CONDITIONS, EITHER
EXPRESS, IMPLIED, STATUTORY OR OTHERWISE, ARE MADE BY SICASYS WITH RESPECT TO THE
SOFTWARE AND THE ACCOMPANYING DOCUMENTATION, AND SICASYS EXPRESSLY DISCLAIMS ALL
WARRANTIES AND CONDITIONS NOT EXPRESSLY STATED HEREIN, INCLUDING BUT NOT LIMITED TO
THE IMPLIED WARRANTIES OR CONDITIONS OF MERCHANTABILITY, NONINFRINGEMENT, AND
FITNESS FOR A PARTICULAR PURPOSE. SICASYS DO NOT WARRANT THAT THE FUNCTIONS
CONTAINED IN THE SOFTWARE WILL MEET USER’S REQUIREMENTS, BE UNINTERRUPTED OR ERROR
FREE, OR THAT ALL DEFECTS IN THE PROGRAM WILL BE CORRECTED. USER ASSUMES THE ENTIRE
RISK AS TO THE RESULTS AND PERFORMANCE OF THE SOFTWARE.
Limitation of Liability. IN NO EVENT SHALL SICASYS BE LIABLE FOR ANY INDIRECT, SPECIAL,
CONSEQUENTIAL OR INCIDENTAL DAMAGES WHATSOEVER (INCLUDING, WITHOUT LIMITATION,
DAMAGES FOR LOSS OF BUSINESS PROFITS, BUSINESS INTERRUPTIONS, LOSS OF BUSINESS
INFORMATION, OR OTHER PECUNIARY LOSS) ARISING OUT OF THE USE OF OR INABILITY TO USE THE
SOFTWARE, EVEN IF SICASYS HAVE BEEN ADVISED OF THE POSSIBILITY OF SUCH DAMAGES.
FURTHER, IN NO EVENT SHALL SICASYS BE LIABLE FOR ANY DIRECT DAMAGES ARISING OUT OF
USER’S USE OF THE SOFTWARE. IN NO EVENT WILL SICASYS BE LIABLE TO USER FOR DAMAGES IN AN
AMOUNT GREATER THAN THE FEES PAID FOR THE USE OF THE SOFTWARE.
Intellectual Property Right Infringement. If a claim alleging infringement of an intellectual property
right arises concerning the SOFTWARE (including but not limited to patent, trade secret, copyright or
trademark rights), SICASYS in its sole discretion may elect to defend or settle such claim, and/or
terminate this Agreement and all rights to use the SOFTWARE, and require the return or destruction
of the SOFTWARE, with a refund of the fees paid for use of the SOFTWARE less a reasonable
allowance for use and shipping.
Miscellaneous. This Agreement is the entire agreement between USER and SICASYS with respect to
the SOFTWARE, and supersedes any previous oral or written communications or documents
(including, if USER is obtaining an update, any agreement that may have been included with the
initial version of the Software). This Agreement is governed by the laws of Germany. If any provision,
or portion thereof, of this Agreement is found to be invalid or unenforceable, it will be enforced to
the extent permissible and the remainder of this Agreement will remain in full force and effect.
Failure to prosecute a party’s rights with respect to a default hereunder will not constitute a waiver
of the right to enforce rights with respect to the same or any other breach.
PepSlide® Analyzer User’s Guide
Version 2.0
Page 36
12 | Index
12 Index
A
D
activate · 1, 31, 32
analysis of peptide array data · 5
analysis of peptide library · 5, 16
GAL files · 17, 20
overlapping peptide library · 17
random peptide library · 19
substitution peptide library · 19
array · 2
array · 2
microarray · 2
peptide array diagram · 2
array alignment · 7
automatically · 8
manually · 8
B
background control · 15, 16
association · 15
background correction · 15, 16
background control · 15
for a block · 16
global background value · 15
Local method · 12, 16
block level · 15
global level · 15
spot level · 15
background value · 3, 10
batch · 3, 5, 22
create · 23
execute · 23
template array · 22
block · 3
properties · 7
brightness · 9, 11
C
canvas · 5, 6
canvas toolbar · 5
cluster · 27
consensus motif · 17, 18
contrast · 9, 11
control · 3
background control · 3
marker control · 3
control panel · 5
PepSlide® Analyzer User’s Guide
data mining · 5
dataset · 24, 25, 26
Hierarchical Clustering Analysis · 26
Principal Component Analysis · 25
F
file
array image · 8
CSV · 25
GAL · 8, 23
GenePix Result (*.gpr) · 25
PepSlide® Analyzer project (*.psa) · 8, 24
TIFF (*.tiff, *.tif) · 6
flag · 10
Flex-Spot · 12
detected spot border · 12, 14
smallest spot size (%) · 14
foreground value · 3, 10
H
hardware requirement · 1
HCA · 26
clustering tree · 27
heat map · 27
Hierarchical Clustering Analysis · 26
I
Installation · 1
Mac OS X platforms · 1
Windows Platforms · 1
inversion · 9
L
license
buy · 2
End-User License Agreement · 35
Version 2.0
Page 37
12 | Index
export to CSV file · 11
table · 5
M
main toolbar · 5
menu · 5
N
noise
background · 13
foreground · 13
process noise at quantification · 13
noise filtering · 9
R
raw value · 3, 10
replicas · 11
aggregate results · 11
rotate
array (blocks) · 9
image · 9
S
P
PCA · 25
original dataset · 25
simplified dataset · 25
PepSlide®
PepSlide® Analyzer · 1
PSA · 1
peptide library · 3, 20
design · 20
overlapping · 17
permutation · 17
positional scanning · 17
random · 17
substitution · 17
Principal Component Analysis · 25
Q
quantification · 3, 5, 10, 11, 12, 15, 16
change of intensity values · 11
quantified data · 11
PepSlide® Analyzer User’s Guide
sample data package · 18, 19, 20, 22, 26, 27, 29, 33
search for antigens or proteins · 27, 34
serial number · 31
SF · 3
spot · 2
control spot · 2
peptide spot · 2
properties · 6, 7, 11
smallest spot size · 14
visibility · 9
spot detection method · 12
Fixed-Spot · 12
Flex-Spot · 12
spot family · 3
Spot Image widget · 5, 11
spotted region · 3, 12
Z
zoom · 6
Version 2.0
Page 38