1
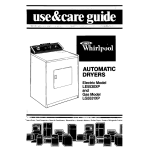
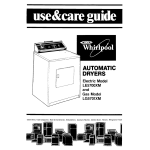
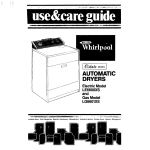
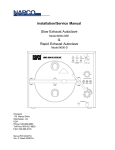
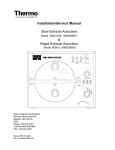
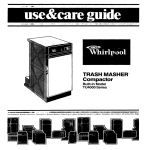
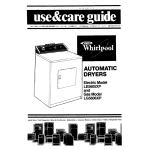
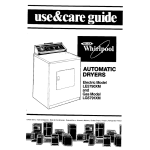
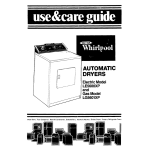
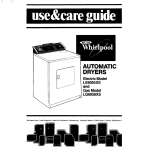
&ti
SERIES
AUTOMATIC
DRYERS
a
wave Ovens. Trash Compactors, Room Au Conditioners. Dehumidifiers.
Electric Model
LE6405XP
Gas Model
LG6406XP
Automatic Washers, Clolhes Dryers. Freezers. Refrigerator-Freez
Parts and features
CYCLE CONTROL KNOB
TEMPERATURE SELECTOR
LAUNDRY
\
\
FORMATION
CENTER
Remove the Consumer Buy Guide label before
using
your dryer. It will be
easier to remove.
out
the
Wipe
dryer drum with a
damp
cloth to remove dust from storing or shipping.
START BUTTON
LINT SCREEN
/
DRYER DRUM
LOADING
DOOR
Copy your Model and Serial Numbers here
When you need service or call with a
question, have this information
ready:
1. Complete Model and Serial Numbers
(from-the plate located
as shown).
2. Purchase date from sales slip.
Copy this information
in these spaces.
Keep this book, vour warrantv, sales slip
and’“Dryer
Guide” in the Laundry
Information Center on the back of the dryer
console.
There is no warranty
registration
to rethat is required
for in-warranty
service.
Contents
Complete
Model
Complete
Serial
Purchase
Number
Number
Date
Service Company
and
Telephone
Number
Page
Page
PARTS AND FEATURES..
YOUR RESPONSIBILITIES. . . .
SAFETYFIRST. . . . . . . . .
SELECTING A CYCLE AND
STARTING YOUR DRYER . .
2
3
3
Dryer Cycles and Settings .
Cool Down Times . . . . . . . .
DRYING TIPS. . . . . . . . . . . . . . . .
FLUFFAIR Setting . . . . . . . . .
TUMBLE PRESS@Setting . . .
Mixed Loads . . . . . . . . . . . . .
Drying Times . . . . . .
. . .
:
Cleaning
Vacation
6
7
7
:
7
01985 Whirlpool
8
LINT SCREEN.
...
.
LINT REMOVAL .
..
CARING FOR YOUR DRYER.
IF YOU NEED SERVICE OR
ASSISTANCE. .
... .
1. Before Calling for
Assistance
...
2. If You Need Assistance
3. If You Need Service .
4. If You Have a Problem
Corporation
t
Dryer Interior
Care
...
;
.
10
.
10
11
11
11
Your
Responsibilities
You are personally
responsible
making sure that your dryer...
l
l
l
l
is located
in an area where the temperature
is above 45°F (7.2”C).
l is connected
to the right kind of outlet, electric
supply and grounding:
l is properly
connected
to fuel and
exhaust systems.*
l is used
only for jobs normally
expected
of home clothes dryers.
l is not run where
there may be explosive fumes.
l is not used
by children
or anyone
unable to operate
it properly
*See the “Installation
Instructlons”
for
complete
informatlon.
l
Read this “Use and Care Guide”
and your “Dryer Guide” carefully
for
important
use and safety information.
for
is installed
by a qualified
installer.
is properly
maintained.
is installed
in an area protected
from the weather.
is properly
installed
and leveled
in
a well ventilated
room’ on a floor
that can support the weight.
. FOR YOUR SAFETY l
IF YOU SMELL GAS:
1. OPEN WINDOWS.
2. DON’T TOUCH ELECTRICAL SWITCHES.
3. ;~~;~lJlSH
ANY OPEN
4. IMMEDiATELY CALL
YOUR GAS SUPPLIER.
l
FOR YOUR SAFETY
l
DO NOT STORE OR USE
GASOLINE OR OTHER
FLAMMABLE VAPORS AND
LIQUIDS IN THE VICINITY
OF THIS OR ANY OTHER
APPLIANCE.
SUGGESTED SUGGESTED
TEMPERATURE
CYCLE
TYPE OF LOAD
COTTONS - LINENS
EXTRA HEAVY - Bedspreads,
mattress pads, quilts.
..
HEAVYWEIGHT FABRICS - Towels,
jeans, corduroys,
work clothes
MEDIUMWEIGHT COTTONS Sheets, pillowcases,
cotton
underwear,
diapers
LIGHTWEIGHT COTTONS -&i&s:
organdles,
lingerie
........
EX HEAVY
.
PERMIT
PRESS
HEAVY
HIGH
MEDIUM
’
LIGHT
PERMANENT PRESS, SYNTHETICS
AND BLENDS
PERM’T PRESS
HEAVYWEIGHT FABRICS -Work clothes,
jackets, raincoats
..
. .
MEDIUMWEIGHT FABRICS - Shirts, play
clothes, sheets, slacks
.
LIGHTWEIGHT FABRICS - Lingerie,
blouses, dresses
.
.
KNITS
40-50
MINS.
30-40
MINS.
20-30
MINS.
PERMIT
PRESS
HEAVY
HIGH
PERMIT PRESS
HEAVYWEIGHT - Cottons, rayons,
blends, T-shirts, slacks, shirts . .
LIGHTWEIGHT - Synthetics (polyester,
acrylic, etc.) and blends, lingerie,
blouses, dresses
.........
..
..
LIGHTWEIGHT AND DELICATE FABRICS
Sheer Curtains (2 or 3 panels)
Gauze, lace, etc. . . . . . . . . . .
HEAVY
....
.....
RUBBER, PLASTIC, HEAT-SENSITIVE
FABRICS
FOAM RUBBER - Pillows, bras,
stuffed toys . . . . . . . . . . .
.
PLASTIC - Shower curtains,
tablecloths
. ...... ...
...
RUBBER-BACKED RUGS . . . . .
..
OLEFIN, POLYPROPYLENE, SHEER NYLON
40-50
MINS.
30-40
MINS.
PERMIT PRESS
HEAVY HIGH
KNITS GENTLE
LOW
PERM’T PRESS KNITS GENTLE
20-30 MINS.
LOW
15-20 MINS.
PERMIT PRESS
20-30
MINS.
20-30 MINS.
40-50 MINS.
15-20 MINS.
FLUFF
AIR
Select a
1. CYCLE
2.
Turn the Control Knob either way to
point to the cycle and settin.g you
want. See page 6 for information
on
the cycles.
Push the
3. START Button
The dryer will start tumbling
you push the START Button.
Set TEMPERATURE
SELECTOR
Turn the Temperature
Selector
needed
drying temperature.
to the
To stop and restart
the dryer
when
To stop the dryer, open the door (or
turn the Control
Knob to OFF].
To restart the dryer, close the door,
select cycle,
START.
if necessary,
and push
The Cycle Control Knob should point to OFF when the dryer is not In use.
Operating instructions
Dryer cycles and settings
Cool down times
In all cycles, the heat shuts off
before the dryer stops tumbling.
This
cool dowh time helps:
l keep
wrinkles from setting in.
l make
handling
the hot load items
easier.
The PERMANENT PRESS Cycle helps
provide the special
care that permanent press and synthetic
fabrics
need...a
period of heated drying
followed
by a 10 minute cool down.
The chart on page 4 suggests time
and temperature
settings for different
kinds of loads.
The EX HEAVY, HEAVY, MEDIUM and
LIGHT cycles describe
the loads
they are designed
to dry The chart
on page 4 tells what is meant by
EX HEAVY, HEAVY MEDIUM and LIGHT
loads.
At each setting, the dryer will run
about long enough to dry the load
described
by the setting. Example:
The HEAVY Cycle is designed
to be
long enough to dry a load of heavy
fabrics (towels, jeans, corduroys,
etc.)
when the Temperature
Selector is set
on PERM’T PRESS/HEAVY HIGH.
I
C
MOPETIME
LESS TIME
+
I
If the load is not as dry as you want,
set the dial more to the leff the next
time you dry that kind of load.
If the load is dryerthan
you want,
set the dial more to the right the next
time you dry that kind of load.
6
The PERMANENT PRESS Cycle has
10 minutes of cool down time at the
end of the cycle.
All other cycles have 5 minutes of
cool down time.
Drying tips
TUMBLE PRESS” Setting
FLUFF AIR
The dryer does not heat when the
Temperature
Selector is set on FLUFF
AIR. This setting can be used to fluff
bedding,
plastic tablecloths,
foam
rubber pillows, stuffed toys, sneakers,
etc.
1. Turn the Temperature
Selector to
FLUFF AIR.
2. Turn the Control Knob to the number of minutes you want in the
TIMED DRYING Cycle.
3. Push the START Button.
Mixed loads
The TUMBLE PRESS setting removes
wrinkles from dry clothing
such as
items that may have been packed
in a suitcase, closet, or items not
removed
from the dryer.
1. Set Temperature
Selector to PERMIT
PRESS/HEAVY HIGH.
2. Set Control Knob to TUMBLE PRESS.
3. Push START Button.
The load will tumble in heated air
for 5 minutes. The heat shuts off and
the dryer continues
to tumble the
load for 10 more minutes.
For best results, TUMBLE PRESS only
a few items at a time. Put them on
hangers or fold them as soon as the
dryer stops.
Drying
When drying a load with different
kinds and weights of fabrics, use the
cycle suggested
for the lightest
fabrics. When the dryer stops, remove
dry items and reset the control.
times
Drying times will vary depending
on:
l amount
of moisture in the clothes.
l type
and weight of the fabric.
l size of the load.
l room
temperature
around the
dryer.
l temperature
of the wash rinse
water.
l amount
of lint in the lint screen.
l dryertemperature
selection.
See page 6 in your”Dryer
Guide”
for more information.
7
Lint screen
Clean the lint screen betore each load. A screen
increase
drying
blocked
by lint can
time and may be a FIRE HAZARD.
Open the lid and pull the lint screen
straight out.
ROLL the lint off the screen
with your fingers.
DO NOT rinse or wash the screen.
:
Lint removal
Lint can gather
inside
should be removed
dryer usage.
the dryer
ELECTRIC DRYERS
Cleaning
l
l
8
should
and create
a fire hazard.This
lint
every 2 to 3 years, or more otten, dependlng
GAS DRYERS
be done only by a qualified
WARNING:
l Avoid
electrical shock
hazard - unplug power
SUDDIV cord or turn off
electrtcal p&tier.
Avold InJury or damage - do not
put hands lnslde cabinet.
Make sure dryer Is cool.
on
1. Remove
person.
back panel [electric)
or lower access panel (gas].
2. Avoid damaging
wires,
thermostats, funnel or igniter.
3. Remove lint from shaded area see art - with a soft brush or
vacuum cleaner.
4. Replace panel; reconnect
and
re-level dryer.
Caring for your dryer
Some pretreatment products can
damage
dials, consoles and finish
Do not use these products on or
near your dryer.
Remove loose and sharp objects
from pockets and cuffs before drying
pins, buckles, etc. Close metal
-
zippers.
Wlpe off all spills with a damp, soft
cloth. Spills allowed to remain
dull or damage
the finish.
Never leave wet or damp
may
laundry
in your dryer.
Cleaning dryer interior
WARNING: Before
cleaning interior, unplug
power supply cord, or
turn off electrical power to
avoid electrlcal shock hazard.
Garments which contain unstable dyes,
such as denim blue jeans or brightly colored cotton items, may discolor
the dryer interior. If the interior
is discolored,
clean with one of the
following methods to avoid staining
later load items.
Powdered laundry
very warm water
detergent
and
Make a paste with detergent
and
very warm water. Apply paste to
a soft cloth and scrub area until all
excess dye is removed. Wipe thoroughly with a damp cloth. Tumble
a load of rags. -OR-
Sharp or heavy objects should
liquid
spray household
cleaner
Spray on stained area. Rub with a
cloth until all excess dye is removed. Tumble a load of rags.
never be put on or in the dryer.
Check pockets for bolts, nuts, etc.
Vacation care
Unplug power cord or turn off electrical power.
l For gas dryers,
close gas valve.
0 Clean lint screen.
l
.
.
.
“”
If you need service or assistance, we suggest
you follow these four steps:
L Before calling for
assistance...
If your dryer does not heat:
The AIR setting is without heat.
The last minutes of heat settings
without heat.
l
l
Performance
problems
often result
from little things you can find and fix
yourself without tools of any kind.
are
If your dryer does not run:
Is the gas turned on? If not, turn the
Control Knob to OFF. Turn on gas.
Wait 5 minutes. Reset controls and
start.
An electric
dryer uses a circuit
breaker
or 2 fuses. If one fuse is
blown, the dryer may run, but not
heat.
l
l
l
l
l
Is the power supply cord plugged
into a live circuit with the proper voltage?
Is the door closed tightly?
Did you push the START Button?
If drying time seems long:
l
l
l
10
Have you checked
main fuses or circuit
your home’s
breaker box?
Is the lint screen clean?
See page 7 of this book and page
of your “Dryer Guide!’
6
2. If
you need
assistance*...
Call Whlrlpool COOL-LINE0 servIce assistance telephone
number.
Dlal tree tram:
Contlnental U.S. . (800) 253-1301
Mlchlgan . . . . . . . . (800) 632-2243
Alaska b Hawall (800) 253-1121
and talk with one of our trained Consultants. The Consultant
can instruct
you in how to obtain satisfactory operation from your appliance
or, if service is necessary,
recommend
a
qualified
service company
in your
area.
3.
If you need service*...
Whirlpool
has
a
nationwide
network
of franchised TECH-CARE @
Service
Companies, TECH-CARE
service technicians
are trained
to
fulfill the product warranty
and provide after-warranty
service,
anywhere in the United States. To locate
TECH-CARE service in your area, call
our COOL-LINE service
assistance
telephone
number (see Step 2) or look
in your telephone
directory
Yellow
Pages under:
4.
If you have a
problem*. . .
asCall our COOL-LINE service
sistance telephone
number (see Step
2) and talk with one of our Consultants,
or if you prefer, write to:
Mr. Stephen E. Upton
Senior Vice President
Whirlpool Corporation
Administrative
Center
2000 US-33 North
Benton Harbor, MI 49022
*If you must call or write, please provide: model number, serial number,
date of purchase,
and a Complete
description
of the problem. This information is needed in order to better respond to your request for assistance.
FSPIs a reglstered trademark
of Whirlpool Corporation for
quallty parts. look for this
symbol of quollty whenever
FSP
you need o replacement part
@ for your Whlrlpool appliance.
FSP replacement parts
will fit rlght and work right. because they are
made to the same exacting speclflcatlons
used to build every new Whlrlpool appliance.
0
Making your world a little easier.
Part No. 696747
01985 Whirlpool
Corporation
matlc Washers, Clothes Dryers, Freezers. Relngerator-Freezers,
Printed
in U.S.A.
Ice Makers, Dishwashers. Built-In Ovens and Surface Units. Ranges, MI