1
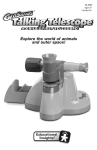
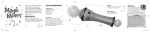
Photo Credits
The following images copyright Dennis Kunkel Microscopy, Inc.: hummingbird feather, plant
cell, blade of grass, E. Coli bacteria on surface of small intestine, Anthrax virus, Northern
house mosquito, yellow jacket wasp stinger, mucus and pollen grain on a nose hair, antibiotic
treatment on E. Coli, Rhinovirus (common cold), surface of rockcress leaf, Velcro™ fastener,
bone, broccoli floret, egg shell, red ant, housefly, skin of dogfish shark, tongue with papillae
and taste buds, Diatoms, cat tongue papillae, moss spores on moss, blood, spinneret of spiny
orb-weaver spider, pollen grains, bean weevil and bean seed, Salmonella bacteria, sperm and
egg, pill bug, root of a germinating radish seed, sand grains, red spider mite, grasshopper head,
scales on monarch butterfly, head of monarch butterfly, brown recluse spider, and rose petal
The following images copyright CMSP, Inc.: human hair, window mold, cat hairs, cotton fibers,
skin, cross section of a pine needle, cross section of a chrysan themum leaf, deer tick, greenbottle
fly maggot on beef, streptococcus bacteria, dental floss with plaque, table salt, starch
granules in wheat flour, cockroach leg, head louse on a human hair, dust mite, chromosomes,
head of leech, newsprint paper, human eye, tongue with bacteria, blood-filled aorta, and
animal cell
EI-8803
Ages 8+
Grades 3+
™
LCD screen
to view
microscopic
images
Focusing
magnifier
Quiz button
Facts button
On/Off button
Volume button
Select button
Navigation
arrows
Home button
Answer
buttons
The amazing Scanning Electron Microscope
Most of the fantastic images in the Talking Electron Microscope were created with a Scanning
Electron Microscope.
Conventional microscopes use glass lenses to bend light to create a magnified image. The
Scanning Electron Microscope bombards the image with electrons instead of light waves.
The resulting images are super-detailed 3-dimensional images that are at much higher
magnifications than can be accomplished with a light microscope.
Developed in Southern California by Educational Insights.
© Educational Insights, Inc., Gardena, CA (U.S.A.). All rights reserved.
Learning Resources Ltd., King’s Lynn, Norfolk (U.K.).
Please retain this information. Made in China.
www.EducationalInsights.com
8803 guide.indd 2-3
The images in the Talking Electron Microscope reveal the amazing detail and complexity of
living things and tiny structures in the world all around us.
10/22/10 2:23:08 PM
1. Push the on/off button to begin
When you see the GeoSafari screen in the eyepiece, you’ll
know that your Talking Electron Microscope is ready to use.
2. Pick a category
Press select to learn about the first category. Press the up or down
arrows to see the other categories and press select to choose one.
• ANIMALS
• VIRUSES AND BACTERIA
• THE HUMAN BODY
• “STUFF”
Keep in mind....
• Forgot to turn it off? The Talking Electron Microscope will power down on its own.
• Use the focusing dial to adjust the focus of the Talking Electron Microscope for
individual use.
Battery Installation
GeoSafari Talking Electron Microscope uses three
C batteries.
1.Carefully remove the screw to lift the battery
compartment door, located on the bottom of
the Talking Electron Microscope.
• PLANTS
2.Install three fresh C batteries in the battery
compartment, as shown.
3. Pick a game: Facts or Quiz
• Do not use rechargeable batteries.
• Non-rechargeable batteries are not to be recharged.
• Do not mix old and new batteries.
Press this button for Facts
Press this button for Quiz
• Do not mix different types of batteries: alkaline, standard (carbon zinc) or
rechargeable (nickel – cadmium) batteries.
4. Pick a specimen
Press select to learn about the first specimen. Press the up or down arrows to see the
other specimens and press select to choose one.
• Only batteries of the same or equivalent type are to be used.
5. HOME
Press the home button anytime to return to the main category listing.
• The supply terminals are not to be short-circuited.
6. Now the Talking Electron Microscope will begin with fun facts or a quiz!
You may switch from Facts to Quiz at anytime by pressing the other button. To change
specimens, press the HOME button.
How to Reset
If the microscope should malfunction, turn it off and then on again. If that doesn’t help,
try inserting new batteries.
Facts
Each time you press the arrow keys in Facts mode, the Talking Electron Microscope will
say an interesting fact about the image in the eyepiece. The display will automatically
zoom and pan the image to focus on the part of the image that the fact is about.
Quiz
Each time you press the arrow keys in Quiz mode, the Talking Electron Microscope will
ask a question. Some questions are True or False. Press A for true. Press B for false.
Some questions are multiple choice. Listen to the question and select your choice
A, B, or C.
Look into the microscope for hints that will help you answer questions. The display
will automatically zoom and pan the image to focus on the part of the image that the
question is asking about.
• Batteries must be inserted with the correct polarity.
• Remove exhausted batteries from the unit.
3. Close the compartment door and tighten the screw.
Cleaning Instructions
Clean product with a damp or dry cloth. Do not immerse or spray any liquid or water
on product.
Note: This equipment has been tested and found to comply with the limits for a Class B digital device, pursuant
to Part 15 of the FCC Rules. These limits are designed to provide reasonable protection against harmful
interference in a residential installation. This equipment generates, uses, and can radiate radio frequency
energy and, if not installed and used in accordance with the instructions, may cause harmful interference
to radio communications. However, there is no guarantee that interference will not occur in a particular
installation. If this equipment does cause harmful interference to radio or television reception, which can be
determined by turning the equipment off and on, the user is encouraged to try to correct the interference by
one or more of the following measures:
• Reorient or relocate the receiving antenna.
• Increase the separation between the equipment and receiver.
• Connect the equipment into a different outlet from the receiver.
• Consult the dealer or an experienced radio/TV technician for help.
Note: The user is cautioned that changes and modifications made to the equipment without the approval of
manufacturer could void the user’s authority to operate this equipment.
2
8803 guide.indd 2-3
3
10/22/10 2:23:13 PM
Animals
The Human Body
Bean weevil and
bean seed
Northern house
mosquito
Brown recluse
spider
Spinneret of spiny
orb-weaver spider
Mucus and pollen
grain on a nose hair
Skin
Bone
Tongue with papillae
and taste buds
Head of monarch
butterfly
Scales on monarch
butterfly
Cockroach leg
Pill bug
Human eye
Blood
Blood-filled aorta
Chromosomes
Head louse on a
human hair
Cat tongue papillae
Deer tick
Skin of dogfish
shark
Sperm and egg
Human hair
Animal cell
Greenbottle fly
maggot on beef
Hummingbird
feather
Red ant
Housefly
Dust mite
Red spider mite
Grasshopper head
Yellow jacket wasp
stinger
Head of leech
4
8803 guide.indd 4-5
5
10/22/10 2:23:25 PM
Plants
Viruses and Bacteria
Blade of grass
Surface of
rockcress leaf
Rose petal
Cross section of a
pine needle
Streptococcus
bacteria
Salmonella
bacteria
E. Coli Bacteria on
surface of small intestine
Broccoli floret
Diatoms
Moss spores
on moss
Plant cell
Tongue with
bacteria
Antibiotic treatment
on E. Coli
Anthrax virus
Rhinovirus
(common cold)
“Stuff”
Pollen grains
Cross section of a
chrysan themum leaf
Root of a germinating
radish seed
6
8803 guide.indd 6-7
Table salt
Velcro™ fastener
Dental floss with
plaque
Sand grains
Cat hairs
Newsprint paper
Egg shell
Cotton fibers
Window mold
Starch granules in
wheat flour
7
10/22/10 2:23:37 PM