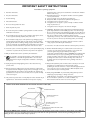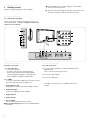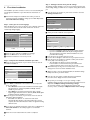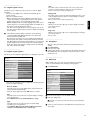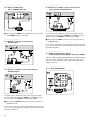
1
Return your Product Registration Card or register online at
www.philips.com/welcome today to get the very most from your purchase.
Registering your model with PHILIPS makes you eligible for all of the valuable benefits listed below, so don’t miss out.
Complete and return your Product Registration Card at once, or register online at www.philips.com/welcome to ensure:
* Proof of Purchase
* Product Safety Notification
Returning the enclosed card guarantees that
your date of purchase will be on file, so no
additional paperwork will be required from
you to obtain warranty service.
By registering your product you’ll receive
notification - directly from the manufacturer in the rare case of a product recall or safety
defect.
* Additional Benefits of
Product Ownership
Registering your product guarantees that
you’ll receive all of the privileges to which
you’re entitled, including special money-saving
offers.
Know these
safety symbols
Congratulations on your purchase, and
welcome to the “family!”
CAUTION
RISK OF ELECTRIC SHOCK
DO NOT OPEN
CAUTION: TO REDUCE THE RISK OF ELECTRIC SHOCK, DO NOT
REMOVE COVER (OR BACK). NO USER-SERVICEABLE PARTS
INSIDE. REFER SERVICING TO QUALIFIED SERVICE PERSONNEL.
Dear PHILIPS product owner:
Thank you for your confidence in PHILIPS.You’ve selected one of
the best-built, best-backed products available today.We’ll do
everything in our power to keep you happy with your purchase for
many years to come.
“bolt of lightning” indicates uninsulated material within your
t This
unit may cause an electrical shock. For the safety of everyone in
your household, please do not remove product covering.
“exclamation point” calls attention to features for which you
s The
should read the enclosed literature closely to prevent operating
As a member of the PHILIPS “family,” you’re entitled to protection
by one of the most comprehensive warranties and outstanding
service networks in the industry.What’s more, your purchase
guarantees you’ll receive all the information and special offers for
which you qualify, plus easy access to accessories from our
convenient home shopping network.
and maintenance problems.
Most importantly, you can count on our uncompromising
commitment to your total satisfaction.
CAUTION:To prevent electric shock, match wide blade of plug to
Warning:To reduce the risk of fire or electric shock, this apparatus
should not be exposed to rain or moisture and objects filled with
liquids, such as vases, should not be placed on this apparatus.
wide slot, fully insert.
ATTENTION : Pour éviter les chocs électriques, introduire la lame la
All of this is our way of saying welcome - and thanks for investing in
a PHILIPS product.
plus large de la fiche dans la borne correspondante de la prise et
pousser jusqu’au fond.
P.S. To get the most from your PHILIPS purchase, be
sure to complete and return your Product
Registration Card at once, or register online at:
www.philips.com/welcome
For Customer Use
Enter below the Serial No., which is located on the rear of the
cabinet. Retain this information for future reference.
Model No.
Serial No.
Visit our World Wide Web Site at http://www.philips.com/welcome
IMPORTANT SAFETY INSTRUCTIONS
Read before operating equipment
1.
Read these instructions.
2.
Keep these instructions.
16.
3.
Heed all warnings.
4.
Follow all instructions.
A.
B.
C.
D.
5.
Do not use this apparatus near water.
6.
Clean only with a dry cloth.
7.
Do not block any of the ventilation openings. Install in accordance with the
manufacturers instructions.
8.
Do not install near any heat sources such as radiators, heat registers, stoves,
or other apparatus (including amplifiers) that produce heat.
9.
Do not defeat the safety purpose of the polarized or grounding-type plug. A
polarized plug has two blades with one wider than the other. A grounding
type plug has two blades and third grounding prong.The wide blade or third
prong are provided for your safety.When the provided plug does not fit into
your outlet, consult an electrician for replacement of the obsolete outlet.
E.
information, please contact your local authorities or the Electronic Industries
Alliance: www.eiae.org.
Damage Requiring Service - The appliance should be serviced by qualified
service personnel when:
The power supply cord or the plug has been damaged; or
Objects have fallen, or liquid has been spilled into the appliance; or
The appliance has been exposed to rain; or
The appliance does not appear to operate normally or exhibits a marked
change in performance; or
The appliance has been dropped, or the enclosure damaged.
17. Tilt/Stability - All televisions must comply with recommended international
global safety standards for tilt and stability properties of its cabinets design.
• Do not compromise these design standards by applying excessive pull force to
the front, or top, of the cabinet which could ultimately overturn the product.
• Also, do not endanger yourself, or children, by placing electronic
equipment/toys on the top of the cabinet. Such items could unsuspectingly fall
from the top of the set and cause product damage and/or personal injury.
18. Wall or Ceiling Mounting - The appliance should be mounted to a wall or
ceiling only as recommended by the manufacturer.
19. Power Lines - An outdoor antenna should be located away from power lines.
10. Protect the power cord from being walked on or pinched particularly at plugs, 20. Outdoor Antenna Grounding - If an outside antenna is connected to the
convenience receptacles, and the point where they exit from the apparatus.
receiver, be sure the antenna system is grounded so as to provide some
protection against voltage surges and built up static charges.
11. Only use attachments/accessories specified by the manufacturer.
Section 810 of the National Electric Code, ANSI/NFPA No. 70-1984, provides
information with respect to proper grounding of the mats and supporting
12.
Use only with a cart, stand, tripod, bracket, or table specified by the
structure grounding of the lead-in wire to an antenna-discharge unit, size of
manufacturer, or sold with the apparatus.When a cart is used, use
grounding connectors, location of antenna-discharge unit, connection to
caution when moving the cart/apparatus combination to avoid injury
grounding electrodes and requirements for the grounding electrode. See
from tip-over.
Figure below.
13. Unplug this apparatus during lightning storms or when unused for long
periods of time.
21. Objects and Liquid Entry - Care should be taken so that objects do not fall
and liquids are not spilled into the enclosure through openings.
a) Warning:To reduce the risk of fire or electric shock, this apparatus should
14. Refer all servicing to qualified service personnel. Servicing is required when
not be exposed to rain or moisture and objects filled with liquids, such as
the apparatus has been damaged in any way, such as power-supply cord or plug
vases should not be placed on this apparatus.
is damaged, liquid has been spilled or objects have fallen into apparatus, the
apparatus has been exposed to rain or moisture, does not operate normally,
22. Battery Usage CAUTION - To prevent battery leakage that may result in
or has been dropped.
bodily injury, property damage, or damage to the unit:
• Install all batteries correctly, with + and - alignment as marked on the unit.
15. This product may contain lead or mercury. Disposal of these materials may be • Do not mix batteries (old and new or carbon and alkaline, etc.)
regulated due to environmental considerations. For disposal or recycling
• Remove batteries when the unit is not used for a long time.
EXAMPLE OF ANTENNA GROUNDING AS PER NATIONAL ELECTRICAL CODE (NEC)
GROUND CLAMP
ANTENNA LEAD IN WIRE
ANTENNA DISCHARGE UNIT
(NEC SECTION 810-20)
GROUNDING CONDUCTORS
(NEC
SECTION
810-21)
GROUND CLAMPS
ELECTRIC SERVICE EQUIPMENT
POWER SERVICE GROUNDING ELECTRODE SYSTEM
(NEC ART 250, PART H)
Note to the CATV system installer: this reminder is provided to call the CATV system installer’s attention to Article 820-40 of the NEC that
provides guidelines for proper grounding and, in particular, specifies that the cable ground shall be connected to the grounding system of the
building, as close to the point of cable entry as practical.
Content
2 Getting started . . . . . . . . . . . . . . . . . . . . . . . . . . . . . . . 4
2.1 Connection overview . . . . . . . . . . . . . . . . . . . . . . . . . . . . . . 4
3 Use of the Remote Control RC 2033601/01
3.1 Use of the OPTION button . . . . . . . . . . . . . .
3.2 Picture format . . . . . . . . . . . . . . . . . . . . . . . . .
3.3 Buttons on the left of the TV . . . . . . . . . . . . . .
3.4 Turn the TV on . . . . . . . . . . . . . . . . . . . . . . . .
4
First time installation
.........6
..........7
..........7
..........7
..........7
.........................8
5 How to navigate through the menus . . . . . . . . . . . . . . 9
5.1 Introduction . . . . . . . . . . . . . . . . . . . . . . . . . . . . . . . . . . . . 9
5.2 Use of the TV menu settings . . . . . . . . . . . . . . . . . . . . . . . . 9
5.2.1 Adjust viewing and listening settings . . . . . . . . . . . . . . . . . . .9
5.2.2 Adjust Picture menu settings . . . . . . . . . . . . . . . . . . . . . . . .10
5.2.3 Adjust Sound menu settings . . . . . . . . . . . . . . . . . . . . . . . . .11
6
6.1
6.2
6.3
6.4
6.5
6.6
6.7
6.8
6.9
Adjust feature menu settings
Closed captions . . . . . . . . . . . . .
Caption service . . . . . . . . . . . . .
Digital caption service . . . . . . . .
Digital caption options . . . . . . . .
Sleeptimer . . . . . . . . . . . . . . . . .
Child lock . . . . . . . . . . . . . . . . .
Set/Change PIN . . . . . . . . . . . . .
On timer . . . . . . . . . . . . . . . . . .
Demo . . . . . . . . . . . . . . . . . . . .
.
.
.
.
.
.
.
.
.
.........
..........
..........
..........
..........
..........
..........
..........
..........
..........
7 How to search for and store TV channels
7.1 Installation menu . . . . . . . . . . . . . . . . . . . . .
7.2 Select your language . . . . . . . . . . . . . . . . . . .
7.3 Store TV channels . . . . . . . . . . . . . . . . . . . .
7.4 Set your preferences . . . . . . . . . . . . . . . . . .
7.5 Select your connections . . . . . . . . . . . . . . .
7.6 Set your clock . . . . . . . . . . . . . . . . . . . . . . .
7.7 Reset AV settings . . . . . . . . . . . . . . . . . . . . .
. . . . . . . . 12
. . . . . . . . . 12
. . . . . . . . . 12
. . . . . . . . . 13
. . . . . . . . . 13
. . . . . . . . . 13
. . . . . . . . . 13
. . . . . . . . . 15
. . . . . . . . . 16
. . . . . . . . . 16
.
.
.
.
.
.
.
.
. . . . . . . . 16
. . . . . . . . . 16
. . . . . . . . . 16
. . . . . . . . . 17
. . . . . . . . . 18
. . . . . . . . . 19
. . . . . . . . . 19
. . . . . . . . . 20
8 Create your favorite list . . . . . . . . . . . . . . .
8.1 Select a channel from the displayed list . . . . . . .
8.2 Select another favorite channel list . . . . . . . . .
8.3 Create or modify a favorite list . . . . . . . . . . . . .
. . . . . . . . 20
. . . . . . . . . 20
. . . . . . . . . 20
. . . . . . . . . 20
.
.
.
.
.
.
.
11 To connect and operate accessory devices . . . . . . . . 23
11.1 Side panel overview . . . . . . . . . . . . . . . . . . . . . . . . . . . . . . 23
11.2 To make video and audio connections . . . . . . . . . . . . . . . . 24
11.3 Connect a recorder (VCR / DVD-R) . . . . . . . . . . . . . . . . . 25
11.4 Connect a recorder and a second A/V device . . . . . . . . . . . 25
11.5 Connect a DVD player/recorder, Set top box,
gameconsole,... with a HDMI connector . . . . . . . . . . . . . . 25
11.6 Connect a DVD player/recorder, Set top box,
gameconsole,... with a DVI connector . . . . . . . . . . . . . . . . 25
11.7 Connect a DVD player with a S-VIDEO connector . . . . . . .26
11.8 Connect a recorder and Set top
cable box with RF output . . . . . . . . . . . . . . . . . . . . . . . . . . 26
11.9 Connect a satellite receiver or Set top cable box
with A/V outputs . . . . . . . . . . . . . . . . . . . . . . . . . . . . . . . . 26
11.10 Connect a satellite receiver or Set top
box and a recorder with A/V outputs . . . . . . . . . . . . . . . . . 26
11.11 Connect digital source devices with Video
Component Output connectors (YPbPr) . . . . . . . . . . . . . . 26
11.12 Connect a Home theater amplifier . . . . . . . . . . . . . . . . . . 27
11.13 Connect a PC . . . . . . . . . . . . . . . . . . . . . . . . . . . . . . . . . . . 27
12
Problems . . . . . . . . . . . . . . . . . . . . . . . . . . . . . . . . . . 28
13
Glossary . . . . . . . . . . . . . . . . . . . . . . . . . . . . . . . . . . . 29
14
Recycling . . . . . . . . . . . . . . . . . . . . . . . . . . . . . . . . . . 29
15
Product information . . . . . . . . . . . . . . . . . . . . . . . . . .29
Annex
1 - Philips TV Slideshow Format with background music
2 - Philips TV - Digital camera and USB issues . . . . . . .
3 - Issues referring to connected peripherals with a
HDMI connector . . . . . . . . . . . . . . . . . . . . . . . . . .
4 - Software update . . . . . . . . . . . . . . . . . . . . . . . . . . . .
ENGLISH
1 Safety warnings . . . . . . . . . . . . . . . . . . . . . . . . . . . . . . . 2
1.2 Care of the screen . . . . . . . . . . . . . . . . . . . . . . . . . . . . . . . 2
1.3 Warning concerning stationary images on the TV screen . . . 2
1.4 Mounting . . . . . . . . . . . . . . . . . . . . . . . . . . . . . . . . . . . . . . . 2
1.5 Electric, Magnetic and Electromagnetic Fields . . . . . . . . . . . 2
1.6 Pixel characteristics . . . . . . . . . . . . . . . . . . . . . . . . . . . . . . . 3
1.7 VESA Compliance Information for Professional Installation . . 3
1.8 Kensington Security Slot . . . . . . . . . . . . . . . . . . . . . . . . . . . . 3
. . . . . . . .30
. . . . . . . .31
. . . . . . . .32
. . . . . . . .33
Index . . . . . . . . . . . . . . . . . . . . . . . . . . . . . . . . . . . . . . . . . . . . . . 35
9 Electronic Program Guide . . . . . . . . . . . . . . . . . . . . . . 21
10 Multimedia browser . . . . . . . . . . . . . . . . . . . . . . . . . 21
10.1 To view content from a USB device . . . . . . . . . . . . . . . . . 21
10.2 Multimedia Browser menu . . . . . . . . . . . . . . . . . . . . . . . . . 21
Manufactured under license from Dolby Laboratories. ‘Dolby’ ‘Pro Logic’
and the double-D symbol are trademarks of Dolby Laboratories.
1
_________________________
_________________________
HD programming
1.3 Warning concerning stationary images on the TV
screen
You must get HD programming to get an HD picture !
Call your Cable or Satellite service to order HDTV Programming.
_________________________
1
Safety warnings
_________________________
1.1
General
ç Do not insert the power plug in a wall socket or hang the TV to the
wall before all connections are made.
- Place or hang the TV wherever you want, but make sure that air can
circulate freely through the ventilation slots. Leave at least 4” to 6” free
all around the TV.
- Do not place the TV on a carpet.
4" - 6"
A characteristic of LCD Panels is that displaying the same image for a
long time can cause a permanent after-image to remain on the screen.
Normal use of the TV should involve the showing of pictures that
contain constantly moving and changing images that fill the screen.
Examples of stationary images (this is not an all-inclusive list, you may
encounter others in your viewing):
- TV menus;
- Black bars: when black bars appear at the left and right side of the
screen, it is recommended to change to a picture format so that the
picture fills the entire screen;
- TV channel logo: present a problem if they are bright and stationary.
Moving or low-contrast graphics are less likely to cause uneven aging of
the screen;
- Stock market stickers: presented at the bottom of the TV screen;
- Shopping channel logos and pricing displays: bright and shown
constantly or repeatedly in the same location on the TV screen.
Examples of still pictures also include logos, computer images, time
display, teletext and images displayed in 4:3 mode, static images or
characters, etc.
4" - 6"
ç Reduce contrast and brightness when viewing.When the same image
is displayed for 10 minutes, brightness will be reduced automatically.
Once burn-in occurs it will never disappear completely.
4" - 6"
4" - 6"
4" - 6"
) Carefully pay attention to these remarks.The warranty does not
apply to damage caused by not taking into account the above
mentioned warnings on stationary images.
_________________________
1.4 Mounting
- Do not install the TV in a confined space such as a book case or a
similar unit.
- To prevent any unsafe situations, no naked flame sources, such as lighted
candles, should be placed in the vicinity.
- Avoid heat, direct sunlight and exposure to rain or water.
- The equipment shall not be exposed to dripping or splashing.
- To prevent damaging the power (AC) cord which could cause a fire or
electric shock, do not place the TV on the cord.
_________________________
1.2 Care of the screen
Do not remove the protective sheet until you have completed the
stand/wall mounting and connection.
Please, handle with care. Use only a soft cloth to clean the glossy black
front of the TV.
Do not touch, push or rub or strike the screen with anything hard as
this may scratch, mar or damage the screen permanently.
And please do not rub with dust clothes with chemical treatment.
Do not touch the surface with bare hands or greasy cloth (some
cosmetics are detrimental to the screen). Unplug the TV before cleaning
the screen.
When the surface becomes dusty, please wipe gently with absorbent
cotton or other soft materials like chamois soaks. Do not use acetone,
toluene and alcohol because they cause chemical damage. Do not use
liquid cleaners or aerosol cleaners.Wipe off saliva or water drops as
soon as possible.Their long time contact with the screen causes
deformations and color fading.
2
Installing the TV requires special skills that should only be performed by
qualified personnel.You should not attempt to do the work yourself.
Philips bears no responsibility for improper mounting or mounting that
results in accident or injury. Make sure that the wall mount is being fixed
securely enough so that it meets safety standards.
) If the TV is mounted on a swivel base or swivel arm, ensure no strain
is placed on the power cord when the TV is swivelled. Strain on the
power cord can loosen connections.This may cause arcing and result in
fire.
________________________
1.5 Electric, Magnetic and Electromagnetic Fields (EMF)
- Philips Royal Electronics manufactures and sells many products targeted
at consumers, which, like any electronic apparatus, in general have the
ability to emit and receive electromagnetic signals.
- One of Philips’ leading Business Principles is to take all necessary health
and safety measures for our products, to comply with all applicable
legal requirements and to stay well within the EMF standards applicable
at the time of producing the products.
- Philips is committed to develop, produce and market products that
cause no adverse health effects.
- Philips confirms that if its products are handled properly for their
intended use, they are safe to use according to scientific evidence
available today.
- Philips plays an active role in the development of international EMF and
safety standards, enabling Philips to anticipate further developments in
standardization for early integration in its products.
_______________________
1.6 Pixel characteristics
1.8 Kensington Security Slot (if present)
Your TV display is made with high-precision technology with a high
number of color pixels. Although it has effective pixels of 99,999% or
more, black dots or bright points of light (red, green or blue) may appear
constantly on the screen.This is a structural property of the display
(within common industry standards) and is not a malfunction.
______________________
Your TV is equipped with a Kensington Security Slot, to
prevent it from getting stolen.
An anti-theft Kensington lock has to be purchased separately.
The Kensington lock is a plastic-coated steel cable with a lock. One
end has to be fixed to the opening of the TV and locked with a special
button.The other end is attached to a fixed point.
1.7 VESA Compliance Information for Professional
Installation
® Kensington and MicroSaver are registered US trademarks of ACCO World
Corporation with issued registrations and pending applications in other
countries throughout the world. All other registered and unregistered
trademarks are the property of their respective owners.
) Caution
Consult a Home Theater installation professional.
Improper mounting could result in severe injury or damage.
Koninklijke Philips Electronics NV bears no responsibility for improper
mounting or mounting that results in accident or injury.
ENGLISH
_________________________
Your TV is prepared for VESA compliant wall mounting.
This bracket is not included. Use a VESA compliant bracket with code
VESA MIS-F, 600, 400, M8.
Consult your dealer for more information.
‡ Locate the VESA screwholes on the back of the TV.
6 00
4x
M8
400
® Should the plastic discs obstruct the VESA bracket, you can unscrew
these 4 discs.
4x
VESA, FDMI and the VESA Mounting Compliant logo are trademarks of the
Video Electronics Standards Association.
3
_________________________
2
à Before installing your TV or before hanging it on the wall, first
connect your accessory devices.
Getting started
Welcome to the growing family of owners of Philips.
) Do not insert the power plug into the mains at the bottom of the
TV and in a wall socket before all connections are made.
_________________________
2.1 Connection overview
USB
There is a wide range of audio and video devices that can be
connected to your TV. See Chapter 11 How to connect and
operate accessory devices.
14
AV 3
Y
Pb
Pr
L
13
AUDIO
VIDEO
AUDIO
R
2
L
AUDIO
R
1
R
R
3
L
AV 2
AUDIO
L
VIDEO
12
S VIDEO
Y
Pb
Pr
VIDEO
AV 1
S VIDEO
42"-47"-52"
10 9 8
7
6
5
HDMI 1
HDMI 2
4
11
DISPLAY
SYNC.
L
OUT
R
IN
R
DIGITAL
AUDIO
AUDIO OUT
DISPLAY SYNCHRONIZED
+
L
AV 1 HDMI 1
AV 2 HDMI 2
AV 3 HDMI 3
ANALOG
AUDIO IN
+
HDMI 3
SERVICE
UART
ANTENNA
HDMI 1
HDMI 2
HDMI 3
_________________________
_________________________
2.1.1 Back connections
2.1.2 Side connections
1-2-3 AV1 - AV2 - AV3
To connect devices with
- an S-Video connector and L and R audio cables
- devices with 3 separate Component Video Output
connectors (YPbPr) and Analog L and R audio cables
- devices with Video and Audio L and R AV cables.
12 To connect devices with Video or S-Video and Audio Left and
Right AV cables.
(For ex. camera, camcorder, game, audio,...)
13 To connect your headphone.
14 To connect a USB device.
4-5-6 HDMI *
To connect a device with a HDMI connector. If the accessory
device has a DVI output only, see Chapter 11.7.
*
7
Analog Audio In L/R
Analog audio for devices connected to a HDMI connector.
8
Digital Audio Out
To connect a digital Home theater amplifier.
9
Digital Audio In
10 Audio Out L/R
11 Service UART
For use only by authorized service personnel.
ç For installers/integrators: Do not connect RS232 without
level shifter.
4
According to your type of set, 2 or 3 HDMI connectors are
available.
_________________________
2.1.3 Connect to the TV
Your Philips Digital TV will allow you to enjoy digital programs directly
from your cable or off air.
Connect directly to the TV or connect via your current cable box or
Satellite Receiver box.
ç Watching Cable TV programs that don’t require the cable
box
Since you’ve connected the cable TV signal directly to the TV’s tuner,
you can also watch the unscrambled programs by simply tuning to
the desired channel.You must first use Autoprogram, however, to
store channels in the TV’s memory. See Chapter 7.3.
This connection will supply stereo sound to the TV if it is being
broadcast by the station you are watching.
_________________________
________________________
2.1.4 Connect the mains
ENGLISH
2.1.3.1 Directly to the TV (you will not be able to receive pay
channels)
MAINS
ANTENNA
‡ Connect the cable TV signal or the incoming antenna signal to the
ANTENNA x 75Ω jack at the bottom of the TV.
® See Chapter 7.3 Store TV channels for details on using
Autoprogram to store channels in the TV’s memory.
ç- Broadcasters are in the middle of a transition from analog to digital
TV.This means that a given broadcaster will have two channels on the
air, one analog and one digital.
- This connection will supply stereo sound to the TV if it is being
broadcast by the station you are watching.
VIDEO
L
AUDIO
) Verify that the power supply voltage corresponds to the voltage
printed on the sticker at the back of the TV. Contact your local
dealer if your power supply is different.
) Ensure the power cord is fully inserted in the TV mains socket and
the wall socket.
_________________________
2.1.5 Remote control
Insert the 2 batteries supplied (Type R03-1,5V).
Be sure the (+) and (-) ends of the batteries line up correctly (inside of
case is marked.)
R
ANTENNA
AV 2
AV2
L + R + VIDEO
SIGNAL
SPLITTER
CABLE
OUT
Set top box
RF IN
________________________
2.1.3.2 Via a cable box or Satellite box
‡ Maintain the connection of the TV cable of your home into your
cable box (or satellite receiver box).
® Connect your Cable box (or satellite receiver box) to the back of
the TV using the best connection options. See Chapter 11.2 To
make audio and video connections.
Ò Select the source using the SOURCE button on the remote control.
† Press the OK button to confirm your selection.
à For more information, please refer to your cable box (or satellite
receiver box) manual.
5
_________________________
3
Use of the remote control RC 2033601/01
1
POWER Press to turn the TV on/off.
2
FAVORITES
- VIEW To display the last selected list.You can create up to four
favorite lists. See Chapter 8 Create your favorite list.
- ✔ No function
POWER
3
CC Select On, off or On during mute to activate/de-activate
Closed Captions. See Chapter 6.1 Closed Captions.
4
ACTIVE CTRL Press to select Active Control on/off.
See Chapter 5.2.2 Adjust picture menu settings.
5
Color buttons When functions are attached to the color buttons,
the color buttons are shown on screen.
5
6
DEMO Demo on/off.
8
7
OPTION To open and close the Quick access menu which
contains a few frequently used options, like Closed captions, Picture
format,... See Chapter 3.1 Use of the Option button.
8
INFO
1
FAVORITES
2
CC
ACTIVE CTRL
VIEW
4
DEMO
3
6
OPTION
INFO
7
OK
Display information: Press to display (when available) information
about the selected TV channel and program or accessory device.The
quality and accuracy of the information on the information banner
are transmitted from broadcasters.You may see a difference in
broadcast time if the broadcaster is from a different time zone area.
Display clock: Select to activate/de-activate the clock display on the
screen.
9
10
EXIT
11
FORMAT
MENU
12
MUTE
13
VOL
PREV CH
14
CH
2
Cursor buttons Press the cursor buttons up/down, left/right to
navigate through the menus.
15
16
1
9
3
10 OK - To activate a setting.
- To display the list of channels stored (according to the selection
made in the Installation mode - Antenna or Cable, see Chapter 7.3
Store TV channels).
- Starts playing content in the Multimedia Browser application. See
Chapter 10 Multimedia browser.
17
4
5
6
11 MENU/EXIT Settings menu on/off. See Chapter 5.2 Use of the
TV menu settings.
7
8
9
12 FORMAT See Chapter 3.2 Picture format.
SOURCE
0
.
18
19
13 VOLUME Press + or - to adjust the volume.
14 Channel selection
- To browse through the TV channels or sources stored and marked in
the selected Favorite channels list. See Chapter 8 Create your
favorite list;
- To quickly browse through the list in the menus;
- To select between Antenna or Cable TV channels, first make your
selection in the Installation menu, Channel installation, Installation
mode, see Chapter 7.3 Store TV channels.
15 MUTE Interrupt the sound or restore it.
16 PREV CH Press to alternate between the currently viewed channel
and the previously viewed channel.
Due to the sensitivity of the remote control, you may experience a
delayed operation at start up of the TV. After a short while your remote
control will work smoothly.
17 Numeric buttons
To select a TV channel.
18 SOURCE Press repeatedly to select AV1, AV2, AV3, HDMI 1,
HDMI 2, HDMI 3, Side or TV channels according to where you
connected the accessory devices.
19 - Type the dot (•) for digital channels.
6
_________________________
3.1 Use of the OPTION button
Movie expand 14:9 (Not for HD.)
Scales classical 4:3 format to 14:9.
The OPTION button allows you to display the Quick access menu
which will give you direct access to some features and menu options.
‡ Press the OPTION button.
> The Quick access menu appears.
Movie expand 16:9 (Not for HD.)
Scales classical 4:3 format to 16:9.
Quick access
ENGLISH
Audio language
Closed captions
Picture format
Wide screen
Stretches 4:3 format to 16:9.
Equalizer
Clock
® Press the cursor up/down to select a menu item.
Ò Press the OK button to jump to the selected menu item in the TV
menu (except for the clock option).
† Use the cursor buttons to make a selection.
º Press the OPTION button to exit.
Audio language
See Chapter 5.2.3 Adjust Sound menu settings.
Closed captions
See Chapter 6 Adjust Feature menu settings.
Picture format
See Chapter 5.2.2 Adjust Picture menu settings, or Chapter 3.2
Picture format.
Unscaled (Only for HD and PC.)
Maximum sharpness. Distortion may appear on
borders. Black bars may appear with pictures
from your PC.
rNote
Do not forget to name the connection in the Connections menu. See
chapter 7.5 Select your connections.
_________________________
3.3 Buttons on the left of the TV
Should your remote be lost or broken you can still change some of the
basic settings with the buttons on the left side of your TV.
-
Equalizer
See Chapter 5.2.3 Adjust Sound menu settings.
MENU
+
VOLUME
Clock
Select to activate/deactivate the clock display on the screen.
_________________________
+ CHANNEL -
3.2 Widescreen picture format
à Tip
The format Automatic is recommended for minimal distortion.
Automatic (Not for PC.)
Enlarges the picture automatically to fill the
screen. Subtitles remain visible.
B
POWER
Avoid black bars on the sides or on top and bottom of the picture.
Change the picture format to a format that fills the screen.
‡ Press FORMAT to switch on the Picture format menu.
® Press o or œ to select an available picture format.
Ò Press o to shift the picture upwards to make partly covered
subtitles visible.
Press the POWER B switch to turn the TV on.
The MENU button can be used to summon or exit the TV menu
without the remote control.
Use the VOLUME + and - buttons to adjust the volume.
Use the CHANNEL + and - buttons to browse through the TV channels
and sources stored and marked in the Favorite channel lists.
_________________________
3.4 Turn the TV on
Super zoom (Not for HD.)
Removes the black bars on the side of 4:3
broadcasts. There is a minimal distortion.
<
<
4:3 (Not for HD.)
Shows the classical 4:3 format.
Press the B POWER switch at the left side of the TV.
> An indicator on the front of the TV lights up.
Press the + CH - button or the POWER button on the remote
control.
ç The first time (and only the first time) you turn on your TV, you see
a welcome screen followed by the installation procedure. See
Chapter 4 First time installation.
7
_________________________
4
First time installation
The installation procedure consists of a series of screens that will guide
you through the installation of your TV. Follow the instructions on
screen.
ç If the TV has already been installed before and/or you want to
change the First time installation settings, proceed with Chapter 5.2
Use of the TV menu settings.
Step 3 - Settings assistant: select your TV settings
The Settings assistant will help you to select your preferred picture and
sound settings. Finally you will arrive at a complete setting which satisfies
you.
‡ Press the green color button on your remote control to enter the
Settings assistant menu.
PHILIPS Installation
This will help you to install the following sections:
Television installation
Step 1 - Select your on-screen language
After the Welcome screen you are asked to select a language of the TV's
on-screen menus.The text of the header and the info on screen
continuously change language.
Menu language
English
Français
Español
Português
.............
Please select your
language.....
PHILIPS
Settings assistant
Previous
Next
® Select your location with the cursor up/down.
PHILIPS Settings assistant
Please select your location before continuing:
Home
Retail store
using cursor up and down
Previous
Next
Skip
Stop
NEXT
>
>
‡ Press the cursor up/down to highlight your language.
® Press the OK button on the remote control.
Ò Follow the instructions on screen to proceed.
Step 2 - Complete the initial TV installation procedure
‡ Press the green color button on your remote control to start the
television installation.
PHILIPS Television installation
Installation mode
Please select your
installation mode.
Antenna
Cable
If you choose Home it will start display the Settings assistant.
If you choose Retail store it will skip the Settings assistant.
The TV parameters for Picture and Sound will then be set to
predefined fixed settings.
Ò Press the green color button again to proceed.
† Use the cursor left/right to each time select your preferred screen.
º Press the green color button to each time confirm your selection
and to jump to the following screen.
> The following items will be presented sequentially.
In the header it is mentioned how many screens have been
completed and how many screens there are in total.
◊When finished, press the green color button twice to store all the
settings and to return to the TV installation menu.
ç When you skip or stop the Settings Assistant, the Standard settings
Philips selected for you will be chosen.
‹ Press the red color button to finish the First time installation
procedure and to display the first stored TV channel.
Previous
Next
® Select Cable or Antenna in the Installation mode and press the
green color button.
> When Antenna is selected, the TV will detect antenna signals
and will search for antenna TV (NTSC and ATSC) channels
available in your local area.
> When Cable is selected, the TV will detect cable company
supplied signals and will search for cable TV (NTSC, ATSC, QAM
modulated) channels available in your area.
Ò Press the green color button on your remote control to start the
Automatic channel installation.
> All available TV channels are searched for and stored
automatically.This will take a few minutes.When the search is
complete, the menu will indicate the number of digital and analog
channels found.
ç If you choose to install the channels at a later time, see Chapter 7.3
Store TV channels to select Autoprogram to scan available
channels.
† Press the red color button when the search is completed.
8
ç At any time you can change or reset your settings or adjust
individual settings for Picture and Sound in the TV Settings menu. See
Chapter 5.2.1 Adjust viewing and listening settings.
To control the settings of special TV functions, features and
accessory devices, see Chapter 6 Adjust Feature menu settings.
_________________________
How to navigate through the menus
_________________________
5.1 Introduction
A lot of guiding instructions, help texts and messages will be displayed on
your TV when you use the menus or when you try to execute an action.
Read the help texts which are being displayed on the specific item
highlighted.
The color buttons at the bottom of the screen refer to the different
actions which may be executed.
Press the corresponding color button on the remote control to perform
the required or desired action.
‡ Press the MENU button on the remote control.
- to reset your picture and sound settings to the factory standard
settings;
- to update your TV software.
- Software update allows you to update your current software.
º Press the cursor right to enter the highlighted menu item.
> The content of the right panel is moved to the left panel and the
right panel now shows the content of the newly highlighted item
in the left panel.
ç In some cases it is important that the picture can be watched while
you adjust the settings.This means that when the highlight is on the
right side panel, the other menu items hide away.When the cursor
left is pressed, the hidden menu items reappear and the highlight
moves to the left panel.
ENGLISH
5
◊Press the MENU button to exit the main menu.
VIEW
_________________________
DEMO
5.2 Use of the TV menu settings
OPTION
INFO
OK
EXIT
MENU
EXIT
FORMAT
The TV menu allows you to access and change settings and preferences
in case you want to change the First time installation settings and/or you
want to control the settings of special TV functions, features and
peripheral equipment.
_________________________
MENU
>
The main menu appears on the screen.
Television
5.2.1 Adjust viewing and listening settings
‡ Press the MENU button on the remote control.
> The main menu appears on the screen.
TV menu
Channel list
Television
Channel list
Program guide
Multimedia
Program guide
USBdevice 1
Multimedia
- TV menu allows you to access the TV menu. See below.
- Channel list allows you to access the TV channel list and to
create up to four favorite lists with your preferred TV channels. See
Chapter 8 - Create your favorite channel list.
- Program guide allows you to access detailed information about
individual digital TV programs.
- Multimedia allows you to access the Multimedia browser
application. It lets you display your personal multimedia (pictures,
audio) files. Multimedia is only present when a USB device is
connected. See Chapter 10 Multimedia browser.
® Use the cursor up/down to highlight and select a menu item.
Ò Use the cursor right to enter the highlighted menu item.
> The right panel shows the content of the highlighted menu item.
† Use the cursor up/down to select a menu item.
TV menu
TV settings
Features
Installation
Software update
TV settings
Settings assistant
Reset to standard
Picture
Sound
TV menu
USBdevice 1
® Select TV menu and press the cursor right.
> The TV menu is displayed.
TV menu
TV settings
Features
Installation
Software update
TV settings
Settings assistant
Reset to standard
Picture
Sound
Info
Ò Select TV settings and press the cursor right.
> The TV settings menu is moved to the left.
† Press the MENU button to exit the menu.
To make it easier to change the settings of the TV, there are 3 ways of
doing it. See further.
Info
- TV settings allows you to adjust your preferred picture and
sound settings
- Features allows you to control the settings of special TV features
- Installation allows you
- to select your menu language;
- to search for and store your TV channels;
- to do a weak ATSC digital channel installation;
- to set or adjust various special functions;
- to select connected peripheral equipment;
9
A. Change settings in an easy-to-use manner with the Settings
assistant
Each time you've made a selection, press the green color button to
confirm your selection.
‡ Select Settings assistant and press the cursor right.
> By means of several split screens/full screens you are prompted to
select your preferred picture and sound settings to finally arrive at a
complete setting which satisfies you. See Chapter 4 First time
installation, Step 3 - Settings assistant.
® Press the green color button to return to the TV menu again.
TV menu
TV settings
Settings assistant
Reset to standard
Picture
Sound
Picture
Contrast
Brightness
Color
Tint
Sharpness
Color temperature
Perfect Pixel HD
120 Hz Clear LCD
B. Use of the Standard settings
This allows you to reset your settings for viewing and listening to
predefined factory settings.
Dynamic contrast
Noise reduction
MPEG artefact reduction
‡ Select Reset to standard and press the cursor right.
> A menu appears which allows you to select one of the standard
settings for viewing and listening.
Color enhancement
Active Control
Light sensor
Picture format
TV menu
TV settings
Settings assistant
Reset to standard
Picture
Sound
Reset to standard
Current
Natural
Vivid
Movie
Info
- Current shows your current settings for viewing and listening.
- If you select Natural, it allows you to set your picture and sound
settings to the recommended standard values. In most cases this
will give the best balanced viewing experience.
- If you select Vivid, it allows you to set your picture and sound
settings to rich values, making use of the TV capabilities to its full
extend.
- If you select Movie, it allows you to set your picture and sound
settings to the purest representation of the original source content.
® Press the green color button to store the selected setting.
C. Individual settings for picture and sound
< Select Picture or Sound and press the cursor right.
> A menu appears which allows you to fine tune the picture and
sound settings.
> To adjust the Picture settings, see Chapter 5.2.2 Adjust picture
menu settings.
> To adjust the Sound settings, see Chapter 5.2.3 Adjust sound
menu settings.
_________________________
5.2.2 Adjust Picture menu settings
The picture menu contains the settings that affect the quality of the
picture.
‡ Press the MENU button on the remote control.
> The main menu appears.
® Select TV menu and press the cursor right.
> The TV menu is moved to the left.
Ò Select TV settings and press the cursor right.
> The TV settings menu is moved to the left panel.
† Select Picture and press the cursor right.
> The Picture menu is moved to the left panel.
º Use the cursor up/down to select the Picture menu items.
◊Press the cursor right to enter the selected Picture menu item.
‹ Use the cursor buttons to adjust the settings.
≈Press the cursor left to return to the Picture menu.
10
Info
Contrast
Adjusts the intensity of bright parts in the picture but keeps the dark
parts unchanged.
Brightness
Adjusts the light output of the complete picture, which will mainly affect
the darker areas of the picture.
Color
Adjusts the saturation level of the colors to suit your personal
preference.
Tint
Allows you to select the color mix (tint) of the picture.
Sharpness
Adjusts the sharpness of fine details in the picture.
Color temperature
Increases or decreases Warm (red) and Cool (blue) colors to suit
personal preferences.
< Select Cool to give the white colors a blue, Normal to give the
white colors a neutral, Warm to give the white colors a red tint.
< Select Custom to make customized settings.
‡ Press the green color button.
> The Custom color temperature screen appears.This allows
you to fine tune the white point (WP) and black level (BL) of
the picture.
® Use the cursor buttons to select and adjust the settings of:
R-WP: allows you to customize the color temperature by adjusting
the red whitepoint of the picture.
G-WP: allows you to customize the color temperature by adjusting
the green whitepoint of the picture.
B-WP: allows you to customize the color temperature by adjusting
the blue whitepoint of the picture.
R-BL: allows you to customize the color temperature by adjusting
the red blacklevel of the picture.
G-BL: allows you to customize the color temperature by adjusting
the green blacklevel of the picture.
Ò Use the color buttons to reset to the predefined settings.
† Press the red color button or the cursor left to return to the
Picture menu.
120 Hz Clear LCD (if present)
120 Hz Clear LCD results in superior sharpness of motion
reproduction, better black level, high contrast with a flickerfree quiet
image and a larger viewing angle.
< Select On or Off.
Dynamic contrast
Automatically makes the contrast in the darker and the brighter picture
areas more noticeable as the image on the screen changes.
< Normally select Medium. It may be preferred to select Minimum,
Maximum or Off.
Noise reduction
Noise reduction automatically filters out and reduces the image noise.
This improves picture quality when receiving weak signals.
< Select Off, Minimum, Medium or Maximum according to the
image noise in the picture.
MPEG artifact reduction
MPEG artifact reduction On smoothens the transitions on digital
content.
< Select On or Off.
Color enhancement
Automatically controls green enhancement and blue stretch. It makes the
colors more vivid.
< Select Off, Minimum, Medium or Maximum.
Active control
The TV continuously measures and corrects all incoming signals in order
to provide the best picture possible.
< Select On or Off to activate/de-activate Active control.
TV menu
TV settings
Settings assistant
Reset to standard
Picture
Sound
Sound
Equalizer
Volume
Balance
Audio language
Alternate audio
Mono/Stereo
Sound mode
Headphone volume
Auto volume leveling
Delta volume
Auto surround
ENGLISH
Perfect Pixel HD
Perfect Pixel HD is the most ideal setting as it fully processes the image
to make every single pixel the best it can be, improving contrast,
sharpness, picture depth, color reproduction and brilliance from every
source, including High Definition.
< Select On or Off to activate/de-activate Perfect Pixel HD.
Info
Equalizer
Allows you to select one of the predefined settings for the equalizer:
Standard, Speech, Multimedia or Music.
TV menu/TV settings
Sound
Equalizer
Volume
Balance
Audio language
Alternate audio
Mono/Stereo
.....
Equalizer
o
3
œ
120Hz 500Hz 1,5kHz 5kHz 10kHz
Info
Use the color buttons to select.
Use the cursor buttons to adjust the frequency response of the sound
to match your personal taste.
Light sensor
Light sensor On automatically adjusts the picture settings for best
viewing dependent on the lighting conditions in the room.
< Select On or Off.
à This function is also accessible via the OPTION button on the
remote control. See Chapter 3.1 Use of the Option button.
Picture format
See chapter 3.2 Widescreen picture format above.
Volume
Allows you to adjust the sound output level.
_________________________
5.2.3 Adjust sound menu settings
The sound menu contains the settings that affect the quality of the
sound.
Balance
Allows you to adjust the output of the right and left speakers to obtain
the best stereo reproduction for your listening position.
‡ Press the MENU button on the remote control.
> The main menu appears.
® Select TV menu and press the cursor right.
> The TV Menu is moved to the left.
Ò Select TV settings and press the cursor right.
> The TV settings menu is moved to the left panel.
† Select Sound and press the cursor right.
> The Sound menu is moved to the left panel.
º Use the cursor up/down to select the Sound menu items.
◊Press the cursor right to enter the selected Sound menu item.
ç Dependent on the input signal, one or more menu items may not be
selectable.
‹ Use the cursor buttons to adjust the settings.
≈Press the cursor left to return to the Sound menu.
Audio language
Allows you to select an audio language out of the list of the available
broadcasted languages.
ça If there is more than one variant for an audio language, then select
one of the variants.To permanently change the audio language, use the
Language menu in the Installation menu, see Chapter 7.2 Select your
language.
à This function is also accessible via the OPTION button on the
remote control. See Chapter 3.1 Use of the Option button.
Alternate audio (only selectable with analog broadcast signals)
Gives you the possibility to swap between the Main and Second audio
Program (SAP) when it is available.
Mono/Stereo
Allows you to select, per TV channel, Mono or Stereo sound when
analog stereo broadcasts are available.
11
Sound mode
Allows you to select the modes for more spatial or surround sound
reproduction dependent on the broadcasted signals or signals from
external inputs received.
Headphone volume
Allows you to control the level of sound through the headphones.
Auto Volume Leveling
Automatically reduces the volume differences between channels and
programs, providing a more constant overall level.This will also reduce
the dynamics of sound.
________________________
6
Adjust Feature menu settings
The Features menu allows you to control the settings of special TV
functions, features and accessory equipment.
‡ Press the MENU button on the remote control.
> The main menu appears.
® Select TV menu and press the cursor right.
> The TV Menu is moved to the left.
Ò Select Features and press the cursor right.
> The Features menu is moved to the left panel.
Delta volume
Allows you to correct for any permanent volume differences between TV
channels or external sources.
TV menu
ç You may change channels with the numeric buttons or the CH- or +
button.
TV settings
Features
Installation
Software update
Auto surround
When turned On, this allows the TV to automatically turn to the best
surround sound mode the broadcaster transmits.
Features
Closed captions
Caption service
Digital caption service
Digital caption options
Sleeptimer
......
Info
† Use the cursor up/down to select the Features menu items.
º Press the cursor right to enter the selected Features menu item.
◊Use the cursor buttons to adjust the settings.
‹ Press the cursor left to return to the Features menu.
_________________________
6.1 Closed captions
This displays the transmitted CC- or CS-text on the screen according to
your chosen CC or CS service in the Caption or Digital caption service
menu below.This text can either be permanently displayed (assuming
that the service is available in the broadcast) or only when mute is
active.
‡ Press the cursor right after having selected Closed captions.
® Select On, Off or On during mute.
_________________________
6.2 Caption service
This allows you to select the Closed Captions service levels of analog
broadcasting to be displayed.
Closed Captioning allows you to read the voice content of television
programs on the TV screen. Designed to help the hearing impaired, this
feature uses on-screen ‘text boxes’ to show dialogue and conversations
while the TV program is in progress.
Captions will appear on the screen during captioned broadcasts.
‡ Select Caption service.
® Press the cursor right.
Ò Select the desired Caption service:
> CC 1, 2, 3 or 4
Dialogue (and descriptions) for the action on the captioned TV
program shows on screen.
Usually CC 1 is the most used. CC 2 may be used for alternate
languages if they are being transmitted.
> T 1, 2, 3 or 4
Often used for channel guide, schedules, bulletin board
information for Closed Captions programs, news, weather
informations or stock market reports.
Not all Caption services are necessarily being used by a TV channel
during the transmission of a Closed Caption program.
12
_________________________
This allows you to configure the way you choose to view the digital
captioning.
< Select one of the digital service channels made available by the
caption provider.
There are 6 standard services.
- CS 1 is designated as the Primary Caption Service.This service
contains the verbatim, or near-verbatim captions for the primary
language being spoken in the accompanying program audio.
- CS 2 is designated as the Secondary Language Service.This service
contains captions in a secondary language which are translations of
the captions in the primary Caption Service.
- The other service subchannels are not pre-assigned. It is up to the
discretion of the individual caption provider to utilize the remaining
service channels.
ç - This television provides display of television closed captioning
conforming with the EIA-608 standard and in accordance with
Sections 15.119 of the FCC rules.
- The captions do not always use correct spelling and grammar. Not
all TV programs and product commercials are made for broadcast
with Closed Caption informations included. Refer to your area’s TV
program listings for the TV channels and times of Closed Caption
shows.The captioned programs are usually noted in the TV listings
with service marks such as ‘CC’.
_________________________
6.4 Digital caption options
- Text
Select this option to select the text color or the opacity of the
text box of caption display according to your own preference.
< Select a color and one of the opacity options.
- Background
Select this option to select the character background color or one
of the background opacity options of caption display according to
your own preference.
< Select a color and one of the opacity options.
- Edge type
Allows you to select the edge type of caption display according to
your own preference.
< Select a type.
- Edge color
Allows you to select the edge color of caption display according to
your own preference.
< Select a color.
_________________________
6.5 Sleeptimer
This sets a time period after which the TV automatically turns to
standby.
‡ Select Sleeptimer.
® Press the cursor right.
Ò Select a value with the cursor up/down.The list will have values from
0 to 180 minutes.You can always turn off your TV earlier or select
another time set.
This allows you to modify how digital captions are displayed on your TV.
_________________________
TV menu
Features
Closed captions
Caption service
Digital caption service
Digital caption options
Sleeptimer
Child lock
Set/Change PIN
On timer
Demo
Digital caption options
Reset to default
Size
Style
Text color
Text opacity
Background color
Background opacity
Edge type
Edge color
Info
<
Select from the following options to change the visual characteristics
of your TV’s digital captioning.
- Reset to default
Select this option to reset the digital caption options back to the
captions provider default settings.
< Press the cursor right and press the OK button to confirm.
- Size
Select this option to select the size of caption display according to
your own preference.
< Select Default (Automatic), Small, Standard or Large.
- Style
Select this option to select the font style of caption display
according to your own preference.
< Select Default, Monospaced serif, Serif, Monospaced sans
serif, Sans serif, Casual, Cursive or Small caps.
6.6 Child lock
With a 4-digit code, you are able to lock TV channels and external
sources to prevent children from watching certain programs.
‡ Select Child lock.
TV menu
Features
Closed captions
Caption service
Digital caption service
Digital caption options
Sleeptimer
Child lock
Set/Change PIN
On timer
Demo
Child lock
Lock after
Channel lock
TV ratings lock
Movie ratings lock
Info
® Press the cursor right to enter the Child lock menu.
Ò Enter your 4-digit code.
ç You have to re-enter your code each time you enter the Child
lock menu.
† Select one of the menu items of the Child lock menu and press the
cursor right.
13
ENGLISH
6.3 Digital caption service
_________________________
6.6.1 Lock after
ç Lock after is only selectable if time and date are known. See
Chapter 7.6 - Set your Clock.
This allows you to prevent the viewing of the selected channel after
a selectable time delay. Locked channels can still be tuned, but the
picture is blanked and the audio is muted.
TV menu / Features
Child lock
Lock after
Channel lock
TV ratings lock
Movie ratings lock
Region ratings lock
Lock after
Timer
Time
Age-based rating
All
None
TV-Y
TV-Y7
TV-G
TV-PG
TV-14
TV-MA
Content-based rating
None
None
None)
(FV) Fantasy Violence
None)
(D) Dialog
(L) Language
(S) Sex
(V) Violence
(D) Dialog
(L) Language
(S) Sex
(V) Violence
(L) Language
(S) Sex
(V) Violence
Info
_________________________
When All has been selected, all items in the age-based and in the
contents-based lists are locked.
If, while All is selected, any other item, either an age-based or contentbased item, is unselected, then All is automatically unselected.
No rating is the selection for items that either have no rating
information or have a rating of None. Both will be locked.
When an item on the age-based list is selected, all items below that item
of the same group are locked as well.
When you select a content-based rating, all identical content-based
ratings in the older age-based categories are also selected.
6.6.2 Channel lock
This allows you to completely lock a certain TV channel or external
source.
< Select the channels or subchannels you want to lock.
ç You can lock/unlock any number of ratings on the list without reentering your code.
Each ratings item has a box-graphics in front of it to indicate whether or
not programs carrying that rating are currently locked.
_________________________
TV ratings
‡ Press the cursor right and select Timer On or Off.
> When set to On this allows you to set the clock.
® Select Time and press the cursor right.
> This allows you to set the time after which the lock is set.
Ò Select AM or PM to select the correct period of the day.
† Enter the time with the digit or the cursor buttons.
6.6.3 TV ratings lock
Your TV is equipped with a V-chip.This allows you to control access
to individual programs based on their movie and TV ratings. All
settings apply to all AV inputs, except HDMI.The program content
advisory data are sent by the broadcaster or program provider.
‡ Select TV ratings lock with the cursor down.
TV menu / Features
Child lock
Lock after
Channel lock
TV ratings lock
Movie ratings lock
Region ratings lock
TV ratings lock
All
None
TV-Y
TV-Y7
TV-G
TV-PG
TV-14
TV-MA
Info
TV-Y appropriate for children of all ages with themes and elements
suitable for children aged 2-6
TV-Y7 programs designed for children age 7 and older
TV-Y7-FV programs include fantasy violence more intense than
other programs in the TV-Y7 category
TV-G programs suitable for all ages.These programs contain little or
no violence, no strong language and little or no sexual dialogue or
situations
TV-PG programs contain elements that some parents may find
unsuitable for younger children and which may need parental
guidance.The program may contain moderate violence, sexual
dialogue and/or situations and some strong language.
TV-14 programs contain elements that may not be suitable for
children under 14 years of age.
These programs include one or more of the following: intense
violence, intense sexual situations, suggestive dialogue and strong
language.
>
A list appears, showing the age-based TV ratings and a
corresponding content-based ratings list.
® Press the cursor right to enter the list.
Ò Select an age-based TV rating with the cursor up/down, and enter, if
present, the list with content-based ratings with the cursor right, and
select one content-based rating.
† Press OK to activate/de-activate the selected rating.
º Select another content-based rating if you like and press OK again.
14
TV-MA programs are designed to be viewed by adults and may be
unsuitable for children under the age of 17.These programs may
contain graphic violence, explicit sexual activity and/or crude or
indecent language.
_________________________
_________________________
6.6.4 Movie ratings lock
This function allows you to control access to individual movies based on
their MPAA ratings (Motion Picture Association of America).
6.6.5 Region ratings lock (if present)
This allows you to control access to individual programs based on their
broadcasted regional rating.
‡ Select Movie ratings lock with the cursor down. A list appears,
showing all valid MPAA content ratings.
‡ Select Region ratings lock with the cursor down.
> A list appears, showing all valid region ratings.
TV menu / Features
Child lock
Lock after
Channel lock
TV ratings lock
Movie ratings lock
Region ratings lock
Movie ratings lock
All
NR
G
PG
PG-13
R
NC-17
X
Info
® Press the cursor right to enter the list.
Ò Select a movie rating with the cursor up/down.
† Press OK to activate/de-activate the selected rating.
Childlock
Lock after
Channel lock
TV ratings lock
Movie ratings lock
Region ratings lock
TV ratings lock
ENGLISH
TV menu / Features
Please enter your PIN.
Info
® Press the cursor right to enter the list.
Ò Select a region rating with the cursor up/down.
† Press the OK button to activate the selected rating.
º Select another region rating if you like and press OK again.
◊Press the cursor left to return to the Child lock menu.
_________________________
Each rating item has a box-graphic in front of it to indicate whether or
not programs carrying that rating are currently locked.
When All has been selected, all items on the movie ratings list become
selected. (All movies are locked.)
If, while All is selected, any other item is unselected, then All is
automatically unselected.
When any other item has been selected, all ratings below are selected as
well, thus all movies with those ratings will be locked.
Movie ratings
NR not rated
G movies with a mild content, suitable for all ages
PG movies for which parental guidance is recommended.They may
contain a few racy or violent scenes or maybe some bad language
PG-13 movies for which parental guidance may be recommended if
under age 13
6.7 Set / Change PIN
This allows you to set or change the personal 4-digit access code that is
used in the different lock functions of the TV.
‡ Select Set or Change PIN with the cursor down.
TV menu
Features
Closed captions
Caption service
Digital caption service
Digital caption options
Sleeptimer
Child lock
Set/Change PIN
On timer
Demo
Set/Change PIN
Please enter yoru current
PIN.
Info
R restricted.The movies usually contain offensive sex or bad language
and may be unsuitable for children under the age of 17. Parental
guidance or permission needed.
NC-17 even with parental permission, forbidden under age 17. More
offensive sex, violence or bad language.
X movies which generally focus on sex, violence and/or bad language.
Also known as pornography.
>
If no PIN-code exists yet, the menu item is set to Set PIN.
Follow the instructions on screen.
> If a PIN-code has previously been entered, the menu item is set
to Change PIN. Follow the instructions on screen.
® Enter your PIN with the digit buttons.
All number combinations from 0000 to 9999 are valid numbers.
Ò The Menu preferences menu reappears with a message confirming
that the PIN has been created.
ç Important: you have forgotten your PIN !
‡ Select Change PIN in the Features menu.
® Press the cursor right to enter the overriding PIN code 0-7-1-1.
Ò Enter a new personal 4-digit PIN code.The previous code is erased
an the new PIN-code is stored.
15
________________________
_________________________
7
6.8 On timer
From standby, this automatically turns the TV to the specified channel
number, at a specified time.
‡ Select On timer.
® Press the cursor right to enter the On timer menu.
Ò Select Timer and press the cursor right.
† Select On.
º Select Channel and then the TV channel you want your TV to turn
to on a selected time and day
◊Select Day and then a day of the week or select Daily.
‹ Select Time and enter the time with the digit buttons or with the
cursor up/down.
≈Press the OK button to activate.
Ú Press the cursor left to return to the Features menu or press the
MENU button to turn off the menu.
How to search for and store TV channels
à You will need this chapter only if you want to change the installation
settings.
_________________________
7.1 Installation menu
This menu will adjust settings related to the installation of the TV
channels.
DEMO
OPTION
OK
EXIT
MENU
ç From now on, your TV will automatically turn to the selected
channel, on the selected day, at the selected time, until the On timer
function is turned off again.
) Only one On timer can be set.
INFO
EXIT
FORMAT
MENU
‡ Press the MENU button on the remote control.
> The main menu appears.
________________________
Television
6.9 Demo
TV menu
Channel list
This allows you to get an idea of the features that are part of the
television.
Program guide
Multimedia
USBdevice 1
‡ Select Demo.
TV menu
Features
......
Set/Change PIN
On timer
Demo
Demo
Perfect Pixel HD
Settings Assistant
120 Hz Clear LCD
Active Control
® Select TV menu and press the cursor right.
> The TV menu is moved to the left.
Ò Select Installation and press the cursor right.
> The Installation menu is moved to the left panel.
TV menu
TV settings
Features
Installation
Software update
Info
Installation
Language
Channel installation
Preferences
Connections
......
Info
® Press the cursor right.
Ò Select a desired demo.
† Press the OK button to start the demo.
> The selected demo is played once.
º Press the red color button to stop the demo and to return to the
demo menu.
◊Press the red color button to exit the demo menu.
† Use the cursor up/down to select the Installation menu items.
º Press the cursor right to enter the selected Installation menu item.
◊Use the cursor button to make a selection.
‹ Press the OK button to activate or to confirm.
≈Press the cursor left to return to the Installation menu or press the
MENU button to turn off the menu.
_________________________
7.2 Select your language
This allows you to select your menu language out
of the list of the available languages.
TV menu
Installation
Language
Channel installation
Preferences
Connections
.........
Info
16
Language
English
Français
Español
Português
_________________________
After language is set correctly, you can now search for and store the TV
channels.
‡ Select Channel installation and press the cursor right.
® Select Autoprogram.
TV menu / Installation
Channel installation
Autoprogram
Installation update
Weak channel installat..
Installation mode
Channel edit
Autoprogram
Channel tuning
ç After the installation of the TV channels has been done, always make
a selection in the Installation menu, Installation mode between Antenna
or Cable whether you want to watch Antenna TV channels or Cable TV
channels.
) If you make use of a signal splitter do not forget to put the switch in
the corresponding position.
Available channels:
- Cable (analog NTSC or digital QAM): max. from 1 to 135
- Terrestrial (analog NTSC or digital ATSC): max. from 2 to 69
Start now
If a tuned channel is not yet in the master channel map, the TV will
attempt to tune the channel and it will be added to the map.
If the channel is not acquired, a message will appear that the channel is
not available.
Info
When you tune an audio-only digital subchannel, a display appears with
the message Audio only.
Ò Press the cursor right.
† Press the OK button.
º Select Cable or Antenna in the Installation mode.
TV menu/Installation
Installation mode
Please select your
installation mode.
Antenna
Cable
Previous
>
>
Next
When Antenna is selected, the TV will detect antenna signals and
will search for antenna TV (NTSC and ATSC) channels available in
your local area.
When Cable is selected, the TV will detect cable company supplied
signals and will search for cable TV (NTSC,ATSC, QAM
modulated) channels available in your area.
ç Make sure that registration with your cable TV provider and
connection of equipment are completed.
◊Press the green corresponding color button on the remote control
for ‘Next’.
ç All channels must be unlocked in order to autoprogram. If requested,
enter your PIN code to unlock all channels. See Chapter 6 Adjust
features menu settings.
‹ Press the green corresponding color button on the remote control
for “Start” to start autoprogramming.
> The menu screen disappears and the progress of
autoprogramming is displayed.
The progress bar indicates the number of analog and digital TV
channels found.
> When Autoprogramming is complete, a message appears
confirming the completion and the TV switches to the first
installed TV channel.
≈Press the red color button to finish.
ç Don’t forget !
- When interrupted, the updated channel information is retained as well
as the not yet updated old channel information.
- Background autoprogramming occurs only when the TV is turned on.
- Channel information of an ATSC channel is updated only for the ATSC
channel currently tuned.
- Once you have searched for as well the available Antenna as well as the
Cable TV channels, they are stored in the memory.
ç Subchannel selections
The new standards employed with digital broadcasting make it possible
to receive multiple program channels under a single major channel
number which can be selected by pressing the digit channel number
entry.
ç Digital Channel selection delay
Due to the tuning complexity of subchannel digital programming, the
time to select and view a digital channel may take slightly longer than
what the viewer is normally accustomed to (as compared to analog
channel programs).
Digital channel broadcasts contain program and system data information
that must be processed before the channel selection can be displayed.
_________________________
7.3.1 Installation update
This allows you to automatically tune to and update all available
channels, without altering the sorting of existing channels.
TV menu / Installation
Channel installation
Autoprogram
Installation update
Weak channel installat..
Installation mode
Channel edit
Installation update
Start now
Info
ç - New channels found will not be added to any favorite list.
- Already installed channels will not be renumbered.
_______________________
7.3.2 Weak channel installation
This allows you to manually tune weak ATSC channels in order to adjust
the antenna and thus optimize signal quality for that channel.This only
available for TV channels installed via an antenna connection.
‡ Select a channel in the displayed list of TV channels (in the antenna
mode).
® The signal strength is displayed and updated continuously as you
rotate the antenna.
17
ENGLISH
7.3 Store TV channels
_________________________
_________________________
7.3.3 Installation mode
This allows you to select the already stored terrestrial or cable TV
channels. Choose for Antenna or Cable whether these signals are
present.
_________________________
7.4 Set your preferences
This menu contains items that can set or adjust various special TV
functions and that will typically be accessed only occasionally.
TV menu
7.3.4 Channel edit
This allows you to rename, to reshuffle and to uninstall or reinstall the
stored channels.
< Press the corresponding color button and follow the on screen
instructions.
TV menu / Installation
Channel installation
Autoprogram
Installation update
Weak channel installat..
Installation mode
Channel edit
Channel edit
0
1
2
3
4
......
Info
_________________________
7.3.4.1 Rename
This allows you to change the name stored in the memory or to assign a
name to a channel for which a name has not yet been entered.
‡ Select the channel you want to rename.
® Press the red color button on your remote control.
Ò Select the characters with the cursor up/down. Select the following
position with the cursor right.
† Press the green color button or the OK button when finished.
à - Press the yellow color button to delete all characters.The cursor
is positioned at the beginning again;
- Press the blue color button to delete the character the cursor is
positioned. Enter a new character with the cursor up/down;
- A name can be given to the channel numbers 0 to 999;
- Space, numbers and other special characters are located between Z
and A.
º Select another channel number and repeat steps 2 to 5.
_________________________
7.3.4.2 Uninstall - reinstall
This allows you to uninstall a stored channel so that it is no longer
possible to tune to.This also allows you to reinstall an earlier uninstalled
channel.
‡ Select the channel you want to uninstall.
® Press the green color button to uninstall the selected channel.
> The uninstalled channel is indicated in the list by an icon in front
of the uninstalled channel.
Ò Press the green color button again to reinstall the uninstalled
channel.
ç Uninstalled channels are not reinstalled during an installation update.
18
Installation
Language
Channel installation
Preferences
Connections
Clock
Reset AV settings
Preferences
Location
Volume bar
Show emergency alerts
Downloaded rating table
Info
_________________________
7.4.1 Select your location
This allows you to select the location of your TV.
If you choose for Retail shop it will result in fixed settings of picture
and sound.
The location Home will give full flexibility to change any predefined
settings for picture and sound.
_________________________
7.4.2 Select the volume bar
This allows you to select the display of the volume bar.
‡ Select Volume bar.
® Press the cursor right to select On or Off.
Select On to activate the temporarily display of the volume bar.
_________________________
7.4.3 Show emergency alerts (EAS)
This allows you to select the alert priority level of the information
disseminated by the cable operator.The standard SCTE18 defines an
Emergency Alert signalling method for use by cable TV systems to signal
emergencies to digital devices such as digital Cable boxes, digital TVs and
digital VCRs.
The Emergency alert signalling scheme defined in the standard allows a
cable operator to disseminate emergency alert information related to
state and local-level emergencies and warnings in a cost-effective and
efficient way, while minimizing disruption of programming.
An Emergency alert message will have one of the following priorities:
Low, Medium, High or Maximum.
The Emergency alert message with priority High or Maximum will always
be presented. Low or Medium will be present or ignored depending on
the selected setting.
) When the TV clock is undefined (See Chapter 7.6 Set your clock),
the Emergency Alert will be ignored.
The Emergency Alert message display will contain following information:
- The Emergency Alert text
- The start time + date
- The end time + date.
‡ Select Show emergency alerts in the Preferences menu.
® Press the cursor right and select one of the Emergency alerts
options:
- Always, when you always want the Emergency alert messages to
be displayed when available;
- Skip low priority, when you want the messages with low level to
be ignored;
- Skip low/medium priority, when you only want the messages
with high priority to be displayed.
ç - Emergency Alert Signalling is not possible:
- with multimedia browser;
- with analog video sources.
- You always have the possibility to remove the message from the
screen.
- The message display will overlap whatever menu element or other
message is on the screen.
connector to an external amplifier or receiver.
If your amplifier or receiver has a matching connector for Digital Audio
In, you can connect it with a single cable to the TV’s digital audio out.
See Chapter 11.1 To make Video and Audio connections, Home
theater amplifier.
_________________________
7.6 Set your clock
_________________________
TV menu
TV menu / Installation
Preferences
Location
Volume bar
Show emergency alerts
Downloaded rating table
ç Adjusting the clock is necessary for the correct working of Lock after
(See Chapter 6 Adjust feature menu settings) features.
Downloaded rating table
Off
On
Info
Installation
Language
Channel installation
Preferences
Connections
Clock
Reset AV settings
Clock
Auto clock mode
Auto clock channel
Time
Day
Time zone
Daylight saving
) Before activating, please ensure regional ratings are broadcasted.
Info
_________________________
_________________________
7.5 Select your connections
This allows you to identify the type of accessory device you have
connected to each particular input and output.
‡ Select Connections.
Menu TV
Installation
Language
Channel installation
Preferences
Connections
Clock
Reset AV settings
Connections
AV1
AV2
AV3
HDMI 1
HDMI 2
HDMI 3
Side
AUDIO IN L/R
DIGITAL AUDIO IN
Info
® Press the cursor right to enter the list of types of external inputs.
Ò Select the appropriate input with the cursor up/down.
> When you select AV1, AV2, AV3, HDMI 1, HDMI 2, HDMI 3,
Side, AUDIO IN L/R or DIGITAL AUDIO IN a list appears
allowing you to identify which type of accessory device is
attached to this input.
† Press the cursor right again to enter the list of types of devices
connected to the selected input.
º Select the accessory device with the cursor up/down.
Digital Audio In
If an accessory device has a digital audio output, you can connect this
with a single cable to the TV’s DIGITAL AUDIO IN jack.
In the Connections menu, assign the DIGITAL AUDIO IN to the
corresponding external input to which your accessory device is
connected.
In addition to accepting audio input via Digital Audio In, the TV can
output encoded Dolby Digital audio via the DIGITAL AUDIO OUT
7.6.1 Auto clock mode
‡ Select Clock in the Installation menu.
® Press the cursor right to select the Auto clock mode.
Ò Press the cursor right to instruct the TV to get the time
automatically or manually.
ç Most of the TV channels are not transmitting clock information.
There are few cable channels but they are at the end of the channel ring.
There is no clock transmission in antenna channels. In such cases either
clock extraction is taking a long time or there is no clock.
_________________________
7.6.2 Auto clock channel (only available when Auto clock mode is set
to Automatic)
With the cursor buttons, select the channel number on which time can
be found by the TV. Typically time can be found on PBS (Public
Broadcasting System) as well as some other channels.
_________________________
7.6.3 Time - Day (only available when Auto clock mode is set to
Manual)
With the cursor buttons, select and enter the correct time and day.
If Auto clock mode Manual has been selected, and no clock search
has been done, the system will keep the entered time and day.
_________________________
7.6.4 Time zone (only available when Auto clock mode is set to
Automatic)
This function allows you to select your local time zone. Broadcasted
time information will correct the clock display for your local time.
‡ Select Time zone with the cursor down.
® Press the cursor right to select your local time zone.
_________________________
7.6.5 Daylight saving (only available when Auto clock mode is set to
Automatic)
Daylight saving time is automatically set by specially broadcasted signals.
This menu item allows you to disable the automatic setting of daylight
saving time.This is useful if you live in an area or state where daylight
saving is not applied, but you receive channels from other areas where
daylight saving signals are broadcasted.
19
ENGLISH
This allows you to set the time and day.
7.4.4 Downloaded rating table
This allows you to add region ratings lock options next to your current
ones.
‡ Select Daylight saving with the cursor down.
® Press the cursor right to select Automatic for automatic clock
correction for daylight saving time, based on specially broadcasted
signals.
Ò Select Off to disable automatic clock correction based on the
specially broadcasted signals.
ç Changes in Clock settings are only activated after turning the set off
and on again.
_________________________
________________________
8
Create your favorite list
This allows you to select up to four favorite channels lists with your
preferred TV channels.
For example, each member of your family can create his/her own
favorite list.
VIEW
DEMO
7.7 Reset AV settings
OPTION
INFO
OK
This allows you to reset most of the predefined factory states.
OK
‡ Select Reset AV settings with the cursor down.
EXIT
TV menu
Installation
Language
Channel installation
Preferences
Connections
Clock
Reset AV settings
FORMAT
MENU
Reset AV settings
Reset
MUTE
ç When the OK button is pressed the first time after you have finished
the installation, it will bring up the full channel list. In other situations it
will bring up the last selected channel list.
All channels
Info
A
® Press the cursor right.
Ò Press the OK button to erase settings and reset them to their
default values.
_________________________
AV1
AV2
HDMI
1 Analog channel 1
2 Digital channel 1
3 Digital channel 2
4 ...........
Select list
Info
_________________________
8.1 To select a channel from the displayed favorite list
‡ Press the OK button.
> The last selected channel list appears.
® Use the cursor up/down to select a channel.
Ò Press the OK button to display the selected channel.
_________________________
8.2 To select another favorite channel list
‡ Press the OK button.
> The last selected channel list appears.
All channels
AV1
AV2
All
HDMI
Favorites 1
1 Analog channel
Favorites 2
Favorites 3
Favorites 4
Select list
Info
® Press the red color button to bring up the list of possible favorite
channel lists.
Ò Use the cursor up/down to select a list.
† Press the OK button.
º Press the OK button again to exit.
20
8.3 To create or modify a favorite list
‡ Press the OK button.
> The last selected channel list appears.
® Press the red color button.
> A list with all possible favorite channel lists appears.
Ò Use the cursor up/down to select a Favorites (1 to 4) channel list.
† Press the OK button.
º Press the green color button to enter the Edit mode.
> The selected Favorite list will bring up a full channel list.
________________________
10 Multimedia browser
Favorites 1
Side
1
15
18
25
.....
A
® Select Program guide and press the cursor right.
> The EPG screen appears. Dependent on conditions it may take
some time to acquire EPG data.
> The EPG screen updates automatically if the EPG data is
acquired successfully. If not, the EPG screen remains blank.
> Information about the selected program appears.
ÒUse the colored buttons to activate the available EPG features
displayed at the bottom of the screen.
† To quit the Program Guide page, press the MENU button again.
ENGLISH
_________________________
None
.....
.....
.....
.....
.....
The Multimedia browser lets you display pictures or play audio files
stored on a USB device.The Multimedia browser application is invoked
from the main menu.
‡ Press the MENU button on the remote control.
Select list
Edit list
Television
TV menu
Channel list
Info
Program guide
◊Use the cursor up/down to select a channel.
‹ Press the OK button to check or uncheck the highlighted channel
and to add it to or remove it from your selected favorite list.
≈Press the green color button again to leave the Edit mode.
> The modified favorite channel list appears.
< Press the OK button again to exit.
> With the –CH+ button you will be able to browse through the
TV channels of the selected list.
ÚPress the red color button to remove the channel list.
Multimedia
USBdevice 1
® Select Multimedia and press the cursor right.
Ò Select the USB device inserted into the USB connector at the side
of the TV.
† Press the cursor right and select a content type.
_________________________
- Following file formats can be reproduced:
for pictures: JPEG
for audio: MP3, LPCM
- Only FAT/DOS-formatted memory devices are supported.
- Philips can not be held responsible if your USB device is not
supported.
9 Electronic Program Guide
_________________________
ç With the numeric buttons you can still select channels which are not
marked as favorite.
(only with Digital TV broadcasting)
10.1 To view content from a USB device
The Electronic Program Guide shows you detailed information about
the current program and also about the next program (if this
information is available).
VIEW
à If your USB device does not fit into the USB connector at the side,
use an USB extend cable (max. 2 m) to connect the USB device to the
USB port. Ask your dealer for more information.
DEMO
_________________________
OPTION
INFO
10.1.1 To insert a USB device
ç USB devices are not supplied with this TV.
OK
EXIT
MENU
EXIT
FORMAT
MENU
lnsert a USB device to the USB connector at the side of the TV.
When a USB device is inserted, the Multimedia browser menu is
displayed automatically. See further.
_________________________
‡ Press the MENU button.
Television
TV menu
Channel list
10.1.2 To remove the USB device
‡ Press the MENU button on the remote control to turn off the main
menu.
® Remove the USB device.
Program guide
Multimedia
USBdevice 1
21
_________________________
10.2 Multimedia Browser menu
‡ Insert a USB device.
® Select the USB device under Multimedia with the cursor up/down.
Following icons may appear:
folder
pictures
USB
Picture
Picture
Music
Afrika_2001
Paris_2006
My_car.jpg
Jean.jpg
music
Function buttons at the bottom of the screen
Mary.jpg
>
The Multimedia browser allows you to browse content stored
on the inserted USB device.
The 2-panel browser will be shown with the left panel containing
the content types (Pictures, Music).
The right panel will display the content that is available of the
selected content type.
>
>
Picture
Kenya.jpg
Congo.jpg
Victoria.jpg
Mary.jpg
Cairo.jpg
Ò Press the cursor right to enter the content.
† Press the cursor up/down to select a content.
Afrika_2001
Afrika_2001
Kenya.jpg
Congo.jpg
Victoria.jpg
Dakar.jpg
Kenya.jpg
Cairo.jpg
Afrika_2001
—
—
º Press the cursor right to enter the content.
◊Press the cursor up/down to select a file or a directory.
Kenya.jpg
Kenya.jpg
à Press the green color button to display all the image files in the
current directory as thumbnails when browsing pictures. Press the green
button again to display the image files in a list.
‹ In case a file, directory, album or playlist is selected, press the
cursor right to enter the content or press the OK button to start a
slide show or a loop playback of the files present.
≈Press the cursor left to keep music playing and switch back to the
Multimedia menu.
Ú Press one of the color buttons on the remote control to perform
the corresponding function mentioned at the bottom of the screen.
à The blue color button can, if necessary, be used to let the color
buttons reappear.
ç The playback will continue to play even if temporarily switched to
browser screens.The audio will be stopped when another song starts
playing, or when the end has been reached.
22
Transitions
to select if you like to apply a transition during a slide show
Slide time
to select the duration a picture will be displayed in a slide show
Afrika_2001
Afrika_2001
Paris_2005
My_car.jpg
Jean.jpg
USB
Details
to display a description of the selected file or directory
Rotate
to rotate a picture
Repeat one/all
to repeat the playback of a music file
Shuffle
to shuffle music collections in a random way
Zoom
to select one of the zoom magnifications (x1, x2, x4) with the cursor
up/down.
Additionally you can shift the selected zoom window over the screen
with the cursor buttons
ç To rotate a picture or to select one of the zoom magnifications, first
stop the slide show with the OK button or the blue color button.
11 How to connect and operate accessory
devices
_________________________
11.1 Side panel overview
USB
_________________________
‡ Connect your accessory AV device. See following pages.
® Link your devices to the connections in the Installation menu. See
Chapter 7.5 Select your connections.
3.5 mm
R
TV menu
AUDIO L /R
2
AUDIO
AUDIO L /R
L
Connections
AV1
AV2
AV3
HDMI 1
HDMI 2
HDMI 3
Side
AUDIO IN L/R
DIGITAL AUDIO IN
Language
Channel installation
Preferences
Connections
Clock
Reset AV settings
VIDEO
1a
VIDEO
ENGLISH
Installation
VIDEO
S VIDEO
1b
S VIDEO
S VIDEO
_____________________
11.2.1 Camera, Camcorder, Game, PC
Do not connect cable 1a and 1b at the same time.This may cause
picture distortion !
Info
) Caution
Before connecting a PC, set the PC monitor refresh rate to 60Hz.
ç In case of Digital audio connection also link the DIGITAL AUDIO
IN to the corresponding input.
In case of Analog audio connection (via Component Video Output
(YPbPr) on AV3 or via HDMI), also link the AUDIO IN L/R to the
corresponding input.
Ò To operate the desired connected device:
- Turn on your connected device.
- Press the SOURCE button on the remote control.
_________________________
11.2.2 Headphone
Select Headphone volume in the Sound menu to adjust the
headphone volume. See Chapter 5.2.3 Adjust sound menu settings.
) Press MUTE on the remote control to turn off the internal
loudspeakers of the TV.
_________________________
1
2
4
5
3
6
7
8
9
SOURCE
0
.
SOURCE
11.2.3 USB
See Chapter 10 Multimedia browser.
- Select your source with the cursor up/down.
- Press the OK button.
23
________________________
11.2 To make video and audio connections
ç Use the inputs that are available on your device that provide the best
video or audio performance, as below.
BEST
BEST
PERFORMANCE
CONNECTOR CABLE
HDMI
(High-definition
Multimedia
Interface)
AUDIO CONNECTION
REQUIRED
No
DISPLAY
SYNC.
DVI to HDMI
(High-definition
Multimedia
Interface)
OUT
DIGITAL
AUDIO
IN
IN
DIGITAL
AUDIO
+
DVI to HDMI
(High-definition
Multimedia
Interface)
AV 1 HDMI 1
AV 2 HDMI 2
AV 3 HDMI 3
L
ANALOG
AUDIO
IN
R
ANALOG
AUDIO IN
+
HDMI 1
HDMI 2
HDMI 3
Component video
(480p,720p,480i,1080i)
DISPLAY
SYNC.
AV 3
Y
Pb
Pr
L
- for digital audio
(AV1, AV3)
OUT
DIGITAL
AUDIO
IN
IN
AUDIO
DIGITAL
AUDIO
R
+
VIDEO
S VIDEO
Y
L
AUDIO
Pb
R
- for analog audio
(AV1, AV3)
AV 1 HDMI 1
AV 2 HDMI 2
AV 3
AV 3
Y
Pb
Pr
L
Pr
AUDIO
R
AV 1
VIDEO
S VIDEO
Y
L
Pb
AUDIO
R
Pr
AV 1
S VIDEO
S VIDEO
(AV1, Side)
L
AUDIO
R
AV1
R
Side
AUDIO
L
VIDEO
VIDEO
L
AUDIO
R
AV1
R
Side
AUDIO
L
75
RF/Coaxial
à - If you experience a discolored line on the left or right side of the
set, adjust the picture position to the center of the screen with the
cursor buttons.
- Cables are often color-coded to connectors. Connect red to red,
white to white....
- Component video (YPbPr) connection is necessary to view video
sources, for example digital broadcastings coming from a settop
box, in 1080i, 1080p, 720p, 480i or 480p;
- The labels for the component video sockets may differ depending
on the DVD player or the device connected. Although the
abbreviations may vary, the letters B and R stand for the blue and
red component signals, respectively, and Y indicates the luminance
signal. Refer to the DVD player’s or devices instructions for use for
definitions and connection details;
- This television is designed to accept high definition signal standards
480p, 720p, 1080p and 1080i as specified by the Electronic
Industries Association standard EIA770.3. Digital devices from
different manufacturers have the possibility of differing output
standards which may cause difficulties for the television to properly
display.
24
No
à DVI to HDMI
- Your TV comes with all types of connectors with the exception of the
DVI connector but some of your equipment may be equipped with this
type. In this case you'll need a DVI to HDMI adapter or a HDMI to DVI
cable and separate audio cables, all available at your local dealer.
- Be sure to connect the DVI output connector first, then connect to
the HDMI input on your TV.
_________________________
_______________________
11.3 Connect a recorder (VCR / DVD-R)
11.5 Connect a DVD player/DVD recorder, Set top box,
game console,... with a HDMI (High Definition
Multimedia Interface) connector
) Do not place your recorder too close to the screen as some
recorders may be susceptible for signals.
à HDMI is the leading new standard for Digital Video and audio
interconnection.
VIDEO
L
AUDIO
R
Sound and picture interruptions ? See Chapter 12 Problems.
ANTENNA
AV 2
DISPLAY
SYNC.
OUT
L
R
IN
2
DIGITAL
AUDIO
3
+
ENGLISH
AV2
L + R + VIDEO
HDMI 1
ANALOG
AUDIO IN
+
AV 1 HDMI 1
AV 2 HDMI 2
AV 3
HDMI 2
HDMI 3
HDMI 1
HDMI 2
CABLE
RF OUT
RF IN
1
RECORDER
________________________
11.4 Connect a recorder (VCR / DVD-R)
and a second A/V device
_________________________
11.6 Connect a DVD player/DVD recorder, Set top box,
game console,... with a DVI connector
AV2
L + R + VIDEO
VIDEO
L
AUDIO
R
L
AUDIO
R
11.6.1 With DIGITAL AUDIO OUT
AV 2
VIDEO
DISPLAY
SYNC.
S VIDEO
ANTENNA
Pb
Y
OUT
Pr
AV 1
5
L
R
IN
DIGITAL
AUDIO
IN
AV1
L + R + VIDEO
HDMI 1
DIGITAL
AUDIO
+
HDMI 2
HDMI 3
ANALOG
AUDIO IN
AV 1 HDMI 1
AV 2 HDMI 2
AV 3
+
HDMI 1
HDMI 2
3
HDMI
2
4
RF
IN
RF OUT
CABLE
RF
OUT
RF IN
1
RECORDER
DIGITAL
AUDIO
OUT
If your recorder has an S-VHS video jack: for improved picture quality,
connect a S-Video cable with the S-VIDEO input and connect the audio
cables to the AUDIO L and R input jacks of AV1.
DVI
11.6.2 With ANALOG AUDIO OUT
ç When using the S-VIDEO connector do not connect any device to
the AV1 video jack.
DISPLAY
SYNC.
OUT
L
R
IN
In case of mono equipment, only the left loudspeaker reproduces sound.
Use a mono to stereo adapter (not supplied) for sound reproduction via
all internal loudspeakers.
DIGITAL
AUDIO
+
AV 1 HDMI 1
AV 2 HDMI 2
AV 3
ANALOG
AUDIO IN
ANALOG
AUDIO IN
+
HDMI 1
HDMI 2
HDMI 3
HDMI 1
HDMI 2
HDMI
DVI
25
________________________
________________________
11.7 Connect a DVD player
with a S-VIDEO connector
11.10 Connect a satellite receiver or Set top box
and a recorder with A/V outputs
VIDEO
L
AUDIO
VIDEO
R
ANTENNA
S VIDEO
S VIDEO
Y
Pb
L
AUDIO
R
AV1 : L + R
AV 2
Pr
AV2
L + R + VIDEO
AV 1
2
3
1
CABLE
4
2
OUT
IN
OUT
1
RF IN
RF OUT
SAT / Set top box
RECORDER
ç When using the S-VIDEO connector, do not connect any device to
the AV VIDEO input that you are using.
If your device has an S-VHS video jack: For improved picture quality,
connect a S-video cable with the S-VIDEO input of AV1 and connect
the audio cables to the AUDIO L and R input jacks of AV1.
________________________
11.8 Connect a recorder and Set top box
with RF output
VIDEO
L
AUDIO
ç When using the S-VIDEO connector do not connect any device to
the AV1 video jack.
In case of mono equipment, only the left loudspeaker reproduces sound.
Use a mono to stereo adapter (not supplied) for sound reproduction via
all internal loudspeakers.
R
AV 2
AV2
L + R + VIDEO
________________________
ANTENNA
11.11 Connect digital source devices
with Component Video Output connectors (YPbPr)
CABLE
SIGNAL
3
RF
IN
OUT
SPLITTER
4
1
This TV is capable of displaying 1080i, 1080p, 720p and 480p DTV signals
when connected to a DTV tuner cable box. Select the output of the
cable box to either 1080i, 1080p, 720p or 480p. A DTV signal must be
available in your area.
2
RF
OUT
RF IN
Set top box
RECORDER
________________________
___________________
11.11.1 With DIGITAL AUDIO
11.9 Connect a satellite receiver or Set top box
with A/V outputs
AV 3
VIDEO
L
AUDIO
R
AUDIO
ANTENNA
Y
Pb
Pr
AV1 / AV3 :
YPbPr
L
AV 2
DISPLAY
SYNC.
VIDEO
L
AUDIO
R
L
AUDIO
R
R
OUT
AV 2
AV2
L + R + VIDEO
IN
VIDEO
DIGITAL
AUDIO
+
2
3
AV 1 HDMI 1
AV 2 HDMI 2
AV 3
DIGITAL
AUDIO
IN
CABLE
S VIDEO
Y
AV 1
RF OUT
2a
RF IN
1
SAT / REC / Set top box
If your device has an S-VHS video jack: For improved picture quality,
connect a S-video cable with the S-VIDEO input of AV1 and connect
the audio cables to the AUDIO L and R input jacks of AV1.
ç When using the S-VIDEO connector do not connect any device to
the AV1 video jack.
In case of mono equipment, only the left loudspeaker reproduces sound.
Use a mono to stereo adapter (not supplied) for sound reproduction via
all internal loudspeakers.
26
DVD / Set top box
Pb
Pr
1
_______________________
________________________
11.11.2 With ANALOG AUDIO
11.13 Connect a PC
________________________
AV 3
Y
Pb
11.13.1 Equipped with a S-VIDEO connector at the side
Pr
AV1 / AV3 :
YPbPr
L
AUDIO
VIDEO
L
AUDIO
R
L
AUDIO
R
USB
AV1 / AV3 :
AUDIO L + R
R
AV 2
2b
S VIDEO
Y
Pb
Pr
1
AV 1
AUDIO L /R
R
ENGLISH
VIDEO
AUDIO L /R
AUDIO
L
VIDEO
S VIDEO
S VIDEO
S VIDEO
DVD / Set top box
_______________________
________________________
11.12 Connect a Home Theater Amplifier
11.13.2 Equipped with a S-VIDEO connector at the back
________________________
VIDEO
11.12.1 Digital Home Theater Amplifier
S VIDEO
S VIDEO
DISPLAY
SYNC.
OUT
L
R
IN
R
DIGITAL
AUDIO
AUDIO OUT
+
AV 1 HDMI 1
AV 2 HDMI 2
AV 3
Y
AUDIO
Pb
R
AV1 : L + R
Pr
AV 1
L
DISPLAY SYNCHRONIZED
L
2
ANALOG
AUDIO IN
+
HDMI 1
HDMI 2
1
HDMI 1
HDMI 2
DIGITAL
AUDIO
OUT
DIGITAL
AUDIO
IN
________________________
11.13.3 Equipped with a DVI connector
DISPLAY
SYNC.
OUT
________________________
DIGITAL
AUDIO
11.12.2 Analog Home Theater Amplifier
+
L
OUT
IN
DIGITAL
AUDIO
AUDIO OUT
DISPLAY SYNCHRONIZED
+
AV 1 HDMI 1
AV 2 HDMI 2
AV 3
R
ANALOG
AUDIO IN
+
AV 1 HDMI 1
AV 2 HDMI 2
AV 3
HDMI 1
HDMI 2
HDMI 3
HDMI 1
HDMI 2
DIGITAL
AUDIO
IN
DISPLAY
SYNC.
R
L
IN
HDMI
L
R
ANALOG
AUDIO IN
+
HDMI 1
HDMI 2
DIGITAL
AUDIO
OUT
HDMI 1
HDMI 2
DVI
AUDIO OUT
L/R
________________________
L /R
11.3.4 Equipped with a HDMI connector
DISPLAY
SYNC.
OUT
L
R
IN
DIGITAL
AUDIO
+
ç Due to legal requirements, it is possible that with certain copy
protected PCM audio qualities from a accessory device connected to the
HDMI input, the Digital audio signal is muted.
AV 1 HDMI 1
AV 2 HDMI 2
AV 3
ANALOG
AUDIO IN
+
HDMI 1
HDMI 2
HDMI 3
HDMI 1
HDMI 2
à If necessary you can adjust the picture position to the center of the
screen with the cursor buttons.
27
________________________
12 Problems
“Ghost” or double images
• This may be caused by obstruction to the antenna due to high rise
buildings or hills. Using a highly directional antenna may improve the
picture.
No power
• Verify that the TV’s AC power cord is plugged into the mains socket.
• Unplug the television, wait for 60 seconds.Then re-insert plug into the
mains socket and turn on the television again.
No picture
• Verify antenna connections at the bottom of the TV to see if they are
properly connected to the TV.
• Possible broadcast station trouble.Try another channel.
• Adjust the contrast and brightness settings.
• Verify the Closed Captions control. Some TEXT modes could block the
screen.
• Verify if you selected the correct AV source.
No picture and power turned on
• Your TV has a protective mode in case there is too much heat build-up.
Verify the clearance around the vents of the device to be certain there
are no blocking walls or cabinets which would limit the air flow.
Picture position adjustment
When displaying a High Definition signal from the YPbPr inputs or
HDMI input, if necessary, you can adjust the picture position to the
center of the screen with the cursor left/right or up/down buttons on
the remote control.This may be needed due to slight differences in
output signals from different brands and types of HD sources boxes.
ç Most High Definition receiver boxes also have picture-positioning
controls in their menu systems. If the TV cursor controls run out of
range before the picture is correctly positioned, the receiver box
controls will need to be adjusted.
No photo, music or video play or in poor quality only
• Verify if the source complies with a supported code.
No sound
• Increase the VOLUME.
• Verify that the TV is not muted, press the MUTE button on the
remote control.
• When no signal is detected, the TV automatically turns off the sound.
This is proper operation and does not indicate a malfunction.
Sound and picture interruptions using HDMI to HDMI
connection
• If it occurs occasionally, perhaps there is something wrong with the
broadcasted program.
• If it occurs persistently, see the manual of your connected device to
verify the necessary adjustments.
• Alternatively, connect an extra audio cable (either an analog or a digital
audio cable) from your connected device to your TV.
Verify whether you selected the connected device in the Installation
menu, Select your connections and also select the respective audio
input in the same Connections menu.
• Limit the HDMI cable length to max 5 m.
• Verify if the connected device is properly selected in the Installation
menu, Connections, according to the connection you have made HDMI
1 or 2.
28
No sound when using DVI to HDMI connection
• Verify whether you properly connected the audio cable to the
DIGITAL AUDIO IN or ANALOG AUDIO IN L/R connector of the
TV.
• Verify whether you selected the connected device in the Installation
menu, Select your connections and if you linked it to HDMI 1, 2 or 3,
according to where you made the connection. Also verify if you
selected DIGITAL AUDIO IN or AUDIO IN L/R in the same
Connections menu.
Good sound but poor color or no picture
• Adjust the contrast, color, tint and brightness setting.
• Select Reset AV settings in the Installation menu.
Snowish picture and noise
• Verify the antenna connection.
Television not responding to remote control
• Verify whether the batteries are working. Replace if necessary.
• Clean the remote control sensor lens on the monitor.
• Operating range between TV and the remote control should not be
> 240”.
• You can still use the buttons at the side of your TV.
The software will not install
Possibly the operating system is wrong.
Go to www.philips.com/welcome to see which operating systems are
supported.
No stable or not synchronized VGA picture
• Check if you have selected the correct VGA mode in your PC.
Control of accessory devices
• The infrared signals of the screen may influence the reception
sensibility of other peripherals
Solution: replace the batteries of the remote control of other devices.
E.g. keep away a wireless headphone from within a radius of 50”.
Standby
Your TV consumes energy in standby mode. Energy consumption
contributes to air and water pollution.
After improper shutdown
If your TV has been shutdown in an improper way (e.g. power drop,
power cord plug out), starting up the TV again will take a longer time
than usual.
) If your problem is not solved
Turn your TV off and then on again once.
Never attempt to repair a defective TV yourself.
Check with your dealer or call a TV technician.
Telephone number Philips Customer Care Center: 1-888PHILIPS (744-5477)
Please, have the Model and Product number which you can find at the
back and the bottom of your television set ready, before calling.
________________________
_______________________
13
14.2 Disposal of batteries
The batteries supplied do not contain the heavy metals mercury and
cadmium. Please check on how to dispose of exhausted batteries
according to local regulations.
Glossary
1080i/p A 1080 screen uses the highest available resolution to display
both 1080i and 1080p signals in the highest possible image quality
without loss of resolution
_______________________
720p Displays images using progressive scanning with 720 horizontal lines.
15 Product information
QAM Digital scrambled and unscrambled cable signals with HDTV
programming.
- Your TV consumes energy in standby mode. Energy consumption
contributes to air and water pollution.Very low standby power
consumption.
- Specifications: see the product leaflet on
www. philips. com/welcome.
YPbPr Component video inputs.
________________________
CS Digital Caption Service
15.1 Philips on-line support
CC Analog Caption Service
The website for support: www.philips.com/welcome offers you all
information you need to optimally enjoy your TV, and to make your
home entertainment experience even more enjoyable. Please visit
www.philips.com/welcome and enter your modelnumber to view:
- FAQ (Frequently Asked Questions)
- Latest updated user manuals
- Firmware upgrade files for your TV
- Product information
- ...
________________________
NTSC Analog signals, on cable or antenna, in Standard definition.
DTV A new technology for transmitting and receiving broadcast television
signals. DTV provides higher resolution and improved sound quality
over analog television.
DV Digital Video (from a camera)
EAS Emergency Alert System
Method for use by cable TV systems to signal emergencies to digital
terminal devices such as digital STV, digital TV receivers and digital
VCRs. It allows a cable operator to disseminate emergency alert
information related to state and local-level emergencies and warnings.
HDMI (High Definition Multimedia Interface)
Provides an uncompressed, all digital audio/video interface between the
TV and any HDMI-equipped audio/video component, such as a set top
box, DVD player and AV receiver. HDMI supports enhanced or highdefinition video plus two-channel digital audio.
DVI (Digital Visual Interface)
A digital interface standard created by the Digital Display Working
Group (DDWG) to convert analog signals into digital signals to
accommodate both analog and digital monitors.
S-VHS signals There are 2 separate Y/C video signals from the S-VHS
and Hi-8 recording standards.The luminance signals Y (black and white)
and chrominance signals C (color) are recorded separately on the tape.
This provides better picture quality than with standard video (VHS and
8 mm) where the Y/C signals are combined to provide only one video
signal.
ENGLISH
ATSC Digital antenna signals with HDTV programming.
15.2 Open source software
This television contains open source software.
NV Philips Innovative Applications hereby offers to deliver or make
available, upon request, for a charge no more than the cost of physically
performing source distribution, a complete machine-readable copy of the
corresponding source code on a medium customarily used for software
interchange.
To obtain the source code, write to
NV Philips Innovative Applications,
Assistant to the Development Manager
Pathoekeweg 11,
B-8000 Brugge - Belgium (Europe)
This offer is valid for a period of 3 years after the date of purchase of
this product.
_____________________
14 Recycling
R The packaging of this product is intended to be recycled. Apply to
the local authorities for correct disposal.
________________________
14.1 Disposal of your old product
Your product is designed and manufactured with highly quality material
and components, which can be recycled and reused. Like all LCD
products, this set contains a lamp with mercury. Please inform yourself
about the local separate collection system for electrical and electronic
products. Please act according to your local rules and do not dispose of
your old products with your normal household waste.
The correct disposal of your old product will help prevent potential
negative consequences for the environment and human health.
29
Annex 1 - Philips TV Slideshow Format with
background music
Introduction
- It is preferable that URL’s referencing PM content are based on a
relative path starting from the directory where the slideshow is stored.
This path includes the device or drive name of the PM.
An absolute path to content will also be supported.
- relative path:
pictures\test1.jpg, tamper.jpg, ..\new\bird.jpg, …
- absolute path:
USB1:\pictures1\foo_bar.jpg, C:\f1.jpg, \organization.jpg, …
This document explains how to make a Philips slideshow file with
background audio.
Be aware that the content of this document is addressing technical or
software skilled users.
To start the slideshow open the slideshow file in the Multimedia browser
of your TV.
General Format
The format and syntax below will be used to create the slideshow file
(simple ascii text) with the extension .alb (.ALB). Examples: slshow1.alb,
summer_holiday_2004.ALB, test.alb, …
‡ Press the MENU button on the remote control after having inserted
a USB device and turned on the TV.
The following syntax should be used to create the text file:
ç Philips can’t be held responsible for any problems that may occur as a
result of the content in this document. Errors reported to Philips
will be adapted and published as soon as possible.
Television
TV menu
Channel list
Program guide
Multimedia
® Select Multimedia and press the cursor right.
Ò Go to where you stored the slideshow file (.alb) on your portable
memory.
† Select the slideshow file and press the OK button to start the slide
show.
General Rules
- The slideshow will use plain ASCII XML syntax to allow the creation
and editing of the slideshow files using simple tools.
- All references to network content must be based on the global address
of the content.
- Content on a Portable Memory (PM) doesn't have a global address; as a
result content from a PM can never be referenced from a slideshow
not stored on the PM itself.
- To maintain portability, a slideshow stored on a PM should ONLY
reference content on the same PM. Referencing global addresses can
result in inconsistencies if the PM is used on a non-networked CE
device. The latter is however not forbidden, it is only a
recommendation.
<?xml version="1.0" encoding="ISO-885h9-1" ?>
<philips-slideshow version="1.0" >
<title>Title of the slideshow</title>
<audio>audio_url</audio>
<slide-duration>30</slide-duration>
<slides>
<slide>slide_1_url</slide>
<slide>slide_2_url</slide>
<slide>slide_3_url</slide>
<slide>slide_4_url</slide>
<slide>slide_5_url</slide>
<slide>slide_6_url</slide>
...
<slide>slide_N-1_url</slide>
<slide>slide_N_url</slide>
</slides>
</philips-slideshow>
Supported XML-tags
The following table gives a description of the XML syntax.
Tag Name
Use
Description
philips-slideshow
mandatory
Philips slideshow signature including the version.
title
optional
The title of the playlist.
audio
optional
The audio-URL following this tag will define the music playing in the background during the slideshow.
A single song or playlist (.m3u & .pls) are the only valid audio references. Other reference will not result
in any audio playback. If a single song is referenced the song will be repeated forever. If a playlist is
referenced the playlist will be played in sequence with a repeat at the end of the playlist.
slide-duration
optional
The default display time (in 0,1 second) of a slide. The TV application isn’t obliged to support this tag.
The TV application can force the use of one or multiple predefined display times.
slides
mandatory
Identifies the slides to show.
slide
optional
Identifies the URL of the individual slide.
30
Annex 2 - Philips TV - Digital camera and USB issues
ENGLISH
ç - The software of your TV is updatable. If you have problems first
check if you have the latest software installed on your TV. The latest
software, together with instructions, can be found on the Philips
support website. Use the type number of your TV to find this
documentation and other related files.
- Philips can’t be held responsible neither for any errors in the content
of this document nor for any problems as a result of the content in
this document. Errors reported to Philips will be adapted and
published as soon as possible.
Digital Camera Issues
If a USB connection between your digital camera and the TV isn’t
working, you can try the solutions below to resolve your problem.
- Make sure your digital camera is turned on and verify if the
configuration of your digital camera is correct (see the manual of your
digital camera for more information).
- Some digital cameras allow you to turn off the USB interface. Make
sure that the USB interface is turned on before connecting to the TV.
- If you have a digital camera with only internal memory (no removable
memory) you can try to copy the content manually to a USB memory
device using a personal computer.
- Some digital cameras allow you to switch between PTP (Picture
Transfer Protocol) or “PC Link” and USB Mass Storage. Make sure
that you select USB Mass Storage or “PC Drive” on your digital
camera.
- If your camera supports different interface settings be sure to try
them one by one or contact the reseller of your camera to find out
the correct setting.
USB Memory Device Issues
- Devices connected to the USB port of your TV must be “Mass Storage
Class” compliant. If your device (digital camera. MP3 player, …) is not
“Mass Storage Class” compliant it will not be detected by the content
browser of the TV.
- The following subsets of the Mass Storage Class specification are
supported:
The implementation of the TV is based on the “Universal Serial Bus
Mass Storage Class Specification Overview” (v1.2, June 23, 2003)
including all documents referenced by the document. The document
can be found on the USB standardization website (www.usb.org).
Full support of the USB Mass Storage Class Bulk-Only Transport
(bInterfaceProtocol = 50h).
Full support of SubClass Code = 05h; SFF-8070i spec.
Full support of SubClass Code = 06h; SCSI transparent command set.
- For large USB memory devices, when you are in the Content Browser,
it may take a long time before you can access your files.
31
Annex 3 - Issues referring to connected accessory devices with a HDMI or
Component Video output connector
The HDMI IN and Component Video connectors allow the following TV and monitor modes:
HD
Standard Definition TV (SDTV)
640x480i 60 Hz
720x480i 60 Hz
720x576i 50 Hz
Enhanced Definition TV (EDTV)
640x480p 60 Hz
720x480p 60 Hz
720x576p 50 Hz
High Definition TV (HDTV)
1920x1080i 50/60 Hz
1920x1080p 24/25/30/35/60 Hz
1280x720p 50/60 Hz
The HDMI IN connectors allow the following PC modes:
PC
640x480
800x600
1024x768
1280x768
1360x768
1920x1080
60 Hz
60 Hz
60 Hz
60 Hz
60 Hz
60 Hz
- If necessary, you can adjust the picture position to the center of the screen with the cursor buttons.
- Due to legal requirements, it is possible that with certain copy protected PCM audio qualities from a an accessory device connected to
the HDMI input, the Digital audio output signal is muted.
- Proper working is only guaranteed with HDMI compliant consumer products. Limit the cable length to maximum 5 m.
- In case no signal is detected from your HDMI devices, turn off the HDMI device and then on again.
32
Annex 4 - Software update
‡ Insert the USB memory device in the USB slot of the TV.
________________________
How to update the TV software
rNote
The device must have at least 48Mb free space. Make sure the write
protection is turned off.
ENGLISH
_________________________
Use of the Update assistant
Philips continuously tries to improve its products and it wants you to
profit of that even after your purchase.
Therefore it allows you to update your TV software using a USB
memory device (not supplied).
® The TV turns off.The screen stays black for about 10 seconds.
Please, wait and do not use the POWER switch on the TV.
Step 1 USB Memory device to TV
‡ Select TV menu and press the cursor right.
> The TV menu appears.
® Select Software update and press the cursor right.
> The Software update menu appears.
TV menu
Software update
Update assistant
Current software info
Local updates
Update assistant
Start now
Ò The update process starts automatically. Please wait.
Info
Ò Select Update assistant and press the cursor right.
† Press the OK button to activate.
º Insert a USB memory device to the USB connector at the side of
the TV.
> The main menu appears.
◊Press the green color button to proceed.
> A message appears the TV has successfully written an
identification file to the USB memory device.
‹Press the green color button again to finish.
≈Remove the USB memory device from the TV.
Step 2 USB Memory device to PC
‡ Insert the USB memory device into a PC linked to the internet.
® Locate and open the file “update.htm” on your device.
Ò Follow the instructions on the page displayed.
> The software update is downloaded on the USB memory device
(on condition the software version is newer than the one
currently installed).
† Remove the USB memory device from your PC.
† The update is finished when the message ‘Operation successful’
appears on the screen.
Programmin
r
g
Operation Successful! Re
º Remove the USB memory device from the TV.
Step 3 USB Memory device back to TV
) - do not remove the USB portable memory device during the
software update procedure;
- in case of a power drop during the update procedure, don’t remove
the USB portable memory from the TV.The TV will continue the
update as soon as the power comes back.
33
_________________________
◊Press the POWER button on the remote control. Do not press
more than once.
Local updates
For Service use only.
POWER
POWER
ç Do not use the POWER switch on the TV.
‹ The TV turns off.The screen stays black for about 10 seconds. Please,
wait.
≈The TV turns back on again.
The update is done.
ÚOnce the upgrade is finished, use your PC to remove the TV
software from your USB portable memory.
________________________
Verifying the version of the TV software
Updating software is only possible if the version of the new available
software is different from the current one.You can verify your current
software version.
‡ Select Software update in the TV menu.
® Press the cursor right.
> The Software update menu moves to the left panel.
TV menu
Software update
Update assistant
Current software info
Local updates
Current software info
Version:
JX31......
Release
.........
Info
Ò Select Current software info to observe the version and the
description of the current software.
34
______________________
A
Autoprogram 17
Auto surround 12
Alternate audio 11
Antenna 5
Auto volume levelling 12
B
Balance 11
Batteries 5,29
Button
cursor 6
MENU 6
MUTE 6
OK 6
POWER 6
Brightness 10
C
Cable 5
Care of the screen 2
Clock 19
Closed captions 12
service 13
options 13
Camera 23
Channels
uninstall 18
edit 18
installation 17
store 17
Code
Set 15
Change 15
Color 10
buttons 6
temperature 10
Connections 19
side 23
audio/video 24
Connector
HDMI 25
Contrast 10
D
Daylight saving 19
Delta volume 12
Demo 16
DVD
recorder 25
player 25
E
Emergency alert signalling 18
F
Features menu 12
G
Game 23,25
Getting started 4
Glossary 29
H
Headphone 23
volume 12
Home theater amplifier 27
U
USB
connector 23
device 21
I
Installation 16
Weak channel 17
First time 8
V
VCR 25
Video comp. connectors 26
Volume 6,11
K
Kensington lock 3
W
Widescreen picture format 7
ENGLISH
Index
L
Language 16
audio 11
Lock 13
after 14
channels 14
TV ratings 14
movie ratings 15
region ratings 15
M
Multimedia browser 21
N
Navigate through the menus 9
Noise reduction 11
O
On timer 16
Overview
side panel 23
P
PC 27
Picture
menu 10
Problems 28
R
Recorder 25
Remote control 6
Recycling 29
Reset AV settings 20
S
Safety warnings 2
Satellite receiver 26
Set top box 25
Sharpness 10
Sleeptimer 13
Software update 33
Sound
menu 11
mode 12
T
Time zone selection 19
Tint 10
Turn the TV on 7
TV menu settings 9
35
Need help ?
Online help
www.philips.com/welcome
www.philips.com/support (outside USA)
USA
1 888 PHILIPS (744 5477)
Mo-Sat 7am-11pm,
Sun 8am-11pm 7 days a week, except public holidays.
Canada
01 800 363 7278 English
01 800 661 6162 Français
Please, have the Model and Serial Number ready before your call.
You can find these numbers on the packaging label or on the back and
bottom of your TV.
Model:
Serial No: ______________________________________
Regulatory Notices - Federal Communications Commission
Notice
This equipment has been tested and found to comply with the limits
for a Class B digital device, pursuant to part 15 of the FCC Rules.
These limits are designed to provide reasonable protection against
harmful interference in a residential installation.This equipment
generates, uses, and can radiate radio frequency energy and, if not
installed and used in accordance with the instructions, may cause
harmful interference to radio communications. However, there is no
guarantee that interference will not occur in a particular installation. If
this equipment does cause harmful interference to radio or television
reception, which can be determined by turning the equipment off and
on, the user is encouraged to try to correct the interference by one or
more of the following measures:
Reorient or relocate the receiving antenna.
Increase the separation between the equipment and the receiver.
Connect the equipment into an outlet on a circuit different from that
to which the receiver is connected.
Consult the dealer or an experienced radio or television technician for
help.
Modifications The FCC requires the user to be notified that any changes or
modifications made to this device that are not expressly approved by
Philips Consumer Electronics may void the user’s authority to operate
the equipment.
36
Cables Connections to this device must be made with shielded cables with
metallic RFI/EMI connector hoods to maintain compliance with FCC
Rules and Regulations.
Canadian notice This Class B digital apparatus meets all requirements of the Canadian
Interference-Causing Equipment Regulations.
Avis Canadien Cet appareil numérique de la classe B respecte toutes les exigences du
Règlement sur le matériel brouilleur du Canada.
WARRANTY COVERAGE:
PHILIPS warranty obligation is limited to the terms set forth below.
WHO IS COVERED:
Philips warrants the product to the original purchaser or the person
receiving the product as a gift against defects in materials and
workmanship as based on the date of original purchase (“Warranty
period”) from an Authorized Dealer.The original sales receipt showing
the product name and the purchase date from an authorized retailer is
considered such proof.
WHAT IS COVERED:
The Philips warranty covers new products if a defect arises and a valid
claim is received by Philips within the Warranty Period.
At its option, Philips will either (1) repair the product at no charge, sing
new or refurbished replacement parts, or (2) exchange the product with
a product that is new or which has been manufactured from new, or
serviceable used parts and is at least functionally equivalent or most
comparable to the original product in Philips current inventory, or (3)
refund the original purchase price of the product.
Philips warrants replacement products or parts provided under this
warranty against defects in materials and workmanship from the date of
the replacement or repair for ninety (90) days or for the remaining
portion of the original product’s warranty, whichever provides longer
coverage for you.When a product or part is exchanged, any replacement
item becomes your property and the replaced item becomes Philips’
property.
When a refund is given, your product becomes Philips’ property.
Note: Any product sold and identified as refurbished or
renewed carries a ninety (90) day limited warranty.
Replacement product can only be sent if all warranty
requirements are met. Failure to follow all requirements can
result in delay.
WHAT IS NOT COVERED - EXCLUSIONS AND LIMITATIONS
This Limited Warranty applies only to the new products manufactured by
or for Philips that can be identified by the trademark, trade name, or
logo affixed to it.This Limited Warranty does not apply to any nonPhilips hardware product or any software, even if packaged or sold with
the product. Non-Philips manufacturers, suppliers, or publishers may
provide a separate warranty for their own products packaged with the
bundled product.
Philips is not liable for any damage to or loss of any programs, data, or
other information stored on any media contained within the product, or
any non-Philips product or part not covered by this warranty. Recovery
or reinstallation of programs, data or other information is not covered
under this Limited Warranty.
This Limited Warranty does not cover:
• Shipping charges to return defective product to Philips.
• Labor charges for installation or setup of the product, adjustment of
customer controls on the product, and installation or repair of
antenna systems outside of the product.
• Product repair and/or part replacement because of improper
installation, connections to improper voltage supply, abuse, neglect,
misuse, accident, unauthorized repair or other cause not within the
control of Philips.
• Damage or claims for products not being available for use, or for lost
data or lost software.
• Damage occurring to product during shipping.
• A product that requires modification or adaptation to enable it to
operate in any country other than the country for which it was
designed, manufactured, approved and/or authorized, or repair of
products damaged by these modifications.
• A product used for commercial or institutional purposes (including but
not limited to rental purposes).
• Product lost in shipment and no signature verification receipt can be
provided.
• Failure to operate per Owner's Manual.
TO OBTAIN ASSISTANCE IN THE U.S.A., PUERTO RICO, OR
U.S.VIRGIN ISLANDS....
Contact Philips Customer Care Center at:
1-888-PHILIPS (1-888-744-5477)
TO OBTAIN ASSISTANCE IN CANADA....
1-800-661-6162 (French speaking)
1-888-PHILIPS (1-888-744-5477) (English or Spanish speaking)
REPAIR OR REPLACEMENT AS PROVIDED UNDER THIS WARRANTY
IS THE EXCLUSIVE REMEDY FOR THE CONSUMER. PHILIPS SHALL
NOT BE LIABLE FOR ANY INCIDENTAL OR CONSEQUENTIAL
DAMAGES FOR BREACH OF ANY EXPRESS OR IMPLIED WARRANTY
ON THIS PRODUCT. EXCEPT TO THE EXTENT PROHIBITED BY
APPLICABLE LAW, ANY IMPLIED WARRANTY OF MERCHANT
ABILITY OR FITNESS FOR A PARTICULAR PURPOSE ON THIS
PRODUCT IS LIMITED IN DURATION TO THE DURATION OF THIS
WARRANTY.
Some states do not allow the exclusions or limitation of incidental or
consequential damages, or allow limitations on how long an implied
warranty lasts, so the above limitations or exclusions may not apply to
you.
This warranty does not apply (a) to damage caused by accident, abuse,
misuse, misapplication, or non-Philips product, (b) to damage caused by
service performed by anyone other than Philips or Philips Authorized
Service Location, (c) to a product or a part that has been modified
without the written permission of Philips, or (d) if any Philips serial
number has been removed or defaced, or (e) product, accessories or
consumables sold “AS IS” without warranty of any kind by including
refurbished Philips product sold “AS IS” by some retailers.
This warranty gives you specific legal rights.You may have other rights which vary from state/province to state/province.
Philips, P.O. Box 671539, Marietta, GA. 30006-0026
37
ENGLISH
PHILIPS LIMITED WARRANTY
ONE (1) YEAR
38