1
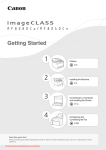
Quick Start Guide
Please read this guide before operating this scanner. After you finish reading this guide,
store it in a safe place for future reference.
Table of Contents
Safety Precautions.............................. 1
Using the Scanner Buttons ................. 9
Package Contents............................... 3
Scanning with MP Navigator EX......... 10
Installing the Software......................... 4
Scanning Film ..................................... 11
Preparing the Scanner ........................ 7
Positioning the Scanner...................... 15
Try Scanning....................................... 8
Specifications...................................... 16
Downloaded from ManualsPrinter.com Manuals
FCC Notice (U.S.A. Only)
Model Number : K10337
This device complies with Part 15 of the FCC Rules. Operation is subject to the following two conditions: (1)
This device may not cause harmful interference, and (2) this device must accept any interference received, including
interference that may cause undesired operation.
Note: This equipment has been tested and found to comply with the limits for a Class B digital device, pursuant to Part 15
of the FCC Rules. These limits are designed to provide reasonable protection against harmful interference in a residential
installation. This equipment generates, uses and can radiate radio frequency energy and, if not installed and used in
accordance with the instructions, may cause harmful interference to radio communications.
However, there is no guarantee that interference will not occur in a particular installation. If this equipment does cause
harmful interference to radio or television reception, which can be determined by turning the equipment off and on, the
user is encouraged to try to correct the interference by one or more of the following measures:
•
•
•
•
Reorient or relocate the receiving antenna.
Increase the separation between the equipment and receiver.
Connect the equipment into an outlet on a circuit different from that to which the receiver is connected.
Consult the dealer or an experienced radio/TV technician for help.
Use of a shielded cable is required to comply with Class B limits in Subpart B of Part 15 of the FCC Rules.
Do not make any changes or modifications to the equipment unless otherwise specified in the manual. If such changes or
modifications should be made, you could be required to stop operation of the equipment.
Canon U.S.A., Inc.
One Canon Plaza
Lake Success, NY 11042
1-516-328-5600
As an ENERGY STAR® Partner, Canon Inc. has determined that this product meets
the ENERGY STAR guidelines for energy efficiency.
Warning
When you use this product, you should pay attention to the following legal issues:
• Scanning of certain documents, such as bank notes (bank bills), government bonds and public certificates, may be
prohibited by law and may result in criminal and/or civil liability.
• You may be required under law to obtain authorization from a person possessing copyrights or other legal rights to the
item being scanned.
If you are uncertain of the legality of scanning any particular item, you should consult your legal adviser in advance.
•
•
•
•
•
Microsoft is a registered trademark of Microsoft Corporation.
Windows is a trademark or registered trademark of Microsoft Corporation in the U.S. and/or other countries.
Windows Vista is a trademark or registered trademark of Microsoft Corporation in the U.S. and/or other countries.
Macintosh and Mac are trademarks of Apple Inc., registered in the U.S. and other countries.
Adobe, Adobe RGB and Adobe RGB (1998) are either registered trademarks or trademarks of Adobe Systems Incorporated
in the United States and or other countries.
• ©ArcSoft, Inc. All rights reserved for PhotoStudio.
• Other names and products not mentioned above may be registered trademarks or trademarks of their respective companies.
Downloaded from ManualsPrinter.com Manuals
Safety Precautions
Safety Precautions
Please read and take note of the following precautions before using the scanner and accessories.
WARNING
Indicates a warning concerning operations that may lead to death or injury to persons if not performed
correctly. In order to use the scanner safely, always pay attention to these warnings.
CAUTION
Indicates a caution concerning operations that may lead to injury to persons or damage to property if not
performed correctly. In order to use the scanner safely, always pay attention to these cautions.
WARNING
This product emits low level magnetic flux. If you use a cardiac pacemaker and feel abnormalities,
please move away from this product and consult your doctor.
About Locations
WARNING
• Do not place the scanner near flammable liquids such as alcohol or thinners. If the internal electrical
parts come in contact with flammable liquids, fire or electrical shock may result.
CAUTION
• Do not place the scanner in areas with high humidity, areas subject to direct sunlight, areas with high
temperatures and areas near flame sources. Fire or electrical shock may result.
• Do not place the scanner on shaky stands, unstable surfaces or surfaces subject to frequent
vibrations. If the scanner falls, it may cause injury.
• When setting up the stand, read this guide carefully to place the scanner correctly. Keep the
document cover close except when necessary. Setting the stand incorrectly may result the scanner
to fall sideways and cause injury.
• Do not push the scanner into a narrow cabinet or put a tablecloth on it or place on a thick rug. If the
scanner has heat, it may cause fire or damage.
About the Power Supply
WARNING
• Do not place heavy objects on, pull or excessively bend, twist or tie the USB cable. Damaged wires
may cause fire or electrical shock.
• Always plug the USB cable in all the way. If it is not plugged in completely, fire or electrical shock may
result.
• Do not use cables other than the one supplied. Fire or electrical shock may result.
• If lightning strikes in your neighborhood, unplug the USB cable from the scanner and refrain from
using it. Lightning strikes could cause a fire, electric shock, or damage to the scanner.
CAUTION
• When unplugging the USB cable, always pull on the main body. Pulling the cable may damage the
wires and lead to fire or electrical shock.
Downloaded from ManualsPrinter.com Manuals
1
Safety Precautions
General Handling Precautions
WARNING
• Do not take apart or modify the scanner and supplies. Fire or electrical shock may result from
improper handling of its components.
• If you hear unusual noises, see smoke, feel excessive heat or smell anything unusual, immediately
unplug the USB cable and contact your retailer or Canon Customer Support Help Desk. Continued
use may result in fires or electrical shock.
• Do not use flammable sprays near the scanner. Do not spill water or liquids into the scanner. Also do
not drop metallic pieces such as paper clips or staples into the scanner. If they enter and contact the
inner electrical parts, fire or electrical shock may result.
• When cleaning the scanner, always unplug the USB cable. Wipe with a soft dry cloth. When it is still
dirty, use a cloth damped with water and wrung well, and then wipe off moisture with a soft dry cloth.
Do not use flammable liquids such as alcohol, benzene or thinners. If a flammable liquid enters the
inner electrical parts or the cables are damaged by plugging/unplugging, fire or electrical shock may
result.
• When transporting the scanner, always unplug the cables. Damaged cables could cause fire or
electrical shock.
If anything enters the scanner, immediately unplug the USB cable and contact your retailer or Canon
Customer Support Help Desk.
CAUTION
• Do not release the document cover until it completely opens/closes. If the document cover falls, it
may lead to pinch your hands or damage the scanner and result in injury.
• Do not place heavy objects on the scanner. Objects may fall and cause injury.
• Do not place items that weigh 2.0 kg (4.4 lbs.) or more on the document glass. Also, do not press
heavily (i.e., more than 2.0 kg (4.4 lbs.)) on the document cover or the document glass. The
document glass may break and cause personal injury.
• Do not bump the document glass or drop heavy books or objects on it. The document glass may
break and injure you.
• When not in use for extended periods, unplug the USB cable for safety.
• Do not use the supplied CD-ROM in regular CD players. It produces excessively loud sound that may
cause hearing damage.
Setup and Operating Conditions
• Do not set up in areas where there are excessive fluctuations in temperature. Also do not move the
scanner from low-temperature areas to high temperature areas. Condensation may cause image
errors. Leave the scanner enough time to gradually adapt to the new conditions before use.
• Do not place the scanner in areas subject to direct sunlight or strong room light. It may cause
damage to the scanner or decrease image quality. If you have to place the scanner in direct sunlight,
make sure to use a thick curtain to block the light.
• Leave enough space (approximately 20 cm (8 in.)) around the scanner when setting up.
2Downloaded from ManualsPrinter.com Manuals
Package Contents
Package Contents
Scanner and Accessories
Scanner
USB Cable
Film Guide
(for 35mm film strip)
Film Adapter Unit
Documentation
• Quick Start Guide (this document)
• Additional Documents
Setup CD-ROM
• Software Programs
-
ScanGear (scanner driver)
MP Navigator EX (utility software)
Solution Menu (menu panel software)
ArcSoft PhotoStudio (image editing software)
• On-screen Manuals
- Scanning Guide (for ScanGear, MP Navigator EX, and troubleshooting)
- Manuals for bundled application programs
*In this guide, Windows Vista operating system Ultimate Edition (hereafter referred to as "Windows
Vista") screenshots are used to illustrate explanations common to all operating systems.
Downloaded from ManualsPrinter.com Manuals
3
Installing the Software
Installing the Software
• Do NOT connect the scanner to a computer before installing the software. If you connect the
scanner and the Found New Hardware screen appears, unplug the USB cable from the
computer and click Cancel. The screen may close automatically when the USB cable is
unplugged.
• Quit all running applications before installation.
• To upgrade from Windows XP to Windows Vista, first uninstall software bundled with the
Canon scanner.
• Log in as an administrator to install the software.
• Do not switch users during the installation process.
1
Place the Setup CD-ROM in the drive.
For Macintosh: Double-click the Setup icon. Enter the administrator ID and password on the
authentication dialog box.
For Windows 2000/XP and Macintosh, skip step 2 and go to step 3.
2
For Windows Vista, when the AutoPlay dialog box
appears, run the setup program, and then click Continue
to proceed when the User Account Control dialog box
appears.
3
If prompted, select your language and place of residence, and then click Next.
In some countries, these dialog boxes will not appear.
4Downloaded from ManualsPrinter.com Manuals
Installing the Software
4
Click Easy Install on the main menu.
5
Click Install to start installation.
Carefully read the License Agreement, and then click Yes to
proceed.
For Macintosh, skip step 6 and go to step 7.
6
For Windows, carefully read the Please Allow All Install
Wizard Processes screen, and then click Next.
7
Follow the on-screen instructions to perform the
installation.
8
For users in the U.S.A., when the User Registration
screen appears, follow the on-screen instructions to
ensure product support.
For Macintosh, skip step 9 and go to step 10.
Downloaded from ManualsPrinter.com Manuals
5
Installing the Software
9
For Windows, when the Extended Survey Program
screen appears, confirm it.
If you can agree, click Agree.
10
When the installation is complete, click Restart to
restart your computer.
For Windows: After restarting the computer, Solution Menu will
appear.
For Macintosh: After restarting the computer, Solution Menu
icon will be registered in the Dock.
<Solution Menu>
You can select either MP Navigator EX, the Scanning Guide
(on-screen manual), or the Online Registration.
* The Online Registration is available for users in the U.S.A.
only.
• Make sure to remove the CD-ROM from the drive and store it in a safe place.
• If you encounter a problem during installation, see "Troubleshooting" in the on-screen manual: Scanning Guide.
6Downloaded from ManualsPrinter.com Manuals
Preparing the Scanner
Preparing the Scanner
Unlocking the Scanner
1
2
Peel the shipping tapes off the scanner.
Slide the lock switch on the bottom of the scanner toward the unlock mark (
).
Unlock Mark
• Handle the scanner with both hands. Be careful not to drop the scanner.
• When you carry or transport the scanner, make sure to slide the lock switch toward the lock
mark ( ) to fasten the scanning unit.
Connecting the Scanner
1
Connect the scanner to your computer with the supplied USB cable.
• Only use the USB cable provided with the scanner. Use of other cables may lead to a
malfunction.
• Do not touch the metallic parts of the USB connector.
• The scanner does not have a power switch. The power is activated as soon as the computer is
turned on.
• When the scanner is connected to the USB 1.1 port and HI-SPEED USB Device Plugged
into non-HI-SPEED USB Hub message appears, ignore the message. The scanner operates
in this condition without problems.
Downloaded from ManualsPrinter.com Manuals
7
Try Scanning
Try Scanning
This section explains the basic scanning procedures using MP Navigator EX.
1
2
Place a color photo document with the side to
be scanned facing down on the document
glass at least 1 cm (0.4 in.) away from the
edges of the document glass, and then close
the document cover.
Top
Bottom
Start MP Navigator EX.
For Windows: Double-click the Canon Solution
Menu icon, then click Scan/import photos or
documents.
For Macintosh: Click the Solution Menu icon in the
Dock, then click Scan/import photos or
documents.
3
Click Photos/Documents (Platen) (*1).
4
Select Color Photo in Document Type.
5
Click Scan to start scanning.
*1
• Do not move the scanner while it is
operating.
• Do not see the light source directly during a
scan job.
6
When prompted that the scanning completed, click Exit.
7
Click Save to save the image and close MP
Navigator EX (*2).
*2
• For more information on scanning using MP Navigator EX, bundled applications, and troubleshooting, see the onscreen manual: Scanning Guide. To open the on-screen manual: Scanning Guide, double-click the on-screen
manual icon on the desktop, or click on in ScanGear or MP Navigator EX.
8Downloaded from ManualsPrinter.com Manuals
Using the Scanner Buttons
Using the Scanner Buttons
Scanner buttons allow you to copy, scan, e-mail, and save scanned images in PDF format with a press
of a button. Simply place your document on the scanner, and then press the scanner button for the
required function. For more information, see the on-screen manual: Scanning Guide.
COPY Button
Prints (copies) the scanned image with a
printer.
SCAN Button
Discriminates the document type
automatically, then scans and saves it with
appropriate settings.
PDF Button
E-MAIL Button
Saves the scanned image as a PDF file.
Attaches the scanned image to a new
e-mail message.
• Before using scanner buttons, make sure that the required software programs for each function are installed on
your computer using the supplied CD-ROM. See "Setup CD-ROM" on page 3.
If the scanner buttons do not work properly, see "Troubleshooting" in the on-screen manual: Scanning Guide.
• For Mac OS X v.10.3.9: Before using the scanner buttons, you need to set Image Capture (in Applications folder)
to open MP Navigator EX automatically when a scanner button is pressed.
Start Image Capture, and then click Options and select MP Navigator EX in Application to launch when scanner
button is pressed:.
Downloaded from ManualsPrinter.com Manuals
9
Scanning with MP Navigator EX
Scanning with MP Navigator EX
MP Navigator EX enables you to perform various tasks, such as compositing images, scanning with the
scanner driver (ScanGear), and correcting/editing scanned images, as well as simply scanning.
Starting MP Navigator EX
1
Click Scan/import photos or documents in the Solution Menu.
You can also start it by following procedure.
For Windows: Select Start – (All) Programs – Canon Utilities – MP Navigator EX 2.1, and click
MP Navigator EX 2.1.
For Macintosh: Open Applications – Canon Utilities folders, then double-click the MP Navigator
EX 2.1 icon.
The navigation mode window of MP Navigator EX is displayed.
Features of MP Navigator EX
MP Navigator EX is constituted of the following three sheets by the function.
Scan/Import Documents or Images sheet
View & Use Images on your Computer sheet
Custom Scan with One-click sheet
• For more information on MP Navigator EX, see the on-screen manual: Scanning Guide.
Downloaded from ManualsPrinter.com Manuals
10
Scanning Film
Scanning Film
This scanner can scan 35 mm film strip one frame at a time. Follow the procedure below when scanning
film.
• Do not connect other than the accompanying Film Adapter Unit to the FAU connector. Use of
other units may lead to malfunctions of the connected unit and the scanner.
• Do not touch the metallic parts of the FAU connector.
• Clean the document glass before placing the Film Guide on it, otherwise dirt and dust can
affect image quality or damage the film.
1
Attach the cable for the Film Adapter Unit to the
FAU connector on the scanner's side panel.
Insert the cable plug of the Film Adapter Unit
all the way into the FAU connector.
2
Open the document cover and place the Film
Guide on the document glass of the scanner.
Align the Film Guide's tab with the FAU symbol on the
document glass of the scanner.
3
Remove the cap from the Film Adapter Unit and
gently set the Film Adapter Unit over the first
frame in the Film Guide.
Align the tab on the Film Adapter Unit with the Film
Guide.
You need to calibrate the scanner before scanning film for
the first time. Do not place a film strip in the Film Guide at
this point as it is not required for calibration.
Downloaded from ManualsPrinter.com Manuals
11
Scanning Film
4
Gently close the document cover.
5
Start MP Navigator EX.
Follow the step 2 in "Try Scanning" on page 8.
6
Click Film.
7
Click Scan.
8
Click OK on the calibration message window.
Do not move the scanner while it is
operating.
9
When the scanning message window appears,
open the document cover, remove the Film
Adapter Unit, and then attach the cap to the unit.
Downloaded from ManualsPrinter.com Manuals
12
Scanning Film
10
Place the film in the Film Guide.
Guidelines
Place the film face up in the Film Guide (images and
words should read correctly from above) with the
spaces between frames aligned with the guidelines on
the guide.
11
Remove the cap from the Film Adapter Unit
and gently set the unit over the frame you
wish to scan.
Align the tab on the Film Adapter Unit with the Film
Guide.
Do not move the Film Adapter Unit once it
has been placed on the Film Guide. Sliding it
may scratch the film.
12
Gently close the document cover.
The document cover does not touch the document glass. Be careful not to force the
document cover down.
13
Click OK on the scanning message window.
The scanned image is displayed in the preview area.
Do not move the scanner while it is
operating.
14
Confirm the scanning image, and then click
Scan to start scanning.
Do not move the scanner while it is
operating.
15
When prompted that the scanning completed,
click Exit.
Downloaded from ManualsPrinter.com Manuals
13
Scanning Film
16
Click Save to save the image and close MP
Navigator EX.
• After the scanning is finished, remove the
Film Adapter Unit, and then attach the cap to
the unit. Remove the film and the Film Guide
from the document glass.
• Do not leave the film strip in the Film Guide
for an extended period of time as heat from
the unit may damage the film.
• For more information on scanning film, see
"Scanning Film" in the on-screen manual:
Scanning Guide.
Downloaded from ManualsPrinter.com Manuals
14
Positioning the Scanner
Positioning the Scanner
Horizontal Position
The document cover fully opens to allow easy scanning of
large or bound documents. An oversized document can be
scanned section by section into a single image using the
stitch-assist function of MP Navigator EX. For details, see the
on-screen manual: Scanning Guide.
Hold the document cover with one hand, and press and hold
at the base hinge as you carefully lower the cover
all the way down.
Alignment Mark
Do not place items that weigh 2.0 kg (4.4
lbs.) or more on the scanner. The scanner
may not work or you may break the
document glass if you press down the
document glass firmly.
Top
Bottom
Cover the scanner with a black cloth if external light enters
around the scanned item.
Upright Position
If you are scanning thin documents (i.e., a single sheet or
double-folded sheet), this position saves the most space.
Thick documents or films cannot be scanned in this position.
Pull out the stand on the bottom of the scanner until it clicks,
and set the scanner upright on a flat stable surface. Gently
open the document cover as far as it goes (stops at
approximately 40°) and slide down the document along the
document cover.
Approximately 40°
• Do not force the document cover open; it
does not fully open when the scanner is in
the upright position.
• Always close and secure the document
cover first when lifting the scanner in the
upright position.
Alignment
Mark
Thin Item
Document
Cover
Downloaded from ManualsPrinter.com Manuals
15
Specifications
Specifications
CanoScan LiDE 700F
Scanner Type
Flatbed
Sensor Type
CIS (Color Contact Image Sensor)
Light Source
Optical Resolution
3-color (RGB) LED
*1
9600 x 9600 dpi *2
Selectable Resolution
Scanning Bit Depth
25-19200 dpi (ScanGear)
Color
48 bit input (16 bit input for each color (RGB))
48 bit or 24 bit output (16 bit or 8 bit output for each color (RGB))
16 bit input / 16 bit *3 or 8 bit output
Grayscale
Color
Scanning Speed *4
(Photo or Document)
Grayscale, B&W
33.5 msec./line (4800 dpi), 33.8 msec./line (2400 dpi),
8.6 msec./line (1200 dpi), 4.5 msec./line (600 dpi),
2.4 msec./line (300 dpi)
11.3 msec./line (4800 dpi), 5.9 msec./line (2400 dpi),
2.9 msec./line (1200 dpi), 1.8 msec./line (600 dpi),
2.3 msec./line (300 dpi)
Scanning Speed *4 (Film)
2.8-223.9 msec./line
Hi-Speed USB *4
Interface
Maximum Document Size
Film Type/Number of Frames
Scanner Buttons
A4/Letter: 216 x 297 mm
35 mm strip (negative/positive) *5 / 1 frame
4 buttons (COPY, SCAN, PDF, E-MAIL)
5 °C to 35 °C (41 °F to 95 °F)
Temperature
Operating Range
Humidity
Power Requirements
Power Consumption
Exterior Dimensions (W) x (D) x (H)
10 % to 90 % RH, 20 % to 80 % RH for film scanning
without condensation formation
Supplied via USB port (No external adapter required)
In operation: 2.5 W maximum, Stand-by: 1.5 W *6,
Suspend: 11 mwatts *6
292 x 409 x 44 mm (11.5 x 16.1 x 1.8 in.)
Weight
*1
*2
*3
*4
*5
*6
*7
Approximately 2.1 kg (4.6 lbs.)*7
Optical Resolution represents the maximum sampling rate based on ISO 14473.
For the document types other than films, the resolution is up to 4800 x 4800 dpi.
For film scanning only.
The fastest speed in Hi-Speed USB mode on Windows PC. Transfer time is not included. Scanning
speed varies according to the document types, scan settings, or specifications of the computer.
35 mm slides are not supported.
USB connection to PC.
Film adapter unit weight is included.
• Specifications are subject to change without notice.
Model Name: K10337 (CanoScan LiDE 700F)
Downloaded from ManualsPrinter.com Manuals
16
CANON U.S.A. INC.
One Canon Plaza, Lake Success, NY 11042 U.S.A.
CANON AUSTRALIA PTY LTD
1 Thomas Holt Drive, North Ryde, Sydney N.S.W. 2113, Australia
CANON NEW ZEALAND LIMITED
Akoranga Business Park, Akoranga Drive, Northcote, Auckland, New Zealand
Downloaded from
ManualsPrinter.com
Manuals
XXXXXXXX
©CANON INC. 2009
QT5-2200-V01
PRINTED IN VIETNAM