1
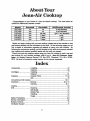
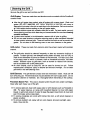
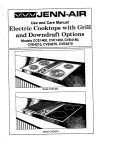
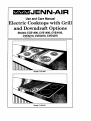
mmmJENN-AIR
Use and Care Manual
Electric
Cooktops
and Downdraft
with Grill
Options
Models CCE1400, CVE1400, CVE4180,
CVE4210, CVE4270, CVE4370
Model CVE1400
Model CVE4270
Read before operating
your cooktop
All appliances - regardless of the manufacturer - have the potential through
improper or careless use to create safety problems. Therefore the following
safety precautions should be observed:
1.
2.
3.
4.
5.
6.
8.
9.
10.
1!.
12.
13.
Be sure your appliance is properly installed and grounded by a qualified
technician.
Never use your appliance for warming or heating the room.
Children should not be left alone or unattended in area where appliance is
in use. They should never be allowed to sit or stand on any part of the
appliance.
Wear proper apparel. Loose-fitting or hanging garments should never be
worn while using the appliance.
Do not repair or replace any part of the appliance unless specifically
recommended in this manual. All other servicing should be referred to an
authorized Jenn-Air Service Contractor.
Flammable materials should not be stored near surface units.
Do not use water on grease fires. Smother fire orflame or use dry chemical
or foam-type extinguisher.
Use only dry potholders. Moist or damp potholders on hot surfaces may
result in burnsfrom steam. Do not let potholder touch hot heating elements.
Do not use a towel or other bulky cloth.
Use proper pan size. Many appliances are equipped with one or more
surface units of different size. Select cookware having flat bottoms large
enough to cover the surface unit heating element. The use of undersized
cookware will expose a portion of the heating element to direct contact and
may result in ignition of clothing. Proper relationship of cookware to heating
element will also improve efficiency and performance.
Never leave surface units unattended at high heat settings. Boil over
causes smoking and greasy spillovers that may ignite.
On conventional element cooktops make sure that drip pans are in place.
Absence of these pans during cooking may subject wiring or components
underneath to damage.
Do not use aluminum foil to line surface unit drip pans or grill basin.
Installation of these liners may result in an electric shock or fire hazard.
Glazed cookware - only certain types of glass, glass-ceramic, ceramic,
earthenware, or other glazed cookware are suitable for cooktop surface
without breaking due to the sudden change in temperature. Use only such
cookware as you know has been approved for this purpose.
2
14.
15.
16.
Cookware handles should be turned inward and not extend over adjacent
surface heating elements to avoid burns, ignition of flammable materials
and spillage due to unintentional contact with the cookware.
Do not soak or immerse removable heating elements in water.
CAUTION - Do not store items of interest to children in cabinets above
cooktop- children climbing on the cooktop to reach items could be seriously
injured.
17. Do not touch surface units or areas near units. Surface units or heating
elements may be hot even though they are dark in color. Areas near
surface units may become hot enough to cause burns. During and after
use, do not touch or let clothing or other flammable materials contact these
areas until they have had sufficient time to cool. Other surfaces may
become hot enough to cause burns - among these surfaces are the
cooktop.
18. Do not cook on glass-ceramic cooking surface if the cooktop is broken.
Cleaning solutions and spillovers may penetrate the broken cooktop and
create a shock hazard. Contact an authorized Jenn-Air Service Contractor.
19.
20.
21.
22.
23.
Clean glass-ceramic cooktops with caution. If wet sponge or cloth is used
to wipe spills on a hot cooking area, be careful to avoid steam burns. Some
cleansers can produce noxious fumes if applied to a hot surface.
Do not operate with damaged cooking element after any product malfunction until proper repair has been made.
Keep all switches "OFF" when unit is not in use.
Clean only parts listed in this manual and use procedures recommended.
This appliance has been tested for safe performance using conventional
cookware. Do not use any devices or accessories that are not specifically
recommended in this manual. Do not use eyelid covers forthe surface units
or stovetop grills. The use of devices or accessories that are not expressly
recommended in this manual can create serious safety hazards, result in
performance problems, and reduce the life of the components of the
appliance.
- SAVE THESE INSTRUCTIONS -
3
Congratulationson your choice of a Jenn-Air electric cooktop. The chart below describes the differences between models.
Model#
Convertible
no
no
CVE'1400
CVE4180
........................
yes
CVE 4210
,.,
yes
. Yes
yes
,,
no
left bay
2 bays
.............
2 bays
3 bays
_
Grill/Elements included, ......
4 _il elements
4 coil elements
1"grill, 2 c0il elements "
none
............................
1 grill
1 grill
Before you begin cooking with your new cooktop, please take a few minutes to read
and become familiar with the instructions in this book. On the following pages you will
find a wealth of information regarding all aspects of using your new cooktop. By
following the instructions carefully, you will be able to fully enjoy and properly maintain
your cooktop and achieve excellent results with the food you prepare.
Should you have any questions about using your Jenn-Air cooktop or need a use and
care manual for your cooktop cartridge, write to us at Jenn-Air Customer Assistance, c/o Maytag Customer Service, P.O. Box 2370, Cleveland, TN U.S.A. 373202370. Be sure to provide the model number for the manual requested.
Accessories
Cartridges
Cleaning
......................
Installing
...................................................................
12
........................
Optional
Installing
Optional
...................................................................
.....................................................................
...................................................................
20
7
21
...........................
Cooktop Parts ....................................................
Grill ...........................................................................
Conventional
Cdii Cooktop ...........................................................................
Cookware .........................
General ............................................................
17-18
16
10-11
8-9, 10
Canning ................................................................
Ducting ................................................................................................................
Grill ..................................
Cleaning ...................................................................
Grill Guide ................................................................
9,11
19
16
14
Grilling Tips ..............................................................
Installing ...................................................................
Usage ......................................................................
Safety Precautions
...........................................................................................
Service Information .............................................................................................
Surface Controls ...................................................................................................
15
12
13
2-3
22
6
Ventilation
System ................................................................................................
4
5
The built-in ventilation system removes cooking vapors, odors and smoke from foods
prepared on the cooktop, grill and grill accessories.
Regular use of this system will
insure a more comfortable and less humid kitchen which is free of heavy cooking
odors and fumes that normally create a frequent need for cleaning and redecorating.
I,',','Using
the Ventilation
System i
• To operate the ventilation system manually, push the switch located in front of the
air grille. If you push on the left side of the switch, the fan will operate at the Lo
speed. If you push on the right side of the switch, the fan will operate at the Hi
speed. To turn the fan off, the switch should be returned to the middle (level)
position.
• The ventilation system will operate automatica//y when the grill element is in use.
During grilling, the fan speed is automatically set for the Hi setting AND cannot be
changed to Lo speed.
• Use Hi fan speed for capturing steam. Use Lo fan speed for capturing smoke
when pan frying.
• The fan can be used to remove strong odors from the kitchen as when chopping
onions near the fan.
control that may turn on the downdraft fan when large cookpots are used
extended
periods
on the large
elements.
The fan will
off when
I for
NOTE
CVE1400
OWNERS:
The cooktop
is designed
withshut
an automatic
the cooktop has cooled down. (See p. 10.)
I Cleaning the Ventilation System I
Air Grille: The air grille lifts off easily. Wipe clean or wash in sink with mild household
detergents. May be cleaned in dishwasher.
Filter: Turn off ventilation system before removing. Turn filter
retainer clip to remove filter.The filter is a permanent type and
should be cleaned when soiled. Clean in sink with warm water
_
IMPORTANT:
DO NOT OPERATE
W/THOUT
and liquid dishwashing
detergent SYSTEM
or in dishwasher.
FILTER. Filter should always be placed at an angle. As you
face the front of the cooktop, the top of the filter should rest
against the left side of the vent opening and the bottom of the
filter should rest against the right side of the vent chamber at
the
bottom. (NOTE:
If filter isflat against the fan wall, ventilation
effectiveness
is reduced.)
Ventilation
Chamber:
This area, which houses the filter,
should be cleaned in the event of spillsor whenever it becomes
coated with a film of grease. The ventilation chamber may be
cleaned with paper towel, damp cloth, or sponge and with a
mild household detergent or cleanser.
5
The infinitesurfacecontrolsprovideflexibilityin settingselectionwhen usingthe cooktop or grill.
i To Set Control s J
• Since the controls are a push-turn type, they must be pushed down before turning. To set (from the OFF position), push down on control knob and turn in either
direction to desired setting.
• When the control is in any position, other than OFF, it may be turned in any direction without pushing down.
• The red light bar (in front of the control knob area) will glow when any control knob
is ON.
......................
,
1.
2.
3.
4.
ii
i
!
Leftrear element (rear Energy-Saver or Standard grill)
Leftfront element (frontEnergy-Saver)
Right front element (frontEnergy-Saver or Standard grill)
Right rear element (rear Energy-Saver)
Note: For model CVE4370, the rightbay isfor
cooktopcartridgesonly.
2.
J
, .......................
NOTE: The =Energy-Saver' grillelement (right) isincludedwith some cooktops or may be purchased as an option for most models. This permits
utilizingonly half of the grillarea, if desired, or using different controlsettings for the front and rear positionof the element. When using this element, both cooktop controls,front and rear, must be turned on in order to
use the fultgrillarea. Formodel CVE4180, the standardgdllwas included.
See directionsabove.
.............................
,
..................
(Suggested
J
i
!
i
,.d
J
Control Settings for Surface Elements !
The size and type of cookware used and the amount and type of food being cooked will
influence the setting needed for best cooking results. Electrical line voltage may also
vary, which will affect the needed control setting. The setting indicated should serve as
a guide while you become familiar with your cooktop.
Hi
A fast heatto startcookingquickly, to bringliquidstoa boil,to preheatoilfordeepfat frying.
Usedfor mostgrilling.
7-10 (MediumHigh)Forfastfryingorbrowningfoods,tomaintainrapidboiloflargeamountsoffood,
tomaintainoiltemperaturefor deepfat frying.
5-6
(Medium) Forfoods cookedina double boiler, saut6ing, slow boil oflarge amounts offood, and
mostfrying.
3-4
(Medium Lo) Tocontinuecooking foods startedon higher settings.
Lo-2 Maintaining serving temperatures of foods, simmering foods, melting butteror chocolate.
The controls offer flexibility in setting selection. On settings other than Hi, you may adjust
the controls above or below the numbered setting for best results. This applies to
settings when using cooktop cartridges or when using the grill or any of the accessories.
Suggested settings are provided as general guidelines.
6
Cooktop cartridges can be installed in most cooktops.
conventional coil, halogen, radiant, or solid element.
[ To Install Cartridges
Cartridge
options
include
]
1. If the grill grates, element, and/or grill-rocks are in place, remove before installing
a cooktop cartridge. Clean basin pan of any grease accumulation. (See page 16
for cleaning recommendations.)
2. To install any of the optional cooktop cartridges, be sure controls are OFF. Position
the cartridge terminal plug towards the terminal receptacle.
3. Slide the cartridge towards the receptacle until the cartridge terminal plug is
completely engaged.
4. Lower the opposite end of the cartridge into the cooktop until it is flush with the
surface. Your cooktop is now ready to use.
i To Remove
Cartridges i
1. Controls must be OFF and the cartridge should be cool.
2. Lift up on the "tab" located on the cartridge until top of cartridge clears the opening
of the cooktop by about 2 inches. Lifting the cartridge too high while still engaged
in the receptacle could damage the terminal plug.
3. To disengage terminal, hold cartridge by the sides and slide away from the terminal
receptacle. Lift out when fully unplugged.
4. A storage tray, Model A350 is available and can be used for storing a cartridge.
5. Do not stack cartridges where they may fall or be damaged. Never store other
materials on top of a glass-ceramic cartridges since this could damage or mar the
surface.
Note: Remember to replace the air grille before using the ventilation system.
[,,,,,,,Home
Canning i
For best results, canning should be done on the conventional coil cartridge/cooktop.
Canning element accessory, Model A145A, makes it possible to use large oversized
canners with the conventional coil cartridge/cooktop.
For additiona/ information, refer to use and care manua/ packaged with your cartridge.
7
To achieve optimum cooking performance, use heavy gauge, f/at, smooth bottom
cookpots that conform to the diameter of the element (no more than one inch overhang).
Proper cookpots will minimize cooking times, use less electricity, cook food more evenly
and require less water or oil.
Cookpots with thin, uneven bottoms do not adequately conduct heat from the element
to the food in the cookpots which results in hot spots, burned or underdone food. Using
bad cookpots also requires more water, time, and energy to cook food.
i
i
I Selecting Proper Cookware
I
• Select heavy gauge cookpots. Usually heavy gauge cookpots will not change
shape when heated.
• Use cookpots with flat, smooth bottoms. The two ways to determine if cookpots
have a flat, smooth bottom are the ruler test and the cooking test.
Ruler Test: I
1. Place the edge of ruler across the
bottom of the pot.
2. Hold up to the light.
3. No light should be visible under the
ruler.
I Cooking Test: I
1. Put 1 inch of water into the cookpot.
2. Place cookpot on the element. Turn
control to the HI setting.
3. Observe the bubble formation to determine the heat distribution. If the bubbles are
uniform across the cookpot, the cookpot will perform satisfactorily. If the bubbles
are not uniform, the bubbles will indicate the hot spots.
•
Match the size of the cookpot to the size of the element.
will be the same size or slightly larger.
8
Ideally, the cookpot
[ ImproPer C0okware I
•
Do not use cookware that extends more than 1 inch beyond the edge of the
element.
• Do not use a small cookpot on a large element. Not only can this cause the element
to require more energy and time, but it can also result in spillovers burning onto the
element which cause extra effort in cleaning.
• Do not use nonflat specialty items that are oversized, uneven or do not meet
proper cookware specifications such as round bottom woks with rings, griddles,
rippled bottom canners, lobster pots, large pressure canners, etc.
i Home Canning I
Acceptable
canning pots should not be oversized
Canning element
or rippled bottom
use of the HI heat
In addition, water
accessory, A145A, makes
canners. (See p 11 .) When
setting becomes excessive
may not come to a boil and
and must have a flat bottom.
Note:
it possible to use large oversized, flanged
canners do not meet these standards, the
and may result in damage to the cooktop.
canners may not reach 10 lb. of pressure.
The acceptable canning procedure uses the HI setting just long enough to bring the
water to a boil, then lower the setting to maintain the water temperature.
I Characteristics
of Cookware Materials J
Heavy gauge cookpots with flat, smooth bottoms will usually work in a similar way.
However, there are some differences in the cooking performance of various materials.
• Aluminum cookpots heat quickly and evenly. Best suited for simmering, braising,
boiling and frying.
• Stainless steel cookpots will evenly distribute heat if constructed of tri-ply or
combined with other metals such as aluminum and copper. Use for cooking
functions similar to aluminum.
• Cast iron cookpots are slow to heat but cook more evenly once temperature is
reached. Use for long term low heat cooking or for browning and frying.
• Glass ceramic, earthenware, heat-proof glass or glazed cookpots can be used if
recommended by the manufacturer for cookpot cooking. Do not use with trivets.
Best used on low to medium control settings.
• Porcelain enamel-on-steel or porcelain enamel-on-cast iron should be used
according to manufacturer's directions. Do not allow to boil dry.
Ic°°king''''Pr°cedures
I
• For best results, always use recommended cookware.
• Different cookpots and different amounts of food being prepared will influence the
control settings needed for best results. For fastest cooking, start with the surface
control on Hi for one minute; then turn the control to the lower desired setting.
Covering pans, whenever possible, speeds cooking and is more energy efficient.
• Do not allow pans to boil dry as this could damage both the cooktop and the pan.
• Do not drop heavy cookware on the cooktop surface.
I Selecting Proper Cookware I
•
•
•
•
•
•
•
Select cookware with flat bottoms. Flat bottom pans are the fastest and best
conductors of heat and provide the most consistent and satisfactory results. The
entire bottom of the pan should touch the heating element evenly. Avoid using pans
with convex, concave or irregular bottoms. A pan which is not flat receives the most
heat at the point of contact, which causes "hot spots" and uneven heat distribution.
Hot spots can result in scorching or burning of the food. Uneven heat distribution
slows the cooking process and wastes energy.
To determine if pan is flat, lay a straight edge ruler against the bottom. (See p. 8)
Do not use a pan with a turned down flange around the bottom or a ripple bottom.
Do not use a pans that extend more than 1 inch on either side of the element. Use
the correct size pan for the size of the heating element. (See exceptions for canners
and stockpots below.)
Do not use wire trivets or any kind of heat retarding pad between the pan and
element. Reduce the control setting instead.
Special cooking equipment without flat bottoms, such as the Oriental wok, should
not be used on the cooktop. Use the Jenn-Air wok accessory, Model A0142, on
the cooktop. It has a flat bottom and is designed to be used on the small element.
Large stockpots and canners should be used with Jenn-Air's "Big-pot" canning
element only (Model A145A). The use of large pans on the large element on Hi for
extended periods of time can cause damage to the cooktop, discolor chrome drip
pans, shorten the life of the etement, as well as trap excess heat inside the cooktop.
NOTE: CCE1400 OWNERS: Sustained trapped heat can cause the large elements ......
to cycle off. Elements wilt cycle back on after the cooktop has cooled down.
CVE1400 OWNERS: Sustained trapped heat can cause the downdraft fan to cycle
on. Downdraft fan will cycle off after the cooktop has cooled down.
[ Large Stockpots
or Canners I
Canning element accessory, Model
A145A, makes itpossible to use large
oversized flanged or rippled bottom
canners.
RIGHT
10
_WRON_::: .....
WRONG_ _'
[ Follow These Procedures When Canning
•
•
•
•
•
•
Bring water to boil atHi setting; after boiling has begun, reduce heat to lowest setting
that will maintain boiling.
Make certain canner fits over center of surface unit.
Flat-bottomed canners give the best canning results.
Use canning recipes from a reputable source such as the manufacturer of your
canner and manufacturers of canning jars.
Remember that canning is a process that creates large amounts of steam. Be
careful and follow equipment instructionsto avoid burns from steam or hot canners.
Remember that if your area has low voltage at times, canning may take longer than
indicated by the directions.
I Cleaning the Conventional coil Co0kto p !
Be sure all control knobs are in the OFF position before cleaning or removing heating
elements.
Never immerse cartridge in water to clean. This can damage wiring. A drain hole within
the cartridge permits drainage of normal spills into the porcelain basin pan where itwill
drain into the grease container. Bottom of cartridge may be wiped clean with detergent
solution if necessary.
|Heating
ElementsI
Under normal conditions, most soil will burn off elements. The heating elements unplug
for your convenience in cleaning the drip pans. Lift the elements slightly and pull away
from receptacle. DO NOT IMMERSE ELEMENTS IN WATER. To replace elements,
push completely into the receptacle. Make sure the elements fit flat.
i
I Drip Pans ]
To keep the like-new appearance, clean frequently and never allow anything to bvrn on
_Remove
soiled pans by first removing cooled heating element.
• For light to moderate soil: Clean by wiping with soapy dishcloth or Cooktop
Cleaning Creme (Part No. 20000001) and sponge or clean in dishwasher. Rinse
and dry.
• To loosen baked on soils: Place drip pans in pan with 2 quarts of water and boil
for 20 minutes. Remember, all drip pans cannot be boiled at once because element being used must have a drip pan in place.
• For stubborn stains: Rub lightlywith soapy S.O.S. pads or nonabrasive cleansers.
Note on Chrome Drip Pans: Do not use abrasive cleansers, steel wool or cleansers
not recommended for use on chrome. A bluing of the drip pans indicates improper
cookware selection and/or using excessively high heat and cannot be removed.
Note on Porcelain Drip Pans: For extremely stubborn stains, use an oven cleaner.
Allow to sit overnight, then rinse. CAUTION: When using an oven cleaner, avoid
spraying other areas.
11
The grill accessory consists of two black grill grates, a grill element and two grill-rocks
[ To Install Grill ]
1. Before installing grill components, be certain surface controls are OFF.
2. Place the two grill-rocks into an empty basin pan with their handles running parallel
to the front of the cooktop. These grill-rocks must be used since they support the
grill element.
3. Position the grill element with the terminal plug towards the terminal receptacle.
Slide the element towards the receptacle until the terminal plug is completely
engaged. The grill element should rest on the handles of the grill-rocks.
4. Place the black grill grates on the top of the cooktop.
Note: The cooking bay on the extreme right of Model CVE4370
cartridges
accepts cooktop
only.
ii/
I To Remove Grill I
1. Remove grill components once they are cool. Be sure controls are OFF.
2. To remove grill element, pull away from receptacle until it is unplugged. (Note:
Lifting the element too high while still engaged in the receptacle could damage the
terminal plug.)
3. A storage tray, Model A350, is available for purchase and can be used for storing
the grill assembly.
I Installing
Other Accessories
!
1. Remove the two black grill grates from the grill. Now you are ready to use the
optional grill accessories.
2. Review the instructions for installing and using the accessories that are packaged
with the accessory.
12
I Using the Grill
O
Before the first use, wash your new grill grates in hot soapy water, rinse and dry.
Then "season" the surface by wiping on a thin coating of cooking oil. Remove
excess oil by wiping again with another paper towel. This procedure should be
repeated when either: a) cleaning in the dishwasher since the detergent may
remove seasoning, or b) anytime a surgar-based marinade (for example, barbecue
sauce) is going to be used.
•
Preheat the grill on Hi for 5 minutes. Preheating improves the flavor, appearance
of meats and quickly sears the meat to help retain the juices. The heating element
should glow a bright cherry red.
•
Use nonmetallic spatulas or utensils to prevent damaging the Excalibur ® nonstick
grill grate finish.
•
Excessive amounts of fat should be trimmed from meats. Only a normal amount
is necessary to produce the smoke needed for that smoked, "outdoor" flavor.
Excessive fat can create cleaning and flare-up problems.
Allowing
excessive
amounts
of grease
warranty on the grill grates. Excessive
needs to be cleaned or that excessive
was not properly
or drippings
flare-ups
amounts
to constantly
flame voids the
indicate that either the grill interior
of fat are in the meat or the meat
trimmed.
• Grease drippings will occasionally ignite to produce harmless puffs of flame for a
second or two. This is a normal part of the cooking process.
•
NEVER LEAVE GRILL UNATTENDED
DURING GRILL OPERATION.
I Should excess grease cause sustained flare-up !
1.
2.
3.
Turn on Fan manually.
Immediately turn grill control(s) OFF.
Remove meat from grill.
IMPORTANT
•
•
•
•
Do not use aluminum foil inside the grill area.
Do not use charcoal or wood chips in the grill area.
Do not allow grill-rocks to become overloaded with grease. Clean frequently.
Do not cover grates completely with meat. Leave air space between each steak,
etc. to allow proper ventilation as well as prevent flare-ups.
13
i,, ,,,i
i,,,,,,,,,
I Grill Guid e J
Preheat grill on Hi, 5 minutes, for best flavor.
Type
Setting
Steak (1/2 - 3/4")
Rare
Medium
Well
Steak (1 - 1 1/4")
Rare
Medium
Well
Hamburgers (3-4 oz.)
Cooking
Time
Procedure
Hi
Hi
Hi
9 to 12 minutes
12 to 19 minutes
16 to 23 minutes
Tum after 5 to 6 minutes.
Tum after 6 to 9 minutes.
Turn after 8 to 11 minutes.
Hi
Hi
Hi
10
10 to 17
19 to 26
24 to 32
15 to 25
Turn after 5 to 8 minutes.
Turn after 9 to 12 minutes.
Tum after 12 to 16 minutes.
Turn after half the time.
Pork Chops (1/2 - 3/4")
Fully-cooked
Smoked Pork Chops
Ham Slices (1/2")
Fully.cooked sausages
Hot Dogs
Polish
Fresh Sausage
Links
Patties (21/2"
diameter)
Italian Sausage
10
30 to 40 minutes
Tum occasionally.
Hi
10
10 to 15 minutes
15 to 20 minutes
Tum once.
Tum once.
Hi
Hi
5 to 10 minutes
10 to 20 minutes
Turn occasionally.
Turn once.
10
10to 15 minutes
Turn occasionally,
10
10
15 to 20 minutes
25 to 35 minutes
Turn occasionally,
Pierce casing with a fork.
Turn once.
Lamb Chops
10
25to 35 minutes
Turn occasionally. Brush with
glaze, if desired.
Chicken
Boneless Breasts
Bone-in
10
10
25 to 35 minutes
45 to 60 minutes
Turn occasionally.
Turn occasionally. Brush
with marinade or glaze during
last 10 minutes.
• ii1,,
Fish
Steaks (1")
i
minutes
minutes
minutes
minutes
.........................
10
20 to 30 minutes
Fillets (1/2")
(with skin on)
10
10 to 15 minutes
Shrimp
(skewered)
10
8to 12 minutes
Garlic Bread
Hi
2 to 4 minutes
Hot Dog Buns
Hamburger Buns
10
2 to 3 minutes
H
ii
i
Brush with butter. Turn after half
thetime.
Start skin side down, Brush
with butter. Turn after half
thetime.
Turn and brush with butter or
marinadefrequently.
Turn after half the time.
Note: This chart is a suggested guide, Cooking times and control settings are approximate due
to variations in meats and voltage.
14
[Grilling
Tips i
With your Jenn-Air grill and accessories, literally any food you've considered "at its best"
when prepared outdoors can now be prepared indoors with less fuss and great flavor.
The following suggestions are good rules to follow and will increase your enjoyment of
the equipment.
•
Be sure to follow directions on page 13 for using the grill.
• Suggested cooking times and control settings are approximate due to variations in
meats and electrical voltage. Experience will quickly indicate cooking times as well
as which settings work best.
@ Use the Energy-Saver grill element for grilling small amounts of food on half of the
grill or for keeping cooked foods warm or preparing food requiring different control
settings.
•
For best results, buy top grade meat. Meat that is at least 3/4 inch will grill better
than thinner cuts.
•
Score fat on edges of steak, but do not cut into meat, to prevent curling while
cooking.
@
For the attractive =branded" look on steaks, be sure grill is preheated. Allow one
side of meat to cook to desired doneness, or untiljuices appear on the top surface,
before turning. Turn steaks and hamburgers just once. Manipulating food causes
loss of juices.
• When basting meats or applying sauces to foods, remember that excessive
amounts wind up inside your grill and do not improve the food flavor. Apply sauces
during the last 15 to 20 minutes of cooking time unless recipe specifies otherwise.
Sugar-based sauces, excessively used, will caramelize on the grill-rocks and create
extra cleaning.
• There are many meat marinades which will help tenderize less expensive cuts of
meat for cooking on the grill.
•
Certain foods, such as poultry and non-oily fish, may need some extra fat. Brush
with oil or melted butter occasionally while grilling.
•
Use tongs with long handles or spatulas for turning meats. Do not use forks as these
pierce the meat, allowing juices to be lost.
•
To help retain meat juices, salt after turning meat or after cooking is completed.
• Should grilled foods be prepared and ready before you're ready to sen,e, turn
control to a low setting and cover meat with a single sheet of foil. Food will continue
to cook.
15
[ Cleaning the Grill
J
Be sure the grill is coo] and controls are OFF.
Grill Grates: These are made from cast aluminum and are coated with the Excalibur_
nonstick finish.
•
After the grill grates have cooled, wipe off grates with a paper towel. Wash cool
grates (DO NOT IMMERSE
HOT GRILL GRATES
IN WATER) with soap or
detergent in hot water in the sink or wash them in the dishwasher. Be sure to remove
all food residue before cooking on the grill grates again.
•
Remove stubborn spots with a plastic mesh puff or pad. For best results, use only
those cleaning products which state they are recommended for use when cleaning
nonstick surfaces.
•
•
If grates were washed in the dishwasher, season with oil prior to grilling.
Do not use metal brushes or abrasive scouring pads or other scrubbers intended
to clean outdoor charcoal grills. These wild remove the finish as well as scratch the
grates.
Grill-rocks:
enamel.
Do not clean in self-cleaning
oven or use oven cleaners
on the grates.
These are made from cast-iron which have been coated with porcelain
• The grill-rocks should be cleaned frequently or after any excessive build-up of
grease. To clean light soil, use detergent and a plastic scrubber, such as Tuff,v,or
wash in the dishwasher if burned on residue is first removed. For heavy soil, soak
in hot soapy water to which a cleanser, such as household ammonia, has been
added. Stubborn spots on grill-rocks, such as burned on residue from sauces,
can be scrubbed with a stiff bristle brush.
• An oven cleaner, such as Easy-Off, can be used for burned on soil. Follow
manufacturer's directions: spray on cleaner and let soak overnight. Do not c/ean
gri//-rocks in the se/f-c/eaning oven.
Grill Element:
The grill element should never be immersed in water. Most soil will
burn off during use. The terminal block may be cleaned with warm soapy water. Do not
use abrasive cleaners or materials, Dry thoroughly before reinserting in the cooktop.
Porcelain Basin Pan: This area is located under the grill-rocks andtor cartridges.
Clean after each heavy use of the grill.
• To remove light soil, clean with soapy water or with cleaners such as Fantastik or
409. For easier cleanup, a ) spray with household cleaner; b) cover with paper
towels; c) add small amount of water to keep the paper towel moist; d) cover and
wait 15 minutes; and e) wipe clean.
• To remove moderate soil, scrub with Comet, Bon Ami, a soft scrub cleanser or
plastic scrubber.
• To remove stubborn soil, spray with an oven cleaner, let soak overnight, wipe
clean, rinse and dry.
16
j,
i
i i,,,,,,,
i
!,,,Control Knobs I
The knobs on the control panel can be removed with the controls in the OFF position.
Pull each knob straight from the shaft. Wash knobs in warm soapy water or dishwasher; do not use abrasive cleansers or materials. To replace each knob, match flat
part of knob opening with the spring on the shaft, returning in OFF position.
[control
Knob Area
Use mild cleansers,
Wipe with sponge,
sive cleansers.
such as soapy water or mild liquid sprays, such as 409 or Fantastik.
damp cloth or paper towel.
i ,l,i
Do not scrub with S.O.S.
pads or abra-
i
I Stainless Steel Cooktop
]
• To clean light soil, wipe with soapy cloth or nonabrasive cleanser, such as Soft
Scrub. Rinse, buff with soft cloth; polish with glass cleaner if necessary.
Q To clean moderate
golden
discoloration),
soil or discoloration
of the surface (excessive heat will cause a
clean with Zud, Bar Keepers Friend, or Luneta (Jenn-Air
Model A912, Part No. 712191 ). With a sponge or cloth, rub cleanser with the grain
to avoid streaking the surface. Rinse well, buff dry; polish with a glass cleaner if
necessary to remove cleanser residue and smudge marks,
0
0
Heavy soil, such as burned on food soil, can be removed by first cleaning as per the
instructions for moderate soil. Stubborn stains can be removed with a damp
Scotch-Brite scour-pad; rub evenly with the grain to avoid streaking the surface.
Rinse well, buff with dry cloth; polish with glass cleaner if necessary to remove
cleanser residue and smudge marks. Scotch-Brite is also useful in buffing and
removing minor scratches.
Stubborn food stains may also be removed
by spraying with Easy-Off
oven cleaner.
Allow to set overnight,
then rinse.
If stains remain, clean with recommended
cleansers such as Zud, Luneta (Jenn-Air Model A912, Part No. 712191 ), or ScotchBrite scour-pad. CAUTION:
When using Easy-Off, avoid spraying areas other than
the stainless steel such as the air grille and control knob area. Immediately
wipe
up any spray from these areas with a damp cloth.
Read the manufacturer's
precautions
on using oven cleansers.
Hint: Easy-Off can be used to clean the
porcelain
burner
basin
area.
17
I Porcelainized
•
Steel Cooktop
J
Wash cool cooktop with warm soapy water and rinse. Polish with a dry cloth.
• To clean stubborn spots, clean with Cook'top Cleaning Creme (Part No. 20000001)
and a sponge. Do not use abrasive or caustic cleaning agents which may
permanently damage the finish.
• NEVER WIPE OFF A WARM OR HOT PORCELAIN ENAMEL SURFACE WITH A
DAM P CLOTH.
NOTE:
• The porcelain enamel used on your cooktop is acid resistant, not acid proof.
Therefore, acid foods (such as vinegar, tomato, milk, etc.) spilled on the cooktop
should be wiped up immediately with a dry cloth.
•
Remove sugar spills immediately.
j Under Counter J
r
Grease
Jar: A grease jar is located
below each grill basin (under the counter).
Check periodically to prevent spillovers.
Unscrew and remove. The grease jar
can be replaced with any heat tempered
jar, such as a canning jar, which has a
standard screw neck.
Serial Plate: DO NOT CLEAN.
18
Jenn-Air's ventilation system is designed to capture both cooking fumes and smoke
while grilling, if the system does not, these are some ducting installation situations to
check:
•
6" diameter
diameter
round or 3 1/4" x 10" rectangular
round ducting
ducting
may be used if the duct length
should be used.
Note:
5"
is 10' or less.
•
No more than three 90° elbows should be used. Distance between elbows should
be at least 18".
•
Recommended
Jenn-Air wall cap should be used.
freely when ventilation system is operating.
•
There
If there
should be a minimum clearance
is not an obvious
improper
of 6" for cooktop
installation,
there
Make
sure damper
installed
moves
near a side walt.
may be a concealed
problem
such as a pinched joint, obstruction
in the pipe, etc. Installation is the res0onsibility
of
the installer and questions should be addressed
first by the installer.
The installer
should very carefully check the ducting installation
instructions.
19
Griddle
Model A302
Self-draining
griddle
makes many favorite
foods easier to fix.
Family-sized surface lets
you
cook
several
pancakes, hamburgers,
or grilled sandwiches at
a time. Has a black nonstick finish.
Grill Accessory
A158
Grill accessory
grill-rocks,
Model
includes
Energy-
Saver grill element, and
two black nonstick grill
grates.
2800 watt grill
element permits you to
control
temperatures
under front and rear grills
Grill Cover
Model A341
Attractive grillcover
protects grill when
not in use. Textured steel with
molded handles.
independently.
Cooker-Steamer
Model A335
Ideal for anything you
steam, blanch, poach or
stew. Includes a dua!-position basket and see-through
cover. Attractive black nonstick finish.
Rotiss-Kebab
Model A312
Enjoy the great flavor of
rotissed foods indoors all
year around and make parties more fun by serving attractive shish kebabs. Indudes chrome finish motor,
rotiss, shish kebab skewers
and all brackets. Folds for
easy storage.
20
Wok Accessory
Model AO142
Ideal for stir-frying, steaming,
braising, and stewing. Wok has
Canning Element
Model A145A
Special canning element plugs into
conventiona/ coi/cooktop/cartridge
raising the heating element above
the cooking surface. Allows use of
oversized utensils and those with
warped or rippled bottoms.
nonstick finish, wood handles,
cover, steaming rack, rice paddles
and cooking tips. Flat bottom wok
can be used on ALL cartridges.
I Cooktop Cartridges I
Conventional
Coil
Conventional
Halogen
Radiant
Solid
Element
Coil*
Rated 240 volts...........................
A100B-Black Porcelain
A100S- Stainless Steel
A100W-White Porcelain
Halogen
Rated for 240 volts .........................
A125B-Black
A125W-White
Radiant*
Rated for 240 volts ........................
A121 B-Black
A121 W-White
Solid Element
Rated for 240 volts ......
. .................
At06B-Black
A106W-White
* To order 208 volt cartridges, add -8 to the model number.
21
Checkthe followinglist to be sure a servicecall is really necessary. A quick reference
of this manual may prevent an unneeded service call.
If nothing on the cooktop operates:
• check for a blown circuit fuse or a tripped main circuit breaker.
• check if cooktop is properly connected to electric circuit in house.
If grill heating element or cooktop does not get hot enough:
• check if heating erement is plugged in solidly.
• surface controls may not be set properly.
• voltage to house may be low.
If ventilation system is not capturing
smoke efficiently:
• check on cross ventilation in room or make up air.
• excessive amount of smoke is being created; check instructions for grilling,
trimming meats. (See p 13.)
• outside wall cap may be trapped shut.
• cooktop may be improperly installed; check ducting information. (See p 19.)
• air filter may be improperly installed. (See p 5.)
CCE1400 Owners:
if larger elements quit during cooking:
• sustained heat was trapped. (See pp. 10-11 - Large stockpots or canners.)
CVE1400 Owners: If downdraft
fan automatically
turns on during
cooking:
• sustained heat was trapped. (See pp. 10-11 - Large stockpots or canners.)
Note: If either element of the cooktop cartridge fails to heatmswitch the cartridge to
other side of cooktop. If it operates on that side, then cooktop control switch may be at
fault. If it does not heat on either side--indications are that cartridge requires service.
In this event, you may speed service by delivering the lightweight cartridge to the
authorized Jenn-Air Service Contractor, thus by-passing the time required for normal
home-service schedules.
if You Need Service
•
call the dealer from whom your appliance was purchased or the authorized JennAir Service Contractor listed in the Yellow Pages. Your Jenn-Air Service Contractor can provide better and faster service if you can accurately describe problems
and give model and serial number of the appliance. Be sure to retain proof of
purchase to vedfy warranty status. Refer to WARRANTY for further information
of owner's responsibilities for warranty service.
• if the dealer or service company cannot resolve the problem, write to Jenn-Air
Customer Assistance, c/o Maytag Customer Service, P.O. Box 2370, Cleveland,
TN 37320-2370, USA, 800-688-1100
• use and care manuals, service manuals, and parts catalogs are available from
Jenn-Air Customer Assistance, c/o Maytag Customer Service.
All specifications subject to change by manufacturer without notice.
22