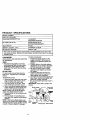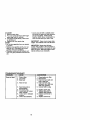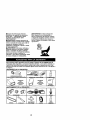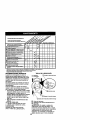
1
Owner's Manual
ICRRFTSMRN°I
6.75 HORSEPOWER
21" REAR DISCHARGE
ROTARY LAWN MOWER
Model No
917.388690
•
•
•
•
Safety
Assembly
Operation
Maintenance
•
•
EspaSol
Repair Parts
CAUTION:
Read and follow all
Safety Rules and Instructions
before operatingthis equipment
Sears, Roebuck and Co., Hoffman Estates, IL 60179
visit our Craftsman website: www.sears.com/craftsman
Warranty .................................................
2
Safety Rules ........................................ 2-4
Assembly ................................................ 5
Operation ............................................. 6-9
Maintenance Schedule ........................ 10
Maintenance .................................... 10-13
Product Specifications .......................... 11
Service and Adjustments ...................... 14
Storage ............................................ 15-16
Troubleshooting .............................. 16-17
Repair Parts .......................................... 34
Parts Ordedng ........................ Back Cover
LIMITED TWO YEAR WARRANTY ON CRAFTSMAN POWER MOWER
For two years from date of purchase, when this Craftsman Lawn Mower is maintained,
lubdcated, and tuned up according to the operating and maintenance instructions in
the owner's manual, Sears will repair free of charge any defect in material or workmanship.
If this Craftsman Lawn Mower is used for commercial or rental purposes, this warranty
applies for only 90 days from the date of purchase.
This Warranty does not cover:
• Expendable items which become worn dudng normal use, such as rotary mower
blades, blade adapters, belts, air cleaners and spark plug.
• Repairs necessary because of operator abuse or negligence, including bent
crankshafts and the failure to maintain the equipment according to the instructions
contained in the owner's manual.
Warranty service is available by returning the Craftsman power mower to the nearest
Sears Service Center/Department in the United States. This warranty applies only
while this product is in use in the United States.
This Warranty gives you specific legal dghts, and you may also have other rights which
vary from state to state.
SEARS, ROEBUCK AND CO., D/817 WA, HOFFMAN ESTATES, ILLINOIS 6O179
IMPORTANT: This cutting machine is capable of ampufating hands and feet and
throwing objects. Failure to observe the following safety instructionscould result in
serious injury or death.
I. GENERAL OPERATION
• Read, understand, and follow all
instructionson the machine and in the
manual(s) before starting. Be thoroughly familiar with the controls and the
proper use of the machine before
starting.
• Do not put hands or feet near or under
rotating parts. Keep clear of the
discharge opening at all times.
• Only allow responsible individuals, who
are familiar with the instructions,to
operate the machine.
• Clear the area of objects such as rocks,
toys, wire, bones, sticks, etc., which
could be picked up and thrown by the
blade.
• Be sure the area is clear of other
people before mowing. Stop machine ff
anyone enters the area.
• Do not operate the mower when
barefoot or weadng open sandals.
Always wear substantial foot wear.
• Do not pull mower backwards unless
absolutely necessary. Always look
down and behind before and while
moving backwards.
• Do not operate the mower with proper
guards, plates, grass catcher or other
safety protective devices in place.
• See manufacturer's instructionsfor
proper operation and installationof
accesaodes. Only use accessories
approved by the manufacturer.
and under the watchful care of another
• Stop the blade(s) when crossing gravel
drives, walks, or roads.
responsible adult.
• Be alert and rum machine off if children
• Stop the engine (motor) whenever you
enter the area.
leave the equipment, before cleaning
the mower or unclogging the chute.
• Before and while walking backwards,
look behind and down for small
• Shut the engine (motor) off and wait
children.
until the blade comes to complete stop
• Never allow children to operate the
before removing grass catcher.
machine.
• Mow only in daylight or good artificial
• Use extra care when approaching blind
light.
comers, shrubs, trees, or other objects
• Do not operate the machine while
under the Influence of alcohol or drugs.
that may obscure vision.
• Never operate machine in wet grass.
IV. SERVICE
Always be sure of your footing: keep a
firm hold on the handle and wall<; never • Use extra care in handling gasoline
and other fuels. They are flammable
run.
and vapors are explosive.
• Disengage the selt-propelled mecha-Use only an approved container.
nism or drive clutch on mowers so
- Never remove gas cap or add fuel
equipped before starting the engine
with the engine running. Allow
(motor).
engine to cool before refueling. Do
• If the equipment should start to vibrate
not smoke.
abnormally, stop the engine (motor)
- Never refuel the machine indoors.
and check immediately for the cause.
-Never store the machine or fuel
Vibration is generally a warning of
container inside where there is an
trouble.
open flame, such as a water heater.
• Always wear safety goggles or safety
• Never run a machine inside a closed
glasses with side shields when operatarea.
ing mower.
• Never make adjustments or repairs with
I1. SLOPE OPERATION
the engine (motor) runnlt',g.
Disconnect
Slopes are a major factor related to slip
the spark plug wire, and keep the wire
and fall accidents which can result in
away from the plug to prevent accidensevere injury. All slopes require extra
tal starting.
cautlan. If you feel uneasy on a slope, do
• Keep nuts and bolts, especially blade
not mow it.
attachemant bolts, tight and keep
DO:
equipment in good condition.
• Never tamper with safety devices.
• Mow across the face of slopes: never
Check their proper operation regularly.
up and down. Exercise extreme caution
• Keep machine free of grass, leaves, or
when changk_g direction on slopes.
other debris build-up. Clean oil or fuel
• Remove obstacles such as rocks, tree
spillage. Allow machine to cool before
limbs, etc.
• Watch for holes, ruts,or bumps. Tall
storing.
• Stop and inspect the equipment if you
grass can hide obstacles.
strike an object. Repair, if necessary,
DO NOT:
before restarting.
• Do not trlm near drop-ads, ditches or
• Never attempt to make wheel height
embankments. The operator could lose
adjustments while the engine (motor) is
footing or balance.
running.
• Do not trim excessively steep slopes.
• Grass catcher components are subject
• Do not mow on wet grass. Reduced
to wear, damage, and deterioration,
footing could cause slipping.
which could expose moving parts or
IlL CHILDREN
allow objects to be thrown. Frequently
check components and replace with
Tragic accidents can occur if the operator
manufacturer's recommended parts,
is not alert to the presence of children.
Children are of_ana_racted to the
when necessary.
• Mower blades are sharp and can cut.
machine and the mowing activity. Never
assume that children will remain where
Wrap the blade(s) or wear gloves, and
use extra ca_ion when servicing them.
you last saw them.
• Keep children out of the trimming area
• Do not change the engine governor
3
setting or overspeed the engine.
ALook for this symbol to point out
important safety precautions. It means
CAUTIONI!I BECOME ALERT!I! YOUR
SAFETY IS INVOLVED,
AWARNING:
In order to prevent
accidental starting when setting up,
transporting, adjusting or making repairs,
always disconnect spark plug wire and
place wire where it cannot contact spark
plug.
AWARNING: Battery posts, terminals and
related acoessories contain lead and
lead compounds, chemicals known to the
State of California to cause cancer and
birth defects or other reproductiveharm.
Wash hands after handling.
A CAUTION: Muffler and other engine
parts become extremely hot during
operation and remain hot after engine
has stopped. To avoid severe burns on
contact, stay away from these areas.
AWARNING: Engine exhaust, some of
its constituents, and certain vehicle
components contain or emit chemicals
known to the State of California to cause
cancer and birth defects or other reproductive harm.
These accessorieswere availa_ when this lawn mower was produced. They are not
shipped with your mower. They are also availableat most Sears retail outletsand service
centers. MostSears storescan also order repairpartsfor you, when youprovide the model
numberof yourlawnmower. Some of these accessories may not app_ to yourlawnmower.
LAWN MOWER PERFORMANCE
FOR REAR DISCHARGE LAWN MOWERS
FOR
REAR DISCHARGE
GRASS
LAWN CATCHERS
MOWERS
MDLCHER KQS
STABILIZER
FOR
SIDE DISCHARGE
GRASS
LAWN CATCHERS
MOWERS
_
GAS CANS
LAWN MOWER MAINTENANCE
MUFFLERS
BELTS
AIR FILTERS
BLADES
BLADE ADAPTERS
4
SPARK PLUGS
WHEELS
ENGINE OIL
Read these instructionsand this manual in
its entiretybefore you attempt to assemble
or operate your new lawn mower.
IMPORTANT: This lawn mower is shipped
WITHOUT OIL OR GASOLINE in the
engine.
Your new lawn mower has been assembled
at the factory with the exceptionof those
parts left unasssmbled for shipping
purposes. To ensure safe and proper
operationof yourlawn mower, all parts and
herdware yon assemble must be tightened
securely. Use the correct tools as neces*
sary to ensure propartightness. All parts
such as nuts, washers, bolts, etc., necessary to complete the assembly have been
placed in the parts bag.
3. Remove any packing material from
around control bar.
Your handles may be adjusted for your
mowing comfort. Refer to =ADJUST
HANDLE" in the Service and Adjustments
section of this manual.
control bar
Lift u
position
TO REMOVE LAWN MOWER FROM
CARTON
1. Remove loose parts included with
Lower handle
mower.
2. Cut down two end corners of carton
and lay end panel down flat.
3. Remove all packing materials except
padding between upper and lower
handle and padding holding operator
presence control bar to upper handle.
4. Roll lawn mower out of carton and
check carton thoroughly for additional
loose parts.
HOWTO SET UPYOUR LAWN
MOWER
TO UNFOLD HANDLE
IMPORTANT: Unfold handle carefully so
as not to pinch or damage control cables.
1. Raise lower handle section to operating position and squeeze the bottom
ends of lower handle towards each
other until the pin in handle can be
inserted into one of the three height
adjustment holes.
2. Remove protective padding, raise
upper handle section into place on
lower handle and tighten both handle
knobs.
pin
3-Position
handle
J
bracket
TO INSTALL ATACHMENTS
Your lawn mower was shipped ready to
be used as a mulcher.To convert to
bagging, see "TO CONVERT MOWER" in
the Operation section of this manual.
KNOWYOUR
LAWN
MOWER
READTHIS OWNER'S MANUAL AND SAFETY RULES BEFORE OPERATING YOUR LAWN
MOWER. Compare the ilustraSons with your lawn mower to familiarize yourself with the
location of various controlsand ac_ustments.Save this manualfor future referer_e.
These symbols may appear on your lawn mower or In literature supplied with the
product. Learn and understand their meaning.
CAUTION
OR WARNINQ
ENGINE
ON
ENGINE
OFF
FAST
SLOW
CHOKE
FUEL
OIL
DANGER, KEEP HANDS
AND FEET AWAY
•Engine zone control cable
Starter handle
Gasoline filler cap
Handle I
Air filter
Pdmer
Engine oil cap
with dipstick
Housing
IMPORTANT: This lawn mower Is shipped
WITHOUT OIL OR GASOLINE in the engine.
Wheel adjuster
(on each wheet)
MEETS CPSC SAFETY REQUIREMENTS
Sears rotarywalk-behindpower lawn mowerscooformto the safetystandardsof the American
NationalStandardsInstituteand the U.S. ConsumerP_
Safety Commission.The blade
toms when the engine is running.
Operator Presence Control Bar- must be
helddown totbe handleto startthe engine,
Release to stopthe engine,
Starter Handle - ussd for starting the e_ine.
Primer - pumpsadd_
fuelfromthe
carberetorto the cySnderfor use whea
start_g a _
engine.
6
Theoperation
ofanylawn
mower
canresultinforeign
TO CONVERT MOWER
Yourlawn mower was shippedready to be
usedas a moP..her.To oonvertto bagging :
REAR BAGGING
• Liftrear doorof the lawn mower and place
the grasscatcherframe hooksontothe
deer pivotpins,
• To convertto mulching opera,an, remove
grasscatcher anddose rear door.
ACAUTION: Do not run your lawn mower
without clipping deflector or approved
grass catcher in place. Never attempt to
operate the lawn mower with the rear
door removed or propped open.
objects thrown into the eyes,
which can result in severe
eye damage. Always wear
safety glasses or eye shields while
operating your lawn mower or performing
any adjustments or repairs. We recommend a wide vision safety mask over
spectacles or standard safety glasses.
HOWTO USEYOUR LAWN MOWER
ENGINE SPEED CONTROL
The eegine speed was setat the factory for
optVnurnperformance. Speed is not adjustable.
ENGINEZONE CONTROL
_,CAUTION:
Federal regulations require
an engine control to be installed on this
lawn mower in order to minimize the risk
of blade contact injury. Do not under any
circumstances attempt to defeat the
function of the operator control.The blade
turns when the engine is running.
• Your lawn mower is equippedwith an
operatorpresencecontrolbar which
requiresthe operatorto be pesitloeed
behindthe lawn mowerhandle to startand
operate the lawn mower.
TO ADJUST cu'n3NG HEIGHT
Raise wheels for low cut and lower
wheels for high cut. Adjust cutting height
to suit your requirements. Medium
position is best for most lawns.
• To change curing height,squeeze ac_uster
levertowardwheel. Move wheelup or
down_ suityourrequirements.Besure all
whealsare in the same setting.
NOTE: Adjuster is propedy positioned
when plate tab inserts into hole in lever.
Also, 9-position adjusters (if so equipped)
allow lever to be positioned between the
plate tabs.
Pivot "
Rear
Grass
cafchor
handle
TO EMPTY GRASS CATCHER
1. Lift up on grass catcher using the
frame handle.
2. Remove grass catcher with clippings
from under lawn mower handle.
3. Empty clippings from bag using both
frame handle and bag handle.
NOTE: Do not drag the bag when
emptying; it will cause unnecessary wear.
Grass
Lower Wheels for High Cut
Plate Tab
frame
handle
Bag handle
I
RaiseWheels for Low Cut
Lever
7
BEFORE STARTING ENGINE
ADD OIL
Your lawnmower is shipped without oil in
the engine. Engine holds 20 oz. of oil.
For type and grade of oilto use, see
"ENGINE" in Maintenance section of this
manual.
1. Be sure lawnmower is level and area
around oil fill is clean.
2, Remove engine oil cap and fill to the
full line on the dipstick. Pour oil slowly.
Do not over fill.
NOTE: Allow oil to settle down into engine
for accurate reading. To read proper level,
tighten engine oil cap, then remove it to
read the dipstick,
3. Reinstall engine oil cap and tighten.
• Check oil level before each use. Add
oil if needed. Fill to full line on dipstick.
• Change the oil after every 25 hours of
operation or each season. You may
need to change the oil more often
under dusty, dirty conditions.
ADD GASOLINE
• Fill fuel tank. Use fresh, clean, regular
unleaded gasoline with a minimum of
87 octane. Do not mix oil with gasoline, Purchase fuel in quantities that
can be used within 30 days to assure
fuel freshness.
AWARNING: Experience indicates that
alcohol blended fuels (called gasohol or
using ethanol or methanol) can attract
moisture which leads to separation and
formation of acids during storage. Acidic
gas can damage the fuel system of an
engine while in storage, To avoid engine
problems, the fuel system should be
emptied before storage of 30 days or
longer. Drain the gas tank, start the
engine and let it run until the fuel lines
and carburetor are empty. Use fresh fuel
next season. See Storage Instructionsfor
additional information. Never use engine
or carburetor cleaner products in the fuel
tank or permanent damage may occur.
_, CAUTION: Fill to bottom of gas tank
filler neck. Do not overfill. Wipe off any
spilled oil or fuel. Do not store, spill or
use gasoline near an open flame.
Ga,O,c' ;
Engine
_/_
_f,_Z.i_(T_L"ilnI
o=1
cap
TO START ENGINE
NOTE: Due to protective coatings on the
engine, a small amount of smoke may be
present during the initial use of the
product and should be considered
normal.
1. To start a cold engine, push primer
three (3) times before trying to start.
Use a firm push, This step is not
usually necessary when starting an
engine which has already run for a
few minutes.
2. Hold operator presence control bar
down to the handle and pull starter
handle quickly. Do not allow starter
rope to snap back.
TO STOP ENGINE
• To stop engine, release operator
presence control bar.
NOTE: In cooler weather it may be
necessary to repeat primingsteps. In
warmer weather over priming may cause
flooding and engine will not start. If you
do flood engine, wait a few minutes
before attempting to start and do not
repeat priming steps.
MOWING'rIPS
• Under
certain conditions, such
as very
tall gross, it may be necessary to raise
the height of cut 1o reduce pushing
effort and to keep from ovedoading the
engine and leaving clumps of grass
clippings. It may also be necessary to
reduce ground speed and/or run the
lawn mower over the area a second
time.
• For extremely heavy cutting, reduce the
width of cut by ovedapping previously
cut path and mow stow|y.
• For better grass bagging and most
cutting conditions, the engine speed
should be set in the fast position.
• When using a rear discharge lawn
mower in moist, heavy grass, clumps of
cut grass may not enter the grass
catcher. Reduce ground speed
(pushing speed) and/or run the lawn
mower over the area a second time.
• If a trail of clippings is left on the right
side of a rear discharge mower, mow in
a clockwise direction with a small
ovedap to collect the clippings on the
next pass.
• Pores in cloth grass catchers can
become filled with dirt and dust with use
and catchers will collect less grass. To
provent this, regularly hose catcher off
with water and let dry before using.
• Keep top of engine around starter clear
and clean of grass clippings and chaff.
This will help engine air flow and
extend engine life.
MULCHING MOWlNGTIPS
IMPORTANT: For best performance,
keep mower housing free of built-up
grass and trash. See "CLEANING" in the
Maintenance section of this manual
• The special mulchingblade wil recat the
grassclippingsmany times end reduce
them in size so that as theyfal ontothe
lawn they willdisperseinto the grass and
not be noticed.Also,the mulchedgrasswill
biodegradequicklyto pr_de nutrientsfor
the lawn. Always mulchwithyour Nghest
engine (blade) speed as this will provide
the best recutiingactionof the blades.
• Avoidcuttingyour lawnwhen it is wet. Wet
grasstendsto form dumps and interferes
with the mulchingaction.The best time to
mew your lawnis the eadyettemoon. At
thistime the grasshas driedand the newly
cut area wil not be exp<_;edto the direct
sun.
• For best results,adjust _ lawn mower
cutting height so that the lawn mower cuts
off onlythe top one-third of the grass
blades. If the lawn is overgrown it wgl be
necessary to raise the height of cut to
reduce puchk_geffortand to keep from
overloading the engine and leaving
clumps of mulched grass. For extremely
heavy mulching, reduce your width of cut,
rr_N slowly and raisethe rear of the lawn
mower one wheel a_uster set_nghigher
than _e fronL
• Certaintypes of grass end grass condk
tions
may require
thatan areabe mulched
a secondtimetocompletely
hidethe
clippings.When doing a second cut, mow
acrossor perpondcularto the tirst cut path.
• Change yourcutiJngpatternfromweak to
week. Mc_wP_rthto eau_ one weak then
changeto east to west the nextweek. "INs
wighelp preventmattingand grainingof
the lawn.
Max 1/3
9
MAINTENANCE
SCHEDULE
FILL IN DATES
AS YOU COMPLETE
REGULAR SERVICE
Check for Loose Fasteners
Clearvlnspect Grass Catcher
(If Equipped)
Clean Lawn Mower
Clean Under Drive Cover
(power-Propelled Mowers)
Check drive beJtl ulleys
(p ower.P ropellJ_eaPMowem)
SERVICE
"t/
I_
'
"
'
DATES
if/
IV#
W/
t_
i_/
V/
I_
ChecWSharpen/Replace Blade
_3
Lubrication Chart
Clean Batte_//Rechar, e
IElectrlc Start Mowers
_
it/
f_/
11/4
Check Engine Oir Level
Chanqe Engine 0
b/1.2
Clean Air Ftlter
I_
Inspect Muffler
Clean or Replace Spark Plug
Replace Air Filter Paper Cartridge
¥/
11_2
1 - Cl_mge n'_ reoften whe_ 0t0erattlg under a heavy Iced or Ii_high ambierd t_rt_"
2 - Ser_
mo_l oftl_ when opecatit_g_ dirtyor dL_ty CCJldi_ons.
3 - Replace blades r_,to often when mowing in wdy _
4 - Ckarge 48 hours at I_,r_d
of w.
GENERAL RECOMMENDA'I1ONS
The warrantyon _is lawn rr_wer does nct
coverfferns that havebeen subjectedto
operatorabuse or negiigence.Toreceivefull
valuefrom the warrant_operatormust
maintainmoweras ins'a'ucted
in thismanual.
Some a_us_nents v_l need to be made
periodicallyto properlymaintain your u_.
All adjus_nents inMe Service and
Aclustments section of this manual should be
checkedat least once each season.
• Once a year, replacethe sparkplug,
replaceair filterelement and check blade
for wear.A new sparkplug and clea_-_ew
air filter elementassureproperair-fuel
mixtureand help your engine run better
and last longer.
• Follow the maintenance schedule in tNs
manual.
BEFORE EACH USE
I. Check engine oil level.
2. Check for loose fasteners.
LUBRICATION
Keep unitwell lubricated(See
"LUBRIC,_'ION CHART").
LUBRICATION
(_)Whoel adjusters
(on each wheel)
CHART
)Brake spring bracket
) Engine oil
Rear door hinge
Handle bracket mounting pins
(_) Spray LUbricanl
_) Refer to "ENGINE"in 1heMaintenancesection.
IMPORTANT: Do not oil or grease plastic
wheel bearings. Viscous lubricants will
attract dust and dirt that will shorten the
life of the self lubricating bearings. If you
feel they must be lubduated, use only a
dry,powdered graphite type lubricant
loSparingly -
PRODUCT
SPECIFICATIONS
SERIAL NUMBER:
DATE OF PURCHASE:
GASOLINE CAPACITY/TYPE:
1.5 QUARTS
UNLEADED REGULAR
Z)ILTYPE (API-SF-SJ):
_)ILCAPACITY:
SAE 30 (ABOVE 32=F)
SAE 5W-30 (BELOW 32°F)
20 OZS.
;PARKPLUG(GAP: .045")
BLADE BOLTTORQUE:
CHAMPION RJ19LM4
35-40 FT. LBS.
, The model and serial numbers will be found on a decal attached to the rear of the
lawn mower housing. Record both sedal number and date of pumhase in the space
provided above.
LAWN MOWER
Alwaysobsewe safety ruleswhen performing
any maintenance.
TIRES
• Keaptiresfreeof gasoine, oil, orinsect
controlchemicalswhich can harm rubber.
• Avoid stumps, stones, deep nJts,sharp
objects and other hazards that may cause
tire damage.
BLADE CARE
For best results, mower blade must be
kept sharp. Replace bent or damaged
blades,
TO REMOVE BLADE
1. Disconnect spark plug wire from spark
plug and place wire where it cannot
come in contact with spark plug.
2. Turn lawn mower on its side. Make
sure air filter and carburetor are up.
3. Usa a wood block between blade and
mower housing to prevent blade from
turning when removing blade bolt.
NOTE: Protect your hands with gloves
and/or wrap blade with heavy cloth.
4. Remove blade bolt by turning counterclockwise.
5. Remove blade and attaching hardware (bolt, lock washer and hardened
washer).
NOTE: Remove the blade adapter and
check the key inside hub of blade adapter.
The key must be in good condition to work
properly. Replace adapter if damaged.
TO REPLACE BLADE
1. Position the blade adapter on the
engine crankshaft. Be sure key in
adapter and crankshaft keyway are
aligned.
2. Position blade on the blade adapter
aligning the two (2) holes in the blade
with the raised lugs on the adapter.
3. Be sure the trailing edge of blade
(opposite sharp edge) is up toward
the engine.
4. Install the blade bolt with the lock
washer and hardened washer into
blade adapter and crankshaft.
5. Use block of wood between blade and
lawn mower housing and tighten the
blade bolt, turning clockwise.
• The recommended tightening torque is
35-40 ft. Ibs.
IMPORTANT: Blade bait is grade 8 heat
treated.
Bladeadapter _
Key._.
__j'
11
Crankshaft
_.1
_
washer
"_
keyway
_C_rank
Trailing edge Blade adapter
TO SHARPEN BLADE
NOTE: We do not recommend
sharpening blade - but if you do, be sure
the blade is balanced.
Care should be taken to keep the blade
balanced. An unbalanced blade will
cause eventual damage to lawn mower or
engine.
• The blade can be sharpened with a file
or on a grinding wheel. Do not attempt
to sharpen while on the mower.
• To check blade balance, drive a nail
Into a beam or wall. Leave about one
inch of the straight nail exposed. Place
center hole of blade over the head of
the nail. If blade is balanced, it should
remain in a horizontal position, If either
end of the blade moves downward,
sharpen the heavy end until the blade
is balanced.
GRASS CATCHER
• The grass catcherrnay be _
with
water, but mustbe dry when used.
• Ch_:_ your grass catcher often for damage
or deterioratien. Through normal use it will
wear. If catcherneeds replacing,replace
onlywith a manufacturerapproved
replacementcatcher.Give the lawn mower
model numberwhen ordering.
ENGINE
LUBRICATION
Use only high quality detergent oil rated
with API service classification SF-SJ.
Select the oil's SAE viscositygrade
according to your expected operating
temperature.
L
T_TUR_
_IGE
ANT1CpAT_
BIE,_ Rll NE_
_
_i_
Change the oil after every 25 hours of
operation or at least once a year if the
lawn mower is not used for 25 hours in
one year.
Check the crankcase oil level before
starting the engine and after each five (5)
hours of continuous use. Tighten oil plug
securely each time you check the oil
level
TO CHANGE ENGINE OIL
NOTE: Before tipping lawn mower to
drain oil, drain fuel tank by rUnning
engine until fuel tank is empty.
t. Disconnect spark plug wire from spark
plug and place wire where it cannot
come in contact with spark plug.
2. Remove engine oil cap; lay aside on a
clean surface.
3. Tip lawn mower on its side as shown
and drain oil into a suitable container.
Rock lawn mower back and forth to
remove any oil trepped inside of
engine.
4. Wipe off any spilled oil from lawn
mower or side of engine.
5. Fill engine with oil (see "ADD OIL" in
the Operation section of this manual).
6. Reconnect spark plug wire to spark
plug.
E
NOTE: Although muiti_viscosity oils
(5W30, 10W30 etc.) improve starting in
cold weather, these multi_viscosity oils
will result in increased oil consumption
when used above 32°R Check your
engine oil level more frequently to avoid
possible engine damage from running
low on oil
12
_.IRFILTER
_our engine will not run properly and may
3e damaged by using a dirty air filter.
Cteplacathe air filter every 100 hours of
operation or every season, whichever
occursfirst. Service air cleaner more
_ffen under dusty conditions. Do not
,rash air filter.
TO CHANGE AIR FILTER
1. Remove the air filter by turning
clockwise to the stop and pull away
from collar.
2. Remove filter from inside of cover.
3. Clean the inside of the cover and the
collar to remove any dirt accumulation.
4. Insert new filter into cover.
5. Put air filter cover and filter into collar
aligning the tab with the slot.
6. Push in on cover and turn counterclockwise to tighten.
Collar
Turn
Clip
remove
clockwiseto
Slot
Air tilter'
Air filter cover
MUFFLER
Inspect and replace corroded muffler as it
could create a fire hazard and/or damage.
SPARK PLUG
Replace spark plugs at the beginning of
each mowing season or after every 100
hours of operation, whichever occurs first.
Spark plug type and gap setting are
shown in =PRODUCT SPECIFICATIONS"
in Maintenance section of this manual.
CLEANING
IMPORTANT: For best performance,
keep mower housing free of built-up
grass and trash. Clean the underside of
your mower after each use.
_,CAUTION: Disconnect spark plug wire
from spark plug and place wire where it
cannot come in contact with the spark
plug.
• Clean the underside of your lawn
mower by scraping to remove build-up
of grass and trash.
• Clean engine often to keep trash from
accumulating. A clogged engine runs
hotter and shortens engine life.
• Keep finished surfaces and wheels free
of all gasoline, oil, etc.
• We do not recommend using a garden
hose to clean lawn mower unless the
electrical system, muffler, air filter and
carburetor are covered to keep water
out. Water in engine can result in
shortened engine life.
Turn
counterclockwise to tighten
13
ACAUTION:
Before performing any
service or adjustments:
1. Release control bar and stop engine.
2. Make sure the blade and all moving
parts have completely stooped.
3. Disconnect spark plug wire from spark
plug and place where it cannot come
in contact with plug.
LAWN MOWER
TO ADJUST CUTTING HEIGHT
See _'O ADJUST CUTTING HEIGHT" in
the Operation section of this manual.
REAR DEFLECTOR
The rear deflector, attached between the
rear wheels of your lawn mower, is
provided to minimize the possibilitythat
objects will be thrown out the rear of the
lawn mower into the operator's mowing
position. If the rear deflector becomes
damaged, it should be replaced.
TO ADJ UST HANDLE
The handle on your lawn mower has
three (3) height positions- adjust to height
that suits you.
• Squeeze the bottom ends of lower
handle towards each other until the pin
in handle can be inserted into one of
the three height adjustment holes.
3-position
handle
bracket
\\
TO ASSEMBLE GRASS CATCHER
1. Put grass catcher frame into grass bag
with dgid part of bag on the bottom.
Make sure the frame handle is outside
of the bag top.
2. Slip vinyl bindings over frame.
NOTE: If vinyl bindingsare too stiff, hold
them in warm water for a few minutes. If
bag gets wet, let it dnj before using.
•-CAUTION: Do not run your lawn
mower without clipping deflector or
approved grass catcher in place. Never
attempt to operate the lawn mower with
the rear door removed or propped open.
Catcher
frame
handle
Frame
ENGINE
ENGINE SPEED
Yourangina speed has been factory set. Do
not attemptto increaseengine speedor it
may resuitin persocalinjury. If youbellsve
thatthe englne is runnix:jtca fast or tous/ow,
ta_e yourlawn mowerto an a Sears or other
qusiflad servicecenterfor repairand
a_usknent,
CARBURETOR
Yourcarburetorhas a non-adjustablefixed
mainjetfor ntxture control, it yourangine
does notoperate properlydueto suspected
cafouretorproofems,take yourlawn mower
to a Seara or other quafiFted
seMce canter
for repairor adjusl_',ent.
IMPORTANT: Never tamper with the
engine governor, which is factory set for
proper engine speed. Overspeeding the
engine above the factory high speed
setting can be dangerous, if you think the
engine.governed high speed needs
adjusting, contact your nearest Sears or
other qualified service center, which has
proper eduipment and experience to
make any necessary adjustments.
14
Immediatelypreparey_ar lawn mowerfor
storageat the end of the season or ifthe unit
willnot be usedfor 30 daysor more.
LAWN MOWER
When lawn mower isto be storedfor a pedod
of time, clean itthoroughly,removeal dirt,
grease, leaves,etc. Storein a dean, dryarea.
1. Clean entire lawn mower (See
"CLEANING" in the Maintenance
section of this manual).
2. Lubricate as shown in the Maintenance section of this manual.
3. Be sure that all nuts, bolts, screws, and
pins are securely fastened. Inspect
moving parts for damage, breakage
and wear. Replace if necessary.
4. Touch up all rusted or chipped paint
sudacas; sand lightly before painting.
HANDLE
You can fold your lawn mower handle for
storage.
1. Loosen the two (2) handle knobs on
sides of the upper handle and allow
handle to fold down to the rear.
2. Squeeze the bottom ends of lower
handle toward each other until pins in
handle clear the brackets and pivot
entire handle assembly forward and
allow it to rest on mower.
• When setting up your handle from the
storage position, the lower handle will
require manually locking into the
mowing position.
IMPORTANT: When folding the handle
for storage or transportation, be sure to
fold the handle as shown or you may
damage the control cables.
Operator presence
Upper
Lower
Fold
backward
Mowing
position
pin
/
3-Position
adjustment
ENGINE
FUEL SYSTEM
IMPORTANT: It is important to prevent
gum deposits from forming in essential
fuel system parts such as carburetor,fuel
filter, fuel hose, or tank during storage.
Also, experience indicates that alcohol
blended fuels (called gasohol or using
ethanol or methanol) can attract moisture
which leads to separation and formation
of acids during storage. Acidic gas can
damage the fuel system of an engine
while in storage.
1. Drain the fuel tank.
2. Start the engine and let it run until the
fuel lines and carburetor are empty.
• Never use engine or carburetor cleaner
products in the fuel tank or permanent
damage may occur.
• Use fresh fuel next season.
NOTE: Fuel stabilizer is an acceptable
alternative in minimizing the formation of
fuel gum deposits during storage. Add
stabilizer to gasoline in fuel tank or
storage container. Always follow the mix
ratio found on stabilizer container. Run
engine at least 10 minutes after adding
stabilizer to allow the stabilizer to reach
the carburetor. Do not drain the gas tank
and carburetor if using fuel stabilizer.
ENGINE OIL
Drain oil (with engine warm) and replace
with clean engine oil. (See "ENGINE" in
the Maintenance section of this manual).
15
CYLINDER
t. Remove spark plug.
2. Pour one ounce (29 ml) of oil through
spark plug hole into cylinder.
3. Pull starter handle slowly a few times
to distribute oil.
4. Replace with new spark plug.
OTHER
• Do not store gasoline from one season
to another.
• Replace your gasoline can if your can
starts to rust. Rust and/or dirt in your
gasoline will cause pmblerns.
• If possible, store your unit indoors and
cover it to give protection from dust and
dirt.
TROUBLESHOOTING
PROBLEM
Does not start
• Cover your unit with a suitable protective cover that does not retain moisture.
Do not use plastic. Plasfic cannot
breathe, which allows condensation to
form and will cause your unit to rust.
IMPORTANT: Never cover mower while
engine and exhaust areas are still warm.
_I,CAUTION: Never store the lawn
mower with gasoline in the tank inside a
building where fumes may reach an open
flame or spark. Allow the engine to cool
before storing in any enclosure.
CHART
CAUSE
CORRECTION
1. Dirty air filter,
2. Out of fuel.
3. Stale fuel.
4. Water in fuel.
5. Spark plug wire is
disconnected.
6. Bad spark plug.
7. Loose blade or broken
blade adapter.
8. Control bar in released
position.
9. Control bar defective.
16
1. Clean/replace air filter.
2. Fill fuel tank.
3. Drain tank and refill with
fresh, clean fuel.
4. Drain fuel tank and
carburetor and refill tank
with fresh gasoline.
5. Connect wire to plug.
6. Replace spark plug.
7. Tighten blade bolt or
replace blade adapter.
8. Depress control bar to
handle.
9. Replace control bar.
TROUBLESHOOTING
CHART
PROBLEM
CAUSE
1. Rear of lawn mower
Loss of power
housingor cutting blade
dragging in heavy grass.
2. Cutting too much grass.
3. Dirty air filter.
4. Buildup of grass, leaves,
and trash under mower.
5. Too much oil in engine.
6. Walking speed too fast.
Poor cut uneven
1. Worn, bent or loose blade.
2. Wheel heights uneven.
3. Buildup of grass, leaves
and trash under mower.
Excessive
vibration
1. Worn, bent or loose blade.
2. Bent engine crankshaft.
Starter rope
hard to pull
1. Engine flywheel brake is
on when control bar is
released.
2. Bent engine crankshaft.
3. Blade adapter broken.
4. Blade dragging in grass.
CORRECTION
1. Set to "Higher Cut*
position,
2. Set to =Higher Cut"
position.
3. Clean/replace air filter.
4. Clean underside of mower
housing.
5. Check oil level.
6. Cut at slower walking
speed.
1. Replace blade. Tighten
blade bblt.
2. Set all wheels at same
height,
3. Clean underside of
mower housing.
1. Replace blade. Tighten
blade bolt.
2. Contact a Sears or other
qualified service center.
1. Depress control bar to
upper handle before
pulling starter rope.
2, Contact a Sears or other
qualified service center.
3. Replace blade adapter.
4. Move lawn mower to cut
grass or to hard surface.
Grass catcher
not flUlng (if so
equipped)
1. Cutting height too low.
2, Lift on blade wom oft,
3. Catcher not venting air.
1. Raise cutting height.
2, Replace blade,
3. Clean grass catcher.
Hardtopush
1. Grass is too high or wheel
height is too low.
2. Rear of lawn mower
housing or cutting blade
dragging in grass.
3. Grass catcher too full.
4. Handle height position not
rightfor you.
1. Raise cutting height.
17
2. Raise rear of lawn mower
housing one (1) setting
higher.
3. Empty grass catcher.
4. Adjust handle height to
suit.
GaranSa .........................................................
18
Reglas de Seguridad ................................ 18-20
Montaje ...........................................................
21
Operacidn .................................................
22-25
Mantenimiento .......................................... 26-29
programa de Mantenimiento .......................... 26
Especificaciones de1 Producto ...................... 27
Servicio y Adjostes ........................................ 30
Almacenam[ento ....................................... 31-32
Identificack_nde problemas ..................... 32-33
Partes de repuesto ..................... Vea el manual
ingles dal duer3o
Orden de Partes ............................. Contratapa
GARANTfA LIMITADA DE DOS ,t_OS PARA LA SEGADORA A MOTOR CRAFTSMAN
Pot dos (2) afios, a par6r de la fecha de compra, cuando esta Segadora Craftsman se
mantenga, lubdque y aline segdn las inslrucciones para la operaci6n y el mantenimiento en el
manual dal dueSo, Sears reparard gratis todo defecto en el material y la mano de obra.
Si la Segadora Craftsman se usa pare fines comemiales o de arriendo, esta garanfla sblo se
apiica por noventa (90) dlas a partir de la fecha de compra.
Esta Garantfa no cubre:
• Artlculos que se desgastan durante el uso normal tales como las cuchillas segadoras
rotatorias, los adaptadores de la cuchilla, las correas, los filtros de airs y las bujlas.
• Reparacionos nocesarias debido al abuso o a ta negligencia del operador, incluy6ndose a los
cigQefiales doblados y a la falta de mantenimiento del equipe segt3nlas instrucciones que se
incluyen en el n_nual dal duefio.
EL SERVICIO DE GARANTIA ESTA DISPONIBLE al devolver la segadera a motor Craftsman al
Centro/Departmento de Sewicio Sears mas oercano en los Estados Unidos. Esta garantfa se
aplica solamente mientras el producto este an uso en los Estados Unidos.
Esta Garantfa le otorga derechos legales espec|ficos, y pueds que tarnbi_n tenga olros
derachos que varlan de estado a estado.
Sears, Roebuck and Co., D/817WA, Hoffman Estates, IL 60179
USA
IMPORTANTE: Esta maquina cortadaora as capaz de amputar las manos y los manos y los
pies y de lanzar objetos. Si no se obser,,an las instrucciones de segurided siguientes se pueden
producir lesiones graves o la muerte.
L OPERACION
• Antes de empezar, debe lamiliarizarse
completamente con los controles y el uso
correcto de la maquina. Para esto, debe leer
y comprender todas las instrucciones que
aparecen an la maquina y an los manuales
de operaci6n.
• No penga las manos o los pies cerca o
debajo de las pertes mtalodas. Mant_ngase
slempre lejos de la absrtura de la descarga.
• PernTrtaque salameote las personas
responsables que esten familiadzadas con
las instrucciones operen la mdquina.
• Despeje el draa de objetos tales como
piedras, juguetes, alambres, huesos, palos,
etc. qua pueden ser recogidos y lanzades
per las cuchillas.
• AsegOrese qua el drea no se haflen
personas, antes de segar. Pare la m_quina
si alguien entra en el _rea.
• No opere la maquina sin zapatos o con
sandalias abiertas. Pbngase sJempre
zapatos sbfidos.
• No tire de la segadora hacia atr_s a menos
que sea absolotarnente necesatio. Mire
siempre haala abajo y hacia detrds antes y
mientras que se mueve hacia atr_s.
• No opera la segadora sin los respectivos
resguardos, placas u otros aditamentos
diseSados para su proteccion y seguddad.
• Refidrase alas instrucciones del fabricante
para el funcionamiento e instalacion de
accesodos. Use dnicamente accesodos
aprobados per el fabncante.
• Detenga la cuchilla o las cuchillas cuando
crose por calzadas, calles o caminos de
grava.
• Parar el moto_ cada vez que se abandona el
aperato, antes de limpiar la segadora o de
remover msiduos del tubo.
• Apagar el motor y esperar hasta que las
cucl_llas est_n completarnents parades
antes de remover el receptor de hierba.
• Segar solamente con luz del dla o con una
buena luz artificial.
• No opere la mdquina bajo la intluencia del
18
alcohol o de las drogas.
. Nunca
opere
larnaquina
cuando
lahierba
est& mojada Aseg0rese siempre de tener
buena tracci6n ensus pies; mantenga el
mango firmemente y camine; nunca corra
• Desconectar el mecaalsmo de propulsibn
autbnoma o el embrague de transmisibn en
las segadoras que Io tienen antes de poner
en marcha el motor
• Si el equipo empezara a vibrar de una
manera anormal, pare el motor y revise de
inrnediato para avenguar la causa
Generalmente la vibracibn suele indicar que
existe alguna averla
• Siempre use gafas de seguridad o ante_jos
con protecci6n lateral cuando opere la
segadora
II. OPERACION
$OBRE LA$ CUESTAS
Los accidentes ocurren con rods frecuencia
en las cuestas Estos accidentes ocurren
debido a resbaladas o cafdas, las cuales
pueden resultar en graves lesiones Operar la
recortadora en cuestas requiere mayor
concentracibn Si se siente inseguro en una
cuesta,
no
la
recorte.
HACER:
• Puede recortar a tray,s de la superficie de
la cuesta, nunca hacia arriba y hacia abajo
Proceda con extrema precaucibn cuando
cambie de direccibn en las cuestas
• Renueva todos los objetos extraRos, tales
como guijarros, rarnas, etc
• Debe prestar atencibn a boyos baches o
protuberancias Recuerde que la hierba alia
puede esconder obstdculos
NO HACER:
0 No recorte cerca de pendientes zanjas o
terraplenes El operador puede perder la
traccibn en los pies o el equilibrio
. No recorte cuestas demasiado inclinades
. No recoile en hierba mojada La reduccibn
an la traccibn de la pisada puede causar
resbalones
Ill Nll;IO S
Se pueden producir accidentes trdgicos si el
oderador no presta atenckY_a la presencia de
rosniRos A menudo, los niSos se sienten
atrafdos por la rn_quina y por la actividad de la
_iega Nunca suponga que los niRos van a
permanecer en el mismo lugar donde los vio
por Oltima vez,
• Mantenga a los niSos alejades del drea de la
siega y bajo el cuidado estdcto de otra
persona adelta responsab[e,
• Este alerta y apague la mdquina si hay
niRos que entran al area.
, Antes y cuando este retrocediendo, mire
hacia atr_s y hacia abajo para verfficar si
hay niSos dequeRos,
• Nunca permita que los niSos operen la
mdquina.
• Tenga un cuidado extra cuando se acerque
a esquinas donde no hay visibilidad, a los
arbustos, drboles u otros objetos que
pueden interferir con su linea de visibn
IV. SERVIClO
• Tenga cuidado extra al manejar la gasolina
y los den_s combustibles. Son inflamables
y los gases son explcoivos.
- Use solamente un envase aprobado.
- Nunca remueva la tapa del depbsito
de gasolir_ o agregue combustible
con el motor funcionando Permita
que el motor se enfde antes de
volver a pone combustible No fume
Nunca vueiva a poner combustible
en la m_quina en recintos cerrados
Nunca almacene la rndquina o el
envase del combustible dentro de
alg0n lugar en donde haya una llama
expuesta, tar como la del calentador
de agua
• Nunca haga funcionar una n_quina dentro
de un _ea cerrada
• Nunca haga ajustes o reparaciones
miantras el motor estd en marcha
Oescanecte el cable de la bujia, y
mantdngalo a cierta distancia de 6sta para
prevenir un arranque accidental
• Mantenga las tuercas y los pemos,
especialmente los pemos del accesorio de
la cuchilla apretados y mantenga el equipo
en buenas condiciones
• Nunca maalpule de forma indebida los
dispositivos de seguddad. Contrale
regularrnente su funcionamiento correcto
• Mantenga la rndquina litxe de hierba, hojas
u otras acumulaciones de desperdicio
Limpie los derrames de acelte o combustible Permita que la m&quina se enfrfe antes
de almacenarla
• Pare e inspeccione el equipo si le pega a un
objeto Repdrelo, si es necesado, antes de
hacedo arrancar
• En ningun caso hay que regular la altura de
las ruedas mientras el motor estd en
marcha
• Los componentes del receptor de la hierba
van sujetos a desgaste, daRos y detedoro
que pueden exporter las partes en
movimiento o perrnilJrque objetos sean
disparados Controlar frecuentemente y
cuando sea necesario sustituir con partes
aconsejadas por el fabdcante
• Las cuchillas de la segadora est_n aflladas
y pueden corlar Cubrir las hojas o ]levar
guantes, y otilizar precauciones especiales
cuando se efectde mantenimiento sobre las
mismas
• No cambie el ajuste del regulader del motor
ni exceda su velocided
19
_Busque este sfmbolo que sepia )as
precauciones de seguridad de importancia.
Quiere decir- fiiATENCI(_NrNiEiESTE
ALERTOI!t SU SEGURIDAD ESTA
COMPROMETIDA.
J_ADVERTIENClA: Siempre desconecle el
alambre de la bujia y pbngalo donde no pueda
entrar en contacto con la bujia, para evitar el
arranque por accidente, durante la
preparaci6n, el transpode, el ajuste o cuando
se hacen reparaciones,
_J_DVERT1ENCIA: Los bomes, tenninales y
accesorios relativos de la baterfa conlienen
4_ADVERTENCIA; El tubo de escape del
motor, algunos de sus constituyentes y
algunos componentes del vehiculo contienen
o desprenden productos qufmicos conocidos
en el Estado de California como causa de
cdncer y defectos al nacimiento u otros da_os
reproductivos.
plorno o compuestos de p_omo, productos
qufmicos conocfdos en el Estado de California
como causa de cdncer y defectos al
nacimiento u otros da_os reproduclivos. Lavar
las manos despu6s de manipulados.
Estos accesonos estaban disponiblescuando se pmdt_o la segadora. No son facilitados junto al
cortacesped. Estdn disponiblesen la mayorfa de laslJendasde Seam yen los centros de _.
La
n_yoda de _ tiendas Sears larnb_n pueden _
a pedir p,_rtesde repuestopara usted,si les
propomior_el nt_memdel modeto de su segadom. AJgunosde est_ acceso_ostaJvez no se apliquena
su seg_dora.
RENDIMIENTO
DE LA SEGADORA
PARA SEGADORAS CON DESCARGA TRASERA
JUEGOS
PARA t.A ACOLC HADORA
SEQADORAS
CON DESCARGA
TRASERA
MANTENIMIENTO
$EGADORAS
CON DESCARGA
LATERAL
ENVASES
DE GASOMNA
DE LA SEGADORA
SlLENClADORES
CORR EAS
ESTABILIZADORES
FILTROS
CUCHILLAS
DE CUCHILLA
20
DE AIRE
BUJ|AS
RUEDAS
DEL MOTOR
_an estan i_
y este manual
:ompletamenteanles de _tar de rnontaru oparar
;U Se(_doi_
nL_va.
MPORTANTE: Este cortac_spad viene SIN
_CEITE O GASOLINA an el motor.
3u segadora nueva ha side montada an la
abrica con la excepcibn de aquellas partes
lue se dejaron sin montar par razones de
_nvio. Todas las parian como las tuercas, las
_mndelas, los pemos, etc., qua son
._ecesadas pare completar el rnontaje hen sido
colccadas en la boise rio partes. Para
_sngorarse qua su segadom funcione an
forma segura y adecuada, todas las partes y
,os articulos de ferreterfa que se monten
rienen qua ser apretados seguramenfe. Use
'as herramientas correctas, como sen
_ecesario, para asegurar que se aprieten
_decuadamente.
PARA REMOVER LA SEGADORA
CAJA DE CART6N
3, Remueva el material de empaque de
alrededor de la barra de control.
Sus mangos pueden ajustarse para qua le
acomode al segar, Refl_rase ala seccibn de
Servielo y Ajustes en este manual.
Barra de controlquesxigela presenciadelopemdor
Mangoinfedc9
Levarltat
antar
/
•
//
DE LA
1. Remueva las partes sueltas que se
incluyen con la segadora.
._. Corte Fas dos esquinas de los extremos rio
la caja de cartbn y tienda el panel del
exVemo piano.
3. Remueva todo el material rio empaque,
excepto la curia entre el mango supedor y
eI inferior, y la cuSa qua sujnta la barm de
los control que exige la presencia del
operador junto con el mango superior.
$. Haga rodar la segadera hada afuera de la
caja de cart6n y rev[sala cuidadosamente
para vedficar el todavla quedan partes
suel_as adicionales.
COMO PREPARAR SU SEGADORA
Plnza de4mango
Sopode de
ajust e mango
aARA DESDOBLAFI EL MANGO
MPORTANTE: Desdeble el mango con
_-uidadopare no pincher o da_r los cable de
:ontrol.
I. Levante la seccibn del mango inferior ala
posicibn de operack_n y presione las
exlremidades inferioran del mando infedor
una en contra una rio la otra haste qua la
pinza del mando puede set insertade en uno
de los tres ngujeros del control de la attura.
__Levante la seccibn del mango superior
haste la poalcion rio operaci6n, remueva la
cuRa protectora y apriete las maniflas dal
mango en forma segura.
PAPA INSTALAR LOS ACCESORIOS
Su segadora rue enviada Iista pare usarse
como una acolchadom de capa vegetel. Para
convertirla de modo qua puede ensacar,
Refi_ase a =PARA CONVERTIR LA
SEGADORA" in la seccide de Operacibn an
este manual.
21
FAM|UARICESE CON SU SEGADORA
LEA ESTE MANUAL DEL DUEllO Y I.AS REGLAS DE SEGURIDAD ANTES DE OPERAR SU
SEGADOFtA. Compare las ilustrack_es con su segadQ-apara famil_arizarsecon _aubicack_ de los
diversoscontrolesy ajustes. Guarde este manual para referenda en el lutum,
Estos slmbolos pueden apam._ sobm su segadora o en la literatura proporclonada con el
producto. Apmnda y comprenda sus s_jnif'mados.
ATiqENC_N O
ADVERTENCIA
MOTOR
ENCENDIDO
MOTOR
APAGADO
RAPIDO
LENTO
E_U
LACI_I
COMAcEn'E
BUS31BLE
PEUGRO, GUARDIE I.AS
MANO_yLosPIESLEJOS
Barra de control que exlge
la presenda del opemdor
Cable de controLde La
vetocldad del motor
Tapa del relleno de la gasolina
Filtro del aJre
Cebador
Tapa del deposito de
aceite del motor con
vartlla Indicadora de nlvel
AjL=stador
de la rueda
(encadarueda)
IMPORTANTE: Este cortacdsped viene
SIN ACEITE O GASOLINA en el motor.
CUMPLIE CON LOS REQUISITOS DE SEGURIDAD DE LA CPSC
Las secJadorasa motor,que se cct_tjcen desde h parte de _,
rolator_s, Seam, cumplen con los
estdndamsde seguddad del/Vnedca_ _
Standa_s I_
y de la U.S. Consumer Product
Safety Commission.La cuchillagka cuandoel moqorestdfuncionando.
Cebador-- bombea combustible addooal desde
el cafoumdoral cilindropara uso cuando se
n_cesita hacer arrancar un motor trio.
Cordbn ='nmcador-.-se usa para hacer
_
el motet.
Barra de conbol que exlge la prese_tda del
operador-- t_eneope sqetaF=eabajo, junto con el
mango, para hater anancar el rnotor.Sudltela
pare parar el motor.
22
La operani6n de cualquier
segedora puede hater que
salten objetos exlta_os denlrO
de sus ojos, Io que puede
prodL_Cirda_os graves en 6stos.
Siempre use anteojos de seguddad o
proteccidn para los ojos miantras opera su
segadora o cuando haga ajustes o
reparaciones. Recomendamos una mascara
de seguridad de visi6n amplia, para use
esgejuelos o anteojos de seguridad
estandarte.
COMe USAR SU SEGADORA
VELOCIDAD DEL MOTOR
La velocidad del motor se estableci6 en ta
f:_bdcapara un rendimiento 6ptimo. La
ve]ooldad no se puede ajustar.
CONTROL DE ZONA DEL MOTOR
_,PRECAUClC)N; Las regulaolones federales
exigen que se instale un control para el motor
en esta segadora para reducir a un minimo el
_esgo de lesionarse debido al contacto con la
cuchilla. For ningOnmotive irate de eliminar la
funci6n del control del operador. La cuchilla
_]ira cuando el reeler esta funcionando.
• Su seged_a viene equipadacon una bana de
conbolqL_ exige la presenc_ del ogerador,Io
que requiem que el opstador est8 defa'dsdel
mange de b segedora para hacerla amancary
operada.
_'ARA AJUSTAR LA ALTURA DE CORTE
_evante las ruedas para el corte bajo y baje
as ruedas para el corte alto. Ajuste la altura
_e code para que se acornode a sus
equisitos. La posici6n del medio es la meier
)ara la mayorla de los c_spedes.
Para cambiarla alturade corte,empuje la
pabr:ca del ajustadorhaola la rueda. Mueva b
rueda hacia aniba o hacia aba.lode mode que
se aoomode a sus requisites.AsegOmseque
tcdas las rusdas queden _=Jalrnenteajustadas.
_,VISO: El ajustador esta correctamente
olccado cuando las orelas de la placa estdn
_sertades en el agujero del mango. Tambidn,
)s ajusles de 9 posiciones (si equipado)
ermilen que el mango pueda ser movido
ntre las orejas de la placa,
PARA CONVERTIR
LA SEGADORA
Su segadora rue enviada lista para usarse
come acolchadora de capa vegetal, para
convertir la a una operacibn de ensacado:
SEGADORAS CON DESCARGA TRASERA
• Levantar la puerta trasera de cortacdsped y
colocar los ganchos del armazbn de la
recolectora de hierba en los pasadores del
quicio de la puerta.
• Para pasar a la opercai(_n de
acolchamiento, remover la recolec_ora de
hierba y cerrar la puerta trasera.
_PRECAUCI_N:
No haga funcionar su
segadora sin el desviador de recortes o sin el
recogedor de c_sped, aprobados, an su Ingar.
Nunca trate de operar la segadora cuando se
ha removido la puerta trasera o cuando estd
un Ix)co abierta.
trasera
M_u_jodel
b_tidor del
recogedor
de c_sped
G_ncho lateral del
bastldor del recogedor
PARA VACIAR
EL RECOGEDOR
DE
C_SPED
1. Levante el recogedor de cdsped usando el
mango del bastidor.
2. Remueva el recogedor de cesped, con los
recorles, de debajo del mango de la
segadora.
3. Vacfe los recortes de la bolsa usando
tanto el mango del baslidor come dl de la
bolsa.
AVISO: No amastre la bolsa cuando la vac[e;
se producird un desgaste innecesado.
ara uncodealto,
Mango del
bastldof del
aje laS ruedas
ara un corte bajo,
leva_te
las rueda.s
23
ANTES DE HACER
ARRANCAR
EL
MOTOR
AGREGUE ACEITE
Su segador'a lue enviada sin aceite en el
motor. El motor puede contener 20 oz. de
aceite. Para el tipo y la calidad yea =MOTOR"
en la seccibn de las Mantenimiento en este
manual.
1. AsegOrese qua la segadom estd nivelada
y que el drea alrededor del depbsito de
acelte est6 limpia.
2. Remueva la tapa del depdsito de aceite del
motor y rellene haste la Ilnea de Ileno en
6sta. Vacle el acetie lentamiente. No Io
i]ene dernasiado.
AVISO: Permita que el acelte se aciente bien
an el motor para una leotura exacta. Pare leer
el nivel apropiade, apdete Tatapa del relleno
del acelte de motor, remuevala paneleer la
vadlla rnedidora del acede.
3. Vuelva a insta]ar la tapa del dep6sito del
aceite y apri_tela.
• Revise el nivel del aceite antes de cada uso.
Agregue aceite si es necesado. Llene haste
la IInea de Ileno en la varilla indicadora de
nivel.
• Cambie el aceite despuds de 25 horas de
operecide o una vez por temporada. Puede
necesitar camblar el aceite mds a menudo
cuando las condiciones son polvorosas o
sucias.
AGREGUE GASOLINA
• Llene el estanque de combustible. Use
gasolina regular, sin plomo, nueva y limpia
con el minimo de 87 octanos. (El uso de
gasoline con plomo aumentard los
dep6sitos de 6xido de plomo y carbono y so
reducird la duracibn de la valvula). No
mezcle el acelte con la gasolina. Pare
asegurer qua la gasoline utilizade sea
fresca compre estanques los cuales
puedan ser utilizados durante los primeros
30 dies.
_JADVERTENCIA;La
experiecoia ha indicado
que los combustibles rnezclades con alcohol
(conocidos como gasoho[, o el use de etanol o
metanol) pueden atraer la humedad, la que
conduce ale separacibn y formaci6n de
_cidos durante el almacenamJento. La gasoline
acidica puede dafiar el sistema del combustible de un motor durente el alrnacenamiento.
Para evitat los problernas con el motor, se
debe vaciar el sistema clef combustible antes
de guardado por un perfodo de 30 dies o rnds.
Vacle el estanque del combustible, haga
arrancar el motor y hdgalo funcionar haste
que las lineas del combustible y el carburader
queden vacios. La pr6xima temporada use
combustible nuevo. Vea las instrucciones para
El Almacenamiento pare rods informaci6n.
Nunca use productos de limpleza para el
motor o pare el carburador en el estanque del
combustible puss se pueden p_oducir da,5os
_errnanentes.
_PRECAUCI(_N:
Llene haste la parte inferior
del cuello de relleno del estanque de gasolina.
No Io Ilene demaslado. LJmpieel aceite o el
combustible derramado. No almacene,
derrame o use gasolina cerca de una llama
expuesta.
Tape del
gasoline
Tapa d_
deposito de
acelto co_
varilla Indicadora
de nivel
PARA HACER ARRANCAR
EL MOTOR
NORA: Deblde alas capes protectoms del
motor, una cantidad peque_a de humo puede
ester presente durante el use inicial del
producto y se debe considerar no_mal.
1. Pare hacer arrencar un motor frio, empuje
el cebador tres (3) veces antes de trntade.
Empuje tirmemente. Este paso
norrnalmente no es necesede cuando se
hace arrancar un motor que ya ha estado
fucoionando por unos cuantos minotos.
2. Sujete la barra de contr_es que exigen la
presencia del operador abajo en el mango
y tire el mango del amancador
rdpidamente. No permita que el cordbn del
arrencador se devuelva abruptamente.
PARA PARAR EL MOTOR
• Pare parer el motor, suelte la barra de
contreles que exlgen la presencia del
operador.
AVISO: En climes rods frios puede que sea
necesario repetir los pasos del cebado. En
climes reds calurosos el cebar dernasiado
puede producir el ahogo y el motor no va a
arrancar. Si se ahoga el motor espere unos
cuantos minotos antes de tratar de hacedo
a_rancar y no repita los pesos del cebado.
24
CONSEJOS
PARA SEGAR
• Bajo cle_s cor_liciones, tel como c6sped
muy alto, puede sar necesario el elevar la
altura del corte pare reducir el esfuarzo
necesado Dam emp(iJar la segadora y pars
evitar sobmcargar el motor, dejando
montones de recortes de c6sped. Puede
qua sea necesario reducir la velocidad del
recorrido y/o hags ]uncionar la seg_dom
sobre el drea por segunda vsz.
• Pare un corte muy penado, reduzca el
ancho de1 corte pasando parciaJrnentepor
eos[ma dot lugar antedorments cortado y
siegue tentamente.
• Pars un major ensacado del c_sped y pars
la mayorfa de las condiciones de code, la
velcoidad del motor dsbe ajustarse ala
posicibn de r_pido.
• Cuando use una segadora con descarga
trasera en c_sped hdrnedo y posade, los
montones del c6sped cortado puedo qce no
entrenen el renogedor de cdsped. Reduzca
la velocidad del recorddo (velocidad de
empuje) y/o haga funcionar la segadom
sobre el ,_rea por segunda vez.
• Si queda ur_ huella de cortes en el lade
darecho de una, segadora con descarga
trasera, siegue en la direcoi_ en qua glmn
las manillas del reloj, solapando un peco
para recauder los recortes en la prbxima
pasada.
• Los poros en los recogedores de c6sped
de tela pueden Itenarse con mugre y polvo
con el uso y los recogedores recaudan_n
menos cdsped, para evltar dste, rcot'e el
recogedor con la marbguera de ague
regularmente y dejelo senarse antes de
usado.
• Mantenga la parts superior del motor,
aimdedor del a_'ancador, despejada y sin
recortes de cdsped y paja. Esto ayudar_ el
ltujo del airs del motor y extender_ su
doraci6n.
CONSEJOS
PARA SEGAR Y
ACOLCHAR
IMPORTANTE: para obtensr el mejor
rendimiento mantenga la caja de la segadom
sin acumutacico de cesped y basura. Vea
"LtMPIF.ZA" in la sencion Mantenimiento de
este manual.
• La cuchilla acolchadora especial va a volver
a cortar los recortes de c_sped mUchas
vecos, y los reduce an tamel_o, de modo
qua si se caen en el c6sped se van a
disperser entre ds_e y no se Van acotar.
Tambidn, el crisped acolchado saw a
deshacer rdpidamente entregando
subs_anclas nutrith/as pars el cdsped.
Siempre acolche con la velocidad del motor
(coshilta) I'nds alta, puss as| ss obtendrd la
major acci6n de recorte de 1ascuchUlas,
• Evite cortar el c_sped nuando est6 rnojado.
El c6sped mojedo tlende a fon'nar montones
e intediere con ta accidn de acelchado. La
major hora pars segar el c_sped es
tempmno en la tarde. A esa hera 6ste se ha
secado y el ;Ires reckoncortada no quedard
expuesta al sol directo.
• Pars obte_er los mo.iores resultados, ajusts
la altura del corta de la segadora de mode
qua _sta corte sdame_te el temio superior
de las hojas de c6sped. En el caso de qce
el cSsped hays creddo demaslado, puede
ser nenesario el elevar la altura del corte
pars reducir el esfuerzo necesar_o pars
empuJar la segadora y para evltar
sobrecargar el motor, dejando montones de
recortes de cdsped. Para un acolchamiento
muy pesado, reduzca el ancho del corte
posando por encima del lugar antedormonte
cortado y siegue lentamente.
• Cierlos lJpos de c_sped y sus condiciones
pueden exigir qce un drea tenga qua sar
acolchada ;)or segunda vez para oscondar
completamente los recortes. Cuando se
haga el segundo code, siegce a_'avesado o
en forma perpendicular ala pasada del
pdmer code.
• Cambie su patrbn de code de semana a
sarnana. Siegue de node a sur una semana
y luego cambie de ests a oeste la prbxima
semana. Esto evltard qua el cSsped se
enrede y cambie de direnci6n.
25
PROGRAMADE MANTENIMIENTO
LLENELASFECHASA MEDIDA
QUECOMPLETE
SUSERVICIOREGULAR
Fr:CHASDE SERVICIO
Revtsar
sl ha}'$ujetadoms
sue_os
Limpl_t/lnspecdonar
elrecogedor
de
(elvelne+qu_o)
t/
t/
Lkllplar la segadora
Iv/
I/
V'
fJ
I_
LLlll_aat deba o de la cub_srla de la trans-
ml_t6n
(=egadoms
conpodetpmpubor
Reelsarlascormasy laspoleas impulsadas (se_dorasoon poder p_opulsor
I
Re'_sato/afllar/camblat
lacuchilla
it_4
_ 3
Tabladelubrlc_cl_n
Llmplar labateriWre_gar
(segadorus con arranque el6ctrlco)
Rev_sar
el niveldedacelt e
Camb_ar
el ace_te
detmotor
LImpiat elflltmde airs
Inspeccionar el elleneledor
Limplar cJcambiar
la bujia
Cambiar
elcartucho
depapel delflltto
deaim
ll_
11_
11_
1_4
I_
11_1J
I/'2
1_2
1- _
n_s a rNm udo cuando se opere bejo _rga pee_da o en ambieetes c_1 aP+as_aturas
2 - Dar eevlclo n,d6 a raenudo cuando se opete en conelcionessucias o pclvor_eas.
3.
Can_
[as ct:chillaa n_
a rt_n_ldo
c_ndo
s_gue
en tetreno
a retloso_
4 - Cargar pot 48 hor_ al fin de la temporada,
RECOMENDACIONES
TABLA
GENERALES
DE LUBRICACI6N
La garantia de esta segadora no cubre bs
(_) Ajustadc¢
Punt_lde resodedelfmno
atticulosque hart estado sujetosal ab4Jsoo a la
de la rueda
negligendadel op_ader. Para recibirrode el va_
de la garantia, el cperadortiene que mantenerla
segadem seg0n las instrucaonesdescntasen
este manual.
Hay alguncsajustes que se tienel cluehacer en
for'mapedbdicapara poder m_ntener su unidad
adecuadememe.
Todeslos ajustesen b seccidnde ServL--ioy
Ajusles de esle n_nu_ tienen que ser revisados
p<x Io men<_ un vez p<x cada temporade.
• Una vez al afro, cambie la buj[a,limpie o cambie
Aceite de rnolor
el e_rnento del lilvo de aim y revisesi la cuchiUa
es_ desgas_da. Una bu_far_uevay un
elemento del flltro de aim limpio/nuevoaseejJran
la mezcla de airs-combustibleadecuada y
I Bisagra de la puerta trasera
ayudan a qu_ su m_or func_re mejor y que
dure rnds.
) Clavlja de montaje del puntal del mango
• Siga el prograrnade mantenim]enloen este
itl_qual.
(_) Rccie el lubricants
ANTES DE CADA USO
Refierase a I_ seccion Mantenirnenlo en
1. Revise el nivel del aceite del motor.
(_ "MOTOR"
2. Revise si hay sujetadores suellos.
IMPORTANTE: No aceite o engrase los
LUBRICACI(_N
rodamientos de la rueda de plastico. Los
Mantenga la unidad blen lubricada
lubdcantes viscosos atraeran polvo y mugre,
(Vea la "TABIA DE LUBRICACI_N').
Io que acortara la duraci6n de los rodamientos
autolubdcantes. Si cme que tienen que
lubdcarse, use solamente un lubricante fipo
grafito, de polvo seco in forma moderade.
26
ESPECIFICACIONES
DEL
PRODUCTO
NOMERO DE SERIE:
FECHA DE COMPRA:
CAPACIDAD Y TIPO
DE GASOLINA:
TIPO DE ACEITE:
API-SF-SJ)
CAPACIDAD DE ACEITE:
1.5 Cuartos
REGULAR SIN PLOMO
SAE 30 (sobre 32°F)
SAE 5W-30 Idebalo 32_F)
20 oz.
CHAMPION RJ19LM4
.045")
;ION DEL PERNO
DE LA CUCHILLA:
35-40 FT. LBS.
• El numero del nodeloy el de sedese encuentranen la catcomaniaadjuntaala partetrasera
de la cajade la segadora.Deberegistrartanto el num_rode sedecomela _echade compray
mantengalosen un lugarseguropara refenciaen el futaro,
SEGADORA
Siempre observe las reglas de seguridad
cuando haga el rnantenimiento.
LLANTAS
• Manteega las Ilant_s sin gasoline, aceite o
substancias qufmicas para conlrol de
insectos que pueden daSar ta goma.
• Evite los tocones, las piedras, las gdetas
profundas, los objetos afilados y otros
peligros que pueden daSar alas Ilantas.
CUIDADO DE LA CUCHILLA
Para obtener los mejores resultados, la
cuchilia de la segadora denen que mantenerse
afilada. Carnbie la cuchilla doblada o daSada.
PARA REMOVER LA CUCHILLA
1.
Desconecte el alambre de la bujia y
pbngalo en donde no pueda entrar en
contacto con _sta.
2. Haga descansar la segadora en su lade.
Asegdrese que el filtm de aire y que el
carburader queden mirando hacia arnba.
3. Use un bloque de madera entre la cuchina
y la caja de la segadera para evitar que la
cuchilla gire cuando se le quite el pemo.
AVISO: Proteja sus manos con guantes y/o
envuelva la cuchiila con una tela gruesa.
4. Remueva el perno de la cuchilla girdndolo
en el sentido contrario en que giran las.
manillas del reloj.
5. Remueva la cuchilla y los artlculos de
ferreterla adjuntadores (el perno, la
amndela de seguddad y la arandela
endurecida).
AVISO: Remueva el adaptador de la cuchilla y
revise el cubo interior de la ranura del
adeptador de la cuchilla. La ranura tiene que
estar en buenas condiciones pare que
funcione en forma adecuada. Cambie el
adeptador si estzi de5ade.
PARA CAMBIAR LA CUCHILLA
1.
Poega el adaptador de la cuchilla en el
ciguefial del motor. Aseg0rese que la
ranura del adaptador y que el chavetero
del ciguefial est_n alineados.
2. Poega la cuchilla en el adaptador de dsta
alineando los dos (2) agujeros en la
cuchilta con las satientes elevadas en el
adaptador.
3. Aseg_3resede que el horde de salida de la
cuchilla (opuesto al borde afilado) esle
hacia arriba hacia el motor.
4. Instale el pemo de la cuchilla con la
amndela de seguddad y la arandela
endurecida en el adaptador de la cuchilla y
el ciguehal.
5. Use un bloque de madera entre la cuchilla
y la caja de la segadora y apriete el perno
de la cuchilla girandolo en el sentido en
que giran las manillas del reloj.
• La torsibn pare apretar recomendada es de
35 - 40 pies libras.
IMPORTANTE: El pemo de la cuchina es
clase 8 tratado a calor.
Adaptader de la cuchllla
Ranu_ _
Amndela de
segurided
Cuchlla
Chaveterodel
dguenat
Arandeta
perno endumcid_
dek_
cuchifla
Borde de sallda
27
gu_naJ
Adeptader de la cuchilla
PARA AFILAR LA CUCHILLA
AVISO: No recomendamos el afilar la cuchilla pero si Io hace, asegt]rese de que quede
balanceada.
Se tiene que tener cuidedo de manteneda
batanceada. Una cuchilta que no estd
balanceada va a producir evectualmente da5o
en ta segadora o en el motor.
• La cuchilla puede afilarse con una lima o en
una ruede rectJflcadora. No trate de afilarla
mientras se encuentra en la segadore.
• Para revisar el balance de la cuchilta, clave
un clavo en una riga o en la pared. Deje
almdedor de una putgade de un clavo recto
expoesto. Ponga el agujero central de la
cuchilla sobre la cabeza del clavo. Si la
cuchilla est_ balanceada debe permanecer
en la posici6n horizontal. Si cualquiera de los
extremos de la cuchilla se mueve hacia
abajo, afile el ex_mmo posado hasta que
dsta quede balanceada.
RECOGEDOR DE CESPED
• El recogeder de c_sped puede ser rociado
con el agua de la manguera pero tiene que
estar seco cuande se vaya a usar.
• Revise su recogedor de cesped a menudo
para vedficar si est_ daSado o detedorado.
Se va a desgastar con el uso normal. Si se
necesita cambiar el recogedor, c_mbielo
solamente pot uno que sea apmbado por el
fabdcante. Dr, el n_mero del rnodelo de la
segadora cuando Io ordene.
MOTOR
LUBRICACI(_N
Use solamente aceite de detergente de alta
catidad clasificado con la clasificacibn SF-SJ
de servicio API. Seleccione la calidad de
viscosidad SAE seg,3n su temperatura de
operaci6n esperada.
CALIDAO_S
0£ VISCOSIDAD
AV|SO: A posar de que los aceites de
multiviscosidad (5W30, 10W30, etc.) mejoren
el arranque en clima frio, estos aceites de
multiviscosidad van a aurnentar el consumo
de aceite cuando se usan el3 temperatures
solxe 32= E Revise el nivel del aceite del
motor mds a menudo, para evitar un posible
daf_o en el motor, debido a que no tiene
suficiente aceite.
Carnbie el aceite despuds de 25 bores de operacibno por Io menos una vez al az3osi la segadora
se ul_lizarnenos 25 horas et a6o.
Revise el nivel del aceite del carter antes de
anancar el motor y despues de cada cinco (5)
ho_as de uso continuado. Apdete el talx_ del
aceile en forma segura ceda vez que revise el
nivel del aceite.
PARA CAMBIAR EL ACEITE DEL MOTOR
AVISO: Antes de inclinar la segadora para
dmnar el aceite, drene el tanque de combustible haciendo cower el motor hasta que el
tanque estd vacio.
1. Desconecte el alarnbre de la buj[a y
p6ngeto de rnodo que no pueda entrar en
coctacto con 6sta.
2. Rernueva la tapa del depbsito del aceite;
dejela a un _ado en una supedicie limpia.
3. Incline la cortadora de cesped por este
costado tal como se mueetra y purgue el
acei_e en un recipiente id6neo. Mueva la
segadora de arras para adelante para
remover todo el aceite que se haya
quedado atrapado dentin del motor.
4. Umpie todo el aceite derramade en la
segadore yen el lade del motor.
5. Rellene el motor con aceite. (Vea =PARA
AGREGAR EL ACEITE" en la seccibn de
Operacibn de este manual.)
6. Vuelva a conectar el alarnbre de la buj[a a
esta.
DE SAE
28
SILENClADOR
Inspeccioney cambieel silenciadorsi estd
corroldopuedeproducirun peligrode incendio
y/o da_o.
FILTRO DE AIRE
Su motor puede sufdr averias y funcionar de
manera incorrecta con un flltro del aire sucio.
Sustituirel papel del carfucho una vez al aRo o
tras 100 horas de luncionamiento, rods a
menude si se utilize on condieiones de
suciedad y polvo particulares. No lava el filtm
de Are,
PAPA CAMBIAR EL FILTRO DE AIRE
1. Remueva el filtro de aire gir_ndolo an et
sentido en que gfrela de tas manil]as del
reloj para apretada, haste el tope, y retirelo
del collar.
2. Rernueva el filtJ'ode la parts interior de la
cubierta.
3. Limpie la parte intedor de la cubierta y el
collar pare remover toda acumulacibn de
rnugre.
4. Inserte el filtro nuevo en la cubierta.
5. Ponga la cubierta del filtro de aire dentro
del coltar alineando la oreja con la ranura.
6. Empuje la cub4erta hacla adentro y glrela
en el sentido eontrado de 1as rnani[las del
reloj para apretada.
Collar
GIm en el senttdoalas manillasdel
relcJpare
Abrazad_ra
BUJ|AS
Cambie las bujlas al cornienzo de cada
temporada do sisga o despLl_S de carla 100
horas de operacibn, Io que suceda pdmero. El
tipo de bujfa y el ajuste do la abertura
aparecen en "ESPEClFICACIONES DEL
PRODUCTO" seccion do este manual.
LIMPIEZA
IMPORTANTE: Pare obtener el mejor
rendimiento, mantenga la caja de la segadora
sin acumutacion de cesped y basura. Limpin la
parle de abajo de su segadora despues de
cada uso.
_kPRECAUCI(_N: Desconecle el alambre de
la bujia y pbngalo on donde no pueda entrar
eft contacto
r_r
• Mantenga las superficies pulidas y las
ruedas sin gasotina, aceite, etc.
• No recomendamos el uso de una manguera
de jard[n pare limpiar la segadora a menos
que el sistema eldctrlco, el silenciador, el
firm de alre y el carburador estdn tapados
para evitar que les entre el agua. El agua en
el motor puede acortar la duracibn de dste.
P,antJr&
Filtro de aire
Cublerta del filtro de aim
COl3 _sta.
• Limpie ta parte infedor de su segadom
raspandola pare remover la acumulacibn do
c_sped y basura.
• Limpie el motor a menudo pare evitar que
se acumule la basura. Un motor tapado
funciona rods caliente y se acorta su
duraciOn.
Sire en
)1sentJdo
conttado las manUlas
del reloj pare apreiar
29
APRECAUCI6N:
Antes de dar calquier
sen/icio o de hacer ajustes:
1. Suelte la barra de control y pare el motor.
2. AsegOrese que la cuchilla y que todas las
partes movibles se hayan detenide
completamente.
3, Desconecte el alambre de la bujla y
p6ngalo en dende no pueda entrar en
contacto con esta.
SEGADORA
pAPA AJUSTAR LA ALTURA DE CORTE
yea =PAPA AJUSTAR LA ALTURA DE CORTE"
en laseccibnde Operaci_ de estemanual.
DESVIADOR TRASERO
Se _
un desviader 'tasem, a_unto entre
las nJedes_aseras de su segadora, pare reducir
a un minimola posibilidacl que objetossean
lanzados hacia afuera de la parte trasera de la
segadora, en la posJd6nen donde se encuenlta el
operador. Si se da_a el desviador debe carnbiame.
PARA AJUSTAR EL MANGO
El mango de su segadora cuenta con tres (3)
posiciones de altura - ajestelo a la altum que le
acomode.
• Preelone las extremidades infedores del
mando infedor una en contra una de la otra
hasta que la pinza del mango pueda ser
insertada en uno de los tres agujeros del
control de la altura,
Pinza del mango
Sopode de
ajuste mango
de 3 posidones
PARA MONTAR Y ADJUNTAR EL
RECOGEDOR DE ClaSPED
1. Ponga ef bastidor det recogedor de c_sped
en la bolsa del cdsped con la parte dgida
de la bolsa en la parte inferior. Aseg_rese
que el mango del bastidor est(t en el
exterior de la partesupedorde la bolsa.
2.
Deelice los sujetadores de vinilo sobre el
bastidor.
AVISO: Si los sujetadores de vinilo estdn muy
duros, n_talos en agua caliente por algunos
minutos. Si se rnoja la bolsa, ddjela que se
seque antes de usada.
_.PRECAUCI_N:
No haga funcionar su
segadora sin el desviador de recortes o sin el
recogedor de cesped, aprobades, en su lugar.
Nunca trate de operar la segadora cuando se
ha remm/ido la puerta trasera o cuando est_
un poco abierta.
Marcodel
basUd_
MOTOR
CARBURADOR
Su carburador lJene un chorro principal fijo no
ajustable para controlar la mezcta. Si su motor
no estd funcionando en forma adecuada
debido a problemas que se sospecha vienen
del carburador, neve su ssgadora a un centro
de servicio Sears o con un otro centre de
servico cualificado pare repararla y/o ajustarla
IMPORTANTE: Nunca manipulee el reguador
del motor, el que ha side ajustado en ta |agrica
para ta velocidad del motor adecuada, puede
ser poligroso hacer funcionar el motor a una
velocided por sobre el ajuste de atta velocided
de la fabrica. Si cree que la velosidad alia
regulada des motor necesita ajuste, pongase
en contacto con centro/departmento de
servicio Seam o con un otro centro de servico
cualificado mas cerano, el que cuenta con el
equipdo ade cuado y la expedencia para hacer
los ajustes necesarios.
VELOClDAD DEL MOTOR
La velocidad del motor ha side ajustada en la
fabrica. No tmte de aumentar ta velocidad det
motor pues se pueden pmdudr leelones
personales. Si cree que el motor est_
funcionando demasiado r'&pidoo demasiado
lento, Ileve su segadora a un centro de
servicio Sears o con un otro centro de servico
cualificado para reparade o ajustada.
30
Inrnediatamente prepare su segadora pare el
alrnacenamiento al rinal de cada temporada o si
la unidad no se va a user por 30 dias o m_.s.
SEGADORA
Cuando se va a guardar la segadora por cierto
periode de tiempo, limpLela cuidadesarneote,
remueva toda la mugre, la grasa, las hojas, etc.
Gu_rdela en un area limpia y seca.
1. Limpie toda la segadora (Vea =LIMPIEZA"
en ta seecibn de Mantenimento de este
manuat).
2. Lubrlquela seg0n se muestm en la seccibn
de Mantenimanto de este manual.
3. Asegdrese de que todas las tuercas y
clavijas y todos los pemos y tomillos est6n
apretados en foma segura. Inspeccione las
partes que se mueven para verificar el
est_ln dariadas, quebradas o desgastadas.
Cdmbietas si es necesario.
4. Retoque todas las superficies que estdn
oxidades o con la pintura picade; use una
lija antes de pintar.
MANGO
Puede doblar elmango de su segadora para el
almacenamiento.
1. Suelte las dos (2) manillas del mango en
cada lade del mango superior y permita
que el mango sa dobte hacia detras.
2. Apdete los extremos inferiores del mango
infedor entre si haste que el mango infeder
quede separado del puntal del mango,
luego mueva]o hacia adelante.
• Cuando prepare su mango a partir de la
posicioh de alrnacenamiento, el mango
inferior nesecitara cerrarlo manualmente
para la posicibn de sega.
IMPORTANTE: Cuando doble el mango pare el
alrnacenamiento o el transporte, aseg0resa
que Io doble seg_n se muestra o purde dariar
los cables de contml.
Barrade con_olque
exJgela presenelade1
Doblar
hacla
operador
Mangosupedorp_
lelantepar
Mango Inferior
__.._
..r-r. jz_
__:
"_.,.,j.,,.._.. ._.
atr_s
Doblat hacia
Po_icl6n para segar
/
Sopodede
_uste
Mangode 3
posiclones
MOTOR
SISTEMA DE COMBUSTIBLE
IMPORTANTE: Es importante evitar que se
formen depositos de goma an partes
fundamenteles del sistema de combustible
tales como el carburador, el fittm dal
combustible, la manguera del combustible o an
el estanque durante el elmacenamiento. La
expedncia tambien endica que los
combustibles Mezclados con alcohol
(conocido ccrno gasohol o que denen etanbl o
metanel) pueden atraer hurnedad, Io
queconduce a la separacion y a la formacion
de acidos durante el almacanamiento. La
gasolina acdica puede denar el sistema de
combustible de un motor durante el pedodo de
almacenamiento.
1. Drene el estanque de combustible.
2. Haga arrancar el motor y deJelo funcionar
hasta que las Ifneas del combustible y el
carburador est6n vacios.
• Nunca use los productos para limpieza del
carburador o del motor en el estanque de
combustible pues se pueden producir daSos
permanenles.
• Use combustible nuevo la prbxima
temporada.
AVISO: El estabilizador de combustible es una
alternativa aceptable para mducir a un minlmo
la formacibn de del_sitos de goma en el
combustible duranta el periodo de
almacenamiento. Agmgue estabitizador a la
gasolina an el estanque de combustible o an el
envase para el elmacanamiento. Siempre siga
la pmporcibn de mezcla que se encuantra an
el envase del estabilizador. Haga funcionar el
motor por Io menos 10 minutos despu_s de
agregar el estabilizador, para permitir qua este
Ilegue al carburador. No drene la gasolina del
estanque de gasolina y el carburador si se
est& usando estabilizador de combustible.
31
ACEITIE DEL MOTOR
Drene el aceite (con el moto_ caliente) y
c_mbielo con aceite de rnotot limpio. (Vea
=MOTOR" en ]a secci6n de Mantenimento de
este manual.)
CILINDRO
Remueva la bujla.
Vacle una onza (29 ml) de aceite a trav_s
del agujero de la buj[a en el cilindro.
3. Tire la manilla de arranque lentamente
unas cuantas veces para distribuir el
aceite.
4. Vuelva a montar la nueva bujla.
OTROS
• No guarde la gasolina de una temperade a _a
otra.
• Carnble el envase de la gasdina si se
empieza a oxider. La oxidad6n y/o la mugre
en su gasolina produciran problemas.
cerrado y cdbrala para protegeda contra el
Si es posible,
guarde su unidad en un recinto
polvo
y la mugre.
Cubt-a su Ur_ldadcon un forro protector
adecuade qua no retenga la humsdad. No
use pl_stJco.El plds_cono puede respirar, Io
qua permite la formaci6n de condensaci6n, Io
que produci_ la oxidaci6n de su unided.
1.
2.
IDENTIFICACI6N
PROBLEMA
No a_anca
CORRECCKSN
1.
2,
Filtro de aire sucio.
Sin combustible.
3,
Combustible rancio.
4.
Agua en el combustible.
5.
Alambre de la bujia
desconectado.
Bujla mala.
CuchiIla suelta o adaptador
de la cuchilla quebrado.
8.
9.
de fue_a
APRECAUCI_N:
Nunca alrnacene la
segadora con gasolina an el estanque dentro
de un edificio en dende los gases pueden
alcanzar una llama expuesta o una chispa.
Perrn_taqua se enfrle el motor antes de
almacenade en elgOn recinto celTado.
DE PROBLEMAS
CAUSA
6.
7.
_a
IMPORTANTE: Nunca cubra la segadora
nientras el motor y las areas de escape
todavia estan calientes.
Barra de control en la
posici6n suelta,
Barra de control defectuosa.
1. Umpie/carnbie el fittro de aire.
2. Liana el estanque de combustible.
3. Drene el estanque y vuelva a
]lenarlo con combustible _impio
y nuevo.
4. Drene e] estanque de combustible y el carburador y vuelva a
I]enar e] estanque con gosolina
nueva.
5. Conecte el aJambre a la bujfa.
6.
7.
8.
9.
Cambie la bujfa.
Apdete el pemo de la cuchilla
cambie el adaptador de la
cuchilla.
Presione la barra de control
hacia el mango.
Cambie la barta de control.
1, Cuchilla desgastada, doblada
o suerta.
2. Altura de las ruedas dispereja.
1. Ajuste a la posici6n de "Cone
m_tsaJ_o."
2. Ajuste a la posici6n de =Cone
rn_tsalto. _
3.
4.
3.
4.
IJmpie/cambie el filtro de aire.
Limpie la pane inferior de la
caja de la segadora.
5.
Revise el nivel del aceite.
6.
Code a una velocidad de
recorrido m_Lslenta.
5.
6.
Velocidad del motor lenta.
Acumulaci6n de c6sped,
hojas o basura debajo
de la segadera.
Demasiado aceite en
el motor.
Velocidad de recorndo
demasiado rdpide.
32
IDENTIFICACI6N
PROBLEMA
Ma! cortedlspareJo
DE PROBLEMAS
CAUSA
1.
CuchiUa desgastada, doblada
o suelta.
2. Altura de las ruedas dispareja.
3.
_ibracl6n
mxcesiva
_ord6n
arrancador
:liflc|l de tlrar
Dif|c|| de empuJar
Acuroulacibn de c_sped,
hojas o basum debajo
de la segadora.
1. Cuchi]la desgastada, doblada
o suelta.
2, CigueRal del motor dobLado.
1.
El freno del vc4ante del
motor estd ap_icado
cuando se suelta la barra de
control.
2.
Cigue_al del motor doblado.
3.
Adaptador de la cuchilla
quebrado.
La cuchilla se arrastra en
el cdsped.
4.
Racogedor de
c6sped no se
Ilena (s| vlene
Bquipado)
CORRECCI_N
1.
Cambie la cuchiUa. Apriete el
peroo de la cuchilla.
2, Ajuste todas las ruedas a la
roisma altura,
3, Liropiela parts infedor de la
caja de la segadora,
1.
= 2.
Cambie
peroo delalacuchilla.
cuchilla.Apriete el
p_gase en cootacto con su
centro de serviclo Sears o con
un otro centro de servicio
cualiflcado.
1.
Presione la barra de control
hacia el mango
super;or antes de tirar el
cordbn an'ancador.
2. Pbngase an contacts con su
centro de servic]o Sears o con
un otro centro de servlcio
cualificade.
3. Cambie el adaptador de la
cuchilla.
4. Mueva la segadora a un lugar
en dende el c_sped ha sido
cortado o a una supedicie flrme
para hacer arrancar el motor.
1, Altura de code demasiado
baja.
2. Levantamiento de la cuchilla
desgastado,
3. Recogeder sin ventiLacidn
de aire.
1.
Eleve la altura de corte.
2.
Carobie las cuchinas.
3.
Limpie el rocogodor de c_sped.
1.
1.
Eteve la attura de coda.
2,
Eleve la parte trasera de la caja
de la segadora (1) un lugar
rn_s alto.
Vacle el recogodor de c_sped
El c_sped estzt demasiado
alto o la airura de la rueda
demasiade baja.
Parte trasera de la
caja/cuchilla de la segadora
arrastrdndose en el cdsped.
3. Recogsdor de c_sped
demas[ado Ileno.
2.
4,
Posicibn de la altura del mango
no adecuada para usted.
33
3.
4.
Ajuste la altum del mango de
modo que le acomode.
CRAFTSMAN
ROTARY
LAWNMOWER
-- MODEL NUMBER 917.388690
31
34
33
19
31
lO
CRAFTSMAN ROTARY LAWN MOWER - - MODEL NUMBER 917.388690
KEY
NO.
_i_
PART
NO,
1
2
3
4
5
6
7
8
9
t0
11
12
13
131696
166860X479
1611GSX479
132001
132G04
131959
66426
74780512
166785
164362
156577
750634
850733X004
14
15
17
18
19
20
21
22
136376
51793
165946X479
17600406
167132X004
167133XCO4
165858
168360X004
I_75
751153
166236X479
166243X479
851856
63124
1608353(007
19112222
151161
878"/7
24
2_
27
28
29
30
31
33
DESCRIPTION
ControlBar
Upper Handle
l_owerl_le
RopeGuide
LOcknut 1/4-20
Handle Bolt
Wite Tie
Hex Bolt 5/16-18 x 3/4
Locknut 5/16-18
Shoulder Bott
Engine Zone Control Cable
Hex Washer Head Screw #10-24 x 1/2
Up*Stop Bracket
Handle Knob
H_irpinCotter
Support Bracket
Screw
Axle Ann Assembly. LF
Axle Arm Assembly - RF
Rear Skirt
Selector Spring
Rear Door Assembly Kit (Incl. Spdngs)
Locknut 5/16-18
Handle BrBcket Assembly (Left)
Handle Bracket Assembly (Right)
Screw 114-20 x 3/8
Nut
Wheel Adjusting Bracket - Front
Spacer
Wh_
Select o_"Knob
KEY
NO,
PART
NO.
34
35
36
37
38
39
40
41
42
43
44
45
46
47
48
52
53
54
55
56
57
67
68
70
167130X004
57143
160828
151162
7399(]_00
83923
77400
88652
165766
165767
165912
150406
85463
161551
167131XCO4
166872
851084
850263
851074
175064
851514
166113
16o-755
-- -
---
161058
175875
DESCRIPTION
Axle Arm Assembly - LR
Wavewasher
ShouldBr Boit 5/16.18
WheelAssembly
Nut
Flangnd Locknut
Hubcap
PLklgeScreNv
Spring (LH)
Spr_ng (RH)
Door Bolt
Hex Head Thread Rolling Screw 3/8-16 x 1
Danger Decal
Adjusbnent Belt
Axle Arm Assembly - RR
Houslng Assembty (Incl. Ref, #17. 18 & 46)
Hex Head Screw 5/6.24 x 1-3/8 Grd. 8
Helical Lockw_.he r
HardenedWa, sher
21" Blade
Blade Adapter
Grass Bag
Catcher Frame
Engine, Craftsman, Model Number
143.016706 (See Breakdown)
Warning Decal JNotShown)
Owner's Manual
NOTE: All component dimensions given in U.S. inches.
1 inch - 25.4 mm
CRAFTSMAN 4-CYCLE ENGINE
MODEL NUMBER 143.016706
400
130
120
119
416
41',._
18
19
174
1821C/
178
36
MODEL NUMBER 143.016706
CRAFTSMAN 4-CYCLE ENGINE
KEY pART
NO. NO.
1
2
6
7
12
12A
37465
26727
33734
36557
36775
36558
12B
14
15
16
17
18
19
20
30
40
40
06694
28277
30589
34839A
31335
651018
36281
32600
37464
40027
40028
41
40025
41
40026
42
42
43
45
40006
40007
20381
36777
46
48
50
32610A
27241
37460
52
69
70
72
75
80
81
82
29914
37609
37608
37614
27897
30574A
30590A
30591
83
86
69
90
92
93
100
101
103
30588A
650488
611004
611112
650815
650816
34443C
610118
651007
104
110
119
120
125
37480
37047
36787
36825
36780
125
37288
126
130
135
37289
6021A
37598
DESCRIPTION
Cylinder(Incl. 2 & 20)
Dowel Pin
Breather Element
Breather Ass'y.(incL 6 & 12A)
Breather Tube
Breather Cover & Tube
(includes Key Number 12B)
Breather Tube Elbow
Washer
Governor Rod (!ncl. 14)
Governor Lever
Governor Lever Clamp
Screw, Tom "1"-15,8-32x19/64
Extension Spring
Oil Seal
Crankshaft
Piston, Pin & Ring Set (Std.)
Piston, Pin & Ring Set
(.010" Oversize)
Piston & Pin Assembly (Std.)
(Includes Key Number 43)
Piston & Pin Assembly
(.OlO" OS)(Includes Key#43)
Ring Set (Std.)
Ring Set (.010" OS)
Piston Pin Retaining Ring
Connecting Rod Assembly
(Includes Key Number 46)
Connecting Rod Bolt
Valve Lifter
Camshaft (Exhaust MCR)
(includes Key Number 104)
Oit Pump Assembly
• Mounting Flange Gasket
Moungng Flange (Incl. 72-83)
Oil Drain Plug
Oil Seal
Governor Shaft
Washer
Governor Gear Assembly
(IncludesKey Number 81)
Governor Spool
Screw, 1/4-20 x 1-1/4"
Flywheel Key
Flywheel
BellevilleWasher
Flywheel Nut
Solid State Ignition
Spark Plug Cover
Screw,Ton( T-15,
#10-24 x 15/16"
Cam Bushing
Ground Wire
• Cylinder Head Gasket
Cylinder Head
Exhaust Valve (1/32" OS)
(Includes Key Number 151)
Exhaust Valve (Standard)
(Includes Key Number 151)
Intake Valve (Std.) (Incl. 151)
Screw, 5/16-18 x 1-1/2"
Resistor Spark Plug
(RJ19LM4)
KEY PART
NO, NO,
150
151
151A
169
172
174
178
182
184
185
186
189
191
195
207
216
223
224
238
239
241
245
250
260
261
262
275
277
285
287
290
292
298
300
301
305
306
307
309
309A
310
311A
313
370A
370C
370R
380
390
400
31672
31673
40017
36783
36784
30200
29752
6201
26756
37466
32653
650839
36559A
610973
34336
33086
650451
36786
650932
34338
36919
36905
37122
36980
30200
650831
36790A
650988
35000A
650926
29774
26460
28763
36916
36246
35647
37610
35499
650562
650783
35648
37611
34080
36261
37318
37317
640271
590737
36792B
416
36085
417
900
650760
750865
DESCRIPTION
"
*
*
*
*
Verve Spring
Valve Swing Cap
Intake Verve Seal
Valve Cover Gasket
Valve Cover
Screw, 10-24 x 9/16°
Nut & Lock Washer, 1/4-28
Screw, 1/4-28 x 7/8"
Carb. To Intake Pipe Gasket
intake Pipe
Governor Link
Screw, 1/4-20 x 3/8"
S.E. Brake Bracket (IncL 195)
Terminal
Throttle Link
R.P.M. Adjusting Lever
Screw, 1/4-20 x 1"
Intake Pipe Gasket
Screw, 10-32 x 49/64"
Air Cleaner Gasket
Air Cleaner Collar
Air Cleaner Filter
Air Cleaner Cover
Blower Housing
Screw, 10-24 x 9/16"
Screw, 1/4-20 x 1/2"
Muffler
Screw, 1/4-20 x 2-5/16"
Starter Cup
Screw, 8-32 x 21/64"
Fuel Line
Fuel Une Clemp
Screw, 10-32 x 33/64"
Fuel Tank (Incl. 292 & 301)
Fuel Cap
Oil FillTube
=O'-Ring
=O'-Ring
Screw, 10-32 x 1/2"
Screw, 10-24 x 3/4"
Dipstick
Hold Down Bracket
Spacer
LubricaSonDecal
Prkner Decal (3X)
Hot Surface Decal
Carburetor (incl. 184)
Rewind Starter
Gasket Set
(inc;udes All Items Marked °)
Spark Arrestor KIt (Inoludes
Key Number 417)(Optional)
Screw, 8-32 x 3/8" (Optional)
Replacement S/B
order from 71-999
RPM High 2900 to 3200
NOTE: This engine could have been built with
590694 starter.
NOTE: All componentdk_en.sionsgiven in U.S.
inches. 1 Lqch= 25.4 mm
37
MODEL NUMBER 143.016706
CRAFTSMAN 4-CYCLE ENGINE
KEY
NO.
PART
NO.
DESCRIP_ON
..
640271
31615
31767
631164
631163
640070
650506
631807
651025
630766
640027
640200
631867
631024
632019
631028
631021
631022
640259
640680
632766
632547
640030
27110A
630748
631027
632760S
Carburetor (Incl, 184 of Engine Parts List)
Throttle Shaft & Lever Assembly
Throttle Return Spring
Dust Seal W_sher
Dust Seal (Throttle)
Throttle Shutter
Shu_er Screw
Fuel Fitting
ThrotSe Crack Screw/Idle Speed Screw
Tension Spring
Idle Restdctor Screw
Idle Res'_iotor Scrwe Cap (Black)
Float Bowl
Float Shaft
Float
Float Bowl "O" Ring
Inlet Needle, Seat, & Clip (Incl, 31)
Spdng Clip
Primer Bulb/Retainer
Ring
Main Nozzle Tube
Carburetor Tube
"O_ Ring, Main Nozzle Tube
High Speed Bowl Nut
Bowl Nut Washar
Welch Plug, Idle Mixture Well
Welch Plug, Atmospheric Vent
Repair _ (inel, items Marked * in Notes)
1
2
4
5
6
7
16
17
18
2o
20A
25
27
28
29
30
31
35
36
36A
37
40
44
47
48
6O
*
*
*
*
*
*
*
*
°
*
38
MODEL NUMBER 143.016706
CRAFTSMAN 4-CYCLE ENGINE
KEY
NO.
PART
NO.
°°
1
2
3
4
5
6
7
8
590694
590599A
590600
590696
590601
590697
590698
590699
590700
11
590695
12
590535
13
590701
KEY PART
NO. NO.
-3
6
7
8
11
590737
590740
590616
590617
590618A
590687A
590535
ill
M --I
13
590701
590760
DESCRIPTION
RecogStarter
Spring Pin (Incl.4)
Washer
Retainer
Washer
Brake Spring
Starter Dog
Dog Spring
Pulley & Rewind Spring
Assembly
Starter Housing Assembly
(40 degree grommet)
Starter Rope
( 98' long x 9/64' diameter)
Starter Handle
DESCRIPTION
Rewind Starter
Retainer
Starter Dog
DOg Spring
Pugey & Rewind spring Ass'y
Starter Housing Assembly
(40 degree grommet)
Starter Rope
(98" long x 9/64" diameter)
Starter Handle
Spring Clip
For repairof major brand appliances In your own home...
no matterwhomade it,no matterwho soldit]
1-800-4-MY-HOME _
(1_)
._ne, dayo.-_l
(U.S.A.andCanada
_&_VW.soaI'8.COlTI
Www.seozns.ca
For repairofcarry-inproducts like vacuums,lawn equipment,and
elec_onics, callfor thenearestSears Parts and Repair Center.
1-800-488-1222
An_, dayorr'i_tt(U.SAonl,,,)
t&'_,_t.r.e_l_. Oollri
Forthe replacementparts, accessoriesand owner'smanuals
thatyou need to do-it-yourseff,
callSears PartsDirectS_J
1-800-366-PART
0-8oo_7278)
6 a.m.- 11 p.rn., 7 daysaweek
(U.s._m_A
www__
To purchaseor inquireabout a Sears Service Agreement
or Sears MaintenanceAgreement:
1-800-827..6655 (U.S.A.)
7 a.rn.- 5 p.rn.,CST, Mort.- Sat
1-800-361-6665 (Canada)
9 a.m.- 8 p.m.EST, M- F, 4 p.m.Sat
® Registered Trademark/'rM Trademark / s_ Service Mark of Sears, Roebuck and Co.
® Marca Registrada I "r_Mama de Fdbdca / s_ Marc& de Servlclo de Sears, Roebuck and Co.
Mc Marque de commerce / MoMarque d_posee de Sears, Roebuck and Co.
175875 03.21.01 BY
Printed in U.S.A.