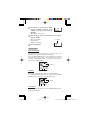
1
DIGITAL VOICE RECORDER DIGITALES DIKTIERGERÄT ENREGISTREUR VOCAL NUMÉRIQUE GRABADORA DE VOZ DIGITAL REGISTRATORE VOCALE DIGITALE PA-VR10E PA-VR5E OPERATION MANUAL BEDIENUNGSANLEITUNG MODE D’EMPLOI MANUAL DE MANEJO MANUALE DI ISTRUZIONI SHARP CORPORATION • ENGLISH ...................... Page 1 • DEUTSCH .................... Seite 33 • FRANÇAIS ................... Page 69 • ESPAÑOL .................... Página 104 PRINTED IN CHINA / IMPRIMÉ EN CHINE / IMPRESO EN CHINA • ITALIANO ..................... Pagina 139 05AT(TINSZ0786EH01) PA-VR10(表紙1-4) < REVISED > Page 1 04.12.18, 4:54 PM Adobe PageMaker 6.5J/PPC ENGLISH Warnings Using the Product Never use the earphones or operate the digital voice recorder while driving a car or riding a motorcycle or bicycle. Doing so could result in a traffic accident. DEUTSCH While walking, never turn up the volume so high that you cannot hear what is going on around you. (Be particularly careful when crossing railroad tracks or crossing the street.) Failure to exercise appropriate caution could result in a traffic accident. FRANÇAIS Do not disassemble or modify the product. Doing so could result in fire, damage or malfunction. Do not use the product in the bath, in locations where it is exposed to rain, or in excessively humid places. Doing so could result in fire, damage or malfunction. ESPAÑOL Cautions Using the Product Do not place the product in excessively cold locations or near an open flame. Doing so could result in fire or damage. ITALIANO Do not place the product where it will be exposed to direct sunlight for extended periods of time (in particular, closed locations such as inside an automobile) or near heating equipment. Doing so could result in deformation or discoloration of the product, or in fire or damage. Do not place the product in an unstable location. Doing so could result in the product falling and could cause injury or damage. Do not place the product in a location where it will be exposed to oily fumes or steam. Doing so could result in fire or damage. Do not leave the product in places where there is a likelihood of grit or foreign matter getting inside it, for example dusty or sandy locations such as a beach. Doing so could result in fire or damage. Do not expose the product to excessive pressure or force, for example by putting it in your back trouser pocket or carrying it in a crowded train. Doing so could result in deformation of or damage to the product. 1 PA-VR10(En) Page 1 04.11.19, 0:11 PM Adobe PageMaker 6.5J/PPC Do not turn up the volume excessively. Listening through earphones at a very high volume for extended periods of time can damage your hearing. Be sure to exercise appropriate caution. Do not place magnetic cards, etc., near the speaker. The speaker contains magnets. Do not place magnetic media such as credit cards with magnetic strips, magnetically encoded prepaid cards, videocassettes, etc., near the speaker. Doing so could corrupt the digital data encoded in the magnetic media. Do not place the product where it will be exposed to strong magnetic fields or near equipment that emits such fields. Making 必 recordings in places with strong magnetic fields, such as near highず wires, or near equipment that emits electromagnetic waves, tension お such as mobile phones, can cause noise in the recorded audio. 読 み く だ Cautions さ い Using Batteries ● Improper use of the batteries can cause them to rupture or catch fire. Improper use can also cause fluid leakage that could corrode the product or soil the user’s hands or clothing. Be sure to observe the following precautions regarding battery usage. • Make sure the positive (+) and negative (–) contacts are oriented correctly when inserting batteries. • Do not use batteries of different types together. Do not mix new and old batteries. • Do not leave exhausted batteries in the product. • Should fluid that has leaked from the batteries get in your eyes, flush your eyes thoroughly with clean water and immediately seek medical attention immediately. Failure to do so could result in permanent eye damage. • Should fluid that has leaked from the batteries get on your skin or clothing, rinse immediately and thoroughly with water. • Never place batteries in water, expose them to an open flame, disassemble them or deliberately short the contacts. • Do not use rechargeable batteries with the product. • If the product will not be used for an extended period of time, remove the batteries to prevent damage from fluid leakage. 2 PA-VR10(En) Page 2 04.11.19, 0:11 PM Adobe PageMaker 6.5J/PPC DEUTSCH ENGLISH Information Stored in Memory Information stored by the user in the product’s memory can be altered or erased due to improper use of the product, exposure to static electricity or electromagnetic noise, malfunction and repair, or if the batteries are replaced incorrectly. Be sure to make a permanent note on paper, etc., of important information stored in the product’s memory. FRANÇAIS NOTICE • SHARP assumes no responsibility for any loss or damage arising from improper use of the product and its accessories by the customer or any third party, malfunction during use, or any other problems caused by the use of the product and its accessories, except in cases where legal liability exists. • The information provided in this manual is subject to change without notice. • Use only a SHARP approved service facility. ESPAÑOL Contents ITALIANO Page Part names ....................................................................................... 4 Using the PA-VR10E/5E for the first time ........................................ 6 Settings .......................................................................................... 12 Recording ...................................................................................... 14 Playing recordings ......................................................................... 16 Deleting .......................................................................................... 20 Other Functions ............................................................................. 21 Important Information ................................................................... 28 Troubleshooting ............................................................................. 31 Specifications ................................................................................. 32 3 PA-VR10(En) Page 3 04.11.19, 0:11 PM Adobe PageMaker 6.5J/PPC Part names 1 23 13 7 4 18 8 5 6 9 必 ず お 読 み く だ さ い 1. 2. 3. 4. 5. 6. 7. 8. 9. 10. 11. 12. 13. 14. 15. 16. 17. 18. 14 15 16 10 11 12 17 Microphone jack Built-in microphone (page 13) Earphone jack (page 19) Display (page 5) Cursor buttons ▲ (VOL+), ▼ (VOL-), 1 (5 for skip/search) and 0 (4 for skip/search) OK button HOLD switch (page 25) RECORD/PAUSE button (page 14) FOLDER/REPEAT button (page 14) ERASE button (page 20) PLAY/PAUSE button (page 16) STOP/MENU button (page 8) Reset button (page 6) Speaker (page 19) Clip USB jack (PA-VR10E only) (page 26) Battery cover (page 6) Record/play lamp (page 14, 16) 4 PA-VR10(En) Page 4 04.11.19, 0:12 PM Adobe PageMaker 6.5J/PPC ENGLISH Display 1 9 10 2 11 3 4 12 5 6 14 13 13 35 25 15 16 FRANÇAIS 7 DEUTSCH 8 17 ITALIANO ESPAÑOL 1. Folder no.: Indicates the number of the folder in which recorded data files are stored (page 14). 2. Date/File no.: Indicates the month/file no. of each recorded audio file (page 15). 3. Date/Event marking no.: Indicates the day/event marking number (page 16). 4. Settings mode: Displayed when making settings (page 10). 5. Remaining time: Indicates the remaining time available for recording (page 15) or that of the timer. 6. Playback speed: Indicates the playback speed (page 16). 7. Settings/Playback time, etc.: Indicates the setting item, playback time, etc. (page 8). 8. Volume: Indicates the volume level (page 16). 9. Battery level: Indicates the amount of battery charge remaining (page 29). 10. Recording: Displayed while recording is in progress (page 15). 11. Repeat playback: Displayed while repeat playback is in progress (page 17). 12. Recording mode: Indicates the recording quality (page 12). 13. Silence skip recording: Displayed while silence skip recording is in progress (page 13). 14. Message alarm function: Indicates that an alarm has been set (page 23). 15. Timer function: Indicates that the timer has been set (page 24). 16. Recording scheduler function: Displayed when the recording scheduler function has been activated (page 21). 17. Clock mode: Displayed when the clock mode has been activated (page 7). 5 PA-VR10(En) Page 5 04.11.19, 0:12 PM Adobe PageMaker 6.5J/PPC Screen displays and examples • The screens actually displayed on the recorder may differ from the example screens shown in this manual. Using the PA-VR10E/5E for the first time Before you attempt to use the recorder, insert the batteries and reset (initialize) the recorder to initialize its status. 必 ず お Inserting the batteries and resetting (initializing) 読 theみrecorder く だ Remove the battery cover as shown in the diagram below. さ い 1 2 Insert the batteries provided with the recorder. Ensure that the batteries are inserted with the correct polarity. Indent 3 Fit the battery cover back in its original position, by aligning with the indent on the side of the recorder. 4 Using a ballpoint pen or similar tool, press the reset button on the back of the recorder. A reset confirmation message (“RESET?”) appears on the display. • Do not use objects with extremely sharp or flexible points to press the Reset button. 6 PA-VR10(En) Page 6 04.11.19, 0:12 PM Adobe PageMaker 6.5J/PPC ENGLISH FRANÇAIS Press the OK button. When “OK?” appears on the display, press the OK button again. The “RESET…” message appears on the display briefly and changes to “RESET!”, then the screen for setting the date and time appears. To set the date and time, follow from step 5 of the procedure on page 10. ESPAÑOL 5 DEUTSCH RESET? 2005Y ITALIANO • If the display does not appear, try pressing the reset button again. If the display still does not appear, reinsert the batteries once again by repeating steps 1 to 5. Clock and standby mode screens Clock mode screen Month Day The recorder switches to the clock mode if it is not used for approximately 30 seconds. To restore recorder operation, press the OK or PLAY/PAUSE button or any of the cursor buttons (▲, ▼, 1, 0). The Time 13 35 25 display standby mode screen shown below then appears. * If you press the RECORD/PAUSE button, the recorder starts recording. There may be a gap of a few seconds before recording actually begins. The indication “WAIT…” appears on the display during this time. 7 PA-VR10(En) Page 7 04.11.19, 0:12 PM Adobe PageMaker 6.5J/PPC Standby mode screen This screen shows the folder number, file number and the recording date/ event marking time. Pressing the OK button switches to a screen showing the recording time for marked events. Subsequent presses of the OK button toggle between the two screen displays. 必 ず お 読 み く だ さ い Using File number Folder number Event marking number 20 14 30 Date (day only) Time 00 15 32 Recording date/event marking time Recording time for the marked event the Settings Menu The settings menu enables you to make recording settings or select alarm functions. To make recording, select from among the setting items shown on the menu screen. (Refer to the menu listing on the following page.) 1 Press the STOP/MENU button once or twice to display the menu screen (the screen with the “SET” indication). 2 Use the ▲ (+) or ▼ (-) cursor button to select a function and then press the OK button to display the settings screen for the selected function. • The “SET” menu contains 4 settings. Use the cursor buttons to select an option and then press the OK button. 3 To change the setting, use the ▲ (+) or ▼ (-) cursor button to select the desired value and then press the OK button to confirm the setting. ※Refer to the respective settings page for details. 4 When you have completed the settings, press the STOP/MENU button to return to the original screen. 8 PA-VR10(En) Page 8 04.11.19, 0:12 PM Adobe PageMaker 6.5J/PPC ENGLISH ● Menus Press the STOP/MENU button once or twice. ▲ ▲ Press the OK button. ▲ ▲ Recording scheduler function (page 21) SCHED ▲ Microphone sensitivity setting (page 13) SENSE FRANÇAIS ▲ CODEC ▲ ▲ ▲ Message alarm function (page 22) ALARM ▲ ▲ SET Recording mode setting (page 12) DEUTSCH Setting menu (page 12) Silence skip recording setting (page 13) ▲ ESPAÑOL VAFON ▲ Timer function (page 24) ▲ ▲ Date and time setting (page 10) T I MER ▲ ▲ CLOCK Playback speed setting (page 16) ITALIANO ▲ SPEED ▲ ▲ : Press the ▲ (+) or ▼ (-) cursor button. ▲ 9 PA-VR10(En) Page 9 04.11.19, 0:12 PM Adobe PageMaker 6.5J/PPC Setting the date and time (Clock setting) You must set the date and time before using the recorder for the first time and after installing new batteries. 1 Press the STOP/MENU button once or twice to display the menu screen. SET the OK button. 2 ず必Press The settings mode screen appears. 3 お 読 み く Press the ▲ (+) or ▼ (-) cursor button until the “CLOCK” だ (time settings) screen appears. さ い CLOCK 4 Press the OK button. The “year” display flashes. 2005Y 5 Press the ▲ (+) or ▼ (-) cursor button to select the year. The year can be set between 2000 and 2099. 6 Press the OK button to confirm the selected year setting. Next, the “month” display flashes. 2005Y 10 PA-VR10(En) Page 10 04.11.19, 0:12 PM Adobe PageMaker 6.5J/PPC Press the OK button to confirm the selected month setting. Next, the “day” display flashes. 9 Press the ▲ (+) or ▼ (-) cursor button to select the day. Press the OK button to confirm the selected day setting. Then use the same procedure to set the “hour” and “minute” settings. ESPAÑOL 10 ENGLISH 8 DEUTSCH Press the ▲ (+) or ▼ (-) cursor button to select the month. FRANÇAIS 7 11 After you have confirmed the “minute” setting by referring to an accurate clock, press the OK button. This completes the date and time setting procedure and returns you to the menu screen. 12 Press the STOP/MENU button. ITALIANO 10 25 Tip • Press the 1 (5) cursor button to go to the preceding item. • The screen will return to the clock mode if you do not press any buttons for 30 seconds or more. In order to set the seconds accurately against a radio time signal, press the ▲ (+) and ▼ (–) cursor buttons alternately until just before the time signal you are waiting for to ensure that 30 seconds does not elapse with no button presses. 11 PA-VR10(En) Page 11 04.11.19, 0:12 PM Adobe PageMaker 6.5J/PPC Settings In this section it is explained how to select the settings required to use the recorder’s various functions. Screen display Recording mode setting ............................... CODEC Microphone sensitivity setting ..................... SENSE Silence skip recording setting ...................... VAFON Date and time setting .................................... CLOCK 必 ず Setting the recording mode お You読 can select HQ (high-quality recording), SP (standard-quality み recording) or LP (long-play recording) as the recording mode. く だ Press the STOP/MENU button once or さ twice to display the menu screen. い 1 SET 2 Press the OK button. The settings mode screen appears. 3 Press the ▲ (+) or ▼ (-) cursor button until the “CODEC” (recording mode settings) screen appears, then press the OK button. Recording The recording mode setting screen appears. mode indicator The displayed setting changes in the sequence shown below each time you press the ▲ (+) or ▼ (-) cursor button. HQ ↔ SP ↔ LP ↔ HQ... CODEC Recording modes and recording times PA-VR10E: HQ mode: Approx. 4 hours SP mode: Approx. 8.5 hours LP mode: Approx. 28 hours PA-VR5E: HQ mode: Approx. 2 hours SP mode: Approx. 4 hours LP mode: Approx. 14 hours HQ mode: Records at the recorder’s highest quality. SP mode: Records at the recorder’s standard quality. LP mode: Records for a long time but at reduced quality. 12 PA-VR10(En) Page 12 04.11.19, 0:12 PM Adobe PageMaker 6.5J/PPC Select a recording mode and press the OK button. ENGLISH 4 Setting the microphone sensitivity Press the STOP/MENU button once or twice to display the menu screen. 2 Press the OK button. The settings mode screen appears. 3 Press the ▲ (+) or ▼ (-) cursor button until the “SENSE” (microphone sensitivity settings) screen appears, then press the OK button. The microphone sensitivity settings screen appears. The setting switches between HIGH and LOW each time you press the ▲ (+) or ▼ (-) cursor button. FRANÇAIS 1 DEUTSCH You can select the sensitivity of the recorder’s internal microphone from two levels. H I GH 4 ESPAÑOL HIGH: A high-sensitivity mode that enables you to record peripheral sound also. LOW: The normal sensitivity mode. Ideal for dictation. Select the microphone setting and press the OK button. ITALIANO Setting silence skip recording Silence skip recording (VAFON) is a function that automatically pauses recording when the sound being recorded becomes inaudible. 1 Press the STOP/MENU button once or twice to display the menu screen. 2 Press the OK button. The settings mode screen appears. 3 Press the ▲ (+) or ▼ (-) cursor button until the “VAFON” (silence skip recording settings) screen appears, then press the OK button. The silence skip recording settings screen appears. 13 PA-VR10(En) Page 13 04.11.19, 0:12 PM Adobe PageMaker 6.5J/PPC Press the ▲ (+) or ▼ (-) cursor button to select ON or OFF. ON: Enables silence skip recording. OFF: Returns to normal voice recording. 4 ON Press the OK button. Icon display SET 必 ず お 読 Setting the date and time み See く “Setting the date and time” on page 10 for information on だ setting さ the date and time. い Recording The PA-VR10E/PA-VR5E has four folders for storing voice recordings, which allows you to group recordings by category or occasion. The total recording time (page 12) is shared between all the folders, and there is no limit on the part of the total time that may be stored in any one folder. Each folder may contain up to 127 recordings (files). 1 Press the FOLDER/REPEAT button to select the folder in which the recording will be stored and then press the OK button. The displayed folder changes in the sequence shown below each time you press the FOLDER/REPEAT button. Folder 1 ➝ Folder 2 ➝ Folder 3 ➝ Folder 4 ➝ Folder 1... Folder display 2 When you press the RECORD/PAUSE button, “REC” appears on the display along with the file number for the new recording, and recording begins. The lamp on the back of the recorder lights red. 14 PA-VR10(En) Page 14 04.11.19, 0:12 PM Adobe PageMaker 6.5J/PPC Recording display Folder display File number 08 15 27 To stop recording, press the STOP/MENU button. DEUTSCH 3 ENGLISH Remaining recording time Recording mode Notes on recording voice ESPAÑOL FRANÇAIS • You can record up to 127 files in each folder. • When no available recording time remains, “FULL” appears on the display and you cannot make any more recordings. Erase some unwanted files and then try again. • When you press the RECORD/PAUSE button, “FULL” may appear on the display even though some available recording time remains. Erase some unwanted files and try again. • The record/play time indication is only approximate. • Do not remove the batteries while recording. • You may connect a commercially available microphone and use it for recording, but the quality of the audio cannot be guaranteed. ※ Do only connect cable of microphone less than 1.0 m to the digital voice recorder. Tip ITALIANO • When the clock mode screen is displayed, you can begin recording by pressing the RECORD/PAUSE button. Voice is then recorded using the current folder and recording settings. There may be a gap of a few seconds before recording actually begins. To pause recording Press the RECORD/PAUSE button while the recorder is running. “PAUSE” appears on the display and recording is paused. To resume recording, press the RECORD/PAUSE button again. Silence skip recording function When silence skip recording is set to ON (see page 13), recording pauses when the sound being recorded becomes inaudible. Under certain conditions the beginning of a recording may not be recorded. In such cases, turn this function OFF. Inserting event marking numbers You can insert event marking numbers into a file so that you can quickly locate a section you want to listen to again later. When a file PA-VR10(En) Page 15 15 04.11.19, 0:12 PM Adobe PageMaker 6.5J/PPC contains event marking numbers, you can skip backwards or forwards to the part you want to hear by pressing the 1 (5) or 0 (4) cursor button during playback. • Up to 50 event marking numbers can be inserted into each file. 1 Press the OK button during recording or during playback. A new event marking number appears on the display. Recording or playback continues after the marking number has been inserted. You can insert additional marking numbers in the same way. 必 ず お 読 み く だ さ い Event marking number 00 17 52 Playing recordings 1 Press the FOLDER/REPEAT button to select the desired folder and then press the OK button. 2 5 ) or 0 (4 4 ) cursor button to select the Use the 1 (5 desired file number. 3 Press the PLAY/PAUSE button to start playback. The lamp on the back of the recorder lights green. 4 Use the ▲ (VOL+) and ▼ (VOL-) cursor buttons to adjust the playback volume. 5 To stop playback, press the STOP/MENU button. Playback stops automatically when the end of the file is reached. To pause playback Press the PLAY/PAUSE button during playback. “PAUSE” flashes on the display and playback is paused. To resume playback, press the PLAY/PAUSE button again. To change the playback speed 1 Press the STOP/MENU button once or twice to display the menu screen. 16 PA-VR10(En) < REVISED > Page 16 04.12.16, 9:03 AM Adobe PageMaker 6.5J/PPC 2 Press the ▲ (+) or ▼ (-) cursor button until the “SPEED” (playback speed settings) screen appears, then press the OK button. The settings screen appears. 3 Press the ▲ (+) or ▼ (-) cursor button to select “FAST,” “REG” or “SLOW.” ENGLISH DEUTSCH Icon display FAST: Fast playback REG: Playback. SLOW: Slow playback Press the OK button. FAST FRANÇAIS 4 NORMAL Repeat playback Event marking repeat ESPAÑOL This function repeatedly plays back a section between 2 event marking numbers in the recording currently playing. Press the FOLDER/REPEAT button during playback to repeatedly play back the section between event marking numbers. See “Inserting event marking numbers” on page 15 for more information on event marking numbers. ITALIANO Flashing 00 17 21 File repeat This function repeatedly plays back the file currently playing. To repeatedly play back the entire file, hold down the FOLDER/ REPEAT button for 1 second or longer during playback. Flashing 00 08 35 Cancel repeat To return to normal playback, press the FOLDER/REPEAT button during repeat playback. 17 PA-VR10(En) Page 17 04.11.19, 0:12 PM Adobe PageMaker 6.5J/PPC Skip/Search File skip You can skip to the previous or next file by briefly pressing the 1 (SKIP/SEARCH 5) or 0 (SKIP/SEARCH 4) cursor button. If the current file contains event marking numbers, this procedure skips to the previous or next event marking number. Mode status SKIP/SEARCH button pressed Stopped 必 5 or 4 ず お 読 み く だ Playback さ い 4 (File advance) 5 (File rewind) Result Displays the previous or next file number. If the current recording contains event marking numbers, the previous or next event marking number is displayed. Displays the next file number and begins playback from the beginning of that file. If the current recording contains event marking numbers, the next event marking number is displayed and playback begins from that number. Displays the previous file number and starts playback from the beginning of that file. If the current recording contains event marking numbers, the recorder displays the previous event marking number and starts playback from the beginning of that event. File search This function searches within files in the Fast forward/Fast rewind mode while the left (5) or right (4) SKIP/SEARCH button is held down. If the current file contains event marking numbers, the recorder searches by marked events. 18 PA-VR10(En) Page 18 04.11.19, 0:12 PM Adobe PageMaker 6.5J/PPC 5 (Fast rewind) ENGLISH DEUTSCH Scans forward through the current file. When you release the right (4) skip/ search button, normal playback resumes. If the current recording contains event marking numbers, the recorder scans forward to the end of the current event and then skips forward one event marking number at a time. When the last event marking number in the file is reached, the recorder starts skipping forward one file at a time. When you release the right (4) skip/search button, playback starts from the beginning of the file (or marked event) that has been reached. FRANÇAIS 4 (Fast forward) Result Scans backward through the current file. When you release the left (5) skip/ search button, normal playback resumes. If the current recording contains event marking numbers, the recorder scans backward to the beginning of the current event and then skips backward one event marking number at a time. When the first event marking number in the file is reached, the recorder starts skipping backward one file at a time. When you release the left (5) skip/search button, playback starts from the beginning of the file (or marked event) that has been reached. ESPAÑOL Playback SKIP/SEARCH button (Press and hold) ITALIANO Mode status Using the earphone You can listen to your recordings through the earphone provided simply by plugging it into the recorder’s earphone jack. When the earphone is connected, no sound is played through the speaker. Notes: • Do not turn the volume up too high when using the earphone as this could damage your hearing. • Do not connect an earphone to the recorder other than the one provided. 19 PA-VR10(En) Page 19 04.11.19, 0:12 PM Adobe PageMaker 6.5J/PPC Deleting Deleting event marking numbers 1 Press the FOLDER/REPEAT button, select a folder and then press the OK button. 2 5) or 0 (4 4) cursor button and select the Press the 1 (5 desired file number. 5 ) or 0 (4 4) cursor button and select the the 1 (5 3 必Press event marking number to be deleted. Flashing ず the ERASE button. 4 読おPress “DEL.?” appears and the selected event 5 marking number flashes. み く だ さ DEL. ? い Press the OK button. “DELETE!” appears and the event marking number is deleted. • The remaining event marking numbers are adjusted after the number is deleted. Note: Only the event marking number is deleted. The audio data referenced by the event marking number is not deleted. Deleting during playback • Follow steps 4 and 5 above while the event marking number appears on the display. Deleting files 1 Press the FOLDER/REPEAT button, select a folder and then press the OK button. 2 5) or 0 (4 4) cursor button and select Hold down the 1 (5 the file number to be deleted. 3 Hold down the ERASE button for 1 second or longer. “DEL.?” appears and the selected file flashes. 4 Press the OK button. “DELETE!” appears and the file is deleted. Flashing DEL. ? 20 PA-VR10(En) Page 20 04.11.19, 0:12 PM Adobe PageMaker 6.5J/PPC ENGLISH • The remaining file numbers are adjusted after the file is deleted. Deleting during playback DEUTSCH • Follow steps 3 and 4 above while the file number appears on the display. Deleting all the files in a folder 1 Press the FOLDER/REPEAT button, select a folder and then press the OK button. 2 Hold down the ERASE button for approximately 5 seconds or longer. “DEL.?” appears and the selected folder number flashes. 3 Press the OK button. “DELETE!” appears and all the files in the folder are deleted. FRANÇAIS Flashing ESPAÑOL DEL. ? Deleting during playback • Follow steps 2 and 3 above. ITALIANO Other Functions Recording scheduler function This function enables you to automatically make a recording at a set time by specifying the start and end times. 1 Press the STOP/MENU button once or twice to display the menu screen. 2 Press the ▲ (+) or ▼ (-) cursor button until the “SCHED” (recording scheduler function) screen appears, then press the OK button. Icon display The recording scheduler settings screen appears with the “hour” setting for the start time flashing. 3 Press the ▲ (+) or ▼ (-) cursor button to select the hour. 13 20 FR Start time 21 PA-VR10(En) Page 21 04.11.19, 0:12 PM Adobe PageMaker 6.5J/PPC 4 Press the OK button to confirm the displayed hour. The “minutes” setting then starts flashing. 5 Press the ▲ (+) or ▼ (-) cursor button to select the minutes. 13 30 FR Press the OK button to confirm the displayed minutes. The “hour” setting for the end time then starts flashing. Use the same procedure to select the hour and minute settings for the 14 30 TO end time. 必 ず After you have confirmed the “minutes” setting, press the お OK button. 読 み This completes the time setting procedure and returns you to く the menu screen. だ Tip さ い Press the 1 cursor button to go to the preceding setting. Press the 0 cursor button to go to the next setting. 6 7 • Recording begins slightly before the scheduled recording time. • Settings such as the recording mode and microphone sensitivity used for scheduled recording are those that were set before recording begins. • If the scheduled time is reached while you are playing a recording, playback stops and the recorder starts recording. • If the scheduled time is reached while the digital voice recorder is connected to a personal computer, a flashing indication appears on the display and recording does not take place. To cancel the settings 1 Display the recording scheduler settings screen. (See steps 1 and 2 on page 21.) 2 Press the ERASE button. “DEL.?” appears on the display. 3 Press the OK button. “DELETE!” appears and the settings are deleted. Message alarm function This function enables the recorder to play a pre-recorded message or sound an alarm tone at a set time. You can set up to 3 alarms at one time. 22 PA-VR10(En) Page 22 04.11.19, 0:12 PM Adobe PageMaker 6.5J/PPC Press the STOP/MENU button once or twice to display the menu screen. 2 Press the ▲ (+) or ▼ (-) cursor button until the “ALARM” (message alarm function) screen appears on the display, then press the OK button. The ALARM 1 screen appears. • To select ALARM 2 or ALARM 3, press ALARM 1 the ▲ (+) or ▼ (-) cursor button. DEUTSCH 1 ENGLISH Playing a message Icon display Press the OK button to display the ALARM settings screen. FRANÇAIS 3 4 Press the ▲ (+) or ▼ (-) cursor button until the “MSG” (message) screen appears on the display. Then press the OK button. The RECORD screen appears. 5 Press the OK button to start recording. (1) A “REC 3, 2, 1” countdown appears on the display, followed by “START” to indicate that you should begin recording the message. The recorded message can be up to 15 seconds long. A countdown on the 15 display shows the remaining time. • To stop recording mid-way, press the OK button. ESPAÑOL CH I ME ITALIANO RECORD (2) When you have finished recording the message, the “MSG” display flashes and the recorder plays back the recorded message. (3) Then a confirmation message “OK?” appears on the display. • If you are happy with the recording, press the OK button. • To redo the recording, press the ▲ (+) cursor button to return to the RECORD screen selected in step 4. 6 Press the OK button to display the alarm time settings screen. 23 PA-VR10(En) Page 23 04.11.19, 0:12 PM Adobe PageMaker 6.5J/PPC 7 Press the ▲ (+) or ▼ (-) cursor button to select the “hour” setting for the start time and then press the OK button. Next, the “minutes” setting flashes. Use the same procedure to select the minutes setting and then press the OK button. 8 Press the ▲ (+) or ▼ (-) cursor button to select “ONCE” or “DAILY” and then press the OK button. (The “ONCE” setting plays the alarm message one time only. The “DAILY” setting plays the alarm message every day.) DA I LY Tip 必 • Toずuse a message recorded earlier, use the ▲ (+) or ▼ (-) cursor お button after step 4 to select “RECALL” and then press the OK 読 button. Then set the alarm time. み • Messages are recorded with the microphone sensitivity set to く だ “LOW” and “HQ” selected as the recording mode. These settings さ be changed. cannot い • If the set time is reached while you are playing a recording, playback stops and the recorder plays the message alarm. • If the set time is reached while you are making a recording, the message alarm icon flashes on the display but recording is not interrupted. • If the set time is reached while the digital voice recorder is connected to a personal computer, the message alarm icon flashes on the display. The recorder plays the message alarm as soon as it is disconnected from the personal computer. Using an alarm tone To have the recorder sound an alarm tone, select “CHIME” in step 4 and then set the alarm time. Timer function The recorder’s timer function sounds an alarm once a set time has elapsed. You can set the timer delay to be from 1 to 99 minutes. 1 Press the STOP/MENU button once or twice to display the menu screen. 2 Press the ▲ (+) or ▼ (-) cursor button until the “TIMER” (timer function) screen appears on the display, then press the OK button. The timer delay settings screen appears. 24 PA-VR10(En) Page 24 04.11.19, 0:12 PM Adobe PageMaker 6.5J/PPC Press the ▲ (+) or ▼ (-) cursor button to select a timer delay (1 to 99 minutes), then press the OK button. The timer starts running. ENGLISH 3 • To stop the timer while it is running, press the STOP/MENU button. DEUTSCH Hold function FRANÇAIS Setting the HOLD switch to the locked position locks the recorder in its current status and disables the other buttons. Use this feature to prevent the recorder’s buttons from being pressed by mistake. To unlock the recorder status, set the HOLD switch to the unlocked position. Storing your recordings on a PC (Only possible with the PA-VR10E) ESPAÑOL You can store material captured using the digital voice recorder on a personal computer in the form of data files. It is also possible to transfer such data files from the personal computer back to the digital voice recorder at a later date. Your personal computer must meet the system requirements listed below in order to connect the digital voice recorder and store recorded material. Supported models IBM PC/AT compatible Supported operating systems Microsoft® Windows® XP Professional/ XP Home/Me/2000 Professional/98/98SE USB port One USB port (version 1.1 or above) required to connect to the digital voice recorder ITALIANO ● Personal Computer Running Microsoft Windows Note: If your PC is running Windows 98 or 98 SE, you will need to install a dedicated USB driver. You can download the USB driver from the website at the URL given below. After downloading the driver, read the instructions on the website for how to install it. Digital Voice Recorder Support page: http://www.sharp.co.uk/voicerecorder • Users of other OS versions should read the information provided on the website support pages. PA-VR10(En) Page 25 25 04.11.19, 0:12 PM Adobe PageMaker 6.5J/PPC • Microsoft and Windows are either registered trademarks or trademarks of Microsoft Corporation in the U.S. and/or other countries. Connecting the digital voice recorder to a personal computer To connect to a PC, purchase a commercially available USB cable (USB (A) male-USB (Mini-B) male). • Do only connect USB cable less than 1.2 m to the digital voice recorder. the smaller connector of the USB cable into the USB 1 必Plug jack of the digital voice recorder. ず the larger connector into a USB port on your personal 2 読おPlug computer. み く Notes: だ • Do さ not force the USB connectors when inserting them. If the い connector cannot be plugged in easily, make sure it is not upside down. • Connect the digital voice recorder directly to a USB port on your PC using a USB cable. • Make sure the digital voice recorder is powered on before connecting it to your PC. • Make sure the recorder is not connected to the PC during recording or playback. Folder structure when connected to a PC When the recorder is connected to a PC, it appears as a removable drive in Microsoft Windows. The recordings are stored on this removable drive in the folder structure shown below. .......................... Removable drive ..................... SACM folder 26 PA-VR10(En) ........... 1 folder Corresponds to folder 1 on the recorder ........... 2 folder Corresponds to folder 2 on the recorder ........... 3 folder Corresponds to folder 3 on the recorder ........... 4 folder Corresponds to folder 4 on the recorder ........... NONVOICE folder Used for recorder operations ........... SETTINGS folder Used for recorder operations Page 26 04.11.19, 0:12 PM Adobe PageMaker 6.5J/PPC Backing up recorded audio data ENGLISH The audio recordings are stored as data files in folders 1 to 4. To store these files on your PC, copy folders 1 to 4 to a folder of your choice. Refer to the Microsoft Windows User’s Manual for instructions on copying files and folders. Transferring audio data back to the digital voice recorder DEUTSCH To transfer audio files stored on your PC to the recorder so that you can listen to them, copy folders 1 to 4 from your PC to the SACM folder on the removable drive. Copying stored folders from your PC to the recorder will overwrite the folders and files previously stored in the recorder, and their contents will be lost forever. Appropriate care is therefore necessary when performing this step. ITALIANO ESPAÑOL FRANÇAIS Notes: Be sure to keep the following points in mind when connecting the recorder to a PC. • Do not use your personal computer to format the removable drive representing the digital voice recorder. Doing so could cause the recorder to malfunction, possibly making it impossible to record or play back audio correctly, reducing the recording time or causing data corruption. • Do not create new folders inside the SACM folder or delete or rename the folders it contains. Doing so could cause the recorder to malfunction, possibly resulting in data loss or the deletion of recorder settings. • Do not copy files other than audio files recorded using the recorder to the folders inside the SACM folder. Doing so could cause the recorder to malfunction. • If you try to play a file in an incompatible format to the recorder, “ ? ? ?” appears on the display and the file does not play. • Always copy audio recordings from the recorder to your PC, or from your PC to the recorder, an entire folder at a time. Attempting to copy individual files could result in the accidental deletion of important files from the recorder or cause it to malfunction. • Do not change the names, attributes or extensions of audio files. Doing so could cause the recorder to malfunction. • Do not unplug the USB cable while data transfer is in progress. Doing so could result in data corruption or cause the recorder to malfunction. • Do not connect the digital voice recorder to your PC during recording or playback. • Do not copy so many audio files to the recorder that its storage capacity is used up. Doing so may result in a very short available recording time or recording may not be possible at all. 27 PA-VR10(En) Page 27 04.11.19, 0:12 PM Adobe PageMaker 6.5J/PPC • Recorded data is stored in the audio files in a proprietary format. It is not possible to play audio files recorded using the recorder on your PC using Windows Media Player or similar applications. • Do not connect the recorder to your PC when the batteries are dead or if there are no batteries in the recorder. Doing so could cause the recorder to malfunction or could result in the recorder not being recognized as an external drive by the PC. Disconnecting the digital voice recorder • After confirming that data transfer is complete and performing the procedure for removing hardware from the personal computer, 必 the USB cable from the digital voice recorder. unplug ず recorder remains in “LINK…” status until it is disconnected • The お from 読 the PC. み く だ Important Information さ い Replacing the batteries Once the batteries are becoming exhausted, you will no longer be able to record or play back voice recordings. Before replacing the batteries, be sure to read the following information carefully and observe the instructions closely. Batteries used Type Model Quantity AAA-size alkaline batteries LR03 2 ※ Use only the designated battery type. Other batteries may have different capacities or voltages and could cause malfunctions or faults. Notes: • Remove the batteries if the recorder will not be used for a long period. • Never remove batteries while the recorder is operating. Removing the batteries during recording, while recording is paused, during playback, or while erasing is in progress could result in recorded data not being saved or in loss of all recorded data. • Leaving depleted batteries in the recorder may result in battery fluid leakage and damage to the recorder. 28 PA-VR10(En) Page 28 04.11.19, 0:12 PM Adobe PageMaker 6.5J/PPC ENGLISH Notes: • The batteries supplied with the recorder were included at shipment and may become exhausted before their suggested operating time. DEUTSCH When to replace the batteries The icon in the top-right corner of the display indicates when the batteries are becoming exhausted and should be replaced soon. FRANÇAIS Battery level icons : Full : Low Battery operating times • Continuous recording time (in LP mode): Approx. 8 hours • Continuous playback time (in LP mode): Approx. 6 hours Slide the battery cover in the direction of the arrow to remove it. 2 3 Remove the used batteries. 4 Fit the battery cover back in place. The screen for setting the date and time appears on the display. To set the date and time, follow from step 5 of the procedure on page 10. ITALIANO 1 ESPAÑOL Battery replacement procedure Insert the new batteries. Ensure that both replacement batteries are new and that they are inserted with the correct polarity. 29 PA-VR10(En) Page 29 04.11.19, 0:12 PM Adobe PageMaker 6.5J/PPC Dealing with problems In very unusual circumstances, such as exposure to strong external electrical interferences or a strong impact, all the buttons on the recorder may cease to function. If this happens, reset the recorder as described below. Reset procedure Using a ballpoint pen or similar tool, press the reset button on the back of the recorder. The “RESET?” message appears on the display. 必 ず Press the STOP/MENU button. お The screen for setting the date and time appears on the 読 display. み To set the date and time, follow from step 5 of the procedure く on page 10. だ さ い Initialization procedure 1 2 If resetting the recorder does not remedy the problem, try initializing the recorder. Never initialize the recorder unless absolutely necessary as this will erase all the data on the recorder. ※This procedure will erase all the recordings stored on the recorder and will reset all the recorder settings (date/time, etc.) to their initial values. 1 Using a ballpoint pen or similar tool, press the reset button on the back of the recorder. The "RESET?" message appears on the display. 2 Press the OK button. When “OK?” appears on the display, press the OK button again. The “RESET!” message appears on the display briefly and then the screen for setting the date and time appears. To set the date and time, follow from step 5 of the procedure on page 10. Cleaning the recorder Use a soft dry cloth to clean the recorder. Do not use volatile fluids such as thinners or benzene or a dampened cloth as this could result in deformation or discoloration of the recorder. 30 PA-VR10(En) Page 30 04.11.19, 0:12 PM Adobe PageMaker 6.5J/PPC ENGLISH Troubleshooting If the problems described below occur, it does not necessarily mean that the recorder is faulty. Check the suggested items before requesting repairs. The recorder will not record. • Are the batteries exhausted? • If the “FULL” indication is displayed, try deleting some unwanted files. The recorded voice is not audible. • Is the earphone connected? • Is the volume set too low? The recorded voice is too low. • Is the microphone sensitivity set to LOW during recording? Set the microphone sensitivity to HIGH. (See page 13.) The duration of the recorded audio is shorter than the actual recording time FRANÇAIS • Is the HOLD switch set to the locked position? ESPAÑOL Nothing happens when any button is pressed. ITALIANO Nothing appears on the display. • Are the batteries exhausted? • Are the batteries inserted with the correct polarity? ※ If neither of the above apply, try the reset procedure. DEUTSCH Check this Problem • Is silence skip recording turned on? (See page 13.) The beginning of the recording is cut off. The recording is hard to hear. • Is the recording mode set to LP? (See page 12.) 31 PA-VR10(En) Page 31 04.11.19, 0:12 PM Adobe PageMaker 6.5J/PPC Specifications Model Name Internal memory 必 ず お 読 み く だ Input/output terminals さ い Speaker Clock accuracy Operating temperature Maximum power Power supply Continuous battery operation time Dimensions Accessories 32 < REVISED > Earphone: 3.5 mm dia.; impedance: 32 Ω Microphone: 3.5 mm dia.; impedance: 2.4 kΩ USB jack (Mini-B) (PA-VR10E only) 23 mm dia. Average ±1 min./month (at 25°C) 0°C to 40°C 70 mW 3V (DC): AAA-size alkaline batteries (LR03) (2) Approx. 8 hours (continuous recording in LP mode) Approx. 6 hours (continuous playing in LP mode) • Volume at factory setting (initial level) ※ Varies depending on the operating conditions and type of usage. The above figure is only an approximate guide and is in no way guaranteed. PA-VR10E: Approx. 66 g (including batteries) PA-VR5E: Approx. 65 g (including batteries) 31 (W) × 111 (D) × 16.8 (H) mm AAA-size alkaline batteries (2), earphone, operation manual Weight PA-VR10(En) PA-VR10E/PA-VR5E Digital voice recorder PA-VR10E: 64 MB PA-VR5E: 32 MB Recording times PA-VR10E: HQ mode: Approx. 4 hours SP mode: Approx. 8.5 hours LP mode: Approx. 28 hours PA-VR5E: HQ mode: Approx. 2 hours SP mode: Approx. 4 hours LP mode: Approx. 14 hours Page 32 04.12.16, 9:03 AM Adobe PageMaker 6.5J/PPC In Europe: This equipment complies with the requirements of Directive 89/336/EEC as amended by 93/68/EEC. Dieses Gerät entspricht den Anforderungen der EGRichtlinie 89/336/EWG mit Änderung 93/68/EWG. Ce matériel répond aux exigences contenues dans la directive 89/336/CEE modifiée par la directive 93/68/CEE. Dit apparaat voldoet aan de eisen van de richtlijn 89/336/ EEG, gewijzigd door 93/68/EEG. Dette udstyr overholder kravene i direktiv nr. 89/336/EEC med tillæg nr. 93/68/EEC. Quest’ apparecchio è conforme ai requisiti della direttiva 89/ 336/EEC come emendata dalla direttiva 93/68/EEC. ∏ ÂÁηٿÛÙ·ÛË ·˘Ù‹ ·ÓÙ·ÔÎÚ›ÓÂÙ·È ÛÙȘ ··ÈÙ‹ÛÂȘ ÙˆÓ Ô‰ËÁÈÒÓ Ù˘ ∂˘Úˆ·˚΋˜ ∂ÓˆÛ˘ 89/336/∂√∫, fiˆ˜ Ô Î·ÓÔÓÈÛÌfi˜ ·˘Ùfi˜ Û˘ÌÏËÚÒıËΠ·fi ÙËÓ Ô‰ËÁ›· 93/68/∂√∫. Este equipamento obedece às exigências da directiva 89/ 336/CEE na sua versão corrigida pela directiva 93/68/CEE. Este aparato satisface las exigencias de la Directiva 89/336/ CEE, modificada por medio de la 93/68/CEE. Denna utrustning uppfyller kraven enligt riktlinjen 89/336/ EEC så som kompletteras av 93/68/EEC. Dette produktet oppfyller betingelsene i direktivet 89/336/ EEC i endringen 93/68/EEC. Tämä laite täyttää direktiivin 89/336/EEC vaatimukset, jota on muutettu direktiivillä 93/68/EEC. PA-VR10(表紙1-4) Page 2 04.11.19, 5:21 PM Adobe PageMaker 6.5J/PPC DIGITAL VOICE RECORDER DIGITALES DIKTIERGERÄT ENREGISTREUR VOCAL NUMÉRIQUE GRABADORA DE VOZ DIGITAL REGISTRATORE VOCALE DIGITALE PA-VR10E PA-VR5E OPERATION MANUAL BEDIENUNGSANLEITUNG MODE D’EMPLOI MANUAL DE MANEJO MANUALE DI ISTRUZIONI SHARP CORPORATION • ENGLISH ...................... Page 1 • DEUTSCH .................... Seite 33 • FRANÇAIS ................... Page 69 • ESPAÑOL .................... Página 104 PRINTED IN CHINA / IMPRIMÉ EN CHINE / IMPRESO EN CHINA • ITALIANO ..................... Pagina 139 05AT(TINSZ0786EH01) PA-VR10(表紙1-4) < REVISED > Page 1 04.12.18, 4:54 PM Adobe PageMaker 6.5J/PPC