1
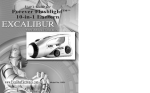
User’s Guide for
Jeff Gordon
Radio/CD Helmet
Model No.
RD501-24
C
ongratulations on your purchase of the Jeff
Gordon Radio/CD Helmet from Excalibur
Electronics, Inc.
You and your friends will enjoy hours of fun listening
to your favorite CDs or tuning in to the radio to listen
as Jeff Gordon seals another victory.
Your Jeff Gordon Radio/CD Helmet is easy to use
and maintain but be sure to read this manual thoroughly,
especially noting safety and proper maintenance
information.
Keep this manual for future reference.
© 2006 HGL, LLC The name, likeness and signature of
Jeff Gordon and the likeness of the #24 DuPont Chevrolet
are used under license by HGL, LLC.
TABLE OF CONTENTS
Layout of the Jeff Gordon Radio CD Helmet ………..page 4
Get to know your Jeff Gordon Radio/CD Helmet … page 6
Using Your Jeff Gordon Radio CD Helmet ………… page 7
Radio ……………………...……………………..page 7
CD Player …………………………………... .....page 7
Remote Control …………………………………page 7
CD Precautions ……………………………………… page 9
Reminders ……………………………………… ……page 10
Troubleshooting ……………………………………....page 10
Specifications …………………………………………page 11
Warnings ……………………………………...............page 11
Special Care and Handling ………………………… page 14
Limited 90-day Warranty …………………………… page 15
NASCAR® is a registered trademark of The
National Association for Stock Car Auto Racing, Inc.
The legendary King Arthur
brandished a magic sword,
Excalibur, from which we take
our company name. With this
unique weapon in his hand,
he could not be vanquished.
Although Excalibur Electronics
can’t claim the magical secrets of
Merlin, King Arthur’s court wizard,
sometimes our patented technology
may make it seem as if we could.
We make you think.
2
3
Layout of the Jeff Gordon
Radio/CD Helmet
CD
4
LED
SCREEN
DRAWER DOOR
HELMET
CD
5
DRAWER DOOR
Get to know your
Jeff Gordon Radio/CD Helmet
POWER:
OFF.
the entire
playing.
Turns the unit ON and
CD
when it is done
FUNCTION:
TUNING : Use this knob to
locate AM and FM stations when
listening to the radio.
STANDBY:
INDICATOR LIGHTS: These will
light up according to which
mode is in use; AM/FM; CD; FM
STEREO; PROGRAM; REPEAT.
Switches helmet
between FM, AM and CD mode.
OPEN/CLOSE: Opens and closes the CD door.
When in PAUSE
mode this indicator will light up.
VOLUME: Turn this knob to
increase or decrease volume.
LCD SCREEN: Displays track
number currently playing while
listening to a CD.
PLAY/PAUSE:
Press when in
STOP mode (with a CD loaded) to
begin listening to a CD. Press
again during PLAY MODE to
pause the CD.
STOP:
playing.
REMOTE SENSOR :
Receives
signals from the remote control.
CD DOOR:
This is where a CD
can be loaded or removed.
FM ANTENNA: This antenna is
provided for better reception of
FM stations.
Press to stop a CD while
REPEAT: Press once to set the
Radio/CD helmet to repeat a
desired track of a CD. Press once
more to set the helmet to repeat
Using Your Jeff Gordon
Radio/CD Helmet
Your Jeff Gordon Radio/CD
Helmet can tune into AM/FM
radio stations and play CDS. To
begin, unpack all parts and
remove protective packing
around the unit. Plug in the AC
adaptor into the unit first then
into a three-pronged outlet. You
are now ready to begin enjoying
your Radio/CD Helmet.
button to set the unit
mode. Press the
OPEN/CLOSE button to open the
CD door. Load in a CD (with the
label side facing up) and press
OPEN/CLOSE again to close the
CD door. After a moment the
LED display will show the total
number of tracks on the CD that
was inserted. Press the
PLAY /PAUSE button to begin
playing the CD.
FUNCTION
on
Listening to the Radio
Turn the unit on by pressing
the POWER button. Now with the
FUNCTION button you can switch
between FM or AM radio. After
you have chosen, use the tuning
wheel to locate a station that you
wish to listen to. Adjust volume
with the volume knob. Also,
keep the FM antenna raised so
that it has the best chance of
picking up a strong signal.
Using the Remote
Control
Before using the remote control, remove the battery cover
and insert two AA size batteries.
Make sure that the batteries’
polarities match the battery diagram shown on the battery compartment. When done, replace
the battery cover and you are
ready to use the remote control.
Listening to a
Compact Disc (CD)
6
Turn the unit on by pressing
the POWER button. Now use the
CD
7
(NOTE: When remote control
operation becomes erratic, or
the distance from which it operates shortens, then it is time to
change the batteries on the
remote control unit.)
will cycle through CD tracks in
reverse. Therefore, if you’d like
to listen to a previous track, use
the R-SKIP button. You can also
use R-SKIP to rewind through a
track by pressing and holding it
while the track plays.
Always keep in mind that the
remote control works best when
pointed directly at the remote
sensor on the front of the unit
(located just under the LED display.) The remote will function
consistently when used within a
distance of roughly 18 feet
(6m.)
F-SKIP: The F-SKIP button
functions just like the R-SKIP
button only forward. This button
allows you to cycle through
tracks in order. You can also use
F-SKIP to fast-forward through a
track by pressing and holding it
while the track plays.
Do not expose the remote sensor to strong light (direct sunlight or artificial lighting) and
make sure that there are no
obstacles between the sensor
and the remote control.
REPEAT: Press this button
once to instruct the helmet to
play the current track over and
over. This track will play repeatedly until the helmet is instructed otherwise. The REPEAT indicator light on the helmet will
begin to blink. Press REPEAT
again to have the entire CD
repeated when it is done playing
through all the tracks. Now, the
REPEAT indicator light will stay
lit. Press one more time to turn
REPEAT off. The indicator light
will turn off.
The remote control features
six buttons, three of which are
also located on the helmet itself.
Those are PLAY, PAUSE and STOP
and they function exactly as the
buttons located on the unit. The
other three buttons are unique to
the remote control and provide
for even more control over the
CDs that you listen to.
Buttons on the
Remote Control
R-SKIP:
The
R-SKIP
PROGRAM:
button
8
This button allows
you to program the order in
which the CD tracks will be
and you may continue. Keep
selecting tracks using the PROGRAM button to register them in
the order that you desire. You
may program up to 19 tracks in
any order you wish. If you use
all 19 slots the diplay will flash
with “- -”. If the STOP button is
pressed during PROGRAM MODE,
the unit will remove the content
of the program and cancels program mode.
played. When the CD is in stop
mode, press PROGRAM to begin
selecting the order in which you
want tracks to play. The track
number and PROGRAM indicator
light will flash. Use the RSKIP/F-SKIP buttons to cycle
through tracks until you have
found the track that you’d like to
play first. Press PROGRAM again
and this track will be registered
CD Precautions
If the CD is scratched, dirty, or
incorrectly placed on the disc
tray, it will not play properly.
• Near a heating device or a
place where the temperature is
high.
When holding a CD, try to
keep your hands off of the playing surface. Hold the CD by its
edges.
Never use chemicals such as
record sprays, anti-static sprays,
benzene or cleaning fluid on
your CDS.
Should there be any fingerprints or other smudges on the
playing surface of the CD
(opposite the side with the label)
wipe gently using a soft cloth
making sure to wipe from the
inside out or from the center of
the CD to the outer edge.
•
Bear in mind the following
points since any dirt, scratches
or warping of the disc can cause
broker or intermittent sound and
noise.
Do not place discs in the following locations:
9
Damp or dusty areas.
Reminders
Please read, follow and
adhere to all instructions and
safety precautions written in this
manual.
Keep the power cord out of
areas where it may be stepped
on. Do not unnecessarily bend
or pinch the cord or place the
cord under a heavy object.
Connect your Radio/CD helmet into a proper power supply
source as described earlier in the
users guidel.
Troubleshooting
location where a proper signal
can be found. Remember and
keep the FM antenna raised for
best signal.
If your Radio/CD does not
work properly, try one of the following solutions before seeking
further assistance.
Problems listening to
the Radio:
Problems listening to a
Compact Disc (CD):
• Make sure the power is on
and the unit is properly plugged
to a viable power source.
• When listening to a CD make
sure that the CD is properly
inserted (label side up). Also,
make sure that you have pressed
the PLAY button to begin playing
CD and that the volume is loud
enough for you to hear it.
Always remember to properly
care and handle your CD as
instructed earlier.
• Make sure that you have
turned up the volume enough.
• Sometimes radio signals may
be weak, move the antenna
around until you have found a
better signal or, if necessary,
move the entire unit to another
10
Specifications
Power Supply:
Compact Disc (CD):
DC 12V
Frequency Response (-3dB):
Output Power (Per Channel):
60 – 16000 Hz
2.0 watts RMS into 8 ohm
Signal-to-noise Ratio: 70 dB
Radio:
AM 530-1700 KHz
FM 88- 108 MHz
Harmonic Distortion: 0.4%
Warnings
• All warnings on your Jeff Gordon Radio/CD Helmet should be
strictly adhered to.
• DO NOT connect the unit to any electrical outlet before checking
the main voltage.
• Use of any controls, adjustments, or procedures other than those
specified within this manual may result in hazardous radiation
exposure.
• To prevent electrocution and fire, please adhere strictly to the
following:
•
•
•
Do not place objects on or near ventilation openings or
obstruct in any way the top, sides, or back (allowing
several inches of space around unit to ensure proper
ventilation) of your Jeff Gordon Radio/CD Helmet.
Keep helmet securely on a flat and dry surface area.
Do not expose your Jeff Gordon Radio/CD Helmet to rain,
water/liquid, or moisture of any kind.
11
•
•
•
•
•
Real humid conditions may cause condensation build up
inside the unit causing the malfunction. If this occurs,
allow the unit to stand and dry out for several hours
before using again.
When plugging into outlet, make sure to match the wider
prong of the plug, to the wider entrance of the electric
socket, making sure plug is fully in socket.
When disconnecting, grip plug to remove.
DO NOT pull the cord.
Do not position your Jeff Gordon Radio/CD Helmet near
heat sources such as radiators, heat registers, stoves, or any
other appliance (including amplifiers) that produces heat.
If you are not using your Jeff Gordon Radio/CD Helmet for
an extended length of time, disconnect plug from socket.
What to do with a damaged
Jeff Gordon Radio/CD Helmet.
The Jeff Gordon Radio/CD Helmet should be serviced by qualified
service personnel when:
• The power-supply cord or plug has been damaged.
Caution
To reduce the risk of electric shock, do not remove cover
or bottom of your helmet radio. Refer servicing to qualified
service personnel.
Grounding and Polarization
Precautions should be taken to ensure that the grounding or polarization of the Jeff Gordon Radio/CD Helmet is effective.
Cleaning
The appliance should be cleaned only as recommended by the
manufacturer.
Power Lines
An outdoor antenna should be located away from power lines.
AC/DC Adapter
The Radio/CD Helmet is equipped with an AC/DC adapter. This
adapter converts the input from the AC current to DC current.
Under no circumstances should the Jeff Gordon Radio/CD Helmet
be connected to a socket on the wall without first passing through the
supplied adapter. If for any reason the adapter supplied ceases to
operate, you should contact a qualified service agency.
• Objects have fallen into, or liquid has been spilled into the
appliance enclosure.
• The CD player has been exposed to rain.
• The CD player has been dropped, or the enclosure damaged.
• The CD player does not appear to operate normally or exhibits
a marked change in performance.
12
13
Special Care and Handling
• Avoid rough handling such as bumping or dropping.
• Avoid moisture and extreme temperatures. For best results, use
between the temperatures of 39º F and 100º F (4º C and 38º C).
• Clean using only a slightly damp cloth. Do not use cleaners with
chemical agents.
• To prevent fire or shock hazard, DO NOT expose this appliance
to rain or moisture.
• Remember to disconnect the Jeff Gordon Radio/CD Helmet from
any outlet when not in use.
• CAUTION: To reduce the risk of electric shock. DO NOT
remove cover or bottom of your Radio/CD Helmet.
Send for servicing to qualified service personnel.
This device complies with Part 15 of the FCC Rules. Operation is subject to the following
two conditions: (1) this device may not cause harmful interference, and (2) this device must
accept any interference received, including interference that may cause undesired operation.
NOTE: This equipment has been tested and found to comply with the limits for a Class B digital
device, pursuant to Part 15 of the FCC Rules. These limits are designed to provide reasonable l
interference in a residential installation. This equipment generates, uses and can radiate radio
frequency energy and, if not installed and used in accordance with the instructions, may cause
harmful interference to radio communications. However, there is no guarantee that interference
will not occur in a particular installation. If this equipment does cause harmful interference to
radio or television reception, which can be determined by turning the equipment off and on, the
user is encouraged to try to correct the interference by one or more
of the following measures:
•
Reorient or relocate the receiving antenna.
•
Increase the separation between the equipment and receiver.
•
Consult the dealer or an experienced radio/TV technician for help.
•
Connect the equipment into an outlet on a circuit different from that to which the
receiver is connected.
Excalibur Electronics reserves the right to make technical changes
without notice in the interest of progress.
14
LIMITED
90-DAY
EXCALIBUR
ELECTRONICS,
INC., warrants to the original consumer
that its products are free from any electrical or mechanical defects for a period
of 90 DAYS from the date of purchase.
If any such defect is discovered within
the warranty period, EXCALIBUR
ELECTRONICS, INC., will repair or
replace the unit free of charge upon
receipt of the unit, shipped postage prepaid and insured to the factory address
shown at right.
WARRANTY
tal or consequential damages, so the
above limitations and exclusions in
these instances may not apply. The only
authorized service center in the United
States is:
Excalibur Electronics, Inc.
13755 SW 119th Ave
Miami, Florida 33186 U.S.A.
Phone: 305.477.8080
Fax: 305.477.9516
www.ExcaliburElectronics.com
Ship the unit carefully packed, preferably in the original carton, and send it
prepaid, and adequately insured. Include
a letter, detailing the complaint and
including your daytime telephone number, inside the shipping carton. If your
warranty has expired and you want an
estimated fee for service, write to the
above address, specifying the model and
the problem.
The warranty covers normal consumer use and does not cover damage
that occurs in shipment or failure that
results from alterations, accident, misuse, abuse, neglect, wear and tear, inadequate maintenance, commercial use, or
unreasonable use of the unit. Removal
of the top panel voids all warranties.
This warranty does not cover cost of
repairs made or attempted outside of the
factory.
PLEASE DO NOT SEND
YOUR UNIT WITHOUT
RECEIVING
AN ESTIMATE
FOR SERVICING.
WE CANNOT
STORE YOUR UNIT!
Any applicable implied warranties,
including warranties of merchantability
and fitness, are hereby limited to 90
DAYS from the date of purchase.
Consequential or incidental damages
resulting from a breach of
any applicable express or
implied warranties are
hereby excluded. Some
states do not allow limitations on the duration
of implied warranties
and do not allow
exclusion of inciden-
15
EXCALIBUR ELECTRONICS, INC.
13755 SW 119TH AVENUE
MIAMI, FLORIDA 33186 U.S.A.
PHONE: 305.477.8080
FAX: 305.477.9516
Play games live at:
www.ExcaliburElectronics.com
RD501-24 (MA) JeffGordonRadioCDhelmet 081606 V7