1
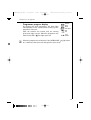
132989390_d.qxd
16/03/2004
11:14
Pagina
1
(Nero/Process Black pellicola)
LAVAMAT L 60610
Der umweltschonende Waschvollautomat
The environmentally friendly washing machine
Benutzerinformation
Instruction booklet
LAVAMAT
850
700
600
400
F
D
95
C
E
B
A
60
50
40
30
30
40
30
40
40
40
60
50
L 60610
PERFEKT IN FORM UND FUNKTION
132989390_gb.qxd
17/03/2004
10:24
Pagina
47
(Nero/Process Black pellicola)
Dear customer,
Please read these operating instructions carefully and pay particular
attention to the safety notes indicated in the first pages. We recommend that you keep this instruction booklet for future reference and
pass it on to any future owners.
The warning triangle and/or the key words (Warning!, Caution!) emphasize information that is particularly important for your safety or correct
functioning of the appliance.
This symbol guides you, step by step, in the operation of the appliance.
The information marked with this symbol provides additional instructions and practical tips on the use of the appliance.
Tips and information about economical and ecological use of the
machine are marked with the clover symbol.
Should any problems arise, this booklet provides instructions on how to
solve them by yourself; see section “Something not working?”.
If this information is not sufficient, please contact our nearest SERVICE
CENTRE.
Printed on recycled paper.
People who think ecologically, act accordingly…
47
132989390_gb.qxd
17/03/2004
10:24
Pagina
48
(Nero/Process Black pellicola)
Contents
Safety instructions . . . . . . . . . . . . . . . . . . . . . . . . . . . . . . . . . . . . . . . . . . . . . . 51
Disposal . . . . . . . . . . . . . . . . . . . . . . . . . . . . . . . . . . . . . . . . . . . . . . . . . . . . . . . 53
Tips for environmental protection . . . . . . . . . . . . . . . . . . . . . . . . . . . . . . . . 53
Main features of your washing machine . . . . . . . . . . . . . . . . . . . . . . . . . . 54
Description of the appliance. . . . . . . . . . . . . . . . . . . . . . . . . . . . . . . . . . . . . . 55
Control panel . . . . . . . . . . . . . . . . . . . . . . . . . . . . . . . . . . . . . . . . . . . . . . . . . . . . 56
Programme selector dial . . . . . . . . . . . . . . . . . . . . . . . . . . . . . . . . . . . . . . . . 56
START/PAUSE button . . . . . . . . . . . . . . . . . . . . . . . . . . . . . . . . . . . . . . . . . . 57
DELAY START button . . . . . . . . . . . . . . . . . . . . . . . . . . . . . . . . . . . . . . . . . . . 57
Programme Option buttons . . . . . . . . . . . . . . . . . . . . . . . . . . . . . . . . . . . . . 58
STAIN . . . . . . . . . . . . . . . . . . . . . . . . . . . . . . . . . . . . . . . . . . . . . . . . . . . . . . . 58
QUICK . . . . . . . . . . . . . . . . . . . . . . . . . . . . . . . . . . . . . . . . . . . . . . . . . . . . . . . 58
SOAK . . . . . . . . . . . . . . . . . . . . . . . . . . . . . . . . . . . . . . . . . . . . . . . . . . . . . . . 58
PREWASH . . . . . . . . . . . . . . . . . . . . . . . . . . . . . . . . . . . . . . . . . . . . . . . . . . . . 58
SPIN SPEED . . . . . . . . . . . . . . . . . . . . . . . . . . . . . . . . . . . . . . . . . . . . . . . . . . 59
RINSE HOLD . . . . . . . . . . . . . . . . . . . . . . . . . . . . . . . . . . . . . . . . . . . . . . . . . . 59
Display. . . . . . . . . . . . . . . . . . . . . . . . . . . . . . . . . . . . . . . . . . . . . . . . . . . . . . . 59
Programme progress display. . . . . . . . . . . . . . . . . . . . . . . . . . . . . . . . . . . . . 60
Cancelling a programme . . . . . . . . . . . . . . . . . . . . . . . . . . . . . . . . . . . . . . . . 61
Altering a programme which is running . . . . . . . . . . . . . . . . . . . . . . . . . . . 61
Opening the door after the programme has started . . . . . . . . . . . . . . . . . 61
Detergent dispenser drawer . . . . . . . . . . . . . . . . . . . . . . . . . . . . . . . . . . . . . . . . 62
Before the first wash . . . . . . . . . . . . . . . . . . . . . . . . . . . . . . . . . . . . . . . . . . . . 62
Preparing the wash cycle. . . . . . . . . . . . . . . . . . . . . . . . . . . . . . . . . . . . . . . . . 63
Sorting out and preparing the laundry . . . . . . . . . . . . . . . . . . . . . . . . . . . . . . 63
Weight of laundry . . . . . . . . . . . . . . . . . . . . . . . . . . . . . . . . . . . . . . . . . . . . . . . . 64
Types of fabric and care labels . . . . . . . . . . . . . . . . . . . . . . . . . . . . . . . . . . . . . 64
Detergents and additives . . . . . . . . . . . . . . . . . . . . . . . . . . . . . . . . . . . . . . . . . . 66
Which detergent and additive? . . . . . . . . . . . . . . . . . . . . . . . . . . . . . . . . . . 66
How much detergent?. . . . . . . . . . . . . . . . . . . . . . . . . . . . . . . . . . . . . . . . . . 66
Liquid detergent. . . . . . . . . . . . . . . . . . . . . . . . . . . . . . . . . . . . . . . . . . . . . . . 66
Adding a water softener (descaling product) . . . . . . . . . . . . . . . . . . . . . . . . . 66
Information on water hardness . . . . . . . . . . . . . . . . . . . . . . . . . . . . . . . . . . . . . 66
48
132989390_gb.qxd
17/03/2004
10:24
Pagina
49
(Nero/Process Black pellicola)
Contents
How to wash . . . . . . . . . . . . . . . . . . . . . . . . . . . . . . . . . . . . . . . . . . . . . . . . . . . . 67
Load the laundry . . . . . . . . . . . . . . . . . . . . . . . . . . . . . . . . . . . . . . . . . . . . . . . . . 67
Add detergent and additives . . . . . . . . . . . . . . . . . . . . . . . . . . . . . . . . . . . . . . . 68
Select the desired wash programme . . . . . . . . . . . . . . . . . . . . . . . . . . . . . . . . . 68
Select the desired options . . . . . . . . . . . . . . . . . . . . . . . . . . . . . . . . . . . . . . . . . 68
Select the SPIN SPEED or RINSE HOLD option . . . . . . . . . . . . . . . . . . . . . . . . 68
Select the EXTRA RINSE . . . . . . . . . . . . . . . . . . . . . . . . . . . . . . . . . . . . . . . . . . . 69
Select the DELAY START option . . . . . . . . . . . . . . . . . . . . . . . . . . . . . . . . . . . . . 69
Starting the programme. . . . . . . . . . . . . . . . . . . . . . . . . . . . . . . . . . . . . . . . . . . 70
At the end of the programme . . . . . . . . . . . . . . . . . . . . . . . . . . . . . . . . . . . . . . 70
Programme charts: wash and special programmes . . . . . . . . . . . . . . . 72-73
Cleaning and maintenance . . . . . . . . . . . . . . . . . . . . . . . . . . . . . . . . . . . . . . . 74
After each wash . . . . . . . . . . . . . . . . . . . . . . . . . . . . . . . . . . . . . . . . . . . . . . . . . 74
Periodical cleaning . . . . . . . . . . . . . . . . . . . . . . . . . . . . . . . . . . . . . . . . . . . . . . . 74
Exterior . . . . . . . . . . . . . . . . . . . . . . . . . . . . . . . . . . . . . . . . . . . . . . . . . . . . . . 74
Detergent dispenser drawer . . . . . . . . . . . . . . . . . . . . . . . . . . . . . . . . . . . . . 74
Door seal. . . . . . . . . . . . . . . . . . . . . . . . . . . . . . . . . . . . . . . . . . . . . . . . . . . . . 75
Drain pump. . . . . . . . . . . . . . . . . . . . . . . . . . . . . . . . . . . . . . . . . . . . . . . . . . . 75
Water inlet filter . . . . . . . . . . . . . . . . . . . . . . . . . . . . . . . . . . . . . . . . . . . . . . 76
Emergency emptying out . . . . . . . . . . . . . . . . . . . . . . . . . . . . . . . . . . . . . . . . . . 76
Frost precautions. . . . . . . . . . . . . . . . . . . . . . . . . . . . . . . . . . . . . . . . . . . . . . . . . 76
Something not working? . . . . . . . . . . . . . . . . . . . . . . . . . . . . . . . . . . . . . . . . . 77
Troubleshooting. . . . . . . . . . . . . . . . . . . . . . . . . . . . . . . . . . . . . . . . . . . . . . . 77-79
Unsatisfactory washing results . . . . . . . . . . . . . . . . . . . . . . . . . . . . . . . . . . . . . 80
Technical data . . . . . . . . . . . . . . . . . . . . . . . . . . . . . . . . . . . . . . . . . . . . . . . . . . 81
Service . . . . . . . . . . . . . . . . . . . . . . . . . . . . . . . . . . . . . . . . . . . . . . . . . . . . . . . . 82
Instructions for installation and electrical connection. . . . . . . . . . . . . . . 83
Safety instructions for the installer . . . . . . . . . . . . . . . . . . . . . . . . . . . . . . . . . 83
Dimensions of the appliance. . . . . . . . . . . . . . . . . . . . . . . . . . . . . . . . . . . . . . 84
Front view and side view . . . . . . . . . . . . . . . . . . . . . . . . . . . . . . . . . . . . . . . . . . 84
Rear view . . . . . . . . . . . . . . . . . . . . . . . . . . . . . . . . . . . . . . . . . . . . . . . . . . . . . . . 84
Installation . . . . . . . . . . . . . . . . . . . . . . . . . . . . . . . . . . . . . . . . . . . . . . . . . . . . . 85
Unpacking . . . . . . . . . . . . . . . . . . . . . . . . . . . . . . . . . . . . . . . . . . . . . . . . . . . . . . 85
Positioning . . . . . . . . . . . . . . . . . . . . . . . . . . . . . . . . . . . . . . . . . . . . . . . . . . . . . . 86
Levelling . . . . . . . . . . . . . . . . . . . . . . . . . . . . . . . . . . . . . . . . . . . . . . . . . . . . . . . . 86
Water inlet . . . . . . . . . . . . . . . . . . . . . . . . . . . . . . . . . . . . . . . . . . . . . . . . . . . . . 86
Water drainage . . . . . . . . . . . . . . . . . . . . . . . . . . . . . . . . . . . . . . . . . . . . . . . . . . 87
Electrical connection . . . . . . . . . . . . . . . . . . . . . . . . . . . . . . . . . . . . . . . . . . . . . 87
Permanent connection . . . . . . . . . . . . . . . . . . . . . . . . . . . . . . . . . . . . . . . . . . . . 88
49
132989390_gb.qxd
17/03/2004
10:24
Pagina
50
(Nero/Process Black pellicola)
Safety instructions
The safety of AEG appliances complies with the industry standards and
with legal requirements on the safety of appliances. However, as manufacturers, we feel it is our duty to provide the following safety notes.
General safety
• Repairs to the machine must be carried out only by qualified personnel. Repairs carried out by inexperienced persons could cause serious
danger. Contact your local AEG Service Force Centre.
• Never start the machine if the electrical supply cable is damaged or
the control panel or worktop are so damaged that inner components
can be reached.
• Unplug the appliance before carrying out any cleaning or maintenance operations.
• Never pull the power supply cable to remove the plug from the socket; always take hold of the plug itself.
• Never spray the machine with a jet of water. Danger of electric shock!
• During high temperature wash programmes the door glass may get
hot. Do not touch it!
• Let the water cool down before carrying out emergency emptying or
before opening the door in an emergency.
• Small animals can gnaw electric wires and water hoses causing electrocution hazard and damage due to water leaks.
Positioning, connection, starting up
• Follow the instructions for positioning and connection.
• Carry out a first wash without laundry (COTTONS 60, with half the
amount of detergent) in order to remove any manufacturing residue
from the tub and the drum.
• Should the machine be purchased in winter, when temperatures can
be below 0°, leave the appliance for 24 hours at ambient temperature
before starting it.
50
132989390_gb.qxd
17/03/2004
10:24
Pagina
51
(Nero/Process Black pellicola)
Safety instructions
Child safety
• Children are often not aware of how dangerous electrical appliances
can be. When the machine is working, children should be carefully
supervised and not be allowed to play with the appliance - there is a
risk that they could become trapped inside.
• The packaging components (e.g. plastic film, polystyrene) can be dangerous to children - danger of suffocation! Keep them out of children’s reach.
• Keep all detergents in a safe place out of children’s reach.
• Make sure that children or pets do not climb into the drum.
• When the appliance is to be scrapped, cut off the electrical supply
cable and destroy the plug with the remaining cable. Disable the door
catch in order to prevent children from becoming trapped inside
while playing.
Proper use
• This appliance is designed for domestic use only. If the machine is
used for any other purposes or is not used correctly, the manufacturer accepts no responsibility for any damage that might occur.
• For safety reasons, the appliance must not be modified.
• Use only detergents suitable for washing machines and follow the
manufacturer’s instructions.
• Garments which have been in contact with flammable solvents
should not be machine washed.
• Do not use your machine for dry cleaning.
• Dyes and bleaching agents may only be used if specifically permitted
by the manufacturer of these products. We cannot be held responsible for any damage.
• Always unplug the appliance and turn off the water tap after use.
51
132989390_gb.qxd
17/03/2004
10:24
Pagina
52
(Nero/Process Black pellicola)
Disposal
Packaging materials
The materials marked with the symbol
are recyclable.
>PE<=polyethylene
>PS<=polystyrene
>PP<=polypropylene
This means that they can be recycled by disposing of them properly in
appropriate collection containers.
Machine
Use authorised disposal sites for your old appliance. Help to keep your
country tidy!
Tips for environmental protection
To save water, energy and to help protect the environment, we recommend
that you follow these tips:
• Normally soiled laundry may be washed without prewashing or soak
in order to save detergent, water and time (the environment is protected too!).
• Use the energy saving programme when washing normally soiled garments.
• The machine works more economically if it is fully loaded.
• When small loads are washed, use only half to two thirds of the recommended amount of detergent.
• With adequate pre-treatment, stains and limited soiling can be
removed; the laundry can then be washed at a lower temperature.
• If the water has a medium or high degree of hardness (starting from
hardness degree II, see “Detergents and additives”) water softeners
must be added.
The amount of detergent can then be adjusted to hardness degree I (= soft).
52
132989390_gb.qxd
17/03/2004
10:24
Pagina
53
(Nero/Process Black pellicola)
Main features of your washing machine
• Programme and temperature setting using the programme selector.
• Stain programme for effectively treating stained washing.
• Energy saving programme for normally soiled cotton items.
• Speed for the final spin can be reduced to 700, 600 or 400 rpm.
• RINSE HOLD: the laundry is left immersed in the final rinse water to
prevent creasing.
• Delay timer: programme start can be delayed by 1 to 19 hours (e.g.
to times with a more economical power rate).
• Programme progress display showing the programme steps selected
and the programme phase which is running.
• Because of its gentle washing action, the special wool cycle washes
your garments with extreme care.
• 4-compartment drawer for detergent, fabric softener and bleaching
agent.
• Unbalance detection device: to prevent vibration during spinning.
• The ECO valve allows total use of detergent and reduces water consumption so saving energy.
53
132989390_gb.qxd
17/03/2004
10:24
Pagina
54
(Nero/Process Black pellicola)
Description of the appliance
Front view
Detergent drawer
Control panel
850
700
600
400
F
D
95
C
B
A
E
60
50
40
30
30
40
30
40
40
40
60
50
L 60610
Door
Drain pump
Adjustable feet
54
132989390_gb.qxd
17/03/2004
10:24
Pagina
55
(Nero/Process Black pellicola)
Description of the appliance
Control panel
1000
900
700
400
A
B
C
D
E
F
G
=
=
=
=
=
=
=
Option buttons
Spin speed button
Display
Delay start button
START/PAUSE button
Programme progress display
Programme selector dial
Programme selector dial
The programme selector determines the type of washing cycle (e.g. water
level, drum movement, number of rinses) and the washing temperature
according to the type of laundry.
F
95
The selector dial is divided into 5 D
E
60
C
sections:
50
B
40
A
• Cottons
30
30
• Synthetics
40
60
50
• Delicates
30
40
40
40
• Woollens
(hand washing)
• Special programmes A...F
• Reset programme O/OFF
The selector dial can be turned either clockwise or anticlockwise.
Position E corresponds to the ENERGY SAVING programme at approx.
67°C for normally soiled laundry, extended washing time (cannot be
combined with QUICK ).
55
132989390_gb.qxd
17/03/2004
10:24
Pagina
56
(Nero/Process Black pellicola)
Description of the appliance
Position
at 40°C = Easy to iron.
In this position the laundry is gently washed and spun to avoid any
creasing. In this way ironing is easier.
Position
= cold wash
START/PAUSE button
This button has three functions:
a) Start
After having selected the required programme, press this button to start
the machine. If you have selected the DELAY START option
, the
machine starts its hourly countdown.
b) Pause
To interrupt a programme which is running, press the START/PAUSE
button: the relevant light starts to flash.
To restart the programme from the point at which it was interrupted,
press the START/PAUSE button again.
c) Empty out water
At the end of a programme which ends with water in the drum (RINSE
HOLD
option), press the START/PAUSE button to empty out the
water: the machine will empty and spin.
DELAY START button
The wash programme can be delayed from 1 hour up to a maximum of
19 hours.
The button must be pressed after selecting the programme and
before pressing the START/PAUSE button.
The figures indicating the delay appear for about 3 seconds in the display. The duration of the selected wash programme is then displayed.
After depressing the START/PAUSE button
, the machine starts its
hourly countdown.
To alter or cancel the preset delay, press the START/PAUSE button, then
press the DELAY START button
until the required time is displayed
or, if you wish to cancel the delay, until the symbol 0 h is displayed.
Then press the START/PAUSE button
again.
When the delay is cancelled, the display shows the duration of the wash
programme previously selected.
56
132989390_gb.qxd
17/03/2004
10:24
Pagina
57
(Nero/Process Black pellicola)
Description of the appliance
Programme Option buttons
Depending on the programme, different functions can be combined.
These must be selected after choosing the desired programme and
before depressing the START/PAUSE button.
When these buttons are pressed, the corresponding pilot lights come on.
When they are pressed again, the pilot lights go out.
STAIN
To treat heavily soiled or stained laundry with stain remover (extended main
wash with time optimised stain action phase, not selectable for wool or programmes with temperatures lower than 40°C).
This function cannot be used with QUICK , SOAK
and PREWASH .
QUICK
By pressing this button the washing time is reduced. For use when
washing lightly soiled laundry.
This option is not available with the cotton programme 50°, wool and
economy programme and cannot be used with STAIN .
SOAK
The machine performs a soak of about 30 minutes at 30°C. By pressing
the DELAY START button
the soak time can be prolonged up to 10
hours max. After this time the wash cycle will automatically start.
This function cannot be used with WOOL programme, PREWASH
or
STAIN
options.
The soak programme ends with a short spin in programmes for Cotton
and Synthetics, and with emptying of the water without spinning for
Delicates.
PREWASH
The machine performs a prewash cycle at 30°C max. The prewash cycle
ends with a short spin in programmes for Cotton and Synthetics, and
with emptying of the water without spinning for Delicates.
This option is not available with the wool programme and cannot be
used with SOAK
and STAINS .
For use when washing heavily soiled laundry.
Important: By depressing at the same time buttons
and
the
machine will perform an extra rinse (see page 68) and depressing buttons
and
the acoustic signal at the end of the cycle is switched
off.
57
132989390_gb.qxd
17/03/2004
10:24
Pagina
58
(Nero/Process Black pellicola)
Description of the appliance
SPIN SPEED
Press this button to reduce the maximum speed of the final
speed proposed by the machine for the selected programme or to select option
(RINSE HOLD).
The maximum spin speed for cotton is 1000 rpm, for
synthetics and wool 900 rpm and for delicates 700
rpm.
1000
900
700
400
RINSE HOLD
By selecting this option, the last rinse water is not emptied out, to
prevent the fabrics from creasing. When the programme has finished,
the pilot light
(END) on the programme progress display illuminates
to indicate that the water must be emptied out.
To empty out water:
• press the START/PAUSE button: after emptying, the machine performs
the spin cycle required for the type of wash selected;
• select the spin speed by means of the relevant button and press
START/PAUSE;
• select the DRAIN programme “C” to empty out the water without
spinning.
Warning! The programme selector dial must be turned first to RESET O
and then to the DRAIN programme “C”.
If the water is not emptied out, the machine automatically empties
itself after 18 hours.
Display
The display shows the following information:
• Duration of the selected programme (in minutes), calculated automatically on the basis of the maximum recommended load for each type
of fabric.
• When the programme has finished, a steadily lit zero is displayed.
• Delayed start, (19 hours max.) programmed using the special button
. The countdown is updated every hour.
• Alarm code indicating a fault in the machine operation (see page 77).
58
132989390_gb.qxd
17/03/2004
10:24
Pagina
59
(Nero/Process Black pellicola)
Description of the appliance
Programme progress display
By selecting the wash programme, the pilot lights
corresponding to the various phases making up the
programme come on.
After the machine has started, only the running
phase pilot light stays on. When the programme has
finished, the END
pilot light comes on.
When the programme has finished, if the OVERDOSAGE
on, it indicates that too much detergent has been used.
PREWASH
WASH
RINSES
EXTRA RINSE
SPIN
END
OVERDOSAGE
light comes
59
132989390_gb.qxd
17/03/2004
10:24
Pagina
60
(Nero/Process Black pellicola)
Description of the appliance
Cancelling a programme
To cancel a programme which is running, turn the programme selector
dial to the RESET O position.
Warning! After a programme which ends with water in the drum
(RINSE HOLD
option), turn the selector dial first to O and then to
the DRAIN programme “C”.
Altering a programme which is running
To alter a programme, first set the machine to PAUSE by pressing the
START/PAUSE button.
Any function can be modified before the machine starts it. After selecting the new option press the START/PAUSE
button again to restart the selected programme.
To modify the selected programme turn the programme selector dial to
O and then choose a new programme.
The water is not emptied out and after pressing the START/PAUSE button again the machine restarts with the newly selected programme.
Opening the door after the programme has started
To open the door set the machine to PAUSE by pressing the START/PAUSE
button.
The door can be opened if:
• the machine is not already heating;
• the water level is not above the bottom edge of the door;
• the drum is not turning.
The light
on the control panel indicates if the door can be
opened:
• green light: the door can be opened;
• unlit light: the door cannot be opened;
• flashing red light: the door is open.
60
132989390_gb.qxd
17/03/2004
10:24
Pagina
61
(Nero/Process Black pellicola)
Description of the appliance
Detergent dispenser drawer
Cl
Compartment for prewash or soak detergent and stain remover. The prewash
or soak detergent is added at the beginning of the wash programme. The
stain remover is added during the STAIN-Action phase in the main wash.
Compartment for powder or liquid detergent used for main wash.
It is emptied at the beginning of the wash cycle.
Compartment for liquid additives (fabric softener, starch).
It is emptied at the last rinse.
The quantity of additives must not exceed the “MAX” mark in the
drawer.
Compartment for bleaching agent.
It is emptied at the first rinse.
The quantity must not exceed the “MAX” mark in the drawer.
Before the first wash
Before your first wash, we recommend that you pour 2 litres of water
into the main wash compartment
of the detergent drawer in
order to activate the ECO valve.
Then, run a cotton cycle at 60°C, without any laundry in the
machine, to remove any manufacturing residue from the drum and
tub.
Pour 1/2 a measure of detergent into the dispenser drawer and start the
machine.
61
132989390_gb.qxd
17/03/2004
10:24
Pagina
62
(Nero/Process Black pellicola)
Preparing the wash cycle
Sorting out and preparing the laundry
• Sort out the laundry according to type of fabrics and care labels (see
“Types of fabric and care labels”).
• Empty pockets.
• Remove any metal parts (safety pins, clips, etc.).
• To prevent the laundry from getting damaged and forming bundles,
it is advisable to close zips, button up pillowcases and quilt covers and
tie up loose straps such as those of aprons.
• Turn double faced items inside out (sleeping bags, anoraks, etc.)
• Turn coloured knitted fabrics, woollens and fabrics with trim inside
out.
• Wash small and delicate items (baby socks, tights) inside a laundry net
or in a pillow case closed with a zip, or in larger socks.
• Treat curtains with special care. Remove all metal or plastic hooks or
put them in a net or a bag. We take no responsibility for any damage.
• Whites and coloureds must be washed separately: white items can
loose their whiteness.
• New coloured fabrics often have excess dyes; it is advisable to wash
them separately for the first time.
• Wash small and large items together; this improves the washing result
and the laundry is better distributed during spinning.
• Shake out garments before putting them into the machine.
• Insert each garment separately.
62
132989390_gb.qxd
17/03/2004
10:24
Pagina
63
(Nero/Process Black pellicola)
Preparing the wash cycle
Weight of laundry
Sort of laundry
Approximate
dry weights
Bathrobes
1200 g
Work shirts
300-600 g
Quilt covers
700 g
Sheets
500 g
Blouses
100 g
Hand towels
200 g
Tea towels
100 g
Shirts
200 g
Pillowcases
200 g
Night-gowns/Pyjamas
200-250 g
Tablecloths
200-300 g
Underwear
250 g
Types of fabric and care labels
The labels on garments help you to select the most suitable wash programme. The laundry should be sorted out according to the type of fabric and the instructions indicated on care labels.
Temperatures indicated on labels are always maximum temperatures.
Cotton 95
Linen and cottons marked with this symbol can be washed at high temperatures.
Cotton 60
Linen and cottons marked with this symbol are colourfast and can be
washed at 60°C.
Cotton 50 40 30
Garments marked with these symbols have delicate colours, therefore
the washing temperature must not exceed these values.
Synthetics 40 60
Mixed and synthetic fabrics marked with these symbols require a gentle
wash programme and they must therefore be washed using the specific
programme.
63
132989390_gb.qxd
17/03/2004
10:24
Pagina
64
(Nero/Process Black pellicola)
Preparing the wash cycle
Delicates 40 30
Microfibres, synthetics or curtains marked with these symbols require a
very gentle treatment.
The DELICATES programme is suitable for this type of fabric.
40
30
Woollens and particularly delicate items
Fabrics such as wool, wool mix or silk marked with this symbol are particularly sensitive to machine washing.
The WOOL programme
is suitable for this type of fabric.
If the label has the symbol
(do not wash), the garments must not
be machine washed!
The wool wash cycle of this machine has been approved by Woolmark
for the washing of machine washable Woolmark products provided
that the garments are washed according to the instructions on the
garment label and those issued by the manufacturer of this washing
machine. M9604.
64
132989390_gb.qxd
17/03/2004
10:24
Pagina
65
(Nero/Process Black pellicola)
Preparing the wash cycle
Detergents and additives
Which detergent and additive?
Use only detergents and additives for washing machines. Follow the
manufacturer’s instructions.
How much detergent?
The quantity depends on:
• the load:
if the manufacturer does not provide any indications on the amount of
detergent for small loads, use about one third less than the suggested
amount for half loads and half the amount for very small loads;
• the degree of soil:
use a small amount of detergent for lightly soiled garments. Judge
the amount according to the detergent manufacturer’s instructions
and size of the load;
• the water hardness:
the harder the water, the more detergent required. Instructions
according to water hardness are given on the detergent pack.
Liquid detergent
Liquid detergent can be poured directly into the main wash compartment
of the dispenser drawer immediately before starting the programme, or
a special dispenser can be used that is placed directly in the drum. Measure the detergent according to the manufacturer’s instructions.
Adding a water softener (descaling product)
A water softener must be added when water has a medium-high degree
of hardness (from degree of hardness II). Follow the manufacturer’s
instructions. The quantity of detergent can then always be adjusted to
degree of hardness I (= soft). Information on water hardness can be
obtained from your local water supply authority.
Information on water hardness
Degree of hardness
German degrees °dH French degrees °TH
I=Soft
0-7
0-15
II=Medium
7-14
16-25
III=Hard
15-21
26-37
more than 21
more than 37
IV=Very hard
65
132989390_gb.qxd
17/03/2004
10:24
Pagina
66
(Nero/Process Black pellicola)
How to wash
Load the laundry
Open the door.
Place the laundry in the drum, one item at a time. Distribute laundry as
evenly as possible. Close the door.
Add detergent and additives
Cl
Pull the drawer
out till it stops.
Pour the main
wash detergent
into compartment
.
If you wish to perform a prewash, a
SOAK or a STAINAction programme, pour detergent or stain remover into compartment .
Important!
Do not use normal detergent for the STAIN-Action programme,
always use a STAIN remover.
Cl
Pour the fabric softener into compartment
and the bleaching
agent into compartment
without exceeding the “MAX” mark.
Close the drawer gently, pushing it fully in.
66
132989390_gb.qxd
17/03/2004
10:24
Pagina
67
(Nero/Process Black pellicola)
How to wash
Select the desired wash programme
Turn the programme selector
dial to the desired position:
the lights corresponding to
the different phases making
up the selected programme
light on.
The display shows the duration of the programme.
F
D
C
B
A
95
E
60
50
40
30
30
40
30
40
40
40
60
50
Select the desired options
depending on the degree of soil of the laundry.
The corresponding light comes on.
Select the spin speed or RINSE HOLD option
It is possible to select a lower spin speed by means of
the relevant button; the light corresponding to the
selected speed comes on.
Selecting the option
(RINSE HOLD) the laundry is
left immersed in the final rinse water.
1000
900
700
400
If the spin speed is not reduced, the final spin speed will
be as follows:
- cottons
1000 r.p.m.
- synthetics
900 r.p.m.
- delicates
700 r.p.m.
- wool
(hand washing)
900 r.p.m.
67
132989390_gb.qxd
17/03/2004
10:24
Pagina
68
(Nero/Process Black pellicola)
How to wash
EXTRA RINSE
This appliance is designed for saving water. However, for people with
a very delicate skin (allergic to detergents) it may be necessary to
rinse the laundry using an extra quantity of water (extra rinse).
The extra rinse is available only with the cotton, synthetics or delicate
programme and with programme “A”.
Selection of the EXTRA RINSE option
Press simultaneously the buttons
and
for about 2 seconds: the
light
comes on in the programme progress display.
This function stays permanently on. To remove it press the buttons
and
again until the light
comes off.
Select the DELAY START option
To delay starting of a programme, press the DELAY START button
before starting the machine. The figures corresponding to the
selected delay will be displayed for about 3 seconds, after which the
duration of the selected programme will appear on the display.
If the button
(SOAK) has been pressed the selected delay will correspond to the soak time. If no delay time is selected the soak programme will last about 30 minutes.
When the START/PAUSE button is pressed, the selected delay will
appear again on the display and the machine starts its countdown.
68
132989390_gb.qxd
17/03/2004
10:24
Pagina
69
(Nero/Process Black pellicola)
How to wash
Starting the programme
1. Check that the water tap is open.
2. Press START/PAUSE
to start the programme.
If the Delay Start option has been selected the programme will start
at the end of the countdown.
If the door light
is red and flashing at the start of the programme it indicates that the door is open. Close the door and press
the START/PAUSE button again.
If the delay start option has been selected, the machine starts its
countdown, in hours, which will appear on the display. During this
period it is possible to load other laundry, to modify or cancel the
delay time.
• Load other laundry: press the START/PAUSE button. Open the door.
Load the laundry. Close the door and press the START/PAUSE button
again.
• Modify or cancel the delay time: press the START/PAUSE button.
Press the DELAY START button
until the time required appears
on the display, or 0h, if you wish to cancel it. Press the START/
PAUSE button again.
Programme progress display
By selecting the wash programme, the pilot lights corresponding to the various phases making up the programme
come on. After the machine has started, only the running
phase pilot light stays on.
PREWASH
WASH
RINSES
EXTRA RINSE
SPIN
END
OVERDOSAGE
Display
The time to the end of the programme decreases minute by minute and
appears on the display.
At the end of the programme
The machine stops automatically. A zero appears on the display. An
acoustic signal is clearly audible. The END
light comes on in the programme progress display.
69
132989390_gb.qxd
17/03/2004
10:24
Pagina
70
(Nero/Process Black pellicola)
How to wash
If the RINSE HOLD
option has been selected, the water must be
emptied out before opening the door either
- by pressing the START/PAUSE button (the laundry will be spun at the
speed corresponding to the selected type of fabrics. The spin speed
can be reduced by means of the SPIN SPEED button)
- or by turning the selector dial to O and then to DRAIN “C” and
pressing the START/PAUSE button again. In this case the water will be
emptied, but the laundry is not spun.
Turn the selector dial to O to switch the machine off.
Remove the laundry from the drum.
Check that the drum is empty so as to avoid any forgotten items
being damaged in a subsequent wash (e.g. shrinking) or their colour
running into a load of whites.
Close the water tap.
Leave the door open to prevent the formation of mildew and unpleasant smells.
70
132989390_gb.qxd
17/03/2004
10:24
Pagina
71
(Nero/Process Black pellicola)
Programme chart
Wash programmes
Wash
Temp.
programme
Fabrics
Cotton and linen,
for example norWhite
Cottons 95°-60° mally soiled work
garments, sheets,
household linen,
underwear, towels.
E
Whites
ECONOMY
67°
Cotton and linen, for
example normally to
lightly soiled sheets
and household linen.
(●)60°
Coloured
50°-40° Coloured cotton or
cottons
30° linen fabric, shirts,
underwear, towels.
Synthetics
Synthetic fabrics,
60°-50° underwear,
40° coloured garments,
non-shrink shirts,
blouses.
Delicates 40°-30° Delicate fabrics, for
example curtains.
Wool
/
Hand wash
40°-30° Wool, wool mixtures, silk.
Additional
functions
STAIN
SOAK
QUICK
PREWASH
EXTRA RINSE
RINSE HOLD
SPIN SPEED
STAIN
SOAK
PREWASH
EXTRA RINSE
RINSE HOLD
SPIN SPEED
STAIN
SOAK
QUICK
PREWASH
EXTRA RINSE
RINSE HOLD
SPIN SPEED
STAIN
SOAK
QUICK
PREWASH
EXTRA RINSE
RINSE HOLD
SPIN SPEED
STAIN
SOAK
QUICK
PREWASH
EXTRA RINSE
RINSE HOLD
SPIN SPEED
RINSE HOLD
SPIN SPEED
Consumption*
Max.
Energy
Water Duration
load
kWh
lt.
min.
5 kg
1.8
52
140
5 kg
1.3
49
135
5 kg
0.85
42
135
2.5 kg
0.9
47
94
2.5 kg
0.4
45
66
2 kg
0.4
46
58
(●) In compliance with EC directive 92/75, the consumption figures indicated on
the energy label refer to the 60°C wash programme for cotton.
* The consumption data shown on this chart is to be considered purely indicative, as it may vary depending on the quantity and type of laundry, on the inlet
water temperature and on the ambient temperature. It refers to the highest temperature for each wash programme.
71
132989390_gb.qxd
17/03/2004
10:24
Pagina
72
(Nero/Process Black pellicola)
Programme chart
Special programmes
Programme
A
Gentle
rinses
Consumption*
DescripAdditional Max.
Programme phases
Energy
Water Duration
tion
functions load
kWh
lt.
min.
This programme can 3 rinses with liquid
EXTRA RINSE
be used for additive.
RINSE HOLD 5 kg 0.15
38
23
rinsing hand Short spin.
SPIN SPEED
washed gar- (700 rpm max)
ments.
Hand washed
1 rinse with liquid
garments to
B
additive.
Softeners be starched
Long spin.
or softened.
C
Drain
D
Spin
For emptying
out the last
rinse water in
programmes
with the Rinse
Hold option
The water is emptied
out.
Separate spin
Long spin.
for cottons.
RINSE HOLD
5 kg
SPIN SPEED
/
SPIN SPEED 5 kg
Separate spin
for synthetics Short spin.
F
SPIN SPEED 2.5 kg
Short spin and delicate (700 rpm max)
fabrics.
For cancelling the
programme which
O
is running or to
(Reset/Off)
switch the machine
off.
18
21
/
3
10
4
* The consumption data shown on this chart is to be considered purely
indicative, as it may vary depending on the quantity and type
(●) of laundry,
on the inlet water temperature and on the ambient temperature.
72
132989390_gb.qxd
17/03/2004
10:24
Pagina
73
(Nero/Process Black pellicola)
Cleaning and maintenance
After each wash
At the end of the wash programme, pull the dispenser drawer out a little to let it dry.
Leave the door ajar to allow air to circulate.
If the machine is not used for a prolonged period:
Close the water tap and unplug the appliance.
Periodical cleaning
Exterior
Clean the outside of the cabinet with soap and water only. Rinse with
clean water and dry.
Important: do not use methylated spirits, solvents or similar products
to clean the cabinet.
Detergent dispenser drawer
After a while,
detergents and
fabric softeners
leave deposits in
the drawer.
Clean the drawer,
from time to
time, by rinsing it
under a running
tap. To remove
the drawer from the machine, press the button in the rear left-hand
corner.
To facilitate cleaning, the top part of the additive compartments can be
removed.
Detergent can also accumulate inside the
drawer recess: clean it with an old toothbrush.
Refit the drawer after cleaning.
73
132989390_gb.qxd
17/03/2004
10:24
Pagina
74
(Nero/Process Black pellicola)
Cleaning and maintenance
Door seal
Check from time to time the door seal and
eliminate eventual possible objects that
could be trapped in the fold.
Drain pump
The pump should be inspected regularly and particularly if
the machine does not empty and/or spin
the machine makes an unusual noise during draining due to objects
such as safety pins, coins etc. blocking the pump.
Proceed as follows:
Disconnect the appliance.
If necessary wait until the water has cooled down.
Open the pump door.
Place a container close to the
pump to collect
any spillage.
Release the
emergency
emptying hose,
place it in the
container and
remove its cap.
When no more water comes out, unscrew the pump and remove it.
Always keep a rag nearby to dry up spillage of water when removing
the pump.
Remove any
objects from the
pump impeller
by rotating it.
Put the cap
back on the
emergency
emptying hose
and place the
latter back in its seat.
Screw the pump fully in.
Close the pump door.
74
132989390_gb.qxd
17/03/2004
10:24
Pagina
75
(Nero/Process Black pellicola)
Cleaning and maintenance
Water inlet filter
If you notice that the machine is taking
longer to fill, check that the filter in the
water inlet hose is not blocked.
Turn off the water tap.
Unscrew the hose from the tap.
Clean the filter in the hose with a stiff brush.
Screw the hose back onto the tap.
Emergency emptying out
If the water is not discharged, proceed as follows to empty out the
machine:
pull out the plug from the power socket;
close the water tap;
if necessary, wait until the water has cooled down;
open the the pump door;
place a bowl on the floor and place the end of the emergency emptying hose into the bowl. Remove its cap. The water should drain by gravity into the bowl. Whe the bowl is full, put the cap back on the hose.
Empty the bowl. Repeat the procedure until water stops flowing out;
clean the pump if necessary as previously described;
replace the emergency emptying hose in its seat after having plugged it;
screw the pump again and close the door.
Frost precautions
If the machine is installed in a place where the temperature could drop
below 0°C, proceed as follows:
Close the water tap and unscrew the water inlet hose from the tap.
Place the end of the emergency emptying hose and that of the inlet
hose in a bowl placed on the floor and let water drain out.
Screw the water inlet hose back on and reposition the emergency emptying hose after having put the cap on again.
By doing this, any water remaining in the machine is removed, avoiding
ice forming and consequently damage to the appliance.
When you use the machine again, make sure that the ambient temperature is above 0°C.
75
132989390_gb.qxd
17/03/2004
10:24
Pagina
76
(Nero/Process Black pellicola)
Something not working?
Important!
Every time you drain the water through the emergency emptying hose
you must pour 2 litres of water into the main wash compartment of the
detergent drawer and then run the drain programme “C”. This will activate the ECO valve avoiding that part of the detergent remains unused
at next washing.
Something not working?
If during the spin cycle the machine makes an unusual
whistling noise, different from the noise made by traditional washing machines, this is due to a
new type of motor.
If water is not visible in the drum, this is due
to the modern technology of new washing
machines that use less water than traditional
machines.
Troubleshooting
If a problem arises, you can try to solve it yourself following the
instructions below.
If you call out an engineer when one of the following problems arises,
or to repair a fault due to incorrect use, the call-out will be charged
even if requested within the guarantee period.
During machine operation the following alarm codes may be displayed:
- E10: problem with the water supply (phase light
is on)
- E20: problem with water draining (phase light
is on)
- E40: door open (phase light
is on)
Once the problem has been eliminated, press the START/PAUSE button
to restart the programme. If after all checks, the problem persists, contact your local AEG Service Force Centre.
Problem
Possible cause
The main electrical fuse
has blown.
The door is not properly
closed (E40).
The machine does not work The plug is not connected.
The START button has not
been pressed.
The DELAY START
option has been selected.
76
Solution
Replace the fuse.
Close the door; the click
of the lock should be heard.
Insert the plug.
Press the button.
Check the selected delay on
the display.
132989390_gb.qxd
17/03/2004
10:24
Pagina
77
(Nero/Process Black pellicola)
Something not working?
Problem
Possible cause
Solution
The water tap is closed (E10). Open the water tap.
The water inlet hose is
squashed or kinked (E10).
The machine does not fill
The machine fills then
empties immediately
Check the whole length of the
hose and remove the kink.
The small filter of the water Clean the filter.
inlet hose is clogged (E10).
The door is not properly
closed (E40).
Close the door.
The end of the drain hose
is too low.
Place the hose at the right
height (see Installation
section).
The drain hose is
squashed or kinked (E20).
Check the whole length of
the hose and remove the
kink.
The drain pump or the
Clean the pump or check
drain hose are clogged (E20). the hose.
The machine does not
empty and/or does not spin The RINSE HOLD option
(stop with water in drum)
has been selected.
Empty out the water by
pressing the START button
or selecting the DRAIN
programme.
The laundry is not evenly
Redistribute the laundry
distributed inside the drum. manually in the drum.
Too much detergent has
been used.
Measure detergent
according to the
manufacturer’s instructions.
An unsuitable detergent
has been used that
creates too much foam.
Use a suitable washing
machine detergent.
One of the connectors on
the water inlet hose is
There is water on the floor
leaking.
Check that the hose is
firmly screwed on at both
ends.
The drain pump has not
been properly screwed on
after cleaning.
Fully screw the pump into
place.
The cap on the emergency Replace the cap on the
emptying hose has not been emergency emptying hose
replaced after cleaning the after cleaning the pump.
pump.
77
132989390_gb.qxd
17/03/2004
10:24
Pagina
78
(Nero/Process Black pellicola)
Something not working?
Problem
The machine vibrates or is
noisy
The door will not open
Possible cause
Solution
The transit bolts have
not been removed.
Check that the machine
has been unpacked as
described in the Installation
section.
The feet have not been
adjusted.
Carefully level the machine.
There is little laundry in
the drum.
Correct operation of the
machine is not affected.
The programme is still
running and the drum
is turning.
Wait until the end of the
programme before opening
the door.
The water level is above the
bottom edge of the door.
Before opening the door,
the water must be emptied
out.
The machine is heating the Wait until the end of the
water.
heating phase.
The unbalance detection
device that prevents
excessive vibration during
spinning has cut in.
Spinning starts late or the
machine does not spin
78
If the laundry is not evenly
distributed inside the drum
at the beginning of the
spin cycle, the machine
detects this and tries to
redistribute it more evenly
by means of a few drum
rotations.
Only when the laundry is
more evenly distributed
will the spin cycle be
performed, at a lower speed,
if the laundry is not evenly
distributed.
If, after about 10 minutes,
the laundry is still tangled,
the machine will not spin.
Therefore, if the laundry is
still wet at the end of the
cycle, it is advisable to
redistribute it manually
inside the drum and to
select the spin programme.
132989390_gb.qxd
17/03/2004
10:24
Pagina
79
(Nero/Process Black pellicola)
Something not working?
Unsatisfactory washing results
If the laundry looks grey and lime scale is found in the drum
• Too little detergent has been used.
• An unsuitable detergent has been used.
• Stubborn stains have not been treated prior to washing.
• The programme/temperature has not been correctly selected.
If grey stains remain on the laundry
• Laundry stained with ointments, grease or oil has been washed with
an insufficient amount of detergent.
• The temperature selected for the wash programme was too low.
• Fabric softener - especially the concentrated type - has come into
direct contact with the laundry. Wash these stains immediately and
pour fabric softener carefully.
Foam is still visible even after the last rinse
• Modern detergents often produce foam, even in the last rinse. However the laundry has been completely rinsed.
White residue is left on the laundry
• This is due to insoluble components in modern detergents and is
therefore not the result of insufficient rinsing. Shake or brush the
laundry. In future, it may be better to turn garments inside out before
washing them. Check the choice of detergent; try using liquid detergents.
79
132989390_gb.qxd
17/03/2004
10:24
Pagina
80
(Nero/Process Black pellicola)
Technical data
Height x Width x Depth
Depth with door opened
Height adjustment
Load (depending on programme)
Use
Drum speed during washing
Drum speed during spinning
Water pressure
85x60x57 cm
100.5 cm
± 10 mm approx.
5 kg max.
domestic
max. 55 rpm
1000/900/700/400 rpm
50-800 kPa
This appliance complies with the following EC directives:
- 73/23/EEC of 19.2.1973 “Low voltage directive”, including directive
93 / 68 / EEC
- 89/336/EEC of 3.5.1989 “Electromagnetic Compatibility Directive”.
80
132989390_gb.qxd
17/03/2004
10:24
Pagina
81
(Nero/Process Black pellicola)
Service
In the section “Something not working?” some problems that can be
solved by yourself are listed. Read this section in the event of problems.
If you are not able to find a solution, contact the Service centre.
In all cases, explain your problem carefully, in order to facilitate troubleshooting: the engineer will be able to decide whether a service call
is necessary.
Take note of the serial number (Ser.No.) and the product number (Prod.
No.) indicated on the rating plate.
Ser. No. . . . . . . . . . . . . . . . . . . . . . . .
Prod. No. . . . . . . . . . . . . . . . . . . . . . .
Made in EEC
Mod. L60610
Type P6346627
Prod.No. 914515055 00
220-230V~50Hz 2200 W
10 A
Ser.No.
IPX4
Furthermore, try to specify, as precisely as possible:
- The symptoms of the fault
- When the fault occurs
- The alarm code displayed
When can a service visit be charged during the guarantee period?
- when it should have been possible to solve the problem by yourself,
with the help of the troubleshooting chart (see section “Something
not working?”)
- when the engineer has to come out several times because he has
not been given all the relevant information he needs and so, for
example, has to fetch spare parts. Repeated trips can be avoided if
you prepare your call to the Service centre as described above.
81
132989390_gb.qxd
17/03/2004
10:24
Pagina
82
(Nero/Process Black pellicola)
Instructions for installation and electrical connection
Safety instructions for the installer
• This appliance is heavy, care should be taken when moving it.
• When unpacking the appliance, check that it is not damaged. If in
doubt, do not use it and contact the retailer.
• All internal packing must be removed before using the appliance.
Serious damage may be caused to the machine or adjacent furniture
if the protective transit devices are not completely removed. Refer to
the relevant paragraph.
• Any electrical work required to install this appliance must be carried
out by a qualified electrician.
• Any plumbing work required to install this appliance must be carried
out by a qualified plumber.
• After having installed the machine, check that it is not standing on
its electrical supply cable.
• If the appliance is placed on a carpeted floor, ensure that air can circulate freely between the adjustable feet and the floor.
• The installation should comply with local water authority and building regulations requirements.
• Should the appliance power supply cable need to be replaced, this
should be carried out by our Service Force Centre.
82
132989390_gb.qxd
17/03/2004
10:24
Pagina
83
(Nero/Process Black pellicola)
Dimensions of the appliance
Front view and side view
1005
605
1000
F
D
900
C
700
B
400
95
A
E
60
50
40
30
30
40
30
40
40
40
60
50
90
L 60610
25
565
335
Rear view
40
170
70
Cold water
Power cable
Drain
45
85
83
132989390_gb.qxd
17/03/2004
10:24
Pagina
84
(Nero/Process Black pellicola)
Installation
Unpacking
All transit bolts and packing must be removed before using the appliance.
Using a spanner,
unscrew
and
remove the 2
rear
bottom
screws. Slide out
the 2 plastic
pins. Lay the
P0001
machine on its 025
back,
taking
care not to squash the hoses. This can be
1
avoided by placing one of the corner
2
packing pieces between the machine and
the floor.
3
Remove the polystyrene block from the
bottom of the machine and release the
two plastic bags.
P1124
Carefully slide out
the left-hand bag
removing it
towards the right
and then downwards.
Slide out the
right-hand bag
P1126
P1127
removing it
towards the left
and then
upwards.
Set the machine
upright and
remove the
remaining rear
screw. Slide out P1128
P0002
the relevant pin.
Plug the open holes with the plugs which you will find in the plastic bag
containing the instruction booklet.
84
132989390_gb.qxd
17/03/2004
10:24
Pagina
85
(Nero/Process Black pellicola)
Installation
You are advised to keep all transit devices so that they can be refitted if the
machine ever has to be transported again.
Positioning
Install the machine on a flat hard floor.
Make sure that air circulation around the machine is not impeded by
carpets, rugs etc.
• Before placing it on small tiles, apply a rubber coating.
• Never try to correct any unevenness in the floor by putting pieces of
wood, cardboard or similar materials under the machine.
• If it is impossible to avoid positioning the machine next to a gas
cooker or coal-burning stove, an insulating panel (85x57 cm) covered
with aluminium foil on the side facing the cooker or stove, must be
inserted between the two appliances;
• The machine must not be installed in rooms where the temperature
can drop below 0.
• The water inlet hose and the drain hose must not be kinked.
• Please ensure that when the appliance is
installed, it is easily accessible for the engineer in the event of a breakdown.
Levelling
Carefully level by screwing the adjustable
feet in or out. Never place cardboard, wood
or similar materials under the machine to
compensate for any unevenness in the floor.
Water inlet
Connect the water
inlet hose to a
separate tap with
a 3/4" thread.
The other end of
the inlet hose
which connects to
the machine can be turned in any direction. Simply loosen the fitting,
rotate the hose and retighten the fitting, making sure there are no
water leaks.
The inlet hose must not be lengthened. If it is too short and you do not
wish to move the tap, you will have to purchase a new, longer hose specially designed for this type of use.
85
132989390_gb.qxd
17/03/2004
10:24
Pagina
86
(Nero/Process Black pellicola)
Installation
Water drainage
The end of the drain hose can be positioned in three ways:
Hooked over the edge of a sink using
the plastic hose guide supplied with the
machine. In this case, make sure the end
cannot come unhooked when the machine
is emptying.
This could be done by tying it to the tap
with a piece of string or attaching it to the
wall.
In a sink drain pipe branch. This branch must be above the trap so that
the bend is at least 60 cm above the ground.
Directly into a
drain pipe at a
height of not
less than 60 cm
and not more
than
90 cm.
The end of the drain hose must always be ventilated, i.e. the inside
diameter of the drain pipe must be larger than the outside diameter of
the drain hose.
The drain hose must not be kinked.
For a correct functioning of the machine the drain hose must
remain hooked on the proper support piece situated on the top
part of the back side of the appliance.
Electrical connection
This machine is designed to operate on a 220-230 V, single-phase,
50 Hz supply.
Check that your domestic electrical installation can take the maximum
load required (2.2 kW), also taking into account any other appliances in
use.
Connect the machine to an earthed socket.
The manufacturer does not accept any responsibility for damage or
injury through failure to comply with the above safety precaution.
86
132989390_gb.qxd
17/03/2004
10:24
Pagina
87
(Nero/Process Black pellicola)
Installation
Permanent connection
In the case of a permanent connection it is necessary that you install a
double pole switch between the appliance and the electricity supply
(mains), with a minimum gap of 3 mm between the switch contacts and
of a type suitable for the required load in compliance with the current
electrical regulations.
The switch must not break the yellow and green earth cable at any
point.
This operation must be performed by a qualified electrician.
Important: The power supply cable must be easily accessible after
installing the machine.
87
132989390_gb.qxd
17/03/2004
10:24
Pagina
AEG Hausgeräte GmbH
Postfach 1036
D-90327 Nürnberg
http://www.aeg.hausgeraete.de
© Copyright by AEG
132989390-03-04/01
88
(Nero/Process Black pellicola)