1
SHARR
_
“,
/’
‘/
f
,.,‘*
,’
U,’
I
,
I’ ,
VIDEO CASSETTE RECORDER
OPERATION MANUAL
/,I
I
.
a>
I
,
3
,
‘/
,
I
I
‘,J,,
,’
,,
’
”
,
CONTENTS
q
?Rii
GENERAL INFORMATION
IMPORTANT SAFEGUARDS AND
PRECAUTIONS ..........#..................................
Features . ............ ... ... .... ... .. ....... ... ... .................
Accessories ,..............................~....................
Major Components of Your VCR .... ... .... .. ... ..
Remote Control ... ... .. ....... .. .... .. .... .. ... ..............
l
Inserting
RECORDING
Recording a TV Programme . ....... ... ..L......_..... 22
3
4
4
5
6
the Batteries
Only for VC-H6 10X
Using the Remote Control for
TV Operation .. ....**...*..*.........*...**...*.......*.**... 7
Cassette Erase Protection
@To Watch Another TV Programme
Recording
l
While
Only for VC-HGIOX
Recording Hi-Fi Stereo Sound . ... ..... .*..*.... .... 23
Simple Recording Timer .. .. ... ... ......... .. ... .. ...... 24
Recording with the Timer ...... ...... ... .. ... ..... .. ... 25
l
l
Confirming
Cancelling
Timer Programmes
Timer Programmes
Intelligent Timer Recording (JUST REC) ..... 28
!!§I
SETTING UP
ml
SPECIAL FUNCTIONS
Connections .......... ... .... ............ ...... ... .. ... ...... .. 8
Adjusting the Video Channel .. ...... .. ... ... ........ 8
Only for VC-H6 10X
Connecting to a Stereo TV .. ... ..~.......~~........... 9
9
Connecting to TV And Audio Equipment.....
Setting the Language ..... ... ... ... .. .... ... .. ... ......... 10
Setting the Clock ..... ... .............*...........*.......... 11
Setting the Channels ........ .... ... ...*.........a........ 12
Channel Skip/Cancelling Skip ... .... ................ 14
Menu Screen ...... ....... ......~............................... 15
OSD (On Screen Display) .,...........................* 15
New Sharp Super Picture . .. ... ......... .. ... .. ... ... ..
Zero-Back Function . ... ........ ... .... ..... ..... .. ...... ..
DPSS (Digital Programme Search
System) ... ... ...... .... ............... .. ....... .. ..... ... .......
Auto Repeat . .............. ... ...... .. ............ ... .... .......
Skip Search ......... ....... ......... ... .. .... .. ... ... .. ... .. ....
29
29
29
30
30
only for vc+Yux
Instant Replay .*. .. ... .. **..a... .. .. . . . . . . . . . “.a..* . . . . mm.**.*30
l
Mode Selection ........ ..................... ... ......... ... ... 16
New Child-Proof Lock ........... ... ... ... ...... .... ...... 31
VCR Display ................ ... ... ......~....................... 32
Tape Remaining Display ...... .. ... ..... ....... ..*...... 32
r;l
El
.How
-
to Display
Indicators
BASIC OPERATIONS
Playback ................. ................ ... ... ... .. ... ...... ... .. 17
Inserting a Video Cassette
l Playback
.Video Search (with the Remote Control)
l Fast Forwarding
and Rewinding (with the
Remote Control)
l Shuttle
System
l Slow Motion
Playback (with the Remote
Control)
Gtill Picture and Frame Advance
l Double
Speed Playback
l Colour
Mode
lNTSC Tape Playback on PAL TV
l Auto Tracking
Control System
l Auto
Head Cleaning System
@Auto Rental Mode
Quick
Start with Full Loading Mechanism
l Blue Back
l Full Auto
Playback
l
Oni’y for VC-H61UX
Playback of Hi-i? Recorded Tapes.
l Audio Output
Mode
*Adjusting
Hi-Fi Audio Tracking
l
2
HELPFUL HINTS
Editing from a Camcorder to Your VCR.. ..... 33
Specifications .................................................
33
Before Calling for Service ............................. 34
/a, IMPORTANTSAFEGUARDSAND PRECAUTIONS
ZAUTION
3EFORE OPERATING YOUR NEW VCR, PLEASE CAREFULLY READ THIS OPERATION MANUAL AND
-HEN SAVE IT FOR FUTURE REFERENCE AS IT WILL BE USEFUL IF YOU HAVE ANY PROBLEMS
IPERATING YOUR VCR IN THE FUTURE.
-ocation and Handling
Air vents are provided
in the VCR cabinet
to prevent
excessive
temperatures
inside the unit. Do not place your VCR in closed spaces
cover it, or otherwise block the vents.
Do not place the VCR in direct sunlight,
or near heat sources.
Keep the VCR and tapes away from strong magnetic
Do not insert or drop
cassette
compartment
resulting in fire.
1
n
objects.
anything
into the VCR through the air vents or
as this could cause serious damage,
possibly
Do not place any object containing water or other liquids on the VCR. In
the event that liquid should enter the cabinet, unplug the VCR immediately
and contact
the retailer
or a service centre approved by Sharp
immediately.
Do not remove the VCR cabinet. Touching parts inside the cabinet could
result in electric
shock and/or damage to the VCR For service and
adjustment
inside the cabinet, call a qualified dealer or service centre
approved by Sharp.
The use of head cleaning
Caution-Prevent
tapes is not recommended
as they may cause damage
to your machine.
Condensation
flhen
moving
the VCR from a cold place
to a warm one,
condensation
(dew) is likely to form on the VCR drum and heads.
If you try to play back or record in these circumstances,
the
videotape and VCR may be damaged.
To prevent this, turn the power switch on and wait for a few hours for
the VCR to warm up and dry before attempting
playback
or
recording.
This is particularly
important before loading a cassette for the first
time after purchasing the VCR.
3
a/
IMPORTANT SAFEGUARDS AND PRECAUTIONS
Service
Donot attempt
experience
to service this VCR yourself. Please carry out the user checks on page 34. If you sti,
a problem. contact your dealer or nearest Sharp service facility.
Others
Copyright may exist in material you wish to record. Copying such material without permission of the
relevant licensee(s) or owner(s) of the copyright is prohibited by law. SHARP is not in a position tc
authorize the recording of copyright works and nothing in this manual should be read or implied a:
glvlng that authority
OPERATE button (turns VCR on/off) Clock
display will work regardless oi this ~uiior?
This VCR is not equipped with a mains power switch.
Accordingly,
nominal current to drive the clock is
drawn at all times when the AC power cord is
plugged into a wall socket. If the VCR is not to be
:
used for an extended period, be sure to unplug the
cord.
T/-KSpicture IS for VC-H61 OX
a
Features
ONLYFORVC-HGIOX
:-
WHS Hi-Fi Stereo Sound/lGR System
. ..
COMMONFEATURES
@MID-Drive (New Centre-Mounted
Mechanism)
H@, (High Quality) Circuity
@Multi Language On Screen Display (English, French, Spanish, Chinese)
*New Sharp Super Picture - Enhances picture quality during playback.
lOSD (On Screen Display) with Menu Screen Guidance
.DPSS (Digital Programme Search System)
*Quick Start with Full Loading Mechanism
.365=Day, 8-Programme Timer (DailyWeekly Programmable)
@Auto Channel Tuning
.48-Channel Preset PLL Frequency Synthesized Tuner
l
POWER SUPPLY:
The voltage supply of this VCR is AC 240 V, 50 Hz.
CASSETTE TAPE:
This VCR uses @& standard video signals. Use only video cassette tapes that carry the #& mark
a,
Accessories
Be sure that the following accessories
I
I
REMOTE CONTROL UNIT
VC-A41
Coaxial
(TV-VCR
I
4
are all included with your VCR.
OX
I
VC-H61
ox
cable
cable)
I
I
I
1
/ Major Components
Ri
Front
of Your VCR
OPERATE button (turns VCR on/off)
Clock display will work regardless of this button.
Basic function
Cassette compartment (See
Playback, Recording.)
I
Channel tuning
controls (See
Setting the
Channels.)
(This picture is
for VC-H6 1OX.)
When pressed;
l
1-
Front AU jack
(LINE IN 2: VfDEO, AUDIO)
Stops :he
tape during
Playback. FF.
REW or REC
Only far VC-HGIOX
VCR Display (explained throughout the operation instructions)
(VC-A41 OX)
l
(VC-H61 OX)
When the VCR is ON. this indicator (where a channel
position number is usually displayed) WIII :ight Uo
When the power is OFF, this part will not be iIt
l
Only for VC-H61 OX
Cassette-In
Indicator
P I_ 8
‘j
Play/Double speed
playback
When the VCR is ON. thrs lndcator (wrere a cnannel
position number is usually displayed) ~~“vili
,lgj7t ;p
When the power IS OFF, thrs part will not be II:
Slow
.
i-1 1: IIT I_ I_
iWhen operatmg mode
IS drsplayed)
0
Rewind
1-i fi
I-
F F
Fast Forward
I3
II
Still/
Frame Advance
17 E 1J
51 T
_I
1sH R I? PI
When AC power cord
is first plugged In
l
The display
changes
; 1 1: 1
I_ _I I_
)I Ii-1
u _I r;
Video Search
1I I- Id :I I_-
Video Search Forward
Rewind
Ret Pause
T i-1 l-7
stop
_
Recordtng with the timer/
Simple Recording timer
Recording
New Child-Proof
&I
lock
mark
I.1
each time the DISPLAY button on the remote control is pressed.
Rear
(See page 32.)
i
(VC-A41 OX)
Connection
Audio Output
mode
Ell8
Record
terminals (See CONNECTIONS
(VC-H61 OX)
i
on page 8.)
RF converter output channel
(CHANNEL) adjuster
(UHF channel 31 to 40)
I
Connection
terminals
(See CONNECTIONS
on page 8.)
RF converter output channel
(CHANNEL) adjuster
(UHF channel 31 IO 40)
5
a
Remote Control
L
J
-
STOP
y
CASS~E
P&t
il-
VIDEO
CASSElTE
RECORDER
RE~~FHX~
(VGA41 OX)
(VC-H61 OX)
@OPERATE button
@ MENU button
@ 4 1.1~1 v buttons
0 REW button
@ REC button
@ TIME button
@TAPE SPEED button
@ Numeric buttons
@ AM/PM button
Digit select (When inoutting
up to two digit numbers)
@ SLOW button
@TIMER ON/OFF button
@ MODE OSD button
@ DISPLAY button
@ SET button
@ CLEAR button
@ PLAY/x 2 button
(D FF button
@ PAUSE/STILL button
@ STOP button
@I CHANNEL @/@ buttons
@ ZERO BACK button
@ SKIP SEARCH button
@I @& button
@ 3/s buttons (SLOW s/s.
DPSS @4/s)
Only for VGH6IOX
@ 1NPUT SELECT button
@ VCR button
6) AUDIO OUT button
@ G-CODE/TIMER button
@ INSTANT REPLAY button
@I TV button
@ VOLUME n/v
button
Only for VGA41UX
@ TlMER bum-~
@ TV operation buttons
*. “._:;” (OPERATE, INPUT SELEGI,:.
CH B/3, VUL n/v)
. .
Inserting the Batteries
First, install the batteries properly. Fit two R6 UM/SUM-3, AA) 1.5
volt batteries (included) or equivalent.
If the remote control stops
working, insert new batteries.
Ensure the batteries are inserted correctly,
( +/- ) indicated in the remote control.
l
l
l
l
l
6
matching
the polarities
Do not subject the remote control to shock, water or excessive humidity.
The remote control may not function if the VCR sensor is in direct sunlight or any other strong light.
incorrect use of battenes may cause them to leak or burst. Read the battery warnings and use the batterie
properly.
Do not mix old and new batteries, or mix brands in use.
Remove the batteries if you will not use the remote control for an extended per-rod of time
- // Using
a
the Remote Control for TV Operation
:Only for VC-H61 OX)
-he provided remote control can operate the basic functions of your tetevision. In addition to most
;harp televisions, other manufacturers’ televisions listed below can also be controlled by setting the
emote control to the corresponding TV brand. The remote control’s default brand is “SHARP”. which
enables control of most Sharp televisions. When you replace the batteries in the Remote Control, the
:ontrol’s TV brand setting will be reset to SHARP.
(For example)
IV brand: SHARP
(Corresponding
button is “I “)
Setting the TV Brand
@ Turn on your TV.
@ Press the OPERATE button and the button
simultaneously
which corresponds to the
brand of your TV. Hotd the button down for
about one second.
- Refer to the table of brands below.
When setting is complete, the remote control
will send a “power off” signal (~5 ) to the TV,
and it should turn off.
NoTE)
>aPERm VCR
l-v
TWER
OWOFF
-a000
-z REW
buttons
aI
REC
and hold for more
than 1 second.
PLAkX2
FF S
f-a
STOP
aI
i i3lME TM SPEfU
Phii&
/STILL
0II
H*F.ADV
00
1If the TV does not turn off in step 0. repeat the step
@ setting
procedure
and select the button for a
different brand.
1TV BRAND NAME ICorresponding bt;tton 1TV BRAND NAME
I
1Corresponding txficn 1
lsHARP
1
7
I
I-
I
1GRAETZ
I LUXOR
I
7
I
1SALORA
I
7
I
I
9
I
I
I PHILIPS
t
2
1THOMSON
1
3 or4
~TELEFUNKEN
I
[ NORDMEND
[
1SELECO
1SONY
3 or4
i BRANDT
I
i SABA
1
3 or4
1PANASONIC
1SANYO
IGRuND~G
1
t
3 or4
5
IBIAUPUNKT
I
5
t FERGUSON
1
1I-TTNOKIA
I
~TELAwA
TOSHIBA
3 or4
f
0 or -/-VOLUME
1
1HtTACHl
v
1
1 INPUT SELECT
t MITSUBISHI
i
CHANNEL@
t
6
I JVC
1
CHANNEL.:
1
7
!
1
TV Functions to be Controlled
_
Switch to TV control mode.
l
Return to VCR control mode.
Press the TV button to seiect the TV control mode.
l
Press the VCR button lo select the VCR control mode.
4
TV function controt
@ Press the TV button to select the TV control
mode.
@ Use the following buttons on your remote
control to operate
your TV set.
TV function
.TVPOWER((I,)
lTV CHANNEL UP/DOWN
*TV VOLUME UP/DOWN
l INPUT SELECT button (TV-AV selector)
@ Press the VCR button
control mode.
to return
to the VCR
l
l
When you replace the batteries in the remote control,
if your televtslon is not a Sharp model you must reset
the TV brand.
if the MENU,
PLAY, STOP. FF or REW butions are
pressed in the TV control mocfe. the VCR will return to
VCR control mode.
tMPORTANT NOTE:
Although the provided remote controi unit is compatible with most
SHARP televisions, as weii as many TV models manufactured by
others, it is possible that the provided remote control will not work with
your TV, or will control only some of the functions.
If the button listed in the table does not work with your TV set, you may
want to try another; occasionally, models
vary within a brand.
Consequently, Sharp’s warranty does not cover all of the models under
the brands listed in the table.
7
El Connections
0
Disconnecting TV Cable
Disconnect the aerial cable from the back of
your TV set.
0
Connecting Aerial Cable to VCR
Connect the aerial cable to the ANTENNA IN
terminal
of your VCR.
0
ANTENNA
0
IN
Connecting VCR to TV
Connect the supplied coaxial
TV’s ANTENNA IN terminal.
cable to the RF OUT terminal
of the VCR. Plug the other end into you
RF OUT
ANTENNA
IN
TV back panel
ANTENNA
IN
Adjusting the Video Channel
To view the output of your VCR on the television screen, you must select an unused channel on your T\
and tune it to the output of your VCR (factory preset to UHF channel 37).
0 Make sure that both units (TV and VCR) are connected (power cord) to the power point.
Q Turn on your TV.
0 Select an unused channel on your TV.
0A Set the power on the VCR to off. (If the VCR is ON, press the OPERATE button to turn off th
power.)
0 Keep pressing the MENU button for more than two seconds to light up the “VCR” on the VC
display.
0a Adjust the tuning of the selected TV channel until the MENU pattern appears on your TV screer
(Refer to your TV Operation Manual for tuning procedures.)
l
If interference or a beat pattern is received wnen the test pattern is tuned in, use a small screwdriver to turn the F
converter output channel adjuster to change the VCR output channel, and then retune your TV as above.
0l
8
!!§IConnecting
(This picture
to a Stereo TV (Only for VC-H61
OX)
is for VC-HGIOX}
From RF OUT
From
AUDIO OUT FUL
From VIDEO OUT
) Stereo sound output is only possible using the AUDIO OUT terminais. Sound from the radio frequency converter
(RF OUT) is mono onfy.
’ The power cord should not be plugged into the power outlet until the above connections have been completed.
1If TV reception is weak. use a TV signal booster {not suppiied).
Connecting toTV And Audio Equipment
(This picture is for VC-t-610X)
From AUDIO OUT R/l_
1
I
I
From VIDEO OU T
1
From RF OUT 1
To VIDEO IN
9
!!aSetting
the Language
PREPARATION
@Select the video channel on your TV. Press the OPERATE button to turn on the VCR.
When you use the VCR for the first time or after a power failure of more than 60 seconds the language
will be reset. Apply power to the unit to switch it on and press the MENU button. Then perform the
following
INoTE>
l
procedure.
If the power has been disconnected,
it will be necessary
to set the language
and clock agarn
-E -
. SET
V CHANNEL
0
SET
A
V CHANNEL
A
0
Numeric buttons
(VC-A410X)
(VC-HGIOX)
AM/PM -
Numeric
buttons
AM/PM
:NoTE>
l You can use either the remote
buttons or the buttons on the front panel.
1) Buttons on the remote control are in green
A-+UP
v + Down
4 -+ Left
b -+ Right
2) Buttons on the front panel are.
A + Channel up
v + Channel down
(+REW
b --+FWD
Initial Setting of Language
@
LANGUAGE
0 I)
MENU.
l
FRANCAIS
A
ESPAROL
*z
Or
v
SELECT
:A
ENTER
:SET
If the language
SET
r)
0
0
Press the MENU button.
Select the language with the A/V
press the SET button.
Ex. : ENGLISH
V
EXIT
has already
l
: MENU
been set previously
buttons
and
Refer to page 11 to set the clock.
and you want to change
it, follow the steps below.
I
I
@
0 I)
MENU
TINER
NODE
SET
A
CHANNEL
Press the MENU button.
Select item “LANGUAGE”
press the SET button.
with A/V
buttons
and
:he A/V
buttons
and
PRESET
CLOCK
SELECT
:.
ENTER
:SET
V
EXIT
: MENU
I
@
LANGUAGE
t
j
SELECT
:.
ENTER
: SET
$
,
5
1
V
EXIT
:MENU
I
I
I
Select the language with
press the SET button.
Ex.:ENGLlSH
!siSetting
the Clock
Vhen you use the VCR
x the first time or after a
lower failure of more
Ian 60 seconds
the
lock will be reset. Apply
:ower to the unit to
witch it on and press the
‘IENU button. Then perx-m the following proedure.
(VC-A4 1OX)
(VC-HGIOX)
OPERATE
OPERATE
MENU
- SET
4/./r/r
MENU
buttons
W.!A/v
buttons
Numeric
buttons
Numeric
buttons
AM/PM
AM/PM
- SET
NITIAL SETTING OF CLOCK
0
First set the language
(Refer to page
10). Then press the SET button.
@
CLOCK
Select whether the clock should show 12-hour AM/
PM time or 24-hour
time by pressing
the A/V
buttons, and then press the b button.
Ex.: 72H
I>
MODE
:248/12B
SELECT
:4
ENTER
:SET
b
CBANGE:A
EXIT
l
V
:MENU
l
l
@
Numeric
buttons
MODE
l2H
DATE
TIME
B
l/O1
MODE
:24H/12B
SELECT
:4
ENTER
:SET
YEAR
00
CBANGE:A
b
EXIT
V
Set the present time with the numeric or A/V
buttons on the remote control and then press the b
button. (First set the ‘hour’ digits and then the ‘minute’. If there is only one ‘hour’ or one ‘minute’ digit,
enter a 0 first.) Set AM or PM. using the AM/PM
button. (12 hour)
Ex. : 10:28AM
pam-->
t
: MENU
f
l
Numeric
buttons
10:28AH
Of
m
I
MODE
12x
DATE
TIME
10:28AM
15/12
0
then
set the AM/PM
Set the year digits with the numeric
or A/V
tons on the remote control.
(If there is only
‘year’ digit, enter a 0 first.)
YEAR
Ex.:
m
butone
97
I
SET
0
selected,
@
I
Numeric
buttons
was
Set the date with the numeric or A/V
buttons on
the remote control, and then press the b button.
(First set the ‘day’ digits and then the ‘month’.
If
there is only one ‘day’ or one ‘month’ digit, enter a
0 first.)
Ex.: Dec.
15 (15712)
00
:DAY/MONTH
If 12H mode
indicator
@
I),
DATE
“24H” . .. . . . . . . . ... .. 24-hour display.
“IZH” ... . . ... .. . .... .. . . . . 12-hour AM/PM display.
12H (AM/PM) mode is preset at the factory.
MENU
*
@
0
Press the SET button.
screen, press the MENU
To return
button.
to the
Normal
SHANGING THE CLOCK SETTING
* If the clock has already been set previously
follow the procedures above.
and you want to change
it, select “clock”
Select item “CLOCK”
press the SET button.
SET
0
0
Normal
Screen
@
with
rom the MENU, and then
the
A/v
.
buttons
and
To return to Normal Screen, press the SET button.
11
.
!!§ISetting
the Channels
Your VCR can receive VHF channels 0 to 12, and UHF channels 28 to 69. Your VCR has 4t
programmable channel positions, each of which can be set to any of the above broadcas
channels. The channel positions have been preset at the factory as shown below.
Preset N
POSlllon
Channel
/
Posttbon
j-W%->
Presel TV Channel
l
8
0
1
,
Skipped channel
’
Skrpped channel
9
VHF 9
l
/
I
2
VHF 2
3
Skipped channel
I
11-27
4
Skipped channel
/
28
UHF 28
5
VHF 5A
29-46
Skipped channels
6
VHF 6
7
VHF 7
10
VHF 10
/
Skipped channel
l
Use the A / ‘I / 4 / b buttons on the remote
control to set the OSD.
Channel position numbers 1, 3, 4, 8, 11 to 27, ant
29 to 46 have been factory set to be skipped wher
the CHANNEL @ or @ button is used.
If the picture is not clear, if you want a differer
channel from the one preset or if you wish to reset I
skipped channel, reset the channel as follows.
’
47
AUTO TUNING
PREPARATION
l
Select the video channel on your TV. Press the OPERATE button to turn on the VCR.
!
A
@
UENU
A
SELECT
:A
ENTER
:SET
SET
V
EXIT
:PENU
@ Select item “AUTO” with the A/V
press the SET button.
MANUAL
SET
:A
ENTER
0
@CHANNEL PRESET has been preset to MANUAL
the factory.
EXIT
:umau
AUTOMATIC
TUNING.
PLEASE
WAIT.
-______________________
EXIT
l
*
Normal
Screen
The channel display on the TV screen will continue through all of the channels and when
finished, the TV screen will return to the normal
screen.
:MENU
If additional unwanted channels were found, refer to page 14 to skip unwanted channels.
If some channels were unable to be found, please refer to page 13 for Manual Tuning.
12
at
V
rSET
0
l
buttons and
!>
0
ISELECT
Press the MENU button.
Select item ‘CHANNEL PRESET” with the A/V
buttons, and press the SET button.
Setting the Channels
MANUAL TUNING
PREPARATION
@Select the video channel on your TV. Press the OPERATE
Example:
Tuning
Channel
Position 3 to Broadcast
button to turn on the VCR.
TV Channel
-1
7
@ Press the MENU button.
Select item “CHANNEL PRESET” with the A I V
buttons and press the SET button.
TIMRR
noox
MENU
0’
. .
-CLOCK
LANGUAGE
SELECT
:A
ENTER
:SBT
v
:MENU
EXIT
CHANNEL
I
@
PRESET
AUTO
Select item “MANUAL” with the A or v
and press the SET button.
buttons
-
l
I
SELECT
:A
v
ENTER
:SET
EXIT
~PRESET
at
:MENU
[Preset CH]
Numeric
buttons
CHANNEL PRESET has been preset to MANUAL
the factory.
@
Select the preset channel position number with
the numeric or 4 / b buttons, and then press
the v button.
@
Press the numeric buttons or the 4.
buttons
until you see the desired broadcast channel on
your TV, and then press the v button.
@
For fine tuning, press the 4 or b button until the
broadcast channel comes in clearly on your TV.
Next
Screen
@
If you wish to preset more channels, press SET
button and repeat steps @ through 0.
Normal
Screen
@
To return to the Normal Screen,
buttons.
cH
m
CHANNEL
FINE
4
TUNING
ON
SKIP
SELECT
:.
ENTER
: SET
v
b
m
CBANGE:4
I
b
: MENU
EXIT
[Broadcast CH]
f
I
PRESET
3
CH
m
FINE
4
TUNING
ON
w
CEANGE:4
SXLECT
b
b
:MENU
EXIT
[Fine tuning]
PRESET
CH
CHANNEL
IrINa:
TUNING
:. V
: SRT
CHANGE:4
0 *
0 *
SET
0
MENU
l
Numeric
between
m
ON
SKIP
SELECT
RNTER
EXIT
b
:USNU
I
buttons on the remote control can also be used to select channel
one and two digit numbers for step 0.
numbers.
press the MENU
Press the -/-- button to switch
13
!a
Channel Skip/Cancelling
Skip
Channel skip
If there are channel
positions
that are not preset, you can skip them with the following
PREPARATION
@Turn on your TV and VCR, and select the video channel
Example:
Skip channel
position
0 I)
A
Or
v
:A
Press the MENU button. The MENU screen will
appear.
Select item “CHANNEL PRESET” with the A / v
buttons and press the SET button.
SET
0
*
o
V
CHANNEL
PRESET
@
Select item “MANUAL”
press the SET button.
@
Set the channel position you wish to skip with the
( / b (or numeric) buttons.
Ex.: 12
@
Select SKIP setting
ton.
@
Press the ( or b button to select
press the SET button.
@
If you wish to set more channels
repeat steps @ through 0.
@
To return to the Normal Screen
button.
SET
41.
Or
‘Numeric
, buttons >
A
FINE
TUNING
I
esKIP
4
on your TV.
12.
MENU
SELECT
procedure.
ON
m
SET
I
H&SKIP
MENU
0
OFF
m
0
Normal
Screen
0’
with A / v
buttons
mode with the A or v
and
but-
SKIP ON and
to be skipped,
press the MENU
Cancelling skip
PREPARATION
@Turn on your TV and VCR, and select the video channel
Example:
*Follow
Reset channel
position
the same procedure
0,
12.
@ in Channel
skip. and then the procedure
ESKIP
m
OFF
4
;
I
SET
I
&xIP
ON
-I
0
0
0-0
below.
@
Select the channel position you wish to unskip
with the 4 / b (or numeric) buttons.
Ex: 12
@
Select SKIP setting
v button.
@
Press the 4 or b button to select SKIP OFF and
press the SET button.
I
A
on your TV.
@ If you
mode by pressing
wish to unskip
steps @ through 0.
@
more
To return to the Normal Screen,
button.
channels,
the A or
repeat
press the MENU
!§I Menu
Screen
@
@
Turn on your TV and select the video channel.
Press the OPERATE button to turn on the VCR, and then press the
MENU button to display the MENU screen.
@ Select the item you want by pressing the A or ‘I button on the
remote control. Refer to the pages listed below for details on each
item.
The following 5 items can be set by using the On Screen Display (OSD).
1: TIMER . ..... ... ....... ....... .. .. Setting a timer recording (and checking it).
(See page 26 for the setting procedure.)
2: MODE . ... .. ...... .... .... ... .... VCR operating conditions are set according to
MENU
MODE
CHANNEL
CLOCK
LANGUAGE
SELECT
ENTER
PRESET
:A v
:SHT
EXIT
:MENU
the broadcast reception and tape playback conditions. (See page 16.)
3: CHANNEL PRESET . . .. . . Setting the channels. (See page 12.)
3: CLOCK . . .. . . . . .. . .. . . . .. .. . . . . . Setting the present time. (See page 11.)
5: LANGUAGE . . . .. . . . . . .. . .. . . Selection of language to be used for the On Screen Display. (See page IO.)
A
ress the SET button. The screen changes to the item which you have selected.
OP
_
@ To cancel the MENU screen, press the MENU button.
!§I OSD
(On Screen
Display)
The tape counter and VCR mode can be shown on the screen while you are playing back a tape or
watching a broadcast on the video channel.
Display example
S. PICTURE (New
Sharp Super Picture)
Audio output indicator
(Only for vc-fi610x)
Auto Repeat display
l
If the clock IS not set, the time and date WIII not be displayed.
How to Display Indicators
0
@
0
Turn on your TV and select the video channel.
Press the OPERATE button to turn on the VCR. Mode indicators are displayed
screen.
Each time the MODE OSD button is pressed, the screen changes as follows:
4) AUTO Display
--+
@ FULL Display
---+
0
COUNTER Display
+
in the AUTO display
0
Display off
A
AUTO Display
When an operation button, numeric button,
the number of the channel will be displayed
l
or CHANNEL @/@ button is pressed, the current mode or
in the upper section of the TV screen for about 3 seconds.
When you record a video signal output from this VCR on another VCR, press the MODE OSD burton to select
Display Off. (If the mode indicator is displayed on the screen, it is also recorded on the tape.)
15
Mode Selection
You can set the basic functions
listed in the table below on the MODE selection
PREPARATION
lTurn on your TV and select the video channel.
[Colour]
I~COLOUR
BACK
BLUE
AUTO
!
RBNTAL
REPIAT
.
III
ON
JUST
REC
SELECT
i ENTER
v
@
Press the MENU button.
@
Select the MODE selection mode with the
buttons, and then press the SET button.
@
Select the COLOUR mode by pressing the 4 /,
buttons and then press the v button.
(For details, see Colour Mode on page 19.)
or?
OFF
m
N
:.
I
Press the OPERATE button to turn on the VCR.
PAL
.
l
b
I
EXIT :NEN"
@
Select the BLUE BACK mode by pressing
the
4 / b buttons, and then press the v button.
AUTO . . . . . . . . . . . . Usually select AUTO.
A blue screen will appear when
your VCR receives no TV signal or
an unrecorded
tape is played
back.
OFF.. . . . . . . . . . . Select OFF if the screen
turns
blue due to weak TV signal reception, or playback
of a poorly
recorded tape.
@
Select the AUTO RENTAL mode by pressing the
4 / b buttons, and then press the v button.
(For details, see Auto Rental Mode on page 20.)
@
Select the REPEAT mode by pressing the 4 / b
buttons, and then press the ‘I button.
(For details. see Auto Repeat on page 30.)
@
Select the JUST REC mode by pressing
the
4 / b buttons. and then press the v button.
(For details, see Intelligent
Timer Recording
(JUST REC) on page 28.)
@
Press the SET button
screen.
[Blue back]
BACK
AUTO
RENTAL
REPEAT
JUST
REC
m
PAL
m
o.?r
p
ON
m
or?
m
OIF
v
%
:.
v
:SET
b
CHANGE:4
EXIT :NENU
[Auto Rental]
COLOUR
BLUE
BACK
RENTAL
:e AUTO
REPEAT
REC
i JUST
i
A / V
AUTO . . . . . . . . . . . . . Usually select AUTO mode.
PAL . . . . . . . . . . . . . . . . Strict PAL colour mode.
O??
CHANGE:4
:SET
1 COLOUR
keBLUE
screen.
m
m
m
PAL
OFF
err
ON
m
m
O??
i
:* .
:
fL SELECT
(
ENTER
SET
CHANGL:4
b
:YENU
EXIT
[Repeat]
m
COLOUR
BLOk
BACR
m
AUTO
RLNTAL
m
BRBPEAT
PAL
OII
O??
ON
RLC
JUST
m
m
SLLLCT
:.
ENTLR
: SIT
v
O??
CIiANCL:4
b
:NLNU
LXIT
[Just REC]
COLOUR
BLUL
BACK
AUTO
RLNTAL
.. PAL
IIB
m
OFT
OII
ON
REPEAT
eJo.5~
RIG
m
SLLLCT
:.
PNTLR
i 5LT
V
m
CHANGE:4
LXTT
0 *
SET
0
16
OIT
b
:
urau
I
Normal
Screen
v
to return
to the normal
/
- Playback
Fl
inserting a Video Cassette
3ently insert the video cassette into the cassette compartment. The VCR turns on automatically.
If the
zassette is inserted incorrectly, the loading system will not function. Do not force the cassette into the
/CR. When the cassette has been properly loaded, “[m ” appears on the VCR display.
-0 remove the cassette, press the EJECT button during stop mode.
‘layback
‘REPARATION
‘Turn on your TV and select the video channel.
OPERATE
OPERATE
PLAY/x 2
REW
PLAY/x 2
REW
STOP
STOP
FF
FF
Insert a cassette.
OPERATE--l
\
EJECT
(This picture
/
ATOP
PLAY/x
2
is for VC-H6lOX)
(VC-A4OX)
(VC-H6lOX)
@
@
@
@
Press the OPERATE button to turn on the VCR.
Insert a cassette.
Press the PLAY/X2 button. (The auto tracking control system engages and ” b” flashes ‘s=nthe TV
screen for a few seconds.)
To stop playback, press the STOP button. (If the tape reaches its end, the VCR will automatically
rewind the tape to the beginning, eject the cassette, and turn off the power.)
Video Search (with the Remote Control)
Jse the following procedure to quickly find the section you want, while viewing the picture.
0
During playback,
press the FF button for forward video search, or the REW button for reverse
search.
There are 2 search speeds in each direction. The VCR switches between them eat? ;Ime the
button is pressed.
@ Press the PLAY/X2 button to resume normal playback.
l
During video search of a tape recorded
in the LP mode, the upper part of the picture may be skewed tc z?e side
Fast Forwarding and Rewinding (with the Remote Control)
0 To move through the cassette faster. press the STOP button and then press the
@
to fast forward or rewind the cassette. (The picture cannot
Press the STOP button to stop fast forward or rewind.
NOTE
l
be viewed
FF or REW button
in this mode.)
>
If you use other than E-90/E-180 cassettes,
fast forward and rewind may take somewhat
longer
17
R
Playback
Shuttle System
The shuttle system lets you control all the basic playback
functions
using just the shuttle ring.
pQmE->
l The
shuttle ring does not rotate 360”.
DURINGSTOP
MODE
Fast Forward and Rewind
0
Q
DURINGPLAY
MODE
Turn the ring either to the right or the left and release
ring will return to centre.)
Press the STOP button to stop fast forward or rewind.
it. (The shuttle
Video Search
aTurn the ring to the left or the right during playback to enter VSF (Videc
Search Forward), or VSR (Video Search Reverse) mode. Select from
two speeds by turning the ring. Release the ring (the shuttle ring return:
to centre) to return to playback.
@During playback, turning the ring all the way to the left or right locks the
VCR in VSF (Video Search Forward), or VSR (Video Search Reverse‘
mode. Press the PLAY/X2 button to return to regular playback.
TAPE SPEED
/
Slow Motion Playback (with the Remote Control)
0
Q
L6DPSStBJ
0
18
Press the SLOW button on the remote control during playback.
Press the SLOW @ or 0 button (to the right of the SLOW button) t_c
vary the slow motion playback
speed between l/5 and %O of the
normal playback speed.
Press the PLAY/X2 button to resume normal playback.
R
Playback
Still Picture and Frame Advance
0 Press the PAUSE/STILL (F.ADV) button during
Q
0
0
A
0
playback. This will freeze the picture on your TV.
If noise bars appear on the screen during still picture, set your VCR to the slow mode and press the
CHANNEL @@ buttons to make the noise disappear. Then press the PAUSE/STILL (F.ADV)
button again.
If there is vertical jitter during Still Picture Playback, press the CHANNEL O/Q buttons to stop the
jitter.
Press the PAUSE/STILL (F.ADV) button during still mode for frame advance.
Press the PLAY/X2 button again to resume normal playback
Double Speed Playback
@ Press the PLAY/X2 button during
speed.
Press the PLAY/X2
-0
playback.
The tape will be played
back
at twice
the normal
button to resume normal playback.
I>
l
l
l
Sound is muted during video search, slow motion, still picture, frame advance, and double speed playback.
To avoid damage to the tape, your VCR will resume normal piayback after about 5 minutes of slow motion
playback and still picture.
During slow motion, still, frame advance and double speed playback with a tape recorded in the LP mode, the
upper part of the picture may be skewed to one side.
Colour Mode
If a colour recording’s
quality is poor, the picture
may turn black and white. In this event, set the
COLOUR mode on the MODE selection screen to
PAL (strict PAL colour mode). Normally, the colour
mode should be set to “AUTO” mode.
(See Mode Selection on page 16.)
l
When the colour mode is set to fixed colour mode while
the VCR is playing back a black and white tape or is
receiving a black and white broadcast, the picture may
be coloured. In this event, set the COLOUR mode on
the MODE selection screen to “AUTO” mode.
m
PAL
BLUE
BACK
m
OFF
AUTO
RENTAL
m
OFF
ON
m
COLOUR
REPEAT
JUST
m
REC
+-l
-b
AUTO
mode
OFF
Strict PAL colour mode
SELECT
:A
V
ENTER
: SET
CHANGE:4
EXIT
b
. .
:MENU
t=
(Select with 4 or b button.)
t
Then press SET button.
NTSC Tape Play Back on PAL TV
When you play back an NTSC tape on your VCR, it is possible
multi-system compatible TV. However, please note the following:
to use a PAL or
@The picture will shrink vertically to some degree, as shown in the diagram, but
this does not indicate a malfunction in your TV or VCR.
@If your TV does not have a V-HOLD control,
the picture .may roll and be
unwatchable.
However, if you use a TV with a V-HOLD control, you can stop the
rolling by adjusting the V-HOLD control and watch the picture.
@Horizontal noise bars may appear on the screen during special effect playback (video search, still,
slow, frame advance, and double speed playback), possibly accompanred
by dscolouring.
@Although NTSC tapes can be played back onto a PAL TV, those tapes cannot be dubbed by a PAL
system VCR connected to the AUDIO OUT and VIDEO OUT terminals of this product. Tapes recorded
in this way cannot be played back on PAL system VCRs.
@Set the COLOUR mode to AUTO. If the COLOUR mode is set to PAL, you cannot play back the tape.
19
R
Playback
Auto Tracking Control System
This function automatically
the following cases:
l
adjusts
When you insert the cassette
the tracking
to match the recorded
tape. Auto tracking
engages
in
and begin playback.
8 and @ buttons
lWhen you press the CHANNEL
at the same time.
*When the VCR has been playing
back an unrecorded
section of tape, and then reaches a
recorded tape segment.
When auto tracking
engages,
screen flashes for a few seconds.
l
“ b”
on the
TV
Poor Tracking
Normal tracking
When a poorly recorded tape is played back, auto tracking may not operate normally.
adjust the tracktng with the CHANNEL @/IS buttons to make any noise disappear.
In this event,
manually
Auto Head Cleaning System
When the tape is inserted or ejected, this system automatically
special roller before recording
or playback
begins, protecting
preserving beautiful picture quality.
cleans the drum and heads with a
the heads and drum from dirt and
Quick Start with Full Loading Mechanism
Your VCR has a standby function (Full Loading Mechanism)
to allow immediate recording and playback.
After pressing the REC or PLAY/X2 button, it takes about 2 seconds until recording or playback is engaged when in the standby mode.
Auto Rental Mode
(This function only works when AUTO RENTAL mode on the MODE selection screen is set to ON.)
The convenient auto rental mode lets you enjoy playback with ease. When you insert a cassette with
the erasure protection tab removed (rental videos, etc.), your VCR automatically
turns on the power,
winds the tape forward to find the recorded section, and plays back the tape. When the tape reaches
the end of recorded section, the VCR automatically rewinds the tape, ejects it and turns off the power.
-NOTE)
If there is more than a 15 second unrecorded section between recorded sections, the tape will automatically stop
and rewrnd. To watch the next recorded section, press the STOP button, fast forward to that section and play the
tape.
l If the erasure
protection hole is covered, press the PLAY/x2
button after the power turns on automatically.
(Auto
Rental Mode does not work.)
.The AUTO REPEAT mode has priority over the AUTO RENTAL mode. If the AUTO REPEAT mode IS set to ON andthe video cassette reaches its end, the VCR will rewind the tape and play it back again without ejecting the tape or
turning off the power.
l
20
Playback
Blue Back
Set the BLUE BACK mode to AUTO on the MODE-selection
screen. (See Mode Selection on page 16.)
This function eliminates monitor noise and mutes sound during playback of unrecorded
portions of a
-ape, and when receiving a non-broadcasting
channel. Blue Back will also appear if the VCR is set to
-he Auxiliary input (LINE IN) mode but no video signal is fed to the VCR. (The BLUE BACK mode is set
-0 AUTO at the factory.)
Blue Back does not function during still ptcture. variable slow motlor: and vicec search
a Blue Back may not function properly if the broadcast signal is too strong or to3 \.vesk.
l Blue Back cannot
be recorded.
l If the antenna
signal IS weak while recording a TV programme. or if the input signal IS weak while tape dubbing,
the monitor screen may turn blue back since the unit may not recognize wpether or not a proper signai is being
received. In this event, set the BLUE SCREEN mode to OFF.
l
hll Auto Playback
This function only works when AUTO RENTAL mode on the MODE selection is set to OFF.
311 Auto Playback lets you enjoy playback with ease. When you Insert a cassette with the erasure
Jrotection tab removed, your VCR automatically turns on the power and plays back the tape. When the
ape reaches its end, the VCR automatically
rewinds the tape, ejects it and turns off the power.
l
If the erasure protectlon
(Only
hole IS covered,
press the PLAY/x
for VC-H61 OX)
Playback of Hi-Fi Recorded Tapes
ThisVCR will play back both video and audio-only
l
2 button after the power turns on automatically.
tapes recorded in the Hi-Fi mode.
Stereo sound output is only possible
using the AUDfO OUT terminals. Sound from the radio frequency
(RF OUT) is mono only. A blue screen will appear if audio-only Hi-Fi tapes are played back.
converter
Audio Output Mode
The audio output mode is controlled by the AUDIO OUT button on the remote control. The VCR is normaHy set to the Hi-Fi mode, with Q and q displayed on the VCR display, and normal stereo sound
3utput.
Select lB, and only the Hi-Fi Left channel audio is heard from both the Right and Left speakers.
Select I& and only the Hi-F; Right channel audio is heard from both the Right and Left speakers.
If you select the mono linear track, B and D wifl disappear.
l
l
Should the Hi-Fi output level be poor, the VCR will automatically seiect the mono iinear track output.
When playing back tapes which have only Hi-Fi sound recorded: if Hi-Fi sound is not reproduced,
some noise in the audio, press the CtiANNEL
or if there is
@I or 0 button until the sound improves.
Adjusting Hi-Fi Audio Tracking
(Toadjust the Hi-Fi tracking manually when playing
l
back a poorly recorded Hi-Fi tape)
Normaily you can simultaneously press and hold both CHANNEL @ / 0 buttons to obtain the optimal
I-Ii-Fi audio tracking I
*If Hi-Fi
audio
is unstable
(frequent
dropouts,
etc.) with a rental video,
a tape recorded
on another
VCR, restore normal tracking while playing back the tape as described below:
@ Simultaneously press the CHANNEL @ / 0 buttons.
@ Press the CHANNEL 0 button repeatedly at equal, short intervals until the m and a indicators
disappear from the VCR display.
@ Press the CHANNEL @ button in the same manner while counting button operations until the 0
and Gl indicators reappear and then disappear again.
@ Press the CHANNEL 0 button again for half the number of times counted in step 0 above to
obtain optimal tracking.
21
Recording a TV Programme
Cassette Erase Protection
ERASURE PROTECTION
TAB
cassette
has a removable
tab to prevent accidental
erasrye
of recorded
material.
Removing
the tab prevents
recording. To record on a video cassette with the tab removed.
place adhestve tape over the tab opening.
A Ivus/
Recording a TV Programme
ST OP PAUSE/STILL
(VC-.A41 OX) lnse r-t a cassette.
OPERATE
OPERATE -
INPUT
SELECT
OPERATE
CHANNEL s/3
PAUSE/
STILL
PAUSE/ STILL
REC
REC -
TAPE
SPEED
TAPE SPEED
STOP
STOP -
CHANNEL
5312
CHANNEL o/2
REC
STOP
C-H6lOX)
PAUSE/S TILL
Insert a cassette.
I
!-
OPERATE
CHANNEL
I -
I
@/@
INPUT SELECT
REC
PREPARATION
@Turn on your TV and select the video channel.
(VC-H61 OX)
(VC-A41OX)
PROCEDURE
0
Q
0
0
A
0
0
a
l
l
Press the OPERATE button to turn on the VCR.
Insert the cassette, making sure the erasure protection hole is covered.
Select the channel position you wish to record with the CHANNEL O/O buttons.
Select the SP (Standard Play) or LP (Long Play) recording speed with the TAPE SPEED button or
the remote control (‘SP” or “LP” will light up on the VCR display). SP (Standard Play) gives the best
picture quality. LP (Long Play) gives the longest recording time.
Press the REC button. (If the erasure protection hole is uncovered, the cassette wilt be ejected.) Tc
pause during recording, press the PAUSE/STILL (F. ADV) button. To resume recording, press the
PAUSE/STILL
(F. ADV) button again.
To stop recording, press the STOP button.
The pause mode disengages
To record audio
press the iNPUT
channel position
displayed where
after about 5 minutes, and the VCR enters stop mode.
and vi&u from an external source through the AUDKYVDEO
terminal on the rear of the VCR.
SELECT button on the remote control or press the CHANNEL @/@ buttons to select the AL
situated between the fast channel and first channel. (When the AV position is selected, “AVT is
.__
a channel position number is usually displayed.)
iBBz>
l VC-A41OX
is oniy equipped
l
automatically
..
..
If the TV signals are weak and the picture changes to monochrome, set the PAL mode on the MODE selectior
screen. (See Colour Mode on page 19.) Normally, the colour mode should be set to “AUTO”.
with AUDtU/VIDEO
(rear) terminals.
(“AU” is displayed.)
To Watch Another TV Programme While Recording
After steps @ to @ have been completed, select the programme you wish to view using the TV tuner.
At the end of the tape, your VCR will automatically
stop recording, rewind to the beginning of the tape,
eject the tape and turn off the power.
22
I
mRecording
Hi-Fi Stereo Sound
This VCR automatically records audio signals on two kinds of audio tracks.
Using speciafized rotary heads, audio signals are recorded on the video track in the FM
I-ii-FL
format. Multi-sound broadcasts (stereo or bilingual programmes) are automaticaHy recorded
on two channels.
Normal: Audio signals are recorded monaurally on the linear track. Stereo broadcasts are recorded in
mono. and only the main audio track of bilingual programmes is recorded.
*Video cassettes recorded on a non-Hi-Fi VCR can also be played back. However. if the audio signats are recorded
on two linear channels, stereo programmes will be played back monaurally and bilingual programmes will be
played back with both the main and sub audio tracks mixed together.
l Video
cassettes recorded on this VCR can be played back on a non-Hi-Fi VCR. However. only Ihe normal (linear)
track wifl be played back.
Switching input Signals
Various sources of video and audio signals can be recorded as shown in the following chart.
(a) Selecting a channel will record both video and audio from the VCR tuner.
(b) Selecting an external source position (to select an external source position, press the 1NPUT
SELECT button or select a channel situated between the last channel and the first channel with the
CHANNEL @ / @ buttons) will record both video and audio from an externat source via the backpanel AUDIO/VIDEO
WE’1
or front LINE IN 2 terminal.
Signals Recorded
tnput mode
TV screen
Video track
Tuner
7
External 1
(LINE 1)
Normal audio track
Hi-Fi audio track
Signals from tuner
Signals from AUDIO/VIDEO (LINEI) socket on the rear of the VCR
-7
External 2
(LINE 2)
I
Signals from LINE IN 2 terminai on the front of the VCR
i-1
Recording Audio Only
This VCR can record l-ii-Fi audio-only
signals.
@ Connect the audio source (CD player, etc.) to the AUDIO-IN L/R terminals on the front or rear of the
VCR.
@ Select the connected external position LINE IN I or 2 (“Ll” or “L2” lights up) by pressing the
fNPUT SELECT button or the 0 / @ buttons.
@ Press the TAPE SPEED button on the remote control to select SP or LP mode.
@ Press the REC button.
q Simple
Recording Timer
There are two ways to use this Simple Recording Timer
1
l
for your convenience.
Immediate recording:
Convenient when having
telephone
l
Immediate
Recording
visitor
Delayed recording:
Convenieni when leaving
the house or going
the channel position to be recorded
pressing the CHANNEL
@/@ buttons.
ON
(Ex. : Channel position:
2)
. .
the screen fur VC-HGIOX.
S.PICTURE
0a
@ Press
the REC button to enter the normal
recording mode. Then, press the REC button
repeatedly to set the desired ending time.
2
0
ON
STEREO
e3
SP
STOP
9:30AM
L
R
(Ex.: Ending time: 9:30 AM)
INoTE)
l
REM
2:00
o:oo.oo
Press the STOP button to terminate
l
by
In each step, Vn (or STEREO) and t R apee&@%
SP
REC
or
to bed.
Select
0
8
S.PICTURE
an unexpected
call.
l
Each press of the REC button increases the stop time by 10
minutes.
If necessary, press the CHANNEL 010 buttons to change
the minutes setting.
recording.
Delayed Recording
@ Select the channel position to be recorded
pressing the CHANNEL
@/@ buttons.
STEREO
(Ex. : Channel position:
LR
@
BTIME
n
DSTART
ON,,
,, ,
l
--8:40AMSTEREO
f/ ! \ k
SP
LR
l
l
f 8
o I
21
S.PICTURE
0
SP
BSTART
STOP
8:40AMSTEREO
\\I,/
-9:30AMY/I\\
l
L
R
I
0...
l
l
Set the ending time by pressing
(Ex.: Ending time: 9:30 AM)
the REC button.
I-WTF-)
ON
OPERATE
l
aTIME
Each press of the aTIME button increases the start time by
10 minutes.
Setting the time within a 24-hour period in lo-minute
intervals
is possible.
Press the CHANNEL
O/O buttons
to adjust the minutes
if
necessary.
@
REC
time by pressing the
(Ex.: Starting time: 8.40 AM)
i>
2
S.PICTURE
2)
Set the starting
button.
by
After the Simple Recording Timer is set, the channel position
To confirm the starting time and the ending time, first press
the starting and ending time. Press the OPERATE button to
To clear the Simple Recording Timer setting during setting
l
Each press of the REC button increases the stop time by 10 minutes. If necessary, press the CHANNEL 010 buttons to change the
minutes setting.
@
Press the OPERATE
button to turn off the power.
(Ex. : Present
time: 8:28 AM)
cannot be changed.
the OPERATE button to turn on the power.Then press the IDW~E
j
I
I
button to confirm
turn off the power.
of “Delayed Recording”. press the CLEAR button on the remote control. TO clear after
setting, turn on the power, press the BTIME button to select Simple Recording Timer mode. and then while the DSTARTtime is flashing. press
the CLEAR button.
The Simple Recording Timer cannot be set if the timer has been preset (“a” indicator on the VCR display is lit). If this is the case, cancel the timer
standby mode by pressing the TIMER ON/OFF button, Win on the power and then proceed with setting of the Simple Recording Timer.
l Select
the SP (Standard Play) or LP (Long Play) recording speed with the TAPE SPEED button on the remote control (“SP” or “LP” will light up on
the VCR display). SP (Standard Play) gives the best picture quality. LP (Long Play) gives the largest recording time.
l The stop time for delayed recording must be set within 10 seconds of setting the start time otherwise start time must be set again.
l
24
NHRecording
with the Timer
The timer can be set manually
for automatic
recording
of up to 8 events over a 365 day period.
PREPARATION
*Load the cassette, ensuring the erasure protection hole is covered.
The VCR power will automatically
turn on.
@Check that the clock is displaying the correct time. (See Setting the Clock on page 11.)
PROCEDURE
; Example:
Recording channel position 47 in SP mode from 12:OO PM to 12:30 PM, December 15,
/
1997, if the present time is IO:28 (morning),
[Menu]
@
CI1AIIIIL
PIE**=
MENU
0
SET
[Timer position]
A
;
Numeric
buttons
PI ST&R*
SIOP
_i__- -~---sp
__,____ _,____:_____
[Once]
I)
_,___-:-_--_,____,-----
If you want to record
only once, press the
button and go to step 0. Otherwise, select ‘ID
(DAILY)” to record at the same time each day or
“W (WEEKLY)” to record at the same time each
week by pressing the A or v button, and then
pressing the b button.
b
PR
15/11
:::::
m
:I
START
-:---
I) b
@
[Channel]
Numeric
buttons
STOP
-:---BP
_*-__ _I _____
the
@
b
[Daily/Weekly]
A/V
and press
Set the date for timer recording with the numeric
or A / v buttons on the remote control and then
press the b button.
l First
set the “day” digits and then “month”. If
there is only one “day” or one “month” digit,
enter a 0 first.
0
’
mode
@
When the clock is
set to 24H mode,
i‘
-:--” will appear.
STOP
m__ PI START
_:___
_:___sp
__,____ _:____;_____
__,____ _,___
__I____ _,___
_:_____
Press the MENU button.
Select the TIMER-setting
SET button.
Select the timer position with the A/V buttons
and press the SET button.
l If the timer
positions 1 to 4 have already been
set, the screen changes 2/2 (timer positions 5
to 8).
l Press
the TIMER button (for VC-A410X) or the
G-CODE/TIMER
button (for VC-HGIOX) to directly select the TIMER mode.
0
[Date]
14, 1997.
@
SET
‘0
December
Set the channel number using the numeric
V buttons and then press the b button.
or A /
@To record audio and video from an external
source
through an AUDIO/VIDEO terminal on the VCR, press the
A / V buttons to select an AV channel. (When an AV
“Ll” or “L2” IS displayed
where a
position is selected,
channel position number is usually displayed.) (VC-A41OX
is only equipped with AUDIO/VIDEO (rear) terminals.)
I>
Continued
on next page
. A /v buttons can also be used to set the date and time instead of the numeric buttons.
Press 0 first if the day, month, hour or minute is a single digit.
l
25
Recording with the Timer
WOPI
15/12
__/__
__,__
PR
47
__
__
@
Set the stop time with the numeric buttons
7 buttons and press the b button.
START
STOP
12:OOin~P
_:__-_ _:_-_-___
Select the tape speed with A or V button.
15/12
47
v
2/2
_:__-__
v
v
Normal Screen
l
l
l
l
l
l
l
l
(See
12:OOP~12:3OPBSP
_;___
v
l
or or. /
rn to the Normal Screen,
press the MENU
If the video cassette runs out before recording all the programmes, your VCR will stop, eject the cassette, and shut
off automatically.
If power is interrupted for more than 1 minute (power failure, etc.), all timer settings will be cancelled.
If the TIMER ON/OFF button is pressed when there is no cassette loaded, “B’” flashes for 5 seconds, indicating
that timer recording is not possible.
If the TIMER ON/OFF button is pressed while a cassette with an uncovered erasure protection hole is loaded, “E3”
flashes and the cassette is ejected.
When “D” is lit, regular VCR operation, clock setting and setting/cancelling/confirming
timer positions are not
possible. For regular VCR operation, clock setting and setting/cancelling/confirming
timer positions, press the
TIMER ON/OFF button to disengage the timer (“a” disappears), and then turn on your VCR.
During timer recording, the timer cannot be set.
To terminate timer recording, press the STOP button during timer recording.
If no buttons are pressed within one minute while setting a timer programme position. the mode automatically
returns to the previous mode.
If the same trme is input for the start time and the stop time, the timer setting will be cancelled.
26
Recording with the Timer
Confirming Timer Programmes
IOUcan see on the On Screen Display a list
of all timer programmes
‘REPARATION
‘Turn on your TV and VCR and select the video channel
[Example]
that are already
set.
on the TV.
0
Press the MENU button. (If the “Q” indicator on the
VCR display is lit, cancel the timer standby mode by
pressing the TIMER ON/OFF button and then turn on
the power.)
@
Select the TIMER-setting
mode with the A/T
buttons and then press the SET button.
@
The screen for confirming programmes that have
been set will appear.
l Check
the information displayed.
l If you
want to correct the data, select the programme to be changed with the A/V buttons
and then press the SET button. Correct the
setting as described on pages 25 and 26.
@
To return to the Normal Screen. press the MENU
button.
lAfter checking
or correcting
the programme
contents, press the TIMER ON/OFF button to
enter the Timer Standby mode.
1/a
R START
STOP
_:___
-:---Sp
no indicator
ONCE.
“D” IS displayed.
DAILY:
WEEKLY: “W” IS displayed.
ME*
Normal Screen
Cancelling Timer Programmes
‘erform
the following
procedure
to cancel timer programmes
=REPARATION
‘Turn on your TV and VCR and select the video channel
Ii
ZIElU
A
CR~LNNXL
PRESET
CLOCX
LANCUAOE
',O
SELECT :. .
*NTER
:SET
PR
START
EXIT
:"Sta"
been set.
on the TV.
0
Press the MENU button. (If the “Q” Indicator on the
VCR display is Iii. cancel the tamer standby mode by
pressing the TIMER ON/OFF button and then turn on
the power.)
@
Select the TIMER-setting
mode with the A/V
buttons and then press the SET button.
@
The screen for confirming
timer recording
grammes that have been set will appear.
@Select the programme you wish to cancel
the A/V buttons.
(The selected programme will appear
highlighted.)
SET
IrODE
that have already
0
STOP
prowith
@
Double-check
that it is the programme you wish
to cancel, and press the CLEAR button. It will be
cleared on the screen.
INoTE>
CLEAR
0
l
Ensure that the remote control
is in VCR mode. Press the
VCR button.
@
ME*
Normal Screen
To return to the Normal
Screen,
press the MENU
button.
elf there are still some programmes
set, press
the TIMER ON/OFF button to enter the Timer
Standby mode.
27
!!BIntelligent
Timer Recording (JUST REC)
When the tape is expected to run out halfway during timer recording in the SP (standard play) mode
the mode will automatically change to the LP (long play) mode to prevent termination of recording.
This function works only when JUST REC mode on the MODE selection screen is set to ON.
For example:
When a 120-minute programme is timer-recorded with a go-minute tape while the automatic
set to LP mode as shown bellow:
l
r
About 60 minutes
l
SP (standard play) mode
,-
l
l
l
iz
About 30 minutes1
LP (long play) mode
Total: 120 minutes
l
select
1
This function may not properly work for video tapes other than E60, E90, El 80 and E240.
This tape may not be completely used up.
When more than one programme is set on the timer, the automatic recording function will work for the length o
each timer-set programme, but not for the total length of all programmes.
When the LP mode is initially used for timer-recording
a programme, if the tape is not long enough to record the
entire length of the programme, the programme will not be entirely recorded.
mNew Sharp Super Picture
This function
quality.
creates
clearer
modulation
during
playback
for high picture
S.PICTTJRE
Press the S. PICTURE button on the VCR.
“S.PlCTURE ON (or OFF)” will appear on the TV screen
ON
I
for a few seconds.
Each time the button is pressed, the mode switches between ON and OFF.
......... .
SE=
0
(The New Sharp Super Picture is preset to ON at the factory.)
ON:
Normally leave the mode set to ON. This high
create a clearer image during playback.
picture
quality
function
will
OFF:
Set to OFF when playing back a tape on the VCR while editing or when strong noise
appears on the screen. Set to OFF when using the VCR as an editing source.
NoTE)
This function only operates during playback. It will not
operate when recording or watching a TV programme
with the VCR tuner.
l
mZero-Back
The zero-back
function
ooint and stop there.
ZEROBACK
0
I
0
l
Function
makes
0
I
This function can not be set to ON/OFF with the MENU
screen displayed.
If power is interrupted
for more than 60 seconds
(power failure, etc.), the setting will return to ON.
l
the cassette
fast forward
(or rewind)
to the previously
set “O:OO.OO”
Make sure the counter is displayed, then press the CLEAR button on the
remote control at the point you wish to return to later. “O:OO.OO” IS displayed.
Press the ZERO BACK button
on the remote
control.
The VCR
automatically
detects the direction
of the “O:OO.OO” position
and fast
forwards (or rewinds) the tape.
When the tape reaches the “O:OO.OO”position, the tape automatically stops.
*The zero-back function does not operate
forward, rewind and video search modes.
during
recording.
The function
works during
the playback.
stop, fast
DPSS (Digital Programme Search System)
m
With this feature you can quickly locate a desired section of the tape. The DPSS feature makes use of
VISS (index) signals to search for a specified tape segment and begin playback automatically.
VISS (Index) Signal
An V/S’S (index) signal is automatically
recorded
on the tape at the start of ordinary
recording,
simple recording timer and timer recording.
losition
s-m,_
I/
FIastforward
//
/
t
1,
SLOW-
o
es+
0
0
@ -
0
l
l
:
//////
I
I
I
I
’
1
I
V
VISS (Index signals)
Load a tape containing VISS (index) signals into the VCR.
Select the VISS (index) number of the desired programme using the DPSS
8 or e button on the remote control.
Search starts immediately. (When a signal is located, the displayed number decreases.)
When the selected VISS (index) signal-encoded
section is found, playback begins automatically.
iNoTE>
l
I
DPSS may not function properly if the VISS (index)
signals are too close together (within 3 minutes of
each other).
DPSS can be cancelled by pressing the PLAY/x2
or
STOP button.
If the tape reaches Its end or is rewound completely
before locating the desrred VISS (index) signal, DPSS
is cancelled.
1
l DPSS may not function
for damaged or worn tapes.
*The DPSS function cannot be used wtth tapes that
contain no VISS (index) signals.
l The starting
point of a programme may vary slightly.
l DPSS does
not operate during the slow, record, timer
standby, and trmer recording modes, or when there IS
no cassette loaded.
29
_.
PI Auto
tape is played back repeatedly.
Set the REPEAT mode on the MODE-selection
screen to ON.
With this feature,
()
Repeat
the entire
When the video cassette reaches its end, the VCR will stop
playback,
rewind the tape, and automatically
play it back
again.
BLUE
BACK
JUST
REC
.;NoTE)
l
l
The ON/OFF status of the Auto Repeat can be checked on the MODE Selection screen. (See Mode Selection o:
page 16.) (And when the AUTO REPEAT IS ON, “REPEAT” will be displayed on the OSD screen.)
If the Auto Repeat IS on and the tape IS rewound to the beginning with rewrnd or reverse video search, the tape WI:
automatically start playback.
Skip
PI;1
El
SKIP
SEARCH
Search
When the SKIP SEARCH button on the remote control
mode. the VCR will perform a forward video search for
time before resuming playback. Depending on how many
it is possible
to set the forward video search time to
seconds of recorded material.
Number of Times Pressed
Forward Video Search Time
1 time
Approx. 30 sec.
(of playback time)
2 times
Approx. 60 sec.
(of playback time)
3 times
Approx. 90 :sec.
time)
(of plavback
. .
4 times
Approx. 120 sec.
(of playback time)
1
is pressed during playback
a fixed interval of playbacktimes the button is pressed
approx. 30. 60. 90 or 1.X
(On the VCR display)
I
During skip search, the interval of the video search will flash on the display.
(OnlyforVC-H6lOX)
Instant Replay
. .. ....__..
When the C, button on the remote control is pressed during$ayback,
the VCR wili
perform a reverse video search fur a fixed interval of playback time before resumin5
playback. Depending on how many times the button is pressed, it is possible to s&
the reverse video search time to approx. 20, 40, 60, or 80 seconds of recordec
material.
.. . .
30
m
New Child-Proof Lock
With this feature, you can lock all VCR modes to prevent accidental change.
This function works even when the VCR power is off, thus preventing
children
operating the VCR or viewing select programmes while you are away from home.
from
,_,
IVew Child-Proof Lock
@ Press &FI on the remote control for about 2 seconds.
“h”
flashes and “l<---‘I
lights on the VCR-function display.
@ Press ti
again.
‘X3=& remains lit on the VCR display confirming that New Child-Proof Lock has been activated.
@ Now regardless of what other operating buttons are touched, the VCR will continue to operate in
- the present mode.
(If New Child-Proof Lock is activated during playback, once the tape reaches its end, the VCR
automatically
rewinds the tape, ejects it, and turns the power off.)
Disengaging New Child-Proof Lock
a Press ti
“GM’
button for about 2 seconds.
starts flashing and then disappears.
Now, New Child-Proof
Lock is disengaged.
Advanced New Child-Proof Lock
0
Q
0
0
A
Press %
button on the remote control for about 2 seconds.
<
I‘%”
flashes and “;{:---I’
lights on the VCR display.
Input the personal code number (4 digit code) with the numbered
buttons. The perslUr
e sl
number you have input is displayed on the VCR display.
rol.
Press ti
button again.
“ti”
remains lit on the VCR display confirming that New Child-Proof Lock has been actiT=
Now regardless of what other operating buttons are touched, the VCR will continue to :,T _
the present mode.
(If New Child-Proof Lock is activated during playback, once the tape reaches its end, the VCR
automatically
rewinds the tape, ejects it, and turns the power off.)
Disengaging Advanced New Child-Proof Lock
0
Q
0
Press %
button for about 2 seconds.
“%KI” flashes and “$I---”
lights on the VCR display.
Input the personal code number (4 digit code) you used to activate Advanced
New Child-Proof
Lock with the numbered buttons. The personal code number you have input is displayed on the
VCR display.
Press %=I button again.
“@FI” disappears.
Now, New Child-Proof
Lock is disengaged.
If the code number is wrong,
6,\I,
---” is displayed
on the VCR display. Retry to input the right code number. Press ti
button
<t\
again.
If you forget your personal
procedure:
0
@
l
code number,
you can disengage
New Child-Proof
Press %
button for about 2 seconds.
“ti”
flashes and “ I$---”
lights on the VCR display.
Press the OPERATE buttons on both the VCR and remote
Child-Proof Lock is disengaged.
If, while New Child-Proof Lock is on, you attempt to change
will flash on the VCR display.
control
modes by pressing
Lock with the following
for at least 2 seconds.
New
another button, the “%EI” indicator
31
VCR Display
When the DISPLAY
button is pressed,
the display
changes
in the following
when the clock time is set and displayed
in the Q-hour system.)
Example:
Example:
[TAPE COUNTER/CHANNEL]
[TAPE REMAINING/CHANNEL]
.
-Al
l
During
Example:
[PRESENT
way.
changes
tne TIMER
ON/OFF
Example:
[RECORD
IS the cas
Example
[OPERATING MODEICHANNEL]
TIME/CHANNEL]
or Sample Recordtng
Timer, the drsplay shows the recoru ftnist trme When t’ie DISPLAY
In the following way (If the “a” Indicator on the VCR display IS IV cancel the time: s:andSy
button and then turn on the power.)
Example:
[OPERATING
FINISH TIME]
Example,
[PRESENT
MODE]
Example.
[REMAINING
Example.
[COUNTER]
= 3tir1ng
tfie foliovi’ing
b&or
moae
timer recording
the display
[NOTE
(However,
IS pressec
by Dressin:
TIME1
TIME]
‘7
Simple
Recording
Timer recording.
“a ” lights
Counter Clear
Make sure the counter is displayed.
control “0 00 00” IS displayed
!NoTE)
i% counter
l
WI;: reset
mlTape
then press the CLEAR
to “0.00 00’ when the :ape
IS
Remaining
rewound
Display
*Select
FULL or COUNTER display
mode by
pressing the MODE OSD button on the remote
control.
[On Screen Display]
I
on the remote
completely.
On Screen Display
REM
button
[VCR Display]
the
control.
lPress
DISPLAY
on
the
remote
1:05
o:oo.oo
I
[OSDI
l
button
[KR
Dlspiayj
-
This iun:tan accurately drsplays the tape remaining only for tapes recorded in
P4L mode (II does not accurately display the tape remainmg for tapes recorded I
In NTSC 0; MESECAM modes.)
L
. When you mser: the iape and the VCR is rn the stop mode, the taoe remaining cannot be computed The followlng mdlca!o; IC shxlr M’W !?e tax walning has not yf
been computed or cannot be computed
l When you start recording or playback. the VCR will begin the computation. However, this may take some time.
When computation IS completed. tape remaining will be shown on the OSD and VCR display for 5 seconds.
l I! tne “REM ” mode IS selected with the MODE
OSD or DISPLAY button and the VCR is in stop mode, the tape WI/’ a.zzar:zall:b ~2s’ fsrv,z 3’ rewmd for a fe,
seconds and then the VCR will begin computmg the amount of tape remaining.
l Dunng computa!lon. the REC button WIII not function. and pressing the STOP, PLAY/x
2, or other buttons will lnterrupi In? c~m?~:a!icr
l Setting the DPSS or ZERO-BACK function durtng computation may cancel it.
. The inaicared length of tape remaining IS only an approximate guide.
l This function may not properly work fo: video tapes other than E60. E90, El80 and E240.
l The lenoth of tape remalnin
during fast forward or rewind may be Indicated as greater than it actually IS.
z&l
l When rv’srsn
and SVflS
tapes are used with a cassette adapter, the indication may not be correct.
Warning for the length of tape remaining
When the tape reaches the point where only about five minutes
length of tape will be automatically displayed, as a warning.
i>
No warnmg. however. WIII be shown during timer recording or Simple Recording
32
l
of recording
Timer recording
time is left. the remaining
p;1Editing
from a Camcorder toYour VCR
s extremely easy using your VCR with a linear tape counter, etc. The
Editing from your Camcorder
only. Refer to your Camcorder operation manual for
onnection
diagram below is for a guideline
_recise connection
information.
Came
‘VIEW
To AUDIO/VIDEO IN
terminais
LINE iN 1 (Rear)
-Onlyfor VC-HGIQX
Select
position AV
Sefect Position L2 (or l-1)
Uniy for VC-H61OX
ttNE IN 2 (Front)
aniyfor VC-H6 1OX
t2 (Only for VC-&YlUX)
(This picture IS for VC-H6lOX)
“AV” display for VGA41 OX
a Specifications
Format: VHS PAL standard
Video recording system: Two rotary heads helical scan
Video signal system: PAL colour or monochrome siqnals: 625 lines
Hi-Fi audio recording system
(Only for VC-HGIOX): Deep-layer recording system conforming to stereo I-Ii-Fi VHS standard
Maximum playing time: 480 min. with E-240 video cassette in LP mode
Tape width: 12.7 mm
Tape speed: 23.39 mm/set. SP: 11.70 mm/set. LP
Antenna: 75 Ohm unbalanced
Reception channels: VHF channel 0 to 12, UHF channel 28 to 69
RF output signal: UHF channel 31 to 40 (preset to 37)
Power requirement:
AC 240 V. 50 Hz
16 W (approx.) for VC-A41 OX/l 9 W (approx.) for VC-A61 OX
Power consumption:
Operating temperature:
5°C to 40°C
Storage temperature:
-20°C to 55%
Video input: 1.O Vp-p, 75 Ohm
output: 1 .O Vp-p, 75 Ohm
47 kohm
Audio input: (phono type) Line: -8dBs,
1 kohm
output: (phono type) Line: -8dBs
.
_.
./, , , .
A
r!
,
II
(&iiy
.,
,,
..-_._
_
Hi,-Fi audio
fo; VGH6lOX)f Dynamic kange: Typically 90dB
Frequency response: 20b20kHz
Wow and flutter: less than 0,005% Wrm
Supplied
Dimensions:
Weight:
accessories:
‘
360 (W) x 286 (D) x 94 (H) mm (VC-A410X/VC-H610X)
3.4 kg (approx.) (VC-A41OX/VC-H61 OX)
R6 (AA, UM/SUM-3) battery x2, 75ohm coaxial cable.
unit
Design and specifications
,.*
4
remote control
are subject to change without nottce.
33
RI Before
Calling for Service
Check this list before calling
for service.
Problem
MISCELLANEOUS
l
No power.
OPERATE
Possible Cause/Solutions
PROBLEMS
l
button will not function.
l
l
l
l
No operation
pressed.
does
not operate
l
l
when
any
button
is
l
Cassette
pressing
button.
is automatically ejected when
REC, or TIMER
ON/OFF
No tape movement.
l
Cassette cannot be loaded.
l
l
l
l
Make sure VCR is not In pause/still mode.
Make sure tape has not reached the beginning
Make sure there is no other cassette inside.
Make sure the cassette is properly positioned
l
Desired channel
selected.
@The channel has been set to be skipped.
that channel.
cannot
be
l
or end.
and reinsert.
Make sure the VCR is not in the timer setting or clock setting mode.
Make sure the VCR is not in the channel setting mode.
Picture does not change even though
CHANNEL O/O buttons are pressed.
position
and set the
*Cassette’s
erasure protectron
tab has been removed.
Use a
different cassette or place adhesive tape over the tab opening.
l
l
Make sure that the Child-Proof Lock is not engaged.
Safety device in VCR is functioning.
Unplug VCR and plug in again after a few minutes
clock again. Set the tamer again if necessary.
@Cassette’s erasure protection
tab has been removed.
Use a
different cassette or place adhesive tape over the tab opening.
l Check
if a cassette is loaded.
VCR does not record.
.
l
the timer.
Cassette cannot be ejected.
@The VCR display
properly
l
Make sure the power cord is plugged in.
Check the outlet, fuse or circuit breaker.
Press the TIMER ON/OFF button and disengage
Cancel the skip mode for
NO COLOUR OR POOR PICTURE
l
No colour or poor TV picture on normal
viewing.
*Snowy picture
playback.
appears
on TV during
@The VCR cannot
remote control.
l
l
.No picture appears or colour
correct during playback.
REMOTE CONTROL
l
l
is not
Make sure all the cables are connected properly.
Make sure the VCR power cord is properly plugged
in.
Adjust the CHANNEL @l/s buttons or try a different cassette.
The heads may be dirty from condensed moisture or the magnetic
coating of the video tape. (If this is the case, the heads need to be
cleaned. Ask the retailer or Sharp approved service centre.)
@Make sure the TV is set to the same channel
converter output channel adjuster.
l Check
all connecting cables.
as the VCR RF
PROBLEM
be operated
by the
The remote control unit is too far away from the main unit.
.The
remote
control
unit is not pointed
correctly
at the
photoreceptor window.
l The batteries
are exhausted.
l The batteries
have not been inserted in the correct direction (+/l
This unit is equipped with a microprocessor. its performance could be adversely affected by external electrical
or interference. If this should happen, unplug the VCR and plug it on again after a few minutes.
34
noise
Memo
35
SHARP CORPORATION
OF AUSTRALIA PTY. LIMITED
A.C.N. 003 039 405
1 Huntingwood Drive, Huntingwood,
Blacktown, N.S.W. 2148
SHARP CORPORATION
Osaka, Japan
Printed in Malay
TINS-31 65AJZZ
T1569-A


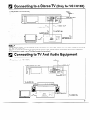
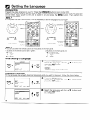
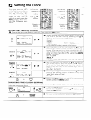
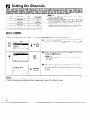
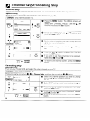
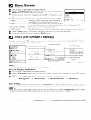
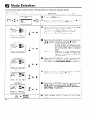


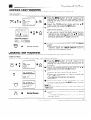
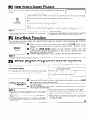
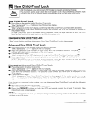
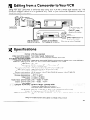


![10780-90006 - 10780A Laser Receiver for 5501A [Prefix 1948] (Mar](http://vs1.manualzilla.com/store/data/006009643_1-6e2f54ebb2199ef6df634558ba4c1bb6-150x150.png)