1
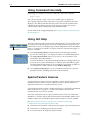
Chapter 1
Getting Started
Establishing a Management Session with the Router ...................................... 1-2
Assigning an IP Address ................................................................................. 1-2
About Setting Routes ..................................................................................... 1-3
Checking Connections with PING .................................................................. 1-3
Changing a Password .................................................................................... 1-3
Using Command Line Help ............................................................................ 1-4
Using GUI Help .............................................................................................. 1-4
Special Feature Licences ................................................................................. 1-4
Setting System Parameters ............................................................................. 1-5
Saving Configurations Entered with the CLI ................................................... 1-5
Saving Configurations Entered with the GUI .................................................. 1-6
Troubleshooting Traffic Flow .......................................................................... 1-6
Software Upgrades ........................................................................................ 1-7
SNMP and MIBs ............................................................................................. 1-7
To Avoid Problems ......................................................................................... 1-7
For More Information ..................................................................................... 1-9
1-2
AlliedWare OS Software Reference
Establishing a Management Session with
the Router
The router displays a login prompt after it completes a series of self-tests. For
details about these tests and messages, refer to the Hardware Reference.
The first step for configuring your router is to login using either its:
■
command line interface (CLI) through the asynchronous management port
(asyn0), using a terminal or terminal server program. For instructions on
configuring Windows™ installation HyperTerminal terminal emulation
software, see the Hardware Reference.
■
command line interface (CLI) by telneting to the default IP address
(AR750S, AR750S-DP, and AR770S). To telnet to an AR725 or AR745 router
you must first login to the router using the CLI and assign an IP address to
an interface.
■
graphical user interface (GUI) through the default IP address (AR750S and
AR750S-DP). To use the GUI on an AR725 or AR745 router you must first
login to the router using the CLI and assign an IP address to an interface.
There is no GUI available on the AR770S.
For instructions on connecting to the router via the CLI or GUI, including the
default IP address, see the Installation and Safety Guide. If you experience
problems telneting to the router, see “Telnet Fails” on page 21-60 of Chapter 21,
Internet Protocol (IP).
For information about the CLI, see Chapter 2, Using the Command Line
Interface (CLI).
For information about the GUI, including detailed instructions on using the
GUI to connect to the router, see Chapter 3, Using the Graphical User Interface
(GUI).
Assigning an IP Address
To configure the router to perform IP routing, for example, to access the
Internet, you need to configure IP, including assigning IP addresses to at least
one of the router’s interfaces. You must also configure IP if you want to manage
the router from a Telnet session or with the GUI.
The AR750S, AR750S-DP, and AR770S have an IP address assigned by default.
For the default configuration, see the Installation and Safety Guide.
For step-by-step instructions on assigning an IP address to the router, see
“Assigning an IP Address” on page 21-10 of Chapter 21, Internet Protocol (IP).
To change the IP address for an interface, use the command:
set ip interface=interface ipaddress=ipadd mask=ipadd
Software Version 2.8.1
C613-03119-00 REV A
Getting Started
1-3
About Setting Routes
The process of routing packets consists of selectively forwarding data packets
from one network to another. Your router bases the decision to send a packet to
a particular network on information it learns dynamically from listening to the
selected route protocol, and from static information entered as part of the
configuration process. If the router does not know a valid route to the network
where a packet is addressed, it tries to discover one. If it cannot discover a valid
route, it does not send the packet.
For more information about routes and how to set IP routes, see “Routing” on
page 21-20 of Chapter 21, Internet Protocol (IP).
Checking Connections with PING
Ping polling allows the router to check whether it can reach another device. To
check a connection, use the command:
ping ipadd
If you receive a reply from the end destination, the physical and Layer 2 links
are functioning, and any difficulties are in the network layer or higher.
If pinging the end destination fails, check the router’s routes, and ping
intermediate network addresses. If you can successfully ping some network
addresses but not others, you can deduce which link in the network is down.
Note that if Network Address Translation (NAT) is configured on the remote
router, pinging devices connected to it may provide misleading information.
The ping command supports a number of protocols and can be configured
with default settings. For more information about using ping, see “Ping and
Trace Route” on page 21-37 of Chapter 21, Internet Protocol (IP).
Changing a Password
To prevent unauthorised access to the router, change the password for the
Manager user account as soon as possible.
If you are using the CLI, enter the command:
set password
If you are using the GUI:
1.
Select Management > Users from the sidebar menu.
2.
Select the Manager account and click Modify.
3.
Enter the new password.
4.
Check you have typed it correctly.
5.
Click Apply. The router prompts you to log in again, using the new
password.
The password can contain any printable characters and must be at least six
characters long. For more information about passwords, see “Choosing
Passwords” on page 40-12 of Chapter 40, User Authentication.
Software Version 2.8.1
C613-03119-00 REV A
1-4
AlliedWare OS Software Reference
Using Command Line Help
Online help is available for all router commands. Enter the command:
help [topic]
If you do not specify a topic, a list of all available topics is displayed.
Also, typing a question mark at the end of a partially completed command
displays a list of the parameters that may follow the current command line,
with the shortest possible entry shown in uppercase letters. The current
command line is then re-displayed, ready for further input.
For information about upgrading help, see Chapter 2, What Commands does a
Feature Support?.
Using GUI Help
Help button
The GUI’s context-sensitive help system is displayed in a pop-up window that
covers the title of the GUI page. You can move the banner to any part of your
screen and/or resize it. To display help, click the Help button above the sidebar
menu or on the page for which you require assistance. The following types of
help are available:
■
Click General Page Info for brief information about background and
process flow. This page is also displayed when you click the Help button.
■
Click Page Element Info and roll your mouse over an element to view
information about that element.
To freeze the banner so that the help displayed does not change when you
move the mouse, press the Ctrl key. To unfreeze, press the Ctrl key again.
Note that element information is not available for most entries in tables. To
see descriptions of table columns, click Complete Help Page.
■
Click Complete Help Page to see all available information in a separate
printable window, including information about elements.
Special Feature Licences
A special licence and password are required to activate features other than the
standard software version. Licences and passwords for special features are
separate from those for a standard software version.
A special feature licence can be a 30-day trial licence or a full licence (unlimited
time). Each licence is specific to a router serial number and cannot be
transferred from one router to another.
You must order passwords for special feature licences from your authorised
distributor or reseller. Specify the special feature licence bundle and the serial
number of the router on which the special feature licences are to be enabled.
See “Special feature licences” on page 5-16 of Chapter 5, Managing
Configuration Files and Software Versions for:
■
information about which software features require a special feature licence
■
instructions for enabling special feature licences
■
more information about special feature licences
Software Version 2.8.1
C613-03119-00 REV A
Getting Started
1-5
Setting System Parameters
If you are using ISDN, you can use a global setting to set the router to defaults
appropriate for the territory where you operate. The command is:
set system territory
To aid in identifying the router you can name it, specify its location, and
identify the person responsible for administering it. These settings are
controlled by the commands:
set system name
set system location
set system contact
The system name is displayed as part of the command prompt, and all three of
the above settings are displayed in the output of the command:
show system
You can set the router’s time and date, which are displayed in log messages, by
using the command:
set time
For more information, see “System Identification” on page 4-3 of Chapter 4,
Configuring and Monitoring the System.
Saving Configurations Entered
with the CLI
To view the router’s current dynamic configuration, enter the command:
show configuration dynamic
If the router restarts (boots), any changes to the dynamic configuration are lost
unless you have saved them by entering the command:
create config=filename.cfg
The filename can be up to 28 characters long. The configuration file that you
create with this command records passwords in encrypted form, not in
cleartext.
To set the router to execute this configuration file when it restarts, enter the
command:
set config=filename.cfg
Software Version 2.8.1
C613-03119-00 REV A
1-6
AlliedWare OS Software Reference
Saving Configurations Entered
with the GUI
Save button
Configuration changes applied using the GUI can be saved as a configuration
file by clicking the Save button at the top of the sidebar menu. A pop-up Save
window gives you the option of saving to the current configuration file, to
another existing file, or to a new file. You can also choose to use this
configuration when the router restarts.
When the Save button is red, this indicates that changes have been made to the
configuration and not yet saved. If you attempt to exit the GUI without saving
the configuration, a pop-up window lets you choose whether or not to save it.
The configuration file you create with the GUI Save function records
passwords in encrypted form, not plaintext.
Troubleshooting Traffic Flow
If no traffic is passing through the router, or to or from the LAN, the DMZ or
both, try the following checks. Each check includes in parentheses how to find
relevant information in the GUI.
■
■
■
Check that the router’s link to the LAN is functioning by checking the
interface status (Monitoring) and whether the link LED is lit. If the LED is
not lit, or the appropriate interfaces do not have an “active” status, then:
•
Check that the port is enabled (Configuration > Port > Settings).
•
Check that the IP address of the interface is still valid.
•
Check that the cables are connected and functioning correctly.
If you are using RIP, check the RIP configuration (Configuration > Internet
Protocol > RIP) as follows:
•
Check that the RIP neighbour can reach the router, by pinging the
router from the RIP neighbour.
•
Check that password and authentication settings are configured on the
neighbour as well as on this router.
Check that the router is passing the correct DNS information to hosts on
the LAN if the router is a DHCP server. If the router is also acting as a
DHCP client, and therefore passing DNS information from another DHCP
server, check that this DHCP server is providing the router with the correct
information.
Software Version 2.8.1
C613-03119-00 REV A
Getting Started
1-7
Software Upgrades
Updates to the router’s software are available periodically. See the following
sections of Chapter 5, Managing Configuration Files and Software Versions.
For instructions and examples for upgrading software:
■
Upgrade Overview
■
Install Process
■
Example: Upgrading to new software
■
Example: Upgrading to a new patch file
■
Upgrading the GUI
For descriptions of the different types of software, see Software Upgrades and
Patches.
SNMP and MIBs
You can remotely monitor many features of the router using Simple Network
Management Protocol (SNMP). The router supports SNMP Version 1
(SNMPv1), SNMP Version 2c (SNMPv2c) and Version 3 (SNMPv3). For
information about SNMP and configuring SNMP, see Chapter 54, Simple
Network Management Protocol (SNMP).
For a description of all MIBs (Management Information Bases) and MIB objects
supported by the router, see Appendix C, SNMP MIBs.
The router’s Documentation and Tools CD-ROM contains the MIB files that are
supported by the router, including the Allied Telesis enterprise MIB. The
Allied Telesis enterprise MIB files includes atrouter.mib, and other files with
filenames beginning with “at”.
To Avoid Problems
Backup software
files
Store a backup of the current router software. If the router software is
accidentally cleared from the router’s flash memory, you must reload the
software files. If your access to the Internet is via the router, then you need the
files on your LAN. You may want to keep a copy of the current files on a TFTP
server on your network. You can download router software from
www.alliedtelesis.com/support/.
Backup
configuration script
Store a backup of the latest configuration script in case the configuration file on
the router is accidentally deleted or damaged.
Backup router
If your network has many routers, you may want to keep a backup router
ready in case one malfunctions. When you upgrade software on routers in the
network, upgrade the backup too. Store one current config script on the backup
for each router in your network, so that if a problem occurs you need only set
the configuration file with which it boots to match the router it replaces.
Software Version 2.8.1
C613-03119-00 REV A
1-8
AlliedWare OS Software Reference
Configure logging
The logging facility stores log messages for events with a specified severity in a
log file. You can change the size of the log file, and the type of messages
recorded. You can configure the router to output log messages in several ways,
for example to a remote router with a specified IP address, or as an email to a
particular email address. The router can also receive log messages from
another router. Set the Logging Facility to log and forward key messages to
your network (see Chapter 59, Logging Facility). Regularly inspect the log file,
especially when difficulties arise.
Configure firewall
Use the firewall to protect your network from several kinds of unwanted traffic
or deliberate attacks (see Chapter 45, Firewall).
The firewall facility is enabled with a special feature license. To obtain one,
contact an Allied Telesis authorised distributor or reseller.
Flash compaction
If flash memory fills to a certain level, it automatically compacts itself to
recover space available from deleted files. You can also activate flash
compaction manually if desired.
Caution While flash is compacting, do not restart the router or use commands
that affect the flash file subsystem. Do not restart the router, or create, edit, load,
rename, or delete files until a message confirms that flash file compaction is
complete. Interrupting flash compaction can damage files.
Watch for software
updates
Updates are released periodically to improve the function of your router
software and to add new features. Watch for these at
www.alliedtelesis.com/support/updates/.
Software Version 2.8.1
C613-03119-00 REV A
Getting Started
1-9
For More Information
Refer to the following chapters for details about operating the router, including
full command syntax:
Software Version 2.8.1
C613-03119-00 REV A
See this chapter...
For information about...
Chapter 2, Using the
Command Line Interface (CLI)
the command line interface, including how to set aliases
to represent common command strings.
Chapter 3, Using the
Graphical User Interface (GUI)
the Graphical User Interface, including supported
browser/OS combinations, detailed connection
instructions, troubleshooting, and an overview of features
and navigation.
Chapter 4, Configuring and
Monitoring the System
specifying global system parameters, configuring the
router to email alerts, and monitoring system
functionality.
Chapter 5, Managing
Configuration Files and
Software Versions
upgrading the router’s software, creating configuration
files, supported servers, and loading files onto the router.
This chapter also describes how to use LDAP, and load PKI
certificates and CRLs onto your router.
Chapter 6, Managing the File
System
creating and editing files, including the supported
memory types.
Chapter 40, User
Authentication
authenticating users who log onto the router and
ensuring that only authorised login accounts are used.
Options include the User Authentication Facility, RADIUS,
TACACs or TACACS+.
Chapter 42, Port
Authentication
802.1x port based network access control.
Chapter 43, Secure Shell
managing the router using SSH.
Chapter 54, Simple Network
Management Protocol
(SNMP)
and Appendix C, SNMP MIBs
and the MIBS folder on the
Documentation and Tools
CD-ROM.
using SNMP to manage the router remotely.
Chapter 56, Network Time
Protocol (NTP)
using NTP to synchronise your router’s time clock with
those of other network devices.
Chapter 57, Scripting
creating, deleting and modifying configuration scripts.
Chapter 58, Trigger Facility
setting up triggers to automatically run scripts at specified
times or events.
Chapter 59, Logging Facility
log messages about network activity, including filters to
select and display a subset of the results.
Chapter 64, Test Facility
using software to test whether the router’s hardware
functions correctly.
Appendix A, Messages
information and error messages that the router may
display.