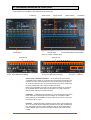
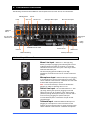
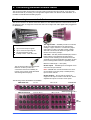
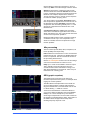
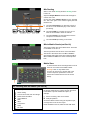
1
Check www.allen-heath.com for the latest firmware available Check www.allen-heath.com for the latest firmware available Publication AP9372 issue 1 Publication AP9372 Limited One Year Manufacturer’s Warranty This product is warranted to be free from defects in materials or workmanship for period of one year from the date of purchase by the original owner. To ensure a high level of performance and reliability for which this equipment has been designed and manufactured, read this User Guide before operating. In the event of a failure, notify and return the defective unit to the place of purchase. If this is not possible then please contact the authorised ALLEN & HEATH distributor or agent in your country as soon as possible for repair under warranty subject to the following conditions: Conditions Of Warranty The equipment has been installed and operated in accordance with the instructions in this User Guide. The equipment has not been subject to misuse either intended or accidental, neglect, or alteration other than as described in the User Guide or Service Manual, or approved by ALLEN & HEATH. Any necessary adjustment, alteration or repair has been carried out by an authorised ALLEN & HEATH distributor or agent. This warranty does not cover fader wear and tear. The defective unit is to be returned carriage prepaid to the place of purchase, an authorised ALLEN & HEATH distributor or agent with proof of purchase. Please discuss this with the distributor or the agent before shipping. If the unit is to be repaired in a different country to that of its purchase the repair may take longer than normal, whilst the warranty is confirmed and parts are sourced. Units returned should be packed to avoid transit damage. In certain territories the terms may vary. Check with your ALLEN & HEATH distributor or agent for any additional warranty which may apply. If further assistance is required please contact Allen & Heath Ltd. Qu Series products complies with the European Electromagnetic Compatibility directives 2004/108/EC and the European Low Voltage directives 2006/95/EC. Any changes or modifications to the equipment not approved by Allen & Heath could void the compliance of the product and therefore the users authority to operate it. Qu Mixer User Guide AP9372 Issue 1 Copyright © 2014 Allen & Heath. All rights reserved ALLEN&HEATH Allen & Heath Limited, Kernick Industrial Estate, Penryn, Cornwall, TR10 9LU, UK http://www.allen-heath.com Qu Mixer User Guide 2 AP9372 iss.1 IMPORTANT - Read these instructions before starting: Safety instructions Before starting, read the Important Safety Instructions printed on the sheets supplied with the equipment. For your own safety and that of the operator, technical crew and performers, follow all instructions and heed all warnings printed on the sheet and on the equipment panels. System operating firmware The function of the Qu mixer is determined by the firmware (operating software) that runs it. Firmware is updated regularly as new features are added and improvements made. The firmware version current when this guide was released is noted in the Contents section. The latest firmware can be downloaded from the Allen & Heath website, transferred to USB key and then loaded into the Qu mixer using the Firmware Update utility. Check the Allen & Heath website for the latest version of Qu firmware. Software licence agreement By using this Allen & Heath product and the software within it you agree to be bound by the terms of the relevant End User Licence Agreement (EULA), a copy of which can be found on the Allen & Heath website in the product's pages. You agree to be bound by the terms of the EULA by installing, copying, or using the software. Further information Please refer to the Allen & Heath website for further information, knowledgebase and technical support. You can join our Allen & Heath Digital Community to share knowledge and information with other Qu users. General precautions To prevent damage to the controls and cosmetics, avoid placing heavy objects on the control surface, obstructing movement of the motorised faders, scratching the surface or touch screen with sharp objects, or rough handling and vibration. Protect the equipment from damage through liquid or dust contamination. Avoid dust or small objects getting into the fader slots. Cover the mixer when it is not being used for a long period. Computer and touch screen technology can be affected by extreme cold. If the equipment has been stored in sub-zero temperatures allow time for it to reach normal operating temperature before use at the venue. Recommended operating temperature for Qu is 5 to 35 degrees Celsius. Avoid using the equipment in extreme heat and direct sunlight. Make sure the mixer ventilation slots are not obstructed and that there is adequate air movement around the equipment. Transport the Qu using a touring grade, purpose designed flightcase with adequate foam lining and internal support for protection. Clean the control surface with a soft brush and dry lint-free cloth. Do not use chemicals, abrasives or solvents. It is recommended that servicing is carried out only by an authorised Allen & Heath agent. Contact details for your local distributor can be found on the Allen & Heath website. Allen & Heath do not accept liability for damage caused by maintenance, repair or modification by unauthorised personnel. Qu Mixer User Guide 3 AP9372 iss.1 1. Packed contents Qu Mixer User Guide AP9372 Safety Sheets AP3345 – English AP7287 – French AP8513 – Chinese Mains lead • Check this is correct for your territory • Read this before starting Options and Accessories available Remote AudioRacks Provides remote audio over dSNAKE Cat5 cable digital snake. AR2412 24 Mic/Line in, 12 Line out AR84 8 Mic/Line in, 4 Line out Part: GLD-AR2412 Part: GLD-AR0804 19” Rack Ear Kit for Qu-16 To mount the Qu-16 in a standard 19” rack or flightcase. These fit over the plastic trims. LEDlamp Right angled 4-pin XLR LED lamp with built-in dimmer Part: QU-16-RK19 Part: LEDlampX Qu Cat5 cables For use with dSNAKE remote audio Soft cover AP9262 Qu-16 AP9458 Qu-24 Qu-Pad app for iPad Available from the Apple Store AH8822 2m (6.6’) short patch AH7000 80m (264’) drum AH8721 120m (396’) drum REGISTER YOUR PRODUCT Register online at: http://www.allen-heath.com Qu Mixer User Guide 4 AP9372 iss.1 2. Contents 1. Packed contents ................................................................................................................................. 4 2. Contents .............................................................................................................................................. 5 3. Introduction ......................................................................................................................................... 7 3.1 Overview and Features .............................................................................................................. 7 3.2 System Architecture and Processing ........................................................................................ 8 3.3 Differences between the Qu-16 and Qu-24 ............................................................................... 9 4. Connection Overview........................................................................................................................ 10 4.1 Local Input Connections .......................................................................................................... 10 4.2 Local Output Connections ....................................................................................................... 11 4.3 Other Connections ................................................................................................................... 11 4.4 Powering up the mixer ............................................................................................................. 12 5. Connecting dSNAKE Remote Audio ................................................................................................ 13 5.1 Connecting to a remote AudioRack ........................................................................................ 13 5.2 Qu-16 and Qu-24 Systems ...................................................................................................... 14 5.3 Connecting to the ME Personal Mixing System ...................................................................... 15 6. Operational Overview ....................................................................................................................... 16 6.1 Fader Strips .............................................................................................................................. 16 6.2 Channel Processing ................................................................................................................. 18 6.3 Working with the Processing: .................................................................................................. 18 6.4 Working with Processing Libraries: ......................................................................................... 18 6.5 Processing Libraries ................................................................................................................ 23 6.6 Channel Routing ...................................................................................................................... 24 6.7 Working with the Routing screens:.......................................................................................... 24 6.8 Working with the Groups (not Qu-16) ..................................................................................... 25 6.9 Working with the Matrix (not Qu-16) ........................................................................................ 26 6.10 Mute Groups ............................................................................................................................ 27 6.11 Using the Mute Groups............................................................................................................ 27 6.12 The Master Strip ....................................................................................................................... 28 6.13 Working with the sends on faders: .......................................................................................... 29 7. Touch Screen Mixing Functions ....................................................................................................... 30 7.1 Copy, Paste, Reset keys .......................................................................................................... 31 7.2 The Sel screens – Processing and Routing ............................................................................ 32 7.3 Home Screen ........................................................................................................................... 32 7.4 Home Screen – Changing User............................................................................................... 32 7.5 Home Screen – Meters ............................................................................................................ 33 7.6 Home Screen – RTA ................................................................................................................ 33 7.7 Home Screen – Qu-Drive (USB audio) .................................................................................... 33 7.8 The FX ...................................................................................................................................... 36 7.9 Working with FX – Adding vocal reverb: ................................................................................. 38 7.10 8. Scene Memories ...................................................................................................................... 39 Touch Screen Setup Functions ........................................................................................................ 41 8.1 Audio Setup -PAFL................................................................................................................... 41 8.2 Audio Setup - Talkback ........................................................................................................... 41 8.3 Audio Setup –Signal Generator ............................................................................................... 42 8.4 Control Setup – Custom Strip .................................................................................................. 42 8.5 Control Setup - SoftKeys ......................................................................................................... 43 8.6 Control Setup - Network .......................................................................................................... 44 Qu Mixer User Guide 5 AP9372 iss.1 8.7 Control Setup - MIDI ................................................................................................................ 44 8.8 USB Data – Scene Transfer ..................................................................................................... 45 8.9 USB Data – Library transfer ..................................................................................................... 45 8.10 USB Data – Show transfer ....................................................................................................... 46 8.11 Output Patch Setup – Surface ................................................................................................. 47 8.12 Output Patch Setup – dSNAKE ............................................................................................... 47 8.13 Output Patch Setup - Monitor .................................................................................................. 48 8.14 Output Patch Setup – USB Audio ............................................................................................ 49 8.15 Utility - Calibration .................................................................................................................... 49 8.16 Utility – Qu-Drive ...................................................................................................................... 50 8.17 Utility – Firmware Update ......................................................................................................... 51 9. Working with a DAW ......................................................................................................................... 52 10. Qu-Pad iPad app .............................................................................................................................. 53 11. Resetting the Mixer ........................................................................................................................... 54 12. 11.1 Reset Mix Settings – A starting point for mixing ...................................................................... 54 11.2 System Hard Reset .................................................................................................................. 55 Specifications .................................................................................................................................... 56 12.1 Qu-16 System Block Diagram ................................................................................................. 57 12.2 Qu-24 System Block Diagram ................................................................................................. 58 12.3 Mechanical Details ................................................................................................................... 59 About this guide This is the User Guide for the Allen & Heath Qu-16 and Qu-24 digital mixers. Please Note This guide refers to Qu firmware V1.3. A few features are not supported by this release. Please refer to the Allen & Heath website for the latest version of firmware and this user guide. For more details read the Release Notes available with the firmware. Features not supported by this version: FX User Libraries Per Scene Recall Filters User Permissions Note – USB streaming and DAW MIDI control is compatible with Apple® Mac computers only. Windows® PC is not supported. Qu Mixer User Guide 6 AP9372 iss.1 3. Introduction 3.1 Overview and Features Building on the heritage of the GLD and flagship iLive digital consoles, the Qu presents exceptional performance together with an intuitive analogue style user interface with a motorised fader per channel, knobs and touch screen, total recall of all settings, full input, output and FX processing, USB streaming and hard drive multitrack recording, digital snake capability and remote wireless control using an iPad. There are two models in the Qu Digital Audio Mixer Series: Qu-16 – Compact, rack mountable mixer with 16 mic and 3 stereo line channels. Qu-24 – Larger mixer with 8 more mic channels, 2 more FX sends, 6 more assignable SoftKeys, and adding 2 stereo groups and 2 stereo matrix. Qu-16 Qu-24 16 mono Mic/Line channels 24 mono Mic/Line channels 3 stereo Line channels 3 stereo Line channels 24 sources to the mix 32 sources to the mix 12 mixes (4 mono, 3 stereo, LR) 12 mixes (4 mono, 3 stereo, LR) 4 FX with 2 FX send buses 4 FX with 4 FX send buses 4 assignable SoftKeys 10 assignable SoftKeys 4 Mute Groups 4 Mute Groups 24 out, 22 in USB streaming 32 out, 30 in USB streaming 2 stereo Groups 2 stereo Matrix Qu-16 and Qu-24 Extra stereo outputs – AES digital, Alt Out, 2TRK out Talkback mic input dSNAKE for remote audio using an AR2412 or AR84 AudioRack AnaLOGIQ™ total recall analogue preamps Effects ported from the flagship iLive console Dedicated stereo FX return channels Master strip for quick access to mix levels and processing Input channel linking for stereo sources Input processing – Preamp, HPF, Gate, PEQ, Compressor, Delay Output processing – PEQ, Graphic EQ, Compressor, Delay 800x480 pixel colour touch screen for quick control Motorised faders for sends on faders, GEQ fader flip and mix recall Quick copy and reset of settings and scenes 100 Scene memories Scene Recall Filter and channel Safes Channel processing User Libraries Qu-Drive for stereo and 18-track recording/playback to USB hard drive USB streaming to/from an Apple® Mac computer (PC not supported) MIDI DAW Control driver for Mac (converts to HUI or Mackie Control) USB transfer of Scenes, Libraries, Shows User assignable Custom Layer Qu-Pad wireless remote app for iPad Compatible with the Allen & Heath ME personal mixing system User Permissions to restrict operator access (Not available in V1.3) Qu Mixer User Guide 7 AP9372 iss.1 3.2 System Architecture and Processing The following diagrams show the Qu-16 and Qu-24 I/O (inputs and outputs), audio architecture and processing available. The differences between the models and the routing capability of each processing section is illustrated. Refer also to the more detailed System Block Diagrams at the rear of this guide. Qu-16 SYSTEM DIAGRAM Mic/Line Inputs 1 ---------- 16 PREAMP GAIN 48V Mic Line Cat5 Digital Snake to AudioRack dSNAKE Line Inputs ST2 L/M ST3 ST1 L/M Playback LR, 18 trk Qu-Drive USB B L/R R Stream 22 ch R Local Inputs GATE PEQ COMP DELAY MUTE PAFL FADER L PAN L R R Local Outputs LR post Route to: DELAY PAFL Output PATCH PAFL MONITOR RTA LR MIX Sends FX Sends DIR OUT ASSIGN R PRE/POST SENDS Alt Out L Mix Input Channels 1-16, ST1-3 HPF Mix 1-----------10 Main LR USB dSNAKE Inputs AES Out 2Trk Stream 24 ch dSNAKE USB Channel SOURCE TRIM POL Insert FX 0 Line Outputs Record LR, 18 trk PFL TRIM PHONES PAFL FX FX Send 1-2 MUTE FX Return 1-4 Insert FADER ASSIGN PRE/POST SENDS PEQ FX 1-4 MUTE FADER L PAN PAFL ASSIGN R PRE/POST SENDS GAIN Mic HPF LR MIX Sends FX Sends Insert FX TALK ASSIGN SIG GEN Sine LEV Pink MUTE ASSIGN White Bandpass Mic Line PREAMP GAIN 48V L/M Playback LR, 18 trk Stream 30 ch Local Inputs Main LR Qu-Drive USB B GATE PEQ COMP DELAY GEQ COMP DELAY Route to: PAFL MUTE FADER Outputs Output BAL L R Line Outputs Grp 1---4 Mix 1---------------10 Main LR MTX 1---4 Stream 32 ch USB dSNAKE Outputs MUTE PAFL FADER L PAN ASSIGN PRE/POST SENDS R AES Out 2Trk L L R R Masters Group 1-2, 3-4 Route to: GRP LR MIX Sends FX Sends DIR OUT Insert FX PEQ Alt Out Local Outputs Mix Input Channels 1-24, ST1-3 HPF PEQ Record LR, 18 trk dSNAKE USB Inputs TRIM POL Insert FX 0 FADER Cat5 Digital Snake to AudioRack R Channel SOURCE MUTE LR MIX L/R R DELAY dSNAKE Line Inputs ST2 L/M ST3 ST1 COMP Route to: PAFL Output BAL L R Route to: SYSTEM DIAGRAM Mic/Line Inputs 1 ---------- 24 GEQ LR MIX Insert FX Qu-24 PEQ Route to: TALKBACK Talkback Mono 1-4, Stereo 5-6, 7-8, 9-10 Mix Route to: GEQ COMP DELAY MUTE FADER L PAN LR post Output PATCH PAFL Output BAL L R Route to: R ASSIGN PRE/POST SENDS Outputs LR MIX Sends FX Sends MTX Sends FX FX Send 1-4 MUTE FX Return 1-4 Insert FADER ASSIGN PRE/POST SENDS PEQ FX 1-4 MUTE FADER RTA DELAY PAFL MONITOR PFL TRIM PHONES PAFL ASSIGN R PRE/POST SENDS TALKBACK Talkback Mic L PAN PAFL GAIN HPF TALK ASSIGN SIG GEN Sine LEV Pink MUTE ASSIGN White Bandpass Mono 1-4, Stereo 5-6, 7-8, 9-10 Mix Route to: GRP LR MIX Sends FX Sends Route to: GRP LR MIX MTX PEQ GEQ COMP DELAY MUTE FADER Main LR Insert FX PEQ GEQ Route to: GRP LR MIX MTX COMP DELAY 8 Insert FX PEQ GEQ COMP DELAY ASSIGN PRE/POST SENDS PAFL MUTE FADER Matrix 1-2, 3-4 PAFL Qu Mixer User Guide Insert FX PAFL Output BAL L R MUTE FADER Output BAL L R ASSIGN PRE/POST SENDS PAFL Output BAL L R Route to: Outputs MTX Sends Route to: Outputs MTX Sends Route to: Outputs ASSIGN PRE/POST SENDS AP9372 iss.1 3.3 Differences between the Qu-16 and Qu-24 Both models operate in the same way and have a similar touch screen menu structure. The larger model adds Groups and Matrix. Other differences are shown here: 4 SoftKeys Shelf for iPad 16 fader strips Group masters 24 fader strips Matrix masters 10 SoftKeys Extra FX Send and Group Mix select LED colour strips to identify layer 16 Mic/Line in 24 out, 22 in USB audio streaming 24 Mic/Line in 32 out, 30 in USB audio streaming Group out Scene, Library and Show memories - Qu-16 and Qu-24 memories are compatible. Files created on one model can be transferred via USB key and loaded on the other. The extra features of the Qu-24 will be ignored when a Qu-24 file is loaded on a Qu-16. The extra features of the Qu-24 will be reset to factory default when a Qu-16 file is loaded on a Qu-24. Note To be compatible, ensure all your Qu mixers including Qu-16 and Qu24 are loaded with the same version of firmware V1.3 or later. Check the Allen & Heath web site for the latest firmware. USB Audio - A USB hard drive formatted on one model can be used on the other. Stereo and multitrack Qu-Drive recordings are compatible. USB B audio streaming is compatible, but note that the Qu-16 is 24 out / 22 in, and the Qu-24 is 32 out / 30 in. Firmware - Different firmware is needed for each model. Choose either the Qu-16 or Qu-24 file when downloading firmware from the Allen & Heath web site. The firmware version number will be the same for each update that is made available. The procedure for updating firmware is the same for both models. Qu Mixer User Guide 9 AP9372 iss.1 Matrix out 4. Connection Overview The following connections are available on the rear panel of the Qu mixer. The Qu-16 is shown here. AES digital out Lamp Alt out 2Trk out LR main out Analogue Mix outputs Mic and Line inputs Talkback Mic in ST1 and ST2 stereo line in Kensington Lock Cable clamp dSNAKE remote audio Power On/Off Network USB B streaming Mains fuse Mains power input 4.1 Local Input Connections Mono Line Input – Balanced ¼” TRS (Tip, Ring, Sleeve) jack input for plugging in line level signals such as multitrack players and radio mic receivers. To work with unbalanced sources use a mono jack or link ring to sleeve within the TRS stereo jack. Use DI boxes plugged into the Mic input for high impedance, low level sources such as acoustic instrument pickups. Pin2 = hot Microphone Input – Balanced XLR input for plugging in a low level source such as a microphone or DI box. 48V can be switched to the socket for condenser mics and active DI boxes that require phantom power. Note - To avoid loud thumps, mute the channel before plugging in cables or switching 48V on or off. Stereo Line Input – ST1 and ST2 balanced ¼” TRS (Tip, Ring, Sleeve) jack inputs for plugging in line level stereo sources such as CD players. The L input normals (switches) through the R input so that you can work with a mono source by plugging into just the L/M input. To work with RCA phono connections use jack to RCA converter plugs. Talkback Input – Dedicated balanced XLR input for plugging in a microphone to route to the mixes for the engineer to talk to the performers on stage. Phantom power can be switched to the socket for condenser microphones. Qu Mixer User Guide 10 AP9372 iss.1 4.2 Local Output Connections Group, Mix, Matrix outputs – Balanced XLR line level outputs for the mono and stereo mixes, for example to feed monitor amplifiers, external processing devices, delay fill speaker systems and recording devices. These use low impedance, high quality differential driver circuits for connection to +4 or 0dBu equipment. Maximum output is +22dBu. Pin2 = hot Professional equipment provides ‘balanced’ connections for maximum interference rejection over long cable runs. If you are connecting to ‘unbalanced’ equipment then make sure the XLR pin 3 (signal cold) is linked to pin 1 (signal ground). Main LR output – Balanced XLR line level outputs for the main Left and Right stereo mix. These typically plug into the FOH speaker processor, amplifier or powered speakers. AES output – 2-channel digital output using a single XLR connection and standard mic (2-core screened) audio cable. It follows the AES (Audio Engineering Society) digital audio standard and can connect to any equipment fitted with an AES input socket. The source to this output is patched using the Setup / Audio / Output Patch screen. Applications include the feed to a PA speaker processor, amplifier, stereo broadcast or recording device equipped with AES input. Alt out – Stereo ‘alternative’ output on balanced TRS jacks for connection to +4 or 0dBu equipment such as zone feeds, fill speakers, broadcast or local monitor. The source to this output is patched using the Setup / Audio / Output Patch screen. 2TRK out – Stereo output on balanced TRS jacks for connection to +4 or 0dBu equipment such as stereo recorders. It follows the post master fader main LR mix. 4.3 Other Connections Lamp – Plug in a 4-pin gooseneck lamp to illuminate the mixer surface. You can use any industry standard 12V, 5W or lower power lamp. We recommend the Allen & Heath LEDLamp with built-in thumbwheel dimmer. USB B – Type B USB connection for multi-channel bi-directional audio streaming between the mixer and a computer. Follows the high speed USB 2.0 standard. Qu supports DAW connection to an Apple Mac only. Windows PC drivers are currently not available. Network – Fast Ethernet (100 Mbit/s) port for Cat5 cable connection to a computer for MIDI over TCP/IP control of mixer parameters, or to a wireless router (access point) for live mixing control using the Allen & Heath Qu-Pad app running on an iPad. The Lnk indicator flashes to indicate network activity. dSNAKE – The proprietary Allen & Heath ‘digital snake’ connection for remote audio using an AR2412 or AR84 AudioRack, and for personal monitoring using the ME Personal Mixing System. Qu Mixer User Guide 11 AP9372 iss.1 4.4 Powering up the mixer The Qu mixer has an internal universal voltage power supply unit. This means you can use your mixer in most parts of the world without the need to modify the unit as long the local mains supply is within the range: Mains Voltage = 100 to 240 V.AC Mains Frequency = 47 to 63Hz Important - Before starting, read the Safety Instructions Sheet packed with the mixer. These can also be downloaded from the Allen & Heath website. Also read the safety notes printed on the rear of the mixer. AC MAINS IN – Standard IEC socket for connecting the mixer to the local mains supply. Plug in a mains lead with moulded plug suitable for your territory. A suitable mains lead is shipped with the mixer. Note – Do not replace the mains plug or modify the lead in any way. For your own safety and that of the operator and performers do not remove or defeat the ground connection. A cable clamp is provided. You can slot the cable into this or lock it in place. To lock the cable use a star head Torx T20 screwdriver to refit the clamp around the cable. Fuse – Mains input fuse to protect the mixer circuits in the unlikely event of a failure or excessive power surge. If you need to replace the fuse always use one of the same type and rating as printed on the rear panel. If the replacement fuse blows then refer to your authorised Allen & Heath service agent for advice. Power ON/OFF switch – Press to switch the mixer on. Press again to switch it off. Switching the mixer on – Press the ON/OFF switch. The rear panel blue Power indicator lights. The mixer takes just a few seconds to boot up. It restores its previous settings. CH1 is selected and its processing shown on the screen. Note – To avoid loud thumps, do not switch the mixer on or off while the PA speakers are powered. Always switch the amplifiers on last, and switch them off first. Switching the mixer off – First select the Home screen. Touch Shut Down to safely complete processes such as parameter storing and USB data transfer or recording. Once complete, press the ON/OFF switch to turn the mixer off. Qu Mixer User Guide 12 AP9372 iss.1 5. Connecting dSNAKE Remote Audio The Qu mixer provides local sockets on its rear panel for all audio inputs and outputs. It can also work with remote audio by connecting over a single cable ‘digital snake’ to an Allen & Heath AudioRack, or to the Allen & Heath ME Personal Mixing System. 5.1 Connecting to a remote AudioRack The Qu can connect to an Allen & Heath GLD-AR2412 or GLD-AR84 AudioRack so that the audio can be plugged into a rack on stage and routed to the mixer over a single Cat5 cable ‘digital snake’ plugged into its dSNAKE port. dSNAKE carries: Up to 30 remote input signals Up to 16 remote output signals 40 personal mixing sends Preamp control – Gain, Pad, 48V The ‘digital snake’ – dSNAKE provides a convenient, single Cat5 cable alternative to the typical heavy analogue copper multicore to connect many inputs and outputs on stage. One cable carries multiple channels of audio in both directions together with remote control of the preamps. Cat5 cable – Use STP (shielded twisted pair) Cat5e or higher cables. Those with both foil and braided screens provide shielding from interference and are generally more rugged. Stranded core cables are less prone to damage when kinked or repeatedly coiled. Maximum cable length = 120m (396’) The Qu mixer provides a locking Neutrik EtherCon socket to protect the connections and ensure suitability for touring. Use a touring grade cable fitted with locking EtherCon plugs. Remote Inputs - dSNAKE inputs are mapped one-toone to the Qu input channels. Note - dSNAKE does not add channels to the mixer. Choose either Local (rear panel) or dSNK (remote) input for each channel. Remote Outputs - Qu mix and LR outputs are mapped to the output sockets on the AR rack. These duplicate the outputs on the Qu-16 rear panel. The following remote AudioRacks are available: AR84 main rack CH 1-8 AR2412 main rack CH1-16, ST1-3 Mix 1-2, LR Mix 1-10, LR dSNAKE link AR84 expander or ME-1 ME-1 Monitor Qu Mixer User Guide 13 AP9372 iss.1 5.2 Qu-16 and Qu-24 Systems The Qu mixer has sockets for all its inputs and outputs on its rear panel and can therefore be used without any additional rack. However, if you wish to use a digital snake to connect remote stage audio to the mixer using a single Cat5 cable then there are several rack options available. CH1-8 Inputs – Use the Preamp screen to choose either ‘Local’ or ‘dSNK’ (remote) for each channel source. Adding a rack does not expand the number of Qu channels available. Mix1-2, LR AR84 dSNAKE Qu-16 Outputs – The Qu outputs will appear simultaneously at its rear panel sockets and also at the sockets on the remote rack. The mixes mapped to the rack sockets are shown in the diagrams here. Qu-16 + AR84 AudioRack CH1-16, ST1-3 Mix1-10, LR Remote Mic/Line inputs are available for CH1 to 8. AR2412 dSNAKE Qu-16 Mix1, 2 and the main LR mix are available from rack sockets 1-4. This compact setup is ideal for a band, corporate event or small club using a stereo PA and two monitor mixes. Qu-16 + AR2412 AudioRack CH1-8 Remote Mic/Line inputs are available for all channels including mono CH1-16 and stereo ST1-3. Left and right of the stereo channels use rack sockets 17-22. Rack sockets 23-24 are not used. Mix1-2, LR AR84 dSNAKE Qu-24 The EXPANDER socket is not used for audio I/O, but can also be used to connect to a ME monitor system. All Qu-16 mixes including Mix1-10 and LR are available from rack sockets 1-12 (L=11, R=12). Qu-24 + AR84 AudioRack Remote Mic/Line inputs are available for CH1 to 8. CH1-24 Mix1-10, LR AR2412 dSNAKE Qu-24 Mix1, 2 and the main LR mix are available from rack sockets 1-4. This setup is ideal for a band, corporate event or small club where you are using just a few remote inputs and a stereo PA with two monitor mixes. Qu-24 + AR2412 AudioRack Remote Mic/Line inputs are available for all mono channels CH1-24. ST1-3 Mix1-10 and LR are available from rack sockets 1-12 (L=11, R=12). MTX1-4 AR84 CH1-24 Mix1-10, LR EXPANDER AR2412 dSNAKE Qu Mixer User Guide Qu-24 Qu-24 + AR2412 + AR84 AudioRacks Remote Mic/Line inputs are available on the AR2412 for all mono channels CH1-24. ST1-3 inputs are available on an AR84 plugged into the AR2412 EXPANDER port. Mix1-10 and LR are available from AR2412 rack sockets 1-12 (L=11, R=12). MTX1-2 and 3-4 outputs are available on an AR84 plugged into the AR2412 EXPANDER port. 14 AP9372 iss.1 5.3 Connecting to the ME Personal Mixing System The Allen & Heath ME Personal Mixing System can be used with the Qu mixer. This provides customisable personal monitor control for individual musicians and performers on stage. ME-1 personal mixer – A compact personal mixer able to work with up to 40 channels. Features built-in headphones and monitor output. Intuitive and easy to operate, its 16 select keys can be configured to provide as much or as little control as the musician needs. The 40 ME channels are mapped from the Qu input channel direct outputs, FX and mixes to dSNAKE. These can be chosen and grouped to ME-1 keys using the setup function available on the ME-1 mixer. Multiple ME-1 mixers can be connected in series (daisy chained) by linking the output of one to the input of the next. Alternatively, they can be connected in parallel and powered over their Cat5 cables using a standard PoE Ethernet switch or the Allen & Heath ME-U hub. The ME connects directly to a dSNAKE compatible port using a Cat5 cable. Connecting ME to the AR2412 AudioRack - ME-1 mixers, a standard Ethernet switch or the ME-U hub can be plugged into either or both the AR2412 MONITOR and EXPANDER ports. Power unit Daisy chain MONITOR port EXPANDER port dSNAKE Connecting ME to the Qu mixer - ME-1 mixers, a standard Ethernet switch or the ME-U hub can be plugged directly into the Qu dSNAKE port if you are not using this to connect to an AudioRack. Power can be provided over the Cat5 by the ME-U or a PoE switch. Daisy chain other ME-1 dSNAKE Find out more about the ME Personal Mixing System at www.allen-heath.com Qu Mixer User Guide 15 AP9372 iss.1 6. Operational Overview This section provides an overview of the Qu layout and operation to help you get started quickly. The smaller Qu-16 is shown here. Touch Screen SuperStrip TouchChannel Screen select Qu-Drive Fader Flip Engineer’s monitor Copy/Paste/reset Function key Mix assign SoftKeys Layer select Master Strip Fader Strips Mix select Mix keys Channel select Sel key 6.1 Fader Strips The Qu has a group of fader strips, one per channel. These provide access to the input and master channel levels and processing. The main channel levels, master levels and all sends to the FX and mixes can be easily viewed and adjusted using the faders. The faders can also be used to adjust the Graphic EQ while in Fader Flip mode. The faders are motorised and instantly move to show the current settings when the layer or function is changed. Layers – There are three Layers. These provide access to inputs and masters as identified by the labels alongside the layer select keys. Indicators next to the keys show which layer is active. Press the lower key to access the mono channels. Press the upper key to access the 3 stereo channels, FX returns, FX sends and Mix masters. Press both keys together to access the user assignable Custom layer. Qu Mixer User Guide 16 AP9372 iss.1 Mute key – Press to turn off the channel audio signal. This affects the send to all mixes including LR, groups, effects and stage monitors. The Mute key lights red when the channel is muted. It flashes when it is muted by a Mute Group master. Sel key (select) – Press to access the Channel Processing. Parameters can be adjusted using the SuperStrip controls. The touch screen will display the settings and provide additional controls if either the Processing or Routing screen is active. The Sel key is also used for: Assign mix routing – Hold down the ‘Assign’ key and press Sel keys to assign channels to the mix currently selected in the Master Strip. The Sel keys light green to show channels assigned to the selected mix. Assign Pre/Post fade sends – Hold down the ‘Pre Fade’ key and press Sel keys to toggle channel sends pre or post fader for the mix currently selected in the Master Strip. The Sel keys light green to show channels set pre-fade. Copy channel processing – Hold down the Copy key and press a channel Sel key to copy its processing settings. Then hold down the Paste key and press one or more Sel keys to instantly paste those settings to other channels. Reset channel processing – Hold down the Reset key and press a channel Sel key to instantly reset all its processing to factory default. Reset Graphic EQ band – Press Sel to reset the associated GEQ frequency band to 0dB while in GEQ Flip mode. PAFL key – Press to listen to a channel using headphones and check its level on the main meters. The meter PAFL indicator lights. Press PAFL again to turn it off. A SoftKey can be assigned to clear all active PAFL selections. Options are available in the Setup screen to choose how you want PAFL to work: Auto-cancel – Listen to one channel at a time. Additive mode – Listen to more than one channel at a time. Sel follow PAFL – Link the Sel switch so that pressing PAFL automatically selects the processing for that channel. LR to PAFL – Routes the main LR mix to the monitor when there is no PAFL selected. Output AFL – This option sets the mix strip PAFL keys to monitor AFL (afterfade listen). With this option turned off these keys monitor PFL (pre-fade listen). The default is AFL so that you can check mixes after the master fader. Input AFL – This option sets the input strip PAFL keys to monitor AFL (afterfade listen). With this option turned off these keys monitor PFL (pre-fade listen). PFL is the usual setting for inputs so that you can check and set their gain before you bring up the faders. Channel meter – The strip meters let you keep an eye on signal levels while you are mixing. These display channel level before the fader and mute control: Pk – Lights red to warn that the signal is too hot and gain or trim should be reduced. It turns on 3dB before clipping to warn you before audible distortion. Pk senses the signal at several points within the channel. 0 – Lights when the signal reaches nominal 0dBu allowing a healthy 18dB headroom. This is the normal level for mixing. Sig – Lights to show signal presence. It turns on at -26dBu. Fader – Controls the level of the input channel, FX or mix master assigned to it. This can be the main channel fader or a send to an effect or mix depending on which Mix Select key is active in the Master Strip. The faders can control the Graphic EQ frequency bands while in GEQ Flip mode with a mix master Sel key active. The range of frequencies accessed by the faders is highlighted in the touch screen and labelled at the top of the faders. The centre 0dB flat position is marked on the fader scale. Qu Mixer User Guide 17 AP9372 iss.1 6.2 Channel Processing The SuperStrip provides familiar, analogue feel, one function per knob control of channel and mix master processing such as equalisers and dynamics. The Touch Screen displays the parameter values and provides additional related controls while in the Processing screen. This processing is accessed using the fader strip Sel keys. The following processing is available: Mono input CH Stereo input ST1-3 FX Return 1-4 Grp1-4 (not Qu-16) Mix1-10, LR MTX1-4 (not Qu-16) = Source, Preamp, HPF, Gate, PEQ, Compressor, Delay, Stereo Linking = Source, Preamp, HPF, Gate, PEQ, Compressor, Delay = FX parameters, PEQ = Parametric EQ, Graphic EQ, Compressor, Delay = Parametric EQ, Graphic EQ, Compressor, Delay = Parametric EQ, Graphic EQ, Compressor, Delay 6.3 Working with the Processing: Press a fader strip Sel key. The Processing Block controls become active for that channel. Press the Processing key to work with the parameters on the Touch Screen. Touch the top part of the Touch Screen to open the tabs for the available processing blocks. View values in the lower part of the screen. Touch screen buttons and use the screen rotary to adjust parameter values. 6.4 Working with Processing Libraries: Qu Mixer User Guide Press the ‘Library’ Fn key to open and close the related Library page. Use the left hand list for individual processing libraries or the right hand list for complete input channel processing libraries including the preamp. Store - Touch ‘Store New’. Enter a name using the screen keypad to store a new User Library. You can store up to 128 Libraries. Recall - Highlight a library item and touch ‘Recall’ to instantly recall its settings. Turn on ‘Recall Preamp’ if you want to recall the preamp settings. Edit – Highlight a library item and touch ‘Overwrite’ to overwrite an existing library with the current settings, or ‘Delete’ to delete it from the list. Touch the ‘Name’ box to edit its name. 18 AP9372 iss.1 Preamp An analogue preamplifier (‘head amp’) matches each connected microphone or line signal to the operating level of the console before it gets converted to digital to be processed and mixed with the other channels. Source lets you choose one of four sources as the input to the channel: Local – Mic/Line sockets on the Qu rear panel. dSNK – Remote preamps via dSNAKE. Qu-Drv – Playback from USB hard drive. USB B – Audio streaming from a Mac computer. Press the Fn key to open the Source Select screen. Touch the CH buttons to highlight those you wish to change. Select the source from the list. Choose either Qu-Drive or USB (affects all channels) Local (red Gain) dSNAKE (yellow Gain) Channel Preamp source Local (red Gain) – Rear panel Mic/Line sockets feeding the internal Qu mixer preamps. These are padless preamps featuring wide gain range. dSNAKE (yellow Gain) – Remote preamps located in an AR2412 or AR84 AudioRack on stage or other remote location and connected to the Qu dSNAKE port via a Cat5 cable. The AudioRack preamps include 20dB Pad switching. Qu-Drive (dark blue Gain) USB B (Light blue Gain) Channel USB source Qu-Drive source (blue Gain) – Stereo or multitrack playback from a USB hard drive plugged into the top panel Qu-Drive port. Provides a +/-24dB Trim control. USB B source (blue Gain) – Multi-channel streaming from a Mac computer via the rear panel USB B port. Provides a +/-24dB Trim control. The panel USB Select key in the SuperStrip switches between the current Preamp source (Local or dSNAKE) and the current USB source (Qu-Drive or USB B). Phantom Power Turn on 48V if the connected device requires phantom power, for example a condenser microphone or active DI box. Touch and hold for 1 second to toggle on or off. This prevents accidental operation. Gain Qu Mixer User Guide Note - To prevent audible thumps make sure the channel is muted before switching 48V on or off. 19 AP9372 iss.1 Peak Gain Turn up Gain so that the average loud signal reads into the yellow of the meter. Turn down if any red peak light flashes. Polarity Touch Ø to reverse the polarity of the input signal, for example that of the lower mic when working with two microphones on a snare drum. Other functions in the Preamp section Insert switches an internal FX in or out if one has been patched into the channel. The button is disabled when the insert is not patched. The FX is inserted between the preamp and EQ. Use the FX / Back panel screen to choose and assign one of the 4 internal FX as an Insert into a channel. Post-Preamp Gain/Trim Insert Pre-EQ HPF GATE Post-EQ PEQ COMP Post-All DELAY 0 Delay up to 85ms can be added to each input channel. In most cases delay is not needed, but can be useful in time aligning sound from the PA to the acoustic sound from an instrument on stage. Allow 1ms per foot distance as a starting point. Linking lets you gang the preamp, processing and routing of an odd/even mono channel pair for stereo operation. All parameters including the preamp, processing and routing are linked. Pan becomes a width control when linked. Some parameters can be removed from the link using the buttons: Preamp – Gain/Pad/48V, Polarity Dynamics (Compressor and Gate) - Side Chains Main mix – Fader/Mute, Pan Touch Apply to accept your changes. Gate The Noise Gate can be switched in to dynamically turn off the audio when it drops below a certain level. For example, to reduce resonant decay of a kick drum or floor tom, or hiss of a noisy keyboard. Use the In key to switch the Gate in or out. This is similar to inserting an outboard rack mounted device into the Insert socket on an analogue console channel. Set Depth for how much signal reduction you want when the gate closes. 20dB is a typical setting. Sound check the instrument and reduce Threshold to shut off as much of the tail of the signal as you want. The GR indicator lights and red screen meter shows the amount of reduction when the gate is closed. Gate active GR = Gain Reduction Qu Mixer User Guide Hold sets how long the gate remains open after dropping below the threshold. Attack sets how fast the gate opens when the signal rises above the threshold. Release sets how fast it closes when dropping below the threshold. Experiment with these controls to achieve smooth operation without a pumping effect. 20 AP9372 iss.1 HPF (high pass filter) The HPF is used to reduce unwanted low frequency sounds such as vocal popping, wind noise and stage rumble. Switch the HPF in using the In key. Use the panel rotary or screen button and rotary to sweep the cut-off frequency until you have reduced the unwanted sound. The filter has a 12dB slope and can be swept from 20Hz to 2kHz. The violet screen curve shows the resulting frequency response. PEQ (parametric equaliser) The Parametric Equaliser allows tonal adjustment of the channel sound. It splits the 20Hz to 20kHz audio frequency range into 4 bands: LF (low frequency) LM (low mid frequency) HM (high mid frequency) HF (high frequency) Each provides 3 parameters that can be adjusted: Gain – Boost or cut frequencies by up to 15dB. Centre 0dB is flat response (no affect). Frequency – Each band can sweep its centre point frequency across the full range from 20Hz to 20kHz. This means you can overlap bands and have more precise control over problem frequency areas. Width – Each band has a bell-shaped response. The width of the bell can be varied from a very wide 1.5 octaves affecting many frequencies to a very narrow 1/9th octave affecting a small range of frequencies. Setting LF or HF to widest position changes its response to shelving. Experiment with the controls to hear their affect on different sounds. Switch the PEQ in or out using the In key to compare the sound. It is better to cut rather than boost frequencies where possible. Compressor The Compressor is a powerful tool for controlling the dynamics of the sound, for example to smooth out a bass guitar or to narrow the dynamic range of a vocal to make it more intelligible in a busy mix. At its extreme setting the compressor can be used as a limiter to prevent the signal exceeding a preset maximum level. A compressor works by dynamically reducing the amount of gain when the signal increases above a certain threshold. This pulls back loud moments. Applying ‘make-up’ gain restores the average volume and also has the effect of bringing up quiet moments. The result is a reduced dynamic range. Compressor active GR = Gain Reduction Qu Mixer User Guide While listening to the signal adjust Thres (threshold) to set the point at which compression starts. The GR indicator and red screen meter will start to show that compression is active. Set Ratio for how much compression you want from none (1:1) to full limiting (Inf). A ratio of 3:1 is a good starting point. 21 AP9372 iss.1 Use the In key to switch the compressor in and out and turn up Gain so that the average volume is similar. Attack sets how fast the compressor starts to work when the threshold is reached. Release sets how fast it stops compressing when the signal drops below the threshold. For example, adjust these to achieve a ‘punchy’ dynamic sound, or smooth out the response to reduce an audible ‘pumping’ effect. Two ‘knee’ settings are available. Hard Knee means that compression is applied at the set ratio as soon as the threshold is reached. Soft Knee means that the compression ratio increases gradually from 1:1 to the set ratio as it approaches the threshold. The curve illustrates this. 4 Compressor types are available using the dropdown menu. Two ‘Manual’ types allow user control of attack and release. Two ‘Auto’ types provide automatic control of the compressor dynamics. Experiment with the effect of the compressor settings on different sounds. Try to use compression only where it is needed, and avoid compression in stage monitor speakers. Mix processing The mix masters provide PEQ, GEQ, Compressor, FX Insert capability and output Delay. Insert switches an internal FX in or out if one has been patched into the mix. The button is disabled when the insert is not patched. The FX is inserted at the start of the processing before the EQ. Use the FX / Back panel screen to choose and assign one of the 4 internal FX as an Insert into a mix. Delay up to 170ms can be added to each mix output. This is typically used to time align the PA to the acoustic sound from the instruments on stage, or to align fill loudspeakers to the main PA. Allow 1ms per foot distance as a starting point. GEQ (graphic equaliser) The Graphic EQ is a popular tool for tuning out resonant frequencies in PA systems, for example when ringing out monitor speakers. The GEQ allows tonal adjustment of the overall mix sound. It splits the 20Hz to 20kHz audio frequency range into 28 standard 1/3 octave bands from 31.5Hz to 16kHz allowing +/-12dB cut or boost. Touch the screen In button to switch the GEQ in or out. Touch a slider to highlight it and use the screen rotary to cut or boost its frequency. This affects a small range of frequencies 1/3 octave wide centred on the frequency marked below the slider. The position of the sliders shows the approximate shape of the resulting frequency response curve. Qu Mixer User Guide 22 AP9372 iss.1 Press the GEQ Fader Flip key to view and adjust the GEQ on the faders while a mono or the LR mix is selected. The screen highlights the active range of frequencies. Press the switch again to change range or return to normal mix mode. The faders toggle between the lower and higher ranges of frequencies with a useful overlap. The frequencies are shown on screen and marked on the panel above the faders. The fader strip Sel key turns on when the slider is at 0dB mid (flat) position while in fader flip mode. Press a Sel key to return a slider to 0dB. It is better to cut rather than boost frequencies when tuning speakers using the GEQ. 6.5 Processing Libraries Processing block settings can be stored as Libraries: PEQ GEQ Gate Comp Channel (Preamp, Gate, PEQ, Comp, Delay) You can store up to 128 library items including all types. Press the Fn key on the related Processing screen to open the Library page. The Channel library is available from its Gate, PEQ and Comp screens. Channel Library – This is available for the mono and stereo input channels. Turn the ‘Recall Preamp’ option on if you want to recall the Preamp settings with the channel processing. This includes all its Local, dSNAKE and USB preamp settings. Factory Libraries – A few built-in libraries are available to give you a starting point. These cannot be deleted or edited. User Libraries – You can name and save your often used settings for quick recall. Library lists – The left hand list displays related processing block libraries, for example the PEQ. The right hand list displays libraries for complete input channel processing. Qu Mixer User Guide 23 AP9372 iss.1 6.6 Channel Routing The Touch Screen presents tabs to access the channel assignments and send levels when its fader strip Sel key is selected and the Touch Screen Routing screen is active. The Channel Block Pan control provides quick access to the related mix pan setting for the channel. The Fn key is used to access the Mute Group masters while in any Routing screen. 6.7 Working with the Routing screens: Press a fader strip Sel key. Press the Touch Screen Routing key. Touch the tabs at the top of the screen. Touch screen buttons and use the rotary. Press the Fn key to access the Mute Groups. Pan The rotary Pan control becomes active when an input channel Sel key is active. Its function depends on currently selected Master Strip mix: LR = Channel main pan FX send = Disabled Group (Qu-24) = Channel main pan Mono Mix1-4 = Disabled Stereo Mix5-10 = Channel send pan Pan becomes a Width control when linked for two input channels – Panning one to the left automatically pans the other by the same amount to the right. Channel Routing screen Adjust the channel Direct Output Trim from off to +10dB gain. The Direct Outputs can be patched to feed the internal FX devices, for example a delay effect send for a single vocal. They also feed the dSNAKE Monitor outputs (ME Personal Mixing System). The channel source for the Direct Outputs can be changed on this screen. This is a global setting affecting all channel direct outputs. Typical Direct out settings: Qu Mixer User Guide 24 FX send = Post Delay, Follow fader, Follow mute ME Monitor = Post Comp, pre-fader, Follow mute AP9372 iss.1 Channel Mix Sends screen Use this screen to work with the sends and assignments from one channel to all the mixes. Each send can be set Pre or Post fader. It is typical to set monitor sends pre-fade so that the channel fader does not affect the monitor mixes, and to set effects and fill speaker sends post-fade so that their levels do follow the faders. The channel can be assigned (routed) On or Off to each mix. Touch the Level and Pan buttons and use the screen rotary to adjust their settings. To work with the sends and assignments from all channels to one mix use the Master Strip Mix keys and the fader strips. Channel FX Sends screen Use this screen to work with the sends and assignments from one channel to the FX mixes. These are for Mix>Return effects such as reverb and delay. The sends can be set Pre or Post fader but it is usual to leave these set post-fade so that the effects follow the channel fader level. Each send can be assigned On or Off. Its Level can be adjusted here. To work with the sends and assignments from all channels to one FX mix use the Master Strip Mix keys and the fader strips. Qu-16 FX3 and FX4 do not have dedicated sends. However, you can assign any of the Mix1-10 buses to feed these. To do this use the FX / Back panel screen. Channel Audio Group Assign screen The Qu-24 includes two stereo Group mixes. These are not available on the Qu-16. This screen lets you assign one channel to all groups. To work with the assignments from all channels to one group use the Master Strip Mix keys and the Assign + fader strip Sel keys. 6.8 Working with the Groups (not Qu-16) Each Group provides: Stereo routing Source Assign to Group Master Fader and Mute Output Balance Routing to LR and Matrix PEQ GEQ Compressor Delay FX insert Mono and stereo input channels and FX returns can be routed to groups. Group routing follows the channel faders and pan. They do not have send levels. You can use a Group to sub mix several channels for single fader level control, or to process several channels, for example: FX return or stereo drum sub mix Compressor over several backing singers Single EQ over several lavalier microphones Grouping signals for recording or ME monitoring For sub mixing – Assign channels to the Group rather than LR, then assign the Group to LR. Access the Group masters using the Master Strip Mix keys. Qu Mixer User Guide 25 AP9372 iss.1 Mix Routing Select a mix master Sel key while the Routing screen is active to: Adjust the Output Balance between Left and Right of a stereo mix or LR. Choose the global Channel Source for the selected mix. This is the point in the channel signal path that feeds the mix. Post-Preamp Gain/Trim Insert Pre-EQ HPF GATE Post-EQ PEQ COMP Post-All DELAY 0 Choose Post-Preamp if you want the sources to the mix to not be affected by any of the channel processing. Choose Pre-EQ for a monitor mix if you do not want the channel EQ to affect the monitor. Choose Post-EQ if you want the EQ but not the compressor to affect the monitor. Choose Post-All processing for FX sends. Mix to Matrix Sends (not Qu-16) The Qu-24 includes two stereo Matrix mixes. These are not available on the Qu-16. The Groups, Mixes and LR can be sent to the Matrix. The sends to the matrix can be set Pre or Post the send master fader. Each send can be assigned On or Off. Its Level and Pan to the matrix can be adjusted here. Matrix View To work with the sends and assignments from all mixes to one matrix use the Matrix master Routing screen Fn key ‘Matrix View’. Touch a mix source box. Use the right of the screen to adjust its parameters. Touch the buttons and value boxes and use the screen Rotary. 6.9 Working with the Matrix (not Qu-16) Each Matrix provides: Stereo mixing Source send Levels, Pan and Assign Master Fader and Mute Output Balance PEQ GEQ Compressor Delay FX Insert Qu Mixer User Guide A Matrix is a ‘mixer within the mixer’. Inputs route to the Groups, Mixes and LR. These can then be routed to the Matrix to provide additional outputs, for example: Stereo recording, video or broadcast Delay fill speakers Access the Matrix masters using the top fader Layer, or assign them to the Custom Layer. Patch the Matrix to Alt Out, AES Out and USB audio. 26 AP9372 iss.1 6.10 Mute Groups The Qu features 4 Mute Groups. You can assign channels to a Mute Group so that pressing its master key will instantly mute all assigned channels. For example, mute all drum channels, mute all mics on stage during band changeover, or mute all FX returns between songs. Mute masters are accessed from the Home or any Routing screen, or using the SoftKeys. The following may be assigned to Mute Groups: Mono and stereo Input Channels FX Send masters FX Return channels Stereo Groups (not Qu-16) Assigning a single channel Press an input channel or FX send or return fader strip Sel key and select the Touch Screen Routing screen. Open the Mute Grp Assign tab. Use this screen to assign the channel to any combination of the 4 Mute Groups. A green tick next to the button indicates that the Mute Group master is available on the related SoftKey. Assigning all channels While in any Routing screen press the Fn key to open the Mute Groups view. Select the tab for the Mute Group you wish to assign. All sources to that group are shown. Touch buttons to toggle assignments on or off. Touch the Clear/Set All button to turn off or on all the assignments. Press the Fn key again to close the Mute Groups view. 6.11 Using the Mute Groups There are 3 ways to use the Mute Groups: Touch the master buttons on the Home screen. While in any Routing screen press the Fn key to open the Mute Groups view. Select the MG Masters tab and touch the master buttons. Assign and use one or more SoftKeys as Mute Group masters. The Mute Groups are assigned to SoftKeys with the same number as the group. The Mute key will flash red if the channel is muted by a Mute Group. A short flash shows it is muted by the group only. A long flash shows it is muted by the Mute key and a group. Qu Mixer User Guide 27 AP9372 iss.1 6.12 The Master Strip Qu provides a dedicated fader strip for the Mix Masters. It presents the fader and controls for the mix currently selected using the Mix keys alongside. The sends to the selected mix are presented on the channel faders. They move to show the current settings. This provides a very quick way to access each mix without the need to switch to the Masters layer. Mute key – Press to turn off the mix master audio signal. The Mute key lights red when the audio is muted. Sel key (select) – Press to access the mix Processing (PEQ, GEQ, Compressor, Delay) and its Routing parameters using the SuperStrip and Touch Screen. The screen presents related parameters while its Processing or Routing key is active. The Sel key can also be used to: Copy mix processing – Hold down the Copy key and press the Sel key to copy the processing settings. Then select a different Mix, hold down the Paste key and press the Sel key to instantly paste those settings to that mix. Reset mix processing – Hold down the Reset key and press the Sel key to instantly reset all its processing to factory default. Assign all sources – Hold down the Assign key and press the Sel key to toggle all sources on (assigned) or off to the mix. Set all sources Pre or Post-Fade – Hold down the Pre Fade key and press the Sell key to toggle all sources Pre or Post Fade. PAFL key – Press to listen to a mix using headphones and check its level on the main meters. The meter PAFL indicator lights. Press PAFL again to turn it off. A SoftKey can be assigned to Clear All active PAFL selections. Options are available in the Setup screen to choose how you want PAFL to work. The default setting is AFL (after-fade listen). Mix meter – The strip meter lets you keep an eye on the mix master signal level. This is ‘post-fader’ and displays the level after the fader and mute control to follow the signal available at the output of the mixer. Pk – Lights red to warn that the signal is too hot and mix level should be reduced. It turns on 3dB before clipping to warn you before audible distortion. 0 – Lights when the signal reaches nominal 0dBu allowing a healthy 18dB headroom. This is the normal level for mixing. Sig – Lights to show signal presence. It turns on at -26dBu. Fader – Controls the level of the mix master currently selected. There is +10dB boost available. Normal setting is around the ‘0’ position. Mix Select keys – These select which mix master is presented on the master strip. Only one can be active at any time. Press a key to select a mix. The channel faders move to become the sends to the selected mix. Channels can be assigned using the Sel keys. Press the key again turn return to the main LR mix. LR sets the strip to control the main LR mix. This is the normal selection for mixing the FOH (main PA) sound. FX sets the strip to control the FX internal effects send master. The Qu-16 has 2 FX buses, the Qu-24 has 4 FX buses. Mix, Grp sets the strip to control one of the mono or stereo mix or Group masters. Groups are not available on the Qu-16. The Mix key can also be used to copy or reset any of the FX and Mix send levels, pan and assignments. This does not affect the Pre/Post settings. Qu Mixer User Guide 28 AP9372 iss.1 6.13 Working with the sends on faders: Select a Mix - Press a Mix key. The master strip presents the mix fader and controls. The channel faders move to present the sends to that mix. Adjust Send levels – For Mix and FX sends. Move the channel faders. These become the sends to the selected mix. Adjust Send pans - While a stereo Mix is selected, press a channel Sel key and use the Pan control to pan its send in the mix. Assign sends to the mix – Hold the Assign key to view the current channel assignments (routing) to the mix. The Sel keys light when the channel is assigned to the mix. To toggle individual assignments on or off, press channel Sel keys while holding Assign. To toggle all assignments on or off - Hold the Assign key and press the master strip Sel key. Set sends Pre or Post fader – For Mix and FX sends. Hold the Pre Fade key to view the current channel pre/post fade settings for the mix. The Sel keys light when set to Pre-fade. To toggle individual sends pre or post, press the channel Sel keys while holding Pre Fade. It is typical to use Pre-fade for monitor sends and Post-fade for effects sends. To toggle all sources Pre or Post Fade - Hold the Pre Fade key and press the master strip Sel key. Group mixes – Selecting a Grp mix lets you assign channels and FX returns to the group. Main channel faders and pan positions are shown as they are when LR is selected. Groups are not available on the Qu-16. Press the Mix key again or press LR to return to the main mix, or press another Mix key to adjust a different mix. Qu-16 Qu-24 Note Always remember to return to the main LR mix once you have finished adjusting monitor or effects levels. Hold and then press Sel Toggle individual sources Toggle all sources Pre/Post Assign Sends on faders Qu Mixer User Guide 29 AP9372 iss.1 7. Touch Screen Mixing Functions The Qu features an 800x480 pixel, colour touch screen for quick and intuitive setup and control of the mix. Sel screens TouchChannel Touch to select each processing block Button Option menu Parameter box Other screens Status toolbar Function key Screen Rotary Edit keys Screen select keys Button – Touch to select its function or change its state. To avoid accidental operation some functions need be touched for at least 1 second, for example switching 48V phantom power. These are marked ‘(Hold)’. Parameter box – Touch to change its value. The box highlights orange to show it is selected and can be adjusted using the screen rotary. Option Menu – Touch to open a list of options available. Scroll using the screen rotary and touch an item in the list to select it. Several menu lists are available within the screens, for example, to choose a compressor type. Screen Rotary – Use this to change the value of the parameter in the box highlighted orange on the screen, or to scroll through lists. Apply / Cancel – Some setup screens present several parameters associated with one function, for example channel linking. These can be chosen before they are applied. Touch Apply to accept the changes or Cancel to close the screen without accepting the changes. Function Key – The Fn key provides access to further options associated with the currently selected screen, for example channel source selection and processing libraries. It is also used to access the Mute Group and Matrix mix settings. If available, its function will appear in the lower toolbar above the key. Press the key again to close the option screen. This example shows access to the Mute Groups screens from within a Routing screen. Qu Mixer User Guide 30 AP9372 iss.1 Status Bar – This lower screen toolbar shows useful system information and is always visible. Fn key function - for example to show that the key is available to select a Library or Options page. Scene information – Shows the number and name of the current (Curr:) and next (Next:) scenes. Curr: is the last scene recalled. This is blank when the mixer powers up and only appears after a scene has been recalled. Next: is the scene highlighted in the Scenes list ready to be recalled. This information is useful when using the SoftKeys for scene recall during a theatre show. System messages – The scene information can be overwritten by system messages, for example when using the Copy/Paste/Reset keys. dSNAKE device status – The yellow dS icon appears when an AudioRack device such as the AR2412 or AR84 is connected to the dSNAKE port and is identified as powered up and operational. Note – ME-1 personal monitor mixers can be used with the Qu mixer but are not recognised by the mixer. The dS icon will only appear when AudioRack devices are connected. USB status – A USB symbol appears when a compatible USB key or drive is plugged into the Qu-Drive port and is recognised by the mixer. The symbol flashes while the drive is being read. If the symbol does not appear then the USB device may need formatting using the Qu Format utility. Qu-Drive transport status – The USB symbol is replaced with one or more icons to show the transport status of the Qu-Drive Stereo or Multitrack playback and recording. 7.1 Copy, Paste, Reset keys Press + hold down one of these keys and then press another key or screen item to copy, paste or reset the related parameters. For example: Copy – Press Copy + a channel Sel key to select its processing to copy. Press Paste + another channel Sel key to paste the processing to that channel. You can copy just one processing block such as PEQ using its In key and then paste it into other channels using their strip Sel keys. Reset – Press Reset + a channel Sel to instantly reset its processing to factory default settings. Reset parameters Paste parameters Copy parameters The following Copy/Reset is supported: + Input strip Sel key = HPF, Gate, PEQ, Comp, Delay + Mix strip Sel key = PEQ, GEQ, Comp, Delay + Master Mix key = Send levels, Pans, Assign + HPF In key = HPF only + PEQ In key = PEQ only + Gate In key = Gate only + Comp In key = Compressor only + Fader Flip key = GEQ + touch Scene item in list = Scene contents Note – Copy/Reset of Mix does not affect the Pre/Post fader settings. Qu Mixer User Guide 31 AP9372 iss.1 7.2 The Sel screens – Processing and Routing Processing Screen – When selected this screen presents the processing such as Preamp, EQ, Gate, Compressor for the channel or master currently selected using its strip Sel key. Touch the top part of the screen to select the processing block you wish to view or adjust, for example Preamp or PEQ. This is known as the TouchChannel. The lower part of the screen changes to provide access to the related parameters and additional related controls. The physical controls in the SuperStrip and the touch controls in this screen provide quick access live mixing functions. Routing Screen – When selected this screen lets you access the assignment and routing for the channel or master currently selected using its strip Sel key. This lets you work with routing to all mixes from one channel. To work with all channels to one mix use the Master Strip Mix keys and sends on faders. The Fn key provides access to the Mute Group masters and assignments. 7.3 Home Screen Press the Home key. Pressing it again restores the last selected Sel screen. The Home tab presents: Current Firmware version Current User The 4 Mute Group master buttons Shut Down button to use before powering down the mixer Lock Surface to protect settings when the mixer is left unattended 7.4 Home Screen – Changing User This screen lets you log in as one of 3 Users with different permissions: Admin – Full access to all functions Firmware V1.3 does not support User Permissions. The only User Profile available is Admin. Qu Mixer User Guide 32 AP9372 iss.1 7.5 Home Screen – Meters This screen provides a convenient view of all channel, mix and FX signal activity. For optimum performance the loudest signals should read into the yellow. If any red Peak meter flashes then reduce the level of that signal to avoid possible distortion. Increase levels if the meter readings are consistently low. The Qu-24 meters screen is shown here. The Qu-16 does not include Group and Matrix meters. 7.6 Home Screen – RTA This screen displays a Real Time Analyser (RTA) which analyses the frequency content of the audio signal currently being monitored using the PAFL keys. It splits the frequency into 31 third octave bands from low 20Hz to high 20kHz, the same frequencies as used on a graphic equaliser. The RTA is a useful tool to help you identify problem frequencies such as room resonance and feedback. The iPad Qu-Pad app can show a display of the RTA peak band (most dominant frequency). 7.7 Home Screen – Qu-Drive (USB audio) This opens screens associated with the USB stereo and multitrack recording: Qu-Drive Stereo page – This screen presents the controls for stereo recording to and playback from a USB hard drive plugged into the top panel Qu-Drive port. The blue Stop buttons light if the USB key or drive is recognised by the mixer. The controls are disabled if a USB drive is not plugged in or recognised. Stereo Record – You can record to a USB hard drive plugged into Qu-Drive: Note – We recommend you transfer previous recordings to your computer and then reformat the USB drive on the Qu mixer before using it for each show. This will avoid potential audio skipping that may occur with some hard drives containing long recordings. Qu Mixer User Guide Format = 48kHz, 24-bit, WAV file Data rate = 288 KB/sec, maximum 4 hours (4GB) Qu allocates a file name ‘QU-STnnn.WAV’ where ‘nnn’ increments from 001 to 999 starting at the highest number +1 it finds on the drive. Note – Use a USB hard drive, not a key, for all stereo and multitrack recording. Note - Use the USB hard drive for the Qu mixer only. Do not use it for other applications. * Format the hard drive on the Qu mixer before starting to record. Use the Setup / Utility / Qu-Drive screen. This clears the drive and sets up the Qu directory structure. 33 AP9372 iss.1 Patch the source to be recorded using the Setup / Output Patch / USB Audio screen. Touch the track 17 box and turn the rotary to select the left source. Press the ‘+1’ Fn key to increment the right source to track 18, or use the rotary to select an unrelated source. Note Qu-Drive Stereo recording shares the same patch as Track 17-18 of the Qu-Drive multitrack recording and USB streaming. The record meter on the USB page displays the current source. The default is LR post-fade. Arm the recording by touching the red circle Record button. Touch the Play button to start the recording. Stereo Playback – You can play back audio files from a USB hard drive plugged into Qu-Drive port: Format = 44.1 or 48kHz, 16 or 24-bit, WAV file Note – Do not use wav files with BWF (broadcast) chunks. Note – Use the USB hard drive for the Qu mixer only. Do not use it for other applications. Format the USB drive on the Qu mixer before loading the playback files. Use the Setup / Utility / Qu-Drive screen. This clears the drive and sets up the Qu directory structure. Copy audio WAV files on to USB from your computer. Place these in the AHQU / USBPLAY directory. Plug the USB drive into Qu-Drive. Patch the playback to the ST3 channel using the Processing / Preamp screen Fn key to open the Preamp Source screen. Make sure Qu-Drive is selected as the ‘Global USB Source’. Select USB as the source for ST3. Once you have selected Qu-Drive as the global USB source you can also use the panel USB key in the Preamp section to toggle between the ST3 preamp and USB source. Select the track to play back by touching the name box. You can choose a track from the Playback or the Recordings directory. Touch Select to confirm. Press the Fn key for options to choose playback mode: Qu Mixer User Guide 34 AP9372 iss.1 Qu-Drive Multitrack page – This screen presents the controls for multitrack recording to and playback from a USB hard drive plugged the top panel Qu-Drive port. The blue Stop button lights if the USB drive is recognised by the mixer. The controls are disabled if not plugged in or recognised. Multitrack Record – You can record to a USB hard drive plugged into Qu-Drive: Note – We recommend you transfer previous recordings to your computer and then reformat the USB drive on the Qu mixer before using it for each show. This will avoid potential audio skipping that may occur with some hard drives containing long recordings. 18 Tracks = Individually patchable sources Record format = 48kHz, 24-bit, WAV file Data rate = 144 KB/sec per track (max 4GB total) Qu allocates a folder name ‘QU-MTnnn’ for each recording where ‘nnn’ increments from 001 to 999 starting at the highest number +1 it finds on the drive. The tracks are named ‘TRKnn’ within the folder where ‘nn’ is 01 to 18. Note – Use a USB hard drive, not a key, for all stereo and multitrack recording. Note - Use the USB hard drive for the Qu mixer only. Do not use it for other applications. Format the hard drive on the Qu mixer before starting to record. Use the Setup / Utility / Qu-Drive screen. This clears the drive and sets up the Qu directory structure. Patch the sources to be recorded using the Setup / Output Patch / USB Audio screen. Touch a track box and turn the rotary to select the source. Press the ‘+1’ Fn key to increment the assignments. Arm the recording by touching the red circle Record button. Touch the Play button to start the recording. Multitrack Playback – You can play back your multitrack recordings from the hard drive plugged into the Qu-Drive port: Patch the playback to the input channels using the Processing / Preamp screen Fn key to open the Preamp Source screen. Make sure Qu-Drive is selected as the ‘Global USB Source’. Select USB as the source for the channels you wish to play back. Select the recording to play back by touching the name box. You can choose a folder from the list. Touch Select to confirm. Press the Fn key for options to choose playback mode: Note – Qu always expects 18 tracks to be present in the multitrack folder. -You can create dummy tracks by duplicating and renaming your files. Note – Choose to play back either Qu-Drive stereo or multitrack. It is not possible to play back both stereo and multitrack at the same time. Qu Mixer User Guide 35 AP9372 iss.1 7.8 The FX Qu features 4 internal stereo FX (effects) processors. Each can be loaded from a library of different effects types and presets. These are the same as found in the flagship Allen & Heath iLive digital mix system and are based on emulations of popular industry standard effects. The FX screen Press the FX key next to the Touch Screen to open the FX screen. You work with the FX in the same way you would with a traditional outboard rack. Start with an empty rack as shown here. Each of the 4 FX has a rack slot. Touch the tabs at the top to select each slot. Library – Press the Fn key to open the Library page. Scroll through and select the FX type you wish to load into the rack. The effects are arranged in types on the left with available presets for each in the right hand window. Touch Recall to load the FX. Listen to and experiment with the different presets and their parameters available. FX types Front Panel view Reverb – This is the most popular effect in live sound mixing. The SMR Live (Spatial Modelling Reverberator) features 4 fully configurable spatial models - Classic, Hall, Room and EMT plate. Each of these use different reflection and decay algorithms to add natural sounding space to the dry signal whether subtle small room echo, vintage vocal plate or a massive arena. Reverb can make a vocal sound spacious and smooth in the mix or add body to an instrument such as acoustic guitar or flute. There are plenty of factory presets available. The 4 buttons at the top control the main parameters if you wish to make adjustments. HF and LF cut shape the response, and Expert opens up a host of parameters for fine control if you wish to experiment further. You also have the 4-band PEQ available in the FX Return channel processing. Delay – Generates separate left and right tap delay outputs from the input. Delay time can be dialled in using the screen rotary, tapped on screen or tapped using a SoftKey. The left and right delay taps can be linked to produce a mono effect. Feedback adds regeneration for a repeating echo effect. Set a short delay time around 80 to 160ms for the classic slapback effect. ADT - An Automatic Double Tracking module capable of creating short echo/chorusing, classic double tracking and ‘slapback’ tape delay loops. It includes a stereo width enhancer and auto panning within the stereo field. The ADT is perfect for creating classic doubling effects, thickening programme on stage or developing a stereo sound field as an alternative to chorusing. Chorus - Chorus derives from the late 80’s where different stereo field creation techniques influenced the sound of each chorusing unit. Chorus recreates the classics using 3 stereo-field emulations. These emulations can be switched in any combination creating many different stereo fields. Qu Mixer User Guide 36 AP9372 iss.1 Symphonic Chorus - A faithful emulation of the 80’s classic chorus effect. Simple to use and frequently requested. The unit has just two controls, Frequency and Depth controlling the rate and delay range of the stereo modulator. The unit produces a rich, lively and wide chorus sound with a suggestion of very mild phasing / flanging. Live engineers commonly use this for thickening vocals and strings and creating a spatial sound from a mono source. This has led to two factory presets ‘SymphonicVox’ and ‘SymphonyStrings’. Flanger – Qu provides three classic flanger effect emulations – ‘Ambient’, ‘Vintage’ and ‘Wild’. During research of classic pedal flangers we found numerous LFO modulators and stereo splitting techniques. We implemented them all. For classic deep flange set Stereo Split and Stereo Spread off, pick triangular modulation, Vintage type and adjust Depth and Regeneration. Phaser - A classic 12 stage emulation producing rich textured phasing with plenty of control. You can control the number of stages, feed forward and feed back, and ‘zero’ depth manual mode to manually sweep the Phaser using the offset control. Gated Verb- An accurate emulation of the popular 80’s Gated Reverb plus two other variants called ‘Panned’ and ‘Powerbox’. The user interface gives instant access to Lo-cut Hi-cut decay spectrum filters and the gate envelope controls - predelay, attack, hold and release. Back Panel view Patching the FX Touch the top right tab to select the Back Panel view. Open the option list to select the type of FX. Touch Apply to confirm any changes: Mix>Return – Known as a ‘system effect’ this uses a bus to Send a mix of the channels to the effect, and a dedicated stereo FX Return channel to add the ‘wet’ effect to the ‘dry’ original sound. This is used for effects such as reverb and delay. Choose which mix bus to use as its input. For the Qu-16, FX1 and FX2 have dedicated buses. If you want to use FX3 or FX4 as another system effect you could patch one of the Mix1-10 buses as its input. Ch>Return – This is similar to a Mix>Return system effect but fed from one channel rather than a mix of channels. It uses the assigned input channel Direct Output as its source. Examples include a vocal channel delay, gated verb on a snare, or chorus added to guitar. Insert – Here the effect is patched in line with an input channel or mix master. It is switched in or out using the channel Insert switch. Inserted FX provide a Dry/Wet control to balance the effect with the original signal. FX processing view Press an FX Send or Return strip Sel key while the Processing screen is active to view and work with its parameters. Touch the top of the screen to open the PEQ view and adjust its return channel equaliser. Qu Mixer User Guide 37 AP9372 iss.1 7.9 Working with FX – Adding vocal reverb: Press the FX key to open the FX screen. Touch to select FX1. Press the Fn key to open the Library page. Recall a Reverb into the FX1 slot if one is not already loaded. Open the Back Panel view and check that FX1 is set for Mix>Return with FX1 as its input. Start by turning up a vocal channel fader while the master strip LR mix is selected to hear the signal in the main PA mix. Select the top layer to view the FX Return channel strips. Set these faders to their ‘0’ position and check they are unmuted to ensure the effect signals will be returned to the main mix. Press the FX1 Mix key. The master strip now presents the FX1 Send master fader and controls. The channel faders move to present the sends to FX1. Sends on faders Press the master strip Sel key to view the FX1 parameters on the screen. Press the Fn key to open the library and recall a reverb preset. Set the master strip fader to its ‘0’ position and check that it is unmuted to ensure the channel sends will be sent to the FX. Move the vocal channel fader to adjust its send level to the selected FX. This is similar to turning an Aux send knob on an analogue mixer to feed an outboard effects unit. You should now hear the reverb added to the dry vocal signal. Adjust the send fader for the amount of reverb you want. You can also send other channels to the reverb by turning up their send faders, for example backing vocals and instruments. When done, remember to return the faders to the main mix by turning off the FX1 Mix key or selecting the LR key. You can assign the FX sends or returns to a Mute Group if you want to be able to turn off all the effects with a single key, for example between songs. You can assign a SoftKey as a tap tempo key for a delay effect. This lets you quickly tap in the beat for a vocal delay without the need to open the FX screen. Use the FX Library to recall different effects types and presets. Listen to their effect of different signals and experiment with their levels and settings so that you can use them as a creative tool while mixing. Qu Mixer User Guide 38 AP9372 iss.1 7.10 Scene Memories Qu provides 100 Scene memories. These store and recall a snapshot of all live mixing parameters. Scenes have many applications. They can be used to store settings for bands during sound check for recall before they take to the stage during the show. Scenes can also be used for cue recall during theatre shows, or to provide a known starting point for different events or users in a multi-purpose venue. The Scenes screen Press the Scenes key next to the Touch Screen to open the Scenes screen. Scene list – Scroll through the list of 100 Scenes using the screen rotary. The currently selected Scene is highlighted. The last recalled (Curr:) and highlighted (Next:) scenes are shown in the lower toolbar. The green tick means that a scene is stored. Name – Touch the Name box to open the screen keypad. Touch characters to name the selected Scene. Touch OK to accept. A confirmation screen appears for the following functions: Store – Touch this button to store the current settings to the Scene selected in the list. Recall – Touch this button to recall the scene and overwrite the current mixer settings. Clear – Touch this button to clear the scene contents and name. You can also clear a scene by holding down the Reset key and touching the name in the list. A Scene stores the following: Preamp settings Channel processing and linking Channel patch and routing Channel sends Channel mutes Channel faders/pan Mix processing Mix mutes Mix faders FX parameters Output patch Talkback assign and filter Mute Groups Custom strip assign SoftKey assign Reset Mix Settings – This provides a quick way to ‘Zero the board’ by resetting the mix and processing to a typical starting point. To avoid accidental operation the button must be touched for 1 second or more to action the reset. Note – Reset Mix Settings affects all scene settings and is not affected by the Global Recall Filter. Note – Reset Mix Settings restores the Local preamps as the source to input channels. A Scene does not store: PAFL settings Signal generator settings USB record/playback settings Scene preferences User profile settings Network and MIDI settings ‘Custom Layer Only’ option Qu Mixer User Guide To Copy a Scene – Press and hold the Copy key below the screen and then touch the scene to copy. Now press and hold the Paste key and touch the scene in the list to paste to. This copies the scene contents and name. 39 AP9372 iss.1 Qu-16 The Global Filter screen A Recall Filter protects one or more parameter types for all channels. A scene stores all live mixing parameters. A Recall Filter can be set to protect (block) chosen parameters from being overwritten when the scene is recalled. The Global Filter protects parameters from being overwritten by any of the 100 scenes. Qu-24 A red dot o appears in the tab if one or more items have been blocked. Note – Only the Global Filter is available with firmware V1.3. Filters per scene are not available. The Safes screen A Recall Safe protects all parameters for one channel. Scene recall affects all input channels, FX and mixes. You can make one or more of these ‘Scene Safe’ so that none of their parameters are overwritten by any of the 100 scenes. For example, walk-in music and continuity microphone channels. Filter selections are grouped according to input, output and type: Inputs/FX (All CH1-16, ST1-3, FX1-4) Input patch (Local, dSNAKE, USB) Preamps (Gain/Pad/Trim/48V/Pol) CH/ST process (Gate/PEQ/Comp/Dly) Group processing (not Qu-16) FX patch FX parameters Inputs/FX/Group Faders/Pan Inputs/FX/Group Mutes Outputs (All FX masters, Mix1-10, LR) Input patch Output patch (Sockets, Qu-Drive) Mix process (PEQ/GEQ/Comp/Dly) LR process (PEQ/GEQ/Comp/Dly) Matrix processing (not Qu-16) Master Faders Master Mutes Routing Audio Groups (Assign) Mix sends (Lev/Pan/Assign/Pre) FX sends (Lev/Assign/Pre) Matrix sends (Qu-24 only) Mute Groups (Assign) A blue dot o appears in the tab if one or more channels have been made safe. Input Safes – Make any combination of the sources to the mixes safe – CH, ST1-3, FX Returns. Protects: Channel processing, Channel fader and pan Routing and sends to all the mixes Mute Group assignments Mix Safes – Make any combination of the mixes safe – Mix1-10, FX Sends1-2, LR. The Qu-24 includes Safes for its Groups and Matrix mixes. Protects: Master processing, Master fader and balance Routing and sends from the channels Global channel send source Mute Group assignments Other Mute Group masters Custom Layer (Assign) SoftKeys (Assign) System (Talkback assign/HPF) Qu Mixer User Guide 40 AP9372 iss.1 8. Touch Screen Setup Functions Press the Setup key next to the Touch Screen to open the Setup screens. Touch the top tabs to access the different categories of setup function. Touch the tabs below to open up the related options available. Dimmer – Turn the screen rotary while pressing and holding the Setup key to adjust the screen and surface LED brightness. 8.1 Audio Setup -PAFL Choose how you want PAFL to work: Additive mode – Select to listen to more than one channel at a time. Pressing a PAFL key adds to the previous selection. When off, the mode is Auto-cancel to listen to one channel at a time where pressing a PAFL key cancels the previous selection. Input/Output PFL (pre-fade listen) – Monitor the signal before the fader, for example to check it and set its gain before you bring up the fader. This is the default. Input/Output AFL (after-fade listen) – Monitor the signal in stereo after the fader and pan so that you can hear its contribution and position in the LR mix. Sel follow PAFL – Link the Sel switch so that pressing PAFL automatically selects the processing for that channel. LR to PAFL – Routes the main LR mix to the monitor when there is no PAFL selected. PAFL Delay – Delay the monitor to time align it with the acoustic sound from the source when the mixer is a long distance away from the stage. Start with 1ms per foot. PAFL Trim – Attenuate the PFL (pre-fade) signal by up to 24dB to match it with the average AFL (after-fade) signal which is often much lower than PFL. 8.2 Audio Setup - Talkback Set up and assign Talkback to talk to the musicians via their monitors, or make announcements via the house (PA) mix: HPF – Dial in the High Pass Filter to remove low frequency pops and resonance while talking. 48V – Hold for 1 second to switch on phantom power. Gain – Adjust the talkback mic level. Assign – Touch to toggle the assignments to the different mixes on or off. Press the surface Talk key to talk to the musicians or house. Qu Mixer User Guide 41 AP9372 iss.1 8.3 Audio Setup –Signal Generator Set up and assign the Signal Generator to test loudspeakers and align levels between equipment. Source – Touch to open the list of sources available: Sine – Pure tone with adjustable frequency. Set to 1kHz and use meters to match equipment levels. White Noise – Equal energy per Hz. Pink Noise – Filtered white noise for equal energy per octave. This is a good source to use for testing loudspeaker drivers and phase. Its response matches the way we hear frequencies. Band-pass Noise – Pink noise filtered around a frequency which can be swept from low to high. Level – Start with the level set low to avoid unexpected loud sounds when you assign to the mixes. Mute – Turns the signal off. Assign – Touch to toggle the assignments to the LR and Mixes 1-10 on or off. Assignment to the Groups and Matrix is not available on the Qu-16. Note – To avoid noise in the system remember to turn the assignments off when you are finished using the generator. 8.4 Control Setup – Custom Strip The Custom Layer can have any combination of channel, FX , master and MIDI strips assigned to its faders. Faders can be left unassigned. This lets you arrange the faders you are using for your show into one convenient layer, or use the Custom Layer to control your Digital Audio Workstation (DAW). The screen presents an assignment button for each fader. Touch a button and then turn the screen Rotary to scroll through the available strips. Use the Fn key ‘+1’ function to quickly assign strips in sequence. The following strip types are available: X Unassigned CH Mono input channels ST Stereo input channels FX Ret FX returns FX Send FX sends Mix Mix masters 1-10 LR Main LR master Grp Stereo Groups (not Qu-16) MTX Stereo Matrix (not Qu-16) MIDI MIDI DAW control Qu Mixer User Guide DAW control – When working with a DAW (Digital Audio Workstation) it is typical to assign all faders as MIDI strips so that the Custom Layer can be used to control the audio tracks within the DAW. Touch button 1, turn the rotary until it displays ‘MIDI’, then press Fn key ‘+1’ to quickly assign the other strips for DAW control. 42 AP9372 iss.1 To select the Custom Layer press both Layer keys together. Turn on the ‘Custom layer only’ option if you want to lock out the two standard layers and let the operator work with just the Custom layer. Use the space provided to label the custom strips. 8.5 Control Setup - SoftKeys Qu-24 shown Qu-16 provides 4 SoftKeys. The Qu-24 provides 10 SoftKeys. These are called ‘Soft’ because they can be assigned to different functions by the user. Function – Touch the box to open and choose from the list of available functions. Touch Apply to confirm the changes. Note SoftKey settings are stored in scenes. If you do not want these settings overwritten when scenes are recalled then block the ‘SoftKeys’ item in the Global Filter. Use the Scenes / Global Filter screen. Unassigned – The SoftKey does nothing. Mute Group – Becomes the Mute master for the same number Mute Group. This is the factory default setting for SoftKeys 1-4. Tap Tempo – Use the SoftKey to tap in the time setting for Delay FX. Choose L, R or L+R (both to follow the same tap). Recall Scene – Instantly recalls the scene number assigned to the SoftKey. Scene Store Current – Instantly stores the current mixer settings to the last recalled scene. This is shown in the ‘Curr:’ bar. Scene Recall Go – Instantly recalls the Scene shown in the ‘Next:’ bar. Set Auto Increment if you want to step through your scenes using a single key. This recalls a scene, then advances to the next available scene ready to recall it when the key is pressed again. For example, step through your cues in a theatre show. Auto-increment skips blank scenes. Scene Next – Advances to but does not recall the next scene in the list. Scene Previous – Steps back to but does not recall the previous scene in the list. PAFL Clear – Set a SoftKey to clear any active PAFL keys. The SoftKey lights to show when a PAFL is currently selected. Qu Mixer User Guide 43 AP9372 iss.1 8.6 Control Setup - Network Use this screen set the TCP/IP address for the Network port and the name used to identify the Qu mixer on the network. It is important that the network address is compatible with the addresses of equipment connected to the port, for example a laptop providing MIDI control of mixer parameters, or a wireless router providing remote control using the Qu-Pad iPad app. DHCP – Enable this if the connected device has DHCP capability and is therefore able to automatically allocate a compatible IP address to the mixer. This is the factory default and is the typical setting for connecting to a wireless router used to interface with an iPad. For manual setting of the network address, enter compatible IP Address, Subnet Mask and Gateway settings. Unit Name – Enter a name with up to 15 characters to identify the Qu mixer on the network. The default name is the model number, for example, ‘Qu-16’ or ‘Qu-24’. 8.7 Control Setup - MIDI The Qu mixer can send and receive MIDI messages for remote control of many of its functions. It uses two MIDI channels, one for Qu mixing functions, the other for DAW control using the Custom Layer. MIDI over USB – The rear panel USB B port allows direct connection to Apple® Mac computers running OSX 10.6 or later. This carries MIDI and audio streaming. USB B is the recommended connection for DAW and other computer based MIDI control. MIDI control available: Mutes Faders and Pan Audio Group Assign (not Qu-16) Mix and FX Sends, Pan, Assign, Pre LR Assign Matrix sends, Pan, Assign, Pre (not Qu-16) Mute Group Assign, master Mute PAFL select Input channel source Preamp Gain/Trim, Pad, 48V Insert In/Out Input Polarity, Gate, PEQ, Comp, Delay Mix PEQ, GEQ, Comp, Delay Scene Recall FX Tap Tempo MIDI Custom strips (DAW control) Qu Mixer User Guide Note – Qu currently supports only Apple® Mac computers. USB MIDI is supported natively by the Mac so no driver is needed. A driver for Windows® computers is not available. MIDI over TCP Network – The rear panel Network port is used for connection to a WiFi router to work with an iPad running the Qu-Pad app. The app uses these MIDI messages to remotely control the Qu mixer. Alternatively, the Network port can be used with a touch panel or other remote controller that allows configurable MIDI over a TCP/IP port. Note – Qu currently allows only one TCP connection at a time over its Network port. MIDI channel number – The Qu uses two MIDI channels, one for mixing functions, the other for DAW control. Choose and Apply the mixing function MIDI channel. DAW control will use the next MIDI channel above that. 44 AP9372 iss.1 8.8 USB Data – Scene Transfer Individual Scenes can be transferred between Qu mixers via a USB device (key or drive) plugged into the Qu-Drive port. This provides a quick way to transfer settings without overwriting the current scenes and preferences. Make sure the USB device has been previously formatted using the Qu mixer Utility / Qu-Drive screen. The list on the left displays a list of scenes stored in the Qu mixer. The list on the right displays those found on the USB device. Scenes are transferred as data files numbered from ‘0’. Both the number and name will appear in the USB list. To Qu – Touch to highlight a USB Scene to transfer. Touch a Qu Scene to highlight the position to transfer to. Once both are highlighted touch ‘to Qu’. A confirmation box appears if you are about to overwrite an existing scene. Once transferred, the highlighted scenes increment ready to transfer the next if required. To USB – Highlight both positions as above. Touch ‘to USB’ to transfer. Delete – Highlight a scene in either list. Touch ‘Delete’ to remove it. Scenes can be deleted from either the Qu or from the USB device. 8.9 USB Data – Library transfer Individual processing Libraries can be transferred between Qu mixers via a USB device (key or drive) plugged into the Qu-Drive port. Make sure the USB device has been previously formatted using the Qu mixer Utility / Qu-Drive screen. The list on the left displays a list of libraries stored in the Qu mixer. The list on the right displays those found on the USB device. Libraries are transferred as data files numbered from ‘0’. Both the number and name will appear in the USB list. To Qu – Touch to highlight a USB Library item to copy to the Qu mixer. Touch ‘to Qu’ to copy the item. Once copied, the highlighted library increments ready to copy the next if required. To USB – Touch to highlight a Qu Library item to transfer via USB. Touch ‘to USB’ to copy the item to USB. Once copied, the highlighted library increments ready to transfer the next if required. Delete – Highlight a library in either list. Touch ‘Delete’ to remove it. Libraries can be deleted from either the Qu or from the USB device. Qu Mixer User Guide 45 AP9372 iss.1 8.10 USB Data – Show transfer Qu mixer settings can be stored to a USB device (key or drive) plugged into the Qu-Drive port. Data can be archived to computer and transferred between Qu mixers. A ‘Show’ stores all the Qu mixer settings and memories. It is stored as a set of files in a numbered folder on the USB device. Shows are not stored in the Qu mixer. A Show stores the following: Current mixer settings Mixer setup and preferences All Scenes All User Libraries MIDI channel number A Show does not store: Network settings User profile settings The Qu mixer displays a list of Shows found on the USB device. Shows are numbered from ‘0’. They can be named. Both the number and name will appear in the USB list. Make sure the USB device has been previously formatted using the Qu mixer Utility / Qu-Drive screen (described later in this guide). Store New – Touch to store a new Show folder on the USB device. This opens the screen keypad for naming the Show. Recall – Select a Show in the USB list. Touch the button to overwrite the current Qu mixer settings with the contents of the USB Show. A popup will appear . Note - If you want to keep your existing Qu settings then store these first as a new Show before recalling another Show. Overwrite – Existing USB Shows can be overwritten with the current mixer settings. Touch to overwrite the highlighted Show in the USB list with the current Qu mixer settings. Name – Touch the Name box to open the screen keypad and rename the Show highlighted in the USB list. The Show folder Each Show is stored as a set of data files within a numbered folder in the AHQU / SHOWS directory. The first show is numbered ‘0’. Note - Do not rename or edit the Show folder or its files. If you want to archive the Show on your computer we recommend you copy the numbered Show folder to a new named directory on your computer. To use the Show again copy just the numbered Show folder back into the SHOW directory of the USB device. Note - Do not change the format of the Show folder. Its name must have 8 characters = SHOWnnnn where nnn is a number from 0000 upwards. Note - The Show name is stored within a data file in the numbered Show folder on the USB device. The name is not part of the folder name. It is held within the SHOW.DAT file in the folder. To view the Show name on your computer – Open the numbered Show folder and find its SHOW.DAT text file at the end of the list. Open the file to view the Show name. Do not edit the file. Qu Mixer User Guide 46 AP9372 iss.1 8.11 Output Patch Setup – Surface Use this screen to patch signals to the rear panel Alt Out and AES outputs. Touch a box to open up the list of available options. Changes are applied instantly. You can also touch outside the list to exit. Alt Out – Choose the source for the rear panel stereo Alt Out jacks. AES Out – Choose the source for the rear panel AES digital output. The reset default for both is LR postfade. Group and Matrix outputs are not available on the Qu-16. 8.12 Output Patch Setup – dSNAKE This screen presents the patching for the dSNAKE remote audio outputs. These outputs have a fixed mapping as shown here and are not patchable. This suits the typical application. The Qu mixer can detect whether an AR2412 or an AR84 AudioRack is connected. No AudioRack plugged into dSNAKE The screen shows a picture of unconnected dSNAKE sockets when no AudioRack is detected. The Qu-24 shows two sockets, the Qu-16 shows one. AR2412 AudioRack plugged into dSNAKE The screen presents a picture of the AudioRack output sockets to show which Qu signals are mapped. All 10 mixes and the main LR output can be plugged using an AR2412 to feed the FOH PA and monitor sends on stage. The example here shows a Qu-24 with AR84 plugged into the EXPANDER port of the AR2412. This provides outputs for the stereo matrix of the Qu-24. The yellow ‘dS’ icon appears when an AudioRack is detected on dSNAKE. AR84 AudioRack plugged into dSNAKE The example here shows a Qu-24 with an AR84 rack connected. The Qu-16 can also work with just an AR84 connected. The screen presents a picture of the output sockets to show which Qu signals are mapped. Mix 1 and 2 and the main LR output can be plugged here, for example to feed a PA system with LR and two monitors. Qu Mixer User Guide 47 AP9372 iss.1 8.13 Output Patch Setup - Monitor This screen presents the patching of the dSNAKE remote audio outputs. This allows the Qu mixer to work with the Allen & Heath ME Personal Monitor mixing system. Qu-24 A ME-1 mixer or ME-U distribution hub can be plugged into any of these sockets: Qu rear panel dSNAKE port AR2412 MONITOR port AR2412 EXPANDER port There are 40 Monitor output channels. These have a fixed map and are not patchable. The outputs are fed from the input channels, FX and various mixes according to the tables below. Qu-16 Mono (CH) and stereo (ST) channel sends follow the Global Direct Output settings. Mixes are postprocessing, post-mute, post-fader. Note - Set the Global Direct Out source using a channel Routing screen. Note – The Qu-16 and Qu-24 have different output patching according to the tables below. Qu-16 dSNAKE Monitor Patch Ch 1 2 3 4 5 6 7 8 Qu out CH1 CH2 CH3 CH4 CH5 CH6 CH7 CH8 Ch 9 10 11 12 13 14 15 16 Qu out CH9 CH10 CH11 CH12 CH13 CH14 CH15 CH16 Ch 17 18 19 20 21 22 23 24 Qu out ST1 L ST1 R ST2 L ST2 R ST3 L ST3 R Main L Main R Ch 25 26 27 28 29 30 31 32 Qu out FX1ret L FX1ret R FX2ret L FX2ret R FX3ret L FX3ret R Mix1 Mix2 Ch 33 34 35 36 37 38 39 40 Qu out Mix3 Mix4 Mix5 L Mix6 R Mix7 L Mix8 R Mix9 L Mix10 R Qu-24 dSNAKE Monitor Patch Ch 1 2 3 4 5 6 7 8 Qu out CH1 CH2 CH3 CH4 CH5 CH6 CH7 CH8 Qu Mixer User Guide Ch 9 10 11 12 13 14 15 16 Qu out CH9 CH10 CH11 CH12 CH13 CH14 CH15 CH16 Ch Qu out 17 18 19 20 21 22 23 24 48 CH17 CH18 CH19 CH20 CH21 CH22 CH23 CH24 Ch 25 26 27 28 29 30 31 32 Qu out ST1 L ST1 R ST2 L ST2 R ST3 L ST3 R FX1ret L FX1ret R Ch 33 34 35 36 37 38 39 40 Qu out Grp1 L Grp2 R Grp3 L Grp4 R Mix7 L Mix8 R Mix9 L Mix10 R AP9372 iss.1 8.14 Output Patch Setup – USB Audio This screen presents the patching of the USB audio outputs. This includes the Qu-Drive Stereo, Qu-Drive Multitrack and the USB B audio streaming. These outputs share the same block of 32 patchable tracks: Qu-Drive Stereo = Track 17-18 Qu-Drive Multitrack = Track 1-18 USB B Streaming = Track 1-32 There are two screens: Track 1-18 = All tracks associated with Qu-Drive Track 19-32 = The rest of the tracks for USB B Touch the lower left ’19-32’ or ‘1-18’ buttons to navigate between the screens Touch a button and then turn the screen Rotary to scroll through the available outputs. Use the Fn key ‘+1’ function to quickly assign strips in sequence. Once you have chosen the outputs press Apply to accept or Cancel to discard the changes. The following sources can be patched: X Unassigned CH Mono channel pre processing ST Stereo channel pre processing Input sources are pre-fader. Channels are sourced from their Insert send point. This is after the Preamp and before the processing. This is preferred for live multitrack recording. FX Ret FX returns 1-4 pre-fader Output sources are post processing, post fader. Grp Group post-fader (not Qu-16) Mix Mix 1-10 post-fader The USB Audio factory reset default patching is: LR pre Main LR mix – pre-fader LR post Main LR mix – post-fader L+R pre Main LR mono sum – pre-fader MTX Matrix post-fader (not Qu-16) PAFL Stereo PAFL monitor 8.15 1-16 = CH1-16 17-18 = LR post fader 19-24 = ST1-3 25-32 = CH17-24 (Not Qu-16) Utility - Calibration Use the routines here to calibrate the touch accuracy of the Touch Screen and positional accuracy of the Motor Faders. Follow the on-screen instructions. Qu Mixer User Guide 49 AP9372 iss.1 8.16 Utility – Qu-Drive This screen lets you check and format a USB device (key or hard drive) for use with Qu-Drive. Once formatted you do not need to format it again. Note – Formatting the USB device will erase all current data on it. If you want to keep this then make sure you archive the data elsewhere first. Note – For reliable performance we recommend you first format your USB device using the Qu mixer Format utility. Once formatted use this with Qu only. Do not use the device for other applications. Note – Use a USB HDD (hard disk drive), not a key, for Qu-Drive stereo and multitrack recording and playback. A USB key can be used for data transfer but is not recommended for audio. Plug in the USB device. Wait for the mixer to read the drive. The status window displays information about the USB device: File system: OK (no need to format) File system: Unsupported (you need to format it) Touch Format to start formatting. When complete, wait a few seconds for the mixer to read the key. If successful the status window will display ‘OK’. Note – Do not remove the USB device or turn off power while until formatting is complete. For more information on working with USB refer to the ‘Understanding Qu-Drive and USB’ article available in the Qu Knowledgebase on the Allen & Heath web site. Qu Mixer User Guide 50 AP9372 iss.1 8.17 Utility – Firmware Update The Qu mixer operating firmware can be easily updated using a USB device (key or drive). Make sure the USB device has been previously checked and formatted to work with the Qu mixer. If you need to format the device then use the Format facility in the Setup / Utility / Firmware screen. Step1 Download the firmware Visit the Allen & Heath web site and download the latest Qu firmware. Choose the firmware for your Qu mixer model. The file has a .QUU extension and a name that includes the model and version number. Save the file to your computer. For example: Qu16UpdtV1_23_4567.QUU Read the Release Notes available on the download page. Step2 Remove previous Qu Firmware from USB It is important to remove previous firmware files as the Qu will attempt to load the first version it finds. The firmware file is in the root directory of the USB device and has a .QUU extension. Step3 Copy the file to the USB root directory The Qu mixer will look for a valid firmware file in the root directory of the device. Step4 Run the Firmware Update Plug the USB device into the Qu-Drive port. Open the Setup / Utility / Firmware screen. If valid firmware is found its version number will be displayed on the screen. For example: Touch the Update button. The update will start immediately. The screen goes blank and the Pan control indicators flash in sequence while the update is running. After a few minutes the mixer will reboot. Important note Do not remove power during the firmware update. Do not remove the USB device until the update has completed. The mixer restarts automatically after the firmware update. Qu Mixer User Guide 51 AP9372 iss.1 9. Working with a DAW The Qu mixer can stream audio and send MIDI messages to and from an Apple® Mac computer via the rear panel USB B port. This lets you work with a DAW (Digital Audio Workstation) running on your computer. The Custom Layer can provide MIDI control faders and keys. You can work with the standard Qu MIDI messages or download the Allen & Heath DAW Control driver for the Mac computer to convert these into one of the popular HUI or Mackie Control protocols. Note – Qu currently supports only Apple® Mac computers. USB MIDI is supported natively by the Mac so no driver is needed. A driver for Windows® computers is not available. Check the Qu mixer firmware version – This is displayed on the Home / Home screen. Make sure you are running V1.30 or higher. Check for the latest firmware at the Allen & Heath web site. Set the Qu mixer MIDI channel number – Use the Setup / Control / MIDI screen. Qu DAW control uses its own MIDI channel. This is the next number up from that set for other Qu MIDI messages. Qu defaults to channel 2 for DAW control. Connect the Qu mixer to the Mac – Plug a suitable cable into the rear panel USB B port. Set the Custom Layer for fader control – Use the Setup / Control / Custom Layer to assign the faders as MIDI strips. Download the DAW Control driver from the Allen & Heath web site. Install this on your Mac and follow the setup instructions in its Help Manual. DAW control (MIDI channel N+1)): Mute key / indicator Sel key / indicator PAFL key / indicator Fader movement = = = = Mute Select Solo Fader Refer to the Allen & Heath web site for the Qu MIDI Protocol document and more information on using the Qu mixer with different DAW systems. DAW Control converts the Qu MIDI messages into HUI or Mackie Control protocol. Set the MIDI channel to be the same as the Qu mixer DAW channel. For USB connection select MIDI Ports. Select the MIDI Input and Output ports to be used. Select the Custom Layer Two squares in the status bar flash to display MIDI I/O activity. To check you are connected to the mixer, the left square should flash when you move any Qu fader. Stream audio to the Mac – Audio is sent via USB B. Go to the Setup / Output Patch / USB Audio screen to check the patch. Stream audio back to the Qu – Audio is returned via USB B. This is mapped one-to-one to the inputs channels. Use the Preamp screen Fn key Source page to patch USB B to the channels. Make sure you have set ‘USB B Streaming’ as the global USB source. Qu Mixer User Guide 52 AP9372 iss.1 10. Qu-Pad iPad app Qu-Pad is an engineer's mixing tool providing wireless mobile control for the Qu mixer. It gives you the freedom to walk the room or stage and control the sound right where it is needed. Qu-Pad is intended for live mixing control, not for system setup or memory access. Qu-Pad and the Qu console can work together to provide simultaneous control of independent functions, for example one engineer using the console to mix front-of-house sound, and another using the iPad to mix monitors on stage. Qu-Pad detects which Qu mixer model is connected. Note - This version of Qu-Pad supports only one iPad connection at a time. Live mixing functions available: LR mix selected, CH preamp shown CH PEQ shown Fader levels, mutes, pan Aux and FX sends, routing and Pre/Post switching Input Preamp/USB selection Preamp Gain, Pad, Polarity and 48V HPF, Gate, PEQ, GEQ, Comp, Delays FX Tap Tempo Mute Groups RTA function PAFL select Full signal metering Custom strips for personalised channel layout Custom channel naming (stored on the iPad) Requirements: FX mix selected Qu-Pad app downloaded from the Apple Store. Qu mixer running firmware V1.30 or higher. Suitable wireless router (wireless access point). Cat5 cable to connect to the Qu Network port. iPad running iOS5.1.1 or higher. Current version tested at time of publication is iOS7.0. Note –The Qu-Pad app and the Qu mixer firmware must have the same feature release number (1.N), but can have a different maintenance number (x) where: Firmware version = V1.Nx Wireless router - For information on choosing and setting up a wireless router, refer to the Help Manual built into the Qu-Pad app and to the manufacturer’s setup guide that comes with the router. Custom Layer setup Qu mixer Network settings – The Qu mixer and wireless router must have compatible TCP/IP addresses. We recommend setting the mixer to DHCP for the typical application where the Network port connects to the router only. This means the mixer will be given an IP address automatically by the router. Go to the Setup / Network screen to check this setting. Channel naming – Input channels, mixes, FX and mute groups can be named with up to 5 characters. These names are stored along with the Custom Layer settings on the iPad. They do not appear on the Qu mixer and are not part of the Scene or Show memories. Using Qu-Pad – Refer to the Help Manual built into the Qu-Pad app for instructions on how to set up and operate Qu-Pad. Further information is available in the Knowledgebase and Digital Community on the Allen & Heath web site. Qu Mixer User Guide 53 AP9372 iss.1 11.Resetting the Mixer There are two ways to reset the Qu settings: 11.1 Reset Mix Settings – A starting point for mixing This button in the Scenes screen resets the mixer to a known starting point for mixing. It provides a quick way to reset the processing, mixes and patching before a show or after another user has finished with it. All parameters that can be stored in Scene memories are reset to a factory default. Parameters that are not stored in scenes are not affected. This reset does not affect existing scenes stored in the mixer. If you want to keep your current settings then save these as a Scene before resetting the mixer. Note - This reset is not affected by the Global filter and Safes settings. Touch and hold the Reset Mix Settings button for 1 second until the confirmation screen appears. Touch Yes to reset the mixer or No to exit without resetting. This ‘resets the board’ ready for mixing: All preamps are patched and have nominal mic gain set and phantom power switched off, a good start for vocal microphones, All EQ is switched in and set flat ready to start adjusting tone, Gates and compressors are switched out but have their parameters set ready for being switched in for applications such as drum gating and vocal compression, Channels are assigned to the mixes and FX with their faders and send levels turned down ready to start dialling into the mix, The mixes are set pre-fade and sourced post-EQ, pre-compressor ready to be used as monitor sends, a common application for the mixes. The FX master and return faders are turned up and a default reverb and delay patched ready for you to hear the effects as soon as you raise a channel send. The Mix master faders are turned up ready to hear sound when you raise a channel send. The main LR master is turned down to avoid unexpected loud level in the PA. The Groups are unassigned and their master faders turned down (not Qu-16). The Matrix sends are assigned and their master faders turned down (not Qu-16). Reset mix settings: Source Preamp, Gain 28dB, 48V off ST1-3 trim 0dB HPF out, 100Hz PEQ and GEQ in, flat Gates out, thres -36dB, depth 20dB Comp out, thres 0dB, ratio 3.2:1 Delays 0ms Mix source post-EQ Sends to Mixes -Inf and pre-fade Sends to FX -Inf and post-fade Direct Out post-fade/mute, trim 0dB Mutes off Channel faders -Inf FX return faders 0dB FX send and Mix master faders -4dB LR master fader -Inf FX1 = Mix>Return, Reverb (EMT250) FX2 = Mix>Return, Delay (Vocal) FX 3 and 4 = unassigned Audio Groups unassigned (not Qu-16) Group and Matrix faders –Inf (not Qu-16) Matrix sends assigned, post (not Qu-16) Mute Groups unassigned AES, Alt Out patch LR post-fade Qu-Drive stereo patch LR post-fade USB patch CH1-16, ST1-3, LR Talkback unassigned, HPF 120Hz Custom Strip unassigned SoftKeys = Mute Groups 1-4 Qu Mixer User Guide Creating your own start settings – You can start by resetting the mixer and then editing the patching, levels and parameters to suit your starting preferences. Name and store this as a Scene, for example Scene 1 “Reset Board”. 54 AP9372 iss.1 11.2 System Hard Reset A power up reset is available if you need to fully reset the Qu mixer settings and memories. This could be done to clear the system out before sending the mixer to a client, or if you suspect a system problem. To reset mix parameters before starting a show or sound check, use a Scene or the Reset Mix Setting function described earlier in this guide. Note – A hard reset clears all current settings, all Scenes and all User Libraries. Hold for 5 seconds while powering up the mixer System hard reset: Source Preamp, Gain 28dB, 48V off ST1-3 trim 0dB HPF out, 100Hz PEQ and GEQ in, flat Gates out, thres -36dB, depth 20dB Comp out, thres 0dB, ratio 3.2:1 Delays 0ms Mix source post-EQ Sends to Mixes -Inf and pre-fade Sends to FX -Inf and post-fade Direct Out post-fade/mute, trim 0dB Mutes off Channel faders -Inf FX return faders 0dB FX send and Mix master faders -4dB LR master fader -Inf FX1 = Mix>Return, Reverb (EMT250) FX2 = Mix>Return, Delay (Vocal) FX 3 and 4 = unassigned Mute Groups unassigned AES, Alt Out patch LR post-fade Qu-Drive stereo patch LR post-fade USB patch CH1-16, ST1-3, LR Talkback unassigned, HPF 120Hz Custom Strip unassigned SoftKeys = Mute Groups 1-4 Input PAFL = PFL, mix = AFL PAFL additive mode off Sel follow PAFL on, LR to PAFL on PAFL trim 0dB, delay 0ms Talkback mic gain 27dB Sig Gen Pink Noise, unassigned Clears all scene Safes Clears all Scene memories Clears all User Libraries Resets Network address to DHCP Resets touch screen calibration Qu Mixer User Guide First turn off the system including amplifiers and powered speakers. To hard reset the Qu mixer - Press and hold the touch screen Reset and Setup keys together and then power up the mixer. Keep the keys pressed for at least 5 seconds while the mixer boots. Release the keys. The hard reset: Resets the current settings the same as using the Scenes screen ‘Reset Mix Settings’ button. Resets non-scene parameters and user preferences to a factory default. Clears scene recall Safes. Clears all memories including Scenes and User Libraries. Resets the Network IP address and the touch screen calibration. 55 AP9372 iss.1 12.Specifications Inputs Mic/Line Inputs 1-16 (Qu-16) 1-24 (Qu-24) Control Faders 100mm motorised Input Sensitivity (XLR / TRS) -60 to +10dBu / -50 to +20dBu Touch Screen 5" TFT, 800x480 resolution Analogue Gain -10 to +60dB, 1dB steps SoftKeys 4 (Qu-16), 10 (Qu-24) Maximum Input Level (XLR / TRS) +19dBu / +29dBu Mute Groups 4 Input Impedance (XLR / TRS) >5kΩ / >10 kΩ Network TCP/IP Ethernet for MIDI and iPad app THD+N, Unity gain 0dB 0.0005% -89 dBu (20-20kHz, Direct Out @0dBu 1kHz) THD+N, Mid gain +30dB 0.001% -83dBu (20-20kHz, Direct Out @0dBu 1kHz) Balanced, XLR and 1/4" TRS jack, fully recallable Input Processing Stereo Line Inputs Source CH1-16 (Qu-16), CH1-24 (Qu-24) Local, dSNAKE, or USB ST1, ST2 Local, dSNAKE, or USB Balanced, 1/4" TRS jack, half normalled ST3 Local, dSNAKE, or USB ST3 connector Unbalanced, 3.5mm Mini Jack USB Global Source Qu-Drive or USB B Streaming Input Sensitivity (ST1, ST2 / ST3) Nominal +4dBu / 0dBu ST1, ST2 connector Trim +/-24dB Stereo Linking Odd/even input pairs Maximum Input Level (ST1,ST2 / ST3) +22dBu / +18dBu Parameters linked EQ, dynamics, insert, delay, assignments, sends Input Impedance >7kΩ Link options Preamp, polarity, sidechains, fader/mute, pan Outputs Mix1-10 and LR Out Balanced, XLR Grp1-4, MTX1-4 (Qu-24 only) Polarity Normal/Reverse High Pass Filter 12dB/octave 20Hz – 2kHz Output Impedance <75Ω Insert Assign FX into Input channels Nominal Output +4dBu = 0dB meter reading Delay Up to 85ms Maximum Output Level +22dBu Residual Output Noise -91 dBu (muted, 20-20kHz) Gate Threshold / Depth Self key Sidechain -72dBu to +18dBu / 0 to 60dB Attack / Hold / Release 50us to 300ms / 10ms to 5s / 10ms to 1s Stereo Alt Out & 2Trk Out Balanced, 1/4" TRS jack Source (Alt Output / 2Trk Output) Patchable / LR post-fade Output Impedance <75Ω PEQ 4-Band fully parametric, 20-20kHz, +/-15dB Nominal Output +4dBu = 0dB meter reading Band 1 Selectable LF Shelving (Baxandall), Bell Maximum Output Level +22dBu Band 2, Band 3 Bell Residual Output Noise -90 dBu (muted, 20-20kHz) Band 4 Selectable HF Shelving (Baxandall), Bell Bell Width Non-constant Q, variable, 1.5 to 1/9th octave Compressor Self key Sidechain -46dBu to 18dBu / 1:1 to infinity AES Digital Output 2 channel, 48kHz sampling rate, XLR 2.5Vpp balanced terminated 110Ω Threshold / Ratio dSNAKE Inputs Remote source for CH1-24, ST1, ST2, ST3 Attack / Release 300us – 300ms / 100ms - 2s Outputs Remote outputs for Mix1-10, LR Knee Soft/Hard Compatible with AudioRacks AR2412, AR84 Types Peak Manual, RMS Manual, SlowOpto, PunchBag Channel Direct Out to USB Follow Fader, follow Mute (global options) Source select (global) Post-Preamp, Pre-EQ, Post-EQ, Post-Delay Compatible with ME personal mixing system System USB Audio Dynamic Range Measured balanced XLR in to XLR out, 0dB gain, 0dBu input 112 dB Frequency Response +0/-0.5dB 20Hz to 20kHz Headroom +18dB Internal operating Level 0dBu dBFS Alignment Meter Calibration +18dBu = 0dBFS (+22dBu at XLR output) Mix Insert Processing Delay GEQ Assign FX into Mix channels Up to 170ms Constant 1/3 oct, 28 bands 31Hz-16kHz, +/-12dB Gain Meter Peak indication 0dB meter = -18dBFS (+4dBu at XLR out) -3dBFS (+19dBu at XLR out), multi-point sensing PEQ 4-Band fully parametric, 20-20kHz, +/-15dB Meter Signal indication -48dBFS (-26dBu at XLR out) Band 1 Selectable LF Shelving (Baxandall), Bell Meter Type Fast (peak) response Band 2, Band 3 Bell Band 4 Selectable HF Shelving (Baxandall), Bell Bell Width Non-constant Q, variable, 1.5 to 1/9th octave Self key Sidechain -46dBu to 18dBu / 1:1 to infinity Sampling Rate 48kHz +/-100PPM ADC, DAC 24-bit Delta-Sigma Latency 1.2 ms (local XLR in to XLR out) Compressor 0.7 ms (local XLR in to AES out) Threshold / Ratio Attack / Release 300us – 300ms / 100ms - 2s Operating Temperature Range 0 deg C to 35 deg C (32 deg F to 95 deg F) Knee Soft/Hard Mains Power 100-240V AC, 50/60Hz, 82W max (Qu-16), 120W (Qu-24) Types Peak Manual, RMS Manual, SlowOpto, PunchBag Internal FX 4x RackFX engine, Send>Return or Inserted Qu-Drive USB A Device Use a USB hard drive (not a USB key) Stereo Record 2 channel, WAV, 48kHz, 24-bit, patchable Stereo Playback 2 channel, WAV, 44.1 or 48kHz, 16 or 24-bit, to ST3 Multitrack Record 18 channel, WAV, 48kHz, 24-bit, patchable Multitrack Playback 18 channel, WAV, 48kHz, 24-bit FX Types Reverbs, Delays, Gated Reverb, ADT Chorus, Symphonic Chorus, Phaser, Flanger 4 dedicated Stereo FX returns Audio Tools PAFL Fader, Pan, Mute, Routing to Mix/LR, 4-Band PEQ PFL or stereo in-place AFL, 0 to -24dB Trim, 85ms Delay Talkback Assignable to any mix, 12dB/oct HPF USB B, Core Audio compliant Signal Generator Assignable to any mix, Sine / White/Pink/Bandpass Noise Send (upstream) Qu-16/Qu-24 24/32 channel, WAV, 48kHz, 24-bit RTA 31-Bands 1/3 octave 20-20kHz, follows PAFL source Return (downstream) Qu-16/Qu-24 22/30 channel, WAV, 48kHz, 24-bit USB Audio Streaming Dimensions Qu-16 Mixer & Weights Desk mounted Width x Depth x Height Qu-24 Mixer Width x Depth x Height 440 x 500 x 186 mm (17.4" x 19.7" x 7.4") Desk mounted 632 x 500 x 186 mm (24.9" x 19.7" x 7.4") Rack mounted 483 x 472 x 190 mm (19" x 18.6" x 7.5") Packed in shipping box 670 x 790 x 350 mm (26.4" x 31.1" x 13.8") Packed in shipping box 610 x 680 x 350 mm (24" x 27" x 13.8") Unpacked weight 14 kg (31 lbs) Unpacked weight 10 kg (22 lbs) Packed weight 18 kg (40 lbs) Packed weight 13.5 kg (30 lbs) Qu Mixer User Guide 56 AP9372 iss.1 Qu Mixer User Guide Global USB source CAT5 'digital snake' ST3 R ST2 L/M R ST1 L/M Line In Mic In USB dSNAKE ADC ADC ADC ADC + - + - ADC ADC Gain ADC + - + - + - LOCAL 48V 57 USB B Stream 24 ch AR84 AR2412 Stream 22 ch Stereo or Multitrack Stereo or Multitrack 18 ch RECORD Outputs Inputs Qu-Drive PLAYBACK Mic/Line 1-16 MUTE + - ADC GAIN Mic/Line Inputs 1-8 -20dB PAD 48V Skt1-16 = CH1-16 Skt17-22 = ST1-3 Mic/Line Inputs 1-16, ST 1-3 CH1-16 Insert ST1-3 Insert FX1-4 Ret pre FX1-4 Send post Mix1-10 post LR pre/post L+R pre/post PAFL FADER DAC METER CH1-16, ST1-3 Source From Insert Sends Qu-Drive Multitrack / USB B Streaming LR pre/post L+R pre/post Mix1-10 post PAFL Qu-Drive Stereo GATE Talkback Mic Ready XLR Out 1-4 BAL + - + - Gain +4dBu Mix>Return FX 1-4 Insert CH>Return Mix>Return XLR Out 1-12 PFL AFL COMP Post-PEQ PEQ CH/Mix Insert FX Pre-EQ Global source for Direct Out FX Send1-2 USB Patch: HPF Source source per Mix Post-Preamp 0 TRIM POL Insert FX Input Channels 1-16, ST1-3 To USB patch USB SOURCE Local/dSNAKE PEQ 1-2 = Mix 1-2 3-4 = LR Post Pre Follow Fader FADER FADER HPF MUTE LEV R R PAN R R Mix sends FX sends to LR PFL AFL Direct Out To ME Personal Mix System 40 Channels, fixed map: 1-16 = CH1-24 Dir Out 17-22 = ST1-3 Dir Out 23-24 = LR post 25-30 = FX1-3 Ret pre 31-40 = Mix1-10 post To ME Personal Mix System (AR84 expansion not available) Mix LR ASSIGN to Mix LR ASSIGN to SEND L L TRIM Mix sends FX sends to LR PFL AFL Connect one remote rack (AR2412 or AR84) dSNAKE dSNAKE MONITOR EXPANDER Sine White Noise Pink Noise B/P Noise Post Pre PAN SEND L L Press to TALK TALKBACK MUTE FX Return 1-4 SIG GEN METER 1-10 = Mix 1-10 11-12 = LR ADC 48V MUTE Global Follow Mute Post-All DELAY METER m-point Pk FX Mix LR PAFL GEQ COMP DELAY PEQ GEQ 28-band DELAY GEQ 28-band RTA 31-band 1/3 octave PEQ L, R Masters INSERT FX Monitor DELAY DELAY -24dB 0dB PAFL PFL TRIM COMP COMP Mix 5-6, 7-8, 9-10 Masters PEQ 28-band Mix 1-4 Masters INSERT FX AFL PFL MUTE MUTE MUTE DAC DAC Pre L+R FADER FADER FADER Phones PAFL to Output Patch METER METER METER L L BAL BAL R PFL R PFL PFL Patch: LR pre/post L+R pre/post Mix post PAFL Patch: LR pre/post L+R pre/post Mix post PAFL post L+R post AFL post AFL post AFL BAL +4dBu + - + - R L R L R L AES Out R L Alt Out BAL +4dBu + - + - BAL +4dBu + - + - BAL +4dBu + - + - BAL +4dBu + - AES digital out (option) DAC DAC 2TRK Out DAC DAC LR Out DAC DAC Mix Out 5-6, 7-8, 9-10 DAC Mix Out 1-4 12.1 Qu-16 System Block Diagram AP9372 iss.1 Qu Mixer User Guide 58 + - + - + - + - + - LOCAL USB dSNAKE ADC ADC ADC ADC ADC ADC Gain ADC 48V USB B Stream 32 ch AR84 AR2412 Stream 30 ch Stereo or Multitrack Stereo or Multitrack RECORD Outputs Inputs Qu-Drive PLAYBACK CAT5 Global USB source ST3 R ST2 L/M R ST1 L/M Line In Mic In Mic/Line 1-24 + - 48V ADC GAIN Mic/Line Inputs 1-8 -20dB PAD FADER COMP Post-PEQ PEQ Talkback Mic Ready XLR Out 1-4 BAL + - + - Gain +4dBu Mix>Return FX 1-4 XLR Out 1-12 PFL AFL Insert CH>Return Mix>Return CH/Mix/Grp/MTX Insert FX DAC METER CH1-24, ST1-3 Source From Insert Sends USB Patch: MUTE FX Send1-4 Mic/Line Inputs 1-24 CH1-24 insert ST1-3 insert FX Ret1-4 pre Grp1-4 insert Mix1-10 post LR pre/post L+R pre/post MTX post PAFL Pre-EQ GATE Global source for Direct Out Qu-Drive Multitrack / USB B Streaming MTX1-4 post LR pre/post L+R pre/post Mix1-10 post Grp1-4 post PAFL Qu-Drive Stereo HPF Source source per Mix Post-Preamp 0 TRIM POL Insert FX Input Channels 1-24, ST1-3 To USB patch USB SOURCE Local/dSNAKE PEQ 1-2 = Mix 1-2 3-4 = LR Post Pre Follow Fader FADER FADER HPF LEV R R Mix sends FX sends to LR PFL AFL to Grp Direct Out Mix sends FX sends to LR To ME Personal Mix System 40 Channels, fixed map: 1-24 = CH1-24 Dir Out 25-30 = ST1-3 Dir Out 31-32 = FX Ret1 pre 33-36 = Grp1-4 post 37-40 = Mix7-10 post ST1-3 Inputs MTX1-4 Outputs ASSIGN to Grp Mix LR MTX ASSIGN to Grp Mix LR MTX SEND L L PAN TRIM PFL AFL to Grp Connect one remote rack (AR2412 or AR84) dSNAKE dSNAKE MONITOR EXPANDER MUTE Sine White Noise Pink Noise Bpass Noise Post Pre R R SEND L L PAN Press to TALK TALKBACK MUTE FX Return 1-4 SIG GEN METER 1-10 = Mix 1-10 11-12 = LR ADC 48V MUTE Global Follow Mute Post-All DELAY METER m-point Pk FX Mix Grp LR PAFL GEQ PEQ GEQ 28-band COMP COMP DELAY DELAY GEQ DELAY GEQ 28-band COMP COMP DELAY DELAY GEQ RTA 31-band 1/3 octave PEQ 28-band 0dB PAFL PFL TRIM -24dB MUTE MUTE MUTE MUTE AFL PFL DELAY Monitor COMP Matrix 1-2, 3-4 Masters PEQ INSERT FX INSERT FX PEQ 28-band L, R Masters INSERT FX Mix 5-6, 7-8, 9-10 Masters INSERT FX Mix 1-4 Masters To USB patch PEQ 28-band Group 1-2, 3-4 Masters INSERT FX Post Pre L DAC DAC MUTE L BAL PFL R PFL BAL R PFL METER L BAL R PFL R MTX sends L post AFL MTX1-4 post LR pre/post L+R pre/post Mix1-10 post Grp1-4 post PAFL Patch: MTX1-4 post LR pre/post L+R pre/post Mix1-10 post Grp1-4 post PAFL post AFL L+R post AFL post AFL post AFL Mix sends FX sends MTX sends R PFL R MTX sends Phones PAFL FADER to LR L BAL R MTX sends SEND L METER Post Pre R R SEND L METER Post Pre PAN SEND L METER Post Pre L METER SEND L+R to Output Patch FADER FADER FADER FADER MTX + - BAL +4dBu + - BAL +4dBu + - + - BAL +4dBu + - + - BAL +4dBu + - + - BAL +4dBu + - + - R L R L R L AES Out R L R L R L Alt Out BAL +4dBu + - AES digital out (option) DAC DAC BAL +4dBu DAC + - + DAC Mtx Out 1-2, 3-4 2TRK Out DAC DAC LR Out DAC DAC Mix Out 5-6, 7-8, 9-10 DAC Mix Out 1-4 DAC DAC Grp Out 1-2, 3-4 12.2 Qu-24 System Block Diagram AP9372 iss.1 12.3 Mechanical Details The following provides information for mixer installation. The Qu mixer can be operated on a flat surface or fitted into a flightcase. The Qu-16 can be mounted in a 19” equipment rack or plinth. Ventilation - Make sure that air flow around the ventilation slots at the rear and underside of the mixer is not obstructed. Keep these areas clear when flight casing, installing or operating the mixer. Note – Blocking or obstructing the ventilation slots may cause damage to the mixer through overheating. Qu-16 = 440 440 Qu-24 = 632 27 30 186 20 degrees 70 471 62 134 133 190 43 171 40 496 43 Qu-16 Rack Mount Option A kit of parts is available from Allen & Heath to mount the Qu-16 in a standard 19” equipment case. Rack kit part number QU-16-RK19 486 Minimum rack space required is 11U. Note - Allow space for the connectors and cables at the rear. The rack ears can be fitted without the need to remove the plastic side trims. Simply secure them to the base of the mixer with the 6x M4x8 screws supplied (part number AB0332) using a T20 Torx screwdriver. Secure the mixer in the 19” rack with 8x M6 screws with plastic cup washers to protect the mixer surface. 483 Qu Mixer User Guide 59 AP9372 iss.1 Qu Mixer User Guide 60 AP9372 iss.1