1
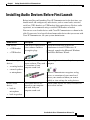
CH A P T E R
1
Getting Started with
Cisco IP Communicator
Cisco IP Communicator is a desktop application that turns your computer into a
full-featured Cisco Unified IP Phone, allowing you to place, receive, and
otherwise handle calls. If you install Cisco IP Communicator on a laptop or
portable computer, you can use Cisco IP Communicator (and all of your phone
services and settings) from any location where you can connect to the corporate
network. For example, if you are on a business trip, you can use
Cisco IP Communicator to receive calls and check voice messages while online.
Or, if you are working from home, co-workers can reach you by dialing your work
number.
Cisco IP Communicator works with Cisco Unified Video Advantage, another
desktop application, to enhance your communication experience with video. For
example, you can place a call through Cisco IP Communicator and the available
video is automatically displayed through Cisco Unified Video Advantage.
•
Cisco Product Security Overview, page 1-2
•
Getting Started Checklist, page 1-2
•
Installing Audio Devices Before First Launch, page 1-3
•
Installing Cisco IP Communicator on Your Computer, page 1-4
•
Launching Cisco IP Communicator, page 1-5
•
Using the Audio Tuning Wizard, page 1-6
•
Configuring and Registering Cisco IP Communicator, page 1-8
•
Testing Cisco IP Communicator, page 1-9
User Guide for Cisco IP Communicator Release 7.0
OL-10863-01
1-1
Chapter 1
Getting Started with Cisco IP Communicator
Cisco Product Security Overview
Cisco Product Security Overview
This product contains cryptographic features and is subject to United States and
local country laws governing import, export, transfer and use. Delivery of Cisco
cryptographic products does not imply third-party authority to import, export,
distribute or use encryption. Importers, exporters, distributors and users are
responsible for compliance with U.S. and local country laws. By using this
product you agree to comply with applicable laws and regulations. If you are
unable to comply with U.S. and local laws, return this product immediately.
A summary of U.S. laws governing Cisco cryptographic products may be found
at: http://www.cisco.com/wwl/export/crypto/tool/stqrg.html. If you require
further assistance please contact us by sending e-mail to export@cisco.com.
Getting Started Checklist
Follow this checklist to set up Cisco IP Communicator on your desktop so that
you can start making calls.
Quick Start Task
For more information, see...
1. Install any sound cards or USB audio devices that
you want to use, including a USB headset or handset.
Installing Audio Devices Before First Launch,
page 1-3
2. Install the Cisco IP Communicator application.
Installing Cisco IP Communicator on Your
Computer, page 1-4
3. Launch Cisco IP Communicator.
Launching Cisco IP Communicator, page 1-5
4. Use the Audio Tuning Wizard to select audio modes
and tune audio devices.
•
Using the Audio Tuning Wizard, page 1-6
•
How to Assign Audio Modes, page 4-9
5. Accomplish network configuration or registration
steps required by your system administrator.
Configuring and Registering
Cisco IP Communicator, page 1-8
6. Place test calls.
Testing Cisco IP Communicator, page 1-9
User Guide for Cisco IP Communicator Release 7.0
1-2
OL-10863-01
Chapter 1
Getting Started with Cisco IP Communicator
Installing Audio Devices Before First Launch
Installing Audio Devices Before First Launch
Before installing and launching Cisco IP Communicator for the first time, you
should install and configure any audio device (such as sound cards, universal
serial bus (USB) handsets, or USB headset) that require drivers. For best audio
experience, we recommends using a certified USB handset or headset
You can use several audio devices with Cisco IP Communicator as shown in the
table. If you want a list of specific brand-name audio devices that you can use with
Cisco IP Communicator, ask your system administrator.
Audio Device
Description
Notes
USB devices:
USB devices require device
driver software and have
rectangular plugs.
Follow the instructions of the device
manufacturer to install USB devices. If
prompted, complete the Microsoft Windows
Found New Hardware Wizard.
•
a USB handset
•
a USB headset
Analog audio devices do not Plug analog devices into audio jacks on your
require software. They work computer.
as extensions of your
• an analog headset
computer sound card.
• external speakers
or microphones
Cisco IP Communicator recognizes analog
External analog
devices:
devices as extensions of your sound card;
choose your sound card when you want to
modify or view settings for analog devices.
Internal audio
devices:
•
built-in
microphone
•
built-in speakers
These audio devices are
internal to your computer
and work with your
computer sound card.
Internal audio devices are always available for
you to select and use.
User Guide for Cisco IP Communicator Release 7.0
OL-10863-01
1-3
Chapter 1
Getting Started with Cisco IP Communicator
Installing Cisco IP Communicator on Your Computer
Note
If you install or insert an audio device that requires a driver (a USB handset, USB
headset, or sound card) after launching Cisco IP Communicator, the application
does not recognize the device until you relaunch Cisco IP Communicator. Then
the Audio Tuning Wizard automatically launches so that you can tune the device.
Related Topics
•
Installing Cisco IP Communicator on Your Computer, page 1-4
•
Using a Headset, page 5-2
•
Removing and Re-Installing Audio Devices, page 5-6
Installing Cisco IP Communicator on Your Computer
Before You Begin
•
If you use a laptop computer, be sure that you are not connected to a docking
station when launching Cisco IP Communicator for the first time after
installation. The docking station can interfere with the ability of
Cisco IP Communicator to locate the computer network adapter.
•
If Cisco Unified Personal Communicator is running, exit it before launching
Cisco IP Communicator.
•
If you are installing Cisco IP Communicator on a computer running
Microsoft Vista, the security message Microsoft cannot verify the publisher
of this driver software might appear. Click Install This Driver Software
Anyway to continue the installation.
Procedure
Step 1
Double-click the executable (CiscoIPcommunicatorSetup.exe) to open it, or click
the installation link provided by your system administrator.
Step 2
Click Next to initiate the InstallShield wizard.
Step 3
Read the license agreement carefully, and click I Accept and Next.
Step 4
Select the default destination folder for the application or browse to select a
different one.
User Guide for Cisco IP Communicator Release 7.0
1-4
OL-10863-01
Chapter 1
Getting Started with Cisco IP Communicator
Launching Cisco IP Communicator
Step 5
Click Install in the Ready to Install window. Installation might take a few
minutes.
Step 6
Click Launch the Program and click Finish to launch Cisco IP Communicator.
(In some cases, you are prompted to reboot at this point, and you do not see the
Launch the Program check box.)
Related Topics
•
Launching Cisco IP Communicator, page 1-5
Launching Cisco IP Communicator
Note
If you use a laptop computer, be sure that you are not connected to a docking
station when launching Cisco IP Communicator for the first time after
installation.
If Cisco Unified Personal Communicator is running, exit it before launching
Cisco IP Communicator.
If you clicked the Launch the Program check box as a final installation step,
Cisco IP Communicator automatically launches.
To launch manually, choose Start > Programs > Cisco IP Communicator, or
double-click the Cisco IP Communicator desktop shortcut.
When you launch Cisco IP Communicator for the first time:
•
The security message Microsoft cannot verify the publisher of this driver
software might appear if you are launching Cisco IP Communicator on a
computer running Microsoft Vista. Click Install This Driver Software
Anyway to continue.
•
The Audio Tuning Wizard opens. Your audio device must be available for
tuning.
On subsequent launches, you might be prompted to use it to revert to previous
volume settings.
•
LocaleDownloader prompts might appear.
User Guide for Cisco IP Communicator Release 7.0
OL-10863-01
1-5
Chapter 1
Getting Started with Cisco IP Communicator
Using the Audio Tuning Wizard
In general, you should accept these prompts as soon as possible to maintain
the latest version of the product on your computer. However, if you are using
Cisco IP Communicator over a remote connection, you might choose to
postpone running LocaleDownloader until you are connected locally. (For
example, if you are working from home, you might wait until you return to
the office.) LocaleDownloader might take longer to complete over a remote
connection.
Related Topics
•
Using the Audio Tuning Wizard, page 1-6
Using the Audio Tuning Wizard
The Audio Tuning Wizard guides you through the process of selecting and tuning
installed audio devices.
•
Selecting means assigning an audio device to one or more audio modes and/or
to the ringer.
•
Tuning involves testing and, if necessary, modifying the speaker and
microphone volume for each selected device.
The Audio Tuning Wizard automatically appears the first time that you launch
Cisco IP Communicator after installation. You can access it manually from the
menu as needed on subsequent launches. The table provides more information
about the Audio Tuning Wizard and other audio setting options.
Note
Before you use the Audio Tuning Wizard to tune an audio device that has its own
volume adjuster, such as a headset with inline volume controls, increase the
device volume level to the highest setting.
User Guide for Cisco IP Communicator Release 7.0
1-6
OL-10863-01
Chapter 1
Getting Started with Cisco IP Communicator
Using the Audio Tuning Wizard
If you...
Then....
Notes
Just installed
Cisco IP Communicator
and need to use the
Audio Tuning Wizard for
the first time
Tune each audio device when the Audio Tuning a device is a different
task from changing the volume
Tuning Wizard appears.
setting for a call. Ideally, you
The Audio Tuning Wizard gives you
tune each device only once and
the opportunity to select audio devices
retune only if you encounter
for audio modes or to use the default
voice quality issues.
Windows audio device.
For information, see How to
Assign Audio Modes, page 4-9
and Selecting an Audio Mode,
page 4-9.
See the Check Audio
Settings window on a
subsequent launch after
installing
Choose one of these buttons:
•
Revert—to re-instate previous
settings for this audio device
•
Tune—to retune this device
•
Skip—to maintain modified
settings (for example, to keep the
sound card muted)
The Check Audio Settings
window appears on subsequent
launches if you modified (or
muted) the volume for a device
since you last tuned it. For
example, if you muted your
computer sound card or changed
the volume controls on a USB
headset or USB handset.
Want to change the
volume during a call
Click the Volume button on
Cisco IP Communicator. To save your
settings, click Save.
This is the best way to change
volume settings on a per-call
basis. See Adjusting the Volume
for a Call, page 4-2.
Want to retune an audio
device to address voice
quality issues
Access the Audio Tuning Wizard
See Voice Quality Issues,
(right-click > Audio Tuning Wizard). page 8-4.
Want to change your audio Right-click > Preferences> Audio tab. See How to Assign Audio
mode selections without
Modes, page 4-9.
retuning audio devices
Related Topics
•
Configuring and Registering Cisco IP Communicator, page 1-8
User Guide for Cisco IP Communicator Release 7.0
OL-10863-01
1-7
Chapter 1
Getting Started with Cisco IP Communicator
Configuring and Registering Cisco IP Communicator
Configuring and Registering Cisco IP Communicator
After installing the Cisco IP Communicator application, completing the Audio
Tuning Wizard, and viewing the Cisco IP Communicator interface on your
desktop, you might need to complete one or more configuration and registration
tasks before you can start making calls.
Note
The following tasks vary by company and phone system; your system
administrator will give you specific instructions. Do not perform these tasks
unless instructed to do so.
Task
Notes
Choose a device name
Cisco IP Communicator relies on either the network adapter or the
device name to identify itself to the network. In either case, your
system administrator will tell you which adapter to choose or which
device name to enter:
•
Note
•
Locate a device name
Select the network adapter specified by your system administrator
in Cisco IP Communicator (right-click > Preferences >
Network tab). In general, the selected adapter is the one that
provides permanent connectivity or the one that is always
enabled—even if it is not plugged in. Wireless cards should be
avoided. The correct network adapter must be selected for
Cisco IP Communicator to function properly.
This setting is used for network identification, not audio
transmission. You do not need to change this setting once it is
established unless you are permanently removing or disabling
the selected network adapter. In this case, coordinate with
your system administrator before selecting a new adapter.
Enter the device name provided by your system administrator in
Cisco IP Communicator (right-click > Preferences > Network
tab > Use this Device Name).
If your system administrator requests the device name of your network
adapter, you can view it in Cisco IP Communicator (right-click >
Preferences > Network tab > Device Name section).
User Guide for Cisco IP Communicator Release 7.0
1-8
OL-10863-01
Chapter 1
Getting Started with Cisco IP Communicator
Testing Cisco IP Communicator
Task
Notes
Specify TFTP server addresses Under the guidance of your system administrator, enter TFTP server
addresses in Cisco IP Communicator (right-click > Preferences >
Network tab > Use these TFTP servers).
Register with TAPS
After you install and launch Cisco IP Communicator and under the
guidance of your system administrator, auto-register
Cisco IP Communicator by using the Tool for Auto-Registered
Phones Support (TAPS).
Your system administrator will provide you with the number to dial in
Cisco IP Communicator to register with TAPS. You might need to
enter your entire extension, including the area code. Follow the voice
prompts. After Cisco IP Communicator displays a confirmation
message, you can end the call. Cisco IP Communicator will restart.
Related Topics
•
Testing Cisco IP Communicator, page 1-9
Testing Cisco IP Communicator
Before you can test Cisco IP Communicator, make sure that you can see your
extension number on the display screen and can hear a dial tone after going
off-hook.
Note
If you cannot see your extension number or hear a dial tone, see General
Troubleshooting Issues, page 8-1.
Place a few test phone calls, and ask other parties how your voice sounds. The
table lists actions that you might need to take while placing test calls.
User Guide for Cisco IP Communicator Release 7.0
OL-10863-01
1-9
Chapter 1
Getting Started with Cisco IP Communicator
Testing Cisco IP Communicator
If you need to...
Do this...
Adjust the volume
Adjust the audio mode volume in Cisco IP Communicator. Click the
Volume button or press the Page Up/Page Down keys on your keyboard.
Use a remote connection
If you are using Cisco IP Communicator over a remote connection (for
example, on a VPN connection from home or a hotel), enable Optimize for
Low Bandwidth (right-click > Preferences > Audio tab).
After optimizing for low bandwidth, call someone and ask how your voice
sounds.
Related Topics
•
Cisco IP Communicator Features, page 2-1
•
Adjusting the Volume for a Call, page 4-2
•
Audio Settings, page 4-8
•
Voice Quality Issues, page 8-4.
User Guide for Cisco IP Communicator Release 7.0
1-10
OL-10863-01