1
CONTENTS
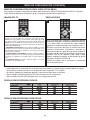
BD/DVD Operation................................................27
• Playback of a Blu-ray Disc or a DVD................27
• Skip ...................................................................28
• Search...............................................................28
• Pause and Step ................................................28
• Slow ..................................................................28
• Top Menu Button...............................................29
• Pop-Up Menu....................................................29
• Home Button .....................................................29
• Time Search......................................................29
• Repeat Playback...............................................30
• Display-Title/Chapter Search ............................30
• PIP (Picture in Picture) .....................................30
• 2nd Audio ..........................................................30
• Zoom.................................................................31
• Angle.................................................................31
• Subtitle ..............................................................31
• Audio.................................................................31
MP3/WMA Operation ............................................32
• Playback of an MP3/WMA Disc ........................32
• Selecting Folders/Tracks Using the SKIP
Buttons..............................................................34
• Repeat Play ......................................................34
• MP3 FAQs.........................................................34
CD Operation ........................................................35
• Playback of a CD ..............................................35
• Selecting Tracks/Files Using the
Number Buttons ................................................36
• Selecting Tracks/Files Using the SKIP
Buttons..............................................................36
• Fast Forward/Rewind Search ...........................36
• Repeat/Random................................................36
Data CD/USB Operation.......................................37
• Playback of a Data CD/USB.............................37
Troubleshooting Guide ........................................39
Care and Maintenance .........................................41
Specifications .......................................................42
Language List Codes...........................................43
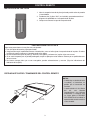
Contents..................................................................1
Important Safety Instructions ...............................2
Features ..................................................................5
Precautions.............................................................6
Power Source .........................................................6
Location of Controls ..............................................7
• Front....................................................................7
• Rear ....................................................................7
• Remote ...............................................................8
Remote Control ......................................................9
• Battery Installation ..............................................9
• Effective Distance of the Remote
Control Transmitter .............................................9
Connection............................................................10
• Connecting the Player to a TV Using the
Audio/Video Output Jacks ................................10
• Connecting the Player to a TV using the
S-Video Output Jack .........................................10
• Connecting the Player to a TV Using the
Y/PB/PR Jacks...................................................11
• Progressive (Y, PB, PR) Video Output...............11
• 525 Line Digital Progressive-scan Component
Video Output .....................................................11
• Connecting the Player to a TV using the
HDMI Output Jack ............................................12
• Connecting the Player to a TV using a
DVI Cable..........................................................13
• Connecting the Player to a Home Theater
System (via Coaxial/Optical Jack) ....................14
• Connecting the Player to a Home Theater
System (via 7.1 Channel Output Jacks) ...........15
About Discs ..........................................................16
Setup Menu ...........................................................18
• General Setup Menu.........................................18
• Video Setup Menu ............................................20
• Audio Setup Menu ............................................21
• Language Setup Menu .....................................23
• Setting the Parental Control Options ................24
Basic Operation (General)...................................26
• Volume Buttons.................................................26
• Color Buttons ....................................................26
• Mute ..................................................................26
1
IMPORTANT SAFETY INSTRUCTIONS
CAUTION
RISK OF ELECTRIC SHOCK
DO NOT OPEN
WARNING: SHOCK HAZARD - DO NOT OPEN
AVIS: RISQUE DE CHOC ÉLECTRIQUE - NE PAS OUVRIR
This Caution Marking is located at the rear enclosure of the unit.
The symbol for class II
(Double Insulation)
The lightning flash with arrowhead symbol
within an equilateral triangle is intended to alert
the user to the presence of uninsulated
dangerous voltage within the product’s
enclosure that may be of sufficient magnitude to
constitute a risk of electric shock to persons.
The exclamation point within an equilateral
triangle is intended to alert the user to the
presence of important operating and
maintenance (servicing) instructions in the
literature accompanying the appliance.
FCC NOTICE:
This equipment has been tested and found to comply with the limits for
a Class B digital device, pursuant to part 15 of the FCC Rules. These
limits are designed to provide reasonable protection against harmful
interference in a residential installation. This equipment generates,
uses and can radiate radio frequency energy and, if not installed and
used in accordance with the instructions, may cause harmful
interference to radio communications.
However, there is no guarantee that interference will not occur in a
particular installation. If this equipment does cause harmful interference
to radio or television reception, which can be determined by turning the
equipment off and on, the user is encouraged to try to correct the
interference by one or more of the following measures:
•
Reorient or relocate the receiving antenna.
•
Increase the separation between the equipment and receiver.
•
Connect the equipment into an outlet on a circuit different from
that to which the receiver is connected.
•
Consult the dealer or an experienced radio/TV technician for
help.
CAUTION:
THIS DIGITAL VIDEO DISC PLAYER EMPLOYS A
LASER SYSTEM.
TO ENSURE PROPER USE OF THIS PRODUCT,
PLEASE READ THIS OWNER’S MANUAL CAREFULLY
AND RETAIN FOR FUTURE REFERENCE. SHOULD
THE UNIT REQUIRE MAINTENANCE, CONTACT AN
AUTHORIZED SERVICE LOCATION-SEE SERVICE
PROCEDURE.
USE OF CONTROLS, ADJUSTMENTS OR THE
PERFORMANCE OF PROCEDURES OTHER THAN
THOSE SPECIFIED HEREIN MAY RESULT IN
HAZARDOUS RADIATION EXPOSURE.
TO PREVENT DIRECT EXPOSURE TO LASER BEAM,
DO NOT TRY TO OPEN THE ENCLOSURE. VISIBLE
LASER RADIATION MAY BE PRESENT WHEN THE
ENCLOSURE IS OPENED. DO NOT STARE INTO BEAM.
FCC CAUTION:
To assure continued compliance, follow the attached installation
instructions and use only shielded cables when connecting to other
devices. Also, any changes or modifications not expressly approved by
the party responsible for compliance could void the user’s authority to
operate the equipment.
This Class B digital apparatus complies with Canadian ICES-003.
Cet appareil numérique de la classe B est conforme à la norme
NMB-003 du Canada.
WARNING:
TO REDUCE THE RISK OF FIRE OR ELECTRIC
SHOCK, DO NOT EXPOSE THIS PRODUCT TO RAIN
OR MOISTURE.
ATTENTION:
POUR ÉVITER LES CHOC ÉLECTRIQUES, INTRODUIRE LA
LAME LA PLUS LARGE DE LA FICHE DANS LA BORNE
CORRESPONDANTE DE LA PRISES ET POUSSER JUSQU’AU
FOND.
WARNING:
TO REDUCE THE RISK OF FIRE OR ELECTRIC
SHOCK, AND ANNOYING INTERFERENCE, USE THE
RECOMMENDED ACCESSORIES ONLY.
Manufactured under license from Dolby Laboratories.
Dolby and the double-D symbol are registered trademarks of
Dolby Laboratories.
Manufactured under license under U.S. Patent #’s:
5,451,942; 5,956,674; 5,974,380; 5,978,762; 6,226,616;
6,487,535 & other U.S. and worldwide patents issued &
pending. DTS is a registered trademark and the DTS logos,
Symbol, DTS-HD, DTS-HD High Resolution Audio and DTSHD High Res Audio are trademarks of DTS, Inc. © 1996-2008
DTS, Inc. All Rights Reserved.
SURGE PROTECTORS:
It is recommended to use a surge protector for AC
connection. Lightning and power surges ARE NOT
covered under warranty for this product.
LASER WARNING:
This unit employs a laser. Only qualified service
personnel should attempt to service this device due to
possible eye injury.
2
IMPORTANT SAFETY INSTRUCTIONS (CONTINUED)
Before using the unit, be sure to read all operating instructions carefully. Please note that these are general
precautions and may not pertain to your unit. For example, this unit may not have the capability to be connected to
an outdoor antenna.
1. READ INSTRUCTIONS
All the safety and operating instructions should be read before the product is operated.
2. RETAIN INSTRUCTIONS
The safety and operating instructions should be retained for future reference.
3. HEED WARNINGS
All warnings on the product and in the operating instructions should be adhered to.
4. FOLLOW INSTRUCTIONS
All operating and use instructions should be followed.
5. CLEANING
Unplug this product from the wall outlet before cleaning. Do not use liquid cleaners or aerosol cleaners. Use a dry cloth
for cleaning.
6. ATTACHMENTS
Do not use attachments not recommended by the product's manufacturer as they may cause hazards.
7. WATER AND MOISTURE
Do not use this product near water–for example: near a bathtub, washbowl, kitchen sink or laundry tub; in a wet
basement; or near a swimming pool.
8. ACCESSORIES
Do not place this product on an unstable cart, stand, tripod, bracket or table. The product may fall, causing serious injury
and serious damage to the product. Use only with a cart, stand, tripod, bracket or table recommended by the manufacturer
or sold with the product. Any mounting of the product should follow the manufacturer’s instructions, and should use a
mounting accessory recommended by the manufacturer.
8A. An appliance and cart combination should be moved with care. Quick stops, excessive force and
uneven surfaces may cause the appliance and cart combination to overturn.
9. VENTILATION
Slots and openings in the cabinet and in the back or bottom are provided for ventilation, to ensure
reliable operation of the product and to protect it from overheating. These openings must not be blocked
or covered. The openings should never be blocked by placing the product on a bed, sofa, rug or other
similar surface. This product should never be placed near or over a radiator or heat source. This product
should not be placed in a built-in installation such as a bookcase or rack unless proper ventilation is provided or the
manufacturer's instructions have been adhered to.
10. POWER SOURCES
This product should be operated only from the type of power source indicated on the marking label. If you are not sure of
the type of power supply to your home, consult your appliance dealer or local power company. For products intended to
operate from battery power, or other sources, refer to the operating instructions.
11. GROUNDING OR POLARIZATION
This product is equipped with a polarized alternating-current line plug (a plug having one blade wider than the other).
This plug will fit into the power outlet only one way. This is a safety feature. If you are unable to insert the plug fully into
the outlet, try reversing the plug. If the plug should still fail to fit, contact your electrician to replace your obsolete outlet.
Do not defeat the safety purpose of the polarized plug.
12. POWER-CORD PROTECTION
Power-supply cords should be routed so that they are not likely to be walked on or pinched by items placed upon or
against them, paying particular attention to cords at plugs, convenience receptacles, and the point where they exit from
the appliance.
13. LIGHTNING
To protect your product from a lightning storm, or when it is left unattended and unused for long periods of time, unplug it
from the wall outlet and disconnect the antenna or cable system. This will prevent damage to the product due to lightning
and power-line surges.
14. POWER LINES
An outside antenna system should not be located in the vicinity of overhead power lines or other electric light or power
circuits, or where it can fall into such power lines or circuits. When installing an outside antenna system, extreme care
should be taken to keep from touching such power lines or circuits as contact with them might be fatal.
15. OVERLOADING
Do not overload wall outlets and extension cords as this can result in a risk of fire or electric shock.
3
IMPORTANT SAFETY INSTRUCTIONS (CONTINUED)
16. OBJECT AND LIQUID ENTRY
Never push objects of any kind into this product through openings as they may touch dangerous voltage points or short out
parts that could result in fire or electric shock. Never spill or spray any type of liquid on the product.
17. OUTDOOR ANTENNA GROUNDING
If an outside antenna is connected to the product, be sure the antenna system is grounded so as to provide some
protection against voltage surges and built-up static charges. Section 810 of the National Electric Code, ANSI/NFPA 70,
provides information with respect to proper grounding of the mast and supporting structure, grounding of the lead-in wire
to an antenna discharge product, size of grounding conductors, location of antenna discharge product, connection to
grounding electrodes and requirements for grounding electrodes.
EXAMPLE OF ANTENNA GROUNDING AS PER
NATIONAL ELECTRICAL CODE
18. SERVICING
Do not attempt to service this product yourself as opening or removing covers may expose you to dangerous voltage or
other hazards. Refer all servicing to qualified service personnel.
19. REPLACEMENT PARTS
When replacement parts are required, be sure the service technician uses replacement parts specified by the
manufacturer or those that have the same characteristics as the original part. Unauthorized substitutions may result in fire,
electric shock or other hazards.
20. SAFETY CHECK
Upon completion of any service or repairs to this product, ask the service technician to perform safety checks to determine
that the product is in proper operating condition.
21. WALL OR CEILING MOUNTING
The product should be mounted to a wall or ceiling only as recommended by the manufacturer.
22. DAMAGE REQUIRING SERVICE
Unplug the product from the wall outlet and refer servicing to qualified service personnel under the following conditions:
a. When the power-supply cord or plug is damaged.
b. If liquid has been spilled or objects have fallen into the product.
c. If the product has been exposed to rain or water.
d. If the product does not operate normally by following the operating instructions. Adjust only those controls that are covered
by the operating instructions, as an adjustment of other controls may result in damage and will often require extensive
work by a qualified technician to restore the product to its normal operation.
e. If the product has been dropped or the cabinet has been damaged.
f. When the product exhibits a distinct change in performance-this indicates a need for service.
23. HEAT
The product should be situated away from heat sources such as radiators, heat registers, stoves or other products
(including amplifiers) that produce heat.
24. NOTE TO CATV SYSTEM INSTALLER
This reminder is provided to call the CATV system installer's attention to Article 820-40 of the NEC that provides
guidelines for proper grounding and, in particular, specifies that the cable ground shall be connected to the grounding
system of the building, as close to the point of cable entry as practical.
4
FEATURES
This unit has many features, some are outlined below. Please read the owner’s manual to take full advantage of
all the features this unit has to offer.
•
•
•
•
•
•
•
BD-ROM Playback
BD-ROM is a next generation optical disc format in the HD era. Featuring massive storage capacity of 25 to
50 GB (five times larger than a DVD) and a high-speed transfer rate of up to 54 Mbps, this format offers not
only uncompromised HD quality video*†, but also enables rich bonus content on a single disc and HD quality
audio up to 8ch, and interactive operability.
* A compatible HD display device is necessary to enjoy the same quality.
†
Some discs allow viewing only with an HDMI connection.
24p True Cinema
Movies shot with a film camera consist of 24 frames per second. Since conventional televisions (both CRT
and flat panels) display frames either at 1/60 or 1/50 second intervals, the 24 frames do not appear at an
even pace.
When connected to a TV with 24p capabilities, the player displays each frame at 1/24 second intervals —
the same interval originally shot with the film camera, thus faithfully reproducing the original cinema image.
BD-J application
The BD-ROM format supports Java for interactive functions. “BD-J” offers content providers almost unlimited
functionality when creating interactive BD-ROM titles. Java and all Java-based trademarks and logos are
trademarks or registered trademarks of Sun Microsystems, Inc. in the U.S. and other countries.
Support of uncompressed multi-channel Linear PCM
In combination with a compatible AV amplifier, the player can output up to 8ch Linear PCM surround sound.*
With a non-compatible amplifier, the player can output 5.1ch analog signals from its 5.1CH OUTPUT jack for
high quality audio enjoyment.
* Note that the DIGITAL OUTPUT (COAXIAL or OPTICAL) jack does not output 8ch signals. You will need
an HDMI cable and an HDMI compatible device that support 8ch signals.
Support of “Dolby TrueHD” and “DTS-HD” - 7.1 Channel Surround Sound
The player supports the bitstream output functionality of Dolby TrueHD, Dolby Digital Plus, and DTS-HD
High Resolution Audio bitstream via HDMI. It also supports the decoding functionality of Dolby TrueHD,
Dolby Digital Plus, and DTS-HD High Resolution Audio to multi-channel Linear PCM via HDMI.
HDMI (High-Definition Multimedia Interface) digital interface
When connected to an HDMI-equipped display device using a single HDMI cord, the player can output both
SD to HD video and multi-channel audio signals, in digital form without degradation. The HDMI specification
supports HDCP (High-bandwidth Digital Content Protection), a copy protection technology that incorporates
coding technology for digital video signals.
Library function for recorded files (For JPEG image, MP3 audio, AVI, WMV files only)
With DATA-DVDs and DATA-CDs, three separate Audio/Video/Picture/All Title List-browsers allow for easy
sorting, searching and playback.
5
PRECAUTIONS
NOTES ON HANDLING:
•
•
•
•
•
TO OBTAIN A CLEAR PICTURE:
The player is a high technology, precision device. If the
optical pick-up lens and disc drive parts are dirty or worn
down, the picture quality becomes poor. To obtain a clear
picture, we recommend regular inspection and
maintenance (cleaning or parts replacement) every 1,000
hours of use depending on the operating environment.
For details, contact your nearest dealer.
When shipping the player, always use the original
shipping carton and packing materials. For maximum
protection, repack the unit as it was originally packed
at the factory.
Do not use volatile liquids, such as insect spray, near
the player. Do not leave rubber or plastic products in
contact with the player for a long time. They will leave
marks on the finish.
NOTES ON MOISTURE CONDENSATION:
The top and rear panels of the player may become
warm after a long period of use. This is normal and
not a malfunction.
Moisture condensation damages the player. Please
read the following carefully.
When the player is not in use, be sure to remove the
disc and turn off the power.
•
If you do not use the player for a long period, the unit
may not function properly in the future. Turn on and
use the player occasionally.
NOTES ON LOCATING THE PLAYER:
•
Moisture condensation occurs, for example, when you
pour a cold drink into a glass on a warm day. Drops of
water form on the outside of the glass. In the same
way, moisture may condense on the optical pick-up
lens inside this unit, one of the most crucial internal
parts of the player.
Moisture condensation occurs during the following
cases:
When you place this player near a TV, radio or VCR,
the playback picture may become poor and the sound
may be distorted. In this case, move the player away
from the TV, radio or VCR.
•
•
NOTES ON CLEANING:
•
Use a soft, dry cloth for cleaning.
• For stubborn dirt, soak the cloth in a weak detergent
solution, wring well and wipe. Use a dry cloth to wipe
it dry. Do not use any type of solvent, such as thinner
or benzene, as it may damage the surface of the
player.
• If you use a chemical-saturated cloth to clean the unit,
follow that product’s instructions.
Warning: Cleaning and adjustment of lenses and/or
other components of playback mechanism should be
performed by a qualified service technician.
•
When you bring the player directly from a cold place
to a warm place.
When you use the player in a room where you just
turned on the heater, or a place where the cold wind
from the air conditioner directly hits the unit.
In summer, when you use the player in a hot and
humid place just after you moved the unit from an air
conditioned room.
When you use the player in a humid place.
Do not use the player when moisture condensation
may occur.
• If you use the player in such a situation, it may
damage discs and internal parts. Remove the disc,
connect the power cord of the player to the wall outlet,
turn on the player and leave it “ON” for two or three
hours. After two or three hours, the player will have
warmed up and evaporated any moisture. Keep the
player connected to the wall outlet and moisture
condensation will seldom occur.
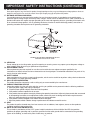
POWER SOURCE
Insert the AC plug (with the 2 blades) into a conveniently located AC outlet having 120V,
60Hz.
NOTE: The AC plug supplied with the unit is polarized to help minimize the possibility of
electric shock. If the AC plug does not fit into a nonpolarized AC outlet, do not file or cut
the wide blade. It is the user’s responsibility to have an electrician replace the obsolete
outlet.
AC Outlet
AC Plug
6
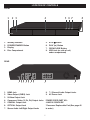
LOCATION OF CONTROLS
FRONT
1
2 3
4
5 67
8
IN
1.
2.
3.
4.
Standby Indicator
POWER/STANDBY Button
Display
Disc Compartment
5. STOP X Button
6. PLAY (®) Button
7. OPEN/CLOSE Button
8. USB Jack (on side of unit,
under compartment)
REAR
1
1.
2.
3.
4.
5.
6.
7.
2 3
4
5 6
7
8
HDMI Jack
Video Output (CVBS) Jack
S-Video Output Jack
Component Video (Y, PB, PR) Output Jacks
COAXIAL Output Jack
OPTICAL Output Jack
Stereo Audio Left/Right Output Jacks
9
8. 7.1 Channel Audio Output Jacks
9. AC Power Jack
POWER CORD PART NO.:
JJA0310-150NFIX-R0*
*Consumer Replaceable Part (See page 40
to order.)
7
LOCATION OF CONTROLS (CONTINUED)
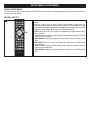
REMOTE
POWER
OPEN/CLOSE
21
1
REPEAT
SETUP
ZOOM
22
2
3
4
ANGLE
CLEAR
5
23
SUBTITLE
AUDIO
HOME
24
6
7
-U
P
U
EN
M
9
25
R
P
M
A
T
O
11
Y
ENTER
10
EN
D IS
U
SLOW STOP
12
13
RE
TU
PL
PAUSE
26
PLAY
27
PREV
NEXT
REW
F.F
14
15
28
29
30
VOL
SEARCH MUTE
16
17
31
A
B
C
D
18
PIP
19
14.
15.
16.
17.
18.
N
PO
P
8
1.
2.
3.
4.
5.
6.
7.
8.
9.
10.
11.
12.
13.
2ND
USB
AUDIO
20
32
BD PLAYER
19.
20.
21.
22.
23.
24.
25.
26.
27.
28.
29.
30.
31.
32.
POWER Button
REPEAT Button
ZOOM Button
Number (0–9) Buttons
ANGLE Button
SUBTITLE Button
AUDIO Button
POP-UP MENU Button
Navigation (π,†,√,®) Buttons
ENTER Button
TOP MENU Button
SLOW Button
STOP Button
o) Button
Skip/PREVIOUS (o
n) Button
Skip/NEXT (n
SEARCH Button
MUTE Button
Color Buttons
Red (A) Button
Green (B) Button
Yellow (C) Button
Blue (D) Button
PIP Button
2ND AUDIO Button
OPEN/CLOSE Button
SETUP Button
CLEAR Button
HOME Button
RETURN Button
DISPLAY Button
PLAY Button
PAUSE/Step Button
SEARCH/FAST FORWARD ®® Button
SEARCH/REWIND √√ Button
VOLUME +/– Buttons
USB Button
REMOTE CONTROL PART NO. JAK0800-MEM-R0*
A/V RCA Cable - PART NO. JFX1001-150-R0*
BATTERY COVER PART NO. JAK0800-COV-R0*
*Consumer Replaceable Part (See page 40 to order.)
8
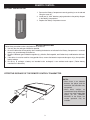
BATTERY INSTALLATION
– +
+
REMOTE CONTROL
1. Remove the Battery Compartment cover by pushing in on the tab and
lifting the cover off.
2. Install two (2) “AAA” batteries, paying attention to the polarity diagram
in the Battery Compartment.
3. Replace the Battery Compartment cover.
–
BATTERY PRECAUTIONS
Follow these precautions when using batteries in this device:
1. Use only the size and type of batteries specified.
2. Be sure to follow the correct polarity when installing the batteries as indicated in the Battery Compartment. A reversed
battery may cause damage to the device.
3. Do not mix different types of batteries together (e.g. Alkaline, Rechargeable, and Carbon-zinc) or old batteries with fresh
ones.
4. If the device is not to be used for a long period of time, remove the batteries to prevent damage or injury from possible
battery leakage.
5. Do not try to recharge a battery not intended to be recharged; it can overheat and rupture. (Follow battery
manufacturer’s directions.)
EFFECTIVE DISTANCE OF THE REMOTE CONTROL TRANSMITTER
NOTES:
• When there is an obstacle
between the player and the
transmitter, the transmitter may
not operate.
30˚
30˚
20 ft.
9
• When direct sunlight, an
incandescent lamp, fluorescent
lamp or any other strong light
shines on the REMOTE
SENSOR of the Player, the
remote operation may be
unstable.
CONNECTION
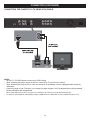
CONNECTING THE PLAYER TO A TV USING THE AUDIO/VIDEO OUTPUT JACKS
CONNECTING THE PLAYER TO A TV USING THE S-VIDEO OUTPUT JACK
NOTES:
• If your TV has an HDMI input, connect the player with the HDMI cable for best results, otherwise use the Component,
S-Video or Video OUT jack on the player.
• Set the TV’s TV/VIDEO button or switch to the VIDEO setting.
• When connecting the Player, refer to the owner’s manual of the TV, as well as this manual.
• When connecting the Player to the TV, make sure the power is off and both units are unplugged before making any
connections.
• If your TV only has one audio input, the use of a “Y” connector may be necessary. Visit your local electronics supply
store, or purchase online.
• Connect the player to your TV directly. If you connect the player through a VCR, the playback picture will be distorted
because video discs are copy protected.
• The video source is always output in 480i resolution, regardless of the setup menu settings.
10
CONNECTION (CONTINUED)
CONNECTING THE PLAYER TO A TV USING THE Y/PB/PR JACKS
NOTES FOR CONNECTING TO A TV:
• If your TV has an HDMI input, connect the player with the HDMI cable for best results, otherwise use the Component,
S-Video or Video OUT jack on the player.
• TV must have Y, PB and PR input jacks.
• Set the TV’s TV/VIDEO button or switch to the VIDEO setting.
• When connecting the Player, refer to the owner’s manual of the TV, as well as this manual.
• When connecting the Player to the TV, make sure the power is off and both units are unplugged before making any
connections.
• Connect the player to your TV directly. If you connect the player through a VCR, the playback picture will be distorted
because video discs are copy protected.
• If using a TV with a blue screen option, turn the option off, on the TV for best results.
• When using the component jacks as your source, setup the HD resolution in the Video menu as described on page 20.
PROGRESSIVE (Y, PB, PR) VIDEO OUTPUT:
Use these jacks to connect to a TV with progressive video input jacks. Progressive scan is a video scanning system that
displays all lines in a frame in one pass, as opposed to the traditional system, interlaced scan. This connection provides
optimum quality. To ensure maximum picture quality, use three video-grade cables for connections. Note that it is essential
to match the color-coded connectors with a compatible TV.
525 LINE DIGITAL PROGRESSIVE-SCAN COMPONENT VIDEO OUTPUT
Compared to standard interlaced video, progressive scan effectively doubles the amount of video information fed to your TV
or monitor. The result is a stable, flicker-free image. (Check your TV/monitor for compatibility with this feature.)
For the very highest picture quality, try watching a movie on DVD-Video on a progressive-scan compatible TV.
NOTE:
• CONSUMERS SHOULD NOTE THAT NOT ALL HIGH DEFINITION TELEVISION SETS ARE FULLY COMPATIBLE
WITH THIS PRODUCT AND MAY CAUSE ARTIFACTS TO BE DISPLAYED IN THE PICTURE. IN CASE OF 525
PROGRESSIVE SCAN PICTURE PROBLEMS, IT IS RECOMMENDED THAT THE USER SET THE VIDEO SETTING
TO 1080i INTERLACE SETTINGS, SEE PAGE 20.
11
CONNECTION (CONTINUED)
CONNECTING THE PLAYER TO A TV USING THE HDMI OUTPUT JACK
NOTES:
• If your TV has an HDMI input, connect the player with the HDMI cable for best results, otherwise use the Component,
S-Video or Video OUT jack on the player.
• Set the TV’s TV/VIDEO button or switch to the VIDEO setting.
• When connecting the Player, refer to the owner’s manual of the TV, as well as this manual.
• When connecting the Player to the TV, make sure the power is off and both units are unplugged before making any
connections.
• Connect the player to your TV directly. If you connect the player through a VCR, the playback picture will be distorted
because video discs are copy protected.
• When using HDMI as your source, setup the HD resolution in the Video menu as described on page 20 and the Digital Output
•
in the Audio menu as described on page 21.
The player’s video output will automatically change to HDMI when the HDMI cable is connected and the power is on.
12
CONNECTION (CONTINUED)
CONNECTING THE PLAYER TO A TV USING A DVI CABLE
NOTES:
• Set the TV’s TV/VIDEO button or switch to the VIDEO setting.
• When connecting the Player, refer to the owner’s manual of the TV, as well as this manual.
• When connecting the Player to the TV, make sure the power is off and both units are unplugged before making any
connections.
• Connect the player to your TV directly. If you connect the player through a VCR, the playback picture will be distorted
because video discs are copy protected.
• When using HDMI as your source, setup the HD resolution in the Video menu as described on page 20.
•
The player’s video output will automatically change to HDMI when the HDMI cable is connected and the power is on.
13
CONNECTION (CONTINUED)
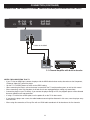
CONNECTING THE PLAYER TO A HOME THEATER SYSTEM (VIA COAXIAL/OPTICAL JACK)
Cables not included
5.1-Channel Amplifier with built-in decoder
NOTES FOR CONNECTING TO A TV:
• If your TV has an HDMI input, connect the player with the HDMI cable for best results, otherwise use the Component,
S-Video or Video OUT jack on the player.
• Set the TV’s TV/VIDEO button or switch to the VIDEO setting.
• When connecting the Player, refer to the owner’s manuals for the TV and the audio system, as well as this manual.
• When connecting, make sure the power is off and all units are unplugged before making any connections.
• Connect the player to your TV directly. If you connect the player through a VCR, the playback picture will be distorted
because video discs are copy protected.
• If using a TV with a blue screen option, turn the option off, on the TV for best results.
• If you place the player near a tuner, the radio broadcast sound might be distorted. In this case, move the player away
from the tuner.
• When using this connection, a Blu-ray Disc with an LPCM audio soundtrack will be heard over the five channels.
14
CONNECTION (CONTINUED)
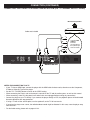
CONNECTING THE PLAYER TO A HOME THEATER SYSTEM (VIA 7.1 CHANNEL OUTPUT JACKS)
Multi channel speakers
Cables not included
Connect Audio
cables to
terminals
corresponding to
the speakers you
have connected.
Back of the unit
NOTES FOR CONNECTING TO A TV:
• If your TV has an HDMI input, connect the player with the HDMI cable for best results, otherwise use the Component,
S-Video or Video OUT jack on the player.
• Set the TV’s TV/VIDEO button or switch to the VIDEO setting.
• When connecting the Player, refer to the owner’s manuals for the TV and the audio system, as well as this manual.
• When connecting, make sure the power is off and all units are unplugged before making any connections.
• Connect the player to your TV directly. If you connect the player through a VCR, the playback picture will be distorted
because video discs are copy protected.
• If using a TV with a blue screen option, turn the option off, on the TV for best results.
• If you place the player near a tuner, the radio broadcast sound might be distorted. In this case, move the player away
from the tuner.
• For the Audio setting, please refer to pages 21-22.
15
ABOUT DISCS
The region/BD-DVD codes for this player are listed on the back of the player. See the following page
for information regarding region/BD-DVD codes.
PLAYABLE DISCS:
The following discs can be played back
on this player:
MP3
When playing an MP3, the total number of files will appear in the display, and the TV screen will list the folders/tracks.
MP3 is the abbreviation of “MPEG1 Audio Layer 3”. MPEG Audio is a format that compresses the audio portion only.
IMPORTANT NOTE:
Due to many variables, including recording condition, type of disc, writing software, etc., this unit does not guarantee
playback of all MP3 discs.
DISC TYPES:
DISCS
Data on most discs is divided into sections called “titles” and
then into subsections called “chapters”, each of which is
given a title or chapter number. Some features of this player
will not operate with some discs as they are preset. If a
function you selected does not run as desired, refer to the
manual accompanying the disc.
AUDIO CD
Data on an audio CD is divided into sections called “tracks”,
each of which is given a track number.
KODAK PICTURE CD
Data on a Kodak picture CD is usually not divided into
separate folders, and should appear in the root directory.
16
ABOUT DISCS (CONTINUED)
DVD-R/RW, DVD+R/RW
This disc can be played in this player once it has been finalized by the recording unit.
IMPORTANT:
It is important that you read the manual that accompanies the disc, as there are features that are on
the player that cannot be used with certain discs. There are also extra features on the disc that are
different for each disc, so they are not explained in this owner’s manual.
Notes on Copyright:
It is forbidden by law to copy, broadcast, show, broadcast on cable, play in public and rent copyrighted
material without permission. Video discs are copy protected, and any recordings made from these
discs will be distorted. This product incorporates copyright protection technology that is protected by
method claims of certain U.S. patents and other intellectual property rights owned by Macrovision
Corporation and other rights owners. Use of this copyright protection technology must be authorized by
Macrovision Corporation, and is intended for home and other limited viewing uses only, unless
otherwise authorized by Macrovision Corporation. Reverse engineering or disassembly is prohibited.
Region Management Information:
This Player is designed and manufactured to respond to the Region Management Information that is
recorded on a disc. If the Region number described on the disc does not correspond to the Region
number of this player, this player cannot play that disc. You may not be able to play back some video
discs on this player if they were purchased from outside your geographic area or made for business
purposes.
17
SETUP MENU
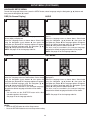
GENERAL SETUP MENU:
To enter the General Setup menu, press the SETUP button, select General using the Navigation (π,†) buttons and then
press the Navigation (®) button.
U
EN
M
P
P
1
O
A
EN
D IS
U
SLOW STOP
PREV
NEXT
PLAY
REW
F.F
B
PIP
C
UPDATE FIRMWARE
U
EN
M
2
P
1
1
O
SLOW STOP
PREV
NEXT
PLAY
REW
F.F
PIP
B
C
2ND
CLEAR
-U
P
U
EN
M
P
HOME
RE
TU
R
1
ENTER
M
EN
D IS
U
SLOW STOP
PREV
VOL
SEARCH MUTE
A
PL
PAUSE
SETUP
Use this option to view the Software version.
Select the General menu as shown above. Select Software
Version using the Navigation (π,†) buttons 1, then press
the Navigation (®) button 1; “View” will appear. Press the
ENTER button 2 to view the software version and firmware
version.
Y
D IS
U
OPEN/CLOSE
AUDIO
2
ENTER
A
EN
USB
ANGLE
R
Imation may offer upgrades to your player’s firmware in the
future. To upgrade, go to www.memorexelectronics.com
and download the latest firmware, then load on a CD or
onto a USB device. Select the General menu as shown
above. Select Update Firmware using the Navigation (π,†)
buttons 1, then press the Navigation (®) button 1; “CD
ROM” and “USB” will appear. Select one and press the
ENTER button 2, then select YES using the Navigation
(√,®) buttons 1 and press the ENTER button 2 again.
BD PLAYER
Insert the CD or USB device and the updated firmware will
install.
M
D
ZOOM
SUBTITLE
T
T
O
RE
TU
C
N
PO
P
P
VOL
2ND
REPEAT
HOME
N
-U
F.F
SOFTWARE VERSION
SETUP
AUDIO
PLAY
BD PLAYER
CLEAR
SUBTITLE
PL
REW
POWER
OPEN/CLOSE
ANGLE
1
AUDIO
PO
P
1
R
PAUSE
B
PIP
USB
ZOOM
D IS
U
NEXT
A
BD PLAYER
REPEAT
EN
SEARCH MUTE
AUDIO
POWER
M
PREV
D
2ND
P
RE
TU
ENTER
SLOW STOP
VOL
SEARCH MUTE
A
PL
PAUSE
U
EN
M
P
HOME
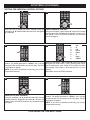
Use this option to reset all the settings to their original factory
settings.
Select the General menu as shown above. Select Reset
Settings using the Navigation (π,†) buttons 1, then press
the Navigation (®) button 1; “Are you sure?” will appear.
Press the ENTER button 2, then select YES using the
Navigation (√,®) buttons 1 and press the ENTER button 2
again to reset the settings.
Y
Select the General menu as shown above. Select
Screensaver using the Navigation (®) button 1, then press
the Navigation (®) button 1 again; “ON” and “OFF’ will
appear. Select ON (the screen saver will come on when the
unit stops or the image is paused for approximately 10
minutes) or OFF (the screen saver will not come on) using
the Navigation (π,†) buttons 1, then press the ENTER
button 2.
M
-U
2
ENTER
T
T
O
R
AUDIO
N
2
CLEAR
SUBTITLE
HOME
RE
TU
ANGLE
Y
AUDIO
N
PO
P
SUBTITLE
-U
1
CLEAR
SETUP
ZOOM
A
ANGLE
REPEAT
OPEN/CLOSE
Y
1
RESET SETTINGS
SETUP
ZOOM
PO
P
SCREENSAVER
REPEAT
POWER
OPEN/CLOSE
A
POWER
NEXT
PAUSE
PLAY
REW
F.F
VOL
SEARCH MUTE
D
A
PIP
USB
AUDIO
PL
B
C
2ND
D
USB
AUDIO
BD PLAYER
NOTES:
• Press the SETUP button to exit the Setup menus.
• Press the RETURN button to return to the previous setting.
18
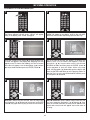
SETUP MENU (CONTINUED)
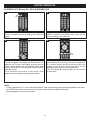
LOCAL STORAGE
For a disc compatible with the virtual package. Virtual package is defined as: Some BD-Video discs copy data to other
media (local storage) and then play the secondary video, secondary audio, and subtitles (sub contents) simultaneously.
These functions are called virtual packages. Sub contents are automatically recorded to other media from the disc prior to
playing the virtual package.
For this unit, data is copied to a Local Storage. The methods for copy and playback and the required available capacity on
the local storage may vary with the disc. For details, refer to the instructions for the disc.
To use the above functions, it is recommended that you format the local storage on this unit.
Format the local storage using the following procedures. BD-Video data, such as secondary video recorded on the local
storage, can also be erased with the following procedures.
TO CLEAR THE LOCAL STORAGE
POWER
POWER
OPEN/CLOSE
OPEN/CLOSE
When the Local Storage does not have enough space to keep the BD-Java application data you should clear the Local
Storage first before playback.
AUDIO
U
EN
M
P
T
P
RE
TU
R
1
O
Y
T
D IS
U
SLOW STOP
PREV
NEXT
PLAY
REW
F.F
B
PIP
C
2ND
U
EN
M
P
P
M
EN
D IS
U
PREV
NEXT
R
1
D
A
USB
PIP
PL
PAUSE
PLAY
REW
F.F
VOL
SEARCH MUTE
B
C
D
2ND
AUDIO
USB
AUDIO
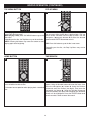
TO FORMAT THE LOCAL STORAGE
BD PLAYER
POWER
RE
TU
ENTER
SLOW STOP
VOL
SEARCH MUTE
A
PL
PAUSE
-U
HOME
Select YES using the Navigation (√,®) buttons 1 and press
the ENTER button 2 again to clear the data, or NO to return
to the previous screen.
A
EN
CLEAR
AUDIO
2
ENTER
Select the General menu as shown on the top of the
previous page. Select Local Storage using the Navigation
(π,†) buttons 1, then press the Navigation (®) button 1.
Select Clear Data using the Navigation (π,†) buttons 1,
then press the ENTER button 2; “Do you want to clear Data?”
will appear.
M
ANGLE
SUBTITLE
N
2
O
HOME
N
PO
P
SUBTITLE
-U
2
CLEAR
SETUP
ZOOM
Y
ANGLE
REPEAT
PO
P
1
SETUP
ZOOM
A
REPEAT
BD PLAYER
POWER
OPEN/CLOSE
OPEN/CLOSE
In some special occasions, after clearing the Local Storage, the unit still acts abnormally. In this case, you should format the
Local Storage.
P
AUDIO
U
EN
M
T
P
RE
TU
R
1
O
Y
NEXT
PLAY
REW
F.F
PIP
B
C
2ND
P
PREV
U
EN
M
RE
TU
R
1
ENTER
M
EN
D IS
U
NEXT
A
USB
PIP
AUDIO
PL
PAUSE
PLAY
REW
F.F
VOL
SEARCH MUTE
D
BD PLAYER
P
SLOW STOP
VOL
SEARCH MUTE
A
PL
PAUSE
-U
HOME
Select YES using the Navigation (√,®) buttons 1 and press
the ENTER button 2 again to format the local storage, or NO
to return to the previous screen.
A
D IS
U
SLOW STOP
PREV
T
EN
CLEAR
AUDIO
2
ENTER
Select the General menu as shown on the top of the
previous page. Select Local Storage using the Navigation
(π,†) buttons 1, then press the Navigation (®) button 1.
Select Format using the Navigation (π,†) buttons 1, then
press the ENTER button 2; “Do you want to format?” will
appear.
M
ANGLE
SUBTITLE
N
2
O
HOME
N
PO
P
SUBTITLE
-U
2
CLEAR
SETUP
ZOOM
Y
ANGLE
REPEAT
PO
P
1
SETUP
ZOOM
A
REPEAT
B
C
2ND
D
USB
AUDIO
19
BD PLAYER
SETUP MENU (CONTINUED)
VIDEO SETUP MENU:
To enter the Video Setup menu, press the SETUP button, select Video using the Navigation (π,†) buttons and then press
the Navigation (®) button.
ANGLE
P
AUDIO
U
EN
M
R
1
Y
D IS
U
SLOW STOP
PREV
NEXT
PLAY
REW
F.F
VOL
SEARCH MUTE
A
PIP
O
PL
PAUSE
B
C
2ND
-U
P
AUDIO
U
EN
M
2
ENTER
A
EN
CLEAR
SUBTITLE
Use this option to set the desired TV Aspect.
Select the Video menu as shown above. Select TV ASPECT
using the Navigation (π,†) buttons 1, then press the
Navigation (®) button 1; the TV ASPECT options will appear.
Select one of the options (described below) using the
Navigation (π,†) buttons 1, then press the ENTER button 2.
4:3 PAN-SCAN: Select when the unit is connected to a
conventional TV. Video material formatted in the Pan Scan
style is played back in that style (the left and right edges are
BD PLAYER
cut off).
4:3 LETTERBOX: Select when the unit is connected to a
conventional TV. Wide-screen images are shown on the
screen with a black band at the top and/or bottom.
16:9 WIDE: Select when the unit is connected to a widescreen TV.
M
ANGLE
T
T
P
RE
TU
D
USB
AUDIO
SETUP
ZOOM
P
HOME
RE
TU
R
N
2
O
HOME
N
PO
P
SUBTITLE
-U
1
CLEAR
REPEAT
OPEN/CLOSE
1
ENTER
Y
1
RESOLUTIONS
SETUP
ZOOM
PO
P
TV ASPECT
REPEAT
POWER
OPEN/CLOSE
M
A
POWER
EN
D IS
U
SLOW STOP
PL
PAUSE
PLAY
REW
F.F
Use this option to set the desired resolution when connected
to the component video output, or HDMI output. The true
output resolution depends on the connection used and the
TV’s resolution.
Select the Video menu as shown above. Select Resolutions
using the Navigation (π,†) buttons 1, then press the
Navigation (®) button 1; the Resolution options will appear.
BD PLAYER
Select one of the options
(720p, 1080i, 1080p, 1080p24)
using the Navigation (π,†) buttons 1, then press the
ENTER button 2.
See charts below for resolutions.
PREV
NEXT
VOL
SEARCH MUTE
A
PIP
B
C
2ND
D
USB
AUDIO
NOTES:
• Some movies will be displayed in 4:3 pillar box format (black bars on the sides of the picture), even if 16:9 Wide is
selected in TV Aspect menu option.
• To use the 1080p24 (MovieFrame 24 Frames Per Second), the Blu-ray Disc must have this feature.
• Press the SETUP button to exit the Setup menus.
• Press the RETURN button to return to the previous setting.
BD PLAYBACK RESOLUTION
DVD PLAYBACK RESOLUTION
20
SETUP MENU (CONTINUED)
AUDIO SETUP MENU:
To enter the Audio Setup menu, press the SETUP button, select Audio using the Navigation (π,†) buttons and then press
the Navigation (®) button.
POWER
OPEN/CLOSE
DIGITAL OUTPUT
REPEAT
ANGLE
CLEAR
SUBTITLE
-U
P
AUDIO
U
EN
M
2
M
EN
D IS
U
NEXT
PIP
PL
PAUSE
PLAY
REW
F.F
VOL
SEARCH MUTE
A
1
ENTER
SLOW STOP
PREV
R
Y
P
RE
TU
A
T
O
HOME
N
PO
P
1
SETUP
ZOOM
B
C
2ND
D
USB
AUDIO
BD PLAYER
Use this option to set the Digital Output. See below for the explanation of specific
outputs.
Select the Audio menu as shown above. Select Digital Output using the
Navigation (π,†) buttons 1, then press the Navigation (®) button 1; the Digital
Output options will appear. Select one of the options (described below) using the
Navigation (π,†) buttons 1, then press the ENTER button 2.
S/PDIF: Select this when your equipment connected via Optical/Coaxial cable.
Select as follows:
PCM: Decodes using the internal decoder and outputs the audio in PCM from
the S/PDIF output jack(s).
BITSTREAM: Outputs the original bit stream directly from the S/PDIF output
jacks.
HDMI AUDIO: Select this when your equipment connected via HDMI cable.
Select as follows:
PCM: Decodes using the internal decoder and outputs the audio in PCM form
from the HDMI output jack.
BITSTREAM: Outputs the original bit stream directly from the HDMI output
jack.
21
R
1
A
Y
Use this option to turn the PCM down sampling On or Off.
Some amplifiers cannot support the high sampling rate of the
PCM signal. In this case, turn this option ON and the player
will output at 48kHz.
Select the Audio menu as shown on the previous page. Select
PCM DOWN SAMPLING using the Navigation (π,†) buttons
1, then press the Navigation (®) button 1; “ON” and “OFF’
will appear. Select ON to turn on this option or OFF to turn off
this option using the Navigation (π,†) buttons 1, then press
BD PLAYER
the ENTER button 2.
NOTE: Even when PCM down sampling is set to OFF, some
discs will show output down sampled audio through the
coaxial and optical digital outputs.
EN
D IS
U
SLOW STOP
PREV
PAUSE
PLAY
REW
F.F
NEXT
VOL
SEARCH MUTE
A
B
PIP
PL
C
D
USB
2ND
AUDIO
POWER
REPEAT
OPEN/CLOSE
SPEAKER
ANGLE
P
U
EN
M
PREV
A
D IS
U
PIP
1
A
PIP
B
C
2ND
D
USB
OPEN/CLOSE
SETUP
ZOOM
ANGLE
CLEAR
SUBTITLE
-U
P
AUDIO
U
EN
M
2
O
P
HOME
RE
TU
3
R
1
ENTER
M
EN
D IS
U
SLOW STOP
PAUSE
PL
PLAY
After correctly positioning the speakers, perform this Tone Test
and adjust the volume controls until the desired sound is
achieved.
Select the Audio menu as shown on the previous page. Select
Test Tone using the Navigation (π,†) buttons 1, then press
the Navigation (®) button 1; the Test Tone options will
appear. Select one of the speakers ({C} Center, {FL/FR}
BD PLAYER
Left/Right, {LS/RS} Surround
Left/Surround Right, {Rls/Rrs}
Back Left/Back Right, {lfe} Lower Frequency Effect) using
the Navigation (π,†) buttons 1, then press the ENTER
button 2 to select. Select one of the speakers and then
press the ENTER button 2 again to emit a test tone to the
selected speaker. When done, press the RETURN button 3.
PREV
NEXT
REW
A
D
PIP
USB
B
C
2ND
AUDIO
AUDIO
NOTES:
• Press the SETUP button to exit the Setup menus.
• Press the RETURN button to return to the previous setting.
• For the Speaker and Test Tone setting, please refer to unit connection pages 10 - 15.
22
F.F
VOL
SEARCH MUTE
VOL
SEARCH MUTE
VOL
TEST TONE
PL
F.F
F.F
C
REPEAT
1
PLAY
PLAY
REW
POWER
3
REW
PAUSE
2ND
R
PAUSE
PL
AUDIO
Use this option to turn on a speaker and to set the speaker
distances from the user.
Select the Audio menu as shown on the previous page. Select
Speaker using the Navigation (π,†) buttons 1, then press
the Navigation (®) button 1; the Speaker options will
appear. Select one of the speakers ({C} Center, {FL/FR}
Left/Right, {LS/RS} Surround Left/Surround Right, {Rls/Rrs}
PLAYER
Back Left/Back Right, {lfe}BD Lower
Frequency Effect) using
the Navigation (π,†) buttons 1, then press the ENTER
button 2 to select. Press ENTER button again 2 to disable
this function or use Navigation (π,†) buttons 1 to highlight
different speaker setting option. Adjust the distance from the
desired seating area using the Navigation (√,®) buttons 1.
When done, press the RETURN button 3.
NEXT
D IS
U
B
ENTER
SLOW STOP
PREV
EN
SEARCH MUTE
Y
EN
1
ENTER
NEXT
A
M
M
T
T
P
R
N
2
O
RE
TU
RE
TU
SLOW STOP
HOME
N
-U
AUDIO
P
HOME
Use this option to turn the Dynamic Compression On or Off.
Dynamic Compression reduces the gap between the loudest
and softest sounds. This means you can listen at lower levels.
Select the Audio menu as shown on the previous page.
Select Dynamic Compression using the Navigation (π,†)
buttons 1, then press the Navigation (®) button 1; “ON” and
“OFF’ will appear. Select ON to turn on this option or OFF to
turn off this option using the Navigation (π,†) buttons 1, then
press the ENTER button 2.
BD PLAYER
NOTE: This option is effective only when the soundtrack is
encoded as Dolby Digital.
CLEAR
SUBTITLE
PO
P
1
O
SETUP
ZOOM
U
EN
M
P
PO
P
M
-U
AUDIO
2
ENTER
T
T
P
CLEAR
N
2
O
RE
TU
PO
P
U
EN
M
P
ANGLE
SUBTITLE
HOME
SETUP
ZOOM
Y
AUDIO
N
PO
P
SUBTITLE
-U
1
CLEAR
REPEAT
A
ANGLE
OPEN/CLOSE
DYNAMIC COMPRESSION
SETUP
ZOOM
POWER
Y
PCM DOWN SAMPLING
REPEAT
1
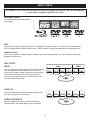
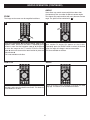
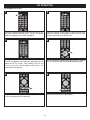
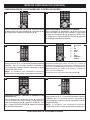
SETUP MENU (CONTINUED)
OPEN/CLOSE
A
POWER
D
USB
LANGUAGE SETUP MENU:
SETUP MENU (CONTINUED)
To enter the Language Setup menu, press the SETUP button, select Language using the Navigation (π,†) buttons and
then press the Navigation (®) button.
POWER
POWER
REPEAT
OSD (On Screen Display)
REPEAT
1
ANGLE
1
CLEAR
ANGLE
CLEAR
SUBTITLE
PO
P
R
1
Y
A
P
D IS
U
SLOW STOP
PREV
NEXT
PLAY
REW
F.F
B
PIP
C
1
U
EN
M
2
P
1
O
SLOW STOP
PREV
NEXT
PLAY
REW
F.F
PIP
B
C
2ND
Y
SETUP
-U
P
AUDIO
U
EN
M
P
HOME
RE
TU
R
1
ENTER
M
EN
D IS
U
SLOW STOP
PREV
VOL
SEARCH MUTE
A
PL
PAUSE
OPEN/CLOSE
Use this option to select the language the Disc Menu will be
displayed in.
Select the Language menu as shown above. Select Audio
using the Navigation (π,†) buttons 1, then press the
Navigation (®) button 1; the Language options will appear.
Select the desired language using the Navigation (π,†)
buttons 1, then press the ENTER button 2.
The disc must be recorded in the selected language,
otherwise the default language of the disc will be shown.
Y
D IS
USB
CLEAR
2
ENTER
U
D
ANGLE
R
A
EN
C
ZOOM
SUBTITLE
Use this option to select the language the Subtitle will be in.
Select the Language menu as shown above. Select Audio
using the Navigation (π,†) buttons 1, then press the
Navigation (®) button 1; the Language options will appear.
Select the desired language using the Navigation (π,†)
buttons 1, then press the ENTER button 2.
The disc must be recorded in the selected language,
otherwise the default language of the disc will be shown.
NOTES:
BD PLAYER
• You can also use the SUBTITLE button with a disc
inserted to perform this function.
• See page 43 for the language code list.
M
VOL
2ND
REPEAT
T
T
O
RE
TU
F.F
N
PO
P
P
1
HOME
N
-U
DISC MENU
SETUP
AUDIO
REW
POWER
CLEAR
SUBTITLE
PLAY
AUDIO
OPEN/CLOSE
ANGLE
NEXT
PL
PAUSE
B
PO
P
SUBTITLE
D IS
U
PIP
USB
ZOOM
EN
A
BD PLAYER
REPEAT
M
SEARCH MUTE
AUDIO
POWER
P
PREV
D
2ND
1
ENTER
SLOW STOP
VOL
SEARCH MUTE
A
L
PAUSE
R
A
T
T
EN
RE
TU
Use this option to select the language the disc will be played
back in.
Select the Language menu as shown above. Select Audio
using the Navigation (π,†) buttons 1, then press the
Navigation (®) button 1; the Language options will appear.
Select the desired language using the Navigation (π,†)
buttons 1, then press the ENTER button 2.
The disc must be recorded in the selected language,
otherwise the default language of the disc will be played.
BD PLAYER
NOTE: See page 43 for the
language code list.
Use this option to select the desired language for the OnScreen display to display text.
Select the Language menu as shown above. Select OSD
using the Navigation (π,†) buttons 1, then press the
Navigation (®) button 1; the Language options will appear.
Select the desired language using the Navigation (π,†)
buttons 1, then press the ENTER button 2.
NOTE: See page 43 for the language code list.
M
U
EN
M
P
2
ENTER
O
P
-U
Y
RE
TU
A
PO
P
2
O
HOME
N
U
EN
M
P
AUDIO
HOME
N
-U
AUDIO
SETUP
ZOOM
AUDIO
SETUP
ZOOM
SUBTITLE
OPEN/CLOSE
OPEN/CLOSE
NEXT
PAUSE
PLAY
REW
F.F
VOL
SEARCH MUTE
D
A
PIP
USB
AUDIO
PL
B
C
2ND
D
USB
AUDIO
BD PLAYER
NOTE: See page 43 for the language code list.
NOTES:
• Press the SETUP button to exit the Setup menus.
• Press the RETURN button to return to the previous setting.
23
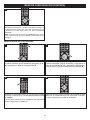
SETUP MENU (CONTINUED)
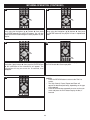
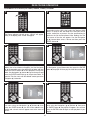
SETTING THE PARENTAL CONTROL OPTIONS
1
POWER
SETUP
ZOOM
1
OPEN/CLOSE
REPEAT
2
OPEN/CLOSE
REPEAT
POWER
ANGLE
CLEAR
SUBTITLE
AUDIO
RE
TU
T
O
Y
A
T
M
EN
U
D
SLOW STOP
PREV
PLAY
REW
F.F
NEXT
B
C
PIP
M
PREV
EN
D IS
U
1
PLAY
REW
F.F
NEXT
A
PL
PAUSE
VOL
SEARCH MUTE
D
2ND
R
ENTER
SLOW STOP
VOL
SEARCH MUTE
A
L
IS P
PAUSE
P
RE
TU
TO SET PARENTAL CONTROL:
Using the Navigation (π,†) buttons 1, select DVD Parental
and then press the Navigation (®) button 1; “Change Level”
will appear. Press the ENTER button 2; the Password
screen will appear.
Press the SETUP button 1, select Parental using the
Navigation (π,†) buttons 2 and then press the Navigation
(®) button 2.
P
U
EN
M
2
R
ENTER
O
P
Y
PO
P
U
EN
M
P
-U
N
PO
P
HOME
N
2
HOME
CLEAR
SUBTITLE
-U
AUDIO
A
ANGLE
SETUP
ZOOM
B
C
D
USB
PIP
AUDIO
USB
2ND
AUDIO
POWER
POWER
4
REPEAT
OPEN/CLOSE
SETUP
ZOOM
REPEAT
BD PLAYER
ANGLE
CLEAR
SUBTITLE
CLEAR
HOME
-U
P
AUDIO
U
EN
M
2
EN
D IS
U
SLOW STOP
PREV
SEARCH MUTE
A
REPEAT
PL
PAUSE
PLAY
REW
F.F
NEXT
POWER
A
PIP
OPEN/CLOSE
VOL
2ND
USB
6
BD PLAYER
CLEAR
P
U
EN
M
2
T
O
P
RE
TU
C
2ND
D
USB
BD PLAYER
POWER
REPEAT
OPEN/CLOSE
SETUP
ZOOM
ANGLE
1
CLEAR
SUBTITLE
AUDIO
HOME
Y
NEXT
PAUSE
B
PO
P
O
F.F
2ND
P
P
M
EN
RE
TU
D IS
U
SLOW STOP
VOL
C
-U
R
ENTER
PLAY
REW
U
EN
M
Enter the six-digit password using the Number (0-9)
buttons. The default password is “000000”, but it can be
changed as per the instructions on the next page. The BD
Age Option will appear.
NOTE: If you enter the password incorrectly, just re-enter
the password correctly.
PL
T
PIP
B
R
A
D IS
U
SEARCH MUTE
A
F.F
VOL
ENTER
SLOW STOP
PREV
PLAY
REW
N
EN
NEXT
HOME
TO SET Blu-ray DISC PARENTAL:
Using the Navigation (π,†) buttons 1, select BD Parental
and then press the Navigation (®) button 1; “BD Age” will
appear. Press the ENTER button 2; the Password screen
will appear.
M
PL
PAUSE
Y
-U
AUDIO
N
PO
P
SUBTITLE
D IS
U
AUDIO
AUDIO
ANGLE
EN
SEARCH MUTE
B
C
D
SETUP
ZOOM
PIP
5
PREV
Y
M
M
SLOW STOP
A
T
P
1
Kid
G
PG
PG-13
PG-R
R
NC17
ADULT
Using the Navigation (√,®) buttons 1, select the desired
rating level for the disc from 1-8 with 1 allowing most movies
and 8 restricting the most. Select OFF to allow all movies.
For example, if you select “6”, discs that are level 7 or 8 will
not play.
When done, press the ENTER button 2.
R
ENTER
O
P
R
ENTER
Y
RE
TU
N
PO
P
P
RE
TU
A
O
T
U
EN
M
Enter the six-digit password using the Number (0-9)
buttons. The default password is “000000”, but it can be
changed as per the instructions on the next page. The DVD
Level Option will appear.
NOTE: If you enter the password incorrectly, just re-enter
the password correctly.
-U
HOME
N
AUDIO
PO
P
ANGLE
SUBTITLE
1.
2.
3.
4.
5.
6.
7.
8.
SETUP
ZOOM
A
3
BD PLAYER
OPEN/CLOSE
PREV
D
NEXT
PAUSE
PLAY
REW
F.F
VOL
SEARCH MUTE
A
USB
PL
B
C
D
AUDIO
PIP
BD PLAYER
CONTINUED ON THE NEXT PAGE
24
2ND
USB
AUDIO
BD PLAYER
POWER
7
REPEAT
OPEN/CLOSE
SETUP
ZOOM
ANGLE
CLEAR
AUDIO
U
EN
M
P
2
R
1
ENTER
Y
P
RE
TU
M
A
T
O
HOME
N
PO
P
SUBTITLE
-U
SET UP MENU (CONTINUED)
EN
D IS
U
PL
Using the Navigation (√,®) buttons 1, select the desired
BD Age for BD discs. Discs with ages over the selected
setting will require a password to play. When done, press
the ENTER button 2.
NOTE: You can also select the BD Age using the Number
buttons (0-9) and press the CLEAR button to clear the
number digits.
SLOW STOP
PREV
PAUSE
PLAY
REW
F.F
NEXT
VOL
SEARCH MUTE
A
B
C
PIP
D
2ND
USB
AUDIO
POWER
OPEN/CLOSE
BD PLAYER
CHANGING THE PASSWORD
1
POWER
REPEAT
2
OPEN/CLOSE
REPEAT
SETUP
ZOOM
1
ANGLE
CLEAR
SUBTITLE
ANGLE
AUDIO
2
R
Y
A
T
M
EN
U
D
SLOW STOP
PREV
PAUSE
PLAY
REW
F.F
NEXT
B
C
P
RE
TU
M
EN
D IS
U
SLOW STOP
PREV
PLAY
REW
F.F
NEXT
A
VOL
B
C
PIP
POWER
4
OPEN/CLOSE
SETUP
ZOOM
AUDIO
BD PLAYER
ANGLE
CLEAR
PO
P
U
EN
M
R
N
PO
P
RE
TU
M
A
T
P
Y
ENTER
O
EN
D IS
U
SLOW STOP
PREV
NEXT
A
PL
PAUSE
PLAY
REW
F.F
B
RE
TU
R
Y
P
M
A
O
EN
D IS
U
SLOW STOP
PL
PAUSE
PLAY
REW
F.F
Press the ENTER button when OK is highlighted to confirm
the new password, or select “Cancel” to exit without
changing the password.
PREV
NEXT
VOL
SEARCH MUTE
A
PIP
B
C
2ND
D
USB
AUDIO
VOL
SEARCH MUTE
PIP
U
EN
M
HOME
ENTER
HOME
T
P
P
CLEAR
AUDIO
Enter the existing six-digit password using the Number (0-9)
buttons. The default password is “000000”.
Using the Number (0-9) buttons, enter a new password and
then enter it again.
-U
-U
AUDIO
N
ANGLE
SETUP
ZOOM
SUBTITLE
SUBTITLE
USB
2ND
REPEAT
BD PLAYER
REPEAT
D
OPEN/CLOSE
USB
AUDIO
3
PL
PAUSE
SEARCH MUTE
D
2ND
1
ENTER
POWER
PIP
R
Using the Navigation (π,†) buttons 1, select Change
Password and then press the Navigation (®) button 1; “Are
you sure?” will appear. Press the ENTER button 2.
VOL
SEARCH MUTE
A
L
IS P
O
T
Press the SETUP button 1, select Parental using the
Navigation (π,†) buttons 2 and then press the Navigation
(®) button 2.
P
U
EN
M
P
Y
RE
TU
-U
A
PO
P
U
EN
M
P
ENTER
O
HOME
N
PO
P
HOME
N
2
AUDIO
CLEAR
SUBTITLE
-U
SETUP
ZOOM
C
2ND
D
BD PLAYER
USB
AUDIO
BD PLAYER
25
POWER
REPEAT
OPEN/CLOSE
BASIC OPERATION (GENERAL)
SETUP
ZOOM
POWER
REPEAT
OPEN/CLOSE
SETUP
ZOOM
IMPORTANT:
When “INVALID KEY” appears while pressing a button, this means that the
corresponding function cannot be performed either on the disc inserted, or in
the selected mode.
ANGLE
CLEAR
ANGLE
SUBTITLE
AUDIO
CLEAR
HOME
EN
P
D IS
U
SLOW STOP
L
PAUSE
PLAY
REW
F.F
P
U
EN
M
NEXT
O
P
PREV
VOL
SEARCH MUTE
2
POWER
A
1
M
EN
D IS
U
C
REW
F.F
VOL
B
C
D
SETUP
USB
ZOOM
2ND
AUDIO
PIP
ANGLE
USB
Press the MUTE button once to mute the sound. Press the
MUTE button again to restore
the sound.
BD PLAYER
CLEAR
AUDIO
2ND
AUDIO
Adjust the VOLUME + button 1 to increase or the VOLUME
BD PLAYER
– button 2 to decrease the volume as desired.
SUBTITLE
PLAY
D
A
REPEAT
PIP
NEXT
PL
PAUSE
SEARCH MUTE
OPEN/CLOSE
B
R
ENTER
SLOW STOP
PREV
RE
TU
Y
M
T
1
Y
P
A
O
-U
HOME
N
MUTE
R
AUDIO
A
PO
P
RE
TU
ENTER
T
1
U
EN
M
P
N
VOLUME BUTTONS
-U
PO
P
SUBTITLE
HOME
P
U
EN
M
RE
TU
R
N
-U
P
M
A
O
Y
ENTER
T
1
PO
P
COLOR BUTTONS (A,B,C,D)
EN
D IS
U
SLOW STOP
PREV
NEXT
PAUSE
PLAY
REW
F.F
VOL
SEARCH MUTE
A
PIP
PL
B
C
2ND
D
USB
These buttons are used as shortcuts for some on-screen
items when viewing a Blu-ray
Disc (can also be used for
BD PLAYER
BD's Java interactive operations).
AUDIO
IMPORTANT NOTES:
• After plugging in, the unit will automatically turn on and the opening screen "Memorex" will load, which could take up to
a minute.
• If a disc is inserted incorrectly, is dirty and/or damaged, “Unknown Disc” will appear on the TV screen.
• Always hold the disc without touching either of its surfaces. When inserting a disc, position it with the printed title side
facing up, align it with the guides and place it in its proper position.
• It is important that you read the manual that accompanies the disc as there are features that are on this player that
cannot be used with certain discs. There are also extra features that are different for each disc, so they are not
explained in this owner’s manual.
• The screen saver will come on when the unit stops or the image is paused for approximately 10 minutes.
26
BD/DVD OPERATION
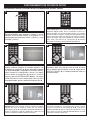
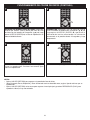
PLAYBACK OF A Blu-ray Disc OR A STANDARD DVD
1
POWER
REPEAT
2
OPEN/CLOSE
REPEAT
SETUP
ZOOM
ANGLE
POWER
CLEAR
POWER
AUDIO
SUBTITLE
HOME
REPEAT
Y
4
A
M
EN
D IS
U
POWER
SLOW STOP
PL
OPEN/CLOSE
PAUSE
PLAY
1
PREV
REW SETUP
NEXTZOOM
F.F
REPEAT
RE
TU
M
EN
D IS
U
SLOW STOP PAUSE PLAY
SUBTITLE
AUDIO
HOME
PREV
REW
NEXT
A
D
PIP
AUDIO
U
EN
M
RE
TU
P
PO
P
N
ENTER
EN
AUDIO
D IS
U
EN
D IS
U
SLOW STOP
PREV
NEXT
PLAY
REW
F.F
PIP
B
A
PIP
C
2ND
2
VOL
B
C
2ND
D
USB
AUDIO
VOL
SEARCH MUTE
A
PL
PAUSE
PLAY
To stop playback, press the STOP button 1; “Press [Stop]
again to confirm or Press [Play] to resume” will appear on
the TV screen. Because the unit will remember where you
stopped, simply press the PLAY button 2 to resume
BD PLAYER
playback where you left off
(resuming playback).
If the STOP button 1 is pressed again, the unit will enter
the Stop mode.
Y
M
A
T
P
PAUSE
PL
REW
NEXTPLAYER
F.F
BD
SEARCH MUTE
Press the OPEN/CLOSE button 1 to close the disc tray.
“CLOSE” will appear in the display and “Detecting Disc” will
appear on the TV screen. After loading, the menu screen of
the disc should appear. Use the Navigation (√,®,π,†)
buttons 2 to select the desired option and the ENTER
button 3 to select it.
NOTE: Some discs do not have a menu screen. Once
loaded, they will immediately begin playing the content.
O
USB
2ND
M
1
PREV
R
2BD PLAYER
3
-U
D
Y
O
HOME
SLOW STOP
P
C
A
CLEAR
USB
2ND
AUDIO
SUBTITLE
B
ENTER
T
ANGLE
PIP
C
F.F
RE VOL
TU
R
PO
P
B
PL
CLEAR
N
A
R
Y
P
ANGLE
NU
SEARCHMEMUTE
P
-U
VOL
SEARCH MUTE
U
EN
M
P
A
O
T
T
3
P
-U
ENTER
ENTER
O
SETUP
ZOOM
Press the OPEN/CLOSE button to open the disc tray,
“OPEN” will appear in the display. Insert a disc with the
label side facing up on the disc tray.
R
PO
P
RE
TU
N
PO
P
U
EN
M
P
AUDIO
HOME
OPEN/CLOSE
N
Press the POWER/STANDBY button to turn on the unit.
“HELLO” will appear briefly in the display, then “LOAD” will
appear.
-U
SETUP
ZOOM
ANGLE
CLEAR
SUBTITLE
OPEN/CLOSE
D
USB
AUDIO
BD PLAYER
NOTES:
• If a Menu appears on the TV screen, press the Navigation (√,®,π,†) buttons to select the desired option/item, then press
the ENTER button. Please make sure to refer to the disc’s jacket or case for additional information.
• Resuming playback may not work on all discs.
27
REPEAT
REPEAT
SETUP
ZOOM
SETUP
ZOOM
BD/DVD OPERATION (CONTINUED)
1
ANGLE
CLEAR
U
EN
M
P
1
HOME
RE
TU
R
CLEAR
SUBTITLE
P
-U
AUDIO
U
EN
M
HOME
RE
TU
R
N
-U
AUDIO
ANGLE
N
PO
P
SUBTITLE
SEARCH
PO
P
SKIP
ENTER
ENTER
M
Y
P
M
SP
DI
EN
U
EN
D IS
U
PL
SLOW STOP
SLOW STOP
PAUSE
PREV
REW
NEXT
2
Press the SKIP/NEXT N button 1 to advance the disc to
the beginning of the next chapter.
During playback, press either the Search/FF ®® 1 or
Search/REW √√ 2 button to move the disc forward or
backward at double (x2) speed to locate a specific section.
Repeatedly press these buttons
and the speed will increase
BD PLAYER
to x4, x8, x16 and resume normal playback.
You can also resume normal playback by pressing the PLAY
button 3.
A
D
2ND
B
2ND
POWER
OPEN/CLOSE
REPEAT
ANGLE
AUDIO
1
HOME
RE
TU
R
OPEN/CLOSE
SETUP
ZOOM
ANGLE
CLEAR
SUBTITLE
-U
P
AUDIO
U
EN
M
HOME
RE
TU
R
N
U
EN
M
USB
N
P
-U
SLOW
CLEAR
SUBTITLE
PO
P
1
SETUP
PO
P
PAUSE AND STEP
D
AUDIO
Press the SKIP/PREV o button 2 to move the disc to the
BD PLAYER
beginning of the previous chapter.
ZOOM
C
PIP
USB
AUDIO
REPEAT
1
VOL
SEARCH MUTE
C
POWER
F.F
3
VOL
B
PIP
PLAY
REW
NEXT
F.F
1
SEARCH MUTE
A
PAUSE
PLAY
PREV
2
L
A
T
O
A
Y
T
OP
ENTER
P
A
Y
T
M
SP
DI
EN
U
M
A
T
O
OP
Y
ENTER
EN
D IS
U
SLOW STOP
SLOW STOP
PREV
1
PAUSE
NEXT
REW
PLAY
1
2
PREV
NEXT
PAUSE
PLAY
REW
F.F
VOL
SEARCH MUTE
Press the PAUSE/Step button 1 to pause the picture.
A
B
C
During playback, repeatedly press the SLOW button 1 to
move the Player forward in slow motion speeds of 1/2, 1/4,
1/8 and resume normal playback. The sound will be muted.
You can also resume normal playback by pressing the PLAY
BD PLAYER
button 2.
A
D
Repeatedly press the PAUSE/Step button 1 to play the disc
one frame at a time.
PIP
2ND
2
F.F
VOL
SEARCH MUTE
PL
L
PIP
B
C
2ND
AUDIO
USB
AUDIO
Press the PLAY button 2 to resume normal playback.
BD PLAYER
28
D
USB
REPEAT
SETUP
ZOOM
BD/DVD OPERATION (CONTINUED)
POWER
HOME
U
EN
M
RE
TU
1
R
ANGLE
3
ENTER
SP
DI
EN
U
L
1
PAUSE
PLAY
REW
F.F
NEXT
2
C
OP
D
While playing a BD Disc, press the TOP MENU button 1
to go to the disc’s top menu.
While playing a DVD, press TOP MENU button to go to the
Title menu.
BD PLAYER
Depending on the disc, the Top Menu may not be available.
NOTE: Pressing this button may cause the content to start
playing again at the beginning.
PIP
2ND
U
EN
M
RE
TU
R
3
T
B
P
-U
ENTER
VOL
SEARCH MUTE
A
HOME
N
SLOW STOP
PREV
AUDIO
M
A
Y
M
CLEAR
SUBTITLE
A
Y
T
OP
1
POP-UP MENU
SETUP
ZOOM
N
2
P
-U
AUDIO
REPEAT
PO
P
1
CLEAR
SUBTITLE
PO
P
TOP MENU BUTTON
ANGLE
OPEN/CLOSE
SP
DI
EN
U
L
BD-DVD: Press the POP-UP MENU button 1 to display the
pop up menu while the BD disc is playing back. You can
select various functions from this pop up menu. Use the
Navigation (√,®,π,†) buttons 2 to select the desired
option and the ENTER button 3 to select it.
SLOW STOP
USB
PREV
AUDIO
PAUSE
PLAY
REW
F.F
NEXT
VOL
SEARCH MUTE
A
B
C
PIP
D
USB
2ND
DVD: Press this button to go to the disc’s root menu.
AUDIO
Depending on the disc, the Pop Up Menu may not be
available.
BD PLAYER
HOME BUTTON
1
POWER
REPEAT
OPEN/CLOSE
SETUP
ZOOM
TIME SEARCH
1
POWER
REPEAT
OPEN/CLOSE
SETUP
ZOOM
2
ANGLE
CLEAR
SUBTITLE
ANGLE
AUDIO
HOME
CLEAR
AUDIO
3
PO
P
HOME
P
-U
U
EN
M
RE
TU
ENTER
OP
4
PO
P
R
Y
PREV
M
1
A
T
P
EN
D IS
U
PL
PREV
NEXT
PAUSE
PLAY
REW
F.F
PIP
C
2ND
PLAY
REW
F.F
VOL
B
C
D
2ND
USB
AUDIO
This button has no operation when playing back a standard
disc.
B
NEXT
Press the SEARCH button 1 once; the Time Search will
appear. Using the Number buttons 2, enter the hours, then
press the Navigation (®) button 3. Using the Number
buttons 2, enter the minutes (two digits), then press the
Navigation (®) button 3. Using the Number buttons 2,
enter the seconds, then press the Navigation (®) button 3;
Search will be highlighted. Press the ENTER button 4 to
search or select Cancel to cancel the search.
VOL
SEARCH MUTE
PIP
L
PAUSE
SEARCH MUTE
A
Press the HOME button to go to the disc’s root menu. The
menu will differ from disc to disc.
SLOW STOP
A
SP
DI
EN
U
SLOW STOP
ENTER
O
M
A
Y
T
P
RE
TU
N
-U
U
EN
M
R
N
SUBTITLE
BD PLAYER
D
USB
AUDIO
BD PLAYER
29
BD/DVD OPERATION (CONTINUED)
POWER
DISPLAY–TITLE/CHAPTER SEARCH
REPEAT PLAYBACK
1
OPEN/CLOSE
POWER
1
OPEN/CLOSE
REPEAT
SETUP
ZOOM
REPEAT
2
ANGLE
CLEAR
SUBTITLE
U
EN
M
P
-U
PO
P
4
CLEAR
AUDIO
HOME
RE
TU
3
ENTER
SUBTITLE
AUDIO
HOME
U
EN
M
RE
TU
SLOW STOP
R
N
PO
P
P
PREV
ENTER
Y
P
M
EN
D IS
U
SLOW STOP
PREV
PL
PAUSE
PLAY
REW
F.F
NEXT
1
PLAY
REW
F.F
NEXT
A
VOL
B
PIP
C
D
USB
2ND
AUDIO
VOL
SEARCH MUTE
L
PAUSE
SEARCH MUTE
A
T
O
SP
DI
EN
U
Press the DISPLAY button 1 to view the Play Mode, Disc,
Frequency, HDMV (Elapsed Time), Title, Chapter, and Bit
Rate.
The title number will be highlighted in red. To go to a
different title, select a title number using the Number buttons
(0-9) 2, followed by the ENTER button 3.
To go to a specific Chapter, press the Navigation (†) button
4 to highlight the Chapter in red. Select a chapter number
BD PLAYER
using the Number buttons (0-9) 2, followed by the ENTER
button 3.
While in the Playback mode, press the REPEAT button once;
“Repeat Title” will appear on the screen for a few seconds and
the currently playing Title will repeat continuously. Press the
REPEAT button a second time; “Repeat Chapter” will appear on
the screen for a few seconds and the currently playing Chapter
will repeat continuously. Press the REPEAT button again to
cancel all Repeat modes; “Repeat Off” will appear on the
screen temporarily.
POWER
B
C
D
This is not available on allA discs.
-U
M
A
Y
T
OP
R
N
ANGLE
SETUP
ZOOM
POWER
OPEN/CLOSE
REPEAT
USB
2ND
PIP
SETUP
REPEAT
ZOOM
AUDIO
OPEN/CLOSE
SETUP
ZOOM
BD PLAYER
PIP (PICTURE IN PICTURE)
2ND AUDIO
1
1
PO
P
RE
TU
R
Y
A
M
EN
D IS
U
SLOW STOP
PREV
NEXT
PAUSE
PIP
B
C
2ND
-U
P
U
EN
M
P
M
EN
PREV
F.F
RE
TU
D IS
U
SLOW STOP
PLAY
NEXT
A
D
PIP
USB
R
PL
PAUSE
PLAY
REW
F.F
VOL
SEARCH MUTE
VOL
SEARCH MUTE
A
PL
REW
HOME
ENTER
O
T
T
P
AUDIO
Use with Picture in Picture to hear the second audio.
ENTER
O
SUBTITLE
N
P
U
EN
M
HOME
N
-U
AUDIO
CLEAR
Y
Some BDs have Picture in Picture capability.
SUBTITLE
ANGLE
A
CLEAR
PO
P
ANGLE
B
C
2ND
D
USB
AUDIO
AUDIO
While viewing a disc (Blu-ray
BD PLAYERDisc only) that has PIP
capability, press the PIP button to view the picture in picture.
Press again to disable.
BD PLAYER
While viewing a disc (Blu-ray
Disc only) and PIP, press the
2ND AUDIO button to hear the sound from the picture in
picture. Press again to return to the primary sound.
30
BD/DVD OPERATION (CONTINUED)
ANGLE
ZOOM
The image on the screen can be magnified as follows:
1
POWER
REPEAT
OPEN/CLOSE
Some discs may contain scenes which have been shot
simultaneously from a number of different camera angles.
This feature only works on discs with more than one camera
”.
angle. The jacket will be marked with “
POWER
1
SETUP
ZOOM
1
REPEAT
OPEN/CLOSE
SETUP
ZOOM
ANGLE
CLEAR
SUBTITLE
ANGLE
AUDIO
PO
P
HOME
3
R
R
SLOW STOP
PLAY
REW
F.F
NEXT
B
POWER
C
Y
PREV
D IS
U
NEXT
PLAY
REW
F.F
VOL
A
B
C
PIP
D
USB
2ND
D
AUDIO
POWER
OPEN/CLOSE
OPEN/CLOSE
USB
2ND
PIP
PL
PAUSE
SEARCH MUTE
VOL
SEARCH MUTE
A
L
PAUSE
EN
SLOW STOP
A
Y
T
SP
DI
M
While in the Playback mode, press the ANGLE button; the
total number of angles will appear on the screen.
Repeatedly press the ANGLE button to select the desired
angle; the angle will change in one to two seconds.
This is not available on all discs.
Press the ZOOM button 1 once during Normal, Slow or Still
playback modes, and the unit will zoom in. Repeatedly press
to zoom in more. Use the Navigation (√,®,π,†) buttons 2
to move the image on the TV screen. Press the ZOOM
button 1 once more to cancel the zoom function or press the
Return button 3.
This is not available on all discs.
EN
U
P
A
T
O
PREV
RE
TU
ENTER
ENTER
M
U
EN
M
P
N
PO
P
RE
TU
-U
N
U
EN
M
P
-U
OP
HOME
CLEAR
SUBTITLE
2
AUDIO
AUDIO
REPEAT
SUBTITLE
BD PLAYER
ANGLE
1
RE
TU
R
CLEAR
SUBTITLE
PO
P
U
EN
M
HOME
ANGLE
-U
P
AUDIO
U
EN
M
Y
EN
D IS
U
SLOW STOP
PREV
NEXT
PL
PAUSE
PLAY
REW
F.F
PIP
B
C
2ND
Y
EN
D IS
U
PREV
NEXT
PL
PAUSE
PLAY
REW
F.F
Press the AUDIO button repeatedly to change the audio
language. This feature is not available on all discs.
VOL
SEARCH MUTE
VOL
SEARCH MUTE
M
SLOW STOP
Press the SUBTITLE button repeatedly to select a subtitle
language, and to turn the subtitle menu on/off. This feature is
not available on all discs.
A
P
A
M
R
A
O
T
T
P
RE
TU
ENTER
ENTER
O
HOME
N
P
AUDIO
N
-U
AUDIO
SETUP
ZOOM
BD PLAYER
CLEAR
SUBTITLE
PO
P
1
REPEAT
SETUP
ZOOM
A
D
PIP
USB
B
C
2ND
D
USB
AUDIO
AUDIO
BD PLAYER
BD PLAYER
31
MP3/WMA OPERATION
PLAYBACK OF AN MP3/WMA DISC
REPEAT
2
OPEN/CLOSE
REPEAT
SETUP
ZOOM
ANGLE
AUDIO
HOME
Y
D IS
U
1
PREV
NEXT
4
PL
PAUSE
PLAY
REW
F.F
SETUP
ZOOM
REPEAT
B
C
PREV
PIP
CLEAR
2ND
AUDIO
A
D
AUDIO
PIP
USB
HOME
RE
TU
Y
D IS
U
NEXT
A
PL
PAUSE
PLAY
REW
F.F
B
U
EN
M
6
SETUP
C
D
2ND
USB
1
Stop
BD PLAYER
REPEAT
SUBTITLE
RE
TU
R
F.F
VOL
C
D
USB
O
Y
PL
PLAY ALL: Select “Play All” from the Title List menu using
the Navigation (π,†) buttons 1, then press the ENTER
button 2; the player will then play all of the files on the disc.
PAUSE
PLAY
REW
F.F
B
C
2ND
AUDIO
U
EN
M
P
HOME
RE
TU
R
1
ENTER
M
EN
D IS
U
SLOW STOP
PREV
NEXT
PL
PAUSE
PLAY
REW
F.F
VOL
SEARCH MUTE
D
A
PIP
USB
AUDIO
BD PLAYER
P
SETUP
ADD TO PLAYLIST: Select “Add to Playlist” from the Title
List menu using the Navigation (π,†) buttons 1, then
press the ENTER button 2; the song will be added to the
playlist and a check mark will appear next to the name of
the song.
VOL
SEARCH MUTE
-U
OPEN/CLOSE
CLEAR
2
A
D IS
U
NEXT
PLAY
REW
N
1
ENTER
SLOW STOP
PAUSE
ZOOM
HOME
T
EN
PL
2ND
ANGLE
N
T
M
NEXT
CLEAR
AUDIO
2
D IS
U
B
PO
P
P
EN
POWER
OPEN/CLOSE
ZOOM
SUBTITLE
PO
P
B
AUDIO
ANGLE
PIP
VOL
R
ENTER
PIP
BD PLAYER
REPEAT
M
A
USB
POWER
A
RE
TU
SEARCH MUTE
D
2ND
P
PREV
AUDIO
PREV
U
EN
M
P
SLOW STOP
VOL
C
PIP
P
F.F
Y
EN
SEARCH MUTE
O
REW
A
PREV
-U
PLAY
The list of files on the disc will appear. (If the disc has
folders, then a list of folders will appear.) Use the
Navigation (π,†) buttons 1 to select the desired
MP3/WMA or folder and then press the ENTER button 2
to start playback or enter the folder. While in the stop
mode, use Navigation (π) button 1 to go to the top file and
press the ENTER button 2 to go to the previous folder. To
open the Title List menu with the desired MP3/WMA, press
BD PLAYER
the Navigation
(®) button 1.
A
T
M
SLOW STOP
5
PAUSE
Y
T
O
Press the OPEN/CLOSE button 1 to close the disc tray.
“CLOSE” will appear in the display and “Detecting Disc” will
appear on the TV screen. After loading, the Title List screen
of the disc will appear. Use the Navigation (π,†) buttons
2 to select Audio and then press the ENTER button 3.
P
NEXT
PL
A
3
ENTER
O
-U
2
BD PLAYER
R
D IS
U
AUDIO
PO
P
PO
P
P
EN
HOME
N
-U
R
N
2
U
EN
M
M
SEARCH MUTE
AUDIO
SUBTITLE
RE
TU
CLEAR
SUBTITLE
ANGLE
U
EN
M
SLOW STOP
ANGLE
A
P
SETUP
ZOOM
VOL
SEARCH MUTE
P
ENTER
O
A
EN
SLOW STOP
OPEN/CLOSE
REPEAT
M
-U
OPEN/CLOSE
T
T
3
POWER
P
HOME
N
POWER
ENTER
O
CLEAR
AUDIO
Press the OPEN/CLOSE button to open the disc tray,
“OPEN” will appear in the display. Insert a disc with MP3
/WMA files with the label side facing up on the disc tray.
R
PO
P
RE
TU
N
PO
P
U
EN
M
SETUP
ZOOM
SUBTITLE
Press the POWER/STANDBY button to turn on the unit.
The Power indicator light will go on. “HELLO” will appear
briefly in the display, then “LOAD” will appear.
P
OPEN/CLOSE
ANGLE
CLEAR
SUBTITLE
-U
POWER
Y
POWER
A
1
B
C
2ND
D
USB
AUDIO
32
BD PLAYER
OPEN/CLOSE
AUDIO
U
EN
M
1
O
Y
EN
D IS
U
SLOW STOP
PL
PAUSE
PLAY
REW
NEXT
A
B
POWER
9
C
2ND
USB
ZOOM
AUDIO
SETUP
BD PLAYER
ANGLE
CLEAR
AUDIO
PO
P
PAUSE
PLAY
REW
F.F
VOL
OPEN/CLOSE
B
C
D
SETUP
ZOOM
PIP
USB
2ND
AUDIO
10
RE
TU
BD PLAYER
ANGLE
CLEAR
SUBTITLE
AUDIO
P
-U
U
EN
M
R
HOME
RE
TU
R
ENTER
1
OP
ENTER
M
EN
D IS
U
SLOW STOP
PL
M
SP
DI
EN
U
PAUSE
SLOW STOP
PREV
PLAY
INFO: Select “Info” from the Title List menu using the
Navigation (π,†) buttons 1, then press the ENTER button
2; the information of the selected file will appear. The
information will stay on screen for 10 seconds, then
disappear.
PREV
REW
NEXT
L
A
B
POWER
PIP
C
PAUSE
PLAY
NEXT
REW
F.F
2
Press the PAUSE/Step button 1 to pause playback. Press
the PLAY button 2 to resume playback.
A
D
PIP
VOL
B
C
2ND
D
USB
AUDIO
OPEN/CLOSE
USB
2ND
AUDIO
ZOOM
REPEAT
1
SEARCH MUTE
F.F
VOL
SEARCH MUTE
SETUP
BD PLAYER
BD PLAYER
ANGLE
P
AUDIO
U
EN
M
HOME
RE
TU
R
N
-U
NOTES:
• Press the RETURN button to return to the Title List
screen.
• The Skip, Search, Pause, Repeat and Zoom will
operate as described previously, depending on the type
of files played.
• Press RETURN button repeatedly to return to the main
menu and press the PLAY button to play the disc, if
inserted.
CLEAR
SUBTITLE
PO
P
11
PL
Y
P
D IS
U
NEXT
A
A
T
O
EN
T
2
1
ENTER
N
P
R
HOME
N
-U
U
EN
M
M
REPEAT
PO
P
SUBTITLE
RE
TU
POWER
SEARCH MUTE
D
PIP
HOME
SORT BY NAME: Select “Sort by Name” from the Title List
menu using the Navigation (π,†) buttons 1, then press
the ENTER button 2; the playlist will sort in alphabetical
order.
OPEN/CLOSE
REPEAT
P
PREV
F.F
VOL
SEARCH MUTE
U
EN
M
SLOW STOP
VIEW PLAYLIST: Select “View Playlist” from the Title List
menu using the Navigation (π,†) buttons 1, then press
the ENTER button 2; the playlist will appear. You can then
press the ENTER button 2 again to start playback of your
playlist.
PREV
P
2
A
M
-U
ENTER
T
T
P
R
AUDIO
N
2
O
RE
TU
CLEAR
A
Y
P
ANGLE
SUBTITLE
HOME
N
PO
P
SUBTITLE
-U
8
CLEAR
SETUP
ZOOM
Y
ANGLE
REPEAT
PO
P
7
MP3/WMA OPERATION (CONTINUED)
SETUP
ZOOM
A
REPEAT
OPEN/CLOSE
M
A
T
P
Y
ENTER
O
EN
D IS
U
SLOW STOP
PREV
NEXT
PL
PAUSE
PLAY
REW
F.F
Press the STOP button to stop playback.
VOL
SEARCH MUTE
A
PIP
B
C
2ND
D
USB
AUDIO
BD PLAYER
33
REPEAT
SETUP
ZOOM
MP3/WMA OPERATION (CONTINUED)
SELECTING FOLDERS/TRACKS USING THE
SKIP O OR N BUTTON
ANGLE
CLEAR
SUBTITLE
PO
P
-U
P
U
EN
M
HOME
RE
TU
REPEAT PLAY
1
R
N
1
AUDIO
POWER
REPEAT
OPEN/CLOSE
SETUP
ZOOM
D IS
U
SLOW STOP
2
PREV
NEXT
PAUSE
PLAY
ANGLE
REW
F.F
SUBTITLE
1
C
D
HOME
2ND
-U
P
U
EN
M
RE
TU
R
To repeat the folder or playlist, press the REPEAT button.
Press again to stop repeat playback.
During playback, simply press the SKIP N 1 or o 2 button
to select a file to be played.
PIP
AUDIO
N
B
CLEAR
VOL
SEARCH MUTE
A
PL
ENTER
USB
AUDIO
T
O
P
Y
EN
M
A
M
PO
P
P
A
T
O
Y
ENTER
EN
D IS
U
SLOW STOP
BD PLAYER
PREV
NEXT
PAUSE
PLAY
REW
F.F
VOL
SEARCH MUTE
A
PIP
PL
B
C
2ND
D
USB
AUDIO
MP3 FAQs (Frequently Asked Questions)
Please read before playing an MP3 CD.
BD PLAYER
What is an MP3 file?
An MP3 file is a computer format that makes a usually large music file into a smaller one which is more convenient to
download and share.
Where can I find MP3 files?
MP3 files are available on the Internet.
Can this unit read regular music CDs?
Yes, it can. However, you cannot mix MP3s and WAV files on the same CD. If you do this, the unit will play only the MP3
files.
Can I use the MP3 extension for non-audio data files?
No, this may result in serious malfunction and harmful noise interference.
Can I mix MP3 files with other file types on the CDR?
Yes, but the unit will ignore those files and read only the MP3 files on the CDR.
Does this unit support subdirectories (subfolders)?
Yes, it can read MP3 files from subfolders.
34
CD OPERATION
PLAYBACK OF A CD
2
OPEN/CLOSE
REPEAT
ANGLE
AUDIO
HOME
Y
D IS
U
SLOW STOP
PREV
4
PL
PAUSE
POWER
PLAY
OPEN/CLOSE
REW
F.F
NEXT
B
PIP
C
PREV
PO
P
PO
P
N
PLAY
REW
F.F
P
R
1
Y
P
M
EN
D IS
U
PL
PAUSE
PLAY
REW
F.F
NEXT
OPEN/CLOSE
VOL
SEARCH MUTE
REPEAT
A
C
SUBTITLE
6
D
AUDIO
HOME
USB
2ND
AUDIO
U
EN
M
RE
TU
B
C
D
2ND
USB
AUDIO
CLEAR
B
SETUP
ZOOM
PIP
VOL
ANGLE
ANGLE
BD PLAYER
SUBTITLE
CLEAR
AUDIO
HOME
R
ENTER
-U
P
U
EN
M
RE
TU
R
N
PO
P
N
PO
P
-U
POWER
Y
PAUSE
SEARCH MUTE
P
-U
USB
RE
TU
DI
NEXT
PIP
2ND
U
EN
M
PREV
A
T
5
DE
HOM
SLOW STOP
ZOOM SPL SETUP
SLOW STOP
A
BAUDIOC
Use the Navigation (π,†) buttons 1 to select a different
track, then press the ENTER button 2 to begin playback.
R
ENTER OPEN/CLOSE
PREV
VOL
CLEAR
A
T
RE
TU
POWER
NU
F.F
ENTER
Press the OPEN/CLOSE button to close the disc tray.
“CLOSE” will appear in the display and “Detecting Disc” will
appear on the TV screen. After loading, the Title List
screen of the disc should appear and Track 1 will
automatically start playing.
U
EN
M
P
REW
NEXT
2BD PLAYER
HOME
O
O
PLAY
N
AUDIO
BD PLAYER
M
REPEAT
E
PAUSE
AUDIO
CLEAR
P
D IS
U
PIP
USB
ANGLE
-U
EN
SLOW STOP
AUDIO
SUBTITLE
SETUP
PL
ZOOM
M
A
SUBTITLE
D
2ND
O
REPEAT
P
SEARCH MUTE
ANGLE
SETUP
REPEATMUTE
ZOOM VOL
SEARCH
A
R
OPEN/CLOSE
ENTER
A
EN
RE
TU
N
M
HOME
U
EN
M
P
T
T
3
P
-U
POWER
ENTER
O
AUDIO
Press the OPEN/CLOSE button to open the disc tray,
“OPEN” will appear in the display. Insert a music CD with
the label side facing up on the disc tray.
R
PO
P
RE
TU
N
PO
P
U
EN
M
P
CLEAR
SUBTITLE
Press the POWER/STANDBY button to turn on the unit.
The Power indicator light will go on. “HELLO” will appear
briefly in the display, then “LOAD” will appear.
-U
SETUP
ZOOM
ANGLE
CLEAR
SUBTITLE
OPEN/CLOSE
REPEAT
SETUP
ZOOM
POWER
Y
POWER
A
1
BD PLAYER
ENTER
SLOW STOP
PREV
O
1
PAUSE
PLAY
NEXT
REW
F.F
2
P
PREV
PIP
B
C
2ND
EN
D IS
U
NEXT
PL
PAUSE
PLAY
REW
F.F
Press the STOP button to stop playback.
Press the PAUSE/Step button 1 to pause playback. Press
the PLAY button 2 to resume playback.
A
M
SLOW STOP
VOL
SEARCH MUTE
Y
L
T
SP
DI
EN
U
A
M
A
Y
T
OP
VOL
SEARCH MUTE
D
A
B
C
D
USB
AUDIO
PIP
2ND
USB
AUDIO
BD PLAYER
BD PLAYER
35
REPEAT
CD OPERATION (CONTINUED)
POWER
SETUP
ZOOM
SELECTING TRACKS/FILES USING THE SKIP
O OR N BUTTON
ANGLE
1
1
CLEAR
SUBTITLE
-U
AUDIO
U
EN
M
P
HOME
RE
TU
R
N
1
REPEAT
OPEN/CLOSE
PO
P
SELECTING TRACKS/FILES USING THE
NUMBER BUTTONS
SETUP
ZOOM
ENTER
T
O
SUBTITLE
AUDIO
P
HOME
Y
CLEAR
M
A
ANGLE
EN
D IS
U
U
EN
M
2
2
SP
DI
EN
U
SLOW STOP
NEXT
A
PLAY
REW
F.F
C
VOL
C
D
During playback, press the SKIP n 1 or o 2 button to
select the next or previous track to be played.
PIP
2ND
USB
AUDIO
BD PLAYER
D
OPEN/CLOSE
USB
2ND
REPEAT
F.F
1
B
VOL
SEARCH MUTE
PIP
PLAY
REW
L
PAUSE
A
B
POWER
PAUSE
NEXT
SEARCH MUTE
Press the Number buttons 1 corresponding to the track
number you would like to play, then press the ENTER
button 2 and the unit will playback the desired track.
PREV
PREV
A
Y
M
R
ENTER
T
OP
RE
TU
N
PO
P
SLOW STOP
P
-U
PL
SETUP
ZOOM
AUDIO
BD PLAYER
ANGLE
CLEAR
FAST FORWARD ®®/REWIND √√ SEARCH
-U
P
AUDIO
U
EN
M
HOME
RE
TU
REPEAT/RANDOM
1
R
N
1
PO
P
SUBTITLE
ENTER
POWER
M
EN
U
D
SLOW STOP
PREV
NEXT
2
L
IS P
PAUSE
PLAY
REW
F.F
1
ANGLE
CLEAR
VOL
SEARCH MUTE
SUBTITLE
C
2ND
USB
To repeat a playing track, simply select the track as
described previously, then press the REPEAT button once
and the unit will repeat all the tracks on the disc, press twice
and the unit will play the selected track continuously. Press
the REPEAT button a third time and the unit will randomly
repeat all the tracks on the disc. To cancel Repeat play,
press the REPEAT button a fourth time.
PO
P
-U
P
U
EN
M
RE
TU
R
N
Each press of the SEARCH ®® 1 or √√ 2 button will
increase the search as follows:
AUDIO
ENTER
x2
x4
x8
x 16
Resume Normal Playback
BD PLAYER
O
T
1st press:
2nd press:
3rd press:
4th press:
5th press:
HOME
D
P
Y
PIP
B
AUDIO
M
A
A
SETUP
ZOOM
A
T
P
Y
REPEAT
O
OPEN/CLOSE
EN
D IS
U
SLOW STOP
PREV
NEXT
PAUSE
PLAY
REW
F.F
VOL
SEARCH MUTE
A
PIP
PL
B
C
2ND
D
USB
AUDIO
BD PLAYER
36
SUBTITLE
POWER
REPEAT
M
EN
D IS
U
PREV
NEXT
A
PLAY
REW
F.F
VOL
B
PIP
AUDIO
PO
P
P
R
N
-U
RE
TU
OPEN/CLOSE
M
A
T
POWER
P
Y
ENTER
O
EN
D IS
U
SLOW STOP
PL
PAUSE
PLAY
REW
F.F
POWER
REPEAT
3
PREV
REPEAT
NEXT
4
SETUP
ZOOM
VOL
SEARCH MUTE
A
PIP
B
C
2ND
D
2ND
USB
Insert the USB device with
data files and press the USB
BD PLAYER
button 1 to select USB, then select the desired USB
device. Or insert a disc with data files. Data files can be
movies, audio files or pictures. See the specifications for
details on the file formats allowed. After loading, the Title
List screen of the disc will appear. Use the Navigation
(π,†) buttons 2 to select a format and then press the
ENTER button 3.
HOME
Press the POWER/STANDBY button to turn on the unit.
The Power indicator light will go on. “HELLO” will appear
briefly in the display, then “LOAD” will appear.
U
EN
M
C
AUDIO
CLEAR
SUBTITLE
PL
PAUSE
SEARCH MUTE
ANGLE
R
Y
P
SLOW STOP
SETUP
ZOOM
RE
TU
A
2
OPEN/CLOSE
U
EN
M
P
ENTER
O
T
1
PO
P
PLAYBACK OF A DATA (PICTURE, AUDIO, VIDEO) CD/USB
-U
HOME
N
DATA CD/USB OPERATION
AUDIO
D
USB
OPEN/CLOSE
SETUP
ZOOM
ANGLE
CLEAR
AUDIO
ANGLE
CLEAR
AUDIO
PO
P
U
EN
M
1
ENTER
O
R
1
ENTER
M
EN
D IS
U
PL
M
A
Y
P
RE
TU
Y
PO
P
P
2
R
T
T
P
-U
N
2
O
RE
TU
N
-U
P
HOME
HOME
BD PLAYER
U
EN
M
AUDIO
A
SUBTITLE
SUBTITLE
EN
D IS
U
PL
SLOW STOP
PREV
NEXT
PAUSE
PLAY
REW
F.F
A
B
PIP
PREV
C
NEXT
REW
F.F
VOL
SEARCH MUTE
VOL
SEARCH MUTE
PLAY
PLAY ALL: Select “Play All” from the Title List menu using
the Navigation (π,†) buttons 1, then press the ENTER
button 2; the player will then play all of the files on the disc.
The list of files on the disc will appear. (If the disc has
folders, then a list of folders will appear.) Use the Navigation
(π,†) buttons 1 to select the desired file or folder and then
press the ENTER button 2 to start playback or enter the
folder. Use Navigation (π) button 1 to go to the top file and
press the ENTER button 2 to go to the previous folder. To
open the Title List menu with the desired content, press the
Navigation (®) button 1.
SLOW STOP
PAUSE
A
D
PIP
B
C
2ND
D
USB
AUDIO
USB
2ND
AUDIO
6
SETUP
REPEAT
ZOOM
BD PLAYER
P
U
EN
M
2
R
1
O
Y
M
EN
D IS
U
PL
ADD TO PLAYLIST: Select “Add to Playlist” from the Title
List menu using the Navigation (π,†) buttons 1, then
press the ENTER button 2; the file will be added to the
playlist and a check mark will appear next to the name of
the file.
SLOW STOP
PREV
NEXT
PAUSE
PLAY
REW
F.F
A
PIP
B
C
2ND
P
PREV
RE
TU
R
1
ENTER
M
EN
D IS
U
NEXT
PL
PAUSE
PLAY
REW
F.F
VOL
SEARCH MUTE
A
PIP
USB
BD PLAYER
U
EN
M
SLOW STOP
D
AUDIO
P
HOME
VIEW PLAYLIST: Select “View Playlist” from the Title List
menu using the Navigation (π,†) buttons 1, then press
the ENTER button 2; the playlist will appear. You can then
press the ENTER button 2 again to start playback of your
playlist.
VOL
SEARCH MUTE
-U
AUDIO
2
ENTER
A
P
SUBTITLE
T
T
O
HOME
RE
TU
CLEAR
N
-U
ANGLE
AUDIO
SETUP
ZOOM
CLEAR
N
PO
P
SUBTITLE
REPEAT
Y
ANGLE
OPEN/CLOSE
BD PLAYER
PO
P
5
POWER
OPEN/CLOSE
A
POWER
37
B
C
2ND
D
USB
AUDIO
BD PLAYER
DATA CD/USB OPERATION (CONTINUED)
SETUP
ANGLE
U
EN
M
R
1
O
Y
A
M
EN
D IS
U
PL
SORT BY NAME: Select “Sort by Name” from the Title List
menu using the Navigation (π,†) buttons 1, then press
the ENTER button 2; the playlist will sort in alphabetical
order.
SLOW STOP
PREV
PAUSE
PLAY
REW
F.F
NEXT
POWER
REPEAT
A
PIP
B
C
6
CLEAR
PO
P
AUDIO
U
EN
M
REW
F.F
VOL
OPEN/CLOSE
C
D
ZOOM
SETUP
2ND
USB
HOME
RE
TU
BD PLAYER
ANGLE
CLEAR
SUBTITLE
AUDIO
HOME
R
PO
P
-U
P
U
EN
M
Y
PL
T
NEXT
PAUSE
PLAY
REW
F.F
PREV
C
2ND
M
EN
D IS
U
NEXT
PL
PAUSE
PLAY
REW
F.F
Press the STOP button to stop playback.
Press the PAUSE/Step button to pause playback. Press
again to resume playback.
B
P
SLOW STOP
VOL
SEARCH MUTE
R
ENTER
A
D IS
U
RE
TU
N
EN
SLOW STOP
PIP
PLAY
N
T
M
PL
PAUSE
B
O
A
NEXT
A
ENTER
PREV
D IS
U
PIP
ANGLE
P
1
AUDIO
SUBTITLE
O
EN
REPEAT
USB
P
R
ENTER
POWER
BD PLAYER
-U
RE
TU
SEARCH MUTE
SETUP
AUDIO
5
M
PREV
D
2ND
U
EN
M
P
SLOW STOP
OPEN/CLOSE
ZOOM
P
HOME
INFO: Select “Info” from the Title List menu using the
Navigation (π,†) buttons 1, then press the ENTER button
2; the information of the selected file will appear. The
information will stay on screen for 10 seconds, then
disappear.
VOL
SEARCH MUTE
-U
2
ENTER
T
T
P
RE
TU
CLEAR
AUDIO
Y
2
O
SUBTITLE
A
P
ANGLE
HOME
N
-U
SETUP
ZOOM
CLEAR
AUDIO
N
PO
P
SUBTITLE
8
REPEAT
OPEN/CLOSE
Y
ZOOM
PO
P
7
REPEAT
POWER
OPEN/CLOSE
A
POWER
D
VOL
SEARCH MUTE
A
USB
B
C
D
AUDIO
PIP
2ND
USB
AUDIO
BD PLAYER
BD PLAYER
NOTES:
• Press the RETURN button to return to the Title List screen.
• The Skip, Search, Pause, Repeat and Zoom will operate as described previously, depending on the type of files played.
• Press RETURN button repeatedly to return to the main menu and press the PLAY button to play the disc, if inserted.
38
TROUBLESHOOTING GUIDE
Check the following before requesting service:
SYMPTOM
GENERAL
No power.
Power on, but unit not functioning
properly.
POSSIBLE CAUSE
AC cord unplugged.
Condensation has formed.
Wrong type of disc inserted.
Unit needs to be reset.
No picture.
The disc is dirty or inserted incorrectly.
Some features and functions are not
available on all discs.
The equipment is not connected properly.
No sound.
The INPUT of the TV is not set to receive
the disc signal output.
The video cables are not securely
connected.
The connected TV power is off.
The equipment is not connected properly.
The playback picture is poor.
The Search feature is not working.
The picture is not fitting properly.
The remote control is not working.
The Preferences menu cannot be
accessed (it is dimmed) in the
Setup menu.
The equipment connected with the audio
cable is not set to receive the Player
signal input.
The audio cables are not securely
connected.
The connected receiver’s power is off.
The disc is dirty.
Some discs have sections that do not
allow searching.
Wrong menu option is selected in the
Setup menu.
The batteries are weak or dead.
The batteries are not installed properly.
The remote is not aimed at the sensor.
Distance is too far or there is too much
light in the room.
There is an obstacle in the path of the
beam.
There is a disc in the disc tray.
39
POSSIBLE SOLUTION
Plug in the AC cord to an AC outlet.
Unplug the unit and wait about one to
two hours to allow the player to dry.
This unit cannot play discs other than
those listed on page 16.
Press the POWER/STANDBY button,
then unplug the power cord. Wait one
minute and then plug the unit back in.
Clean disc and insert label side-up.
This is normal; try another function.
Connect the equipment according to
the instructions in this manual.
Select the appropriate video input
mode, usually VIDEO or AV.
Connect the video cables securely.
Turn the TV on.
Connect the equipment according to
the instructions in this manual.
Select the appropriate audio input
mode.
Connect the audio cables securely.
Turn the audio receiver on.
Clean the disc.
This is normal on some discs.
Select the correct TV type (PS, LB, WIDE)
which matches the TV you are using.
Install fresh batteries.
Install batteries according to the diagram.
Aim the remote at the sensor.
Operate within 20 ft, or reduce the light
in the room.
Move the obstacle.
Remove the disc from the disc tray, as
there cannot be any disc inserted when
setting the preferences.
SYMPTOM
TROUBLESHOOTING GUIDE (CONTINUED)
DISCS
The unit does not start playback.
POSSIBLE CAUSE
Disc not inserted, or inserted upside-down.
Insert disc correctly.
A non-playback disc is inserted.
Make sure to insert a playable disc as
shown on page 16.
Place the disc on the disc tray correctly
inside the guide.
Clean the disc.
This is normal; try another function.
The disc is not placed in the guide.
Some functions do not operate as
stated.
Selected language is not being
shown in the subtitles, or spoken.
Subtitles are not working properly.
Angle cannot be changed.
POSSIBLE SOLUTION
The disc is dirty.
Some features and functions are not
available on all discs.
If the audio or subtitle language does not
appear on the disc, then the initial setting
will not be seen/heard.
Subtitles appear only when the discs
contain them.
Subtitles not turned on.
Angles may not be recorded on the disc
(see disc jacket/case), or they may only
be recorded on certain scenes.
This is normal; try another disc.
This is normal; try another disc.
Turn the subtitles on.
Try another disc, or wait for a scene
which allows a different camera angle.
FOR ADDITIONAL SET-UP OR OPERATING ASSISTANCE, PLEASE VISIT OUR WEBSITE AT:
WWW.MEMOREXELECTRONICS.COM
FOR CONSUMER REPLACEABLE PART(S), SEE PART NUMBER(S) ON PAGE 8, AND THEN
CONTACT FOX INTERNATIONAL AT: 1-800-321-6993.
40
CARE AND MAINTENANCE
Caring for Discs
• Treat the disc carefully. Handle the disc only by its edges. Never allow your fingers to come in contact with the shiny, unprinted
side of the disc.
•
•
•
•
Do not attach adhesive tape, stickers, etc. to the disc label.
Clean the disc periodically with a soft, lint-free, dry cloth. Never use detergents or abrasive cleaners to clean the disc. If
necessary, use a CD cleaning kit.
If a disc skips or gets stuck on a section of the disc, it is probably dirty or damaged (scratched).
When cleaning the disc, wipe in straight lines from the center of the disc to the outer edge of the disc. Never wipe in circular
motions.
B E NZEN E
•
•
•
C LE A N E R
Discs should be stored in their cases after each use to avoid damage.
Do not expose discs to direct sunlight, high humidity, high temperatures or dust, etc. Prolonged exposure or extreme
temperatures can warp the disc.
Do not stick or write anything on either side of the disc. Sharp writing instruments, or the ink, may damage the surface.
Cleaning the Unit
• To prevent fire or shock hazard, disconnect your unit from the AC power source when cleaning.
• The finish on your unit may be cleaned with a dust cloth and cared for as other furniture. Use caution when cleaning and
wiping the plastic parts.
• Mild soap and a damp cloth may be used on the front panel.
41
SPECIFICATIONS
Power Requirements..........................................................................................................AC120V, 60Hz
Power Consumption .....................................<27W (approx. 3W when set to Standby mode by remote)
Weight..........................................................................................................................................6.35 Lbs
Dimensions ....................................................................................16.9 (W) x 10.6 (D) x 1.69 (H) inches
Weight and dimensions are approximate.
Operating Temperature ...........................................................................................................41° to 95°F
Operating Humidity Range.........................................................................5% to 90% (no condensation)
Format
Disc Support.............................................................................BD (405nm), DVD (650nm), CD (780nm)
Video Output
Composite...............................................................................................(75Ω Load) 1 channel: 1.0 Vp-p
Blu-ray 480i
DVD: 480i
Component ............................................................ (75Ω Load) Y: 1.0Vp-p, Pr: 0.70Vp-p, Pb: 0.70Vp-p
Blu-ray 1080i, 720p
DVD: 1080i, 720p
S-Video ....................................................................................... (75Ω Load) Luminance Signal 1.0Vp-p
(75Ω Load) Chrominance Signal 0.3Vp-p
Blu-ray 480i
DVD: 480i
Audio/Video Output
HDMI ..........................................................................................................1080p, 1080p24, 1080i, 720p
Audio Output
PCM Multichannel Audio, Bitstream Audio, PCM Audio
2 Channel............................................................................................................................................L, R
7.1 Channel .............................................................................................FL, FR, Rrs, Rls, C, lfe, LS, RS
Digital Audio Output...........................................................................................................Optical/Coaxial
Frequency Response ..........................48kHz Sampling: 4Hz to 22kHz / 96kHz Sampling 4Hz to 22kHz
S/N Ratio ...........................................................................................................................................95dB
Dynamic Compression ......................................................................................................................85dB
Total Harmonic Distortion ................................................................................................................0.01%
Specifications are subject to change without notice.
42
LANGUAGE LIST CODES
Abkhazian:
6566
Afar:
6565
Afrikaans:
6570
Albanian:
8381
Ameharic:
6577
Arabic:
6582
Armenian:
7289
Assamese:
6583
Aymara:
6589
Azerbaijani:
6590
Bashkir:
6665
Basque:
6985
Bengali; Bangla:
6678
Bihari:
6672
Breton:
6682
Bulgarian:
6671
Burmese:
7789
Catalan:
6765
Chinese:
9072
Corsican:
6779
Croatian:
Czech:
Danish:
Dutch:
English:
Esperanto:
Estonian:
Faroese:
Fiji:
Finnish:
French:
Galician:
Georgian:
German:
Greek:
Greenlandic:
Guarani:
Gujarati:
Hausa:
Hebrew:
Hindi:
7282
6783
6865
7876
6978
6979
6984
7079
7074
7073
7082
7176
7565
6869
6976
7576
7178
7185
7265
7387
7273
Hungarian:
7285
Icelandic:
7383
Indonesian:
7378
Interlingua:
7365
Irish:
7165
Italian:
7384
Japanese:
7465
Javanese:
7487
Kannada:
7578
Kashmiri:
7583
7575
Kazakh:
Kirghiz:
7589
Korean:
7579
Kurdish:
7585
Latin:
7665
Latvian, Lettish:7686
Lingala:
7678
Lithuanian:
7684
Macedonian: 7775
Malagasy:
7771
Malay:
7783
43
Malayalam:
7776
Maltese:
7784
Maori:
7773
Marathi:
7782
Moldavian:
7779
Mongolian:
7778
Nauru:
7865
Nepali:
7869
Norwegian:
7879
Oriya:
7982
Pashto, Pushto:8083
Persian:
7065
Polish:
8076
Portuguese:
8084
Punjabi:
8065
Quechua:
8185
Rhaeto-Romance:
8277
Romanian:
8279
Russian:
8285
Samoan:
8377
Sanskrit:
Scots Gaelic:
Serbian:
Shona:
Sindhi:
Slovak:
Slovenian:
Somali:
Spanish:
Sundanese:
Swahili:
Swedish:
Tagalog:
Tajik:
Tamil:
Tatar:
Telugu:
Thai:
Tibetan:
Tigrinya:
Tonga:
8365
7168
8382
8378
8368
8375
8376
8379
6983
8385
8387
8386
8476
8471
8465
8484
8469
8472
6679
8473
8479
Turkish:
Turkmen:
Twi:
Ukrainian:
Urdu:
Uzbek:
Vietnamese:
Volapük:
Welsh:
Wolof:
Xhosa:
Yiddish:
Yoruba:
Zulu:
8482
8475
8487
8575
8582
8590
8673
8679
6789
8779
8872
7473
8979
9085
CONTENIDO
Contenido ........................................................................1
•
Funciones........................................................................5
Funcionamiento básico del BD/DVD ..........................27
Medidas importantes de seguridad ..............................2
•
Precauciones ..................................................................6
Fuente de energía...........................................................6
•
Parte frontal ................................................................7
•
Control remoto ............................................................8
•
•
•
•
Distancia eficaz del transmisor
•
del control remoto .......................................................9
•
Conexión .......................................................................10
Conexión del Reproductor a un TV utilizando los
•
Conexión del Reproductor a un TV utilizando los
•
•
•
•
•
conectores Y/Pb/Pr ...................................................11
•
Salto..........................................................................28
Pausa y Paso ...........................................................28
Lento .........................................................................28
Botón de Menú Superior (Top Menu) .......................29
Menú emergente (Pop-up) .......................................29
Botón Inicio (Home) ..................................................29
Búsqueda de Tiempo................................................29
Reproducción repetida..............................................30
Búsqueda de Display-Título/Capítulo .......................30
PIP (imagen superpuesta) .......................................30
2º Audio ....................................................................30
Zoom.........................................................................31
Ángulo.......................................................................31
Subtítulos ..................................................................31
Audio.........................................................................31
Funcionamiento de MP3/WMA ....................................32
Salida de video progresivo (Y, PB, PR) .....................11
Conexión del Reproductor a un TV utilizando los
•
•
Conexión del Reproductor a un TV utilizando los
•
•
•
conector de Salida de S-Video .................................10
Salida de video por componente de 525 líneas
•
•
conectores de salida de Audio/Video .......................10
•
Búsqueda..................................................................28
•
Instalación de las pilas ...............................................9
•
•
•
Control remoto................................................................9
•
Reproducción de un Disco Blu-ray o un DVD ..........27
•
Parte posterior ............................................................7
Modo silencioso (Mute) ............................................26
•
•
Ubicación de los controles............................................7
Botones de Color......................................................26
•
digitales para exploración progresiva .......................11
•
Reproducción de un disco MP3/WMA......................32
Selección de carpetas/pistas usando los botones de
SALTO (SKIP)...........................................................34
conector de salida HDMI ..........................................12
•
cable DVI ..................................................................13
Funcionamiento de un disco CD ................................35
Conexión del Reproductor a un TV utilizando un
•
Conexión del Reproductor a un Sistema de Home
•
Theater (a través de un conector coaxial/óptico) .....14
•
Conexión del Reproductor a un Sistema de Home
Theater (a través de conectores de salida de
•
canales 7.1) ..............................................................15
Reproducción repetida..............................................34
Preguntas frecuentes sobre discos MP3..................34
Reproducción de un disco CD..................................35
Seleccionar pistas o archivos usando los
botones de números.................................................36
Selección de pistas/archivos utilizando los botones de
SALTO (SKIP)...........................................................36
Acerca de los discos....................................................16
•
•
Menú de configuración general ................................18
Funcionamiento de un CD/USB con datos ................37
•
Menú de configuración de audio ..............................21
Menú de configuración ................................................18
•
•
•
•
Repetir/aleatorio .......................................................36
Menu de configuración de video ..............................20
•
Menu de configuración de idioma ............................23
Cuidado y mantenimiento............................................41
Reproducción de un CD/USB con datos ..................37
Guía de resolución de problemas...............................39
Especificaciones...........................................................42
Configuración de las opciones del Control
Lista de códigos de idiomas .......................................43
de Padres .................................................................24
Operación básica (General).........................................26
•
Búsqueda de avance rápido/por rebobinado ...........36
Botones de Volumen ................................................26
1
MEDIDAS IMPORTANTES DE SEGURIDAD
PRECAUCIÓN
RIESGO DE DESCARGA
ELÉCTRICA. NO ABRIR.
PRECAUCIÓN: PARA REDUCIR EL RIESGO DE DESCARGA ELÉCTRICA, NO QUITE LA
CUBIERTA (O TAPA POSTERIOR). NO HAY PIEZAS EN EL INTERIOR QUE EL
USUARIO PUEDA REPARAR. REMITA LAS REPARACIONES AL PERSONAL
DE SERVICIO CALIFICADO. (Esta etiqueta con marca de alerta y clasificación se
encuentra en el gabinete inferior de la unidad.)
El símbolo para la clase II
(Aislante doble)
El símbolo de la flecha con forma de rayo adentro
de un triángulo está hecho para alertar al usuario
de la presencia de cables sin aislar de “voltaje
peligroso” en el interior del gabinete, el cual puede
ser de magnitud suficiente para constituir un riesgo
de descarga eléctrica para las personas.
El signo de exclamación dentro de un
triángulo equilátero es para alertar al usuario
de la presencia de instrucciones importantes
de operación y mantenimiento en el manual
que acompaña al aparato.
NOTIFICACIÓN DE LA FCC:
Este equipo fue probado y se encontró que cumple con las limitantes para
aparatos digitales de Clase B, de conformidad con el apartado 15 de las
Normas de la FCC. Estas limitantes están diseñadas para ofrecer una
protección razonable contra interferencia dañina en una instalación
residencial. Este equipo genera, usa y puede irradiar energía de
radiofrecuencia y, si no se instala y usa conforme a las instrucciones,
puede generar interferencia dañina con las radiocomunicaciones.
Sin embargo, no hay garantía de que no habrá interferencia en una
instalación particular. Si este equipo llegara a causar interferencia dañina
con la recepción de radio o televisión, lo cual se puede determinar
encendiendo y apagando el equipo, le pedimos que intente corregir la
interferencia con las siguientes medidas:
•
Cambie la orientación o ubicación de la antena receptora.
•
Incremente la distancia entre el equipo y el receptor.
•
Conecte el equipo a un contacto eléctrico que esté en un circuito
distinto al que está conectado el receptor.
•
Pida ayuda consultando al distribuidor o a un técnico experimentado
en radio o televisión.
Las modificaciones no autorizadas por el fabricante pueden anular la
autoridad del usuario para operar este aparato.
PRECAUCIÓN:
ESTE REPRODUCTOR DIGITAL DE DISCOS DE VIDEO
EMPLEA UN SISTEMA LÁSER.
PARA ASEGURAR EL USO ADECUADO DE ESTE
PRODUCTO, LEA ESTE MANUAL DEL PROPIETARIO
DETENIDAMENTE Y CONSÉRVELO PARA FUTURA
REFERENCIA.
SI
LA
UNIDAD
REQUIERE
MANTENIMIENTO, COMUNÍQUESE CON UN CENTRO
AUTORIZADO DE SERVICIO: VEA LOS PROCEDIMIENTOS
DE SERVICIO.
EL USO DE UN CONTROL, AJUSTE O PROCEDIMIENTO
DIFERENTE A LO AQUÍ ESPECIFICADO PUEDE
RESULTAR EN UNA EXPOSICIÓN DAÑINA A LA
RADIACIÓN.
PARA EVITAR LA EXPOSICIÓN DIRECTA AL RAYO LÁSER,
NO INTENTE ABRIR LA CAJA. LA RADIACIÓN LÁSER
VISIBLE PUEDE ESTAR PRESENTE AL ABRIR LA CAJA.
NO SE QUEDE MIRANDO AL RAYO.
PRECAUCIÓN DE FCC:
PARA GARANTIZAR EL CUMPLIMIENTO CONTINUO, SIGA LAS
INSTRUCCIONES DE INSTALACIÓN ANEXAS Y USE SÓLO CABLES
PROTEGIDOS CUANDO SE CONECTA A OTROS DISPOSITIVOS.
ADEMÁS, CUALQUIER CAMBIO O MODIFICACIÓN, QUE NO HAYA
SIDO EXPRESAMENTE APROBADO POR LA PARTE RESPONSABLE
DEL CUMPLIMIENTO, PUEDE ANULAR LA AUTORIDAD DEL USUARIO
DE OPERAR EL EQUIPO.
ADVERTENCIA:
PARA REDUCIR EL RIESGO DE INCENDIO O DESCARGA
ELÉCTRICA, NO EXPONGA ESTE PRODUCTO A LA
LLUVIA NI A LA HUMEDAD.
ESTE APARATO DIGITAL DE CLASE B CUMPLE CON LA NORMA
ICES-003 DE CANADÁ.
CET APPAREIL NUMÉRIQUE DE LA CLASSE B EST CONFORME À LA
NORME NMB-003 DU CANADA.
ADVERTENCIA:
PARA REDUCIR EL RIESGO DE INCENDIO O DESCARGA
ELÉCTRICA, Y LA INTERFERENCIA MOLESTA, USE
SOLAMENTE LOS ACCESORIOS RECOMENDADOS.
ATTENTION:
POUR ÉVITER LES CHOC ÉLECTRIQUES, INTRODUIRE LA LAME LA
PLUS LARGE DE LA FICHE DANS LA BORNE CORRESPONDANTE
DE LA PRISES ET POUSSER JUSQU’AU FOND.
PROTECTORES DE VOLTAJE:
Se recomienda usar un protector de voltaje para la conexión a
corriente eléctrica. Los rayos y picos en la energía eléctrica NO
ESTÁN cubiertos por la garantía para este producto.
Fabricado bajo la licencia de Dolby Laboratories. Dolby y el símbolo de
doble D son marcas registradas de Dolby Laboratories.
Fabricado bajo licencia del número de patente de Estados Unidos:
5,451,942; 5,956,674; 5,974,380; 5,978,762; 6,226,616; 6,487,535 y otras
patentes de Estados Unidos y de todo el mundo emitidas y pendientes. DTS
es marca registrada y los logotipos y el símbolo de DTS, Audio de alta
resolución DTS-HD, DTS-HD y audio de alta resolución DTS-HD son
marcas comerciales de DTS, Inc. © 1996-2008 DTS, Inc. Todos los
derechos reservados.
ADVERTENCIA SOBRE EL LÁSER:
Esta unidad utiliza un láser. Sólo el personal de
reparaciones calificado es quien puede reparar este
dispositivo debido a posibles lesiones en la vista.
2
MEDIDAS IMPORTANTES DE SEGURIDAD (CONTINÚA)
Antes de usar este aparato asegúrese de leer bien todos los puntos de este manual de operaciones. Una vez leído,
consérvelo a la mano para usarlo como referencia en el futuro. Tenga especial cuidado al seguir las advertencias
indicadas en la unidad, así como las que aparecen en el manual de instrucciones.
1. Lea el instructivo.
Usted deberá leer todo el instructivo de seguridad y funcionamiento antes de operar su equipo.
2. Conserve el instructivo
Conserve el instructivo para futura referencia.
3. Siga las medidas de seguridad
Las medidas de seguridad y funcionamiento deberán seguirse al pie de la letra.
4. Siga las instrucciones
Siga todas las instrucciones sobre el funcionamiento de la unidad.
5. Limpieza
Desenchufe la unidad antes de limpiarla. Nunca use líquidos de limpieza químicos, ni aerosoles. Use un paño seco y suave.
6. Auxiliares
Nunca use ningún aparato auxiliar que no haya sido recomendado por el fabricante.
7. Evite lugares cerca del agua o muy húmedos.
Nunca use su unidad cerca del agua. Por ejemplo, cerca de una bañera o lavamanos, lavadero de cocina o lavandería, en
un sótano húmedo, cerca de una piscina o lugares similares.
8. Accesorios
Coloque la unidad en una mesa, soporte o repisa estables, donde no hay vibración. Cuando coloque la unidad en un carro o
estante, asegúrese de seguir las recomendaciones indicadas en este manual.
8A.La combinación de aparato y carro deberá ser movida con cuidado. Las paradas bruscas, fuerza excesiva y las superficies
irregulares podrán hacer que el aparato y el carro se vuelquen.
9. No permita la entrada de objetos o líquidos dentro de la unidad
ADVERTENCIA SOBRE EL CARRO
PORTÁTIL
Nunca introduzca un objeto metálico en la unidad, ni ponga nada que contenga líquidos cerca de ella.
(símbolo proporcionado por RETAC)
La unidad no deberá ser instalada en un mueble empotrado, como una repisa para libros, un estante
o donde la presencia de cortinas o mobiliario obstruya las aberturas de ventilación.
10.Suministro de energía
Esta unidad solo deberá operarse con la electricidad que aparece en la etiqueta. Si no está seguro del
tipo de energía que hay en su casa, consulte a su distribuidor o compañía de electricidad de su
localidad. Para aquellos productos que funcionan con baterías, u otras fuentes, consulte el instructivo
de funcionamiento.
11. Polarización
Esta unidad está equipada con un cable eléctrico polarizado (el enchufe cuenta con una clavija más ancha que la otra). Dicho
enchufe sólo puede ser insertado en el contacto eléctrico en una sola dirección. Eso se hace como medida de seguridad. Si
no pudiera insertar la clavija completamente en el contacto eléctrico, vuelva a intentarlo invirtiendo la clavija. Si aun así no
puede insertar el enchufe, comuníquese con un electricista para que reemplace su contacto eléctrico obsoleto. No modifique
las características de seguridad de la clavija polarizada.
12.Protección del cable eléctrico
Asegúrese de que el cable nunca se encuentre en el camino donde pasan las personas, y de no colocar nada sobre él que
lo pueda pinchar o recalentar (como puede suceder con un calentador, por ejemplo). Nunca agarre el cable con las manos
mojadas, y asegúrese de agarrar el cuerpo del enchufe (nunca tire del cable), tanto para conectarlo como para desconectarlo.
13.Relámpagos
Para proteger su unidad de una tormenta eléctrica, o cuando no va a ser usada por un período largo de tiempo, es
recomendable que desconecte la unidad de la pared, la antena o el cable. Así evitará daños producidos por
descargas eléctricas.
14.Líneas aéreas de energía eléctrica.
Como medida de precaución, cuando instale una antena exterior, hágalo lo más lejos posible de las líneas aéreas de energía
eléctrica, ya que la antena podría caer sobre dichas líneas y causar un cortocircuito. Asimismo, nunca deberá tocarlas ya que
podría ser fatal.
15.Sobrecarga
Nunca sobrecargue los enchufes ni extensiones, ya que podría resultar en un incendio o cortocircuito.
16.No permita la entrada de objetos o líquidos dentro de la unidad
Nunca introduzca un objeto metálico en la unidad, ni ponga nada que contenga líquidos cerca de ella.
3
MEDIDAS IMPORTANTES DE SEGURIDAD (CONTINÚA)
17.Conexión a tierra de la antena exterior
Si se conecta una antena al receptor, asegúrese de que el sistema de antena tenga una conexión a tierra a fin de proveer
cierta protección contra sobrecargas de electricidad y acumulación de estática. La Sección 810 del Código Eléctrico Nacional,
ANSI/NFPA No. 70-1984, provee información sobre: la correcta instalación a tierra del mástil así como la estructura de apoyo;
la conexión a tierra del cable de plomo a la unidad de descarga de la antena; el tamaño de los conductores a tierra; la ubicación
de la salida de la antena; la conexión de los electrodos de tierra y los requisitos para los mismos.
EJEMPLO DE LA INSTALACIÓN A TIERRA SEGÚN EL CÓDIGO
NACIONAL DE ELECTRICIDAD NEC
18.Reparaciones
Nunca intente darle servicio a su unidad usted mismo, ya que abrir la unidad o quitar la tapa puede exponerlo a circuitos de
voltaje peligrosos. Lleve su unidad a un Centro de servicio autorizado.
19.Repuestos
Cuando tenga necesidad de ordenar piezas, asegúrese de que su centro de servicio use las piezas especificadas por el
fabricante, o aquéllas que tienen las mismas características que la pieza original. El uso de piezas no autorizadas pueden
causar descargas eléctricas u otros peligros.
20.Chequeo de seguridad
Cada vez que repare su unidad, solicite al técnico que hizo la reparación que haga un chequeo de seguridad para determinar
si el producto está funcionando correctamente.
21.Montaje en pared o techo
Este producto deberá montarse en el techo o pared siguiendo las instrucciones dadas por el fabricante.
22.Daños que requieren servicio:
Siempre desenchufe su unidad del contacto eléctrico y solicite el servicio de un técnico calificado cuando se presenten las
siguientes condiciones:
a. El cable eléctrico o el enchufe están dañados.
b. Ha derramado líquido dentro de la unidad.
c. Ha expuesto su equipo a la lluvia o al agua.
d. Su equipo no funciona correctamente a pesar de seguir las instrucciones de funcionamiento, como es el ajuste de
controles indicados en el manual de funcionamiento. El mal manipuleo de dichos controles puede resultar en un daño
mayor a los mismos.
e. Ha dejado caer su unidad y el gabinete se ha dañado.
f.
Su equipo muestra señales diferentes en su funcionamiento; eso es una clara indicación de que su equipo necesita
servicio.
23.Calor
Esta unidad no deberá nunca colocarse cerca a artefactos tales como radiadores, estufas, cocinas u otros dispositivos
(incluyendo amplificadores) que produzcan calor.
24.NOTA ESPECIAL PARA EL INSTALADOR DEL SISTEMA DE CABLE CATV
Esta nota está hecha especialmente para llamar la atención del instalador de cable al Artículo 820-40 del NEC, el mismo que
imparte directrices para conectar a tierra el cable correctamente, así como al edificio y lo más cerca posible a la entrada
del cable.
4
FUNCIONES
Esta unidad cuenta con muchas funciones, algunas se detallan a continuación. Lea el manual del usuario para
aprovechar al máximo todas las funciones que esta unidad tiene para ofrecerle.
•
•
•
•
•
•
•
Reproducción BD-ROM
BD-ROM es un formato de disco óptico de última generación en la era de alta definición. Con una
capacidad de almacenamiento masivo de 25 a 50 GB (cinco veces mayor que un DVD) y una tasa de
transferencia de alta velocidad de hasta 54 Mbps, este formato ofrece no sólo video de calidad de alta
definición*† sino que también permite un buen contenido en un solo disco y con audio de calidad de alta
definición para 8 canales y funcionabilidad interactiva.
* Para poder disfrutar de la misma calidad, es necesario un dispositivo de pantalla de alta definición
compatible.
† Algunos discos permiten visualizarse sólo con una conexión HDMI.
True Cinema de 24p
Las películas filmadas con una cámara filmadora constan de 24 cuadros por segundo. Como los televisores
convencionales (los TRC y los de pantalla plana) muestran cuadros con intervalos de 1/60 ó 1/50
segundos, los 24 cuadros no aparecen con un ritmo constante.
Cuando se encuentra conectado a un TV con capacidad de 24p, el reproductor muestra cada cuadro en
intervalos de 1/24 segundos, — el mismo intervalo filmado originariamente con la cámara filmadora, por
consiguiente reproduce fielmente la imagen cinematográfica original.
Aplicación BD-J
El formato BD-ROM admite Java para las funciones interactivas. “BD-J” ofrece funcionalidad casi ilimitada a
los proveedores de contenido cuando crea títulos de BD-ROM interactivos. Java y todas las marcas
comerciales y logotipos de Java son marcas comerciales o marcas registradas de Sun Mycrosystems, Inc.
en Estados Unidos y en otros países.
Soporte de modulación PCM lineal, multicanal y descomprimida.
En combinación con un amplificador AV compatible, el reproductor puede producir sonidos envolventes de
modulación lineal PCM en hasta 8 canales. * Con un amplificador no compatible, el reproductor puede
producir señales análogas de canales 5.1 desde su conector de SALIDA de canales 5.1 para disfrutar de
una buena calidad de audio.
* Tenga en cuenta que el conector de SALIDA DIGITAL (COAXIAL u ÓPTICA) no produce señales para 8
canales. Necesitará un cable HDMI y un dispositivo HDMI compatible que admita señales para 8 canales.
Soporte de “Dolby TrueHD” y “DTS-HD” - Sonido envolvente de canales 7.1
La unidad admite la funcionalidad de salida del flujo de bits de Dolby TrueHD, Dolby Digital Plus, y flujo de
bits de audio de alta resolución DTS-HD a través de HDMI. También admite la funcionalidad de
decodificación de Dolby TrueHD, Dolby Digital Plus, y audio de alta resolución DTS-HD para PCM lineal y
multicanal a través de HDMI.
Interfaz digital HDMI (Interfaz de multimedia de alta definición)
Al estar conectado a un dispositivo de pantalla equipado con HDMI que utiliza un solo cable HDMI, la
unidad puede reproducir videos SD hasta HD y señales de audio multicanales, en forma digital sin
degradación. La especificación HDMI admite HDCP (Protección de contenido digital de banda ancha), una
tecnología de protección de copia que incorpora tecnología de codificación para señales de video digital.
Función de librería para los archivos grabados (sólo para imágenes JPEG, audio MP3, AVI, archivos
WMV)
Con DATA-DVD y DATA-CD, tres navegadores de listas de todos los títulos de Audio/Video/Imagen
permiten una fácil clasificación, búsqueda y reproducción.
5
NOTAS SOBRE EL MANEJO:
•
•
•
•
•
PRECAUCIONES
PARA OBTENER UNA IMAGEN CLARA:
El reproductor es un aparato de alta tecnología y precisión. Si los
lentes de captación óptica y las piezas de accionamiento del
disco están sucios o desgastados, la calidad de la imagen se
volverá mala. Para obtener una imagen clara, recomendamos la
inspección y el mantenimiento regular (limpieza o reemplazo de
piezas) cada 1,000 horas de uso, dependiendo del entorno
donde opera la unidad. Si desea obtener más detalles,
comuníquese con su distribuidor más cercano.
Al enviar el reproductor, use siempre la caja de cartón
y los materiales de empaque originales. Para máxima
protección, empaque la unidad nuevamente como fue
empacada originalmente en la fábrica.
No use líquidos volátiles, como atomizadores
repelentes de insectos, cerca del reproductor de DVD.
No deje productos de hule o plástico en contacto con el
reproductor por periodos prolongados de tiempo. Éstos
dejarán marcas en el acabado.
Los paneles superior y posterior del reproductor
pueden calentarse después de un periodo prolongado
de uso. Eso es normal y no un defecto de
funcionamiento.
Cuando el reproductor no está en uso, asegúrese de
quitar el disco y apagar la unidad.
Si no usa el reproductor por un periodo prolongado de
tiempo, es posible que la unidad no funcione
debidamente en el futuro. Encienda el reproductor
ocasionalmente y úselo.
NOTAS SOBRE LA CONDENSACIÓN
POR HUMEDAD:
La condensación por humedad daña el reproductor. Lea
detenidamente lo siguiente.
•
La condensación por humedad ocurre en los siguientes
casos:
•
NOTAS SOBRE EL POSICIONAMIENTO DE
REPRODUCTOR:
•
La condensación por humedad ocurre, por ejemplo, cuando
se sirve una bebida fría en un vaso en un día caluroso. En
el exterior del vaso se forman gotas de agua. Del mismo
modo, la humedad puede condensarse en los lentes de
captación óptica adentro de esta unidad, una de las piezas
internas más cruciales del reproductor.
•
Si coloca este reproductor cerca de un televisor, de una
radio o de un VCR, la imagen de la reproducción puede
llegar a ser mala y el sonido puede distorsionarse. Si eso
sucede, mueva el reproductor lejos del televisor, radio o VCR.
•
•
NOTAS SOBRE LA LIMPIEZA:
Cuando trae el reproductor directamente de un lugar frío a
un lugar caliente.
Cuando usa el reproductor en una habitación donde acaba
de encender el calentador, o en un lugar donde el aire frío
del aire acondicionado pega directamente en la unidad.
En verano, cuando usa el reproductor en un lugar caliente y
húmedo, justo después de mover la unidad de una
habitación con aire acondicionado.
Cuando usa el reproductor en un lugar húmedo.
No use el reproductor cuando pueda ocurrir una
condensación por humedad.
• Si usa el reproductor en tales situaciones, se pueden dañar
los discos y las piezas internas. Quite el disco, conecte el
cable eléctrico del reproductor al contacto eléctrico,
encienda el reproductor y déjelo “ENCENDIDO” durante
unas dos o tres horas. Después dos o tres horas, el
reproductor se habrá calentado y se habrá evaporado la
humedad. Mantenga el reproductor conectado al contacto
eléctrico y la condensación por humedad raramente
ocurrirá.
Use un trapo seco y suave para la limpieza.
• Para la suciedad persistente, remoje el trapo en una
solución de detergente diluido, exprímalo bien y frote. Use
un trapo seco para secar la superficie. No use ningún tipo
de solvente, como adelgazador y benceno, ya que pueden
dañar la superficie del reproductor.
• Si usa un trapo empapado en una solución química para
limpiar la unidad, siga las instrucciones de dicho producto.
Advertencia: La limpieza y ajuste de las lentes y/o otros
componentes de reproducción mecánica deben ser realizados
por un técnico de servicio calificado.
FUENTE DE ENERGÍA
Inserte la clavija (de 2 cuchillas) en un contacto eléctrico de 120VCA de 60Hz, ubicado
en un lugar conveniente.
NOTA: El enchufe de CA incluido con la unidad está polarizado para ayudar a
minimizar la posibilidad de una descarga eléctrica. Si el enchufe de CA no entra en el
contacto eléctrico no polarizado, no lime ni corte el lado ancho. Es responsabilidad del
usuario pedir a un electricista que cambie el contacto eléctrico obsoleto.
6
UBICACIÓN DE LOS CONTROLES
PARTE FRONTAL
1
2 3
4
5 67
8
IN
1.
2.
3.
4.
Indicador de modo en espera (Standby)
5.
Botón de ENCENDIDO/Modo en ESPERA
(POWER/STANDBY)
6.
7.
Pantalla
8.
Compartimiento del disco
Botón de DETENER X
Botón (®) REPRODUCIR (PLAY)
Botón ABRIR/CERRAR (OPEN/CLOSE)
Conector USB (en la parte lateral de la unidad,
debajo del compartimiento)
PARTE POSTERIOR
1
1.
2 3
4
5 6
7
8
Conector HDMI
9
8.
Conectores de salida de audio de canales 7.1
2.
Conector de Salida de Video (CVBS)
9.
4.
Conectores de salida de video por
componente (Y, PB, PR)
NO. DE PIEZA, CABLE ELÉCTRICO:
3.
5.
6.
7.
Conector de salida de S-Video
Conector de encendido de CA
JJA0310-150NFIX-R0*
Conector de salida COAXIAL
* Pieza remplazable por el consumidor
(Consulte la página 40 para ordenar.)
Conector de salida ÓPTICO
Conectores de Salida Derecho/Izquierdo de
Audio Estéreo
7
UBICACIÓN DE LOS CONTROLES (CONTINÚA)
CONTROL REMOTO
POWER
OPEN/CLOSE
21
1
SETUP
ZOOM
REPEAT
22
2
3
4
CLEAR
ANGLE
5
23
SUBTITLE
AUDIO
HOME
24
6
7
-U
P
U
EN
M
9
Y
P
M
A
T
O
11
EN
D IS
U
SLOW STOP
PL
PAUSE
26
PLAY
27
PREV
NEXT
REW
F.F
14
15
28
29
30
VOL
SEARCH MUTE
16
17
31
A
B
C
D
18
PIP
19
14.
15.
16.
17.
18.
o)
Botón de Salto (Skip)/ANTERIOR (o
n)
Botón de Salto (Skip)/SIGUIENTE (n
Botón de BÚSQUEDA
Botón MUDO (MUTE)
Botones de Color
Botón rojo (A)
Botón verde (B)
Botón amarillo (C)
Botón azul (D)
Botón PIP (Imagen superpuesta)
Botón de 2º AUDIO
Botón de ABRIR/CERRAR (OPEN/CLOSE)
Botón de CONFIGURACIÓN (SETUP)
Botón de BORRAR
Botón INICIO (HOME)
Botón VOLVER (RETURN)
Botón de DISPLAY
Botón de REPRODUCIR (PLAY)
Botón de PAUSA/PASO
Botón de BÚSQUEDA/AVANCE RÁPIDO
(SEARCH/FAST FORWARD) ®®
Botón de BÚSQUEDA/REBOBINADO
(SEARCH/REWIND) √√
Botón +/– de VOLUMEN
Botón de USB
9.
10.
11.
12.
13.
25
R
ENTER
10
12
13
RE
TU
Botón de ENCENDIDO
Botón de REPETIR
Botón de ZOOM
TECLAS NUMÉRICAS (0–9)
Botón de ÁNGULO
Botón de SUBTÍTULO
Botón de AUDIO
Botón de MENÚ EMERGENTE (POP-UP MENU)
N
PO
P
8
1.
2.
3.
4.
5.
6.
7.
8.
2ND
30.
USB
AUDIO
20
32
BD PLAYER
19.
20.
21.
22.
23.
24.
25.
26.
27.
28.
29.
31.
32.
Botones de NAVEGACIÓN (π,†,√,®)
Botón ACEPTAR (ENTER)
Botón de MENÚ SUPERIOR (TOP MENU)
Botón de LENTO
Botón de DETENER
CONTROL REMOTO PIEZA NO. JAK0800-MEM-R0*
Cable A/V RCA - PIEZA NO. JFX1001-150-R0*
TAPA DE LA PILA PIEZA NO. JAK0800-COV-R0*
*Pieza remplazable por el consumidor
(Consulte la página 40 para ordenar.)
8
INSTALACIÓN DE LAS PILAS
– +
+
CONTROL REMOTO
1. Abra el compartimiento de la pila ejerciendo presión sobre la pestaña
y levantándola.
2. Introduzca dos (2) pilas “AAA” (no incluidas), prestando atención al
diagrama de polaridad en el compartimiento de pilas.
3. Coloque nuevamente la tapa del compartimiento.
–
PRECAUCIONES CON LA PILA
Siga estas precauciones al usar pilas con este aparato:
1. Use sólo pilas del tamaño y tipo especificado.
2. Asegúrese de seguir la polaridad correcta al introducirlas, como se indica junto al compartimiento de las pilas. Si coloca
las pilas de manera incorrecta, el aparato puede sufrir daños.
3. No mezcle diferentes tipos de pilas (ej. alcalinas, recargables y carbono-zinc) o pilas viejas con nuevas.
4. Si no usará el aparato por un periodo prolongado, saque las pilas para evitar daños o lesiones por un posible derrame
de las mismas.
5. No intente recargar pilas que no son recargables; pueden sobrecalentarse y reventar. (Siga las indicaciones del
fabricante de las pilas).
DISTANCIA EFICAZ DEL TRANSMISOR DEL CONTROL REMOTO
NOTAS:
• Cuando hay un obstáculo entre
la unidad y el transmisor, es
posible que el transmisor no
funcione.
30˚
30˚
20 ft.
9
• Cuando alumbra la luz directa
del
sol,
una
lámpara
incandescente, una lámpara
fluorescente o cualquier otra
luz fuerte sobre el SENSOR
DEL REMOTO de la unidad, la
operación del control remoto se
vuelve instable.
CONEXIÓN
CONECTAR EL REPRODUCTOR A UN TELEVISOR USANDO LOS CONECTORES DE SALIDA DE
AUDIO/VIDEO
Cable AV
(incluido)
CONECTAR EL REPRODUCTOR A UN TELEVISOR USANDO LOS CONECTORES DE SALIDA DE
S-VIDEO
Cable de audio
(no incluido)
Cable S-Video
(no incluido)
NOTAS:
• Si su TV tiene una entrada de HDMI, conecte la unidad al cable HDMI para mejores resultados. De lo contrario, use el
conector de componente, de S-Video o de SALIDA de video en el reproductor.
• Ponga el botón o interruptor de TV/VIDEO del televisor en VIDEO.
• Cuando conecte el reproductor, consulte el manual del usuario del televisor, así como este manual.
• Cuando conecte el reproductor al televisor y antes de realizar la conexión, cerciórese de que la energía esté apagada y que
ambas unidades estén desconectadas.
• Si su televisor sólo tiene una entrada de audio, quizá deba usar un conector “Y”. Visite la tienda local de accesorios
electrónicos, o compre por Internet.
• Conecte el reproductor directamente a su TV. Si conecta el reproductor a través de una VCR, la imagen reproducida se
distorsionará dado que los discos de video se encuentran protegidos contra copias.
• La fuente de video es siempre de salida en 480i de resolución, independientemente de la configuración del menú de ajustes.
10
CONEXIÓN (CONTINÚA)
CONECTAR LA UNIDAD A UN TELEVISOR USANDO LOS CONECTORES Y/PB/PR
Cable de audio
(no incluido)
Cable del componente
(no incluido)
NOTAS PARA CONECTAR A UN TV:
• Si su TV posee una entrada de HDMI, conecte la unidad al cable HDMI para mejores resultados. De lo contrario, use el conector de
componente, de S-Video o de SALIDA de video en el reproductor.
• El TV debe poseer conectores de entrada Y, PB y PR.
• Ponga el botón o interruptor de TV/VIDEO del televisor en VIDEO.
• Cuando conecte el reproductor, consulte el manual del usuario del televisor, así como este manual.
• Cuando conecte el reproductor al televisor y antes de realizar la conexión, cerciórese de que la energía esté apagada y que ambas
unidades estén desconectadas.
• Conecte el reproductor directamente a su TV. Si conecta el reproductor a través de una VCR, la imagen reproducida se distorsionará
dado que los discos de video se encuentran protegidos contra copias.
• Si utiliza un televisor con opción de pantalla azul, desactive esta opción en el televisor para obtener mejores resultados.
• Cuando utiliza los conectores de componente como su fuente, configure la resolución de alta definición en el menú de Video como se
describe en la página 20.
Salida de video progresivo (Y, PB, PR):
Utilice estos conectores para conectar la unidad a un televisor con conectores de entrada de video progresivo. La exploración
progresiva es un sistema de exploración de video que muestra en una sola pasada todas las líneas de un cuadro, a
diferencia del sistema tradicional de exploración entrelazada. Esta conexión brinda una calidad óptima. Para asegurar una
calidad máxima en la imagen, utilice tres cables para video para las conexiones. Tome en cuenta que es esencial que las
conexiones con código de color coincidan con un televisor compatible.
SALIDA DE VIDEO POR COMPONENTE DE 525 LÍNEAS DIGITALES PARA EXPLORACIÓN PROGRESIVA
Comparado con el video entrelazado normal, la exploración progresiva duplica eficazmente la cantidad de información de
video que se alimenta a su televisor o monitor. El resultado es una imagen estable y sin fluctuaciones. (Revise que su
televisor o monitor sea compatible con esta función.)
Para ver la mejor calidad en imagen, pruebe ver una película en video DVD en un televisor compatible con exploración progresiva.
NOTA:
• EL CONSUMIDOR DEBE SABER QUE NO TODOS LOS TELEVISORES DE ALTA DEFINICIÓN SON TOTALMENTE
COMPATIBLES CON ESTE PRODUCTO Y ES POSIBLE QUE APAREZCAN OBJETOS EN LA IMAGEN. EN CASO DE
TENER PROBLEMA DE IMAGEN CON LA EXPLORACIÓN PROGRESIVA 525, RECOMENDAMOS QUE EL USUARIO
PONGA LA CONFIGURACIÓN DE VIDEO EN 1080i, CONFIGURACIONES DE INTERFAZ, CONSULTE LA PÁGINA 20.
11
CONEXIÓN (CONTINÚA)
CONECTAR EL REPRODUCTOR A UN TELEVISOR USANDO EL CONECTOR DE SALIDA HDMI
Cable HDMI
(no incluido)
NOTAS:
• Si su TV posee una entrada de HDMI, conecte la unidad al cable HDMI para mejores resultados. De lo contrario, utilice el
conector de componente, de S-Video o de SALIDA de video en el reproductor.
• Ponga el botón o interruptor de TV/VIDEO del televisor en VIDEO.
• Cuando conecte the player, consulte el manual del propietario del televisor, así como este manual.
• Cuando conecte the player al televisor y antes de realizar la conexión, cerciórese de que la energía esté apagada y que
ambas unidades estén desconectadas.
• Conecte el reproductor directamente a su TV. Si conecta el reproductor a través de una VCR, la imagen reproducida se
distorsionará dado que los discos de video se encuentran protegidos contra copias.
• Cuando utilice HDMI como su fuente, configure la resolución de alta definición en el menú de Video como se describe en la
•
página 20 y la salida digital en el menú de audio como se describe en la página 21.
La salida de video del reproductor se cambiará automáticamente a HDMI cuando el cable HDMI se encuentre conectado y el
reproductor esté encendido.
12
CONEXIÓN (CONTINÚA)
CONECTAR EL REPRODUCTOR A UN TELEVISOR USANDO UN CABLE DVI
Cable de audio
(no incluido)
Cable HDMI-DVI
(no incluido)
NOTAS:
• Ponga el botón o interruptor de TV/VIDEO del televisor en VIDEO.
• Cuando conecte el reproductor, consulte el manual del usuario del televisor, así como este manual.
• Cuando conecte el reproductor al televisor y antes de realizar la conexión, cerciórese de que la energía esté apagada y
que ambas unidades estén desconectadas.
• Conecte el reproductor directamente a su TV. Si conecta el reproductor a través de una VCR, la imagen reproducida se
distorsionará dado que los discos de video se encuentran protegidos contra copias.
• Cuando utiliza HDMI como su fuente, configure la resolución de alta definición en el menú de Video como se describe en la
•
página 20.
La salida de video del reproductor se cambiará automáticamente a HDMI cuando el cable HDMI se encuentre conectado y el
reproductor esté encendido.
13
CONEXIÓN (CONTINÚA)
CONECTAR EL REPRODUCTOR A UN SISTEMA “HOME THEATER” (A TRAVÉS DE UN CONECTOR COAXIAL/ÓPTICO)
Los cables no están incluidos
Amplificador de canales 5.1 con
decodificador incorporado
NOTAS PARA CONECTAR A UN TV:
• Si su TV posee una entrada de HDMI, conecte la unidad al cable HDMI para mejores resultados. De lo contrario, utilice el
conector de componente, de S-Video o de SALIDA de video en el reproductor.
• Ponga el botón o interruptor de TV/VIDEO del televisor en VIDEO.
• Cuando conecte el reproductor, consulte el manual del usuario del televisor, así como este manual.
• Cuando conecte el reproductor al televisor y antes de realizar la conexión, cerciórese de que la energía esté apagada y
que ambas unidades estén desconectadas.
• Conecte el reproductor directamente a su TV. Si conecta el reproductor a través de una VCR, la imagen reproducida se
distorsionará dado que los discos de video se encuentran protegidos contra copias.
• Si usa un televisor con opción de pantalla azul, desactive esta opción en el televisor para obtener mejores resultados.
• Si coloca la unidad cerca de un sintonizador, es posible que la transmisión de radio se distorsione. Si eso sucede,
mueva la unidad lejos del sintonizador.
• Cuando utilice esta conexión, se escuchará un Disco Blu-ray con una banda sonora de audio LPCM en los cinco
canales.
14
CONEXIÓN (CONTINÚA)
CONECTAR EL REPRODUCTOR A UN SISTEMA “HOME THEATER” (A TRAVÉS DE CONECTORES
DE SALIDA DE CANALES 7.1)
Altavoces
multicanales
Multi channel
speakers
Los cables no están incluidos
Conectar
Connect
Audio
los cables
to a
cables
de audio
terminals que
terminales
correspondingato
correspondan
the
los speakers
altavocesyou
have
connected.
conectados.
Parteof
posterior
Back
the unit
de la unidad
NOTAS PARA CONECTAR A UN TV:
• Si su TV posee una entrada de HDMI, conecte la unidad al cable HDMI para mejores resultados. De lo contrario, use el
conector de componente, de S-Video o de SALIDA de video en el reproductor.
• Ponga el botón o interruptor de TV/VIDEO del televisor en VIDEO.
• Cuando conecte the player, consulte el manual del propietario del televisor, así como este manual.
• Cuando conecte the player al televisor y antes de realizar la conexión, cerciórese de que la energía esté apagada y que
ambas unidades estén desconectadas.
• Conecte el reproductor directamente a su TV. Si conecta el reproductor a través de una VCR, la imagen reproducida se
distorsionará dado que los discos de video se encuentran protegidos contra copias.
• Si usa un televisor con opción de pantalla azul, desactive esta opción en el televisor para obtener mejores resultados.
• Si coloca la unidad cerca de un sintonizador, es posible que la transmisión de radio se distorsione. Si eso sucede,
mueva la unidad lejos del sintonizador.
• Para obtener información acerca de la configuración del Audio, consulte las páginas 21 y 22.
15
ACERCA DE LOS DISCOS
Los códigos de región para los BD-DVD de este reproductor se encuentran enumerados en la parte
posterior del mismo. Consulte la siguiente página para obtener información relacionada con los
códigos de región de los BD-DVD.
DISCOS REPRODUCIBLES:
Los siguientes discos pueden reproducirse
en esta unidad:
MP3
Cuando se reproduce un disco MP3, el número total de archivos aparecerá en la pantalla, y la pantalla del TV enumerará
las carpetas/pistas.
MP3 es la abreviatura para “MPEG1 Audio Layer 3”. El audio MPEG es un formato que comprime solamente la porción del audio.
NOTA IMPORTANTE:
Debido a muchas variables, incluyendo las condiciones de grabación, el tipo de disco, el software usado para grabar, etc., esta
unidad no garantiza la reproducción de todos los discos MP3.
TIPOS DE DISCO:
DISCOS
Los datos en la mayoría de los discos están divididos en
secciones llamadas “títulos” y luego en subsecciones
llamadas “capítulos”, a cada una de las cuales se le asigna
un número de título o capítulo. Algunas funciones de este
reproductor de disco no operarán con algunos discos ya que
son predefinidos. Si no se activan algunas de las funciones
seleccionadas como desea, consulte el manual que
acompaña al disco.
CD DE AUDIO
Los datos en un CD de audio se dividen en secciones
llamadas “pistas”, cada una de las cuales se les asigna un
número de pista.
CD DE IMÁGENES KODAK
Los datos en el CD de imágenes Kodak normalmente no se
divide en carpetas individuales por lo que deberían
aparecer en el directorio raíz.
16
ACERCA DE LOS DISCOS (CONTINÚA)
DVD-R/RW, DVD+R/RW
Este disco se puede reproducir en esta unidad una vez que la unidad de grabado haya finalizado.
IMPORTANTE:
Es importante que lea el manual que acompaña el disco, ya que hay funciones en el reproductor de disco
que no pueden usarse con ciertos discos. También hay funciones adicionales en el disco que son
diferentes para cada disco, de modo que no se explican en este manual del propietario.
Notas sobre los derechos de propiedad literaria:
Queda prohibido por ley copiar, transmitir, mostrar, transmitir por cable, reproducir en público y rentar sin
premiso los materiales con derechos de propiedad literaria. Los discos están protegidos por esta ley y
cualquier grabación que se haga de estos discos se distorsionará. Este producto incorpora tecnología
de protección de derechos de propiedad literaria que está protegida por el reclamo de similitud de
método de ciertas patentes de los Estados Unidos y otros derechos de propiedad intelectual que son
propiedad de Macrovision Corporation y otros propietarios de derechos. El uso de esta tecnología de
protección de derechos de propiedad literaria debe ser autorizado por Macrovision Corporation, y está
hecho sólo para el hogar y otros usos de visión limitados, a menos que Macrovision Corporation autorice
lo contrario. Se prohíbe la ingeniería inversa o el desensamble.
Información de gestión de región:
Este reproductor de disco fue diseñado y fabricado para responder a la Información de gestión de región
que está grabada en un disco. Si el número de región descrito en un disco no corresponde con el número
de Región de este reproductor de disco, el reproductor de disco no puede reproducir dicho disco. Es
posible que no pueda reproducir algunos discos en este reproductor si fueron comprados fuera de su
área geográfica o fueron preparados con fines comerciales.
17
MENÚ DE CONFIGURACIÓN
MENÚ DE CONFIGURACIÓN GENERAL:
Para ingresar al menú de Configuración general (General Setup), oprima el botón CONFIGURACIÓN (SETUP), seleccione
General usando los botones de Navegación (π,†) y luego oprima el botón de Navegación (®).
PROTECTOR DE PANTALLA
REPEAT
SETUP
ZOOM
ANGLE
U
EN
M
P
ANGLE
R
1
-U
AUDIO
U
EN
M
P
2
ENTER
Y
CLEAR
SUBTITLE
O
T
T
P
RE
TU
SETUP
ZOOM
P
HOME
RE
TU
R
N
2
O
1
HOME
N
PO
P
AUDIO
OPEN/CLOSE
CONFIGURACIONES DE REINICIO (RESET SETTINGS)
CLEAR
SUBTITLE
-U
REPEAT
PO
P
1
POWER
OPEN/CLOSE
1
ENTER
Y
POWER
ACTUALIZACIÓN DEL FIRMWARE
VERSIÓN DEL SOFTWARE
SLOW STOP
PREV
NEXT
PAUSE
PLAY
REW
F.F
VOL
SEARCH MUTE
PIP
PL
USB
2ND
AUDIO
OPEN/CLOSE
PREV
ANGLE
U
EN
M
2
D IS
U
SLOW STOP
PREV
NEXT
PL
PAUSE
PLAY
REW
F.F
SEARCH MUTE
PIP
1
2ND
AUDIO
VOL
USB
USB
SETUP
ZOOM
ANGLE
CLEAR
SUBTITLE
-U
P
AUDIO
U
EN
M
2
ENTER
A
EN
VOL
2ND
REPEAT
1
Imation puede ofrecerle, en el futuro, actualizaciones del firmware
de su reproductor. Para las actualizaciones, ingrese en
www.memorexelectronics.com y descargue el último firmware,
luego guárdelo en un CD o en un dispositivo USB. Seleccione el
menú General como se muestra más arriba. Seleccione
A
B
C
D
Actualización del Firmware (Update Firmware) CON los botones
de Navegación (π,†) 1, luego oprima el botón de Navegación
(®) 1; aparecerá “CD ROM” y “USB”. Seleccione uno y oprima
ACEPTAR (ENTER) 2, luego seleccione SÍ (YES) con los botones
de Navegación (√,®) 1 y oprima el botón ACEPTAR (ENTER) 2
BD PLAYER
nuevamente. Introduzca el CD o el dispositivo USB. Se instalará
el firmware actualizado.
M
F.F
OPEN/CLOSE
R
Y
P
PLAY
REW
BD PLAYER
O
T
T
O
RE
TU
PAUSE
P
HOME
RE
TU
R
N
PO
P
P
PL
AUDIO
HOME
N
-U
AUDIO
NEXT
PIP
CLEAR
SUBTITLE
D IS
U
SEARCH MUTE
PO
P
1
SETUP
ZOOM
EN
SLOW STOP
BD PLAYER
REPEAT
M
1
ENTER
Utilice esta opción para ver la versión del Software.
Seleccione el menú General como se muestra más arriba.
Seleccione Versión del Software (Software Version) con los
botones de Navegación (π,†) 1, luego oprima el botón de
Navegación (®) 1; aparecerá “Visualizar” (View). Oprima
ACEPTAR (ENTER) 2 para ver la versión del software y la
del firmware.
Y
D IS
U
M
A
EN
A
Seleccione esta opción para restablecer todas las configuraciones
a la configuración original de fábrica.
Seleccione el menú General como se muestra más arriba.
Seleccione Restablecer Configuración (Reset Settings) con los
botones de Navegación (π,†) 1, luego oprima el botón de
A
B
C
D
Navegación (®) 1; aparecerá “¿Está seguro? (Are you sure)”.
Oprima el botón ACEPTAR (ENTER) 2, luego seleccione SÍ (YES)
con los botones de Navegación (√,®) 1 . Oprima el botón
ACEPTAR (ENTER) 2 nuevamente
y restablezca la configuración.
POWER
A
Seleccione el menú General como se muestra más arriba.
Seleccione Protector de pantalla (Screensaver) mediante el botón
de Navegación (®) 1, luego oprima el botón de Navegación (®)
1 nuevamente; aparecerá “ENCENDIDO” (ON) y “APAGADO”
(OFF). Seleccione ENCENDIDO (ON) (el protector de pantalla se
A
B
C
D
activará cuando la unidad se detenga o cuando la imagen se
encuentre en pausa por aproximadamente 10 minutos) o
APAGADO (OFF) (el protector de pantalla no se activará) mediante
los botones de Navegación
(π,†) 1, luego oprima el botón
POWER
ACEPTAR (ENTER) 2.
M
EN
D IS
U
SLOW STOP
PREV
NEXT
PAUSE
PLAY
REW
F.F
VOL
SEARCH MUTE
A
PIP
PL
B
C
2ND
D
USB
AUDIO
BD PLAYER
NOTAS:
• Oprima CONFIGURACIÓN (SETUP) para salir de los menús de configuración.
• Oprima el botón VOLVER (RETURN) para volver a la configuración anterior.
18
MENÚ DE CONFIGURACIÓN (CONTINÚA)
ALMACENAMIENTO LOCAL
Para un disco compatible con el paquete virtual. El Paquete Virtual se define como: Algunos discos BD-Video copian información a otro
medio (almacenamiento local) y luego reproducen el video secundario, el audio secundario y los subtítulos (subcontenidos)
simultáneamente.
Estas funciones reciben el nombre de paquetes virtuales. Los subcontenidos se graban automáticamente en otro medio del disco antes
de reproducir el paquete virtual.
Para esta unidad, la información se guarda en un Almacenamiento local. Los métodos para copiar y reproducir y la capacidad disponible
requerida en el almacenamiento local pueden variar con el disco. Para obtener mayor información, consulte las instrucciones del disco.
Para utilizar las funciones ya mencionadas, se recomienda que formatee el almacenamiento local de esta unidad.
Formatee el almacenamiento local siguiendo los siguientes pasos. La información del BD-Video, tal como un video secundario grabado
en el almacenamiento local, también puede borrarse siguiendo los siguientes pasos.
PARA BORRAR EL ALMACENAMIENTO LOCAL
POWER
POWER
OPEN/CLOSE
OPEN/CLOSE
Cuando el Almacenamiento local no contenga suficiente espacio para guardar la información de la aplicación BD-Java,
primero borre el Almacenamiento local antes de reproducir.
AUDIO
U
EN
M
P
T
P
RE
TU
R
1
O
Y
T
D IS
U
SLOW STOP
PREV
NEXT
PLAY
REW
F.F
B
PIP
C
2ND
U
EN
M
P
P
M
EN
D IS
U
PREV
NEXT
R
1
D
A
USB
PIP
PL
PAUSE
PLAY
REW
F.F
VOL
SEARCH MUTE
B
C
D
2ND
AUDIO
USB
AUDIO
CÓMO FORMATEAR EL ALMACENAMIENTO LOCAL
BD PLAYER
POWER
RE
TU
ENTER
SLOW STOP
VOL
SEARCH MUTE
A
PL
PAUSE
-U
HOME
Seleccione SÍ (YES) con los botones de Navegación (√,®)
1 y oprima ACEPTAR (ENTER) 2 nuevamente para borrar
la información o NO para volver a la pantalla anterior.
A
EN
CLEAR
AUDIO
2
ENTER
Seleccione el menú General como se indica en la parte
superior de la página anterior. Seleccione Almacenamiento
local (Local Storage) con los botones de Navegación (π,†)
1, luego oprima el botón de Navegación (®) 1. Seleccione
Borrar datos (Clear Data) con los botones de Navegación
(π,†) 1, luego oprima el botón ACEPTAR (ENTER) 2;
aparecerá “¿Desea borrar datos? (Do you want to clear
Data?)”.
M
ANGLE
SUBTITLE
N
2
O
HOME
N
PO
P
SUBTITLE
-U
2
CLEAR
SETUP
ZOOM
Y
ANGLE
REPEAT
PO
P
1
SETUP
ZOOM
A
REPEAT
BD PLAYER
POWER
OPEN/CLOSE
OPEN/CLOSE
En algunas ocasiones especiales, después de borrar el Almacenamiento local, la unidad puede no funcionar correctamente.
En este caso, deberá formatear el Almacenamiento local.
P
AUDIO
U
EN
M
T
P
RE
TU
R
1
O
Y
NEXT
PLAY
REW
F.F
PIP
B
C
2ND
P
PREV
U
EN
M
RE
TU
R
1
ENTER
M
EN
D IS
U
NEXT
A
USB
PIP
AUDIO
PL
PAUSE
PLAY
REW
F.F
VOL
SEARCH MUTE
D
BD PLAYER
P
SLOW STOP
VOL
SEARCH MUTE
A
PL
PAUSE
-U
HOME
Seleccione SÍ (YES) con los botones de Navegación (√,®)
1 y oprima el botón ACEPTAR (ENTER) 2 nuevamente
para formatear el almacenamiento local, o NO para volver a
la pantalla anterior.
A
D IS
U
SLOW STOP
PREV
T
EN
CLEAR
AUDIO
2
ENTER
Seleccione el menú General como se indica en la parte
superior de la página anterior. Seleccione Almacenamiento
local (Local Storage) con los botones de Navegación (π,†)
1, luego oprima el botón de Navegación (®) 1. Seleccione
Formatear (Format) con los botones de Navegación (π,†)
1, luego oprima ACEPTAR (ENTER) 2; aparecerá “¿Desea
formatear? (Do you want to format?)”.
M
ANGLE
SUBTITLE
N
2
O
HOME
N
PO
P
SUBTITLE
-U
2
CLEAR
SETUP
ZOOM
Y
ANGLE
REPEAT
PO
P
1
SETUP
ZOOM
A
REPEAT
B
C
2ND
D
USB
AUDIO
19
BD PLAYER
MENÚ DE CONFIGURACIÓN (CONTINÚA)
MENÚ DE CONFIGURACIÓN DE VIDEO (VIDEO SETUP MENU):
Para ingresar al menú de Configuración de Video (Video Setup menu), oprima CONFIGURACIÓN (SETUP), seleccione
Video usando los botones de Navegación (π,†) y luego oprima el botón de Navegación (®).
P
AUDIO
U
EN
M
R
1
O
Y
PL
Utilice esta opción para configurar
la Imagen del TV deseada.
S
Seleccione el menú de Video como se muestra más arriba. Seleccione
IMAGEN DEL TV (TV ASPECT) con los botones de Navegación (π,†) 1,
luego oprima el botón de Navegación (®) 1; aparecerán las opciones de
IMAGEN DEL TV (TV ASPECT). Seleccione una de las opciones (que se
describen a continuación) con los botones de Navegación (π,†) 1, luego
oprima ACEPTAR (ENTER) 2.
4:3 PANORÁMICO (PAN-SCAN):Seleccione cuando la unidad se encuentra
conectada a un TV convencional. El material de video desarrollado con el
estilo Panorámico (Pan Scan) se reproduce en ese estilo (con los bordes
izquierdo y derecho cortados).
B
4:3 BANDAS NEGRAS (LETTERBOX):
Seleccione cuando la unidad se
encuentra conectada a un TV convencional. Las imágenes en pantalla ancha
se muestran en la pantalla con una banda negra en la parte superior y/o
inferior.
16:9 COMPLETA (WIDE): Seleccione cuando la unidad se encuentra
conectada a un TV con pantalla ancha.
EN
U
D IS
-U
P
AUDIO
U
EN
M
2
ENTER
A
M
CLEAR
SUBTITLE
T
T
P
RE
TU
ANGLE
P
HOME
RE
TU
R
N
2
O
HOME
N
PO
P
SUBTITLE
-U
1
CLEAR
1
ENTER
Y
ANGLE
PO
P
1
RESOLUCIONES
Z
M
A
IMAGEN DEL TV
Z
EN
U
SLOW STOP
D IS
PAUSE
PL
PLAY
Utilice esta opción para configurar la resolución deseada
cuando esté conectado a la salida de video del componente,
o a la salida HDMI. La resolución de salida verdadera
depende de la conexión utilizada y de la resolución del TV.
Seleccione el menú de Video como se muestra más arriba.
Seleccione Resoluciones (Resolutions) utilizando los
botones de Navegación (π,†) 1, luego oprima el botón de
B
Navegación (®) 1; aparecerán
las opciones de Resolución.
Seleccione una de las opciones (720p, 1080i, 1080p,
1080p24) mediante los botones de Navegación (π,†) 1,
luego oprima ACEPTAR (ENTER) 2.
Consulte los cuadros que se encuentran a continuación
para ver las resoluciones.
P
NOTAS:
• Algunas películas se visualizarán con un formato con barras laterales 4.3 (barras negras a ambos lados de la imagen),
aún cuando se selecciona Ancho 16.9 en la opción del menú Imagen del TV (TV Aspect).
• Para utilizar 1080p24 (24 cuadros por segundo), el disco Blu-ray debe tener esta función.
• Oprima el botón CONFIGURACIÓN (SETUP) para salir del menú de configuración.
• Oprima el botón VOLVER (RETURN) para volver a la configuración anterior.
RESOLUCIÓN DE REPRODUCCIÓN BD
RESOLUCIÓN DE REPRODUCCIÓN DE DVD
20
MENÚ DE CONFIGURACIÓN (CONTINÚA)
MENÚ DE CONFIGURACIÓN DE AUDIO (AUDIO SETUP MENU):
Para ingresar al menu de Configuración de Audio (Audio Setup menu), oprima el botón CONFIGURACIÓN (SETUP);
seleccione Audio con los botones de Navegación (π,†) y luego oprima el botón de Navegación (®).
POWER
SALIDA DIGITAL
REPEAT
SETUP
ZOOM
ANGLE
CLEAR
SUBTITLE
-U
P
AUDIO
U
EN
M
2
M
EN
D IS
U
NEXT
PIP
PL
PAUSE
PLAY
REW
F.F
VOL
SEARCH MUTE
A
1
ENTER
SLOW STOP
PREV
R
Y
P
RE
TU
A
T
O
HOME
N
PO
P
1
OPEN/CLOSE
B
C
2ND
D
USB
AUDIO
Utilice esta opción para configurar la Salida Digital. Vea a continuación la explicación de
las salidas específicas.
Seleccione el menú de Audio como se muestra más arriba. Seleccione Salida Digital
(Digital Output) con los botones de Navegación (π,†) 1, luego oprima el botón de
Navegación (®) 1; aparecerán las opciones de Salida Digital (Digital Output).
Seleccione una de las opciones (que se describen a continuación) con los botones de
Navegación (π,†) 1, luego oprima ACEPTAR (ENTER) 2.
S/PDIF: Seleccione esta opción cuando su equipo se encuentre conectado a través de
un cable Óptico/Coaxial. Seleccione según se explica a continuación:
modulación PCM: Decodifica mediante el decodificador interno y emite el audio en
modulación PCM desde los conectores de salida S/PDIF.
FLUJO DE BITS: Emite el flujo de bits original directamente desde los conectores de
salida S/PDIF.
AUDIO HDMI: Seleccione esta opción cuando su equipo se encuentre conectado a
través de un cable HDMI. Seleccione según se explica a continuación:
modulación PCM: Decodifica mediante el decodificador interno y emite el audio en
modulación PCM desde el conector de salida HDMI.
FLUJO DE BITS: Emite el flujo de bits original directamente desde el conector de
salida HDMI.
BD PLAYER
21
MENÚ DE CONFIGURACIÓN (CONTINÚA)
POWER
OPEN/CLOSE
REDUCCIÓN DEL NÚMERO DE PÍXELES
DE LA MODULACIÓN PCM
1
O
Y
A
M
PL
Utilice esta opción para activar
o desactivar la reducción del número de
SLOW STOP PAUSE PLAY
píxeles de la modulación PCM. Algunos amplificadores no admiten la tasa de
NEXT
REW
F.FPCM. En este caso, ENCIENDA
muestreo alta en la señal dePREV
modulación
esta opción. El reproductor emitirá a 48kHz.
VOL
SEARCH MUTE
Seleccione el menú de Audio como se muestra en la página anterior.
Seleccione REDUCCIÓN ADELB NÚMERO
DE PÍXELES DE LA
C
D
MODULACIÓN PCM (PCM DOWN SAMPLING) mediante los botones de
USB
2ND
Navegación (π,†) 1, luegoPIP oprima
el
botón de Navegación (®) 1;
AUDIO
aparecerá “ENCENDIDO” (ON) y “APAGADO’ (OFF). Seleccione
ENCENDIDO (ON) para activar esta opción o APAGADO (OFF) para
desactivar esta opción con los botones de Navegación (π,†) 1, luego
BD PLAYER
oprima el botón ACEPTAR (ENTER)
2.
NOTA: Aún cuando la reducción del número de píxeles de la modulación
POWER
OPEN/CLOSE
PCM esté configurado en APAGADO (OFF),
algunos discos mostrarán audio
de reducción de píxeles de salida a través de salidas digitales coaxiales y
REPEAT
ZOOM
ópticas.
EN
D IS
U
SETUP
ALTAVOZ
ANGLE
P
U
EN
M
PREV
D IS
U
PAUSE
SEARCH MUTE
PIP
2ND
PAUSE
PLAY
REW
F.F
VOL
USB
2ND
OPEN/CLOSE
REPEAT
SETUP
ZOOM
PRUEBA DE TOMO
1
ANGLE
3
1
CLEAR
SUBTITLE
R
-U
P
AUDIO
U
EN
M
2
O
PL
P
HOME
RE
TU
3
R
1
ENTER
M
EN
D IS
U
SLOW STOP
PLAY
REW
PL
AUDIO
PAUSE
PL
PLAY
Después de ubicar correctamente los altavoces, realice esta prueba
de tono y ajuste los controles de volumen hasta que obtenga el
sonido deseado.
A
B
C
D
Seleccione el menú de Audio como se muestra en la página anterior.
Seleccione Tono de prueba (Test Tone) con los botones de
navegación (π,†) 1, luego oprima el botón de navegación (®) 1;
aparecerán las opciones de Tono de prueba. Seleccione uno de los
altavoces ({C} Central, {FL/FR} Izquierdo/Derecho, {LS/RS} Sonido
BD PLAYER
envolvente izquierdo/Sonido envolvente derecho, {Rls/Rrs}
Posterior izquierdo/Posterior derecho, {lfe} Efecto de frecuencia
baja) con los botones de Navegación (π,†) 1; luego oprima
ACEPTAR (ENTER) 2 para confirmar. Seleccione uno de los
altavoces y luego oprima ACEPTAR (ENTER) 2 nuevamente para
que el altavoz seleccionado emita un tono de prueba. Al finalizar,
oprima el botón VOLVER (RETURN) 3.
Utilice esta opción para encender el altavoz y para configurar la distancia
del altavoz al usuario.
Seleccione el menú de Audio como se muestra en la página anterior.
A
B
C
D
Seleccione Altavoz (Speaker) con los botones de Navegación (π,†) 1,
luego oprima el botón de Navegación (®) 1; aparecerá la opción de
Altavoz (Speaker). Seleccione uno de los altavoces ({C} Central,
{FL/FR}
Izquierdo/Derecho,
{LS/RS}
Sonido
envolvente
izquierdo/Sonido
envolvente
derecho,
{Rls/Rrs}
Posterior
BD PLAYER
izquierdo/Posterior derecho, {lfe}
Efecto de frecuencia baja) con los
botones de Navegación (π,†) 1, luego oprima el botón ACEPTAR
(ENTER) 2 para seleccionar. Oprima el botón ACEPTAR (ENTER)
nuevamente 2 para deshabilitar esta función o utilice los botones de
Navegación (π,†) 1 para resaltar las distintas opciones de
configuración del altavoz. Ajuste la distancia al área de asiento
deseada mediante los botones de Navegación (√,®) 1. Al finalizar,
oprima el botón VOLVER (RETURN) 3.
NEXT
D IS
U
NEXT
ENTER
SLOW STOP
PREV
EN
PIP
Y
EN
1
ENTER
SEARCH MUTE
A
M
M
T
T
P
R
N
2
O
RE
TU
P
RE
TU
SLOW STOP
HOME
N
-U
AUDIO
U
EN
M
P
HOME
Utilice esta opción para encender o apagar la Compresión Dinámica.
La Compresión Dinámica reduce el espacio entre los sonidos más
altos y más bajos. Esto quiere decir que puede escuchar en niveles
más bajos.
Seleccione el menú de Audio como se muestra en la página
A
B
C
D
anterior. Seleccione Compresión Dinámica (Dynamic Compression)
mediante los botones de Navegación (π,†) 1, luego oprima el
botón de Navegación (®) 1; aparecerá “ENCENDIDO” (ON) y
“APAGADO’ (OFF). Seleccione ENCENDIDO (ON) para activar esta
opción o APAGADO (OFF) para desactivar esta opción con los
BD PLAYER
botones de Navegación (π,†) 1, luego oprima el botón ACEPTAR
POWER
(ENTER) 2.
NOTA: Esta opción es efectiva sólo cuando la banda sonora está
codificada como Dolby Digital.
CLEAR
SUBTITLE
PO
P
1
-U
2
ENTER
T
T
P
R
AUDIO
N
2
O
RE
TU
CLEAR
SUBTITLE
HOME
PO
P
U
EN
M
P
ANGLE
Y
AUDIO
N
PO
P
SUBTITLE
-U
1
CLEAR
SETUP
ZOOM
A
ANGLE
COMPRESIÓN DINÁMICA
REPEAT
PO
P
1
SETUP
ZOOM
Y
REPEAT
OPEN/CLOSE
A
POWER
PREV
F.F
NEXT
REW
SEARCH MUTE
VOL
PIP
USB
2ND
F.F
VOL
USB
AUDIO
AUDIO
NOTAS:
• Oprima CONFIGURACIÓN (SETUP) para salir de los menús de configuración.
• Oprima el botón VOLVER (RETURN) para volver a la configuración anterior.
• Para obtener más información sobre la configuración del altavoz y el tono de prueba, consulte las páginas de conexión de la unidad 10 - 15.
22
MENÚ DE CONFIGURACIÓN (CONTINÚA)
MENÚ DE CONFIGURACIÓN DE IDIOMA (LANGUAGE SETUP):
Para ingresar al menú de configuración de idioma, oprima CONFIGURACIÓN (SETUP), seleccione Idioma (Language) con
los botones de navegación (π,†) y luego oprima el botón de navegación (®).
R
1
EN
D IS
U
SLOW STOP
PREV
NEXT
PIP
PL
PAUSE
PLAY
REW
F.F
VOL
SEARCH MUTE
2ND
USB
AUDIO
OPEN/CLOSE
SUBTÍTULO
1
BD PLAYER
REPEAT
SETUP
ZOOM
ANGLE
U
EN
M
2
Y
D IS
SLOW STOP
PREV
NEXT
PAUSE
PLAY
REW
F.F
VOL
SEARCH MUTE
A
PIP
PL
B
C
2ND
AUDIO
D
USB
1
PL
NEXT
PAUSE
PLAY
REW
F.F
VOL
2ND
USB
AUDIO
OPEN/CLOSE
BD PLAYER
MENÚ DEL DISCO
REPEAT
1
SETUP
ZOOM
ANGLE
CLEAR
SUBTITLE
-U
P
AUDIO
U
EN
M
2
ENTER
U
D IS
U
PIP
1
A
EN
EN
SEARCH MUTE
R
Use esta opción para seleccionar el idioma en que se verán
los subtítulos.
Seleccione el menú Idioma (Language) como se indicó
anteriormente. Seleccione Audio con los botones de
navegación (π,†) 1, luego oprima el botón de navegación
(®) 1; aparecerán las opciones de Idioma (Language).
Seleccione el idioma deseado con los botones de
navegación (π,†) 1, luego oprima ACEPTAR (ENTER) 2.
El disco debe estar grabado en el idioma seleccionado; de lo
BD PLAYER
contrario, se mostrará el idioma
predeterminado del disco.
NOTA: También puede utilizar el botón SUBTÍTULOS
(SUBTITLE) con un disco colocado en la unidad para
activar esta función.
NOTA: Consulte la lista de códigos de idioma en la página 43.
M
M
PREV
O
T
T
P
RE
TU
R
P
HOME
RE
TU
R
N
PO
P
P
P
RE
TU
ENTER
SLOW STOP
HOME
N
-U
AUDIO
U
EN
M
P
HOME
Utilice esta opción para seleccionar el idioma en que se escuchará el
disco.
Seleccione el menú Idioma (Language) como se indicó anteriormente.
Seleccione Audio con los botones de navegación (π,†) 1, luego
oprima el botón de navegación (®) 1; aparecerán las opciones de
A
B
C
D
Idioma (Language). Seleccione
el idioma
deseado con los botones de
navegación (π,†) 1, luego oprima ACEPTAR (ENTER) 2.
El disco debe estar grabado en el idioma seleccionado; de lo contrario, se
escuchará el idioma predeterminado del disco.
POWER
NOTA: Consulte la lista de códigos de idioma en la página 43.
CLEAR
SUBTITLE
O
O
Y
A
Use esta opción para seleccionar el idioma deseado para la
visualización del texto en la pantalla.
Seleccione el menú Idioma (Language) como se indicó
anteriormente. Seleccione Visualización en pantalla (OSD) con los
botones de navegación (π,†) 1, luego oprima navegación (®) 1;
A
B
C
D
aparecerán las opciones de Idioma (Language). Seleccione el
idioma deseado con los botones de navegación (π,†) 1, luego
oprima ACEPTAR (ENTER) 2.
NOTA: Consulte la lista dePOWER
códigos de idioma en la página 43.
M
-U
2
ENTER
T
T
P
CLEAR
AUDIO
N
2
O
RE
TU
PO
P
U
EN
M
P
ANGLE
SUBTITLE
HOME
Y
AUDIO
N
PO
P
SUBTITLE
-U
1
CLEAR
SETUP
ZOOM
A
ANGLE
AUDIO
REPEAT
PO
P
1
SETUP
ZOOM
OPEN/CLOSE
1
ENTER
Utilice esta opción para seleccionar el idioma en el que se
mostrará el MENÚ DEL DISCO .
Seleccione el menú Idioma (Language) como se indicó
anteriormente. Seleccione Audio con los botones de
navegación (π,†) 1, luego oprima el botón de navegación
(®) 1; aparecerán las opciones de Idioma (Language).
Seleccione el idioma deseado con los botones de
navegación (π,†) 1, luego oprima ACEPTAR (ENTER) 2.
El disco debe estar grabado en el idioma seleccionado; de lo
BD PLAYER
contrario, se mostrará el idioma predeterminado del disco.
NOTA: Consulte la lista de códigos de idioma en la página 43.
Y
Visualización en pantalla (OSD)
REPEAT
POWER
OPEN/CLOSE
M
A
POWER
EN
D IS
U
SLOW STOP
PREV
NEXT
PAUSE
PLAY
REW
F.F
VOL
SEARCH MUTE
A
PIP
B
C
2ND
AUDIO
NOTAS:
• Oprima CONFIGURACIÓN (SETUP) para salir de los menús de configuración.
• Oprima el botón VOLVER (RETURN) para volver a la configuración anterior.
23
PL
D
USB
MENÚ DE CONFIGURACIÓN (CONTINÚA)
POWER
CONFIGURACIÓN DE LAS OPCIONES DEL CONTROL DE PADRES
1
POWER
2
OPEN/CLOSE
REPEAT
SETUP
ZOOM
REPEAT
1
ANGLE
CLEAR
RE
TU
O
T
Y
EN
U
D
SLOW STOP
PREV
PLAY
REW
F.F
NEXT
B
C
PIP
M
PREV
EN
D IS
U
1
PLAY
REW
F.F
NEXT
A
USB
VOL
B
PIP
AUDIO
PL
PAUSE
SEARCH MUTE
D
2ND
R
ENTER
SLOW STOP
VOL
SEARCH MUTE
A
L
IS P
PAUSE
P
RE
TU
PARA CONFIGURAR EL CONTROL DE PADRES:
Con los botones de navegación (π,†) 1, seleccione
Control de padres del DVD (DVD Parental) y luego oprima
el botón de navegación (®) 1; aparecerá “Cambiar nivel”
(“Change Level”). Oprima ACEPTAR (ENTER) 2; aparecerá
la pantalla de Contraseña (Password).
A
T
M
U
EN
M
2
R
Oprima CONFIGURACIÓN (SETUP) 1, seleccione Control
de padres (Parental) con los botones de navegación (π,†)
2 y luego oprima el botón de navegación (®) 2.
P
P
Y
PO
P
U
EN
M
P
-U
N
PO
P
HOME
ENTER
O
HOME
A
AUDIO
N
2
AUDIO
CLEAR
SUBTITLE
-U
SETUP
ZOOM
SUBTITLE
ANGLE
OPEN/CLOSE
C
D
USB
2ND
AUDIO
POWER
POWER
4
REPEAT
OPEN/CLOSE
SETUP
ZOOM
REPEAT
BD PLAYER
ANGLE
CLEAR
SUBTITLE
CLEAR
HOME
-U
P
AUDIO
U
EN
M
2
EN
D IS
U
SLOW STOP
PREV
SEARCH MUTE
A
REPEAT
PL
PAUSE
PLAY
REW
F.F
NEXT
POWER
A
PIP
OPEN/CLOSE
VOL
2ND
USB
6
BD PLAYER
CLEAR
P
U
EN
M
2
T
O
P
RE
TU
R
C
2ND
D
USB
BD PLAYER
POWER
REPEAT
OPEN/CLOSE
SETUP
ZOOM
CLEAR
SUBTITLE
AUDIO
HOME
Y
NEXT
PAUSE
B
PO
P
O
F.F
2ND
P
PREV
D
RE
TU
M
EN
D IS
U
NEXT
R
A
USB
PIP
CONTINÚA EN LA PRÓXIMA PÁGINA
24
PL
PAUSE
PLAY
REW
F.F
VOL
SEARCH MUTE
AUDIO
BD PLAYER
P
SLOW STOP
VOL
C
-U
ENTER
PLAY
REW
U
EN
M
Introduzca la contraseña de seis dígitos utilizando las
teclas numéricas (0-9). La contraseña predeterminada es
“000000”, pero se la puede cambiar siguiendo las
instrucciones de la página siguiente. Aparecerá la opción
Edad BD (BD Age).
NOTA: Si introduce una contraseña incorrecta,
simplemente vuelva a escribir la contraseña correctamente.
PL
T
PIP
B
ANGLE
1
A
D IS
U
SEARCH MUTE
A
F.F
VOL
ENTER
SLOW STOP
PREV
PLAY
REW
N
EN
NEXT
HOME
PARA CONFIGURAR EL CONTROL DE PADRES EN LOS
DISCOS Blu-ray:
Con los botones de navegación (π,†) 1, seleccione
Control de padres BD (BD Parental) y luego oprima el
botón de navegación (®) 1; aparecerá “Edad BD” (“BD
Age”). Oprima ACEPTAR (ENTER) 2; aparecerá la pantalla
de Contraseña (Password).
M
PL
PAUSE
Y
-U
AUDIO
N
PO
P
SUBTITLE
D IS
U
AUDIO
AUDIO
ANGLE
EN
SEARCH MUTE
B
C
D
SETUP
ZOOM
PIP
5
PREV
Y
M
M
SLOW STOP
A
T
P
1
Niños (Kid)
G
PG
PG-13
PG-R
R
NC17
ADULTOS
(ADULT)
Con los botones de navegación (√,®) 1, seleccione el nivel de
clasificación deseado para el disco, que va de 1 a 8: 1 permite la
visualización de la mayoría de las películas y 8 prohíbe la mayoría.
Seleccione APAGADO (OFF) para permitir la visualización de
todas las películas. Por ejemplo, si selecciona “6”, los discos con
nivel 7 y 8 no se reproducirán.
Cuando haya hecho esto, oprima ACEPTAR (ENTER) 2.
R
ENTER
O
P
R
ENTER
Y
RE
TU
N
PO
P
P
RE
TU
A
O
T
U
EN
M
Introduzca la contraseña de seis dígitos utilizando las
teclas numéricas (0-9). La contraseña predeterminada es
“000000”, pero se la puede cambiar siguiendo las
instrucciones de la página siguiente. Aparecerá la opción
Nivel de DVD (DVD Level).
NOTA: Si introduce una contraseña incorrecta,
simplemente vuelva a escribir la contraseña correctamente.
-U
HOME
N
AUDIO
PO
P
ANGLE
SUBTITLE
1.
2.
3.
4.
5.
6.
7.
8.
SETUP
ZOOM
A
3
BD PLAYER
OPEN/CLOSE
B
C
2ND
D
USB
AUDIO
BD PLAYER
MENÚ DE CONFIGURACIÓN (CONTINÚA)
POWER
7
REPEAT
OPEN/CLOSE
SETUP
ZOOM
ANGLE
CLEAR
-U
AUDIO
U
EN
M
P
2
R
1
ENTER
Y
P
RE
TU
M
A
T
O
HOME
N
PO
P
SUBTITLE
EN
D IS
U
PL
Con los botones de navegación (√,®) 1, seleccione la Edad BD
deseada para los discos BD. Los discos con edades superiores a
la configuración deseada requerirán una contraseña para su
reproducción. Cuando haya hecho esto, oprima ACEPTAR
(ENTER) 2.
NOTA: También puede seleccionar la Edad BD (BD Age) con las
teclas numéricas (0-9); presione
BORRAR (CLEAR) para borrar
BD PLAYER
los dígitos.
SLOW STOP
PREV
PAUSE
PLAY
REW
F.F
NEXT
VOL
SEARCH MUTE
A
B
C
PIP
D
2ND
USB
AUDIO
POWER
MODIFICACIÓN DE CONTRASEÑA
1
POWER
REPEAT
2
OPEN/CLOSE
REPEAT
SETUP
ZOOM
OPEN/CLOSE
1
ANGLE
CLEAR
SUBTITLE
ANGLE
AUDIO
2
R
Y
A
T
M
EN
U
D
SLOW STOP
PREV
PAUSE
PLAY
REW
F.F
NEXT
VOL
SEARCH MUTE
A
L
IS P
B
C
O
T
Oprima CONFIGURACIÓN (SETUP) 1, seleccione Control
de padres (Parental) con los botones de navegación (π,†)
2 y luego oprima el botón de navegación (®) 2.
P
U
EN
M
P
P
RE
TU
Con los botones de navegación (π,†) 1, seleccione
Cambiar contraseña (Change Password) y luego oprima el
botón de navegación (®) 1; ; aparecerá “¿Está seguro?”
(“Are you sure?”). Oprima el botón ACEPTAR (ENTER) 2.
M
EN
D IS
U
SLOW STOP
PREV
PLAY
REW
F.F
NEXT
A
VOL
B
C
PIP
POWER
4
OPEN/CLOSE
SETUP
ZOOM
AUDIO
BD PLAYER
ANGLE
CLEAR
PO
P
U
EN
M
R
N
PO
P
RE
TU
M
A
T
P
Y
ENTER
O
EN
D IS
U
SLOW STOP
PREV
NEXT
A
PL
PAUSE
PLAY
REW
F.F
B
RE
TU
R
Y
P
M
A
O
EN
D IS
U
SLOW STOP
PL
PAUSE
PLAY
REW
F.F
Oprima ACEPTAR (ENTER) cuando esté resaltado OK para
confirmar la contraseña nueva o seleccione “Cancelar”
(“Cancel”) para salir sin cambiar la contraseña.
PREV
NEXT
VOL
SEARCH MUTE
A
PIP
B
C
2ND
D
USB
AUDIO
VOL
SEARCH MUTE
PIP
U
EN
M
HOME
ENTER
HOME
T
P
P
CLEAR
AUDIO
Introduzca la contraseña actual de seis dígitos utilizando
las teclas numéricas (0-9). La contraseña predeterminada
es “000000”.
Con las teclas numéricas (0-9), introduzca una contraseña
nueva y luego vuelva a introducirla.
-U
-U
AUDIO
N
ANGLE
SETUP
ZOOM
SUBTITLE
SUBTITLE
USB
2ND
REPEAT
BD PLAYER
REPEAT
D
OPEN/CLOSE
USB
AUDIO
3
PL
PAUSE
SEARCH MUTE
D
2ND
1
ENTER
POWER
PIP
R
Y
RE
TU
-U
A
PO
P
U
EN
M
P
ENTER
O
HOME
N
PO
P
HOME
N
2
AUDIO
CLEAR
SUBTITLE
-U
SETUP
ZOOM
C
2ND
D
BD PLAYER
USB
AUDIO
BD PLAYER
25
POWER
OPEN/CLOSE
FUNCIONAMIENTO BÁSICO (GENERAL)
POWER
REPEAT
OPEN/CLOSE
SETUP
ZOOM
REPEAT
SETUP
ZOOM
IMPORTANTE:
Cuando aparezca “TECLA INVÁLIDA” (INVALID KEY) mientras presiona un
botón, eso significa que la función correspondiente no puede ser ejecutada ya
sea en el disco colocado o en el modo seleccionado.
ANGLE
CLEAR
ANGLE
SUBTITLE
AUDIO
CLEAR
HOME
SUBTITLE
EN
P
D IS
U
SLOW STOP
L
PAUSE
PLAY
REW
F.F
O
T
1
Y
M
A
P
P
U
EN
M
NEXT
P
PREV
VOL
SEARCH MUTE
2
POWER
A
1
M
EN
D IS
U
C
REW
F.F
VOL
B
C
D
SETUP
USB
ZOOM
2ND
AUDIO
PIP
ANGLE
USB
Oprima MODO SILENCIOSO (MUTE) para desactivar el
sonido. Presione dicho botón
nuevamente para restablecer
BD PLAYER
el sonido.
CLEAR
AUDIO
2ND
AUDIO
Utilice el botón VOLUMEN (VOLUME) + 1 para aumentar
BD PLAYER
el volumen o el botón VOLUMEN (VOLUME) – 2 para
disminuirlo según sus preferencias.
SUBTITLE
PLAY
D
A
REPEAT
PIP
NEXT
PL
PAUSE
SEARCH MUTE
OPEN/CLOSE
B
R
ENTER
SLOW STOP
PREV
RE
TU
Y
PO
P
N
O
-U
N
MODO SILENCIOSO
R
HOME
A
RE
TU
ENTER
T
1
P
PO
P
U
EN
M
BOTONES DE VOLUMEN
-U
AUDIO
HOME
P
U
EN
M
RE
TU
R
N
-U
P
M
A
O
Y
ENTER
T
1
PO
P
BOTONES DE COLORES (A,B,C,D)
EN
D IS
U
SLOW STOP
PREV
NEXT
PAUSE
PLAY
REW
F.F
VOL
SEARCH MUTE
A
PIP
PL
B
C
2ND
D
USB
Estos botones se utilizan como métodos abreviados de
algunos elementos en pantalla
cuando se utilizan discos
BD PLAYER
Blu-ray (también pueden usarse para operaciones
interactivas Java de BD).
AUDIO
NOTAS IMPORTANTES:
• Una vez enchufada, la unidad se enciende automáticamente y la pantalla de bienvenida de “Memorex” se carga, lo que
puede llevar hasta un minuto.
• Si hay un disco colocado incorrectamente, sucio o dañado, en la pantalla del televisor aparecerá “Disco desconocido”
(Unknown Disc).
• Siempre sostenga el disco sin tocar ninguna de sus superficies. Cuando introduzca un disco, colóquelo con el título
impreso hacia arriba, alinéelo con las guías y colóquelo en la posición adecuada.
• Es importante que lea el manual que acompaña el disco, ya que hay funciones en este reproductor de disco que no
pueden usarse con ciertos discos. También hay funciones adicionales que son diferentes para cada disco, de modo que
no se explican en este manual del propietario.
• Se activará el protector de pantalla cuando se detenga la unidad o la imagen esté en pausa durante aproximadamente
10 minutos.
26
FUNCIONAMIENTO DEL BD/DVD
REPRODUCCIÓN DE UN DISCO Blu-ray O UN DVD ESTÁNDAR
1
POWER
REPEAT
2
OPEN/CLOSE
REPEAT
SETUP
ZOOM
ANGLE
POWER
CLEAR
POWER
AUDIO
SUBTITLE
HOME
REPEAT
Y
D IS
U
POWER
SLOW STOP
4
PL
OPEN/CLOSE
PAUSE
PLAY
1
PREV
REW SETUP
NEXTZOOM
F.F
REPEAT
RE
TU
M
EN
D IS
U
ANGLE
SLOW STOP PAUSE PLAY
SUBTITLE
AUDIO
HOME
PREV
REW
NEXT
A
D
PIP
AUDIO
U
EN
M
RE
TU
P
PO
P
N
ENTER
EN
AUDIO
D IS
U
EN
D IS
U
SLOW STOP
PREV
NEXT
PLAY
REW
F.F
PIP
B
A
PIP
C
2ND
2
VOL
B
C
2ND
D
USB
AUDIO
VOL
SEARCH MUTE
A
PL
PAUSE
PLAY
Para detener la reproducción, oprima DETENER (STOP)
1; en la pantalla del televisor aparecerá “Presione
[Detener] nuevamente para confirmar o Presione
[Reproducir] para reanudar” (“Press [Stop] again to confirm
BD PLAYER
or Press [Play] to resume”).
Dado que la unidad recordará
donde se detuvo, simplemente oprima REPRODUCIR
(PLAY) 2 para reanudar la reproducción donde la dejó
(reanudación de reproducción).
Si se oprime nuevamente DETENER (STOP) 1, la unidad
se detendrá.
Y
M
A
T
P
PAUSE
PL
REW
NEXTPLAYER
F.F
BD
SEARCH MUTE
Oprima ABRIR/CERRAR (OPEN /CLOSE) 1 para cerrar la
bandeja del disco. En la pantalla aparecerá “CERRAR”
(“CLOSE”) y en la pantalla del televisor aparecerá
“Detectando disco” (“Detecting Disc”). Después de
cargarse, aparecerá la pantalla de menú del disco. Utilice
los botones de navegación (√,®,π,†) 2 para seleccionar
la opción deseada y oprima ACEPTAR (ENTER) 3 para
confirmar la selección.
NOTA: Algunos discos no poseen una pantalla de menú.
Una vez cargados, comienzan inmediatamente la
reproducción del contenido.
O
USB
2ND
M
1
PREV
R
2BD PLAYER
3
-U
D
Y
O
HOME
SLOW STOP
P
C
A
CLEAR
USB
2ND
AUDIO
SUBTITLE
B
ENTER
T
ANGLE
PIP
C
F.F
RE VOL
TU
R
PO
P
B
PL
N
A
R
CLEAR
NU
SEARCHMEMUTE
P
-U
VOL
SEARCH MUTE
P
P
Y
PO
P
PO
P
O
A
EN
-U
N
M
SETUP
ZOOM
U
EN
M
Oprima el botón ABRIR/CERRAR (OPEN /CLOSE) para abrir la bandeja
ENTER
del disco, aparecerá “ABRIR” (OPEN)
en la pantalla. Colocar un disco con
la etiqueta mirando hacia arriba, sobre la bandeja del disco.
R
T
P
RE
TU
N
T
3
O
P
AUDIO
HOME
OPEN/CLOSE
A
U
EN
M
Oprima el botón de ENCENDIDO/APAGADO/EN ESPERA
ENTER la unidad. En la pantalla aparecerá
(POWER/STANDBY) para encender
brevemente “HOLA” (“HELLO”) y luego “CARGAR” (“LOAD”).
-U
SETUP
ZOOM
ANGLE
CLEAR
SUBTITLE
OPEN/CLOSE
D
USB
AUDIO
BD PLAYER
NOTAS:
• Si aparece un MENÚ en la pantalla del televisor, presione los botones de Navegación (√,®,π,†) para seleccionar la opción o elemento
deseado, luego presione el botón ACEPTAR (ENTER). Consulte la cubierta o caja del disco para obtener información adicional.
• Es posible que no funcione reanudar la reproducción en todos los discos.
27
REPEAT
REPEAT
SETUP
ZOOM
SETUP
ZOOM
FUNCIONAMIENTO DEL BD/DVD (CONTINÚA)
1
ANGLE
CLEAR
U
EN
M
P
1
HOME
RE
TU
R
CLEAR
SUBTITLE
P
-U
AUDIO
U
EN
M
HOME
RE
TU
R
N
-U
AUDIO
ANGLE
N
PO
P
SUBTITLE
BÚSQUEDA
PO
P
SALTO
ENTER
ENTER
M
Y
P
M
SP
DI
EN
U
EN
D IS
U
PL
SLOW STOP
SLOW STOP
PAUSE
PREV
REW
NEXT
2
Durante la reproducción, presione el botón de Búsqueda
Adelante/FF ®® 1 o Atrás/REW √√ 2 para mover el
DVD hacia adelante o atrás al doble (x2) de velocidad para
encontrar una sección específica.
Presione repetidamente
BD PLAYER
esos botones y la velocidad aumentará a x4, x8, x16 Se
reanudará la reproducción normal.
También puede reanudar la reproducción normal
presionando el botón de REPRODUCIR (PLAY) 3.
Presione el botón de SALTO (SKIP)/SIGUIENTE n 1 para
avanzar el disco al inicio del próximo capítulo.
A
D
2ND
B
2ND
POWER
OPEN/CLOSE
REPEAT
ANGLE
AUDIO
1
HOME
RE
TU
R
OPEN/CLOSE
SETUP
ZOOM
ANGLE
CLEAR
SUBTITLE
-U
P
AUDIO
U
EN
M
HOME
RE
TU
R
N
U
EN
M
USB
N
P
-U
LENTO
CLEAR
SUBTITLE
PO
P
1
SETUP
PO
P
PAUSA Y PASO
D
AUDIO
Presione el botón de SALTO (SKIP)/ANTERIOR o 2 para
BD PLAYER anterior.
mover el disco al inicio del capítulo
ZOOM
C
PIP
USB
AUDIO
REPEAT
1
VOL
SEARCH MUTE
C
POWER
F.F
3
VOL
B
PIP
PLAY
REW
NEXT
F.F
1
SEARCH MUTE
A
PAUSE
PLAY
PREV
2
L
A
T
O
A
Y
T
OP
ENTER
P
A
Y
T
M
SP
DI
EN
U
M
A
T
O
OP
Y
ENTER
EN
D IS
U
SLOW STOP
SLOW STOP
PREV
1
PAUSE
NEXT
REW
PLAY
1
2
PREV
NEXT
PAUSE
PLAY
REW
F.F
VOL
SEARCH MUTE
Presione el botón de PAUSA/PASO 1 para pausar la
imagen.
A
PIP
B
C
2ND
2
F.F
Durante la reproducción, presione el botón de LENTO 1 para
avanzar el disco en cámara lenta de 1/2, 1/4, ó 1/8 y
reanudar la reproducción normal. El sonido estará
silenciado.
BD PLAYER la
También puede reanudar
reproducción normal
presionando el botón de REPRODUCIR (PLAY) 2.
VOL
SEARCH MUTE
PL
L
A
D
PIP
B
C
2ND
AUDIO
USB
Presione repetidamente el botón de PAUSA/PASO 1 para
reproducir el disco un cuadro a la vez.
AUDIO
BD PLAYER
Presione el botón de REPRODUCIR (PLAY) 2 para
reanudar la reproducción normal.
28
D
USB
REPEAT
SETUP
ZOOM
FUNCIONAMIENTO DEL BD/DVD (CONTINÚA)
POWER
BOTÓN DE MENÚ SUPERIOR (TOP MENU)
ANGLE
HOME
U
EN
M
RE
TU
1
R
ANGLE
3
ENTER
M
SP
DI
EN
U
AUDIO
HOME
L
1
PAUSE
PLAY
REW
F.F
NEXT
2
U
EN
M
RE
TU
R
3
ENTER
OP
T
VOL
SEARCH MUTE
P
-U
N
SLOW STOP
PREV
CLEAR
SUBTITLE
A
Y
T
OP
1
MENÚ EMERGENTE (POP-UP MENU)
M
A
Y
2
P
-U
AUDIO
SETUP
ZOOM
N
PO
P
SUBTITLE
REPEAT
PO
P
1
CLEAR
OPEN/CLOSE
SP
DI
EN
U
L
Mientras se reproduce un disco BD, oprima MENÚ
SUPERIOR (TOP MENU) 1 para ir al menú superior del
disco.
Mientras se reproduce
un DVD, oprima MENÚ
BD PLAYER
SUPERIOR (TOP MENU) para ir al menú Títulos (Title).
El menú superior puede no estar disponible en todos los
discos.
NOTA: Si se oprime este botón el contenido podría
comenzar a reproducirse nuevamente desde el principio.
BD-DVD: Oprima MENÚ EMERGENTE (POP-UP MENU)
1 para que aparezca dicho menú mientras se reproduce un
disco BD. Puede seleccionar varias funciones desde este
menú. Utilice los botones de navegación (√,®,π,†) 2
para seleccionar la opción deseada y ACEPTAR (ENTER)
3 para confirmar.
BOTÓN INICIO (HOME)
BÚSQUEDA DE HORA
A
B
C
PIP
2ND
D
SLOW STOP
USB
PREV
AUDIO
1
POWER
REPEAT
OPEN/CLOSE
SETUP
ZOOM
PAUSE
PLAY
REW
F.F
NEXT
VOL
SEARCH MUTE
A
B
C
PIP
D
USB
2ND
AUDIO
DVD: Oprima este botón para
ir al menú principal del disco.
BD PLAYER
El menú emergente puede no estar disponible en todos los
discos.
1
POWER
REPEAT
OPEN/CLOSE
SETUP
ZOOM
2
ANGLE
CLEAR
SUBTITLE
ANGLE
AUDIO
HOME
CLEAR
AUDIO
3
PO
P
HOME
P
-U
U
EN
M
RE
TU
ENTER
OP
4
PO
P
R
Y
PREV
M
1
A
T
P
EN
D IS
U
PL
PREV
NEXT
PAUSE
PLAY
REW
F.F
PIP
C
2ND
PLAY
REW
F.F
VOL
B
C
D
2ND
USB
AUDIO
Este botón no tiene función cuando se reproduce un disco
estándar.
B
NEXT
Oprima BÚSQUEDA (SEARCH) 1 una vez para que
aparezca la Búsqueda de la hora (Time Search). Con las
teclas numéricas 2, introduzca la hora, luego oprima el
botón de navegación (®) 3. Utilice estas mismas teclas 2,
para introducir los minutos (dos dígitos), luego oprima el
botón de navegación (®) 3. Asimismo 2, introduzca los
segundos, luego oprima el botón de navegación (®) 3;
Búsqueda (Search) estará resaltada. Oprima ACEPTAR
(ENTER) 4 para buscar o seleccione Cancelar (Cancel)
para cancelar la búsqueda.
VOL
SEARCH MUTE
PIP
L
PAUSE
SEARCH MUTE
A
Oprima INICIO (HOME) para ir al menú principal del disco.
El menú será diferente según el disco.
SLOW STOP
A
SP
DI
EN
U
SLOW STOP
ENTER
O
M
A
Y
T
P
RE
TU
N
-U
U
EN
M
R
N
SUBTITLE
BD PLAYER
D
USB
AUDIO
BD PLAYER
29
FUNCIONAMIENTO DEL BD/DVD (CONTINÚA)
POWER
REPRODUCCIÓN REPETIDA
1
POWER
BÚSQUEDA DE DISPLAY-TÍTULO/CAPÍTULO
1
OPEN/CLOSE
REPEAT
SETUP
ZOOM
REPEAT
SETUP
ZOOM
2
ANGLE
CLEAR
SUBTITLE
U
EN
M
P
-U
PO
P
4
CLEAR
AUDIO
HOME
RE
TU
3
ENTER
SUBTITLE
AUDIO
HOME
SLOW STOP
R
PREV
REW
F.F
A
REPEAT
REPEAT
AUDIO
BD PLAYER
PIP (IMAGEN SUPERPUESTA)
AUDIO
HOME
R
N
PO
P
P
RE
TU
2º AUDIO
1
Y
M
A
P
EN
D IS
U
SLOW STOP
PREV
NEXT
PAUSE
PIP
B
C
2ND
AUDIO
-U
P
U
EN
M
HOME
P
PREV
F.F
RE
TU
M
EN
D IS
U
NEXT
A
PIP
USB
PL
PAUSE
PLAY
REW
F.F
VOL
SEARCH MUTE
D
R
ENTER
O
SLOW STOP
PLAY
VOL
SEARCH MUTE
A
PL
REW
CLEAR
SUBTITLE
T
O
SETUP
ZOOM
Utilícelo con la imagen superpuesta para oír el segundo audio.
ENTER
T
1
-U
U
EN
M
OPEN/CLOSE
N
Algunos BD admiten la función de imagen superpuesta.
USB
ANGLE
CLEAR
SUBTITLE
D
2ND
POWER
USB
ANGLE
C
AUDIO
SETUP
ZOOM
2ND
F.F
VOL
B
PIP
VOL
OPEN/CLOSE
SEARCH MUTE
REW
NEXT
Y
PLAY
NEXT
PIP
PL
PAUSE
1
PLAY
A
D IS
U
PO
P
EN
L
PAUSE
SEARCH MUTE
Y
M
SLOW STOP
PREV
RE
TU
A
PO
P
P
U
EN
M
N
T
O
P
SP
DI
EN
U
Oprima el botón MOSTRAR (DISPLAY) 1 para ver Modo de
reproducción, Disco, Frecuencia, formato HDMV (tiempo
transcurrido), Título, Capítulo y Tasa de transferencia.
El número de título estará resaltado en rojo. Para ir a un
título diferente, seleccione un número de título usando las
teclas numéricas (0-9) 2, seguidas de ACEPTAR (ENTER)
3.
Para ir a un capítulo específico, oprima el botón de
PLAYER
navegación (†) 4 paraBDresaltar
con rojo el capítulo.
Seleccione un número de capítulo con las teclas numéricas
(0-9) 2, seguidas de ACEPTAR (ENTER) 3.
Cuando esté en el modo Reproducción, oprima REPETIR
ENTER
(REPEAT) una vez; en la pantalla
aparecerá “Repetir título”
(Repeat Title) durante unos pocos segundos y el título que se está
reproduciendo en ese momento se repetirá de manera continua.
Oprima REPETIR (REPEAT) por segunda vez; en la pantalla
aparecerá “Repetir capítulo” (Repeat Chapter) durante unos pocos
segundos y el capítulo que se está reproduciendo en ese momento
se repetirá de manera continua.
Oprima REPETIR (REPEAT)
POWER
nuevamente para cancelar todos los modos de repetición; en la
A
B
C
D
pantalla aparecerá temporalmente “Repetir apagado” (Repeat Off).
Esta función no está disponible en todos los discos.
-U
M
A
Y
T
OP
R
N
ANGLE
OPEN/CLOSE
B
C
2ND
D
USB
AUDIO
AUDIO
Mientras visualiza un discoBD
(únicamente
discos Blu-ray) que
PLAYER
admita la función de imagen superpuesta (PIP), oprima PIP
para ver la imagen superpuesta. Oprima nuevamente el
botón para desactivar la función.
BD PLAYER
Mientras visualiza un disco
(únicamente discos Blu-ray) y la
imagen superpuesta, oprima 2º AUDIO (2ND AUDIO) para
oír el sonido de la imagen superpuesta. Oprima nuevamente
el botón para volver al sonido original.
30
FUNCIONAMIENTO DEL BD/DVD (CONTINÚA)
ZOOM
La imagen en la pantalla se puede agrandar del siguiente modo:
1
POWER
REPEAT
OPEN/CLOSE
ÁNGULO
Algunos discos contienen escenas que se tomaron
simultáneamente desde varios ángulos diferentes con la cámara.
Esta función sólo funciona con los discos que tienen más de un
ángulo
de
cámara. POWER
La
cubierta
está
marcada
con “
”
OPEN/CLOSE
1
SETUP
ZOOM
1
REPEAT
SETUP
ZOOM
ANGLE
CLEAR
SUBTITLE
ANGLE
AUDIO
PO
P
HOME
RE
TU
-U
U
EN
M
P
3
R
RE
TU
R
N
U
EN
M
ENTER
N
P
-U
P
Y
T
O
ENTER
M
A
PO
P
HOME
CLEAR
SUBTITLE
2
AUDIO
EN
D IS
U
PL
Oprima una vez ZOOM 1 durante los modos de
reproducción Normal, Cámara lenta o Imagen congelada; la
unidad acercará la imagen. Oprima varias veces para
acercarla más. Utilice los botones de navegación
(√,®,π,†) 2 para mover la imagen en la pantalla del
televisor. Oprima ZOOM 1 una vez más para cancelar esta
función o presione Volver (Return) 3.
Esta función no está disponible en todos los discos.
Mientras está en modo de Reproducción, presione el botón
de ÁNGULO; el número total de ángulos aparecerá en la
pantalla. Presione repetidamente el botón de ÁNGULO para
seleccionar el ángulo deseado; el ángulo cambiará en uno o
dos segundos.
Esta función no está disponible en todos los discos.
SUBTÍTULOS
AUDIO
M
SP
DI
EN
U
SLOW STOP
PREV
SLOW STOP
A
Y
T
OP
PAUSE
PLAY
REW
F.F
NEXT
B
POWER
PREV
C
NEXT
PAUSE
PLAY
REW
F.F
VOL
SEARCH MUTE
A
VOL
SEARCH MUTE
A
L
B
C
PIP
D
USB
2ND
AUDIO
POWER
OPEN/CLOSE
OPEN/CLOSE
USB
2ND
PIP
D
AUDIO
REPEAT
BD PLAYER
ANGLE
RE
TU
R
CLEAR
SUBTITLE
PO
P
U
EN
M
HOME
ANGLE
-U
P
AUDIO
U
EN
M
Y
EN
D IS
U
SLOW STOP
PREV
NEXT
PL
PAUSE
PLAY
REW
F.F
PIP
B
C
2ND
Y
EN
D IS
U
PREV
NEXT
PL
PAUSE
PLAY
REW
F.F
Presione repetidamente el botón de AUDIO para cambiar el
idioma del audio. Esta función no está disponible en todos los
discos.
VOL
SEARCH MUTE
VOL
SEARCH MUTE
M
SLOW STOP
Presione repetidamente el botón de SUBTÍTULOS para
seleccionar un idioma de subtítulos, y para activar/
desactivar el menú de subtítulos. Esta función no está
disponible en todos los discos.
A
P
A
M
R
A
O
T
T
P
RE
TU
ENTER
ENTER
O
HOME
N
P
1
N
-U
AUDIO
SETUP
ZOOM
BD PLAYER
CLEAR
SUBTITLE
PO
P
1
REPEAT
SETUP
ZOOM
A
D
PIP
USB
B
C
2ND
D
USB
AUDIO
AUDIO
BD PLAYER
BD PLAYER
31
OPERACIÓN DE UN DISCO MP3 O WMA
REPRODUCCIÓN DE UN DISCO MP3 O WMA
REPEAT
2
OPEN/CLOSE
REPEAT
SETUP
ZOOM
ANGLE
AUDIO
U
EN
M
HOME
PO
P
Y
PO
P
PREV
4
A
EN
D IS
U
NEXT
PL
PAUSE
PLAY
REW
F.F
SETUP
ZOOM
B
C
PREV
PIP
CLEAR
2ND
AUDIO
A
D
AUDIO
PIP
USB
HOME
RE
TU
Y
D IS
U
NEXT
A
PL
PAUSE
PLAY
REW
F.F
B
D
OPEN/CLOSE
C
D
2ND
USB
1
Stop
BD PLAYER
SUBTITLE
P
6
REPEAT
R
1
O
Y
A
NEXT
PL
PAUSE
PLAY
REW
F.F
B
C
2ND
USB
P
AUDIO
U
EN
M
P
HOME
RE
TU
R
1
ENTER
M
EN
D IS
U
SLOW STOP
PREV
NEXT
PL
PAUSE
PLAY
REW
F.F
SEARCH MUTE
D
PIP
USB
AUDIO
BD PLAYER
-U
SETUP
AGREGAR A LISTA DE REPRODUCCIÓN (ADD TO
PLAYLIST): Seleccione “Agregar a lista de reproducción” (Add to
Playlist) del menú de Lista de títulos con los botones
denavegación (π,†) 1, luego oprima ACEPTAR (ENTER) 2; la
B
C
D
canción seA agregará
a la lista de reproducción y aparecerá una
marca de verificación al lado del nombre de la canción.
VOL
SEARCH MUTE
VOL
CLEAR
2
REPRODUCIR TODO (PLAY ALL): Seleccione
“Reproducir todo” (Play All) del menú de Lista de títulos
con los botones de navegación (π,†) 1, luego oprima
ACEPTAR (ENTER) 2; la unidad reproducirá todos los
archivos del disco.
SLOW STOP
F.F
ZOOM
SUBTITLE
ENTER
D IS
PLAY
REW
2ND
HOME
RE
TU
U
PAUSE
N
EN
PL
OPEN/CLOSE
T
T
M
D IS
U
NEXT
ANGLE
N
2
EN
CLEAR
AUDIO
U
EN
M
M
BD PLAYER
SETUP
ZOOM
ANGLE
PO
P
B
AUDIO
PO
P
REPEAT
PIP
VOL
R
ENTER
PIP
BD PLAYER
A
RE
TU
SEARCH MUTE
AUDIO
POWER
P
PREV
USB
2ND
PREV
U
EN
M
P
SLOW STOP
VOL
C
PIP
P
F.F
Y
EN
SEARCH MUTE
O
REW
A
PREV
-U
PLAY
Aparecerá la lista de archivos del disco. (Si el disco posee
carpetas, entonces aparecerá una lista de carpetas.) Con los
botones de navegación (π,†) 1 , seleccione el MP3/WMA o la
carpeta deseados y luego oprima ACEPTAR (ENTER) 2 para
C
D
comenzar Ala Breproducción
o entrar a la carpeta. Mientras la
unidad esté detenida, utilice el botón de navegación (π) 1 para ir
al archivo superior y oprima ACEPTAR (ENTER) 2 para ir a la
carpeta anterior. Para abrir el menú Lista de títulos (Title List) con
POWER
el MP3/WMA
deseado, oprima el botón de navegación (®) 1.
A
T
M
SLOW STOP
5
PAUSE
Y
T
O
Oprima ABRIR/CERRAR (OPEN /CLOSE) 1 para cerrar la
bandeja del disco. En la pantalla aparecerá “CERRAR”
(“CLOSE”) y en la pantalla del televisor aparecerá
“Detectando disco” (“Detecting Disc”). Después de cargar,
aparecerá la pantalla de Lista de títulos del disco. Utilice
los botones de navegación (π,†) 2 para seleccionar
Audio y oprima ACEPTAR (ENTER) 3.
P
NEXT
PL
A
3
ENTER
O
-U
2
BD PLAYER
R
D IS
U
AUDIO
PO
P
PO
P
P
EN
HOME
N
-U
R
N
2
U
EN
M
M
SEARCH MUTE
AUDIO
SUBTITLE
RE
TU
CLEAR
SUBTITLE
ANGLE
P
P
SLOW STOP
ANGLE
A
-U
SETUP
VOL
SEARCH MUTE
U
EN
M
HOME
N
1
REPEAT
M
SLOW STOP
OPEN/CLOSE
O
T
POWER
P
CLEAR
AUDIO
Oprima el botón ABRIR/CERRAR (OPEN /CLOSE) para abrir la bandeja
POWER
ENTER
OPEN/CLOSE
del disco, aparecerá
“ABRIR” (OPEN)
en la pantalla. Coloque un disco
con archivos MP3 /WMA con la etiqueta mirando hacia arriba sobre la
ZOOM
bandeja delREPEAT
disco.
R
N
T
3
O
RE
TU
SETUP
ZOOM
SUBTITLE
Oprima el botón de ENCENDIDO/APAGADO/EN ESPERA
ENTER la unidad. La luz del indicador de
(POWER/STANDBY) para encender
Encendido (Power) se encenderá. En la pantalla aparecerá brevemente
“HOLA” (“HELLO”) y luego “CARGAR” (“LOAD”).
P
OPEN/CLOSE
ANGLE
CLEAR
SUBTITLE
-U
POWER
Y
POWER
A
1
2ND
VOL
USB
AUDIO
32
BD PLAYER
OPEN/CLOSE
FUNCIONAMIENTO DE UN DISCO MP3 O WMA (CONTINÚA)
SETUP
ANGLE
R
D IS
U
O
PL
PAUSE
PLAY
ANGLE
CLEAR
AUDIO
A
PL
PAUSE
PLAY
REW
F.F
VOL
OPEN/CLOSE
B
C
D
SETUP
ZOOM
PIP
USB
2ND
AUDIO
10
RE
TU
BD PLAYER
ANGLE
CLEAR
SUBTITLE
AUDIO
P
-U
U
EN
M
R
HOME
RE
TU
R
ENTER
1
OP
M
SP
DI
EN
U
L
Y
ENTER
M
EN
D IS
U
SLOW STOP
PL
PAUSE
SLOW STOP
PREV
PLAY
INFORMACIÓN: Seleccione “Info” del menú de Lista de
títulos utilizando los botones de navegación (π,†) 1,
luego oprima ACEPTAR (ENTER) 2; aparecerá la
información del archivo seleccionado. La información
permanecerá en la pantalla durante 10 segundos y luego
desaparecerá.
PREV
REW
NEXT
A
B
POWER
PIP
C
A
D
PIP
PLAY
NEXT
REW
F.F
2
VOL
B
C
2ND
D
USB
AUDIO
USB
2ND
PAUSE
Oprima PAUSA/Cuadro por cuadro (PAUSE/Step) 1 para
pausar la reproducción. Oprima REPRODUCIR (PLAY) 2
para reanudar la reproducción.
OPEN/CLOSE
AUDIO
ZOOM
REPEAT
1
SEARCH MUTE
F.F
VOL
SEARCH MUTE
SETUP
BD PLAYER
BD PLAYER
ANGLE
P
AUDIO
U
EN
M
HOME
RE
TU
R
N
-U
NOTAS:
• Oprima el VOLVER (RETURN) para regresar a la
pantalla de lista de títulos.
• Salto, Búsqueda, Pausa, Repetir y Zoom funcionarán
como se describió antes, según el tipo de archivos que
se reproduzcan.
• Oprima VOLVER (RETURN) varias veces para regresar
al menú principal y presione REPRODUCIR (PLAY)
para reproducir el disco, si hay uno colocado.
CLEAR
SUBTITLE
PO
P
11
D IS
U
NEXT
REPEAT
A
P
EN
A
Y
PO
P
T
O
M
T
2
1
ENTER
N
P
R
HOME
N
-U
U
EN
M
RE
TU
POWER
SEARCH MUTE
PO
P
SUBTITLE
HOME
ORDENAR POR NOMBRE (SORT BY NAME): Seleccione
“Ordenar por nombre” (Sort by Name) del menú de Lista
de títulos con los botones de navegación (π,†) 1, luego
oprima ACEPTAR (ENTER) 2; la lista de reproducción se
ordenará alfabéticamente.
SETUP
9
P
PREV
F.F
BD PLAYER
U
EN
M
SLOW STOP
VER LISTA DE REPRODUCCIÓN (VIEW PLAYLIST): Seleccione “Ver
VOL
SEARCH MUTE
lista de reproducción” (View Playlist) del menú de Lista de títulos con los
botones de navegación (π,†)POWER
oprima
ACEPTAR (ENTER) 2;
A 1, Bluego
C
D
OPEN/CLOSE
aparecerá la lista de reproducción. Luego puede oprimir nuevamente
USB
2ND
PIP
ACEPTAR (ENTER) 2 para
comenzar
a reproducir su lista de
REPEAT
ZOOM
AUDIO
reproducción.
REW
NEXT
P
AUDIO
2
Y
EN
SLOW STOP
PREV
-U
ENTER
A
M
CLEAR
N
1
T
T
P
RE
TU
ANGLE
PO
P
U
EN
M
P
SETUP
ZOOM
SUBTITLE
HOME
N
PO
P
AUDIO
2
O
8
CLEAR
SUBTITLE
-U
REPEAT
Y
ZOOM
A
REPEAT
7
OPEN/CLOSE
M
A
T
P
Y
ENTER
O
EN
D IS
U
SLOW STOP
PREV
NEXT
PL
PAUSE
PLAY
REW
F.F
Oprima DETENER (STOP) para detener la reproducción.
VOL
SEARCH MUTE
A
PIP
B
C
2ND
D
USB
AUDIO
BD PLAYER
33
REPEAT
SETUP
ZOOM
FUNCIONAMIENTO DE UN DISCO MP3 O WMA (CONTINÚA)
SELECCIONAR CARPETAS O PISTAS
USANDO EL BOTÓN DE SKIP ( N) O ( O)
ANGLE
CLEAR
SUBTITLE
PO
P
-U
P
U
EN
M
HOME
RE
TU
REPRODUCCIÓN REPETIDA
1
R
N
1
AUDIO
POWER
REPEAT
OPEN/CLOSE
SETUP
ZOOM
D IS
U
SLOW STOP
2
PREV
NEXT
PAUSE
PLAY
ANGLE
REW
F.F
SUBTITLE
1
C
D
HOME
2ND
-U
P
U
EN
M
RE
TU
R
Para repetir una carpeta o lista de reproducción, oprima
REPETIR (REPEAT). Oprima nuevamente para detener la
repetición de la reproducción.
Durante la reproducción, simplemente presione el botón
SALTO (SKIP) n 1 o o 2 para seleccionar el archivo que
se va a reproducir.
PIP
AUDIO
N
B
CLEAR
VOL
SEARCH MUTE
A
PL
ENTER
USB
AUDIO
T
O
P
Y
EN
M
A
M
PO
P
P
A
T
O
Y
ENTER
EN
D IS
U
SLOW STOP
BD PLAYER
PREV
NEXT
PAUSE
PLAY
REW
F.F
VOL
SEARCH MUTE
A
PIP
PL
B
C
2ND
D
USB
AUDIO
BD PLAYER
PREGUNTAS FRECUENTES SOBRE DISCOS MP3
Lea esta sección antes de reproducir un disco MP3.
¿Qué es un archivo MP3?
Un archivo MP3 es un formato de computadora que hace que un archivo de música bastante grande sea más pequeño, lo
cual es más conveniente para descargarse y compartirlo.
¿Dónde puedo encontrar archivos MP3?
Los archivos MP3 están disponibles en todo el Internet.
¿Puede esta unidad leer los CD regulares de música?
Sí, sí puede. Sin embargo, no se pueden mezclar archivos MP3 y WAV en un mismo CD. Si lo hace, este reproductor de
CD sólo reproducirá los archivos MP3.
¿Puedo usar la extensión MP3 para archivos de datos que no son de audio?
No. Eso puede resultar en fallas severas e interferencia dañina de ruido.
¿Puedo mezclar archivos MP3 con otro tipo de archivos en el CDR?
Sí. Pero su reproductor de CD ignorará aquellos archivos y sólo leerá los archivos MP3 en el CDR.
¿Funciona esta unidad con subdirectorios (subcarpetas)?
Sí. Esta unidad puede leer archivos MP3 en subcarpetas.
34
FUNCIONAMIENTO DE UN DISCO CD
REPRODUCCIÓN DE UN DISCO CD
2
OPEN/CLOSE
REPEAT
ANGLE
AUDIO
HOME
PO
P
PO
P
Y
U
D
SLOW STOP
PREV
PLAY
REW
F.F
NEXT
POWER
VOL
SETUP
ZOOM
A
4
OPEN/CLOSE
SEARCH MUTE
REPEAT
L
IS P
PAUSE
B
C
-U
U
EN
M
P
P
M
EN
SLOW STOP
PREV
PO
P
RE
TU
HOME
2ND
USB
Y
PLAY
REW
F.F
ANGLE
SEARCH MUTE
SUBTITLE
PIP
U
EN
MAUDIO
RE
TU
Y
ANGLE
-U
AUDIO
PLAYER
HOME
1
NEXT
REW
F.F
2
P
RE
TU
R
EN
D IS
U
NEXT
PL
PAUSE
PLAY
REW
F.F
Oprima DETENER (STOP) para detener la reproducción.
Oprima PAUSA/Cuadro por cuadro (PAUSE/Step) 1 para
pausar la reproducción. Oprima REPRODUCIR (PLAY) 2
para reanudar la reproducción.
C
M
SLOW STOP
VOL
2ND
U
EN
M
A
Y
T
O
PLAY
B
P
ENTER
PREV
PIP
CLEAR
SUBTITLE
BD
L
PAUSE
SEARCH MUTE
A
USB
R
SP
DI
EN
U
SLOW STOP
PREV
2ND
N
T
BD
PLAYER
O
M
D
USB
ENTER
P
C
AUDIO
N
PO
P
6
D
2ND
P
-U
PLAY
REW
F.F
OPEN/CLOSE
B
PIP
HOME
C
PL
PAUSE
NEXT
A
CLEAR
AUDIO
B
D IS
U
Y
A
VOL
EN
VOL
SEARCH MUTE
SETUP
REPEAT
ZOOM
PL
PAUSE
NEXT
1
A
5
PREV
R
ENTER
POWER
A
SLOW STOP
M
PREV
SETUP
D IS
U
RE
TU
SLOW STOP
OPEN/CLOSE
ZOOM
P
PO
P
PO
P
T
EN
U
EN
M
P
Con los botones de navegación (π,†) 1 , seleccione una
pista diferente, luego oprima ACEPTAR (ENTER) 2 para
comenzar la reproducción.
R
N
POWER
M
D
AUDIO
A
T
U
EN
M
Oprima el botón ABRIR/CERRAR (OPEN/CLOSE) para cerrar la
ENTER
bandeja del disco. En la pantalla aparecerá “CERRAR”
(“CLOSE”) y en la pantalla del televisor aparecerá “Detectando
disco” (“Detecting Disc”). Una vez cargado el disco, aparecerá la
pantalla de Lista de títulos del disco y la Pista 1 comenzará a
reproducirse automáticamente.
P
CLEAR
C
BD PLAYER
HOME
O
O
VOL
N
AUDIO
-U
2
BD PLAYER
REPEAT
F.F
B
PIP
CLEAR
P
REW
AUDIO
ANGLE
-U
PLAY
SEARCH MUTE
AUDIO
SUBTITLE
PL
PAUSE
NEXT
A
USB
2ND
R
SETUP
ZOOM
ANGLE
D
D IS
U
REPEAT
SUBTITLE
PIP
RE
TU
OPEN/CLOSE
O
A
EN
HOME
N
M
AUDIO
Oprima el botón ABRIR/CERRAR (OPEN /CLOSE) para abrir la
ENTER
POWER
bandeja del disco, aparecerá
“ABRIR” (OPEN) en la pantalla.
Coloque un CD de música con la etiqueta hacia arriba, sobre la
bandeja del disco.
R
T
3
P
RE
TU
N
T
O
U
EN
M
P
CLEAR
SUBTITLE
Oprima el botón de ENCENDIDO/APAGADO/EN ESPERA
ENTER
(POWER/STANDBY) para encender
la unidad. La luz del indicador
de Encendido (Power) se encenderá. En la pantalla aparecerá
brevemente “HOLA” (“HELLO”) y luego “CARGAR” (“LOAD”).
-U
SETUP
ZOOM
ANGLE
CLEAR
SUBTITLE
OPEN/CLOSE
REPEAT
SETUP
ZOOM
POWER
Y
POWER
A
1
VOL
SEARCH MUTE
D
A
B
C
D
USB
AUDIO
PIP
2ND
USB
AUDIO
BD PLAYER
BD PLAYER
35
REPEAT
SETUP
ZOOM
FUNCIONAMIENTO DE UN DISCO CD (CONTINÚA)
POWER
SETUP
ZOOM
SELECCIONAR PISTAS O ARCHIVOS CON EL
BOTÓN DE SALTO (SKIP) O O N
ANGLE
1
1
CLEAR
SUBTITLE
-U
AUDIO
U
EN
M
P
HOME
RE
TU
R
N
1
REPEAT
OPEN/CLOSE
PO
P
SELECCIONAR PISTAS O ARCHIVOS CON
LAS TECLAS NUMÉRICAS
ENTER
T
O
SUBTITLE
AUDIO
P
HOME
Y
CLEAR
M
A
ANGLE
EN
D IS
U
U
EN
M
2
2
SP
DI
EN
U
SLOW STOP
NEXT
A
A
PLAY
REW
F.F
C
VOL
B
C
D
PIP
2ND
USB
AUDIO
D
SETUP
ZOOM
PIP
F.F
1
Durante la reproducción, oprima el botón SALTO (SKIP) n
1 o o 2 para seleccionar la pista siguiente o anterior que
desea reproducir.
BD PLAYER
VOL
OPEN/CLOSE
B
REPEAT
PLAY
REW
L
PAUSE
SEARCH
MUTE
POWER
PAUSE
NEXT
SEARCH MUTE
Oprima las teclas numéricas 1 que correspondan al
número de pista que desea reproducir, luego oprima
ACEPTAR (ENTER) 2. La unidad reproducirá la pista
deseada.
PREV
PREV
A
Y
M
R
ENTER
T
OP
RE
TU
N
PO
P
SLOW STOP
P
-U
PL
USB
2ND
AUDIO
BÚSQUEDA CON AVANCE RÁPIDO (FAST
FORWARD)®®/REBOBINADO (REWIND) √√
BD PLAYER
ANGLE
CLEAR
-U
P
AUDIO
U
EN
M
HOME
RE
TU
REPETIR/ORDEN ALEATORIO
(REPEAT/RANDOM )
1
R
N
1
PO
P
SUBTITLE
ENTER
POWER
M
EN
D IS
U
SLOW STOP
PREV
NEXT
2
PL
PAUSE
PLAY
REW
F.F
1
ANGLE
CLEAR
VOL
SEARCH MUTE
SUBTITLE
C
2ND
USB
HOME
Para repetir la reproducción de una pista, simplemente
seleccione la pista como se describió anteriormente, luego
oprima una vez REPETIR (REPEAT). La unidad repetirá
todas las pistas del disco. Presione dos veces y la unidad
reproducirá la pista seleccionada de manera continua.
Oprima REPETIR (REPEAT) por tercera vez; la unidad
repetirá de forma aleatoria todas las pistas del disco. Para
cancelar la reproducción con repetición, oprima REPETIR
(REPEAT) por cuarta vez.
PO
P
-U
P
U
EN
M
RE
TU
R
N
Cada vez que oprima el botón BÚSQUEDA (SEARCH) ®®
1 o √√ 2 , ésta se incrementará de la siguiente manera:
AUDIO
ENTER
BD PLAYER
O
T
Si oprime 1 vez:x 2
Si oprime 2 veces:
Si oprime 3 veces:
Si oprime 4 veces:
Si oprime 5 veces:
AUDIO
D
x4
x8
x 16
Retoma la reproducción normal.
P
Y
PIP
B
M
A
A
SETUP
ZOOM
A
T
P
Y
REPEAT
O
OPEN/CLOSE
EN
D IS
U
SLOW STOP
PREV
NEXT
PAUSE
PLAY
REW
F.F
VOL
SEARCH MUTE
A
PIP
PL
B
C
2ND
D
USB
AUDIO
BD PLAYER
36
SUBTITLE
AUDIO
FUNCIONAMIENTO DE CD/USB DE DATOS
PO
P
POWER
REPEAT
Y
P
M
EN
D IS
U
SLOW STOP
PREV
SETUP
ZOOM
NEXT
A
PLAY
REW
F.F
VOL
B
PIP
AUDIO
PO
P
P
RE
TU
R
N
-U
3
OPEN/CLOSE
EN
D IS
U
SLOW STOP
PREV
REPEAT
M
A
T
POWER
P
Y
ENTER
O
NEXT
PL
PAUSE
PLAY
REW
F.F
REPEAT
4
VOL
SEARCH MUTE
A
PIP
2ND
B
C
2ND
USB
OPEN/CLOSE
SETUP
ZOOM
D
Coloque el dispositivo USB con
los archivos de datos y oprima el
BD PLAYER
botón USB 1 para seleccionar USB, luego seleccione el
dispositivo USB deseado. O bien, introduzca un disco con
archivos de datos. Los archivos de datos pueden ser películas,
archivos de audio o imágenes. Consulte las especificaciones para
obtener información
sobre los formatos de archivo permitidos.
POWER
Después de cargar, aparecerá la pantalla de Lista de títulos del
disco. Utilice los botones de navegación (π,†) 2 para
seleccionar un formato y oprima ACEPTAR (ENTER) 3.
HOME
Oprima el botón de ENCENDIDO/APAGADO/EN ESPERA
(POWER/STANDBY) para encender la unidad. La luz del
indicador de Encendido (Power) se encenderá. En la
pantalla aparecerá brevemente “HOLA” (“HELLO”) y luego
“CARGAR” (“LOAD”).
U
EN
M
C
AUDIO
CLEAR
SUBTITLE
PL
PAUSE
SEARCH MUTE
ANGLE
R
A
2
OPEN/CLOSE
RE
TU
ENTER
O
T
1
U
EN
M
P
N
REPRODUCCIÓN DE CD/USB DE DATOS (IMÁGENES, AUDIO, VIDEO)
-U
HOME
D
USB
SETUP
ZOOM
ANGLE
CLEAR
AUDIO
ANGLE
CLEAR
AUDIO
PO
P
U
EN
M
1
ENTER
O
R
1
ENTER
M
EN
D IS
U
PL
M
A
Y
P
RE
TU
Y
PO
P
P
2
R
T
T
P
-U
N
2
O
RE
TU
N
-U
P
HOME
HOME
BD PLAYER
U
EN
M
AUDIO
A
SUBTITLE
SUBTITLE
EN
D IS
U
PL
SLOW STOP
Aparecerá la lista de archivos del disco. (Si el disco posee
carpetas, entonces aparecerá una lista de carpetas.) Con
los botones de navegación (π,†) 1 , seleccione el archivo
o la carpeta deseados y luego oprima ACEPTAR (ENTER)
2 para comenzar la reproducción o entrar a la carpeta.
Utilice el botón de navegación (π) 1 para ir al archivo
superior y oprima ACEPTAR (ENTER) 2 para ir a la carpeta
anterior. Para abrir el menú Lista de títulos (Title List) con el
PLAYER
contenidoBD
deseado,
oprima el botón de navegación (®) 1.
SLOW STOP
PREV
NEXT
PAUSE
PLAY
REW
F.F
A
B
PIP
C
PREV
NEXT
REW
F.F
VOL
SEARCH MUTE
A
D
PIP
B
C
2ND
D
USB
AUDIO
USB
2ND
PLAY
REPRODUCIR TODO (PLAY ALL): Seleccione
“Reproducir todo” (Play All) del menú de Lista de títulos
con los botones de navegación (π,†) 1, luego oprima
ACEPTAR (ENTER) 2; la unidad reproducirá todos los
archivos del disco.
VOL
SEARCH MUTE
PAUSE
AUDIO
U
EN
M
2
R
1
EN
D IS
U
PL
AGREGAR A LA LISTA DE REPRODUCCIÓN (ADD TO
PLAYLIST): Seleccione “Agregar a lista de reproducción” (Add to
Playlist) del menú de Lista de títulos con los botones
denavegación (π,†) 1, luego oprima ACEPTAR (ENTER) 2; el
A
B
C
D a la lista de reproducción y aparecerá una
archivo se
agregará
marca de verificación al lado del nombre del archivo.
SLOW STOP
PREV
NEXT
PAUSE
PLAY
REW
F.F
SEARCH MUTE
PIP
O
Y
M
2ND
AUDIO
P
U
EN
M
P
RE
TU
R
1
M
EN
D IS
U
PL
VER LISTA DE REPRODUCCIÓN (VIEW PLAYLIST): Seleccione
“Ver lista de reproducción” (View Playlist) del menú de Lista de
títulos con los botones de navegación (π,†) 1, luego oprima
ACEPTAR (ENTER) 2; aparecerá la lista de reproducción. Luego
B
C
D (ENTER) 2 para comenzar
puede oprimir nuevamenteAACEPTAR
a reproducir su lista de reproducción.
PREV
NEXT
PAUSE
PLAY
REW
F.F
SEARCH MUTE
37
HOME
ENTER
SLOW STOP
VOL
USB
-U
AUDIO
2
ENTER
A
P
SUBTITLE
T
T
O
HOME
RE
TU
CLEAR
N
PO
P
P
ANGLE
AUDIO
SETUP
ZOOM
CLEAR
N
-U
REPEAT
OPEN/CLOSE
Y
ANGLE
SUBTITLE
6
SETUP
ZOOM
POWER
PO
P
5
REPEAT
BD PLAYER
OPEN/CLOSE
A
POWER
PIP
2ND
AUDIO
VOL
USB
FUNCIONAMIENTO DE CD/USB DE DATOS (CONTINÚA)
SETUP
ANGLE
P
U
EN
M
2
R
1
O
Y
M
EN
D IS
U
-U
CLEAR
AUDIO
PL
P
HOME
U
EN
M
P
2
ENTER
A
P
SUBTITLE
T
T
O
ANGLE
HOME
RE
TU
SETUP
ZOOM
RE
TU
R
N
-U
REPEAT
CLEAR
AUDIO
N
PO
P
SUBTITLE
8
OPEN/CLOSE
1
ENTER
Y
ZOOM
PO
P
7
REPEAT
POWER
OPEN/CLOSE
M
A
POWER
EN
D IS
U
PL
ORDENAR POR NOMBRE (SORT BY NAME): Seleccione
“Ordenar por nombre” (Sort by Name) del menú de Lista
de títulos con los botones de navegación (π,†) 1, luego
oprima ACEPTAR (ENTER) 2; la lista de reproducción se
ordenará alfabéticamente.
INFORMACIÓN: Seleccione “Info” del menú de Lista de
títulos utilizando los botones de navegación (π,†) 1,
luego oprima ACEPTAR (ENTER) 2; aparecerá la
información del archivo seleccionado. La información
permanecerá en la pantalla durante 10 segundos y luego
desaparecerá.
5
6
PLAY
REW
F.F
NEXT
POWER
REPEAT
PIP
PREV
OPEN/CLOSE
VOL
SEARCH MUTE
A
SLOW STOP
B
C
A
CLEAR
PO
P
P
HOME
RE
TU
BD PLAYER
ANGLE
SUBTITLE
PO
P
D IS
U
HOME
P
U
EN
M
NEXT
PLAY
REW
F.F
C
2ND
P
M
EN
D IS
U
SLOW STOP
PREV
VOL
R
NEXT
PL
PAUSE
PLAY
REW
F.F
Oprima DETENER (STOP) para detener la reproducción.
Oprima PAUSA/Cuadro por cuadro (PAUSE/Step) para
pausar la reproducción. Presione nuevamente para
retomar la reproducción.
B
RE
TU
ENTER
PAUSE
SEARCH MUTE
PIP
-U
PL
T
SLOW STOP
A
AUDIO
Y
EN
O
PREV
CLEAR
A
M
USB
N
T
P
2ND
R
ENTER
O
D
SETUP
N
-U
U
EN
M
C
ZOOM
AUDIO
BD PLAYER
AUDIO
VOL
B
PIP
USB
ANGLE
F.F
OPEN/CLOSE
REPEAT
AUDIO
SUBTITLE
REW
POWER
D
2ND
PLAY
SEARCH MUTE
SETUP
ZOOM
NEXT
PAUSE
Y
PREV
PAUSE
A
SLOW STOP
D
VOL
SEARCH MUTE
A
USB
B
C
D
AUDIO
PIP
2ND
USB
AUDIO
BD PLAYER
BD PLAYER
NOTAS:
• Oprima VOLVER (RETURN) para regresar a la pantalla de lista de títulos.
• Salto, Búsqueda, Pausa, Repetición y Zoom funcionarán como se describió antes, según el tipo de archivos que se
reproduzcan.
• Oprima VOLVER (RETURN) varias veces para regresar al menú principal y presione REPRODUCIR (PLAY) para
reproducir el disco, si hay uno colocado.
38
GUÍA DE RESOLUCIÓN DE PROBLEMAS
Lea el siguiente cuadro antes de solicitar el servicio técnico:
PROBLEMA:
GENERAL
No hay energía.
Unidad encendida, pero unidad no
funciona debidamente.
CAUSA POSIBLE
Cable eléctrico desconectado.
Se formó condensación.
Tipo de CD equivocado.
Debe resetear unidad.
No hay imagen.
Sin sonido.
Imagen es de mala calidad.
La función de Buscar no funciona.
Imagen no se ajusta debidamente.
El control remoto no funciona.
El menú de Preferencias no se
puede acceder (está atenuado) en
el menú de configuración.
Disco sucio o incorrectamente introducido.
Algunas funciones no están disponibles
en todos los discos.
El equipo no está debidamente
conectado.
La entrada del televisor no está configurada para recibir una señal de disco.
Los cables de video no están bien
conectados.
El televisor conectado está apagado.
El equipo no está debidamente
conectado.
El equipo conectado al cable de audio no
está configurado para recibir la señal de
entrada del reproductor.
Los cables de audio no están bien
conectados.
El receptor conectado está apagado.
El disco está sucio.
Algunos disco tienen secciones que no
permite la búsqueda.
Opción de menú equivocada en el menú
de configuración.
Las pilas están bajas o descargadas.
Las pilas están instaladas incorrectamente.
No está dirigiendo el control remoto al sensor.
La distancia es demasiado grande o hay
demasiada luz en la habitación.
Obstáculo en el trayecto del sensor.
No hay un disco en la bandeja del disco.
39
SOLUCIÓN POSIBLE
Conecte el cable al contacto eléctrico.
Desconecte la unidad y espere 1 ó 2
horas para dejar que seque el reproductor.
Esta unidad no puede reproducir otros
discos que no sean los de la página 16.
Oprima ENCENDIDO/APAGADO/EN
ESPERA; luego desenchufe el cable de
alimentación. Espere un minuto y luego
enchufe la unidad nuevamente..
Limpie disco y póngalo con etiqueta arriba.
Eso es normal, pruebe otra función.
Conecte el equipo siguiendo las
instrucciones en este manual.
Seleccione el modo apropiado de entrada
de video, normalmente VIDEO o AV.
Conecte bien los cables de video.
Encienda el televisor.
Conecte el equipo siguiendo las
instrucciones en este manual.
Seleccione el modo apropiado de
entrada de audio.
Conecte bien los cables de audio.
Encienda el receptor de audio.
Limpie el disco.
Eso es normal en algunos discos.
Seleccione el tipo correcto de TV (PS, LB,
WIDE) que concuerde con TV usado.
Introduzca baterías nuevas.
Introduzca las baterías como indica el diagrama.
Apunte el control remoto al sensor.
Opere a no más de 20 pies o reduzca
la luz en la habitación.
Mueva el obstáculo.
Quite el disco de la bandeja, ya que no
debe haber un disco en el interior al
configurar las preferencias.
GUÍA DE RESOLUCIÓN DE PROBLEMAS (CONTINÚA)
PROBLEMA:
DISCOS
La unidad no inicia la
reproducción.
CAUSA POSIBLE
No hay disco o fue introducido al revés.
Se introdujo un disco no reproducible.
El disco no se colocó en la guía.
Algunas funciones no operan
como se indica.
Idioma seleccionado no se muestra
en los subtítulos, o no se habla.
Los subtítulos no funcionan
debidamente.
No puede cambiar el ángulo.
El disco está sucio.
Algunas funciones no están disponibles
en todos los discos.
Si el idioma de audio o subtítulo no
aparece en el disco, entonces la
configuración inicial no se verá/oirá.
Los subtítulos aparecen sólo cuando el
disco cuenta con ellos.
Subtítulos no habilitados.
Quizá no hay ángulos en el disco (vea
cajita del disco) o sólo para algunas
escenas.
SOLUCIÓN POSIBLE
Introduzca el disco correctamente.
Asegúrese de colocar un disco que se
pueda reproducir como se muestra en
la página 16.
Coloque el disco en la bandeja
correctamente dentro de las guías.
Limpie el disco.
Eso es normal, pruebe otra función.
Eso es normal; pruebe con otro disco.
Eso es normal; pruebe con otro disco.
Active los subtítulos.
Pruebe con otro disco, o espere otra
escena que tenga diferentes ángulos.
PARA ASISTENCIA ADICIONAL SOBRE LA CONFIGURACIÓN O EL FUNCIONAMIENTO, INGRESE EN:
WWW.MEMOREXELECTRONICS.COM
CONSULTE EL NÚMERO DE PIEZAS REMPLAZABLES EN LA PÁGINA 8, LUEGO COMUNÍQUESE CON
FOX INTERNATIONAL AL 1-800-321-6993.
40
CUIDADO Y MANTENIMIENTO
Cuidado de los discos
• Trate el disco con cuidado. Maneje el disco sólo por sus orillas. Nunca permita que sus dedos toquen el lado brilloso
y sin impresión del disco.
• No pegue cinta adhesiva, calcomanías u otra cosa en la etiqueta del disco.
• Limpie el disco periódicamente con un trapo suave, seco y sin pelusa. Nunca use detergentes ni limpiadores
abrasivos para limpiar el disco. Si es necesario, use un juego de limpieza para CD.
• Si el disco salta o se atora en una sección del disco, probablemente esté sucio o dañado (rayado).
• Cuando limpie el disco, frote en línea recta del centro hacia la orilla exterior del disco compacto. Nunca frote con
movimientos circulares.
B E NZEN E
C LE A N E R
• Los discos deben guardarse en sus cajas después de usarlos para evitar que se dañen.
• No exponga los discos a los rayos directos del sol, mucha humedad, altas temperaturas ni al polvo. La exposición
prolongada y las temperaturas extremas pueden doblar el disco.
• No pegue ni escriba nada sobre ninguno de los lados del disco. Los instrumentos filosos o bien la tinta pueden
dañar la superficie.
Limpieza de la unidad
• Para evitar los riesgos de incendio o descarga eléctrica, desconecte su unidad del contacto eléctrico cuando
la esté limpiando.
• El acabado de su unidad puede limpiarse con un trapo seco y cuidarse como haría con cualquier otro mueble.
Tenga cuidado al limpiar y frotar las partes de plástico.
• Puede usar un jabón neutro y un trapo húmedo para limpiar el panel frontal.
41
ESPECIFICACIONES
Requisitos de energía.........................................................................................................................................AC120V, 60Hz
Consumo de energía...........................<27W (aprox. 3W cuando se configura en el modo en Espera con el control remoto)
Peso .........................................................................................................................................................................6.35 libras
Dimensiones...............................................................................................16.9 ( ancho) x 10.6 (largo) x 1.69 (alto) pulgadas
El peso y las dimensiones son aproximados.
Temperatura de operación .......................................................................................................................................41° to 95°F
Rango de humedad de operación ....................................................................................Entre 5% y 90% (sin condensación)
Formato
Discos compatibles ...................................................................................................BD (405nm), DVD (650nm), CD (780nm)
Salida de Video
Compuesta ..................................................................................................................................(75ž carga) 1 canal: 1.0 Vp-p
Blu-ray 480i
DVD: 480i
Componente ........................................................................................... (75ž carga) Y: 1.0Vp-p, Pr: 0.70Vp-p, Pb: 0.70Vp-p
Blu-ray 1080i, 720p
DVD: 1080i, 720p
S-Video .................................................................................................................... (75ž carga) Señal de luminancia 1.0Vp-p
(75ž carga) Señal de crominancia 0.3Vp-p
Blu-ray 480i
DVD: 480i
Salida de Audio/Video
HDMI ...........................................................................................................................................1080p, 1080p24, 1080i, 720p
Audio multicanal PCM, Audio por flujo de bits, Audio PCM
Salida de audio
2 canales ..............................................................................................................................................................................L, R
7,1 canales...............................................................................................................................FL, FR, Rrs, Rls, C, lfe, LS, RS
Salida de audio digital.........................................................................................................................................Óptica/Coaxial
Respuesta de frecuencia.......................................................48kHz Muestreo: 4Hz a 22kHz / 96kHz Muestreo 4Hz a 22kHz
Relación Señal/Ruido ........................................................................................................................................................95dB
Compresión dinámica ........................................................................................................................................................85dB
Distorsión armónica total .................................................................................................................................................0.01%
Las especificaciones están sujetas a cambios sin previo aviso.
42
LISTA DE CÓDIGOS DE IDIOMAS
Introduzca el código con las teclas numéricas
Abkhazian:
6566
Afar:
6565
Afrikaans:
6570
Albanian:
8381
Ameharic:
6577
Arabic:
6582
Armenian:
7289
Assamese:
6583
Aymara:
6589
Azerbaijani:
6590
Bashkir:
6665
Basque:
6985
Bengali; Bangla:
6678
Bihari:
6672
Breton:
6682
Bulgarian:
6671
Burmese:
7789
Catalan:
6765
Chinese:
9072
Corsican:
6779
Croatian:
Czech:
Danish:
Dutch:
English:
Esperanto:
Estonian:
Faroese:
Fiji:
Finnish:
French:
Galician:
Georgian:
German:
Greek:
Greenlandic:
Guarani:
Gujarati:
Hausa:
Hebrew:
Hindi:
7282
6783
6865
7876
6978
6979
6984
7079
7074
7073
7082
7176
7565
6869
6976
7576
7178
7185
7265
7387
7273
Hungarian:
7285
Icelandic:
7383
Indonesian:
7378
Interlingua:
7365
Irish:
7165
Italian:
7384
Japanese:
7465
Javanese:
7487
Kannada:
7578
Kashmiri:
7583
7575
Kazakh:
Kirghiz:
7589
Korean:
7579
Kurdish:
7585
Latin:
7665
Latvian, Lettish:7686
Lingala:
7678
Lithuanian:
7684
Macedonian: 7775
Malagasy:
7771
Malay:
7783
43
Malayalam:
7776
Maltese:
7784
Maori:
7773
Marathi:
7782
Moldavian:
7779
Mongolian:
7778
Nauru:
7865
Nepali:
7869
Norwegian:
7879
Oriya:
7982
Pashto, Pushto:8083
Persian:
7065
Polish:
8076
Portuguese:
8084
Punjabi:
8065
Quechua:
8185
Rhaeto-Romance:
8277
Romanian:
8279
Russian:
8285
Samoan:
8377
Sanskrit:
Scots Gaelic:
Serbian:
Shona:
Sindhi:
Slovak:
Slovenian:
Somali:
Spanish:
Sundanese:
Swahili:
Swedish:
Tagalog:
Tajik:
Tamil:
Tatar:
Telugu:
Thai:
Tibetan:
Tigrinya:
Tonga:
8365
7168
8382
8378
8368
8375
8376
8379
6983
8385
8387
8386
8476
8471
8465
8484
8469
8472
6679
8473
8479
Turkish:
Turkmen:
Twi:
Ukrainian:
Urdu:
Uzbek:
Vietnamese:
Volapük:
Welsh:
Wolof:
Xhosa:
Yiddish:
Yoruba:
Zulu:
8482
8475
8487
8575
8582
8590
8673
8679
6789
8779
8872
7473
8979
9085