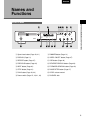
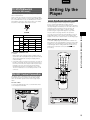
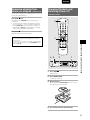
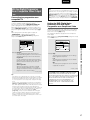
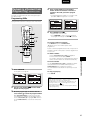
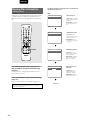
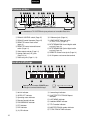
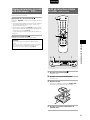
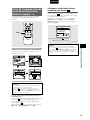
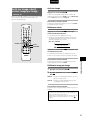
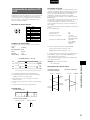
1
R
Model DV7110 User Guide
DVD Player
CLASS 1 LASER PRODUCT
LUOKAN 1 LASERLAITE
KLASS 1 LASERAPPARAT
ENGLISH
CONGRATULATIONS ON YOUR PURCHASE OF THIS
FINE MARANTZ PRODUCT.
MARANTZ is on the leading edge of DVD research for
consumer products and this unit incorporates the latest
technological developments.
We are sure you will be fully satisfied with the DVD player.
CAUTION
• Use of controls or adjustments or performance of
procedures other than those specified herein may result
in hazardous radiation exposure.
• The use of optical instruments with this product will
increase eye hazard.
Thank you for your support.
WARNING:
Do not expose the equipment to rain or moisture.
Do not remove the cover from the equipment.
Do not insert anything into the equipment through the ventilation
holes.
Do not handle the mains lead with wet hands.
Make a space of about 0.1 meter around the unit.
IMPORTANT NOTICE
[For U.S. model]
The serial number for this equipment is located on the rear
panel. Please write this serial number on your enclosed
warranty card and keep it in a secure area. This is for your
security.
CAUTION: This product satisfies FCC regulations when
shielded cables and connectors are used to connect the
unit to other equipment. To prevent electromagnetic
interference with electric appliances such as radios and
televisions, use shielded cables and connectors for
connections.
This equipment has been tested and found to comply with
the limits for a Class B digital device, pursuant to Part 15
of the FCC Rules. These limits are designed to provide
reasonable protection against harmful interference in a
residential installation. This equipment generates, uses,
and can radiate radio frequency energy and, if not
installed and used in accordance with the instructions,
may cause harmful interference to radio communications.
However, there is no guarantee that interference will not
occur in a particular installation. If this equipment does
cause harmful interference to radio or television reception,
which can be determined by turning the equipment off
and on, the user is encouraged to try to correct the
interference by one or more of the following measures:
– Reorient or relocate the receiving antenna.
– Increase the separation between the equipment and
receiver.
– Connect the equipment into an outlet on a circuit different
from that to which the receiver is connected.
– Consult the dealer or an experienced radio/TV technician
for help.
Information to User
Alteration or modifications carried out without appropriate
authorization may invalidate the user's right to operate the
equipment.
2
[For Canadian model]
This Class B digital apparatus complies with Canadian
ICES-003.
[Pour le modèle Canadien]
Cet appareil numérique de la Classe B est conforme à la
norme NMB-003 du Canada.
[For Canadian model]
CAUTION: TO PREVENT ELECTRIC SHOCK, DO NOT USE
THIS (POLARIZED) PLUG WITH AN EXTENSION CORD,
RECEPTACLE OR OTHER OUTLET UNLESS THE BLADES
CAN BE FULLY INSERTED TO PREVENT BLADE EXPOSURE.
ATTENTION: POUR PREVENIR LES CHOCS ELECTRIQUES
NE PAS UTILISER CETTE FICHE POLARISEE AVEC UN
PROLONGATEUR, UNE PRISE DE COURANT OU UNE
AUTRE SORTIE DE COURANT, SAUF SI LES LAMES
PEUVENT ETRE INSEREES A FOND SANS EN LAISSER
AUCUNE PARTIE A DECOUVERT.
This product incorporates copyright protection technology
that is protected by method claims of certain U.S. patents
and other intellectual property rights owned by
Macrovision Corporation and other rights owners. Use of
this copyright protection technology must be authorized
by Macrovision Corporation, and is intended for home
and other limited viewing uses only unless otherwise
authorized by Macrovision Corporation. Reverse
engineering or disassembly is prohibited.
CAUTION:
LASER SAFETY : This unit employs a
LASER. Only a qualified person should
remove the cover or attempt to service
this device, due to possible eye injury.
“CAUTION-USE OF CONTROLS OR
ADJUSTMENTS OR PERFORMANCE
OF PROCEDURE OTHER THAN
THOSE SPECIFIED HEREIN MAY
RESULT IN HAZARDOUS RADIATION
EXPOSURE.”
ENGLISH
Please read through these operating instructions so you will know how to operate your model properly. After you have finished
reading the instructions, put them away in a safe place for future reference.
• This player is not suitable for commercial use.
IMPORTANT
CAUTION
RISK OF ELECTRIC SHOCK
DO NOT OPEN
The lightning flash with arrowhead symbol, within an
equilateral triangle, is intended to alert the user to the
presence of uninsulated "dangerous voltage" within
the product's enclosure that may be of sufficient
magnitude to constitute a risk of electric shock to
persons.
CAUTION:
TO PREVENT THE RISK OF ELECTRIC SHOCK, DO
NOT REMOVE COVER (OR BACK). NO USERSERVICEABLE PARTS INSIDE. REFER SERVICING
TO QUALIFIED SERVICE PERSONNEL.
The exclamation point within an equilateral triangle is
intended to alert the user to the presence of important
operating and maintenance (servicing) instructions in
the literature accompanying the appliance.
IMPORTANT SAFETY INSTRUCTIONS
READ INSTRUCTIONS — All the safety and operating
instructions should be read before the product is
operated.
RETAIN INSTRUCTIONS — The safety and operating
instructions should be retained for future reference.
HEED WARNINGS — All warnings on the product
and in the operating instructions should be adhered
to.
FOLLOW INSTRUCTIONS — All operating and use
instructions should be followed.
CLEANING — Unplug this product from the wall
outlet before cleaning. The product should be
cleaned only with a polishing cloth or a soft dry
cloth. Never clean with furniture wax, benzine,
insecticides or other volatile liquids since they
may corrode the cabinet.
ATTACHMENTS — Do not use attachments not
recommended by the product manufacturer as
they may cause hazards.
WATER AND MOISTURE — Do not use this product
near water — for example, near a bathtub, wash
bowl, kitchen sink, or laundry tub; in a wet
basement; or near a swimming pool; and the like.
ACCESSORIES — Do not place this product on an
unstable cart, stand, tripod, bracket, or table. The
product may fall, causing serious injury to a child
or adult, and serious damage to the product. Use
only with a cart, stand, tripod, bracket, or table
recommended by the manufacturer, or sold with
the product. Any mounting of the product should
follow the manufacturer’s instructions, and should
use a mounting accessory recommended by the
manufacturer.
CART — A product and cart combination should be
moved with care. Quick stops, excessive force,
and uneven surfaces may cause the product and
cart combination to overturn.
VENTILATION — Slots and openings in the cabinet
are provided for ventilation and to ensure reliable
operation of the product and to protect it from
overheating, and these openings must not be
blocked or covered. The openings should never
be blocked by placing the product on a bed, sofa,
rug, or other similar surface. This product should
not be placed in a built-in installation such as a
bookcase or rack unless proper ventilation is
provided or the manufacturer’s instructions have
been adhered to.
POWER SOURCES — This product should be
operated only from the type of power source
indicated on the marking label. If you are not sure
of the type of power supply to your home, consult
your product dealer or local power company.
LOCATION – The appliance should be installed in a
stable location.
NONUSE PERIODS – The power cord of the appliance
should be unplugged from the outlet when left
unused for a long period of time.
GROUNDING OR POLARIZATION
• If this product is equipped with a polarized
alternating current line plug (a plug having one
blade wider than the other), it will fit into the outlet
only one way. This is a safety feature. If you are
unable to insert the plug fully into the outlet, try
reversing the plug. If the plug should still fail to fit,
contact your electrician to replace your obsolete
outlet. Do not defeat the safety purpose of the
polarized plug.
• If this product is equipped with a three-wire
grounding type plug, a plug having a third
(grounding) pin, it will only fit into a grounding type
power outlet. This is a safety feature. If you are
unable to insert the plug into the outlet, contact
your electrician to replace your obsolete outlet. Do
not defeat the safety purpose of the grounding
type plug.
POWER-CORD PROTECTION — Power-supply cords
should be routed so that they are not likely to be
walked on or pinched by items placed upon or
against them, paying particular attention to cords
at plugs, convenience receptacles, and the point
where they exit from the product.
OUTDOOR ANTENNA GROUNDING — If an outside
antenna or cable system is connected to the
product, be sure the antenna or cable system is
grounded so as to provide some protection against
voltage surges and built-up static charges. Article
810 of the National Electrical Code, ANSI/NFPA
70, provides information with regard to proper
grounding of the mast and supporting structure,
grounding of the lead-in wire to an antenna
discharge unit, size of grounding conductors,
location of antenna-discharge unit, connection to
grounding electrodes, and requirements for the
grounding electrode. See Figure A.
LIGHTNING — For added protection for this product
during a lightning storm, or when it is left unattended
and unused for long periods of time, unplug it from
the wall outlet and disconnect the antenna or cable
system. This will prevent damage to the product
due to lightning and power-line surges.
POWER LINES — An outside antenna system should
not be located in the vicinity of overhead power
lines or other electric light or power circuits, or
where it can fall into such power lines or circuits.
When installing an outside antenna system, extreme
care should be taken to keep from touching such
power lines or circuits as contact with them might
be fatal.
OVERLOADING — Do not overload wall outlets,
extension cords, or integral convenience
receptacles as this can result in a risk of fire or
electric shock.
OBJECT AND LIQUID ENTRY — Never push objects
of any kind into this product through openings as
they may touch dangerous voltage points or shortout parts that could result in a fire or electric shock.
Never spill liquid of any kind on the product.
SERVICING — Do not attempt to service this product
yourself as opening or removing covers may
expose you to dangerous voltage or other hazards.
Refer all servicing to qualified service personnel.
DAMAGE REQUIRING SERVICE — Unplug this
product from the wall outlet and refer servicing to
qualified service personnel under the following
conditions:
• When the power-supply cord or plug is damaged.
• If liquid has been spilled, or objects have fallen
into the product.
• If the product has been exposed to rain or water.
• If the product does not operate normally by
following the operating instructions. Adjust only
those controls that are covered by the operating
instructions as an improper adjustment of other
controls may result in damage and will often require
extensive work by a qualified technician to restore
the product to its normal operation.
• If the product has been dropped or damaged in
any way.
• When the product exhibits a distinct change in
performance — this indicates a need for service.
REPLACEMENT PARTS — When replacement parts
are required, be sure the service technician has
used replacement parts specified by the
manufacturer or have the same characteristics as
the original part. Unauthorized substitutions may
result in fire, electric shock, or other hazards.
SAFETY CHECK — Upon completion of any service
or repairs to this product, ask the service technician
to perform safety checks to determine that the
product is in proper operating condition.
WALL OR CEILING MOUNTING — The product
should not be mounted to a wall or ceiling.
HEAT — The product should be situated away from
heat sources such as radiators, heat registers,
stoves, or other products (including amplifiers)
that produce heat.
ANTENNA
LEAD IN WIRE
GROUND
CLAMP
ELECTRIC
SERVICE
EQUIPMENT
Fig. A
ANTENNA
DISCHARGE UNIT
(NEC SECTION 810-20)
GROUNDING CONDUCTORS
(NEC SECTION 810-21)
GROUND CLAMPS
POWER SERVICE GROUNDING
ELECTRODE SYSTEM
(NEC ART 250, PART H)
NEC — NATIONAL ELECTRICAL CODE
3
ENGLISH
Features of This Player
Selecting fine audio equipment such as the unit you’ve just
purchased is only the start of your musical enjoyment. Now it’s
time to consider how you can maximize the fun and excitement
your equipment offers. This manufacturer and the Electronic
Industries Association’s Consumer Electronics Group want you to
get the most out of your equipment by playing it at a safe level. One
that lets the sound come through loud and clear without annoying
blaring or distortion-and, most importantly, without affecting your
sensitive hearing.
Compatible with DVD, Video CD and
CD formats
DVD, Video CD and CD discs that display the logos shown
below can be played back on MARANTZ DVD players. For
more information on discs compatible with this player, refer to
the table below.
Types of playable
discs and their marks
Sound can be deceiving. Over time your hearing “comfort level”
adapts to higher volumes of sound. So what sounds “normal” can
actually be loud and harmful to your hearing. Guard against this by
setting your equipment at a safe level BEFORE your hearing
adapts.
Diameter/
Playable sides
Playback time
DVD VIDEO
DVD VIDEO
To establish a safe level:
• Start your volume control at a low setting.
• Slowly increase the sound until you can hear it comfortably and
clearly, and without distortion.
Digital audio
Digital video
(MPEG 2)
12 cm (5in.)/
single-sided
1 layer
2 layer
133 min.
242 min.
12 cm (5in.)/
double-sided
1 layer
2 layer
266 min.
484 min.
DVD VIDEO
Digital audio
Digital video
(MPEG 2)
Once you have established a comfortable sound level:
• Set the dial and leave it there.
Taking a minute to do this now will help to prevent hearing
damage or loss in the future. After all, we want you listening for a
lifetime.
We Want You Listening For A Lifetime
VIDEO CD
Used wisely, your new sound equipment will provide a lifetime
of fun and enjoyment. Since hearing damage from loud noise is
often undetectable until it is too late, this manufacturer and the
Electronic Industries Association’s Consumer Electronics Group
recommend you avoid prolonged exposure to excessive noise. This
list of sound levels is included for your protection.
Decibel
Level
30
40
50
60
70
80
1 layer
2 layer
41 min.
75 min.
8 cm (3 in.)/
double-sided
1 layer
2 layer
82 min.
150 min.
VIDEO CD
12 cm (5 in.)/
single-sided
VIDEO CD single
8 cm (3 in.)/
single-sided
Example
Quiet library, soft whispers
Living room, refrigerator, bedroom away from traffic
Light traffic, normal conversation, quiet office
Air conditioner at 20 feet, sewing machine
Vacuum cleaner, hair dryer, noisy restaurant
Average city traffic, garbage disposals, alarm clock
at two feet.
CD
Digital audio
Digital video
(MPEG 1)
Max. 74
minutes
Digital audio
Digital video
(MPEG 1)
Max. 20
minutes
CD
Digital audio
12 cm (5 in.)/
single-sided
Max. 74
minutes
*
CD single
Digital audio
THE FOLLOWING NOISES CAN BE DANGEROUS
UNDER CONSTANT EXPOSURE
90
100
120
140
180
8 cm (3 in.)/
single-sided
Subway, motorcycle, truck traffic, lawn mower
Garbage truck, chain saw, pneumatic drill
Rock band concert in front of speakers, thunderclap
Gunshot blast, jet plane
Rocket launching pad
*
8 cm (3 in.)/
single-sided
Max. 20
minutes
Information courtesy of the Deafness Research Foundation.
The disc format logos shown above are found on disc labels
or on disc jackets.
• To prevent malfunction, do not use an 8 cm (3 in.) adaptor
(for CDs).
• Discs other than the ones indicated above cannot be
played on this unit.
• DVDs that have incompatible region numbers, DVD-Audio,
DVD-ROM, and CD-ROM cannot be played on this unit.
The region number of the player can be found on the rear
panel.
*
4
Playing recordable CDs
• Note that this unit cannot record onto recordable discs.
• This unit can play music-use CD-R and CD-RW discs. However,
depending on the condition of the player and the disc, you may
find that not all discs will play successfully. (For example, if the
disc is scratched or dirty, or if the player’s pickup lens is dirty.)
ENGLISH
525 line digital progressive-scan
component video output
Wide range of DVD viewing options
Multi-Angle (page 29)
Compared to standard interlaced video, progressive scan
effectively doubles the amount of video information fed to
your TV or monitor. The result is a stable, flicker-free image.
(Check your TV/monitor for compatibility with this feature.)
For the very highest picture quality, try watching a movie on
DVD-Video on a progressive-scan compatible TV.
You can view scenes from different camera angles when
watching movies or other media with multiple angle playback
available.
ANGLE
ANGLE
: 2/4
: 3/4
The DV7110 offers complete flexibility and compatibility with
all types of AV equipment with composite video and S-Video
outputs, as well as component video outs.
Compatible with a wide range of DVD
digital audio output formats
1
DVDs are recorded in one of four types of digital audio
formats (as of October 1998). The digital audio output jacks
of this player output Dolby Digital*, DTS**, MPEG, and linear
PCM digital bitstreams.
This player has a function that converts Dolby Digital and
MPEG audio formats into the linear PCM format. This allows
playback of DVDs recorded in Dolby Digital and MPEG
without the need for a decoder.
Multiple Languages (page 31)
You can select the language on when watching movies or
other media that have multiple language and/or audio
soundtracks recorded on them.
Audio
:1
English
Dolby Digital
5.1CH
Audio
:2
Spanish
Dolby Digital
5.1CH
O
HELL
HOLA
Multi-Language Subtitles (page 32)
You can select a subtitle language or turn subtitles off when
watching movies or other media with subtitles available.
Easy setup and adjustment using onscreen menus
Press SETUP on the remote control to open the Setup screen
and you’ll find setting up and adjusting the system easy to do
with on-screen menus conveniently organized and arranged.
Additionally, on-screen information ( i )❖ appears to clarify
the functions and explain the options available. Below are just
a few examples.
Audio1 Audio2 Video Language General
Setup Navigator
Setup Navigator Start
Auto Start Off
Move
ENTER
Answer a few questions and
have all the necessary audio,
video, and on-screen
language adjustments set
automatically by the player
using the Setup Navigator
(page 15).
Subtitle
:1 English
HELLO!
Subtitle
:2 Spanish
HOLA!
This mark indicates this may not be possible with certain discs.
Energy-saving design
This unit is designed to use 0 W of energy when this player is
in Power OFF mode.
Select SETUP Exit
Select the type of TV screen you
are using and the preferred
screen format you’d like to use
when watching DVDs in the
Video menu (page 26).
Audio1 Audio2 Video Language General
TV Screen 4:3(Letter Box)
Component Video - 4:3(Pan&Scan)
Progressive DNR - 16:9(Wide)
Picture Quality -Standard
Select your display preference
Move
❖
SETUP
Exit
The on-screen information ( i ) only appears if you choose
[English] as the [OSD Language] (page 16, 30).
While using the Setup Navigator, no on-screen information
( i ) is displayed.
*
Manufactured under license from Dolby Laboratories. “Dolby” and
the double-D symbol are trademarks of Dolby Laboratories.
Confidential unpublished works, © 1992-1997 Dolby Laboratories.
All rights reserved.
** “DTS” and “DTS Digital” are trademarks of Digital Theater Systems,
Inc.
5
ENGLISH
Differences in Disc
Composition
How to Proceed in This
Manual
DVD
DVDs are divided into units referred to as titles, and titles are
divided into chapters. A DVD which contains a movie may
have only one title with many or no chapter divisions. Karaoke
DVDs may have many titles, assigning a title to each song on
the disc. Menu screens do not belong to any title.
DVD player functions generally apply to titles on a disc or
chapters within a selected title. The player functions available
may also vary from title to title, depending on the disc. When
discs have a unique title division, it should be noted that
search and program functions may be affected.
Title 2
Chapter 1
Chapter 2
Title 1
Chapter 2
Chapter 1
DVD is an incredible format that presents the highest quality
digital audio and video available today. The amount of
information that can be recorded onto a DVD disc is
remarkable, allowing it to offer numerous functions and
features available with no other format.
Because using the DVD player and DVDs may be confusing
at first, following the order below should help you get through
the important stages of getting set up so you can start using
your player as soon as possible.
Get familiar with the player.
Refer to the section “Before Using” on page 8 to confirm that
all the accessories were included with the player. If you are
new to DVD, it might be beneficial for you to go through the
“Names and Functions” section starting on page 9 to get
familiar with the parts and buttons on the main unit and
remote control as they will be referred to throughout this
manual.
There is also a list of terms that can be found on page 53 if
you are having trouble understanding some of the
terminology associated with DVD.
DVD
Make the necessary connections.
Video CD/CD
Video CDs and CDs are divided into units referred to as
tracks (Video CD tracks may also be referred to as scenes).
One song generally corresponds to one track. Some tracks
are further divided into units referred to as indexes. Video
CDs with PBC (Playback Control) also contain menus
recorded on the disc which enable easy access to the
contents of the disc.
When played back on a DVD player, both Video CDs and
CDs are considered to be a single title, regardless of the
number of tracks.
Track 1
Track 2
Track 3
Track 4
No entertainment system seems to be set up exactly the
same way. The “Making Connections” section starting on
page 12 shows how video and audio connections may be
made to suit your home entertainment system.
Set up the necessary player menus.
Before you can begin to enjoy the benefits of the DVD format,
it is first necessary to set up the player to output the video
and audio information that corresponds to your system. The
section “Setting Up the Player” starting on page 15 explains
how to use the Setup Navigator, a function that automatically
sets up the player corresponding to the answers given in a
multiple-choice on-screen procedure. The Setup screen
menus, described in the section starting on page 22, are also
used in a number of other functions. Learning the procedure
for operating these menus will make using this player much
easier and more enjoyable.
Play a disc.
When all the connections and setups have been made, you
are ready to play a DVD, Video CD, or CD with the player. The
section “Getting Started Using Your DVD Player” starting on
page 18 outlines the basic player operations.
Video CD
Track 1
Track 2
CD
6
Track 3
Track 4
Track 5
Enjoy the many features available.
Once you are comfortable using the basic player functions,
you are ready to take advantage of the various options DVD
and this player have to offer. The section “Advanced
Functions” starting on page 35 describes how to use the
features available on many DVDs.
ENGLISH
Table of contents
Before Using ...............................................8
Setting the Language Options ................30
Checking Accessories ........................................... 8
Preparing the Remote Control ................................ 8
Setting the on-screen display (OSD) language ... 30
Setting Language and Subtitle Preferences in the
Setup Screen Menus ...................................... 30
Changing the Audio Language (Multi-Language
Function) ......................................................... 31
Selecting a Subtitle Language (Multi-Language
Subtitles) ......................................................... 32
Names and Functions ................................9
Front Panel ............................................................. 9
Rear Panel ............................................................ 10
Display Window .................................................... 10
Remote Control ..................................................... 11
Making Connections ................................12
Connecting Your DVD Player ............................... 12
Audio Connections ............................................... 13
Video Connections ............................................... 14
System Control Connections ................................ 14
TV SYSTEM switch ............................................... 15
Setting Up the Player ...............................15
Using the Setup Navigator ................................... 15
Getting Started Using Your DVD Player . 18
Playing DVDs, Video CDs and CDs ..................... 18
Chapter (Track) Skip Forward/Skip Back ............. 20
Forward and Reverse Scanning ........................... 20
Resuming playback from where you stopped ..... 21
Stopping Playback and Switching Power Off ....... 21
Adjusting Audio and Video Settings ......22
Using the Setup Screen Menus ............................ 22
Changing to the Setup Screen “Expert” Menu
Mode ...............................................................23
Setting the Digital Audio Output To Be Compatible
with Your AV Component ................................ 24
Adjusting the Dynamic Range of the Audio
Soundtrack ..................................................... 25
Setting the TV Screen Size ................................... 26
525 line Digital Progressive Scan Compatible Video
Output ............................................................. 27
Selecting Picture Quality Appropriate for Program
Content ........................................................... 28
Viewing from a Desired Camera Angle (MultiAngle) ............................................................. 29
Advanced Functions ................................35
Setting the Parental Lock Level ............................ 35
Changing the Background Color of the Screen ... 36
Still Frame/Slow Play/Frame Advance Playback .. 37
Searching for a Title, Chapter, Track, or Location on
a Disc .............................................................. 38
Repeat Play .......................................................... 39
Random Play ........................................................ 40
Playback in a Desired Order (Program Play) ....... 41
Continuing Playback from a Specified Location
(Last Memory) ................................................. 44
Memorizing Settings for Often Viewed DVDs
(Condition Memory) ........................................ 45
Viewing Disc Information ...................................... 46
Video ON/OFF ...................................................... 47
Resetting the Player to System Settings .............. 47
Additional Information .............................48
Disc Care .............................................................. 48
For Proper and Long Use of This Unit .................. 49
Language Code List ............................................. 50
RS-232C System control ...................................... 51
Troubleshooting .................................................... 53
Terms .................................................................... 55
Specifications ....................................................... 56
7
ENGLISH
Before Using
Preparing the Remote Control
Inserting batteries into the remote
control
Checking Accessories
1
While pushing the tab on the
battery compartment cover
toward the center of the
remote, pull out in the
direction indicated by the
arrow.
2
Insert batteries.
Please confirm that the following were received with the
player.
Audio / Video cord
Make sure to match the plus (+)
and minus
(–) polarity guides on the batteries
with the marks inside the battery
compartment.
Remote Control cord
3
Close the cover.
REMOTE CONTROLLER
RC7010DV
DIMMER
SETUP
AUDIO
LAST
MEMORY
OSD
CONDITION
MEMORY
SUBTITLE
ANGLE
ENTER
RETURN
PROGRAM
MENU
0
TOP
MENU
T-C
6
9
CLEAR
8
+10
7
3
5
4
VIDEO ON/OFF
OPEN/CLOSE
A-B
REPEAT
RANDOM
2
1
Remote control unit
Notes
AA/R6P batteries
• Do not mix old and new batteries.
• When replacing batteries, use all new batteries.
• When not using the remote control for a long period of time (over
1 month), remove the batteries to avoid possible damage from
battery corrosion. If battery leakage occurs, wipe the battery
liquid from the battery component, then insert new batteries.
Remote control operation
Operating instructions (this manual)
When operating the remote control, point it at the remote
sensor located on the player’s front panel. The remote control
can be used up to 17 feet (5 m) from the player and within a
30° angle on each side of the sensor.
DVD PLAYER DV7010
STOP
REPEAT
OPEN/CLOSE
A-B
TITLE
V I D E O
REPEAT SHUFFLE SVCD
DTS CHAPTER
TRACK
PBC
SCAN CHAPTER
FTS
TOTAL
TITLE
TRACK
PLAY
TRACK
TIME
STANDBY
POWER
FL OFF
ON/OFF
PAUSE
1
DIMMER
VIDEO OFF
LEVEL
PHONES
OSD
DIGITAL OUT
-
30°
+
30°
Within about 17 feet
OPEN/CLOSE
VIDEO ON/OFF
A-B
REPEAT
RANDOM
1
2
3
4
5
6
7
8
9
Notes
• Exposing the remote sensor to direct sunlight or strong light may
cause faulty operation.
• When using this DVD player as a stand-alone player, set the
REMOTE CONTROL switch on the rear panel to INTERNAL and set
the RS-232C switch to RC-5/6.
8
ENGLISH
Names and
Functions
Front Panel
ert y u
w
DVD PLAYER DV7110
STOP
REPEAT
OPEN/CLOSE
5.1ch
SACD
V I D E O
DOWN MIX
VIDEO OFF
TITLE
PROGRESSIVE
dts
VCD
SURROUND
LAST MENO
TRACK
CHP
REMAIN
TOTAL
CONDITION
PLAY
192KHz
96KHz
DVD
AUDIO
STANDBY
POWER
FL OFF
ON/OFF
PAUSE
1
DIMMER
VIDEO OFF
LEVEL
PHONES
OSD
DIGITAL OUT
i
-
o
!0 !1 !2 !3
+
!4 !5 !6
q Open/close button (Page 18, 21)
o DIMMER button (Page 10)
w DISPLAY (Page 10)
!0 VIDEO ON/OFF button (Page 47)
e REPEAT button (Page 37)
!1 OSD button (Page 46)
r PREVIOUS button (Page 20)
!2 REVERSE SEARCH button (Page 20)
t NEXT button (Page 20)
!3 FORWARD SEARCH button (Page 20)
y STOP button (Page 21)
!4 PAUSE/STEP button (Page 37)
u PLAY button (Page 18, 20)
!5 LEVEL volume control
i Power switch (Page 15, 18, 21, 22)
!6 PHONES Jack
BEFORE USING/NAMES AND FUNCTIONS
q
9
ENGLISH
Rear Panel
q w e r t y u i o !0 !1 !2
!3
Y
RC-5/6 RS-232C
RS-232C CONTROL
L
1
CB
/PB
R
2
CR
/PR
IN
OUT
RS-232C
DVD 1 DVD 2
CODE
INTERNAL
VIDEO/S2
EXTERNAL
COMPONENT
REMOTE
CONTROL
2
VIDEO
OUTPUT
1
S2
VIDEO
AUDIO
OUTPUT
COMPONENT
COAXIAL
OPTICAL
REMOTE
CONTROL
DIGITAL
OUTPUT
VIDEO
OUTPUT
The TV SYSTEM switch is not present on the USA model.
q RS232C CONTROL switch (Page 15)
u Video out jacks (Page 12, 14)
w RS232C Control Connector (Page 15)
i S Video out jack (Page 14)
e REMOTE Control Code switch
(page 11)
o COMPONENT Video out jacks
(Y, CB/PB, CR/PR) (Page 14)
r REMOTE Control external/internal
switch (Page 14)
!0 BITSTREAM/PCM Coaxial digital audio
out jack (Page 13)
t Video output selector (Page 14)
!1 BITSTREAM/PCM Optical digital audio
out jack (Page 13)
y Analog audio out (L/R) jacks
(Page 12, 13)
!2 REMOTE Control in/out jacks (Page 14)
!3 AC IN power cord connection terminal
Display Window
q w e r t y u i o !0 !1 !2
VIDEO OFF
TITLE
PROGRESSIVE
dts
VCD
TRACK
CHP
REMAIN
LAST MEMO
TOTAL
CONDITION
96KHz
!3
!4
!5
Pressing of the DIMMER button
changes the brightness of the display.
Dimmed
OFF
q 96 kHz indicator
o Camera Angle indicator
w VIDEO OFF indicator
!0 CHAPTER/TITLE/TRACK Repeat
indicators
e Operating status indicator
r Remote Control indicator
t PROGRESSIVE indicator
y DTS indicator
u DVD indicator
i (V) CD indicator
10
Normal
DIMMER
!1 LAST MEMO indicator
!2 Condition MEMO indicator
!3 TITLE number indicator
!4CHAPTER/TRACK number indicator
!5 TOTAL/TRACK TIME indicators
ENGLISH
Remote Control
OPEN/CLOSE button (Page 18, 21)
REPEAT A/B button (Page 39)
POWER button (Page 15)
OPEN/CLOSE
VIDEO ON/OFF
A-B
REPEAT
REPEAT button (Page 39)
RANDOM
RANDOM button (Page 40)
VIDEO ON/OFF button (Page 47)
2
3
4
5
6
7
8
+10
T-C
T-C button (Page 38)
TOP MENU button (Page 19)
9
CLEAR
CLEAR button (Page 39, 40, 41)
0
TOP
MENU
MENU button (Page 19)
MENU
/
(PAUSE / STEP) button (Page 37)
RETURN button (Page 19, 23)
Number button (Page 19, 38, 42)
ENTER
RETURN
/
/
(Direction) button (Page 15, 18, 19)
NAMES AND FUNCTIONS
1
ENTER buttons (Page 15, 18, 19)
(Stop) button (Page 19, 21, 41)
(Play) button (Page 18, 20, 37, 38)
(Next) button (Page 19, 20, 40)
(Previous) button (Page 19, 20, 40)
ANGLE
SUBTITLE
AUDIO
PROGRAM
OSD
LAST
MEMORY
SETUP
DIMMER
CONDITION
MEMORY
ANGLE button (Page 29)
/
(Reverse/Slow) button (Page 20, 37)
/
(Foward/Slow) button (Page 20, 37)
AUDIO button (Page 31)
LAST MEMORY button (Page 44)
PROGRAM button (Page 41)
CONDITION MEMORY button (Page 45)
SETUP button (Page 15, 22, 23)
SUBTITLE button (Page 32)
DIMMER button (Page 10)
OSD button (Page 46)
REMOTE CONTROLLER
RC7010DV
• This remote control supports two remote control codes: DVD1 and DVD2.
• When the unit is shipped from the factory, the remote control is set to DVD1.
• To set the remote control to DVD2, hold down both the “7 (Stop)” button and the “2” number button on
the remote control for at least five seconds. (If the batteries in the remote control are replaced while the
remote control is set to DVD2, the setting will revert to DVD1.)
• To set the remote control back to DVD1, hold down both the “7 (Stop)” button and the “1” number button
on the remote control for at least five seconds.
• To check which remote control code is set at any time, hold down both the left and right direction
buttons; the current setting (either “DVD1” or “DVD2”) will be displayed in the display window on the
main unit.
• Also set the REMOTE CONTROL CODE switch on the rear panel of the Player to the same setting as
the remote control. (This switch is set to DVD1 when the unit is shipped from the factory.)
11
ENGLISH
Making
Connections
Connection Guide
The illustration on this page shows the basic setup using the
audio and video cords included with this player. Use this
illustration as a guide to setting up your home system.
An explanation of each type of audio and video connection
available can be found on pages 13 to 14. To determine the
best audio and video connection setup for your system, refer
to the manuals supplied with the components you are making
connections to.
In addition to making physical connections to your TV or
monitor, it is also necessary to assign the TV screen size. You
can use the [Setup Navigator] in the Setup screen General
menu to set whether you are using a wide screen or standard
size TV or monitor (page 16). Additionally, you can use the
[TV Screen] setting in the Setup screen Video menu (page
26).
Connecting Your DVD Player
Unlike any other audiovisual media format, DVD offers a wide
array of audio and video output options which allows
playback to be enjoyed in any number of system
configurations from a standard TV with stereo audio input to a
home theater system with a TV or monitor and full surround
sound capabilities.
Notes
• When making connections to this unit or when changing
connections, check that the unit is off by pressing
Power Switch and unplug the power cord from the power outlet.
• The analog video output on this player uses copy protect
circuitry to prevent the video playback on DVDs from being
copied. If you connect the player to a TV via a VCR, or record
and play back the contents of a disc with a VCR, the playback
picture may not be normal.
To wall outlet
Y
RC-5/6 RS-232C
RS-232C CONTROL
L
1
CB
/PB
R
2
CR
/PR
IN
OUT
RS-232C
DVD 1 DVD 2
CODE
INTERNAL
VIDEO/S2
EXTERNAL
COMPONENT
REMOTE
CONTROL
VIDEO
OUTPUT
(white)
2
1
S2
VIDEO
OUTPUT
(red)
(yellow)
(red)
(white)
VIDEO
AUDIO
OUTPUT
L
R
AUDIO IN
Make audio connections from the AUDIO
OUT jacks on the player to the AUDIO IN
jacks on the TV or monitor using the stereo
audio cord included with the player. Be sure
to match the color of the plugs with the color
of the jacks (red and white).
COMPONENT
COAXIAL
Power plug
OPTICAL
DIGITAL
OUTPUT
TV or monitor
REMOTE
CONTROL
(yellow)
VIDEO IN S-VIDEO IN
Make video connections from the VIDEO OUT jacks
on the player to the VIDEO IN jack on the TV or
monitor using the video cord included with the
player.
Note
• Set the VIDEO OUT SELECT to the RIGHT position
(VIDEO/S2) (page 14).
12
ENGLISH
Audio Connections
This player features two digital (optical and coaxial) and also
analog audio output formats.
Digital Audio Connections:
You can enjoy the digital audio recorded on DVD discs from
both optical digital and coaxial digital output jacks.
DIGITAL OUT (Coaxial)
The digital signal is transmitted electronically through a
coaxial cable.
• Use to connect to an AV amplifier or receiver with built-in
Dolby Digital, DTS, or MPEG decoder.
• Use a coaxial cable (not supplied) to connect the DIGITAL
OUT (coaxial digital output) on the player to the coaxial
digital input on an AV amplifier or receiver.
When making digital audio connections, do not make
connections from both the coaxial and optical digital
outputs to the same component.
Y
RC-5/6 RS-232C
RS-232C CONTROL
L
1
R
2
CB
/PB
IN
RS-232C
INTERNAL
VIDEO/S2
EXTERNAL
COMPONENT
REMOTE
CONTROL
2
VIDEO
OUTPUT
1
CR
/PR
AUDIO
OUTPUT
OUT
COMPONENT
S2
VIDEO
COAXIAL
OPTICAL
DIGITAL
OUTPUT
VIDEO
OUTPUT
REMOTE
CONTROL
MAKING CONNECTIONS
When a DVD recorded in Dolby Digital, DTS, or MPEG is
loaded, noise will be output if you have made connections via
the digital audio jacks to a receiver or amplifier that cannot
decode a Dolby Digital, DTS, or MPEG digital bitstream. In
this case, be sure to set up the Setup Navigator audio
settings to best reflect the type of system you are using (page
17). Additionally, the digital audio settings can be adjusted
manually in the Setup screen Audio 1 menu (page 24-25).
DVD 1 DVD 2
CODE
COAXIAL
DIGITAL IN
DIGITAL OUT (Optical)
The digital signal is transmitted as light pulses through a
fiber-optic cable.
• Use to connect to an AV amplifier or receiver with built-in
Dolby Digital, DTS, or MPEG decoder.
• Use a fiber-optic cable (not supplied) to connect the
DIGITAL OUT OPT (digital optical output) on the player to
the digital optical input on an AV amplifier or receiver.
Analog Audio Connection:
Y
RC-5/6 RS-232C
RS-232C CONTROL
L
1
R
2
CB
/PB
IN
RS-232C
DVD 1 DVD 2
CODE
INTERNAL
VIDEO/S2
EXTERNAL
COMPONENT
REMOTE
CONTROL
VIDEO
OUTPUT
2
1
AUDIO
OUTPUT
CR
/PR
VIDEO
S2
COMPONENT
VIDEO
OUTPUT
OUT
COAXIAL
OPTICAL
DIGITAL
OUTPUT
REMOTE
CONTROL
AUDIO OUT
OPTICAL
DIGITAL IN
AV amplifier or receiver with
built-in Dolby Digital, DTS, or
MPEG decoder
AV amplifier or receiver with
built-in Dolby Digital, DTS, or
MPEG decoder
• Make analog audio connections to a stereo amplifier or
receiver.
• Analog audio connections can also be made to a TV or
monitor with stereo input jacks.
• Use the supplied audio cord to connect the AUDIO OUT
on the player to the audio input on the stereo amplifier or
receiver.
• When making analog audio connections, be sure to match
the color of the plugs with the color of the jacks (red and
white).
Y
RC-5/6 RS-232C
RS-232C CONTROL
L
1
R
2
CB
/PB
IN
RS-232C
DVD 1 DVD 2
CODE
INTERNAL
VIDEO/S2
EXTERNAL
COMPONENT
VIDEO
OUTPUT
REMOTE
CONTROL
2
1
AUDIO
OUTPUT
CR
/PR
VIDEO
S2
COMPONENT
VIDEO
OUTPUT
OUT
COAXIAL
OPTICAL
DIGITAL
OUTPUT
REMOTE
CONTROL
L
R
1
AUDIO IN
R
(red)
L
(white)
(red)
(white)
Stereo amplifier or receiver
13
ENGLISH
COMPONENT VIDEO OUT
(Interlace/Progressive-scan)
Video Connections
This player features S-video, composite, and component
video output possibilities.
Check the manual supplied with your TV or monitor to
determine the best possible connection for your system.
In addition to making physical connections to your TV or
monitor, it is also necessary to assign the TV screen size. You
can use the [Setup Navigator] in the Setup screen General
to set whether you are using a wide screen or standard size
TV or monitor (page 16). Additionally, you can use the [TV
Screen] setting in the Setup screen Video menu (page 26).
• Make component video connections to a TV or monitor with
component inputs to produce a higher quality video image.
• Use a component video cable or 3 video cords (not
supplied) to connect the COMPONENT VIDEO OUT jacks
on the player to the component jacks on the monitor.
• If connected to a progressive-scan compatible TV, set the
[Component Video] menu to [Progressive] (page 27).
• When making component video connections, make sure to
set the VIDEO OUT SELECT switch on the rear panel of
the player to the left to assign component video output.
S-VIDEO OUT
Y
Make S-video connections to a TV or monitor with S-video
input to produce a high quality video image.
Use an S-video cable (not supplied) to connect the output on
the player to S-video input on the TV or monitor.
When making S-video connections, make sure to set the
VIDEO OUT SELECT switch on the rear panel of the player
to the right to assign S-video output.
RC-5/6 RS-232C
RS-232C CONTROL
L
1
R
2
CB
/PB
IN
RS-232C
DVD 1 DVD 2
CODE
INTERNAL
VIDEO/S2
EXTERNAL
COMPONENT
REMOTE
CONTROL
VIDEO
OUTPUT
2
1
CR
/PR
S2
VIDEO
AUDIO
OUTPUT
OUT
COMPONENT
COAXIAL
OPTICAL
REMOTE
CONTROL
DIGITAL
OUTPUT
VIDEO
OUTPUT
Y
CB
/PB
VIDEO/S2
COMPONENT
VIDEO
OUTPUT
CR
/PR
COMPONENT
Y
RC-5/6 RS-232C
RS-232C CONTROL
L
1
CB
/PB
R
2
CR
/PR
IN
RS-232C
DVD 1 DVD 2
CODE
INTERNAL
VIDEO/S2
EXTERNAL
COMPONENT
2
1
VIDEO
OUTPUT
REMOTE
CONTROL
S2
VIDEO
AUDIO
OUTPUT
COMPONENT
COMPONENT
VIDEO IN
OUT
COAXIAL
OPTICAL
DIGITAL
OUTPUT
VIDEO
OUTPUT
REMOTE
CONTROL
Y
CB
CR
VIDEO/S2
COMPONENT
S2
VIDEO
OUTPUT
TV or monitor
System Control Connections
S-VIDEO IN
REMOTE CONTROL IN/OUT jacks
By connecting this DVD player to another Marantz audio component
using a supplied remote control cable, you can remotely operate the
components as a single system.
• When connecting to component with a remote sensor
(such as the SR-14, SR-18, SR-19), be sure to connect the
“REMOTE CONTROL IN” jack of this DVD player to the
“REMOTE CONTROL OUT” jack of the component with the
remote sensor.
• When connecting to component which is not equipped with
a remote sensor, be sure to connect the component to the
“REMOTE CONTROL OUT” jack of this DVD player.
TV or monitor
VIDEO OUT
Synchronized power on and off
• Make composite video connections to a standard TV or
monitor with a video input jack.
• Use the supplied video cable to connect the VIDEO OUT
jacks on the player to the video input on the TV or monitor.
• Be sure to match the color of the plug with the color of the
jack (yellow).
• When making video connections, make sure to set the
VIDEO OUT SELECT switch on the rear panel of the player
to the right to assign composite video output.
• Connect with the remote control output jack of a
component (such as the SR-14, SR-18, SR-19) which is
compatible with Marantz remote control system. The
remote control allows to switch the power of this DVD
player to “POWER ON and Standby mode”.
Note
be sure to leave power switch on the Front panel in the power mode.
RS232C CONTROL switch
To control the DVD player with the remote controller, set this switch to
RC-5/6.
Remote switch
• When using this DVD player independently, set this switch
to “INTERNAL”. When using this DVD player in a system
with a Marantz tuner or timer equipped with a remote
sensor, set the switch to “EXTERNAL.
Y
RC-5/6 RS-232C
RS-232C CONTROL
L
1
R
2
CB
/PB
IN
RS-232C
DVD 1 DVD 2
CODE
VIDEO/S2
INTERNAL
EXTERNAL
COMPONENT
REMOTE
CONTROL
VIDEO
OUTPUT
2
1
CR
/PR
VIDEO
AUDIO
OUTPUT
S2
COMPONENT
OUT
COAXIAL
OPTICAL
DIGITAL
OUTPUT
VIDEO
OUTPUT
REMOTE
CONTROL
TV or
monitor
1
VIDEO/S2
COMPONENT
VIDEO
OUTPUT
Y
RC-5/6 RS-232C
RS-232C CONTROL
L
1
R
2
CB
/PB
IN
RS-232C
2
DVD 1 DVD 2
CODE
VIDEO/S2
INTERNAL
EXTERNAL
COMPONENT
REMOTE
CONTROL
VIDEO
OUTPUT
2
1
CR
/PR
VIDEO
AUDIO
OUTPUT
S2
VIDEO
OUTPUT
COMPONENT
OUT
COAXIAL
OPTICAL
DIGITAL
OUTPUT
REMOTE
CONTROL
VIDEO
(yellow)
IN
VIDEO IN
(yellow)
INTERNAL
EXTERNAL
OUT
REMOTE
CONTROL
IN
OUT
14
ENGLISH
TV SYSTEM switch
(except for USA model)
Video output changes as follows according to the playback
disc’s recorded format.
NTSC → PAL, PAL → NTSC conversion is possible on Video
CDs. PAL → NTSC conversion is not possible on DVDs. When
the TV SYSTEM switch is set to the AUTO position, the disc’s
format will be output as is. When a CD or disc is not loaded,
the previous video output format will be selected.
AUTO NTSC
PAL
TV
SYSTEM
Output format
Position of TV SYSTEM switch
Format
Type
NTSC
PAL
AUTO
NTSC
MOD. PAL
NTSC
PAL
PAL
NTSC
NTSC
MOD. PAL
NTSC
PAL
NTSC
PAL
PAL
NTSC
PAL
NTSC or PAL
NTSC
DVD
PAL
Video CD
CD, No disc
Using the Setup Navigator
The Setup Navigator has been designed to simplify the
process of getting the DVD player ready to perform.
Designed as a series of on-screen multiple-choice questions,
the Setup Navigator automatically sets the audio, video, and
language settings according to how the questions are
answered. Once this procedure is complete, it will be
possible to begin using the DVD player to enjoy DVDs.
The procedure on this page describes the operations
necessary to function within the Setup Navigator screens. A
detailed description of the contents of each question that
appears on the screen can be found on the following pages.
When setting up for the first time
Some DVDs start playing automatically when loaded in the
player. Because the Setup Navigator cannot be used if a disc
is playing, it is recommended to set up the player using the
Setup Navigator before loading a DVD for the first time. If a
DVD has been loaded, be sure to press STOP 7 before
proceeding.
About MOD. (Modulation) PAL
• SHRINK
Most models of the newly developed countdown PAL TV
system detect 50 Hz (PAL)/60 Hz (NTSC) and automatically
switch vertical amplitude, resulting in a display without
vertical shrinkage.
• If your PAL TV does not have a V Hold control, you may not
be able to view NTSC disc because the picture may roll. If
the TV has a V-Hold control, adjust it until the picture stops
rolling. On some TVs, the picture may shrink vertically,
leaving black bands at the top and bottom of the screen.
This is not a malfunction; it is caused by the NTSC → PAL
conversion.
1
OPEN/CLOSE
VIDEO ON/OFF
A-B
REPEAT
RANDOM
1
2
3
4
5
6
7
8
9
+10
T-C
CLEAR
0
TOP
MENU
MENU
RETURN
ENTER
3
MAKING CONNECTIONS / SETTING UP THE PLAYER
Disc
Setting Up the
Player
4
RS-232C Control Connection
This player can be controlled by a PC. Connect the player
and a serial port on the PC with a 9-pin RS-232C straight
cable. See RS-232C System Control Section (Page 51) for
detail.
2
ANGLE
SUBTITLE
AUDIO
PROGRAM
OSD
LAST
MEMORY
SETUP
DIMMER
CONDITION
MEMORY
RS-232C switch
REMOTE CONTROLLER
RC7010DV
To control this DVD player by a PC, set the RS-232C switch
on the rear panel to RS-232C.
Y
RC-5/6 RS-232C
RS-232C CONTROL
L
1
CB
/PB
R
2
CR
/PR
IN
RS-232C
DVD 1 DVD 2
CODE
INTERNAL
VIDEO/S2
EXTERNAL
COMPONENT
REMOTE
CONTROL
VIDEO
OUTPUT
2
1
VIDEO
AUDIO
OUTPUT
S2
VIDEO
OUTPUT
COMPONENT
OUT
COAXIAL
OPTICAL
DIGITAL
OUTPUT
REMOTE
CONTROL
1
RC-5/6 RS-232C
RS-232C CONTROL
DVD PLAYER DV7110
STOP
REPEAT
OPEN/CLOSE
RS-232C
A-B
TITLE
V I D E O
REPEAT SHUFFLE SVCD
DTS CHAPTER
TRACK
PBC
SCAN CHAPTER
FTS
TOTAL
TITLE
TRACK
PLAY
TRACK
TIME
STANDBY
POWER
FL OFF
ON/OFF
PAUSE
1
DIMMER
VIDEO OFF
LEVEL
PHONES
OSD
DIGITAL OUT
-
+
RS-232C
15
ENGLISH
1
Press Power button on the front panel.
• Press the POWER button on the Front panel to turn
the power on, and press it again to turn the power off.
Note
When it is required to remote control the power mode of this DVD
player, be sure to leave this switch in the power on mode.
2
Setting the OSD Language
(On-Screen Display Language)
The [OSD Language] screen establishes the OSD language,
or on-screen display language, which refers to the language
that is used by the player in menus and on-screen messages.
Additionally, the language that is established at this setting
will also be used for the default audio and subtitle language.
Press SETUP.
Audio1 Audio2 Video Language General
Setup Navigator
When SETUP is pressed for the first time, the following
screen appears. Though the Setup Navigator may be
used more than once, this screen only appears the first
time SETUP is pressed.
Language
English
OSD Language français
Español
Move
ENTER
Select SETUP Exit
Audio1 Audio2 Video Language General
Setup Navigator
Setup Navigator Start
Auto Start Off
Move
ENTER
Settings: English*
français
Español
* Factory setting
Select SETUP Exit
Note
3
5/ ) to make a
Use the cursor buttons (5
selection.
• If you are going to use the Setup Navigator, it is not
necessary to change the setting on the first screen.
Please proceed to the next step.
• If you do not want to set up the player using the
Setup Navigator, use the cursor button ( ) to
select [Auto Start Off] at this time.
The Setup Navigator function may still be used at a
later time in manual Setup screen menu operation
(page 22).
4
Press ENTER.
In addition to setting the OSD language, the audio and subtitle
language are also set at this time. If you wish to change the audio
or subtitle language to a different language, make changes in the
Setup screen Language menu [Audio Language] and [Subtitle
Language] as needed (page 30, 31).
Setting the TV screen size
The [TV Type] screen establishes the size, or more
appropriately the width to height ration of your television or
monitor. The width-to-height ratio of conventional TVs is 4:3,
while the width-to-height ratio of wide screen and highdefinition TVs is 16:9. This width-to-height ratio is called the
aspect ratio.
The selection is entered and the next Setup Navigator
screen appears.
Audio1 Audio2 Video Language General
Setup Navigator
Use steps 3 and 4 as a basis for entering selections on the all
of the Setup Navigator screens described on the following
pages.
TV Connection
TV Type
Move
ENTER
Widescreen (16:9)
Standard (4:3)
Select SETUP Exit
To change the answer to a prior question
Use the cursor button (2) to return to previous screens.
Please note, however, that you cannot go forward using the
cursor button (3), so it will be necessary to answer all the
questions that occur after the screen that was returned to.
Settings: Widescreen (16:9)*
Standard (4:3)
* Factory setting
To exit the Setup Navigator
Press SETUP while on any of the screens to exit the Setup
Navigator. Please note that if the Setup Navigator is exited
before all the questions are answered, no settings are
changed.
To return to the Setup screen
Press RETURN. The Setup Navigator is exited and the Setup
screen General menu screen appears. Please note that no
settings are changed if RETURN is pressed before the Setup
Navigator is finished.
16
Note
There are two screen formats that can be used to display
wide-screen format DVDs: letter box and pan & scan. When
[Standard (4:3)] is selected in the Setup Navigator, the letter box
screen format is automatically selected. To switch the preference
to the pan & scan format, make changes in the Setup screen
Video menu [TV Screen] setting (page 26).
ENGLISH
Setting digital audio connections to an
AV amplifier or decoder
The [Digital Jack] screen establishes whether digital
connections have been made to an AV amplifier, receiver, or
external decoder. As there are numerous options available,
please refer to the instructions supplied with the component
the player is connected to determine what digital audio
formats can be decoded. If you have made no digital
connections, select [Not Connected].
Confirming the settings
The [Exit Setup Navigator] is the final screen in the Setup
Navigator.
Audio1 Audio2 Video Language General
Setup Navigator
Save Changes
Exit Setup Navigator Delete Changes
Start Again
Move
ENTER
Select SETUP Exit
Audio1 Audio2 Video Language General
Dolby Digital
Dolby Digital/DTS
Dolby Digital/MPEG
Dolby D/DTS/MPEG
PCM
Not Connected
Setup Navigator
Amp Connection
Digital Jack
Move
ENTER
Select SETUP Exit
Settings: Dolby Digital*
Dolby Digital/DTS
Dolby Digital/MPEG
Dolby D/DTS/MPEG
PCM
Not Connected
* Factory setting
* Factory setting
To exit the Setup screen
Setting compatibility with 96 kHz
output
The [96 kHz PCM Audio] screen establishes whether or not
the AV component the player is connected to is capable of
processing an audio signal with a sampling rate of 96 kHz.
This screen only appears if connections have been made to
an external AV component as determined in previous
screens.
When you have completed setting up the player using the
Setup Navigator or if you exit the Setup Navigator, the Setup
screen General menu appears. Press SETUP to close the
Setup screen.
To change other player settings in the Setup
screen menus
The procedure for changing the settings in the Setup screen
menus is described on page 22.
SETTING UP THE PLAYER
Settings: Save Changes*
Select to have the player make all of the
necessary audio, video and language settings
automatically.
Delete Changes
Select to exit the Setup Navigator without
changing any of the system settings.
Start Again
Select to return to the [OSD Language] screen of
the Setup Navigator and do the settings again.
Audio1 Audio2 Video Language General
Setup Navigator
Amp Connection No
96 kHz PCM Audio Yes
Don’t Know
Move
ENTER
Select
SETUP
Exit
Settings: No*
Select if the connected AV component cannot
process an audio signal with a sampling rate of 96
kHz.
Yes
Select if the connected AV component can
process an audio signal with a sampling rate of 96
kHz.
Don’t Know
Select if you are uncertain whether the connected
AV component can process an audio signal with a
sampling rate of 96 kHz.
* Factory setting
17
ENGLISH
Getting Started
Using Your
DVD Player
1
Press POWER on the front panel.
2
Press OPEN/CLOSE.
The disc tray comes out.
3
Load a disc.
Load a disc with the label side facing up, using the disc
tray guide to align the disc.
Playing DVDs, Video CDs
and CDs – DVD/Video CD/CD
Before you can start to enjoy the digital audio and video on
DVDs, be sure that you have either performed the Setup
Navigator procedure described in the previous section or
made the necessary settings in the Setup screen menus as
outlined in the next section to set up the player to correspond
to your home system. Having made these settings, you are
now ready to start using the player to enjoy DVDs, Video
CDs, and CDs.
2
4
OPEN/CLOSE
VIDEO ON/OFF
A-B
REPEAT
1
2
3
4
5
6
7
8
5
9
+10
T-C
MENU
RETURN
ENTER
Select the item you want to view.
• When a DVD is loaded:
Select the item with the cursor buttons (2/3/5/ ) or
the number buttons then press ENTER.
• When a Video CD is loaded:
Use the number buttons to select the item.
CLEAR
0
TOP
MENU
Press PLAY 3 .
• The disc tray closes, and playback begins.
• Depending on the disc, a menu may be displayed.
If a menu is displayed, proceed to step 5.
RANDOM
5
4
SUBTITLE
AUDIO
PROGRAM
OSD
LAST
MEMORY
SETUP
DIMMER
CONDITION
MEMORY
ANGLE
Notes
• Noise is output if you make digital audio connections to a
receiver or amplifier that does not have a built-in decoder. Check
that the digital audio output format selected in the
Audio 1 menu corresponds to the audio components you have
made connections to (page 24-25).
• The TV screen size is factory set to present the wide screen
format (16:9 aspect ratio). If you have a standard TV screen (4:3
aspect ratio), this setting can be changed to match your TV
screen size in the Video menu (page 26).
REMOTE CONTROLLER
RC7010DV
When an operation is prohibited
1 3
2
There are times when you are using the player and attempt to
perform an operation, but for some reason it cannot be performed.
When this occurs, one of the two following icons appears on the
screen.
4
DVD PLAYER DV7110
STOP
REPEAT
OPEN/CLOSE
A-B
TITLE
V I D E O
REPEAT SHUFFLE SVCD
DTS CHAPTER
TRACK
PBC
SCAN CHAPTER
FTS
TOTAL
TITLE
TRACK
PLAY
TRACK
TIME
STANDBY
POWER
FL OFF
ON/OFF
PAUSE
1
DIMMER
VIDEO OFF
LEVEL
PHONES
The operation is prohibited by the player.
OSD
DIGITAL OUT
-
+
The operation is prohibited by the programming on
the disc.
18
ENGLISH
When a menu screen is displayed
Menu screens are displayed for DVDs that have menu
screens or Video CDs that include Playback Control (PBC).
DVDs often contain extra information that can be accessed in
the DVD menu and sometimes makes navigating DVD menu
screens as enjoyable as watching the feature presentation.
To open or return to the DVD or Video CD menu
screen
Although this differs depending on the disc, pressing MENU,
TOP MENU, or RETURN during DVD playback or RETURN
during Video CD playback displays the menu screen. Refer to
the DVD or Video CD disc jacket and accompanying
documentation for more information.
To navigate a menu screen
OPEN/CLOSE
VIDEO ON/OFF
A-B
REPEAT
RANDOM
1
2
3
4
5
6
7
8
9
+10
T-C
Number
buttons
CLEAR
0
TOP MENU
TOP
MENU
MENU
MENU
Cursor
RETURN
ENTER
RETURN
ANGLE
SUBTITLE
AUDIO
PROGRAM
OSD
LAST
MEMORY
SETUP
DIMMER
CONDITION
MEMORY
REMOTE CONTROLLER
RC7010DV
Example: When a DVD that has menu screens is loaded
1
2
3
4
5
6
Highlight Clips
Chapter List
Commercial Header
Subtitles
Soundtrack
Start Main Feature
To play Video CDs without displaying menu
screens
Video CDs with Playback Control (PBC) display a menu
screen when play is started. It is possible, however, to play
back Video CDs without displaying menu screens.
When a Video CD with PBC is loaded, press STOP 7, and
then the number button of the track you want to play.
GETTING STARTED USING YOUR DVD PLAYER
STOP
NEXT
PREV.
ENTER
• Although individual DVD titles may differ, when a menu
screen is displayed, use the cursor buttons (2/3/5/ ) and
ENTER on the remote control. The cursor buttons are used
to move around the options on the screen and ENTER is
used for selection.
• Occasionally, the number buttons may also be used to
make selections. If this is possible, using number buttons
serves to directly select an option on a menu screen. Only
number buttons are used to make selections on Video CD
menu screens.
• When the Video CD has more than one menu, pages can
be advanced to or returned to with PREV 4 or NEXT
¢.
Example: When a Video CD that has Playback Control is
loaded
STANDARD VOCAL BEST
1
Don't Tekno for an Answer
Bertie B.& the Goans
2
Bad Whack Naff Riff
Hood in the Boyz
3
dubmyheadbassman
Sleek Machine
4
Gooey Love Jingle
Philip William
5
Praise the Day
Formerly an Artist
6
G3, Ba-san
Pfeuti
7
Abstract Jazz Phunk
John Torn
8
Rock the Love Jive
Hot Monkey Stick
19
ENGLISH
Chapter (Track) Skip Forward/
Skip Back – DVD/Video CD/CD
7
8
CLEAR
0
NEXT
PREV.
TOP
MENU
MENU
RETURN
ENTER
Press NEXT ¢ .
• Press to skip forward to the next chapter (track).
• You can advance more than one chapter (track) forward by
pressing and holding NEXT ¢ and releasing when the
desired chapter (track) number appears in the display.
9
+10
T-C
Advancing to the next chapter (track)
Skipping back to the previous chapter
(track)
Press PREV 4 .
ANGLE
SUBTITLE
AUDIO
PROGRAM
OSD
LAST
MEMORY
SETUP
DIMMER
CONDITION
MEMORY
• Press once to skip back to the start of the chapter (track)
currently playing.
• Press twice to skip back to the start of the previous chapter
(track).
• You can skip back to previous chapters (tracks) by
pressing and holding PREV 4 and releasing when the
desired chapter (track) number appears in the display.
REMOTE CONTROLLER
RC7010DV
4
¢
DVD PLAYER DV7110
STOP
REPEAT
OPEN/CLOSE
A-B
TITLE
V I D E O
REPEAT SHUFFLE SVCD
DTS CHAPTER
TRACK
SCAN CHAPTER
FTS
TOTAL
PBC
TITLE
TRACK
PLAY
TRACK
TIME
STANDBY
POWER
FL OFF
ON/OFF
PAUSE
1
DIMMER
VIDEO OFF
LEVEL
PHONES
OSD
DIGITAL OUT
-
+
Fast forward scanning
Forward and Reverse
Scanning – DVD/Video CD/CD
7
8
• Release FWD ¡ when you reach the desired location.
Normal playback resumes.
• When the “Scan” indicator on the screen changes from
flashing to lit, fast forward scanning will continue even if the
button is released. When the desired location has been
reached, press PLAY 3.
9
+10
T-C
Press and hold FWD ¡ during playback.
CLEAR
0
TOP
MENU
MENU
RETURN
ENTER
Fast reverse scanning
PLAY
REV/FWD
SUBTITLE
AUDIO
PROGRAM
OSD
LAST
MEMORY
SETUP
DIMMER
CONDITION
MEMORY
ANGLE
• Release REV 1 when you reach the desired location.
Normal playback resumes.
• When the “Scan” indicator on the screen changes from
flashing to lit, fast reverse scanning will continue even if the
button is released. When the desired location has been
reached, press PLAY 3.
REMOTE CONTROLLER
RC7010DV
1
¡
3
DVD PLAYER DV7110
STOP
REPEAT
OPEN/CLOSE
A-B
TITLE
V I D E O
REPEAT SHUFFLE SVCD
DTS CHAPTER
TRACK
PBC
SCAN CHAPTER
FTS
TOTAL
TITLE
TRACK
PLAY
TRACK
TIME
STANDBY
POWER
FL OFF
ON/OFF
PAUSE
1
20
DIMMER
VIDEO OFF
Press and hold REV 1 during playback.
LEVEL
PHONES
OSD
DIGITAL OUT
-
+
ENGLISH
Resuming playback from
where you stopped – DVD/Video CD
Use the resume feature to restart playback from the point that
the disc was stopped last time.
Stopping Playback and
Switching Power Off
– DVD/Video CD/CD
Press STOP 7 once.
The display shows “RESUME” and the stop position is
memorized.
OPEN/CLOSE
2
VIDEO ON/OFF
• The resume position remains memorized as long as the
disc is in the player — even if you switch the power off.
• Pressing STOP 7 twice causes the disc to return to the
beginning when PLAY 3 is pressed again. The display
shows the disc type (DVDs or Video CDs)
A-B
REPEAT
RANDOM
1
2
3
4
5
6
7
8
9
+10
T-C
CLEAR
0
Press PLAY 3.
TOP
MENU
MENU
RETURN
ENTER
Playback starts from the resume position.
Notes
1
ANGLE
SUBTITLE
AUDIO
PROGRAM
OSD
LAST
MEMORY
SETUP
DIMMER
CONDITION
MEMORY
REMOTE CONTROLLER
RC7010DV
4 3
2
1
DVD PLAYER DV7110
STOP
REPEAT
OPEN/CLOSE
A-B
TITLE
V I D E O
REPEAT SHUFFLE SVCD
DTS CHAPTER
TRACK
PBC
SCAN CHAPTER
FTS
TOTAL
TITLE
TRACK
PLAY
TRACK
TIME
STANDBY
POWER
FL OFF
ON/OFF
PAUSE
1
1
DIMMER
VIDEO OFF
LEVEL
PHONES
OSD
DIGITAL OUT
-
+
Press STOP 7.
Playback stops.
2
GETTING STARTED USING YOUR DVD PLAYER
• The actual restart position may be slightly before or after the
resume position.
• If you want to remove the disc, but still want to resume playback
from the last stopped position, use the LAST MEMORY feature
instead (page 44).
Press OPEN/CLOSE.
The disc tray comes out.
3
Remove the disc.
Be sure to press the OPEN/CLOSE button to closs the
disc tray after you remove the disc.
4
Press Power button on the front panel.
21
ENGLISH
Adjusting
Audio and
Video Settings
1
Press Power on the front panel.
2
Press SETUP.
The Setup screen appears.
(Example)
Audio1 Audio2 Video Language General
Using the Setup Screen
Menus
Dolby Digital Out – Dolby Digital
DTS Out – Off
96kHz PCM Out – 96kHz 3 48kHz
MPEG Out – MPEG 3 PCM
The procedure on this page describes how to operate the
menus on the Setup screen. These menus are used to set and
adjust a number of system settings. The various functions that
can be adjusted are covered throughout this manual. The
procedure on this page provides a basic outline for using the
Setup screen menus.
Setup audio
Digital output format/tone adjust
SETUP Exit
Move
3
2/3
3) to select the
Use the cursor buttons (2
menu you want.
As each menu is selected with the cursor, the settings
appear below the menu heading.
When setting up for the first time
It is recommended to set up player using the Setup Navigator
(page 15). If you selected [Auto Start Off] when the Setup
Navigator appeared, you may still set up the player using the
Setup Navigator in the General menu screen.
If you choose not to use the Setup Navigator, be sure to make
the necessary settings in the Setup screen
Audio 1, Audio 2, Video, and Language menus as
described on the following pages.
Some DVDs start playing automatically when loaded in the
player. If a DVD has been loaded, be sure to press STOP 7
before proceeding.
4
Use the cursor buttons ( ) to enter the menu.
The top item within the menu becomes highlighted.
(Example)
Audio1 Audio2 Video Language General
Dolby Digital Out Dolby Digital
DTS Out - Dolby Digital 3 PCM
96kHz PCM Out – 96kHz 3 48kHz
MPEG Out – MPEG 3 PCM
Change Dolby Digital output mode
Move
5
OPEN/CLOSE
VIDEO ON/OFF
A-B
REPEAT
RANDOM
1
2
3
4
5
6
7
8
6
CLEAR
0
TOP
MENU
Exit
5/ ) to select the
Use the cursor buttons (5
setting you want to change.
The options available for each setting appear to the right
when the setting is selected. The current setting appears
with the setting indicator lit.
9
+10
T-C
SETUP
3) to enter the setting
Use the cursor buttons (3
options.
MENU
(Example)
3, 4, 5, 6
Audio1 Audio2 Video Language General
Dolby Digital Out Dolby Digital
DTS Out - Dolby Digital 3 PCM
96kHz PCM Out – 96kHz 3 48kHz
MPEG Out – MPEG 3 PCM
ENTER
RETURN
Output Dolby Digital
ANGLE
SUBTITLE
AUDIO
PROGRAM
OSD
LAST
MEMORY
SETUP
DIMMER
CONDITION
MEMORY
2
Move
ENTER
Select SETUP Exit
• Not all menu options can be changed while a disc is
playing. In these cases, the options appear grayed out
on the screen and cannot be adjusted. To change
these settings, press STOP 7 first before pressing
SETUP.
• Operating the menu after pressing STOP 7 may
cancel the resume function.
• Some menu options are not immediately effective if set
while a disc is playing. To make these settings
effective, stop playback and then start again, or
change the settings while the disc is stopped.
REMOTE CONTROLLER
RC7010DV
1
DVD PLAYER DV7110
STOP
REPEAT
OPEN/CLOSE
A-B
TITLE
V I D E O
REPEAT SHUFFLE SVCD
DTS CHAPTER
TRACK
PBC
SCAN CHAPTER
FTS
TOTAL
TITLE
TRACK
PLAY
TRACK
TIME
STANDBY
POWER
FL OFF
ON/OFF
PAUSE
1
22
DIMMER
VIDEO OFF
LEVEL
PHONES
OSD
DIGITAL OUT
-
+
continued
ENGLISH
IMPORTANT
Changing to the Setup
Screen “Expert” Menu Mode
OPEN/CLOSE
VIDEO ON/OFF
A-B
REPEAT
RANDOM
1
2
3
4
5
6
7
8
+10
T-C
9
CLEAR
0
TOP
MENU
MENU
RETURN
ENTER
7
8
9
ANGLE
SUBTITLE
AUDIO
PROGRAM
OSD
LAST
MEMORY
SETUP
DIMMER
CONDITION
MEMORY
The Setup screen menus are divided into two levels, [Basic]
and [Expert], to make this unit more convenient to operate for
different levels of users. The [Basic] menu mode contains
functions that may be considered necessary for the basic
operations of this player and helpful on-screen information
identified by the i mark. The [Expert] menu mode adds to
the [Basic] menu mode additional functions of the player that
can be adjusted to further personalize performance of the
player.
In this manual, functions that are contained in the [Expert]
menu mode are identified by the
icon.
Make changes to the [Setup Menu Mode] setting in the
Setup screen General menu.
Audio1 Audio2 Video Language General
Setup Menu Mode Expert
Setup Navigator Basic
Parental Lock – Level 8
REMOTE CONTROLLER
RC7010DV
Change menu mode
Move
SETUP
Exit
7
5/ ) to select a new
Use the cursor buttons (5
setting and press ENTER to set the new setting
in memory. Press RETURN or the cursor button
2) to exit the options without making any
(2
changes.
8
2) to go
Press RETURN or the cursor button (2
back to the main menu bar to select another
menu.
9
Press SETUP to close the Setup screen.
The Setup screen closes.
Note
* Factory setting
Note
On-screen information only appears if the [OSD Language] is set
to [English] and menu mode is set to [Basic].
ADJUSTING AUDIO AND VIDEO SETTINGS
Settings: Expert
Basic*
The next time you press SETUP, you’ll see the menu screen that
you exited from last time.
How to interpret the setting indicator colors in the
Setup screen menus
When setting up the system, or when making adjustments, it
is convenient to know what settings are applicable to the
different disc formats. When the settings appear for each
menu option, the currently selected setting appears with the
setting indicator highlighted in one of three colors: blue,
green or yellow. These colors correspond to what formats the
menu option effects as shown in the table below.
Color of indicator
Disc format(s)
Blue
DVD only
Yellow
DVD / Video CD
Green
All compatible formats
Note
If a setting applicable only to DVDs is changed while a Video CD
or CD is loaded, a blue DVD icon appears in the upper right hand
corner of the screen to indicate that the setting is not applicable to
the currently loaded disc. The setting will be effective the next time
a DVD is loaded.
23
ENGLISH
Setting the Digital Audio
Output To Be Compatible
with Your AV Component – DVD
This player is capable of digital audio output for Dolby Digital,
DTS, MPEG, and signals with a sampling rate of 96 kHz.
Make settings in the Setup screen Audio 1 menu to reflect
the capabilities of the components that you have made digital
connections to.
DTS Out
This player is capable of outputting DTS digital audio for
DVDs recorded in DTS. When this player is connected to an
AV component that has a built-in DTS decoder, select [DTS].
If your system is not equipped to decode DTS, select [Off].
Refer to the operating instructions supplied with your audio
components if you are unsure about compatibility with DTS.
Audio1 Audio2 Video Language General
Dolby Digital Out – Dolby Digital
DTS Out Off
DTS
96kHz PCM Out - 96kHz>48kHz
MPEG Out – MPEG 3 PCM
Notes
• If you have already completed the Setup Navigator screen
operations, the settings on this page have already been set by
the player.
• If you have made only stereo line connections (analog) using the
supplied audio cord, it is not necessary to make any changes in
this menu.
Move
SETUP
Exit
Settings: Off*
DTS
Dolby Digital Out
* Factory setting
This player is capable of outputting the Dolby Digital
surround sound audio signal. When the player is connected
to an AV component that has a built-in Dolby Digital decoder,
select [Dolby Digital]. This player can also convert the Dolby
Digital signal to a digital Linear PCM signal, the same digital
signal output from a CD. Select [Dolby Digital 3 PCM] when
you have made connections to an amplifier or receiver with a
Dolby Pro Logic decoder or a Digital Analog Converter
(DAC).
Change Dolby Digital output mode
SETUP
Note
If you have made digital audio connections to component(s) not
equipped to decode the DTS digital bitstream, be sure to select
[Off]. If a DTS signal is output without decoding, the output is
digital noise that could potentially cause damage to your speakers.
96 kHz PCM Out
This player is capable of outputting digital signals with a
sampling frequency of 96 kHz. If you have made connections
to a component capable of processing this signal rate, select
[96 kHz] for the signal to be output as is. As some
components are incapable of processing digital signal input
with sampling rates of 96 kHz, selecting [96 kHz 3 48 kHz]
compresses the signal to a standard signal with a sampling
rate of 48 kHz.
Audio1 Audio2 Video Language General
Dolby Digital Out Dolby Digital
DTS Out - Dolby Digital 3 PCM
96kHz PCM Out – 96kHz 3 48kHz
MPEG Out – MPEG 3 PCM
Move
Change DTS output mode
Exit
Settings: Dolby Digital*
Dolby Digital 3 PCM
Audio1 Audio2 Video Language General
Dolby Digital Out – Dolby Digital
DTS Out – Off
96kHz PCM Out 96kHz 3 48kHz
MPEG Out - PCM
96kHz
* Factory setting
Change 96 kHz output mode
Move
SETUP
Exit
Settings: 96 kHz 3 48 kHz*
96 kHz
* Factory setting
Notes
• On DVDs that contain copy protection, the 96 kHz signal may only
be output from the analog audio jacks.
• Changes to the [96 kHz PCM Out] setting cannot be made when
a disc is playing.
24
ENGLISH
MPEG Out
This player is capable of outputting the MPEG digital
bitstream. When the player is connected to an AV component
that has a built-in MPEG decoder, select the [MPEG] setting.
Otherwise, select [MPEG 3 PCM] to convert the digital signal
to the PCM signal, the digital signal output from a CD.
Audio1 Audio2 Video Language General
Dolby Digital Out – Dolby Digital
DTS Out – Off
96kHz PCM Out – 96kHz 3 48kHz
MPEG Out MPEG
MPEG 3 PCM
Change MPEG audio output mode
Move
SETUP
Adjusting the Dynamic Range
of the Audio Soundtrack – DVD
Audio DRC stands for Audio Dynamic Range Compression.
When Audio DRC is on, soft sounds such as dialog can be
heard more clearly without making loud sounds even louder.
Select from three levels of compression depending on how
much effect you want. When Audio DRC is set to [Off], there
is no effect on the audio source.
Make changes to the [Audio DRC] setting in the Setup
screen Audio 2 menu.
Exit
Audio1 Audio2 Video Language General
Audio DRC
Settings: MPEG
MPEG 3 PCM*
Dynamic playback at low volume
Move
* Factory setting
Digital Out
Audio1 Audio2 Video Language General
Dolby Digital Out – Dolby Digital
DTS Out – Off
96kHz PCM Out – 96kHz>48kHz
MPEG Out – MPEG 3 PCM
Digital Out On
Off
SETUP
SETUP
Exit
Settings: High
(maximum compression of audio source)
Medium
(moderate compression of audio source)
Low
(very little compression of audio source)
Off*
* Factory setting
Note
Audio DRC is only effective with Dolby Digital audio sources.
Exit
Settings: On (Digital bitstream is output)*
Off (Digital bitstream is not output)
* Factory setting
ADJUSTING AUDIO AND VIDEO SETTINGS
Depending on your preferences and the type of connections
made, you may opt not to have the digital audio signal output
at all. When this setting is set to [Off] there is no signal output
from the digital audio output jacks.
Make changes to the [Digital Out] setting in the Setup screen
Audio 1 menu in the [Expert] menu mode (page 23).
Move
High
Medium
Low
Off
25
ENGLISH
Setting the TV Screen Size
The width-to-height ratio of conventional TVs is 4:3, while the
width-to-height ratio of wide screen and high-definition TVs is
16:9. This width-to-height ratio is called the aspect ratio.
When viewing software recorded in different aspect ratios, the
image’s height to width ratio can be switched to match the TV
or monitor being used.
Make changes to the TV screen size in the [TV Screen]
setting in the Setup screen Video menu. Please note that
changes to the [TV Screen] setting cannot be made when a
disc is playing. Stop playback of the disc before attempting
to make any changes.
Audio1 Audio2 Video Language General
TV Screen 4:3(Letter Box)
Component Video - 4:3(Pan&Scan)
Progressive DNR - 16:9(Wide)
Picture Quality -Standard
Select your display preference
Move
SETUP
Exit
Settings: 4:3 (Letter Box)
4:3 (Pan & Scan)
16:9 (Wide)*
* Factory setting
When viewing a wide screen TV or monitor
DVD screen size format
Setting and Appearance
Wide screen format DVD
Please note that there are some
wide screen letter box formats
that place black bars at the top
and bottom of the screen. This is
not a malfunction.
“Wide” setting
Standard screen format DVD
When viewing a standard
screen format DVD on a wide
screen TV, black bars may be
automatically placed at the side
of the screen to adjust to the
DVD format.
Standard screen format DVD
(unnatural stretched effect)
If you are viewing a standard
screen format DVD on a wide
screen TV, the picture may
appear ‘stretched’ on the
screen. To remedy this
condition, change your wide
screen TV to display a standard
(4:3) screen. Refer to the
instructions supplied with your
wide screen TV or monitor for
more information.
“Wide” setting
“Wide” setting
Notes
• If [Standard (4:3)] is selected in the Setup Navigator screen,
[4:3 (Letter Box)] is selected on this screen. If you prefer the
pan&scan format, change the settings on this screen.
• Whether the aspect can be switched or not depends on the disc.
Please refer to the information written on the disc jacket, etc.
• Some discs may not include the screen format selected in the
[TV Screen] setting. When this occurs, the standard TV screen
format available on the disc is automatically selected.
Differences in screen sizes and DVD formats
The number of screen size formats currently available can be
somewhat confusing. If set incorrectly, the video presentation
may not appear as it should. The following diagrams and
descriptions are intended to help you set your TV screen size
in a way that will allow you to fully enjoy the digital video of
DVD.
The settings in the [TV Screen] setting are perhaps most
applicable when the DVD you are watching is programmed
in the wide screen format. If you have a standard TV, select
either [4:3 (Letter Box)] or [4:3 (Pan & Scan)] based on your
personal preference. If you have a wide screen TV, select
[16:9 (Wide)].
When viewing a standard size TV or monitor
DVD screen size format
Wide screen format DVD
The Letter box presentation
places black bars at the top
and bottom portions of the
screen to provide the full wide
screen presentation of a movie
on a standard TV (4:3 aspect
ratio).
Setting and Appearance
“Letter Box” setting
Wide screen format DVD
The Pan & Scan presentation
crops both sides of the wide
screen presentation to use the
full standard TV screen.
“Pan & Scan” setting
Standard screen format DVD
If you have a standard TV, the
standard screen format will be
presented regardless of the
setting.
Any setting
Wide screen format DVD
(unnatural squeezed effect)
If you are viewing a wide screen
format DVD on a standard TV and
the [TV Screen] setting is set to
[16:9 (Wide)], the picture may
appear ‘squeezed’ on the screen.
To remedy this condition, select
either [4:3 (Letter Box)] or [4:3
(Pan & Scan)].
26
“Wide” setting
ENGLISH
525 line Digital Progressive
Scan Compatible Video Output
– DVD
Connecting to a progressive scancompatible TV
Compared to a standard interlaced TV picture, a progressive
scan TV is capable of stable, flicker-free images.
Set only if you connected the COMPONENT VIDEO OUT
jacks to a progressive scan-compatible TV or monitor.
When making component video connections, make sure to
set the VIDEO OUT SELECT switch on the rear panel of the
player to the right to assign component video output (page
14).
When a progressive-scan video signal is output, the
“PROGRESSIVE” indicator lights in the display.
Make changes to the [Component Video] setting in the
Setup screen Video menu.
Audio1 Audio2 Video Language General
Note
If you connect a TV that is not compatible with a progressive scan
signal and choose one of the progressive scan settings, you will not
be able to see any picture at all. If you accidently do this, set the
VIDEO OUT SELECT switch on the rear panel to COMPOSITE & SVIDEO. With your TV connected using either the composite or SVideo terminals, choose the [Interlace] setting in the [Component
Video] menu, then set the rear panel switch back to COMPONENT.
Setting the DNR (Digital Noise
Reduction) level with Digital
Progressive-scan Component Video
DNR reduces progressive scan 'video noise'. Select from 2
level of noise reduction depending on how much effect you
want. There is also an [Off] setting.
This setting only applies to progressive-scan component
video output.
Make changes to the [Progressive DNR] setting in the Setup
screen Video menu.
Audio1 Audio2 Video Language General
TV Screen — 16:9(Wide)
Component Video - Interlace
Progressive DNR - Progressive
Picture Quality - Auto Progressive
Select Interlace or Progressive
output Component Video
SETUP Exit
Move
Settings: Interlace*
Use this setting with regular TVs that are not
compatible with progressive scan. Check the TV’s
instruction manual if you are not sure about this.
Progressive
Use this setting with TVs and monitors that have
progressive scan component video inputs. Check
the TV’s instruction manual if you are not sure
about this.
Auto Progressive
Switches to progressive scan when 16:9 DVD
discs are played,4:3 DVD discs uses interlace
setting. Your TV/monitor must be compatible with
progressive scan to use this setting.
* Factory setting
Tip:
If this player is set to output progressive-scan video, it’s possible
that the picture will appear stretched when playing discs recorded in
4:3 format. This happens when the TV’s aspect ratio is set at 16:9.
To see the picture in its correct aspect ratio, change the TV setting
to 4:3.
If your TV can be switched between 4:3 and 16:9, set this player to
[Interlace] or [Auto progressive]. In Auto progressive mode, 4:3
discs will be played in Interlace mode, while discs that are recorded
in both 4:3 and 16:9 will play in interlace mode during the 4:3
sections, and in progressive mode during the 16:9 parts. Switch your
TV’s aspect ratio to the most suitable setting (for more details, see
the manual that came with your TV). When set to [Auto
progressive], you may see picture disturbance when this player
(and the TV) switches between progressive and interlace modes.
This is not a malfunction of either this player or the TV. Picture
disturbance should only occur when switching from a menu screen
to the main feature, for example.
Settings: High
This setting is for a progressive scan TV. Strong
DNR is applied to the picture.
Low
This setting is for a progressive scan TV. Normal
DNR is applied to the picture.
Off*
This setting is for a progressive scan TV. No DNR
is applied to the picture.
* Factory setting
Compatibility of this unit with progressive-scan TVs.
‘CONSUMERS SHOULD NOTE THAT NOT ALL HIGH
DEFINITION TELEVISION SETS ARE FULLY COMPATIBLE
WITH THIS PRODUCT AND MAY CAUSE ARTIFACTS TO
BE DISPLAYED IN THE PICTURE. IN CASE OF 525
PROGRESSIVE SCAN PICTURE PROBLEMS, IT IS
RECOMMENDED THAT THE USER SWITCH THE
CONNECTION TO THE “STANDARD DEFINITION”
OUTPUT.
ADJUSTING AUDIO AND VIDEO SETTINGS
TV Screen — 16:9(Wide)
Component Video —Progressive
Progressive DNR - High
Picture Quality - Low
Off
Progressive Compatible TV only
Progressive DNR On/Off
SETUP Exit
Move
27
ENGLISH
Selecting Picture Quality
Appropriate for Program
Content – DVD/Video CD
This lets you select the ideal picture quality for watching
movies, animation and other video media.
Make changes to the [Picture Quality] setting in the Setup
screen Video menu.
Setting the position of the
on-screen display
When watching conventional software on a wide screen TV,
the operation display is at the very top of the screen, and may
be difficult to see. Changing the position of the display lets
you see operation indicators clearly even on a wide screen
TV.
Alternatirely, you can choose to turn them off completely with
the [Off] setting.
Make changes in the [On Screen Display] in the Setup
screen Video menu in the [Expert] menu mode (page 23).
Audio1 Audio2 Video Language General
TV Screen — 16:9(Wide)
Component Video — Interlace
Progressive DNR - Cinema
Picture Quality Animation
Standard
Adjust picture quality
Move
SETUP
Audio1 Audio2 Video Language General
TV Screen —16:9(Wide)
Component Video — Interlace
Progressive DNR — Off
Picture Quality —Standard
Still Picture - Position-Wide
On Screen Display Position-Normal
Angle Indicator - Off
SETUP Exit
Move
Exit
Settings: Cinema
Provides a sharp, clear black picture for images
with high contrast.
Animation
Provides images with bright clear colors.
Standard*
Presents the video with no effect added.
* Factory setting
Settings: Position-Wide
Position-Normal*
Off
* Factory setting
Note
This setting is only effective with DVDs that contain a 4:3 aspect
ratio video presentation.
Selecting the type of paused image to
display
This function lets you view a clear still-image when DVD
playback is paused.
Make changes in the [Still Picture] setting in the Setup
screen Video menu in the [Expert] menu mode (page 23).
Audio1 Audio2 Video Language General
TV Screen —16:9(Wide)
Component Video — Interlace
Progressive DNR — Off
Picture Quality —Standard
Still Picture Field
On Screen Display - Frame
Angle Indicator - Auto
SETUP Exit
Move
Settings: Field
(Picture shake will be eliminated during a paused
picture.)
Frame
(Select to obtain higher picture quality.)
Auto*
(Selects field or frame automatically according to
the disc.)
* Factory setting
28
ENGLISH
Viewing from a Desired
Camera Angle (Multi-Angle)
– DVD
You can select a camera angle when viewing DVDs with the
multi-angle option.
RETURN
Turning the angle indicator on and off
When a picture recorded in different angles is played back
is displayed on the screen. This setting lets you see
clearly whether the playback picture is recorded in multiple
angles or not.
Turn the angle indicator on or off in the [Angle Indicator]
setting in the Setup screen Video menu in the [Expert] menu
mode (page 23).
Audio1 Audio2 Video Language General
ENTER
ANGLE
SUBTITLE
AUDIO
PROGRAM
OSD
LAST
MEMORY
SETUP
DIMMER
CONDITION
MEMORY
ANGLE
TV Screen – 16:9(Wide)
Picture Quality – Standard
Still Picture – Field
On Screen Display – On
OSD Position – Normal
Angle Indicator On
Off
SETUP Exit
Move
Settings: On* (
is displayed)
Off (Not Displayed)
REMOTE CONTROLLER
RC7010DV
* Factory setting
Note
Press ANGLE during playback.
The camera angle changes each time you press the button.
ANGLE
: 1/4
ANGLE
: 2/4
\
»
ANGLE
«
: 4/4
ANGLE
: 3/4
ADJUSTING AUDIO AND VIDEO SETTINGS
Even when the [Angle Indicator] setting is set to [Off], the
indicator in the display panel of the player lights during multi-angle
playback. Therefore, it is possible to know when the multi-angle
function can be used without having to display the icon on the
screen.
|
Notes
• You can use the Multi-Angle function only with discs featuring
recordings of images shot from different camera angles.
• During Multi-Angle playback, the
indicator in the display
lights.
• For some discs, selection can be made using the DVD menu.
In this case, press MENU to display the DVD menu screen and
then make your selection.
To check whether or not a disc is recorded with angles:
The jacket of discs that are recorded with angles will be marked with
. When locations on discs that are recorded with angles are
played back, the
indicator can be displayed.
To cancel the angle mark, set [Angle Indicator] to [Off] in the Setup
screen Video menu described in the section below.
29
ENGLISH
Setting the
Language
Options
Setting Language and
Subtitle Preferences in the
Setup Screen Menus
DVDs have the capacity to contain a great deal of audio
information, which includes the ability to hold up to 8 different
language tracks and subtitle information in as many as 32
different languages. This section outlines the variety of audio
language and subtitle options available with this player.
Notes
• DVDs differ in content and do not all contain multiple language or
subtitle information. Therefore making settings in this section may
have no effect on some DVDs.
• If you have already completed the Setup Navigator screen
operations, the settings on this page have already been set by the
player.
The Setup screen Language menu contains a number of
settings related to the audio and subtitle language
preferences.
Selecting an audio language
preference
The audio language that you normally listen to can be
selected from the various audio languages on a DVD. Even
when the audio language is changed during playback by
pressing AUDIO, the language selected at this setting will be
selected as the default when the DVD is changed.
Make changes to the [Audio Language] setting in the Setup
screen Language menu.
Setting the on-screen
display (OSD) language
Audio1 Audio2 Video Language General
OSD Language – English
Audio Language - English
English
Subtitle Language - Japanese
French
Auto Language - Japanese
Spanish
Other
This setting is used to establish the language that operation
indicators and on-screen messages and operations display.
Change this setting in the Setup screen Language menu
[OSD Language] setting.
Setup audio language
Move
OSD Language English
English
Audio Language - English
français
Subtitle Language - Japanese
Español
Auto Language – On
*Factory setting
Setup player’s OSD language
SETUP
Exit
Note
Settings: English*
français
Español
The menu settings may be different from those shown above.
* Factory setting
Note
The [OSD Language] setting is factory set to [English]. If you
want English to be displayed, it is not necessary to adjust this
setting.
30
Exit
Settings: English*
French
Spanish
Other
(For details on how to select other languages, see
‘When “Other” is selected’ on page 33.)
Audio1 Audio2 Video Language General
Move
SETUP
ENGLISH
Changing the Audio Language
(Multi-Language Function) – DVD
Dolby Digital, PCM, and other audio data can be recorded on
DVDs in a number of languages or audio tracks, letting you
choose the desired language or audio.
Changing Audio Type – Video CD/CD
For enjoyment of karaoke or similar format Video CDs and
CDs, it is possible to select stereo audio, or either right or left
channel mono depending on the requirements of the source.
Press AUDIO repeatedly during playback to switch
the audio type.
Audio output changes from [1/L] (Left channel) to
[2/R] (Right channel) to [Stereo].
OPEN/CLOSE
VIDEO ON/OFF
A-B
REPEAT
RANDOM
1
2
3
4
5
6
Audio
7
8
+10
T-C
: 1/L
9
CLEAR
0
TOP
MENU
MENU
RETURN
ENTER
Audio
ANGLE
SUBTITLE
AUDIO
PROGRAM
OSD
LAST
MEMORY
SETUP
DIMMER
CONDITION
MEMORY
: 2/R
AUDIO
Audio
: Stereo
Press AUDIO repeatedly to select the desired
language.
Pressing AUDIO once displays the currently selected
language. Subsequent presses rotates through the audio
languages available on the DVD.
Audio
O
HELL
:1
English
Dolby Digital
5.1CH
Audio
:2
Spanish
Dolby Digital
5.1CH
Note
With karaoke and other discs, set the appropriate audio type for
singing and accompaniment after referring to information on the
disc jacket or accompanying material.
SETTING THE LANGUAGE OPTIONS
REMOTE CONTROLLER
RC7010DV
HOLA
Notes
• You cannot switch languages if there is only one language
recorded on the disc.
• Switching the audio language may not be possible with some
titles. In this case, the
mark is displayed.
• For some titles, selection can be made using the DVD menu.
In these cases, press MENU to display the DVD menu screen
and then make your selection.
31
ENGLISH
Selecting a Subtitle Language
(Multi-Language Subtitles)
– DVD
You can select a desired subtitle language with DVDs that
have subtitle data in multiple languages recorded on them.
Selecting a subtitle language
preference
The subtitle language that you will normally display can be
selected from the subtitles programmed on a disc. Even
when the subtitle language is changed during playback by
pressing SUBTITLE, the language selected at this setting will
be selected when the disc is changed.
Make changes to the [Subtitle Language] setting in the
Setup screen Language menu.
OPEN/CLOSE
VIDEO ON/OFF
Audio1 Audio2 Video Language General
A-B
REPEAT
1
2
3
4
5
6
7
8
+10
T-C
OSD Language – English
Audio Language – English
English
Subtitle Language Japanese
Auto Language - English
French
Spanish
Other
Setup disc’s subtitle language
SETUP Exit
Move
RANDOM
9
CLEAR
0
TOP
MENU
MENU
RETURN
ENTER
ANGLE
SUBTITLE
Settings: English*
French
Spanish
Other
(For details on how to select other languages, see
‘When “Other” is selected’ on page 33.)
PROGRAM
OSD
LAST
MEMORY
SETUP
DIMMER
CONDITION
MEMORY
*Factory setting
SUBTITLE
AUDIO
Note
The menu settings may be different from those shown above.
REMOTE CONTROLLER
RC7010DV
Press SUBTITLE repeatedly during playback.
Pressing SUBTITLE once displays the currently selected
subtitle language. Subsequent presses rotates through the
subtitle languages available on the DVD.
Subtitle
:1 English
HELLO!
Subtitle
:2 Spanish
HOLA!
Notes
• The subtitle language cannot be switched if the subtitle
language is not recorded, or if only one language is recorded.
• Switching the subtitle language may not be possible with some
discs. In this case, the
mark will be displayed.
• To clear subtitles during playback, press SUBTITLE and then
press CLEAR, or press SUBTITLE until [Off] appears.
• For some discs, subtitle language selection can be made using
the menu on the DVD. In this case, press MENU to display the
DVD menu screen and then make your selection.
32
ENGLISH
When “Other” is selected
When you want to select one of the 136 languages as the
main audio language, follow the steps below when the
following screen appears.
3
If you select “List of Languages”, use the
5/ ) to select the language.
cursor buttons (5
For languages which are only shown as a code, please
refer to “Language Code List” on page 50.
A language code list can be found on page 50.
List of Languages
Audio1 Audio2 Video Language General
ja: Japanese
OSD Language – English
Audio Language - English
English
Subtitle Language - Japanese
French
Auto Language - Japanese
Spanish
Other
If you select “Code”, use the cursor buttons
5/ ) to input the numbers of the input code.
(5
Setup audio language
Move
SETUP
Exit
Use the cursor buttons (2/3) to change the position of
the cursor. You can also use the number buttons to enter
the code.
Code (0~2)
OPEN/CLOSE
VIDEO ON/OFF
A-B
REPEAT
1
RANDOM
0
0
1
2
3
4
5
6
Note
7
8
9
To select number 0, press +10/0 rapidly.
+10
T-C
1
CLEAR
0
TOP
MENU
MENU
RETURN
ENTER
4
1, 4
1, 2, 3
SUBTITLE
AUDIO
OSD
LAST
MEMORY
SETUP
DIMMER
CONDITION
MEMORY
To exit the screen without making any changes, press
RETURN.
Setting Auto Language to control
subtitle and audio language based on
program content
REMOTE CONTROLLER
RC7010DV
1
Use the cursor buttons to select “Other” and
press ENTER.
When the Auto Language function is used, foreign movies are
shown with the original audio soundtrack and subtitles in the
language selected in the [Subtitle Language] menu option.
Domestic films are shown with the original audio soundtrack
and no subtitles.
Make changes to the [Auto Language] setting in the Setup
screen Language menu.
SETTING THE LANGUAGE OPTIONS
ANGLE
PROGRAM
Press ENTER to set the new language.
The language selection screen appears.
Audio1 Audio2 Video Language General
OSD Language – English
Audio Language – English
Subtitle Language – Spanish
Auto Language On
On
Off
Play dialog, etc. in original language
Subtitle ON with foreign audio.
SETUP Exit
Move
Audio1 Audio2 Video Language General
Audio Language
List of Languages
Code (0~2)
ja: Japanese
1
0
0
1
Setup audio language
RETURN Return
Move
+/–
ENTER Select SETUP Exit
Settings: On*
Off
* Factory setting
2
2/3
3) to select either
Use the cursor buttons (2
“List of Languages” or “Code”.
Note
The Auto Language function operates only when this function is set
to [On], and the language set for the [Audio Language] and
[Subtitle Language] settings is the same.
33
ENGLISH
Selecting a DVD menu language
preference
Selecting subtitles, assist subtitles or
no subtitles
In addition to containing different audio languages, DVD may
also contain menu screens in different languages as well.
Setting a DVD language preference, sets the selected
language as a default when DVDs with menu information in
that language are encountered.
Selecting [w/ Subtitle Language] automatically assigns the
language selected in the [Subtitle Language] setting.
Make changes to the [DVD Language] setting in the Setup
screen Language menu in the [Expert] menu mode (page
23).
Use this function to turn the subtitles on or off. Additionally,
some DVDs provide assist subtitles that provide additional
explanations of scenes in addition to the standard subtitles
for viewers who are hard of hearing. Select [Assist Subtitle]
to display these subtitles on DVDs where this function is
offered.
Make changes to the [Subtitle Display] setting in the Setup
screen Language menu in the [Expert] menu mode (page
23).
Audio1 Audio2 Video Language General
Audio1 Audio2 Video Language General
OSD Language – English
Audio Language – English
Subtitle Language – Spanish
Auto Language – On
DVD Language - English
On
Off
Subtitle Display On
Assist Subtitle
Subtitle Off - Selected
Subtitle
SETUP Exit
Move
OSD Language – English
Audio Language – English
Subtitle Language Japanese
w/ Subtitle Language
Auto Language - On
English
DVD Language English
French
Subtitle Display - On
Spanish
Subtitle Off - Selected
Other Subtitle
SETUP Exit
Move
Settings: w/ Subtitle Language*
English
French
Spanish
Other
(For details on how to select other languages,
see ‘When “Other” is selected’ on page 33.)
* Factory setting
Notes
• The menu settings may look different from the one shown above.
• If this function is not effective, the languages that can be
selected may also be selected in the DVD menu. Press MENU to
open the DVD menu and make your selection accordingly.
Settings: On*
Off
Assist Subtitle
* Factory setting
Notes
• If there is no subtitle information recorded on the DVD, no
subtitles are displayed even if this function is set to [On].
• This setting serves as a default as whether or not to display
subtitles. Even if this option is set to [Off], subtitles can be
displayed by pressing SUBTITLE. Similarly, if this option is set to
[On], the subtitles can be turned off by pressing SUBTITLE and
then CLEAR.
Forcing subtitles to be displayed
This setting allows you to force subtitles to be displayed with
DVDs that do not automatically display them on the screen.
Select [With Audio] to display the subtitles in the same
language as the currently selected audio language. Select
[Selected Subtitle] to display the subtitles in the language
set in the [Subtitle Language] setting.
Make changes to the [Subtitles Off] setting in the Setup
screen Language menu in the [Expert] menu mode (page
23).
Audio1 Audio2 Video Language General
OSD Language – English
Audio Language – English
Subtitle Language – Spanish
Auto Language – On
DVD Language – English
With Audio
Subtitle Display - On
Subtitle Off Selected
Subtitle
Selected Subtitle
SETUP Exit
Move
Settings: With Audio
Selected Subtitle*
* Factory setting
34
ENGLISH
Advanced
Functions
Entering the password
When you select either [Level Change] or [Password
Change], it is necessary to enter the password (4-digit code
number). Use the following steps at any time you are asked to
enter or confirm your password.
1
This player is compatible with DVD, Video CD, and CD disc
formats. Users already familiar with Video CD or CD will
already be familiar with some of the functions the player is
capable of performing. With DVD, an even greater number of
possibilities and functions are available.
5/ ) or the number
Use the cursor buttons (5
buttons to select a number between 0 and 9.
You can also use the number buttons to enter the
numbers directly. When entering your password for the
first time, or changing it, you will be asked to reenter
your password. When using the number buttons to
confirm the password, the numbers appear as asterisks,
and the cursor advances automatically to the next
position.
Note
DVDs differ in content and do not all contain the same information.
Therefore some functions in this section may not work or have no
effect on some DVDs.
Audio1 Audio2 Video Language General
Parental Lock: Register Code Number
Setting the Parental Lock
Level
This player lets you set the Parental Lock if the DVD has a
parental lock level recorded on it. With Parental Lock capable
discs, you can block access to material you feel is
inappropriate for your children. Refer to the DVD disc jacket
and the accompanying documentation to see if a particular
disc contains a parental lock level.
Make changes to the [Parental Lock] setting in the Setup
screen General menu. Please note that changes to the
Parental Lock level can only be made when the player is
stopped.
Enter 4–Digit Code
Move
+/–
RETURN Return
SETUP
Exit
Note
To select number 0, press +10/0 rapidly.
2
2/3
3) to move the
Use the cursor buttons (2
cursor to a different position in the password.
When all four numbers of the passoword have been
entered, ENTER appears on the screen.
Audio1 Audio2 Video Language General
Setup Menu Mode – Basic
Setup Navigator
Parental Lock Level Change
Password Change
Parental Lock: Register Code Number
1
Move
0
1
9
ENTER
Enter 4–Digit Code
Setup viewing restrictions
SETUP
Move
+/–
Exit
RETURN Return
SETUP
Exit
Settings: Level Change
(For information, refer to “Setting the Parental Lock
level” on the following page.)
Password Change
3
Press ENTER to set the new password.
The password is entered.
(For information, refer to “Changing the password”
on the following page.)
Note
When a DVD with a set Parental Lock level is
loaded
Playback cannot be started until the code number has been correctly
input by using the cursor buttons (2/3/5/ ) or the number buttons,
and ENTER has been pressed.
Be sure not to forget your password. If you should forget it, reset
the system, and enter a new password. To reset the system, see
‘Resetting the Player to System Settings’ (page 47). Please note
that this procedure resets the system, and clears all saved
settings, not just the password.
SETTING THE LANGUAGE OPTIONS / ADVANCED FUNCTIONS
Audio1 Audio2 Video Language General
35
ENGLISH
Setting the Parental Lock level
Changing the password
Change the Parental Lock level to a higher or lower level
according to the settings printed on the DVD disc jacket or
accompanying documentation. If you use the Condition
Memory function to save the settings for a particular disc, the
Parental Lock level is saved as well. Because it is saved in
memory, Parental Lock levels can be set for individual discs
according to their content rather than a set level for all DVDs.
Change your password whenever you feel it is necessary.
However, if you forget your existing password, you cannot
enter this screen to change it.
Audio1 Audio2 Video Language General
Setup Menu Mode – Basic
Setup Navigator
Parental Lock Level Change
Password Change
Setup viewing restrictions
Audio1 Audio2 Video Language General
Move
Parental Lock: Level Change
Level 1
2
3
4
5
6
7
ENTER
Select SETUP Exit
8
Set Parental Lock
Move
1
ENTER
RETURN Return
Select SETUP Exit
2/3
3) to adjust the
Use the cursor buttons (2
Parental Lock level.
The lock icons appear [unlocked] up to the selected
level to indicate that access is available.
3
Press ENTER to set the new level.
Select [Password Change] in the [Parental
Lock] setting.
The screen changes to the password input screen. To
enter the password, refer to ‘Entering the password’ on
the previous page.
If you have not yet set a password, you cannot select
this setting. Establish a password by selecting [Level
Change] first.
Select [Level Change] in the [Parental Lock]
setting.
The screen changes to the password input screen. If you
have not yet set a password, you will be asked to do so
at this time. To enter the password, refer to “Entering the
password” on the previous page.
2
1
2
2/3
3/5
5/ ) or the
Use the cursor buttons (2
number buttons to enter the new password.
3
When the new password has been entered,
press ENTER.
The new password is set and the screen returns to the
General menu screen. To go back to the General menu
screen without making any changes, press RETURN.
The new Parental Lock level is set and the screen returns
to the General menu screen. To go back to the General
menu screen without making any changes, press
RETURN.
Changing the Background
Color of the Screen
Notes
The parental lock level is equivalent to the following USA movie
ratings.
LEVEL 7: NC-17
LEVEL 6: R
LEVEL 4: PG 13
LEVEL 3: PG
LEVEL 1: G
You can select a blue or black background to appear when
the player is in the stop mode.
Make changes to the [Background Color] setting in the
Setup screen General menu in the [Expert] menu mode
(page 23).
The parental lock levels for “CANADA” are included for future use.
Check the appropriate parental lock level when you buy a DVD
video disc equipped with the parental lock feature in the future.
Audio1 Audio2 Video Language General
Setup Menu Mode – Expert
Setup Navigator
Parental Lock – Level 8
Background Color Black
Blue
Move
SETUP
Exit
Settings: Black
Blue*
*Factory setting
36
ENGLISH
Still Frame/Slow Play/Frame
Advance Playback – DVD/Video CD
The video images on DVD and Video CD can be viewed as a
still frame, played back at slow speeds and even advanced
frame by frame.
A-B
REPEAT
2
3
4
5
6
8
+10
T-C
When viewing a DVD, if the paused picture shakes, select the
[Field] setting in the Setup screen Video menu [Still Picture]
setting as described in the section on page 28.
When viewing a still frame playback, pressing PLAY 3
restores normal playback operation.
RANDOM
1
7
Press PAUSE 8.
To return to normal playback
OPEN/CLOSE
VIDEO ON/OFF
Viewing a still frame
Viewing slow playback
9
Press FWD ¡ for longer than one second during
Pause.
CLEAR
0
TOP
MENU
MENU
• Slow playback is engaged.
• During slow playback, the speed of playback can be
adjusted from 1/2 normal playback speed to 1/16 normal
playback speed in four steps using REV 1 and FWD ¡.
ENTER
RETURN
PAUSE
PLAY
1/16 – 1/8 – 1/4 – 1/2
REV/FWD
ANGLE
SUBTITLE
AUDIO
PROGRAM
OSD
LAST
MEMORY
SETUP
DIMMER
CONDITION
MEMORY
REMOTE CONTROLLER
RC7010DV
Press REV 1 for longer than one second during
Pause.
• Slow playback in the reverse direction is engaged.
• In the reverse direction, the playback speed cannot be
adjusted.
To return to normal playback
Frame by frame advance playback:
Viewing one frame at a time
1
Press PAUSE 8.
2
Press FWD ¡ or REV 1 rapidly.
ADVANCED FUNCTIONS
When viewing still frames or slow playback, pressing PLAY 3
restores normal playback operation.
FWD ¡: The picture advances one frame each
time the button is pressed.
REV 1: The picture backs up a DVD a few frames each
time the button is pressed.
To return to normal playback
When viewing frame by frame playback, pressing
PLAY 3 restores normal playback operation.
Notes
• There is no sound when viewing still frames or slow playback, or
when advancing one frame at a time.
• Still frame, slow play, or frame advance playback may not be
possible with certain titles. In this case, the
mark is
displayed.
37
ENGLISH
Searching for a Title, Chapter,
Track, or Location on a Disc
1
The type of search changes which each press as
follows.
– DVD/Video CD/CD
3 Title
This player offers different ways of accessing the information
on a DVD, Video CD, or CD. Using SEARCH MODE, you can
search for titles or chapters on a DVD, tracks on a Video CD
or CD, and even select the point in time to start playback.
Off 2
2
VIDEO ON/OFF
1
A-B
REPEAT
Time 2
Press the number button(s) of the desired title,
chapter or track or of the specific time where
you would like to begin playback.
RANDOM
2
3
4
5
6
7
8
+10
T-C
3 Chapter/Track
• To select number 3, press 3.
• To select number 10, press 1 and +10/0 rapidly.
• To select number 87, press 8 and 7.
OPEN/CLOSE
1
Press T/C repeatedly to select the type of
search.
When performing a time search:
• To select 21 minutes, 43 seconds, press
2, 1, 4, and 3.
• To select 1 hour, 14 minutes, press 7, 4, +10/0 and
+10/0.
2
9
CLEAR
0
TOP
MENU
MENU
Note
• To select number 0, press +10/0 rapidly.
ENTER
RETURN
3
ANGLE
SUBTITLE
AUDIO
PROGRAM
OSD
LAST
MEMORY
SETUP
DIMMER
CONDITION
MEMORY
REMOTE CONTROLLER
RC7010DV
3
Press PLAY 3.
Playback of the selected title, chapter or track starts.
When a time search is performed, playback begins at
the appointed time.
Notes
• For some discs, selection can be made using the top menu on
the DVD. In this case, press TOP MENU to display the menu
screen and then make your selection.
• With some DVDs, the search operation may not be possible and
may stop shortly after being performed. In this case, the
mark is displayed.
• Time search is not possible with CDs.
• When performing DVD time search, playback may start from a
slightly different time than that specified.
• Time search is not possible during when the disc is stopped.
• Search using time search is not possible during PBC playback
of Video CDs.
To perform a direct title or chapter/track search
using the number buttons
• Press the number buttons while the disc is stopped to
select a title number.
• Press the number buttons while the disc is playing to select
a chapter or track.
Note
Direct search cannot be performed for title, chapter, or track
numbers 20 or higher. To search for titles, chapters, or tracks with
numbers 20 or higher, use the title or chapter/track search
procedures using SEARCH MODE as described on this page.
Notes (for direct search)
• To select number 3, press 3.
• To select number 10, press +10/0 for longer than 1 sec and then
press +10/0 rapidly.
• To select number 13, press +10/0 for longer than 1 sec and then
press 3 rapidly.
Memo
• To select number 10, press +10/0 for longer than 1 sec.
• To select number 0, press +10/0 rapidly.
38
ENGLISH
Repeat Play – DVD/Video CD/CD
You can repeat an entire title, chapter or track, or just a part.
OPEN/CLOSE
VIDEO ON/OFF
A-B
REPEAT
RANDOM
REPEAT
(PEPEAT) A-B
1
2
3
4
5
6
7
8
+10
T-C
Repeat play of a specified section
Press (REPEAT) A–B at the beginning and end of
the section you want to repeat.
• When (REPEAT) A–B is pressed a second time, the disc
returns to the location where (REPEAT) A–B was pressed
first and plays the selected section repeatedly.
• You can only perform A–B repeat within the same title,
chapter, or track.
9
CLEAR
0
TOP
MENU
MENU
RETURN
ENTER
CLEAR
Press CLEAR. Playback continues, but the repeat function is
canceled.
PLAY
ANGLE
SUBTITLE
AUDIO
PROGRAM
OSD
LAST
MEMORY
SETUP
DIMMER
CONDITION
MEMORY
To cancel A–B repeat play
Return to a specified location on a
disc
1
Press (REPEAT) A–B at the desired location.
2
When you want to return to the specified
location, press PLAY 3.
REMOTE CONTROLLER
RC7010DV
To clear the specified location
Press CLEAR to cancel repeat play or to clear the specified
location that was set using (REPEAT) A–B.
Repeat play of a chapter/track
Repeat play of a title
Press REPEAT twice during playback of the title
you want to repeat.
• With some DVD discs, there may be times when repeat playback
is not possible. In these cases, the
mark will appear on the
screen.
• With Video CDs, repeat play is not possible when the menu is
displayed (PBC playback). To perform repeat play, start
playback without displaying a menu by pressing the track
number to be repeated when the disc is stopped, and then press
REPEAT.
• If you switch camera angle during repeat play, repeat play is
cancelled
ADVANCED FUNCTIONS
Press REPEAT once during playback of the chapter
or track you want to repeat.
Notes
• With DVDs, the title continues playing until the end, and
then playback starts once more from the beginning of that
title.
• With CDs and Video CDs, a disc is considered a single
title, so the entire disc is repeated.
To repeat a program
Press REPEAT once during program playback to repeat the
program.
To cancel repeat play
Press CLEAR. Playback continues, but the repeat function is
canceled.
39
ENGLISH
Random Play – DVD/Video CD/CD
Play titles, chapters, or tracks on a disc in random order.
Random playback of chapters within
one title – DVD
Press RANDOM once, then press ENTER or
PLAY 3 .
OPEN/CLOSE
VIDEO ON/OFF
A-B
REPEAT
RANDOM
1
2
3
4
5
6
7
8
+10
T-C
RANDOM
“Random Chapter” appears on the screen, and chapters
within the title will be played back in random order.
Random playback of titles
9
CLEAR
0
TOP
MENU
MENU
RETURN
ENTER
CLEAR
Press RANDOM twice, then press ENTER or
PLAY 3 .
ENTER
“Random Title” appears on the screen, and titles will be
played back in random order.
PLAY
NEXT
PREV.
ANGLE
SUBTITLE
AUDIO
PROGRAM
OSD
LAST
MEMORY
SETUP
DIMMER
CONDITION
MEMORY
Random playback of tracks
–Video CD/CD
Press RANDOM.
REMOTE CONTROLLER
RC7010DV
“Random” appears on the screen, and random playback
begins.
To change titles, chapters, or tracks during random
play
• Press NEXT ¢ and the next randomly selected track
starts playing.
• Press PREV 4 and playback of the current track starts
again from the beginning.
To stop random play
Press CLEAR. This returns you to normal playback of
chapters/tracks in order from the chapter/track currently
playing.
Notes
• With Video CDs, random play is not possible during playback
when the menu is displayed (PBC playback). To perform
random play, start playback without displaying a menu by
pressing a track number button while in the stop mode, and then
press RANDOM.
• Random play of programmed chapters/tracks is not possible.
• In the case of DVDs, random playback may not be possible with
some discs.
• Repeat playback of random playback is not possible. In these
cases, the
mark will appear on the screen.
40
ENGLISH
Playback in a Desired Order
(Program Play) – DVD/Video CD/CD
4
The titles and chapters within a title on a DVD and similarly
the tracks on a Video CD or CD can be arranged to play in
the order you want.
In the program window, use the number
buttons to enter the numbers of the titles or
chapters in the order you want to program
them in.
• To program DVD titles/chapters 9, 7, and 18 in order,
press 9, 7, +10/0 for longer than 1 sec and 8.
Programming DVDs
Program Chapter Program Title
Program Chapter Program Title
A program with a maximum of 24 steps can be memorized.
Current:
Title
Title
7 Chapter 1
1 (Chapter 1~ 18)
Move
VIDEO ON/OFF
A-B
REPEAT
1
2
3
5
6
7
8
9
+10
CLEAR
TOP
MENU
MENU
RETURN
ENTER
5
4
CLEAR
0
2, 3
5
5
STOP 7
1
2(/20)
ENTER
Play
PROGRAM
Exit
Move
ENTER
Play
PROGRAM
Exit
RANDOM
4
T-C
Title
Program Memory – Off
Program Memory – Off
OPEN/CLOSE
Current:
09 07 18
09 07 18
ANGLE
SUBTITLE
AUDIO
PROGRAM
OSD
LAST
MEMORY
SETUP
DIMMER
CONDITION
MEMORY
Press ENTER or PLAY 3.
• Playback starts in the set order.
• Press PROGRAM to return to the previous display.
The program will not begin until PLAY 3 is pressed.
To program a pause in a program
Press PAUSE 8 instead of a number button.
“8” appears on the screen and the pause can be
programmed.
A pause cannot be programmed as the first or last position in
a program, and two or more pauses cannot be programmed
in succession.
To delete a number:
Use the cursor buttons (5/ /2/3) to highlight the
incorrect number and then press CLEAR.
The number is deleted. If the number was before another
number, the later numbers are reordered automatically.
REMOTE CONTROLLER
RC7010DV
Use the cursor buttons (5/ /2/3) to highlight the number
to be placed after the new number and then press the
number button(s) of the number to be inserted.
1
The new number is inserted before the previously selected
number.
Press PROGRAM.
To stop program play
The Program screen appears.
Press STOP 7.
Program Chapter Program Title
Program Chapter Program Title
Current:
Title
Title
7 Chapter 1
1 (Chapter 1~ 18)
Current:
Title
2(/20)
ADVANCED FUNCTIONS
To insert a number:
Notes
Program Memory – Off
Program Memory – Off
Move
ENTER
Play
PROGRAM
Exit
Move
ENTER
Play
PROGRAM
Exit
2
2/3
3) to select either
Use the cursor buttons (2
Chapter or Title program.
3
Once the program type is selected. Use the
cursor button ( ) to enter the program window.
• When programming chapters, chapters not programmed may
appear on the screen. This is not a malfunction.
• Programming may not be possible with certain DVD discs. On
these types of discs, the
mark will appear on the screen
when programming is attempted.
• Only chapters within the same title can be programmed during
chapter programming.
When [Program Chapter] is selected, you must also
select what title the chapters to be programmed are in.
Use the cursor button (5) to highlight “Title” and then
use the number buttons to enter the title number to be
used.
41
ENGLISH
Programming Video CDs, CDs
Additional programming options
A program with a maximum of 24 steps can be memorized.
– DVD/Video CD/CD
After you have made a program, it is then possible to confirm,
add, or clear the contents of the program.
OPEN/CLOSE
VIDEO ON/OFF
A-B
REPEAT
1
2
3
4
5
6
7
8
+10
T-C
To confirm the contents of a program:
RANDOM
On a CD or Video CD track program, press PROGRAM to
confirm. The program screen displays the current program.
2
9
CLEAR
CLEAR
0
TOP
MENU
MENU
RETURN
ENTER
Cursor
1
ANGLE
SUBTITLE
AUDIO
PROGRAM
OSD
LAST
MEMORY
SETUP
DIMMER
CONDITION
MEMORY
3
3
On a DVD, select the program type (title or chapter) with the
2/3
3). The current DVD title or chapter
cursor buttons (2
program can then be confirmed on the appropriate program
screen.
To add to a program:
1 Press PROGRAM.
2 Press a number button to add a new title, chapter, or track
at the end of the program.
3 Press PROGRAM to exit the program screen.
To delete a program:
1 Press PROGRAM.
2 Select the program with the cursor buttons (2/3), then
press CLEAR.
3 Press PROGRAM to exit the program screen.
REMOTE CONTROLLER
RC7010DV
Notes
1
Press PROGRAM.
The program screen appears. When a Video CD or CD is
loaded, the cursor appears in the program window.
Program Track
1(/10)
0.00
Current: Track
Total Time
Move
2
ENTER
Play
PROGRAM
Exit
Use the number buttons to enter the numbers
of the tracks in the order you want to program
them in.
• To program tracks 9, 7, and 18 in order, press 9, 7,
+10/0 for longer than 1 sec and 8.
• To edit the program, refer to the procedures on the
previous page.
3
Press ENTER or PLAY 3.
• Playback starts in the specified track order.
• To stop the program play, press STOP 7.
Notes
• To program a pause, or to add or delete a number, refer to the
procedures for programming DVDs on page 41.
• You cannot program when playing a Video CD using menu
selections (during PBC).
42
• The complete program will be deleted even if the disc tray is
open.
• Pressing CLEAR when the disc is stopped will clear all
programs.
ENGLISH
To make a program of your favorite parts of a disc
as it plays – DVD/Video CD/CD
With this player, it is possible to make a program as you
watch a DVD or Video CD or while listening to a CD.
Press and hold PROGRAM for at least 2 seconds at
any point during playback of a title, chapter, or
track you want to program, and it will be made into
or added to a program without displaying a
Program screen. When a title, chapter, or track is
successfully added to the program, it is shown
momentarily in the display as well as its position in
the program.
Chapter
To erase a program saved in memory – DVD
The player erases programs in chronological order when the
maximum number of programs that can be held in memory is
exceeded. To prevent the player from erasing older programs
that you may still use regularly, or when you don’t want to use
a program anymore, it is possible to manually erase
programs stored in memory.
1
Load a DVD that has a program stored in
memory.
2
Press PROGRAM.
The program screen appears.
3
Use the cursor button ( ) to highlight [Program
3/ ) to
Memory] and use the cursor buttons (3
select [Off].
4
Press ENTER.
07 3 Program 03
The program is cleared from memory.
To confirm the contents of a program:
Press PROGRAM.
Notes
• When using this function to program DVDs, the program being
created corresponds to the Program screen (chapter or title) that
appears when PROGRAM is pressed. Be sure to check that the
appropriate program type is selected.
• You cannot make a program containing chapters in different
titles.
This player can memorize the programs on up to 24 DVDs.
By turning the [Program Memory] to [On], the player will
save your program and recall it the next time you use the
same DVD. When the program memory exceeds 24,
programs will be erased in chronological order from the
oldest program in memory.
1
Use the cursor button ( ) to highlight [Program
3) to
Memory] and use the cursor button (3
select [On].
ADVANCED FUNCTIONS
To save a program in memory – DVD
Program Chapter Program Title
Current:
Title
7 Chapter 1
1 (Chapter 1 ~ 49)
Title
09 07 18
Program Memory On
Off
Move
2
PROGRAM
Exit
Press ENTER.
The program is saved in memory.
Note
When a DVD with a program stored in memory is loaded, program
playback may start automatically.
43
ENGLISH
Continuing Playback from a
Specified Location (Last
Memory) – DVD/Video CD
The Last Memory function is convenient when you want to
continue viewing a disc from the point where you were
watching before. Unlike the resume function, the Last
Memory function is effective even if the DVD is removed from
the player (Last Memory locations saved for Video CDs are
effective only if the disc remains loaded in the player).
Memorizing a Last Memory location to
return to later
1
The “LAST MEMO” indicator lights on the player.
2
A-B
REPEAT
RANDOM
1
2
3
4
5
6
7
8
+10
T-C
9
CLEAR
0
TOP
MENU
MENU
RETURN
ENTER
STOP 7
CLEAR
Resuming playback from where LAST
MEMORY was pressed
1
PLAY
ANGLE
Press the Power button to turn the power off,
or stop playback with STOP 7.
Once memorized, the memorized point will be recalled
even if the power is turned off, or if the disc is ejected.
Points on up to 5 discs can be memorized, and those
points are recalled the next time any of the discs are
played back.
• A Last Memory point can be memorized for only one
Video CD at a time as the function is only effective
until the Video CD is removed from the player.
OPEN/CLOSE
VIDEO ON/OFF
Press LAST MEMORY during play.
SUBTITLE
Some DVDs will start playback automatically when
loaded. In this case, press STOP 7 to stop playback.
AUDIO
PROGRAM
OSD
LAST
MEMORY
SETUP
DIMMER
CONDITION
MEMORY
REMOTE CONTROLLER
RC7010DV
Load a disc that has a Last Memory point
memorized.
LAST MEMORY
2
Press LAST MEMORY while in the stop mode.
The disc begins playback at the memorized point.
• Last Memory mode may not function for some DVDs.
• If you register more than five DVDs, details of the
latest disc are memorized, while details of the least
recent disc (the disc you registered first) is erased.
• Even with a disc you have memorized with Last
Memory, playback begins at the start of the disc if you
press PLAY 3.
• This function is for playback of DVDs or Video CDs
only. You cannot use it with CDs.
To clear the Last Memory location
Call up the Last Memory location by pressing LAST
MEMORY. Then press CLEAR while “Last Memory” is still
being displayed on the screen.
The “LAST MEMO” indicator disappears from the display.
44
ENGLISH
Memorizing Settings for
Often Viewed DVDs
(Condition Memory) – DVD
You can store in memory settings for DVDs you often watch.
Settings remain in memory even if you remove the disc from
the player, or switch power to the player to standby. If you
load a disc that has its settings memorized, “CONDITION”
appears in the display. When you start playing the disc, the
memorized settings are automatically recalled.
OPEN/CLOSE
VIDEO ON/OFF
A-B
REPEAT
RANDOM
1
2
3
4
5
6
7
8
+10
T-C
9
CLEAR
0
TOP
MENU
MENU
RETURN
ENTER
ANGLE
SUBTITLE
AUDIO
PROGRAM
OSD
LAST
MEMORY
SETUP
DIMMER
CONDITION
MEMORY
CLEAR
When a disc that has memorized settings is loaded
“Condition Memory” will appear on the screen, and the
previously memorized settings will be selected.
Erasing the recorded contents
Load a disc that has memorized settings, and press CLEAR
while “Condition Memory” is being displayed. The disc’s
recorded data will be erased.
Notes
• Settings are stored in memory for use any time.
• You can store settings for up to 15 DVDs in memory. If
you memorize settings for more than 15 DVDs,
previously memorized settings are erased in
chronological order from the least recently memorized.
Subsequently, if you load a disc with erased settings, the
settings of the most recently played disc are used.
• If you make changes to any of the settings memorized in
Condition Memory, press CONDITION MEMORY during
playback to memorize new settings.
• Switching of the multi-language mode etc., is automatic
on some discs.
CONDITION
MEMORY
REMOTE CONTROLLER
RC7010DV
Settings are memorized for the disc currently playing.
ADVANCED FUNCTIONS
Press CONDITION MEMORY during playback.
The following six settings are memorized:
Picture Quality (page 28)
On Screen Display (page 28)
Multi-Angle (page 29)
Multi-language (page 31)
Multi-Language subtitles (page 32)
Parental Lock Level (page 35)
45
ENGLISH
Viewing Disc Information
The display changes for each type of disc as follows each
time the button is pressed.
– DVD/Video CD/CD
Use OSD to get current information about the disc currently
loaded. You can get information about the titles and chapters
on a DVD or tracks on a Video CD or CD. When viewing
DVDs, you can also check the digital bitstream transmission
rate.
DVD
TITLE information:
Play
Title
2–1
–0.05/
0.24
0.29
Top Row: title and chapter
number, elapsed time of
current title
Bottom Row: remaining
time in title, total time of
title
OPEN/CLOSE
VIDEO ON/OFF
A-B
REPEAT
RANDOM
«
1
2
3
4
5
6
7
8
+10
T-C
Play
Chapter
9
CLEAR
1–1
1.19/
1.19
2.18
0
TOP
MENU
MENU
Top Row: title and
chapter number, elapsed
time of current title
Bottom Row: time in
current chapter, total time
of chapter
ENTER
RETURN
CHAPTER information:
«
ANGLE
SUBTITLE
PROGRAM
OSD
LAST
MEMORY
DIMMER
CONDITION
MEMORY
SETUP
AUDIO
OSD
Play
Chapter
1–1
–0.59/
1.19
2.18
REMOTE CONTROLLER
RC7010DV
CHAPTER information:
Top Row: title and
chapter number, elapsed
time of current title
Bottom Row: remaining
time in current chapter,
total time of chapter
«
Press OSD during while a disc is playing. Press
OSD repeatedly to change the information being
displayed.
Play
Tr. Rate :
1–1
1.32
8.9
Data transmission rate
information:
Top Row: title and
chapter number, total
elapsed time of DVD
The disc information is displayed superimposed over the
video image on the screen.
Bottom Row: bitstream
transmission rate level
Press and hold OSD to display the time remaining
on the disc.
When you release the button, the information disappears.
Note
Depending on the format and type of disc being used, not all
screens may be displayed.
46
«
Display off
ENGLISH
CD
Track Information:
Play
Track
1
–3.29/
0.03
3.32
Top Row: current track
number, track time
Bottom Row: remaining
time of current track, and
total time of track
Press OSD during while a disc is stopped to display DVD
title and chapter information or Video CD and CD track
information. Press OSD again to turn the display off.
Information about the titles and chapters or tracks on a disc is
displayed. When the information exceeds the space on the
screen, use the cursor buttons (2/3) to move to other
screens.
DVD
«
DVD information
Information: DVD
Disc information:
Play
All
1/2
–6.15/
0.15
6.32
Top Row: current track
number, total number of
tracks on CD, total elapsed
time of CD
Title
01
02
03
04
05
Chapter
1~ 1
1~ 1
1~ 1
1~ 1
1~ 1
Title
06
07
08
09
1/1
Chapter
1~ 1
1~ 1
1~ 1
1~ 4
DISPLAY
When a DVD is loaded, each
title and the number of
chapters within each title is
displayed.
Exit
Bottom Row: remaining
time of CD, total time of CD
CD and Video CD
«
CD and Video CD
information
Information: Compact Disc
Display off
Total Time
Track
Time
01
02
Video CD (with PBC disabled)
6.30
3.32
2.58
1/1
DISPLAY
Exit
When a CD or Video CD is
loaded, the total time of the
disc and the time of each
track on the disc is
displayed.
Disc information:
Play
All
5/10
–2.38/
20.19
22.57
Top Row: current track
number, total number of
tracks, total elapsed time of
Video CD
To exit the title, chapter and track information.
Press OSD to close the title, chapter and track information
even “Display” icon is shown on the Screen.
Video ON/OFF
«
Track information:
Play
Track
5
2.38/
20.19
4.40
Top Row: current track
number, total elapsed time
of Video CD
Bottom Row: track time,
total time of track
Track information:
5
–2.02/
Resetting the Player to
System Settings
To reset the player, press and hold 7 (stop) on the front panel
when pressing Power switch to turn the power on.
«
Play
Track
Press Video OFF button to turn all of Video Output (Video, S2
and Component) off and then picture is disappeared.
And press it again to turn the all of Video output on.
ADVANCED FUNCTIONS
Bottom Row: remaining
time of Video CD, total time
of Video CD
20.19
4.40
All program memory, saved settings from functions such as
Last Memory and Condition Memory are cleared, and all
Setup screen menus are returned to factory settings.
Top Row: current track
number, total elapsed time
of Video CD
Bottom Row: remaining
time of track, total time of
track
«
Display off
Note
When playing Video CDs in PBC mode or unfinalized CD-Rs not all
the above information is displayed.
47
ENGLISH
Additional
Information
Disc Care
After using discs, store them upright
After playing a disc, always remove it from the player and
return it to its jacket. Then store it standing upright away from
heat and humidity.
• Store discs carefully. If you store discs at an angle, or
stacked on top of each other, discs may become warped
even when in their jackets.
• Do not leave discs in locations such as the seat of a car,
which may become excessively hot.
How to hold discs
CAUTION WHEN USING THE DISC
When loading or removing discs,
try not to touch their playing
surfaces.
All rights reserved.
Unauthorized public performance, broadcasting or
copying is a violation of applicable laws.
Cleaning
Fingerprints or other dirt on the disc may affect sound and
picture quality.
To clean your discs, use a soft clean cloth to wipe them. If
necessary, moisten a soft cloth with diluted neutral detergent
to remove heavy dirt or fingerprints.
Do not wipe in a circular
direction (Concentric
scratches in the disc groove
tend to cause noise.)
Gently wipe from the
inside toward the outer
edge.
Discs must not be cleaned with record cleaning sprays, or
static prevention sprays, etc. Also do not use volatile liquids
such as benzine, or thinner, etc.
Lens cleaner
The player's pickup lens should not become dirty in normal
use, but if for some reason it should malfunction due to
soiling, contact your nearest MARANTZ service center. Lens
cleaners are commercially available, but special care should
be exercised in their use since some may cause damage to
the lens.
Never play cracked or warped discs
The disc revolves in the player at high
speed when it is played. Never play a
cracked, scratched or warped disc. This
may damage the player or cause it to
malfunction.
Never use discs with special shapes
CD’s with special shapes (heart-shaped
CDs, octagonal CDs, etc.) cannot be
played on this set.
Attempting to do so may damage the set.
Do not use such CDs.
48
Notes on using optical cables
• Do not route cords around sharp angles.
When storing, wind the cords so that they
have a diameter of at least 15 cm (6 in.).
15 cm (6 in.) dia.
• When connecting, push all the way into the or more
terminal.
• Do not use cords with a length of over 3 m.
• If moisture or dust has collected on the
plug, wipe it with a soft cloth before connecting.
ENGLISH
For Proper and Long Use of
This Unit
Do not move the unit during playback
During playback, the disc rotates at high speed. Do NOT lift
or move the unit during playback. Doing so may damage the
disc.
When moving the unit
When changing places of installation or packing the unit for
moving, be sure to remove the disc and return the disc table
to its original position in the player. Then, press Power switch
to turn off, then disconnect the power cord. Moving this unit
with the disc loaded may result in damage to this unit.
Installation
• Select a stable place to the side of a TV set or stereo
system to be connected to the unit.
• When using the unit with a stereo system, install the
speakers a little bit away from the TV.
• Do NOT install the unit on top of a TV or color monitor. Install
the unit away from equipment that may be affected by
magnetism, such as a cassette deck.
• Do NOT place objects on top of the unit.
Avoid installing in a place that is:
• Exposed to direct sunlight
• Exposed to humidity or where ventilation is poor
• Extremely hot or cold
• Exposed to vibration
• Exposed to dust
• Exposed to oily smoke, steam or heat (for example, a
kitchen)
Do not block vents
Do NOT use the player on top of a long-fibered carpet, bed
or sofa, and do not cover it with a cloth, etc. This will prevent
heat radiation and could result in damage.
Do NOT place the unit on equipment which generates heat,
such as an amplifier.
When installing the unit in a rack, place it on the lowest shelf
possible (however, not where it is exposed to dust) and
separated from the amplifier to avoid the heat generated by
the amplifier or other audio equipment.
CAUTION: WHEN PLACING THE UNIT IN A
STEREO RACK WITH GLASS DOORS
Be sure there is ample space between the unit and the
glass doors when opening the disc table using the remote
control. If the disc table opens against strong resistance,
such as a closed glass door, damage to the unit may
result.
Moisture may form in the operating section of the player if the
player is brought from cool surroundings into a warm room or
if the temperature of the room rises suddenly. When this
happens, the player’s performance will be impaired.
To prevent this, let the player stand in its new surroundings for
about an hour before switching it on, or make sure that the
room temperature rises gradually.
Condensation may also form
during the summer if the
player is exposed to the
breeze from an air
conditioner. In such cases,
change the location of the
player.
Switch POWER to turn off when not using the unit
Depending on the strength of the TV or radio broadcast
signal, having the TV or radio on while
power to the unit is on may result in stripes
on the TV screen or noise. However, this is
not a malfunction of this unit or the TV or
radio. In such a case, switch the power of
the unit to turn off.
Power-cord caution
Handle the power cord by the plug. Do not pull out the plug
by tugging the cord and never touch the power cord when
your hands are wet as this could cause a short circuit or
electric shock. Do not place the unit, a piece of furniture, etc.,
on the power cord, or pinch the cord. Never make a knot in
the cord or tie it with other cords. The power cords should be
routed in such a way that they are not likely to be stepped on.
A damaged power cord can cause a fire or give you an
electrical shock. Check the power cord once in a while. When
you find it damaged, ask your nearest MARANTZ service
center or your dealer for a replacement.
Cleaning the player
To clean the PLAYER, wipe with a soft, dry cloth. For stubborn
dirt, wet a soft cloth with a mild detergent solution made by
diluting one part detergent to 5 or 6 parts water, wring well,
then wipe off the dirt. Also use a dry cloth to wipe the surface
dry. Do not use volatile liquids such as benzene and thinner
which are harmful to the unit.
ADDITIONAL INFORMATION
Avoid heat
Condensation
49
ENGLISH
Language Code List
Language codes are used when setting the audio and
subtitle language preferences (page 33).
Language
Language
Input-code
Language
Input-code
Japanese (ja)
English (en)
1001
0514
Gujarati (gu)
Hausa (ha)
0721
0801
Rhaeto-Romance (rm)
Kirundi (rn)
1813
1814
French (fr)
0618
0405
Hindi (hi)
0809
0818
Romanian (ro)
1815
1823
0920
0519
Hungarian (hu)
0821
0825
Sanskrit (sa)
2608
1412
Interlingua (ia)
0901
0905
Sangho (sg)
1620
1922
Inupiak (ik)
0911
0914
Sinhalese (si)
1821
1115
0512
0101
0102
Icelandic (is)
0919
0923
1009
1023
1101
Slovenian (sl)
0106
0113
Kazakh (kk)
1111
1112
Serbian (sr)
Cambodian (km)
Malay (ms)
1113
1114
1119
1121
1125
1201
1214
1215
1220
1222
1307
1309
1311
1312
1314
1315
1318
1319
Sesotho (st)
Bhutani (dz)
0118
0119
0125
0126
0201
0205
0207
0208
0209
0214
0215
0218
0301
0315
0319
0325
0401
0426
Urdu (ur)
1920
1921
1923
2001
2005
2007
2008
2009
2011
2012
2014
2015
2018
2019
2020
2023
2111
2118
Esperanto (eo)
0515
Maltese (mt)
1320
Uzbek (uz)
2126
Estonian (et)
0520
0521
0601
Burmese (my)
1325
1401
1405
Vietnamese (vi)
2209
2215
2315
Norwegian (no)
Oromo (om)
1415
1503
1513
Xhosa (xh)
Faroese (fo)
0609
0610
0615
Frisian (fy)
0625
Oriya (or)
1518
Irish (ga)
0701
0704
0712
Panjabi (pa)
Scots-Gaelic (gd)
Galician (gl)
Polish (pl)
Pashto, Pushto (ps)
1601
1612
1619
Guarani (gn)
0714
Quechua (qu)
1721
German (de)
Italian (it)
Spanish (es)
Chinese (zh)
Dutch (nl)
Portuguese (pt)
Swedish (sv)
Russian (ru)
Korean (ko)
Greek (el)
Afar (aa)
Abkhazian (ab)
Afrikaans (af)
Amharic (am)
Arabic (ar)
Assamese (as)
Aymara (ay)
Azerbaijani (az)
Bashkir (ba)
Byelorussian (be)
Bulgarian (bg)
Bihari (bh)
Bislama (bi)
Bengali (bn)
Tibetan (bo)
Breton (br)
Catalan (ca)
Corsican (co)
Czech (cs)
Welsh (cy)
Danish (da)
Basque (eu)
Persian (fa)
Finnish (fi)
Fiji (fj)
50
Input-code
Croatian (hr)
Armenian (hy)
Interlingue (ie)
Indonesian (in)
Hebrew (iw)
Yiddish (ji)
Javanese (jw)
Georgian (ka)
Greenlandic (kl)
Kannada (kn)
Kashmiri (ks)
Kurdish (ku)
Kirghiz (ky)
Latin (la)
Lingala (ln)
Laothian (lo)
Lithuanian (lt)
Latvian (lv)
Malagasy (mg)
Maori (mi)
Macedonian (mk)
Malayalam (ml)
Mongolian (mn)
Moldavian (mo)
Marathi (mr)
Nauru (na)
Nepali (ne)
Occitan (oc)
Kinyarwanda (rw)
Sindhi (sd)
Serbo-Croatian (sh)
Slovak (sk)
Samoan (sm)
Shona (sn)
Somali (so)
Albanian (sq)
Siswati (ss)
Sundanese (su)
Swahili (sw)
Tamil (ta)
Telugu (te)
Tajik (tg)
Thai (th)
Tigrinya (ti)
Turkmen (tk)
Tagalog (tl)
Setswana (tn)
Tonga (to)
Turkish (tr)
Tsonga (ts)
Tatar (tt)
Twi (tw)
Ukrainian (uk)
Volapük (vo)
Wolof (wo)
Yoruba (yo)
Zulu (zu)
1901
1904
1907
1908
1909
1911
1912
1913
1914
1915
1917
1918
1919
2408
2515
2621
ENGLISH
System commands
RS-232C System control
This DVD player can be controlled by a PC. Connect the
player and a serial port on the PC with a 9-pin RS-232C
straight cable. To control this DVD player by a PC, set the RS232C switch on the rear panel to RS-232C.
RS-232C Pin assignments
Pin No.
1
2
3
4
5
6
7
8
9
5
1
6
9
Signal
Not connected
RXD
TXD
Not connected
GND
Not connected
RTS
CTS
Not connected
There are 3 types of commands. Normal command is to
request operation from PC to DVD player. Request command
is to request player status and Status command is to let the
PC know the change of DVD player status.
Upon reception of a command, DVD player will return either
OK, ERROR or Status.
ASCII code is used for data and letters are case sensitive.
The start character and the end character are added as
shown below for sending command and returning status.
The DVD player’s own ID code follows the start character.
This ID code is 1.
Start Character
End Character
Command Sample
FeedbOK Sample
: ’@’
: 0Dh
“1?A”, 0Dh
(ID=1 Request Power Status)
“1A1“, 0Dh
(ID=1 Power Status = On)
The following codes are used for OK and ERROR.
OK (data receive successful) : 06h
ERROR (data receive error) : 15h
Communication conditions
Configure the serial port of the PC as shown below.
Baud Rate
9600bps
Data Bits
8bit
Parity
None
Stop bit
1bit
The receiving side ignores data received prior to ’@’. If 0Dh is
received without receiving ’@’, ERROR(data receive error) will
be returned.
Handshaking
(example)
For numeric data, ASCII coded hexadecimal number is used.
RTS/CTS
For a decimal number 26
'1', 'A' → 0x31, 0x41
SYSTEM (HOST) ´ DV7110
RTS
CTS
Hand shake flow chart
CTS
RTS
Normak command and
Request command
TXD
RXD
RXD
TXD
DV7110
PC
Request command
DV7110
PC
Basic format
Command format
Header
@
Addr
COMMAND
Status
Command
OK
Request
Command
Answer
data
OK
ADDITIONAL INFORMATION
Normal
Command
1. The host requests data by setting RTS to L.
2. Upon data request by CTS, the slave responds by setting
RTS to H if not busy.
3. The host checks if CTS is H and starts data output on TXD.
4. When data output finishes, the host sets RTS to H.
5. The slave checks if CTS is H and sets RTS to L.
Return
1
0Dh
Reponse code format
Normal response
Error response
OK
ERR
06h
15h
51
ENGLISH
Command list
Request command
Normal command
ITEM
Category
ITEM
Request
POWER
STANDBY
?A
Answer
A0
POWER
ON
?A
A1
Category
POWER
Class
STANDBY
Command
A0
PLAY MODE
STOP
?C
C0
POWER
TRAY
ON
OPEN/CLOSE
A1
B0
PLAY MODE
PLAY
?C
C1
PLAY MODE
PAUSE
?C
C6
PLAY MODE
STOP
C0
PLAY MODE
SLOW
?C
C7
PLAY MODE
PLAY
C1
DISC
NO DISC
?J
J0
PLAY MODE
NEXT
C2
DISC
CD
?J
J1
PLAY MODE
PLAY MODE
PREVIOUS
FAST FORWARD
C3
C4
DISC
VCD
?J
J2
DISC
DVD
?J
J3
PLAY MODE
FAST BACKWARD
C5
PLAY MODE
PAUSE/STEP
C6
REPEAT
REPEAT
OFF
ON
?D
?D
D0
D1
PLAY MODE
TRICK PLAY
SLOW *1
REPEAT
C7
D1
TRICK PLAY
TRICK PLAY
REPEAT A-B
PROGRAM
D2
D3
TRICK PLAY
RANDOM
D4
Status command
TRICK PLAY
T-C
D5
DISPLAY
OSD
E0
DISPLAY
Video ON/OFF
E1
POWER
STANDBY
DISPLAY
Dimmer
E2
POWER
ON
A1
MEMORY
CONDITION MEMORY
F0
TRAY
CLOSE
B0
B1
ITEM
Category
Class
Command
A0
MEMORY
LAST MEMORY
F1
TRAY
OPEN
MENU
TOP MENU
G0
PLAY MODE
STOP
C0
MENU
MENU
MENU
RETURN
G1
G2
PLAY MODE
PLAY
C1
PLAY MODE
PAUSE
C6
NUMERIC
0
H0
NUMERIC
1
H1
PLAY MODE
COUNTER
SLOW
TITLE
C7
K0
NUMERIC
2
H2
COUNTER
CHAPTER
K1
NUMERIC
3
H3
NUMERIC
4
H4
COUNTER
COUNTER
TRACK
COUNTER
K2
K3
NUMERIC
5
H5
NUMERIC
6
H6
NUMERIC
7
H7
NUMERIC
8
H8
NUMERIC
9
H9
NUMERIC
+10
HA
SETTING
ANGLE
I0
SETTING
SUBTITLE
I1
SETTING
AUDIO
I2
SETTING
Direction UP
I3
SETTING
Direction DOWN
I4
SETTING
Direction LEFT
I5
SETTING
Direction RIGHT
I6
SETTING
ENTER
I7
SETTING
SETUP
I8
SETTING
CLEAR
I9
*1 For SLOW send the command after pausing. SLOW is
available only in pause mode.
52
Command
Class
For TITLE, CHAPTER, TRACK and COUNTER, number data
follows the command.
Example)
TITLE 1
@1K0 1
CHAPTER 3
@1K1 3
COUNTER 01:15
@1K3 1:15
Note
The tolerance for send/receive clock error is ± 10%.
For sending a command, wait more than 20ms after reception
of a response (OK, ERROR or Status).
Reception of 0Dh or timeout is used to determine the end of a
command. Timeout occurs 1 second after the reception of the
last byte.
ENGLISH
Troubleshooting
No picture.
The rear panel’s VIDEO OUT SELECT switch setting is not
correct.
\ Check that the VIDEO OUT SELECT switch is set to
the correct position for the monitor connection you are
using (page 14).
Incorrect operations are often mistaken for trouble and
malfunctions. If you think that there is something wrong with
this component, check the points below. Sometimes the
trouble may lie in another component. Inspect the other
components and electrical appliances being used. If the
trouble cannot be rectified even after exercising the checks
listed below, ask your nearest MARANTZ service center or
your dealer to carry out repair work.
Connection is incorrect.
\ Check that cord connections are correct and that plugs
are firmly connected.
The disc table comes back out automatically, shortly after
the disc table is closed.
The disc is dirty or warped.
\ Refer to ‘Disc Care’ (page 48).
The disc is not placed properly on the disc table.
\ Use the disc table guide to align the disc (page 18).
Region number does not conform with this unit.
\ If the region number on the disc does not match the
number on the player, the disc cannot be used (page
54).
The [Component Video] menu is set to [progressive] but
your TV/monitor is not compatible with progressive scan.
\ Reconnect the player to your TV using a composite or
S-video cord, then set set the VIDEO OUT SELECT
switch on the rear panel to COMPOSITE & S-VIDEO.
With your TV connected using either the composite or
S-Video terminals, choose the [Interlace] setting in the
[Component Video] menu, then set the rear panel
switch back to COMPONENT (page 27).
\ Reset the player (page 47). [Component Video] will
be reset to [Interlace] but you’ll also loose other
settings.
There is condensation on the operating section of the
player.
\ Allow time for condensation to evaporate. If player is
near an air conditioning unit, you should move the
player (page 49).
\ Check that the VIDEO OFF switch is set to the correct
position (page 47).
Playback is not possible.
The disc has been loaded upside down.
\ Check that the disc has been loaded with the label
side facing up.
The screen is stretched or aspect does not change.
The multi aspect setting is not appropriate.
\ Change the aspect setting in the [TV Screen] setting in
the Setup screen Video menu to the screen type most
appropriate to the TV or monitor you are using (page
26).
mark appears on screen.
The selected function does not operate for that disc.
This is not a malfunction.
\ The aspect ratio of some progressive-scan compatible
TVs cannot be changed.
mark appears on screen.
The operation is prohibited by the player.
New settings made in the Setup screen menus while a
disc is playing are ineffective.
Some settings can be changed while a disc is playing, but
are not effective. This is not a malfunction.
\ Make the same setting when the player is stopped.
\ Stop disc playback (press STOP 7), then start
playback again. When playback is resumed, the new
settings should be in effect. Please note that making
settings in the Setup screen menus may cancel the
resume function.
is
Picture disturbance during playback or dark.
This is not a malfunction.
\ This player is compatible with Macro-Vision System
copy guard. Some discs include a copy prevention
signal, and when this type of disc is played back,
stripes etc., may appear on some sections of the
picture depending on the TV.
When using progressive-scan.
\ If your TV is connected using the COMPONENT
VIDEO OUT jacks, set the [Component Video] menu
to [Interlace] (page 27).
When recorded on a VCR or passed through an AV
selector, there is disturbance in the playback picture.
This is not a malfunction.
\ Due to the player’s copy protection circuits, connection
of this device through a VCR or an AV selector may
prevent recording or cause picture problems.
ADDITIONAL INFORMATION
Picture playback stops and the operation buttons cannot
be used.
Player malfunctions.
\ Stop disc playback (press STOP 7), then start
playback again.
When making changes in the Setup screen menus,
displayed.
There is a Video CD or CD loaded in the player and the
setting that was changed only applies to DVD
performance.
\ The setting will be effective the next time a DVD is
loaded.
Operation (settings) of TV or AV amplifier is not
appropriate.
\ Be sure that your TV, receiver, or amplifier is set up to
view DVD playback.
Remote control operation is not possible.
The rear panel control input jack on the player is being
used.
\ Point the remote control at the component that the
player is connected to (page 14).
The remote control is too far from the player, or the angle
with the remote sensor is too wide.
\ Be sure to operate the remote from a location within its
operating range (page 8).
The batteries are exhausted.
\ Replace the exhausted batteries with all new batteries
(page 8).
53
ENGLISH
No sound from the DIGITAL OUT (optical or coaxial)
jacks.
The [Digital Out] menu is set to [Off].
Set the [Digital Out] (Audio 1 menu) to [On] (page 25).
Audio is not output or is distorted.
The Setup screen Audio 1 menu [96 kHz PCM Out]
setting is set to [96 kHz]. Digital output is prohibited on
some discs.
\ Be sure to make analog audio connections as well as
digital connections (page 13).
The disc is dirty.
\ Refer to ‘Disc Care’ (page 48).
The connection plugs are not inserted fully into the
terminals or are not connected.
\ Check that all connection plugs are firmly inserted.
The connection plug or terminal is dirty.
\ Check that the plugs and terminals are wiped clean of
dirt, etc.
Audio cable connection is wrong.
\ Check to make sure that the audio cables are
connected correctly (page 13).
Connection is made to the stereo amplifier‘s PHONO input
terminal.
\ Change connection to any input terminal except
PHONO.
The pause mode is engaged.
\ Press PLAY 3 to exit the pause mode.
Stereo amplifier operation is incorrect.
\ Check input (CD, AUX, etc.) selector to determine if it
is selected for DVD playback.
The DVD or CD is recorded in DTS audio.
\ DTS audio is only output from the digital output jacks.
Connect the digital output on the player to the digital
input on a receiver or amplifier with a built in DTS
decoder to hear DTS audio.
Noticeable difference in DVD and CD volume.
DVDs and CDs use different recording methods.
\ This is not a malfunction.
Caution
Static electricity or other external influence may cause
malfunctioning of this unit. In this case, unplugging the
power cord and then re-plugging it in will usually reset the
unit for proper operation. If this does not correct the
problem, please consult your nearest MARANTZ service
center.
54
ENGLISH
Terms
DTS
Aspect ratio
Aspect ratio refers to the length to height ratio of TV screens.
The ratio of a standard TV is 4:3, while the ratio of a highdefinition or wide TV is 16:9. The latter allows you to enjoy a
picture with a wider perspective.
Chapter number
Chapter numbers are the numbers assigned to sections of a
title on the disc, similar to chapters in a book. If the disc
includes chapter numbers, you can locate the section you
want very quickly using search and other functions.
Component (color difference) video output
The color signal of the TV is divided into the luminance (Y)
signal and the color (CB and CR) signals and then output. In
this way mutual interference of each signal is avoided. On a
TV with component input jacks, these signals are synthesized
to produce the picture.
Condition memory
“Condition” refers to the various mode settings, etc. On this
player, various conditions, such as those set during playback,
can be memorized. This function allows you to play back the
same disc at any time without having to redo your preferred
settings.
Digital bitstream
The bitstream does not refer to the audio signal, but rather to
the digital data that, once converted, becomes the audio
signal. The player outputs digital bitstreams via the digital
optical or digital coaxial output. If the bitstream cannot be
decoded by the connected AV amplifier etc., digital noise is
produced. Digital bitstream formats compatible with different
entertainment systems can be selected in the Setup screen
Audio 1 menu.
Digital output (Coaxial)
Digital output (Optical)
Normally, audio is converted to an electric signal and
transmitted through an electric wire from the player to the
amplifier, etc. Changing this signal to a digital signal and
transmitting it through an fiber-optic cable is called optical
digital output. Similarly, optical digital input receives digital
signals from external units such as an AV amplifier or
receiver.
Dolby Digital
The maximum 5.1 channels of audio used in the surround
system (Surround Digital) for movie theaters is digital data
compressed by the third generation algorithm encoder.
1
In order to enjoy Dolby Digital discs, this unit’s digital output
jack (either coaxial or optical) must be connected to the
digital input jack of an AV amplifier or Dolby Digital decoder
to enjoy the sound of Dolby Digital soundtracks.
Dynamic range
Dynamic range refers to the difference between the maximum
and minimum levels of the audio soundtrack as measured in
decibels (dB).
Compressing the dynamic range raises the minimum signal
level and lowers the maximum signal level. This allows you to
hear voices and other low level audio signals clearly while
lowering strong audio signals like the sound of explosions.
Interlaced video
A method of displaying a picture in which odd-numbered
lines are updated in one pass, then even-numbered lines
updated in the next. See also Progressive scan video.
MPEG
Short for Moving Picture Experts Group. This is an
international standard for compression of moving images. On
some DVDs, digital audio has been compressed and
recorded in this format.
Multi-angle
When you watch a TV program, you are watching the image
filmed through the TV camera. Because of this, the picture is
displayed on your TV from the viewpoint of the TV camera’s
position. In a TV studio, the image is filmed by many cameras
at the same time, and one of those images is selected by the
program director and transmitted to your TV. If all the filmed
images were transmitted to your TV you would be able to
select the camera image you want. Some DVD discs are
recorded with the angles of more than one camera used for
filming, and these can be selected using this player. These
types of discs are called multi-angle discs.
Parental lock level
This function was suggested by parents concerned about
what type of media their children were able to watch. Parental
lock restrictions are restrictions incorporated into titles which
include scenes that parents may not wish their children to
view.
PCM
PCM stands for Pulse Code Modulation and is digital audio.
The digital audio of CDs is PCM. This player also has a
function that converts Dolby Digital and MPEG digital
bitstreams into PCM to enable you to listen to quality digital
sound even without a special decoder.
ADDITIONAL INFORMATION
Output of the digital audio signal is transmitted electronically
using a coaxial cable. Because the signal being transmitted
is digital, connection must be made to the coaxial digital
input of another component. Noise will be output if connected
to the analog audio inputs as the digital signal cannot be
decoded.
DTS stands for Digital Theater System. DTS is a surround
system different from Dolby Digital that has become a
popular surround sound format for movies. In order to enjoy
the benefits of DTS encoded discs, the digital output jack
(either coaxial or optical) of this player needs to be
connected to an AV amplifier or receiver or to a DTS decoder
to be able to enjoy the surround sound of DTS audio. DTS
audio is not output from the analog audio outputs.
Playback Control (PBC)
This refers to signals recorded on a Video CD (Version 2.0)
enabling playback control.
You can use menus recorded on discs with PBC for easy,
interactive search for desired scenes, and playback.
You can also enjoy viewing high-resolution/standard
resolution still images.
Progressive scan video
Also called non-interlaced video, this method of displaying a
picture updates all the lines in one pass, resulting in a more
stable, flicker-free image than interlaced video (for a given
scanning rate). See also Interlaced video.
55
ENGLISH
Regional restriction codes (region number)
Regional restriction codes are built in to DVD players and
DVD discs for each sales region. If the regional code of the
DVD player does not match one of the regional codes of the
DVD disc, playback is not possible.
The region number can be found on the rear panel of the
DVD player. The illustration below shows the regions and
corresponding region numbers.
Sampling Frequency
When a sound wave is converted to a digital signal, the
sound is sampled and converted to data at a specific
frequency rate. For example, a signal with a 96 kHz sampling
rate indicates that in one second, the analog signal was
sampled 96000 times to produce the digital signal.
Subtitle
Subtitles are language titles superimposed on movies, or
other media. Up to 32 different subtitle languages can be
recorded on a DVD disc. The subtitle function can be used to
select the language of your choice.
Specifications
General
System ............ DVD system and Compact Disc digital audio system
Power requirements
USA model ............................................................ AC 120 V, 60 Hz
Australia model ..................................................... AC 240 V, 50 Hz
Power consumption
USA model .............................................................................. 14 W
Australia model ....................................................................... 14 W
Weight ....................................................................... 8.38 lbs (3.8 kg)
Dimensions ........................................ 440 (W) x 304 (D) x 87 (H) mm
(17 5/16 (W) x 12 (D) x 3 7/16 (H) in.)
(Not including protruding cables, etc.)
Operating temperature .................... +5°C to +35°C (+36°F to +96°F)
Operating humidity .............................. 5% to 85% (no condensation)
S-Video output
Y (luminance) - Output level .......................................... 1 Vp-p (75 Ω)
C (color) - Output level ........................................... 286 mVp-p (75 Ω)
Jacks .............................................................................. S-VIDEO jack
Video output
Output level .................................................................... 1 Vp-p (75 Ω)
Jacks ..................................................................................... RCA jack
S-video
Component video output
(Y, CB / PB, CR / PR)
Output level ............................................................ Y: 1.0 Vp-p (75 Ω)
CB / PB, CR / PR: 0.7 Vp-p (75 Ω)
Jacks ................................................................................... RCA jacks
Connecting the S-video output on the player to a TV or
monitor with S-video input via an S-video cable produces
clearer picture reproduction by sending separate signals for
the luminance and the color. These signals are then
combined by the television to produce a better quality
picture.
Audio output
Output level
During audio output ................................ 200 mVrms (1 kHz, –20 dB)
Number of channels .......................................................................... 2
Jacks ................................................................................... RCA jacks
Time number
Digital audio characteristics
Frequency response ........................ 4 Hz to 44 kHz (DVD fs: 96 kHz)
S/N ratio .................................................................. More than 115 dB
Dynamic range ....................................................... More than 102 dB
Total harmonic distortion ........................................................ 0.002%
Wow and flutter ................................................. Limit of measurement
(± 0.001% W. PEAK) or lower
The time number corresponds to the elapsed playback time
of a disc from its beginning. When using the time search
function, use the time number to locate scenes that occur at
the time selected.
Title number
DVD discs are divided into units referred to as titles, and titles
are divided into chapters. Menu screens do not belong to any
title. A disc which contains a movie may have only one title
with many or no chapter divisions. Karaoke discs may have
many titles, assigning a title to each song on the disc.
Digital output
Optical digital output ............................................. Optical digital jack
Coaxial digital output ............................................................ RCA jack
Accessories
Remote control unit ............................................................................ 1
AA (R6P) dry cell batteries ................................................................ 2
Audio/Video Cable ............................................................................. 1
Remote Control Cable ....................................................................... 1
Operating Instructions ....................................................................... 1
Note
The specifications and design of this product are subject to
change without notice, due to improvement.
56
FRANÇAIS
IMPORTANT
ATTENTION
DANGER D'ELECTROCUTION
NE PAS OUVRIR
Ce symbole de l'éclair, placé dans un triangle
équilatéral, a pour but d'attirer l'attention de
l'utilisateur sur la présence, à l'intérieur du
coffret de l'appareil, de "tensions
dangereuses" non isolées d'une grandeur
suffisante pour représenter un risque
d'électrocution pour les êtres humains.
ATTENTION:
Pour éviter tout risque d'électrocution, ne pas enlever
le couvercle (ni le panneau arrière).
Aucune pièce réparable par l'utilisateur ne se
trouve à l'intérieur. Confier tout entretien
uniquement à un personnel qualifié.
Ce point d'exclamation, placé dans un triangle
équilatéral, a pour but d'attirer l'attention de
l'utilisateur sur la présence, dans les
documents qui accompagnent l'appareil,
d'explications importantes du point de vue de
l'exploitation ou de l'entretien.
ATTENTION: AFIN DE PREVENIR TOUS RISQUES
DE CHOC ELECTRIQUE OU DE DEBUT D'INCENDIE,
NE PAS EXPOSER CET APPAREIL A L'HUMIDITE OU
A LA PLUIE.
ATTENTION: POUR PREVENIR LES CHOCS
ELECTRIQUES NE PAS UTILISER CETTE FICHE
POLARISEE AVEC UN PROLONGATEUR, UNE PRISE
DE COURANT OU UNE AUTRE SORTIE DE COURANT,
SAUF SI LES LAMES PEUVENT ETRE INSEREES A FOND
SANS EN LAISSER AUCUNE PARTIE A DECOUVERT.
L'INTERRUPTEUR D'ALIMENTATION EST RACCORDE
SECONDAIREMENT ET PAR CONSEQUENT NE
SEPARE PAS L'APPAREIL DE L'ALIMENTATION
SECTEUR SUR LA POSITION D'ATTENTE.
Cet appareil numérique de la classe B est comforme à la norme NMB-003 du Canada.
3
FRANÇAIS
Particularités de ce lecteur
Sortie vidéo en composantes à balayage
progressif numérique 525 lignes
Compatibilité avec les formats DVD,
Video CD et CD
Comparé à la vidéo à balayage entrelacé standard, le
balayage progressif double effectivement la quantité des
informations vidéo fournies à votre téléviseur ou moniteur. Le
résultat est une image stable sans papillotement. (Vérifiez
votre téléviseur/moniteur pour savoir s’il est compatible avec
cette caractéristique.)
Pour obtenir une très grande qualité d’image, essayez de
regarder un film d’un disque DVD sur un téléviseur
compatible avec le balayage progressif.
Le DV7110 offre une flexibilité et une compatibilité complète
avec tous les appareils vidéo munis de sorties vidéo
composites, S-Vidéo et de sorties vidéo en composantes.
Les DVD, Video CD et CD qui portent les logos respectifs
figurant dans le tableau ci-dessous, peuvent être lus par un
lecteur MARANTZ de DVD. Pour de plus amples détails
concernant les disques compatibles, consultez le tableau cidessous.
Types de disques
acceptables
DVD VIDEO
Diamètre du disque et nombre de
faces gravées
Temps de
lecture
DVD VIDEO
Audionumérique
Vidéonumérique
(MPEG 2)
12 cm (5 pouces),
une face
une couche
deux couches
133 mn
242 mn
12 cm (5 pouces),
deux faces
une couche
deux couches
266 mn
484 mn
DVD VIDEO
Audionumérique
Vidéonumérique
(MPEG 2)
8 cm (3 pouces),
une face
une couche
deux couches
8 cm (3 pouces),
deux faces
une couche
deux couches
VIDEO CD
VIDEO CD
12 cm (5 pouces), une
face
VIDEO CD single
8 cm (3 pouces), une
face
CD
CD
*1
*1
12 cm (5 pouces),
une face
41 mn
75 mn
82 mn
150 mn
Audionumérique
Vidéonumérique
(MPEG 1)
Maximum 74
minutes
Audionumérique
Vidéonumérique
(MPEG 1)
Maximum 20
minutes
1
Les enregistrements sur DVD sont réalisés selon 4 formats
audionumériques possibles (octobre 1998). Les signaux
résultant de ces formats, Dolby Digital*2, DTS*3, MPEG et
PCM linéaire, peuvent être présents sur les prises de sortie
pour signaux numériques de ce lecteur.
Ce lecteur convertit les signaux audionumériques Dolby
Digital et MPEG dans le format PCM linéaire. De cette
manière, les disques portant des enregistrements Dolby
Digital ou MPEG peuvent être lus sans faire appel à un
décodeur extérieur.
Mise en oeuvre et réglages facilités
par les menus affichés sur l’écran
Appuyez sur la touche SETUP de la télécommande pour
ouvrir la page de mise en oeuvre; vous découvrirez alors que
le réglage de votre chaîne se trouve grandement facilité par
la présence des menus, bien organisés, qui s’affichent sur
l’écran. Par ailleurs, des informations s’affichent sur l’écran
( i )❖ pour clarifier les fonctions et expliquer les options
disponibles. Voici quelques exemples.
Audionumérique
Maximum 74
minutes
CD single
Audionumérique
8 cm (3 pouces),
une face
Maximum 20
minutes
Des marques, rappelant le format d’enregistrement, sont
apposées sur les disques et leur coffret ou pochette.
• Pour éviter toute anomalie de fonctionnement, n’utilisez
pas d’adaptateur pour disque (CD) de 8 cm.
• Les disques autres que ceux figurant dans le tableau cidessus, ne peuvent pas être lus par cet appareil.
• Les DVD dont le numéro de région est incompatible, les
DVD-Audio, DVD-ROM et CD-ROM ne peuvent pas être
lus par cet appareil. Le numéro de région de ce lecteur
est indiqué sur le panneau arrière.
1
* Lecture des disques compacts enregistrables
• Sachez que cet appareil n’est pas conçu pour l’enregistrement
sur disque compact enregistrable.
• Cet appareil est conçu pour la lecture des CD-R et CD-RW
destinés aux enregistrements musicaux. Toutefois, selon le
disque et selon l’enregistreur de CD, certains disques, pourront
être illisibles. (Par exemple parce que le disque est rayé ou
l’optique du lecteur est sale.)
4
Compatibilité avec divers formats DVD
audionumériques
Audio1 Audio2 Video Language General
Setup Navigator
Setup Navigator Start
Auto Start Off
Move
ENTER
Select SETUP Exit
Le menu Video est prévu pour
choisir le type d’écran de
télévision et le format d’image
préféré pour regarder un film
gravé sur DVD (page 26).
Répondez à quelques questions
à la suite de quoi, tous les
réglages audio et vidéo de même
que ceux qui concernent les
affichages sur l’écran, sont
automatiquement réalisés par le
lecteur grâce à l’assistant de
mise en oeuvre (page 15).
Audio1 Audio2 Video Language General
TV Screen 4:3(Letter Box)
Component Video - 4:3(Pan&Scan)
Progressive DNR - 16:9(Wide)
Picture Quality -Standard
Select your display preference
Move
SETUP
Exit
❖
L’information sur l’écran ( i ) apparaît seulement si vous
avez choisi [English] pour le réglage [OSD Language]
(page 16, 30).
Lors de l’utilisation du navigateur de réglage, aucune
information sur l’écran ( i ) n’apparaît.
*2
Fabriqué sous licence de Dolby Laboratories.
«Dolby» et le symbole double D sont des marques de
commerce de Dolby Laboratories. Œuvres confidentielles non
publiées. © 1992-1997 Dolby Laboratories.
Tous droits réservés.
“DTS” et “DTS Digital” sont des marques de Digital Theater
Systems, Inc.
*3
FRANÇAIS
Grand choix d’options pour le
visionnement des DVD
Choix de l’angle de prise de vues (page 29)
Certains DVD portent plusieurs enregistrements de la même
scène filmée sous des angles différents. En ce cas, il est
possible de choisir l’angle de prise de vues.
ANGLE
ANGLE
: 2/4
: 3/4
Choix de la langue des dialogues (page 31)
Certains DVD portent plusieurs pistes sonores. En ce cas, il
est possible de choisir, par exemple, la langue des dialogues
ou encore les signaux sonores que vous souhaitez entendre.
Audio
:1
English
Dolby Digital
5.1CH
Audio
:2
Spanish
Dolby Digital
5.1CH
O
HELL
HOLA
Choix de l’angle de prise de vues (page 32)
Certains DVD portent plusieurs enregistrements de la même
scène filmée sous des angles différents. En ce cas, il est
possible de choisir l’angle de prise de vues.
Subtitle
:1 English
HELLO!
Subtitle
:2 Spanish
HOLA!
Cette marque indique que la fonction évoquée n’est pas
disponible avec tous les disques.
Économie d’énergie
Ce lecteur est conçu pour utiliser 0 W d'énergie lorsqu'il est
en mode hors tension.
5
FRANÇAIS
Différences dans le contenu
des disques
DVD
Les DVD sont divisés en titres qui eux-mêmes se divisent en
chapitres. Un disque sur lequel est gravé un film peut ne
comporter qu’un seul titre, et celui-ci peut comprendre
plusieurs chapitres, ou, au contraire, aucun chapitre. Les
disques de karaoké peuvent être divisés en de nombreux
chapitres, chacun représentant une chanson. Les pages de
menu ne sont pas propres à un titre donné.
Les fonctions du lecteur de DVD s’appliquent le plus souvent
aux titres, ou aux chapitres à l’intérieur du titre choisi. Les
fonctions de lecture disponibles peuvent varier d’un titre à
l’autre, cela dépend de l’éditeur du disque. Lorsqu’un disque
forme un tout, les fonctions de recherche et de
programmation peuvent être très sensiblement réduites.
Titre 1
Chapitre 1
Chapitre 2
Titre 2
Chapitre 1
Chapitre 2
Comment utiliser ce mode
d’emploi
Le DVD est un support remarquable sur lequel peuvent être
enregistrés, sous forme numérique, des images et des sons
avec une qualité inégalée à ce jour. La quantité d’information
qui peut être gravée sur un DVD est tout simplement
étonnante, ce qui permet de disposer de fonctions ou
d’options de lecture qu’aucun autre support n’est en mesure
d’offrir.
Utiliser ce lecteur de DVD et des DVD peut paraître, au tout
début, un peu difficile. C’est pourquoi nous vous conseillons
de procéder dans l’ordre ci-dessous, de façon à être en
mesure d’utiliser le lecteur au mieux dès que possible.
Familiarisez-vous avec le lecteur.
Reportez-vous à la page 8, “Avant d’utiliser le lecteur”, pour
vous assurer que tous les accessoires vous ont été fournis
avec le lecteur. Si c’est votre premier contact avec lecteur de
DVD, vous aurez intérêt à lire la section “Nom et rôle des
commandes”, page 9, dans laquelle vous trouverez toutes les
explications requises sur les touches de l’appareil et de sa
télécommande.
Il existe également un glossaire (page 53) qui peut vous
aider à comprendre la terminologie nouvelle à laquelle le
DVD a donné naissance.
DVD
Effectuez les raccordements.
Video CD/CD
Les Video CD et CDsont divisés en plages musicales (les
plages musicales des Video CD sont parfois appelées
“scènes”). A une plage musicale correspond généralement
une chanson. Il peut arriver que les plages musicales soient
elles-mêmes divisées par des index de repérage de certains
passages. Les Video CD “PBC” (c’est-à-dire les Video CD
dont la lecture peut être commandée par menu) contiennent
en outre des menus qui permettent un accès rapide et précis
au contenu du disque.
Lors de leur lecture par un lecteur de DVD, les Video CD et
CD sont considérés comme un “titre”, quel que soit le nombre
de plages musicales qu’ils portent.
Plage 1
Plage 2
Plage 3
Plage 4
Deux chaînes ne semblent jamais être identiques, ni câblées
de la même manière. La section “Raccordements” qui débute
à la page 12, indique comment vous devez procédez pour
réaliser les liaisons audio et vidéo convenables.
Sélectionnez les menus appropriés.
Avant de pouvoir vous divertir avec les images et les sons
gravés sur un DVD, vous devez régler le lecteur pour qu’il
fournisse les informations audio et vidéo qu’attend votre
chaîne. La section “Mise en oeuvre du lecteur”, page 15,
explique comment utiliser le navigateur qui n’est rien d’autre
qu’une fonction de réglage automatique du lecteur à partir
des réponses que vous avez fournies aux questions
présentées sur l’écran. Les menus de configuration qui sont
décrits à compter de la page 22, sont utilisés pour diverses
fonctions. Connaître la manière d’utiliser les menus rendra
plus aisé et plus agréable l’emploi de cet appareil.
Écoutez un disque.
Lorsque tous les raccordements et tous les réglages sont
réalisés, vous êtes prêt à écouter un disque, DVD, Video CD
ou CD. La section “Utiliser le lecteur de DVD”, page 18, traite
des opérations de base.
Video CD
Plage 1
Plage 2
CD
6
Plage 3
Plage 4
Plage 5
Profitez de toutes les possibilités
offertes.
Dès que vous vous sentirez à l’aise avec le maniement de
base du lecteur, vous aurez intérêt à prendre connaissance
de la section “Autres fonctions”, page 35, où sont décrites les
opérations qui vous donneront le moyen de tirer parti de tous
les avantages du format DVD.
FRANÇAIS
Table des matières
Avant d’utiliser le lecteur...........................8
Définition des options de langue ............30
Vérification des accessoires ................................... 8
Préparation de la télécommande ............................ 8
Définition de l’affichage sur l’écran (OSD) ............ 30
Définition des préférences pour la langue des
dialogues et celle des sous-titres .................... 30
Choix de la langue des dialogues (Dialogues en
plusieurs langues) ........................................... 31
Choix de la langue des sous-titres (Sous-titrage en
plusieurs langues) ........................................... 32
Nom et rôle des commandes .................... 9
Face avant ............................................................... 9
Fenêtre d’affichage ............................................... 10
Panneau arrière ..................................................... 10
Télécommande ...................................................... 11
Raccordements ........................................12
Comment raccorder le lecteur de DVD ................. 12
Raccordements pour le son .................................. 13
Raccordements pour l’image ................................ 14
Raccordements pour la commande d’ensemble .... 14
Commutateur TV SYSTEM ..................................... 15
Mise en oeuvre du lecteur .......................15
Utilisation du navigateur (Setup Navigator) .......... 15
Utiliser le lecteur de DVD ........................18
Lecture des DVD, Video CD et CD ....................... 18
Saut, dans les deux sens, de chapitre
(de plage musicale) ......................................... 20
Examen rapide du disque, dans un sens ou dans
l’autre ...............................................................20
Reprise de la lecture là où elle a été interrompue ... 21
Arrêt de la lecture et mise en veille ....................... 21
Mise en oeuvre du lecteur .......................22
Utilisation des menus de configuration ................. 22
Adoption du menu de mise en oeuvre “Expert” .... 23
Régler la sortie audionumérique pour qu’elle soit
compatible avec les autres appareils – DVD .. 24
Mise en et hors service de la sortie numérique .... 25
Réglage de la dynamique sonore ......................... 25
Définition du format de l’image sur l’écran du
téléviseur .......................................................... 26
Sortie vidéo compatible avec le balayage progressif
numérique 525 lignes – DVD ........................... 27
Réglage de la qualité de l’image en fonction du
type d’enregistrement ...................................... 28
Choix de l’angle de prise de vues (même scène
sous plusieurs angles) ..................................... 29
Autres fonctions .......................................35
Définition du niveau de restriction parentale
......................................................................... 35
Choix de la couleur de fond .................................. 36
Arrêt sur image, ralenti, avance image par image 37
Recherche d’un titre, d’un chapitre, d’une plage
musicale ou d’un passage ............................... 38
Répétition de la lecture ......................................... 39
Lecture au hasard ................................................. 40
Programmation de la lecture (Lecture programmée)
......................................................................... 41
Reprise de la lecture
(Mémoire de la dernière image) ...................... 44
Mise en mémoire des réglages de lecture pour les
disques fréquemment employés (Mémoire des
conditions de lecture) ...................................... 45
Consultation des informations propres au disque ... 46
Video ON/OFF ....................................................... 47
Resetting the Player to System Settings ................ 47
Informations Complémentaires ..............48
Prendre soin des disques ..................................... 48
Pour utiliser l’appareil correctement et pendant
longtemps ........................................................ 48
Tableau des codes de langue ............................... 50
Commande de système RS-232C ......................... 51
Guide de dépannage ............................................ 53
Glossaire ............................................................... 55
Caractéristiques techniques ................................. 56
7
FRANÇAIS
Avant d’utiliser
le lecteur
Préparation de la
télécommande
Mise en place des piles dans le boîtier
de télécommande
1
Poussez la languette du
couvercle du logement des
piles vers l’intérieur puis
soulevez le couvercle dans
la direction de la flèche.
2
Introduisez les piles.
Vérification des accessoires
Veuillez vous assurer que les accessoires suivants vous ont
été fournis en même temps que le lecteur.
Câble audio/vidéo
Respectez les polarités (+) et (–)
indiquées dans le logement.
Cordon de télécommande
3
Refermez le couvercle.
REMOTE CONTROLLER
RC7010DV
OSD
DIMMER
AUDIO
LAST
MEMORY
CONDITION
MEMORY
SUBTITLE
SETUP
ANGLE
RETURN
TOP
MENU
T-C
Piles Sèches AA/R6P
PROGRAM
ENTER
9
MENU
0
6
3
CLEAR
+10
5
8
7
4
1
VIDEO ON/OFF
OPEN/CLOSE
A-B
2
REPEAT
RANDOM
Télécommande
Remarques
• N’utilisez pas en même temps une pile neuve et une pile usagée.
• Remplacez les deux piles en même temps.
• Si vous envisagez de ne pas vous servir de la télécommande
pendant une longue période (plus d’un mois), retirez les piles
pour éviter toute corrosion. Si les piles ont fui, essuyez
soigneusement leur logement avant de les remplacer.
Fonctionnement de la télécommande
Mode d’emploi (ce document)
Dirigez le boîtier de télécommande vers le capteur qui se
trouve sur la face avant de l’appareil. La portée de la
télécommande est de 5 m (17 pieds), avec un angle de 30°
de part et d’autre de l’axe du capteur.
DVD PLAYER DV7010
STOP
REPEAT
OPEN/CLOSE
A-B
TITLE
V I D E O
REPEAT SHUFFLE SVCD
DTS CHAPTER
TRACK
PBC
SCAN CHAPTER
FTS
TOTAL
TITLE
TRACK
PLAY
TRACK
TIME
STANDBY
POWER
FL OFF
ON/OFF
PAUSE
1
DIMMER
VIDEO OFF
LEVEL
PHONES
OSD
DIGITAL OUT
-
30°
+
30°
Portée d’environ 5 mètres
OPEN/CLOSE
VIDEO ON/OFF
A-B
REPEAT
RANDOM
1
2
3
4
5
6
7
8
9
Remarques
• L’exposition de la télécommande à la lumière directe du soleil,
ou à celle d’un éclairage puissant, peut entraîner une anomalie
de fonctionnement.
• Lors de l'utilisation de ce lecteur DVD comme lecteur autonome,
réglez le commutateur REMOTE CONTROL du panneau arrière
sur la position INTERNAL et le commutateur RS-232C sur la
position RC-5/6.
8
FRANÇAIS
Nom et rôle des
commandes
Face avant
ert y u
DVD PLAYER DV7110
STOP
REPEAT
OPEN/CLOSE
5.1ch
SACD
V I D E O
DOWN MIX
VIDEO OFF
TITLE
PROGRESSIVE
dts
VCD
SURROUND
LAST MENO
TRACK
CHP
REMAIN
TOTAL
CONDITION
PLAY
192KHz
96KHz
DVD
AUDIO
STANDBY
POWER
FL OFF
ON/OFF
PAUSE
1
DIMMER
VIDEO OFF
LEVEL
PHONES
OSD
DIGITAL OUT
i
-
o
!0 !1 !2 !3
+
!4 !5 !6
q Open/close button (Page 18, 21)
o DIMMER button (Page 10)
w DISPLAY (Page 10)
!0 VIDEO ON/OFF button (Page 47)
e REPEAT button (Page 37)
!1 OSD button (Page 46)
r PREVIOUS button (Page 20)
!2 REVERSE SEARCH button (Page 20)
t NEXT button (Page 20)
!3 FORWARD SEARCH button (Page 20)
y STOP button (Page 21)
!4 PAUSE/STEP button (Page 37)
u PLAY button (Page 18, 20)
!5 LEVEL volume control
i Power switch (Page 15, 18, 21, 22)
!6 PHONES Jack
AVANT D’UTILISER LE LECTEUR / NOM ET ROLE DES COMMANDES
w
q
9
FRANÇAIS
Panneau arrière
q w e r t y u i o !0 !1 !2
!3
Y
RC-5/6 RS-232C
RS-232C CONTROL
L
1
CB
/PB
R
2
CR
/PR
IN
OUT
RS-232C
VIDEO/S2
INTERNAL
EXTERNAL
COMPONENT
DVD 1 DVD 2
CODE
REMOTE
CONTROL
2
VIDEO
OUTPUT
1
VIDEO
AUDIO
OUTPUT
S2
COMPONENT
COAXIAL
OPTICAL
DIGITAL
OUTPUT
VIDEO
OUTPUT
REMOTE
CONTROL
Le commutateur TV SYSTEM n’est pas présent sur le modèle Etats-Unis.
q RS232C CONTROL switch (Page 15)
i S Video out jack (Page 14)
w RS232C Control Connector (Page 15)
o COMPONENT Video out jacks
(Y, CB/PB, CR/PR) (Page 14)
e REMOTE Control Code switch
(page 11)
!0 BITSTREAM/PCM Coaxial digital audio
out jack (Page 13)
r REMOTE Control external/internal
switch (Page 14)
!1 BITSTREAM/PCM Optical digital audio
out jack (Page 13)
t Video output selector (Page 14)
!2 REMOTE Control in/out jacks (Page 14)
y Analog audio out (L/R) jacks
(Page 12, 13)
!3 AC IN power cord connection terminal
u Video out jacks (Page 12, 14)
Fenêtre d’affichage
q w e r t y u i o !0 !1 !2
VIDEO OFF
TITLE
PROGRESSIVE
dts
VCD
TRACK
CHP
REMAIN
LAST MEMO
TOTAL
CONDITION
96KHz
!3
!4
!5
Appuyez sur le bouton DIMMER pour
changer la luminosité d’affichage.
Dimmed
OFF
q 96 kHz indicator
o Camera Angle indicator
w VIDEO OFF indicator
!0 CHAPTER/TITLE/TRACK Repeat
indicators
e Operating status indicator
r Remote Control indicator
t PROGRESSIVE indicator
y DTS indicator
u DVD indicator
i (V) CD indicator
10
Normal
DIMMER
!1 LAST MEMO indicator
!2 Condition MEMO indicator
!3 TITLE number indicator
!4CHAPTER/TRACK number indicator
!5 TOTAL/TRACK TIME indicators
FRANÇAIS
Télécommande
OPEN/CLOSE button (Page 18, 21)
REPEAT A/B button (Page 39)
POWER button (Page 15)
OPEN/CLOSE
VIDEO ON/OFF
A-B
REPEAT
REPEAT button (Page 39)
RANDOM
RANDOM button (Page 40)
VIDEO ON/OFF button (Page 47)
2
3
4
5
6
7
8
+10
T-C
T-C button (Page 38)
TOP MENU button (Page 19)
9
CLEAR
CLEAR button (Page 39, 40, 41)
0
TOP
MENU
MENU button (Page 19)
MENU
/
(PAUSE / STEP) button (Page 37)
RETURN button (Page 19, 23)
Number button (Page 19, 38, 42)
ENTER
RETURN
/
/
(Direction) button (Page 15, 18, 19)
ENTER buttons (Page 15, 18, 19)
(Stop) button (Page 19, 21, 41)
(Play) button (Page 18, 20, 37, 38)
(Next) button (Page 19, 20, 40)
(Previous) button (Page 19, 20, 40)
ANGLE
SUBTITLE
AUDIO
PROGRAM
OSD
LAST
MEMORY
SETUP
DIMMER
CONDITION
MEMORY
ANGLE button (Page 29)
/
(Reverse/Slow) button (Page 20, 37)
/
(Foward/Slow) button (Page 20, 37)
NOM ET ROLE DES COMMANDES
1
AUDIO button (Page 31)
LAST MEMORY button (Page 44)
PROGRAM button (Page 41)
CONDITION MEMORY button (Page 45)
SETUP button (Page 15, 22, 23)
SUBTITLE button (Page 32)
DIMMER button (Page 10)
OSD button (Page 46)
REMOTE CONTROLLER
RC7010DV
• Cette télécommande prend en charge deux codes de télécommande : DVD1 et DVD2.
• Lors de la sortie d’usine de l’appareil, la télécommande est réglée sur DVD1.
• Pour régler la télécommande sur DVD2, maintenir enfoncées simultanément la touche “7 (Arrêt)” et la
touche numérique “2” de la télécommande pendant au moins cinq secondes. (Si les piles de la
télécommande sont remplacées alors que la télécommande est réglée sur DVD2, le réglage revient à
DVD1.)
• Pour ramener la télécommande sur DVD1, maintenir enfoncées simultanément la touche “7 (Arrêt)” et la
touche numérique «1» de la télécommande pendant au moins cinq secondes.
• Pour vérifier quel code de télécommande est réglé, maintenir enfoncées simultanément les touches de
sens gauche et droite ; le réglage actuel (“DVD1” ou “DVD2”) apparaît dans la fenêtre d’affichage de
l’appareil principal.
• Régler aussi le commutateur REMOTE CONTROL CODE du panneau arrière de l’appareil principal sur
le même réglage que la télécommande. (Ce commutateur est réglé sur DVD1 à la sortie d’usine de
l’appareil.)
11
FRANÇAIS
Raccordements
Guide de raccordement
L’illustration de cette page montre les raccordements de
base au moyen des cordons audio et vidéo qui vous ont été
fournis avec le lecteur. Considérez cette illustration comme
un exemple et partez de là pour définir les raccordements du
lecteur à votre chaîne.
Chaque type de liaison audio ou vidéo est expliqué dans les
pages 13 à 14. Pour déterminer les meilleures liaisons à
réaliser compte tenu des appareils audio et vidéo concernés,
reportez-vous au mode d’emploi qui accompagne chaque
appareil qui doit être relié.
Après avoir effectué les raccordements physiques du
téléviseur ou du moniteur, il vous faut préciser le type d’écran,
standard ou grand écran, qui équipe le téléviseur ou le
moniteur. Pour cela, vous pouvez employer l’option [Setup
Navigator] de la page de mise en oeuvre du menu General
(page 16). Accessoirement, vous pouvez utiliser l’option [TV
Screen] de la page de mise en oeuvre du menu Video (page
26).
Comment raccorder le
lecteur de DVD
Contrairement aux autres supports audiovisuels, le DVD offre
de grandes possibilités dans les options de sortie de manière
que vous puissiez profiter de sa lecture soit grâce à une
système stéréo standard et un téléviseur, soit grâce à une
chaîne “Home Theater”, qui restituera toutes les corrections
d’ambiance, et un moniteur à projection.
Remarques
• Avant de procéder aux raccordements de cet appareil ou à une
modification des raccordements, vérifiez que l’appareil est hors
tension en appuyant sur la touche d’alimentation et débranchez
le cordon d’alimentation de la prise électrique.
• Pour empêcher que le signal vidéo fourni par la lecture d’un DVD
ne puisse être copié, le signal appliqué sur la sortie vidéo
analogique du lecteur est altéré d’une certaine manière. Si vous
reliez le lecteur à un téléviseur par l’intermédiaire d’un
magnétoscope, ou encore si vous enregistrez le signal de sortie
du lecteur à l’aide d’un magnétoscope puis commandez la
lecture de cet enregistrement, l’image que vous obtenez sur
l’écran est le plus souvent brouillée.
Vers prise de courant
Y
RC-5/6 RS-232C
RS-232C CONTROL
L
1
R
2
CB
/PB
IN
RS-232C
DVD 1 DVD 2
CODE
INTERNAL
VIDEO/S2
EXTERNAL
COMPONENT
REMOTE
CONTROL
VIDEO
OUTPUT
2
1
AUDIO
OUTPUT
CR
/PR
VIDEO
S2
VIDEO
OUTPUT
COMPONENT
Fiche
secteur
OUT
COAXIAL
OPTICAL
DIGITAL
OUTPUT
REMOTE
CONTROL
(Youge)
(blanc)
(blanc)
(jaune)
(Youge)
L
R
AUDIO IN
Au moyen du cordon audio fourni, reliez la
prise de sortie AUDIO OUT du lecteur à la
prise d’entrée AUDIO IN du téléviseur ou du
moniteur. Veillez à respecter le codage de
couleur des connecteurs et des fiches (blanc
et rouge).
12
Téléviseur ou moniteur
(jaune)
VIDEO IN S-VIDEO IN
Au moyen du cordon vidéo fourni, reliez la
prise de sortie VIDEO OUT du lecteur à la
prise d’entrée VIDEO IN du téléviseur ou du
moniteur.
Remarque
• Placez le commutateur VIDEO OUT
SELECT sur la position de droite (VIDEO/
S2) (page 14).
FRANÇAIS
Raccordements pour le son
En matière de signal audio, ce lecteur peut être relié de trois
manières: deux numériques (optique ou coaxiale) et une
analogique.
Raccordements audionumériques:
Le signal audionumérique gravé sur un DVD est disponible
sur les prises de sortie optique et coaxiale pour signaux
numériques.
Ne reliez pas en même temps la sortie optique et la sortie
coaxiale du lecteur à un autre appareil; utilisez l’une ou
l’autre.
Sortie numérique (coaxiale)
Le signal audionumérique est transmis sous forme électrique
grâce à un câble coaxial.
• Utilisez cette liaison pour effectuer le raccordement à un
amplificateur ou un récepteur audiovisuels possédant un
décodeur Dolby Digital, DTS ou MPEG.
• Au moyen d’un câble coaxial (non fourni), reliez la prise
DIGITAL OUT (sortie coaxiale pour signaux numériques)
du lecteur à l’entrée coaxiale pour signaux numériques de
l’amplificateur ou du récepteur audiovisuels.
Y
RC-5/6 RS-232C
RS-232C CONTROL
L
1
R
2
CB
/PB
IN
RS-232C
VIDEO/S2
INTERNAL
EXTERNAL
COMPONENT
REMOTE
CONTROL
2
VIDEO
OUTPUT
1
CR
/PR
VIDEO
AUDIO
OUTPUT
S2
OUT
COMPONENT
COAXIAL
OPTICAL
REMOTE
CONTROL
DIGITAL
OUTPUT
VIDEO
OUTPUT
RACCORDEMENTS
Si vous avez relié les prises de sorties audionumériques à un
récepteur ou un amplificateur qui ne peut pas décoder les
signaux Dolby Digital, DTS ou MPEG, vous constaterez la
présence de bruit au moment de la lecture d’un DVD portant
une gravure Dolby Digital, DTS ou MPEG. En ce cas, veillez,
grâce au navigateur de mise en oeuvre, que les réglages
soient conformes au système que vous utilisez (page 17). Par
ailleurs, les réglages audionumériques peuvent être réalisés
sur la page de menu Audio 1 (pages 24 et 25).
DVD 1 DVD 2
CODE
COAXIAL
DIGITAL IN
Sortie numérique (optique)
Le signal audionumérique est transmis sous forme
d’impulsions lumineuses grâce à un câble à fibres optiques.
• Utilisez cette liaison pour effectuer le raccordement à un
amplificateur ou un récepteur audiovisuels possédant un
décodeur Dolby Digital, DTS ou MPEG.
• Au moyen d’un câble à fibres optiques (non fourni), reliez
la prise DIGITAL OUT OPT (sortie optique pour signaux
numériques) du lecteur à l’entrée optique pour signaux
numériques de l’amplificateur ou du récepteur
audiovisuels.
Amplificateur ou récepteur
audiovisuels équipés d’un
décodeur Dolby Digital, DTS ou
MPEG
Raccordements audio analogiques:
Sortie audio
Y
RC-5/6 RS-232C
RS-232C CONTROL
L
1
R
2
CB
/PB
IN
RS-232C
DVD 1 DVD 2
CODE
INTERNAL
VIDEO/S2
EXTERNAL
COMPONENT
REMOTE
CONTROL
VIDEO
OUTPUT
2
1
AUDIO
OUTPUT
CR
/PR
VIDEO
S2
VIDEO
OUTPUT
COMPONENT
OUT
COAXIAL
OPTICAL
DIGITAL
OUTPUT
REMOTE
CONTROL
OPTICAL
DIGITAL IN
• Reliez la sortie audio analogique du lecteur à un
amplificateur ou un récepteur stéréophoniques.
• Cette sortie audio analogique peut aussi être reliée à un
téléviseur ou un moniteur équipés de prises d’entrée
stéréophonique.
• Utilisez le cordon audio fourni pour relier les prises AUDIO
OUT du lecteur aux entrées audio de l’amplificateur ou du
récepteur stéréophoniques.
• Lors des raccordements audio analogiques, veillez à
respecter le codage de couleur des connecteurs et des
fiches (blanc et rouge).
Y
RC-5/6 RS-232C
RS-232C CONTROL
L
1
R
2
CB
/PB
IN
RS-232C
DVD 1 DVD 2
CODE
VIDEO/S2
INTERNAL
EXTERNAL
COMPONENT
VIDEO
OUTPUT
REMOTE
CONTROL
Amplificateur ou récepteur
audiovisuels équipés d’un décodeur
Dolby Digital, DTS ou MPEG
2
1
AUDIO
OUTPUT
CR
/PR
VIDEO
S2
COMPONENT
VIDEO
OUTPUT
OUT
COAXIAL
OPTICAL
DIGITAL
OUTPUT
REMOTE
CONTROL
L
R
1
AUDIO IN
R
(Youge)
L
(blanc)
(Youge)
(blanc)
Amplificateur ou récepteur stéréophoniques
13
FRANÇAIS
Raccordements pour l’image
Ce lecteur peut fournir les signaux vidéo sous la forme: Svidéo, vidéo composite et composantes vidéo. Consultez le
mode d’emploi qui vous a été remis avec le téléviseur ou le
moniteur pour savoir quelle est la meilleure manière
d’effectuer les raccordements.
Après avoir effectué les raccordements physiques au
téléviseur ou au moniteur, il vous faut décider du format
d’image. Vous pouvez utiliser [Setup Navigator] de la page
de configuration General et préciser s’il s’agit d’un téléviseur
ou d’un moniteur standard ou grand écran (page 16). Vous
pouvez également employer l’option [TV Screen] de la page
de configuration du menu Video (page 26).
Sortie des composantes vidéo
(Balayage entrelacé/progressif)
• Si le téléviseur ou le moniteur sont dotés d’entrée pour
composantes vidéo, choisissez cette manière de relier le lecteur
car c’est celle qui donne les meilleures images.
• Utilisez un cordon pour composantes vidéo (ou 3 cordons vidéo)
pour relier les prises de sortie COMPONENT VIDEO OUT du
lecteur aux prises correspondantes du téléviseur ou du moniteur.
• Si l’appareil est connecté à un téléviseur compatible avec le
balayage progressif, réglez le menu [Component Video] sur
[Progressive] (page 27).
• Pour que la sortie des signaux vidéo soit la sortie pour
composantes vidéo, veillez à ce que le commutateur VIDEO OUT
SELECT qui se trouve sur le panneau arrière du lecteur, occupe
bien la position de gauche.
Sortie S-vidéo
Y
Si le téléviseur ou le moniteur sont pourvus de prises S-vidéo,
reliez le lecteur de cette manière pour obtenir une image de
bonne qualité.
Reliez le lecteur au téléviseur ou au moniteur au moyen d’un
câble S-vidéo (non fourni).
Pour que la sortie des signaux vidéo soit la sortie S-vidéo,
veillez à ce que le commutateur VIDEO OUT SELECT qui se
trouve sur le panneau arrière du lecteur, occupe bien la
position de droite.
RC-5/6 RS-232C
RS-232C CONTROL
L
1
R
2
CB
/PB
IN
RS-232C
DVD 1 DVD 2
CODE
INTERNAL
VIDEO/S2
EXTERNAL
COMPONENT
VIDEO
OUTPUT
REMOTE
CONTROL
2
1
CR
/PR
VIDEO
AUDIO
OUTPUT
S2
COMPONENT
OUT
COAXIAL
OPTICAL
REMOTE
CONTROL
DIGITAL
OUTPUT
VIDEO
OUTPUT
Téléviseur
ou moniteur
Y
CB
/PB
VIDEO/S2
COMPONENT
VIDEO
OUTPUT
CR
/PR
COMPONENT
COMPONENT
VIDEO IN
Y
RC-5/6 RS-232C
RS-232C CONTROL
L
1
R
2
CB
/PB
IN
RS-232C
DVD 1 DVD 2
CODE
INTERNAL
VIDEO/S2
EXTERNAL
COMPONENT
REMOTE
CONTROL
2
VIDEO
OUTPUT
1
CR
/PR
VIDEO
AUDIO
OUTPUT
S2
COMPONENT
OPTICAL
DIGITAL
OUTPUT
VIDEO
OUTPUT
Y
OUT
COAXIAL
REMOTE
CONTROL
CB
CR
VIDEO/S2
COMPONENT
S2
Raccordements pour la
commande d’ensemble
VIDEO
OUTPUT
S-VIDEO IN
Téléviseur ou moniteur
Sortie vidéo
• Si le téléviseur ou le moniteur ne sont pourvus que d’une
entrée vidéo composite, utilisez cette liaison.
• Utilisez le câble vidéo fourni pour relier une des prises
VIDEO OUT du lecteur à l’entrée vidéo du téléviseur ou du
moniteur.
• Assurez-vous que la couleur du connecteur est la même
que celle de la fiche (jaune).
• Pour que la sortie des signaux vidéo soit la sortie vidéo
standard, veillez à ce que le commutateur VIDEO OUT
SELECT qui se trouve sur le panneau arrière du lecteur,
occupe bien la position de droite.
L
1
R
2
CB
/PB
IN
RS-232C
DVD 1 DVD 2
CODE
VIDEO/S2
INTERNAL
EXTERNAL
COMPONENT
REMOTE
CONTROL
VIDEO
OUTPUT
2
1
CR
/PR
VIDEO
AUDIO
OUTPUT
S2
COMPONENT
OUT
COAXIAL
OPTICAL
DIGITAL
OUTPUT
VIDEO
OUTPUT
Connecter le lecteur de DVD à un autre composant audio Marantz via un
câble de télécommande vous permet de piloter à distance les divers
composants comme un système unique.
• Quand vous effectuez la connexion à un élément équipé d’un
capteur de télécommande (comme le SR-14, SR-18, SR-19),
veillez à connecter la borne “REMOTE CONTROL IN” du lecteur de
DVD à la borne “REMOTE CONTROL OUT” de l’élément disposant
d’un capteur de télécommande.
• Quand vous effectuez la connexion à un élément qui n’est pas
équipé d’un capteur de télécommande, veillez à connecter
l’élément à borne “REMOTE CONTROL OUT” du lecteur de DVD.
Mise sous tension et hors tension synchronisée
• Connectez l’appareil à la borne de sortie pour télécommande d’un
élément (comme le SR-14, SR-18, SR-19) compatible avec le
système de télécommande Marantz. La télécommande permet de
mettre le lecteur de DVD sous tension (“POWER ON”) et en mode
de veilleuse (“Standby”).
Remarque
Veillez à laisser l’interrupteur d’alimentation du panneau avant en
mode d’alimentation.
Commutateur RS232C CONTROL
Pour commander le lecteur DVD avec la télécommande, réglez ce
commutateur sur la position RC-5/6.
Sélecteur de télécommande
• Si vous employez ce lecteur de DVD de manière indépendante,
placez ce sélecteur sur “INTERNAL”. Si vous employez le lecteur
de DVD dans un système composé d’un tuner ou d’un
temporisateur Marantz équipé d’un capteur de télécommande,
placez ce sélecteur sur “EXTERNAL”.
Y
RC-5/6 RS-232C
RS-232C CONTROL
Bornes REMOTE CONTROL IN/OUT
REMOTE
CONTROL
Y
RC-5/6 RS-232C
RS-232C CONTROL
1
DVD 1 DVD 2
CODE
INTERNAL
VIDEO/S2
EXTERNAL
COMPONENT
REMOTE
CONTROL
VIDEO/S2
COMPONENT
L
1
R
2
CB
/PB
IN
RS-232C
VIDEO
OUTPUT
2
1
CR
/PR
VIDEO
AUDIO
OUTPUT
S2
VIDEO
OUTPUT
COMPONENT
OUT
COAXIAL
OPTICAL
DIGITAL
OUTPUT
REMOTE
CONTROL
2
VIDEO
OUTPUT
VIDEO
IN
INTERNAL
EXTERNAL
(jaune)
OUT
VIDEO IN
REMOTE
CONTROL
(jaune)
IN
OUT
14
FRANÇAIS
Commutateur TV SYSTEM
(sauf pour le modèle Etats-Unis)
Selon le système de télévision utilisé pour la gravure des
images sur le disque, la sortie vidéo est modifiée comme suit.
La conversion NTSC → PAL ou PAL → NTSC est possible
dans le cas des Video CD. La conversion
PAL → NTSC n’est pas possible dans le cas des DVD. Si le
commutateur TV SYSTEM est sur la position AUTO, le signal
est appliqué en sortie sans modification. Dans le cas d’un CD
et également dans le cas où aucun disque n’est en place, le
système vidéo précédemment utilisé est adopté.
AUTO NTSC
PAL
TV
SYSTEM
Disque
Format de sortie
Type
NTSC
DVD
NTSC
PAL
AUTO
NTSC
MOD. PAL
NTSC
PAL
PAL
NTSC
PAL
Video CD
NTSC
NTSC
MOD. PAL
PAL
NTSC
PAL
PAL
NTSC
PAL
NTSC ou PAL
CD, aucun
disque
Utilisation du navigateur
(Setup Navigator)
Le navigateur a été conçu pour simplifier la mise en oeuvre
du lecteur de DVD. Proposant plusieurs pages sur lesquelles
figurent diverses questions, le navigateur permet de définir,
automatiquement, les réglages audio, vidéo et de langue en
fonction des réponses apportées aux questions. Lorsque ce
travail est terminé, il est possible d’employer le lecteur et de
profiter des DVD.
Les opérations décrites sur cette page expliquent comment
employer au mieux le navigateur. Une description détaillée du
contenu de chaque question se trouve à la page suivante.
Lors des tout premiers réglages
La lecture de certains DVD commence aussitôt qu’ils sont
introduit dans le lecteur. Nous conseillons donc de régler le
lecteur au moyen du navigateur avant de tenter la lecture
d’un DVD. Si vous avez déjà placé un DVD dans le lecteur,
appuyez sur la touche STOP 7.
Quelques mots sur MOD. (Modulation) PAL
• SHRINK (Réduction de l’image)
Les téléviseurs PAL les plus récents sont en mesure de
discriminer les signaux 50 Hz (PAL) et 60 Hz (NTSC) et
d’adapter l’amplitude du balayage vertical pour éviter toute
réduction de hauteur de l’image.
• Si le téléviseur ne possède pas de commande de
balayage vertical (V-Hold), il peut être impossible de
regarder un disque NTSC car l’image peut défiler en
permanence. Si le téléviseur possède une commande de
balayage vertical (V-Hold), agissez sur cette commande
de façon à arrêter le défilement de l’image. Avec certains
téléviseurs, la hauteur de l’image peut être réduite et une
bande noire peut apparaître en haut et en bas de l’image.
Cela ne traduit pas un défaut de fonctionnement mais
résulte de la conversion NTSC → PAL.
1
OPEN/CLOSE
VIDEO ON/OFF
A-B
REPEAT
RANDOM
1
2
3
4
5
6
7
8
9
+10
T-C
CLEAR
0
TOP
MENU
MENU
RETURN
ENTER
3
4
Raccordement pour
commande RS-232C
Il est possible de commander ce lecteur au moyen d'un
ordinateur personnel. Raccordez le lecteur et un port série de
l'ordinateur à l'aide d'un câble droit RS-232C à 9 broches.
Reportez-vous à la section Commande de système RS-232C
(page 51) pour plus de détails.
2
ANGLE
SUBTITLE
AUDIO
PROGRAM
OSD
LAST
MEMORY
SETUP
DIMMER
CONDITION
MEMORY
Commutateur RS-232C
RACCORDEMENTS / MISE EN OEUVRE DU LECTEUR
FormatPosition du commutateur TV SYSTEM
Format
Mise en oeuvre
du lecteur
REMOTE CONTROLLER
RC7010DV
Pour commander ce lecteur DVD au moyen d'un ordinateur
personnel, réglez le commutateur RS-232C du panneau
arrière sur la position RS-232C.
Y
RC-5/6 RS-232C
RS-232C CONTROL
L
1
R
2
CB
/PB
IN
RS-232C
DVD 1 DVD 2
CODE
INTERNAL
VIDEO/S2
EXTERNAL
COMPONENT
REMOTE
CONTROL
VIDEO
OUTPUT
2
1
CR
/PR
VIDEO
AUDIO
OUTPUT
S2
VIDEO
OUTPUT
COMPONENT
OUT
COAXIAL
OPTICAL
DIGITAL
OUTPUT
REMOTE
CONTROL
1
RC-5/6 RS-232C
RS-232C CONTROL
DVD PLAYER DV7110
RS-232C
STOP
REPEAT
OPEN/CLOSE
A-B
TITLE
V I D E O
REPEAT SHUFFLE SVCD
DTS CHAPTER
TRACK
PBC
SCAN CHAPTER
FTS
TOTAL
TITLE
TRACK
PLAY
TRACK
TIME
STANDBY
POWER
FL OFF
ON/OFF
PAUSE
1
DIMMER
VIDEO OFF
LEVEL
PHONES
OSD
DIGITAL OUT
-
+
RS-232C
15
FRANÇAIS
1
Appuyez sur la touche d’alimentation du
panneau avant.
• Pour mettre l’appareil sous tension, appuyez sur le
bouton POWER du panneau avant; pour le mettre hors
tension, appuyez à nouveau sur ce bouton.
Remarque
Choix de la langue d’affichage sur
l’écran (OSD)
L’option [OSD Language] permet de définir la langue
d’affichage sur l’écran (OSD), autrement dit la langue utilisée
par le lecteur pour les menus et les messages qu’il affiche.
En outre, la langue choisie est utilisée, par défaut, pour les
dialogues et les sous-titres.
Si vous devez piloter via la télécommande le mode d’alimentation
du lecteur de DVD, veillez à laisser cet interrupteur en mode
d’alimentation.
2
Audio1 Audio2 Video Language General
Setup Navigator
Language
English
OSD Language français
Español
Appuyez sur la touche SETUP.
Quand vous appuyez sur SETUP pour la première fois,
l’écran suivant apparaît. Bien que l’écran Setup
Navigateur puisse être utilisé plus d’une fois, il n’apparaît
que la première fois que SETUP est pressé.
Audio1 Audio2 Video Language General
Move
ENTER
Select SETUP Exit
Valeurs: English*
français
Español
Setup Navigator
*Réglage usine
Setup Navigator Start
Auto Start Off
Remarque
Move
3
ENTER
Select SETUP Exit
Utilisez les touches de déplacement du curseur
5/ ) pour effectuer une sélection.
(5
• Si vous utilisez le navigateur, il n’est pas nécessaire
de modifier le réglage de la première page. Passez
alors à l’opérations suivante.
• Si vous désirez régler le lecteur sans utiliser le
navigateur, utilisez la touche de déplacement du
curseur ( ) pour choisir [Auto Start Off].
Le navigateur peut être utilisé ultérieurement lors d’une
mise en oeuvre manuelle (page 22).
4
Appuyez sur la touche ENTER.
Outre la langue d’affichage, ce sont les langues des dialogues et
des sous-titres qui sont également précisées par la même
opération. Pour changer la langue des dialogues ou celle des
sous-titres, utilisez les options [Audio Language] et [Subtitle
Language] du menu Language et choisissez les valeurs
convenables (page 30 et 31).
Format de l’image sur le téléviseur
La page [TV Type] permet de définir le format de l’image, ou
mieux le rapport de la largeur à la hauteur. Ce rapport est
égale à 4/3 dans le cas d’un téléviseur standard; dans le cas
d’un téléviseur haute définition, ce rapport est de 16/9. Ce
rapport caractérise l’image.
Le choix est validé et la page suivante du navigateur
s’affiche.
Audio1 Audio2 Video Language General
Setup Navigator
Utilisez les opérations 3 et 4 comme base de saisie de toutes
les sélections effectuées sur les pages du navigateur de mise
en oeuvre décrites ci-après.
TV Connection
TV Type
Move
Pour modifier une réponse à une question
précédente
Utilisez la touche de déplacement du curseur (2) pour revenir
à la page précédente concernée. Toutefois, sachez que vous
ne pouvez pas poursuivre en appuyant sur la touche (3)
mais que vous devez répondre à toutes les questions qui
suivent la page en question.
Select SETUP Exit
Valeurs: Widescreen (16:9)*
Standard (4:3)
*Réglage usine
Pour abandonner le navigateur de mise en oeuvre
Remarque
Appuyez sur la touche SETUP pour abandonner le
navigateur quand une page est affichée. Si vous quittez le
navigateur avant d’avoir répondu à toutes les questions,
aucun réglage n’est modifié.
l existe deux formats d’image permettant l’affichage d’un
enregistrement sur DVD au format grand écran, à savoir: “letter
box” et “pan&scan”. Si vous choisissez la valeur [Standard (4:3)]
grâce au navigateur, c’est le premier de ces deux formats, “letter
box”, qui est automatiquement adopté. Pour que ce soit, par
défaut, le format “pan&scan”, utilisez la page de configuration du
menu Video, [TV screen] setting (page 26).
Pour revenir à la page de configuration
Appuyez sur la touche RETURN. Le navigateur de mise en
oeuvre est abandonné et la page du menu General s’affiche.
Si vous appuyez sur la touche RETURN avant que tous les
réglages n’ait été définis grâce au navigateur de mise en
oeuvre, aucun réglage n’est modifié.
16
ENTER
Widescreen (16:9)
Standard (4:3)
FRANÇAIS
Définition des raccordements
audionumériques avec un amplificateur
audiovisuel ou un décodeur
La page [Digital Jack] vous permet de préciser si une liaison
audionumérique a été établie avec un amplificateur ou un
récepteur audiovisuels, ou un décodeur externe. Etant donné
que de nombreuses options sont disponibles, veuillez vous
reporter au mode d’emploi qui est fourni avec chaque
appareil auquel le lecteur est relié, de façon à déterminer les
formats audionumériques qui peuvent être décodés. Si vous
n’avez effectué aucune liaison audionumérique, choisissez la
valeur “Not Connected”.
Dolby Digital
Dolby Digital/DTS
Dolby Digital/MPEG
Dolby D/DTS/MPEG
PCM
Not Connected
Setup Navigator
Move
ENTER
La page [Exit Setup Navigator] est la dernière affichée par
le navigateur de mise en oeuvre.
Audio1 Audio2 Video Language General
Setup Navigator
Save Changes
Exit Setup Navigator Delete Changes
Start Again
Move
ENTER
Select SETUP Exit
Select SETUP Exit
Valeurs: Dolby Digital*
Dolby Digital/DTS
Dolby Digital/MPEG
Dolby D/DTS/MPEG
PCM
Not Connected
*Réglage usine
*Réglage usine
Définition de la compatibilité avec la
sortie 96 kHz
La page [96kHz PCM Audio] permet de préciser si l’appareil
audiovisuel auquel le lecteur est relié est capable, ou non, de
traiter les signaux audionumériques à fréquence
d’échantillonnage de 96 kHz. Cette page ne s’affiche que si
une liaison a été effectuée avec un appareil audiovisuel
comme il est dit dans les pages précédentes.
Pour quitter la page de mise en oeuvre
Lorsque vous avez terminé les réglages du lecteur grâce au
navigateur, ou encore lorsque vous quittez le navigateur, la
page de configuration du menu General s’affiche. Appuyez
sur la touche SETUP pour fermer cette page.
Pour modifier d’autres réglages du lecteur grâce
aux menus de mise en oeuvre
La méthode pour modifier les réglages grâce aux menus de
mise en oeuvre est décrite à la page 22.
MISE EN OEUVRE DU LECTEUR
Valeurs: Save Changes*
Choisissez cette option pour que le lecteur
effectue de lui-même tous les réglages audio,
vidéo et de langue nécessaires.
Delete Changes
Choisissez cette option pour quitter le navigateur
sans modifier les réglages précédents.
Start Again
Choisissez cette option pour revenir à la page
[OSD Language] du navigateur et reprendre les
réglages.
Audio1 Audio2 Video Language General
Amp Connection
Digital Jack
Validation des réglages
Audio1 Audio2 Video Language General
Setup Navigator
Amp Connection No
96 kHz PCM Audio Yes
Don’t Know
Move
ENTER
Select
SETUP
Exit
Valeurs: No*
Choisissez cette option si l’appareil audiovisuel
connecté n’est pas capable de traiter les signaux
audionumériques à fréquence d’échantillonnage
de 96 kHz.
Yes
Choisissez cette option si l’appareil audiovisuel
connecté est capable de traiter les signaux
audionumériques à fréquence d’échantillonnage
de 96 kHz.
Don’t Know
Choisissez cette option quand vous ne savez pas
si l’appareil audiovisuel connecté est capable de
traiter les signaux audionumériques à fréquence
d’échantillonnage de 96 kHz.
*Réglage usine
17
FRANÇAIS
Utiliser le
lecteur de DVD
Lecture des DVD, Video CD
et CD – DVD/Video CD/CD
1
Appuyez sur la touche d’alimentation du
panneau avant.
2
Appuyez sur la touche OPEN/CLOSE.
Le tiroir pour disque s’ouvre.
3
Déposez un disque dans le tiroir.
L’étiquette du disque doit être tournée vers le haut; le
disque doit être soigneusement déposé dans l’alvéole
convenable.
Avant de pouvoir vous divertir avec les images et les sons
gravés sur un DVD, assurez-vous d’avoir procédé aux
réglages de base à l’aide du navigateur de mise en oeuvre,
réglages que nous avons abordés dans la section
précédente, ou bien d’avoir procédé comme il est dit dans la
section qui suit pour régler le lecteur en fonction des
caractéristiques de votre chaîne. Ces réglages faits, tout est
prêt pour la lecture des DVD, Video CD et CD.
2
OPEN/CLOSE
VIDEO ON/OFF
A-B
REPEAT
RANDOM
4
1
2
3
4
5
6
7
8
• Le tiroir se ferme et la lecture commence.
• Selon le disque, un menu s’affiche. En ce cas,
passez à l’opération 5.
9
+10
T-C
Appuyez sur la touche PLAY 3 .
CLEAR
0
TOP
MENU
MENU
RETURN
ENTER
5
5
• Si vous avez mis en place un Video DVD:
Choisissez l’enregistrement au moyen des touches de
déplacement du curseur (2/3/5/ ) ou des touches
numérotées, puis appuyez sur la touche ENTER.
• Si vous avez mis en place un Video CD:
Choisissez l’enregistrement au moyen des
touches numérotées.
4
ANGLE
SUBTITLE
AUDIO
PROGRAM
OSD
LAST
MEMORY
SETUP
DIMMER
CONDITION
MEMORY
Choisissez l’enregistrement que vous désirez
écouter ou regarder.
Remarques
• Si vous avez relié les prises de sorties audionumériques à un
récepteur ou à un amplificateur qui ne peuvent pas décoder ces
signaux, il s’ensuit la présence de bruit. Assurez-vous que la
valeur choisie pour l’option de sortie audionumérique du menu
Audio 1 est bien adaptée aux appareils audio auxquels le
lecteur est connecté (page 24 et 25).
• Le format d’image est choisi, en usine, pour être celui d’un
téléviseur grand écran (format 16:9). Si vous possédez un
téléviseur standard (format 4:3), utilisez le menu Video pour
changer la valeur de l’option (page 26).
REMOTE CONTROLLER
RC7010DV
1 3
2
4
DVD PLAYER DV7110
STOP
REPEAT
OPEN/CLOSE
A-B
TITLE
V I D E O
REPEAT SHUFFLE SVCD
DTS CHAPTER
TRACK
PBC
SCAN CHAPTER
FTS
TOTAL
TITLE
TRACK
PLAY
TRACK
TIME
STANDBY
POWER
FL OFF
ON/OFF
PAUSE
1
DIMMER
VIDEO OFF
LEVEL
PHONES
OSD
DIGITAL OUT
-
+
Si l’opération demandée est interdite
Il peut arriver que vous ayez commandé une opération qui, pour
une certaine raison, est interdite. En ce cas, une des icônes cidessous s’affiche sur l’écran.
L’opération est interdite par le lecteur.
L’opération est interdite par la gravure du disque.
18
FRANÇAIS
Si un menu s’affiche
Un menu s’affiche si le DVD est prévu pour cela, ou si le
Video CD est tel que sa lecture puisse être commandée par
un menu (PBC). Les DVD portent parfois des informations
autres que celles strictement en rapport avec le film gravé;
naviguer à travers les menus du DVD à la découverte de ces
données peut alors présenter un réel intérêt.
Pour ouvrir un menu de DVD ou Video CD, ou
revenir à ce menu
Bien que cela dépende du disque, une pression sur MENU,
TOP MENU ou RETURN pendant la lecture du DVD, ou une
pression sur RETURN pendant la lecture du Video CD,
permet d’afficher le menu gravé sur le disque. Pour de plus
amples détails concernant cette question, reportez-vous à la
pochette du disque.
Pour naviguer à travers un menu
OPEN/CLOSE
VIDEO ON/OFF
A-B
REPEAT
RANDOM
1
2
3
4
5
6
7
8
9
+10
T-C
Number
buttons
CLEAR
0
TOP MENU
TOP
MENU
MENU
RETURN
ENTER
MENU
Cursor
RETURN
ENTER
Pour écouter un Video CD sans afficher son menu
ANGLE
SUBTITLE
PROGRAM
OSD
LAST
MEMORY
DIMMER
CONDITION
MEMORY
SETUP
AUDIO
REMOTE CONTROLLER
RC7010DV
Les Video CD dont la lecture peut être commandée par un
menu (PBC) affichent le menu dès que la lecture commence.
Il est possible, toutefois, d’éviter le passage par le menu et
de commander directement la lecture. Il suffit, pour cela,
d’appuyer sur la touche STOP 7, puis d’appuyer sur la
touche portant le numéro de la plage musicale désirée.
UTILISER LE LECTEUR DE DVD
STOP
NEXT
PREV.
• Bien que chaque DVD puissent présenter des différences,
après avoir affiché un menu, utilisez les touches de
déplacement du curseur (2/3/5/ ) et la touche ENTER
de la télécommande. Les touches de déplacement du
curseur permettent de passer d’une option à l’autre, la
touche ENTER de valider un choix.
• Parfois, vous pouvez également utiliser les touches
numérotées pour effectuer une sélection. Ces touches
sont commodes pour le choix direct d’une option. Dans le
cas des menus pour Video CD, seules les touches
numérotées permettent une sélection.
• Si un menu de Video CD comporte plusieurs pages, le
passage de l’une à l’autre s’obtient grâce aux touches
PREV 4 ou NEXT ¢.
Exemple: Si le DVD mis en place porte des menus
1
2
3
4
5
6
Highlight Clips
Chapter List
Commercial Header
Subtitles
Soundtrack
Start Main Feature
Exemple: Si la lecture du Video CD mis en place peut
être commandée par un menu
STANDARD VOCAL BEST
1
Don't Tekno for an Answer
Bertie B.& the Goans
2
Bad Whack Naff Riff
Hood in the Boyz
3
dubmyheadbassman
Sleek Machine
4
Gooey Love Jingle
Philip William
5
Praise the Day
Formerly an Artist
6
G3, Ba-san
Pfeuti
7
Abstract Jazz Phunk
John Torn
8
Rock the Love Jive
Hot Monkey Stick
19
FRANÇAIS
Saut, dans les deux sens, de
chapitre (de plage musicale)
Atteindre le chapitre (la plage
musicale) suivant
– DVD/Video CD/CD
Appuyez sur la touche NEXT ¢ .
ENTER
RETURN
NEXT
PREV.
• Appuyez sur cette touche pour atteindre le chapitre (la
plage musicale) suivant.
• Vous pouvez commander le saut d’un ou plusieurs
chapitres (plages musicales) vers la fin du disque en
maintenant la pression d’un doigt sur la touche NEXT ¢
que vous relâchez au moment opportun.
Atteindre le chapitre (la plage
musicale) précédent
SUBTITLE
AUDIO
PROGRAM
OSD
LAST
MEMORY
SETUP
DIMMER
CONDITION
MEMORY
ANGLE
Appuyez sur la touche PREV 4 .
• Appuyez une fois sur cette touche pour atteindre le début
du chapitre (de la plage musicale) en cours de lecture.
• Appuyez deux fois sur cette touche pour atteindre le
chapitre (la plage musicale) précédent.
• Vous pouvez commander le saut d’un ou plusieurs
chapitres (plages musicales) vers le début du disque en
maintenant la pression d’un doigt sur la touche PREV 4
que vous relâchez au moment opportun.
REMOTE CONTROLLER
RC7010DV
4
¢
DVD PLAYER DV7110
STOP
REPEAT
OPEN/CLOSE
A-B
TITLE
V I D E O
REPEAT SHUFFLE SVCD
DTS CHAPTER
TRACK
SCAN CHAPTER
FTS
TOTAL
PBC
TITLE
TRACK
PLAY
TRACK
TIME
STANDBY
POWER
FL OFF
ON/OFF
PAUSE
1
DIMMER
VIDEO OFF
LEVEL
PHONES
OSD
DIGITAL OUT
-
+
Examen rapide du disque,
dans un sens ou dans
l’autre – DVD/Video CD/CD
PLAY
REV/FWD
SUBTITLE
AUDIO
PROGRAM
OSD
LAST
MEMORY
SETUP
DIMMER
CONDITION
MEMORY
ANGLE
1
¡
3
DVD PLAYER DV7110
STOP
REPEAT
OPEN/CLOSE
A-B
TITLE
V I D E O
REPEAT SHUFFLE SVCD
DTS CHAPTER
TRACK
PBC
SCAN CHAPTER
FTS
TOTAL
TITLE
TRACK
PLAY
TRACK
TIME
STANDBY
FL OFF
ON/OFF
PAUSE
1
20
DIMMER
VIDEO OFF
Examen rapide vers le début du disque
Maintenez la pression d’un doigt sur la touche REV
1.
REMOTE CONTROLLER
RC7010DV
POWER
Maintenez la pression d’un doigt sur la touche FWD ¡ .
• Relâchez la pression sur la touche FWD ¡ lorsque le
passage désiré est atteint. La lecture normale commence
alors.
• Lorsque la mention “Scan” affichée sur l’écran ne clignote
plus mais demeure éclairée, l’examen rapide vers la fin du
disque se poursuit même si vous avez relâché la touche.
En ce cas, appuyez sur la touche PLAY 3 lorsque le
passage désiré est atteint.
ENTER
RETURN
Examen rapide vers la fin du disque
LEVEL
PHONES
OSD
DIGITAL OUT
-
+
• Relâchez la pression sur la touche REV 1 lorsque le
passage désiré est atteint. La lecture normale commence
alors.
• Lorsque la mention “Scan” affichée sur l’écran ne clignote
plus mais demeure éclairée, l’examen rapide vers le début
du disque se poursuit même si vous avez relâché la
touche. En ce cas, appuyez sur la touche PLAY 3 lorsque
le passage désiré est atteint.
FRANÇAIS
Reprise de la lecture là où elle
a été interrompue – DVD/Video CD
Arrêt de la lecture et mise
en veille – DVD/Video CD/CD
Utilisez la fonction de reprise de la lecture pour recommencer
à partir du dernier point d’arrêt.
OPEN/CLOSE
2
Appuyez une fois sur la touche STOP 7.
VIDEO ON/OFF
L’indication “RESUME” s’éclaire et le point d’arrêt est mis en
mémoire.
• La position du point d’arrêt est conservée aussi longtemps
que le disque demeure dans le lecteur — même si le
lecteur est mis hors service.
• Deux pressions sur la touche STOP 7 provoque la reprise
de la lecture au début du disque quand vous appuyez une
nouvelle fois sur la touche PLAY 3.
Le type de disque est (DVD ou Video CD) est signalé sur
l’afficheur.
A-B
REPEAT
RANDOM
1
2
3
4
5
6
7
8
9
+10
T-C
CLEAR
0
TOP
MENU
MENU
RETURN
ENTER
1
Appuyez sur la touche PLAY 3.
La lecture reprend à partir du dernier point d’arrêt.
Remarques
SUBTITLE
AUDIO
OSD
LAST
MEMORY
SETUP
DIMMER
CONDITION
MEMORY
REMOTE CONTROLLER
RC7010DV
4 3
2
1
DVD PLAYER DV7110
STOP
REPEAT
OPEN/CLOSE
A-B
TITLE
V I D E O
REPEAT SHUFFLE SVCD
DTS CHAPTER
TRACK
PBC
SCAN CHAPTER
FTS
TOTAL
TITLE
TRACK
PLAY
TRACK
TIME
STANDBY
POWER
FL OFF
ON/OFF
PAUSE
1
1
DIMMER
VIDEO OFF
LEVEL
PHONES
OSD
UTILISER LE LECTEUR DE DVD
• Le point de reprise peut être légèrement différent du point
d’arrêt.
• Si vous désirez retirer le disque mais être malgré tout en mesure
d’en reprendre la lecture à partir du point d’arrêt, utilisez la
fonction de mémoire de la dernière image (page 44).
ANGLE
PROGRAM
DIGITAL OUT
-
+
Appuyez sur la touche STOP 7 .
La lecture s’arrêt.
2
Appuyez sur la touche OPEN/CLOSE.
Le tiroir s’ouvre.
3
Retirez le disque.
Assurez-vous d’appuyer sur la touche OPEN/CLOSE
pour fermer le tiroir après avoir retiré le disque.
4
Appuyez sur la touche d’alimentation du
panneau avant.
21
FRANÇAIS
Mise en oeuvre
du lecteur
1
Appuyez sur la touche d’alimentation du
panneau avant.
2
Appuyez sur la touche SETUP.
La page de mise en oeuvre s’affiche.
(Exemple)
Utilisation des menus de
configuration
Audio1 Audio2 Video Language General
Dolby Digital Out – Dolby Digital
DTS Out – Off
96kHz PCM Out – 96kHz 3 48kHz
MPEG Out – MPEG 3 PCM
Les explications de cette page concernent les menus de
configuration. Ces menus permettent de choisir un certain
nombre d’options et d’en préciser les valeurs. L’ensemble
des fonctions est traité tout au long de ce mode d’emploi. Le
mode opératoire décrit sur cette page est un exemple
général d’utilisation des menus.
Setup audio
Digital output format/tone adjust
SETUP Exit
Move
3
Après le choix d’un menu, les options possibles
s’affichent sous le titre.
Lors des tout premiers réglages
Il est recommandé de régler le lecteur en utilisant l’option
“Setup Navigator” (page 15). Si vous choisissez [Auto Start
Off] quand l’option “Setup Navigator” apparaît, vous pouvez
toujours régler le lecteur avec l’option “Setup Navigator” du
menu General.
Utilisez les touches de déplacement du curseur
2/3
3) pour choisir le menu qui vous intéresse.
(2
4
Utilisez les touche de déplacement du curseur
( ) pour accéder au menu.
La première option du menu se trouve maintenant mise
en valeur.
Si vous choisissez de ne pas utiliser l’option “Setup
Navigator”, n’oubliez pas de réaliser les réglages
nécessaires dans les menus de configuration Audio 1, Audio
2, Video et Language de la façon décrite sur les pages
suivantes.
La lecture de certains DVD commence aussitôt qu’ils sont
mise en place; en ce cas, appuyez sur la touche STOP 7
pour arrêter la lecture.
(Exemple)
Audio1 Audio2 Video Language General
Dolby Digital Out Dolby Digital
DTS Out - Dolby Digital 3 PCM
96kHz PCM Out – 96kHz 3 48kHz
MPEG Out – MPEG 3 PCM
Change Dolby Digital output mode
Move
SETUP
Exit
OPEN/CLOSE
VIDEO ON/OFF
A-B
REPEAT
1
2
3
4
5
6
7
8
CLEAR
0
TOP
MENU
MENU
RETURN
ENTER
6
3, 4, 5, 6
Utilisez les touche de déplacement du curseur
3) pour accéder aux options.
(3
(Exemple)
ANGLE
SUBTITLE
AUDIO
PROGRAM
OSD
LAST
MEMORY
SETUP
DIMMER
CONDITION
MEMORY
2
Utilisez les touches de déplacement du curseur
5/ ) pour choisir l’option dont la valeur doit
(5
être modifiée.
Les valeurs possibles de chaque option apparaissent
sur la droite après que l’option a été choisie. La valeur
actuelle est celle dont le témoin est éclairé.
9
+10
T-C
5
RANDOM
Audio1 Audio2 Video Language General
Dolby Digital Out Dolby Digital
DTS Out - Dolby Digital 3 PCM
96kHz PCM Out – 96kHz 3 48kHz
MPEG Out – MPEG 3 PCM
Output Dolby Digital
Move
ENTER
Select SETUP Exit
REMOTE CONTROLLER
RC7010DV
1
DVD PLAYER DV7110
STOP
REPEAT
OPEN/CLOSE
A-B
TITLE
V I D E O
REPEAT SHUFFLE SVCD
DTS CHAPTER
TRACK
PBC
SCAN CHAPTER
FTS
TOTAL
TITLE
TRACK
PLAY
TRACK
TIME
STANDBY
POWER
FL OFF
ON/OFF
PAUSE
1
22
DIMMER
VIDEO OFF
LEVEL
PHONES
OSD
DIGITAL OUT
-
+
• Les valeurs de toutes les options ne sont pas
modifiables pendant la lecture d’un disque. Les
options qui relèvent de cette situation figurent sur fond
grisé. Pour modifier la valeur d’une de ces options,
vous devez appuyer sur la touche STOP 7 avant
d’appuyer sur la touche SETUP.
• Accéder à un menu après avoir appuyé sur la touche
STOP 7 peut annuler la fonction de reprise de lecture.
• Certaines options ne jouent pas immédiatement un
rôle si elles sont modifiées alors qu’un disque est en
cours de lecture. Pour que les nouvelles valeurs soient
prises en compte, arrêtez la lecture du disque puis
reprenez-la, ou bien effectuez les modifications tandis
que la lecture du disque est arrêtée.
à suivre
FRANÇAIS
4
5
7
8
6
9
+10
T-C
IMPORTANT
Adoption du menu de mise
en oeuvre “Expert”
CLEAR
0
TOP
MENU
MENU
RETURN
ENTER
7
8
9
ANGLE
SUBTITLE
AUDIO
PROGRAM
OSD
LAST
MEMORY
SETUP
DIMMER
CONDITION
MEMORY
Les menus de mise en oeuvre sont de deux niveaux [Basic] et
[Expert] de manière que l’appareil soit plus agréable à
employer en fonction des différents utilisateurs possibles. Les
menus de la catégorie [Basic] contiennent toutes les options
requises pour employer les fonctions de base du lecteur, ainsi
que des aides affichées sur l’écran et identifiées par le symbole
i . Le mode de menu [Expert] ajoute des fonctions
supplémentaires au mode de menu [Basic] du lecteur afin de
permettre des ajustements plus personnalisés du lecteur.
Dans ce mode d’emploi, les fonctions qui dépendent du
menu [Expert] sont identifiées par l’icône
.
Sur la page de menu General, choisissez la catégorie de
menu grâce à l’option [Setup Menu Mode].
REMOTE CONTROLLER
RC7010DV
Audio1 Audio2 Video Language General
Setup Menu Mode Expert
Setup Navigator Basic
Parental Lock – Level 8
Change menu mode
Move
7
8
Appuyez sur la touche RETURN, ou sur la
2), pour
touche de déplacement du curseur (2
revenir à la barre de menu et choisir un autre
menu.
9
Appuyez sur la touche SETUP pour fermer la
page.
SETUP
Exit
Valeurs :Expert
Basic*
* Réglage usine
Remarque:
Les informations sur l’écran apparaissent uniquement si [OSD
Language] est réglé sur [English] et si le mode de menu est réglé
sur [Basic].
MISE EN OEUVRE DU LECTEUR
Utilisez les touches de déplacement du curseur
5/ ) pour choisir une autre valeur puis
(5
appuyez sur la touche ENTER pour valider le
réglage effectué et l’introduire en mémoire.
Appuyez sur la touche RETURN, ou sur la
2), pour
touche de déplacement du curseur (2
quitter sans valider les modifications.
La page de mise en oeuvre se ferme.
Remarque
La prochaine fois que vous appuyez sur SETUP, le dernier menu
utilisé apparaîtra sur l’écran.
Que signifie les couleurs des témoins qui figurent
sur les pages de configuration?
Lors de la mise en oeuvre de l’ensemble, et lors des choix de
détail, il est utile de savoir quels réglages s’appliquent à quel
disque. Si des valeurs apparaissent pour chaque option du
menu, la valeur actuellement choisie est accompagnée d’un
témoin qui peut prendre trois couleurs, bleu, vert et jaune, qui
dépendent du support concerné, comme le montre le tableau
ci-dessous.
Couleur du témoin
Bleu
Type de disque
DVD uniquement
Jaune
DVD / Video CD
Vert
Tous les disques compatible
Remarque
Si une valeur qui n’est applicable qu’aux DVD est adoptée alors
qu’un Video CD, ou un CD, est dans le lecteur, une icône de
couleur bleue et représentant un DVD s’affiche dans le coin
supérieur droit de l’écran pour indiquer que cette valeur ne
s’applique pas au disque que contient le lecteur. La valeur ne
deviendra effective qu’au moment où un DVD sera mis en place.
23
FRANÇAIS
Régler la sortie audionumérique
pour qu’elle soit compatible avec
les autres appareils – DVD
Ce lecteur est à même de fournir un signal audionumérique
Dolby Digital, DTS, MPEG ou dont la fréquence
d’échantillonnage est de 96 kHz. Sur la page de
configuration du menu Audio 1, choisissez la valeur
convenable compte tenu des appareils auxquels ce lecteur
est connecté.
Sortie DTS (DTS Out)
Ce lecteur est capable de fournir les signaux
audionumériques DTS éventuellement gravés sur un DVD.
Lorsqu’il est relié à un appareil audiovisuel pourvu d’un
décodeur DTS, choisissez la valeur [DTS]. Si la chaîne ne
comporte pas de décodeur DTS, choisissez la valeur [Off].
En cas de doute sur la compatibilité, reportez-vous au mode
d’emploi des appareils de la chaîne.
Audio1 Audio2 Video Language General
Dolby Digital Out – Dolby Digital
DTS Out Off
DTS
96kHz PCM Out - 96kHz>48kHz
MPEG Out – MPEG 3 PCM
Remarques
• Si vous avez achevé la mise en oeuvre grâce au navigateur, les
réglages de cette page ont été définis par le lecteur.
• Si vous n’avez relié le lecteur à la chaîne qu’au moyen du
cordon audio fourni (liaison analogique), aucune modification
n’est nécessaire sur ce menu.
Change DTS output mode
Move
SETUP
Exit
Valeurs: Off*
Sortie Dolby Digital (Dolby Digital Out)
Ce lecteur est capable de fournir les signaux
audionumériques avec correction d’ambiance au format
Dolby Digital. Lorsqu’il est relié à un appareil audiovisuel
pourvu d’un décodeur Dolby Digital, choisissez la valeur
[Dolby Digital]. Ce lecteur est également capable de
convertir les signaux Dolby Digital en signaux Linear PCM,
c’est-à-dire en signaux identiques à ceux employés pour la
gravure des CD. Lorsqu’il est relié à un amplificateur ou un
récepteur pourvus soit d’un décodeur Dolby Pro Logic, soit
d’un convertisseur numérique-analogique (DAC), choisissez
la valeur [Dolby Digital 3 PCM].
DTS
*Réglage usine
Remarque
Si vous avez réalisé une liaison audionumérique entre le lecteur et
un ou plusieurs appareils qui ne sont pas conçus pour décoder les
signaux numériques DTS, veillez tout particulièrement à choisir la
valeur [Off]. En effet, si un signal DTS, qui est un train binaire, est
appliqué à un appareil qui ne peut pas le décoder, ce signal est
perçu comme un bruit d’origine numérique qui peut gravement
endommager les enceintes acoustiques de la chaîne.
Sortie PCM 96 kHz (96 kHz PCM Out)
Ce lecteur est capable de fournir des signaux
audionumériques dont la fréquence d’échantillonnage est
égale à 96 kHz. Lorsqu’il est relié à un appareil conçu pour
traiter des signaux de ce type, choisissez [96 kHz] de
manière que le lecteur fournisse les signaux tels qu’ils sont.
Si le lecteur est relié à un appareil qui ne peut pas traiter les
signaux à 96 kHz, choisissez la valeur [96 kHz 3 48 kHz]
de façon que le lecteur fournisse des signaux ayant fait
l’objet d’un premier traitement consistant à diviser par deux
la fréquence d’échantillonnage pour revenir à la valeur plus
commune de 48 kHz.
Audio1 Audio2 Video Language General
Dolby Digital Out Dolby Digital
DTS Out - Dolby Digital 3 PCM
96kHz PCM Out – 96kHz 3 48kHz
MPEG Out – MPEG 3 PCM
Change Dolby Digital output mode
Move
SETUP
Exit
Valeurs: Dolby Digital*
Dolby Digital 3 PCM
*Réglage usine
Audio1 Audio2 Video Language General
Dolby Digital Out – Dolby Digital
DTS Out – Off
96kHz PCM Out 96kHz 3 48kHz
MPEG Out - PCM
96kHz
Change 96 kHz output mode
Move
SETUP
Exit
Valeurs: 96 kHz 3 48 kHz*
96 kHz
*Réglage usine
Remarques
• Certains DVD protégés contre la copie ne permettent pas la
reproduction du signal audio à 96 kHz.
• Sachez que vous ne pouvez pas modifier le réglage [96 kHz
PCM Out] quand un disque est en cours de lecture.
24
FRANÇAIS
Sortie MPEG (MPEG Out)
Ce lecteur est capable de fournir le train binaire MPEG.
Lorsqu’il est relié à un appareil audiovisuel pourvu d’un
décodeur MPEG, choisissez la valeur [MPEG]. Lorsqu’il est
relié à un appareil dépourvu de décodeur MPEG, choisissez
la valeur [MPEG 3 PCM] de manière que le signal
numérique soit converti au format PCM, c’est-à-dire au format
utilisé pour la gravure sur CD.
Audio1 Audio2 Video Language General
Dolby Digital Out – Dolby Digital
DTS Out – Off
96kHz PCM Out – 96kHz 3 48kHz
MPEG Out MPEG
MPEG 3 PCM
Change MPEG audio output mode
Move
SETUP
Réglage de la dynamique
sonore – DVD
Audio DRC signifie “Audio Dynamic Range Compression”.
Lorsque cette fonction est en service, la dynamique sonore est
peu étendue et les sons les moins forts, par exemple, les
dialogues peuvent être entendus plus clairement sans
amplification des sons qui sont déjà puissants. Choisissez un
des trois niveaux de compression de dynamique selon l’effet
désiré. Si la valeur de l’option Audio DRC est [Off], aucune
compression de dynamique n’est appliquée aux signaux de la
source.
Sur la page du menu Audio 2, choisissez la valeur
convenable pour l’option [Audio DRC].
Exit
Audio1 Audio2 Video Language General
Audio DRC
Valeurs: MPEG
MPEG 3 PCM*
*Réglage usine
High
Medium
Low
Off
Dynamic playback at low volume
Move
En fonction de vos préférences et du type de connexions
réalisées, vous pouvez choisir de ne sortir aucun signal audio
numérique. Quand ce réglage est sur [Off] (hors service),
aucun signal n’est sorti par les prises de sortie audio
numériques.
Faites le réglage dans [Digital Out] du menu Audio 1 de
l’écran Setup en mode de menu [Expert] (page 23).
Audio1 Audio2 Video Language General
Dolby Digital Out – Dolby Digital
DTS Out – Off
96kHz PCM Out – 96kHz>48kHz
MPEG Out – MPEG 3 PCM
Digital Out On
Off
Move
SETUP
Exit
Valeurs: High
(compression maximal du signal de la source)
Medium
(compression modérée du signal de la source)
Low
(compression très réduite du signal de la source)
Off*
*Réglage usine
Remarque
Audio DRC n’a d’effet que si la touche est de type Dolby Digital.
MISE EN OEUVRE DU LECTEUR
Mise en et hors service de la
sortie numérique
SETUP
Exit
Valeurs: On*
(un train de binaires numérique est sorti)
Off
(aucun train de binaires numérique n’est
sorti)
* Réglage usine
25
FRANÇAIS
Définition du format de
l’image sur l’écran du
téléviseur
Le rapport de la largeur à la hauteur d’un écran standard de
téléviseur est égal à 4/3; dans le cas des téléviseurs haute
définition, ce rapport est de 16/9. Ce rapport caractérise le
format d’image.
Selon le format de l’image enregistrée sur le disque, il peut
être nécessaire de changer le format d’image sur le
téléviseur.
Pour cela, choisissez le menu Video puis l’option
[TV Screen] et enfin la valeur appropriée. Sachez que vous
ne pouvez pas effectuer une modification de la valeur choisie
pour [TV Screen] quand un disque est en cours de lecture. Il
vous faut tout d’abord arrêter la lecture du disque.
Si vous possédez un téléviseur ou un moniteur grand écran
Format de la gravure sur DVD
Apparence en fonction
Gravure au format “Grand
écran”
Sachez que le format “Letter
Box” sur grand écran entraîne
parfois la présence d’une barre
horizontale noire au-dessus et
au-dessous de l’image. Cela ne
traduit pas un défaut de
Valeur “Wide”
Gravure au format standard
Si la gravure sur le DVD est de
type standard et le téléviseur de
type grand écran, des barres
noires peuvent apparaître de
Valeur “Wide”
Gravure au format standard
(étirement déformant)
Si la gravure sur le DVD est de
type standard et le téléviseur
de type grand écran, l’image
peut être étirée. Pour corriger
les déformations qui en
résultent, modifiez la manière
dont le téléviseur affiche les
images et adoptez la valeur
standard (4/3). Pour de plus
amples détails concernant cette
question, reportez-vous au
Audio1 Audio2 Video Language General
TV Screen 4:3(Letter Box)
Component Video - 4:3(Pan&Scan)
Progressive DNR - 16:9(Wide)
Picture Quality -Standard
Select your display preference
Move
SETUP
Exit
Valeurs: 4:3 (Letter Box)
4:3 (Pan & Scan)
16:9 (Wide)*
Valeur “Wide”
*Réglage usine
Remarques
Si vous possédez un téléviseur ou un moniteur standard
• Si la valeur [Standard (4:3)] est choisie sur la page du
navigateur de mise en oeuvre, [4:3 (Letter Box)] est sélectionné
sur cette page. Si vous préférez le format “pan&scan”, modifiez
le réglage sur cette page.
• Le choix d’un autre format d’image dépend du disque. Veuillez
consulter les indications que porte la pochette.
• Certains disques n’offrent pas le format d’image choisi comme
valeur de l’option [TV Screen]. En ce cas, le format d’image
standard, pour le disque, est adopté.
Format de la gravure sur DVD
Différences entre formats d’image et gravure sur
DVD
L’existence de plusieurs formats d’image peut être source de
confusion, et en cas de réglage incorrect l’image peut être
très différente de ce qu’elle devrait être. Les explications qui
suivent vous permettront de choisir le format d’image
convenable pour profiter pleinement de la gravure du DVD.
Les valeurs de l’option [TV Screen] sont probablement plus
claires lorsque vous utilisez un DVD portant un
enregistrement pour grand écran. Si vous possédez un écran
standard, choisissez [4:3 (Letter Box)] ou [4:3 (Pan &
Scan)], en fonction de vos goûts personnels. Si vous
possédez un écran large, choisissez la valeur [16:9 (Wide)].
Gravure au format “Grand
écran”
Dans ce cas, une barre noire
apparaît en haut et en bas de
l’image de manière que le
rapport de la largeur à la
hauteur de l’image soit respecté
bien que l’écran du téléviseur
présente normalement un
Apparence en
Valeur “Letter Box”
Gravure au format “Grand
écran”
Ici, l’image est “plus grande”
que l’écran et une portion, de
part et d’autre, est coupée pour
que l’affichage sur un écran
Valeur “Pan & Scan”
Gravure au format standard
Si l’écran du téléviseur a le
format standard, le format
d’image standard sera adopté
quelle que soit la valeur de
Valeur quelconque
Gravure au format standard
(retrécissement déformant)
Si la gravure sur le DVD est de
type grand écran, et d’une part
le téléviseur de type standard et
d’autre part la valeur choisie
pour l’option [TV Screen] est
[16:9 (Wide)], l’image peut être
retrécie. Pour corriger les
déformations qui en résultent,
adoptez la valeur [4:3 (Letter
Box)] ou [4:3 (Pan & Scan)].
26
Valeur “Wide”
FRANÇAIS
Sortie vidéo compatible
avec le balayage progressif
numérique 525 lignes – DVD
Connexion à un téléviseur compatible
avec le balayage progressif
Comparé à une image de téléviseur à balayage entrelacé
standard, un téléviseur compatible avec le balayage
progressif offre une image plus stable et sans papillotement.
Faites ce réglage uniquement si vous connectez les prises
COMPONENT VIDEO OUT à un téléviseur ou un moniteur
compatible avec le balayage progressif.
Lors des connexions vidéo en composantes, assurez-vous
de positionner le commutateur VIDEO OUT SELECT du
panneau arrière du lecteur vers la droite pour choisir la sortie
vidéo en composantes (page 14).
Quand un signal vidéo à balayage progressif est sorti,
l’indicateur “PROGRESSIVE” s’allume sur l’affichage.
Modifiez le réglage [Component Video] du menu “Setup
screen” Video.
Remarque
Si vous connectez un téléviseur qui n’est pas compatible avec les
signaux à balayage progressif et choisissez le réglage du
balayage progressif, vous ne verrez aucune image. Si vous vous
trouvez accidentellement dans cette situation, réglez le
commutateur VIDEO OUT SELECT du panneau arrière sur
COMPOSITE & S-VIDEO. Si le téléviseur connecté utilise des
prises composites ou S-Vidéo, choisissez le réglage [Interlace]
dans le menu [Component Video], puis réglez à nouveau le
commutateur du panneau arrière sur COMPONENT.
Réglage du niveau DNR (Digital Noise
Reduction) pour la vidéo en composantes
à balayage progressif numérique
Le DNR réduit le “bruit vidéo” du balayage progressif.
Choisissez un des 2 niveaux de réduction de bruit en fonction
de l’effet que vous souhaitez obtenir. Vous pouvez aussi
choisir le réglage [Off] (hors service).
Ce réglage ne s’applique qu’à la sortie vidéo en
composantes à balayage progressif.
Modifiez le réglage [Progressive DNR] dans le menu “Setup
screen” Video.
Audio1 Audio2 Video Language General
Audio1 Audio2 Video Language General
TV Screen — 16:9(Wide)
Component Video —Progressive
Progressive DNR - High
Picture Quality - Low
Off
Progressive Compatible TV only
Progressive DNR On/Off
SETUP Exit
Move
Select Interlace or Progressive
output Component Video
SETUP Exit
Move
Valeurs: Interlace*
Utilisez ce réglage avec un téléviseur ordinaire qui
n’est pas compatible avec le balayage progressif.
Consultez le mode d’emploi du téléviseur si vous
n’êtes pas sûr à propos de ce point.
Progressive
Utilisez ce réglage avec un téléviseur ou un
moniteur munis d’entrées vidéo en composantes à
balayage progressif. Consultez le mode d’emploi
du téléviseur si vous n’êtes pas sûr à propos de ce
point.
Auto Progressive
Se règle sur le balayage progressif lors de la
reproduction d’un disque DVD 16:9 et sur le
balayage entrelacé lors de la reproduction d’un
disque DVD 4:3. Votre téléviseur ou moniteur doit
être compatible avec le balayage progressif pour
pouvoir utiliser ce réglage.
*Réglage usine
Conseil:
Si le lecteur est réglé pour sortir un signal vidéo à balayage
progressif, il est possible que l’image apparaisse étirée lors de la
lecture de disques enregistrés au format 4:3. Cela se produit
quand le format d’image du téléviseur est réglé sur 16:9. Pour voir
l’image avec dans son format d’image correct, changez le réglage
du téléviseur sur 4:3.
Si votre téléviseur peut être commuté entre 4:3 et 16:9, réglez ce
lecteur sur [Interlace] ou [Auto progressive].
En mode progressif auto, les disques 4:3 sont reproduits en mode
entrelacé tandis que les disques enregistrés à la fois au format 4:3
et 16:9 sont reproduits en mode entrelacé pour les sections 4:3 et
en mode progressif pour les sections 16:9. Commutez le format
d’image du téléviseur sur le réglage qui convient le mieux (pour
plus de détails, référez-vous au mode d’emploi fourni avec le
téléviseur). Quand le lecteur est réglé sur [Auto progressive],
l’image peut être légèrement perturbée lorsque le lecteur (et le
téléviseur) commute entre le mode progressif et entrelacé. Ce
n’est pas un mauvais fonctionnement du lecteur ni du téléviseur.
Une perturbation de l’image peut se produire, par exemple, lors de
la commutation d’un écran de menu sur l’image ordinaire.
Valeurs: High
Ce réglage applique une forte réduction de bruit à
l’image à balayage progressif.
Low
Ce réglage applique une réduction normale de
bruit à l’image à balayage progressif.
Off*
Avec ce réglage aucune réduction de bruit n’est
appliquée à l’image à balayage progressif.
MISE EN OEUVRE DU LECTEUR
TV Screen — 16:9(Wide)
Component Video - Interlace
Progressive DNR - Progressive
Picture Quality - Auto Progressive
*Réglage usine
Compatibilité de cet appareil avec les téléviseurs à
balayage progressif
“LES CONSOMATEURS DOIVENT NOTER QUE TOUS
LES TÉLÉVISEUR HAUTE DÉFINITION NE SONT PAS
COMPLÈTEMENT COMPATIBLES AVEC CET APPAREIL
ET CERTAINS PROBLÈMES PEUVENT APPARAÎTRE SUR
L’IMAGE. POUR LES PROBLÈMES AVEC LES IMAGES À
BALAYAGE PROGRESSIF 525 LIGNES, IL EST
RECOMMANDÉ DE CHANGER LA CONNEXION SUR LA
SORTIE “DÉFINITION STANDARD”.
27
FRANÇAIS
Réglage de la qualité de
l’image en fonction du type
d’enregistrement – DVD/Video CD
Vous pouvez choisir la qualité d’image qui convient le mieux aux
films, aux dessins animés et aux autres enregistrements.
Sur la page du menu Video, choisissez la valeur convenable
pour l’option [Picture Quality].
Audio1 Audio2 Video Language General
TV Screen — 16:9(Wide)
Component Video — Interlace
Progressive DNR - Cinema
Picture Quality Animation
Standard
Adjust picture quality
Move
SETUP
Choix de la position d’affichage sur
l’écran
Si vous regardez au moyen d’un téléviseur grand écran, une
gravure vidéo pour écran standard, la fenêtre de menu et
autres indicateurs de fonctionnement se trouvent placés tout
en haut de l’écran et peuvent être difficiles à voir. En
changeant la position occupée par ces informations, vous
pouvez en prendre connaissance complètement, même sur
un écran large.
Vous pouvez aussi choisir de les éteindre complètement avec
le réglage [Off].
Pour cela, choisissez la catégorie [Expert] puis le menu
Video et enfin l’option [On Screen Display] (page 23).
Audio1 Audio2 Video Language General
TV Screen —16:9(Wide)
Component Video — Interlace
Progressive DNR — Off
Picture Quality —Standard
Still Picture - Position-Wide
On Screen Display Position-Normal
Angle Indicator - Off
SETUP Exit
Move
Exit
Valeurs: Cinema
Image nette et très contrastée avec un fond clair.
Animation
Image aux couleurs vives et claires.
Standard*
Aucun effet n’est ajouté à l’image vidéo.
* Réglage usine
Choix du type d’image arrêtée
Cette fonction permet d’obtenir une image arrêtée de très
bonne qualité.
Choisissez la catégorie [Expert] puis le menu Video et enfin
l’option [Still Picture] pour laquelle vous devez sélectionner
la valeur appropriée (page 23).
Audio1 Audio2 Video Language General
TV Screen —16:9(Wide)
Component Video — Interlace
Progressive DNR — Off
Picture Quality —Standard
Still Picture Field
On Screen Display - Frame
Angle Indicator - Auto
SETUP Exit
Move
Valeurs: Field
(Le tremblement de l’image arrêtée est
supprimé.)
Frame
(L’image est de très haute qualité.)
Auto*
(Permet de choisir automatiquement [Fiel] ou
[Frame] en fonction du disque.)
* Réglage usine
28
Valeurs: Position-Wide
Position-Normal*
Off
*Réglage usine
Remarque
Ce réglage n’opère que dans le cas de DVD qui portent des
enregistrements au format 4/3.
FRANÇAIS
Choix de l’angle de prise de
vues (même scène sous
plusieurs angles) – DVD
Si le DVD porte la même scène prise sous divers angles,
vous pouvez choisir l’angle qui vous semble le plus
intéressant.
RETURN
Affichage ou non du témoin d’angle
multiple de prise de vues
Quand survient la lecture d’une scène filmée sous plusieurs
angles, le symbole
s’affiche sur l’écran. Grâce à cela
vous savez donc si une gravure de la même scène vue sous
un autre angle existe sur le disque.
Pour afficher ou non ce symbole, choisissez la catégorie
[Expert] puis le menu Video et enfin l’option [Angle
Indicator] pour laquelle vous devez sélectionner la valeur
appropriée (page 23).
ENTER
Audio1 Audio2 Video Language General
ANGLE
SUBTITLE
AUDIO
PROGRAM
OSD
LAST
MEMORY
SETUP
DIMMER
CONDITION
MEMORY
ANGLE
TV Screen – 16:9(Wide)
Picture Quality – Standard
Still Picture – Field
On Screen Display – On
OSD Position – Normal
Angle Indicator On
Off
SETUP Exit
Move
Valeurs: On* (Le symbole
est affiché)
REMOTE CONTROLLER
Off (Le symbole n’est pas affiché)
RC7010DV
* Réglage usine
Remarque
L’angle de prise de vues change chaque fois que vous
appuyez sur cette touche.
ANGLE
: 1/4
ANGLE
: 2/4
\
«
»
ANGLE
: 4/4
ANGLE
MISE EN OEUVRE DU LECTEUR
Pendant la lecture, appuyez sur la touche ANGLE.
Quand survient la lecture d’une scène filmée sous plusieurs
angles, le témoin
de l’afficheur s’éclaire, et cela même si la
valeur de l’option [Angle Indicator] est [Off]. Autrement dit, vous
pouvez toujours savoir si une scène a été filmée sous plusieurs
angles sans pour autant afficher le symbole correspondant sur le
téléviseur.
: 3/4
|
Remarques
• Vous ne pouvez employer cette fonction que si le disque porte
plusieurs prises de vues de la même scène.
• Le témoin
s’éclaire pendant l’utilisation de la fonction.
• Certains DVD permettent le choix de l’angle grâce à un menu.
En ce cas, appuyez sur la touche MENU pour afficher le menu
du DVD puis effectuez votre sélection.
Pour savoir si un disque porte plusieurs prises de vues
de la même scène:
La mention
figure sur la pochette d’un disque portant de
mêmes scènes filmées sous des angles différents. Par
ailleurs, quand survient une scène de ce type, l’appareil
affiche le symbole
.
Pour supprimer l’affichage de ce symbole, donnez la valeur
[Off] à l’option [Angle Indicator] du menu Video.
29
FRANÇAIS
Définition des
options de langue
Le DVD est un support de très grande capacité puisqu’il est
en mesure de porter 8 pistes sonores pour les dialogues,
chacune dans une langue différente, et 32 pistes pour les
sous-titres, chacune également dans une langue différente.
Cette section décrit les possibilités offertes par ce lecteur
dans ce domaine.
Remarques
• Chaque DVD est différent et tous les DVD ne contiennent pas
plusieurs pistes sonores ni plusieurs sous-titrages. En
conséquence, les réglages de cette section peuvent n’avoir
aucun effet sur certains DVD.
• Si vous avez déjà réalisé les réglages de l’écran du navigateur
de réglage, les réglages de cette page ont déjà été faits par le
lecteur.
Définition des préférences
pour la langue des dialogues
et celle des sous-titres
Le menu Language contient un certain nombre d’options
ayant trait aux préférences en matière de langue des
dialogues et celle des sous-titres.
Choix de la langue des dialogues
Dans le cas d’un DVD, la langue des dialogues peut être
choisie parmi plusieurs langues. Le choix que vous effectuez
à l’aide du menu est le choix par défaut, celui qui est adopté
lors de la lecture du DVD suivant même si, entre-temps vous
avez modifié ce choix en appuyant sur la touche AUDIO.
Choisissez la valeur convenable pour l’option [Audio
Language] du menu Language.
Audio1 Audio2 Video Language General
OSD Language – English
Audio Language - English
English
Subtitle Language - Japanese
French
Auto Language - Japanese
Spanish
Other
Définition de l’affichage sur
l’écran (OSD)
Choix de la langue d’affichage
Vous pouvez choisir la langue dans laquelle s’affichent les
messages et les indications de fonctionnement. Pour cela,
accédez au menu Language puis choisissez la valeur
convenable pour l’option [OSD Language].
Setup audio language
Move
SETUP
Exit
Valeurs: English*
French
Spanish
Other (Pour de plus amples détails concernant les
autres langues, reportez-vous à la page 33, ‘Si
vous choisissez “Other”’.)
*Réglage usine
Audio1 Audio2 Video Language General
OSD Language English
English
Audio Language - English
français
Subtitle Language - Japanese
Español
Auto Language – On
Remarque
Setup player’s OSD language
Move
SETUP
Les paramètres du menu peuvent être différents de ceux indiqués
ci-dessus.
Exit
Valeurs: English*
français
Español
* Réglage usine
Remarques
Par défaut, la valeur de l’option [OSD Language] est [English]. Si
l’anglais vous convient, ne changez rien.
30
FRANÇAIS
Choix de la langue des
dialogues (Dialogues en
plusieurs langues) – DVD
Un DVD peut porter plusieurs pistes sonores, chacune dans
une langue différente; de plus, certaines pistes peuvent être
au format Dolby Digital, d’autres au format PCM, d’autres
encore dans un autre format.
Choix de la sortie audio – Video CD/CD
De manière à profiter pleinement des formats spéciaux tels
que celui employé pour le karaoké, ce lecteur permet, dans
le cas des Video CD et CD, le choix de la sortie audio
(stéréophonie, voie gauche ou voie droite).
Pendant la lecture, appuyez de manière répétée sur
la touche AUDIO.
La sortie audio passe de [1/L] (voie gauche) à [2/R] (voie
droite) à [Stereo].
OPEN/CLOSE
VIDEO ON/OFF
Audio
A-B
REPEAT
1
2
3
4
5
6
7
8
+10
T-C
: 1/L
RANDOM
9
CLEAR
0
TOP
MENU
MENU
RETURN
ENTER
Audio
ANGLE
SUBTITLE
AUDIO
PROGRAM
OSD
LAST
MEMORY
DIMMER
CONDITION
MEMORY
SETUP
: 2/R
AUDIO
: Stereo
Appuyez de manière répétée sur la touche AUDIO
pour choisir la langue.
La première pression sur la touche AUDIO affiche la langue
des dialogues présentement choisie. Les pressions suivantes
sur cette touche sélectionnent, l’une après l’autre, les autres
langues gravées sur le DVD.
Audio
:1
O
HELL
English
Dolby Digital
5.1CH
Audio
:2
Spanish
Remarque
Dans le cas des disques de karaoké et des disques similaires,
choisissez la sortie audio du chant et celle de l’accompagnement
en tenant compte des indications figurant sur la pochette ou la
notice du disque.
DEFINITION DES OPTIONS DE LANGUE
Audio
REMOTE CONTROLLER
RC7010DV
Dolby Digital
5.1CH
HOLA
Remarques
• Il n’est pas possible de choisir la langue des dialogues si une
seule langue a été gravée.
• Choisir la langue des dialogues est impossible avec certains
disques. En ce cas, l’icône
s’affiche.
• Certains DVD permettent le choix de la langue des dialogues
grâce à un menu. En ce cas, appuyez sur la touche MENU pour
afficher le menu du DVD puis effectuez votre sélection.
31
FRANÇAIS
Choix de la langue des
sous-titres (Sous-titrage en
plusieurs langues) – DVD
Vous pouvez choisir la langue des sous-titres si le DVD porte
plusieurs pistes sonores, chacune dans une langue
différente.
Choix de la langue des sous-titres
Dans le cas d’un DVD, la langue des sous-titres peut être
choisie parmi les langues disponibles sur le disque. Le choix
que vous effectuez à l’aide du menu est le choix par défaut,
celui qui est adopté lors de la lecture du DVD suivant même
si, entre-temps vous avez modifié ce choix en appuyant sur
la touche SUBTITLE.
Choisissez la valeur convenable pour l’option [Subtitle
Language] du menu Language.
Audio1 Audio2 Video Language General
OPEN/CLOSE
VIDEO ON/OFF
A-B
REPEAT
1
2
3
4
5
6
7
8
+10
T-C
OSD Language – English
Audio Language – English
English
Subtitle Language Japanese
Auto Language - English
French
Spanish
Other
Setup disc’s subtitle language
SETUP Exit
Move
RANDOM
9
CLEAR
0
TOP
MENU
Valeurs: English*
MENU
French
Spanish
Other (Pour de plus amples détails concernant les
autres langues, reportez-vous à la page 32, ‘Si
vous choisissez “Other”’.)
ENTER
RETURN
*Réglage usine
ANGLE
SUBTITLE
SUBTITLE
AUDIO
PROGRAM
OSD
LAST
MEMORY
SETUP
DIMMER
CONDITION
MEMORY
Remarque
Les paramètres du menu peuvent être différents de ceux indiqués
ci-dessus.
REMOTE CONTROLLER
RC7010DV
Pendant la lecture, appuyez de manière répétée sur
la touche SUBTITLE.
La première pression sur la touche SUBTITLE affiche la
langue de sous-titrage présentement choisie. Les pressions
suivantes sur cette touche sélectionnent, l’une après l’autre,
les autres langues gravées sur le DVD.
Subtitle
:1 English
HELLO!
Subtitle
:2 Spanish
HOLA!
Remarques
• Il n’est pas possible de choisir la langue de sous-titrage si aucun
sous-titrage n’a été gravé, ni si un seul sous-titrage a été gravé.
• Choisir la langue de sous-titrage est impossible avec certains
disques. En ce cas, l’icône
s’affiche.
• Pour arrêter l’affichage des sous-titres pendant la lecture du
disque, appuyez sur la touche SUBTITLE puis sur la touche
CLEAR, ou bien appuyez sur la touche SUBTITLE jusqu’à ce
que la mention [Off] apparaisse.
• Certains DVD permettent le choix de la langue des sous-titres
grâce à un menu. En ce cas, appuyez sur la touche MENU pour
afficher le menu du DVD puis effectuez votre sélection.
32
FRANÇAIS
Si vous choisissez “Other”
Procédez comme il est dit ci-dessous pour choisir une des
136 langues possibles comme langue des dialogues.
3
La liste des codes de langue figure à la page 50.
Si vous optez pour [List of Languages], utilisez
5/ )
les touches de déplacement du curseur (5
pour afficher la langue désirée.
Pour les langues qui ne sont données que par des
codes, reportez-vous à la page 50, ‘Liste des codes de
langue’.
Audio1 Audio2 Video Language General
List of Languages
OSD Language – English
Audio Language - English
English
Subtitle Language - Japanese
French
Auto Language - Japanese
Spanish
Other
ja: Japanese
Setup audio language
Move
SETUP
Exit
Si vous optez pour [Code], utilisez les touches
5/ ) pour taper la
de déplacement du curseur (5
valeur du code.
OPEN/CLOSE
VIDEO ON/OFF
A-B
REPEAT
1
2
3
4
5
6
7
8
9
+10
T-C
Pour cela, vous pouvez également employez les touches
numérotées. Utilisez les touches de déplacement du
curseur (2/3) pour changer la position de ce dernier.
RANDOM
Code (0~2)
CLEAR
1
0
TOP
MENU
MENU
RETURN
ENTER
1, 4
0
1
Remarque
SUBTITLE
AUDIO
OSD
LAST
MEMORY
SETUP
DIMMER
CONDITION
MEMORY
Pour sélectionner le chiffre 0, appuyez rapidement sur la touche
+10/0.
4
Appuyez sur la touche ENTER pour valider la
sélection.
Pour fermer la page sans effectuer de sélection,
appuyez sur la touche RETURN.
Choix des langues de base pour les
dialogues et les sous-titres
Choisissez [Other] à l’aide des touches de
déplacement du curseur puis appuyez sur la
touche ENTER.
La page de sélection de langue s’affiche.
Ce lecteur est capable d’adopter automatiquement un certain
comportement, à savoir: s’il s’agit d’un film étranger, la
langue des dialogues est celle de la piste sonore d’origine et
les sous-titres sont dans la langue choisie comme valeur de
l’option [Subtitle Language]; s’il s’agit d’un film produit dans
votre pays, la langue des dialogues est celle de la piste
sonore d’origine et aucun sous-titre n’est affiché.
Choisissez le menu Language puis l’option [Auto Language]
pour laquelle vous devez sélectionner la valeur appropriée
.
Audio1 Audio2 Video Language General
Audio Language
List of Languages
Code (0~2)
ja: Japanese
1
0
0
Audio1 Audio2 Video Language General
1
OSD Language – English
Audio Language – English
Subtitle Language – Spanish
Auto Language On
On
Off
Play dialog, etc. in original language
Subtitle ON with foreign audio.
SETUP Exit
Move
Setup audio language
RETURN Return
Move
+/–
ENTER Select SETUP Exit
2
DEFINITION DES OPTIONS DE LANGUE
ANGLE
PROGRAM
1, 2, 3
REMOTE CONTROLLER
RC7010DV
1
0
Au moyen des touches de déplacement du
2/3
3), choisissez [List of Languages]
curseur (2
ou [Code].
Valeurs: On*
Off
* Réglage usine
Remarque
Pour que le choix de la langue soit automatique, il faut que la
valeur de Auto Language soit [On] et que les langues
sélectionnées comme valeur de [Audio Language] et [Subtitle
Language] soient les mêmes.
33
FRANÇAIS
Choix de la langue de travail pour le
DVD
Affichage ou non des sous-titres et
des sous-titres d’aide
Outre plusieurs langues pour les dialogues ou les sous-titres,
le DVD peut aussi contenir l’ensemble des menus et
messages en plusieurs langues. Après avoir choisi une
langue, les menus et messages s’affichent dans cette langue
chaque fois qu’ils existent sur le DVD considéré.
Utilisez l’option suivante pour afficher, ou non, les sous-titres.
Par ailleurs, certains DVD fournissent un sous-titrage d’aide
servant à expliciter l’action et destiné aux malentendants.
Choisissez la valeur [Assist Subtitle] pour afficher ces soustitres lorsqu’ils sont disponibles sur le disque.
Si vous choisissez la valeur [w/ Subtitle Language], le
lecteur tient alors compte de la langue choisie pour valeur de
l’option [Subtitle Language].
Choisissez la catégorie [Expert] puis le menu Language et
enfin l’option [Subtitle Display] pour laquelle vous devez
sélectionner la valeur appropriée (page 23).
Choisissez la catégorie [Expert] puis le menu Language et
enfin l’option [DVD Language] pour laquelle vous devez
sélectionner la valeur appropriée (page 23).
Audio1 Audio2 Video Language General
OSD Language – English
Audio Language – English
Subtitle Language – Spanish
Auto Language – On
DVD Language - English
On
Off
Subtitle Display On
Assist Subtitle
Subtitle Off - Selected
Subtitle
SETUP Exit
Move
Audio1 Audio2 Video Language General
OSD Language – English
Audio Language – English
Subtitle Language Japanese
w/ Subtitle Language
Auto Language - On
English
DVD Language English
French
Subtitle Display - On
Spanish
Subtitle Off - Selected
Other Subtitle
SETUP Exit
Move
Valeurs: On*
Off
Assist Subtitle
Valeurs: w/ Subtitle Language*
* Réglage usine
English
French
Remarques
Spanish
• Aucune sous-titre n’est affiché, même si la valeur de cette option
est [On], si le disque ne porte aucun sous-titre.
• Le réglage effectué grâce au menu est un réglage par défaut,
Autrement dit, même si la valeur de l’option est [Off], vous avez
la possibilité d’afficher les sous-titres en appuyant sur la touche
SUBTITLE. Pareillement, si la valeur de l’option est [On], vous
pouvez arrêter l’affichage des sous-titre en appuyant sur la
touche SUBTITLE puis sur la touche CLEAR.
Other (Pour de plus amples détails concernant les
autres langues, reportez-vous à la page 33, ‘Si
vous choisissez “Other”’.)
*Réglage usine
Remarques
• Les valeurs proposées peuvent être différentes de celles de
l’illustration ci-dessus.
• Si cette fonction ne vous donne pas satisfaction, effectuez la
sélection sur le menu affiché par le DVD. Pour cela, appuyez sur
la touche MENU pour afficher le menu du DVD puis choisissez la
valeur convenable.
Sélection de la langue pour l’affichage
forcé des sous-titres
Même si l’option d’affichage des sous-titres est hors service,
certains DVD les afficheront quand même sur l’écran. Ce
réglage permet de choisir la langue des sous-titres à afficher
avec ce type de DVD.
Choisissez la valeur [With Audio] pour afficher les sous-titres
dans la même langue que celle adoptée pour l’option [Audio
Language]. Par contre, choisissez la valeur [Selected
Subtitle] pour afficher les sous-titres dans la même langue
que celle adoptée pour l’option [Subtitle Language].
Choisissez la catégorie [Expert] puis le menu Language et
enfin l’option [Subtitle Off] pour laquelle vous devez
sélectionner la valeur appropriée (page 23).
Audio1 Audio2 Video Language General
OSD Language – English
Audio Language – English
Subtitle Language – Spanish
Auto Language – On
DVD Language – English
With Audio
Subtitle Display - On
Subtitle Off Selected
Subtitle
Selected Subtitle
SETUP Exit
Move
Valeurs: With Audio
Selected Subtitle*
* Réglage usine
34
FRANÇAIS
Autres
fonctions
Frappe du mot de passe
Quand vous choisissez l’option [Level Change], ou l’option
[Password Change], vous êtes invité à taper le mot de
passe (un nombre de quatre chiffres). Procédez alors de la
manière suivante.
1
Cet appareil a été conçu pour la lecture des DVD, Video CD
et CD. Si vous êtes déjà familier avec les Video CD et CD,
vous connaissez nécessairement certaines des opérations
qu’il est en mesure de réaliser. Dans le cas des DVD, la
diversité des opérations possibles est encore plus grande.
Utilisez les touches de déplacement du curseur
5/ ) pour choisir un nombre compris entre 0
(5
et 9, ou bien tapez ce nombre au moyen des
touches numérotées.
Vous pouvez taper le nombre directement au moyen des
touches numérotées. Lorsque vous tapez le mot de
passe pour la première fois, le lecteur vous demande de
le retaper pour confirmation; la même chose se produit
quand vous désirez changer le mot de passe. Si vous
utilisez les touches numérotées, les chiffres sont
remplacés sur l’écran par des astérisques et le curseur
passe automatiquement à la position suivante.
Remarque
Chaque DVD est différent, et tous les DVD ne contiennent pas les
mêmes informations. Certaines fonctions décrites dans cette
section ne s’appliquent donc pas à tous les disques.
Définition du niveau de
restriction parentale – DVD
Ce lecteur est pourvu d’une fonction grâce à laquelle vous
pouvez restreindre l’affichage de certaines scènes, dans la
mesure où la gravure du disque a fait l’objet du codage
approprié. Dans le cas de la lecture d’un tel disque, vous
pouvez donc faire en sorte que le lecteur ignore les
passages qui ne vous semblent pas convenir, eu égard à
l’âge des spectateurs. Pour de plus amples détails, veuillez
vous reporter à la pochette du disque et aux autres
indications qui accompagnent le disque.
Parental Lock: Register Code Number
Enter 4–Digit Code
Move
+/–
RETURN Return
SETUP
Exit
Remarque
Pour sélectionner le chiffre 0, appuyez rapidement sur la touche
+10/0.
2
Utilisez les touches de déplacement du curseur
2/3
3) pour déplacer le curseur à l’intérieur du
(2
mot de passe.
Lorsque les quatre chiffres ont été tapés, la mention
ENTER s’affiche sur l’écran.
Audio1 Audio2 Video Language General
Setup Menu Mode – Basic
Setup Navigator
Parental Lock Level Change
Password Change
Audio1 Audio2 Video Language General
Setup viewing restrictions
Parental Lock: Register Code Number
Move
SETUP
Exit
1
0
1
9
ENTER
Enter 4–Digit Code
Valeurs: Level Change (Pour de plus amples informations,
reportez-vous au paragraphe ‘Définition du niveau
de restriction parentale’ de la page suivante.)
Password Change (Pour de plus amples
informations, reportez-vous au paragraphe
‘Modification du mot de passe’ de la page
suivante.)
Move
+/–
3
RETURN Return
SETUP
Exit
Appuyez sur la touche ENTER pour valider le
mot de passe.
Le mot de passe est mis en mémoire.
Lorsque vous mettez en place un DVD dont la
lecture peut être restreinte
La lecture de ce disque ne peut pas commencer aussi longtemps
que vous ne tapez pas le mot de passe en utilisant les touches de
déplacement du curseur (2/3/5/ ) ou les touches numérotées,
puis la touche ENTER.
Remarque
Veillez à ne pas oublier le mot de passe. En cas d’oubli, vous
devez réinitialiser le lecteur et, le cas échéant, taper un nouveau
mot de passe. Pour effectuer cette opération, reportez-vous au
paragraphe ‘Réinitialisation du lecteur’ (page 47); sachez qu’elle
efface tout le contenu de la mémoire du lecteur, pas seulement le
mot de passe.
DEFINITION DES OPTIONS DE LANGUE / AUTRES FONCTIONS
Choisissez le menu General puis l’option [Parental Lock]
pour laquelle vous devez sélectionner la valeur appropriée.
Sachez qu’une modification du niveau de restriction parentale
n’est possible que si le lecteur est à l’arrêt.
Audio1 Audio2 Video Language General
35
FRANÇAIS
Définition du niveau de restriction parentale
Modification du mot de passe
Modifiez le niveau de la restriction parentale en fonction des
indications figurant sur la pochette du disque ou la notice qui
l’accompagne. Si vous utilisez la mémoire des conditions de
lecture, le niveau de restriction parentale est sauvegardé au
même titre que les autres réglages. Vous pouvez donc définir
le niveau de restriction parentale pour chaque disque et en
tenant compte de son contenu, plutôt que de vous en tenir à
une valeur valable pour tous les disques.
Modifiez le mot de passe chaque fois que cela vous semble
nécessaire. Sachez, toutefois, que vous ne pouvez pas
changer le mot de passe si vous l’avez oublié puisque la
page ci-dessous n’est pas alors accessible.
Audio1 Audio2 Video Language General
Setup Menu Mode – Basic
Setup Navigator
Parental Lock Level Change
Password Change
Audio1 Audio2 Video Language General
Setup viewing restrictions
Parental Lock: Level Change
Level 1
2
3
4
5
Move
6
7
ENTER
Select SETUP Exit
8
Set Parental Lock
RETURN Return
Move
1
2
ENTER
Select
SETUP
Exit
Choisissez l’option [Password Change] pour
l’option [Parental Lock].
La page de frappe du mot de passe s’affiche. Tapez le
mot de passe comme il est dit au paragraphe ‘Frappe du
mot de passe’ de la page précédente.
Si vous n’avez pas encore tapé le mot de passe, vous ne
pouvez pas choisir cette option. Définissez tout d’abord
le mot de passe en choisissant l’option [Level Change].
Choisissez la valeur [Level Change] pour
l’option [Parental Lock].
Si vous n’avez pas encore tapé le mot de passe, vous
êtes invité à le faire. Pour le mot de passe, reportez-vous
au paragraphe ‘Frappe du mot de passe’ de la page
précédente.
2
Utilisez les touches de déplacement du curseur
2/3
3) pour choisir le niveau de la restriction
(2
parentale.
Utilisez les touches de déplacement du curseur
2/3
3/5
5/ ) ou les touches numérotées pour
(2
taper le mot de passe.
3
Cela fait, appuyez sur la touche ENTER.
Le cadenas est “déverrouillé” jusqu’au niveau accessible
sans frappe préalable du mot de passe.
3
1
Appuyez sur la touche ENTER pour valider le
réglage.
Le niveau de restriction parentale est mis en mémoire et
le menu General s’affiche de nouveau. Pour revenir au
menu General sans effectuer aucune modification,
appuyez sur la touche RETURN.
Remarques
Les niveaux de tolérance de la fonction Parental Guide sont
équivalents aux normes de censure suivantes adoptées pour les
films aux Etats-Unis.
Le mot de passe est mis en mémoire et le menu General
s’affiche de nouveau. Pour revenir au menu General
sans effectuer aucune modification, appuyez sur la
touche RETURN.
Choix de la couleur de fond
Lorsque le lecteur est à l’arrêt, l’écran du téléviseur peut être
de couleur noire ou bleue.
Choisissez la catégorie [Expert] puis le menu General et
enfin l’option [Background Color] pour laquelle vous devez
sélectionner la valeur appropriée (page 23).
Audio1 Audio2 Video Language General
LEVEL 7: NC-17
LEVEL 6: R
LEVEL 4: PG 13
LEVEL 3: PG
LEVEL 1: G
Setup Menu Mode – Expert
Setup Navigator
Parental Lock – Level 8
Background Color Black
Blue
Les niveaux de tolérance pour le “CANADA” sont aussi inclus.
Quand vous achetez un disque DVD vidéo compatible avec la
fonction Parental Guide, définissez le niveau de tolérance
approprié.
Move
SETUP
Exit
Valeurs: Black
Blue*
*Réglage usine
36
FRANÇAIS
Arrêt sur image, ralenti,
avance image par image
– DVD/Video CD
Dans le cas des DVD et Video CD, vous pouvez obtenir l’arrêt
sur une image, le défilement ralenti des images, ou le
défilement image par image.
Arrêt sur image
Appuyez sur la touche PAUSE 8.
Si, dans le cas d’un DVD, l’image arrêtée est animée de
tremblement, donnez la valeur [Field] à l’option [Still Picture]
du menu Video reportez-vous à la page 28.
Pour revenir à la lecture normale
A partir d’une image arrêtée, appuyez sur la touche PLAY 3,
pour rétablir la lecture normale.
OPEN/CLOSE
VIDEO ON/OFF
A-B
REPEAT
1
2
3
4
5
6
7
8
+10
T-C
Défilement ralenti
RANDOM
Appuyez sur la touche FWD ¡ pendant plus
d’une seconde durant la pause.
9
CLEAR
• Le défilement ralenti est adopté par le lecteur.
• Tandis que les images défilent au ralenti, la vitesse peut
être réglée (4 niveaux), de 1/2 fois à 1/16 fois la vitesse
normale, en agissant sur les touches
REV 1 and FWD ¡.
0
TOP
MENU
MENU
RETURN
ENTER
PAUSE
PLAY
1/16 – 1/8 – 1/4 – 1/2
REV/FWD
ANGLE
SUBTITLE
AUDIO
PROGRAM
OSD
LAST
MEMORY
SETUP
DIMMER
CONDITION
MEMORY
REMOTE CONTROLLER
RC7010DV
Appuyez sur la touche REV 1 pendant plus d’une
seconde durant la pause.
• Le défilement ralenti inverse est adopté par le lecteur.
• Dans ce cas, la vitesse de ralenti ne peut pas être réglée.
Pour revenir à la lecture normale
Défilement image par image
1
Appuyez sur la touche PAUSE 8.
2
Appuyez rapidement sur la touche FWD ¡ ou
REV 1.
AUTRES FONCTIONS
A partir d’une image arrêtée ou du défilement ralenti des
images, appuyez sur la touche PLAY 3.
FWD ¡: L’image suivante apparaît chaque fois que vous
appuyez sur cette touche.
REV 1:
L’image précédente apparaît chaque fois que
vous appuyez sur cette touche.
Pour revenir à la lecture normale
A partir de l’avance image par image, appuyez sur la touche
PLAY 3.
Remarques
• Aucun son n’est émis pendant l’arrêt sur image, le défilement
ralenti ou le défilement image par image.
• Certains titres ne permettent pas l’usage de l’arrêt sur image, du
défilement ralenti ou image par image. En ce cas, l’icône
s’affiche.
37
FRANÇAIS
Recherche d’un titre, d’un
chapitre, d’une plage musicale
ou d’un passage – DVD/Video CD/CD
Ce lecteur offre plusieurs moyens de recherche. Grâce à la
touche SEARCH MODE, vous pouvez localiser un titre ou un
chapitre sur un DVD, une plage musicale sur un Video CD ou
un CD, ou même choisir le point à partir duquel doit
commencer la lecture.
OPEN/CLOSE
VIDEO ON/OFF
REPEAT
RANDOM
1
2
3
4
5
6
7
8
9
+10
T-C
1
A-B
2
CLEAR
0
TOP
MENU
MENU
RETURN
ENTER
ANGLE
SUBTITLE
AUDIO
PROGRAM
OSD
LAST
MEMORY
SETUP
DIMMER
CONDITION
MEMORY
Appuyez sur la touche T/C autant de fois qu’il
est nécessaire pour sélectionner le type de
recherche.
Chaque pression sur cette touche, provoque le choix
d’un autre type de recherche.
Off 2
2
3 Chapter/Track
Remarques
• Certains DVD permettent le choix du titre grâce à un menu. En
ce cas, appuyez sur la touche TOP MENU pour afficher le menu
du DVD puis effectuez votre sélection.
• Avec certains DVD, la recherche peut être impossible et
s’interrompre peu de temps après avoir commencé. En ce cas,
l’icône
s’affiche.
• La recherche d’un passage par indication d’un temps n’est pas
possible dans le cas des CD.
• Dans le cas d’une recherche par indication d’un temps effectuée
sur un DVD, le commencement de la lecture peut se faire à partir
d’un point légèrement différent du point précisé.
• La recherche d’un passage par indication d’un temps n’est pas
possible quand le lecteur est à l’arrêt.
• La recherche d’un passage par indication d’un temps n’est pas
possible pendant la lecture d’un Video CD commandée par
menu (PBC).
• Le disque étant arrêté, appuyez sur les touches
numérotées correspondant au numéro du titre.
• La lecture du disque étant en cours, appuyez sur les
touches numérotées correspondant au numéro du
chapitre ou de la plage musicale.
Remarque
Remarques (pour la recherche directe)
• Pour sélectionner le chiffre 3, appuyez sur la touche 3.
• Pour sélectionner le chiffre 10, appuyez sur la touche +10/0
pendant plus d’une seconde, puis appuyez rapidement sur la
touche +10/0.
• Pour sélectionner le chiffre 13, appuyez sur la touche +10/0
pendant plus d’une seconde, puis appuyez rapidement sur la
touche 3.
Time 2
Tapez le numéro du titre, du chapitre ou de la
plage musicale, au moyen des touches
numérotées.
Mémo
• Pour sélectionner le chiffre 10, appuyez sur la touche +10/0
• Pour localiser le titre 3, appuyez sur la touche 3.
• Pour localiser le titre 10, appuyez sur la touche 1 puis
rapidement sur la touche +10/0.
• Pour localiser le titre 87, appuyez sur les touches 8 et 7.
• Pour sélectionner le chiffre 0, appuyez rapidement sur la touche
Pour effectuer une recherche par indication d’un
temps:
• Pour localiser le point situé 21 minutes et 43 secondes
après le début du disque, appuyez sur les touches 2,
1, 4, et 3.
• Pour localiser le point 1 heure et 14 minutes après le
début du disque, appuyez sur les touches 7, 4, +10/0
et +10/0.
Remarque
Pour sélectionner le chiffre 0, appuyez rapidement sur la touche
+10/0.
38
La lecture du titre, du chapitre ou de la plage musicale
choisis commence. Dans le cas d’une recherche par
indication d’un temps, la lecture commence au temps
précisé.
La recherche directe d’un titre, d’un chapitre ou d’une plage
musicale portant un numéro supérieur à 20 n’est pas possible.
Pour localiser un titre, un chapitre ou une plage musicale portant
un numéro supérieur à 20, employez la méthode décrite sur cette
page et faisant appel à la touche SEARCH MODE.
REMOTE CONTROLLER
RC7010DV
3 Title
Appuyez sur la touche PLAY 3.
Recherche directe d’un titre, d’un chapitre ou d’une
plage musicale au moyen des touches numérotées
3
1
3
pendant plus d’une seconde.
+10/0.
FRANÇAIS
Répétition de la lecture
– DVD/Video CD/CD
Vous pouvez demander la répétition de la lecture d’un titre,
d’un chapitre, d’une plage musicale ou d’un passage.
A-B
REPEAT
Appuyez sur la touche (REPEAT) A–B au début et à
la fin du passage à répéter.
• Au moment où vous appuyez pour la seconde fois sur la
touche (REPEAT) A–B, le lecteur revient au point A puis
répète le passage (REPEAT) A–B que vous venez de
définir.
• Le passage A-B à répéter doit appartenir tout entier au
même titre, au même chapitre, à la même plage musicale.
OPEN/CLOSE
VIDEO ON/OFF
Répétition de la lecture d’un passage
RANDOM
REPEAT
(PEPEAT) A-B
1
2
3
4
5
6
7
8
+10
T-C
Pour annuler la répétition du passage A–B
9
CLEAR
0
TOP
MENU
CLEAR
Appuyez sur la touche CLEAR. La lecture continue mais la
répétition est annulée.
MENU
Retour à un point donné du disque
ENTER
RETURN
1
Le moment venu, appuyez sur la touche
(REPEAT) A–B.
2
Quand vous désirez revenir à ce point, appuyez
sur la touche PLAY 3.
PLAY
ANGLE
SUBTITLE
AUDIO
PROGRAM
OSD
LAST
MEMORY
SETUP
DIMMER
CONDITION
MEMORY
Pour effacer le point marqué
REMOTE CONTROLLER
RC7010DV
Appuyez sur la touche CLEAR pour effacer le point marqué à
l’aide de la touche (REPEAT) A–B.
Remarques
Pendant la lecture du chapitre ou de la plage
musicale à répéter, appuyez une fois sur la touche
REPEAT.
AUTRES FONCTIONS
Répétition de la lecture d’un chapitre
(d’une plage musicale)
• Certains DVD ne permettent pas l’usage de la fonction de
répétition. En ce cas, l’icône
s’affiche.
• La répétition n’est pas possible pendant la lecture d’un Video CD
commandée par menu (PBC). Pour obtenir la répétition, le
disque étant à l’arrêt, commandez la lecture sans faire usage du
menu en appuyant pour cela sur la touche numérotée
correspondant au numéro de la plage musicale à répéter; cela
fait appuyez sur la touche REPEAT.
• Si vous choisissez un autre angle de prise de vues au cours de
la répétition, ce mode de lecture est abandonné.
Répétition de la lecture d’un titre
Pendant la lecture du titre à répéter, appuyez deux
fois sur la touche REPEAT.
• Dans le cas des DVD, la lecture se poursuit jusqu’à la fin
du disque puis reprend au début.
• Dans le cas des Video CD et CD, le disque étant considéré
comme un seul titre, c’est tout le disque qui est répété quel
que soit le nombre de plages musicales.
Pour répéter un programme
Appuyez une fois sur la touche REPEAT pendant la lecture
du programme.
Pour annuler la répétition
Appuyez sur la touche CLEAR. La lecture continue mais la
répétition est annulée.
39
FRANÇAIS
Lecture au hasard – DVD/Video CD/CD
Vous pouvez commander la lecture des titres, chapitres et
plages musicales dans un ordre quelconque.
Lecture au hasard des chapitres d’un
titre donné – DVD
Appuyez une fois sur la touche RANDOM puis sur
la touche ENTER ou PLAY 3.
La mention “Random Chapter” s’affiche sur l’écran; les
chapitres du titre sont lus dans un ordre quelconque.
OPEN/CLOSE
VIDEO ON/OFF
A-B
REPEAT
RANDOM
1
2
3
4
5
6
7
8
9
+10
T-C
CLEAR
0
TOP
MENU
MENU
RETURN
ENTER
RANDOM
Lecture au hasard des titres
CLEAR
ENTER
Appuyez deux fois sur la touche RANDOM puis sur
la touche ENTER ou PLAY 3.
La mention “Random Title” s’affiche sur l’écran; les titres
que porte le disque sont lus dans un ordre quelconque.
PLAY
NEXT
PREV.
ANGLE
SUBTITLE
AUDIO
PROGRAM
OSD
LAST
MEMORY
SETUP
DIMMER
CONDITION
MEMORY
Lecture au hasard des plages
musicales
–Video CD/CD
REMOTE CONTROLLER
RC7010DV
Appuyez sur la touche RANDOM.
La mention “Random” s’affiche sur l’écran; les plages
musicales que porte le disque sont lues dans un ordre
quelconque.
Pour choisir un autre titre, un autre chapitre, une
autre plage musicale
• Appuyez sur la touche NEXT ¢; une autre sélection au
hasard a lieu et sa lecture commence.
• Appuyez sur la touche PREV 4; la même sélection est
reprise depuis le début.
Pour abandonner la lecture au hasard
Appuyez sur la touche CLEAR. La lecture normale reprend à
partir de la sélection en cours.
Remarques
• La lecture au hasard n’est pas possible pendant la lecture d’un
Video CD commandée par menu (PBC). Pour obtenir la lecture
au hasard, le disque étant à l’arrêt, commandez la lecture sans
faire usage du menu en appuyant pour cela sur une des touches
numérotées; cela fait appuyez sur la touche RANDOM.
• La lecture au hasard des chapitres (plages musicales) d’un
programme n’est pas possible.
• Certains DVD ne permettent pas l’usage de la fonction de lecture
au hasard.
• La répétition de la lecture au hasard n’est pas possible. Si vous
tentez l’opération, le symbole
s’affiche.
40
FRANÇAIS
Programmation de la lecture
(Lecture programmée)
4
– DVD/Video CD/CD
A l’aide des touches numérotées, inscrivez,
dans la fenêtre de programmation, les numéros
des titres ou des chapitres dans l’ordre désiré
de leur lecture;
• Pour programmer les titres/chapitres DVD 9, 7 et 18
dans cet ordre, appuyez sur les touches 9, 7, +10/0
pendant plus d’une seconde, puis sur la touche 8.
Vous pouvez commander la lecture dans un ordre donné des
titres d’un DVD, ou des plages musicales d’un Video CD ou
d’un CD.
Programmation de la lecture d’un DVD
Program Chapter Program Title
Program Chapter Program Title
Current:
Title
Le programme de lecture peut contenir 24 étapes.
Title
7 Chapter 1
1 (Chapter 1~ 18)
Title
2(/20)
Program Memory – Off
Program Memory – Off
Move
Current:
09 07 18
09 07 18
ENTER
Play
PROGRAM
Exit
Move
ENTER
Play
PROGRAM
Exit
OPEN/CLOSE
VIDEO ON/OFF
A-B
REPEAT
RANDOM
1
2
3
4
5
6
7
8
+10
T-C
TOP
MENU
MENU
RETURN
ENTER
CLEAR
2, 3
5
5
STOP 7
ANGLE
SUBTITLE
AUDIO
PROGRAM
OSD
LAST
MEMORY
DIMMER
CONDITION
MEMORY
SETUP
Appuyez sur la touche ENTER ou PLAY 3.
• La lecture dans l’ordre précisé commence.
• Appuyez sur la touche PROGRAM pour revenir à la
page précédente. Le programme ne commence alors
qu’au moment où vous appuyez sur la touche PLAY
3.
9
CLEAR
0
1
5
4
Pour programmer une pause
Appuyez sur la touche PAUSE 8 au lieu d’appuyer sur une
touche numérotée.
Le symbole “8” s’affiche sur l’écran et une pause est
programmée.
Vous ne pouvez pas programmer une pause au début ou à la
fin d’un programme, ni plusieurs pauses consécutives.
Pour effacer un chiffre:
Utilisez les touches de déplacement du curseur (5/ /2/3)
pour mettre en valeur le chiffre incorrect puis appuyez sur la
touche CLEAR.
Le chiffre est effacé. Le cas échéant, les chiffres suivants
sont déplacés.
Pour insérer un chiffre:
1
Utilisez les touches de déplacement du curseur (5/ /2/3)
pour mettre en valeur le chiffre qui doit suivre celui (ceux)
que vous allez taper puis utilisez les touches numérotées
pour insérer ce(s) chiffre(s).
Appuyez sur la touche PROGRAM.
La page de programmation s’affiche.
Current:
Title
Title
Le(s) chiffre(s) juste tapé(s) est (sont) inséré(s) devant le
chiffre sélectionné.
Program Chapter Program Title
Program Chapter Program Title
7 Chapter 1
Current:
Title
AUTRES FONCTIONS
REMOTE CONTROLLER
RC7010DV
2(/20)
1 (Chapter 1~ 18)
Pour arrêter la lecture programmée
Move
ENTER
Play
Appuyez sur la touche STOP 7.
Program Memory – Off
Program Memory – Off
PROGRAM
Exit
Move
ENTER
Play
PROGRAM
Exit
Remarques
2
Utilisez les touches de déplacement du curseur
2/3
3) pour choisir “Program Chapter” ou
(2
“Program Title”.
3
Cela fait, appuyez sur la touche ( ) pour
accéder à la fenêtre de programmation.
• Lors du passage d’un chapitre à un autre chapitre programmé,
un chapitre non programmé peut apparaître brièvement sur
l’écran; cela ne traduit pas un défaut de fonctionnement.
• La lecture de certains DVD n’est pas programmable. En ce cas,
l’icône
s’affiche sur l’écran.
• Seuls des chapitres appartenant au même titre peuvent faire
partie d’un programme.
Si vous avez choisi [Program Chapter], vous devez
également sélectionner le titre qui contient les chapitres.
Mettez en valeur “Title” au moyen des touches de
déplacement du curseur (5) puis tapez le numéro du
titre à l’aide des touches numérotées.
41
FRANÇAIS
Programmation de la lecture d’un
Video CD ou d’un CD
Autres options de programmation
Le programme de lecture peut contenir 24 étapes.
Après avoir composé un programme de lecture, vous pouvez
vérifier ou modifier son contenu.
– DVD/Video CD/CD
Pour vérifier le contenu d’un programme:
Dans le cas d’un Video CD ou d’un CD, appuyez sur la
touche PROGRAM. Le contenu du programme s’affiche.
OPEN/CLOSE
VIDEO ON/OFF
A-B
REPEAT
RANDOM
1
2
3
4
5
6
7
8
2
9
+10
T-C
CLEAR
CLEAR
0
TOP
MENU
MENU
Cursor
1
3
3
ENTER
RETURN
ANGLE
Dans le cas d’un DVD, choisissez le type de programme (titre
ou chapitre) à l’aide des touches de déplacement du
curseur (2/3). Le programme de lecture de titres ou de
chapitres s’affiche et vous avez alors toute faculté de le
vérifier.
SUBTITLE
OSD
LAST
MEMORY
SETUP
DIMMER
CONDITION
MEMORY
1 Appuyez sur la touche PROGRAM.
2 Au moyen des touches numérotées, tapez le numéro du
titre, du chapitre ou de la plage musicale qui doit être
ajouté à la fin du programme.
3 Appuyez sur la touche PROGRAM pour abandonner la
page de programmation.
AUDIO
PROGRAM
Pour ajouter quelque chose à un programme:
Pour effacer un programme:
1 Appuyez sur la touche PROGRAM.
2 Choisissez le programme au moyen des touches de
déplacement du curseur (2/3) puis appuyez sur la
touche CLEAR.
3 Appuyez sur la touche PROGRAM pour abandonner la
page de programmation.
REMOTE CONTROLLER
RC7010DV
1
Appuyez sur la touche PROGRAM.
La page de programmation s’affiche. Si un Video CD, ou
un CD, a été déposé dans le lecteur, le curseur est dans
la fenêtre de programmation.
Program Track
1(/10)
0.00
Current: Track
Total Time
Move
2
ENTER
Play
PROGRAM
Exit
Tapez les numéros des plages musicales dans
l’ordre désiré de leur lecture;
• Pour programmer les plages musicales 9, 7 et 18
dans cet ordre, appuyez sur les touches 9, 7, +10/0
pendant plus d’une seconde, puis sur la touche 8.
• Pour modifier un programme, reportez-vous à la page
précédente.
3
Appuyez sur la touche ENTER ou PLAY 3.
• La lecture dans l’ordre précisé commence.
• Pour arrêter la lecture programmée, appuyez sur la
touche STOP 7.
Remarques
• Pour programmer une pause, ou bien ajouter ou effacer un
numéro, reportez-vous au paragraphe de la page 41 qui
concerne la programmation des DVD.
• La lecture programmée d’un Video CD dont la lecture a été
commandée par un menu (PBC) n’est pas possible.
42
Remarques
• Le programme est effacé, même si le tiroir était ouvert.
• Si vous appuyez sur la touche CLEAR alors que le disque est
arrêté, vous effacez tous les programmes.
FRANÇAIS
Pour ajouter un chapitre à un programme pendant
sa lecture – DVD/Video CD/CD
Pour effacer un programme mis en mémoire
— DVD
Ce lecteur permet de composer un programme tandis que se
déroule la lecture d’un DVD, Video CD ou CD.
Lorsque le nombre maximum de programmes est atteint, le
lecteur efface le plus ancien au moment où vous composez
un nouveau programme. Pour éviter que ne soient ainsi
effacés des programmes que vous employez encore, ou bien
pour effacer un programme que vous ne désirez plus voir
conservé en mémoire, utilisez la méthode suivante
d’effacement manuel.
Appuyez, pendant au moins 2 secondes, sur la
touche PROGRAM à n’importe quel moment pendant
la lecture du titre, du chapitre ou de la plage musicale
qui doivent faire partie du programme; la sélection
ainsi opérée devient un programme ou fait partie d’un
programme existant, cela sans que la page de
programmation ne s’affiche.
Quand un titre, un chapitre ou une plage est ajouté
avec succès au programme, il apparaît
momentanément sur l’affichage, de même que sa
position dans le programme.
Chapter
1
Mettez en place un DVD pour lequel il existe un
programme de lecture en mémoire.
2
Appuyez sur la touche PROGRAM.
La page de programmation s’affiche.
3
Utilisez la touche de déplacement du curseur
( ) pour mettre en valeur l’option [Program
Memory] puis les touches de déplacement du
3/ ) pour choisir la valeur [Off].
curseur (3
4
Appuyez sur la touche ENTER.
07 3 Program 03
Le programme est effacé de la mémoire.
Pour vérifier le contenu d’un programme:
Appuyez sur la touche PROGRAM.
Remarques
• Le programme de lecture du DVD créé de cette manière est du
même type (titre ou chapitre) que la page de programmation qui
s’affiche au moment où vous appuyez sur la touche PROGRAM.
Assurez-vous que le type de programme choisi est celui désiré.
• Les chapitres doivent tous appartenir au même titre.
Ce lecteur peut conserver 24 programmes de lecture de DVD.
En donnant la valeur [On] à l’option [Program Memory], le
lecteur sauvegarde le programme et le rappelle lorsque,
ultérieurement, vous introduisez le même disque. Si vous créez
un programme alors que la mémoire en contient déjà 24, le plus
ancien programme est effacé.
1
AUTRES FONCTIONS
Pour sauvegarder un programme grâce à la
mémoire – DVD
Utilisez la touche de déplacement du curseur
( ) pour mettre en valeur l’option [Program
Memory] puis les touches de déplacement du
3) pour choisir la valeur [On].
curseur (3
Program Chapter Program Title
Current:
Title
7 Chapter 1
1 (Chapter 1 ~ 49)
Title
09 07 18
Program Memory On
Off
Move
2
PROGRAM
Exit
Appuyez sur la touche ENTER.
Le programme est mis en mémoire.
Remarque
Si vous déposez dans le lecteur un DVD pour lequel il existe un
programme en mémoire, la lecture programmée du disque
commence aussitôt.
43
FRANÇAIS
Reprise de la lecture
(Mémoire de la dernière image)
Mise en mémoire de la dernière image
1
– DVD/Video CD
La mémoire de la dernière image est commode pour
reprendre la lecture interrompue d’un disque. Cette fonction
peut être employée même si le disque a été retiré, puis remis
en place (dans le cas des Video CD, la mémoire de la
dernière image suppose que le disque n’a pas quitté le
Le témoin “LAST MEMO” s’éclaire sur le lecteur.
2
A-B
REPEAT
RANDOM
1
2
3
4
5
6
7
8
+10
T-C
Appuyez sur la touche d’alimentation pour
mettre le lecteur hors tension ou arrêtez la
lecture au moyen de la touche STOP 7.
Le point d’interruption de lecture que vous avez marqué
demeure en mémoire même si le lecteur est mis hors
service, ou le disque est éjecté. Cinq points peuvent être
conservés en mémoire et chacun d’eux est rappelé
quand le disque correspondant est remis en place.
• Dans le cas d’un Video CD, un seul disque peut être
concerné puisque le disque ne doit pas quitter le
lecteur.
OPEN/CLOSE
VIDEO ON/OFF
Pendant la lecture, appuyez sur la touche LAST
MEMORY.
9
CLEAR
0
TOP
MENU
MENU
RETURN
ENTER
STOP 7
CLEAR
PLAY
ANGLE
SUBTITLE
AUDIO
PROGRAM
OSD
LAST
MEMORY
SETUP
DIMMER
CONDITION
MEMORY
Reprise de la lecture à partir du point
où vous avez appuyé sur la touche
LAST MEMORY
1
La lecture de certains DVD commence aussitôt qu’ils
sont mise en place; en ce cas, appuyez sur la touche
STOP 7 pour arrêter la lecture.
LAST MEMORY
2
REMOTE CONTROLLER
RC7010DV
Mettez en place un disque pour lequel le point
d’interruption de lecture a été mis en mémoire.
Le disque étant arrêté, appuyez sur la touche
LAST MEMORY.
La lecture du disque à partir du point d’interruption
commence.
• Certains DVD ne permettent pas l’emploi de la
mémoire de la dernière image.
• Si vous marquez un point alors que la mémoire en
contient déjà 5, le plus ancien point est effacé.
• Si vous appuyez sur la touche PLAY 3, la lecture
commence au début du disque et non pas à partir du
point d’interruption, même si un tel point existe sur ce
disque.
• La mémoire de la dernière image ne concerne que les
DVD. Vous ne pouvez pas l’utiliser pour les Video CD
ni pour les CD.
Pour effacer un point d’interruption
Appuyez sur la touche LAST MEMORY pour rechercher le
point d’interruption. Cela fait, appuyez sur la touche CLEAR
tandis que le témoin “Last Memory” est éclairé. Le témoin
“LAST MEMO” s’éteint.
44
FRANÇAIS
Mise en mémoire des
réglages de lecture pour les
disques fréquemment
employés (Mémoire des
conditions de lecture) – DVD
Vous pouvez mettre en mémoire le jeu de réglages de lecture
des DVD que vous aimez à regarder souvent. Ces réglages
demeurent en mémoire même si le lecteur est mis hors
service, ou le disque retiré. Lorsque vous introduisez un
disque pour lequel des réglages sont en mémoire, le témoin
“CONDITION” s’éclaire et ces réglages sont utilisés dès que
commence la lecture du disque.
OPEN/CLOSE
VIDEO ON/OFF
A-B
REPEAT
RANDOM
1
2
3
4
5
6
7
8
+10
T-C
Si vous mettez en place un disque pour lequel des
conditions de lecture sont en mémoire
La mention “Condition Memory” s’affiche et le jeu de
réglages mis en mémoire est utilisé.
Pour effacer les conditions en mémoire
Introduisez le disque concerné puis appuyez sur la touche
CLEAR tandis que la mention “Condition Memory” est
affichée. Le contenu de la mémoire est effacé.
Remarques
• Les réglages en mémoire peuvent être employés à tout moment.
• La mémoire peut contenir 15 jeux de conditions de lecture de
DVD. Si vous mettez en mémoire un jeu de réglages alors que la
mémoire en contient déjà 15, le plus ancien jeu de réglages est
effacé. Si vous introduisez un disque pour lequel les conditions
de lecture ont été effacées, ce sont les conditions de lecture les
plus récentes qui sont utilisées.
• Si vous modifiez une des options de lecture et si vous désirez
que la nouvelle valeur adoptée soit introduite en mémoire,
appuyez sur la touche CONDITION MEMORY pendant la
lecture.
• Le choix de l’angle de prise de vues, etc. est automatique dans
9
CLEAR
0
TOP
MENU
MENU
RETURN
ENTER
SUBTITLE
AUDIO
OSD
LAST
MEMORY
SETUP
DIMMER
CONDITION
MEMORY
CONDITION
MEMORY
REMOTE CONTROLLER
RC7010DV
AUTRES FONCTIONS
ANGLE
PROGRAM
CLEAR
Pendant la lecture, appuyez sur la touche
CONDITION MEMORY.
Le jeu de réglages est mis en mémoire et concerne le disque
en cours de lecture.
Un jeu de réglages comprend les 6 options volets:
Qualité de l’image (page 28)
Position de l’affichage sur écran (page 28)
Angle de prise de vues (page 29)
Choix de la langue des dialogues (page 31)
Choix de la langue des sous-titres (page 32)
Niveau de restriction parentale (page 35)
45
FRANÇAIS
Consultation des informations
propres au disque – DVD/Video CD/CD
Appuyez sur la touche OSD pour afficher diverses
informations concernant le disque telles que le nombre de
titres et de chapitres d’un DVD, ou le nombre de plages
musicales d’un Video CD ou d’un CD. Dans le cas des DVD,
vous pouvez également vérifier la vitesse de transmission du
train binaire.
Chaque pression sur la touche provoque la présentation
d’une autre série d’informations qui dépendent bien
entendu du disque.
DVD
Play
Title
2–1
–0.05/
0.24
0.29
Rangée supérieure: numéros de
titre et de chapitre, temps écoulé
depuis le début du titre en cours
de lecture
Rangée inférieure: temps restant
avant la fin du titre, durée totale
de lecture du titre
OPEN/CLOSE
VIDEO ON/OFF
Information sur les titres
(TITLE):
A-B
REPEAT
RANDOM
«
1
2
3
4
5
6
7
8
+10
T-C
9
CLEAR
Play
Chapter
0
TOP
MENU
MENU
RETURN
ENTER
ANGLE
SUBTITLE
AUDIO
PROGRAM
OSD
LAST
MEMORY
SETUP
DIMMER
CONDITION
MEMORY
1–1
1.19/
1.19
2.18
Information sur les chapitres
(CHAPTER):
Rangée supérieure: numéros
de titre et de chapitre, temps
écoulé depuis le début du titre
en cours de lecture
Rangée inférieure: temps
depuis le début du chapitre,
durée totale de lecture du
chapitre
«
OSD
Play
Chapter
1–1
–0.59/
1.19
2.18
REMOTE CONTROLLER
RC7010DV
Information sur les chapitres
(CHAPTER):
Rangée supérieure: numéros de
titre et de chapitre, temps écoulé
depuis le début du titre en cours
de lecture
Rangée inférieure: temps restant
avant la fin du chapitre, durée
totale de lecture du chapitre
Pendant la lecture du disque, appuyez sur la
touche OSD.
Chaque pression sur la touche OSD provoque
l’affichage d’autres informations.
Sur l’écran, les informations sont superposées à l’image.
«
Play
Tr. Rate :
1–1
1.32
8.9
Rangée supérieure: numéros de
titre et de chapitre, temps écoulé
depuis le début du disque
Maintenez la pression d’un doigt sur la touche OSD
pour afficher le temps restant avant la fin du
disque.
Rangée inférieure: niveau de
transmission du train binaire
Quand vous relâchez la touche, l’information disparaît.
«
Remarque
Selon le format et le type de disque, toutes les pages
d’informations ne sont pas affichées.
46
Information sur la vitesse de
transmission:
Arrêt de l’affichage
FRANÇAIS
CD
Play
Track
1
–3.29/
0.03
3.32
Information sur les plages
musicales:
Rangée supérieure: numéro de
la plage musicale en cours de
lecture, temps écoulé depuis le
début de la plage
Rangée inférieure: temps
restant avant la fin de la plage
musicale en cours de lecture,
durée totale de la plage
musicale
«
Le disque étant arrêté, appuyez sur la touche OSD pour
afficher les informations concernant les titres et les
chapitres d’un DVD, ou les plages musicales d’un Video
CD ou d’un CD; appuyez une nouvelle fois sur la touche
DISPLAY pour arrêter l’affichage.
Les informations relatives aux titres, chapitres et plages
musicales s’affichent sur l’écran. Si des informations existent
mais ne peuvent pas être affichées faute de place, utilisez les
touches de déplacement du curseur (2/3).
DVD
Informations sur le DVD
Play
All
1/2
–6.15/
0.15
6.32
Information: DVD
Information sur le disque:
Rangée supérieure: numéro de
la plage musicale en cours de
lecture, nombre total de plages
musicales sur le disque, temps
écoulé depuis le début du
disque
«
Arrêt de l’affichage
Rangée inférieure: temps
restant avant la fin du disque,
durée totale du disque
Video CD (lecture commandée par menu (PBC) hors
service)
Information sur le disque:
Play
All
5/10
–2.38/
20.19
22.57
Rangée supérieure: numéro de
la plage musicale en cours de
lecture, nombre total de plages
musicales sur le disque, temps
écoulé depuis le début du
disque
«
Play
Track
5
2.38/
20.19
4.40
01
02
03
04
05
Chapter
1~ 1
1~ 1
1~ 1
1~ 1
1~ 1
Title
06
07
08
09
1/1
Chapter
1~ 1
1~ 1
1~ 1
1~ 4
DISPLAY
Après avoir mis en place
un DVD, le nombre de
titres et le nombre de
chapitres pour chaque
titre s’affichent.
Exit
Video CD et CD
Informations sur le Video
CD ou CD
Information: Compact Disc
Total Time
Track
Time
01
02
6.30
3.32
2.58
1/1
DISPLAY
Exit
Après avoir mis en place
un Video CD ou un CD, la
durée totale du disque et
la durée de chaque plage
musicale sont affichées.
Pour sortir des informations sur les titres, chapitres et
plages.
Appuyez sur la touche OSD pour fermer les informations sur
les titres, chapitres et plages même si l’icône “affichage” se
trouve sur l’écran.
Information sur les plages
musicales:
Rangée supérieure: numéro de
la plage musicale en cours de
lecture, temps total écoulé
depuis le début du disque
Rangée inférieure: temps
écoulé depuis le début de la
plage musicale, durée totale de
la plage musicale
VIDEO ON/OFF
AUTRES FONCTIONS
Rangée inférieure: temps
restant avant la fin du disque,
durée totale du disque
Title
Appuyez sur la touche VIDEO OFF pour désactiver les sorties
vidéo (VIDÉO et S2) et l’image disparaît.
Appuyez de nouveau sur la touche pour activer les sorties
vidéo.
«
Play
Track
5
–2.02/
20.19
4.40
Information sur les plages
musicales:
Rangée supérieure: numéro de
la plage musicale en cours de
lecture, temps total écoulé
depuis le début du disque
«
Rangée inférieure: temps
restant avant la fin de la plage
musicale, durée totale de la
plage musicale
Réinitialisation du lecteur
aux valeurs système
our réinitialiser le lecteur, appuyez sur la touche 7 (arrêt) du
panneau avant et maintenez-la enfoncée tout en appuyant
sur la touche d’alimentation pour mettre le lecteur sous
tension.
Tous les programmes en mémoire, les réglages sauvegardés
de fonctions comme la mémoire de la dernière image et la
mémoire de condition sont effacés et tous les menus sur
l’écran Setup sont ramenés aux valeurs usine.
Arrêt de l’affichage
Remarque
Lors de la lecture d’un Video CD commandée par menu (mode
PBC),ou d’un disque CD-R non finalisé, toutes les informations cidessus ne sont pas affichées.
47
FRANÇAIS
Informations
Complémentaires
Prendre soin des disques
RANGEZ LES DISQUES VERTICALEMENT
La lecture terminée, replacez le disque dans son coffret ou
sa pochette et rangez-le verticalement, à l’abri de la
chaleur et de l’humidité.
• Rangez les disques avec soin. Évitez que les disques ne
demeurent inclinés ou ne soient empilés, ce qui peut les
voiler, même lorsqu’ils sont dans leur coffret.
• Ne conservez pas les disques dans un endroit où ils sont
exposés à la chaleur, par exemple sur le siège d’une
voiture stationnant en plein soleil.
COMMENT SAISIR UN DISQUE
Pour déposer un disque dans le
tiroir ou le retirer, saisissez-le de
la manière indiquée de façon à
ne pas toucher la surface
gravée.
REMARQUE CONCERNANT LA LECTURE DES
DISQUES
Tous droits réservés.
L’utilisation en public, la diffusion sur les ondes et la copie
sont interdites par les lois en vigueur.
NETTOYAGE
Les empreintes digitales et les taches que peut porter la
surface du disque peuvent, selon leur importance, réduire
l’intensité du faisceau réfléchi et entraîner une altération de la
qualité du son et de l’image.
Pour nettoyer un disque, essuyez-le au moyen d’un chiffon
doux. Si le disque est très sale, humectez d’eau un chiffon et,
après l’avoir bien essoré, éliminez les taches en procédant
avec soin et sans frotter.
Pour utiliser l’appareil
correctement et pendant
longtemps
NE DÉPLACEZ PAS L’APPAREIL PENDANT LA
LECTURE
Pendant la lecture, le disque tourne rapidement. NE
DÉPLACEZ PAS l’appareil pendant cette opération, faute de
quoi vous pourriez endommager le disque.
N’essuyez pas le disque par
des mouvements circulaires.
(Les rayures concentriques
provoquent plus d’erreurs
de lecture que les rayures
radiales.)
Esuyez doucement de
l’intérieur vers
l’extérieur du disque.
N’utilisez aucun produit de nettoyage pour les microsillons.
Pareillement, ne tentez pas de nettoyer un disque avec de
l’essence, du diluant pour peinture ou tout autre solvant
volatil.
N’UTILISEZ AUCUN DISQUE FISSURÉ OU VOILÉ
Pendant la lecture, le disque est entraîné
rapidement. N’utilisez aucun disque rayé,
fissuré ou voilé; cela pourrait
endommager le lecteur ou provoquer
une anomalie de fonctionnement.
N’UTILISEZ AUCUN CD AYANT UNE FORME
SPÉCIALE
N’introduisez dans l’appareil aucun
disque qui ne soit pas circulaire, par
exemple un disque en forme de coeur.
Dans le cas contraire, une anomalie de
fonctionnement se produirait.
SI VOUS DEVEZ DÉPLACER L’APPAREIL
Avant de déplacer l’appareil, pour quelque raison que ce
soit, n’oubliez pas de retirer le disque et de fermer le tiroir.
Puis appuyez sur la touche d’alimentation pour mettre
l’appareil hors tension et débranchez le cordon
d’alimentation. Enfin, assurez-vous que l’indication “-OFF-”
s’éteint puis débranchez la fiche du cordon d’alimentation.
OÙ INSTALLER L’APPAREIL
• Choisissez un emplacement stable, proche du téléviseur ou de
la chaîne stéréophonique auxquels l’appareil sera relié.
• Si vous comptez relier l’appareil à une chaîne stéréophonique,
veillez à ce que les enceintes ne soient pas trop proches du
téléviseur.
• NE PLACEZ PAS l’appareil sur un téléviseur ou un moniteur.
Choisissez un emplacement tel que l’appareil ne soit pas à
proximité immédiate d’un autre appareil dont le
fonctionnement peut être perturbé par un champ
magnétique, ce qui est le cas des platines à cassette.
• NE PLACEZ AUCUN objet sur l’appareil.
ÉVITEZ D’INSTALLER L’APPAREIL DANS UN
ENDROIT TEL QU’IL SOIT EXPOSÉ:
•
•
•
•
•
•
à la lumière directe du soleil;
à l’humidité ou à de l’air confiné;
à des températures très basses ou très élevées;
aux vibrations;
à la poussière;
à la vapeur d’eau et aux vapeurs grasses (par exemple,
dans une cuisine).
N’OBSTRUEZ PAS LES OUÏES D’AÉRATION
NE POSEZ PAS l’appareil sur une moquette à poils longs, un
lit, un canapé, ne le couvrez pas d’un linge, etc. La chaleur
intérieure doit pouvoir se dissiper pour que l’appareil
fonctionnement normalement.
48
FRANÇAIS
ÉVITEZ LA CHALEUR
NE POSEZ PAS l’appareil sur un autre appareil dégageant de la
chaleur tel qu’un amplificateur.
Si vous désirez que l’appareil soit dans un meuble, choisissez
l’étagère la plus basse (à condition qu’il soit à l’abri de la poussière)
et veillez à ce qu’il soit aussi éloigné de l’amplificateur et de tout
autre appareil audiovisuel que possible afin qu’il n’ait pas à souffrir
de la chaleur qu’ils peuvent dégager.
ATTENTION: PRÉCAUTION À PRENDRE SI
VOUS PLACEZ L’APPAREIL DANS UN MEUBLE
MUNI DE PORTES VITRÉES
Avant d’agir sur la télécommande, assurez-vous
qu’il existe un espace suffisant pour que le tiroir puisse
s’ouvrir sans heurter les portes faute de quoi l’appareil
pourrait être endommagé.
PRODUIT DE NETTOYAGE POUR L’OPTIQUE DU
LECTEUR
En principe, il n’y a aucune raison pour que l’optique du
capteur se salisse; toutefois, si cela devait se produire et
entraîner une anomalie de fonctionnement, consultez le
centre d’entretien MARANTZ. Des produits et des dispositifs
de nettoyage de l’optique sont vendus dans le commerce,
mais nous ne saurions trop vous conseiller d’être prudent
dans leur usage car certains peuvent faire plus de mal que
de bien.
CONDENSATION
La vapeur d’eau peut se condenser à l’intérieur des parties
nobles de l’appareil si vous le transporter d’une pièce froide
vers une pièce chaude, ou encore si la température de la
pièce dans laquelle il se trouve augmente rapidement. La
condensation de l’humidité a pour effet d’altérer les
performances de l’appareil.
L’été, l’humidité peut
également se condenser si
l’appareil est placé dans le
courant d’air frais d’un
climatiseur. En ce cas,
changez la place de
l’appareil.
METTEZ L’APPAREIL HORS TENSION QUAND
VOUS NE L’UTILISEZ PAS
Selon la puissance du signal d’émission de télévision ou de
radio, le fait d’allumer le téléviseur ou la
radio alors que l’appareil est sous tension
peut entraîner de l’interférence (lignes) sur
l’écran du téléviseur ou des parasites. Il ne
s’agit toutefois pas d’une anomalie de
fonctionnement de cet appareil, du
téléviseur ou de la radio. Dans un tel cas,
éteignez l’appareil.
Saisissez le cordon d’alimentation par la fiche. Ne
débranchez pas la fiche en tirant sur le cordon; ne touchez
pas le cordon d’alimentation si vous avez les mains mouillées
car vous risquez de provoquer un court-circuit ou de ressentir
une secousse électrique. Ne posez pas l’appareil, un
meuble, etc., sur le cordon d’alimentation; veillez à ce que ce
cordon ne soit pas écrasé. Ne nouez pas le cordon
d’alimentation, ne l’attachez pas à d’autres câbles ou
cordons. Faites cheminer le cordon d’alimentation de telle
manière que l’on ne puisse pas l’endommager en marchant.
Un cordon d’alimentation endommagé peut provoquer un
incendie ou être à l’origine d’une secousse électrique. De
temps à autre, vérifiez l’état du cordon d’alimentation. Si vous
constatez que le cordon d’alimentation est endommagé,
consultez un centre d’entretien MARANTZ, ou un distributeur,
afin de le faire remplacer.
Nettoyage du lecteur
Pour nettoyer le lecteur, l’essuyer avec un chiffon doux et sec.
S’il est très sale, imbiber le chiffon d’une solution de
détergent doux, fabriquée en diluant un volume de détergent
dans 5 ou 6 volumes d’eau, bien essorer puis essuyer la
saleté. Utiliser aussi un chiffon sec pour sécher la surface.
Ne pas utiliser de produits volatiles comme de la benzine ou
du diluant qui peuvent endommager l’appareil.
Précautions concernant l’utilisation des câbles à
fibres optiques
• Veillez à ce que le câble ne chemine pas à proximité d’un
objet tranchant et ne soit pas écrasé. Si vous désirez le
rouler, faites en sorte que le diamètre de la bobine soit au
moins égal à 15 cm (6 pouces).
• Veillez à ce que les fiches du câble soient engagées à
fond dans les prises.
• N’utilisez pas de câble dont la longueur
est supérieure à 3 m.
Diamètre
• Si de la condensation s’est formée sur
minimum 15
une prise, essuyez-la soigneusement à
cm (6 pouces)
l’aide d’un chiffon doux avant d’y
brancher la fiche.
INFORMATIONS COMPLEMENTAIRES
Pour l’éviter, conservez l’appareil dans son nouvel
environnement pendant au moins une heure avant de le
mettre sous tension, ou bien veillez à ce que la température
n’augmente que progressivement.
PRÉCAUTION CONCERNANT LE CORDON
D’ALIMENTATION
49
FRANÇAIS
Tableau des codes de langue
Utilisez les codes figurant dans le tableau ci-dessous lors de la
définition des langues de dialogue et de sous-titrage (page 33).
Langue
Japanese (ja)
English (en)
French (fr)
German (de)
Italian (it)
Spanish (es)
Chinese (zh)
Dutch (nl)
Portuguese (pt)
Swedish (sv)
Russian (ru)
Korean (ko)
Greek (el)
Afar (aa)
Abkhazian (ab)
Langue
1001
0514
Gujarati (gu)
0618
0405
Hindi (hi)
0920
0519
Hungarian (hu)
2608
1412
Hausa (ha)
Croatian (hr)
Armenian (hy)
Interlingua (ia)
Interlingue (ie)
1620
1922
1821
Inupiak (ik)
1115
Hebrew (iw)
Yiddish (ji)
0512
0101
0102
Indonesian (in)
Icelandic (is)
Javanese (jw)
Georgian (ka)
0106
0113
Kazakh (kk)
0118
0119
0125
0126
0201
0205
0207
0208
0209
0214
0215
0218
0301
0315
0319
0325
0401
Cambodian (km)
0426
0515
0520
Malay (ms)
Nauru (na)
Finnish (fi)
0521
0601
0609
Fiji (fj)
Faroese (fo)
Code
numérique
Langue
0721
0801
Rhaeto-Romance (rm)
0809
0818
Romanian (ro)
0821
0825
Sanskrit (sa)
0901
0905
Kirundi (rn)
Kinyarwanda (rw)
Sindhi (sd)
Sangho (sg)
Serbo-Croatian (sh)
0911
0914
0919
Sinhalese (si)
0923
Samoan (sm)
Shona (sn)
1009
1023
1101
Slovak (sk)
Slovenian (sl)
Somali (so)
Albanian (sq)
Code
numérique
1813
1814
1815
1823
1901
1904
1907
1908
1909
1911
1912
1913
1914
1915
1917
1111
1112
Serbian (sr)
1113
1114
1119
1121
1125
1201
1214
1215
1220
1222
1307
1309
1311
1312
1314
1315
1318
Sesotho (st)
1319
1320
1325
Urdu (ur)
1920
1921
1923
2001
2005
2007
2008
2009
2011
2012
2014
2015
2018
2019
2020
2023
2111
2118
Uzbek (uz)
2126
Vietnamese (vi)
Volapük (vo)
2209
2215
2315
Norwegian (no)
1401
1405
1415
0610
Occitan (oc)
1503
Yoruba (yo)
Oromo (om)
Panjabi (pa)
1513
1518
1601
Zulu (zu)
Irish (ga)
0615
0625
0701
Scots-Gaelic (gd)
0704
Polish (pl)
1612
Galician (gl)
0712
0714
Pashto, Pushto (ps)
1619
1721
Afrikaans (af)
Amharic (am)
Arabic (ar)
Assamese (as)
Aymara (ay)
Azerbaijani (az)
Bashkir (ba)
Byelorussian (be)
Bulgarian (bg)
Bihari (bh)
Bislama (bi)
Bengali (bn)
Tibetan (bo)
Breton (br)
Catalan (ca)
Corsican (co)
Czech (cs)
Welsh (cy)
Danish (da)
Bhutani (dz)
Esperanto (eo)
Estonian (et)
Basque (eu)
Persian (fa)
Frisian (fy)
Guarani (gn)
50
Code
numérique
Greenlandic (kl)
Kannada (kn)
Kashmiri (ks)
Kurdish (ku)
Kirghiz (ky)
Latin (la)
Lingala (ln)
Laothian (lo)
Lithuanian (lt)
Latvian (lv)
Malagasy (mg)
Maori (mi)
Macedonian (mk)
Malayalam (ml)
Mongolian (mn)
Moldavian (mo)
Marathi (mr)
Maltese (mt)
Burmese (my)
Nepali (ne)
Oriya (or)
Quechua (qu)
Siswati (ss)
Sundanese (su)
Swahili (sw)
Tamil (ta)
Telugu (te)
Tajik (tg)
Thai (th)
Tigrinya (ti)
Turkmen (tk)
Tagalog (tl)
Setswana (tn)
Tonga (to)
Turkish (tr)
Tsonga (ts)
Tatar (tt)
Twi (tw)
Ukrainian (uk)
Wolof (wo)
Xhosa (xh)
1918
1919
2408
2515
2621
FRANÇAIS
Commande de système RS232C
Il est possible de commander ce lecteur DVD au moyen d'un
ordinateur personnel. Raccordez le lecteur et un port série de
l'ordinateur à l'aide d'un câble droit RS-232C à 9 broches.
Pour commander ce lecteur DVD au moyen d'un ordinateur
personnel, réglez le commutateur RS-232C du panneau
arrière sur la position RS-232C.
Affectation des broches RS-232C
Broche N°
1
2
3
4
5
6
7
8
9
5
1
6
9
Signal
Non connectée
RXD
TXD
Non connectée
GND (terre)
Non connectée
RTS
CTS
Non connectée
Commandes de système
Il y a 3 types de commandes. La commande normale sert à
demander une opération depuis l'ordinateur vers le lecteur
DVD. La commande de demande sert à demander l'état du
lecteur et la commande d'état sert à faire connaître à
l'ordinateur le changement de l'état du lecteur DVD.
A la réception d'une commande, le lecteur DVD renvoie OK,
ERROR ou état.
Un code ASCII est utilisé pour les données et une distinction
est faite entre les lettres majuscules et minuscules.
Le caractère de début et le caractère de fin sont ajoutés
comme indiqué ci-dessous pour l'envoi de commande et le
renvoi d'état.
Le code identifiant propre du lecteur DVD suit le caractère de
début.
Ce code identifiant est 1.
Caractère de début
Caractère de fin
Exemple de commande
Exemple de retour d'information OK
Conditions de communication
Configurez le port série de l'ordinateur comme indiqué cidessous.
Débit
9 600 bps
Bits d'information
8 bits
Parité
Aucune
Bit d'arrêt
1 bit
Mise en liaison
RTS/CTS
: '@'
: 0Dh
: "1?", 0Dh
(ID = 1 Demande
état de l'alimentation)
: "1A1", 0Dh
(ID = 1 Etat de
l'alimentation =
Activée)
Les codes suivants sont utilisés pour OK et ERROR.
OK (réception de données réussie) : 06h
ERROR (erreur réception de données) : 15h
Le côté réception ignore les données reçues antérieurement
à '@'. Si 0Dh est reçu sans recevoir '@', ERROR (erreur
réception de données) sera renvoyé.
Pour les données numériques, des nombres hexadécimaux
codés ASCII sont utilisés.
SYSTEME (HOTE) ↔ DV7110
CTS
CTS
RTS
TXD
RXD
RXD
TXD
1. L'hôte demande des données en réglant RTS sur L.
(Exemple) Pour le nombre décimal 26
'1', 'A' → 0x31, 0x41
Organigramme de la mise en liaison
Commande normale et
commande de demande
DV7110
2. A la demande de données de CTS, l'esclave répond en
réglant RTS sur H s'il n'est pas occupé.
3. L'hôte vérifie si CTS est H et commence la sortie de
données sur TXD.
Ordinateur
DV7110
Ordinateur
Commande
normale
Commande
d'état
OK
4. Lorsque la sortie de données se termine, l'hôte règle RTS
sur H.
Commande
de demande
5. L'esclave vérifie si CTS est H et règle RTS sur L.
Données
de réponse
Format de base
Commande de demande
OK
INFORMATIONS COMPLEMENTAIRES
RTS
Format de commande
En-tête
@
Addr
COMMANDE
Renvoi
1
0Dh
Format de code de réponse
Réponse normale
Réponse d'erreur
OK
ERR
06h
15h
51
FRANÇAIS
Liste des commandes
Commande de demande
Commande normale
ELEMENT
Catégorie
Demande
ALIMENTATION
STANDBY
?A
A0
Commande
A0
ALIMENTATION
ON
?A
A1
ELEMENT
Réponse
Catégorie
ALIMENTATION
Classe
STANDBY
MODE LECTURE
STOP
?C
C0
ALIMENTATION
TIROIR
ON
OPEN/CLOSE
A1
B0
MODE LECTURE
PLAY
?C
C1
MODE LECTURE
PAUSE
?C
C6
MODE LECTURE
STOP
C0
MODE LECTURE
SLOW
?C
C7
MODE LECTURE
PLAY
C1
DISQUE
NO DISC
?J
J0
MODE LECTURE
NEXT
C2
DISQUE
CD
?J
J1
MODE LECTURE
MODE LECTURE
PREVIOUS
FAST FORWARD
C3
C4
DISQUE
VCD
?J
J2
DISQUE
DVD
?J
J3
MODE LECTURE
FAST BACKWARD
C5
MODE LECTURE
PAUSE/STEP
C6
REPETITION
REPETITION
OFF
ON
?D
?D
D0
D1
MODE LECTURE
LECTURE SPECIALE
SLOW *1
REPEAT
C7
D1
LECTURE SPECIALE
LECTURE SPECIALE
REPEAT A-B
PROGRAM
D2
D3
LECTURE SPECIALE
RANDOM
D4
LECTURE SPECIALE
T-C
D5
AFFICHAGE
OSD
E0
AFFICHAGE
Video ON/OFF
E1
ALIMENTATION
STANDBY
A0
AFFICHAGE
Dimmer
E2
ALIMENTATION
ON
A1
MEMOIRE
CONDITION MEMORY
F0
TIROIR
CLOSE
B0
MEMOIRE
LAST MEMORY
F1
TIROIR
OPEN
B1
MENU
TOP MENU
G0
MODE LECTURE
STOP
C0
MENU
MENU
MENU
RETURN
G1
G2
MODE LECTURE
PLAY
C1
MODE LECTURE
PAUSE
C6
NUMERIQUE
0
H0
NUMERIQUE
1
H1
MODE LECTURE
COMPTEUR
SLOW
TITLE
C7
K0
NUMERIQUE
2
H2
COMPTEUR
CHAPTER
K1
NUMERIQUE
3
H3
NUMERIQUE
4
H4
COMPTEUR
COMPTEUR
TRACK
COUNTER
K2
K3
NUMERIQUE
5
H5
NUMERIQUE
6
H6
NUMERIQUE
7
H7
NUMERIQUE
8
H8
NUMERIQUE
9
H9
NUMERIQUE
+10
HA
REGLAGE
ANGLE
I0
REGLAGE
SUBTITLE
I1
REGLAGE
AUDIO
I2
REGLAGE
Direction UP
I3
REGLAGE
Direction DOWN
I4
REGLAGE
Direction LEFT
I5
REGLAGE
Direction RIGHT
I6
REGLAGE
ENTER
I7
REGLAGE
SETUP
I8
REGLAGE
CLEAR
I9
*1 Pour SLOW (ralenti), envoyez la commande après la mise
en pause. Le ralenti n'est disponible qu'en mode de
pause.
52
Commande
Classe
Commande d'état
ELEMENT
Catégorie
Classe
Commande
Pour TITLE, CHAPTER, TRACK et COUNTER, des données
numériques suivent la commande.
Exemple)
TITLE 1
@1K0 1
CHAPTER 3
@1K1 3
COUNTER 01:15
@1K3 1:15
Remarque
La tolérance pour l'erreur d'envoi/réception d'horloge est de
± 10%.
Pour envoyer une commande, attendez plus de 20 ms après
réception d'une réponse (OK, ERROR ou état).
La réception de 0Dh ou le dépassement du temps imparti est
utilisé pour déterminer la fin d'une commande. Le
dépassement du temps imparti se produit 1 seconde après la
réception du dernier octet.
FRANÇAIS
Guide de dépannage
Une erreur de commande peut parfois être interprétée
comme une anomalie de fonctionnement. Si vous pensez que
cet appareil est défectueux, procédez aux vérifications cidessous. Il peut arriver aussi que le défaut provienne d’un
autre élément de l’installation; assurez-vous que ce n’est pas
le cas. Si le problème ne peut pas être résolu après avoir
effectué les contrôles indiqués ci-dessous, demandez au
centre de service après-vente MARANTZ le plus proche ou à
votre distributeur d’effectuer une réparation.
Le tiroir s’ouvre immédiatement après avoir été fermé.
Le disque est sale ou voilé.
\ Reportez-vous au paragraphe ‘Prendre soin des
disques’ (page 48).
Le disque ne repose pas correctement dans le tiroir.
\ Veillez à déposer le disque dans l’alvéole du tiroir
(page 18).
Le numéro de région ne convient pas.
\ Si le code régional du lecteur n’est pas identique à celui
du disque, la lecture est impossible (page 54).
De la condensation s’est formée dans le lecteur.
\ Attendez que la condensation soit évaporée. Si le
lecteur est près d’un climatiseur, déplacez-le (page
49).
La lecture du disque n’est pas possible.
Le disque est à l’envers.
\ Assurez-vous que la face portant l’étiquette est bien
tournée vers le haut.
Le signe
s’affiche sur l’écran.
La fonction choisie n’est pas disponible pour ce disque.
Le signe
s’affiche sur l’écran.
L’opération demandée est interdite par le lecteur.
Les valeurs nouvelles choisies grâce aux menus de
configuration pendant la lecture d’un disque, ne sont pas
prises en compte.
Certaines valeurs peuvent être choisies pendant la lecture
d’un disque mais ne sont pas immédiatement adoptées. Il
ne s’agit pas d’un défaut de fonctionnement.
\ Choisissez les mêmes valeurs alors que le lecteur est à
l’arrêt.
\ Arrêtez la lecture du disque (appuyez sur la touche
STOP 7), puis commandez à nouveau la lecture. A ce
moment-là, les nouvelles valeurs doivent être prises en
compte. Rappelez-vous également que changer un
réglage de configuration peut annuler la fonction de
reprise.
L’icône
s’affiche sur l’écran quand des modifications
sont apportées sur les pages de menu de configuration.
Le lecteur contient un Video CD ou un CD mais les
modifications ne concerne que les DVD.
\ Les nouveaux réglages ne deviendront eggectifs
qu’après la mise en place d’un DVD.
Les raccordements sont incorrects.
\ Vérifiez les raccordements et assurez-vous que les
fiches sont introduites à fond dans les connecteurs.
Le fonctionnement (les réglages) du téléviseur ou de
l’amplificateur audiovisuel ne sont pas convenables.
\ Assurez-vous que le téléviseur, le récepteur ou
l’amplificateur sont réglés comme il convient pour le
visionnement d’un DVD.
Le menu [Component Video] est réglé sur [Progressive]
mais votre téléviseur/moniteur n’est pas compatible avec le
balayage progressif.
\ Reconnectez le lecteur au téléviseur en utilisant un
cordon composite ou S-vidéo, puis réglez le
commutateur VIDEO OUT SELECT du panneau arrière
sur COMPOSITE & S-VIDEO. Avec le téléviseur
connecté et utilisant les prises composites ou S-vidéo,
choisissez le réglage [Interlace] dans le menu
[Component Video], puis remettez le commutateur du
panneau arrière sur COMPONENT (page 27).
\ Réinitialisez le lecteur (page 47). [Component Video]
est réinitialisé sur [Interlace] mais vous perdez aussi
tous les autres réglages.
\ Vérifiez que le commutateur VIDEO OFF est sur la
position convenable (page 47).
L’image est étirée, ou encore son format ne peut pas être
modifié
Le format d’image choisi ne convient pas.
\ Choisissez le format d’image approprié grâce au menu
Video et à l’option [TV Screen] et en fonction du
téléviseur ou du moniteur que vous utilisez (page 26).
Ce n’est pas un mauvais fonctionnement.
\ Le format d’image de certains téléviseurs compatible
avec le balayage progressif ne peut pas être changé.
Pendant la lecture, l’image est altérée ou assombrie.
Il ne s’agit pas d’un défaut de fonctionnement.
\ Ce lecteur est doté de circuits d’interdiction de copie
conçus par Macrovision. Certains disques sont
protégés et comportent donc des codes qui
empêchent leur copie, brouillent leur lecture, etc.
Lors de l’utilisation du balayage progressif
\ Si votre téléviseur est connecté à l’aide des prises
COMPONENT VIDEO OUT, réglez le menu
[Component Video] sur [Interlace] (page 27).
L’image est altérée après son enregistrement sur une
cassette vidéo ou son passage à travers un sélecteur
audiovisuel.
Il ne s’agit pas d’un défaut de fonctionnement.
\ En raison des circuits d’interdiction de copie, les
images ayant franchi un magnétoscope ou un
sélecteur audiovisuel sont brouillées.
INFORMATIONS COMPLEMENTAIRES
La lecture s’arrête et les touches de fonctionnement sont
sans effet.
Le lecteur présente une anomalie.
\ Arrêtez la lecture du disque (appuyez sur la touche
STOP 7), puis commandez à nouveau la lecture.
Absence d’image.
Le réglage du commutateur VIDEO OUT SELECT placé
sur le panneau arrière n’est pas correct.
\ Assurez-vous que le commutateur VIDEO OUT
SELECT est sur la position convenable compte tenu
des raccordements au téléviseur (page 14).
La télécommande ne fonctionne pas.
La prise d’entrée de commande d’ensemble (sur le
panneau arrière) est reliée à un autre appareil.
\ Dirigez la télécommande vers l’appareil auquel le
lecteur est relié (page 14).
La télécommande est trop éloignée du lecteur, ou bien le
faisceau est trop incliné sur l’axe du capteur.
\ Utilisez la télécommande dans les conditions
prescrites (page 8).
Les piles sont épuisées.
\ Remplacez les piles (page 8).
53
FRANÇAIS
Aucun son ne sort des prises DIGITAL OUT (optiques ou
coaxiales)
Le menu [Digital Out] est réglé sur [Off].
\ Réglez [Digital Out] (menu Audio 1) sur [On] (page
25).
Absence de son, ou sons déformés.
La valeur [96 kHz] a été choisie pour l’option [96 kHz PCM
Out] du menu Audio 1. Certains disques ne permettent
pas la sortie d’un signal numérique.
\ Veillez à ce que le lecteur soit aussi relié à la chaîne
par une liaison analogique (page 13).
Le disque est sale.
\ Reportez-vous au paragraphe ‘Prendre soin des
disques’ (page 48).
Les fiches ne sont pas introduites à fond dans les
connecteurs.
\ Contrôlez toutes les fiches et tous les connecteurs.
Assurez-vous qu’il y a contact.
Les fiches ou les connecteurs sont sales.
\ Contrôlez toutes les fiches et tous les connecteurs.
Assurez-vous de leur propreté.
Le raccordement des cordons audio est incorrect.
\ Contrôlez tous les cordons audio (page 13).
Le lecteur est relié à l’entrée PHONO de l’amplificateur
stéréophonique.
\ Vous pouvez utiliser diverses entrées sur l’amplificateur
mais jamais l’entrée PHONO.
Le lecteur est en pause.
\ Appuyez sur la touche PLAY 3, ou la touche PAUSE
8 pour libérer la pause.
Le fonctionnement de l’amplificateur stéréophonique n’est
pas correct.
\ Vérifiez la position du sélecteur d’entrée (CD, AUX,
etc.) et assurez-vous qu’elle convient aux signaux
DVD.
Le DVD ou le CD portent une gravure DTS.
\ Les signaux DTS ne sont présents que sur les prises
numériques. Reliez la sortie audionumérique du lecteur
à l’entrée audionumérique du récepteur ou de
l’amplificateur pourvus d’un décodeur DTS.
Le niveau des signaux fournis par un DVD est très
différent de celui des signaux provenant d’un CD.
Les méthodes de gravure des DVD et CD sont différentes.
\ Le phénomène constaté ne traduit pas une anomalie.
Attention
Une anomalie de fonctionnement peut être due à une
charge d’électricité statique ou à un phénomène de
brouillage. Pour rétablir les conditions normales,
débranchez la fiche du cordon d’alimentation puis
rebranchez-la. Si, en dépit de cela, vous n’êtes pas en
mesure d’obtenir un fonctionnement satisfaisant, consultez
le centre d’entretien MARANTZ ou le distributeur.
54
FRANÇAIS
Glossaire
DTS
Format d’image
Le rapport de la longueur à la hauteur est de 4:3 dans le cas
des téléviseurs standard et de 16:9 dans le cas des
téléviseurs à écrans larges et des téléviseurs Hi-Vision. Ce
rapport s’appelle “format d’image”.
Numéro de chapitre
A chacune des sections de certains disques est attribué un
numéro de manière à distinguer ces sections qui sont
appelées des chapitres. Si cela est effectivement le cas du
disque que vous avez placé dans le lecteur, vous pouvez
alors effectuer une recherche sur le disque en précisant le
numéro du chapitre.
Sortie des composantes vidéo (différence de
couleur)
Le signal télévisé comprend un signal de luminance (Y) et
des signaux de couleur (CB et CR). En transmettant le signal
de cette manière, on évite les brouillages mutuels. Si on
applique ces trois signaux sur un téléviseur, celui-ci peut
reconstituer l’image en couleur.
Mémoire des conditions de lecture
Il s’agit d’une mémoire des divers réglages de
fonctionnement que vous avez choisis. Ce lecteur est en
mesure de conserver, pour un certain nombre de disques,
divers réglages de manière que vous puissiez revoir le même
film, ou le même documentaire, dans les mêmes conditions,
et sans être tenu de préciser une nouvelle fois les conditions
de fonctionnement.
Train binaire
Sortie numérique (coaxiale)
Le signal audionumérique présent en sortie est transmis
grâce à un câble coaxial. Ce signal doit être appliqué à
l’entrée audionumérique d’un autre appareil. Si le signal ne
peut pas être décodé par l’appareil auquel le lecteur est relié,
il s’ensuit un bruit.
Sortie numériques (optique)
Le signal sonore est tout d’abord un signal électrique qui,
véhiculé par un conducteur, quitte le lecteur pour atteindre
l’amplificateur, etc. Le signal électrique d’origine peut être
numérique et en ce cas, sa transmission est assurée le plus
souvent par câble à fibres optiques; l’appareil est alors pourvu
d’une sortie optique des signaux numériques. Pour que le
lecteur et l’amplificateur audiovisuel puissent communiquer, ce
dernier doit être muni d’une entrée optique des signaux
numériques.
Dynamique
La dynamique est la différence qui existe entre le niveau
maximal utilisable, sans distorsion, lors d’une transmission ou
d’une conversion et le niveau de bruit ou de signal minimal
qui résulte des caractéristiques de l’appareil. La dynamique
se mesure en décibels (dB).
La compression de la dynamique consiste à relever le niveau
minimal et à abaisser le niveau maximal. En procédant ainsi,
les voix sont mieux perceptibles car elles ne sont plus
“noyées” dans les sons puissants tels que ceux d’une
explosion.
Vidéo à balayage entrelacé
Une méthode d’affichage de l’image pour laquelle les lignes
impaires sont affichées lors du premier passage et les lignes
paires lors du suivant. Référez-vous aussi à Vidéo à balayage
progressif.
MPEG
MPEG signifie Moving Picture Expert Group. Ce groupe est
l’auteur d’une norme internationale qui porte le même nom et
gère la compression des images animées. Sur certains DVD, la
gravure des signaux audionumériques est également réalisée
selon cette norme.
Angles de prise de vues
Les images qui se forment sur l’écran de votre téléviseur ont été
prises par une caméra de télévision et le point de vue de ces
images est celui de la caméra au moment de la prise de vues. En
réalité, les studios de télévision sont dotés de plusieurs caméras et
c’est une des tâches du directeur de programme que de choisir
celle qui, à un certain instant, doit être retenue pour transmettre les
images à l’émetteur et donc aux téléspectateurs. Si toutes les
caméras transmettaient les images à l’antenne et si votre téléviseur
était équipé d’un circuit capable d’assurer la séparation des
signaux, vous pourriez alors, à tout moment, choisir l’angle de prise
de vues parmi ceux qui vous seraient proposés. Certains DVD
portent effectivement plusieurs enregistrements de la même scène
filmée sous des angles différents et ce lecteur vous donne la
possibilité de choisir, parmi eux, celui qui vous plaît.
Restriction parentale
Diverses associations de parents ont demandé l’introduction
de cette fonction qui permet d’interdire la projection de
certaines scènes jugées inacceptables eu égard à l’âge des
spectateurs. Ces restrictions font l’objet d’un codage au
moment de la gravure du disque, codage qui est ensuite
employé pour définir le niveau acceptable.
INFORMATIONS COMPLEMENTAIRES
Le train binaire n’est pas le signal audio mais les données
numériques qui, lors de la conversion, donnent naissance au
signal audio. Ce lecteur fournit le train binaire sur les prises
optique et coaxiale. Si le train binaire ne peut pas être
décodé par l’amplificateur audiovisuel, etc., auquel le lecteur
est relié, il s’ensuit un bruit. Le format du train binaire peut
être choisi grâce au menu Audio 1.
DTS signifie Digital Theater System. DTS est un système de
correction d’ambiance sonore, différent de Dolby Digital, qui jouit
désormais d’une grande faveur de la part des réalisateurs de films.
Pour profiter pleinement des disques DTS et en particulier
des pistes son DTS, la sortie numérique de cet appareil
(coaxiale ou optique) doit être reliée à l’entrée numérique
d’un amplificateur audiovisuel ou d’un décodeur DTS. Le
signal DTS ne peut pas être présent sur les prises de sortie
analogique.
PCM
Dolby Digital
Les données numériques couvrant les signaux destinés aux “5,1”
voies du système de correction d’ambiance (Surround Digital)
sont codées grâce selon l’algorithme.
1
Pour profiter pleinement des disques Dolby Digital et en
particulier des pistes son Dolby Digital, la sortie numérique
de cet appareil (coaxiale ou optique) doit être reliée à l’entrée
numérique d’un amplificateur audiovisuel ou d’un décodeur
Dolby Digital.
PCM (Pulse Code Modulation, pour Modulation par
impulsions et codage) est une abréviation utilisée pour
qualifier certains signaux audionumériques. Les signaux
audionumériques que porte un CD sont des signaux PCM.
Ce lecteur possède une fonction de conversion des trains
binaires au format Dolby Digital ou MPEG en signaux PCM;
cette conversion permet de restituer des signaux sonores de
grande qualité sans faire appel à un décodeur extérieur.
55
FRANÇAIS
Play Back Control (PBC)
Il s’agit des signaux enregistrés sur un disque Video CD
(version 2,0) et destinés à permettre certaines opérations
spéciales lors de la lecture.
Grâce aux menus que proposent ces disques, vous pouvez
aisément rechercher une scène, ou bien afficher des images
fixes de définition standard ou élevée.
Vidéo à balayage progressif
Aussi appelée vidéo à balayage non-entrelacé, cette
méthode d’affichage de l’image affiche toutes les lignes en
un seul passage et offre une image plus stable sans
papillotement par rapport à la vidéo à balayage entrelacé
(pour une fréquence de balayage donnée). Référez-vous
aussi à Vidéo à balayage entrelacé.
Code régional restrictif (numéro de région)
A chaque lecteur de DVD et à chaque disque DVD vendus
dans une région donnée du globe, sont attribués des codes
qui en restreignent l’utilisation. Si le code régional du lecteur
n’est pas identique à celui du disque, la lecture est
impossible. Une indication apparaît alors sur l’écran pour
signaler ce fait.
Le numéro de région est gravé sur le panneau arrière du
lecteur de DVD. L’illustration ci-dessous indique les régions
et leur numéro.
Caractéristiques techniques
Généralités
Système ........................... DVD et Compact Disc Digital Audio
Alimentation
Modèle Etats-Unis ............................... Secteur 120 V, 60 Hz
Modèle Australie ................................. Secteur 240 V, 50 Hz
Consommation
Modèle Etats-Unis ........................................................ 14 W
Modèle Australie .......................................................... 14 W
Poids .............................................................. 8.38 lbs (3.8 kg)
Dimensions ..................................... 440 (W) x 304 (P) x 87 (H)
(17 5/16 x 12 x 3 7/16 po.)
(Non compris les parties saillantes, câbles, etc.)
Température de fonctionnement ....................... +5°C à +35°C
(+36°F à +96°F)
Humidité ambiante ................. 5% à 85% (sans condensation)
Sorties S-vidéo
Niveau de sortie de la luminance (Y) ........... 1 Vp-p (75 Ohms)
Niveau de sortie de la chrominance (C) ................. 286 mVp-p
(75 Ohms)
Prises ............................................................... Prises S-VIDEO
Sorties vidéo
Niveau de sortie ........................................... 1 Vp-p (75 Ohms)
Prises ......................................................... Prises Cinch (RCA)
Sortie des composantes vidéo
(Y, CB / PB, CR / PR)
Niveau de sortie .................................... Y: 1,0 Vp-p (75 Ohms)
CB / PB, CR / PR: 0,7 Vp-p (75 Ohms)
Prises ......................................................... Prises Cinch (RCA)
Fréquence d’échantillonnage
Lors de la conversion d’un signal sonore en signal
audionumérique, le premier est échantillonné avec une
périodicité donnée. A titre d’exemple, un signal numérique
dont la fréquence d’échantillonnage est de 96 kHz est le
résultat de l’échantillonnage 96.000 fois par seconde d’un
signal analogique.
Sous-titrage
Les sous-titres sont des incrustations de texte sur l’image. Un
DVD peut porter jusqu’à 32 versions (langues) du même
sous-titre. Une fonction secondaire permet de choisir la
langue du sous-titrage.
S-vidéo
Si vous reliez la sortie S-vidéo du lecteur à l’entrée S-vidéo du
téléviseur ou du moniteur, vous pouvez obtenir des images
de meilleure qualité que celle attachée à la liaison vidéo
standard car le signal de chrominance est alors séparé du
signal de luminance. La recombinaison de ces signaux est
effectuée par le téléviseur ou le moniteur.
Temps écoulé
Il s’agit du temps écoulé depuis le début du disque. Grâce à
l’indication de ce temps, vous avez la possibilité de localiser
une scène ou un passage d’un disque.
Sortie audio
Niveau de sortie
Niveau de sortie numérique ... 200 mV eff. (1 kHz, –20 dB)
Nombre de voies .................................................................... 2
Prises ......................................................... Prises Cinch (RCA)
Caractéristiques audionumériques
Réponse en fréquence ... 4 Hz à 44 kHz (Fs de DVD: 96 kHz)
Rapport signal/bruit ......................................... Plus de 115 dB
Dynamique ....................................................... Plus de 102 dB
Distorsion harmonique totale ....................................... 0,002%
Taux de pleurage et de scintillement .............. Non mesurable
(± 0,001% crête, pondéré, ou moins)
Sortie numérique
Sortie optique ...................................................... Prise optique
Sortie coaxiale ............................................ Prise Cinch (RCA)
Accessoires
Télécommande ....................................................................... 1
Piles sèches AA (R6P) ............................................................ 2
Câble audio/vidéo ................................................................... 1
Câble de télécommande ........................................................ 1
Mode d’emploi ........................................................................ 1
Numéro de titre
Les DVD sont divisés en titres qui peuvent être divisés en
chapitres. Les menus sont indépendants des titres. Un
disque sur lequel est gravé un film peut ne comporter qu’un
seul titre, et celui-ci peut comprendre plusieurs chapitres, ou,
au contraire, n’en comprendre aucun. Les disques de
karaoké peuvent être divisés en de nombreux chapitres,
chacun représentant une chanson.
56
Remarque:
Les caractéristiques et la présentation peuvent être modifiées sans
avis préalable à fin d’amélioration.
COUNTRY
ALGERIE
ARMENIA
AUSTRALIA
AUSTRIA
BAHREIN
BANGLADESH
BELGIUM
BULGARIA
CANADA
CHINA
CYPRUS
CZECH REPUBLIC
DENMARK
DUBAI
EGYPT
ESTONIA
F.Y.R.O.M.
FINLAND
FRANCE
GERMANY
GREECE
HEADQUARTERS EUROPE:
HONG KONG
HUNGARY
ICELAND
INDIA
IRAN
IRELAND
ISRAEL
ITALY
IVORY COAST
JAPAN
KOREA
KUWAIT
LATVIA
LEBANON
LITHUANIA
MALAYSIA
MALTA
MAURITIUS
MILITARY MARKET EUROPE
NETHERLANDS
NEW ZEALAND
NORWAY
OMAN
POLAND
PORTUGAL
PROFESSIONAL EUROPE
PROFESSIONAL U.S.A.
QATAR
REUNION
ROMANIA
RUSSIA
SAUDI ARABIA
SINGAPORE
SLOVAKIA
SLOVENIA
SOUTH AFRICA
SPAIN
SRI LANKA
SWEDEN
SWITZERLAND
SYRIA
TAHITI
TAIWAN
THAILAND
TUNESIA
TURKEY
U.K.
U.S.A.
YUGOSLAVIA
www.marantz.com
COMPANY
Azur 2000
NGYIG Ltd.
QualiFi Pty. Ltd.,
Huber & Prohaska GmbH
Ambassador Stores
Target
Van der Heyden Audio N.V.
Ariescommerce GmbH
Lenbrook Industries Limited
Guang Chang Audio International Co., Ltd.
Empire Hifi systems Ltd.
Audio International
Audio Nord
V.V.& SONS
Solimco
HiFi Club Estonia
T.P. KODI
Audio Nord
Marantz France
Marantz Deutschland
Adamco S.A.
Marantz Europe B.V.
Marantz Hong Kong Ltd.
Infovox Ltd.
ID Electronics Ltd.
NOVA Audio Private
Home Co.
Marantz Ireland
Elmor Ltd.
Marantz Italy
Hifivoir
Marantz Japan Inc.
MK Enterprises Ltd.
alAlamiah Electronics Intl.
Ace Ltd.
AZ Electronics S.A., 1,
Accapella Ltd.
Wo Kee Hong Electronics Sdn. Bhd.
Doneo Co Ltd.
SKR Electronics Ltd.
PASCO GmbH
Marantz Europe B.V.
Wildash Audio Systems
Audio Nord
Mustafa & Jawad Trading CO.
Philips Polska Sp. z.o.o.
Corel2
Marantz Professional Products
Marantz Professional Products
Almana & Partners W.W.L.
Vision +
Nova Music Entertainment
Absolute Audio
Adawlia Univ. Electr. Apl
Wo Kee Hong Distribution PTE Ltd.
Bis Audio s.r.o.
Bofex
Coherent Imports (PTY) Ltd.
Marantz Spain
The listening Room
Audio Nord
Sound Company AG
Hamzeh & Partners
Covecolor
Pai-Yuing Co. Ltd.
MRZ Standard Co. Ltd.
Societe EDEVIG
Türk Philips Ticaret A.S.
Marantz Hifi UK Ltd.
Marantz America Inc.
ITM Company
ADDRESS
8, Lotissement Ben Hatadi, Alger, Algerie
47 A/75 St. Lalaiants, 375000 Yerevan, Armenia
P.O. Box 350, Mt. Waverley, VIC 3149, Australia
Taborstraße 95 / Ladestraße 1, Gebäude Hangartner, A-1200 Wien, Austria
P.O. Box 237,141, Government Avenue, Manama,Bahrein
1078, Ramjoy Mohanja Lane Asadgonj, Chittagong 4000, Bangladesh
Brusselbaan 278, 9320 Erembodegem, Belgium
Makedonia Blvd. 16, 1606 Sofia, Bulgaria
633 Granite Court, Pickering, Ontario
No.38 Yushan Road, ShiQiao, Pan Yu, Guang Dong, China
P.O. Box 5604, Nicosia, Cyprus
Sokolska 41, 67902 Rajecko, OKR,Blansko, Czech Republic
Dali Allé 1, 9610 Noerager, Denmark
P.O. Box 105, Dubai, U.A.E.
9, El Attibaa St. Doki, Cairo, Egypt
Ehte 4, 90503 Haapsalu, Estonia
ul.Cedomir Kantargiev 21a, Skopje, Former Yugoslavian Republic of Macedonija
Uudenmaankatu 4-6, Helsinki SF-00120, Finland
A division of Marantz Europe B.V., P.O. Box 301, 92 156 Suresnes Cedex, France
Hakenbusch 3, 49078 Osnabrück, Germany
188, Hippocratous Street, 11471 Athens, Greece
P.O. Box 8744, 5605 LS Eindhoven, The Netherlands
Unit 1706, Metroplaza II, 223 Hing Fong Road, Kwai Fong, N.T., Kowloon, Hong Kong
Terez Krt.31, 1067 Budapest, Hungary
Armula 38, 108 Reykjavik, Iceland
8,Punam Co-op.Society 29/30 Road#5, Union Park MUMBAI 400052, India
5th floor no 878 Philips Building Enghelab ave, P.O. 11365/7844 Tehran, Iran
Clonskeagh, Dublin 14, Ireland
52 Heh Beiyar Street, Kikar Hamedina, Tel Aviv, Israel
Via Casati 23, 20052 Monza (Milano), Italy, Servizio Consumatori 1678-20026, Numero Verde
B.P. 2428, Abidjan 01, Ivory Coast
35-1 Sagami Ohno 7-Chome, Sagamihara-shi, Kanagawa 228-8505, Japan
Rm604, Electro-officetel, 16-58. Hangang-ro 3Ga, Yongsan-Ku, Seoul, Korea
P.O. Box 8196, Salmiah 22052, Kuwait
61, LacPlesa Str., Riga LV 1011, Latvia
P.O. Box 11 2833, Beirut, Lebanon
Ausros, Vartu G/5, Pasazo SKG., 2001 Vilnius, Lithuania
Suite 8.1, Level 8, Menara Genesis, No. 33, Jalan Sultan Ismail, 50250 Kuala Lumpur, Malaysia
78 The Strand, Sliema SLM07, Malta
P.O. Box 685, Bell Village, Port Louis, Mauritius
PO BOX 1280, Sandhausen 69200, Germany
P.O. Box 8744, 5605 LS Eindhoven, The Netherlands
14 Malvern Road, Mt. Albert, Auckland, New Zealand
Sandkerveien 64, Oslo 0483, Norway
P.O. Box 1918, Ruwi, Oman
Al.Jerozolimskie 195b, 02 222 Warszawa, Poland
Comércio de Electrónica Lda., Av. Luís Bívar, No 85 A, 1050 Lisboa, Portugal
Kingsbridge House, Padbury Oaks, 575-583 Bath Road, Longford, Middlesex UB7 0EH, U.K.
Distributed by: Superscope Technologies Inc., 1000 Corporate Blvd. Ste.D, Aurora, Illinois
P.O. Box 49, Doha, Qatar
180 Rue du Marechal Leclerc, 97400 Saint Denis, Ile de la Reunion
5, Zagazului Str. Bl.1G,apt.18, sector 1,Bucharest, Romania
7/2, Montazhnaya Street, 107497 Moscow, Russia
P.O. Box 2154, Alkhobar 31952, Saudi Arabia
130 Joo Seng Road, #03-02 Olivine Building, Singapore 368357
Nam. SNP 10, 96001 Zvolem, Slovakia
Smartinska 152, HALA V/3, 61000 Ljubljana, Slovenia
P.O. Box 1614, Alberton, 1450, South Africa
Martinez Villergas 2, Apartado 2065, Madrid 28027, Spain
Mezzanine Floor, The Landmark 385, Galle Road, Colombo - 3, Sri Lanka
Almedalsvagen 4, Gotenborg 402-23, Sweden
Postfach, 8010 Zürich, Switzerland
Hafez Ibrahim Str. No 117, Damascus Shalan, Syria
Av. Prince Hinoi, Cours de l'union sacré, P.O. Box 2334, Papeete, Tahiti
6th No 148 Sung Kiang Road, Taipei 10429, Taiwan R.O.C.
746-750 Mahachai Road, Wangburapa, Bangkok 10200, Thailand
40, Avenue du Golfe Arabe, El Menzah, 1004, Tunesia
Yukari Dudullu Organize sanayi Bolgesi, 2.Cadde no.28, 81260 Umraniye-Istanbul, Turkey
Kingsbridge House, Padbury Oaks, 575-583 Bath Road, Longford, Middlesex UB7 0EH, U.K.
1100 Maplewood Drive Itasca, IL 60143, U.S.A.
Omladinskih Brigada 86, 11070 Belgrade, Yugoslavia
is a registered trademark.
Printed in Japan
02/06 MITs 03AK851250