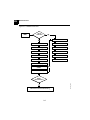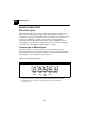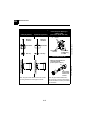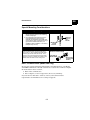
1
00810-0177-4728
Rev EA
9/01
Models 644H and 644R Smart
Temperature Transmitters
EN
EN
FIELD
MANUAL
Model 644 Smart
Temperature Transmitter
Model 644 Revision: 5.5.2, 5.5.3, 5.5.4
HART® Communicator Field Device Revision:
Dev v5, DD v2
NOTICE
Read the complete product manual before installing,
operating, or servicing the Models 644H and 644R
Smart Temperature Transmitters. Failure to comply with
safe transmitter installation and operating practices can
cause severe injury or death.
Rosemount Inc.
8200 Market Boulevard
Chanhassen, MN 55317 USA
Tel 1-800-999-9307
Fax (952) 949-7001
The information contained in this abbreviated field
manual is intended only as an aid for skilled users who
possess complete product manuals and are already
familiar with the installation and operation of the
Models 644H and 644R Smart Temperature
Transmitters.
Rosemount Temperature GmbH
Frankenstrasse 21
63791 Karlstein
Germany
Tel 49 (6188) 992-0
Fax 49 (6188) 992-112
Please contact your nearest Fisher-Rosemount
location for additional information or assistance
regarding safe installation and operation of the Models
644H and 644R Smart Temperature Transmitters.
Fisher-Rosemount
Singapore Pte Ltd.
1 Pandan Crescent
Singapore 128461
Tel (65) 777-8211
Fax 65 777-0947
AP.RMT-Specialist@frco.com
© 2001 Rosemount, Inc.
Rosemount® Models 644H and 644R Smart Temperature Transmitters
may be protected by one or more U.S. Patents pending. Other
international patents pending.
Rosemount and the Rosemount logotype are registered trademarks of
Rosemount Inc.
HART is a registered trademark of the HART Communication
Foundation.
Noryl and Lexan are registered trademarks of General Electric
WAGO is a registered trademark of WAGO KontakHechnik GmbH,
Germany
Photo Cover: 644-644C904, 644C903, 644C905
Fisher-Rosemount satisfies all
obligations coming from
legislation to harmonize
product requirements in the
European Union.
Fisher-Rosemount
satisfies all
obligations coming from
Product documentation available at...
www.rosemount.com
EN
TABLE OF
CONTENTS
Table of Contents
Section 1: Introduction
Safety Messages . . . . . . . . . . . . . . . . . . . . . . . . . . . . . . . . . . . . . . . 1-1
Warnings . . . . . . . . . . . . . . . . . . . . . . . . . . . . . . . . . . . . . . . . . . 1-1
Transmitter Overview . . . . . . . . . . . . . . . . . . . . . . . . . . . . . . . . . . 1-2
Manual Overview . . . . . . . . . . . . . . . . . . . . . . . . . . . . . . . . . . . . . . 1-2
Considerations . . . . . . . . . . . . . . . . . . . . . . . . . . . . . . . . . . . . . . . . 1-3
General. . . . . . . . . . . . . . . . . . . . . . . . . . . . . . . . . . . . . . . . . . . . 1-3
Mechanical. . . . . . . . . . . . . . . . . . . . . . . . . . . . . . . . . . . . . . . . . 1-3
Electrical . . . . . . . . . . . . . . . . . . . . . . . . . . . . . . . . . . . . . . . . . . 1-3
Environmental. . . . . . . . . . . . . . . . . . . . . . . . . . . . . . . . . . . . . . 1-3
Section 2: Installation
Safety Messages . . . . . . . . . . . . . . . . . . . . . . . . . . . . . . . . . . . . . . . 2-1
Tools needed for installation . . . . . . . . . . . . . . . . . . . . . . . . . . . . . 2-3
Mounting. . . . . . . . . . . . . . . . . . . . . . . . . . . . . . . . . . . . . . . . . . . . . 2-3
Special Mounting Considerations. . . . . . . . . . . . . . . . . . . . . . . 2-3
Installation Procedures . . . . . . . . . . . . . . . . . . . . . . . . . . . . . . . . . 2-4
Transmitter . . . . . . . . . . . . . . . . . . . . . . . . . . . . . . . . . . . . . . . . 2-4
Multichannel Installations . . . . . . . . . . . . . . . . . . . . . . . . . . . . 2-9
LCD Meter Installation. . . . . . . . . . . . . . . . . . . . . . . . . . . . . . . 2-9
Field Wiring . . . . . . . . . . . . . . . . . . . . . . . . . . . . . . . . . . . . . . . . . 2-10
Sensor connections . . . . . . . . . . . . . . . . . . . . . . . . . . . . . . . . . . . . 2-12
RTD or Ohm Inputs. . . . . . . . . . . . . . . . . . . . . . . . . . . . . . . . . 2-12
Thermocouple or Millivolt Inputs. . . . . . . . . . . . . . . . . . . . . . 2-12
Failure Mode . . . . . . . . . . . . . . . . . . . . . . . . . . . . . . . . . . . . . . . . . 2-13
Changing Switch Positions . . . . . . . . . . . . . . . . . . . . . . . . . . . 2-13
Section 3: Operation
Safety Messages . . . . . . . . . . . . . . . . . . . . . . . . . . . . . . . . . . . . . . . 3-1
Power Supply . . . . . . . . . . . . . . . . . . . . . . . . . . . . . . . . . . . . . . . . . 3-1
Surges and Transients . . . . . . . . . . . . . . . . . . . . . . . . . . . . . . . 3-2
Configuration . . . . . . . . . . . . . . . . . . . . . . . . . . . . . . . . . . . . . . . . . 3-2
Online Menu . . . . . . . . . . . . . . . . . . . . . . . . . . . . . . . . . . . . . . . 3-2
Hart Fast Key Feature . . . . . . . . . . . . . . . . . . . . . . . . . . . . . . . 3-2
i
EN
Rosemount Inc
Section 4: Hardware and Software Maintenance and Troubleshooting
Safety Message . . . . . . . . . . . . . . . . . . . . . . . . . . . . . . . . . . . . . . . .4-1
Diagnostic Messages . . . . . . . . . . . . . . . . . . . . . . . . . . . . . . . . . . . .4-1
Hardware . . . . . . . . . . . . . . . . . . . . . . . . . . . . . . . . . . . . . . . . . .4-1
Model 275 HART Communicator . . . . . . . . . . . . . . . . . . . . . . .4-4
LCD Meter . . . . . . . . . . . . . . . . . . . . . . . . . . . . . . . . . . . . . . . . .4-7
Appendix A: Reference Data
Specifications. . . . . . . . . . . . . . . . . . . . . . . . . . . . . . . . . . . . . . . . . A-1
Functional . . . . . . . . . . . . . . . . . . . . . . . . . . . . . . . . . . . . . . . . A-1
Performance . . . . . . . . . . . . . . . . . . . . . . . . . . . . . . . . . . . . . . . A-3
Dimensional Drawings . . . . . . . . . . . . . . . . . . . . . . . . . . . . . . . . . A-8
Ordering Information . . . . . . . . . . . . . . . . . . . . . . . . . . . . . . . . . A-11
Configuration . . . . . . . . . . . . . . . . . . . . . . . . . . . . . . . . . . . . . . . A-13
Standard. . . . . . . . . . . . . . . . . . . . . . . . . . . . . . . . . . . . . . . . . A-13
Custom . . . . . . . . . . . . . . . . . . . . . . . . . . . . . . . . . . . . . . . . . . A-14
Tagging. . . . . . . . . . . . . . . . . . . . . . . . . . . . . . . . . . . . . . . . . . A-14
Appendix B: Hazardous Locations Certifications
Safety Messages . . . . . . . . . . . . . . . . . . . . . . . . . . . . . . . . . . . . . .
Hazardous Locations Certifications. . . . . . . . . . . . . . . . . . . . . . .
European ATEX Directive Information. . . . . . . . . . . . . . . . . . . .
Installation Drawings . . . . . . . . . . . . . . . . . . . . . . . . . . . . . . . . . .
B-1
B-1
B-4
B-5
Appendix C: Model 644 and 244E Manual Supplement
Old Transmitter . . . . . . . . . . . . . . . . . . . . . . . . . . . . . . . . . . . . . .
Transmitter Design . . . . . . . . . . . . . . . . . . . . . . . . . . . . . . . . .
Sensor Wiring Diagrams . . . . . . . . . . . . . . . . . . . . . . . . . . . . .
Special Mounting Considerations . . . . . . . . . . . . . . . . . . . . . .
New Transmitter. . . . . . . . . . . . . . . . . . . . . . . . . . . . . . . . . . . . . .
Transmitter Design . . . . . . . . . . . . . . . . . . . . . . . . . . . . . . . . .
Sensor Wiring Diagrams . . . . . . . . . . . . . . . . . . . . . . . . . . . . .
Special Mounting Considerations . . . . . . . . . . . . . . . . . . . . . .
HART Communicator (Model 644 only) . . . . . . . . . . . . . . . . .
Specifications. . . . . . . . . . . . . . . . . . . . . . . . . . . . . . . . . . . . . . . . .
ii
C-2
C-2
C-2
C-3
C-4
C-4
C-4
C-5
C-5
C-6
EN
SECTION
1
Introduction
Safety Messages . . . . . . . . . . . . . . . . . . . . . . . . . . . . . . . . . . . . . . . . . .
Transmitter Overview . . . . . . . . . . . . . . . . . . . . . . . . . . . . . . . . . . . . . .
Manual Overview . . . . . . . . . . . . . . . . . . . . . . . . . . . . . . . . . . . . . . . . .
Considerations . . . . . . . . . . . . . . . . . . . . . . . . . . . . . . . . . . . . . . . . . . . .
page 1-1
page 1-2
page 1-2
page 1-3
SAFETY MESSAGES
Instructions and procedures in this section may require special precautions to
ensure the safety of the personnel performing the operations. Information that
raises potential safety issues is indicated by a warning symbol ( ). Please refer to
the following safety messages before performing an operation preceded by this
symbol.
Warnings
Explosions could result in death or serious injury.
•
Do not remove the connection head cover in explosive atmospheres when the
circuit is live.
•
Before connecting a HART-based communicator in an explosive atmosphere,
make sure the instruments in the loop are installed in accordance with
instrinsically safe or non-incendive field wiring practices.
•
Verify that the operating atmosphere of the transmitter is consistent with the
appropriate hazardous locations certifications.
•
All connection head covers must be fully engaged to meet
explosion-proof requirements.
Process leaks could result in death or serious injury.
•
Install and tighten thermowells and sensors before applying pressure
•
Do not remove the thermowell while in operation.
Electrical shock could cause death or serious injury.
•
Use extreme caution when making contact with the leads and terminals.
•
Under certain fault conditions, high voltage may be present on transmitter leads
and terminals.
1-1
EN
Rosemount Inc
TRANSMITTER OVERVIEW
Thank you for choosing the Model 644 Smart Temperature Transmitter. Features of
the Model 644 include:
• Accepts inputs from a wide variety of sensors
• Configuration using HART protocol
• Electronics that are completely encapsulated in epoxy and enclosed in a
metal housing, making the transmitter extremely durable and ensuring
long-term reliability
• A compact size and two housing options allowing mounting flexibility for the
control room or the field
Rosemount Inc. has a full range of compatible connection heads, sensors, and
thermowells to provide complete assemblies for process temperature
measurements. Refer to Volume 1 of the Rosemount Temperature Sensors and
Assemblies Product Data Sheet (document number 00813-0100-2654) for thread
mount sensors and accessories. Refer to Volume 2 (document number
00813-0101-2654) for DIN-style sensors and accessories.
MANUAL OVERVIEW
This manual is designed to assist in the installation, operation, and maintenance of
Rosemount® Models 644H and 644R.
Section 2: Installation
• Installation tools
• Mounting
• Installation
• Field wiring
Section 3: Operation
• Power supply
• Configuration
Section 4: Hardware and Software Maintenance and Troubleshooting
• Hardware maintenance
• Diagnostic messages
Appendix A: Reference Data
• Specifications
• Dimensional drawings
• Ordering information
1-2
Rosemount Inc
EN
Appendix B: Hazardous Locations Certifications
• Hazardous locations certifications
• Installation drawings
Appendix C: Model 644 and 244E Manual Supplement
• Comparison between new and old Models 644 and 244E
• Specifications
CONSIDERATIONS
General
Electrical temperature sensors such as RTDs and thermocouples produce low-level
signals proportional to their sensed temperature. The Model 644 converts the lowlevel sensor signal to a standard 4–20 mA signal that is relatively insensitive to
lead length and electrical noise. This current signal is then transmitted to the
control room via two wires.
Mechanical
When choosing an installation location and position, take into account the need for
access to the transmitter.
Wiring Connections
Make wiring connections through the cable entry in the side of the connection
head. Be sure to provide adequate clearance for
cover removal.
Electrical
Proper electrical installation is necessary to prevent errors due to sensor lead
resistances and electrical noise. Shielded cable should be used in electrically noisy
environments.
Environmental
The transmitter electronics module is permanently sealed within the housing,
resisting moisture and corrosive damage. Verify that the operating atmosphere of
the transmitter is consistent with the appropriate hazardous locations
certifications.
1-3
EN
SECTION
2
Installation
Safety Messages . . . . . . . . . . . . . . . . . . . . . . . . . . . . . . . . . . . . . . . . . .
Tools needed for installation . . . . . . . . . . . . . . . . . . . . . . . . . . . . . . . . .
Mounting . . . . . . . . . . . . . . . . . . . . . . . . . . . . . . . . . . . . . . . . . . . . . . . .
Installation Procedures . . . . . . . . . . . . . . . . . . . . . . . . . . . . . . . . . . . . .
Field Wiring . . . . . . . . . . . . . . . . . . . . . . . . . . . . . . . . . . . . . . . . . . . . . .
Sensor connections . . . . . . . . . . . . . . . . . . . . . . . . . . . . . . . . . . . . . . . .
Failure Mode . . . . . . . . . . . . . . . . . . . . . . . . . . . . . . . . . . . . . . . . . . . . .
page 2-1
page 2-3
page 2-3
page 2-4
page 2-10
page 2-12
page 2-13
SAFETY MESSAGES
Instructions and procedures in this section may require special precautions to
ensure the safety of the personnel performing the operations. Information that
raises potential safety issues is indicated by a warning symbol ( ). Please refer
to the appropriate safety messages listed in “Warnings” on page 1-1 before
performing an operation preceded by this symbol.
2-1
Rosemount Inc
Figure 2-1. Installation Flowchart
START
HERE
Bench
Calibration
FIELD INSTALL
BASIC SETUP
Set Failure Mode Switch
Set Sensor Type
Mount Transmitter
Set Number of Wires
Wire Transmitter
Set Units
Power Transmitter
Set Range Values
FINISHED
Set Damping
VERIFY
Simulate Sensor Input
Within
Specifications?
Refer to Section 4 Hardware and Software
Maintenance and Troubleshooting
2-2
244-244_03A
EN
Rosemount Inc
EN
TOOLS NEEDED FOR INSTALLATION
The tools needed for installation are as follows:
Models 644H and 644R
• Transmitter
Model 275 HART Communicator
• Hart communicator
• Mounting apparatus
MOUNTING
The Models 644H and 644R transmitters will operate within specifications for
ambient temperatures between –40 and 185 °F
(–40 and 85 °C).
Special Mounting Considerations
Special mounting hardware is available for mounting a Model 644H head mount
transmitter to a DIN rail, or assembling a new Model 644H to an existing threaded
sensor connection head (former option code L1).
Mounting a Model 644H to a DIN Rail
To attach a head mount transmitter to a DIN rail, assemble the appropriate rail
mounting kit (part number 00644-5301-0010) to the transmitter as shown in
Figure 2-2, then follow the procedure under “Rail Mount Transmitter with
Integral Mount Sensor” on page 2-7.
Figure 2-2. Assembling Rail Clip Hardware to a Model 644H
Top Hat Rail (symmetric)
Mounting
Hardware
Mounting
Hardware
Transmitter
Transmitter
Rail Clip
Rail Clip
Note: Kit includes Mounting Hardware and both types of Rail Kits.
2-3
644-5302B01A, D02A
G-Rail (asymmetric)
Rosemount Inc
Retrofitting a Model 644H for Use in an Existing Threaded Sensor
Connection Head
To mount a Model 644H in an existing threaded sensor connection head (former
option code L1), order the Model 644H retrofit kit (part number 00644-5321-0010).
The retrofit kit includes a new mounting bracket and all associated hardware
necessary to facilitate the installation of the Model 644H in the existing head (see
Figure 2-15).
Figure 2-3. Assembling Model 644H for Use in an Existing L1 Connection Head
Existing Threaded Sensor
Connection Head
(Former option code L1)
Kit includes replacement
bracket and screws.
INSTALLATION PROCEDURES
Transmitter
Installation consists of attaching a thermowell to the pipe or process container wall,
assembling any necessary extensions, connection heads, or junction boxes, and
making electrical connections. Refer to the appropriate procedure and the
accompanying illustrations when installing the transmitter.
2-4
644-5321A01A
EN
Rosemount Inc
EN
Head Mount Transmitter with DIN Plate Style Sensor
Refer to Volume 2 of the Rosemount Sensors Product Data Sheet (document
number 00813-0101-2654) for complete sensor and mounting accessory
information.
To complete the assembly, follow the steps described below.
1. Attach the thermowell to the pipe or process container wall. Install and
tighten the thermowell before applying pressure.
2. Set the transmitter failure mode switch (see Figure 2-11 on page 2-11).
3. Assemble the transmitter to the sensor. Push the transmitter mounting
screws through the sensor mounting plate and insert the snap rings
(optional, part number 00644-4432-0001) into the groove of each transmitter
mounting screw.
4. Insert the transmitter-sensor assembly into the connection head. Thread the
transmitter mounting screw into the connection head mounting holes.
5. Assemble the extension to the connection head. Insert the assembly into
the thermowell.
6. Attach a cable gland into the shielded cable.
7. Insert the shielded cable leads into the connection head through the cable
entry. Connect and tighten the cable gland.
8. Connect the shielded cable leads to the transmitter power terminals. Avoid
contact with leads and terminals.
9. Install and tighten the connection head cover. Enclosure covers must be fully
engaged to meet explosion-proof requirements.
Figure 2-4. Typical Model 644H Transmitter Mounting Configuration Using Integral
Mount Sensor and Assembly
Connection Head
Integral Mount Sensor
with Flying Leads
Threaded Thermowell
Threaded Extension
2-5
644-0000B04A
Model 644H
Transmitter
Rosemount Inc
Head Mount Transmitter with Threaded Sensor
Refer to Volume 1 of the Rosemount Sensors Product Data Sheet (document
number 00813-0100-2654) for complete sensor and mounting accessory
information.
To complete the assembly, follow the steps as described below.
1. Attach the thermowell to the pipe or process container wall. Install and
tighten thermowells before applying pressure.
2. Attach necessary extension nipples and adapters. Seal the nipple and adapter
threads with silicone tape.
3. Screw the sensor into the thermowell. Install drain seals if required for severe
environments or to satisfy code requirements.
4. Set the transmitter failure mode switch (see Figure 2-11 on page 2-11).
5. Pull the sensor wiring leads through the extensions and adapters into the
universal head. Mount the transmitter into the universal head by threading
the transmitter mounting screws into the universal head mounting holes.
6. Mount the assembly into the thermowell. Seal adapter threads with
silicone tape.
7. Install conduit for field wiring to the conduit entry of the universal head.
Attach the sensor and power leads to the transmitter. Avoid contact with leads
and terminals.
8. Pull the field wiring leads through the conduit into the universal head. Attach
the sensor and power leads to the transmitter. Avoid the contact with leads
and terminals.
9. Install and tighten the universal head cover. Enclosure covers must be fully
engaged to meet explosion-proof requirements.
Figure 2-5. Typical Model644H Transmitter Mounting Configuration Using
Threaded Style Sensor and Assembly
Standard Extension
Threaded
Thermowell
Universal Head
Threaded Style Sensor
2-6
644-0000A04A
EN
Rosemount Inc
EN
Rail Mount Transmitter with Integral Mount Sensor
Refer to Volume 2 of the Rosemount Sensors Product Data Sheet (document
number 00813-0101-2654) for complete sensor and mounting accessory
information.
To complete the assembly, follow the procedure described below.
1. Attach the transmitter to a suitable rail or panel.
2. Attach the thermowell to the pipe or process container wall. Install and
tighten the thermowell before applying pressure.
3. Attach the sensor to the connection head and mount the entire assembly to
the thermowell.
4. Attach sufficient lengths of sensor lead wire to the sensor terminal block.
5. Attach and tighten the connection head cover. Enclosure covers must be fully
engaged to meet explosion-proof requirements.
6. Run sensor lead wires from the sensor assembly to the transmitter.
7. Set the transmitter failure mode switch (see Figure 2-11 on page 2-11).
8. Attach the sensor and power leads to the transmitter. Avoid contact with
leads and terminals.
Figure 2-6. Typical Rail Mount Transmitter Mounting Configuration Using
Integral Mount Sensor and Assembly
Integral Mount Sensor
with Terminal Block
Rail Mount Transmitter
Connection Head
Sensor Leads
with Cable Gland
Threaded Thermowell
2-7
644-0000C04A
Standard Extension
Rosemount Inc
Rail Mount Transmitter with Threaded Sensor
Refer to Volume 1 of the Rosemount Sensors Product Data Sheet (document
number 00813-0100-2654) for complete sensor and mounting accessory
information.
To complete the assembly, follow the procedure described below.
1. Attach the transmitter to a suitable rail or panel.
2. Attach the thermowell to the pipe or process container wall. Install and
tighten the thermowell before applying pressure.
3. Attach necessary extension nipples and adapters. Seal the nipple and adapter
threads with silicone tape.
4. Screw the sensor into the thermowell. Install drain seals if required for severe
environments or to satisfy code requirements.
5. Screw the connection head to the sensor.
6. Attach the sensor lead wires to the connection head terminals.
7. Attach additional sensor lead wires from the connection head to
the transmitter.
8. Attach and tighten the connection head cover. Enclosure covers must be fully
engaged to meet explosion-proof requirements.
9. Set the transmitter failure mode switch (see Figure 2-11 on page 2-11).
10. Attach the sensor and power leads to the transmitter. Avoid contact with leads
and terminals.
Figure 2-7. Typical Rail Mount Transmitter Mounting Configuration Using
Threaded Style Sensor and Assembly
Threaded Sensor
Connection Head
Standard Extension
Rail Mount
Transmitter
Threaded
Style Sensor
2-8
Threaded
Thermowell
644-0000A04B
EN
Rosemount Inc
EN
Multichannel Installations
You can connect several transmitters to a single master power supply, as shown in
Figure 2-8. In this case, the system may be grounded only at the negative power
supply terminal. In multichannel installations where several transmitters depend
on one power supply, and the loss of all transmitters would cause operational
problems, consider an uninterrupted power supply or a back-up battery. The
diodes shown prevent unwanted charging or discharging of the back-up battery.
Figure 2-8. Multichannel Installations
Backup
Battery
Transmitter
No. 1
RLead
Transmitter
No. 2
RLead
dc
Power
Supply
Readout or
Controller
No. 1*
RLead
Readout or
Controller
No. 2*
*Between 250 Ω and 1100 Ω if no load resistor.
To Additional
Transmitters
LCD Meter Installation
The LCD Meter for the 644H transmitter provides local indication of the
transmitter output and abbreviated diagnostic messages governing transmitter
operation. Transmitters ordered with the LCD meter are shipped with the meter
installed. After-market installation of the meter can be performed on Model 644H
transmitters that have a meter connector (transmitter Revision 5.5.2 or later).
After-market installation requires the meter kit (part number 00644-4430-0001),
which includes:
• LCD meter assembly (includes LCD meter, meter spacer, and 2 screws)
• Meter cover with O-ring in place
Figure 2-9. Installing the LCD Meter
Captive Mounting Screws and Springs
Meter Spacer
Model 644H
10 pin Connector
LCD Meter
2-9
3044-0131A
RLead
EN
Rosemount Inc
Use the following procedure to install the meter.
1. If the transmitter is installed in a loop, secure the loop and disconnect the
power. If the transmitter is installed in an enclosure, remove the cover from
the enclosure.
2. Decide meter orientation (the meter can be rotated in 90° increments). To
change meter orientation, remove the screws located above and below the
display screen. Lift the meter off the meter spacer. Remove the 8-pin plug and
re-insert it in the location that will result in the desired viewing orientation.
3. Reattach the meter to the meter spacer using the screws. If the meter was
rotated 90° from its original position it will be necessary to remove the screws
from their original holes and re-insert them in the adjacent screws holes.
4. Line up the 10-pin connector with the 10-pin socket and push the meter into
the transmitter until it snaps into place.
5. Attach the meter cover; tighten at least one-third turn after the O-ring
contacts the transmitter housing. The cover must be fully engaged to meet
explosion-proof requirements.
6. Use a Model 275 HART Communicator to configure the meter to the desired
display. Refer to “LCD Meter Installation” on page 2-9 for information on
configuring the LCD meter.
NOTE
Observe the following LCD meter temperature limits:
Operating: –4 to 185 °F (–20 to 85 °C)
Storage: –50 to 185 °F (–45 to 85 °C)
FIELD WIRING
All power to the transmitter is supplied over the signal wiring. Use ordinary copper
wire of sufficient size to ensure that the voltage across the transmitter power
terminals does not drop below 12.0 V dc.
If the sensor is installed in a high-voltage environment and a fault condition or
installation error occurs, the sensor leads and transmitter terminals could carry
lethal voltages. Use extreme caution when making contact with the leads and
terminals.
NOTE
Do not apply high voltage (e.g., ac line voltage) to the transmitter terminals.
Abnormally high voltage can damage the unit. (Sensor and transmitter power
terminals are rated to 42.4 V dc.)
For multichannel installations, see “Multichannel Installations” on page 2-9.
2-10
Rosemount Inc
EN
The transmitters will accept inputs from a variety of RTD and thermocouple types.
Refer to Figure 2-11 on page 2-11 when making sensor connections.
Use the following steps to wire the transmitter:
1. Connect the positive lead from the power supply to the transmitter terminal
marked “+” and the negative lead to the transmitter terminal marked “–” (see
Figure 2-10 and Figure 2-12).
2. Tighten the terminal compression screws to ensure adequate contact. No
additional power wiring is required.
3. After making connections, recheck the polarity and correctness of
connections, then turn the power on.
Figure 2-10. Connecting a Communicator to a Transmitter Loop
Model 644R
250 ≤ RL ≤ 1100 250 ≤ RL ≤ 1100 Power Supply
Power Supply
644-0000A02A, 0000A02B
Model 644H
Note: Signal loop may be grounded at any point or left ungrounded.
Note: A HART-based communicator may be connected at any termination point in the signal loop. The signal
loop must have between 250 and 1100 ohms load for communications.
Figure 2-11. Transmitter Power, Communication, and Sensor Terminals
Model 644H
Model 644R
Sensor Terminals
Meter Connector
1
2
3
Sensor
Terminals
4
Failure Mode
Switch
Failure Mode
Switch
Power/Configuration
Terminals
Power Terminals
2-11
644-1105E01A,
1260B02D
Communication
Terminals
Rosemount Inc
SENSOR CONNECTIONS
RTD or Ohm Inputs
The transmitters will accept a variety of RTD configurations, including 2-wire, 3wire, 4-wire, and compensation loop designs. If the transmitter is mounted
remotely from a 3-wire or 4-wire RTD, it will operate within specifications, without
recalibration, for lead wire resistances of up to 10 ohms per lead (equivalent to
1,000 feet of 20 AWG wire). In this case, the leads between the RTD and
transmitter should be shielded. If using only two leads, both RTD leads are in
series with the sensor element, so significant errors can occur if the lead lengths
exceed three feet of 20 AWG wire (approximately 0.05 °C/ft).
Thermocouple or Millivolt Inputs
The thermocouple can be connected directly to the transmitter for process
mounting applications. Use appropriate thermocouple extension wire if mounting
the transmitter remotely from the sensor. Make connections for millivolt inputs
with copper wire. Use shielding for long runs of wire.
Figure 2-12. Sensor Wiring Diagrams
Model 644 Sensor Connections Diagram
1 2 3 4
1 2 3 4
1 2 3 4
2-wire
RTD
and *
3-wire
RTD
and RTD ** 4-wire
with
RTD
Comp. and Loop
1 2 3 4
12 34
T/C
and mV
* Rosemount Inc. provides 4-wire sensors for all single element RTDs. You can use these RTDs in 3-wire
configurations by leaving the unneeded leads disconnected and insulated with electrical tape.
** The transmitters must be configured for a 3-wire RTD in order to recognize an RTD with a
compensation loop.
2-12
644-0000B01A
EN
Rosemount Inc
EN
FAILURE MODE
Changing Switch Positions
See Figure 2-11
On the Model 644H, the failure mode switch is located on top of the transmitter
near the power terminals. On the Model 644R the switch is located in the center of
the front panel. Manually set the orange switch to either high or low alarm by
positioning it accordingly. To set high alarm, position the switch towards the “HI”
mark; to set low alarm, position the switch in the opposite direction.
2-13
EN
Rosemount Inc
2-14
EN
SECTION
3
Operation
Safety Messages . . . . . . . . . . . . . . . . . . . . . . . . . . . . . . . . . . . . . . . . . . page 3-1
Power Supply . . . . . . . . . . . . . . . . . . . . . . . . . . . . . . . . . . . . . . . . . . . . . page 3-1
Configuration . . . . . . . . . . . . . . . . . . . . . . . . . . . . . . . . . . . . . . . . . . . . . page 3-2
SAFETY MESSAGES
Instructions and procedures in this section may require special precautions to
ensure the safety of the personnel performing the operations. Information that
raises potential safety issues is indicated by a warning symbol ( ). Please refer to
the appropriate safety messages listed in “Warnings” on page 1-1 before
performing an operation preceded by this symbol.
POWER SUPPLY
The dc power supply should provide power with less than 2 percent ripple. The
power supplied to the transmitter should not drop below the transmitter operating
voltage. Use Figure 3-1 to calculate the maximum resistance load. Compare this
with the total resistance load, which is the sum of the resistance of the signal leads
and the load resistance of any controller, indicator, or related pieces of equipment
in the loop. The resistance of intrinsic safety barriers, if used, must be included in
the maximum resistance load calculation. The supply voltage will need to be
increased if the total resistance exceeds the maximum resistance load.
NOTE
HART communication requires a minimum of 17.75 dc power supply and a loop
resistance of 250 to 1100 ohms. Do not communicate with the transmitter when
power is below 12.0 V dc at transmitter terminals.
Figure 3-1. Load Limits
1322
1100
1000
750
500
250
0
4–20 mA dc
Operating
Region
0 12.0 20 30
40 42.4
Supply Voltage (V dc)
3-1
644_08A
Load (Ohms)
Maximum Resistance Load = 43.5 x (Supply Voltage – 12.0)
EN
Rosemount Inc
Surges and Transients
To protect against high-energy transients, install the transmitter into a suitable
connection head with the Rosemount Model 470 Transient Protector. Refer to the
Model 470 Transient Protector Product Data Sheet (document number 00813-01004191) for more information.
CONFIGURATION
Online Menu
The HART Communicator Online Menu provides direct access to Fast Key
Sequences and all software functions of the transmitter. it appears automatically if
the communicator is connected to an active loop with an operating transmitter or it
can be selected from the Main Menu.
Hart Fast Key Feature
HART Fast Keys are operational only from the Online Menu. To use them, you
must return to the Online Menu by pressing HOME (F3) when it is available. If you
do not start at the Online Menu, the HART Fast Key Sequences will not function
properly.
HART Fast Key Description
Example: Changing the Date
Hart Fast Key sequences are made up of a
series of number that correspond to the
individual options in each step of the menu
structure. They can be identified using the
following conventions:
1 through 9 - Refer to the keys on the
alpha-numeric keypad located below the
dedicated keypad.
1. Following the menu structure, press 1 to
reach Device Setup.
2. Press 3 for Configuration.
3. Press 4 for Device information.
4. Press 2 for Date.
The Corresponding HART Fast Key sequence
is 1, 3, 4, 2.
3-2
Rosemount Inc
EN
Figure 3-2. HART Communicator Menu Tree
On-line
Menu
1 PROCESS
VARIABLE
1 DEVICE
SETUP
2 PV is
3 PV
4 AO
5 % RNGE
6 PV LRV
7 PV URV
1 TRANSMITTER VARS
2 PV is
3 Pv Digital
4 PV AO
5 PV% rnge
6 PV LRV
7 PV URV
8 PV LSL
9 PV USL
10 PV Damp
1 TEST DEVICE
1
2
3
4
2 CALIBRATION
2 DIAGNOSTICS
AND SERVICE
1 Snsr 1
2 Terminal
Loop Test
Self test
Master Reset
Status
3 Write Protect
1 SNSR 1 TRIM
2 D/A trim
3 Scaled D/A
4 VARIABLE
MAPPING
1
2
3
4
5
PV is
SV is
TV is
QV is
Variable re-
1 Snsr 1 inp trim
2 Snsr 1 trim-fact
3 Active Calibrator
1 Connections
2 SNSR 1 SETUP
1
2
3
4
5
2-wire Offset
Snsr 1 Units
Snsr 1 Damp
USL
LSL
3 CAL VANDUSEN
5 SENSOR
CONFIGURATION
1 SENSOR 1
2 TERMINAL
4 PV RANGE
VALUES
3 CONFIGURATION 6 DEV OUTPUT
CONFIGURATION
5 ALARM
SATURATION
6 HART OUTPUT
7 DEVICE
INFORMATION
7 LCD METER
OPTIONS
1
2
3
4
5
8 MEASUREMENT
FILTERING
Tag
Date
Descriptor
Message
Final Assembly
number
1 50/60 Hz Filter
2 Intermit Detect
3 Intermit Thresh
4 REVIEW
1
2
3
4
5
Revision #s
Sensor Review
Dev Outputs Review
Device Information
Measurement Filtering
3-3
4 Sensor S/N
1
2
3
4
Terminal Units
Terminal Damp
Terminal LSL
Terminal USL
1
2
3
4
5
6
7
8
PV LRV
PV URV
PV Damping
PV Units
Apply Values
PV LSL
PV USL
PV Min. Span
1
2
3
4
5
AO alrm type
Low Alarm
High Alarm
Low Sat.
High Sat.
1
2
3
4
Poll addr
Num req preams
Burst mode
Burst option
1
2
3
4
R0
Alpha
Delta
Beta
1 Meter Configuration
2 Meter Decimal pt
NOTE
The review menu lists all
of the information stored
in the Model 644. This
includes device
information, measuring
element, output
configuration, and
software revision.
EN
Rosemount Inc
Table 3-1. Model 644 Fast Key Sequence
Functions
Active Calibrator
Alarm/Saturation
AO Alarm Type
Burst Mode
Burst Option
Calibration
Callendar-Van Dusen
Configuration
D/A Trim
Damping Values
Date
Descriptor
Device Info
Device Output
Configuration
Diagnostics and Service
Filter 50/60 Hz
Hardware Rev
Hart Output
Intermittent Detect
LCD Meter Options
Loop Test
LRV (Lower Range Value)
LSL (Lower Sensor Limit)
Measurement Filtering
Message
Meter Configuring
Meter Decimal Point
HART
Communicator
Fast Keys
Functions
HART
Communicator
Fast Keys
1, 2, 2, 1, 3
1, 3, 3, 2
1, 3, 3, 2, 1
1, 3, 3, 3, 3
1, 3, 3, 3, 4
1, 2, 2
1, 3, 2, 1, 3
1, 3
1, 2, 2, 2
1, 1, 10
1, 3, 4, 2
1, 3, 4, 3
1, 3, 4
1, 3, 3
Num Req Preams
Percent Range
Poll Address
Process Temperature
Process Variables
PV Damping
PV Unit
Range Values
Review
Scaled D/A Trim
Sensor Connection
Sensor 1 Setup
Sensor Serial Number
Sensor 1 Trim
1, 3, 3, 3, 2
1, 1, 5
1, 3, 3, 3, 1
1, 1
1, 1
1, 3, 3, 1, 4
1, 3, 3, 1, 3
1, 3, 3, 1
1, 4
1, 2, 2, 3
1, 3, 2, 1, 1
1, 3, 2, 1, 2
1, 3, 2, 1, 4
1, 2, 2, 1
1, 2
1, 3, 5, 1
1, 4, 1
1, 3, 3, 3
1, 3, 5, 2
1, 3, 3, 4
1, 2, 1, 1
1, 1, 6
1, 1, 8
1, 3, 5
1, 3, 4, 4
1, 3, 3, 4, 1
1, 3, 3, 4, 2
Sensor 1 Trim-Factory
Sensor Type
Software Revision
Status
Tag
Terminal Temperature
Test Device
URV (Upper Range Value)
USL (Upper Sensor Limit)
Variable Mapping
Variable Re-Map
Write Protect
2-Wire Offset
1, 2, 2, 1, 2
1, 3, 2, 1, 1
1, 4, 1
1, 2, 1, 4
1, 3, 4, 1
1, 3, 1, 2,
1, 2, 1
1, 1, 7
1, 1, 9
1, 3, 1
1, 3, 1, 5
1, 2, 3
1, 3, 2, 1, 2, 1
3-4
EN
SECTION
4
Hardware and Software Maintenance
and Troubleshooting
Safety Message . . . . . . . . . . . . . . . . . . . . . . . . . . . . . . . . . . . . . . . . . . . page 4-1
Diagnostic Messages . . . . . . . . . . . . . . . . . . . . . . . . . . . . . . . . . . . . . . . page 4-1
SAFETY MESSAGE
Instructions and procedures in this section may require special precautions to
ensure the safety of the personnel performing the operations. Information that
raises potential safety issues is indicated by a warning symbol ( ). Please refer to
the appropriate safety messages listen in “Warnings” on page 1-1 before
performing an operation preceded by this symbol.
DIAGNOSTIC MESSAGES
Hardware
If you suspect a malfunction despite the absence of diagnostics messages on the
HART Communicator display, follow the procedures described in Table 4-2 to
verify that transmitter hardware and process connections are in good working
order. Under each of four major symptoms, specific suggestions are offered for
solving the problem.
4-1
EN
Rosemount Inc
TABLE 4-2. Hardware diagnostic messages
Symptom
Potential
Source
Corrective Action
Transmitter
Does Not
Communicate
with HART
Communicator
Loop Wiring
• Check the revision level of the transmitter device descriptors
(DDs). The communicator should report Dev v5, DD v2.
• Check for a minimum of 250 ohms resistance between the
power supply and HART-based communicator connection.
• Check for adequate voltage to the transmitter. If a HARTbased communicator is connected and 250 ohms resistance
is in the loop, the transmitter requires a minimum of 12.0 V at
the terminals to operate (over entire 3.75 to 23 mA
operating range).
• Check for intermittent shorts, open circuits, and multiple
grounds.
• Specify the transmitter by tag number. For certain nonstandard transmitter installations, specify the transmitter tag
number to initiate communications.
High Output
Sensor Input
Failure or
Connection
• Connect a HART-based communicator and enter the
Transmitter test mode to isolate a sensor failure.
• Check for a sensor open or short circuit.
• Check the process variable to see if it is out of range.
Loop Wiring
• Check for dirty or defective terminals, interconnecting pins,
or receptacles.
Power
Supply
• Check the output voltage of the power supply at the
transmitter terminals. It should be 12.0 to 42.4 V dc (over
entire 3.75 to 23 mA operating range).
Electronics
Module
Erratic Output
• Connect a HART-based communicator and enter the
transmitter status mode to isolate module failure.
• Connect a HART-based communicator and check the sensor
limits to ensure calibration adjustments are within the sensor
range.
Loop Wiring
• Check for adequate voltage to the transmitter. It should be
12.0 to 42.4 V dc at the transmitter terminals (over entire
3.75 to 23 mA operating range).
• Check for intermittent shorts, open circuits, and multiple
grounds.
• Connect a HART-based communicator and enter the Loop
test mode to generate signals of 4 mA, 20 mA, and userselected values.
Electronics
Module
• Connect a HART-based communicator and enter the
Transmitter test mode to isolate module failure.
4-2
Rosemount Inc
EN
Symptom
Potential
Source
Low Output or
No Output
Sensor
Element
• Connect a HART-based communicator and enter the
Transmitter test mode to isolate a sensor failure.
• Check the process variable to see if it is out of range.
Loop Wiring
• Check for adequate voltage to the transmitter. It should be
12.0 to 42.4 V dc (over entire 3.75 to 23 mA operating
range).
• Check for shorts and multiple grounds.
• Check for proper polarity at the signal terminal.
• Check the loop impedance.
• Connect a HART-based communicator and enter the Loop
test mode.
• Check wire insulation to detect possible shorts to ground.
Electronics
Module
• Connect a HART-based communicator and check the sensor
limits to ensure calibration adjustments are within the sensor
range.
• Connect a HART-based communicator and enter the
Transmitter test mode to isolate an electronics module
failure.
Corrective Action
4-3
EN
Rosemount Inc
Model 275 HART Communicator
Table 4-3 provides a guide to diagnostic messages used by the Model 275 HART
Communicator (HC).
Variable parameters within the text of a message are indicated with the notation
<variable parameter>.
Reference to the name of another message is identified by the notation [another
message].
TABLE 4-3. Model 275 HART Diagnostics Messages
Message
Description
Add item for ALL device
types or only for this ONE
device type
Command Not
Implemented
Communication Error
Asks the user whether the hot key item being added should be
added for all device types or only for the type of device that is
connected.
The connected device does not support this function.
Configuration memory
not compatible with
connected device
Device Busy
Device Disconnected
Device write protected
Device write protected.
Do you still want to shut
off?
Display value of variable
on hotkey menu?
Download data from
configuration memory to
device
Exceed field width
Exceed precision
Ignore next 50
occurrences of status?
Illegal character
Either a device sends back a response indicating that the message
it received was unintelligible, or the HC cannot understand the
response from the device.
The configuration stored in memory is incompatible with the device
to which a transfer has been requested.
The connected device is busy performing another task.
Device fails to respond to a command.
Device is in write-protect mode. Data can not be written.
Device is in write-protect mode. Press YES to turn the HC off and
lose the unsent data.
Asks whether the value of the variable should be displayed
adjacent to its label on the hotkey menu if the item being added to
the hotkey menu is a variable.
Prompts user to press SEND softkey to initiate a memory to device
transfer.
Indicates that the field width for the current arithmetic variable
exceeds the device- specified description edit format.
Indicates that the precision for the current arithmetic variable
exceeds the device- specified description edit format.
Asked after displaying device status. Softkey answer determines
whether next 50 occurrences of device status will be ignored or
displayed.
An invalid character for the variable type was entered.
4-4
Rosemount Inc
EN
Message
Description
Illegal date
Illegal month
Illegal year
Incomplete exponent
The day portion of the date is invalid.
The month portion of the date is invalid.
The year portion of the date is invalid.
The exponent of a scientific notation floating point variable is
incomplete.
The value entered is not complete for the variable type.
Polling for multidropped devices at addresses 1–15.
Asks whether the user should be allowed to edit the variable from
the hotkey menu if the item being added to the hotkey menu is a
variable.
There is no configuration saved in memory available to re-configure
off-line or transfer to a device.
Poll of address zero fails to find a device, or poll of all addresses
fails to find a device if auto-poll is enabled.
There is no menu named “hotkey” defined in the device description
for this device.
There are no device descriptions available to be used to configure
a device offline.
There are no device descriptions available to simulate a device.
Incomplete field
Looking for a device
Mark as read only
variable on hotkey menu?
No device configuration
in configuration memory
No Device Found
No hotkey menu available
for this device.
No offline devices
available.
No simulation devices
available.
No
UPLOAD_VARIABLES in
ddl for this device
No Valid Items
OFF KEY DISABLED
Online device
disconnected with unsent
data. RETRY or OK to
lose data.
Out of memory for hotkey
configuration. Delete
unnecessary items.
Overwrite existing
configuration memory
Press OK.
Restore device value?
There is no menu named “upload_variables” defined in the device
description for this device. This menu is required for offline
configuration.
The selected menu or edit display contains no valid items.
Appears when the user attempts to turn the HC off before sending
modified data or before completing a method.
There is unsent data for a previously connected device. Press
RETRY to send data, or press OK to disconnect and lose unsent
data.
There is no more memory available to store additional hotkey
items. Unnecessary items should be deleted to make space
available.
Requests permission to overwrite existing configuration either by a
device-to-memory transfer or by an offline configuration. User
answers using the softkeys.
Press the OK softkey. This message usually appears after an error
message from the application or as a result of HART
communications.
The edited value that was sent to a device was not properly
implemented. Restoring the device value returns the variable to its
original value.
4-5
EN
Rosemount Inc
Message
Description
Save data from device to
configuration memory
Saving data to
configuration memory.
Sending data to device.
There are write only
variables which have not
been edited. Please edit
them.
There is unsent data.
Send it before shutting
off?
Too few data bytes
received
Transmitter Fault
Prompts user to press SAVE softkey to initiate a device-to-memory
transfer.
Data is being transferred from a device to configuration memory.
Units for <variable label>
has changed. Unit must
be sent before editing, or
invalid data will be sent.
Unsent data to online
device. SEND or LOSE
data
Use up/down arrows to
change contrast. Press
DONE when done.
Value out of range
<message> occurred
reading/writing <variable
label>
<variable label> has an
unknown value. Unit must
be sent before editing, or
invalid data will be sent.
Data is being transferred from configuration memory to a device.
There are write-only variables which have not been set by the user.
These variables should be set or invalid values may be sent to the
device.
Press YES to send unsent data and turn the HC off. Press NO to
turn the HC off and lose the unsent data.
Command returns fewer data bytes than expected as determined
by the device description.
Device returns a command response indicating a fault with the
connected device.
The engineering units for this variable have been edited. Send
engineering units to the device before editing this variable.
There is unsent data for a previously connected device which must
be sent or thrown away before connecting to another device.
Gives direction to change the contrast of the HC display.
The user-entered value is either not within the range for the given
type and size of variable or not within the min/max specified by the
device.
Either a read/write command indicates too few data bytes received,
transmitter fault, invalid response code, invalid response command,
invalid reply data field, or failed pre- or post-read method; or a
response code of any class other than SUCCESS is returned
reading a particular variable.
A variable related to this variable has been edited. Send related
variable to the device before editing this variable.
4-6
Rosemount Inc
EN
LCD Meter
In addition to the output, the LCD meter displays abbreviated diagnostic
messages for troubleshooting the transmitter. To determine the cause of a
message, use a Model 275 HART Communicator to further interrogate the
transmitter. A description of each diagnostic message is identified in Table 4-4.
The device sometimes requires additional interrogation to determine the source of
the warning. Contact Rosemount Customer Central at (800) 999-9307 or your local
Rosemount support center for further information.
TABLE 4-4. LCD Meter Diagnostics
Alarm
Description
DEV FAIL
The top line of the display scrolls through the following three messages:
• “BAD”
• “DEV”
• “FAIL”
This message indicates one of several conditions. For example, the transmitter
may have experienced an electronics failure while attempting to store information.
If diagnostics indicate an electronics failure, replace the transmitter with a new
one. Contact the nearest Rosemount Field service Center if necessary.
The top line of the display scrolls through the following three messages:
• “BAD”
• “SNSR”
• “FAIL”
The bottom line display s the name of the sensor that has failed. This message
indicates that the transmitter has detected an open or shorted sensor condition.
The sensor may be disconnected, connected improperly, or malfunctioning.
Check the sensor connections and sensor continuity.
The top line of the display alternates between “UNCRN” and the sensor value.
The bottom line will display the name of the sensor for which this message
applies. The uncertain message is displayed when the sensor reading is outside
of the acceptable temperature range for the particular sensor type.
During a loop test or a a 4–20 mA output trim, the analog output defaults to a fixed
value. The top line of the display alternates between “FIXED” and the amount of
current selected in milliamperes. The bottom line will hold on “AO mA.”
SNSR
FAIL
UNCRN
FIXED
4-7
EN
Rosemount Inc
Alarm
Description
OFLOW
The location of the decimal point, as configured in the meter setup, is not
compatible wit the value to be displayed by the meter. For example, if the meter is
measuring a process temperature greater than 9.9999 degrees and the meter
decimal point is set to 4-digit precision, the meter will display an “OFLOW”
message because it is only capable of displaying a maximum of 9.9999 when set
to 4-digit precision.
When a failure occurs and the meter is configured to display Primary Variable
Percent of Range and/or Analog Output, the top line o the meter will display
“ALARM.” This indicates that the transmitter is in failure mode.
When the transmitter output saturates and the meter is configured to display
Primary Variable Percent of Range and/or Analog Output, the top line of the meter
will display “SAT.” This indicates that the transmitter output has reached saturation
level.
ALARM
SAT
4-8
EN
SECTION
A
Reference Data
Specifications . . . . . . . . . . . . . . . . . . . . . . . . . . . . . . . . . . . . . . . . . . . . .
Dimensional Drawings . . . . . . . . . . . . . . . . . . . . . . . . . . . . . . . . . . . . .
Ordering Information . . . . . . . . . . . . . . . . . . . . . . . . . . . . . . . . . . . . . .
Configuration . . . . . . . . . . . . . . . . . . . . . . . . . . . . . . . . . . . . . . . . . . . . .
page A-1
page A-8
page A-11
page A-13
SPECIFICATIONS
Functional
Inputs
User-selectable; sensor terminals rated to 42.4 V dc.
Output
2-wire 4–20 mA, linear with temperature or input; digital output signal
superimposed on 4–20 mA signal, available for a HART communicator or control
system interface
Isolation
Input/output isolation tested to 500 V ac rms (707 V dc) at 50/60 Hz
Local Display
The optional five-digit integral LCD meter includes a floating or fixed decimal
point. It also displays options for engineering units (°F, °C, °R, K, Ω, and
millivolts), milliamperes, and percent of span. The display can be configured to
alternate between selected display options. Display settings are preconfigured at
the factory according to the standard transmitter configuration. They can be
reconfigured in the field using a HART Communicator.
Humidity Limits
0–99% relative humidity, non-condensing
Turn-on Time
Performance within specifications is less than 5.0 seconds after power is applied to
transmitter when damping value is set to zero seconds
Update Time
Approximately 0.5 seconds
Power Supply
An external power supply is required. The transmitter operates on 12.0 to 42.4 V
dc transmitter terminal voltage with load resistance between 250 and 1100 ohms.
A minimum of 17.75 V dc power supply is required with a load of 250 ohms.
Transmitter power terminals are rated to 42.4 V dc.
A-1
EN
Rosemount Inc
NOTE
A HART Communicator requires a loop resistance between 250 and 1100 ohms. Do
not communicate with the transmitter when power is below 12 V dc at the
transmitter terminals.
Temperature Limits
Operating Limit
With LCD Meter
Without LCD Meter
°F
–4 to 185
–40 to 185
°C
–20 to 85
–40 to 85
Storage Limit
°F
–50 to 185
–58 to 248
°C
–45 to 85
–50 to 120
Failure Mode
The values at which the transmitter drives its output in failure mode depends on
whether it is configured to standard, NAMUR-compliant (NAMUR
recommendation NE 43, June 1997), or custom operation. The values for standard
and NAMUR-compliant operation are as follows:
Table A-5. Standard and NAMUR-Compliant Operation Parameters
Linear Output:
Fail high:
Fail low:
Standard
NAMUR-Compliant
3.9 ≤ I ≤ 20.5 mA
21.0 ≤ I ≤ 23.0 mA (Default)
I ≤ 3.75 mA
3.8 ≤ I ≤ 20.5 mA
21.0 ≤ I ≤ 23.0 mA
I ≤ 3.6 mA
Custom Alarm and Saturation Levels
Custom factory configuration of alarm and saturation level is available with option
code C1. These values can also be configured in the field using a HART
Communicator.
A-2
Rosemount Inc
EN
Performance
The Model 644 transmitters maintain a specification conformance of at least 3σ.
Accuracy
Table A-6. Model 644 Input Options and Accuracy.
Sensor
Options Sensor Reference
2-, 3-, 4-Wire RTDs
Pt 100
PT 100
Pt 200
Pt 500
Pt 1000
Ni 120
Cu 10
IEC 751, 1995
(α = 0.00385)
JIS 1604, 1981
(α = 0.003916)
IEC 751, 1995
(α = 0.00385)
IEC 751, 1995
(α = 0.00385)
IEC 751, 1995
(α = 0.00385)
Edison Curve
No. 7
Edison Copper
Winding No. 15
Thermocouples(4)
Type B(5) NIST Monograph
Type E
Type J
Type K(6)
Type N
Type R
Type S
Type T
DIN
Type L
175, IEC 584
NIST Monograph
175, IEC 584
NIST Monograph
175, IEC 584
NIST Monograph
175, IEC 584
NIST Monograph
175, IEC 584
NIST Monograph
175, IEC 584
NIST Monograph
175, IEC 584
NIST Monograph
175, IEC 584
DIN 43710
Input Ranges
Recommended
Min. Span (1)
Digital
Accuracy(2)
°C
–200 to
850
–200 to
645
–200 to
850
–200 to
850
–200 to
300
–70 to
300
–50 to
250
°F
–328 to
1562
–328 to
1193
–328 to
1562
–328 to
1562
–328 to
572
–94 to
572
–58 to
482
°C
10
°F
18
°C
± 0.15
°F
± 0.27
10
18
± 0.15
± 0.27
10
18
± 0.27
10
18
± 0.19
±
0.49
± 0.34
10
18
± 0.19
± 0.34
10
18
± 0.15
± 0.27
10
18
±1.40
± 2.52
100 to
1820
–50 to
1000
–180 to
760
–180 to
1372
–200 to
1300
0 to
1768
0 to
1768
–200 to
400
–200 to
900
212 to
3308
–58 to
1832
–292 to
1400
–292 to
2502
–328 to
2372
32 to
3214
32 to
3214
–328 to
752
–328 to
1652
25
45
± 0.77
± 1.39
25
45
± 0.20
± 0.36
25
45
± 0.35
± 0.63
25
45
± 0.50
± 0.90
25
45
± 0.50
± 0.90
25
45
± 0.75
± 1.35
25
45
± 0.70
± 1.26
25
45
± 0.35
± 0.63
25
45
± 0.35
± 0.63
A-3
D/A
Accuracy
(3)
±0.03%
of span
±0.03%
of span
±0.03%
of span
±0.03%
of span
±0.03%
of span
±0.03%
of span
±0.03%
of span
±0.03%
of span
±0.03%
of span
±0.03%
of span
±0.03%
of span
±0.03%
of span
±0.03% of
span
±0.03% of
span
±0.03% of
span
±0.03% of
span
EN
Rosemount Inc
Sensor
Options Sensor Reference
DIN
Type U
DIN 43710
Type
W5Re/
W26Re
Millivolt
Input
ASTM E 988–96
2-, 3-, 4-Wire Ohm Input
Input Ranges
–200 to
600
0 to
2000
Recommended
Min. Span (1)
–328 to
1112
32 to
3632
Digital
Accuracy(2)
25
45
± 0.35
± 0.63
25
45
± 0.70
± 1.26
–10 to 100 mV
3 mV
±0.015 mV
0 to 2000 ohms
20 ohm
±0.45 ohm
D/A
Accuracy
(3)
±0.03% of
span
±0.03% of
span
±0.03% of
span
±0.03% of
span
(1) No minimum or maximum span restrictions within the input ranges. Recommended minimum span will hold
noise within accuracy specification with damping at zero seconds.
(2) Digital accuracy: Digital output can be accessed by HART Communicator or Rosemount control system.
(3) Total Analog accuracy is the sum of digital and D/A accuracies.
(4) Total digital accuracy for thermocouple measurement: sum of digital accuracy +0.5 °C
(5) Digital accuracy for NIST Type B T/C is ±3.0 °C from 100 to 300 °C.
(6) Digital accuracy for NIST Type K T/C is ±0.70 °C from –292 to –130 °F (–180 to –90 °C).
Accuracy Example
When using a Pt 100 (α = 0.00385) sensor input with a 0 to 100 °C span: Digital
accuracy would be ±0.15 °C, D/A accuracy would be ±0.03% of 100 °C or ±0.03 °C,
Total = ±0.18 °C.
A-4
Rosemount Inc
EN
Ambient Temperature Effect
Transmitters can be installed in locations where the ambient temperature is
between –40 and 85 °C (–40 and 185 °F).
Sensor Options
Temperature Effects per
1.0 °C (1.8 °F) Change in
Ambient Temperature(1)
Ranges
D/A Effect
2-, 3-, 4-Wire RTDs
Pt 100
(α = 0.00385)
PT 100
(α = 0.003916)
Pt 200
• 0.003 °C (0.0054 °F)
Entire sensor input range
0.001% of span
• 0.003 °C (0.0054 °F)
Entire sensor input range
0.001% of span
• 0.004 °C (0.0072 °F)
Pt 500
• 0.003 °C (0.0054 °F)
Pt 1000
• 0.003 °C (0.0054 °F)
Entire sensor input range
Entire sensor input range
Entire sensor input range
Entire sensor input range
Entire sensor input range
0.001% of span
0.001% of span
0.001% of span
0.001% of span
0.001% of span
Ni 120
• 0.003 °C (0.0054 °F)
Cu 10
• 0.03 °C (0.054 °F)
Thermocouples
• 0.014 °C
• 0.032 °C – (0.0025% of
(R – 300))
• 0.054 °C – (0.011% of
(R – 100))
• 0.005 °C +(0.00043% of R)
• R ≥ 1000°C
• 300 °C ≤ R < 1000 °C
• 100 °C ≤ R< 300 °C
0.001% of span
• All
• 0.0054 °C +(0.0029%of R)
• 0.0054 °C + (0.0025% of
absolute value R)
• 0.0061 °C +(0.00054% of R)
• 0.0061 °C + (0.0025% of
absolute value R)
• 0.0068 °C +(0.00036% of R)
• R ≥ 0 °C
• R < 0 °C
0.001% of span
0.001% of span
Type R, S, W5Re/
W26Re
Type T
•
•
•
•
•
•
•
•
DIN Type L
•
Type B
Type E
Type J
Type K
Type N
•
DIN Type U
•
•
Millivolt Input
•
0.016 °C
0.023 °C – (0.0036% of R)
0.0064 °C
0.0064 °C +(0.0043% of
absolute value R)
0.0054 °C + (0.00029%
of R)
0.0054 °C +(0.0025% of
absolute value R)
0.0064 °C
0.0064 °C +(0.0043% of
absolute value R)
0.0005 mV
2-, 3-, 4-Wire Ohm Input0.0084 Ω
• R ≥ 0 °C
• R < 0 °C
0.001% of span
• All
0.001% of span
0.001% of span
R ≥ 200°C
R < 200 °C
R ≥ 0 °C
R < 0 °C
0.001% of span
• R ≥ 0 °C
• R < 0 °C
0.001% of span
• R ≥ 0 °C
• R < 0 °C
0.001% of span
Entire sensor input range
Entire sensor input range
0.001% of span
0.001% of span
(1) Change in ambient is with reference to the calibration temperature of the transmitter 68 °F (20 °C) from
factory.
A-5
EN
Rosemount Inc
Temperature Effects Example
When using a Pt 100 (α = 0.00385) sensor input with a 0–100 °C span at 30 °C
ambient temperature:
Digital Temperature Effects:
0.003 °C x (30 – 20) = 0.03 °C
D/A Effect:
[0.001% of 100] x (30 – 20) = 0.01 °C
Worst Case Error:
Digital + D/A + Digital Temperature Effects + D/A Effects = 0.15 °C
+ 0.03 °C + 0.03 °C + 0.01 °C = 0.22 °C
Total Probable Error:
0.15 2 + 0.03 2 + 0.03 2 + 0.01 2 = 0.16°C
RTDs and thermocouples have a stability of ±0.1% of reading or 0.1 °C (whichever
is greater) for twelve months.
Power Supply Effect
Less than ±0.005% of span per volt
Vibration Effect
The Model 644H and Model 644R are tested to the following specifications with no
effect on performance:
Frequency
Vibration
10–60 Hz
60–500 Hz
0.21 mm peak displacement
3 g peak acceleration
A-6
Rosemount Inc
EN
CE Electromagnetic Compatibility Compliance Testing
The Models 644H and 644R meet all requirements listed under IEC 61326:
Amendment 1, 1998.
Self Calibration
The analog-to-digital measurement circuitry automatically self-calibrates for each
temperature update by comparing the dynamic measurement to extremely stable
and accurate internal reference elements.
Electrical Connections
Power and Sensor Terminals
Model 644H
Compression screws permanently fixed to
terminal block
Model 644R:
Compression screw permanently fixed to
front panel
WAGO® spring clamp terminals are optional (option code G5)
Clips permanently fixed to
terminal block
Clips permanently fixed to front panel
Materials of Construction
Construction Material for the Electronics Housing and Terminal Block
Model 644H
Model 644R:
Noryl® glass reinforced
Lexan® polycarbonate
The Model 644H installs in a connection head or universal head mounted directly
on a sensor assembly, apart from a sensor assembly using a universal head, or to a
DIN rail using an optional mounting clip. The Model 644R mounts directly to a
wall or to a DIN rail.
Weight
Code
Options
Add(1)
Model 644H
M5
J5, J6
J5, J6
Model 644R
Head Mount
LCD Meter
Universal Head, Standard Cover
Universal Head, Meter Cover
Rail Mount
78 (2.75)
34 (1.20)
520 (18.43)
604 (21.27)
173 (6.10)
(1) All weights are in grams (ounces).
Enclosure Ratings (Model 644H)
Option codes J5 and J6 are NEMA 4X, IP66, and IP68.
Option code J6 is CSA Enclosure Type 4X
A-7
Rosemount Inc
DIMENSIONAL DRAWINGS
Model 644R
Model 644H
Shown with Standard Compression
Screw Terminals
Sensor Terminals
60
(2.4)
33 (1.3)
Meter
Connector
24 (1.0)
Communication
Terminals
Power Terminals
Failure
Mode
Switch
Power
Terminals
33 (1.30)
644-1360A02A
Standard
Sensor
Terminals
Shown with WAGO® Spring
Clamp Terminals
36
(1.4)
104
(4.1)
WAGO Spring
Clamp Sensor
Terminals
Meter
Connector
Communication
Terminals
Power
Terminals
60
(2.4)
33 (1.3)
24 (1.0)
Failure
Mode
Switch
34 (1.33)
A-8
644-1360B02A
82
(3.2)
644-1105E01A. 1101A01A
EN
Rosemount Inc
EN
Threaded-Sensor Universal Head
(Option code J5 or J6)
Integral DIN Style Sensor
Connection Head
Shown with LCD Meter
(see note below)
112 (4.41)
Label
96 (3.76)
104 (4.09)
95 (3.74)
Meter Cover
103 (4.03)
with LCD Meter
128 (5.04)
with LCD Meter
75 (2.93)
SST “U” Bolt
Mounting, 2inch Pipe
100
(3.93)
Note: A “U” Bolt is shipped with each universal Note: The DIN Style Integral sensor connection
head unless assembly option X1, X2, or X3 is head is only available through Volume 2 of the
ordered. However, since the head can be
Rosemount Temperature Sensors and
integrally mounted to the sensor, it may not
Accessories Product Data Sheet (document
need to be used.
number 00810-0101-2654).
Dimensions are in millimeters (inches)
A-9
Rosemount Inc
Mounting
G-Rail (asymmetric)
Top Hat Rail (symmetric)
Universal Clip for Mounting to
a Wall or a Rail
(part number 03044-4301-0001)
Mounting
Hardware
Transmitter
Transmitter
Rail Clip
Rail Clip
Top Hat Rail
Grooves
Screw Holes
for Mounting
to a Wall
3044-4001A01B,
644-5302B01A, D02A
G-Rail Grooves
Mounting
Hardware
Model 644H Retrofit Kit
Existing Threaded Sensor
Connection Head
(former option code L1)
Kit includes
replacement
bracket and
screws.
Note: Kit (part number 00644-5301-0010 includes
mounting hardware and both types of rail kits.
A-10
Note: Kit (part number 00644-53210010) includes a new mounting bracket
and the hardware necessary to facilitate
the installation.
3044-0000C01B, D01B,
644-1041B02B,G02B
EN
Rosemount Inc
EN
ORDERING INFORMATION
Table A-7. Model 644H and Model 644R Ordering Table
• = Available
— = Not available
Model
Product Description
644H
644R
Smart Head Mount Temperature Transmitter
Smart Rail Mount Temperature Transmitter
Code
E5
I5
K5
I6
C6
N1
ED
I1
E7
N7
I7
NA
Hazardous Area Certifications
FM Explosion-Proof Approval
FM Intrinsic Safety and Non-Incendive Approval
FM Intrinsic Safety, Non-Incendive, and Explosion-Proof
Approval Combination
CSA Intrinsic Safety and Non-Incendive Approval
CSA Intrinsic Safety, Non-Incendive, and Explosion-Proof
Approval Combination
CENELEC/BASEEFA Type n Approval
CENELEC/KEMA Flameproof Approval
CENELEC/BASEEFA Intrinsic Safety Approval
SAA Flameproof Approval. Consult factory for availability.
SAA Type N Approval. Consult factory for availability
SAA Intrinsic Safety Approval. Consult factory for availability.
No Approval
Head
Mount
Rail
Mount
•
—
—
Enclosure
Purchase
Required?
Head
Mount
Rail
Mount
Yes
No*
Yes
•
•
•
—
•
—
No*
Yes
•
•
•
—
Yes
Yes
No*
Yes
Yes
No*
No*
•
•
•
•
•
•
•
—
—
•
—
—
•
•
* Transmitters with intrinsic safety approvals can be ordered without enclosures. However, to meet intrinsic
safety requirements, the transmitter must be installed in an enclosure with IP20 or higher rating. Model 644H
transmitters ordered with enclosure options J5 or J6 meet this requirement.
Code
X1
X2
X3
Options
Assembly Options (Model 644H Only)
Assemble Transmitter to a Sensor Assembly (hand tight, Teflon®
(PTFE) tape where appropriate, fully wired)
Assemble Transmitter to a Sensor Assembly (hand tight, no Teflon
(PTFE) tape, unwired)
Assemble Transmitter to a Sensor Assembly (wrench tight, Teflon
(PTFE) where appropriate, fully wired)
•
—
•
—
•
—
Note: If ordering X1, X2, X3, specify the same code on the sensor model number.
Option codes X1 and X3 are not available with CSA Approvals (Hazardous Area Certifications C6 or I6)
Enclosure Options
Threaded Style Temperature Sensor Users (Americas and Asia Pacific)
Remote/Integral Mount
J6
Universal Head (Junction Box), Aluminum Alloy with 2-in. SST Pipe Bracket
•
—
(M20 Entries)
A-11
EN
Rosemount Inc
Table A-7. Model 644H and Model 644R Ordering Table
• = Available
— = Not available
J5
J6
C1
A1
CN
F6
C2
C4
Q4
M5
G1
G2
G3
G5
DIN Plate Style Temperature Sensor Users (EMEA-Europe, Middle East,
and Africa)
Remote Mount
Universal Head (Junction Box), Aluminum Alloy with 2-in. SST Pipe Bracket
(M20 Entries)
Universal Head (Junction Box), Aluminum Alloy with 2-in. SST Pipe Bracket (½–
14 NPT Entries)
Integral Mount
*****Order connection head through Volume 2 of the Rosemount Temperature
Sensor and Accessories Product Data Sheet
(document number 008100101-2654) sensor model number*****
Configuration Options
Factory Custom Configuration of Alarm and Saturation Levels, Date, Descriptor,
and Message Fields.
Analog Output Levels Compliant with NAMURRecommendations NE 43:June 1997
Analog Output Levels Compliant with NAMUR-Recommendations NE 43: June
1997: Alarm Configuration Low
60 Hz Line Voltage Filter
Calibration Options
Transmitter-Sensor Matching Trim to specific Rosemount RTD Calibration
Schedule.
5-Point Calibration. Use Q4 option to generate a calibration certificate
Calibration Certificate. 3-Point standard; use C4 with Q4 option for a 5-point
calibration certificate.
Accessory Options (Model 644H only)
LCD Meter Option. Enclosure Option J5 or J6 is required when ordering flameproof or explosion-proof approvals.
External Ground Screw. Only available with options J5 or J6.
Cable Gland. Only available with option code J5.
Cover Chain. Only available with enclosure options J5 or J6. Not available with
LCD meter option code M5.
WAGO Spring Clamp Terminals
Typical Model Number – Americas and Asia Pacific: 644H E5 X1 J6 M5
Typical Model Number – Europe, Middle East, Africa: 644H ED X1 M5
A-12
F6
•
—
•
—
•
•
•
•
•
•
•
•
•
•
•
•
•
•
•
—
•
•
•
—
—
—
•
—
Rosemount Inc
EN
Table A-8. Transmitter Accessories
Part Description
Aluminum Alloy Universal Head, Standard Cover—M20 Entries
Aluminum Alloy Universal Head, Meter Cover—M20 Entries
Aluminum Alloy Universal Head, Standard Cover—½-14 NPT Entries
Aluminum Alloy Universal Head, Meter Cover—½-14 NPT Entries
LCD Meter (includes meter and meter space assembly)
LCD Meter Kit (includes meter and meter space assembly,
and meter cover)
Ground Screw Assembly Kit
Kit, Hardware for Mounting a Model 644H to a DIN rail (includes clips
for symmetrical and asymmetrical rails)
Kit, Hardware for Retrofitting a Model 644H in an existing Threaded
Sensor Connection Head (former option code L1)
Blank Transmitter Configuration Labels (sheet of 48)
Universal Clip for Rail or Wall Mount
24 Inches of Symmetric (Top Hat) Rail
24 Inches of Asymmetric (G) Rail
Ground Clamp for symmetric or asymmetric rail
End Clamp for symmetric or asymmetric rail
Snap Rings Kit (used for assembly to a DIN sensor)
Part Number
Availability
00644-4420-0002
00644-4420-0102
00644-4420-0001
00644-4420-0101
00644-4430-0002
00644-4430-0001
•
•
•
•
•
•
00644-4431-0001
00644-5301-0010
•
•
00644-5321-0010
•
00644-5154-0001
03044-4103-0001
03044-4200-0001
03044-4201-0001
03044-4202-0001
03044-4203-0001
00644-4432-0001
•
•
•
•
CONFIGURATION
Standard
Unless specified, the transmitter will be shipped as follows:
Table A-9. Standard Configuration Parameters
Sensor Type:
4 mA Value:
20 mA Value:
Damping:
Output:
Failure Mode:
LIne Voltage Filter:
Tag:
RTD, PT 100 (α = 0.00385, 4-wire)
0 °C
100 °C
5 seconds
Linear with temperature
High/Upscale
50 Hz
See “Tagging”
A-13
•
•
•
EN
Rosemount Inc
Custom
The transmitter can be ordered with custom configuration. Use Table A-10 to
determine the requirements when specifying the custom configuration.
Table A-10. Custom Configuration Requirements/Specification
Option Code
Requirements/Specification
C1: Factory Configuration Data
Date: day/month/year
Descriptor: 16 alphanumeric characters
Message: 32 alphanumeric character
Analog Output: Alarm and saturation levels
Specify a Rosemount 65, 68, or 78 RTD order with a special
characterization curve
See Table A-5, “Standard and NAMUR-Compliant Operation
Parameters,” on page 2
See Table A-5, “Standard and NAMUR-Compliant Operation
Parameters,” on page 2
Will include five-point calibration at 0, 25, 50, 75, and 100%
analog and digital output points. Use with Rosemount Calibration
Certificate Q4.
Calibrated to a 60 Hz line voltage filter instead of the standard
50 Hz filter
C2: Transmitter Sensor Matching
A1: NAMUR-compliant
CN: NAMUR-Compliant, Low Alarm
C4: Five Point Calibration
F6: 60 Hz Line Filter
Tagging
Hardware Tag
•
•
•
•
•
Software Tag
No charge
Tagged in accordance with customer requirements
Tags are adhesive labels
Permanently attached to transmitter
Character height is 1/16 -in (1.6 mm)
• No charge
• The transmitter can store up to 8 characters. If no
characters are specified, the first 8 characters of
the hardware tag are the default.
A-14
EN
SECTION
B
Hazardous Locations Certifications
Safety Messages . . . . . . . . . . . . . . . . . . . . . . . . . . . . . . . . . . . . . . . . . .
Hazardous Locations Certifications . . . . . . . . . . . . . . . . . . . . . . . . . . .
European ATEX Directive Information. . . . . . . . . . . . . . . . . . . . . . . .
Installation Drawings . . . . . . . . . . . . . . . . . . . . . . . . . . . . . . . . . . . . . .
page B-1
page B-1
page B-4
page B-5
SAFETY MESSAGES
Instructions and procedures in this section may require special precautions to
ensure the safety of the personnel performing the operations. Information that
raises potential safety issues is indicated by a warning symbol ( ). Please refer to
the following safety messages before performing an operation preceded by this
symbol.
Once a device labeled with multiple approval types is installed, it should not be reinstalled
using any of the other labeled approval types. To ensure this, the approval label should be
permanently marked to distinguish the used from the unused approval type(s).
HAZARDOUS LOCATIONS CERTIFICATIONS
The Models 644 are available with circuitry that is suitable for intrinsically safe
operation. The Model 644H is available with optional explosion-proof enclosures
and can be specified for non-incendive operation. Individual transmitters are
clearly marked with a tag indicating the approvals they carry.
To maintain certified ratings for installed transmitters, they must be installed in
accordance with all applicable installation codes and approval drawings. Verify
that the operating atmosphere of the transmitter is consistent with the
appropriate hazardous locations certification.
IMPORTANT
Once a device labeled with multiple approval types is installed, it should not be
reinstalled using any of the other labeled approval types. To ensure this, the
approval label should be permanently marked to distinguish the used from the
unused approval type(s).
B-1
EN
Rosemount Inc
Factory Mutual (FM) Approvals
E5
Explosion-Proof for Class I, Division 1, Groups B, C, and D. Dust-Ignition
Proof for Class II, Division 1, Groups E, F, and G. Dust-Ignition Proof for
Class III, Division 1 hazardous locations when installed in accordance with
Rosemount Drawing 00644-1049. Non-Incendive for Class I, Division 2,
Groups A, B, C, and D. Ambient temperature limits: –50 to 85 °C. Conduit
seal not required for compliance with NEC 501-5a(1). Temperature Code T5
(Tamb = 85 °C)
NOTE:
Approval E5 is only available with 644H option codes J5 and J6.
I5
Intrinsically Safe for Class I, II, III, Division 1, Groups A, B, C, D, E, F, G;
Non-incendive for Class I, Division 2, Groups A, B, C, D. Suitable for indoor
and outdoor locations NEMA 4x. Ambient temperature limits: –50 to 80 °C
when installed in accordance with Rosemount Drawing 00644-0009. FM
Entity Parameters: See installation drawing 00644-0009. Temperature Code
T5 (Tamb = 80 °C) (T6 (Tamb = 40 °C))
Special Conditions for Safe Use (X):
When the ouput of the associated apparatus does not exceed Po = 0.6 Watts,
the temperature code is T6 (Tamb = 50 °C)
K5
Combination of E5 and I5
NOTE:
Approval K5 is only available with Model 644H option codes J5 and J6.
Canadian Standards Association (CSA) Approvals
I6
Intrinsically safe for Class I, Division 1, Groups A, B, C, and D when
connected in accordance with Rosemount drawing 00644-1064
C6
Combination of I6 and the following: Explosion-Proof for Class I, Division 1,
Groups B, C, and D. Dust-ignition proof for Class II, Division 1, Groups E, F,
and G. Dust-ignition proof for Class III, Division 1 hazardous locations when
installed in accordance with Rosemount Drawing 00644-1059. Suitable for
Class I, Division 2, Groups A, B, C, and D.
NOTE:
Approval C6 is only available with Model 644H option code J6.
B-2
Rosemount Inc
EN
CENELEC/KEMA Approvals
ED
ATEX Category II 2 G Certification number KEMA 99ATEX8715
Flameproof (Zone 1) (Model 644H only)
EEx d IIC T6 (Tamb = –40 to 65 °C).
Requires a connection head or Universal head.
CENELEC/British Approvals Service for Electrical Equipment in
Flammable Atmospheres (BASEEFA) Approvals
I1
ATEX Category II 1 G Certification number BAS00ATEX1033X
Intrinsically Safe Operation (Zones 0)
EExia IIC T6 (Tamb = –60 to 40 °C)
EExia IIC T5 (Tamb = –60 to 50 °C)
EExia IIC T5 (Tamb = –60 to 40 °C)
EExia IIC T4 (Tamb = –60 to 80 °C)
Entity Parameters: See appropriate approval certificate
Special Conditions for Safe Use (X):
The apparatus must be installed in an enclosure which affords it a degree of
protection of at least IP20. Non-metallic enclosures must have a surface
resistance of less than 1GΩ, light alloy or zirconimum enclosures must be
protected from impact and friction when installed.
N1
ATEX Category II 3 G Certification number BAS00ATEX3145
Type ‘nL’ Operation Non-Incendive Approval (Zone 2 only)
EEx nL IIC T5 (Tamb = –40 to 70 °C)
(Type ‘nL’ certification is only available as a complete assembly with the
Rosemount universal head, thermometer, and thermowell.)
Standard Australia Quality Assurance Service (SAA)
NOTE
Consult factory for SAA availability.
I7
Intrinsic Safety,
Ex ia IIC T5 (Tamb = –60 to 80 °C)
Ex ia IIC T4 (Tamb = –60 to 80 °C)
Entity Parameters: See appropriate approval certificate
B-3
EN
Rosemount Inc
Special Conditions for Safe Use (X):
The transmitter must be installed so that its external terminals and
communication pins are protected to at least IP20.
N7
Type n Approval,
Ex n IIC T6 (Tamb = –40 to 60 °C)
Special Conditions for Safe Use (X):
The assembly must be installed such that its external terminals and
communication pins are protected to at least the requirements of IP54.
E7
Flameproof Approval (Model 644H only)
Ex d IIC T6 (Tamb = 65 °C)
NOTE:
Flameproof certification is only available as a complete assembly with Rosemount
universal head – option codes J5 or J6.
Gostandart
Tested and approved by the Russian Metrological Institute GOSTANDART.
EUROPEAN ATEX DIRECTIVE INFORMATION.
Rosemount Model 644H and 644R Temperature Transmitters that have the
following labels attached have been certified to comply with Directive 94/9/EC of
the European Parliament and the Council as published in the Official Journal of
the European Communities No. L 100/1 on 19-April-1994.
B-4
Rosemount Inc
EN
The following information is provided as part of the labeling of the transmitter:
• Name and address of the manufacturer (Rosemount U.S.A)
•
0600
• Complete model number
• The serial number of the device
• Year of construction
• Marking for explosion protection:
BASEEFA ATEX Certification Number: BAS00ATEX1033X
II 1 G
EEx ia IIC T4/T5/T6
or KEMA ATEX Certification Number: KEMA 99ATEX8715
II 2 G
EEx d IIC T6
INSTALLATION DRAWINGS
The installation guidelines presented by the drawings must be followed in order to
maintain certified ratings for installed transmitters.
Rosemount Drawing 00644-1064, 1 Sheet,
Canadian Standards Association Intrinsic Safety Installation Drawing
Rosemount Drawing 00644-1059, 1 Sheet;
Canadian Standards Association Explosion-Proof Installation Drawing
Rosemount Drawing 00644-0009, 1 Sheet
Factory Mutual Intrinsic Safety Installation Drawing
Rosemount Drawing 00644-1049, 1 Sheet;
Factory Mutual Explosion-proof Installation Drawing
IMPORTANT
Once a device labeled with multiple approval types is installed, it should not be
reinstalled using any of the other labeled approval types. To ensure this, the
approval label should be permanently marked to distinguish the used from the
unused approval type(s).
B-5
EN
Rosemount Inc
Figure B-3. Canadian Standards Association (CSA) Intrinsic Safety Installation Drawing
00644-1064, Rev. AB
B-6
Rosemount Inc
EN
644-1059A01A
Figure B-4. Canadian Standards Association (CSA) Explosion-Proof Installation
Drawing 00644-1059, Rev. AC
B-7
Rosemount Inc
Figure B-5. Factory Mutual (FM) Intrinsic Safety Installation Drawing 00644-0009,
Rev. AA
644-0009A01A
EN
B-8
Rosemount Inc
EN
Figure B-6. Factory Mutual (FM) Explosion-Proof Installation Drawing 00644-1049,
Rev. AB
B-9
EN
Rosemount Inc
B-10
EN
SECTION
C
Model 644 and 244E Manual
Supplement
Old Transmitter . . . . . . . . . . . . . . . . . . . . . . . . . . . . . . . . . . . . . . . . . . . page C-2
New Transmitter . . . . . . . . . . . . . . . . . . . . . . . . . . . . . . . . . . . . . . . . . . page C-4
Specifications . . . . . . . . . . . . . . . . . . . . . . . . . . . . . . . . . . . . . . . . . . . . . page C-6
This manual supplement is intended to indicate the primary differences between
the old and new Models 644 and 244E. These differences are as follows:
• Transmitter design
• Sensor Wiring Diagrams
• Special Mounting Considerations
• Specifications
C-1
OLD
OLD TRANSMITTER
Transmitter Design
Models 644R and 244ER
644-01260B01B, 1105E01B,
1101A01A
Models 644H and 244EH
Two Mounting Holes
Sensor Wiring Diagrams
1 2 34
2-wire
RTD
and 1 2 3 4
1 2 3 4
1 2 3 4
12 3 4
3-wire * RTD with**4-wire T/C and
mV
Comp. RTD
RTD
Loop and and * Rosemount Inc. provides 4-wire sensors for all single element RTDs. You can use these
RTDs in 3-wire configurations by leaving the unneeded leads disconnected and insulated
with electrical tape.
** The transmitters must be configured for a 3-wire RTD in order to recognize an RTD with a
compensation loop.
644-0000B01B
Models 644 and 244E
Special Mounting Considerations
Mounting a Model 644H to a DIN Rail
G-Rail
Top Hat Rail
644-5301B01B,D01B
1. Assemble the appropriate rail clip
(part number 00644-5301-0001).
2. Attach the transmitter to a rail or panel.
3. Attach the thermowell to the pipe or process
container wall and attach sufficient lengths of
sensor lead wire. Tighten the connection
head cover.
4. Run the sensor lead wires from to the sensor
and set the transmitter failure mode switch.
5. Attach the sensor and power leads to the
transmitter.
To mount the Models 644H and 244EH in an existing L1
connection head, assemble the Model 644H retrofit kit
(part number 00644-5321-0001) to the transmitter as
shown. Then mount the assembly in the connection
head.
Kit includes replacement
bracket and screw
644-644-5051A01A
Use with an Existing Threaded Sensor Connection Head
NEW
NEW TRANSMITTER
Transmitter Design
Models 644H and 244EH
Models 644R and 244ER
644, 244-1360A02B, 1105E01B,
1101A01A
Captive Mounting
Screws and Springs
Hole in Middle
of Transmitter
Meter Connector
(Model 644H only)
Sensor Wiring Diagrams
1 2 3 4
2-wire
RTD
and 1 2 34
1 2 3 4
1 2 3 4
3-wire* RTD with**4-wire
RTD Comp. RTD
and Loop and 1 2 3 4
T/C
and
mV
* Rosemount Inc. provides 4-wire sensors for all single element RTDs. You can use these
RTDs in 3-wire configurations by leaving the unneeded leads disconnected and insulated with
electrical tape.
** The transmitters must be configured for a 3-wire RTD in order to recognize an RTD with a
compensation loop.
644-0000B01C,
Models 644 and 244E
Rosemount Inc
EN
Special Mounting Considerations
1. Secure the bottom of the mounting screw
sleeve with pliers. Remove the mounting
screws and springs.
2. Once the springs are removed, use the
new transmitter mounting screws to
assembly the transmitter to the DIN plate
and connection head. (Optional snap rings
(part number 00644-4432-0001) are
available to ease installation o an existing
DIN plate style sensor.)
Mounting
Springs
and
Screws
Mounting
Screw
Sleeves
SENSORS-0000A02B
Use with an Existing DIN Plate Style Sensor
To mount the new Models 644H or 244EH to an
existing threaded sensor connection head (former
option code L1), order the Models 644H and 244EH
retrofit kit (part number 00644-5321-0010). The fit
includes a new mounting bracket and all associated
hardware necessary to facilitate the installation of the
Models 644H and 244EH into the existing head.
Existing Threaded
Sensor Connection Head
Model 644H or
Model 244EH
Kit includes
replacement
bracket
HART Communicator (Model 644 only)
To guarantee proper transmitter functionality and communication, your Model
275 HART Communicator should contain device revision Dev v5 DD v2 or higher.
To check software device revision,
1. Turn on the communicator.
2. Select 1 Off-line, 1 New Configuration, Rosemount, 644 Temp
If you do not have this device revision, contact your local Rosemount
representative for information on receiving an upgrade.
C-5
644-644-5321A01A,
Use with an Existing Threaded Sensor Connection Head
EN
Rosemount Inc
SPECIFICATIONS
Old
(1)
BASEFFA
Power
Loop
Group II
C
Zones 0
and 1
Sensor
Cable
Load
New
Intrinsically Safe Installation Entity Parameters:
Umax:in
30 V dc
30 V dc
Imax:in
200 mA
200 mA
Wmax:in
1.0 W
1.0 W
• T5 (– 40 ≤ Ta ≤
40 °C)
• T4 (– 40 ≤ Ta ≤
80 °C)
0.67 W
• T5 (– 60 ≤ Ta
≤ 40 °C)
• T6 (– 40 ≤ Ta
≤ 40 °C)
Ceq
13.4 nF
Li
0 µH
0 µH
Uo
24.2 V dc
13.6 V dc
Io
33 mA
80 mA
Po
0.2 W
• T4 (– 40 ≤ Ta ≤
80 °C)
• T5 (– 60 ≤ Ta ≤
50 °C)
10 nF
0.08 W
IIC
IIB
IIA
IIC
IIB
IIA
Co (µF)
0.2
0.
6
1.6
0.7
5.1
18.5
Lo (mH)
31
93
248
5
23
48
Special Conditions for Safe Use: The apparatus
must be installed such that its external
terminals and the communication pins are
protected to at least IP20.
C-6
Special Conditions for Safe Use: The apparatus
must be installed in an enclosure which affords it a
degree of protection of at least IP20. Non-metallic
enclosures must have a surface resistance of less
than 1 GΩ, light alloy or zirconium enclosures must
be protected from impact and friction when
installed.
Rosemount Inc
EN
CSA(2) Intrinsically Safe Installation Connection Parameters:
Class I
Div. 1
Groups
A, B, C,
and D
T5 (– 50 ≤
Ta ≤ 60 °C)
• 30 V or less, 330
ohms or more
• 28 V or less, 300
ohms or more
• 25 V or less, 200
ohms or more
• 22 V or less, 180
ohms or more
T6 (– 50 ≤ Ta ≤
40 °C)
T5 (– 50 ≤ Ta ≤
60 °C)
T4 (– 50 ≤ Ta ≤
80 °C)
Class I
Div. 1
Groups C
and D
• 30 V or less, 150
ohms or more
T4 (– 50 ≤ Ta ≤
80 °C)
• 30 V or less, 340
ohms or more
• 28 V or less, 300
ohms or more
• 25 V or less, 240
ohms or more
• 22 V or less, 190
ohms or more
• 30 V or less, 330
ohms or more
• 28 V or less, 250
ohms or more
• 25 V or less, 240
ohms or more
• 22 V or less, 190
ohms or more
• 30 V or less, 230
ohms or more
• 28 V or less, 200
ohms or more
• 25 V or less, 160
ohms or more
Factory Mutual(3) Intrinsically Safe Installation Entity Parameters:
Power
Loop
Vi
30 V dc
Ii
250 mA
240 mA
Class I, II,
and III
Div. 1
Groups
A, B, C,
D, E, F,
and G
Pi
1.0 W
1.0 W
Sensor
30 V dc
• T5 (– 50 ≤ Ta ≤
60 °C)
0.67 W
• T5 (– 50 ≤ Ta
≤ 40 °C)
• T6 (– 50 ≤ Ta ≤
40 °C)
• T4 (– 50 ≤ Ta
≤ 80 °C)
• T5 (– 50 ≤ Ta ≤
50 °C)
Ci
0.008 µF
0.010 µF
Li
0
µH
0 µH
Vt
10.7 V dc
13.6 V dc
It
15.3 mA
22 mA
Po
0.04 W
0.11 W
Ca
2.23 µF
0.8 µF
La
140 mH
60.0 mH
(1) For more information see approval certificate, Old: Model 644H: 95C2010X, Model 244E: 95C2019X; New:
Model 644H: BAS00ATEX1033X, Model 244E: BAS00ATEX1034X
(2) For more information see Rosemount drawing 00644-1040, Rev. B (old) and 00644-1064,
Rev AA (new).
(3) For more information see Rosemount drawing 00644-1056, Rev. B (old) and 00644-0009,
Rev AA (new)
C-7
EN
Rosemount Inc
C-8