Download 13 STEPS TO A BASIC SEATING POSTURE Passive
Transcript
13 STEPS TO A BASIC SEATING POSTURE
Passive Wheelchairs
Introduction
This checklist has been devised as a tool to aid the basic assessment of a client in a passive
or comfort wheelchair. There are multitude of accessories available for this process and
we have chosen to focus on a small selection. For more information about accessories,
please refer to the Invacare Rea sales literature or go to www.invacare-rea.com or www.
invacare.co.uk
Thanks for contributing to safer seating posture!
Goal
•To evaluate the posture of the client
•To have a logical sequence in adjusting a seating system for your client
•To check how the client is seated after you have made a change in the existing
seating system
•To be able to measure differences before and after a fitting/ assessment
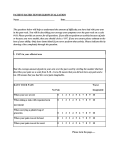
The first column of the checklist explains the 13 steps. It contains the main questions
and hints on how to check the critical areas.
The next column tells you what to adjust (refer to the user manual for product
specific information) and what to aim for.
The final column identifies possible problem areas and considerations:
if something does not work during one of the steps, the problem
area will give solution suggestions.
The checklist takes assumes that you are aware of the way the pelvis and spine
interface with each other and with the rest of the body.
Points to remember
•The client must sit in a wheelchair.
•Examination - explain what you want to check and that you will need to touch them - with their permission.
•The wheelchair sizes should correspond to the size of the client.
•As the different body parts are interconnected a change in one position may have consequences on previous adjustments.
•Make one adjustment at a time. Analyze the results before each adjustment.
© Invacare International Sàrl 2009
13 STEPS TO A BASIC SEATING POSTURE
Passive Wheelchairs
Checklist
What to adjust and
the aim
Possible problem
areas / Considerations
1. 1 Mapping the user
Remember that the client
relatives, therapist, etc.
may have different
opinions about goals
A. Activities in daily living
B. Physiological condition
C. Psychological factors
D. Social situation
E. Economical factors
1.2 Preparations
1. Tilt and recline the chair slightly
2. Remove the legrests
3. Put a cushion or
support under the feet
Relaxed feet position
Check pressure distribution of the buttocks with
your hand comparing
backrest with seating
2. Position of buttocks
in the chair
Is the client sitting as far
into the seat as possible?
Should the backrest be
slightly reclined?
Lean the client forward
and check the position
from above by palpating
the buttocks.
Seat depth
The client should sit
as far back as possible
The upper inside of the
calf should not touch
the seat cushion.
Strive for a 2-3 cm space
To be done before and
after the adjustment
3. Pelvic symmetry
Palpate SIAS/ ASIS
Check whether the two
upper pelvic edges are
level.
After adjustment, check
pressure with two fingers,
between side guard and
Trochanter
© Invacare International Sàrl 2009
The hamstrings should be
relaxed. This is achieved
naturally if the user can
move their feet to
a preferred position
Seat width
Should be as narrow
as possible without
allowing direct pressure
Kneel in front of the client
so you are at eye level
with your hands when
palpating SIAS/ ASIS
The armrest sides should
“just” touch the buttock
sides at Trochanter area
13 STEPS TO A BASIC SEATING POSTURE
Passive Wheelchairs
Checklist
What to adjust and
the aim
4. Position of the feet
1. Check hamstring
tightness
2. Choose and add
legrests that correspond
to the preferred
position that the client
has selected
3. Check if the feet are
bearing weight
4. Check height of foot
plate
5. Check pelvic position
by SIAS
5. Position of thighs
Check if the thighs are
parallel and straight and
facing forward
Check that the hamstrings
are relaxed
6. Seat angle and cushion
1. Assess how the body
pressure should be
divided between seat
and backrest
2. Create a stable sitting
position
3. Insert your hand between client and seat,
little finger first, and feel
the pressure both
before and after the
adjustment
4. Check patient for comfort
5. Check risks of decubitus
(pressure ulcer) – use
the Norton scale
or similar and proceed
accordingly
© Invacare International Sàrl 2009
Footrest height, angle and
depth
Legrests angle
Calf pad support – adjust
height and depth
The feet should be
positioned so the pelvis
is in a natural position
Adjust the width of the
legrests to avoid pressure
on knees
The legs should be as
straight as possible
Adjust the seat angle (tilt)
with the lever at the rear
of the backrest
There should a large
contact area between
seat and backrest
Possible problem
areas / Considerations
Hamstrings should
never be tight – it will
pull the pelvis into a
backward rotation!
Check hamstring
tendons for relaxed
position
Pressure applied under
the soles of the feet
stimulate upright posture
and help to keep them
on the footplates
Use two fingers for
pressure checks at cushion
level – both top and front
The upper legs should not
be abducted, adducted or
wind-swept
Make sure that you have
a seat cushion that allows
enough space for the
ischial tuberocities
The seat should be tilted
just enough to maintain
balance and feel secure.
Check that eyes and ears
are level: this ensures that
the client remains alert
13 STEPS TO A BASIC SEATING POSTURE
Passive Wheelchairs
Checklist
7. Back angle
1. Check position of head and how it is balanced
in the spine
2. Lean the client forward
and check the position
from above by palpating
the both buttocks
What to adjust and
the aim
Adjust the backrest angle
with the lever at the rear
to a relaxed position
Check for comfort
Ears and eyes should be
parallel with the floor
and the complete
backrest should
support the backrest
of the client
8. Back height
Adjust the backrest height
Check for comfort and
mobility
Check with your hand for
pressure distribution
9. Back shape
Check support of
preferred posture.
Use your hand for
pressure evaluation
10. Arm rest
Evaluate the support both
for upper and lower trunk
by giving stabilisation with
your hands
© Invacare International Sàrl 2009
The support should
be at least up to the
client’s arm pits
If not sufficient adjust with wedges and/ or the
tension-adjustable
backrest
Strive for mobility
movement without
locking the posture
Possible problem
areas / Considerations
To avoid sliding out of the
chair, have the backrest as
upright as possible
Make sure that
the shoulder blades are
not pushed forward
Strive for a natural pelvic
position. Ensure that firm
support is given just at the
upper pelvis (sacrum-iliac
joint) to avoid backward
rotation of pelvis
Adjust height and depth
Shoulder area should
be relaxed
Does it give support
during transferal/ body
shifting
13 STEPS TO A BASIC SEATING POSTURE
Passive Wheelchairs
Checklist
11. Lateral / trunk
support
What to adjust and
the aim
Adjust the depth and
height
Create upper body
stability
The body posture
should be stable thanks
to rear rather than side
support
12. Head support
Adjust height and angle
and loosen all screws then
adjust from the bottom
to the top
Check the reason:
1. Support during
transportation
2. Tilt in space
Possible problem
areas / Considerations
Could another backrest
cushion/ backrest base
give better support?
Support area for
car- transportation
Neck and headrests
should be used when
seat angle is > 105º
Support area for
normal use
13. Tilt in space
Check interval of relevant
use
Adjust the backrest angle
with the lever at the rear
Make a final check with
your hand around the
user for distribution of
pressure - this will indicate
if optimum support is
being given
Tilt should be used
in short periods
for weight and pressure
distribution purposes
© Invacare International Sàrl 2009
As tilt increases,
the pressure distribution
transfers from the seat
to the backrest area
Please note that a greater
tilt angle increases
drowsiness and decreases
activity levels


