1
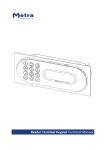
Control Unit ELS RFID User Manual Control Unit ELS RFID User Manual Table of contents Control Unit ELS RFID User Manual ....................................................................................................... 2 Product description.............................................................................................................................. 2 User interface ...................................................................................................................................... 3 Display Unit ..................................................................................................................................... 3 Coin acceptor (optional) .................................................................................................................. 3 Euro deposit pad (optional) ............................................................................................................. 4 Operation indication ............................................................................................................................ 4 Indication of unoccupied locker ........................................................................................................... 4 Basic operation.................................................................................................................................... 5 Presenting RFID media as a locker key .............................................................................................. 6 Locking procedure ............................................................................................................................... 7 Normal locking procedure ............................................................................................................... 7 User waiting time increment ........................................................................................................... 8 Locking procedure – payment required .......................................................................................... 8 Multiple locking procedure .............................................................................................................. 9 Locking procedure – deposit required .......................................................................................... 10 Unlocking procedure ......................................................................................................................... 10 Normal unlocking procedure ......................................................................................................... 10 Multiple unlocking procedure ........................................................................................................ 11 Use as an information terminal ......................................................................................................... 11 Use of Master card ............................................................................................................................ 11 Opening single locker ................................................................................................................... 12 Opening all lockers: ...................................................................................................................... 13 Closing back the locker opened with Master card ........................................................................ 14 Warning signalization ........................................................................................................................ 15 Alarm signalization ............................................................................................................................ 16 Locker brake-in Alarm ................................................................................................................... 16 Control Unit box brake-in Alarm .................................................................................................... 16 Remote opening of single locker ...................................................................................................... 16 Emergency opening of all lockers ..................................................................................................... 17 Error mode of operation .................................................................................................................... 17 Construction mode of operation ........................................................................................................ 17 User stickers...................................................................................................................................... 17 Warnings for User ............................................................................................................................. 18 Appendix ........................................................................................................................................... 19 Page 1 Control Unit ELS RFID User Manual Control Unit ELS RFID User Manual Manufacturer: Metra Inženiring d.o.o. IOC Trzin Špruha 19 SI-1236 Trzin, Slovenia System: Product Group: Types: Metra ELS – Electronic Locking Systems Control Unit ELS RFID Year of Construction: 2003 - 2006 Declaration of Conformity: phone: fax: web: +386 1 56 10 740 +386 1 56 10 744 www.metra.si ELCUIS (ISO 15693, ISO14443A/B) ELCUSD (Skidata) ELCULF (LF Multitag) ELCUA (Tagsys) ELCUTG (TechnoGym) ELCUMF (Mifare, ISO14443A/B) The Metra ELS products have been developed, designed and manufactured in accordance with the EU directive for Electromagnetic Compatibility (2004/108/EC). Control Unit ELS RFID User Manual [rev.1-140909] 2009 Metra Inženiring d.o.o. All Rights reserved. No part of this manual may be reproduced in any form or by any means without prior written permission of Metra inženiring d.o.o. The contents of this manual are subject to change without notice. All efforts have been made to ensure the accuracy of the contents of this manual, However, should any errors be detected, Metra inženiring would greatly appreciate being informed of them. Metra inženiring d.o.o. can assume no responsibility for any errors in this manual. Product description Control unit ELS RFID is used in Metra Electronic Locking System (ELS) which is primarily designed and used for locking lockers. Control unit ELS RFID has two basic components: Control unit PCB and Display unit. Control unit PCB drives and monitors up to 16 directly connected Metra Electronic Locks (see also: Electronic Lock) and other enhancing accessories. Display Unit (also connected to CU PCB) is the products user interface. It consists of a 4-digit LED display to show locker numbers (and other UI messages) and a contactless RFID reader. Different RFID readers are supported (see order list). Enhancing accessories: - Euro deposit pad limits locker misuse - Coin acceptor generates revenue from locker use Product can be used totally independent of Metra network. Wiring all the Control units into a network and adding a Network controller ELS enables additional alarm notification and remote unlocking of locks by pushbutton. Page 2 Control Unit ELS RFID User Manual User interface Display Unit # 1 2 description 4 digit LED display with decimal points. Antenna field or TechnoGym reader. Standard models are supplied with front mask in gray colour and LED display in blue colour. For additional colours contact Metra sales. Coin acceptor (optional) Control Unit ELS can be configured to ask for payment when locking the locker door. In that case Coin Acceptor is mounted near the Display Unit. Page 3 Control Unit ELS RFID User Manual Euro deposit pad (optional) Euro deposit pad is mounted under the door strike. The locker can be locked only if a coin is inserted. The coin is used as a deposit while the locker is closed/locked. Operation indication When the unit is running, a blue dot on the left side of display is flashing. Indication of unoccupied locker Indication of unoccupied locker is slightly opened locker door. The Metra Electronic Lock has built-in door ejector. Page 4 Control Unit ELS RFID User Manual Basic operation User can choose any unoccupeid locker. User locks the locker by using RFID media (card, wristband, tag…). Only one locker at the same level can be locked by the same RFID media. By presenting RFID media again the locker unlocks and is free for another user. Page 5 Control Unit ELS RFID User Manual Presenting RFID media as a locker key Approach the RFID media to the antenna field. Reading distance is 2 – 5 centimetres from the device surface. Hold it in the antenna field for a few moments for Control Unit to read and process the RFID media. When the RFID media is recognized the following possibilities exist: Time countdown starts (vertical lines are displayed) on Display Unit accompanied by acoustic signal. The RFID media is accepted as a locker key and the locker can be locked. “no” sign is displayed. This RFID media is not accepted as a locker key! Ask at the reception desk to assign A locker number is displayed on Display Unit and the corresponding locker is unlocked and opened. Short acoustic signal is activated. The locker was already locked at this Control Unit by this RFID media and is now unlocked and opened. Page 6 Control Unit ELS RFID User Manual Locker number is flashing and the interrupted beep acoustic signal is activated. The locker was already locked at different Control Unit by this RFID media. Only one locker can be locked with the same RFID media. Multi key: “FrEE” sign is displayed. This RFID media is accepted as a Multi key! There are no lockers closed with this Multi key at the moment. Multi key: “ALL” sign is displayed. This RFID media is accepted as a Multi key! Control Unit enters multiple unlocking mode. See multiple unlocking procedure for more information. Locking procedure Normal locking procedure STEP 1: Close the locker door. Time countdown starts (vertical lines are displayed) on the Display Unit and interrupted beep acoustic signal is activated. Page 7 Control Unit ELS RFID User Manual STEP 2: Approach the RFID media to the antenna field. Reading distance is 2 – 5 centimetres from the device surface. Hold the RFID media in the field for a few moments for Control Unit to read and process it. STEP 3: When the RFID media is accepted as a locker key the corresponding locker is locked and its number is displayed. NOTE If the locker was closed and RFID media was not presented, locker automatically opens when time countdown ends. User waiting time increment User waiting time increments (slower countdown) after the countdown ended without presenting the RFID media to lock the locker. This gives user more time to present the RFID media in second attempt. Locking procedure – payment required Steps 1 and 2 are the same as in normal locking procedure. Page 8 Control Unit ELS RFID User Manual STEP 3: Sign ”Euro”/“Coin”/”GbP”/”PAY”/”USd” is displayed on Display unit. User is asked for payment to finalize the locking procedure. STEP 4: Insert a coin in the coin acceptor. Coin value is displayed after the insertion. NOTE If the coin is not inserted the locker unlocks and opens after a few seconds. STEP 5: Locker number is displayed on Display Unit and corresponding locker is locked. Multiple locking procedure For multiple locking a special multi key is needed. All the lockers closed that way can be later unlocked (all at once) using the Multi key. NOTE See also Metra Software Help for more information on how to make a multi key. Steps 1 and 2 are the same as in normal locking procedure. Page 9 Control Unit ELS RFID User Manual STEP 3: When the RFID media is accepted as a Multi key the corresponding locker is locked and its number is displayed. You can now repeat the locking procedure on multiple lockers. Locking procedure – deposit required STEP 1: Insert coin in coin deposit pad. Steps 2, 3 and 4 are the same as steps 1, 2 and 3 in normal locking procedure. Unlocking procedure Normal unlocking procedure STEP 1: Approach the RFID media to the antenna field. Reading distance is 2 – 5 centimetres from the device surface. Hold the RFID media in the antenna field for a few moments for Control Unit to read and process it. STEP 2: Display shows the locker number and the locker is unlocked when the RFID media is recognized as a locker key that previously locked that particular locker. Short acoustic signal is also activated. NOTE See also paragraph “Presenting RFID media as a locker key” for other possible reactions. Page 10 Control Unit ELS RFID User Manual Multiple unlocking procedure Step 1 is the same as in normal unlocking procedure. STEP 2: Display shows sign “ALL” following by locker numbers of previously locked lockers by this Multi key. Each number is displayed for 1.5 second. Remove the Multi key form the antenna filed. NOTE See also paragraph “Presenting RFID media as a locker key” for other possible reactions. STEP 3: To open all lockers at once present the Multi key again to the antenna field right after sign “ALL” is displayed or when desired locker number to be opened is displayed, to open just one locker. If you want to open locker one by one you can present the Multi key again when next desired locker number to be opened is displayed, etc. When the Multi key is recognized, a short beep acoustic signal is activated and lockers are unlocked/locker is unlocked. Remove the Multi key form the antenna filed. Use as an information terminal If the RFID media is presented and recognized as a locker key on different Control Unit ELS the locker number is flashing on the display and interrupted acoustic signal is activated. Locker remains closed. This feature can be viewed as information for user which locker was locked by her/his RFID media and where to go to open it. Use of Master card Master cards are used to unlock any locker. The master card is useful when a user’s RFID media is lost or stolen. The Master cards are defined in Metra ELS software and downloaded into Control Units as other operating parameters. Page 11 Control Unit ELS RFID User Manual Opening single locker STEP 1: Approach the Master card to the antenna field. Reading distance is 3 – 5 centimetres from the device surface. Hold the Master card in the field for a few moments. STEP 2: When the Master card is recognized three dots are displayed indicating master mode of operation was entered. Remove the Master card form the antenna filed. STEP 3: Display starts counting the locker numbers of the lockers connected to that Control Unit. Each number is displayed for 1.5 second. STEP 4: When desired locker number to be opened is displayed, present the Master card again to the antenna field. When the Master card is recognized, the locker number starts flashing. Remove the Master card form the antenna filed. Page 12 Control Unit ELS RFID User Manual STEP 5: While the locker number is flashing, present the Master card again to the antenna field to confirm unlocking. When the Master card is recognized, a short beep acoustic signal is activated and locker is unlocked. After that the Control Unit automatically exits from the Master mode. NOTE While display shows locker number the blue dot shows that the locker is occupied. Opening all lockers: Steps 1 and 2 are the same as when unlocking single locker. STEP 3: Wait until “ALL” is displayed (after locker numbers are all displayed). STEP 4: While “All” is displayed, present the Master card to the antenna field again. When the Master card is recognized, a short beep acoustic signal is activated and “All” starts flashing. Remove the Master card form the antenna filed. Page 13 Control Unit ELS RFID User Manual STEP 5: While “ALL” is flashing, present the Master card again to the antenna field to confirm unlocking all the lockers connected to that Control Unit. Remove the Master card. STEP 6: All the lockers connected to that Control Unit start to open one after another and corresponding locker number is displayed. Closing back the locker opened with Master card Sometimes it is needed to close back the locker opened with the Master card. The following rules apply: Only lockers previously unlocked with the Master card can be locked back with Master card. When locker is locked back with the Master card the user can still unlock it with her/his RFID media. STEP 1: Close the locker. Time countdown starts (vertical lines are displayed) on Display Unit and interrupted acoustic signal is activated. Page 14 Control Unit ELS RFID User Manual STEP 2: Approach the Master card to the antenna field. Reading distance is 2 – 5 centimetres from the device surface. Hold the card in the field for a few moments for Control Unit to read and process the card. STEP 3: When the Master card is recognized the locker number is displayed and corresponding locker is locked. Remove the Master card form antenna field. NOTE Locking with Master card is only possible if the locker was previously unlocked by Master card! NOTE If you close the locker that was not previously opened with the Master card and approach the Master card to the antenna field, “no” sign is displayed. The locker unlocks and opens. Warning signalization If locker was unlocked but not opened (door is jammed) blue dot lights up on the right side of the 4 digit LED display. Page 15 Control Unit ELS RFID User Manual Alarm signalization Locker brake-in Alarm If locker brake-in is detected the alarm notice is displayed. The interrupted acoustic signal is turned on. Display alternately shows '-AL-' notice and the locker number. Control Unit box brake-in Alarm If Control Unit box brake-in is detected, the alarm notice is displayed. The interrupted acoustic signal is turned on. Display alternately shows '-AL-' notice and 'CU' notice. NOTE To avoid Control Unit brake-in Alarm during maintenance, the Control Unit box should be opened when the Control Unit is in Master mode of operation. In this case alarm is not activated. Remote opening of single locker If remote opening of single Lockers is initiated over the network the system signals this by acoustic signal and displaying “EOPn” message followed by locker number. Page 16 Control Unit ELS RFID User Manual Emergency opening of all lockers If emergency opening of all Lockers is initiated remotely by the network the system signals this by acoustic signal and displaying “EOPn” message for few seconds! Error mode of operation If display shows »Err1« there is a technical problem (communication with RFID reader module). Call maintenance. Construction mode of operation “ConS” message on display means that the Control Unit is in “construction mode” of operation. It is initialized with default parameter settings as it comes out of production. Call maintenance. User stickers Main purpose of the stickers is to inform user which locks belong to which ELS Control Unit (arrow stickers and colour coding). Two adjacent banks of lockers have different colour coding of the stickers. Above the Control Unit is multilingual instruction how to lock/unlock the locker by using RFID media. Metra Inženiring d.o.o. recommends locker manufacturers to apply short user instruction stickers on the final product with integrated Metra ELS Control Unit and Electronic locks. Example is shown bellow. # 1 2 3 4 5 description Bank of lockers with 16 lockers Right arrow sticker Left arrow sticker Locking/unlocking sticker User instructions sticker Page 17 Control Unit ELS RFID User Manual Warnings for User Locker manufacturer should place on the final product relevant warnings (stickers) about locker usage: Be sure the Locker is properly locked. If not sure try lock/unlock procedure again. Use locker at your own risk. Page 18 Control Unit ELS RFID User Manual While locking watch your fingers and clothes. Caution: door ejects automatically when unlocking. Caution! Slippery floor. Do not spray or splash water on Locker! Appendix 1 2 3 4 5 User instructions sticker Locking/unlocking sticker Left arrow sticker Right arrow sticker Warning stickers Page 19 1 D I 1 © WARNING - WARNUNG - OPOZORILO ! ENG: GER: BEEP! ! 504 SLO: ENG: GER: SLO: ENG: GER: ! 504 504 ! 504 SLO: ENG: GER: Be sure the Locker is properly locked. If not sure try lock/unlock procedure again. Vergewissern Sie sich, daß Ihr Garderobenfach richtig verriegelt ist. Sind Sie nicht sicher, wiederholen Sie zuerst das Entriegeln und danach das Verriegeln. Preprièajte se, èe je omarica pravilno zaklenjena. V primeru dvoma ponovite postopek (odklep/zaklep). Use of Locker at your own risk. Benutzung der Garderobenfächer auf eigene Verantwortung. Keine Haftung für Wertsachen. Uporaba omarice na lastno odgovornost. While locking watch your fingers and clothes. Beim Schließen der Fächer auf Finger und Kleidung achten. Bodite pozorni na prste in garderobo pri zapiranju omarice. SLO: Caution: door ejects automatically when unlocking. Achtung! Die Tür öffnet sich beim Entriegeln Automatisch. Pazite na avtomatski izmet vrat pri odpiranju omarice. ENG: GER: SLO: Caution! Slippery floor. Achtung! Glatter Boden. Pozor! Spolzka tla. ENG: GER: Do not spray or splash water on Locker! Es ist strengstens verboten das Gepäckschließfach mit Wasser zu bespülen. Ne polivaj omarice z vodo! SLO: