1
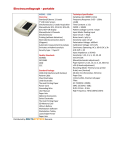
TraceNet ECM-P / FAK-1 Kit
TM
ECM Electronic Control Module
Mounted on FAK-1 Bulkhead Entry
INSTALLATION PROCEDURES
For Use With TubeTrace Bundles
TM
le electronic
justab
con
tro
lm
PN 27673
d
na
sa
ea
ule
od
M
Fo
ru
s
ceNet EC
Tra
IP66/Type 4X
-60°C ≤ Ta ≤ # °C
120 Vac / 240 Vac / 50-60 Hz
# See product specification for ambient temperatures
Do
t io
ns
.
Ordinary & Hazardous Locations
Class I Division 2, Groups A, B, C, D
Class II Division 2, Groups F, G; Class III; T4
Cl. I, Zn. 1, AEx eb mb [ib] IIC T4; Zone 21 AEx tb IIIC T135°C
14.2709489X, Ex eb mb [ib] IIC T4; Ex tb IIIC T135°C
1725
II 2 (2) GD Ex eb mb [ib] IIC T4, Ex tb IIIC T135°C
SIRA 12ATEX5239X
IECEx SIR 12.0103X Ex eb mb [ib] IIC T4, Ex tb IIIC T135°C
no
to
pen
w h il e
ta
e n er g i ze d. S ee in s
ll a ti
on
ins
tr u
c
The Heat Tracing Specialists
®
TraceNet ECM / FAK-1
INSTALLATION PROCEDURES
The following installation procedures are suggested
guidelines for the installation of the Terminator ECM/ FAK-1
Split Bulkhead Entry Kit with the ECM Electronic Controller.
For translations other than English and local language
translation provided here, please contact Thermon. The English
language installation procedure shall govern.
Order Separately . . .
TM
PETK Power and End Termination Kits (per cable)
PETK-1
for RSX, VSX, BSX
PETK-2
for KSX, HTSX
PETK-3-ECM
for HPT, FP
RTD Sensors
TraceNet ECM / FAK-1 Kit Contents . . .
2
inator EC
rm
table electronic c
djus
on
tro
For
u
s
a
an
as
lm
PN 27673
IP66
-60°C ≤ Ta ≤ + 55°C
ule
od
e
M
Te
1
5
4
no
ns
Do
.
1725 II 2 GD Ex eb mb [ib]ib IIC T4, Ex tb IIIC T135°C
SIRA 12ATEX5239X
IECEx SIR 12.0103X Ex eb mb [ib]ib IIC T4, Ex tb IIIC T135°C
to
pe
nw
h il e
energ
ize d . S e e in st a
l l a ti
on
in s
tru
ct
io
3
PT-100-3L
RTD Control Sensor
6
11
12
9
Receiving, Storing and Handling . . .
1. Inspect materials for damage incurred during
shipping.
2. Report damages to the carrier for settlement.
3. Identify parts against the packing list to ensure the
proper type and quantity has been received.
4. Store in a dry location.
13
7
14
15
8
16
Manuals . . .
• For operating and monitoring please refer to ECM
operating manual.
17
10
Item
Qty
1
1
Expediter Assembly: Wall Mount Base, Grommet,
Grommet Compressor, and Support Cap with O-Ring
2
1
Junction Box Lid
3
1
Junction Box Base with O-Ring & M25 Dust Cap
4
1
Expediter Nut Assembly
PT-100-3L
RTD Limiter Sensor
Dimensions . . .
Description
A
B
Electronic Control Module w/ Terminal Blocks
(Refer to terminal specifications for maximum allowable wire size)
C
D
ECM Type
C - Controler
L - Limiter
CL - Controller/Limiter
5
5
6
1
Junction Box Cord
7
1
Bulkhead Entry Cover (Top)
8
1
Bulkhead Entry Base (Bottom)
9
4
Pan Head S.S. Screws, #10-32 x 19mm
10
4
KEPT S.S. Nuts, #10-32
11
3
M5 Screw
12
3
M5 Lock Washer
13
1
Heat Reflective Tape
14
1
Glass Fiber Tape
15
3
RTV Sealant Tube
16
1
U-Bolt, Washers and Nuts
17
3
Blind Plug
TraceNet
ECM / FAK-1
A
inch (mm)
B
inch (mm)
C
inch (mm)
D
inch (mm)
(206mm)
(340mm)
(133mm)
(171mm)
Tools Required . . .
1
TraceNet ECM / FAK-1
INSTALLATION PROCEDURES
TM
Installation Precautions . . .
• Keep ends of bundles, heat tracing and kit components
dry before and during installation.
• To minimize the potential for arcing on electrical
heat tracing caused by product damage or improper
installation, use appropriate ground-fault circuit
protection.
• Installation must comply with Thermon requirements
and be installed in accordance with any applicable
national and local codes.
• Component approvals and performance ratings are
based on the use of Thermon specified parts only. User
supplied power connection fittings must be listed or
certified for intended use.
• De-energize all power sources before opening
enclosure.
• Individuals installing these products are responsible
for complying with all applicable safety and health
guidelines. Proper personal protective equipment, or
PPE, should be utilized during installation. Contact
Thermon if you have any additional questions.
The TraceNet ECM / FAK-1 Split Bulkhead Entry Kit is
designed to provide accurate control with ECM Electronic
Control and make a waterproof seal over the end of
TubeTrace and terminate Thermon electric heat trace in
an approved Terminator junction box. Review Instructions
prior to installation. Kit will make one connection.
Terminator ECM Certifications/Approvals . . .
II 2 G Ex e mb [ib]ib IIC T4 Gb SIRA 12ATEX5239X
II 2 D Ex tb IIIC T135°C IP66 Db
International Electrotechnical Commission
IEC Certification Scheme for Explosive Atmospheres
SIR 12.0103X
Jacket and
Insulation
305mm -381mm
Trim as Required
for Connection
Jacket and
Insulation
Tubing
Tubing Bundle
305mm -381mm
Heat Tracing
Tubing
Heat Tracing
Tubing
1. Remove outer jacket and insulation from
tubing bundle to expose the electric heat
trace and tubing. Ensure sufficient heat
trace is available for electrical connection.
See instructions included with heat trace
PETK kit.
Self-Regulating Heat Tracing
2. Trim heat tracing to within 305mm - 381mm
of the end of the insulation. If self-regulating
heat trace proceed to step 3. For Zone-type
heat trace continue with identification of bus
connection on step 2a.
Zone Type Heat Tracing
2a.Strip
back bundle insulation 38mm to
76mm beyond bus connection heat
tracing. If bus connection indentation is
less than 305mm -381mm from end of
the heat tracing, proceed stripping the
bundle insulation to the next indentation.
Glass Fiber Tape
Heating Cable vs. Sensor Location
Heating Cable
(Typical)
Bus Connection
Indentations
(Zone Heater
Only)
180°
Thermostat
Sensor
Heat Tracing
RTD
RTD
Heat Reflective Tape
3. Prepare tubing bundle for thermostat sensor
by inserting a phillips screwdriver between the
process tube(s) and insulation at a point opposite
the heating cable. The sensor should be placed
180° around the circumference from the
heating cable. Make sure that the entire length
of the sensor is in intimate contact with the tube
surface. Prevent kinking.
4. Insert the RTD into the prepared hole in the
thermal insulation.
2
5. Wrap tubes and heat tracing with pass of
heat reflective tape (25% overlap). Then
wrap with 3 passes of glass fiber tape (50%
overlap), or until fiber tape is equal to original
bundle insulation thickness.
TraceNet ECM / FAK-1
INSTALLATION PROCEDURES
TM
FAK-1 (Top)
FAK-1 Base
O-Ring
Expediter Base
Heat Reflective Tape
Tubing
Bundle
Tubing
RTD
FAK 1 (Base)
Heat Tracing
6. Complete with 1 additional pass of heat
reflective tape.
FAK-1 Cover (Top)
Heat Tracing
RTD
Glass Fiber Tape
7. Cut FAK-1 top and base ends to match
outside diameter of tubing bundle and
remove end pieces.
Weep Hole
8. Mount Expediter Base with O-Ring to FAK-1
(bottom) base cover using (3) M5 mounting
screws and lock washers (included). Punch
out weep hole.
FAK-1
Top
10-32
Kept Nuts
FAK-1 Base
GRW-GT2
GRW
FAK-1 Base
Expediter Base
Expediter Base
RTD
Heat Tracing
9. Form a gasket by applying RTV sealant to
FAK-1 base (bottom) and cover (top).
10.Fit tubing bundle to FAK-1. Inspect bundle 11.For
entry into FAK-1 for tight fit. Screw down
firmly with screws provided.
Drilled hole
for bundle
entry
Heat Tracing
FAK-1
Assembled
Mounting
Screws and
Washers
10-32 x 19mm
Screws
RTV
Sealant
RTV Sealant
Cut and
Remove
to Fit
Drilled holes
for securing
FAK-1
Drilled holes
for U-Bolt
entry
HPT and FP cable, exchange
grommet in Terminator with GRW-GT2
provided in PETK-3-ECM.
7 mm holes for
securing FAK-1
to bulkhead
(Field Drilled)
RTD
Power
Connection
Boot (TBX)
Ground Braid
12.Trim heat tracing to 180 mm minimum
from expediter base. Terminate heat
tracing with appropriate PETK termination
kit. Refer to PETK installation instructions
for details not addressed here.
13.Drill hole matching bundle diameter into
bulkhead. Mark location for U-Bolt entry
and FAK-1 securing screws and drill 7
mm holes through bulkhead.
3
14.Pre-drill FAK-1 with 7 mm holes (to match
drilled holes in bulkhead) for securing
FAK-1 to bulkhead.
TraceNet ECM / FAK-1
INSTALLATION PROCEDURES
TM
Stainless Steel Screws
(Customer Supplied)
Align Slots
U-Bolt
RTD
Backside View
RTV Sealant
15.Apply RTV bead to back of FAK-1 flange
16.Secure FAK-1 to bulkhead using (3) three
17.Mount junction box on expediter making sure
18.Remove M25 dust cap. Install M25 power
19. Install
20.Use the rotary switches for settling Control and
prior to securing to bulkhead.
gland (order separately) and M25 blind
plug.
M
m
PN 27673
ea
IP66/Type 4X
-60°C ≤ Ta ≤ # °C
120 Vac / 240 Vac / 50-60 Hz
# See product specification for ambient temperatures
ule
od
Fo
ru
s
ECM electronic control module
and complete system wiring. Terminal
set screws shall be tightened to a torque
value of 1,4 Nm (12,4 lb-in). See wiring
details. Set ECM modules electronic
control and/or control limiter at desired
setpoints.
RTV Sealant
Around FAK-1
Flange
Net EC
ace
Tr
table electronic c
djus
ont
na
rol
sa
stainless steel screws (Not Included
- Customer Supplied) and U-Bolt as
shown.
GND
30º
.
ns
t io
to
pen
w h il e
e n er g i ze d. S ee in s
t all a
ti o n
ins
tr u
c
1
2
Alarm Relay
L
N
N
Main supply
Bulkhead
Power Supply
By Others
RTD
Limiter Sensor
eNet ECM
ac
e
electronic contr
ol m
table
jus
od
ad
ul
an
PN 27673
For
us
ea
s
4X
IP66/Type≤ # °C
≤ Ta
Hz
res
-60°C
Vac / 50-60 temperatu
/ 240
ambient
120 Vac
ion for
specificat
s
product
s LocationC, D
# See
L
NO C NC
Heater output
A
B
Tr
no
Limit Temperature, (Celsius or Fahrenheit)
and Auto or Manual reset (Control switches
on Type “C”, Limiter switches on Type “L” and
both on Type “CL”). Refer to ECM user manual
for further details.
Comm. Port
Ordinary & Hazardous Locations
Class I Division 2, Groups A, B, C, D
Class II Division 2, Groups F, G; Class III; T4
Cl. I, Zn. 1, AEx eb mb [ib] IIC T4; Zone 21 AEx tb IIIC T135°C
14.2709489X, Ex eb mb [ib] IIC T4; Ex tb IIIC T135°C
1725
II 2 (2) GD Ex eb mb [ib] IIC T4, Ex tb IIIC T135°C
SIRA 12ATEX5239X
IECEx SIR 12.0103X Ex eb mb [ib] IIC T4, Ex tb IIIC T135°C
Do
to align slots to properly orient junction box
base.
B
B
B
A
RTD
Controller Sensor
ns
tr u
ct i
on
s.
A, B,
& Hazardou
T135°C
III; T4
2, Groups
Ordinary
G; Class 21 AEx tb IIIC
Division 2, Groups F,
Class I
T4; Zone IIIC T135°C
tb
Division
[ib] IIC
T135°C
Class II 1, AEx eb mb [ib] IIC T4; Ex
tb IIIC
T4, Ex
Cl. I, Zn. 89X, Ex eb mb
[ib] IIC
eb mb
T135°C
14.27094 2 (2) GD Ex
tb IIIC
II
T4, Ex
239X
1725
[ib] IIC
eb mb
SIRA 12ATEX5 X Ex
SIR 12.0103
IECEx
i
io n
lat
Do
t al
in s
not
open
S ee
w h il e e n e r g i z e d.
21.Install junction box lid and twist hand tight.
Insert screwdriver into ratchet slot located
on side of junction box base to tighten.
Use screwdriver to ratchet on junction
box lid. Lid will rotate 30° for tight seal.
To remove lid, repeat step 21 in opposite
direction.
22.Apply RTV bead around FAK-1 flange.
Completed Terminator with ECM
Electronic Controller and FAK-1 for
bulkhead entry of Electrically Heated
TubeTrace Bundles.
4
Wiring Details
Connection (for Heat Trace, RTD Sensor Leads,
Alarm and/or Communication Connections)
THERMON . . . The Heat Tracing Specialists
100 Thermon Dr. • PO Box 609 • San Marcos, TX 78667-0609
Phone: 512-396-5801 • Facsimile: 512-396-3627
1-800-820-HEAT • In Canada call 1-800-563-8461
®
Specifications and information are subject to change without notice.
For the Thermon office nearest you
visit us at . . .
www.thermon.com
Form PN50088-1213