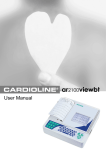
Download Carditte ECG Unit Vet600 - Eickemeyer Veterinary Equipment Inc.
Transcript
1
MEDIZINTECHNIK FÜR TIERÄRZTE
vet600
user manual
2
This User Manual is prepared with the objective of providing the user with all of the
information necessary to obtain the best use of the cardiette® vet600. Together
with a description of the equipment's functions the following documentation will be
found:
Certificate of Guarantee
General information
cardiette® is a registered trade mark et medical devices SpA
All rights reserved © et medical devices SpA ITALY.
et medical devices SpA, in its continual pursuit of technological improvement and
customer satisfaction, reserves the right to modify this publication without notice at
any time.
vet600 is a medical device manufactured by et medical devices SpA - Via De Zinis, 6
38011 Cavareno (TN) – Italy.
Eltastr. 8 ▫ 78532 Tuttlingen
Tel:
+49/7461/96580 – 0
Fax: +49/7461/96580- 90
MEDIZINTECHNIK FÜR TIERÄRZTE
www.eickemeyer.de ▫ info@eickemeyer.de
1
2
MEDIZINTECHNIK FÜR TIERÄRZTE
Index
1 Introduction ..................................................................................……………………………………..3
1.1 How to read the manual .............................................................………………………………………..3
1.2 Information and recommendations related to safe use ...................…………………………………………4
1.3 The electrocardiograph...............................................................…………………………………………5
2 Installation and initial preparation...................................................…………………………………………8
2.1 Selecting the installation site ....................................................……………………………………………8
2.2 Loading the heat-sensitive
paper...............................................………………………………………………………………………………………………8
2.3 Power supply; control and management of the internal batteries...…………………………………………….9
Recharging the batteries .............................................................……………………………………………10
Battery charger: precautions for use.............................................…………………………………………….10
2.4 How to switch on the electrocardiograph ....................................…………………………………………10
2.5 How to switch off the electrocardiograph ....................................…………………………………………11
Auto power off ...........................................................................……………………………………………11
2.6 Setup of the electrocardiograph ................................................…………………………………………11
How to access the "Setup Menu" ..................................................……………………………………………11
How to change the setup.............................................................…………………………………………….12
Selections available ....................................................................……………………………………………12
How to quit the "Setup Menu"......................................................…………………………………………….13
3 Preparing for an ECG recording.....................................................…………………………………………13
3.1 Connecting the patient cable.....................................................…………………………………………13
3.2 Selection of recording characteristics: speed, sensitivity, filters.....………………………………………….13
Speed of recording on paper........................................................…………………………………………….13
Sensitivity of recording on paper ..................................................……………………………………………14
Recording filters.........................................................................…………………………………………….14
4 Recording a resting ECG ................................................................………………………………………14
4.1 Recording in manual mode .......................................................…………………………………………14
4.2 Recording in automatic mode....................................................………………………………………….15
Copy of an automatic ECG recording
......................................……………………………………………..15
Saving an automatic ECG recording to archive on a Personal Computer
......................................................................................………………………………………….16
4.3 Recording in "PC ECG" mode
..........................................……………………………………….16
4.4 Defibrillation ...........................................................................………………………………………..17
5 Management and control of the functions of the electrocardiograph.....………………………………………17
5.1 Disconnected electrodes, potential presence of defibrillation .........………………………………………….17
Stop phase................................................................................…………………………………………….17
Manual recording phase ..............................................................……………………………………………17
Automatic recording phase ..........................................................……………………………………………17
Defibrillation..............................................................................…………………………………………….17
5.2 Batteries low on energy or no charge........................................…………………………………………..17
5.3 Print system control. Out of paper .............................................…………………………………………17
5.4 Status messages & errors indication: description and related event ………………………………………..18
5.5 Troubleshooting ......................................................................…………………………………………18
6 Maintenance ................................................................................………………………………………19
6.1 Self-test ................................................................................…………………………………………19
6.2 Replacement of the heat-sensitive paper ...................................………………………………………….19
6.3 How to clean the device and the electrodes................................………………………………………….19
6.4 Batteries replacing ..................................................................…………………………………………20
6.5 Periodic checks .......................................................................…………………………………………20
Technical information.................................................................……………………………………………..20
7 Technical Specifications...............................................................…………………………………………21
Basic accessories supplied ..........................................................…………………………………………….22
2
3
MEDIZINTECHNIK FÜR TIERÄRZTE
1 Introduction
vet600 is a portable veterinary electrocardiograph with dual power supply,
(mains and rechargeable internal batteries), which in the basic configuration
allows:
recording of an ECG in either automatic or manual mode;
printing the ECG on 60 mm single channel format paper using a highresolution
thermal print;
storing the most recent ECG recording in automatic mode and printing
additional copies of the ECG as required.
Thanks to the flexibility of the software used and to the infrared interface,
the vet600 can be adapted at any given moment to suit your individual
requirements.
In just a few minutes your vet600 can be equipped with:
- "L.E.M.S - PC archive option": for saving the ECG to archival storage in
a personal computer running "L.E.M.S. 4057 Local ECG Management
System" software (PC archive option);
- "R.T.E. - PC-ECG option": for real time display of the twelve ECG leads
on your computer monitor screen to allow management of medical
records and archiving of exams in digital format using " R.T.E. 4057 Real Time ECG" software.
CONGRATULATIONS ON YOUR PURCHASE. Your new computerised
veterinary electrocardiograph cardiette® has been designed and built in
compliance with the applicable regulations in force at the time when et
medical devices SpA, Cavareno (Trento) - ITALY drew up this manual. et
medical devices operates in accordance with the requirements for quality
management systems defined by EN ISO 9001: 2000 and EN ISO 13485:
2003 standards. The system is covered by a Nemko Certification (Cert. N.
800278). Your new electrocardiograph has also been built in compliance
with the Medical Device Directive 84/539/CEE (medical devices used in
veterinary medicine) and 89/336/CEE (electromagnetic compatibility) and is
therefore marked by the relevant mark .
1.1 How to read the manual
In order to ensure the cardiette® vet600 is operated in a safe and correct
manner, and to appreciate its ease of use and high reliability the user
instructions must be read carefully.
This documentation describes the functions of your electrocardiograph
including those provided by all the possible "options" available. It is
therefore possible that some of the functions described may not be present
in the model you have purchased. For details of the options, consult the
"firmware configuration" chart which accompanies each individual appliance.
This symbol allows you to identify the functions not provided on all
models, which must be requested specifically at the time of purchase.
This symbol allows you to identify the functional, behavioral and
operational aspects that may be programmed by the type of configuration
selected during the step of "Installation and initial preparation: setup of the
electrocardiograph".
When a given key is depicted in the body of a sentence or a
paragraph, press the corresponding key on the appliance to perform the
action.
The structure of this manual allows you to approach the use of the
electrocardiograph according to your own level of experience. If you are
3
4
MEDIZINTECHNIK FÜR TIERÄRZTE
already familiar with cardiette® equipment, the initial fast-track part of
each paragraph will allow you to begin working immediately. If you continue
reading the paragraph, however, you will see that the individual aspects of
the operation are discussed in more detail.
The manual gives detailed information on the use of the model vet600 for
typical ECG procedures, and an introduction to the use of particular
functionalities involving interaction with software and a Personal Computer.
For instructions on the use of the software applications for Personal
Computer, consult the special online guides.
The quick guide to the electrocardiograph (
to obtain the printout)
sums up the operations linked to the single commands presented in the
manual.
1.2 Information and recommendations related to safe use
- Always use the device according to the instructions in this manual.
- The device is equipped with a set of standard accessories. For reasons
of safety, reliability and conformity with the Medical Devices Directive
84/539/CEE and 89/336/CEE, use only original accessories or
accessories approved by the manufacturer.
- The device is equipped with a special long-life thermal print head writing
system, which allows maximum writing precision. To avoid frequent and
costly replacements and repairs, always use the original paper or paper
approved by the manufacturer. The manufacturer does not accept
responsibility for any damage to the device or any other effect on it,
caused by the use of unsuitable paper.
- Do not subject the device to impact or excessive vibrations.
- Do not allow liquids to penetrate inside the device. If this should
accidentally occur, have the functional efficiency of the device tested by
a Qualified Assistance Centre before using it again.
- Make sure that the value of the supply voltage corresponds to that
indicated on the data plate of the device.
- If you are using the device in connection with others, ensure that: all
connections are made by skilled persons; all connections comply with
safety regulations; all other devices connected respond likewise to
regulations. Non-compliance with regulations can cause physical harm to
the patient connected and to the person operating the device. Should it
be difficult to obtain the necessary information for assessing the risk of
the individual connections, apply directly to the manufacturers
concerned or avoid making the connections.
- If other equipment is used, connected directly or indirectly to the
patient, check the possible risks caused by the sum of the leakage
currents on the body of the patient.
- The device is protected against defibrillation discharges according to
standards IEC 601-1-25; to ensure that the signal is restored, use only
original electrodes or electrodes responding to IEC and AAMI standards.
- If an electrosurgical scalpel is in use, the patient cable should be
disconnected from the device.
- At all events, when defibrillators or high-frequency surgical devices are
being used at the same time, it is essential to take the greatest care. If
there is any doubt concerning their use, disconnect the ECG patient
cable temporarily.
- Periodically check the efficiency of all accessories and of the device
itself. Use the built-in test function to make a first check of the
equipment's efficiency. Contact the Authorized Technical Assistance
Center whenever the equipment appears to be malfunctioning.
- To ensure a longer life of your device, it is necessary to have it checked
periodically by an Authorized Assistance Center.
- Caution: do not use the electrocardiograph for intracardiac applications
or for monitoring activities in the operating theatre!
- Caution: do not use the device in the presence of anaesthetics or
inflammable gases!
4
5
MEDIZINTECHNIK FÜR TIERÄRZTE
- Caution: devices for medical applications must be used only by persons
who by virtue of training or practical experience are able to ensure
maximum safety and effectiveness in operation. Every operator must
become familiar with the instrument before using it on a patient.
- Caution: use only original "battery chargers" as indicated alongside the
connector and in the paragraph "Accessories supplied". The original
"battery chargers" ensure the electrical isolation of the patient and the
operator, guaranteeing essential conditions of safety. Do not use
replacement accessories that have not been approved by the
manufacturer.
- Caution: the device is provided with an IR interface for the transfer of
data to other devices. The IR interface must not be masked, even
accidentally, as this will adversely affect its capability and its operation,
interrupting and preventing the correct flow of data.
- The manufacturer will be responsible for the safety and correct use of
the devices only if:
o modifications and repairs are performed by the manufacturer or by
an Authorized Assistance Center;
o the a.c. power supply of the building responds to current
regulations;
o the device is operated in accordance with user instructions;
o the accessories used are those approved by the manufacturer.
1.3 The electrocardiograph
In order to simplify the installation and the use of your electrocardiograph,
it is recommended that you become familiar with the component parts and
method of operation.
Front view
5
6
MEDIZINTECHNIK FÜR TIERÄRZTE
6
7
MEDIZINTECHNIK FÜR TIERÄRZTE
Parts, symbols and commands
1. The keyboard
7
8
MEDIZINTECHNIK FÜR TIERÄRZTE
2. Paper compartment cover
3. IR interface
4. Connector for the CF type patient cable protected from defibrillation as
indicated by the symbol
5. "Reset" key
: allows normal operating conditions to be restored in
the event of an error that cannot be managed using the other keys
6. "Battery charger" connector
7. Data plate. In the event of communicating with Authorized Assistance
Centers, refer to the data indicated
2 Installation and initial preparation
This section describes the operations to be performed prior to using your
new cardiette® vet600 electrocardiograph. Suggestions are given for
"selecting the installation site" and "recommendations for safe use in
conformity with current statutory regulations" are indicated. Also introduced
are the operations involved in preparing the electrocardiograph for use,
such as "loading the heat-sensitive paper", "power supply; control and
management of the internal batteries", "switching on and off", "setup".
2.1 Selecting the installation site
The vet600 electrocardiograph complies with European directives on
electromagnetic compatibility. The absence of emissions damaging to radio
and telecommunications transmissions is therefore assured, as also is
protection from interference emitted by other systems and equipment.
Nevertheless, in order to protect your device from other equipment not in
conformity with the aforementioned directives:
- avoid the use of mobile phones in the vicinity;
- place the electrocardiograph as far as possible from electrical power
lines or from sources of static electricity. The ECG signal can in fact be
disturbed if the electrocardiograph is situated in proximity to sources of
high voltage or electrical lines;
- avoid placing the electrocardiograph close to other diagnostic or
therapeutic equipment (e.g. X-ray machines, ultrasound machines,
electrically operated beds, etc.) that could be a source of excessive
interference and ECG signal distortion;
- if it is impossible to position the electrocardiograph away from other
electrical equipment, switch off such equipment when recording an ECG.
Also, observe the ambient operating conditions when recording ECGs:
- Avoid exposing the equipment to extreme temperatures, excessive dust
or dirt, and very salty or humid environments; refer to the ambient
conditions described in detail under the "Technical characteristics"
heading.
2.2 Loading the heat-sensitive paper
cardiette® vet600 is able to reproduce the ECG signal both on heatsensitive
paper in rolls and on heat-sensitive paper in packs. No special
setup procedure is required for either. This sections gives the instructions
for the correct loading of both types of paper.
8
9
MEDIZINTECHNIK FÜR TIERÄRZTE
If using rolls of paper:
a. Using a coin or similar instrument, open the paper compartment and
remove the "roll guide" hub. If replacing a depleted roll, recover the hub
before throwing away the core of the previous roll.
b. Slot the hub into a new roll of paper (1) and locate in the paper
compartment, positioning the pins in the sockets (2). Ensure that the
black mark on the paper is on the lower part of the roll.
c. Close the cover, positioning the paper between the rubber roller and the
casing of the device (3).
If using packs of paper:
a. Using a coin or similar instrument, open the paper compartment and
remove the "roll guide" hub. To avoid accidentally losing the hub, store
it in a safe place.
b. Prepare a new pack (1) and position it in the compartment (2). Ensure
that the black mark on the paper is on the lower part of the pack.
c. Close the cover, positioning the paper between the rubber roller and the
casing of the device (3).
2.3 Power supply; control and management of the internal batteries
Your electrocardiograph uses a dual power supply system: a.c. mains and
NiMh rechargeable internal batteries protected against short circuits.
To connect the electrocardiograph to the mains, connect the "battery
charger" (provided) to the connector
8308 on the back of the device.
The "battery charger" is protected against short circuits by an internal fuse
(not replaceable) and against overheating.
9
10
MEDIZINTECHNIK FÜR TIERÄRZTE
To gain maximum benefit from the characteristics of the dual power supply
system, follow the indications given below.
Recharging the batteries
The batteries must be recharged when the LED
begins to blink,
signifying that the reserve charge is lower than 30%.
Connect the electrocardiograph to the mains: LED
turns on. Complete
recharging of the batteries requires about 14 hours.
The batteries can be recharged in part, or the device can be kept connected
permanently to the mains. For longer life, the batteries should be allowed to
run down and recharged completely at least every two months.
A complete recharge allows the recording of up to 250 complete ECGs
(automatic recording mode, single channel print format, speed 25 mm/s).
lit), it is still possible to
If the batteries have completely run down (LED
make an ECG recording by connecting the device to the mains.
Battery charger: precautions for use
- The "battery charger" can be damaged if dropped, struck or tampered
with.
- Do not immerse the "battery charger" in water or other liquids. When
using it, do not place it on or near sources of heat.
- Do not damage or tamper with the cables for connection to the mains
and to the electrocardiograph.
- Connect the "battery charger" to the electrocardiograph only by means
of the connector provided.
- Use the "battery charger" only at the specified mains voltage. If the
"battery charger" provided is not compatible with your mains supply,
ask the nearest Authorized Assistance Center for a suitable model.
2.4 How to switch on the electrocardiograph
2.5 How to switch off the electrocardiograph
10
11
MEDIZINTECHNIK FÜR TIERÄRZTE
Auto power off
To preserve the battery charge, the electrocardiograph is provided with an
auto power off function that will activate automatically, depending on the
amount of power still available and on the operating mode selected. The
procedure is activated only after the current operation has been completed.
- After 10 min. have elapsed without any key being pressed: reserve
power > 30%.
- After 1 min. has elapsed without any key being pressed: reserve power
between 15 and 30% (LED
blinking).
- After 10 sec. have elapsed without any key being pressed: reserve
power < 15% (LED
alight).
If the auto power off function is activated, the current ECG and settings (if
applicable), will be stored in memory.
Auto power off is inhibited if:
- a recording is in progress in PC-ECG mode.
- during the self-test routine;
- during "setup".
2.6 Setup of the electrocardiograph
Some of the characteristics of your electrocardiograph can be set according
to individual preference and convenience. The characteristics that can be
configured are listed in the "Setup Menu".
Within the menu, it is possible to activate the self-test function of the device
(see paragraph "Maintenance" ).
How to access the "Setup Menu"
How to change the setup
Accessing the setup menu, a page is printed which shows the list of the
available setup options.
The active setup is highlighted by two square brackets […].
Press the key associated with each option to change the selection.
Selections available
PC ECG recording mode
The PC ECG function allows real time viewing of the twelve leads on the
screen of your Computer using "R.T.E." 4057 (Real Time ECG) software.
Selecting [Yes] it will be possible to select the PC ECG operating mode, from
the keyboard, in addition to the traditional automatic and manual modes;
selecting [No] this selection will not be possible.
11
12
MEDIZINTECHNIK FÜR TIERÄRZTE
Saving to Personal Computer archive
Using the PC Archive function, in association with L.E.M.S. software, a trace
recorded and stored in automatic mode can be transferred to a computer.
Selecting [Yes] the action "activate transmission to PC" is associated with
the key
recording".
; selecting [No] the associated action is "print copy of last
ECG report length
It is possible to select the length of the signal to be represented on paper
during automatic recordings, indicating the number of pages to be used.
Two options are available: [1] page per lead [2] pages per lead or group of
leads.
The option selected will be applied to all recordings in automatic mode.
Mains frequency
To ensure correct operation of the device, the program must be set to
recognize the mains frequency adopted in the area of use.
Two options are available: [50] Hz; [60] Hz.
The option selected will have an effect, both on the battery charging process
and on the operation of the filters used to reduce mains interference.
Self-test
To verify correct operation of the electrocardiograph, the self-test routine
can be run by accessing the dedicated menu. For details, see "Maintenance
- Self-test".
How to quit the "Setup Menu"
12
13
MEDIZINTECHNIK FÜR TIERÄRZTE
3 Preparing for an ECG recording
Below are described the operations to be performed prior to recording a
resting electrocardiogram with the cardiette® vet600 electrocardiograph.
In particular, indications are given on "connecting the patient cable".
Moreover, the necessary procedures for choosing the correct recording
parameters, such as "speed, sensitivity and inserting the filters", are
illustrated.
3.1 Connecting the patient cable
Connect the terminal plug of the patient cable to the connector
identified with the symbol
, positioned on the right side of the device.
Note: to avoid breaking the patient cable, remove it from the connector without
tugging it, gripping it by the plug.
3.2 Selection of recording characteristics: speed, sensitivity, filters
Speed of recording on paper
During printing, the speed of the paper flow is indicated by the width of the
calibration impulse that precedes each lead and is recorded in the
information line
Sensitivity of recording on paper
During printing, the sensitivity of recording on paper is indicated by the
height of the calibration impulse that precedes each lead and is recorded on
the information line
Note: if you select
the sensitivity is set automatically by the device in a way that
optimizes the recording over the entire height of the paper. In this case a sensitivity
of 2.5 mm/mV may be used.
Recording filters
If necessary, it is possible to activate filters capable of improving the
legibility of the signal without modifying its morphology. Activation of the
filters has an effect on the printed signal. To guarantee a correct and
accurate analysis, any automatic interpretation of the trace is performed
always and only on the non-filtered ECG signal.
The special filter against drift of the isoelectric line (ADF) is always inserted.
During printing, the filters inserted are recorded on the information line.
13
14
MEDIZINTECHNIK FÜR TIERÄRZTE
4 Recording a resting ECG
4.1 Recording in manual mode
The selected leads are recorded and printed on paper. The signal is recorded
in real time, i.e. acquisition and reproduction of the trace are simultaneous.
When operating in manual mode it is possible to establish the duration of
registration independently for each group of leads starting from D1.
Note: during a manual recording it is possible to alter the recording characteristics:
speed, sensitivity, filters.
4.2 Recording in automatic mode
Using a patient cable with 5 electrodes, 7 ECG leads are simultaneously
recorded (10 seconds; D1, D2, D3, aVR, aVL, aVF, V*). The recording
interrupts at the end of the printing of the derivation V* (the type of chest
derivation depends on the positioning of the electrode C, usually in
correspondence of the V1).
The signal printed on paper refers to the same time period and is stored in
memory.
An automatic recording allows you to obtain a copy of the recording and to
transfer the test to a Computer ("L.E.M.S. - PC archive" option).
14
15
MEDIZINTECHNIK FÜR TIERÄRZTE
If it is desired to complete the recording of the others V it’s necessary to
proceed manually as follows:
Using a 10 leads wire (optional) is possible to recorder and memorize
simultaneously the 12 leads without operating in manual mode.
Copy of an automatic ECG recording
The ECG recording in automatic mode is automatically memorized and can
therefore be reproduced on paper an unlimited number of times
If the memory does not contain valid data, the message "No ECG trace in
memory" is printed.
Note: memorization of the trace is performed without filtering the signal,
notwithstanding the operation of filters during the recording. The parameters may
therefore be modified before printing: inserting the filters, speed and sensitivity.
Saving an automatic ECG recording to archive on a
Personal Computer
Your electrocardiograph is capable of transferring the stored ECG test to a
Personal Computer equipped with L.E.M.S. (Local ECG Management)
software. For details on the use of the application software, consult the
specific manual.
Your electrocardiograph is capable of transferring the stored ECG test to a
Personal Computer equipped with L.E.M.S. (Local ECG Management)
software. For details on the use of the application software, consult the
specific manual.
15
16
MEDIZINTECHNIK FÜR TIERÄRZTE
4.3 Recording in "PC ECG" mode
The twelve ECG leads are displayed in real time on your Computer screen
where, thanks to the "R.T.E." software (Real Time ECG), it is possible to
perform all the ECG recording operations. Your vet600 therefore becomes
an acquisition system based on a PC. For details on the use of the
application software, consult the specific manual.
4.4 Defibrillation
In the case of defibrillation, the LED
lights up. Within 10 seconds of the
discharge, the signal is automatically reset (if the paper reproduction of the
signal was activated in manual mode)
Always remember to avoid direct contact between the electrodes of the
defibrillator and those of the electrocardiograph. The approved electrodes
supplied as original equipment with your electrocardiograph were developed
so as to minimize the risk in case of accidental contact.
5 Management and control of the functions
of the electrocardiograph
5.1 Disconnected electrodes, potential presence of defibrillation
Saturation events are controlled and monitored by your electrocardiograph.
The operation of the electrocardiograph depends on the current operating
phase.
Stop phase
LED
blinking: critical electrodes contact. It is possible to proceed
with the recording; the "critical" electrodes are indicated on the print
report in the information line (for example "
L 1 " indicates the critical
nature of the left limb electrode and of the electrode C1).
LED
on: electrodes disconnected (saturation). It is not possible to
start an automatic recording. A manual recording may be started; the
"disconnected" electrodes are indicated on the print report in the
information line and a flat signal will be reproduced on paper
corresponding to the lead that cannot be acquired due to the absence of
an electrode (for example "
L1" indicates the saturation of the left
limb electrode and of the electrode C1).
Manual recording phase
The event is indicated as in the stop phase. When normal conditions have
been restored, the signal is cantered.
16
17
MEDIZINTECHNIK FÜR TIERÄRZTE
Automatic recording phase
If the event is detected during acquisition (10s), the ECG is stopped and
automatically returns to the stop phase If the signal is already in the
memory, printing continues without interruptions. The indication of the
event is the same as in all the other phases.
Defibrillation
The LED lights up
. See paragraph "Defibrillation".
5.2 Batteries low on energy or no charge
The batteries must be recharged when the LED begins to blink: the reserve charge is lower than
30%. Follow the indications supplied in the paragraph "Installation and initial preparation".
5.2 Batteries low on energy or no charge
The batteries must be recharged when the LED
begins to blink: the reserve charge is lower
than 30%. Follow the indications supplied in the paragraph "Installation and initial preparation".
5.3 Print system control. Out of paper
The correct closure of the paper cover is monitored and depletion of the thermal paper generates a
warning signal. During a recording, printing is automatically blocked and the LEDs
5 seconds.
blink for
5.4 Status messages & errors indication: description and related event
Below are listed the various error messages printed on paper and the behavior of the LEDs in case
of unusual events. Each message and LED is correlated to a specific condition or operating phase
5.5 Troubleshooting
The following table summarizes problems which may occasionally occur and
their causes
17
18
MEDIZINTECHNIK FÜR TIERÄRZTE
6 Maintenance
6.1 Self-test
Periodically carry out the self-test procedure which permits a functional check of the writing
system, electronic parts, of the keys and of the LEDs. In the event of error messages, contact the
cardiette® Authorized Assistance Center, which will do whatever is necessary to eliminate the
causes of the malfunction. Access to the self-test menu is accomplished from the "setup mode".
Before starting the self-test procedure, ensure that there is paper in the machine.
18
19
MEDIZINTECHNIK FÜR TIERÄRZTE
6.2 Replacement of the heat-sensitive paper
When the heat-sensitive paper is used up, the device stops and any attempt to start recording is
blocked (see paragraph "Print system control. Out of paper".) To replace the paper, proceed as
indicated in the paragraph "Installation and initial preparation".
6.3 How to clean the device and the electrodes
To clean the device, use a cloth dampened with water or denatured ethyl alcohol. Do not use other
chemical products or household detergents. For the electrodes: remove the electrodes from the
patient cable and wash under running water. Do not scratch the electrodes and do not wet the
leads box and the patient socket. Note: the device cannot be sterilized! The electrodes can be sterilized with oxide of
ethylene.
6.4 Batteries replacing
If the operation time in battery mode is considerably reduced or if it’s no
more possible to operate the recorder in battery mode, the batteries must
be replaced.
The battery lifetime is approximately one year.
19
20
MEDIZINTECHNIK FÜR TIERÄRZTE
6.5 Periodic checks
To ensure correct and long-lasting operation of the device, it is necessary to
have an Authorized Assistance Center perform the following checks
Technical information
et medical devices SpA will supply circuit diagrams, a list of components,
and information needed to enable the repair of user-serviceable parts, when
requested by qualified persons.
20
21
MEDIZINTECHNIK FÜR TIERÄRZTE
7 Technical Specifications
21
22
MEDIZINTECHNIK FÜR TIERÄRZTE
Basic accessories supplied
-
battery charger cod. 8308xxxx
patient cable with 5 lead wire and electrodes cod. 63050070
1 roll paper 60mm x 200 sheets cod. 66010037
user manual cod. 36510131
22


