Download Virtue Shocker
Transcript
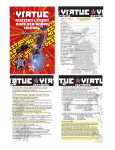
This manual provides installation and operating
instructions for the AdvantagePB Virtue Shocker/Nerve
Upgrade Board.
Features:
•
•
•
•
•
•
•
•
•
•
•
7 Modes of fire - Semi Auto, Modified
PSP/NXL, NXL Style Full Auto, Ramp
Mode, Auto Response, Full Auto, and
Breakout Mode.
15BPS Ready - Be ready for any tournament
series! Put Dipswitch 1 in the off position,
and your maximum rate of fire is capped at
15bps!
All firing modes have user adjustable
maximum rates of fire from 10.50bps to
unlimited rates of fire!
AdvantagePB Trigger Logic constantly
monitors the trigger to ensure every trigger
pull is recognized, giving you the fastest
responding gun, and highest possible rates of
fire.
Adjustable Debounce, Dwell, AntiMechanical Bounce (AMB), Eye Sensitivity,
Ramp Activation Speed, Ramp Percentage,
and Anti-Bolt Stick (ABS).
Power Efficient Software extends the life of
your battery.
All settings are stored in non-volatile memory
so they will not be lost when the battery dies
or is removed.
10 minute idle auto-shutdown saves battery
life.
Forced Shot allows the marker to be fired
when the eyes are enabled, but no object is in
the breech.
Instant On allows the marker to be fired
instantly upon turn on.
Tournament Lock/Unlock allows the marker
to be programmed through the trigger without
having to constantly open the grip. With the
tournament lock enabled, settings cannot be
changed without opening up the grip.
Installing Your AdvantagePB
Shocker/Nerve Board:
1.
2.
3.
4.
5.
6.
7.
With the grip frame open, push out the two pins that
are holding in your existing board.
Remove the battery from the wiring harness being
careful not to damage the wires.
Carefully remove your existing board from the
marker and disconnect the wire harness from your
existing board.
Connect that same wire harness to the AdvantagePB
Virtue Shocker/Nerve Board.
Place the Virtue Shocker/Nerve board back into the
grip frame making sure the bottom of the board is in
the slot of the grip frame.
Line up the two pins you removed in step 1, and
push them back into place.
Last, reconnect the battery and close the grips.
Setting the Dipswitches:
On the AdvantagePB Shocker/Nerve Board, there is a 2position dipswitch.
Dipswitch 1 is the Max Rate of Fire/15bps Cap lock. If
Dipswitch 1 is in the on position, your max rate of fire is set to
your “Max Rate of Fire” setting (Flashing Red LED in
programming mode.) If dipswitch 1 is in the off position, the
Max Rate of Fire of all modes is capped at 15bps. After
changing this setting, you must turn the marker off before it
takes effect.
In addition, the multi-color led on the board will also tell you
the status of your gun:
Solid Blue
Solid Red
Flashing Red
Flashing Blue
Eye Enabled / Ball in Breech
Eye Enabled / No Ball in Breech
Eyes Disabled
Eye Malfunction
If you do not wish to use the multicolor LED during play, it
can be turned off through the programming menu.
Power Operation:
The Virtue Shocker/Nerve Board uses Instant On technology.
Simply tap the power button, and the marker instantly turns on
and is ready to fire. When the marker is turned on, the eye is
automatically enabled. To turn the marker off at any time,
press the power button for 2 seconds.
Eye Operation:
When the marker is turned on the eye system is automatically
enabled. The eyes can be turned off by pressing the power
button for 1 second. When the eyes are disabled the max rate
of fire will not go over 20bps.
The eye logic differentiates between a ball being fired, and
something continually blocking the eye (like your finger). If
the eye becomes blocked, both LED’s (if enabled) will flash
blue, indicating an eye malfunction. When the object blocking
the eyes is removed the eye will automatically return to
working mode.
Programming Mode:
*Please note the actual bps will vary slightly from gun to gun.
If the desired bps is too high or too low with dipswitch 1 off,
then leave Dipswitch 1 in the on position, and adjust the max
rate of fire setting through the programming menu.
Dipswitch 2 is the Tournament Lock. To access the
programming mode of the Virtue Shocker/Nerve Board,
Dipswitch 2 must be in the on position. Then hold down the
trigger and turn the marker on to enter programming
mode. When Dipswitch 2 is in the off position, the gun is in
“Tournament Lock”, and program settings cannot be changed.
LED Indicator:
The power button on the back of the marker also functions as a
small blue LED, telling you the status of your marker:
Solid Blue
Flickering Blue
Fast Flashing Blue
Flashing Blue
Eye Enabled / Ball in Breech
Eye Enabled / No Ball in Breech
Eye Disabled
Eye Malfunction
Tapping the trigger will then toggle through the
different programming modes:
To access the programming mode of the Virtue
Shocker/Nerve Board Dipswitch 2 must be in the on
position. When Dipswitch 2 is in the off position, the
gun is in “Tournament Lock”, and program settings
cannot be changed.
Blue:
Green:
Red:
Firing Mode
Debounce
Ramp Activation Speed
Flickering Blue:
Flickering Green:
Flickering Red:
Flashing Blue:
Flashing Green
Flashing Red:
Purple:
Ramp Percentage
Dwell
Eye Sensitivity
AMB (Anti-Mechanical Bounce)
ABS (Anti-Bolt Stick)
Max Rate of Fire
LED Options
To Change the Value of a Setting:
When the LED is lit for the desired setting, pull and
hold the trigger until the LED Begins to flash. The LED
will flash the number of times the current value is set to.
When the LED stops flashing you then have 2 seconds
to enter in the new value by tapping the trigger the
amount of times you want the new value to be set to.
After you have set the new value, the LED will flash
back at you the number of times you have just entered,
and then flash through the rainbow of colors, returning
to the color you have just adjusted, indicating that the
new value has been set. To exit programming mode,
shut the marker off.
Programming Example:
If you want to change the debounce to 2 you would:
1.
2.
With Dipswitch 2 in the on position, hold the trigger
and turn the marker on. The multi color LED on the
board will then cycle through a rainbow of colors and
stop on blue, indicating that you are now in
programming mode.
3.
4.
The small blue LED on the back of the gun will also
indicate going into programming mode by flashing and
flickering blue, then stopping on blue. When adjusting
the mode of fire, the small blue LED can be used. This
is very useful for changing firing modes on the fly. To
adjust any other setting, you must use the multicolor
LED, as the small blue LED will go out.
6.
5.
7.
With the marker off, and Dipswitch 2 in the
on position, hold the trigger and turn the
marker on.
The multi-color LED will now cycle through
a rainbow of colors and stop on Blue.
Tap the trigger once so the LED glows green.
Pull and hold the trigger until the LED starts
to flash (factory default for debounce is 5, so
the LED will flash 5 times).
When the LED stops flashing, quickly tap the
trigger 2 times.
The LED will now flash 2 times, and then
flash through the rainbow of colors, and stop
on green, indicating the new value has been
set.
To exit program mode, shut the marker off.
Reset to Factory Default:
To return all settings to the factory defaults, while in
programming mode, hold the trigger down for 10 seconds until
the LED turns blue. After the LED turns blue, it will then flash
through the rainbow of colors indicating that all settings have
been returned to the factory default.
ABS (Flashing Green) Values 1 –20 (Default is 10)
Adjustable Settings:
Ramp Activation Speed (Red)
Values 5-15 (Default is 5)
Firing Mode (Blue) Values 1-7 (Default is 1)
The ramp activation speed setting only affects Firing modes 4
and 7 (Ramp and Breakout Mode). The default setting is 5,
which means when the user reaches triggers speeds of 5bps,
ramping will activate, and add the percentage set in the “Ramp
Percentage” setting. The values of this setting are equivalent to
balls per second. For example, 5 = 5bps; 10 = 10bps, etc.
1
2
3
4
5
6
7
Semi Auto- Semi Automatic Fire; 1 trigger
pull equals 1 shot.
PSP Ramping- The first 3 shots of a string
are Semi Auto. After the 4th shot the
marker will ramp to the rate of fire your
“Max Rate of Fire” is set to. Once the
trigger is let go and 1 second elapses, the
3 shot Semi Auto count restarts.
NXL Style Full Auto- The first 3 shots of a
string are Semi Auto. On the 4th shot
you can then hold down the trigger, and
the marker will shoot full auto at your
Max Rate of Fire. Once the trigger is let
go and 1 second elapses, the 3 shot Semi
Auto count restarts.
Ramp Mode- When you reach the “Ramp
Activation Speed” the Marker will ramp
the rate of fire by your “Ramp
Percentage” setting, up to your Max Rate
of Fire. Factory default is when your
trigger speed reaches 5bps, the marker
will ramp up to the maximum speed that
your loader can feed.
Auto Response- 1 shot on the pull of the
trigger; 1 shot on the release. This
setting will make you shoot twice as fast
as you can pull the trigger.
Full Auto- Hold down the trigger, and the
marker will fire at your max rate of fire,
or as fast as your loader can feed.
Breakout Mode- In this mode, when you turn the
gun on, the first shot will shoot full auto for as
long as you hold down the trigger. Once you
release the trigger the gun goes into “Ramp
Mode”. If you turn your marker off and back
on when in this mode, the Breakout function
will repeat.
Debounce (Green) Values 1-30 (Default is 5)
Debounce is the amount of time that the trigger has to be
released before the next trigger pull is allowed. Virtue
software incorporates our own AdvantagePB debounce
algorithm, which ensures every trigger pull is recognized.
This results in giving the user the highest rates of fire possible.
The values range from 1-50 with the default set to 5.
Ramp Percentage (Flickering Blue)
Values 1- 21 (Default 1)
The ramp percentage setting only affects Firing modes 4 and 7
(Ramp and Breakout Mode). The default setting is 1, which
“Maxes Your Loader” as soon as the Ramp Activation Speed is
reached.
Valu
e
1
2
3
4
5
6
7
Percentag
e
Max Loader
10%
15%
20%
25%
30%
35%
Valu
e
Percentag
e
Valu
e
Percentag
e
8
9
10
11
12
13
14
40%
45%
50%
55%
60%
65%
70%
15
16
17
18
19
20
21
75%
80%
85%
90%
95%
100%
200%
Dwell (Flickering Green) Values 5-30 (Default
is 12)
Dwell is the amount of time that the solenoid will be activated.
The default is 12 milliseconds (ms), and the values range from
5 – 30 ms. Too low of a dwell setting will lead to inconsistent
velocities and drop off. Too high of a dwell will result in poor
air efficiency.
Eye Sensitivity (Flickering Red) Values 1-50
(Default is 5)
The Eye Sensitivity setting adds a small delay after the eye has
seen a ball before it allows the marker to shoot. Players using
non-force fed loaders may need to raise this setting to prevent
chopping. The default setting is 5, with 1 being the fastest (No
delay).
AMB (Flashing Blue) Values 1-10 (Default is 3)
The Anti-Mechanical Bounce (AMB) feature allows the user to
adjust for mechanical bounce. Mechanical bounce happens
when the “kick” from having a shot fired causes the marker to
shoot additional shots after the trigger has been pulled. The
default setting is 3, which is a low AMB. This setting ranges
from 1-10 with 1 being AMB off.
The Anti-Bolt Stick (ABS) setting is the amount of dwell time
added for an ABS shot. This setting ranges from 1 – 20
additional milliseconds of dwell, with the default set to 10.
Max Rate of Fire (Flashing Red)
Values 1-22 (Default 1)
TM
The max rate of fire setting applies to all modes of fire. If
Dipswitch 1 is in the up or on position, the max rate of fire is
determined by this setting. If Dipswitch 1 is in the down or off
position, the rate of fire is capped at 15bps for all modes of
fire. The max rate of fire is adjustable from 10.5bps to
unlimited rates of fire. The default setting is 1, which is an
unlimited rate of fire.
Value
1
2
3
4
5
6
7
8
9
BPS
Unlimited
10.50
11.00
11.50
12.00
12.50
13.00
13.50
14.00
Value
10
11
12
13
14
15
16
17
18
BPS
14.50
15.00
15.50
16.00
16.50
17.00
17.50
18.00
18.50
Value
19
20
21
22
BPS
19.00
20.00
21.00
22.00
LED Options (Purple) Values 1-3 (Default is 1)
The LED Options setting allows the user to choose if the multicolor LED on the board is active outside of the programming
menu. In addition, it allows users to only use the multi-color
LED if desired, making the small blue LED simply a power
button. The default setting is 1, which uses both LED’s. If you
do not wish to use the Multicolor LED, you should shut it off
to conserve battery life.
Value
1
2
3
LED Options
Both LED’s
Small Blue LED Only
Multi-color LED Only
For More Information Please See:
www.AdvantagePB.com
103 Fulton Blvd.
Commack, NY 11725
Specifications subject to change without notice.
Shocker/Nerve Board
User’s Manual


