Download User`s manual :WY50QT-53


Transcript
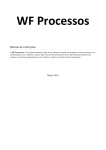
User’s manual :WY50QT-53
PREFACE
Thanks for your purchasing the motorcycle WY50QT-53 and sincerely welcome you to be
our motorcycle user. To enjoy a more safe and pleasurable driving, firstly please familiarity with
the manual must carry on before driving. Your personal safety depends not only on the vigilance
and familiar operation skills, but also relates to whether you are familiar with the mechanical
performance. Before driving, check-up and periodical maintenance are basic requirement. If
maintenance and repair needed, go to our service center for help. If you know the mechanic
knowledge and have the tools, the dealer can offer you help with the maintenance and repair,
like providing the parts catalogue and the spare parts.
This manual explains in detail the correct operation and maintenance, together with the
expectation for your long-time use. Modifications in specification could cause the discrepancy
with some figures and content in the manual, we feel sorry for that and hold the final right of
interpretation.
Have a good enjoyment and thanks again for your purchasing.
The Important Points to Attention
Ÿ The Driver and Passenger
This motorcycle was only adapted for only one driver. Never exceed the Max load capacity of the
motorcycle.
Ÿ For safety, never ride the motorcycle in the atrocious or cold weather(lower than -12℃)。
Ÿ Road Surface: This type of motorcycle is only drive on the high road.
The caution stickers about the driving safety or environment is sticked on the cover of sundries box,
rear shelf, and the cover of fuel tank . (Please read them before driving.and follow the guides while
driving.)
• Please Carefully Read the User Manual
Rider must pay attention to the sentences or paragraphs in caution stickers.
Warning:
Not following the operation instruction in this manual may cause great damage to you.
Attention:
Not following the operation instruction in this manual may cause injury to both you and
vehicle.
Regard this manual as a permanent parts, even when transfering the vehicle to other people, transfer
the manual at the same time.
Content
Ⅰ、Safe Drive
Rules for Safe Drive…………………………1
The Payload…………………………………2
Ⅱ、Various parts name and instruction
Parts & Subassemblies………………………3
Speedometer and Indicator……… …………5
Ignition Switch………………………………5
Fuel Meter……………………………………6
Light Switch…………………………………6
Starter Switch ………………………………6
Dimmer Switch ……………………………7
Turn light Switch……………………………7
Horn Switch…………………………………7
Steering Lock ………………………………7
Seat Lock……………………………………8
Front Box……………………………………8
Attemperator Switch ………………………9
Diner Box …………………………………9
Heat Preservation …………………………9
Ⅲ、Operation Instruction
Check before Drive ………………………10
Engine Starting……………………………14
Driving Motorcycle…………………… 15
Driving Operation…………………………16
Brake Operation……………………………16
Engine Power………………………………17
Parking Operation ………………………17
Ⅳ、Maintenance and service
Periodical Maintenance……………………18
Simple Trouble Solution……………………21
Cleaning Air Filter…………………………23
Maintenance of Battery……………………23
Idling Adjustment……………………… 24
Replacement of Gear Oil …………………26
Spark Plug …………………………………27
Fuse Replacement …………………………27
Ⅴ、Vehicle Storage ………………………28
Ⅵ、Vehicle Identification…………………29
Ⅶ、The tool set ……………………………29
Ⅷ、Main Technical Specification…………30
Ⅸ、Circuit Diagram………………………32
Ⅰ. Safe Drive
Rules for Safe Drive
1. Motorcycle happen the many accident, all reasons are that the car drivers can’t look at the
motorcycle drivers. So the motorcycle drivers must let the car driver to see them:
※Put on the coat in bright color.
※Avoid driving at night .you must drive on guard and carefully to the strong light.
2..Particular care should be exercised at the level crossing of roads, entrance and exit of parking lot
or on the automobile lane.
3.Don’t speeding, because the speeding usually to happen an accident.
4.You must get to the driving license and familiar with motorcycle. Never lend motorcycle to the
man without driving license or unfamiliar with motorcycle.
5.Avoid driving the road with accidental, easily result in the operation without used or the parts was
broken.
6.You must check up the motorcycle before driving.(page 10)
7.During drive, grasp the bar by hands and with feet on the footrests.
8.Don’t drive too close to the other vehicles. Never contend for lane, and strictly observe the local
traffic.
-1-
The Payload
l
Admonition:
Only light goods can be put in the rear shelf or other deposited place.
The goods payload cannot be heavier than the weight in blank 1:
Blank 1
Deposited Item
Weight
Front Box
1kg
Diner Box
20kg
l
The max payload is 75kg, including the weigh of driver and goods.
l
If motorcycle is over- loaded, it will affect the stability and operation of motorcycle.
l
The goods on the motorcycle must be tied tightly.
-2-
Ⅱ. Various parts name and instruction
Parts & subassemblies(Fig1、Fig2)
Fig 1
-3-
Fig2
Fig 2
The broken line(……)indicate the parts unseen in the picture
-4-
Speedometer and Indicator (Fig3)
⑴ Speedometer: Show the speed when the motorcycle move.
⑵ Odometer: Record the mileage.
⑶ Call indicator light: Sparkling when a call incoming.
⑷ Left Turning signal light: Sparkling when turn the button left
⑸ Fuel meter: Show the storage of fuel.
⑹ Right Turning signal light: Sparkling when turn the button right.
⑺ Hgh beam light: It will light when the button is turned to “
”.
⑻ Engine speed recorder: Show the speed when the engine working
Fig 3
Ignition switch(Fig4)
⑴ On(
)—when the switch turn to this position,
Start engine and do not pull out the key.
⑵ Off( )—When the switch turn to this position,
Start engine power off and take out the key.
⑶ Lock(
)—When the switch turns to lock position ( ),
Take out the key .do not do any turning operation
And do not start engine and light.
Fig 4
-5-
Fuel Meter(Fig5)
•
Fuel meter (5) show the approx remainder of fuel. When the hand point to (F),
it indicates Full tank of 4.5L.
When the hand at red section,it indicates the remainder of fuel is 1.8L.
Fig5
Light Switch 1(Fig6)
The light switch: three position“ ” 、“
”and“•”
:When it on the position, the front head light, tail light, position light and meter light turn on。
:When it on the position, tail light, position light and meter light turn on。
•: When it on the position, the front head light, tail light, position lighted instrument
turn off.
Starter Switch 2(Fig 6)
Fig6
Press this button to start engine(Read P14)
-6-
High-low Beam Switch 1(Fig7)
Press“
”button,is high beam;Press“
”button is low beam.
Turn Light Switch 2(Fig7)
When the switches on ( )position, turn left. When the switch on ( ) position,turn
right,.Press it down to turn off lights.
Horn Switch 3(Fig7)
Press the button,the horn makes sound.
Parking Switch 4(Fig7)
Press the button,front and rear turn signal light light at the same time.
Fig7
Steering Lock(Fig8、Fig9)
Turn handle left to end, press down ignition key 1 to ( ),the steering setting is locked. Do the above
opposite, it is unlocked.
Fig 8
Fig9
-7-
Seat Lock(Fig10)
•
Put the key1 into 2 Seat lock hole and then clock-wise
open the lock..
•
Press down the Lock until it make sound of locked,
then push the back of Lock to confirm it has been locked
and take out the key.
Fig10
Front Box(Fig11)
Ÿ
Put the key into the lock hole of Front Box and then turn
clock-wise 90° to open the front box.
Ÿ
Put the key into the lock hole of Front Box and then
Turn clock-wise 90°.Push to close the front box at the
same time. Then move anti-clockwise 90°to lock the
front box.
Fig 11
-8-
Attemperator Switch(Fig12)
•
Press button 1, 2 lights,and then Attemperator starts to heat.
•
Press 1 again, 2 is turned off, and Attemperator stops
heating.
Fig12
Diner Box (Fig13)
l
When lock is in the position like the picture,push 2 up to open 1.
Put the key into 3 and turn anti-clockwise 90°to close 1.
It can’t be opened by pushing 2 now.
Fig13
Heat Preservation Box (Fig14)
•
Turn on Attemperator Switch when engine is working,and then
the box begins to heat and keep food out of cold.
ATTATION: This box only can be used while engine is working.Start
Attemperator while engine isn’t at work,this will cause battery to loss
electricity.
Fig14
-9-
Ⅲ、Operation Instruction
Check before riding:
Check before riding, For safety and prevent trouble or accident,
pre-check up is necessary.
Gasoline Tank
When the pointer or fuel meter is close to red section, replenish
oil. And check the tank and the carburetor are right.
•
Gasoline tank container:4.5L
•
Anticlock-wise open the tank cover.(Fig15)
•
Suggestion gasoline: octane number is 90 above.
•
Do not replenish oil together with tidy or water.
Warning:
Ÿ
Fig15
Gasoline is inflammable,it will burn or even explode in some conditions。So,choose a well
ventilated place to replenish oil and must stop the engine first. No smoke and fire in oil place.
Ÿ
Keep gasoline level under away from the height panel of flue tank while replenish.Close
the fuel tank lock after finish replenishing.
Ÿ
The oil is poison, please keep children far from it. If swallow the oil careless, see the doctor at
once.
- 10 -
Check engine oil
Inspection Engine Oil Level(Fig16、Fig17)
1、 Keep the motor steady in the plane and screw up the oil
dip rod and clean it, then reinsert and inspect oil.
2、
If the oil level reach to down limit sign 2, replenish the
standard oil to upper limit sign 3, then put the oil level into,
cover the lid, to check it whether seeking.
Fig16
Suggestion the engine oil number
SAE-15W/40
3
Fig17
2
- 11 -
The free path of rear brake handle(Fig18、Fig19)
Measure the distance of rear brake pedal before detent function .the free path should between
10-20mm, take the tail of brake handle as standard.
Adjust nut
(A): reduce the distance of free path
(B): increase the distance of free path
The axle pin should touch closely with nut groove after adjust.
Fig18
Fig19
- 12 -
Braker indicator mark(Fig20)
(1)
Reference mark
(2)
Allow indicator mark
When the arrester are full brake, the allow will stand on one line with the reference mark, thus you
should replacement it.
Note::When the brake need to repair, please take the bike to the Maintain department to replace
the original company parts, not others.
1
Fig20
2
WARNING:
When the front disc gets worn to the limit (see the notice on the disc: MIN.TH.3mm),the old
disc must be changed in order not to influence the brake performance.
- 13 -
Tyre
Check the tire pressure regularly and adjust.
Front tyre pressure: 180kPa
Rear tyre pressure: 200kPa
l
l
l
l
Check before the tire cooled
Check if there any hole, especial it’s leaking you should replacement it.
Check the tyre with broke mark or not, such as the nail or tartness. Check the ring too.
When the tyre lines are disappear, please replace it.
WARNING:
l If the tire pressure dose not accord with the standard, it will properly cause the traffic
accident.
l It is dangerous that use the worn tire, It will have effect to friction between tire and rode.
Maybe make difficult from drive or accident.
Engine Starting (Fig21、Fig22)
•
Prepare: Stand the motorcycle. Put the key into ignition
switch and turn to “ ”.
•
Electric starter: press start button 1 to start, Do not use the
starter more than 5 seconds each time.
Fig21
- 14 -
Fig22
NOTICE:
l
Electric starting is only in the condition of grasping the brake handle.
l
Electric starting not succeed, if starting again with it, we must stop for 30 seconds.
l
If cold, start warm up engine for 3 minutes.
l
When the weather is hot, the engine should be turned off to avoid heat after long time work.
Driving motorcycle:
WARNING:
§ Wear the trousers to avoid touching with exhaust pipe and was burnt.
§ Wear helmet, glasses , and gloves to protect when driving.
§ Loose and unsuitable garment are inadvisable when driving.
§ The entire device must be installed according to requirement of the traffic rule. Take the license
to riding.
NOTICE:
Control the speed and payload during the first 1000km.Payload lower than 75kg is appropriate
(including the weight of driver), over speed or over loading will shorten the life of engine.
Control the speed according to blank 2
Log(km)
0~200
200~500
500~1000
Speed(km/h)
≤20
≤30
≤35
- 15 -
Driving operation
put away main stand and sit on the saddle ,step on the ground by left foot to make motorcycle plumb
with floor.
·Turn on the left turning light when look-in the road.
·Slowly to run the throttle when it start, take your left leg to a good position to the good speed, then
close the throttle when the speed cut down.
·Turn off the left turning light when driving normally.
Warning:
·Do not add much gasoline suddenly with throttle grip to prevent motorcycle rush out. Maybe lose
control.
·Before drive, must take the stand. Pole well.
Brake operation:
1.Control throttle grip
If you want to reduce speed, Must control the throttle grip, at that time use the two-brake system,
this point is very important.
Notice: if the drive will be done in this situation, for example: damp or loosely roads,
raining .no matter brake, add speed or turn must take care.
2.Operate front and rear brake.
Notice: Must totally close the flue when drive in a descent, and use two-brake system for
reduce speed. Don’t use brake continuously, other wise it will reduce the effect of brake
because of too hot.
Warning: Don’t use single brake when drive with high speed, special crooked and slippery road.
Must use two-brake system for avoiding accident.
- 16 -
Engine power off operation(Fig23、Fig24、Fig25)
Close throttle: revolve to the lowest place according to picture. (Normal situation is loose the
throttle grip, and the engine is idling speed) Put the Ignition Switch on(
Fig23
Fig24
).
Fig25
Stopping operation:
When the motorcycle stop, put the key to “ ” position .put down stand and lock handle. (Page 7)
Warning: motorcycle should be stopped on the plane and hard floor ,or it can cause damage to
vehicle and driver.
Alarm points:
•
Locking the handle and do not left key in the switch.
•
Put the motor into the garage.
- 17 -
Ⅳ、Maintenance and Service
Maintenance periodic form
The maintenance is important to motorcycle. After driving at high speed in bad
situation for a long time, the times of maintenance must be added,.If motorcycle is
necessary to has a big repaire or after an accident happened, main spare parts must be
checked seriously by machinist,for instance: frame, indicator parts and so on.Then the
worn parts must be repaired or replaced for safety.
Notice:
Don’t change motorcycle make sure it’s safety, Must use good quality spare parts if replace spare
parts .if use bad quality spare parts, it will influence the safety of motorcycle.
Warning: Must close engine when make maintenance .it make sure the repairer’s safety. And put
down the stand on the smooth ground.
Notice: Must make a good maintenance if the motorcycle don’t use over a month, or don’t use in
all the winter. Make flue, tire and battery avoiding corrode.
- 18 -
Maintenance periodic table(Blank 3)
Check before time based maintenance(Page10)
I:check and adjust when necessary
C:clean
R:change
Blank3
Cycle
Item
﹡
﹡
﹡
﹡
﹡
speedometer(x1000km)
Break in period
1
I
I
Fuel pipe line
Throttle
4
operation
Air filter
Spark Plug
Idle speed
8
12
I
I
I
I
C/ 1000km, if need: R
C/2000km,If need: R
I
I
Note1
I
I
I
I
Ref
page
16
23
27
24
- 19 -
Blank3 continue
Cycle
Item
﹡
﹡
﹡
﹡
﹡
**
**
speedometer(x1000km)
Break in period
Drive strap
Gear oil
Brake system
Brake switch
High-low light
Suspension
Screw, bolt
wheel, tyre
Turning bear
Note 3
1
(300km)R
I
I
Note2
I
4
8
C/1000km, if need: R
I
I
I
I
I
I
I
I
I
I
I
I
12
I
I
I
I
I
I
Ref
page
26
12
14
*If you have all of tool and maintenance document, you are a mechanic person, or else must let
special person maintenance and repair.
**For safety, we claim all of items have done by mechanic person.
Note: 1、if this area is very damp or have a lot of dirty .you had better make a short time for
maintenance, when it take more oil quantity or not strength, it must change.
2、if it was used every day, must make maintenance.
3、According to season to change in a cold area.
- 20 -
Solution for troubles(blank 4)
Trouble
phenomenon
Spark plug no spark
The spark is weak
Blank4
reason
Spark plug wear out
solution
Change
Ignition wire wear out
Change
CDI wear out
Change
Ignition switch wear out
Ignition come off or become flexible
Change
Connect well or firm
Spark plug gap too small or big
Adjust
Spark plug pole burn
The spark plug accumulates carbons
Change
Clear out
No spark to consult the spark plug
Can’t start the
engine
No mixed air in
cylinder
The cylinder compresses
strength low
No fuel
Oil mouth stop up
Fuel tank pressed the switch to damage
Replenish
Dredge
Change
The oil passage stops up
Dredge
Air cleaner stop up
Clean
Take in system leak
Check and clear out
Spark plug seat leak
Screw up spark
Cylinder cover leak
Valve seat washer worn out
The piston-ring or the cylinder block worn
Change spacer
Polish
Change them
The piston-ring is broken or stored up the
Change piston-ring or
carbon to hinder very much
clear carbon
- 21 -
Trouble
phenomenon
The vehicle
has bad
accelerative
performance
The electric
start
does
not work
Riding
unsteady
the brake
does not
work
Trouble reason
The octane value of the fuel is too low
Oil path blocked
Ignition in wrong time
Spark too weak or flameout
Mixed air too dense or too thin
Air leak from the engine
Muffler blocked
Belt wear and tear
The automatic clutch roller wear and tear
See “ can’t start the engine” as reference
The clutch is broken
the relay is broken
Battery electricity not enough
gap between turning bearings is too big
tire pressure not enough
Front and rear axle released
The brake block wear and tear superlatively
brake cam wear and tear
Brake cable is broken
Free path too big
- 22 -
Blank 4 continue
solution
Change flue
Clean oil path
Check wire and change CDI
Check ignition and clear out
Clean adjust carburetor
Check and clear out
Dredge
Change
Change
Change
Change
Charge
Adjust
pump
Screw up nut
Change
Change
Change
Adjust
How to clean the air fliter(Fig26)
•
Take apart air filter cover and screw up bolt.
•
Take out filter element.
•
Compress air or use dry brush to clean filter element.
•
Do the above opposite to reinstall the air filter.
Warning:
Do not use gasoline or low burning point solvent to clean paper
filter element.
Fig26
Maintenance battery(Fig27)
It is adopted the airtight battery (don’t add water)
Notice: Do not take apart the airtight battery upper cover.
•
If the motorcycle have not been used for a long time.
Taking
off the battery and putting it into a dry and place
•
The head of battery was corroded, please take it off and clean.
(Can use boil water)
NOTICE: turn off the ignition switch, take apart negative
- first, but install positive pole ○
+ when you are installing.
pole ○
Fig27
- 23 -
Idling adjust(Fig28、Fig29)
The carburetor is in the best situation before sold, if the
carburetor is still influence riding.Please adjust it under the instruction
of professional man.
• Warm up few minutes after start.
• Idle to adjust screw (1) is it is it improve idle speed
slightly
to enter to fasten, is it withdraw it than screw slowly after
stocking to fasten to mix and then rapidly, to stabilizing the
position at most, then withdraw slowly, get and stabilize the
Fig28
position the most low .
• After adjust idle, then adjust accelerograph handle to free path
for 2-4mm,then use adjustor (2) to adjust, screw down nuts, and
then screw up it after adjust.
• Adjusting the good idle speed, when should be able to suddenly
strengthen the throttle, the rotational speed of the engine should be
excessively steady, no flash back and can't go out, stop working or
arrange organ not to blow out at being last throttle.
- 24 -
Fig29
Change engine oil and clean strainer of oil filter
Change engine oil(Fig30)
•
Change the engine oil before engine cold, and under the condition of
steady of motor.
Clean the strainer.
•
Take out oil hole cover and oil filter 1 then take strainer 2 and
spring 3.
•
Using liquor clean the strainer.
•
Install oil filter then take strainer and spring.
•
Replenish the standard engine oil to upper limit line of the oil
Fig30
hole cover.
•
Install the cover of hole and liter.
•
Start engine and keep for few minute then flameout.
•
Measure the lever of engine oil again, makes sure it is not leak.
- 25 -
Change gear oil(Fig31)
Suggestion engine oil No:
SAE 80W/90(The cold place can use the Unfreezing oil)
Oil Capable
Changing capacity:0.10L
•
Parking the bikes by the main stand
•
Take apart the immixing bolt (1), and the spilling bolt (2).
NOTICE: When draining the oil, the engine needs a certain temperature,
use the main stand to support the motor, make sure all the oil
is drained.
Fig 31
Reinstall the spilling bolt after clean. And screw up.
•
Inject 100ml to engine through immit bolt
•
Install immit bolt and screw up.
- 26 -
Spark plug(Fig32)
1
The specification of spark plug
(0.6~0.7)mm
2
Standard: C7HSA(NGK)or A7T、A7RT
•
Take apart the spark plug; Take it of with special tool.
•
Examine if there is dirty on poles and the porcelain head in
center .If it has corroded, must change it .It is the best way to
clean with the liquor of spark plug Use wire brush if no
cleaner
•
Fig32
Normally the gap between side electrode (1) and
Center electrode (2) is 0.6-0.7mm .
•
Don’t use other spare plug
Fuse replacement
The rated electric current of the fuse is 15 A. If the fuse often burns down, it indicates the short
circuit or overload in the electric system. Ask the serviceman to repair it, and never use the brass
wires to replace the fuse.
- 27 -
Ⅴ、Vehicle Storage
Storage
For the motorcycle not to be used for a long period of time, for example, in wintertime, some steps
should be taken to prevent malfunction of and damage to its components, which might be caused by
long storage. Besides, before the long storage, proper maintenance has to be carried out for fear that
it might be forgotten when vehicle is put back into use after storage.
·Change engine oil and oil filter.
·Drain off fuel from the fuel tank and carburetor, spray atomized anti-rust oil onto the inside wall of
the tank and then close the tank.
Warning:
Gasoline is inflammable and may cause fire and even explosion under certain conditions.
Therefore, do not smoke, make fire or have any fire left behind on draining off fuel.
l
Take out the spark plug, pour about 15~20ml clean engine oil into the cylinder, step down
engine and finally fit the spark back on.
l Put the vehicle in a shady and cool place free from humidity and direct sunshine and cover
it properly (but not with plastic or other painted materials).
l After washing and dry it, all the painting face with one Pre-rust oil.
l Wash the motor, wipe it dry and apply an even coat of wax to the painted surface.
Chromate treatment can prevent the surfaces from rusting.
Using the bike again from the storage
§ Take out the coat, if the storing time is more than 4 months, you should change the oil.
§ If need, after you charge then assemble the battery.
§ Please checking all the item(page10),please keep a low speed driving in the free road.
- 28 -
Ⅵ、Vehicle identify
Vehicle type, Code and trademark of the bikes(Fig33)
Provide the numbers above when register to get the license ,do yearly inspection, and enjoy the
after-service .
The rivet for fixing name plate is on the right side.(See P3)
Fig33
Ⅶ、The tool set
The tools bag in the boot of seat(Fig34),for the urgent need in driving,
It including the something of the following:
8×10 spanner
12×14 spanner
Screwdriver
hexagon spanner
Wrench bar
18.5×17 wrench span
Fig34
- 29 -
Ⅷ Main technique Parameter
Blank 5
Items
L×W×H
Wheel Base
mm
mm
120
Dry Weight
105
75
kg
kg
Turning Angle of
Steering Handle º
Max Load
Start speed V=60km/h
Front Tire
1980×700×1190
1380
Ground Clearance mm
Rear Tire
Pressure Of
Front
Tire Of Rear
Pressure
≤48
Front
Distance m
brake
≤21.78
Max Speed km/h
Items
Parameter
Speed-down average m/s
≥3.4
≤50
Economic
Oil ≤2.3 L/100km
Consumption
Climbing
≥4.5
Performance º
Gradient of Low -1.3%
Beam º
Battery
12V 7Ah
- 30 -
2
Parameter
120/70-12
120/70-12
180 kpa
200kpa
Tire
Derailleur
Speed Ratio of
Derailleur
Auto Stepless
Rear brake Distance
Speed-down average m/s2
m
≤26.86
9.39~26.52
≥2.7
139QMB
Engine Type
Single
Cylinder, four strokes、
compulsory air cooled
Bore/stroke mm
39.0×41.5
Displacement ml
49.6
Clutch Type
Auto centrifugal Block
Oil Capacity L
4.5
Blank 5
Items
Parameter
Lubricating Way
Rated Power
Max Torque
kW/r/min
N.m/r/min
Compression Ratio
Specification
of
Spark Plug
Spark Plug Gap
mm
Idling Speed
r/min
Items
License plate light
15 A
12V 18W/18W×2
12V 5W/21W
12V 5W
Turning light
12V 10W×4
Fuel No.
Oil
Gearbox
Above RQ90
Pressure、Splash
Fuse
2.2/7000
3.0/6000
10.5:1
Headlight
Tail light/Braking light
C7HSA(NGK) or A7T、A7RT
0.6~0.7
(1500±150)
Lubrication Capacity of
0.8
Crankshaft L
SF SAE 15W/40(crankcase)
Lubricities oil Number
箱)
Ignition
CDI
Capacity,
L
0.11
Gear Oil No.
SAE 80W/90
Gap of air valve mm
0.03~0.05(cooled)
Electricity/kick start
Start
- 31 -
Ⅸ、Circuit diagram
- 32 -
Parameter