Download HD2 – Mobile Moisture Meter


Transcript
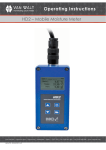
PRECISE MOISTURE MEASUREMENT HD2 – Mobile Moisture Meter Operating Instructions Operating Instructions HD2 Thank you very much for deciding to purchase this IMKO product! Should you have any questions in regard to this product please contact our local distribution partner or us directly. IMKO Micromodultechnik GmbH Im Stoeck 2 D-76275 Ettlingen Germany Phone: Fax: E-mail: Internet: +49-7243-5921-0 +49-7243-90856 info@imko.de http://www.imko.de The HD2 is a portable device which serves for the display of measurement values delivered by Trime moisture measurement sensors and was designed for mobile field deployment. Page 2 2011-12-05 2011-12-05 Operating Instructions HD2 User Manual Portable Measuring Instrument HD2 Version November 2011 Content General Notices ................................................................................................... 5 1 1.1 Intended Use ............................................................................................................................................. 5 1.2 The Chargeable Accumulator ..................................................................................................................... 5 1.3 Charging the HD2 Portable Measuring Instrument ..................................................................................... 5 1.4 Temperatures and Ambient Conditions ....................................................................................................... 5 2 Control Elements ................................................................................................. 6 3 Initial Commissioning ........................................................................................... 7 3.1 Safety Instructions...................................................................................................................................... 7 3.2 Checking the Delivery Scope .................................................................................................................... 7 3.3 Charging the Accumulator .......................................................................................................................... 7 3.4 Connecting a Sensor ................................................................................................................................. 7 Operation ............................................................................................................ 8 4 4.1 Switching ON the HD2 Portable Measuring Instrument ............................................................................. 9 4.2 Switching OFF the HD2 Portable Measuring Instrument ........................................................................... 9 4.3 Measurement .............................................................................................................................................. 9 4.3.1 Operating Mode „Normal“ ................................................................................................................ 10 4.3.2 Operating Mode „Average Value“ .................................................................................................... 10 4.3.3 Operating Mode „Water Calculation“ ............................................................................................... 11 4.4 Settings.................................................................................................................................................... 12 4.4.1 HD2-Mode ...................................................................................................................................... 13 4.4.2 Material Calibration .......................................................................................................................... 13 4.4.3 Detecting Sensor/Probe ................................................................................................................... 17 4.4.4 Language ......................................................................................................................................... 17 4.4.5 Auto-Power-Off ............................................................................................................................... 17 4.4.6 Display Illumination .......................................................................................................................... 17 4.4.7 Display Contrast .............................................................................................................................. 18 4.4.8 Probe Info ....................................................................................................................................... 18 4.4.9 HD2-Info ......................................................................................................................................... 18 5 Technical Data HD2 ........................................................................................... 19 6 Handling of the TRIME-PICO Probes ................................................................ 20 6.1 Introduction .............................................................................................................................................. 20 6.2 Measurement Volume of the PICO Probes ............................................................................................. 20 Page 3 Operating Instructions HD2 2011-12-05 Recommended way to achieve the best possible accuracy with the HD2 kit ........ 21 7 7.1 Measurement directly in the sand and gravel pile .................................................................................. 21 7.2 Measurement of laboratory samples in the bucket .................................................................................. 22 8 Exchange of the Probe Rods ............................................................................. 25 9 Technical Data SONO-M1 probe ....................................................................... 26 9.1 Page 4 SONO-M1 probe ..................................................................................................................................... 26 2011-12-05 Operating Instructions HD2 1 General Notices Please read the operating instructions carefully. Should you have any further questions, please contact our service department under the contact data depicted above. In no event should you attempt to open and repair the device yourself. Should you like to file any guarantee claims, please contact the distribution partner where you purchased the device. Within the scope of product improvements, the device is subject to technical and optical changes. 1.1 Intended Use This portable measuring instrument was designed to serve as a reading device for various IMKO probes. Only respectively intended probes may be connected to the device. The connection of a probe not intended for connection may lead to the destruction of the device and/or the connected probe. 1.2 The Chargeable Accumulator Never exchange the integrated accumulator yourself. The stated maximum operating periods refer to ideal conditions. The ambient temperature and the charging cycle can significantly reduce the performance time. In addition, the charging capacity reduces itself for technical reasons within the course of the utilisation of the device or due to storage at very high or low temperatures. 1.3 Charging the HD2 Portable Measuring Instrument Only deploy the respectively provided charger or a comparable power supply unit to charge the HD2 portable measuring instrument. Any deviation of the charging voltage can lead to damage to the device. Should the device heat up during the charging process, this is normal and not connected with any hazards. Should the HD2 only function for a short period or not at all in spite of several attempts to charge it, the integrated accumulator is defective and must be exchanged. In this case, please contact our local distribution partner or us directly. 1.4 Temperatures and Ambient Conditions The HD2 portable measuring instrument was designed for deployment under rough conditions. The operation of the device under conditions beyond those depicted may lead to damage to the same. Page 5 Operating Instructions HD2 2011-12-05 2 Control Elements Probe/Charger Connection „UP“ Back to previous Menu Item or Setting Direct link to “CHOOSE – Material Calibration” (Mode: Normal / Average) Direct link to “Density setting” (Mode: water calculation) „Measurement/Activate“ Shutting ON/OFF- press 1s Perform Measurement press shortly Selection of a Menu Item press shortly Storing a setting press shortly „Settings“ „DOWN“ Go to next Menu Item or Setting Deleting the Value Memory (Mode – Average Value) Page 6 Conclude Settings Leave Menu Item 2011-12-05 Operating Instructions HD2 3 Initial Commissioning Safety Instructions 3.1 Attention: Before initial commissioning, do not fail to read the General Notices, Item 1 at the front of these operating instructions. Any not intended use may lead to damage to the device. Checking the Delivery Scope 3.2 HD2 Portable Measuring Instrument Plug-in Power Supply Unit (12V/2A) Charging Adapter Protective Hood Manual 3.3 Charging the Accumulator The integrated accumulator should be charged before putting the device into operation the first time. For this purpose, plug in the provided charging adapter into the 7-pole socket of the HD2. Subsequently, connect the plug-in power supply unit to the charging adapter. In the event that the device is already switched on, or if the accumulator is exhaustively discharged, the charging process will commence immediately. If not, switch on the HD2 by pressing the button „Measurement“ for approximately 1 second. An active charging process is signalised in the display by an animated accumulator symbol. The integrated charging electronics charges the accumulator until the same is completely charged. In case of exhaustive discharge, this will approximately take 2 hours. As soon as the charging process is concluded, all 4 „accumulator bars“ will be permanently presented in the display and the trickle charging will commence. Attention: 3.4 Only charge the accumulator at room temperature (approximately between 10°C and 30°C)! At too low temperatures, it may happen that the charging concluding shut-down does not operate safely and the accumulator is over-charged. Too high ambient temperatures may lead to damage to the HD2 due to the additional heat-up during the charging process. Connecting a Sensor The HD2 portable measuring instrument can be operated with the following IMKO-moisture probes: Connect the moisture probe to the HD2 by plugging in the 7-pole plug into the respectively provided socket at the HD“ and fastening the coupling nut. Page 7 Operating Instructions HD2 4 Operation Key/Button Designation: Key/Button Designation Measurement Shutting ON/OFF- press 1s Perform Measurement press shortly Selection of a Menu Item press shortly Storing a setting press shortly Settings Conclude Settings Leave Menu Item UP Back to previous Menu Item or Setting Direct link to “CHOOSE – Material Calibration” (Mode: Normal / Average) Direct link to “Density setting” (Mode: water calculation) Down Go to next Menu Item or Setting Deleting the Value Memory (Mode – Average Value) Display Symbols: Symbol Designation Residual Accumulator Capacity Active Measurement Settings are stored Intensity of the Background Illumination Remaining time until shut-down (illumination / APO) Press button „UP“ Press button „DOWN“ Page 8 2011-12-05 2011-12-05 Operating Instructions HD2 Text Meaning: Text Meaning Cal.: Number of the active calibration in the probe Moist.: Moisture Measurement Value Notice: Depending on the set calibration, the measurement value may refer to %vol, %grav or ns Temp.: Temperature EC-Trime: Electrical Conductivity based on the TDR signal Serialno.: Serial Number of the probe, respectively of the HD2 HW: Hardware Version FW: Firmware Version Switching ON the HD2 Portable Measuring Instrument 4.1 Switch ON the HD2 by pressing the button „Measurement“ for approximately 1 second. During the starting-up process, the HD2 will attempt to communicate with the connected probe. This will take approximately 4 seconds. If no probe is connected, or the probe is not able to communicate for any reason, an error message will be generated on the display. If the probe was successfully detected, the accordingly set background of the operation mode will appear on the display and the HD” is ready for deployment. Notice: Should no connection to the probe be possible in spite of several attempts, check if the probe is connected properly. Should this not deliver a positive result, please contact our service department. Switching OFF the HD2 Portable Measuring Instrument 4.2 Switch OFF the HD2 by pressing the button „Measurement“ Notice: for approximately 1 second. It is not possible to shut off the HD2 while it is in the „Settings“. Please, first leave the menu item „Settings“ by pressing the button „Settings“ until the measurement display appears. Measurement 4.3 The HD2 portable measuring instrument disposes of three operating modes: 1. Normal Individual Value Display – presents the measurement variables Moisture, Temperature and the EC-Trime 2. Average Value presents the average value of the moisture of up to 6 individual measurements 3. Water calculation determine the content of water in l/m³ Notice: During a measurement, no further actions are possible. It is necessary to wait until the measurement is concluded. Page 9 Operating Instructions HD2 4.3.1 2011-12-05 Operating Mode „Normal“ After switching on the HD2 portable measuring instrument, the following display will appear in the operating mode „Normal“ after the start screen: Number of selected Calibration Serial No. If connected probe Residual Accumulator Capacity Name of selected Calibration Measurement Value: Moisture Measurement Value: Temperature Measurement Value: TDRConductivity In order to initiate a measurement, shortly press the button “Measurement” . The measurement will com- mence and a turning -symbol will appear instead of the accumulator-symbol in the upper right hand corner. During this period, no other actions can be performed. The measurement requires approximately 4 to 5 seconds. Once the measurement is concluded, the accumulator-symbol will reappear and the measured values will be generated on the display. The display of the values will be maintained until a new measurement is conducted. 4.3.2 Operating Mode „Average Value“ In this operating mode, only the moisture is measured and an average value of up to 6 individual values is evaluated. Depending on the set calibration, either the volumetric or the gravimetric moisture is presented. After switching on the HD2 portable measuring instrument, the following display will appear in the operating mode „Average value“ after the start screen: Individual Values of the Measurements Number of selected Calibration Residual Accumulator Capacity Average Value oft he Measurement In order to initiate a measurement, shortly press the button “Measurement” . The measurement will com- mence and a turning -symbol will appear instead of the accumulator-symbol in the upper right hand corner. During this period, no other actions can be performed. The measurement requires approximately 4 to 5 seconds. Once the measurement is concluded, the accumulator-symbol will reappear. On the left hand side of the display, the individual values of the measurements will be presented. The currently measured value is presented at Position 1 and old values will be shifted one position onwards. The arithmetic average value is displayed on the right hand side. The average value is calculated out of the existing individual values up to a number of 6 values. Page 10 2011-12-05 Notice: Operating Instructions HD2 Only a maximum of 6 values can be stored in the list. Older values are removed from the list and are no longer involved in the formation of the average value. In order to delete the measurement series, actuate the button „Down“ . TIPP: 4.3.3 Operating Mode „Water Calculation“ In this operating mode, only the variable Moisture is measured. There will be up to six single values stored and concluded to an average value. Out of this the water content per m³ is calculated. To get the correct water contend it is necessary to set up the density of the measured material. The continuous measurement is initiated by actuating the button „Measurement“ . The same is concluded by actuating the button „Measurement“ once more. The currently pending measurement is performed completely once more and the sequence is concluded. Individual Values of the Measurements Number of selected Calibration Residual Accumulator Capacity Density in kg/dm³ Average of Water content in l/m³ In order to delete the measurement series, actuate the button „Down“ To set up the density of your material, actuate the button „Up“ the display: . . Then you will get the following screen in Adjust the density of your material by actuating the buttons „Up“ and „Down“ . Confirm your setting by pressing the button “Measurement” . You will then automatic get back to the measurement screen. Leave the setting without changing the density by pressing the button „Settings“ . Page 11 Operating Instructions HD2 4.4 2011-12-05 Settings There are various options to modify and align the settings of the HD2 portable measuring instrument. You will reach the following menu configuration by actuating the button „Settings“ By actuating the buttons „Up“ and „Down“ , the entry intended for processing can be marked and sub- sequently be selected with the button “Measurement” menu “Settings”, with the button “Settings” : . You can exit the current menu item, and also the . An Overview of the Setting Options Settings Designation HD2-Mode Switching the Operating Mode (German/English) - „Normal“ measurement of the variables Moisture, Temperature, and EC-Trime - „Average Value“ determination of the average value of up 6 individual moisture measurement values - „Water Calculation“ Calculates the content of water of the material in l/m³ Material calibration Choosing or change the needed Material Calibration Detect Probe A new search for a connected probe (if an error has occurred during the activation of the device) Language Switching the System Language -German -English Auto-Power-Off Setting of the automatic shut-down Display Illumination Setting of the Background Illumination - Turn-Off-Time - Intensity LCD-Contrast Setting of the ideal contrast Probe Info Issues various information regarding the probe HD2-Info Issues various information regarding the HD2 portable measuring instrument Page 12 2011-12-05 4.4.1 Operating Instructions HD2 HD2-Mode In this menu item, the operating mode of the HD2 portable measuring instrument can be changed. With the selection „Normal“, an individual measurement of the three probe parameters Moisture, Temperature and the EC-Trime is selected. The parameter Moisture, depending on the selected calibration, the moisture in volumetric or gravimetric percentages or can state the running period of the TDR pulse. In case of the display of the running period, the percent-symbol must be understood as „ns“. When selecting “Average Value”, depending on the selected calibration, only the moisture in %vol or %grav, respectively the running period in ns, is determined. The measured value is stored in a list of up to 6 measurement values. The arithmetic average is formed out of this list. Notice: Only a maximum of 6 values can be stored in the list. Older values are removed from the list and are no longer involved in the formation of the average value. The selection “Water Calculation” will switch on the mode getting the contend of water in l/m³ of the measured material. To get the measurement value of a bigger volume, you can probe on different places of your material. The single values will summed up in one average value. By actuating the buttons „Up“ and „Down“ , the entry intended for processing can be marked and sub- sequently be selected with the button “Measurement” . After the selection, the symbol will appear in the upper right hand display corner which indicates that the selection is activated and has been stored. 4.4.2 Material Calibration Depending on the task of the deployment, various calibrations are deposited in the probe. These can be volumetric calibrations for grounds of various densities, gravimetric calibrations for the measurement of sand moisture contents, or also running period calibrations. You can select the calibration required for your application within the menu item „Material Calibration“. This enables to cover a multitude of deployment options with merely one probe. Also it is possible to setup your own calibration, to get the possibility to measure special materials. After the selection of the menu item „Material Calibration“, you have to choose between “CHOOSE”, to save one out of fifteen calibration as default calibration, or “CHANGE”, to setup a new calibration in one of the fifteen calibration storages Menu item: “CHOOSE”: The 15 calibration options are called up by name which requires a short moment of time. Subsequently a display in a similar form as follows will be generated: Page 13 Operating Instructions HD2 2011-12-05 The list can be scrolled and the wanted calibration be selected by actuating the buttons „Up“ and „Down“ . The “!“ in front of a calibration indicates the currently active one. You can set the selected calibration to become the active one by actuating the button „Measurement“ . After a short moment, the symbol will appear in the upper right hand display corner to indicate that the selection has been activated. In addition, the „!“ will be placed in front of the now active calibration. HINT: Get to this menu item directly out of the measurement screen, by actuating the button „Up“ . Menu item: “CHANGE”: Here you’ve got the possibility to setup your own material calibration or to change an existing one to your requirement. Therefor two options are available: 1-point calibration: - Shifts a calibration curve to a choosen moisture point. - The gradient isn’t changed. - Only one measurement is necessary. 2-point calibration - Creates a linear calibration between two measured moisture points - Two material samples with differnet moisture values are nedded. 1-point Calibration: In this material calibration option only an offset of the appointed calibration is done. As there is no changing of the gradient proceeded, it is necessary to choose a calibration curve that fits to the material. Notice: To perform a 1-point material calibration you need a sample of the material to be measured. You have to determine the moisture of this material with another process before starting the calibration. Procedure: First you have to set the calibration curve to be changed (01 – 15) by pressing the buttons „Up“ and „Down“ . Apply your setting by actuating the button „Measurement“ Page 14 . 2011-12-05 Operating Instructions HD2 Next set the moisture oft the material by pressing the buttons „Up“ and „Down“ . Apply your setting by actuating the button „Measurement“ . To start the measurement push the button „Measurement“ . To increase the accuracy four measurements take place. The whole time of measurement is about 20 seconds. Afterwards the measured average impulse duration is shown for a short moment. Notice: Ensure that the probe rods are totaly covered with the material the whole time of measuring. Attention: If you choose “SAVE” at the end of calibration, the stored calibration inside the probe is overwritten! The only possibility to get back the original calibrations is to connect the probe with a RS485 adapter (for example SM-USB) to the PC. Also you need the software PICO-Config. Finally you can store the calibration into the choosen calibration storage inside the probe. Choose „SAVE“ an confirm by pressing the button „Measurement“ thing is left untouched. . If you choose “DISCARD” every- To track the changed calibration, ist name is left untouched, but a „OWN:“ is prefixed. 2-point Calibration: At the 2-point material calibration, two material samples with different moisture values are measured. Out of this a linear equation ( f(x) = mx + b ) is calculated. Also a higher polynomial would give a higher accuracy, the linear equation produces very good results especially in lower moisture values. Notice: To perform a 2-point material calibration you need two material samples with different moisture values. You have to determine the moisture of these materials with another process before starting the calibration. The sequence, first the lower moisture point and second the higher moisture point must be strictly adhered. Procedure: First you have to set the calibration curve to be changed (01 – 15) by pressing the buttons „Up“ and „Down“ . Apply your setting by actuating the button „Measurement“ Page 15 . Operating Instructions HD2 2011-12-05 Next set the moisture oft the lower moisture point by pressing the buttons „Up“ and „Down“ . Apply your setting by actuating the button „Measurement“ . To start the measurement push the button „Measurement“ . To increase the accuracy four measurements take place. The whole time of measurement is about 20 seconds. Afterwards the measured average impulse duration is shown for a short moment. Notice: Ensure that the probe rods are totaly covered with the material the whole time of measuring. Next set the moisture oft the higher moisture point by pressing the buttons „Up“ and „Down“ . Apply your setting by actuating the button „Measurement“ . To start the measurement push the button „Measurement“ . To increase the accuracy four measurements take place. The whole time of measurement is about 20 seconds. Afterwards the measured average impulse duration is shown for a short moment. Notice: Ensure that the probe rods are totaly covered with the material the whole time of measuring.. Attention: If you choose “SAVE” at the end of calibration, the stored calibration inside the probe is overwritten! The only possibility to get back the original calibrations is to connect the probe with a RS485 adapter (for example SM-USB) to the PC. Also you need the software PICO-Config. Finally you can store the calibration into the choosen calibration storage inside the probe. Choose „SAVE“ an confirm by pressing the button „Measurement“ thing is left untouched. . If you choose “DISCARD” every- To track the changed calibration, ist name is left untouched, but a „OWN:“ is prefixed. Hint: Save your calibrations which are stored inside the probe to your PC. All you need is a RS485 adapter (such as SM-USB) and the software PICO-Config. Hereby you can also copy the calibrations created by yourself to other probes. Page 16 2011-12-05 4.4.3 Operating Instructions HD2 Detecting Sensor/Probe In the event that that communication problems arise with the probe at the activation of the HD2 portable measuring instrument, or if no probe was connected, or it is intended to exchange the probe during operation, this menu item should be selected. After selection of this menu item, the HD2 will again attempt to establish a connection to the connected probe. If this attempt is successful, the serial number of the probe will appear in the display. Should a connection not be possible, „No probe detected“ will be generated on the display. Notice: 4.4.4 Should no connection to the probe be possible in spite of several attempts, check if the probe is connected properly. Should this not deliver a positive result, please contact our service department. Language In this menu item, the language of the HD2 portable measuring instrument can be selected. Currently, the user has the choice between the languages English and German. You can select the desired language by actuating the buttons „Up“ and „Down“ and activate the same via the button „Measurement“ activation of the language, the symbol will appear in the upper right hand corner of the display. 4.4.5 . After Auto-Power-Off In the menu item „Auto-Power-Off“, you can select an automatic shut-down offered in various time periods. Hereby, you can select between the following shut-off times: - 1 Minute - 2 Minutes - 5 Minutes - 10 Minutes - 20 Minutes , respectively also deactivate the automatic shut-down function (Display „—min“). For this purpose, select the desired shut down time by actuating the buttons „Up“ activate the same via the button „Measurement“ right hand corer of the display. Notice: 4.4.6 . After activation, the symbol and „Down“ and will appear in the upper The HD2 will only automatically shut down, if no further button is actuated. Any actuation of a button will lead to the shut down time to start again. Display Illumination If required, the background illumination of the display can be individually adjusted. Consequently, this enables the option to save power and to prolong the operational period. After the selection of the menu entry, the following screen will be presented on the display: Page 17 Operating Instructions HD2 2011-12-05 The selection of the background illumination, respectively the time until the automatic shut-down of the same is selected via the button „Up“ by actuating the same several times. Using the button „Down“ , you can adjust the intensity of the illumination, respectively turn the same completely off. Activate and store your settings by actuating the button „Measurement“ hand corner of the display. 4.4.7 . After activation, the symbol will appear in the upper right Display Contrast At extreme temperatures, it may be necessary to adjust the contrast of the display in order to be able to clearly read the display. For this purpose, select the menu item „Display Contrast“. Change the contrast by actuating the button „Up“ „Measurement“ , respectively „Down“ . After activation, the symbol . Activate and store your settings by actuating the button will appear in the upper right hand corner of the display. Change the contrast by actuating the button „Up“ , respectively „Down“ . Set the contrast that you can realize the whole grayscale on the diagram. Activate and store your settings by actuating the button „Measurement“ . After activation, the symbol appear in the upper right hand corner of the display. 4.4.8 will Probe Info By selecting this menu item, after a short moment, you will be issued various information regarding the connected probe. These are: - Serial Number Probe Type Hardware Version (HW) Firmware Version (FW) 4.4.9 HD2-Info By selecting this menu item you will be issued various information regarding your HD2 portable measuring instrument. These are: - Serial Number Hardware Version (HW) Firmware Version (FW) Accumulator Capacity Accumulator Voltage Page 18 2011-12-05 Operating Instructions HD2 5 Technical Data HD2 Height 36mm Width 64mm Length 150mm Weight Power Consumption Power Down Idle Measurement per Charge ca. 35µA - Background Illum. OFF - Background Illum. Max ca. 26mA Idle ca. 56mA - Background Illum. OFF - Background Illum. Max Probe turned ON ca. 100mA Measurement ca. 350mA 20°C / Background Illum. Max Mode – Continuous Measurement ca. 5000 Connectable Sensors SONO-M1, SONO-M2, PICO64, PICO32, PICO-IPH Storage Temperature -30°C up to 80°C Operating Temperature -20°C up to 70°C Charging Temperature 10°C up to 30°C Charging Voltage Nom. 12V, Max. 15V, Min. 12V Charging Current ca. 1A Charging Time At exhaustively discharged accumulator. 2h Accumulator Ni-MH (4 x 1.2V) (AA), 2000mAh, >1500 Measurements Physical BUS RS485 Bus-Protocol IMP-Bus Port Settings IMP-BUS-Protocol II 8 Data Bits, 2 Stop Bits, Odd Parity Page 19 Operating Instructions HD2 2011-12-05 6 Handling of the TRIME-PICO Probes 6.1 Introduction The determination of the soil moisture content with the Time Domain Reflectometry (TDR) technology has in the mean time managed to well-establish itself on the market. In former times, the reliable measurement of the moisture was laborious and not always accurate. Since the development of the TRIME-TDR technology, there no longer any reason to rely on complicated and inaccurate technologies. 6.2 Measurement Volume of the PICO Probes The penetration depth of the electrical and magnetic flux lines in theory reach indefinitely far into the measured material. However, the effective penetration depth of the SONO-M1 probes relevant for the measurement is approximately 2 cm in the vicinity of the probe rods. The illustration demonstrates the effectively registered measurement volume (green waveform). Page 20 2011-12-05 Operating Instructions HD2 7 Recommended way to achieve the best possible accuracy with the HD2 kit 7.1 Measurement directly in the sand and gravel pile For measurements in sand pile, make sure that the probe (rods) is inserted in the material until the blue probe body. To obtain a representative moisture value of your material, select the operating mode "Average Value" and take measurements at different locations. Bitte beachten Sie dabei, dass Ihr Material bei langer Trockenheit oberflächlich trockener ist, als in tieferen Schichten. Hat es zum Beispiel nach längerer Trockenheit geregnet, ist das Material nun an der Oberfläche feuchter. Um das beste Messergebnis zu erhalten Messen Sie am besten an unterschiedlichen Stellen und in unterschiedlichen Tiefen. Please note that after drought your material is dryer at the surface, as in deeper layers. For example: Did it rain after prolonged drought the material is now more wet on surface as in deeper layers. To get the best results measuring in different places and at different depths. Page 21 Operating Instructions HD2 2011-12-05 Measurement of laboratory samples in the bucket 7.2 Following requirements has to be fulfilled, to ensure the optimal accuracy of the system: The probe rods has to be covered completely by the material to be measured The bucket has to have a volume of 10 liters or more and has to be non-metal The bucket should be as far as possible cylindrical The filling depth of the bucket has to exceed the rod length by minimum 5cm Are the above described requirements fulfilled and the measurements are executed as described below the optimal measurement results can be reached Page 22 2011-12-05 Operating Instructions HD2 1. Dump the sand sample into the bucket 2. Compact the sand sample by lifting the bucket 5cm and letting it fall down vertically onto a solid base and repeat this procedure 5 times (if there is still to see a compaction after 5-times repeat this procedure until there is no more compaction to see!) 3. Insert the probe rods into the sand sample completely, if the probe body reaches the surface of the sand and press until you feel counter pressure of the sand (neither jiggle nor rotate the probe while inserting!) a. For gravel and grit also compact the material before inserting the probe, additionally jiggle the bucket while inserting the rods, as the sensor is difficult to insert without, additionally this helps to ensure, that the material is in well contact with the probe rods!) Page 23 Operating Instructions HD2 2011-12-05 4. Measure once with the HD2 handheld device 5. Remove the probe out of the material and jiggle the bucket to loosen up the material 6. Repeat the steps 2. to 4. Twice until you have determined three values 7. Dump the sand sample into another bucket, the measure the sample from the bottom side (this is especially recommended for gravel and grit and if the sand sample is close to saturation, as in this case it could be possible that the free water is moving through the material to the bottom of the bucket!) 8. Repeat the steps 2. to 4. three more times until you have determined six values 9. The average value out of the six measurements now can be used for your documentation Page 24 2011-12-05 Operating Instructions HD2 8 Exchange of the Probe Rods In the event that the probe rods are damaged, the same can be easily exchanged. 1) Prepare the gaskets, the probe body, and the probe rods 3) Press the gaskets until they reach the interior thread 2) Press the gaskets into the bore holes 4) Screw the rods into the probe body Page 25 Operating Instructions HD2 9 Technical Data SONO-M1 probe 9.1 SONO-M1 probe For measurement of the moisture content in sand, and gravel State-of-the-art sensor with integrated TDR-electronics Measurement Value Range 0..40 vol.% Integrated Temperature Sensor Deployable up to more than 5dS/m Total Conductivity (Bulk-Soil-Conductivity). Measurement Volume ≙ 1000ml Robust (IP68), proven, and suited for long-term installation Page 26 2011-12-05 2011-12-05 Operating Instructions HD2 Power supply: 7V..24V-DC Power consumption: 100mA @ 12V/DC during 2..3sec. of measuring Moisture measuring range: 0..100% volumetric water content Accuracy (in % volumetric water content): ±0.2% conductivity range: 0..5dS/m Repeating accuracy: ±0.3% Temperature caused drift of electronics (full range): ±0.3% Material temperature measuring range: -15°C...50°C Material temperature measuring accuracy: ±0,5°C (permanent installed, complete in the Material) Measurement volume: 1,0L ≅ 130x100mm diameter Operating Temperature: -15°C...50°C Calibration: Calibration for sand and gravel is installed customizable material specific calibration storage of up to 15 user defined calibration curves calibration of dialectric permittivity is possible Probe body: waterproof sealed PVC (IP68) Size: 155 x Ø63mm Rod lenght: standard: 130mm Rod diameter: 6mm Interface: 1,5m cable with 7-pin female connector Page 27 PRECISE MOISTURE MEASUREMENT in hydrology, forestry, agriculture, environmental and earth science, civil engineering, as well as individual applications! www.imko.de IMKO GmbH Im Stöck 2 Germany-76275 Ettlingen Phone +49-(0)72 43-59 210 Fax +49-(0)72 43-9 08 56 e-mail INFO@IMKO.de www.IMKO.de