1
RuimTools
Spy Times
APDU Logger and Analyzer
User Manual
© RuimTools Inc, 2008-2012
http://ruimtools.com
1. Introduction ....................................................................................................................................... 4
2. Hardware installation ......................................................................................................................... 5
2.1 Setting Up Spy Times................................................................................................................... 5
3. Basic Use ........................................................................................................................................... 6
3.1 A log with Spy Times................................................................................................................... 6
3.2 Loading/Saving a log.................................................................................................................... 6
3.3 Recent files .................................................................................................................................. 6
4. Informations....................................................................................................................................... 7
4.1 Hardware ..................................................................................................................................... 7
4.2 Scripts.......................................................................................................................................... 7
4.3 Spy Times .................................................................................................................................... 7
5. Advanced Features............................................................................................................................. 8
5.1 Pausing log................................................................................................................................... 8
5.2 Follow log.................................................................................................................................... 8
5.3 Search .......................................................................................................................................... 8
5.4 Comments .................................................................................................................................... 8
5.5 Open/Close branches.................................................................................................................... 8
5.6 Synchronize ................................................................................................................................. 9
5.7 Open/Close Headers ..................................................................................................................... 9
5.8 Display Events ............................................................................................................................. 9
5.9 Trigger ......................................................................................................................................... 9
5.10 Filters....................................................................................................................................... 10
5.11 Statistics................................................................................................................................... 11
5.12 Goto APDU.............................................................................................................................. 11
5.13 Change Convention .................................................................................................................. 11
6. Scripts.............................................................................................................................................. 13
7. Settings ............................................................................................................................................ 14
7.1 Hardware ................................................................................................................................... 14
7.2 Change Master Script ................................................................................................................. 14
7.3 Fonts .......................................................................................................................................... 14
Spy Times, © RuimtTools Inc, 2008-2012
2
http://ruimtools.com
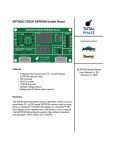
Picture 1: Spy Times hardware
Spy Times, © RuimtTools Inc, 2008-2012
3
http://ruimtools.com
1. Introduction
Spy Times is an analysis tool that visualizes the data exchanges between a Smart Card and Smart Card
Reader, with a very deep level of interpretation. Spy Times helps in debugging and analyzing Smart
Card communications. It is also very useful for learning how a Smart Card application works.
Spy Times runs on any Windows computer (Win2000/Me/XP/Vista). Spy Times tool consist of
following parts:
- Hardware that provides interpretation of the exchanges
- Software to communicate with hardware
- Scripts with deep interpretations of APDU commands
Spy Times comes with a set of interpretation scripts that provide interpretation for the following
specifications:
ISO (ISO 7816-3 and 7816-4)
GSM (GSM 11.11, 11.14, 03.40, 03.48, 03.38)
CDMA (CDMA 1X, CDMA2000, EvDO)
And scripts for the following specifications will be available very soon:
EMV 2000
VSDC
Spy Times, © RuimtTools Inc, 2008-2012
4
http://ruimtools.com
2. Hardware installation
The Spy Times hardware must be connected via USB interface to your computer. All required drivers
for Spy Times hardware available on Spy Times CD or internet site (http://ruimtools.com).
2.1 Setting Up Spy Times
After Spy Times drivers have been installed the tool is ready for use. No other manipulations are
required.
Spy Times, © RuimtTools Inc, 2008-2012
5
http://ruimtools.com
3. Basic Use
3.1 A log with Spy Times
Connect the Spy Times hardware to USB, introduce the probe in the reader and insert the SIM into the
Spy Times reader. Launch Spy Times software and choose Monitor->Start Monitoring (you can also use
the toolbar button). If you correctly installed Spy Times hardware drivers, Spy Times clears the screen
and adds a line : " Spy Times <version> - Log started on <date>". The status bar reports "Monitoring".
Start your smart card application. When the card reader communicates with the smart card, the APDUs
are logged in Spy Times: the left-hand column displays the interpretation and the right-hand column
displays the corresponding part of the APDUs in hexadecimal.
The status bar gives information about the selected APDU: its number, its timestamp (if you are doing a
timed log), its type, its convention. The status bar also tells you if you are connected to the hardware
("Monitoring" or "Not monitoring"), if filters are ON or OFF.
If your log contains timing information, it is interesting to visit the other tabs of the window.
Chronogram is an analysis of the signals on every pin of the smart card. Timing Analysis displays each
APDU and bytes with some timing information (but no interpretation) and "Both view" displays at the
same time the chronogram and the interpretation.
Notice that it is possible to open or close the interpretation, providing two levels of details. The colors of
the items indicate the direction of the exchanged APDU.
To finish your log, choose Monitor->End Monitoring or the corresponding toolbar button. Spy Times
disconnects from the hardware and line 'End of log - <date>' appears at the end of the log. You can save
your log.
3.2 Loading/Saving a log
You can save your log using the menu File->Save Log. If you have some timing information available,
you can save your log in the .chr format, which will keep the timing information. If you don't have the
timing information or don't want to keep it, you can use the other formats: Spy Times (*.vlog) will save
in a text format, Interpreted Spy Times (*.vlog) will save in the same text format, but with the
interpretation information appended as comment.
Spy Times can load (menu entry File->Open Log) the .vlog format.
3.3 Recent files
The recently loaded/saved files are accessible in the File->Recent Files menu entry. A shortcut is
available with 'CTRL+index of the recent file'. The most recent file has always an index of 1.
Spy Times, © RuimtTools Inc, 2008-2012
6
http://ruimtools.com
4. Informations
4.1 Hardware
It is possible to get information about the Hardware connected to Spy Times, with the menu About>Hardware. Spy Times must be able to connect to the hardware to retrieve this information. Information
includes hardware type, serial number, OS version, etc
4.2 Scripts
Spy Times's interpretation is done using a set of scripts, whose name and version are available through
the menu entry About->Interpretation. Information includes the name of the scripts, the description, the
version of the specification and the version of the script. More on the scripts in the chapter "Advanced
Features", Scripts.
4.3 Spy Times
The version number of Spy Times is available through the menu entry About->Spy Times.
Spy Times, © RuimtTools Inc, 2008-2012
7
http://ruimtools.com
5. Advanced Features
5.1 Pausing log
Sometimes, you have to make a long log where only very small parts are interesting. It is possible with
Spy Times to stop the recording of a log, using the menu Monitor->Pause monitoring. Spy Times won't
disconnect from the hardware, it will only stop recording the incoming APDUs. An event "Pause"
appears in the log, to inform the user that the log has been paused and that some APDUs are discarded.
The menu entry is checked. Use the same menu entry to continue the log. You can insert pauses to the
log as many times as you want.
5.2 Follow log
When monitoring a communication, it is possible to have Spy Times always show the last exchanged
APDU. Use the menu Monitor->Follow log to get this. A tick appears in front of the menu entry to
indicate that the follow log mode is selected. This option is also available in the toolbar. The button
stays depressed if the option is checked. In follow-log mode, each new APDU will make the window
scroll down to have it displayed. If you don't select this mode, the window won't scroll when incoming
APDUs arrive.
5.3 Search
It is possible to search a string inside a log. Use the menu entry Log Control->Search, or the toolbar
button or the shortcut CTRL-F.
The search will seek in all the closed branches and may open them if your text is inside one of them.
Using the ticks of the dialog, you can precise if you want a case sensitive behavior or not, if the search is
forward or backward, or to perform the search also in the hexadecimal field.
5.4 Comments
It is possible to insert comments inside the log. Click with the right mouse button on an APDU and
choose "Insert comment before APDU" or " Insert comment after APDU" to insert comments before or
after the selected APDU. The comments are stored in all the text formats supported by Spy Times (vlog,
PCOM), but not in the non-text format (.chr). You can delete the comment by right-clicking on it and
choosing "Delete comment".
5.5 Open/Close branches
There are two levels of interpretation detail with Spy Times. The compact level shows only one line of
interpretation per APDU. The detailed level shows all the interpretation items open. You can switch
between the two levels by choosing the menu entry Log control->Open branches. A tick in front of the
menu entry indicates if the branches are all open or closed.
It is also possible to open or close a branch just like in Windows Explorer, by clicking the ‘+’ sign, or by
using arrow keys, or by using ‘+’ and ‘-‘ keys. You can view the content of the line of interpretation by
clicking on the '+' sign.
Spy Times, © RuimtTools Inc, 2008-2012
8
http://ruimtools.com
5.6 Synchronize
Using the menu entry Log Control->Synchronize or toolbar button, you can synchronize the selected
APDU of the interpretation window with the other windows: Chronogram and Timing Analysis. Then,
when you move in the interpretation and switch to other windows, they will have moved too. This works
in both directions. If you move the cursor in the chronogram, the selected APDU of the interpretation
window will have changed too.
5.7 Open/Close Headers
You can also choose if the interpretation of the headers of DF and EF will be displayed closed or open,
using Log Control->Open header.
DF and EF headers are returned after the commands Get Status or Select + Get Response. It is usually
handy to have all the items open, except the headers, to follow what's happening in the log without
having the uninteresting file headers taking up space on the screen.
5.8 Display Events
You can choose to display or not display events using Log Control->Show Events. A tick indicates if the
events are currently shown or hidden. Events are reported in the Spy Times log. Spy Times features the
following events:
Start Log and End log. Contains the date and the version information of Spy Times
Pause Log and Continue Log.
Power On and Power Off: generated when signal on Vcc raises or falls down
Clock Stop: generated the card reader stops the clock
Trigger started and Trigger Stopped: generated with trigger actions, see the paragraph "Trigger".
The events Power On, Power Off and Clock Stop are only available when using a log with timing
information.
5.9 Trigger
Sometimes, you must record a log during a very long time to analyze only a few events at the end. To
avoid to record the log all the time, Spy Times has a trigger features. Triggers allow starting or stopping
the log according to certain conditions.
To install a trigger, go to Monitor->Trigger monitoring. A dialog pops which permits to define the
trigger conditions. One tabulation is available for the Start conditions, and one for the Stop conditions.
With the Add button, you can add trigger conditions, with the Edit button, you can edit them and with
the Delete button, you can delete them. The last tabulation allows you to loop on the trigger conditions
or not.
When adding or editing a condition, a dialog pops up to edit the possible conditions. You can define the
following conditions:
APDU starts with specific bytes: check the «First data bytes» radio button and edit the text field
with hexadecimal values
Spy Times, © RuimtTools Inc, 2008-2012
9
http://ruimtools.com
APDU contains specific bytes : check the «Data bytes contain» radio button and edit the text
field with hexadecimal values
Interpretation contains specific text : check the «Interpretation contains» radio button and edit
the text field with the string
Wait until a certain number of APDU have been exchanged : check the «Wait for (APDU)» radio
button and edit the text field with the number of APDU that should pass
Wait during a given time : check the «Wait for (seconds)» radio button and edit the text field
with the number of second to wait for.
Conditions can be combined using the logical operators AND and OR. When you define a new
condition in the condition dialog, you choose how the condition will be composed with the preceding
condition (except for the first one).
You must define a Start condition but you can leave the Stop condition empty. Press Accept and the
trigger will be active. Spy Times will connect to the hardware and fetch the exchanged APDU. Every
APDU will be checked against the defined conditions and the APDU that match will start or stop the
log. While the log is not started, the incoming APDU are discarded.
You can define only one start and stop trigger for a log, but it can be used as many times as you want
inside the log. The trigger starting and stopping issues an event that is displayed in the log, to remind
you that you used a trigger.
5.10 Filters
Sometimes it is interesting to filter a log, to see only some relevant APDUs. Spy Times has a filter
function to do this, on a per-APDU basis. When you are using Spy Times normally, you can see "Filters
off"
in the status bar. It means that all APDU are displayed. To use the filter feature, use the menu entry Log
Control->Filters. This will launch the filter dialog.
In the dialog, you can select if you want to hide or to show only the APDU matching certain conditions,
using the radio button "Show Only matching APDU" or " Hide matching APDU" . Two boxes
corresponding to the two modes must be filled with the conditions. You can add new conditions using
the Add button. You can delete the selected condition using the Delete button. And you can edit the
selected condition using the Edit button.
The button Edit and the button Add launch the dialog to define a condition. This dialog looks like the
trigger condition dialog. You can define your condition to be:
a string that the interpretation contains
a hexadecimal string that the APDU contains (right column)
a hexadecimal string with whom the APDU starts
an APDU number (all APDU are numbered starting with 1) before or after which your condition
will be true
You can have as many conditions as you want. Every APDU is checked against every condition to
decide whether the condition applies. Depending on the result of this and the filter mode (Show Only or
Hide), the APDU will be shown or hidden.
Spy Times, © RuimtTools Inc, 2008-2012
10
http://ruimtools.com
Spy Times applies only conditions which are checked. All the conditions are saved between subsequent
use of Spy Times. However, Spy Times starts with all the conditions unchecked by default, so that no
filter is active by default.
When you have configured your filters, choose Ok. The current log will then be filtered and the status
bar will display "Filters On". To remove your filter, just launch the filter dialog again and uncheck all
the conditions.
5.11 Statistics
With Log Control->Statistics, you can get some statistics about the log. A dialog pops up which
presents:
total number of bytes exchanged
number of protocol bytes
number of null protocol bytes
number of bytes with parity error
number of bytes in command APDUs
number of bytes in response APDUs
total number of APDUs
number of ATR APDUs
number of PPS APDUs
number of command APDUs
number of response APDUs
mean and the standard deviance of the interbyte time (in microseconds and in ETU)
standard deviance of the interbyte time
mean and the standard deviance of the returning time (in microseconds and in ETU)
The Interbyte time is the time between the two leading edge of characters going in the same direction.
The returning time is the time interval between the two leading edge of byte going in opposite
directions.
The dialog also reports the number and the types of analysis events. See the paragraph «Timing
analysis» for more details.
This statistic information can be saved in a file using the button «Save Info».
5.12 Goto APDU
The incoming APDUs are numbered in the log. The first APDU is numbered 1. When you select an
APDU in the interpretation, the status bar displays its number. It is possible to jump to an APDU with a
given number using Log Control->Goto APDU.
5.13 Change Convention
In very rare cases, Spy Times might not get the correct convention for your Card. It happens for example
if your card is in inverse convention and you start recording the log after the ATR. Since the convention
is encoded in the ATR, Spy Times can not know the correct convention and will assume a direct
convention.
Spy Times, © RuimtTools Inc, 2008-2012
11
http://ruimtools.com
The hexadecimal APDU will look strange and Spy Times will be completely unable to interpret them.
To deal with such cases, it is possible to manually change the convention of a log with the menu entry
Monitoring->Change convention. A dialog pops up, which permits you to change the convention for the
whole log or only from the selected APDU to the end of the log. All incoming APDUs will use the
convention you specify.
Spy Times, © RuimtTools Inc, 2008-2012
12
http://ruimtools.com
6. Scripts
The interpretation provided by Spy Times is done through a set of scripts. Initially Spy Times comes
with scripts for ISO, GSM, and CDMA. EMV and VSDC specifications are being developed.
An interpretation scripts set comes with a Master Script (visible via menu View->Choose Interpretation)
and a set of sub-scripts. The Master script defines which sub-scripts will be used. Each Master Script
defines some types which are used to colorize the items on the interpretation (See Settings->Fonts).
The Master script used for the current interpretation is displayed in the right of the status bar. It is
possible to change the interpretation's Master Script by using Settings->Change Interpretation. The
menu entry opens up a dialog to choose the new Master Script to load. Once the script is loaded, the
interpretation is regenerated using the new scripts.
At any time, it is possible to reload the current script and regenerate the interpretation, using the menu
entry File->Reload scripts. This is handy when you are modifying a script and want to see the results
directly.
Spy Times, © RuimtTools Inc, 2008-2012
13
http://ruimtools.com
7. Settings
7.1 Hardware
Using the menu entry Settings->Test, you can check if the connection to Spy Times hardware works. If
it does, dialog displaying information about the hardware will pop-up.
7.2 Change Master Script
As we said in the paragraphs "Scripts", using the menu entry Settings->Change Interpretation changes
the Master Script used for the interpretation.
7.3 Fonts
With the command Settings->Fonts, it is possible to define the appearance of the items shown by the
interpretation.
There are two tabs. The first one defines the appearance of interpretation items that belongs to Spy
Times (Events, Comments and Hexa) and the second one the appearance of the items defined by the
Master Script.
Select each item and you can change its font family, its font size, its colour and whether the item is
displayed in bold, italic or underline. The name of the type of the item is drawn using the defined
settings.
The generic items settings are saved independently of the Master Script selected. The specific settings
are saved along with the master script name, and thus loaded only when this particular Master Script is
loaded.
Spy Times, © RuimtTools Inc, 2008-2012
14
http://ruimtools.com