1
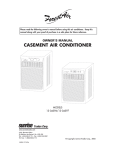
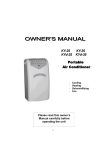
Before using this air conditioner, please read the following instructions carefully and keep
this manual along with your proof of purchase in a safe place for future reference.l
OWNER’S MANUAL
CANADIAN STANDARDS
PORTABLE EVAPORATIVE 3-in-1
AIR CONDITIONER
MODEL : 13-04540/13-04553 (KY-32U/D)
© Copyright, Sunrise Tradex Corp., 2005
00193-12/01/06
TABLE OF CONTENTS
USE ..........................................................................3
SAFETY NOTES ........................................................3
UNIT DIAGRAM
Front ........................................................................4
Back ........................................................................4
Installation Kit ..........................................................4
INSTALLATION
Electrical requirements .............................................. 5
Preparing the air conditioner ...................................... 5
Choosing the location ................................................ 6
Fixing the exhaust hose .............................................. 6
Wall installation ........................................................ 6
Installation by window type ...................................... 7
CONTROL PANEL AND LCD DISPLAY
Control panel ............................................................ 8
LCD display .............................................................. 8
UNIT OPERATION
Cooling .................................................................... 9
Dehumidifying .......................................................... 9
Fan .......................................................................... 9
Auto Mode .............................................................. 10
Sleep Mode .............................................................. 10
Setting the timer ........................................................ 10
REMOTE CONTROL ..................................................11-12-13
WATER DRAINAGE ..................................................14
MAINTENANCE
Cleaning the housing ................................................15
Cleaning the filter ......................................................15
Storage......................................................................15
TROUBLESHOOTING CHART .....................................16
TECHNICAL SPECIFICATIONS ....................................17
CUSTOMER SERVICE ................................................17
WARRANTY...............................................................18
2
WARNING
Before using this air conditioner, please read this owner’s manual carefully. This manual is
not a contract and should be used as a reference guide only. We reserve the right to make
technical changes at all times without prior notice.
USE
Thank you for purchasing this portable evaporative 3-in-1 Air Conditioner. This unit is
designed to improve indoor living and working comfort by providing cooling, dehumidifying and
ventilation with minimal installation. Unlike traditional portable units, there is almost no tank to
empty as the unit evaporates 80% of the condensate water which is drained through the hot
air exhaust hose. This unit is designed for spot cooling or cooling a room no larger than
42m2 (450 sq. ft.) with a standard 2.44 m. (8’) ceiling height. When using this appliance,
always take basic safety precautions.
SAFETY NOTES
1. Always place the unit on a flat surface in a cleared out area.
2. The unit must be connected to a grounded power supply properly rated. For your safety, this unit is
grounded through the power cord plug when connected to a grounded wall outlet. Never use an
adapter plug or extension cord, nor plug the unit in a damaged receptacle.
3. Before unplugging the unit, always turn it off. Always unplug the unit before cleaning or servicing it..
When unplugging the unit, never pull on the power cord - always grip the plug.
,4. Ensure that removable covers, hoses and other accessories are correctly fitted before running the unit.
5. Do not install or use the unit in the following places :
• near a heat source ;
• an area with possible gas leakage or in an explosive atmosphere ;
• near a bath, shower enclosure, swimming pool, or any other steamy and wet areas ;
• in a greenhouse.
6. Do not apply insecticides or any other flammable products on the unit.
7. Do not start or stop the unit by plugging in or pulling out the power cord.
8. Do not operate with wet hands or spray water or other liquid on the unit, nor immerse
the appliance.
9. This unit is not intended for the use of children and close supervision is necessary when it is operating
near children.
10. Never insert fingers, foreign objects, or anything to obstruct the air inlet and outlet grills. Always
warn children.
11. Do not cover the appliance.
12. Do not expose skin or eyes directly to cool air over a long period of time.
13. If an abnormal odour or smoke comes out of the unit, immediately unplug the unit and contact
SUNRISE TRADEX Customer Service.
14. When opening the filter cover, do not touch the internal metal parts of the unit.
15. Always check the power cord for signs of damage before use. If the power cord is damaged, contact
SUNRISE TRADEX Customer Service.
16. Do not place a plant or allow a pet to be exposed directly to the unit cool air flow.
17. Do not put any combustion appliance in the direct path of the unit airflow ; it could affect the
combustion efficiency.
18. Do not sit on the unit or place anything on the unit.
19. Always store the unit standing up. If the unit is to be moved or carried horizontally, wait 24 hours
before plugging the air conditioner..
20. Before storing the unit in a clean and dry area, drain the water and clean the filter.
3
UNIT DIAGRAM
Front
control
panel
upper air
outlet
handle
lower air
inlet grille
Back
upper air
inlet grille
electric cord
hot air outlet
lower air
inlet grille
water drain
hole
INSTALLATION KIT
air
exhaust
hose
hose square adaptor
to unit
hose oval
adaptor to
window
window adjustable slider kit
4
INSTALLATION
• Electrical ratings of the air conditioner are detailed on the rating plate on the back of the unit.
• Basic electrical requirements are listed hereafter. Please make sure to check the following before
installing and connecting your unit.
ELECTRICAL REQUIREMENTS
1. The air conditioner must be grounded ; it is equipped with a LCDI
(Leakage Current Detection and Interruption) power cord and plug
This feature will circuit trip the electrical power source if the nominal
current leakage between the cord shield and either load conductor
exceeds a predetermined value. The cord will remain out of power
until the device is manually reset. This is intended to protect against
electric shock and to reduce the risk of a fire in the power cord or
combustible materials nearby. The cord shield is not grounded and
must be considered a shock hazard if exposed. The cord shield
must not be connected to ground or to any exposed metal.
2. Do not cut or bypass the plug ground prong. If you do not have a grounded outlet available
near the air conditioner, have one installed by a qualified electrician.
3. The power supply rated voltage is ± 6%.
4. Do not connect the unit to an outlet being used by other appliances; ideally, connect to a single
grounded 15A circuit (time-delay fuse or circuit breaker).
5. If the power cord or plug is damaged, call SUNRISE TRADEX Customer Service.
PREPARING THE AIR CONDITIONER
FIXING THE CASTERS
To avoid the risk of causing damages to the air conditioner,
you must install the casters before using the appliance.
1. Open the accessory bag and take the 4 casters out.
2. Recline the unit, one side at a time, to insert the unit into
the base holes. Do not recline the unit more than 45°
from the ground.
3. Screw the casters into the base threaded holes.
Casters
INSTALLATION
OF THE DRAIN HOSE
You must fix the drain hose before operating the unit.
1. Take out the drain hose, the hose cap and the clamp
from the accessory bag.
2. Insert the drain hose into the drain hole on the lower
back of the unit. Make sure that the drain hose is
correctly inserted into the drain hole.
Rear grille
Cap
Clamp
3. Put the hose cap on the free end of the drain hose.
4. Fix the drain hose on the rear grille with the clamp.
Drain hose
5
INSTALLATION
CHOOSING THE LOCATION
Place the unit on a level surface in a cleared
out area where the air outlets cannot be
obstructed. For a maximum efficiency, keep
a clearance of at least 50 cm (20”) front
50 cm
50 cm
850 mm
and rear of the unit (Figure A).
FIXING THE EXHAUST HOSE
• During the operation of an air conditioner,
a large flow of hot air must be exhausted
out of the room. The exhaust hose
supplied with this air conditioner must be
connected at all times (when running in
air conditioning mode) to exhaust the hot
air out.
SLIDE THE HOSE SQUARE ADAPTOR ALL THE WAY
450 mm
370 mm
Figure A
DOWN OVER THE HOT AIR OUTLET ON BACK OF
THE UNIT
(Figure B).
WALL INSTALLATION
Figure B
• The hot air must be exhausted outdoor
through a window, a patio door or directly
through the wall.
1. Pick an exterior wall where you will be able
to correctly install the air conditioner and the
hot air outlet.
2. Drill a hole of 13,3 cm (5-1/4”) on the
exterior wall. The hole must be 40 to 130 cm
(16” tp 50”) above the floor (figures C).
3. Fix the external end of the exhaust hose onto
the wall pre-drilled hole.
APPAREIL
MUR
130 cm (50”)
40 cm (16”)
NOTE :
Figure C
The hot air exhaust hose must be as short as
possible. To avoid hot air backdraft and
guarantee an efficient exhausting of the hot air,
make sure the hose is not bent, kinked or twisted
(Figure D). In order to do so, please check upon
the following :
• Position the air conditioner as close as
possible to the outside air outlet.
• Unscrew the hose connector, cut the excess
hose and screw the connector back on the hose.
• Do not forget to leave a 50 cm (20”)
clearance all around the air conditioner.
• To maximize the efficiency of the air
conditioner, you may insulate the exhaust hose
with a 6” insulating flexible tube.
Figure D
6
INSTALLATION
INSTALLATION BY TYPE OF WINDOW
Casement window
1. It is recommended to replace the
screen with a clear plexiglass
panel (1/4'') fitted to the size of
your window screen.
2. Cut a hole to the same size as the
window oval adaptor of the
exhaust hose - approximately
13,3 cm (5-1/4”).
3. Correctly fit on the adaptor.
4. Fix it on the plexiglass using 4
screws (not included).
HUNG
WINDOW
Sliding windows or patio door
1. Install the window slider kit
vertically or horizontally within the
inside frame (vertically for a patio
door). If necessary, screw the slider
kit on the frame.
2. Close the window onto the window
kit to form a tight seal.
3. Attach the exhaust hose adaptor to
the window slider kit; the adaptor
tabs will lock into place the
adaptor to the window kit.
SLIDING
WINDOW or PATIO DOOR
CASEMENT
WINDOW
MODE
TIMER
• Make sure to correctly install and insulate the window slider kit. It must perfectly fit into
the window. The length can be adjusted. The three pieces are easy to cut and slide well
into each other.
• Tape the edge around the slider kit to stop insect or bug intrusion (tape not included).
NOTE :
Using the window slider kit may make it difficult to correctly close and/or lock the window.
Additional safety precautions should be considered.
7
CONTROL PANEL AND LCD DISPLAY
CONTROL
PANEL
Press this button to turn the unit on or off.
Press this button to select one of the following modes : COOL, FAN, DRY or
AUTO.
In COOL, FAN or AUTO mode, press this button to select the fan speeds (LOW
- MEDIUM - HIGH). In DRY mode, the fan speed cannot be adjusted.
To set temperature in cooling or auto mode.
To set the time (# of hours) when the timer is on.
Sets the air conditioner in SLEEP mode (automatic shut off).
LCD screen display.
LCD DISPLAY
FAN
COOL
SLEEP
DRY
SET TEMP
SET TIME
AUTO
: Auto mode
: Fan speeds LOW/MEDIUM/HIGH
SET TIME : Displays the hours set when
AUTO
SLEEP
COOL
FAN
DRY
: In sleep mode (automatic shut off)
: In cooling mode
: In fan only mode
: In dehumidifying mode
SET TEMP : Displays the set temperature
ON
OFF
*HEATING mode is optional only on some models.
8
timer is on
: Timer is on
: Timer is off
UNIT OPERATION
• Plug the power cord into a properly rated grounded outlet. Do not connect the unit to an
outlet that is being used by other electrical appliances.
• Then press the
I/O button to begin operation.
• When starting the air conditioner, always set the unit to COOL and the temperature to the
coolest degree - 16oC (61oF). Let it run with for 2 hours.
• When the desired room confort level is reached, adjust the fan speed to maintain this
temperature and adjust temperature accordingly if necessary.
• Since the air conditioner takes few hours to cool off the room, it is recommended to let the
air conditioner work 24/24 h. and adjust the temperature instead of stopping and starting
the air conditioner on a daily basis.
• If the unit is turned off while running in COOL, DRY or AUTO mode, when turning the unit
back on, allow 3 minutes before the compressor resumes.
COOLING
1. Press the MODE
button and set until the COOLING icon
lights up.
2. The display will show the set temperature. Press on the temperature button
to set the
temperature - 16oC to 31oC (61oF to 88oF).
3. Press FAN SPEED
to set fan speed at LOW, MEDIUM or HIGH ; each speed level is
identified by an icon lighting up when selected
.
• When the room temperature is slightly warmer than the set temperature, the compressor
starts running and the air conditioner cools the room off. When the room temperature is
slightly colder, the compressor stops, but the fan keeps on running.
• The exhaust hose must be correctly installed and that the air inlet and outlet grilles must be
cleared out.
• Make sure that the drain hose and cap are correctly installed.
• For maximum efficiency, draw the curtains or blinds if the room is exposed to direct sunlight.
• Do not place near a heat source.
DEHUMIDIFYING
BUTTON UNTIL THE DEHUMIDIFYING ICON
LIGHTS UP.
PRESS THE MODE
• The exhaust hose must be correctly installed.
• In dehumidifying mode, the fan runs at low speed and speed cannot be changed.
• Make sure that the drain hose and cap are correctly installed.
• The unit will not operate if the room temperature is lower than 16oC (61oF).
• For maximum dehumidifying efficiency, keep windows and doors closed.
FAN
1. Press the MODE
button and set until the FAN icon
lights up.
2. Press FAN SPEED
to set fan speed at LOW, MEDIUM or HIGH ; each speed level is
identified by an icon lighting up when selected
.
• In FAN mode, the exhaust hose is inoperative.
9
UNIT OPERATION
AUTO MODE
The unit built-in microcomputer analyses the temperature and humidity level in the room ; the
air conditioner controls and automatically adjusts the cooling system (compressor on or off)
and the fan speed. This selfadjustment feature allows you to maintain room comfort by controlling the temperature and air dehumidification in the room.
BUTTON UNTIL AUTO LIGHTS UP ON THE CONTROL
TO SET IN AUTO MODE, PRESS THE MODE
• Exhaust hose, drain hose and cap hose must be correctly installed in AUTO mode.
• The TIMER may be used in AUTO mode.
PANEL.
SLEEP MODE
When setting this mode, the air conditioner will automatically shut off in 7 hours. This is a
fast way to program an automatic shut off of the unit for the night for an optimal room
comfort ; it is also energy saving.
1. Unit must be running when using this mode.
2. Press on the SLEEP
button until the SLEEP
icon lights up on the pannel.
3. The air conditioner will automatically shut off after 7 hours.
4. For programming a shut off in less than 7 hours, use the TIMER
button to adjust the
delay by 1/2 hour slot up to 7 hours maximum. The LCD display will show the set time.
5. To cancel, press again the SLEEP button until the SLEEP icon goes off.
• When the SLEEP mode is on, you can still modify/program any other function on the unit.
• You cannot set the TIMER ON for an automatic shut off if the unit is in SLEEP mode.
• The SLEEP mode cannot be used if the air conditioiner is in AUTO mode.
SETTING THE TIMER
When the unit is operating, the timer can be used to set an automatic shut off time. If the unit
is off but still plugged, the timer can be used to set an automatic start time.
AUTOMATIC STARTING :
1. While the unit is off, press the TIMER
button until the TIMER ON icon lights on.
2. Press the up/down arrows on the TIMER button
to set the time (number of hours)
before the air conditioner turns on (1-24 hours) ; LCD display will show the set time
..
AUTOMATIC SHUT OFF :
While the unit is running, repeat steps 1 and 2, as detailed previously for an automatic shut off.
• To cancel the timer, whether you are programming an automatic start or shut off of the air
conditioner, simply press on the TIMER button until the OFF icon lights on.
10
REMOTE CONTROL
You can control your air conditioner from a distance with the remote control provided with
your unit. The remote can control the same functions than those operated directly from the unit
on the control panel. Before using the remote, do not forget to insert 2 AAA 1.5V batteries
(included).
How to insert the batteries
• Following the arrows shown in the figure, remove the
battery cover.
• Insert the 2 batteries, making sure that the terminals
(+ /-) are correctly fitted.
• Put the cover back into position.
Note :
Always use 2 AAA 1.5V battaries. Replace batteries
with new ones when the LCD display of your remote is
fading out.
USING THE REMOTE :
• Always line up the remote signal transmitter with the unit signal receiver on the front panel.
• The LCD display of the remote will show all the messages and icons you may need to control your air
conditioner from a distance.
• All operational functions of your remote, as well as message and icon identification are described in
the next 2 pages.
• After entering a mode or function on your remote, always press on SEND to initiate the command on the
unit. You will hear a “beep” from the unit, meaning that the function has been received and initiated.
• When keying a function or mode on the remote, the identification icon or message flashes on the remote
LCD display and stops flashing when the SEND button is pressed.
POWER FAILURE
• In case of a power failure during operation, all settings programmed directly from the unit will
be cancelled.
• However, the remote control will keep in memory the last settings programmed on the remote
control. To resume operations, simply press on SEND.
• If the air conditioner does not work properly, unplug the unit and plug it back.
• Wait 3 minutes and then turn the unit on.
• Press SEND on the remote control to resume last operations set from the remote.
11
REMOTE CONTROL
LCD DISPLAY
SEND : initiate all operations
of the air conditioner
FAN : to set fan speeds
MODE : to set the air
conditioner in AUTO, COOL
or FAN mode
SLEEP : to set the air conditioner in SLEEP mode
TIMER : to set the timer or
the clock (time)
DRY : to set in
DEHUMIDIFYING mode
To set the number of hours
when the timer is on or the
time (clock)
+oC / -oC :
to set temperature
I/O (ON/OFF) : to start or
close the air conditioner
*Product may differ from picture or line art.
TO START OR STOP THE AIR CONDITIONER :
Press on the I/O (ON/OFF) button.
TO SET THE MODE :
• Press on MODE until the matching icon flashes on the remote LCD display :
for COOLING mode,
for FAN ONLY mode ou
for the AUTO mode.
• Press on SEND to initiate the operation on the air conditioner ; a “beep” will confirm
transmission and the icon will stop flashing.
*IMPORTANT: some screen may display a “sun” icon for HEATING mode; this mode is available only
on some models.
TO SET FAN SPEED :
• Press on FAN and choose the speed : HIGH, M (Medium) or LOW - each speed icon will flash.
• Press on SEND ; a “beep” will confirm transmission and the speed icon will stop flashing.
TO SET TEMPERATURE :
• Press on +oC or -oC to set the desired température - the temperature icon will flash. The
temperature is increased or decreased by 1o each time you press on these buttons.
The temperature settings range from 16oC to 30oC (61oF to 86oF).
• Press on SEND ; a “beep” will confirm transmission and the temperature icon will stop flashing.
NOTE : all the above operations can be keyed in on the remote control before pressing on SEND
to initiate the operations on the air conditioner.
EX. : to set your air conditioner in COOLING mode, at HIGH fan speed and at 22oC :
• press on MODE until the COOLING flashing icon
shows on the LCD display ;
• then, press on FAN until the HIGH flashing icon shows on the display - when pressing on FAN,
the cooling icon will stop flashing;
• then, press on +oC or -oC until you reach 22oC - the temperature icon will flash and the FAN
icon will stop flashing ;
• to complete, press on SEND - a “beep” will confirm transmission and the temperature icon willl
stop flashing.
12
REMOTE CONTROL
DEHUMIDIFYING MODE :
• Press on DRY to set the air conditioner in dehymidifying mode - will show on the remote
control LCD display ; press on SEND.
• To cancel this mode, simply press on DRY again.
• In DRY (dehumidifying) mode, the compressor is running but the fan speed cannot be changed.
TIMER AND TIME (CLOCK) :
When pressing on TIMER , you may select TIMER to put the timer on and set the number of hours, or
you may select TIME (CLOCK) to set the current time.
TO SET THE TIMER :
For an automatic start of the air conditioner :
1. Press on TIMER - the TIMER icon will flash and the LCD display will show 0.5 if there have been
no previous setting - otherewise, the display will show the time set previously (number of hours).
2. Press on Hr - the number of hours icon will flash and the TIMER icon will stop flashing ; keep on
pressing Hr to set the number of hours (1-24) before the air conditioner starts. From 0 to 8,
time will increase by 1/2 hour ; from 8 to 24, it will increase by 1 hour.
3. Press on SEND ; a “beep” will confirm transmission and the time (hours) icon will stop flashing.
TO SET THE TIME (CLOCK) :
• Press on TIMER until the TIME icon flashes - the LCD screen will display the current time.
• To change the time, press on Hr - the hour icon will flash ; set the hour, then press on Min to set
the minutes - the minute icon starts flashing and the hour icon stops flashing ; set the minutes,
then press on SEND - the minute icon will stop flashing.
IMPORTANT : always check and set the clock at the right time before initiating the timer or the sleep
mode ; do nof forget to press on SEND.
SLEEP MODE
This mode is a fast way to set a 7-hour time delay automatic shut off of your air conditioner.
1. Set this mode when the air conditioner is running.
2. Press on SLEEP ; the SLEEP icon will appear on your remote display ; your air conditioner will
automatically stop running in 7 hours.
4. If you want an earlier shut off, press on Hr - the hour icon will flash ; you may increase the time
(1 hour at a time) up to 7 hours.
5. Press on SEND ; a “beep” will confirm transmission and the hour icon will stop flashing and the
remote LCD screen will display the time left before the shuf off of the air conditioner.
6. To cancel the SLEEP mode, simply press on SLEEP again - the SLEEP icon will go off, then press
on SEND.
• For other operational settings, proceed as detailed previously.
13
WATER DRAINAGE
When the unit is in cooling mode, the air humidity is converted in water used to cool down
the unit. 80% of the water is condensate and evaporated outdoor through the exhaust hose.
When the unit is used in extremely humid environment, exceeding water will be drained into
a pan located at the bottom of the unit. When the water pan is full, the compressor stops
but the fan keeps on running.
When the water pan is full, an overflow alarm will “beep” and the LCD display will show an
E4 message, meaning that the tank is full, and the unit will stop running. To resume
operation, empty the water tank as per the following:
1. Turn the unit off. Do not move the unit when the water pan is full.
2. Unclamp the drain hose from the rear grille.
3. Place a 2L container under the drain hose.
4. Remove the cap from the drain hose. The condensate water will drain out
automatically. When the 2L container is full, put the cap back into the drain hose to stop
the water from draining out. Empty the 2L container. Repeat until all the water is
completely drained out.
4. Once the water container is empty, put the cap back into the drain hose and clamp the
hose back on the grille.
Back grille
Drainage
port
2L container
14
MAINTENANCE
Always turn off and unplug the unit before cleaning to avoid electrical
shock.
CLEANING THE HOUSING
• Wipe the surface of the unit with a soft damp cloth. Cleaning the unit with gasoline, paint
thinner, chemical products or abrasive detergent could damage it. Use mild soap.
• Do not clean the air conditioner directly under a faucet or with a garden hose - its
electrical components could be damaged and cause electric shocks.
• Avoid direct exposure to sunlight as this may affect the finish colour.
BACK OF THE UNIT
CLEANING THE FILTER
• Open the rear grille of the air conditioner
and take the filter out.
• Immerse the filter gently in lukewarm water
and a mild detergent. Rinse thoroughly, let
it dry completely and put the filter back.
• For maximum efficiency of the air
conditioner, clean the air filters every two
weeks, or more frequently if there are
animals around.
• If the filter is damaged or used, contact
SUNRISE TRADEX Customer Service.
Filter cover hooks
Filter
cover
STORAGE
• Turn the unit off and unplug.
• Drain all condensate water from the unit.
• Turn the unit to fan mode for a couple of hours to completely dry out the inside.
• Clean the filter.
• Wind the power cord to the hangers.
• Always store the unit upright in a clean and dry aera. It is recommended to store
the unit in its original packing carton.
Notes :
• If the unit is not used on a regular basis, it is recommended to turn it on once in a while to
keep the compressor in good working condition.
• After running for several seasons, the air conditioner internal components may get dirty and/or
obstructed - the unit may become less efficient. Regular maintenance is recommended. Contact
SUNRISE TRADEX Customer Service for maintenance or repair.
15
TROUBLE-SHOOTING
Before asking for service, please check the following troubleshooting chart.
PROBLEM
The air conditioner does not
work.
The indicator shows the air
conditioner is running, but it
does not work.
CAUSE
Power supply :
1. Unit is not plugged in.
2. The plug or receptacle is
damaged.
SOLUTION
1. Plug in correctly
2. Change the plug or
receptacle.
The timer is on.
Cancel the timer or wait for the
unit to start.
1. The humidity of the room is
under 30%.
2. There is frost on the evaporator.
3. The air filter is dirty.
4. The temperature is
inadequate.
5. Is there any heat source in the
room ?
6. Is the hot air exhaust hose
correctly installed ?
1. Increase the humidity level.
2. The unit is defrosting ; it will
resume after the defrosting
cycle is completed.
3. Clean or change the filter.
4. Increase the temperature and
the fan speed.
5. Close or move the heat
source.
6. Check the installation of the
hot air exhaust hose and
insulate it.
Power supply is unstable and
the unit is not working properly.
Stop the air conditioner
(switch off the power supply).
Wait 10 minutes and turnit
back on ; if E1is still on , call
SUNRISE TRADEX Service.
LCD window shows an E4 error
message.
The water tank is full.
Drain out and empty the water
tank.
The unit is smelly
Is the air filter dirty ?
Clean the air filter, as well as
the front and back grills.
The air conditioner is noisy
and/or vibrates.
Is the air conditioner leveled ?
Make sure the air conditioner is
on a level and flat surface.
There is water dripping on the
inside floor ?
Is the drain hose and the hose
cap correctly installed ?
Secure the installation of the
drain hose and the hose cap
and make sure the unit is on a
level surface.
Air cooling is not efficient.
LCD window shows an E1 error
message.
***NEVER
OPEN THE AIR CONDITIONER.
16
TECHNICAL SPECIFICATIONS
Specifications listed hereafter are for references only. Please see technical
data on your air conditioner unit rating plate.
Cooling
Model
KY-32U/D
Cooling capacity (1)
12000 BTU/H
Dehumidifying capacity
53L (14 Gal.) /day
Power
(Watts)
Cooling
1200 W
Dehumidifying
1200 W
Air flow volume (cubic metre/h) (2)
330 M3/h
Power source
115V 60Hz
Noise level (3)
56 dB(A)
Net Weight / Gross Weight
43 Kg (95 lb) / 45 Kg (99 lb)
Unit
86(H) x 45(W) x 37(D) cm.
34”(H) x 18”(W) x 15”(D)
Package
113(H) x 54(W) x 49(D) cm
44”(H) x 21”(W) x 19”(D)
Size
Refrigerant
R22
Water tank capacity
1 Litre
Note :
(1) Cooling capacity is measured at ambient temperature DB 30˚C, WB 25.5˚C.
(2) Fan airflow is measured when fan runs at highest speed.
(3) Noise level is measured in cooling mode, 1.0 metre away from front of the air conditioner.
CUSTOMER SERVICE
Contact SUNRISE TRADEX CORP. Customer Service for:
• Replacement parts
• Technical support
• Warranty claims
• Any other service or request on other SUNRISE products.
17
WARRANTY
LIMITED WARRANTY
This air conditioner is covered by a warranty against defects in materials and workmanship, if
used for the applications specified in this owner’s manual, for a period of TWO (2) years from
the date of original purchase in Canada.
Note : The internal compressor is covered by a 5-year limited warranty.
During the warranty period, if the air conditioner fails under normal use, SUNRISE TRADEX
CORP. will, at its option, either repair the unit or replace it, free of charge, within a
reasonable period of time after the air conditioner is returned.
As a condition to any warranty service obligation, the customer must present this warranty
certificate along with the proof of purchase.
THIS WARRANTY DOES NOT COVER :
1. Damage, accidental or otherwise, to the air conditioner that are not caused by material or
workmanship defect.
2. Damage caused by misuse, tampering or failure to follow the operating and maintenance
instructions provided in this owner’s manual.
3. Damage to the finish of the unit enclosure or to other outer features caused by wear.
4. The filter.
5. Damage caused by repairs or modifications to the air conditioner made by any person not
duly authorized by SUNRISE TRADEX CORP.
6. Insurance and freight costs for the warranty service.
ALL IMPLIED WARRANTIES, INCLUDING ANY IMPLIED WARRANTY OF MERCHANTABILITY,
ARE LIMITED TO A TWO YEAR (2) PERIOD COVERED BY THIS EXPRESS LIMITED
WARRANTY. SUNRISE TRADEX CORP. DISCLAIMS ANY LIABILITY FOR CONSEQUENTIAL
OR INCIDENTAL DAMAGES AND, IN NO EVENT, SHALL SUNRISE TRADEX CORP. LIABILITY
EXCEEED THE RETAIL VALUE OF THE AIR CONDITIONER FOR BREACH OF ANY WRITTEN
OR IMPLIED WARRANTY WITH RESPECT TO THIS PORTABLE AIR CONDITIONER.
Keep this owner’s manual along with your proof of purchase in a safe
place for future reference. You must provide proof of purchase for
warranty service.
Enter the following information on your air conditioner; it will help you upon getting
assistance or service if you ever need it. You will have then to provide the model and serial
numbers of the air conditioner – these data are detailed on the rating plate of the unit.
Dealer name :
Address :
Model number:
13-04540/13-04553 (KY-32U/D)
Serial number :
Date of purchase :
18