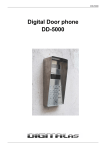
1
Looking for more information? Visit us on the web at http://www.artisan-scientific.com for more information: • Price Quotations • Drivers· Technical Specifications. Manuals and Documentation Artisan Scientific is You~ Source for: Quality New and Certified-Used/Pre:-awned ECJuiflment • Fast Shipping and DelIve1y • Tens of Thousands of In-Stock Items • Equipment Demos • Hundreds of Manufacturers Supported • Leasing / Monthly Rentals Service Center Repairs Experienced Engineers and Technicians on staff in our State-of-the-art Full-Service In-House Service Center Facility • Consignment InstraView Remote Inspection Remotely inspect equipment before purchasing with our Innovative InstraView-website at http://www.instraview.com We bUy used equipment! We also offer credit for Buy-Backs and Trade-Ins Sell your excess. underutilized. and idle used equipment. Contact one of our Customer Service Representatives todayl Talk to a live person: 88EM38-S0URCE fB88-887-68721 I Contact us by email: sales@artisan-scientific.com I Visit our website: http://www.artisan-scientific.com Thermo Electron Laboratory Products CELL CULTURE CO2 INCUBATOR Service Manual Full Featured Models November 2002 Thermo Electron Laboratory Products All rights reserved 97741H01 Rev E Thermo Electron Laboratory Products 2001 Thermo Electron Laboratory Products All rights reserved. No part of this publication may be reproduced, transmitted, transcribed, stored in a retrieval system, or translated into any language in any form by any means without the written permission of Thermo Electron Laboratory Products Training Department. 02/02/06 Rev. E Company name change to Thermo Electron 11/1/02, Rev.D- Clarified procedures 505 & 506 regarding loss of AutoZero offset due to power outage. 2/8/02, Still Rev.C- Various alignment issues on pp400.1, 700.5, removed typed-in page numbers on pp "i" and "ii". 10/30/01, Rev.C- Changed company name to Thermo Electron Laboratory Products throughout. 4/19/01, Rev.B- Added reference tables to Appendix (CO2 signal & part numbers) and CO2 replacement "how to" procedure. 11/30/00, Rev. A- Changed company name to Revco Technologies, Inc throughout. Added "signal ground" to end of 501.7.1; paragraph alignment on step 501.7.4; added Rh Sensor replacement procedure (407); step 501.8; 4/17/00- Corrected PN on front cover from 974.. to 977.. Created 12/29/1999 ii Thermo Electron Laboratory Products Table of Contents • • • • • • • Section 100 Product Overview…………………………..…………… pg. 100.1 Section 200 Construction………………..……..……..……………… pg. 200.1 Section 300 Operation………………..…….…..…………………….. pg. 300.1 Setpoints………………………………………………………………… pg. 300.1 View Offsets……………………………………………………………. pg. 300.2 CO2 Zero……………………………………………………………….. pg. 300.3 Temperature Offset……………………………………………………... pg. 300.4 Humidity Offset………………………………………………………… pg. 300.5 Section 400 Component Replacement Procedures Display Probe…………………………………………………………… pg. 400.1 Control Probe (Single or Upper Chamber)…………..…………………. pg. 400.2 Control Probe (Lower Chamber)……………………..……………..….. pg. 400.3 Chamber Fan…………………………………………….….………….. pg. 400.4 Fuses……………………………………………………..……………... pg. 400.4 Solenoid Valves……………………………………………..………….. pg. 400.5 Pressure Switches……………………………………………..………... pg. 400.5 Electronic Circuit Boards………………………………….….………… pg. 400.6 Humidity Sensors……………………………………………………….. pg. 400.7 CO2 Sensor……………………………………………………………... pg. 400.8 Section 500 Adjustment Procedures Procedure 501 Basic Electrical………………………………………… pg. 500.1 Procedure 502 Chamber temperature Display Offset……………..……. pg. 500.2 Procedure 503 Water Jacket Temperature Control Offset……………… pg. 500.3 Procedure 504 Humidity Sensor………………………………………... pg. 500.4 Procedure 505 TC CO2 PCB Calibration………………………………. pg. 500.4 Procedure 506 IR CO2 PCB Calibration.………………………………. pg. 500.4 Procedure 507 CO2 Auto Zero…………………………………………. pg. 500.5 Procedure 508 CO2 Sensor Offset……………………………………… pg. 500.6 Section 600 PCB Description & Pin-Outs Main Control Board (31664Gxx)………………………………………. pg. 600.1 Display Board (31665H01 or 31665H02)………………………………. pg. 600.3 Humidity Amplifier (IR systems only)…………………………………. pg. 600.3 Power Board (31666H01)………………………………………………. pg. 600.4 THC Board (33686H01) Description and Pin-Outs…………………….. pg. 600.5 Section 700 Appendix….………..……………………………………... pg. 700.1 100.1 Thermo Electron Laboratory Products Section 100 - PRODUCT OVERVIEW Interior tanks are surgical 304 stainless steel. All interior parts are easily removable for cleaning and decontamination. Cabinet insulation is foamed-in-place polyurethane and contains no CFC's. These incubators advise the operator on the status of the unit using an alphanumeric display; controls, self-diagnosis functions and alphanumeric displays are accomplished by a microprocessor-based controller. The various touchpads on the control panel have multiple functions and can be operated in combinations. Controls, self diagnosis functions and numeric displays are accomplished by a microprocessor based controller. When power is initially applied to the unit, the system will indicate “HELLO” while the unit performs a self-test. Upon completion of the test, the system will assume normal operation with the current Temperature and CO2 values displayed. Other parameters can be viewed from the digital display by a use of single or a set key pad combinations; these will be discussed in detail later. CO2 gas control is achieved by the infrared or thermal conductivity method. The infrared sensor measures the transmission of a specific wavelength of light that is proportional to the CO2 concentration. The thermal conductivity sensor measures the amount of heat conducted away from a thermistor (due to a change in electrical resistance), which is proportional to the amount of CO2 within the chamber. A circular High Efficiency Particulate Accumulator (HEPA filter) is fitted to the inlet of the circulation fan opening to continuously scrub airborne particulates to improve air quality and protect cultures from contamination and results in a complete air exchange and filtering process every two minutes. The filter is installed in the ceiling plenum by inserting the mounting tabs into the plenum at the fan opening and giving the filter a one-eighth turn. Removal of the filter is performed in the reverse procedure. The filter should be changed every 2-3 months, or if deterioration of CO2 control is observed. 100.2 Thermo Electron Laboratory Products Section 200 - CONSTRUCTION Model 300/301/3000T-7 300/301/3000D-7 500/501/5000T-7 500/501/5000D-7 Single chamber, top controls Dual chamber, top controls Tank: 304 surgical stainless steel. Holds 11.5 gallons Insulation: Structural foam insulation Drain: Quick-Disconnect drain hose fitting located at bottom left side, front corner of cabinet. Control: Microprocessor. CO2: 15 PSIG supplied to fitting(s) on back of unit. Water: 11.5 gallons / 43.5 Liters of Tap or distilled water Single Chamber Cabinet DO NOT USE DE-IONIZED WATER. Remote Alarm: A terminal strip on the rear of the cabinet contains three (3) screws. These terminals are connected to Common, Normally Open and Normally Closed, dry relay contacts. The Remote Alarm terminals are switched immediately on power up. When an alarm condition occurs, the alarm contacts will be switched to the deenergized state. The remote alarm contacts indicate a power failure because the alarm relay is de-energized when AC power is removed. Circuit Breaker: A button labeled "5" will reset the circuit breaker if for any reason it trips. Main Power Switch: Power switch located on rear of control housing. Always use this switch to turn power off when any work is done on the unit. 75-Watt Outlet: This is a convenience outlet for the operator's use. Do not exceed 0.6A load on this outlet. CO2, Inlet Fittings: There are two fittings. Two barbed fittings are installed in these openings when the optional tank switchover has been ordered; otherwise, is only one fitting is installed. Access Port: This port is used for instrumentation of any kind. 200.1 Double Chamber Cabinet Thermo Electron Laboratory Products Optional RS232 Port: This optional 9-pin connector is for PC computer access to the built-in data logging capabilities of the microprocessor. Strain Relief Fitting: Provided for power cord security. This is a clamp with two screws which when tightened sufficiently will protect the power cord connections against accidental strain. HEPA Filter: A circular High Efficiency Particulate Accumulator is fitted into the intake side of the circulating fan (via tabs), to continuously scrub particulates to protect cultures from airborne contamination. A complete air exchange occurs every two minutes. Filter should be changed every 2-3 months, or if deterioration of CO2 control is observed. 200.2 Thermo Electron Laboratory Products Section 300 - OPERATION When the incubator is first powered up, the alphanumeric display will read "HELLO". The display will go blank after 10 seconds. • Setpoints Temperature The incubator will control from ambient +5°C to 55°C. Simultaneously press the SET TEMP key and either the INCREMENT or DECREMENT key. The alphanumeric display will read SET TEMP and the digital display will scroll up or down until you release the increment or decrement key. The alphanumeric display will automatically go blank approximately 10 seconds after the last change. NOTE The temperature control setpoint must be selected before the Overtemp setpoint can be entered. Overtemp This value cannot be set lower than TEMP SETPOINT +0.1°C. Simultaneously press the OVERTEMP key and the increment or decrement key. The Alphanumeric display will show SET OV TEM while you are changing the value but will automatically go blank within 10 seconds of the last change. CO2 Setpoint (0 to 20%). Simultaneously press the "SET CO2 " key and either the increment or decrement key. This setting and all subsequent ones give similar displays. Door Heater Duty Cycle Door heat is controlled by the microprocessor and is not user adjustable. CAUTION Before the incubator temperature and CO2 levels have stabilized, there will be error messages in the alphanumeric display that indicate warnings. Allow the incubator to stabilize a minimum of eight (8) hours before performing any calibration procedures. 300.1 Thermo Electron Laboratory Products View Setpoints Operating Temperature Press SET TEMP key. The digital temperature display will read the temperature setting. The alphanumeric display will show the SET TEMP message and the alphanumeric display will go blank after approximately 10 seconds. Overtemperature Setpoint Press the SET OVERTEMP key. The alphanumeric display will read SET OV TEM. As above, the display will go blank after 10 seconds. CO2 Setpoint Press the SET CO2 key. The CO2 digital display will read the CO2 setting and the alphanumeric display will read SET CO2, and then go blank as above. RH (Relative Humidity %, optional feature) Press the RH key if present. The Temperature display will read the humidity value View Offsets Viewing offsets is handy for the Service Technician in troubleshooting. Since the range of offsets available is limited, you may have difficulty changing offsets if the maximum or minimum has been set. When placing a call to the factory for assistance relative to calibration, please have the offset values available, as they may be helpful in diagnosis. CO2 Simultaneously press SET CO2, and SET TEMP keys. The alphanumeric display will read VIEW C OFS. Temperature Simultaneously press SET OVERTEMP and SET CO2 keys. The alphanumeric display will show VIEW T OFS. 300.2 Thermo Electron Laboratory Products Humidity Simultaneously depress SET TEMP key and RH% key. The alphanumeric display will show VIEW H OFS. CO2 Zero You must perform a CO2 Zeroing procedure upon initial startup of the incubator. Method 1: Auto zero Step 1: Turn the incubator on and set the operating temperature. Open the glass door to 45° or more. This disables the CO2 injection solenoid and prevents any accidental discharge of gas while the zeroing procedure is taking place. Step 2: Press the CALIBRATE key and the alphanumeric display will show AUTO ZERO and the CO2 display will blank out. The glass door must remain open for at least one minute after key is pressed. Step 3: When the one-minute period has elapsed the alphanumeric message changes to CLOSE DOOR. CAUTION: If the door is closed before this message is displayed, or if you close the door and open it again before the auto zero process is finished, you will see the ZERO ERROR message on the alphanumeric display. This aborts the auto zero process and you must press "CALIBRATE" once to clear the error and begin over. Step 4: After you have closed the door, no further action is required. The CO2 display will remain blanked out while the auto zero process is running. This is five minutes for the units with an infrared CO2 sensor. In units with thermal conductivity (TC) sensors, the period will be at least five minutes plus the time required for the cabinet to attain setpoint temperature minus 0.2°C. 300.3 Thermo Electron Laboratory Products Method 2: Display Offset Step 1: Run a test for CO2 level using an instrument such as a Fyrite tester to see if the result agrees with tile CO2 display. The factory uses traceable gas standards yielding an accuracy of +0.2% for calibration. Step 2: Press the CALIBRATE key twice. The CO2 display will blink and the alphanumeric display will read CALIB CO2 Step 3: Press either the increment or decrement key to change the display to match your reading. The display blinks while you are changing its value but reverts to steady 10 seconds after you have released all keys. NOTE If you press the CALIBRATE key unintentionally, merely close the door or, if it is closed, open it immediately. In either case, the ZERO ERROR will show in the alphanumeric display. Press the CALIBRATE key once and all displays are restored to normal. • Temperature Display Offset If you wish to place a temperature display offset into the control panel display to match any reliable thermometer, such as the Fluke thermocouple, do the following: Step 1: Press the "CALIBRATE" key once. The alphanumeric display will show CALIB TEMP and the temperature display will begin blinking. Step 2: Press either the increment key or decrement key to change the temperature display. Step 3: When you have finished setting the offset the display will stop blinking after 10 seconds. 300.4 Thermo Electron Laboratory Products • Humidity Offset (option) Factory calibration of Relative Humidity (RH) is done using instruments with accuracy of +1.0% or better. If you have an instrument similar to this and you wish to place an offset into the displayed RH reading: Press the CALIBRATE key three times (Unless you have initiated the water calibration mode. Then you must press the CALIBRATE key four times). The alphanumeric display will read CALIB RH and the CO2 Display will have the RH level blinking in its window. 300.5 Thermo Electron Laboratory Products Section 400 - COMPONENT REPLACEMENT Procedure 401 - REPLACING DISPLAY PROBE 401.1. Turn off the power switch, located at the top rear of the control housing. Unplug the service cord from the electrical outlet. 401.2. Open the glass door and remove the ceiling plenum 401.2.1 Remove all shelves and the humidity pan (if it exists). 401.2.2 Grasp the bottom of the left or right false wall and pull toward the center of the chamber to free the shelf support assembly. 401.2.3 Disassemble and remove the support assembly and the ceiling plenum. 401.3. Locate the temperature display sensor and remove the thumbnut securing the harness plastic anchor to the access plate. NOTE: DO NOT discard the plastic anchor. 401.4. Grasp the sensor harness and pull firmly to break the silicone seal and free it from the stainless steel sheath. NOTE: DO NOT discard the metal sheath. 401.5. Remove the four thumbnuts holding the access plate in place and remove the sensor harness from the access plate. 401.6. Remove two Philips head screws from the sides of the control housing cover. Lift straight up on the two rear corners to clear the access plates, and pull cover rearward and up. 401.7. Unplug the sensor from the Main Control PCB connector JP6, and withdraw it from the cabinet. NOTE: When replacing a probe in the Lower chamber of a dual-chamber model, withdrawal and replacement of the sensor will require removing the wiring chase from the rear exterior of the chamber in order to access the sensor harness. 401.8. Install the new sensor in the reverse order, sealing the opening of the stainless steel sheath with silicone to prevent condensation from shorting the sensor. 401.9. Refer to Procedure 501 for the calibration instructions. 400.1 Thermo Electron Laboratory Products Procedure 402 -- REPLACING CONTROL PROBE (Single or Top Chamber of a Dual-Chamber Unit) 402.1. Turn off the power switch, located at the top rear of the control housing. Unplug the service cord from the electrical outlet. 402.2. Remove two Philips head screws from the sides of the control housing cover. Lift straight up on the two rear corners to clear the access plates, and pull cover rearward and up. 402.3. Locate the control or water jacket sensor well in the left rear corner of the control housing, visible through a hole in the left rear corner of the electrical deck. Note that the opening of the well is sealed with silicone in order to prevent formation of condensation in the sensor well, thus shorting the sensor. This must be re-sealed when the replacement procedure is complete. 402.4. Unplug the sensor from the Main Control PCB connector JP8, and withdraw it from the cabinet. 402.5. Install the new sensor in the reverse order, sealing the opening of the stainless steel sheath with silicone to prevent condensation from shorting the sensor. 402.6. Refer to Procedure 502 for the calibration instructions. 400.2 Thermo Electron Laboratory Products Procedure 403 - REPLACING CONTROL PROBE (Lower Chamber of a Dual) 403.1. Turn off the power switch, located at the top rear of the chamber. Unplug the service cord from the electrical outlet. 403.2. Remove two Philips head screws from the sides of the control housing cover. Lift straight up on the two rear corners to clear the access plates, and pull cover rearward and up. 403.3. Locate and remove the access panel at the rear of the left panel, located between the Upper and Lower chambers, and find the black sensor harness. 403.4. Locate the control or water jacket sensor well in the left rear corner of the water jacket, visible through a hole in the left rear corner of the mid-section. Note that the opening of the well is sealed with silicone in order to prevent formation of condensation in the sensor well, thus shorting the sensor. This must be resealed when the replacement procedure is complete. 403.4. Unplug the sensor from the Main Control PCB connector JP8, and withdraw it from the cabinet. NOTE: When replacing a probe in the Lower chamber of a dual-chamber model, withdrawal and replacement of the sensor will require removing the wiring chase from the rear exterior of the chamber in order to access the sensor harness. 403.5. Install the new sensor in the reverse order, sealing the opening of the probe well with silicone to prevent condensation from shorting the sensor. 403.6. Refer to Procedure 503 for the calibration instructions. 400.3 Thermo Electron Laboratory Products Procedure 404 -- REPLACING CHAMBER FAN The chamber Fan is held in place by four Phillips head machine screws with lock-washers accessible from inside the incubator chamber. 404.1. Turn off the main power switch located at the top rear of the chamber. Unplug the service cord from the wall outlet. 404.2. Remove the top air duct over the CO2 sensor and access port by removing all shelves and one side duct sheet inside the chamber to reveal the four screws. 404.3. Remove the four screws, separate the wiring harness at the Molex connector that is tucked under the CO2 Power Board and remove the motor and fan assembly from above. 404.4. To replace, follow the reverse procedure. 404.5. Plug in unit and turn on the main power switch. Procedure 405 -- REPLACING FUSES There are five fuses on the CO2 Power Board and one on the Temperature, CO2 RH Compensator Board. NOTE: Because fuse links can fail near the ends (where the break is not visible), visual inspections are not always reliable – always check fuses with an ohmmeter. Fuse Evaluation 405.1 Turn off the main power switch located at the top rear of the chamber. Unplug the service cord from the wall outlet. 405.2 Using an ohmmeter, place the meter leads across the fuse – a reading of less than 1 ohm indicates a good fuse; a reading of infinite resistance indicates a blown fuse that should be replaced. Replacing 405.3 Remove the incubator top cover and suspected fuse from its spring clips. CAUTION: Use a non-metallic fuse puller Because the fuses are glass enclosed and severe cuts can result from breakage if fingers are used for fuse removal, use of a non-metallic fuse puller is recommended. 405.4 Replace the fuse in the reverse order. 400.4 Thermo Electron Laboratory Products • Procedure 406 – Replacing Solenoid Valves There is normally one solenoid, S1, mounted on the electrical deck unless an optional automatic tank switcher has been factory installed. A second solenoid valve (S2) is used in the tank switcher assembly. Replacing 406.1. Turn off the main power switch located at the top rear of the control housing and unplug the service cord from the wall outlet. 406.2. Remove the control housing cover and locate the solenoid to be replaced. Note that the operating coil electrical leads are very small gauge. 406.3. Unplug the solenoid from the Main Control PCB (connector JP18), remove the plastic tubing from the barbed fittings on the valve and remove the valve mounting screws from the valve bracket. Be careful to retain the rubber washers installed on the mounting screws. 406.4. Install the replacement solenoid in the reverse order. • Procedure 407 – Replacing Pressure Switches The pressure switches PS1 and PS2 in the tank switcher assembly have push-on terminals, which make the changing of these switches very simple. 407.1. Turn off the main power switch located at the top rear of the chamber. Unplug the service cord from the wall outlet. 407.2. Remove the lower chamber display panel, pull out the electrical deck, (see Appendix) and locate the switch to be replaced. 407.3. Remove the switch mounting screws; disconnect plastic CO2 gas tubing and electrical leads. 407.4. Remove old switch and install new one by following steps 1-3 above in reverse order. 400.5 Thermo Electron Laboratory Products Procedure 408 – Printed Circuit Boards DANGER Printed circuit boards are Electrostatic sensitive – all standard ElectroStatic Discharge precautions MUST be observe to prevent damage to the printed circuit boards. 408.1. Turn off the main power switch located at the top rear of the control housing and unplug the service cord from the wall outlet. 408.2. Access the component to be replaced 408.2.1 Single Chamber unit or Top Chamber of a Dual-Chamber unit. 408.2.1.1 Remove the incubator top cover and locate the circuit board to be replaced. 408.2.2 Lower Chamber of a Dual-Chamber unit. 408.2.2.1 Remove the top cover from the control housing. 408.2.2.2 Label and disconnect the cables that exit the control housing and are routed through the wiring channel on the back of the upper chamber. Push slack into the wiring channel. 408.2.2.3 Open the outer door of the lower chamber and remove the single Phillipshead screw from the left and right sides, underneath the display panel. 408.2.2.4 Grasp the display panel and pull it forward; swing the lower edge of the display panel away from the cabinet and lift the panel off retaining bar. 408.2.2.5 The PCB tray is retained by an L-shaped bracket on each side. Remove the brackets and their Phillips-head screws; retain for use later. 408.2.2.6 Grasp the PCB tray and pull it straight out to the limit of the harness. 408.2.2.7 From the Upper chamber, push more wire into the wiring channel. 408.2.2.8 Repeat steps 408.2.2.6 and 408.2.2.7 until sufficient clearance is gained to replace the desired component. 408.3. Label and disconnect all electrical connections on the printed circuit board being replaced. 408.4. Remove the board mounting screws. Do not worry that standoffs or nuts will become inaccessible since they are all captive on the electrical deck. 408.5. Replace the printed circuit board and follow above steps 1-4 in the reverse order. NOTE You must calibrate the system whenever you replace a circuit board or sensor. Refer to applicable calibration procedure(s). 400.6 Thermo Electron Laboratory Products Procedure 409 – Humidity Sensor DANGER Printed circuit boards and the Humidity sensor are Electrostatic sensitive – all standard ElectroStatic Discharge precautions MUST be observe to prevent damage to components. 409.1. Turn off the main power switch located at the top rear of the control housing and unplug the service cord from the wall outlet. 409.2 Access the component to be replaced 409.2.1 Single Chamber unit or Top Chamber of a Dual-Chamber unit (Pre-1999) 409.2.1.1 409.2.1.1 Remove the incubator top cover and locate the humidity sensor & PCB. Lower Chamber of a Dual-Chamber unit 409.2.2.1 Remove the top cover from the control housing. 409.2.2.2 Label and disconnect the cables that exit the control housing and are routed through the wiring channel on the back of the upper chamber. Push slack into the wiring channel. 409.2.2.3 Open the outer door of the lower chamber and remove the single Phillipshead screw from the left and right sides, underneath the display panel. 409.2.2.4 Grasp the display panel and pull it forward; swing the lower edge of the display panel away from the cabinet and lift the panel off retaining bar. 409.2.2.5 The PCB tray is retained by an L-shaped bracket on each side. Remove the brackets and their Phillips-head screws; retain for use later. 409.2.2.6 Grasp the PCB tray and pull it straight out to the limit of the harness. 409.2.2.7 From the Upper chamber, push more wire into the wiring channel. 409.2.2.8 Repeat steps 409.2.2.6 and 409.2.2.7 until sufficient clearance is gained to replace the desired component. (Pre-1999 Rh sensors are mounted from above the ceiling and require the PCB tray to be completely removed to access; 1999-present Rh sensors are mounted from within the chamber, and access only to the respective Rh PCB is required.) 409.2.2 Single Chamber or Either Chamber of a Dual-Chamber unit (1999- Present) 409.2.2.1 Remove the top air duct over the CO2 sensor and access port by removing all shelves and one side duct sheet inside the chamber to reveal the four screws or nuts. 409.2.2.2 Remove the four screws, separate the wiring harness at the Molex connector and remove the sensor assembly. 409.3. Label and disconnect all electrical connections on the sensor and electrically-attached PCB’s, (see diagram, next page). 409.4. Remove the PCB mounting screws and replace the IR Rh PCB or the TC CO2 PCB. 400.7 Thermo Electron Laboratory Products 409.5. Replace the sensor (and printed circuit board, if applicable) and follow above steps 409.1 – 409.4 in the reverse order. 409.6. With a temperature setpoint of 37°C and no water in the chamber, allow to stabilize overnight with a psychrometer inside the chamber. 409.7. The next day, press/hold SET TEMP and VIEW RH, and use the front panel UP or DOWN button to bring the existing Rh Offset to 0.0% (if necessary).Adjust R4 on the humidity PCB (IR: daughter board mounted on the main control PCB; TC: humidity section of the CO2 PCB). Press the CALIBRATE button three times and use the front panel UP or DOWN button to bring the Humidity display to match the measured value. 409.8. With temperature stabilized, place water in the humidity pan and allow to stabilize overnight with a psychrometer inside the chamber. After stabilization, press the CALIBRATE button three times and adjust the displayed Rh value to match the measured value. Remote Alarm Terminal Strip Microprocessor Control PCB Power PCB Rh PCB (IR Only) Rh Section (TC Only) Rh Fan CO2 CO2 PCB Outer Door Control Housing – PCB layout 400.8 Thermo Electron Laboratory Products Procedure 409 – CO2 Sensor DANGER Printed circuit boards and the Humidity sensor are Electrostatic sensitive – all standard ElectroStatic Discharge precautions MUST be observe to prevent damage to components. 404.1. Turn off the main power switch located at the top rear of the chamber. Unplug the service cord from the wall outlet. 404.2. Remove the top air duct over the CO2 sensor and access port by removing all shelves and one side duct sheet inside the chamber to reveal the four screws. 404.3. Remove the four screws, separate the wiring harness at the Molex connector that is tucked under the CO2 Power Board and remove the CO2 sensor assembly. 404.4. Install new sensor in the reverse order. 404.5. Plug in unit and turn on the main power switch. 404.6. Allow temperature to stabilize and calibrate the CO2 control (see Procedure 505 or 506). Remote Alarm Terminal Strip Microprocessor Control Power PCB Rh PCB (IR Only) Rh Section Rh Fan CO2 CO2 Outer Door 400.9 Thermo Electron Laboratory Products Section 500 - ADJUSTMENT PROCEDURES Calibration of the incubator is done using either control panel readout offsets or adjustment to the electronic circuit boards themselves. Offsets are possible only within pre-established limits. Both methods are outlined below. Circuit board calibrations must be performed any time circuit boards or sensors are replaced. NOTE: Make sure all sensors are plugged in and that all connectors are fully seated. CAUTION: Calibrations can only be performed on a thermally stable unit. Ensure that the cabinet has been operating with one constant SET TEMP for a minimum of eight (8) hours before attempting any calibrations. • Procedure 501 -- Basic System Electrical 501.1 Verify DIP switch settings conform to the following pattern: #1 - ON always #2 – OFF always #3 - OFF always #4 – ON for top chamber of a Double, only. #5 - OFF always #6 – ON when Rh option is present #7 - ON when Tank Switcher option present* #8 - On for 8-segment alphanumeric displays; Off for 10 segment displays. (see p. 700.5) NOTE: Remember that a top deck will not actually have a Tank Switcher installed but DIP switch #7 should be ON so the proper alphanumeric messages will be displayed. 501.2 Unplug the Door Heater harness from Power Board connector JP1 and measure the resistance – should measure 130 – 188 ohms (220V units: 240-300 ohms). 501.3 Re-connect harness to JP1. 501.4 Unplug Chamber Heater harness from Power Board connector JP4 and measure the resistance – should measure 40 – 80 ohms (220V units: 165 – 280 ohms). 501.5 Re-connect harness to JP4. 501.6 Open the outer and glass doors. Apply Power 501.6.1. Display Board should light up. 501.6.2. The two LED's on the power board should be lighted. 501.6.3. Close the glass door and observe that the DOOR OPEN warning extinguishes and that the chamber fan begins to turn. 501.6.4. If the water jacket level is low, observe that the ADD WATER warning extinguishes when sufficient water has been added through the Fill Port. 500.1 Thermo Electron Laboratory Products 501.7 Verify Control Voltages CAUTION: Use a 4½ digit voltmeter for these checks. 501.7.1 Place the red probe on TP1 on the 31664H01 Main Control Board, and the black probe on signal ground on the 31666H01 Power Board. The voltage should read 4.000 +0.003 i.e., 3.997 to 4.003. 501.7.2 Adjust R31 on the Main Control Board if the voltage is outside this range. 501.7.3 Measure the voltage between Main Control Board TP2 and Power Board GND, as above. 501.7.4 Adjust R21 on the Main Control Board if the voltage is outside the above specification. 501.8 Relative Humidity Zero Calibration (if Option is present) 501.8.1 If unit has had water in the humidity pan, allow to stabilize overnight without water in the humidity pan. 501.8.2 Depress only the RH button on the control panel. The RH reading will appear on the display. 501.8.3 If the reading on the display differs from the RH test instrument by more than +2% adjust R4 (Zero) potentiometer on either the 33686H02 board (IR sensor systems) or the 33686H01 board (TC sensor systems). CAUTION: Do NOT attempt to adjust R6 as it will result in a board return for calibration at the circuit board manufacturer. 501.9 Verify Alarm Terminals 501.9.1. Create a temperature alarm condition by lowering the SET OVERTEMP below the displayed Temperature value. 501.9.2. Verify that depressing the MUTE button can silence the audio alarm; verify that the red LED next to the MUTE button lights. 501.9.3. With your test meter set on Ohms, check remote alarm terminal screws. With probes on terminals 1 and 2 and unit in an alarm condition, should measure 0.0 Ohms. 501.9.4. Place you meter probes on 1 and 3. Now, with the alarm condition existing, there should be an "OPEN" or "∞" reading. 501.10 Verify Heater Operation 501.10.1 Adjust SET TEMP to 60c to ensure continuous power to heater. 501.10.2 On Power Board connector JP4, verify 115Vac to the chamber heater, between pins 2 & 3. 501.10.3 On Power Board connector J1, verify 115Vac to the door heater, between pins 1 & 2. 501.10.4 Return SET TEMP to the customer’s desired temperature. 500.2 Thermo Electron Laboratory Products Procedure 502 – Chamber (Display) Temperature Offset The chamber temperature probe should read the correct temperature within ±0.1°C. If this is not the case, you will remedy the problem by introducing a temperature offset at the display panel as follows: 502.1 Check the probe by placing a thermocouple or an NIST calibrated glass stem thermometer in the chamber, allowing the chamber temperature to stabilize. 502.2 If the reading on the thermometer is different from the Temperature display on the control panel, press the CALIBRATE key once. Observe the CALIB TEMP message and that the temperature display begins to blink. 502.3 While the display is blinking, press the UP or DOWN key until the display matches the temperature measured in 502.1, above. 502.4 System will automatically exit the Calibration mode if no keys are depressed for approximately fifteen seconds. 502.5 The system will now equilibrate based on the new value. Remove thermocouple used in 502.1 and resume normal operation. 500.3 Thermo Electron Laboratory Products Procedure 503 – Water Jacket (Control) Temperature Offset The water jacket temperature probe should read the correct temperature within ±0.1°C. If this is not the case, you will remedy the problem by introducing a temperature offset at the display panel as follows: 503.1 Place the tip of a thermocouple halfway between top and bottom of the water jacket by inserting it through the Fill Port, and allowing the thermocouple to stabilize three (3) to five (5) minutes. 503.2 Simultaneously depress SET TEMP, SET OVERTEMP, and SET CO2; observe that a decimal point to the extreme left in the CO2 display illuminates – the unit is now in the System Calibration mode. 503.3 Depress the CALIBRATE key three times – the CAL WATER message will be displayed and the temperature display (now showing the water jacket temperature) will blink. 503.4 While the display is blinking, press the UP or DOWN key until the display indicates a temperature of 0.5°C hotter than the temperature measured in Step 503.1, above. 503.5 System will automatically exit the Calibration mode if no keys are depressed for approximately fifteen seconds, and exit the System Calibration mode in approximately ten minutes. 503.6 The system will now equilibrate based on the new value. Remove thermocouple used in step 503.1 and resume normal operation. 503.7 Remove any existing condensation and allow unit to stabilize overnight; evaluate condensation next day: 503.7.1 If condensation exists on the glass door, increase door heat by lowering the water jacket temperature: repeat steps 503.2 & 503.3, then press the Up arrow key until the Temperature display indicates a value of 0 1 - 0.2°C higher. 503.7.2 If condensation exists on the cabinet floor, decrease the door heat by increasing the water jacket temperature: perform steps 503.2 & 503.3, then press the Down arrow key until the temperature display indicates a value of 0 1 - 0.2°C lower. 503.8 Repeat step 503.7 if required. 500.4 Thermo Electron Laboratory Products Procedure 504 - Humidity Sensor Offset Adjustment (optional equipment) NOTE: Although a circuit board Zero adjustment was discussed in Procedure 501.8 above, an offset can be introduced to match any reliable instrument, as follows: 504.1 504.2 504.3 504.4 Fill the humidity pan with tap or distilled water (NOT deionized water), place it inside chamber, and allow to stabilize overnight with the Humidity measurement probe inside. Without opening the glass door, measure the humidity level inside. Press and release the CALIBRATE key three times; observe that the Rh display blinks and the CALIB RH message is seen on the alphanumeric display. Press the UP or DOWN key until the display agrees with the test instrument value. After 10 seconds, the display will return to normal. Remove the humidity measurement probe. Procedure 505 - Thermal Conductivity CO2 Printed Circuit Board Calibration 505.1 505.2 505.3 505.4 505.5 505.5 505.6 Set CO2 Setpoint to 0.0%; open and fan the glass door 30 seconds to remove CO2 from the chamber. Allow temperature to stabilize to within 0.2c of setpoint (approximately 30-45 minutes) and use Fyrite to verify 0.0% CO2 inside the chamber. If J5 exists, adjust R23 (Zero pot) to achieve 0.00VDC with the meter probes connected across the two pins of the CO2 PCB connector J101. The acceptable range is -0.003 to +0.003 volts. If J5 does not exist, adjust R23 (Zero pot) to achieve 0.3000VDC with the meter probes connected across the two pins of the CO2 PCB connector J101. The acceptable range is 0.303 - 0.297Vdc. With the meter connected across the two pins of CO2 PCB connector J5, adjust R27 (Span) for a reading of 0.297V to 0.301V dc. If the CO2 display value is >0.2%, then perform an AutoZero calibration (Procedure 507) before continuing. Adjust SET CO2 to 10% and allow the unit to stabilize 10 additional minutes after the chamber reaches setpoint before measuring Disconnect or pinch off the CO2 supply. Using a CO2 analyzer, measure the CO2 content and adjust R24 (Gain) until the CO2 display matches the analyzer reading. Reconnect the CO2 supply. Procedure 506 - Infra Red CO2 Calibration 506.1 506.2 506.3 Set CO2 Setpoint to 0.0%; open and fan the glass door 30 seconds to remove CO2 from the chamber. Allow temperature to stabilize to within 0.2c of setpoint (approximately 30-45 minutes) and use Fyrite to verify 0.0% CO2 inside the chamber. Remove the control housing cover or display panel (see Appendix) and locate the IR CO2 PCB. Remove jumper from JP5 and place it across the two pins of JP4, and momentarily short the two pins of JP1 with another jumper or the tip of a screwdriver. If the CO2 display is >0.0%, unplug the door switch from JP13 and press the front panel CALIBRATE key to begin the Auto Zero procedure; observe AUTO ZERO is indicated on the Status display. Reconnect JP13 when the status display indicates CLOSE DOOR. NOTE: The Auto Zero function will last for five (5) to thirty (30) minutes and will be complete when the Auto Zero message is no longer displayed and the CO2 window resumes displaying the CO2 content. 506.4 506.5 NOTE: If the door is closed before CLOSE DOOR message is displayed, or if the door is opened before the Auto Zero is completed, a ZERO ERROR message will appear and the Auto Zero is aborted. To clear the message, press CALIBRATE key. Remove the jumper from JP4 and place it across the pins of JP3, and momentarily short the two pins of JP1 with another jumper or the tip of a screwdriver. Then press the Up or Down button to as required to achieve an output signal of 0.945 Vdc between Common (3) and Vo (2). Press the IR PCB’s Up or Down button until the CO2 display indicates 19.0%. Remove jumper from JP3 and store it on one pin of JP5. (Continued) 500.5 Thermo Electron Laboratory Products Procedure 506 - Infra Red CO2 Calibration (Cont’d) 506.6. 506.7 506.8 506.9 Change setpoint to 10% and allow to stabilize for approx. 30 minutes. Disconnect or pinch off the CO2 supply and take a measurement from the sample port. If the reading does not measure 10% + 0.1%, place a jumper on JP2 and press Up or Down button on the IR interface board until the displayed CO2 value equals the analyzer reading. Remove the jumper from JP2 and store it on one pin of JP5. Reconnect the CO2 supply, wait ten minutes, and re-check. Repeat J2 adjustment if required. Change Setpoint to 5%, open/fan door 5 seconds, then allow unit to stabilize for 30-45 minutes. Disconnect or pinch off the CO2 supply and take a measurement from the sample port. If the reading does not measure 5% + 0.1%, place a jumper on JP2 and press Up or Down button on the IR interface board until the displayed CO2 value equals the analyzer reading. Remove the jumper from JP2 and store it on one pin of JP5. Reconnect the CO2 supply, wait ten minutes, and re-check. Repeat J2 adjustment if required. Procedure 507 – CO2 Auto Zero Adjustment NOTE: When CO2 discrepancies are noted, always perform an Auto Zero (Procedure 507), followed with a CO2 Offset (Procedure 508) NOTE: An AutoZero offset value >2.9% will be “lost” if the power is interrupted. If the discrepancy between Measured and Displayed CO2 value is greater than 2.5%, perform board calibration (Procedure 505 or 506). 507.1 507.2 Open and fan the glass door for thirty (30) seconds to eliminate CO2 from the chamber. With the glass door open, depress the front panel CALIBRATE key to begin the Auto Zero procedure; observe AUTO ZERO is indicated on the Status display. NOTE: If the door is closed before CLOSE DOOR message is displayed, or if the door is opened before the Auto Zero is completed, a ZERO ERROR message will appear and the Auto Zero is aborted. To clear the message, press CALIBRATE key. NOTE: The Auto Zero function will last for five (5) to thirty (30) minutes and will be complete when the Auto Zero message is no longer displayed and the CO2 window resumes displaying the CO2 content. 507.3 Close the glass and outer doors when the status display indicates CLOSE DOOR: Auto Zero is complete. 500.6 Thermo Electron Laboratory Products Procedure 508 – CO2 Sensor Offset Adjustment NOTE: When CO2 discrepancies are noted, always perform an Auto Zero (Procedure 507), followed with this CO2 Offset. 508.1 Disconnect or pinch off the CO2 supply. Connect a CO2 analyzer (e.g., Bacharach Fyrite, IR detector, etc.) to the 1/8” barbed fitting on the cabinet front, and measure the CO2 content of the chamber. 508.2 If the reading on the analyzer differs from the readout on the display panel, press the CALIBRATE key twice. Observe the CALIB CO2 message and that the CO2 display begins to blink. 508.3 While the display is blinking, press the UP or DOWN key until the display matches the CO2 content measured in Step 508.1, above. 508.4 Reconnect the CO2 supply; the system will automatically exit the Calibration mode if no keys are depressed for approximately fifteen seconds. 508.5 The system will now equilibrate based on the new value. 500.7 Thermo Electron Laboratory Products Section 600 - PCB Description & Pin-Outs • Main Control Board 31664Gxx Following is a table listing the LEDs and their messages. D101-- On if the –12V dc supply is functioning properly. D15 -- On when the micro is calling for the Main heater to energize; Off otherwise D13 -- On when the micro is calling for the Fan to turn; Off otherwise D14 -- On when the micro is calling for the Door heater to energize; Off otherwise D12 -- On when the micro is calling for the CO2 inject valve to energize; Off otherwise. D11 -- On when the micro is calling for the Tank Switching Solenoid to energize; Off otherwise. D10 -- Blinking On and Off to indicate micro is executing program properly. D9 -- On when the water probe is used as the temperature reference for controlling the chamber heater. D8 is not used – Off. DIP Switch Functions DIP switch 1 is on for customer use and the off position enables diagnostic information to be sent to remote terminal at 9600 bps. DIP switch 2 not used. DIP switch 3 is not used on version 1.1; was used in the on state to view and or calibrate water temperature on version 1.0 software: off is the normal default position. DIP switch 4 is on top chamber of a dual incubator. DIP switch 5 is off. DIP switch 6 is on when RH sensing is present on the unit. DIP switch 7 is on when tank switcher is present and off otherwise. DIP switch 8 is normally Off; On for 8-segment alphanumeric displays (see p. 700.5). • Main Control Board (31664Gxx) Pin-Outs JP1-Power Interface 1) +12 volts from power board. 3) +5 volts from power board. 5) Switched Ground to Fan Relay on power board. 6) Switched Ground to Main Heater 8) Switched Ground to CO2 solenoid 10) Ground 2) -12 volts from power board. 4) Valve Voltage from power board to tank switcher valve (10.7-11.3 V). 7) Switched Ground to Door Heater 9) Ground JP2 – RS 232 Output (to DB9 connector on incubator) 1) Receive 2) Transmit 3) Ground JP3 – Display Cable Output NOTE: Pin 1 is denoted by arrow on board. See Display Board Description (Section 600.2) for cable description. 600.1 Thermo Electron Laboratory Products Main Control Board (31664Gxx) Pin-Outs (Cont’d) JP4 - CO2 Input (from T/C or IR boards) PCB) 1) Signal + (0 - 1.3Vdc) 2) Signal 3) n/c 4) Ground JP5 – Humidity Input (from 33686H0X JP6 – Chamber Temperature Sensor Input 1) Signal + (sense) 2) Ground 3) Shield 4) n/c JP7 – Remote Alarm Contact Output 1) Common 2) NC (with power OFF) 3) NO (with power OFF) JP8 – Water Temperature Sensor Input 1) Signal + 2) Ground 3) Shield JP9 – Temperature Signal Output 1) Signal + 2) Ground JPI0 – Power to 33686H02 Board (Rh add-on PCB) 1) +5 volts 2) n/c 3) Ground 4) -5 volts 5) Ground JP11 – not used. JP13 – Door Switch Input 1) n/c valve) 2) Contact 3) Ground JP14 – Tank Switcher Inputs 1) Switched Ground (to turn on 1) Signal + (0 - 1Vdc) 2) Signal 3) n/c JP12 – not used 2) Valve Voltage 3) Ground 4) Tank 2 Sense 5) Ground 6) Tank 1 Sense JP15 - RS 485 w/ Power (not used) NOTE: for future expansion JP16 - RS 485 NOTE: for future expansion JP17 – Power to T/C or IR Boards 1) n/c 2) +12 volts 3) n/c 4) -5 volts 5) Ground JP18 - CO2 Inject Valve Output 1) Valve Voltage 2) Switched Ground JP19 - Auxiliary (not used) note: for future expansion JP20 – Low Water Indicator Input 1) Input (ground reference) 2) n/c 600.2 Thermo Electron Laboratory Products Display Board (31665Hxx) The display board is very simple and the silkscreen shows all of its features. JP1 is the header where the 16 wire conductor display cable is connected. Pressing the Mute button causes the LED (D1) next to the button to illuminate, indicating that the audible alarm has been silenced. The alarm will not sound until the Mute function is turned off, by pressing the Mute button again. The 10 character alphanumeric display will show the status of the incubator when keys are pressed or when an alarm condition exists otherwise the display is blanked. Indicator LED D1 (red Mute LED) lights next to the mute button on the display panel to show that the audible alarm has been silenced. JP1 - Control Board Data Cable 1) +12Vdc 3) +5Vdc 9 ) Chassis & Signal Ground 2) –12Vdc 4 - 8) Serial Communication Data 10) Chassis & Signal Ground Humidity Amp Board (33686H02) Pin-Outs J1 – Humidity Sensor Input J2 – Power Input (from control board) 1) -5 volts 2) Ground 3) +5 volts 4) Ground J4 – Humidity Output (to control board) 1) Signal + 2) Ground J5 - Not Used note: J5 can be used to measure humidity output 1> + 2)- The humidity output at J4 should match the display reading/100. The humidity output voltage range should be 0 to 1.0 Vdc. The resolution of the humidity display is 0.2%. The maximum humidity value that will be displayed is 98.4. 600.3 Thermo Electron Laboratory Products Power Board (31666H01) The power board drives the door heater, main heater, fan heater, and strip heater. The strip heater is on 100% of the time. The fan is turned off when the door is opened and turned on when the door is closed. The door heater is turned on and off as determined necessary by the microprocessor to prevent formation of condensation on the glass door; the higher the duty cycle, the hotter the door. Indicator LED D8 is lit if the +12V dc supply is functioning properly. Indicator LED D9 is lit if the +5V dc supply is functioning properly. • Power Board Pin-Outs JP1 – Door Heater Output JP2 – Fan output 1) Line 2 (switched by triac Q2) 2) Line 1 3) n/c 4) n/e 1) Line 2 2) Line 1 (switched by relay K1) JP3 – Strip Heater Output (line voltage) JP4 – Main Heater Output (line voltage) 1) Line 1 2) n/c 3) Line 2 1) n/c 2) Line 2 (switched by Triac Q1) 3) Line 1 JP5 – AC Power Input 1) Line 1 2) Line 2 JP6 – Power Interface 1 & 2) Ground 3 ) +12Vdc to CO2 Solenoid 4) Switched Ground to Door Heater 5) Switched Ground to Main Heater 6) Switched Ground to Fan Relay K1 7) 12Vdc to Tank Switching Solenoid 8) +5 volts to Control Board 9)-12 volts to Control Board 10) +12 volts to Control Board 600.4 Thermo Electron Laboratory Products THC Board (33686H01) description and Pin-Outs The THC board has humidity (0 - 1 V) and CO2 (300 mV - 1.300V) outputs. J2 - T/C CO2 Sensor Input 1) Shield 2) G3) G+ 4) B+ J4 – Temperature Signal Input 1) Signal + 2) n/c 3) Ground J1 – Humidity Sensor Input J3 –Power Input 1) n/c 2) +12 volts 3) n/c 4) -5 volts 5) Shield J5 - CO2 Output (to control board) 1) Signal + (50 mV per 1 percent CO2) 2) Ground J6 – Humidity Output (to control board) 1) Signal + (0-1 Vdc for 0% to 100% RH, 10mV = l%) 2) Ground J101 - T/C Signal Monitor (riot wired in H01 version) T/C Board (28860H03) Pin-Outs J2 - T/C CO2 Sensor Input 1) Shield 2) G+ 3) G4)B J3 – Power Input 1) n/c 2) +12 volts 3) n/c 4) -5 volts 5) Shield J101 - CO2 Output (to control board) 1) Signal + 2) Ground The signal range on the output of the TC board for a 0% - 20 % CO2 range is 0Vdc -1Vdc. The zero should be set at 0.300 Vdc when no CO2 is present at the sensor. At 10% the span should be adjusted to read 0.8 VDC. Refer to calibration instructions. 50 mVdc = 1.0% CO2 . Please, note, temperature must remain stable (within + 0.20°C of setpoint during span adjustment). 600.5 Thermo Electron Laboratory Products Section 700 - APPENDIX I. RS-232 Communications ……………………………………………………… pg. 700.2 II. Alphanumeric “Plain Language” Messages……………………………………. pg. 700.5 III. Temperature Sensor Resistance vs. Temperature Chart……………………….. pg. 700.6 IV. Pre-Micro Procedures Temperature Calibration ………………………………………………………. pg. 700.7 Thermal Conductivity (TC) CO2 Control……………………………………... pg. 700.8 Infrared (IR) CO2 Control……………………………………………………... pg. 700.9 Digital Infrared CO2 Sensor Retrofit Instructions……………..………………. pg. 700.10 V. IR Calibration Procedure (March 93 – August 1996)………………………….. pg. 700.12 VI. 1994 Temperature Upgrade Field Installation Instructions……………………. pg. 700.14 VII. Sliding Out the Lower Chamber Electrical Deck……...….…………………… pg. 700.17 VIII. Reference Tables……………………………………………………………….. pg. 700.19 IX. Wiring Diagram (Water Jacketed and Radiant Wall)………………………….. pg. 700.19 700.1 Thermo Electron Laboratory Products I. • RS 232 COMMUNICATIONS RS232 Communication Between an Incubator and a PC If a communications port option has been ordered with the incubator a diskette containing a file entitled RS232 "README.DOC" is included in the shipment. • Requirements In order to run this program you require an IBM XT, AT, 386, 486 or compatible with at least one floppy drive and a color or a monochrome monitor. The computer must also have one or two unused COM ports. Only Com 1, Com 2, Com 3 and Com 4 can be selected in the program. To print the screen, Lpt 1 or Lpt 2 may be used. A hard disk drive is recommended. The program files may use up to 300K of disk space including the two data files, which are saved to disk. DB9 connections are as follows: On the incubator side, Pin 2 is transmit data, Pin 3 is receive data, and pin 5 is ground (GND). The computer serial (COM) port must have the following connections in order for communication to function: Pin 2 receive data (RXD), Pin 3 transmit data (TXD) and pin 5(on DB9) or Pin 7 (on DB 25) ground (GND). You may print as many copies of this file as you like. Program description. To install the contents of these files on a hard disk, you may choose to create a subdirectory with a name of your choice or you may copy the contents of the disk to an existing subdirectory. To use the install utility provided with the disk, place the RS232 data acquisition disk in drive A. At the dos prompt, type " install ". The quotation marks should not be typed. A subdirectory called "DATALOG" is created and the three files (INSTALL.BAT, INCLOG.EXE, and README.DOC and README.BAT) are copied to the subdirectory called "DATALOG". The install utility will automatically place you in the subdirectory DATALOG. By executing the DOS command "DIR" while in the subdirectory "DATALOG", you will notice the three files. You may use an ASCII text editor to view or print additional copies of the Readme.doc file. If you chose to create your own subdirectory, you may do so and then use the copy *.* command to copy to files the three files on the RS232 data acquisition disk to the directory you created. The program INCLOG.EXE acquires data from the incubator using the RS232 serial communication. The communication is established at 9600 bps, no parity and one stop bit. A standard RS232 DB9 at the back of the incubator is used for connecting the computer to the incubator. Cable length between the incubator and the computer must be kept as short as possible. Maximum cable length will vary as a function of the quality of the cable. 700.2 Thermo Electron Laboratory Products To begin RS232 data acquisition, at the DOS prompt, type INCLOG in upper or lower case. A setup screen will pop up. The prompt " Modify these settings. Y/N " will be displayed. For the first time you run the program, answer to this question should be a yes (Y). Type Y to respond to the question. A second screen will pop up which will request data entry. The first field requests you to enter intervals for the program to save data to disk. The shortest interval for saving data to disk is 1 min seconds. The minimum recommended interval for logging data to disk is 5 minutes since incubator temperature and CO2 variation intervals are typically greater than this. Data is saved to disk in ASCII format. To view the data, any ASCII editor may be used. The-data-may also be imported into a spreadsheet or a word processor as an ASCII file. The first field of a data record is the date; second field is time (a 24 hour clock based on the computer clock); third record field is the CO2 reading, and the fourth record field is the CO2 setpoint. The fifth field is the temperature reading; sixth field is the temperature setpoint; the seventh field is the temperature alarm setpoint; the eighth filed is blank if RH option is not present, and the ninth field is the record t count. Count will increase from 1 to 4000. When count increases to 4000 a new file is created called "lastlog.dat" and the 1 to 4000 records are transferred to the new file lastlog.dat. New data will continue to be logged under the filename that was initially entered during setup. When the data record count increases to 4000 the data in lastlog.dat is replaced by data from the newest 4000 records. If a temperature data field appears blank on the screen for a period of 10 seconds, while the message "Communication error" is not displayed a communication problem between computer and incubator may exist or the incubator sensor has developed a fault. Turn off the incubator and computer for about 30 seconds and restart the program. The temperature displayed on the computer must match the temperature displayed on the incubator user interface. There is up to a one-second delay between the computer screen and the incubator user interface. If the computer attempts to communicate with the incubator microcomputer and receives no response after three tries the statement "Communication Error" is saved to disk at the appropriate logging interval and the similar message is displayed to the screen. A sample of the data structure, which is logged to disk, is given below. Field 1 date 09/29/1992 09/29/1992 09/29/1992 09/29/1992 09/29/1992 09/29/1992 09/29/1992 2 time 12:00:45 12:01:45 12:02:45 12:03:45 12:04:45 12:05:45 12:06:45 3 co2 005.0 005.0 005.0 005.0 005.0 005.0 005.0 4 co2 s 005.0 005.0 005.0 005.0 005.0 005.0 005.0 5 temp 037.0 037.0 037.0 037.0 037.0 037.0 037.0 6 temp s 037.0 037.0 037.0 037.0 037.0 037.0 037.0 Field 1 is date Field 2 is time Field 3 is CO2 reading Field 4 is CO2 setpoint Field 5 is temperature reading Field 6 is temperature setpoint Field 7 is high temperature alarm setpoint Field 8 is humidity reading if option is present Field 9 is record count from 0 to 4000 700.3 7 ov tem 037.5 037.5 037.5 037.5 037.5 037.5 037.5 8 rh 098.2 098.2 098.2 098.2 098.2 098.2 098.2 9 count 0001 0002 0003 0004 0005 0006 0007 Thermo Electron Laboratory Products The counter cannot be reset; it automatically resets when it reaches 4000. The screen also provides information that duplicates functions on the user interface panel. The logged parameters are displayed on the screen except the record count. If the incubator is not responding to the computer, the message "COMMUNICATION ERROR" is displayed. Check the link between the computer and the incubator. Make sure that the port in use is dedicated. The mouse can not share the same serial (COM) port with the data this acquisition software. An IR, or TC, on the top right hand side of the computer monitor just below the time clock, will indicate whether the incubator is a TC CO2 sensor (thermal conductivity) or IR (infrared) CO2 sensor based incubator. • Fault and diagnosis Fault: The message "Communication Error" is displayed on the screen. Diagnosis: Check the cable between the computer and the incubator. Verify continuity of the wires from point to point. Make sure that the cable satisfies the connections requirements stated in sub-heading "Requirements". 700.4 Thermo Electron Laboratory Products II Alphanumeric Display Messages The standard array for the alphanumeric display is 10 characters. In the past, on one or two occasions it has been necessary to use an 8-character display, necessitating a slight change in the message displayed. An 8-character display can be easily changed by merely unplugging it and plugging in a 10-character display; DIP switch #8 will then need to be turned Off. Message Meaning Water is Low CO2 Tank No. 1 is Empty CO2 Tank No. 2 is Empty Call for Service Temp Display Calibration Mode CO2 Calibration Mode Temp Control Calibration Mode RH Calibration Mode Automatic CO2 Zero Mode Excess CO2 Alarm Deficient CO2 Alarm Overtemperature Warning Undertemperature Warning Glass Door is Open Display Probe has Failed Temp Control Probe has Failed CO2 Sensor has Failed Action to Start Auto Zero “Auto Zero was Aborted” Set Operating Temp Set Overtemp Alarm Threshold Look at the Temperature Offset Look at the Water Temp Offset Look at the CO2 Offset Look at Humidity Offset View Humidity Level 10 Character Display ADD WATER TANK 1 OUT TANK 2 OUT SYSTEM ERR CALIB TEMP CALIB CO2 CALIB WATER CALIB RH AUTO ZERO HIGH CO2 LOW CO2 HIGH TEMP LOW TEMP DOOR OPEN PROBE1 ERR PROBE2 ERR CO2 SENSOR CLOSE DOOR ZERO ERROR SET TEMP SET OVTEM VIEW T OFS VIEW W OFS VIEW C OFS VIEW H OFS VIEW RH 700.5 8 Character Display ADD WATER TK 1 OUT TK 2 OUT SYS ERR CAL TEMP CAL CO2 CAL WATR CAL RH AUTOZERO HIGH CO2 LOW CO2 HI TEMP LOW TEMP DR OPEN PRB1 ERR PRB2 ERR CO2 SNSR SHUT DR ZERO ERR SET TEMP SET OV T TEMP OFS WATR OFS CO2 OFS RH OFS VIEW RH Audible Alarm? Yes Yes Yes Yes Yes Yes Thermo Electron Laboratory Products III Display and Control Sensor Diagnostic RESISTANCE vs TEMPERATURE Degrees °C Resistance Ω Degrees °C Resistance Ω 15 16 17 18 19 1849.9 1864.4 1879.0 1894.2 1909.0 36 37 38 39 40 2172.0 2188.1 2204.3 2220.6 2237.0 20 21 22 23 24 1924.0 1939.0 1954.2 1969.3 1984.6 41 42 43 44 45 2253.5 2270.0 2286.6 2301.2 2319.9 25 26 27 28 29 2000.0 2015.2 2030.5 2045.9 2061.4 46 47 48 49 50 2336.6 2353.4 2370.2 2387.0 2404.0 30 31 32 33 34 2077.0 2092.6 2108.3 2124.1 2140.0 51 52 53 54 55 2421.0 2438.1 2455.3 2472.6 2490.0 35 2155.9 60 2578.0 Normal Failure Mode: Open (infinite resistance) 700.6 Thermo Electron Laboratory Products IV PRE-MICROPROCESSOR BASED CONTROL PROCEDURES TEMPERATURE CALIBRATION for Water Jacketed Models 100/101/1000, 300/301/3000, 500/501/5000 (for units produced prior to March 93) Read the entire procedure before commencing calibration. 1) Install an NIST thermometer in the geometric center of the cabinet and adjust SET OVERTEMP to 55c; allow the unit to stabilize temperature for twenty-four (24) hours. 2) Remove the cover from the control housing and locate the following parts on the large printed circuit board: VR13, D68, J12, and J7; locate the Heat indicator on the front panel. 3) Adjust the Temperature Display AND the Set Temp to match the thermometer. 4) Unplug J7 and plug it in again; D68 should now be lit. 5) Install a jumper on J12: the Heat indicator on the front panel should now be either Off or On (not blinking). 6) Adjust VR13 until the Heat LED turns On, then reverse direction to the point at which the Heat LED turns Off. This is the desired position in which to leave VR13. 7) Remove jumper from J12, return SET TEMP back to the desired operating temperature and install the control housing cover. 8) Calibration is complete. Allow unit to stabilize twenty-four (24) hours before resetting SET OVERTEMP to the normal value (~0.5c above the desired operating temperature). 700.7 Thermo Electron Laboratory Products THERMAL-CONDUCTIVITY CO2 CONTROL CALIBRATION PROCEDURE for Water Jacketed Models 300/301/3000 produced prior to March 93, and for all Forced Draft incubators produced prior to January 1, 1998 1. 2. 3. 4. 5. Remove control housing cover. On the Main Control board, unplug J4 to disconnect the CO2 solenoid, and turn On DIP switch #1 to temporarily cause the TEMPERATURE display to indicate the raw CO2 board signal. Open and fan the glass door for two (2) minutes and leave the door open. With the glass door open, press the (CO2) Zero button on the front panel; the (CO2) Zero LED should light. Close the door and observe that the Door Ajar LED continues to blink. Allow the temperature and humidity to stabilize 45 minutes before continuing with procedure. On the CO2 board, adjust potentiometer VR2 (“Zero”) until the TEMPERATURE display indicates “0.0”; adjust the Zero potentiometer on the front panel until the CO2 display indicates “0.0”. Press the (CO2) Zero touchpad on the front panel & observe that the Zero LED turns Off. NOTE: If unit will be used to maintain 15% CO2 or less, use Step 6A. If unit will be used to maintain 16% - 20% CO2, use Step 6B. 6A. Connect the CO2 solenoid at J4 and set the Set CO2 to 5% ABOVE the desired operating CO2 setpoint, and allow the unit to stabilize forty-five (45) minutes. Measure the CO2 content and compare to the CO2 setpoint. Adjust the CO2 board potentiometer VR3 (Span) until the CO2 display matches the Measured content. CAUTION: if the Measured content is less than the SET CO2 value, then disconnect the CO2 solenoid (J4) before adjusting VR3. 6B. Connect the CO2 solenoid at J4 and set the Set CO2 to 20% and allow the unit to stabilize forty-five (45) minutes. Measure the CO2 content and compare to the CO2 setpoint. Adjust the CO2 board potentiometer VR3 (Span) until the CO2 display matches the Measured content. CAUTION: if the Measured content is less than the SET CO2 value, then disconnect the CO2 solenoid (J4) before adjusting VR3. 7. Repeat steps 2 - 5 until the unit holds 5% above the desired operating level of CO2. 8. Repeat steps 2 - 4. 9. Connect the CO2 solenoid, set the Set CO2 to the desired operating level of CO2, and allow unit to stabilize forty-five (45) minutes. Measure the CO2 content and compare with SET CO2. Adjust the SET ZERO potentiometer on the front panel until the CO2 display matches the measured content. CAUTION: if the Measured content is less than the SET CO2 value, then disconnect the CO2 solenoid (J4) before adjusting VR3. 10. Repeat Steps 8 and 9 one time. 11. On the Main Control board turn off DIP switch #1; calibration is complete. 700.8 Thermo Electron Laboratory Products INFRA-RED CO2 CONTROL CALIBRATION PROCEDURE for Models 500/501/5000 produced prior to March 93 1. Remove control housing cover. On the Main Control board, unplug J4 to disconnect the CO2 solenoid, and turn On DIP switch #1 to temporarily cause the TEMPERATURE display to indicate the raw CO2 board signal. 2. Open and fan the glass door for two (2) minutes and leave the door open. 3. With the glass door open, press the Auto Zero touchpad on the front panel; the Auto Zero LED should light and the CO2 display should extinguish. 4. IMMEDIATELY close the glass door and observe that the Auto Zero LED extinguishes and the CO2 display illuminates. This aborts the auto-zero procedure after resetting the up and down counters on the CO2 board. 5. On the CO2 board, adjust potentiometer VR2 (“Zero”) until the TEMPERATURE display indicates “0.0”. NOTE: If unit will be used to maintain 15% CO2 or less, use Step 6A. If unit will be used to maintain 16% - 20% CO2, use Step 6B. 8 6A. Connect the CO2 solenoid at J4, set the Set CO2 to 5% ABOVE the desired operating CO2 setpoint, and allow the unit to stabilize forty-five (45) minutes. Measure the CO2 content and compare to the CO2 setpoint. Adjust the CO2 board potentiometer VR3 (Span) until the CO2 display matches the Measured content. CAUTION: if the Measured content is less than the Set CO2 value, then disconnect the CO2 solenoid (J4) before adjusting VR3. 6B. Connect the CO2 solenoid at J4, set the Set CO2 to 20% and allow the unit to stabilize forty-five (45) minutes. Measure the CO2 content and compare to the CO2 setpoint. Adjust the CO2 board Adjust the CO2 board potentiometer VR3 (Span) until the CO2 display matches the Measured content. CAUTION: if the Measured content is less than the Set CO2 value, then disconnect the CO2 solenoid (J4) before adjusting VR3. 7. Repeat steps 2 - 5 until the unit holds 5% above the desired operating level of CO2. 8. Repeat steps 2 - 4. 9. Connect the CO2 solenoid, set the Set CO2 to the desired operating level of CO2, and allow unit to stabilize forty-five (45) minutes. Measure the CO2 content and compare with SetCO2. If Measured is more than setpoint, adjust potentiometer VR2 on the MAIN CONTROL board (the largest PCB) until the CO2 display matches the Measured content. CAUTION: if the Measured content is less than the Set CO2 value, then disconnect the CO2 solenoid (J4) before adjusting VR3. 10. Repeat Steps 8 and 9 one time. 11. On the Main Control board, turn off DIP switch #1; calibration is complete. 700.9 Thermo Electron Laboratory Products Digital Infrared CO2 Sensor Retrofit Instructions (Pre-March ’93 Version Single Chamber Only) Installation Step 1: Disconnect incubator from power. Step 2: Turn off CO2 gas supply to incubator. Step 3: Remove control-housing cover. Step 4: Carefully disconnect the green plug (power/signal harness) from the gas board as well as the gray interconnect cable from the sensor. Step 5: Remove the tubular shield (if provided) from the sensor. Step 6: Remove interior shelving and ductwork (carefully lower the top air duct so as not to damage the gas sensor). Step 7: Remove the sensor (four thumb nuts) internally from the fan/gas port area. Step 8: Remove the gas board (four Phillips head screws) from the electrical deck. Step 9: Detector removal now complete. Step 10: Installation of Digital IR detector assembly Step 11: Carefully unwrap new IR sensor and board. Step 12: Carefully disconnect ribbon cable from sensor. Step 13: Install new sensor in the same sensor location using the existing gasket and four thumbscrews. Use caution during installation so as not to damage the circuit board on top of sensor. Step 14: Install adapter plate assembly in the same position of the previously removed gas board using the same hardware and kit provided flat washers. Step 15: Install new gas board onto the adapter plate using the screws and washers provided. DO NOT use the flat washers. These should have been used performing step 2.0.4. Orient the new board so that the black screw-type connector is on the right as you face the front of the incubator. Step 16: Loosen the screws in the green connector (previously disconnected from the old gas board) and remove the four wires. 700.10 Thermo Electron Laboratory Products Step 17: Install the 18-gauge black wire under the screw in the black connector on the new gas board labeled "V-". Install the 18-gauge Red w/White wire under the screw labeled "V+". Install the 22-gauge black wire under the screw labeled "COM", and finally install the 22-gauge yellow wire under the screw labeled "Vo". Step 18: Connect the ribbon cable from the new gas board to the newly installed sensor. Step 19: Remove mylar overlay from control panel, as necessary, and cut a 1/8" diameter hole for access to the potentiometer next to the "Auto-Zero" key. Replace overlay. Step 20: Perform the CO2 Calibration procedure found on Page 35 before using unit. 700.11 Thermo Electron Laboratory Products V Infra Red CO2 Calibration Procedure for 500/5000 Series (Water-jacketed or Radiant Wall units produced March 93 - August 1996) I. Zero Adjustment Fan the glass door for ninety seconds and then allow temp to equilibrate. With 0% CO2 in the chamber, adjust CO2 board pot ZERO until 0.00V DC (+/-0.003VDC) is measured between pins 3 and 4 on the 5-pin Power/CO2 connector. II. Auto Zero a). Open the glass door and press the CALIBRATE key and the CO2 display will extinguish; leave the door open. b) After several minutes the alpha-numeric display will instruct you to "CLOSE DOOR"; close the door) and the CO2 display will indicate 0.00% CO2. III. Gain (Span) Adjustment a) With chamber stabilized at a setpoint of 20% CO2 (display indicates 20% for 10-15 minutes), adjust CO2 board Span pot until CO2 display matches the analyzer. b) Open glass door 45 degrees and close immediately; repeat steps I through IIIa) one time. IV. Setpoint Adjustments a) Allow system to stabilize at 15% CO2 and measure with analyzer. Press/release the CALIBRATE key until the alphanumeric display indicates "CALIB CO2". Press the UP or DOWN keys until the CO2 display matches the analyzer. b) Allow system to stabilize at 10% CO2 and measure with analyzer. Press/release the CALIBRATE key until the alphanumeric display indicates "CALIB CO2". Press the UP or DOWN keys until the CO2 display matches the analyzer. c) Allow system to stabilize at 5% CO2 and measure with analyzer. Press/release the CALIBRATE key until the alphanumeric display indicates "CALIB CO2". Press the UP or DOWN keys until the CO2 display matches the analyzer. d) The display will return to normal operation automatically approximately ten (10) seconds after completing the offset. 700.12 Thermo Electron Laboratory Products Addendum for CO2 offset adjustment on IR units. If one wishes to use the IR sensor based unit within 0.5% of 2.5% and 7.5%, the offsets must be adjusted at 1.5% and at 5%. Accomplish this by setting the CO2 at 5.0 % and checking the CO2 level with a Fyrite (CO2 calibration device), then introducing the appropriate offset using the CALIBRATE key. View the CO2 offset at 5.0 % by pressing the Set CO2 key and the SET TEMP key simultaneously and make a note of this value. Then the CO2 setting must then be changed to 1.5% and allow the incubator to stabilize at 1.5%. Introduce an offset, which matches the CO2 offset value at 5%. To view the CO2 offset at 1.5 %, press the Set CO2 key and the SET TEMP key simultaneously. The two offsets should be within +0.1 % of each other. To use a setpoint of 7.5% on an IR based unit, you must follow the procedure described above, except the setpoints that you need to use, will be 5% and 10%. Set the offset at 10% and use the same offset value at 5%. After following the procedure above, you may then set the incubator at your desired setpoint. To use a setpoint of 12.5 on an IR based unit, you must follow the procedure described above, except the setpoints that you must use will be 10% and 15%. Set the offset at 15% and use the same offset value at 10%. After following the above procedure, you may then set the incubator at your desired setpoint. 700.13 Thermo Electron Laboratory Products VI 1994 TEMPERATURE UPGRADE INSTRUCTIONS Install Thermocouple Step 1: Carefully slide thermocouple between door and gasket into center air of chamber. (NOTE: Silicone gasket tears easily.) Step 2: Allow 1 minute for thermocouple to stabilize. Record thermocouple and display temperatures. Step 3: Carefully slide thermocouple out of interior chamber and install into water jacket fill port (approximately 24"). Step 4: Allow 1 minute for thermocouple to stabilize and record the water temperature. Calibrate Water Temperature Step 5: Go to calibrate mode by simultaneously pressing the SET TEMP, SET OVERTEMP and SET CO2 buttons. An additional decimal will appear in display. Step 6: Push CALIBRATE button one time until display reads CALIB TEMP. Adjust with UP or DOWN key until display matches thermometer measurement from Step 1. Step 7: Push CALIBRATE button additional times until display reads CALIB WATER. Step 8: Record thermocouple and water display temperatures. Step 9: Wait for displays to stop flashing (approximately 10 seconds). Step 10: Push calibrate button three (3) times until display reads CALIB WATER Step 11: Using the increment and decrement keys on the control panel, adjust flashing temperature displayed value equal to 0.5°c hotter than the water temperature recorded in Step 4, above. Calibrate Air Temperature Step 12: Wait for displays to stop flashing (approximately 10 seconds). Step 13: Push calibrate button one time until display reads CALIB TEMP. 700.14 Thermo Electron Laboratory Products Step 14: Using the increment and decrement keys on the control panel, adjust flashing temperature displayed value equal to previously recorded center air thermocouple temperature or users preferred standard. Set Control Temperature Offset Step 15: Push calibrate button three (3) times until display reads CALIB WATER. Step 16: Using the increment and decrement keys on the control panel, adjust flashing water temperature display until it indicates a value of .9°C above chamber temperature display. Disconnect Power Turn off incubator power and disconnect power cord. Replace EPROM Remove control housing cover. (If double unit, remove front control panel of bottom unit.) Double chamber only: a. b. c. d. Disconnect ribbon cable from printed circuit board. Remove chassis retaining clips from left and right of control housing. Carefully slide chassis out until you meet resistance. Feed wire harness and tubing from top chamber into rear wire chase. Pull chassis out further until EPROM is accessible. (If double unit, repeat process for lower chamber.) Single and Double chambers: a. Replace EPROM with version 2.0 EPROM using EPROM puller. Note orientation of notch on EPROM. b. Orient new EPROM in same position. Disconnect Strip Heater Disconnect top strip heater from main harness by disconnecting both black wires. Perimeter heater (black and white wired connector) MUST remain connected. Re-install Control Chassis Step 1: Re-connect ribbon cable until it snaps into place. Step 2: Re-install top (and front on double unit) Control panel housing cover. 700.15 Thermo Electron Laboratory Products Remove Gas Inject Plate Step 1: Remove gas inject plate by removing four thumbnuts. Note tubing connections. Step 2: Carefully pull and remove sensor from protective sheath and through hole in sensor plate. Clean off any residual silicon RTV adhesive. Install New Gas Inject Plate Step 1: Carefully slide sensor through 1/4" hole located between two tubing connector fittings in new gas inject plate. Step 2: Slip small white snap bushing on sensor and up its length until it fits snugly in hole. Step 3: Re-install tubing to proper connectors on new gas inject plate. Step 4: Re-install new gas inject plate in top of chamber. Do not re-install thumbnut in corner opposing gas inject tube. Step 5: Install probe sheath tube clamp with last thumbnut. Step 6: Slide sheath in clamp. Fill protective sheath with silicon RTV sealant. Fully insert sensor into sheath and seal end with additional silicon. Install New Humidity Pan Ultima (seamless) incubators only - replace bottom support and humidity pan with new set-in kit. Elite (welded) incubators only - install humidity pan support channels in lower-most shelf support slots and pan per humidity pan kit installation instructions. Add Deviation Label Enclosed in the upgrade kit is a small aluminum label showing the upgrade deviation number. Place this label directly under the serial number label. This label is located inside the outer door on the lower right side of the cabinet. Stabilize Incubator Close glass door and allow incubator to stabilize for 24 hours before customer use (Note: Water may be added to the humidity pan after this stabilization period). NOTE: After the incubator is stabilized, if the temperature display disagrees with the user's preferred standard, it may be necessary to perform an additional temperature offset. 700.16 Thermo Electron Laboratory Products VII Sliding Out the Control Housing for the Bottom of a Double-Chamber Incubator Step 1: Unplug the Service Cord. Step 2: Remove the Lower chamber front panel assembly and disconnect the display board ribbon cable. Step 3: Remove the two "L" brackets (two screws each) at each end of the control housing. Step 4: Remove the front panel retainer (2 screws) spanning the top edge of the control housing opening. Step 5: On the TOP incubator. a Remove the top cover. b Disconnect the AC cable going to the terminal strip on the wiring deck. c If a tank switcher is installed, disconnect the AMP connector at JP14 “VALVE SYS”. This is found at the upper left corner of the Control Board. d Take the AC cable and the tank switcher wires and feed them down into the wire chase as far as possible, The connectors should not fall into the chase. Step 6: If a tank switcher is installed, cut the tyraps securing a CLEAR HOSE near the Bottom chamber sensor port clearance hole. Step 7: Slide out the bottom control housing by holding the wiring deck on each corner and pull it out the front, pulling it out only as far as necessary to provide service. NOTE: The deck is designed to pull out far enough to reach the screws at the front of the Control and Power boards. If you meet resistance in your effort to pull out the deck: a Be sure that the wires at the TOP incubator are fed into the wire chase as far as possible without forcing the connectors into the chase. b Place your hand under the wiring deck and lift up slightly as you pull it toward you. c Be sure you removed the front panel retainer. Step 8: Sliding the control housing back in involves a process of pulling the AC Cable and Tank Switcher wires at the TOP incubator back up through the wire chase as you push the control housing in. This is accomplished by pushing the deck in a few inches at a time and then pulling the wires up the wire chase. DO NOT attempt to push in the deck without pulling these wires up. You can not expect the wires to defeat gravity and flow up the wire chase on their own. Push the housing in far enough to replace the two "L" brackets. Step 9: Route the Clear Hose around the sensor port clearance hole such that there is no risk of it contacting the fan and then tyrap it LOOSELY to the tyrap anchors. Step 10: At the TOP incubator, replace the AC cable and Tank Switcher connector. Replace the top cover. (Continued) 700.17 Thermo Electron Laboratory Products Step 11: At the BOTTOM incubator, replace the "L" brackets and the Front Panel Retainer. Connect the display board and reinstall the front panel. NOTES: Regarding the Double Incubator... 1 If you need power to the BOTTOM incubator while the deck (control housing) is pulled out, be sure that the power switch is ON before pulling the deck out as it will be impossible to reach it. After you have the deck where you want it, plug in the service cord. Ensure that the Upper incubator AC cable is not shorting against anything before applying power to the Bottom chamber. 2 The BOTTOM incubator CAN be pulled out just enough to reach the IR or the T/C board for calibration purposes while the TOP incubator remains undisturbed. If this is desired, pull out the BOTTOM deck just enough to reach the potentiometers in need of adjustment. The TOP incubator CAN NOT remain powered up while the BOTTOM deck is pulled out beyond this point, (i.e. the AC cable at the TOP incubator must be disconnected). 700.18 Thermo Electron Laboratory Products VIII REFERENCE TABLES Table 1 Typical CO2 Sensor Signal Values @ 37°°C Measured on the CO2 PCB Measured Value 0% 5% 10% 15% 20% Thermal Conductivity (TC) Connector J5, Pins 1 & 2 0 mV 15 mV 35 mV 50 mV 70 mV Infra-red (IR)Between Vo and COMM 0 mV 250 mV 500 mV 750 mV 1.00 V Table 2 PARTS LIST Power PCB……………………………………. 31666H01 CPU PCB……………………………………… 31664G05 Display PCB………………………………….. 31665H01 Water Jacket (Control) Sensor………………… 302079H01 Chamber (Display) Sensor……………………. 302079H02 Infrared CO2 Sensor/PCB (matched pair)……. 301935G01 Thermal Conductivity Sensor………………… 31853G01 Chamber Heater………………………………. 300811H01 Door Heater…………………………………… 86790H01 Fan Motor…………………………………….. 21487H01 (120V) Fan Motor…………………………………….. 2006H01 (240V) Blower Wheel………………………………… 86832H01 CO2 Solenoid/Valve………………………….. 32541G01 (before 5/1/98) CO2 Solenoid/Valve………………………….. 33862G02 (after 5/1/98) 700.19 Thermo Electron Laboratory Products IX SYSTEM ELECTRICAL DIAGRAM Full-Featured Water Jacketed & Radiant Wall CO2 Incubators 700.20 Looking for more information? Visit us on the web at http://www.artisan-scientific.com for more information: • Price Quotations • Drivers· Technical Specifications. Manuals and Documentation Artisan Scientific is You~ Source for: Quality New and Certified-Used/Pre:-awned ECJuiflment • Fast Shipping and DelIve1y • Tens of Thousands of In-Stock Items • Equipment Demos • Hundreds of Manufacturers Supported • Leasing / Monthly Rentals Service Center Repairs Experienced Engineers and Technicians on staff in our State-of-the-art Full-Service In-House Service Center Facility • Consignment InstraView Remote Inspection Remotely inspect equipment before purchasing with our Innovative InstraView-website at http://www.instraview.com We bUy used equipment! We also offer credit for Buy-Backs and Trade-Ins Sell your excess. underutilized. and idle used equipment. Contact one of our Customer Service Representatives todayl Talk to a live person: 88EM38-S0URCE fB88-887-68721 I Contact us by email: sales@artisan-scientific.com I Visit our website: http://www.artisan-scientific.com


![CURSA [1ex] Catalogue and Table Manipulation](http://vs1.manualzilla.com/store/data/005911996_1-56034bbec42ed74359b0b23f04aae37f-150x150.png)