1
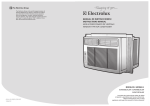
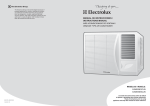
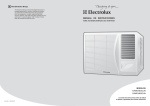
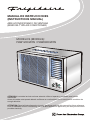
MANUAL DE INSTRUCCIONES
(INSTRUCTIONS MANUAL)
AIRE ACONDICIONADO DE VENTANA
(WINDOW-TYPE AIR CONDITIONER)
MODELOS (MODELS):
FAW122C2DW / FAW092C2DW
ATENCION: Lea todas las instrucciones antes de utilizar el aparato y guardelas para futuras
referencias.
Antes de instalar este aparato deberá verificarse su conformidad con los servicios de suministro de
energía eléctrica.
ATTENTION: Read all instructions prior to using appliance and keep this manual for future reference.
Prior to installation this air-conditioning unit must be submitted for approval by the utility service which
provides electricity.
Gracias por elegir Frigidaire como marca para su acondicionador de aire. Los
acondicionadores de aire Frigidaire han sido concebidos bajo altísimos
estándares técnicos. Poseen características especiales desarrolladas para
ofrecer aun más comodidad al usuario. Para que usted pueda disfrutar todos
los recursos de su nuevo acondicionador de aire, Frigidaire creó este manual.
Con orientaciones simples y prácticas usted conocerá sus funciones; además
aprenderá la manera de operar este aparato de modo adecuado y seguro.
Lea las instrucciones sobre instalación y operación antes de utilizar su
acondicionador de aire y guárdelas en un lugar seguro para futuras consultas.
Frigidaire una vez más fabrica lo mejor en lo que se refiere a electrodomésticos.
Consejos ambientales
El material del embalaje es reciclable. Procure separar plásticos, espuma flex,
papel y cartón y enviarlos a las compañias de reciclaje.
De acuerdo con la directriz de la RAEE (Residuos de Aparatos Eléctricos y
Electrónicos), en inglés WEEE (Waste of Electrical and Electronic Equipment), se
debe colectar y disponer de los residuos de aparatos eléctricos y electrónicos
separadamente. Si futuramente usted necesita desechar este electrodoméstico,
NO lo haga echándolo con el resto de la basura doméstica. Sírvase enviar el
aparato a los puntos de colecta de RAEE donde los haya disponibles.
Lea este manual
En este manual usted hallará varias
sugerencias importantes acerca de
cómo usar y mantener su
acondicionador de aire
adecuadamente. Un poco de cuidado
preventivo por parte del usuario puede
ahorrarle tiempo y dinero durante la
vida útil de su acondicionador de aire.
Usted encontrará muchas respuestas
a problemas comunes en la tabla de
consejos para la solución de
problemas. El leer antes dicha tabla
podría evitarle el llamar al Centro de
Servicio Autorizado.
1
Índice
Precauciones de seguridad .................................................................... 03
Antes de hacer funcionar el aparato ...................................................... 07
Identificación de las partes de la unidad ................................................. 08
Reglas de seguridad eléctrica .................................................................. 09
Instrucciones de operación ......................................................................10
Antes de usar el control remoto .................................................................16
Descripción del control remoto .................................................................17
Ajuste vertical de la corriente de aire (manual) ...........................................17
Mantenimiento y cuidados ........................................................................18
Procedimientos de instalación ................................................................. 20
Instalación de la carcasa .......................................................................... 21
Instalación de la unidad en la carcasa ................................................... 21
Instalaciones de la unidad en la pared ...................................................... 22
Pasos para instalación ............................................................................. 23
Guía para la solución de problemas ......................................................... 25
Informaciones técnicas ............................................................................ 26
Importante
El acondicionador de aire que usted
ha comprado puede ser ligeramente
diferente de la que se muestra en las
figuras de este manual, la forma en
general deberá ser la misma. Lea la
información referente a su operación.
El aparato que usted ha comprado
puede tener un enchufe diferente del
que se muestra en las figuras de este
manual, siendo que el que viene en el
producto cumple la especificación
eléctrica de su país.
La instalación no está cubierta por la
compra del producto.
Entre en contacto con un técnico de
mantenimiento autorizado para
reparar o ejecutar labores de
mantenimiento en esta unidad.
Entre en contacto con el instalador
para instalar esta unidad.
El acondicionador de aire no devera
ser operado por niños pequeños.
Tome cuidado para que los niños
pequeños no jueguen con el
acondicionador de aire.
Si hay necesidad de sustituir el cable
de alimentación, dicha sustitución
deberá ser llevada a cabo unicamente
por personal autorizado.
La instalación del aparato deberá
llevarse a cabo de acuerdo con las
normativas nacionales en materia de
instalaciones eléctricas y únicamente
por personal autorizado.
2
ESP
ESP
Bienvenido al mundo del
manejo simple y sin preocupaciones
La operación incorrecta del aparato, por no seguir las instrucciones, podría
causar accidentes o daños. Para evitar accidentes al usuario o a otras
personas, así como daños materiales, deberán tomarse en cuenta las siguientes
instrucciones:
Asegúrese de que no entre agua a los componentes eléctricos.
ESP
ESP
Precauciones de seguridad
Peligro de descargas eléctricas.
Conecte correctamente el aparato al tomacorriente.
Instale siempre un interruptor automático y un circuito de alimentación
exclusivo para el aparato.
Lo contrario suscita la posibilidad de descargas eléctricas o incendios causados
por producción excesiva de calor.
La ausencia de estos dispositivos podría ocasionar descargas eléctricas y un
incendio.
No haga funcionar ni detenga la unidad enchufándola por el cable de
alimentación o tirando del cable de alimentación.
Desconecte la alimentación eléctrica a la unidad si escucha algún ruido
anormal o si esta emite olores o humo.
Peligro de descarga eléctrica o de incendio causado por producción excesiva de
calor.
Peligro de descargas eléctricas y de incendio.
No dañe ni utilice un cable de alimentación eléctrico no especificado para el
producto.
Peligro de descarga eléctrica o de incendio.
Si el cable de alimentación está dañado, el fabricante, su agente de similar ó
persona autorizada deberá sustituirlo para evitar el peligro que el estado de dicho
mantenimiento o cable representa.
No use el tomacorriente si está flojo o dañado.
Peligro de descarga eléctrica y de incendio.
No abra el aparato durante su funcionamiento.
Peligro de descargas eléctricas.
Mantenga cualquier arma de fuego alejada del electrodoméstico.
No modifique el cable de alimentación eléctrico, ni utilice el mismo conector
para otros electrodomésticos.
Peligro de incendio.
Peligro de descarga eléctrica o de incendio causado por producción excesiva de
calor.
No utilice el cable de alimentación cerca de fuentes de calor.
Peligro de descargas eléctricas y de incendio.
No maneje el aparato con las manos mojadas o en lugares húmedos.
Peligro de descargas eléctricas.
No utilice el cable de alimentación en lugares en los que haya gases
inflamables o combustibles como gasolina, benceno, solventes etc.
No dirija el flujo de aire en la dirección de los ocupantes de la habitación.
Peligro de explosión o de accidentes.
Es dañino para la salud.
Asegúrese de que la puesta a tierra sea adecuada.
Antes de hacer funcionar el aparato haga ventilar la habitación si habido
algún escape de gas de otro aparato.
La ausencia de puesta a tierra puede ocasionar descargas eléctricas.
Peligro de explosión, de incendio y de accidentes
3
4
Desconecte el cable de alimentación sujetándolo por el enchufe.
Podría causar descargas eléctricas y fallas en su funcionamiento.
Peligro de descargas eléctricas y daños al aparato cuando desconectado por el
cable.
No beba el agua drenada del acondicionador de aire.
Contiene agentes contaminantes que pueden resultar dañinos para la salud.
Siempre compruebe la instalación correcta de los filtros y límpielos cada dos
semanas.
Cuando vaya a reemplazar el filtro de aire, no toque las partes de metal del
aparato.
Hacer funcionar el aparato sin los filtros puede ocasionar averías.
Peligro de accidentes.
No ponga objetos pesados sobre el cable de alimentación eléctrico y
asegúrese de no aplastar dicho cable.
No limpie el acondicionador de aire con agua.
Peligro de incendio o descargas eléctricas.
El agua podría penetrar en la unidad y deteriorar su aislamiento.
Peligro de descargas eléctricas.
No use los siguientes artículos:
En presencia de estufas etc. ventile bien el recinto
Podría faltar oxígeno.
Cuando vaya a limpiar la unidad, desconéctela del tomacorriente y
desconecte también el interruptor automático.
No limpie la unidad mientras está conectada pues existe peligro de causar un
incendio, descargas eléctricas o accidentes.
No exponga plantas o animales al flujo directo del aire.
Peligro para la salud del animal o para la planta.
Tome cuidado al desempacar y instalar la unidad.
Los bordes afilados podrían causarle accidentes.
Agua tibia (a más de 40°C ó 104°F). El agua tibia podría deformar o descolorir el
aire acondicionado de pared.
Gasolina, solventes, benceno y objetos abrasivos etc. pueden causar
deformaciones al aparato o rasguñarlo.
No utilize para propósitos especiales.
No utilize ese acondicionador de aire para preservar instrumentos de precisión,
comida, animales, plantas y objetos de arte. Eso puede perjudicar su calidad, etc.
Desenchufe el disyuntor principal de fuerza cuando no vaya a utilizar la
unidad por un amplio período de tiempo.
Puede ocasionar falla del producto o incendio.
Asegúrese que el soporte de instalación del aparato externo no este roto.
Si el soporte está roto, hay la posibilidad de daño debido a la caída de la unidad.
Apague el acondicionador de aire en caso de tormenta o de condiciones
climáticas adversas.
El funcionamiento del aparato con las ventanas abiertas puede causar la
penetración de agua al interior y el humedecimiento de los muebles.
No ponga objetos cerca de las entradas de aire o en las salidas de aire.
Peligro de averías al aparato o de accidentes.
5
Importante
Si entra agua en la unidad, desenchúfela y desenchufe también el interruptor
principal. Aisle la unidad sacando el cable de alimentación de la toma
eléctrica y contacte el servicio técnico calificado.
6
ESP
ESP
No desarme ni modifique el aparato.
Identificación de las partes de la unidad
Preparando el aparato para hacerlo funcionar
1. Contacte al técnico de servicio autorizado para instalación.
2. Conecte correctamente el aparato al tomacorriente.
3. No dañe, ni utilice un cable de alimentación eléctrico no especificado para
el producto.
4. No utilice el mismo tomacorriente para conectar otros electrodomésticos.
5. No utilice una extensión en el cable de alimentación.
6. No haga funcionar ni detenga la unidad enchufándola por el cable de
alimentación o tirando del cable de alimentación.
1 Panel frontal
Uso
1. Exposición al flujo de aire directo por un amplio período de tiempo puede
ser peligroso para su salud. No exponga ocupantes, plantas o animales al
flujo directo del aire.
2. En presencia de estufas etc. ventile bien el recinto pues puede producirse
una falta de oxígeno.
3. No utilize ese acondicionador de aire para preservar instrumentos de
precisión, comida, animales, plantas y objetos de arte. Eso puede
perjudicar su calidad, etc.
8 Cable de alimentación eléctrico
Mantenimiento y cuidados
1. Cuando vaya a reemplazar el filtro de aire, no toque las partes de metal
del aparato. Hay riesgo de lesiones personales.
2. No limpie el acondicionador de aire con agua. El agua podría penetrar en
la unidad y deteriorar su aislamiento, con peligro de choque eléctrico.
3. Cuando vaya a limpiar la unidad, desconéctela del tomacorriente y
desconecte también el interruptor automático.
ESP
ESP
Antes de hacer funcionar el aparato
2 Filtro de aire
3 Marco
4 Gabinete
5 Rejilla de la entrada de aire (lado exterior)
Power
9
6 Rejilla de la salida de aire
Mode
7 Panel de control
4
9 Control remoto
5
3
2
1
6
7
8
Temperatura de operación
MODO DE
REFRIGERACIÓN
MODO DE
CALEFACCIÓN
Temperatura Externa
18 ~ 43 ºC (T1 Ambiente)
21 ~ 52 ºC (T3 Ambiente)
Temperatura Interna
18 ~ 32 ºC (T1 Ambiente)
18 ~ 32 ºC (T3 Ambiente)
Temperatura Externa
-5 ~ -24 ºC (T1 Ambiente) -7 ~ -24 ºC (T3 Ambiente)
Temperatura Interna
0 ~ -27 ºC (T1 Ambiente)
0 ~ -30 ºC (T3 Ambiente)
Si se hace funcionar la unidad en condiciones más allá de lo indicado arriba,
esta podría presentar fallas.
7
Observación
La descripción del panel de control
se basa en un modelo típico, la
función es la misma de su
acondicionador de aire aunque
pueda haber algunas diferencias en
su apariencia.
8
Cuidado
Todo el cableado debe estar de
acuerdo con los códigos y leyes para
el uso de energía eléctrica locales y
debe ser instalado por un electricista
calificado. Si tiene alguna duda
acerca de las instrucciones que están
a continuación, consulte a un
electricista calificado.
Nunca introduzca los dedos o
cualquier objeto extraño en la salida
de aire. Tome especial cuidado en
advertir a los niños acerca de los
peligros de hacerlo.
Para evitar posibles daños físicos,
asegúrese de desconectar el
suministro de energía a la unidad
antes de instalarla, llevar a cabo
labores de mantenimiento y/o
limpiarla.
Si el cable de alimentación está
damnificado, el fabricante, su agente
de servicio o similar persona
autorizada deberá sustituirlo para
evitar el peligro que el estado de
dicho cable representa.
Instrucciones de operación
Para los requisitos eléctricos, lea la
Informaciones técnicas (pag.26)
Asegúrese de que la unidad esté
adecuadamente conectada a tierra.
El tomacorriente deberá ser de fácil
acceso después de instalar el equipo
y deberá estar provisto de un cable a
tierra confiable.
Para su seguridad y protección, esta
unidad está conectada a tierra con el
cable de alimentación (ver la fig. 2).
Por favor entre en contacto con el
fabricante o su agente de servicio o
similar persona autorizada si usted
desea sustituirlo.
9
El teclado del control electrónico será como uno de los que siguientes:
Para los modelos con ciclo frío/calor:
La unidad deberá estar conectada a
un circuito independiente y el
amperaje del fusible deberá ser igual
al del cable de alimentación y del
tomacorriente.
L
Para los modelos con ciclo frío:
E
N
Cable De
Alimentación
AUTO
AUTO
Fig. 1
E - Cable a tierra, amarillo/verde
N - Conductor neutro, azul
L - Cable bajo tensión, marrón
Tomacorriente
Power (Encend./Apagar):
Presione la tecla para encender o
apagar la unidad. (La tecla TIMER
controla la función INICIAR/PARAR de
la unidad.)
Fig. 2
Mode (Función): Presione la tecla
"MODE” para escoger el modo de
funcionamiento deseado. Para los
modelos de refrigeración &
calefacción, la selección de modo
ofrece las opciones AUTO, CALOR ,
FRIO, VENT. (Solo Vent.) y DRY (Seco).
Atención
Es posible distinguir el cable de
alimentación por su color, como se
indica a continuación (ver la fig. 1):
Panel del control
ESP
ESP
Reglas de seguridad eléctrica
POWER
MODE
MODE
SIGNS
AUTO
Auto
CALOR
FRIO
VENT.
DRY
10
Dry (Solo para algunos modelos):
Este modo se utiliza para reducir la
humedad de la habitación.
Frio:
Se puede definir la temperatura entre
16 ºC y 31 ºC. La refrigeración
empieza automáticamente cuando la
temperatura de la habitación está 1
ºC arriba de la temperatura de ajuste,
y se detiene cuando la temperatura
llega a 1 ºC menos que la
temperatura de ajuste. El ventilador
no se detiene.
Calor (Sólo para los modelos con
calefacción):
En el modo de calefacción se puede
ajustar la temperatura entre 16 ºC y
31 ºC. La temperatura definida por
defecto es 24 ºC en el modo de
calefacción y la velocidad del
ventilador es optativa.
Observaciones:
1. Después de cambiar el ajuste
11
Modelo frío/calor:
Modelo frío:
Auto
MODE
MODE
FUNCION
FUNCION
de temperatura, el motor del
ventilador funciona primero en
BAJA velocidad por 3 minutos
para salvaguardar el compresor
antes de que la calefacción
empieze.
2. Cuando la calefacción para,
puede haber un ligero retardo
de 30 segundos hasta que el
motor del ventilador se detenga.
3. Si la temperatura del
condensador está abajo de 35
ºC, el ventilador funcionará en
velocidad BAJA a pesar del
ajuste de la ventilación.
4. Si la temperatura del
condensador es superior a 38
ºC, el ventilador funcionará de
acuerdo con el ajuste de la
ventilación.
Auto (Automático - Sólo para algunos
modelos):
El motor del ventilador permanece en
velocidad MEDIA en el modo AUTO.
La unidad seleccionará el modo de
funcionamiento apropiado entre
VENT. (Sólo Ventilación), FRÍO o
CALIENTE basándose en la diferencia
entre la temperatura real y la
temperatura deseada para la
habitación. Si la temperatura real de la
habitación está 2 ºC arriba de la
temperatura de ajuste, la unidad
funcionará en modo de refrigeración.
Cuando la temperatura real de la
habitación no es 2 ºC superior a la
temperatura de ajuste ni tampoco 1 ºC
inferior a la temperatura de ajuste, la
unidad escogerá el modo de VENT.
(Sólo Ventilación). Cuando la
temperatura real de la habitación esté
2 ºC abajo de la temperatura de ajuste,
la unidad funcionará en modo CALOR
(Calefacción).
Observaciones:
1. Si se activa el modo DORMIR
mientras la unidad está
funcionando en el modo AUTO
(Automático), el motor del
ventilador pasará al modo de
velocidad BAJA inmediatamente.
Definición de la temperatura:
AUMENTAR:
Presione la tecla
para aumentar la
temperatura (de funcionamiento)
escogida. Cada vez que se presione
esa tecla la temperatura aumentará de
la siguiente forma: 1 ºC (en la escala
Celsius) llegando hasta 31 ºC como
temperatura máxima.
BAJAR:
Presione la tecla
para reducir la
temperatura (de funcionamiento)
escogida. Cada vez que se presione
esa tecla la temperatura bajará de la
siguiente forma: 1 ºC (en la escala
Celsius) llegando hasta 16 ºC como
temperatura mínima.
ESP
ESP
Para los modelos con refrigeración
solamente, se puede escoger entre
los modos FRIO, VENT. (Solo Vent.) y
DRY (Seco - solo para algunos
modelos). El indicador luminoso verde
que está al lado de la opción "MODE"
se encenderá identificando la opción
escogida.
Cuando se usa el modo DRY y AUTO,
no se puede escoger la velocidad del
ventilador. El modo del ventilador
funciona con BAJA velocidad en el
modo DRY, y con velocidad MEDIA
en el modo AUTO (Automático).
Aumentar
Bajar
12
Timer:
Presione la tecla "TIMER" para activar
la función de temporización "INICIAR
/PARAR automático".
Los programas para iniciar/parar
automáticamente pueden definirse de
0 a 12 horas. Cada vez que se
presione la tecla "TIMER", el tiempo
definido aumentará 1 hora.
Swing (Solo para algunos modelos):
Presione la tecla "SWING" (presente
solamente en los modelos >
9000Bth/h) para activar la función de
oscilación automática de las aletas. El
indicador luminoso verde que está al
lado del botón "SWING" se
encenderá, indicando el modo
escogido. Las aletas verticales
oscilarán de un lado a otro
automáticamente esparciendo el aire
por la habitación brindando un
enfriamiento/calefacción uniforme.
Para detener esta función, presione el
botón "SWING" nuevamente, el
indicador luminoso verde
correspondiente a ese botón se
apagará.
Presionando la tecla "SWING" por 2
13
segundos usted activará el modo
DORMIR, el cual tiene la capacidad
de reducir el ruido del aparato,
creando de esta manera un ambiente
más confortable para dormir.
Cuando se active el modo DORMIR,
el indicador luminoso verde
"DORMIR" se encenderá.
Vea detalles de la tecla “DORMIR” a
seguir.
Alta
Media
Baja
Timer
Swing
Dormir:
Presione y sostenga la tecla "SWING"
por 2 segundos para activar el modo
"DORMIR" (sólo en los modelos >
9000Btu/h). Para desactivar, presione
y sostenga la tecla "SWING" por 2
segundos. Para los modelos <
9000Btu/h que no poseen la función
"SWING", presione la tecla “DORMIR"
en el control remoto para activar o
desactivar el modo “DORMIR". En el
modo de refrigeración, la temperatura
de ajuste de esfriamiento aumentará 1
ºC por hora después de haber
escogido el modo “DORMIR". Dos
horas más tarde, el punto de ajuste
continuará en la misma temperatura y
el motor del ventilador continuará con
la velocidad BAJA. En el modo de
calefacción, el punto de ajuste de la
temperatura de calefacción baja 1 ºC
por hora después de haber escogido
el modo “DORMIR". Dos horas más
tarde, el punto de ajuste continuará
en la misma temperatura y el motor
del ventilador continuará con la
velocidad BAJA. El uso del modo
“DORMIR" reducirá el ruído creando
de esta manera un ambiente
ESP
ESP
Vent. (Ventilación):
Presione a tecla VENT. para definir la
velocidad de ventilación deseada.
Cada vez que se la presione, la
velocidad se alternará entre BAJA,
MEDIA o ALTA. El indicador luminoso
verde que está al lado de la opción
de velocidad de VENTILACIÓN se
encenderá, identificando la velocidad
que se ha escogido.
Swing
Presione la tecla para
activar la función de
oscilación
automática de las
aletas.
Swing
Presionando la tecla
"SWING" por 2
segundos activará el
modo DORMIR
Dormir
confortable para dormir.
Observaciones:
Al activar el modo DORMIR en modo
AUTO (Automático), la temperatura
definida no cambiará por largo
tiempo.
Indicaciones de fallas:
Er: Indica un mal funcionamiento del
sensor de la temperatura interior de
la habitación.
En: Indica un mal funcionamiento del
sensor de temperatura del
evaporador.
Eo: Indica un mal funcionamiento del
sensor de la temperatura del
condensador exterior.
Observación: Cuando alguno de los
mal funcionamientos indicados
arriba ocurra, desconecte la unidad y
verifique si hay alguna obstrucción.
Vuelva a encender el aparato. Si el
mal funcionamiento persiste, apague
el aparato y desconéctelo del
tomacorriente. Entre en contacto con
el fabricante, con alguno de sus
representantes de servicios de
14
mantenimiento o similar persona
autorizada para prestar tales
servicios.
Ed: Indica el congelamiento de la
protección (apague el aparato y
enciéndalo nuevamente para que
vueva a funcionar normalmente).
EI: Indica la necesidad de verificar el
filtro después de 720 horas de
funcionamiento del ventilador.
Apague la unidad, desconéctela del
tomacorriente. Limpie el filtro y
vuelva a conectar el aparato. Su aire
acondicionado volverá a funcionar
normalmente.
OBSERVACIÓN:
EI = limpiar el filtro de aire: La
pantalla mostrará automáticamente la
indicación “EI” indicando cuando se
debe limpiar el filtro de aire. El
programa “EI” es un dispositivo
medidor de tiempo (incorporado) que
funciona basado en el tiempo de
funcionamiento total (del aire
acondicionado). Es muy importante
mantener siempre limpio el filtro de
aire para que la eficiencia de la
refrigeración sea óptima (lea la
sección de limpieza del filtro). El filtro
de aire debe limpiarse cuando
aparezca el mensaje “EI” en la
pantalla; se deberá apagar el aire
acondicionado y desconectarlo (del
tomacorriente) y después volverlo a
conectar. Esta acción
automáticamente reinicia el
dispositivo de tiempo interno del
programa “EI”.
15
La unidad de control remoto le permite controlar todos los aspectos
operacionales de su acondicionador de aire, sin salir del confort de su sillón
favorito. A continuación se citan algunas cosas que usted debe saber acerca
de cómo operar su acondicionador de aire utilizando el control remoto.
Er
En
Eo
Ed
El
Control de ventilación
El control de ventilación se ubica
sobre las perillas de control (vea las
figuras A y B). La manera de operarlo
varía entre los diferentes modelos.
Para obtener máxima eficiencia de
refrigeración, cierre el respiradero.
Hacerlo permitirá la circulación
interna de aire. Abra el respiradero
para descargar el aire parado.
Cerrar
Abrir
Fig. B
Cerrar
Abrir
Fig. A
ESP
ESP
Antes de usar el control remoto
Cargar el control remoto:
Para usar el control remoto, será necesario cargarlo con dos pilas alcalinas
(R03/Ir03x2) Tipo AAA.
Se deberá sustituir las pilas cuando:
1. Cuando no se escucha un beep de respuesta de la unidad interna o si la luz
del indicador de transmisión no aparece.
2. La unidad interna no responde a los comandos del control remoto para
activar los programas.
Para sustituir las pilas:
1. Deslice hacia abajo la tapa del compartimiento para las pilas (ubicada en la
parte trasera del control remoto).
2. Inserte dos pilas tamaño “AAA” en el compartimiento para las pilas (como se
indica en el dibujo que está dentro de ese compartimiento).
3. Vuelva a poner la tapa del compartimiento para las pilas.
Importante
1. Mantenga el control remoto alejado de líquidos.
2. Proteja el control remoto de altas temperaturas y exposiciones a la
radiación.
3. Mantenga el receptor interno fuera del alcance de la luz del sol. De lo
contrario puede presentar fallas en el funcionamiento.
4. Mantenga el control alejado de EMI (interferencias electro magnéticas)
provistas por otros artefactos electrodomésticos.
5. Al reemplazar las baterías, no utilizar viejas o de diferente tipo. Esto puede
causar un mal funcionamiento del control remoto.
6. Si no se usa el control remoto por largos periodos de tiempo, (vacaciones,
periodo fuera de temporada) se deberá retirar las pilas del control remoto.
7. El promedio de la vida útil de la batería en condiciones normales es de
alrededor de 6 meses.
16
Mantenimiento y cuidados
Filtro de aire
El filtro de aire que está detrás de la rejilla de entrada de aire debe verificarse y
limpiarse por lo menos una vez a cada quince días, o lo necesario para
mantener un desempeño óptimo del aire acondicionado. Si la pantalla muestra
la indicación “E1”, apague y desconecte del tomacorriente el aire
acondicionado y limpie el filtro.
: Aumenta / baja la
“TEMPERATURA”.
1 TEMP.
2 ENC. / APAGAR: Enciende y
apaga el aparato.
3 TIMER: Activa el programa de
“encendido automático” o de
“parada automática” de 0 a 12
horas (con incrementos de 1
hora).
1
4 SWING (solo para algunos
modelos): Activa la función de
oscilación automática de las
“ALETAS” (oscilación vertical de
las aletas).
5 FUNCION: Activa la función
"AUTO" (automático), "CALOR"
(calefacción), "FRÍO", "VENT."
(solo ventilación) o "DRY" (seco).
2
3
6
4
7
5
6 VENT. (solo ventilación): Activa el
ajuste de la velocidad de
“VENTILACIÓN” (ALTA, MEDIA,
BAJA).
7 DORMIR: Activa el modo
“DORMIR”
Ajuste vertical de la corriente de aire (manual)
Para ajustar la dirección vertical de la
corriente de aire, ajuste cualquiera de
las aletas horizontales. Puede subir o
bajar las aletas horizontales. Al
hacerlo evita efectivamente la
formación de condensación de gotas
de agua sobre el panel frontal de la
unidad.
17
Cómo retirar el filtro de aire
1. Se puede abrir la rejilla desde
arriba o desde abajo para prestarle
fácil mantenimiento después de la
instalación.
2. Abra la rejilla de entrada retirando
la puerta expuesta en la base o
parte superior de la unidad
(dependiendo de la instalación).
3. Tire levemente de la lengüeta para
soltar el filtro. Tire del filtro en la
misma dirección de apertura.
4. Limpie el filtro con agua jabonosa
tibia. El agua no puede estar a
más de 40ºC para evitar que el
filtro se deforme.
5. Enjuáguelo y sacuda
cuidadosamente el exceso de
agua. Déjelo secar antes de
volverlo a instalar. Para evitar que
el filtro se deforme, no lo seque
exponiéndolo directamente al sol.
Tratamiento de agua condensada
Para cumplir con las diferentes condiciones de los diferentes tipos de
acondicionadores de aire, existen dos métodos que usted puede escoger para
tratar el agua condensada.
Para los modelos con refrigeración solamente:
Usted puede escoger entre el método de desagüe trasero y el método sin
desagüe. Fijese en los siguientes procedimientos para ejecutar el desagüe
trasero:
18
ESP
ESP
Descripción del control remoto
Junta
de Desagüe
Orificio
Central
Tapón de Caucho
Empaque
TOLDO
TOLDO
CERCA
CERCA
Gabinete
Bandeja
de Desagüe
Salida de la
Manguera de Desagüe
Tapón
de Caucho
Tornillo
Aprox. 10mm
Más de 50cm
75-150cm
Para los modelos con ciclo reverso:
Usted puede escoger el desague por
la base. Fijese en los siguientes
procedimientos para llevar a cabo el
desagüe por la base:
1. Retire la bandeja de desagüe y
los tornillos (que se suministran
con el acondicionador de aire).
2. Instale la bandeja de desagüe
en la base de la unidad y fijela
con los tornillos.
3. Conecte la manguera de
desagüe a la salida que está a
un lado de la bandeja de
desagüe, usted puede adquirir
la manguera o tubo de desagüe
de acuerdo con su propia
necesidad (la manguera de
desagüe no viene con el
acondicionador de aire).
7
Escoja el mejor lugar para la instalación:
1. Para evitar vibraciones y ruido, asegurése de instalar el acondicionador de
aire de forma estable y firme.
2. Instale la unidad en un lugar en el que no reciba directamente la luz del
sol. Si hay incidencia directa de rayos solares sobre la unidad, instale
sobre el aparato un toldo para que le haga sombra.
3. No deberá haber ningún obstáculo, tal como una pared o una cerca, a una
distancia de por lo menos 50 cm de la parte trasera del gabinete pues
evitaría la radiación de calor del condensador.
El restringir el aire exterior reducirá en gran medida la eficiencia de la
refrigeración y de la calefacción del acondicionador de aire.
4. Instale la unidad levemente inclinada hacia afuera para que el agua
condensada no gotee en el interior de la habitación (aproximadamente 10
mm ó 1/4 de burbuja en un nível de burbuja).
5. Al cable de alimentación debe estar conectado a un circuito
independiente. El cable amarillo / verde debe estar conectado a tierra.
6. La unidad deberá instalarse de 75 a 150 cm sobre el nível del piso de la
habitación.
75-150cm
ESP
1. Encaje el empaque en la junta
de desagüe (que viene con su
acondicionador de aire).
2. Retire el tapón de caucho de la
parte trasera de la unidad.
3. Conecte la junta de desagüe
detrás del gabinete en el lugar
del que retiró el tapón de
caucho y gírelo 90º para que
quede bien ajustado.
4. Conecte la junta de desagüe a
una manguera de desagüe
(usted deberá adquirirla
separadamente).
Aprox. 10mm
Más de 50cm
Cuidado
Todas rejillas deverán estar para
fuera de la estructura, como la figura
arriba.
19
20
ESP
Procedimientos de instalación
Paso 1: Retire el acondicionador de aire de su embalaje, retire los tornillos
fijadores y deslícelo hacia afuera de su carcasa (Lea los pasos de
instalación).
Paso 2: Prepare el hueco en la pared para que el fondo de la carcasa esté bien
apoyado, para que haya un espacio mínimo sobre la parte superior y
para que las rejillas para la entrada de aire estén despejadas como se
muestra en las opciones A y B. Los huecos desde afuera en dirección
a la cavidad deberán sellarse. La carcasa deberá estar ligeramente
inclinada hacia atrás aproximadamente 5 mm para permitir que el
agua que se forma debido al funcionamiento del aparato pueda
drenarse con facilidad.
Paso 3: Instale la unidad en la pared y fijela bien. Asegúrese de que los
empaques de espuma no están dañados. Cubra, selle o rellene los
espacios alrededor del aparato, por dentro y por fuera para
proporcionar una aparencia satisfactoria y para protegerlo contra la
intemperie, los insectos y roedores.
Cubra o selle alrededor del marco
en la pared exterior o arquitrabe
de cable bajo el aparato.
Paso 3: Acople los soportes de fijación del chasis al canal de la parte de abajo
de la carcasa y fijelos a la base con el tornillo suministrado.
Paso 4: Retire el panel delantero de su embalaje de cartón y de la bolsa
plástica y encájelo como indican las instucciones de instalación.
Paso 5: Encienda la unidad. Verifique si está funcionando adecuadamente y
verifique si hay vibración en la instalación.
Paso 6: Encaje la bandeja de desagüe en la carcasa y si es necesario tienda la
línea de desagüe en la dirección adecuada.
Cubra o selle alrededor del marco
en la pared exterior o arquitrabe.
Asegúrese de que las rejillas están
completamente fuera de la pared.
Bandeja de desagüe
Marco de madera resistente
Pared con marco
de madera o partición
Marco de madera resistente
alrededor de la unidad.
Pared con marco de
madera o partición
Apoyo de estabilización (uno a cada lado)
Apoyo Sólido de Madera
Método alternativo de instalación en el caso de
no ser posible disponer de un apoyo exterior
Bandeja
de desagüe
Marco de apoyo externo en el punto
de equilibrio del acondicionador de aire.
Alternativamente pueden usarse soportes de
apoyo como se muestra más abajo
Instalaciones de la unidad en la pared
Deben considerarse como métodos preferenciales de instalación la
instalación en hueco con marco de madera, en una partición o ventana.
Corte biselado a Salida
45º para dejar las
rejillas despejadas.
Entrada de aire
Entrada
de aire
Instalación de la unidad en la carcasa
Paso 1: Deslice la unidad hacia adentro de su carcasa hasta que esté
firmemente apoyada contra la parte trasera de esta. Tome cuidado
para que las tiras de sello de espuma no se salgan de su lugar.
Paso 2: Conecte el acondicionador de aire al tomacorriente y ponga el exceso
21
de Aire
Pared
Pared
100mm
Entrada de Aire
Entrada
de aire
Entrada de Aire
Salida
de aire
100mm
100mm
Salida de Aire
OPCIÓN A
OPCIÓN B
22
ESP
ESP
Instalación de la carcasa
Paso 1:
Retire el panel frontal y el filtro de
aire.
1. Sujete de la ranura bajo el panel
frontal, luego levántelo hacia
adelante y después retírelo (ver la
fig. 1).
2. Apriete la agarradera bajo el filtro
de aire y arquee el filtro de aire,
retírelo de la ranura de abajo hacia
arriba (ver la fig. 2) aparato, por
dentro y por fuera para
proporcionar una aparencia
satisfactoria y para protegerlo
contra la intemperie, los insectos y
roedores.
Paso 2:
Retire el marco.
1. Retire los dos tornillos fijos del
marco (ver la fig. 3).
2. Sujete la esquina izquierda en el
lado inferior del marco, luego
aflójelo (ver la fig. 4).
Paso 3:
Instalación
1. Retire los tornillos que sujetan la
placa de fijación al chasis y al
gabinete. Algunos modelos
poseen dos tornillos más detrás
del gabinete (ver la fig. 5).
Fig. 1
7
Fig.
2
Fig. 3
Fig. 4
Fig. 5
23
2. Sujete la agarradera en el chasis y
cuidadosamente deslice el aire
acondicionado hacia afuera del
gabinete (ver la fig. 6)
3. Retire la almohadilla de empaque
del compresor antes de poner en
marcha el acondicionador de aire
y asegúrese de que los puntos de
descarga que van a la bandeja de
desagüe están alineados antes de
empujar el chasis hacia adentro
del gabinete (vea la fig. 7).
4. Empuje el chasis de la unidad
hacia adentro del gabinete (ver la
fig. 8).
5. Fije el chasis y el gabinete (ver la
fig. 5).
ESP
ESP
Pasos para instalación
Fig. 6
Tornillos Pared
Fig. 7
Paso 4:
Instale el marco.
1. Instale el marco y conecte los
tapones de acople tomando
cuidado para no aplastar el cable
del sensor de temperatura (ver la
fig. 9).
2. Fije los tornillos en el marco (ver la
fig. 3).
Paso 5:
Instale el panel frontal y el filtro de aire.
1. Instale el filtro de aire en la ranura
del marco de arriba hacia abajo (ver
la fig. 2).
2. Cuelgue el panel frontal en el broche
del marco, luego presione el panel
frontal contra la ranura del marco
hasta oír un “click” que denote el
encaje (ver la fig. 10).
Gabinete
Apoyo
Fig. 8
Fig. 9
Fig. 10
24
Si su aire acondicionado presenta problemas de funcionamiento, verifique en la
tabla a seguir las probables causas y soluciones. Si estas sugerencias no
solucionan su problema, llame al Centro de Servicio Autorizado.
El desempeño del aparato es insatisfactorio.
Informaciones técnicas
AIRE ACONDICIONADO DE VENTANA (Modelos Fríos)
Modelo
Tamaño del 2
Dimensiones / mm
(AxHxP)
Cableado ( mm )
Voltaje/
Frecuencia
ESP
ESP
Guía para la solución de problemas
Capacidad
(Btu)
Peso
(kg)
FAW092C2DW
450x345x540 mm
1,0 mm
2
220-230 V / 60 Hz
9000 Btu
35 kg
FAW122C2DW
685x420x620 mm
1,5 mm 2
220-230 V / 60 Hz
12000 Btu
39 kg
La salida o la entrada de aire del lado exterior está obstruida.
La temperatura en el exterior está anormalmente alta debido a la incidencia directa de
rayos solares o de alguna otra fuente de calor.
Se está cocinando o usando un calefactor de agua en la misma habitación.
Hay demasiada gente en la habitación.
El filtro de aire está obstruido con polvo.
La palanca de ventilación está en la posición abierta.
El termostato regulador de la temperatura no se ha ajustado correctamente.
La parte frontal del aparato está obstruida.
Direccionadores verticales totalmente cerrados.
Hielo en el evaporador.
La capacidad del producto es inadecuada para el tamaño del ambiente.
Si el aire acondicionado no funciona.
El enchufe no está devidamente conectado al tomacorriente.
Falta de energía eléctrica en el tomacorriente.
La tensión de la red eléctrica no es la correcta.
La temperatura está mal ajustada.
Ver si el fusible se ha quemado.
El compresor no prende. Unicamente la ventilación funciona.
Aparato apagado recientemente.
Caída o sobrecarga momentánea en la red eléctrica.
Baja tensión en la red.
Ajuste del botón temperatura.
Ruido
Instalación inadecuada.
Salida del agua de condensación deficiente.
Pérdida de agua en el ambiente.
Instalación con nivelado incorrecto.
25
26
Thank you for choosing Frigidaire for your air conditioner. Our air conditioners
are developed with high technical and quality standards, with features to offer
you even more comfort.
Read all instructions before using this appliance. This book contains valuable
information about operation, care and service. Keep it in a safe place.
You expect all this from Frigidaire…and we deliver.
Your laundry never looked so good.
Environmental advice
The packaging material used is recyclable; we recommend that you separate
plastic, paper and cardboard and give them to recycling companies.
According to WEEE (Waste of Electrical and Electronic Equipment) guidelines,
waste from electrical and electronic devices should be collected separately. If
you need to dispose of this appliance in the future, do NOT throw it away with
the rest of your domestic garbage. Instead, please take the appliance to the
nearest WEEE collection point, where available.
Read this manual
Inside you will find many helpful hints
on how to use and maintain your air
conditioner properly. Just a little
preventive care on your part can save
you a great deal of time and money
over the life of your air conditioner.
You'll find many answers to common
problems in the chart of
troubleshooting tips. If you review our
chart of Troubleshooting Tips first, you
may not need to call for service at all.
27
Contents
Safety ....................................................................................................... 29
Prior to operation ...................................................................................... 33
Unit parts identification ............................................................................. 34
Electrical safety rules ................................................................................ 35
Operation instruction ................................................................................ 36
Before using the remote control ................................................................ 42
Control remote description ....................................................................... 43
Vertical air flow adjustment (manually) ...................................................... 43
Cleaning and maintenance .......................................................................44
Installation instructions ............................................................................ 46
Installation of the housing.......................................................................... 47
Installation of the unit into the housing ................................................... 47
Installations of the unit into the wall ...................................................... 47
Installation steps ...................................................................................... 49
Troubleshooting ....................................................................................... 51
Technical information .............................................................................. 52
Important
The appliance that you have bought
may be slightly different from the one
illustrated in this manual. Please refer
to the information related to the model
you have.
The appliance you have may carry a
different plug than the one illustrated
in this manual. The plug that comes
with the product follows the electrical
specification of the country where it is
sold.
The installation is not covered by the
purchase of the product.
Contact the authorised service
technician for repair or maintenance
of this unit.
Contact the installer for installation of
this unit.
The air conditioner cannot be use by
childrens.
Young children should be supervised
to ensure that they do not play with
the air conditioner.
If the power cord is to be replaced,
replacement work shall be performed
by authorised personnel only.
Installation work must be performed
in accordance with the national wiring
standards by authorised personnel
only.
28
ENG
ENG
Welcome to the world of
simple handling and no worries.
Safety
ENG
Plug in power plug properly.
Otherwise, it may cause electric shock or fire due to excess heat generation.
Do not operate or stop the unit by inserting or pulling out the power plug.
It may cause electric shock or fire due to heat generation.
Do not use the socket if it is loose or damaged.
It may cause fire and electric shock.
Do not open the unit during operation.
It may cause electric shock.
Keep firearms away.
It may cause fire.
Do not damage or use an unspecified power cord.
Do not use the power cord close to heating appliances.
• It may cause electric shock or fire.
• If the power cord is damaged, it must be replaced by the manufacturer or an
authorised service centre or a similarly qualified person in order to avoid a hazard.
It may cause fire and electric shock.
Do not modify power cord length or share the outlet with other appliances.
It may cause electric shock or fire due to heat generation.
ENG
Incorrect operation due to ignoring of instructions may cause harm or damage.
The seriousness is classified by the following indications
Do not use the power cord near flammable gas or combustibles, such as
gasoline, benzene, thinner, etc.
It may cause an explosion or fire.
Do not operate with wet hands or in damp environment.
Ventilate room before operating air conditioner if there is a gas leakage from
another appliance.
It may cause electric shock.
It may cause explosion, fire and, burns.
Do not direct airflow at room occupants only.
Do not disassemble or modify unit.
This could damage your health.
It may cause failure and electric shock.
Always ensure effective earthing.
Do not drink water drained from air conditioner.
Incorrect earthing may cause electric shock.
It contains contaminants and could make you sick.
Do not allow water to run into electric parts.
When the air filter is to be removed, do not touch the metal parts of the unit.
It may cause failure of machine or electric shock.
Always install circuit breaker and a dedicated power circuit.
It may cause an injury.
Do not clean the air conditioner with water.
Incorrect installation may cause fire and electric shock.
• Water may enter the unit and degrade the insulation.
• It may cause an electric shock.
Unplug the unit if strange sounds, smell, or smoke comes from it.
Ventilate the room well when used together with a stove, etc.
It may cause fire and electric shock.
An oxygen shortage may occur.
29
30
Do not use for special purposes.
Do not clean unit when power is on as it may cause fire and electric shock, it may
cause an injury.
Do not use this air conditioner to preserve precision devices, food, pets, plants,
and art objects. It may cause deterioration of quality, etc.
Do not put a pet or house plant where it will be exposed to direct air flow.
Turn off the main power switch when not using the unit for a long time.
This could injure the pet or plant.
It may cause failure of product or fire.
Use caution when unpacking and installing.
Ensure that the installation bracket of the outdoor appliance is not damaged
due to prolonged exposure.
Sharp edges could cause injury.
ENG
ENG
When the unit is to be cleaned, switch off, and turn off the circuit breaker.
If bracket is damaged, there is concern of damage due to falling of unit.
Stop operation and close the window in storm or hurricane.
Operation with windows opened may cause wetting of indoor and soaking of
household furniture.
Do not place obstacles around air-inlets or inside of air-outlet.
It may cause failure of appliance or accident.
Important
If water enters the unit, turn the unit off at the power outlet and switch off the
circuit breaker. Isolate supply by taking the power-plug out and contact a
qualified service technician.
Hold the plug by the head of the power plug when taking it out.
It may cause electric shock and damage.
Always insert the filters securely. Clean filter once every two weeks.
Operation without filters may cause failure.
Do not place heavy object on the power cord and ensure that the cord is not
compressed.
There is danger of fire or electric shock.
Do not use the following items.
Warm water (more than 40°C or 104°F). The warm water can deforme or bleach the
window air conditioner.
Never clean the appliances with flammable liquids as alcohol, kerosene, gasoline,
some liquid cleaners, some spots removers, turpentine, waxes, wax removers, or
cleaners as amoniac, acids, vinagers, soda or abrasives as plastic or steel
sponges, steel wool, neither also with chemical products that migh release
chemical corrosive or toxic vapors that may damage the appliance.
31
32
Unit parts identification
Preparing for operation
1. Contact an installation specialist for installation.
2. Plug in the power plug properly.
3. Do not use a damaged or non-standard power cord.
4. Do not share the same outlet with other appliances.
5. Do not use an extension cord.
6. Do not start/stop operation by plugging/unplugging the power cord.
1 Front panel
2 Air filter
3 Frame
4 Cabinet
5 Air inlet grille (outdoor side)
Power
9
6 Air outlet grille
Usage
1. Exposure to direct airflow for an extended period of time could be
hazardous to your health. Do not expose occupants, pets, or plants to
direct airflow for extended periods of time.
2. Due to the possibility of oxygen deficiency, ventilate the room when used
together with stoves or other heating devices.
3. Do not use this air conditioner for non-specified special purposes (e.g.
Preserving precision devices, food, pets, plants, and art objects). Usage in
such a manner could harm such property.
Cleaning and maintenance
1. Do not touch the metal parts of the unit when removing the filter. Injuries
can occur when handling sharp metal edges.
2. Do not use water to clean inside the air conditioner. Exposure to water can
destroy the insulation, leading to possible electric shock.
3. When cleaning the unit, first make sure that the power and circuit breaker
are turned off.
ENG
ENG
Prior to operation
Mode
7 Control panel
8 Power supply cord and plug
4
9 Remote control
5
3
2
1
6
7
8
Operating temperature
Outdoor
18 ~ 43 ºC (T1 Environment)
21 ~ 52 ºC (T3 Environment)
MODE
Indoor
18 ~ 32 ºC (T1 Environment)
18 ~ 32 ºC (T3 Environment)
HEATING
Outdoor
-5 ~ -24 ºC (T1 Environment)
-7 ~ -24 ºC (T3 Environment)
Indoor
0 ~ -27 ºC (T 1 Environment)
0 ~ -30 ºC (T3 Environment)
COOLING
MODE
Performance may be reduced outside of these operating temperatures.
33
Observation
Control panel is based on a typical
model, the function should be the
same on your washers, even if the
appearance is a little different.
34
Electrical safety rules
All wiring must comply with local and
national electrical codes and be
installed by a qualified electrician. If
you have any questions regarding the
following instructions, contact a
qualified electrician.
The unit should be provided with an
individual branch circuit and the fuse
size should be same as that of the
power cord and wall outlet.(Air-break
switch).
Control panel
The electronic control keypad will look like one of the following:
Reverse cycle models:
ENG
ENG
Caution
Operation instruction
Never insert your fingers or any foreign
objects into the air outlet. Take special
care to warn children of these
dangers.
To avoid the possibility of personal
injury, be sure to disconnect power to
the unit before installing and/or
servicing and/or cleaning.
L
If the supply cord is damaged, it must
be replaced by the manufacturer or its
service agent or a similar qualified
person in order to avoid a hazard.
Attention
The power cord is distinguished
according to the cord color just as
follows (see fig. 1):
For your safety and protection, this
unit is grounded through the power
cord .(see fig. 2). Please contact the
manufacturer or its service agent or a
similar qualified person if you want to
replace it.
E
N
Power
cord
AUTO
AUTO
Fig. 1
E - Ground wire, yellow/green
N - Neutral wire, blue
L - Live wire, red/brown
Socket
For the electric requirements, read the
technical information (Pg. 52)
Be sure that the unit being correctly
grounded. The wall outlet (Air-break
switch) should be provided with
reliable earth wire.
Fig. 2
35
Cooling only models:
Power:
Press the POWER keypad to turn the
unit on/off. (The TIMER keypad
controls the auto start/stop feature of
the unit.)
Mode: Press the "MODE" keypad to
select the appropriate operating
mode. For the Cooling & Heating
models, the mode selection will
alternate between AUTO, HEATING,
COOLING, FAN and DRY. For the
Cooling only models, select the
POWER
MODE
MODE
SIGNS
AUTO
Auto
HEATING
COOLING
FAN
DRY
36
Dry (some models):
This mode is used to decrease the
humidity in the room.
Cooling:
The temperature setting are
adjustable between 16 °C to 31 °C.
Cooling begins automatically when
the room temperature is 1 °C above
the set point, and stops when the
room temperature is 1 °C below the
set point. The fan will not stop
running.
Heat: (Only heat mode models)
The temperature settings are
adjustable between 16 °C to 31 °C in
heating mode.
The default temperature setting is 24
°C in heating mode and the fan speed
is optional.
Notes:
1. When changing the temperature
setting, the fan motor operates
at LOW speed for 3 minutes first
for compressor protection
feature before heating begins.
37
Reverse models:
Cooling models:
Auto
MODE
MODE
2. When heating stops, there may
be a slight delay of 30 seconds
for the fan motor to stop.
3. If the condenser temperature is
below 35 °C, the fan will run in
LOW speed despite the FAN
setting.
4. If the condenser temperature is
above 38 °C, the fan will run at
the FAN setting.
Auto (some models):
The fan motor remains on MED speed
in AUTO mode. The unit will select
the appropriate operating mode from
FAN, COOL or HEAT based upon the
temperature difference between the
actual and desired room temperature.
If the actual room temperature is 2°C
above the set point, the unit operates
in cooling mode. When the actual
room temperature is not 2°C or higher
above the set point and not 1°C or
lower below the set point, the unit will
select the FAN mode. When the
actual room temperature is 2°C below
the set point, the unit will operate in
HEAT mode.
Note:
1. If activating the SLEEP mode
when the unit is operating on
AUTO mode, the fan motor will
changed into LOW speed mode
immediately.
ENG
ENG
operating mode from COOLING, FAN
and DRY (some models). The green
indicator light beside the "MODE"
option will illuminate, identifying the
mode selected.
When using the DRY and AUTO
mode, you cannot select a fan speed.
The fan motor operates on LOW
speed in DRY mode and on MED
speed in AUTO mode.
Temperature settings:
UP: Press the
keypad to
increase the set (operating)
temperature of the unit. Each time the
keypad is pressed the temperature
increases as follows: 1 °C (Celsius
Scale) Maximum Setting 31°C.
DOWN: Press the
keypad to
decrease the set (operating)
temperature of the unit. Each time the
keypad is pressed the temperature
decreases as follows: 1 °C (Celsius
Scale) Minimum Setting 16 °C.
Up
Down
38
Timer:
Press the "TIMER" keypad to activate
the "auto start/auto stop" timer
function.
Auto start/stop programs can be set
from 0~12 hours. Each depression of
the "TIMER" keypad will increase the
selected time in 1 hour increments.
Swing (some models):
Press the "SWING" keypad ( >
9000Btu/h models only) to activate
the automatic air swing (oscillation)
feature. The green indicator light
adjacent to the "SWING" keypad will
illuminate, identifying to the selected
mode is operational. The vertical
louvers will oscillate back and forth
(side to side) automatically sweeping
air alternately for comfortable
cooling/heating. To stop the air swing
feature, press the "SWING" keypad
again, the green indicator light
adjacent to the keypad will go off.
Press the "SWING" keypad for 2
seconds will activate the SLEEP
mode which can reduce noise
creating a comfortable sleeping
environment.
When the SLEEP mode is activated,
39
the green indicator light beside the
"SLEEP" function will illuminate.
(See sleep mode)
High
Med
Low
Timer
Swing
Sleep:
Press and hold the "SWING" keypad
for 2 seconds or use the remote
control to activate the "SLEEP"
feature ( >9000Btu/h models only) .
Press and hold the "SWING" keypad
or use the remote control again for 2
seconds to deactivate the "SLEEP"
feature. For units ( <9000Btu/h
models) without "SWING" feature,
use the remote control to activate
the "SLEEP" feature. In the Cooling
mode, the cooling temperature set
point will increase 1 °C per hour after
the "SLEEP" mode is selected. Two
hours later, the set point will
continue at this temperature and the
fan motor will remain on LOW speed.
In the Heating mode, the heating
temperature set point will decrease 1
°C per hour after the "SLEEP" mode
is selected. Two hours later, the set
point will continue at this
temperature and the fan motor will
remain on LOW speed. Using the
"SLEEP" mode will reduce noise
creating a comfortable sleeping
environment.
Note: When activating the SLEEP
mode in AUTO mode, the set
temperature will not change over
time.
Swing
Press the
"SWING"
keypad to
activate the
automatic air
Swing
Press and hold the
"SWING" keypad for
2 seconds or use the
remote control to
activate the "SLEEP"
feature.
ENG
ENG
Fan:
Press this keypad to activate the
appropriate fan speed setting. Each
depression of the keypad will
alternate through LOW, MED, HIGH
fan speed options. The green
indicator light beside the FAN speed
option will illuminate, identifying the
fan speed selected.
Sleep
Failure indicator display:
Er: Indicates a malfunction of the
indoor room temperature sensor
En: Indicates a malfunction of the
evaporator temperature sensor
Eo: Indicates a malfunction of the
outdoor condenser temperature
sensor.
Note: When one of the above
malfunctions occurs, turn off the unit,
and check for any obstructions.
Restart the unit, if the malfunction is
still present, turn off the unit and
unplug the power cord. Contact the
manufacturer or its service agents or
a similar qualified person for service.
Ed: Indicates frosting protection (Turn
off the unit and restart it to return to
normal operation).
EI: Indicates the requirement of a
filter check after 720 hours of fan
operation. Turn off the unit,
40
disconnect/unplug from the power
supply. Clean the filter, then restore
the power, the unit will return to
normal operation.
NOTE:
EI=Clean air filter: A message prompt
“EI" will automatically appear in the
LED window indicating when it is
time to clean the air filter. The “EI"
program is a (built-in) time device that
operates based on total (air
conditioner) running time. It is very
important to keep the air filter clean
at all times in order to maximize
cooling efficiency (See Cleaning Air
Filter). The air filter must be cleaned
when the “EI" message from the LED
display, the air conditioner must be
switched off and disconnected
(unplugged) from the power supply
and re-connected. This action
automatically resets the “EI"program
internal time device.
In the event of a power failure, the
“EI" program is automatically re-set,
therefore we suggest you remove and
clean the filter before re-starting the
unit after any power failure.
The hand held remote control unit allows you to control all operational aspects
of your Air Conditioner, from the convenience of your favorite armchair. Here are
some things you should know about operation your air conditioner with the
hand held remote control.
Er
En
Cargar el control remoto:
To operate the hand held remote control, you will require two AAA 1.5Volt
batteries (included).
Batteries should be replaced when:
1. No signal (beep) is heard from the main unit when initiating program
commands from the remote control to the main unit.
2. The main unit does not respond to the remote control program commands.
Battery replacement:
1. Slide the lower (battery) cover down (Located on rear of remote control unit).
2. Insert two "AAA" Batteries inside the battery chamber (as depicted inside the
battery chamber).
3. Re-install lower battery cover.
Eo
Ed
El
Important
Close
Open
Vent control
The vent control is located above the
control knobs. The operation method
is different on different models (see
the following figures).
For maximum cooling efficiency,
CLOSE the vent. This will allow
internal air circulation. OPEN the vent
to discharge stale air.
Fig. A
Close
1. Maintain the remote control away from liquids.
2. Protect the remote control of high temperature and the radiation.
3. Keep the internal receiver out of the reach of sunlight. It may introduce faults
in the operation.
4. Keep the control away from magnet interference from other appliances
furnished.
5. To replace the batteries, not use old or different type. This may cause a
malfuction of the remote control.
6. If the remote control is not being used for extended time periods, (vacation,
off season) the batteries should be removed from the remote control unit.
7. The average battery life under normal conditions is about six months.
Open
Fig. B
41
42
ENG
ENG
Before using the remote control
Control remote description
Cleaning and maintenance
2 POWER: Turns the power to the
ENG
main unit only. "on/off “
3 TIMER: Activates the “auto START”
or “auto STOP” program from 0-12
hours (1 hour increments).
4 SWING (some models): Activates
1
the automatic air “SWING” (vertical
louver oscillation) feature.
5 MODE: Activates the "AUTO" (if
applicable), "HEAT" (if applicable),
"COOL", "FAN" or "DRY" function.
2
3
6
4
7
6 FAN: Activates the “FAN” speed
settings (HIGH, MED,LOW).
7 SLEEP: Activates the “SLEEP”
mode.
5
ENG
Air filter
The air filter behind the inlet grille should
be checked and cleaned at least once
every 2 weeks (or as necessary) to
maintain optimal performance of the air
conditioner. If symbol "E1" displays in the
LED window, switch off and disconnect
the air conditioner from the power supply
and clean the filter.
: Increases / Decreases
operating “TEMPERATURE”.
1 TEMP.
How to remove the air filter
1. The grille may be opened from the
top or bottom for easy maintenance
after installation.
2. Open the inlet grille by pulling off the
exposed door on the bottom or top
of the unit (based on installation).
3. Pull the tab slightly to release the
filter. Pull the filter in the same
direction as the opening.
4. Clean the filter with warm, soapy
water. The water should be below
40 °C to prevent distortion of the
filter.
5. Rinse off and gently shake off
excess water from the filter. Allow
the filter to dry before replacing it.
To prevent distortion of the filter, do
not dry in direct sunlight.
Vertical air flow adjustment (manually)
Treatment of condensed water
To adjust vertical air flow direction,
adjust any one of the horizontal
louvre blades. When adjusting the
horizontal louver blades up or down,
always keep the top or bottom
blades horizontal. This can effectively
prevent water droplets condensing
on the front panel of the unit.
43
To meet different requirement of different type of air conditioner, there are two
kinds of methods for your choice to treat the condensed water.
For cooling only models:
You can choose back drainage or non-drainage. See the following procedures
to perform back drainage:
44
Central
Orifice
Drain Joint
Rubber plug
Seal
AWNING
AWNING
FENCE
FENCE
Cabinet
Drain
pain
Drain
outlet
Rubber
plug
About 10mm
Over 50cm
75-150cm
For reverse cycle models:
You can choose bottom drainage. See
the following procedures to perform
bottom drainage:
1. Take out the drain pan and
screws (which provided with
your air conditioner accessory).
2. Install the drain pan at the
bottom of the unit and secure
with screws provide.
3. Connect the drain hose to the
outlet located at one side of the
drain pan. You can purchase the
drain hose or tubing locally to
satisfy your particular needs
(Drain hose is not supplied)
7
Select the best location:
1. To avoid vibration and noise, make sure the unit is installed securely and
firmly.
2. Install the unit where the sunlight does not shine directly on the unit. If the
unit receives direct sunlight, build an awning to shade the cabinet.
3. There should be no obstacle, such as a fence or wall, within 50cm from
the back of the cabinet because it will prevent heat radiation of the
condenser.
Restriction of outside air will greatly reduce the cooling and heating
efficiency of the air conditioner.
4. Install the unit a little obliquely outward not to leak the condensed water
into the room (about 10mm or 1/4 bubble with level).
5. The power cord must be connected to an independent circuit. The
yellow/green wire must be grounded.
6. Install the unit with its bottom portion 75~150cm above the floor level.
75-150cm
ENG
1. Fit the seal onto the drain joint
(which provided with your air
conditioner accessory).
2. Remove the rubber plug from
the back of the unit.
3. Attach the drain joint to the back
of the cabinet where you remove
the plug and rotate 90° to
securely assemble them.
4. Connect the drain joint with a
extension drain hose (Locally
purchased)
About 10mm
Over 50cm
Screw
Caution
All side louvers of the cabinet must
remain exposed to the outside of the
structure.
45
46
ENG
Installation instructions
Step 1: Remove the air conditioner from it's packaging, remove fixing screws
and slide the air conditioner out of it's housing (Refer to Installation
Steps).
Step 2: Prepare the hole in the wall so that the bottom of the housing is well
supported, the top has minimum clearance and the air inlet louvers
have clearance as shown below in options A and B. Holes from the
outside through to the cavity should be sealed. The housing should
slope down towards the rear by about 5mm to allow water formed
during operation to drain.
Step 3: Install the housing into the wall and secure. Ensure the foam seals are
not damaged. Flash, seal or fill gaps around the inside and outside to
provide satisfactory appearance and protection against the weather,
insects and rodents.
Step 3: Engage the chassis fixing brackets into the bottom housing rail and
secure to the base with the screw provided.
Step 4: Remove the front panel from it's carton and plastic bag and fit as per
the Installation lnstruction.
Step 5: Switch unit on. Check for operation of the unit and check for vibration in
the installation.
Step 6: Fit the drain pan to the housing and run a drain line to a suitable
location if required.
Flash or seal around external
wall frame or architrave
Ensure louvres are
entirely outside the wall
Drain pan
Flash or seal around external
wall frame or architrave
Sturdy
timber frame
Steadying bracket
(one per side)
Timber framed
wall or partition
Sturdy timber
frame all round unit
Timber framed
wall or partition
Drain pan
Solid timber support
Alternative method of installation if external
support cannot be provided.
External support frame at
balance point of air conditioner.
Alternatively, brackets as illustrated
below may be used.
Installations of the unit into the wall
Preferred method of installation into a timber
framed wall, partition or window.
45° brick cut away
To clear louvres
Air in
Installation of the unit into the housing
Step 1: Slide the unit into the housing until it is firmly against the rear of the
housing. Care is required to ensure the foam sealing strips on the
housing remain in position.
Step 2: Connect the air conditioner to the power and position excess cord
length beneath the air conditioner base.
47
Air out
Wall
Air in
Wall
Air in
100mm
Air in
Air in
Air out
100mm
100mm
Air out
OPTION A
OPTION B
48
ENG
ENG
Installation of the housing
Step 1:
Remove the front panel and the air
filter.
1. Hold the slot under the front panel,
then uplift it outwards, and remove
the front panel (See Fig.1).
2. Pinch the handle under the air
filter and make the air filter arched,
remove it from the slot from
underside to upside (See Fig.2).
Fig. 1
7
Fig.
2
Step 2:
Remove the frame.
1. Remove the two fixing screws
from the frame (See Fig.3).
2. Grasp the left corner of the
frame's underside, release the
coupler plugs, then loosen the
frame (See Fig.4).
Step 3:
Installation.
1. Remove the two fixing screws on
the chassis fixing brackets, then
remove the chassis fixing brackets
(See Fig.5).
Fig. 3
Fig. 4
Fig. 5
49
2. Grasp the handle on the chassis
and carefully slide the air
conditioner out of the cabinet (See
Fig.6).
3. Remove shipping pad from around
compressor before operation and
make sure the discharge points to
the drain pan are aligned before
the chassis is pushed into the
cabinet (See Fig.7).
4. Push the unit chassis into the
cabinet (See Fig.8).
5. Install the two chassis fixing
brackets using the two fixing
screws (See Fig.5).
Fig. 6
Screews
Wall
Fig. 7
Step 4:
Install the frame.
1. Install the frame and connect the
coupler plugs, making sure not to
interfere with the temperature
sensor cable (See Fig.9).
2. Fix the screws on the frame (See
Fig.3).
Step 5:
Install the air filter and front panel.
1. Install the air filter into the frame's
slot from upside to underside (See
Fig.2).
2. Hang the front panel on the frame's
buckle, then press the front panel
into the frame's slot until you hear a
click (See Fig10).
ENG
ENG
Installation steps
Cabinet
Supporter
Fig. 8
Fig. 9
Fig. 10
50
ENG
If your air conditioner does not work well, check the table below for probable
cause and / or solutions. If the problem cannot be solved call our technical
service center.
Device performance is unsatisfactory.
Technical information
WINDOW-TYPE AIR CONDITIONER (Cooling Models)
Model
Dimensions
(WxHxD)
Wiring size
( mm2 )
Voltage/
Frequency
Capacity
(Btu)
Weight
(kg)
FAW092C2DW
450x345x540 mm
1,0 mm
2
220-230 V / 60 Hz
9000 Btu
35 kg
FAW122C2DW
685x420x620 mm
1,5 mm 2
220-230 V / 60 Hz
12000 Btu
39 kg
The exit of entry of outside air is blocked.
The temperature on the outside due to abnormally high incidence of direct sunlight or
other heat source.
Is cooking or using water heater in the same room.
There are too many people in the room.
The air filter clogged with dust.
Vent lever is in the open position.
The thermostat regulating the temperature was not use correctly.
The front of the appliances is blocked.
Vents totally enclosed vertical.
Ice in the evaparator.
Output capacity is inadequate for the size of the environment.
If the air conditioning does not work.
The plug is not properly connected to the outlet.
Lack of electricity in the outlet.
The electrical voltage is not correct.
Temperature is incorretly set.
See if the fuse is blown.
The compressor is not turned on. Only the ventilation works.
Appliance off recently.
Drop or momentary overload on the grid.
Low attention on the network.
Temperature setting button.
Noise
Improper installation.
Exit of the condensed water deficient.
Loss of water
Incorrect installation level.
51
52
ENG
Troubleshooting
ENG
ENG
ESP
Anotaciones / Notes
ESP
Anotaciones / Notes
53
54
A0(27 28)FM_Biling_090311Y(1)