1
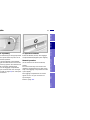
e Vehicle.
e guide
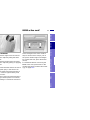
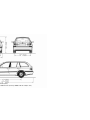
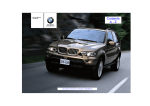
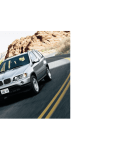
528i
540i
sedan
sport wagon
ations, and thank you for choosing a BMW.
familiarity with your vehicle will provide you with enhanced control and
when you drive it. We therefore have this request:
ke the time to read this Owner's Manual and familiarize yourself with the
n that we have compiled for you before starting off in your new car. It
mportant data and instructions intended to assist you in gaining maximum
atisfaction from the unique range of technical features on your BMW. The
so contains information on care and maintenance designed to enhance
safety and contribute to maintaining the value of your BMW throughout an
service life.
er's Manual should be considered a permanent part of this vehicle.
stay with the vehicle when sold to provide the next owner with important
safety and maintenance information.
ual is supplemented by a Service and Warranty Information Booklet
ls) or a Warranty and Service Guide Booklet (Canadian models).
mmend that you read this publication thoroughly.
W is covered by the following warranties:
hicle Limited Warranty
Warranty Rust Perforation
Emissions System Defect Warranty
Emissions Performance Warranty
a Emission Control System Limited Warranty
nformation about these warranties is listed in the Service and Warranty
n Booklet (US models) or in the Warranty and Service Guide Booklet
models).
you an enjoyable driving experience.
ls used
The individual vehicle
ese sections contain vital inforation – please read the accomtext passages carefully, both
own safety and to prevent damour BMW.<
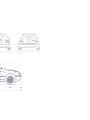
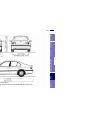
On buying your BMW, you have decided in favor of a model with individualized equipment and features. This
Owner's Manual describes all models
and equipment that BMW offers within
the same group.
ese passages contain informan on special and unique feayour vehicle.<
We hope you will understand that
equipment and features are included
which you might not have chosen for
your vehicle. Any differences can easily
be identified, since all optional accessories and special equipment are
marked with an asterisk *.
dicates special information on
cycling.<
ates the end of a note.
If your BMW features equipment which
is not described in this Owner's Manual
tes special equipment, country(car radio or telephone, for instance),
equipment and optional extras.
Supplementary Owner's Manuals are
enclosed. We ask you to read these
dicates that you should consult
manuals as well.
e relevant section of this
s Manual for information on a
ar part or assembly.
erts you to functions which can
adjusted by your authorized
enter ("Car Memory" or "Key
y"). Refer to page 58.<
5n
portant safety information!
r your own safety, use genuine
d accessories approved by
ou purchase accessories tested
proved by BMW and Original
arts, you simultaneously acquire
urance that they have been
hly tested by BMW to ensure
m performance when installed
vehicle.
arrants these parts to be free
fects in material and workman-
ill not accept any liability for
resulting from installation of
d accessories not approved by
annot test every product from
anufacturers to verify if it can be
a BMW safely and without risk
r the vehicle, its operation, or its
nts.
BMW Parts, BMW Accessories
er products approved by BMW,
r with professional advice on
ese items, are available from all
enters.
Installation and operation of non-BMW
approved accessories such as alarms,
radios, amplifiers, radar detectors,
wheels, suspension components, brake
dust shields, telephones (including
operation of any portable cellular phone
from within the vehicle without using an
externally-mounted antenna) or transceiver equipment (C.B., walkie-talkie,
ham radio, for instance) may cause extensive damage to the vehicle, compromise its safety, interfere with the vehicle's electrical system, or affect the
validity of the BMW Limited Warranty.
Visit your authorized BMW center for
additional information.<
Maintenance, replacement, or repair of the emission control devices and systems may be performed
by any automotive repair establishment
or individual using any certified automotive part.<
wned and operated in the US.
fect which could cause a crash or could cause injury or death, you should
ay Traffic Safety Administration (NHTSA) in addition to notifying BMW of
estwood, New Jersey 07675-1227, Telephone (201) 307-4000.
may open an investigation, and if it finds that a safety defect exists in
ll and remedy campaign. However, NHTSA cannot become involved in
dealer, or BMW of North America, Inc.
the Auto Safety Hotline toll-free at 1-800-424-9393 (or 366-0123 in
TSA, U.S. Department of Transportation, Washington, D.C. 20590. You
motor vehicle safety from the Hotline.
7n
Operation, care
and maintenance
Controls
Controls and features
Car care
Overview
Overview
9n
Advanced technology
Technology Repairs
Owner service procedures
Data
Technical data
Index
Index
cks and security systems:
ys 34
ctronic vehicle
mmobilizer 35
ntral locking system 36
ening and closing – from the
utside 36
h the key 36
ening and closing – from the
nside 40
ggage compartment lid/
ailgate 41
ggage compartment 44
rm system 45
ctric power windows 47
ding/Tilt sunroof 48
justments:
ats 50
ering wheel 54
rors 54
at, mirror and steering wheel
memory 56
r Memory, Key Memory 58
ssenger safety systems:
ety belts 59
bags 60
ld restraints 64
ld seat security 66
ld-safety locks 66
Driving:
Steering/Ignition lock 67
Starting the engine 68
Switching off the engine 69
Parking brake 69
Manual transmission 70
Automatic transmission 71
Automatic transmission with
Steptronic 74
Indicator/Headlamp flasher 77
Wiper/Washer system 77
Rear window defroster 79
Cruise control 80
Everything under control:
Odometer, outside temperature
display 82
Tachometer 83
Energy control 83
Fuel gauge 83
Temperature gauge 84
Service Interval Display 84
Check Control 85
Onboard computer 88
Technology for safety and
convenience:
Park Distance Control (PDC) 90
Automatic Stability Control plus
Traction (ASC+T)/Dynamic
Stability Control (DSC) 91
Tire Pressure Control (RDC) 92
Operation, care and maintenance
oading and transporting cargo:
hrough-loading system 112
ki bag 113
port wagon:
Luggage compartment 116
Roll-up cover 116
Separation net 116
Storage areas in the luggage
compartment 118
Cargo loading 120
Roof-mounted luggage rack 121
11n
Special operating instructions:
Break-in procedure 124
Driving notes 125
Catalytic converter 126
Antilock Brake System
(ABS) 127
Disc brakes 128
Brake system 130
Winter operation 130
Power steering 132
Level control system 132
Cellular phone 133
Radio reception 133
Wheels and tires:
Tire inflation pressure 134
Tire condition 134
Tire replacement 135
Tire rotation 136
Wheel and tire
combinations 137
Winter tires 138
Snow chains 139
Approved wheel and tire
specifications 140
case of electrical
lfunction:
el filler door 180
ding/Tilt sunroof 180
lgate 181
sistance, giving and
eiving:
mp-starting 182
wing the vehicle 183
Advanced technology
placement procedures:
board tool kit 166
per blades 166
mps and bulbs 167
anging tires 173
tery 176
ses 178
Airbags 188
Adaptive Transmission Control
(ATC) 188
Automatic Stability Control plus
Traction (ASC+T)/Dynamic
Stability Control (DSC) 189
Radio reception 190
BMW active seat 190
Safety belt tensioner 191
DSP sound system 192
Interior rearview mirror with
automatic dimmer 192
Rain sensor 193
Tire Pressure Control (RDC) 194
Integrated rear suspension 194
Level control system 195
Xenon lamps 195
verything from A to Z 208
Owner service procedures 214
13n
Operation, care
and maintenance
Overview
Controls
Controls and features
Car care
Overview
Advanced technology
Technology Repairs
Owner service procedures
Data
Technical data
Index
Index
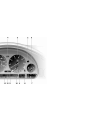
ckpit 16
trument cluster 18
icator and warning lamps 22
ltifunction steering wheel
MFL) 25
zard warning flashersHazard
warning flashers 27
rning triangle 27
st-aid kit 27
ueling 28
el specifications 29
e inflation pressure 29
15n
Index
Data
Technology Repairs
Car care
Controls
Overview
17n
dicator lamp for level control
stem* 23
Overview
Controls
dicator lamp for Automatic
ability Control plus Traction
SC+T)/Dynamic Stability
ontrol (DSC)* 24
Car care
splay for onboard computer
peration via the turn signal lever,
fer to page 88):
Outside temperature
Average fuel consumption
Cruising range
Average speed
19n
Data
dicator and warning lamps for:
Fog lamps 24
Battery charge current 22
Engine oil level/Engine oil
pressure 22, 23
Electronic Engine Power
Control (EML) 24
CHECK ENGINE lamp 24
Index
dicator for Check Control 85
eset button for trip odometer 82
Technology Repairs
dometer and trip odometer 82
ip odometer 82
dicator for Check Control 85
dometer 82
Overview
dicator lamp for Automatic
ability Control plus Traction
SC+T)/Dynamic Stability
ontrol (DSC)* 24
Controls
utside temperature display 82
21n
Technology Repairs
Data
dicator and warning lamps for:
Fog lamps 24
Battery charge current 22
Engine oil pressure 22
CHECK ENGINE lamp 24
Index
eset button for trip odometer 82
Car care
ervice Interval Display 84
Tire Pressure Control (RDC)* ●
In
addition, there is an acoustiBattery charge current ●
cal warning signal: A tire failure
The battery is no longer being
charged. There is a malfunction has occurred. Reduce vehicle speed
ternator V-belt or in the charg- immediately and stop the vehicle. Avoid
uit of the alternator. Please con- hard brake applications. Do not oversteer. For additional information: Refer
nearest BMW center.
to page 92.
top immediately
he ribbed V-belt is defective, do
t continue driving. The engine
e damaged due to overheating.
bbed V-belt is defective, insteering effort is also re<
Engine oil pressure ●
Comes on while the engine is
unning and the "STOP! ENGINE
SS" message appears in the
Control: Stop vehicle and switch
ne immediately. Check level of
gine, top up as required. If oil
correct: Please contact the
BMW center.
o not continue driving. The enne could be damaged because
quate lubrication.<
Parking brake*, brake hydraulic
system ●
Comes on when you engage the
parking brake. For additional information: Refer to page 69.
Comes on although the parking brake is
released: Have the brake fluid level
checked. Before driving further, be
sure to read the notes on pages 130
and 152.
Also comes on with the message
"CHECK BRAKE PADS" in the Check
Control.
Parking brake warning lamp*/
Brake hydraulic system for
Canadian models.
Airbags ●
Please have the system inspected by your authorized
center.
dditional information: Refer to
60.
Antilock Brake System (ABS)
warning lamp for Canadian
models.
Engine oil level ●
Comes on after the engine has
been shut off: Check the engine
oil level. For additional information:
Refer to page 149.
Automatic transmission*
Because of a malfunction, the
automatic transmission shifts
only in the emergency program. Please
consult the nearest authorized BMW
center.
For additional information: Refer to
pages 73, 76.
Brake pads* ●
Have the brake pads checked.
For additional information:
Refer to page 130.
Controls
Car care
Please fasten safety belts ●
Together with an acoustic signal
or a message* in the Check
ol. Comes on until the safety belts
stened. For additional information
ety belts: Refer to page 59.
Technology Repairs
Parking brake warning lamp* for
Canadian models.
Antilock Brake System (ABS) ●
ABS has been deactivated in
response to system malfunction.
Conventional braking efficiency is available without limitations. Please have
the system inspected by your authorized BMW center.
For additional information: Refer to
page 127.
Data
Parking brake*
Comes on when you engage the
parking brake.
dditional information: Refer to
69.
Yellow: Check as soon as possible
Index
An important reminder
Overview
23n
Electronic Engine Power Control
EML)*
Malfunction in the EML. When
higher brake application presy be necessary and brake pedal
ay be significantly longer.
have the system inspected by
thorized BMW center.
CHECK ENGINE lamp ●
f the indicator lamp comes on
either continuously or intermithis indicates a fault in the emiselated electronic systems.
h the vehicle remains operaou should have the systems
d by your BMW center at the
possible opportunity.
itional information: Refer to
62.
CHECK ENGINE warning lamp
or Canadian models.
Green: For your information
Turn signal
Flashes when the turn signals
are in operation. Rapid flashing
indicates a system malfunction.
For additional information: Refer to
page 77.
Cruise control
Lights up when the cruise control is activated. Available for
operation via the multifunction steering
wheel.
For additional information: Refer to
page 80.
Fog lamps
Lights up whenever you switch
on the fog lamps.
For additional information: Refer to
page 95.
Blue: For your information
High beam
Lights up when the high beams
are on or the headlamp flasher
is actuated.
For additional information: Refer to
page 77.
MFL)
dio/Telephone: Volume
dio/Telephone: Forward scan or
n station keys or scroll in the
ne listings.
t forward and reverse for CD and
sette modes
Overview
9 Cruise control: Activate/Interrupt/
Deactivate
10 Recirculated-air mode and AUC or
steering wheel heating: Switch on
and off
Car care
Controls
8 Cruise control: Store and
accelerate (+); decelerate and
store (–)
Technology Repairs
dio/Telephone: Scan backward or
n station keys or scroll in the
ne listings.
t forward and reverse for CD and
sette modes
7 Cruise control: Activate stored
setting (resume)
Data
dio/Telephone: Select
6 Horn: The entire surface
Index
ular phone: Receive a call, initiate
ing and terminate a call
25n
MFL)*
ar phone: Receive a call, initiate
g and terminate a call
5 Cruise control: Activate stored
setting (resume)
/Telephone: Volume
6 Cruise control: Activate/Interrupt/
Deactivate
/Telephone: Forward/Backscan or scan station keys or
in the phone listings.
orward and reverse for CD and
tte modes
The entire surface
7 Cruise control: Store and
accelerate (+); decelerate and
store (–)
8 Radio/Telephone: Select
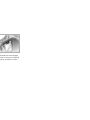
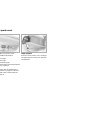
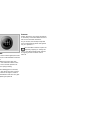
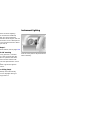
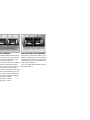
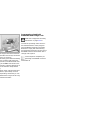
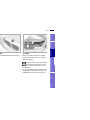
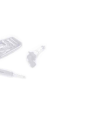
First-aid kit*
azard warning triangle is quickly
ble, stored in the onboard tool kit
ted on the inside of the luggage
artment lid (tailgate).
en the container, loosen the wing
.
The first-aid kit is located under the
front passenger's seat.
Some of the articles in the first-aid
kit may be used within a limited
time only. For this reason, check the
expiration dates of each of the items
regularly, and replace any whose expiration dates have passed. You can
acquire replacements in any drugstore
or pharmacy.
Comply with legal requirements which
cover availability of a first-aid kit in your
vehicle.<
Controls
Car care
Technology Repairs
To store: Position the back of the kit
into the support, then push back until
the lever engages.
Data
390de086
To remove: Lift the release lever on the
front (arrow) and pull the first-aid kit forward out of its support.
Index
Comply with legal requirements
which cover the availability of a
d warning triangle in the car.<
27n
Overview
ning triangle*
and friendly to the
nment
pen the filler cap carefully to
event fuel from spraying out.
ay may cause injury.
op off. Topping off may cause
lage.<
e filler cap in the bracket
d to the fuel filler door.
When refueling, insert the filler nozzle
completely into the filler pipe. Pulling
the nozzle out of the pipe during refueling
> results in premature pump shutoff
and
> will reduce the effect of the vapor
recovery system on the pump.
Close the fuel cap carefully after
refueling. A loose or missing cap
will activate the Service Engine lamp.<
inflation pressure
Your vehicle is equipped with tires that
not only meet US standards, but also
European standards. We recommend
the exclusive use of BMW approved
tires.
Overview
Controls
Car care
The inflation pressures in the table
apply to tires from BMW approved
manufacturers. Your BMW center is
familiar with these pressures. Higher
pressures may be specified for tires
from other manufacturers. You will find
a list of approved tires beginning on
page 140.
Technology Repairs
ehicles with Tire Pressure Control
*:
a correction of the tire inflation
ure, reactivate the system. Refer
ge 92.
Comply with tire approval
specifications
Data
k tire pressures
essure specifications are indicated
(kilopascal) for tires at ambient
erature (refer also to the next
).
Check tire inflation pressures regularly – at least every two weeks
and before beginning a longer trip.
Incorrect tire pressure can lead to tire
damage and accidents.
Check the inflation pressure of the
spare tire also. Inflate the spare tire to
the highest inflation of any tire on your
vehicle.<
Index
flation pressures are indicated on
ker attached to the B-pillar behind
iver's door (visible with door
.
29n
0)
US/CDN:
41 (280) 33 (230)
41 (280)
0)
outside US/CDN:
33 (230) 33 (230)
41 (280)
0)
39 (270)
41 (280)
48 (330)
39 (270)
–
48 (330)
0)
35 (240)
36 (250)
44 (300)
0)
35 (240)
36 (250)
44 (300)
35 (240)
44 (340)
30)
38 (260)
39 (270)
46 (320)
10)
35 (240)
36 (250)
44 (300)
30)
38 (260)
39 (270)
46 (320)
Car care
44 (300)
Technology Repairs
36 (250)
Data
35 (240)
Index
10)
Controls
Overview
31n
s and security systems:
34
onic vehicle
mobilizer 35
al locking system 36
ng and closing
om the outside 36
he key 36
ng and closing
om the inside 40
age compartment lid/
gate 41
age compartment 44
system 45
ic power windows 47
g/Tilt sunroof 48
tments:
50
ng wheel 54
s 54
mirror and steering wheel
mory 56
emory, Key Memory 58
enger safety systems:
y belts 59
gs 60
restraints 64
seat security 66
safety locks 66
Driving:
Steering/Ignition lock 67
Starting the engine 68
Switching off the engine 69
Parking brake 69
Manual transmission 70
Automatic transmission 71
Automatic transmission with
Steptronic 74
Indicator/Headlamp flasher 77
Wiper/Washer system 77
Rear window defroster 79
Cruise control 80
Everything under control:
Odometer, outside temperature
display 82
Tachometer 83
Energy control 83
Fuel gauge 83
Temperature gauge 84
Service Interval Display 84
Check Control 85
Onboard computer 88
Technology for safety and
convenience:
Park Distance Control (PDC) 90
Automatic Stability Control plus
Traction (ASC+T)/Dynamic
Stability Control (DSC) 91
Tire Pressure Control (RDC) 92
Operation, care
and maintenance
Overview
Controls
Controls and features
Car care
Overview
Advanced technology
Technology Repairs
Owner service procedures
Data
Technical data
Index
Index
ading and transporting cargo:
ough-loading system 112
bag 113
ort wagon:
uggage compartment 116
Roll-up cover 116
eparation net 116
torage areas in the luggage
ompartment 118
rgo loading 120
of-mounted luggage rack 121
33n
and ignition key
ocks for the luggage compartlid/tailgate, rear backrest and
compartment cannot be operwith this key. This is useful for
parking, for instance.
Replacement keys
Replacement keys are available exclusively through your authorized BMW
center. Your BMW center is obligated to
ensure that a person requesting a key is
authorized to do so since the keys
belong to a security system (refer to
"Electronic vehicle immobilizer" on
page 35).
If possible, take all of the master
keys that belong to the vehicle
with you when you pick up your replacement key.
Whenever you receive a new replacement key, turn that key to position 2 in
the ignition lock once (ignition switched
on) and then back. This allows the electronic vehicle immobilizer to "learn" the
new key.<
Overview
Controls
Car care
Technology Repairs
Force applied to the key can damage the integrated electronic cirA damaged key can no longer be
to start the engine.<
Data
heart of this system is an elecchip which is integrated into the
he lock mechanism itself is actudual-function device, simultaly serving as a communications
ace designed to allow the security
m to maintain a continuous stream
able, vehicle-specific signals with
ectronic circuitry in the key. The
m will not release the ignition, fuel
on and starter unless it recogan "authorized" key.
Index
the electronics work
35n
ning and closing – from the outside
he key
n of the key in the driver's door
ocks the driver's door only.
the key a second time unlocks
e remaining doors, the luggage
tment lid/tailgate and the fuel
or.
u can have an acknowledgment
essage set to confirm that the
has been secured correctly (not
d at this time).<
Convenience operation
You can also operate the windows and
sliding/tilt sunroof via the door lock.
> To open: With the door closed, turn
the key to the "Unlock" position and
hold it.
> To close: With the door closed, turn
the key to the "Lock" position and
hold it.
Watch the closing process carefully and be sure that no one is
trapped by the closing motion. The windows/sunroof stop moving immediately
when you release the key.<
Manual operation
(in the event of an electrical failure)
Turn the key all the way to the left or
right to unlock/lock the door.
e outside
Overview
Controls
Car care
Technology Repairs
In the event of a system malfunction,
please contact your BMW center. You
can also obtain replacement keys
there.<
Data
Since children might be able to
ock the doors from the inside,
he vehicle's keys with you so that
hicle can be opened again from
utside at any time.<
Master keys that are used repeatedly are always ready for operation since the battery in the key is
charged automatically in the steering
lock as you drive.
If it is no longer possible to unlock the
vehicle via the remote control, the battery is discharged. Use this key while
driving for an extended period in order
to charge the battery. Refer also to
page 34.
To prevent unauthorized use of the remote control, surrender only the door
and ignition key 3 or the spare key 2
(refer to page 34) when leaving the vehicle for valet parking, for example.
Index
er keys
with a transmitter for remote cone master keys. Refer to page 34.
37n
k and secure
utton 2.
380us646
463de027
outside
Deactivate the tilt sensor alarm
system and interior motion sensor
After locking the vehicle press button 2
again.
For additional information: Refer to
page 46.
To switch on the interior lamps
After locking the car, press button 2.
e outside
Compliance statement:
This device complies with part 15 of the
FCC Rules. Operation is subject to the
following two conditions:
> This device may not cause harmful
interference, and
> this device must accept any interference received, including interference
that may cause undesired operation.
Any unauthorized modifications to
these devices could void the
user's authority to operate the equipment.<
Overview
Controls
LX8EWS
LX8FZVS
LX8FZVE
Car care
FCC ID:
Technology Repairs
The transmitter and receiver units comply with part 15 of the FCC (Federal
Communication Commission) regulations. Operation is governed by the following:
Data
nal systems or devices may cause
nterference in the functions of the
e control.
should occur, you can unlock and
he vehicle via the door lock with a
r key.
For US owners only
Index
nal systems
39n
inside
only the driver's door was unTo engage locks
cked from the outside and you
> Use the central locking button to lock
e button
all doors at once, or
her doors, the luggage compart- > press the individual door lock buttons
lid/tailgate and rear window
down. As an added design feature to
he fuel filler door will be unprevent the driver from being inadd if the driver's door is open
vertently locked out of the vehicle,
iver's door will be locked again
the driver's door lock button will not
it is closed.<
engage as long as the door is open.
ock and open the doors
unlock the doors together with
utton for the central locking sysnd then pull the door handle
e the armrest or
he release handle for each door
: The first pull unlocks the door,
he second one opens it.
oors locked from outside can be
ened from inside by first pressbutton and then pulling a reandle twice.<
When the vehicle is moving, do
not lock the doors with their lock
buttons since doors locked in this manner would not open automatically in the
event of an accident.
Children might be able to lock the doors
from the inside. For this reason, you
should always remove the key and take
it with you to be sure that you will be
able to unlock the car from the outside
at all times.<
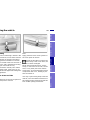
gate
Manual operation
(in the event of an electrical failure)
sedan:
Turn the master key to the left in the
luggage compartment lock clear to the
stop – the luggage compartment lid will
open slightly.
Controls
Overview
ocks the luggage compartment
gate and disconnects it from the
al locking system. This feature can
ed to prevent unauthorized
s to the luggage compartment
you surrender the door and igniey (refer to page 34) for valet parkor instance.
Car care
Press the button (arrow): The luggage
compartment lid/tailgate opens slightly.
Technology Repairs
394de009
To open from outside
he master key to the right past the
ance point and then pull it out in
orizontal position.
sport wagon:
Refer to page 181.
Data
The luggage compartment is locked
again as soon as you close the lid.
Index
re separately
41n
window – sport wagon
ems can be loaded or unloaded
if the rear window is opened
ely.
he button (arrow): The rear winens slightly. It can now be tilted
e window down to close it.
pointed or sharp-edged objects
uld strike the rear window while
be sure to provide protection
all edges. If you do not do this,
ting conductors of the rear winuld be damaged.<
394de128
ate
Closing – sedan
The handle recess (arrow) next to the
lock mechanism is designed to assist
you in closing the luggage compartment lid.
Overview
Controls
Car care
Technology Repairs
Operate the vehicle only when the
uggage compartment lid/tailgate
mpletely closed. Otherwise,
st fumes could penetrate the
or of the vehicle. Should it be
utely necessary to operate the
e with the luggage compartment
gate open:
se all windows. Shut the sliding/
sunroof
ease the airflow of the automatic
mate control to a high level. Refer
age 101.<
Data
When the tailgate of the sport
wagon is opened, the clearance
he ground to the upper edge is
than 6.5 feet (two meters). Please
this in mind when opening the tailn a garage, for example).<
43n
Index
gate
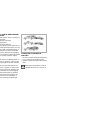
r
eft-hand side of the luggage
tment is a hanger for fastening
g bags, packages or similar
45n
Controls
Car care
Technology Repairs
the system is active, you can still
ccess to the luggage compartby pressing button 3 on the
e control transmitter (refer to
39). When you close the luggage
artment lid/tailgate, it locks again.
> The indicator lamp below the interior
rearview mirror flashes continuously:
The system is armed
> The indicator lamp flashes during
arming: Door(s), the hood or luggage
compartment lid/tailgate are not
completely closed. Even if you do not
close the alerted area, the system begins to monitor the remaining areas,
and the indicator lamp flashes continuously after 10 seconds. However,
the interior motion sensor is not activated
> If the indicator lamp goes out when
the system is disarmed: No manipulation or attempted intrusions have
been detected in the period since the
system was armed
Data
You can have different acknowledgment messages set to confirm
g and disarming (not released at
me).<
Indicator lamp displays
Index
ystem indicates that it has been
ctly armed by switching on the
d flashers for a single cycle and by
ng an acoustical signal.
390de020
the vehicle is locked or unlocked
he key or the remote control, the
system is also simultaneously
d or disarmed.
terior motion sensor is activated
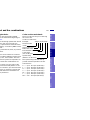
x. 30 seconds after you have finlocking the car.
Overview
ctivate and deactivate the
m system
r motion sensor
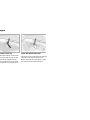
stration depicts the transmitter
eiver of the interior motion sen-
for the interior motion sensor to
properly, the windows and
ilt sunroof must be completely
eless, you should deactivate the
motion sensor (refer to the
s column) if you intend to leave
dows or sliding/tilt sunroof
y feature
tact strip is integrated into the
side of each of the upper window
sections. If pressure is exerted
st this contact strip while a wins being raised, the system will
nd by stopping the window and
etracting it a small distance.
Overview
Controls
Car care
e convenience mode via the door
r the remote control, refer to
36 or 37.
Technology Repairs
Remove the key from the ignition
when you leave the vehicle, so
hildren cannot operate the power
ws and possibly injure thems.<
Data
can still operate the windows as
g as neither of the front doors has
n opened. To open the window,
ss the switch beyond the resisce point.
Despite this safety feature, be extremely careful that the closing
path of the window is not obstructed
whenever it is closed. Otherwise, an
object might not touch the contact strip
in some situations (very thin objects, for
instance).
You can override this safety feature by
pressing the switch beyond the resistance point and holding it.
Because the power windows are sealed
at high pressure to prevent wind noise
when closed, a powerful motor is required for efficient closing. When closing the windows, always be sure that
they are not obstructed in any way. Unsupervised use of these systems can
result in serious personal injury. Remove the ignition key to deactivate the
electric power windows whenever you
leave the car. Never leave the keys in
the car with unsupervised children.
Never place anything that could obstruct the driver's vision on or next to
the windows.<
Index
he ignition has been switched off:
47n
ng/Tilt sunroof*
n avoid pressure or drafts in the
ger compartment when the sunpen or lifted by opening the air
the dashboard and increasing
upply as required. Refer to
8, 101.
nroof is completely open, air
ances may be caused in the vehen you are driving at higher
Close the roof as far as is necuntil this natural phenomenon
convenience mode via the door
he remote control, refer to
6 or 37.
390de636
prevent injuries, exercise care
hen closing the sliding/tilt sund keep it in your field of vision
s shut.
eaving the car, switch off the
sunroof mechanism by taking
ignition key. Do not leave chilattended in the vehicle with acvehicle keys. Use of the key can
starting of the engine and opervehicle systems such as power
, etc. Unsupervised use of these
s can result in serious personal
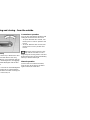
Lifting – opening – closing
From ignition key position 1, press the
switch or slide it to the desired direction
until you feel resistance.
When lifting, the headliner retracts
several inches.
After the ignition has been switched off,
you can still operate the sliding/tilt sunroof as long as neither of the front doors
has been opened.
Automatic* opening and closing
Press the appropriate end of the control
switch past the resistance point and
then release it.
49n
1 Raise the sliding/tilt sunroof all
the way
2 Press and hold the switch for
approximately twenty seconds.
In the event of an electrical malfunction,
you can also operate the sliding/tilt sunroof manually. Refer to page 180.
Controls
Car care
Technology Repairs
After interruptions in the electrical
supply (when the battery is disconnected, for instance), the sunroof may
only lift. To reinitialize the mechanism:
Data
Power loss or malfunction
Index
390de637
ptions and control procedures are
tially the same as those previdescribed for the sliding/tilt sunn order to open the raised roof,
the control switch towards
n" until the roof has reached the
ed position.
eadliner insert slides back somewhen you raise the sunroof. When
unroof is opened the headliner
ts with it. The headliner will then
matically remain in its retracted
on, but can be repositioned as
ed.
Overview
ng/Tilt sunroof with glass
nroof*
ric power seats
Correct sitting posture
ngle (only driver's side)
ard/Back adjustment
on height
est angle
restraint height
he tilt angle of the head restraint
ing it.
omply with the adjustment
structions in the preceding
Failure to do so could result in
hed personal safety.<
To reduce strain on the spinal column,
sit all the way back in the seat and rest
your back fully against the backrest.
The ideal sitting posture is achieved
with your head extending from your
spine in a straight line.
For long-distance driving, you may wish
to increase the backrest tilt-angle
slightly to reduce muscular tension.
Please remember that you should
always remain able to grasp the entire
periphery of the steering wheel without
straightening your arms.
Lumbar support*
Refer to the BMW comfort seat on the
next page.
51n
You can use the adjustable upper backrest for supplementary support in the
shoulder region. This provides a relaxed
driving position and helps relieve stress
on the shoulder muscles.
Press the rocker switch: The support
angle of the upper backrest section is
adjusted.
To obtain an optimal seating posture,
we recommend:
Controls
Car care
Shoulder support
Technology Repairs
380de064
Overview
Comply with the adjustment instructions on page 50. Failure to
could result in diminished persafety.<
Index
1 Adjust the upper backrest section
to its extreme rear position
2 Adjust to the optimal seating posture
as shown in the left column
3 Bring the upper backrest section forward until your shoulders enjoy firm
support.
Data
Driver and front passenger:
390de634
W sports seat*
ngle (only driver's side)
Thigh support
ard/Back adjustment
Press the rocker switch: You can adjust
the thigh support to meet your personal
requirements.
on height
est angle
restraint height
he tilt angle of the head restraint
y by rotating it.
omply with the adjustment inuctions on page 50. Failure to
ould result in diminished perafety.<
Head restraints reduce the risk of
spinal injury in the event of an
ent. Adjust the head restraint so
s center is approximately level
our ears.
the center-rear head restraint in
lly-lowered position at all times,
pulling it out limits its function.<
Controls
Overview
For additional details concerning the
BMW active seat, please refer to the
chapter describing "Advanced technology" on page 190.
Car care
390de629
To activate the seat, press the button
(arrow).
Technology Repairs
just the height of the rear head
ints: Adjust by pulling or applying
ure.
Active changes in the seat's surface
help to avoid muscle cramps, pain in
the spine's lumbar region and fatigue.
Data
just the angle of the front head
ints: Adjust by tilting the head
int.
53n
Index
d restraints
BMW active seat*
Mirrors
atic steering wheel
ment
to make it easier to get into and
he car, the steering wheel autoy moves into the top position
urns to the driving (memory) po-
omatic feature is controlled by
tion of the ignition key and by
er's door.
390us605
conjunction with seat, mirror
ering wheel memory)
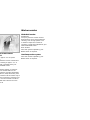
Exterior mirrors
1 Mirror switch for 4-way adjustment
2 Left/Right selection switch
You can also adjust the mirrors manually by pressing against the outer edges
of their lenses.
To store the mirror settings: Refer
to "Seat, mirror and steering wheel
memory" on page 56.
mirror lamps operate in ignition key
ons 1 and 2.
visors
can be folded down toward the
hield or swiveled out against the
windows.
For an explanation of the electro-chromic technology used in this mirror, refer
to page 192.
Controls
Overview
For proper functioning of the mirror, be
sure that the two photocells are unobstructed and clean. One of the photocells (arrow) is positioned in the mirror's
glass, while the other is slightly offset
on the opposite side of the mirror.
Car care
390de031
The mirror automatically reverts to its
clear, undimmed setting whenever you
select "Reverse."
Technology Repairs
down the sun visor and slide the
panel to the side as required.
By responding to the effects of ambient
light and the glare from following traffic,
this mirror automatically dims through
an infinitely-variable range.
Data
ed vanity mirror
Interior rearview mirror with
automatic dimming feature*
Index
or rearview mirror
duce glare from vehicles behind
ter dark, tilt the mirror by moving
mall lever.
55n
memory
re
To select a stored setting
on key at position 1 or 2.
Convenience function:
t the desired positions for the
1 The driver's door remains open after
door mirror and steering wheel.
unlocking or the ignition key is in pothe MEMORY button: The indisition 1.
lamp in the button comes on.
2 Briefly press memory button 1, 2 or 3,
memory button 1, 2 or 3, as
as desired.
ed: The indicator lamp goes out.
Movement stops immediately when
one of the seat-adjustment or memory buttons is activated during the
adjustment process.
Security function:
1 The driver's door is closed and the
ignition key is either removed or in
position 0 or 2.
2 Press and hold the desired memory
button (1, 2 or 3) until the adjustment
process is completed.
If you press the MEMORY button accidentally: Press the button a second
time; the indicator lamp goes out.
Do not call up a position from the
memory while the vehicle is
moving. There is a risk of accident from
unexpected movement of the seat or
steering wheel.<
Overview
Controls
Car care
Technology Repairs
f you make use of this setting
mode, be sure that the footwell
d the driver's seat is unobstructed
e unlocking the vehicle. If you fail
so, any persons or objects behind
at could be injured or damaged
earward movement of the seat.<
Data
Your BMW center can adjust your
vehicle's systems in such a manat your personalized settings are
matically called up for the seat,
and steering wheel positions
you unlock the car with your perremote control.<
57n
Index
l memory
our vehicle is unlocked with the
control, the vehicle recognizes
vidual user by means of a data
ge with the key, and makes
ents accordingly.
for you to distinguish between
t keys, colored decals are
d together with the keys.
he system can do
thorized BMW center can
you with details on the capabilihe Car Memory and Key
systems.
u will see this symbol throught the Owner's Manual. It is to
you at appropriate places of the
that are available to you.<
mple of Key Memory is the autodjustment of the driver's power
h stored settings for the individon when the vehicle is un-
Child restraint systems*
Never install a rear-facing child
restraint device on the front passenger seat. Otherwise, injuries could
occur when the airbag is triggered in
the event of an accident. Children
should always ride in the rear.
Do not attempt to modify child restraint
systems. If you do this, the protection
provided by these systems could be impaired.<
Overview
Controls
Car care
If the safety belt system has been
subjected to the stresses involved
in an accident or otherwise damaged:
Have the entire safety belt mechanism
replaced by your BMW center, including the safety belt tensioner. In addition,
have your BMW center inspect the
safety belt anchors. If a child restraint
system was in the vehicle during an accident, consult the manufacturer's instructions regarding replacement.c
Technology Repairs
sedan with through-loading
system*: Please comply with the
instructions for the center safety belt on
page 112.
sport wagon: If the center safety belt
cannot be pulled out, the larger rear
backrest section is not engaged. Refer
to page 116.<
Data
For care instructions, refer to page 159.
Index
For your safety, comply with the
ollowing instructions for wearing
belts. If you do not, the safety
may not be able to provide their
mum protection. All passengers in
hicle should be aware of and
ly with this information:
allow more than one person to
a single safety belt. Never allow
s or small children to ride in a pasr's lap.
twisting the belt while routing it
across the hips and shoulder. Do
ow the belt to rest against hard or
e objects in your pockets. Never
the belt across your neck, do not
across sharp edges. Be sure that
elt does not become caught or
ed.
the safety belt as firmly as possiainst your body. You should avoid
ng bulky clothing that prevents it
doing so. Pull the belt periodically
tension it across your shoulder. In
ent of a frontal impact, a loose lap
ould slide over your hips, leading
dominal injury. In addition, the
belt's restraint effectiveness is
ed if the belt is worn loosely.
ctant mothers should always wear
afety belts, taking care to position
p belt against the lower hips,
e it will not exert pressure against
bdominal area.<
59n
390de142
e side airbags in the rear pasnger area* of your vehicle may
have been deactivated either at
of manufacture or by a BMW
You may have them activated if
ire to do so. Please contact
horized BMW center for addiformation.<
The illustration depicts schematically
the primary directions of vehicle impact
which initiate an airbag deployment.
Overview
Controls
Car care
Technology Repairs
Data
To avoid sustaining hand and arm injuries: Always grasp the steering wheel
For your safety, comply with the
on the rim with the hands at the 9 and
ollowing instructions for the air3 o'clock positions: Do not place your
If you do not, the airbags may not hands on the center pad.
le to provide their maximum proNever allow any objects to obstruct the
n. All passengers in the vehicle
area between the airbag and an occud be aware of and comply with
pant.
formation:
Do not use the cover panel above the
rbags are supplemental restraint
passenger-side airbag as a storage
es designed to provide extra pro- area.
n; they are not a substitute for
Do not apply adhesive materials to the
belts. Wear your safety belt at all cover panels of the airbags, cover them
The airbags will not be triggered or modify them in any other way.
event of a minor accident, a vehi- Do not install a rear-facing child rel-over, or collisions from the rear. straint system in the front passenger
se instances, the safety belt proseat of this car.
optimal protection.
Children under 13 years of age and
gs are located under cover panels children less than 5 feet (150 cm) tall
steering wheel, in the dashboard, should ride only in the rear seat.
side trim panels in the front and
Infants or small children should never
and in the windshield pillars and be held on the lap of a passenger.
des of the headliner.
If your car is equipped with side airbags
t your seat to a position that pro- in the rear passenger area, be sure that
maximum distance between you
child restraints are mounted correctly
he steering wheel, the instrument
and provided with the greatest-possible
and the door while still allowing
distance between the airbags in the
ortable and safe access to all
side trim panels. Do not allow children
e controls.
to lean out of the child's seat in the direction of the side trim panels. If they
do so, serious injuries can occur if the
airbag is triggered.<
Index
g correctly with airbags
61n
re, we recommend that the rear
e airbags, if provided, be deacf you plan to transport children
ear seat.
r seat side airbags may already
en deactivated, either at the
manufacture or by a BMW cenels in the rear door opening
ndicate the status of your rear
e airbags. If your are uncertain
status, or wish to have the airtivated or deactivated, please
your BMW center.
Even when all these guidelines are
followed, there is still a small residual
risk of injuries to the face, hands and
arms occurring from airbag deployment in isolated instances. The ignition
and inflation noise may provoke a mild
temporary hearing loss in extremely
sensitive individuals.
Airbag warning information is also
provided on the sun visors.
For additional information concerning
the airbag system, refer to pages 160
and 188.
Overview
Controls
Car care
Technology Repairs
Data
Index
s the right way for a larger child to
aring the safety belt when rear
irbags (arrow) are provided.
63n
se a child restraint system with
strap, three additional tether
ge points (refer to the arrows –
tration shows the sport wagon)
en provided. Depending on the
selected for seating in the rear
ger area, attach the tether strap
orresponding anchorage point
e the child restraint system. Ree cover first on the middle loca-
spective seating position is fita headrest lift the headrest and
e tether strap between the head
d the seat back.
he tether strap according to the
straint manufacturer's instruc-
Overview
Controls
Car care
Technology Repairs
Data
ar seating positions in your
e meet the recommendations
E J1819, an industry-recomed practice for securing child
int systems in motor vehicles.
Index
ger children should be secured in
propriate forward-facing child ret system that has first been propecured with a safety belt. Never
a rear-facing child restraint sysn the front passenger seat.
rongly urge you to carefully read
omply with the instructions for inion and use provided by the child
int's manufacturer whenever you
uch a device.
re that all occupants (of all ages)
n properly and securely restrained
imes.<
65n
Child-safety locks
k the safety belt
390de019
the safety belt, remove the
eat and retract the safety belt to
position on the belt retractor.
Insert the key into a rear door lock and
turn it outward:
The door can now be opened from the
outside only.
arting the engine
Vehicles with manual transmission:
on the clutch when starting the
e. If you do not, a lock prevents
ngine from starting.<
Overview
Controls
Car care
ctrical equipment and accessore available for use.
Technology Repairs
nition on
Data
ill find that it is often easier to turn
nition key from position 0 to posiwhen you move the steering
slightly to help disengage the
Index
eering lock disengaged
67n
g the engine
the engine. Do not press the
erator pedal.
MW 528i, BMW 540i with manl transmission:
actuate the starter for too short
Do not turn it for more than ap0 seconds. Release the ignition
mediately as soon as the engine
allow the engine to warm up by
it running while the vehicle retationary. Instead, begin driving
ately at a moderate engine
40i with automatic transmission:
MW is equipped with the convestarting feature. Simply turn the
osition 3 (starter) and then reimmediately.
ter continues to operate autoy.
omatic starting mode will not
if the battery voltage is low.
this condition arise, it remains
e to jump-start the engine (refer
182).<
Should the engine fail to start on the
first attempt (if it is very hot or cold, for
instance):
> Press the accelerator pedal halfway
down while engaging the starter.
Cold starts at extremely low temperatures, from approx. +57 (–156)
and at elevations above 3,300 feet
(1,000 meters):
> It may be necessary to allow the
starter to remain engaged somewhat
longer than under normal operating
conditions (approx. 10 seconds)
> Press the accelerator pedal halfway
down while engaging the starter.
Engine idle speed is controlled by the
engine computer system. Increased
speeds at startup are normal and
should decrease as the engine warms
up. If engine speed does not decrease,
service is required.
To prevent the battery from discharging, always deactivate electrical devices which are not in use. Switch the
ignition off when the vehicle is not
being driven.
lease
p slightly on the lever, press the
n and lower the lever.
arking brake is primarily designed
vent the vehicle from rolling while
d. It operates against the rear
s.
To avoid corrosion, apply the parking
brake lightly from time to time when
coasting to a standstill (at a traffic signal, for instance), provided that it is safe
to do so.
Overview
Controls
Car care
Technology Repairs
ver engages automatically and
ARK BRAKE" or "BRAKE" (in
da "P") indicator lamp comes on in
strument cluster in ignition key
on 2. Refer to pages 22 and 23.
If, in exceptional circumstances, it
should be necessary to engage
the parking brake while the vehicle is in
motion, do not pull it with excessive
pressure. Keep your thumb pressed
against the release button while carefully pulling up the lever to apply moderate pressure.
Excessive pressure can lead to overbraking and loss of traction (fishtailing)
at the rear.
The brake lamps do not come on when
the parking brake is applied.
Vehicles with manual transmission:
Always engage the parking brake when
parking on slopes and inclined surfaces, since placing the lever in 1st gear
or reverse may not provide adequate
resistance to rolling.
Vehicles with automatic transmission:
Place the selector lever in "Park."<
Data
ngage
69n
Index
king brake
540i
t lever's neutral gate (dot in the
on) is located between 3rd and
rs.
hifting from each gear into
," the shift lever returns autoy to this neutral position bef its spring loading.
hen shifting gears in the 5th/
h-gear plane, be sure to press
r lever to the right in order to
inadvertent selection of a gear
rd/4th-gear plane.<
Reverse
Select "Reverse" only when the vehicle
is stationary. Press the shift lever to the
left to overcome the resistance.
As you do this, the backup lamps will
turn on automatically when the ignition
key is in position 2.
Do not hold the vehicle in place on
slopes by slipping or "riding" the
clutch. Use the parking brake instead.
A slipping clutch increases clutch
wear.<
ansmission range display varies
ding to model (refer to illustra-
ing engine
elector lever must be in "Park" or
ral" before it is possible to start
ngine.
A detent prevents inadvertent shifts into
some selector lever positions. To release the shift-lock mechanism, press
the button on the front of the selector
handle (arrow).
While the vehicle is stationary and
before shifting out of "Park" or
"Neutral," depress the footbrake in
order to disengage the selector lever's
lock mechanism (Shiftlock).
Hold the footbrake down until starting
off. Otherwise the vehicle will "creep"
when a drive position is engaged.<
Controls
Car care
Range selection
Technology Repairs
PRND432
Data
ctor lever positions
Index
390de046
Overview
71n
utral
Neutral" only if your journey is
ted for a long period.
ve
atic shift program)
sition is designed for driving
l normal operating conditions.
ard gears are available.
ort Program
sition is recommended if you
select a performance-oriented
style.
3 and 2 – Shift limiter
Select this range when you wish to limit
gear changes (on steep uphill or downhill slopes, for instance). The transmission shifts up only as far as the selected
gear.
"Kickdown"
In the "Kickdown" mode, you achieve
maximum performance.
To activate this mode, depress the accelerator pedal beyond the full-throttle
position, at which a resistance point
must be overcome.
mp-starting, towing and towng, refer to pages 182 and 183.
Overview
Controls
Car care
Technology Repairs
Do not work in the engine compartment when a drive gear (foror reverse) is engaged. If you do
he vehicle could move.<
Data
r these circumstances, avoid exengine loads and consult the
st authorized BMW center.
Index
indicator lamp does not go out,
an place the selector lever in all
ons. However, the vehicle will now
rive forward with limited gear
ion.
73n
or lever positions
390de140
eptronic*
Range selection
R N D M/S
A detent prevents inadvertent shifts to
the "Reverse" or "Park" selector lever
positions. To disengage the detent,
g engine
ine can only be started in selec- press the button on the front of the shift
r positions P ("Park") or N ("Neu- knob (arrow).
While the vehicle is stationary and
before shifting out of "Park" or
"Neutral," depress the footbrake in
order to disengage the selector lever's
lock mechanism (Shiftlock).
Hold the footbrake down until starting
off. Otherwise the vehicle will "creep"
when a drive position is engaged.<
teptronic*
75n
When you change from "D" to "M/S,"
the Sport Program is activated. This is
indicated by "D S" in the gear selection
display. The Sport Program is designed
for performance-oriented driving.
With the first brief touch, the automatic
transmission shifts from the Sport
Program to manual mode. When you
move the selector lever forward in the
"+" direction, the transmission shifts up.
When the lever is moved back in the "–"
direction, the transmission shifts down.
M1... M5 will be displayed in the gear
indicator.
Car care
Technology Repairs
M/S Manual mode and
Sport Program
Data
"Kickdown" mode, you achieve
mum performance.
tivate this mode, depress the actor pedal beyond the full-throttle
on, at which a resistance point
be overcome.
Index
kdown"
390de323
osition is designed for driving unl normal operating conditions. All
rd gears are available.
Controls
Overview
rive
matic shift program)
eptronic*
ding to the situation, for
nce in wintry conditions, the
e can be started in 2nd or
ear.
Do not work in the engine compartment when a drive gear (forward or reverse) is engaged. If you do
this, the vehicle could move.<
onic transmission control
e
For jump-starting, towing and towstarting, refer to pages 182 and 183.
f the indicator lamp comes on
or the message "TRANS.FAILSAFE PROG" appears in the
Control*, there is a fault in the
ssion system.
e vehicle to a stop. Move the
ssion selector lever to "P." Set
king brake and turn the engine
ion key to position 0).
ew seconds, then start the
dicator lamp goes out after a
onds, normal transmission perce has been restored. You may
e to drive as usual. If the indicap does not go out, you can place
ctor lever in all positions. Howe vehicle will now only drive forth limited gear selection.
appens, avoid extreme engine
nd consult the nearest authoMW center.
er/Washer system
omatic windshield washer
omatic intensive-action washer*
ary dial for control of the wipe inal or the sensitivity of the rain
sor*
To activate the rain sensor:
From ignition key position 1 and up,
move the lever to position 1. The wipers
travel once across the windshield,
regardless of the weather.
Overview
Controls
Car care
Rain sensor:
When the rain sensor is activated, the
windshield wiper is controlled automatically, depending on the degree of wetness of the windshield (in both snow
and rain). You do not have to be concerned with switching the windshield
wiper on or off or adjusting the wipe interval between intermittent and full
wipe. Instead, you can concentrate fully
on the traffic conditions. This is especially important under adverse weather
conditions.
The rain sensor is positioned on the
windshield, directly ahead of the interior
rearview mirror.
Technology Repairs
ef wipe
Intermittent wipe:
You can set the wipe interval to four
stages with rotary dial 7.
In addition, the wipe interval is varied
automatically depending on road
speed.
Data
mal wiper speed
t wiper speed
1 Intermittent wipe or rain sensor*
Index
ers retracted
rmittent wipe or rain sensor*
77n
wiper speed
Headlamp washers*
ers automatically revert to nored when the vehicle is stationon vehicles with rain sensor*).
If they are on, the headlamps will also
be cleaned every fifth time you activate
the automatic windshield washer (intensive-action or standard wash/wipe).
matic windshield washer
Do not use the washers if there is
any danger that the fluid will
freeze on the windshield, otherwise vision could be obscured. For this reanly pull the lever briefly, the sysson, use an antifreeze agent. Refer to
ays washer fluid onto the windpage 148.
without activating the wipers.
Do not use the washers when the reservoir is empty, since this could cause
nsive automatic
damage to the washer pump.
tem sprays washer fluid against
dshield and activates the wipers
ef period.
ning unit*
tting 5. In addition, an intensive- Windshield washer jets
washer fluid is first sprayed on
The windshield washer jets are warmed
dshield.
automatically when the ignition key is in
nging the wiper blades, refer to position 2.
66.
Rear window defroster
79n
After the indicator lamp goes out, the
defroster continues operating at reduced power for a limited period before
deactivating automatically.
To deactivate
Car care
Press the button: As long as the indicator lamp remains on, the rear window
defroster continues at high-output
(rapid thaw).
Technology Repairs
To activate
If the indicator lamp is on, press the
button.
Data
hanging the wiper blade, refer to
166.
Index
the rear window is opened, the
window wiper is switched off. It
be switched on again after the
w has been closed.
390de664
prox. 10 seconds after the lever is
ced in position 0 or
r the engine is switched off.
Controls
Overview
amming is cleared:
re and maintain speed
ccelerate
utton 1 briefly:
tem records and maintains the
vehicle speed. Every time you
button, the speed increases by
h (1 km/h).
nd hold button 1:
icle accelerates without
e on the accelerator pedal.
ou release the button, the
registers and maintains the
speed.
on a downhill gradient, the
gine braking effect is not suffie controlled speed can be
ed. Speed can drop on uphill
f the engine output is insuffi-
To decelerate
Press button 2 briefly:
When cruise control is active, every tap
of the button reduces the speed by
approx. 0.6 mph (1 km/h).
Press and hold button 2:
With the cruise control active, the
system automatically reduces the
throttle opening to slow the vehicle.
When you release the button, the
system registers and maintains the
current speed.
Overview
button 3:
ehicle accelerates to and mainhe last speed stored. When you
he ignition key to position 0, the
d speed is deleted from the sysmemory and the system is deacti.
Do not use cruise control on twisting roads, when high traffic density prevents driving at a constant
speed, when the road surface is slick
(snow, rain, ice), or when the road surface is loose (rocks or gravel, sand).<
Controls
sume the stored setting
81n
Technology Repairs
Data
Index
the cruise control has been canpress button 4 again. The indicamp goes off and the memorized
d is canceled.
Car care
eactivate the system
display
ide temperature display
side temperature appears in the
panel as soon as you turn the
key to position 1.
n change the units of measure
by
ing and holding down the
n (arrow) with the ignition key
sition 1
g the ignition key to 0.
so to page 88.
Ice warning
If the outside temperature drops to approx. +37.57 (+36), a warning signal
sounds and the display flashes briefly.
The warning is repeated whenever the
temperature climbs to at least +437
(+6 6) and then drops again to
+37.57 (+36).
The ice warning does not alter the
fact that surface ice can form at
temperatures above +37.57 (+36),
on bridges or shaded road surfaces, for
instance.<
> 2.1 gal (8 liters) – BMW 528i
the vehicle is stationary, the dis> 2.6 gal (10 liters) – BMW 540i
oes to "Maximum" (zero on Canaremaining in the tank.
models).
Tank capacity: Refer to page 203.
Certain operating conditions (such as
those encountered in mountainous areas) may cause the needle to fluctuate
slightly.
Please refuel early, since driving
to the last drop of fuel can result in
damage to the engine and/or catalytic
converter.<
Car care
Technology Repairs
If the indicator lamp stays on, there are
approx.
Data
When you switch on the ignition, the indicator lamp comes on briefly to confirm that the system is operational.
Controls
Overview
83n
Index
tes current fuel consumption in
in liters per 100 km on Canadian
es). This instrument shows
er your current driving style is
ucive to fuel economy with miniexhaust emissions.
Fuel gauge
390us006
rgy control
Service Interval Display
en the blue and red zones
ng coolant level: Refer to
51.
390us702
operating range. It is not unr the needle to rise as far as the
the red zone in response to
side temperatures or severe
ng conditions.
The precise layout varies according to
the individual model version.
Green lamps
The number of illuminated lamps decreases as the time for your next maintenance visit approaches.
Yellow lamp
This field appears together with
OILSERVICE or INSPECTION.
Maintenance is due. Please contact
your BMW center for an appointment.
Red lamp
The maintenance deadline has been
passed.
tus report symbol
play
ECK button
ages concerning system faults are
entiated based on two priorities:
Technology Repairs
These defects are immediately indicated by a gong and a flashing warning
symbol (1). Simultaneous defects will
be displayed consecutively. These
status reports remain in the display until
the defects are corrected. It is not possible to delete them by pressing the
CHECK button (3):
Data
Priority 1
Index
anumeric display*
messages are used to alert the
to system malfunctions when the
n key is turned to position 2. The
s accompanied by a gong.
Car care
Controls
Overview
85n
2
isplays appear for 20 seconds
e ignition key is turned to posiThe warning symbols remain
e message disappears. You can
the messages again by pressing
ECK button (3):
NKLID OPEN
age appears only when the
e is initially set in motion.
R OPEN
message appears after a minimal
ed road speed has been exed.
EN SEAT BELTS*
dition to this message, a
ng lamp with the safety belt icon
ars and an acoustical signal
ds.
HER FLUID LOW
ow; top up fluid at the next
rtunity. Refer to page 148.
CK ENGINE OIL LEV
engine oil as soon as possible.
to page 149.
SIDE TEMP. +207 (–56)
display is only an example. The
nt temperature is displayed at
de temperatures of +37.57
6) and below. Refer also to
82.
> TIRE PRESSURE SET*
The RDC has imported the current inflation pressure in the tires as the target values which the system will
monitor.
Refer to page 92.
> CHECK TIRE PRESSURE*
Check and correct the tire inflation
pressure to specifications at the earliest opportunity (next stop for fuel).
Refer to page 92.
> TIRE CHECK INACTIVE*
A temporary interference of the RDC
or a system fault. Refer to page 93.
> CHECK BRAKE LAMPS
A lamp has failed or the electrical circuit has a fault. Refer to pages 169
and 170 or consult an authorized
BMW center.
> CHECK LOWBEAM LAMPS
CHECK SIDE LAMPS
CHECK REAR LAMPS
CHECK FRONT FOGLAMPS
CHECK LICPLATE LAMP
CHECK HIGHBEAM LAMP
CHECK BACK UP LAMPS
Defective bulb or circuit. Refer to
page 167 or consult an authorized
BMW center.
No malfunctions are present in the
monitored systems.
HTS ON
Y IN IGNITION LOCK
Onboard computer
ECK ENGINE OIL LEV
d engine oil at the next opportunity You will find a description of the onxt stop for fuel). Refer to page 149. board computer in the "Radio and Information Systems" Owner's Manual.
ay appears when you open the
's door after parking the vehicle.
plementary gong is also heard.
You can have the Check Control
and onboard computer messages
s reports remain available for a pedisplayed in a different language.<
f approx. three minutes after the
y goes out and the key is red from the ignition. Press the
CK button. If there were multiple
s, press the CHECK button redly to view them all in sequence.
Controls
f the following displays may ap-
Car care
Press the CHECK button (3) with the
ignition key in position 2:
CHECK CONTROL OK appears in the
display.
Technology Repairs
the malfunctions registered during
p appear consecutively when the
turned to Position 0.
Data
To check the Check Control
Index
ays after completion of trip
Overview
87n
e temperature and
e fuel consumption
n change the units of measure
for the outside temperature dis-
390us703
Operating range and
average speed
The computer bases its calculations of
the cruising range on the rate of fuel
consumption in the period immediately
preceding your data request.
ing and holding the trip odomeset button (in ignition key posiThe computer ignores any time spent
)
with the vehicle stationary and the
hen turning the ignition key to 0. engine off in its average speed calculations.
so to page 82.
Overview
Controls
Car care
Technology Repairs
Data
r vehicle has Check Control with
numeric display, the system's oncomputer is described in the
o and information systems"
r's Manual.
Index
oard computer with
anumeric display*
89n
tical signals
The PDC does not remove the
driver's personal responsibility for
ance to the nearest object is inevaluating the distance between the veby a tone sounding at various
s. As the distance between vehi- hicle and any obstacles. Even when
object decreases, the intervals sensors are involved, there is a blind
spot in which objects cannot be den the tones become shorter. A
ous tone indicates the presence tected. This applies especially in those
cases where the system approaches
bject less than 1 ft. (30 cm)
the physical limits of ultrasonic measurement, as occurs with tow bars and
ning signal will be canceled aftrailer couplings, and in the vicinity of
ox. 3 seconds if the distance to
thin and painted objects.
ruction remains constant during
Certain sources of sound, such as a
e (if you are moving parallel to a
loud radio, could drown the PDC signal
instance).
tone.<
malfunctions will be indicated
ntinuous high-pitched tone
Keep the sensors clean and free
e system is activated the first
of ice or snow in order to ensure
ease have the cause checked
that they continue to operate effectively.
rected by your authorized BMW Do not apply high pressure spray to the
sensors for a prolonged period of time.
Maintain an adequate distance of more
than approx. 4 inches (10 cm).<
indicator lamp fails to go out after
ngine is started, or if it comes on
g normal driving:
system has not been deactivated,
is a system malfunction. The vehimains operational, but without
T/DSC. Consult your authorized
center for repair.
eactivate the system
the button. The indicator lamp
ome on.
nding on equipment options, the
n is marked with ASC or DSC.
deactivated ASC+T/DSC you are
g with conventional, unregulated
e transfer.
Press the button again; the indicator
lamp goes out.
The laws of physics cannot be repealed, even with ASC+T/DSC.
Any consequences arising from traction
loss due to excessive vehicle speed remain the responsibility of the driver. We
therefore urge you to avoid using the
additional safety margin of the system
as an excuse for taking risks.<
For additional details concerning
ASC+T/DSC, please refer to the chapter describing "Advanced technology"
on page 189.
Overview
Controls
To reactivate the system
Car care
ystem is actively regulating drive
e in response to monitored vehicle
ting conditions.
Technology Repairs
The indicator lamp in the instrument cluster goes out shortly af- > When rocking the vehicle or starting
ter you switch on the ignition.
off in deep snow or on loose surfaces
to page 24.
> When driving with snow chains.
Refer also to page 131.
tor lamp flashes:
Data
We recommend that you deactivate the
system for increased traction:
Index
ator lamp
91n
Loss of tire pressure
If, after a certain period of time, the air
pressure has gone down significantly
(which is normal for any tire), the yellow
indicator lamp comes on or the message "CHECK TIRE PRESSURE" appears in the Check Control.
This alerts you that you should have the
tires inflated to the specified pressures
as soon as possible.
If you are prompted to check the
tire pressure shortly after a corhe ignition key to position 2 (do rection has been made, this indicates
art the engine).
that the corrected values were not acand hold the button (arrow) un- curate. Please check the inflation presyellow indicator lamp in the in- sure again and make corrections acent cluster comes on for a few
cording to the inflation pressure table.<
nds or the message "SET TIRE
SURE" appears in the Check
ol.
you have driven for a few minthe RDC will import the current
on pressure in the tires as the
values which the system will
or.
e the system
only have to repeat this procehe tire inflation pressure must
ected. Otherwise, the RDC functomatically when the ignition
position 2, and thus operates
er the vehicle is driven.
Please contact your authorized BMW
center for additional information.
Overview
Controls
> in the event of a system fault
> if a wheel is mounted without the
RDC electronics
> if, in addition to the spare tire,
additional wheels with RDC
electronics are on board.
Car care
You will also see the same message
Technology Repairs
During the period of the malfunction,
the yellow indicator lamp comes on
or the message "TIRE CONTROL
INACTIVE" appears in the Check
Control.
Data
Have the tires changed by your
authorized BMW center.
BMW center has the information
ed for working with RDC and is
ped with the necessary special
<
System interference
Index
The RDC cannot alert you to severe and sudden tire damage
d by external factors.<
93n
Instrument lighting
lamps*
itional details, refer to page 168.
390de036
ollow-me-home lighting:"
you actuate the headlamp
after you have parked the
and shut off the engine, the low
will remain on for a brief period.
y also have this function deactiyou wish.<
TS ON" warning
on key position 0, a buzzer
for a few seconds after the
door is opened if the headave not been switched off.
cles with alphanumeric Check
*:
minder is given through the
Control.
e-driving lamp*
dlamps are automatically
d on for daylight driving at
key position 2.
Turn the rotary dial to adjust the illumination intensity.
95n
If the high beam is switched on, the fog
lamps go out.
Car care
Technology Repairs
A green indicator lamp appears in
the instrument cluster to indicate
that the front fog lamps are on.
Data
Front fog lamps
Index
390us037
Controls
Overview
Fog lamps
Reading lamps
ell lamps
394de301
twell lamps operate in the same
the interior lamps.
The reading lamps are located in the
front near the interior lamp. There are
also reading lamps in the rear. They can
be switched on and off with the switch
(arrow) adjacent to each lamp.
In order to conserve the battery,
all of the lamps in the vehicle
are switched off automatically approx.
15 minutes after the ignition key is
turned to position 0.<
Index
Data
Technology Repairs
Car care
Controls
Overview
97n
o defrost windshield and door
ndows 101
Overview
emperature control –
ght-hand side 100
99n
utomatic recirculated air control
UC 101
ear window defroster 79, 102
Controls
r conditioner 101
Technology Repairs
Data
Index
r grill for interior temperature
nsor – please keep clear and
nobstructed
Car care
r supply 101
esidual heat mode 102
atic air distribution
The AUTO program assumes
the adjustment of the air disn and the air supply for you and
apts the temperature to external
es (summer, winter) to meet
nces you can specify. This proaintains a comfortable in-car cligardless of the season. Select
or temperature that is pleasant
– we recommend 727 (226).
ected temperature and AUTO for
ow appear in the display 7. Ree overview on page 98. Open
ilation outlets for the upper
witch on the air conditioner in
eather. The maximum cooling
y is achieved when you set the
ial 3 (refer to page 102) to cold.
Temperature
You can make individual temperature settings on the
driver's side or the front passenger side. Your settings will be
shown in the display 9. The displayed
temperatures are reference values for
the interior temperature. We recommend 727 (226) as a comfortable
setting, whether the air conditioner is
operating or not.When you start the vehicle, the system ensures that the selected temperature is achieved as
quickly as possible. It then maintains
this temperature, regardless of the season.
Set the rotary dial 3 (refer to "Draft-free
ventilation" on page 102) to a medium
position to provide somewhat cooler
air. This helps to promote driving withual air distribution
out fatigue. Make use of this means of
You can cancel the AUTO pro- mixing air especially for making minor
gram by selecting specific dis- adjustments for personal comfort.
tribution patterns to suit your
own individual requirements.
You can set uncontrolled heater
n direct air to flow onto the winoutput at up to 907 (326). Full
, toward the upper body
,
cooling output is available from the air
the footwell
.
conditioner down to 607 (166).<
If you have a multifunction steering
wheel with the recirculated-air button
(refer to page 25), you can also use it to
switch between "Off" and the recirculated-air mode or AUC and the recirculated-air mode.
Overview
Controls
Car care
> Indicator lamps off: Outside air flow
operational.
> Left-hand indicator lamp on – AUC
mode: The system recognizes pollutants in the outside air and blocks the
flow of air when necessary. The sysCondensation forms in the air contem then recirculates the air currently
ditioner system during operation,
within the vehicle.
then exits under the vehicle.
Depending on the air quality, the aus of condensed water of this kind
tomatic system then switches back
us normal.<
and forth between outside air supply
and recirculation of the air within the
vehicle.
> Right-hand indicator lamp on: The
flow of external air into the vehicle is
permanently blocked. The system
then recirculates the air currently
within the vehicle.
Technology Repairs
You can respond to unpleasant external odors by temporarily stopping the flow of outside air.
The system then recirculates the air
currently within the vehicle. Press the
button repeatedly to run through the
following control sequence:
Data
The air is cooled and dehumidified and – depending on
mperature setting – warmed again
the air conditioner system is
hed on. Depending on the
er, the windshield may fog over
when the engine is started.
he button to switch off the air coner at outside temperatures below
x. +417 (+56). This will help to
nt the windows from fogging up.
windows fog over after switching
r conditioner off, switch it back on.
Automatic recirculated-air
control (AUC)
Index
onditioner
101n
ree ventilation
n adjust the blower controls for
er body area to select the optiflow rates and directions for
rsonal requirements:
ary dial 1 to open and close the
hrough an infinitely-variable
You can also use the levers 2 to
the direction of the airflow.
outlets so that the air flows past
does not flow directly on you.
dial 3 allows you to temper the
from these outlets by adding
cooling as desired:
ward blue – colder
ward red – warmer
390de354
Rear passenger area ventilation
Rotary dial 1 opens the outlets in an infinitely-variable range. You can vary the
temperature of the air as it flows out using rotary dial 3 in the same manner as
for the front rotary dial.
You can change the direction of the air
flow with levers 2.
Steering wheel heating* 103n
eat cushion and backrest can
ated with the ignition key in posi.
To activate and cancel the steering
wheel heater, press the button (arrow)
with the ignition key in position 2.
an call up different heating modes
peatedly pressing the keys.
The lamp within the button lights up
when the steering wheel heater is in operation.
390de630
Controls
Car care
Technology Repairs
Data
an also switch the higher heating
s off directly:
the key and hold it slightly longer.
If you have a multifunction steering
wheel without steering wheel heating,
the button for the recirculated-air mode
is in this location (refer to page 25).
Index
ghest heating mode is on when
ree indicator lamps are lit; one
s lit for lowest heating. Temperaegulation in each mode is with a
ostat.
Overview
t heating*
pendent ventilation system*
tem allows you to ventilate the
and lower its temperature, using
wer of the automatic climate
ependent ventilation system is
d via the multi-information disD or the onboard computer. Ree separate Owner's Manual.
n set two different times for the
to start; it will remain active for
tes. You can also turn it on and
ctly. Since the system uses a
tial amount of electrical current,
uld not activate it twice in sucwithout allowing the battery to
arged in normal operation
n use.
When a preselected activation time is
set, the independent ventilation system
is operational at outside temperatures
above 607 (166), or by direct switch
activation. It cannot be switched on
when the vehicle is moving.
The air emerges via the vent outlets for
the upper body. Therefore, the vents
must be open for the system to operate.
Overview
Controls
Car care
Following that, press and hold the programmed channel key of the BMW Universal Transmitter. If the indicator lamp
of the BMW Universal Transmitter
flashes rapidly for two seconds and
then stays on continuously, the original
hand-held transmitter is equipped with
Before programming, read the
a change code system. If the change
"User's information" section on
code system is available, program the
107.<
channel keys as described in the righthand column on page 106 under "Prooriginal hand-held transmitter
gramming a hand-held transmitter with
If this symbol is depicted on the change code."
packaging or in the user's instructions for the original handIf you have additional questions,
ransmitter, it may be assumed
please consult your BMW center
his original hand-held transmitter
or call 1-800-355-3515.<
mpatible with the BMW Universal
mitter.
Technology Repairs
In order to determine whether the original hand-held transmitter is equipped
with a change code system, you may
either refer to the instructions for the
original hand-held transmitter or program a channel key as described in the
left column on page 106 under "Programming."
Data
Checking for the change code
Index
To Canadian residents:
During programming, your handransmitter may automatically stop
mitting after two seconds. This
ot be long enough to program the
Universal Transmitter. If you are
amming from one of these handransmitters, the Universal Trans's lamp may begin to flash in a sef double flashes. If this occurs,
nue to hold the button on the UniTransmitter while you reactivate
hand-held transmitter. You may
o repeat this function several
while programming.<
105n
Programming a hand-held
transmitter with change code
Read and comply with the safety
precautions on page 105.<
Consult the operating instructions for
the individual device when programming the BMW Universal Transmitter.
Read and comply with the following
programming instructions for the use of
the BMW Universal Transmitter with a
change code system:
the original hand-held transmitward the receiver (3) a maximum
A second person simplifies pronches (5 cm) away.
gramming of the BMW Universal
taneously press the transmitting
Transmitter.<
f the original hand-held trans(arrow 2) and the desired chaney of the BMW Universal Trans(arrow 1). Release both keys as
as the indicator lamp flashes
y.
ogram other original hand-held
mitters, repeat steps 3 and 4.
responding channel key is now
mmed with the signal of the origd-held transmitter.
annel keys are cleared.
Overview
Controls
This device complies with Part 15 of the
FCC Rules. Operation is subject to the
following two conditions:
(1) This device may not cause harmful
interference, and
(2) This device must accept any interference received, including interference
that may cause undesired operation.
Car care
ss and hold the two outer channel
s of the BMW Universal Transmituntil the indicator lamp flashes,
then release the keys.
Technology Repairs
dual channel keys cannot be
d. However, the three channel
can be cleared together in the folg manner:
Do not use this BMW Universal Transmitter with any garage door opener that
lacks safety "stop" and "reverse" features as required by federal safety standards (this includes any garage door
opener model manufactured before
April 1, 1982).
Data
Read and comply with the safety
precautions on page 105.<
User's information
Index
ring the channel keys
107n
Storage facilities
prevent injury in the event of an
cident, close the glove comnt immediately after use.<
on the left-hand side of the
ompartment.
s integral overload-protection,
n be left in its holder continu-
sure that the flashlight is
witched off when it is inserted
holder. Failure to comply with
caution could lead to overchargdamage.<
390de043
rgeable flashlight*
The cover of the storage compartment
on the vertical surface of the center
console can be pushed open or closed
(illustration). If your vehicle is equipped
with a cassette holder*, open each cassette compartment by pressing on the
small button.
Storage compartment on the center
console between the front seats: To
open, reach into the recess at the front
and pull upward.
You will find a coin holder in the door
pocket on the driver's side.
You will find additional storage compartments in all of the doors as well as
on the backrests of the front seats.
109n
Technology Repairs
Data
to open; fold back inward to
Index
olders for canned drinks have
provided in the center console bee controls for the automatic clicontrol, with two additional holdr rear passengers on the rear of
onsole, just below the vent outlets.
Car care
Controls
Overview
erage holder*
pty
e lid and press down (arrow):
n now pull the ashtray upward
oval.
cles equipped for nons, the insert is removed in
e way.
390de364
Cigarette lighter*
Press the cover panel for access
(arrow), then push the lighter down.
Remove as soon as the lighter jumps
back out.
Hold or touch the hot cigarette
lighter by the knob only. Holding
or touching it in other areas could result
in burns.
The cigarette lighter remains operational when the ignition key has been
removed. Therefore, do not leave unsupervised children in the vehicle.<
111n
the edge of the cover (arrow).
an now pull the ashtray upward
moval.
Technology Repairs
mpty
Data
the recess in the lid.
Index
pen
Car care
Controls
Overview
tray, rear
tral belt has an additional small
connect the two belt sections,
an use the central belt as any
al 3-point belt
asier to fold the rear seat backp and down if you unbuckle the
arrow).
394de118
With a master key, you can lock each
backrest in the rear seat.
This also prevents access to the luggage compartment from the interior of
the vehicle when you turn over the door
and ignition key 3 to someone else
(refer to page 34), for valet parking for
instance.
Overview
Controls
Car care
When removing and installing the
center armrest, be sure that the
seat covers are not damaged by the
side pins.<
Technology Repairs
d the center armrest completely
ward.
sen the trim from the upper
cro® fastener and place it on the
rest.
sp the front of the armrest with
hand, then use your other hand
each down behind the armrest
pull up sharply (arrow).
Guide the armrest into position from
above, then apply pressure until you
hear it snap into position.
Data
or vehicles with the through-loadstem and for the sport wagon.
to page 115)
Installing the center armrest
Index
oving the center armrest
113n
380de070
he magnetic retainers to attach
over panel to the upper surface
l surface below rear tray) of the
ge compartment.
Secure the bag's contents by
tightening down the strap at the
buckle.<
ensure that the skis are clean
oading them into the bag. Take
avoid damage from sharp
To store the ski bag, perform the above
steps in reverse sequence.
Overview
Controls
Car care
Technology Repairs
Data
d the center armrest outward.
sen the trim from the upper
cro® fastener and place it on the
rest.
ss button 1 downward and swing
cover forward.
ss button 2: The cover in the luge compartment is unlocked.
Index
e sport wagon
115n
p cover
roll-up cover out and hook it
rear bracket.
er will support light objects
items of clothing.
o not place heavy or bulky
jects on the roll-up cover. They
ose a danger to vehicle
nts during braking or evasive
ers.
allow the cover to snap back,
is could damage it.<
ing the case, refer to the next
392de163
wagon
Separation net*
Pull the separation net out with the
straps. Hold the bar on both sides and
insert it into the holders. It is easiest to
do this from the back seat.
Do not allow the separation net to
snap back. Doing so could pose a
risk of injury and the separation net
could be damaged.<
When the rear backrests are folded
down, you can store the case in front of
the rear seats, pull the separation net
out from there and insert it in the front
holders (refer to the next page).
wagon
an pull the separation net out and
it in the holders above it in the
roof area.
Overview
Controls
Car care
392de166
Open the side covers by pressing the
button.
Technology Repairs
the case in from the side as
n in the illustration. The strap of
paration net must be directed upwhile the end of the roll-up cover
be laid around and under the case
rear.
Side covers
Data
are holders for the case in front of
ar seats.
Index
age
117n
392de169
wagon
e floor cover up
Raise the spare tire cover
he black retainer on the lower
he panel and hook it into the
ame of the tailgate cutout.
Lift up the cover and hook it into the red
retainer on the floor panel (arrow).
you fold the floor cover down,
he retainer to its original posi-
Before you fold the cover down, return
the retainer to its original position.
Index
Data
Technology Repairs
Car care
Controls
Overview
wagon
119n
ng the load
e smaller, light pieces with the
ing straps or a luggage net*, or
lastic straps (refer to page 44)
rge, heavy pieces, visit your
center for load-securing de*. Lashing eyes are provided at
orners of the luggage compartfor attaching these load-securevices (the illustration shows the
wagon)
ply with the information end with the load-securing de-
Always position and secure the
load correctly, otherwise it can
endanger the passengers during braking or evasive maneuvers.
Do not exceed the permissible gross
vehicle weight and the permissible axle
loads (refer to page 201). If you do, the
operating safety of the vehicle is no
longer ensured and you are in violation
of the law.
Do not carry hard or heavy objects
unsecured in the passenger compartment. If you do so, they may be projected through the air during braking
and evasive maneuvers, thus endangering vehicle occupants.<
smoothly. Avoid sudden accelerand braking maneuvers. Take corgently.
oof load increases aerodynamic
ance: Increased fuel consumption
tress on the roof are the immedisults.
Overview
Controls
Car care
Technology Repairs
e the roof luggage correctly and
to prevent it from shifting or best during driving (danger to followaffic).
Data
sure that the load is not too
, and attempt to distribute it
y. Always load the heaviest pieces
on the bottom). Be sure that
uate clearance is maintained for
g the sliding/tilt sunroof, and that
ts do not project into the opening
of the luggage compartment lid/
e.
Index
hould therefore always remember
exceed the approved roof weight,
pproved gross vehicle weight or
le weights when loading the rack.
will find the specifications under
nical data" on page 201.
121n
Overview
Controls
Car care
Operation, care
and maintenance
Owner service procedures
Advanced technology
Technology Repairs
ws and regulations:
chnical modifications 161
D connector 162
Controls and features
Technical data
Data
re and maintenance:
e BMW Maintenance
ystem 154
ring for your car 155
bags 160
hicle storage 160
Overview
Index
Index
der the hood:
od 143
gine compartment 144
sher fluids 148
sher nozzles 148
gine oil 149
olant 151
ake fluid 152
hicle Identification
Number 153
123n
echnical factors associated
ir manufacture, tires do not
their full traction potential until
l break-in period has elapsed
reason, drive with extra care
he initial 200 miles (300 km).
our local and state maximum
mits.
hen the vehicle is operated on
et or slushy roads, a wedge of
ay form between the tire and
d surface. This phenomenon is
to as aquaplaning, or hydroand can lead to partial or comss of traction, vehicle control
king effectiveness. Reduce your
n wet roads.<
Brake system
Approximately 300 miles (500 km) must
elapse before the brake pads and rotors
achieve the optimal pad-surface and
wear patterns required for trouble-free
operation and long service life later on.
To break in the separate parking brake
drums, apply the parking brake lightly
when coasting to a standstill (at a traffic
signal, for instance), provided that traffic conditions allow you to do so. To
avoid corrosion, repeat this procedure
from time to time.
The brake lamps do not come on
when the parking brake is applied.
Vacuum for the brake system servo unit
on your BMW is available only when the
engine is running. When you move the
car with the engine shut off – when
towing, for instance – substantially
higher levels of pedal force will be
required to brake the vehicle.<
Overview
Controls
Car care
Technology Repairs
Data
es hooks:
items of clothing from the hooks
t they will not obstruct the driver's
. In order to avoid personal
s during braking or evasive
uvers, do not hang heavy objects
e hooks.<
Index
parcel tray:
t use the rear parcel tray to store
or bulky objects. They could
a danger to the occupants during
ng, evasive maneuvers, or in a
125n
other situations in which the
not burned, or burns incomy, such as engaging the starter
ently or for extended periods, or
ted start attempts in which the
e does not start (stopping and
ting an engine which is running
rly does not present a problem).
let the engine run with any of
park plug cables disconnected.
Be sure to comply with the instructions above to prevent unburned fuel from reaching the catalytic
converter. Otherwise there is danger of
overheating and damage to the catalytic converter.
Extreme temperatures occur at the catalytic converter on this and every catalyst-equipped vehicle. Heat shields are
installed adjacent to some sections of
the exhaust system. Never remove
these shields; do not apply undercoating to their surfaces. When driving,
standing at idle, and parking the vehicle, take care to avoid contact between
the exhaust system and flammable materials (grass, hay, leaves, etc.). Such
contact could lead to a fire, resulting in
personal injury and property damage.<
BS system closed-loop control
cycles in fractions of a second.
sation at the brake pedal indicates
driver that ABS is active, that is,
he vehicle is within its maximum
ng range. In addition, the audible
ion that accompanies the control
tion calls the attention of the
to the reduced traction between
es and the road surface (slippery
surface), and serves as a reminder
he speed of the car should be red to adapt to road conditions.
Overview
Controls
Car care
Technology Repairs
are in a situation which requires
aking, you will exploit the full benf the ABS system if you apply
mum brake pressure ("panic stop").
the vehicle maintains steering reiveness, you can avoid possible
cles with a minimum of steering
despite the full brake application.
Data
ystem becomes operative once
hicle exceeds a speed of approx.
h (10 km/h). The ABS is deactiwhenever the vehicle's speed
back below approx. 4 mph
/h). This means that the wheels
ck in the final phase of a brake
ation – a factor of no significance
ual use.
On road surfaces which have a loose
layer on a firm base (on gravel or snow,
for instance), the braking distances with
ABS may be longer than with the
wheels locked. The same applies when
snow chains have been mounted. However, ABS continues to provide enhanced vehicle stability and steering response under these conditions.
Index
ng with ABS
127n
event of a fault
f the ABS warning lamp in the
nstrument cluster comes on,
efer to page 23. The brake
system then reverts to convenional operation as on vehicles
without ABS. However, have the
ystem checked by your BMW
as soon as possible. To prevent
cted defects and cumulative
om adversely affecting the brake
refer any problems to your
ed BMW center at the earliest
nity.
Disc brakes
Disc brakes furnish optimum deceleration and braking control and greater
fade resistance under heavy use.
When the vehicle is driven only occasionally, during extended periods when
the vehicle is not used at all, and in
operating conditions where brake applications are less frequent, there is an
increased tendency for corrosion of the
rotors and accumulation of contamination on the brake pads. This occurs
because the minimal pressure which
must be exerted by the pads during
brake applications to clean the rotors is
not reached.
If the brake rotors are corroded, they
will tend to respond to braking with a
pulsating effect which even extended
application will fail to cure.
For your own safety: Use only
brake pads that BMW has
approved for your specific vehicle
model. BMW cannot evaluate nonapproved brake pads to determine if
they are suited for use, and therefore
cannot ensure the operating safety of
the vehicle if they are installed.<
In the event of a malfunction, the yellow
warning lamp comes on. Conventional
braking efficiency is available without
limitations.
Have the system checked and repaired
at your BMW center as soon as possible.
For "Information for your safety"
covering the ABS system, refer to
page 128. This information also generally applies for DBC.<
Overview
Controls
Car care
Do not reduce the pressure on the
brake pedal for the duration of the
brake application. When the brake
pedal is released, the DBC is deactivated.
Technology Repairs
If you apply the brakes rapidly, this system automatically produces the maximum braking force boost and thus
helps to achieve the shortest possible
braking distance during "panic stops."
All of the benefits of the ABS system
are exploited under these circumstances.
Data
Do not coast with the clutch depressed or with the transmission
ector lever in neutral. Do not coast
he engine shut off. The engine
des no braking effect when the
is depressed or the transmission
eutral, and there is no power-asr braking or steering when the
e is not running.
allow floor mats, carpets or any
objects to protrude into the area
d the accelerator, clutch and
pedals and obstruct their move<
Dynamic Brake Control (DBC)*
Index
d engine braking prove inade, you should still avoid extended,
nuous braking. Instead of maing low to moderate pressure over
ended period of time, you should
erate by applying more substantial
ure to the brake pedal (watch for
ing traffic!), then releasing the
, then repeating the application.
taggered braking technique alhe brakes to cool in the intervals
een active braking phases, preg overheating and ensuring that
aking capacity remains available
imes.
129n
pads
The warning lamp for the brake
pads comes on, or the "CHECK
BRAKE PADS" message apthe Check Control:
ke pads have reached their
m pad thickness. Proceed to the
authorized BMW center as
possible to have the pads
d.
r your own safety: Use only
ake pads that BMW has
ed for your specific vehicle
BMW cannot evaluate noned brake pads to determine if
suited for use, and therefore
ensure the operating safety of
cle if they are installed.<
Winter operation
The onset of winter is often accompanied by rapid changes in weather.
Adaptations in driving style should be
accompanied by preparations on the
vehicle itself to ensure that your vehicle
operation through the winter remains
safe and trouble-free.
Coolant
Ensure that the coolant mixture contains the year-round ratio of 50:50 of
water and antifreeze/corrosion protection. This mixture provides protection
against freezing down to approx. -347
(-376). Replace the coolant every four
years.
Locks
BMW door lock deicer can be used to
free the locks if they are frozen. This
deicer also contains lubricant.
After using deicer, treatment with BMW
lock barrel grease is recommended.
ntended to prevent the wheels
cking during brake applications,
ping to maintain vehicle stability
ering response.
Do not shift down on slick road
surfaces. Doing so could cause
the rear wheels to lose traction and
skid, which could result in the loss of
vehicle control.<
Depress the clutch during hard
braking on road surfaces which
provide only poor or uneven traction.<
Overview
Controls
Car care
oad conditions substantially
the amount of traction available
n the tires and the road surface.
ulting increases in braking dise considerable and should be
mind at all times.
Technology Repairs
s
Data
ooth, gentle pressure to control
elerator pedal. Avoid excessive
speeds and shift to the next
gear at an early point. Adapt
eed and driving style when apng grades or slopes. Maintain
uate distance between yourself
car ahead.
If the ABS does not respond in a critical
braking situation and the wheels lock:
Reduce the pressure on the brake
pedal until the wheels just start to roll
again while still maintaining enough
force to continue braking.
Following that, increase pedal pressure
again. Reduce the pressure as the
wheels lock, then reapply pressure.
Repeat this procedure. This type of
staggered braking will reduce the braking distance, and the vehicle still remains responsive to steering.
You can then attempt to steer around
hazards after you have reduced pressure on the brake pedal.
Index
g on low-traction road
es
131n
er steering
Level control system*
s a change in steering behavior,
nce greater steering effort or if
becomes lighter as speed
es in vehicles equipped with
onic*:
your BMW center immediately
nspection.
The warning lamp for the level
control system comes on, or the
message "LEVEL CONTROL
INACTIVE" appears in the Check Control: There is a malfunction in the level
control system.
he power steering fails,
creased effort will be required
the vehicle.<
Stop and inspect the vehicle. If it is
riding significantly lower in the rear than
in the front, or if it is sitting at an incline
(left rear compared to right rear),
consult the nearest authorized BMW
center. Drive with appropriate caution
in the meantime. The vehicle has
reduced ground clearance or driving
comfort is noticeably reduced.
Even if the attitude of the vehicle is
normal, you should consult the nearest
authorized BMW center if the warning
lamp indicates a system fault.
e refer to the (Supplementary)
r's Manual provided with your
d system for detailed information
use.
Overview
Controls
Car care
Technology Repairs
ar phones without official BMW
val can also generate interferThis phenomenon assumes the
of a low-pitched hum emanating
he speaker system.
Data
eception and sound quality
ned from mobile radios varies
ding to a variety of factors, include broadcast range of the transmitd the directional orientation of the
na. Interference factors such as
ension power lines, buildings and
al obstructions can all lead to
idable reception interference,
dless of how well the vehicle
d system is operating.
tic factors such as intense solar
ion, fog, rain and snow can also
ere with reception.
133n
Index
dio reception
condition
ead – tire damage
your tires frequently for tread
gns of damage and for foreign
lodged in the tread. Check the
epth.
epth should not be allowed to
w 0.12 in (3 mm), even though
lly specified minimum tread
only 0.063 in (1.6 mm). At a
epth of 0.063 in (1.6 mm), tread
ndicators (arrow) in the treadbase indicate that the legallyible wear limit has been
d. Below 0.12 in (3 mm) tread
here is an increased risk of
ning, even at relatively modereds and with only small amounts
on the road.
Do not drive on a deflated (flat)
tire. A flat tire greatly impairs
steering and braking response, and can
lead to complete loss of control over
the vehicle.
Avoid overloading the vehicle so that
the permitted load on the tires is not exceeded. Overloading can lead to overheating and increases the rate at which
damage develops inside the tires. The
ultimate result can assume the form of a
sudden air loss.
Unusual vibrations encountered during
normal vehicle operation can indicate
tire failure or some other vehicle defect,
as can variations in normal vehicle response, such as a pronounced tendency to pull to the left or right. Should
this occur, respond by immediately reducing your speed and carefully proceeding to the nearest BMW center or
professional tire center, or having the
vehicle towed in to have it and its tires
inspected.
Tire damage (up to and including blowouts) can endanger the lives of both the
vehicle occupants and other road
users.<
The traction grade assigned to this
ire is based on straight-ahead
ng traction tests, and does not
e acceleration, cornering, hydrog, or peak traction characteri<
The temperature grade for this tire
is established for a tire that is properly inflated and not overloaded. Excessive speed, underinflation, or excessive loading, either separately or in
combination, can cause heat buildup
and possible tire failure.<
Controls
Car care
The temperature grades are A (the
highest), B and C, representing the
tire's resistance to the generation of
heat and its ability to dissipate heat
when tested under controlled conditions on a specified indoor laboratory
test wheel.
Sustained high temperature can cause
the material of the tire to degenerate
and reduce tire life, and excessive temperature can lead to sudden tire failure.
The grade C corresponds to a level of
performance which all passenger car
tires must meet under the Federal Motor Vehicle Safety Standard No. 109.
Grades B and A represent higher levels
of performance on the laboratory test
wheel than the minimum required by
law.
Technology Repairs
action grades, from highest to
t, are AA, A, B and C.
grades represent the tire's ability
p on wet pavement as measured
controlled conditions on speciovernment test surfaces of asand concrete. A tire marked C
ave poor traction performance.
Data
Temperature
Index
ion
Overview
135n
e
e on which the tire was manud is indicated by the code on the
:
129 indicates that the tire was
ctured in Week 12 of 1999.
commends the replacement of
when the tires are no more than
old, even if a tire life of 10 years
ble.
res over 6 years old should be
ly in case of emergency. Such a
uld be replaced by a new tire
ately, and should not be
d together with new tires.
Tire rotation
Between the axles
The tread wear patterns at the front end
differ from those at the rear – the actual
patterns will vary according to individual driving conditions. In the interests of
safety and maintaining optimal handling
characteristics, interaxle tire rotation is
not recommended.
If a proposed interaxle rotation of tires
is based on economic considerations,
one should consider whether the costs
for the rotation are likely to be recaptured by any increase in the service life
of the tires which might be realized. In
principle, interaxle tire rotation should
be performed at short intervals, with a
maximum of 3,000 miles (5,000 km).
Consult your authorized BMW center
for more information.
eel and tire combinations
ight choice
Codes on tires and wheels
nly tires approved by BMW.
to the information beginning on
140.
The tire codes will aid you in selecting
the correct tire.
The speed rating indicates the approved maximum speed for the tire.
Summer tires:
S =
T =
H =
V =
W =
Y =
ZR=
up to
up to
up to
up to
up to
up to
over
112
118
130
150
167
186
150
mph
mph
mph
mph
mph
mph
mph
(180 km/h)
(190 km/h)
(210 km/h)
(240 km/h)
(270 km/h)
(300 km/h)
(240 km/h)
Car care
Nominal width
in mm
Aspect ratio in %
Radial tire code
Rim diameter in inches
Load rating
(not on ZR tires)
Speed rating
(before R on ZR tires)
Controls
235/60 R 16 100W
Technology Repairs
is reason, use only tires of the
brand and tread pattern. In the
of a flat tire if you have mounted
r tires, for example, remount the
ved wheel-tire combination as
as possible.<
Example:
Data
The correct wheel-tire combinaion affects different systems such
S, ATC, ASC+T/DSC. The funcf these systems is impaired if imr wheel-tire combinations are
Codes on radial tires:
Index
use of the high speeds this vehicle
each, the use of specific tire
s, specifications and dimensions
ndatory. Consult any BMW center
tails.
ly with national, state, or province
ations.
Overview
137n
Winter tires
Choosing the right tire
BMW recommends winter tires (M+S
radial tires) for driving in adverse winter
road conditions. While tires known as
all-season tires (M+S designation) provide better winter traction than summer
tires with load ratings H, V, W, Y and
ZR, they generally do not achieve the
performance of winter tires.
In the interests of safe tracking and
steering response, install radial tires
made by the same manufacturer and
with the same tread configuration on all
four wheels if you elect to mount winter
tires.
Mount only winter tires which have
been approved by BMW. Any BMW
center will be glad to provide you with
information for selecting the best winter
tires for your particular driving conditions.
Overview
Controls
Car care
It is not possible to mount snow
chains on tires with 17-inch
wheels.<
Technology Repairs
Use narrow-link BMW snow chains on
summer or winter tires only in pairs and
only on the rear wheels. Comply with all
manufacturer's safety precautions when
mounting the chains.
Data
tires in a cool, dry place, away
ight whenever possible. Protect
es against contact with oil, grease
uel.
139n
Index
age
Snow chains*
cations – sedan
eel rim
heel rim)
Light-alloy wheel
–
7Jx15
–
–
–
–
–
7Jx15
7Jx16
8Jx17
8Jx17
9Jx17
–
–
–
–
6.5Jx15
7Jx15
7Jx16
8Jx17
The use of rims and wheel bolts
that do not meet the specifications
of the original factory-installed equipment will affect the safe operation of
your vehicle and may cause an accident
and personal injury.
Never mix tires of different design, such
as steel-belted radials with radial biasbelted or bias-ply tires, etc. Mixing tire
types will adversely affect roadholding
and can lead to loss of vehicle control.<
7Jx16
8Jx17
8Jx17
9Jx17
–
–
7Jx16
8Jx17
Overview
–
–
–
–
Controls
7Jx16
Car care
–
The use of rims and wheel bolts
that do not meet the specifications
of the original factory-installed equipment will affect the safe operation of
your vehicle and may cause an accident
and personal injury.
Never mix tires of different design, such
as steel-belted radials with radial biasbelted or bias-ply tires, etc. Mixing tire
types will adversely affect roadholding
and can lead to loss of vehicle control.<
Technology Repairs
Light-alloy wheel
Data
Steel rim
wheel rim)
141n
Index
fications – sedan
cations – sport wagon
eel rim
heel rim)
Light-alloy wheel
–
7Jx15
–
–
–
7Jx15
7Jx16
8Jx17
7Jx15
–
–
7Jx15
7Jx16
8Jx17
–
7Jx16
–
–
7Jx16
8Jx17
–
–
7Jx16
8Jx17
Pay attention to the specifications for
tires and wheels in the vehicle's manuals. If sizes not approved by the manufacturer are mounted, an entry in the
vehicle's documents may be necessary.
Comply with local legislation.
Snow chains*
For tires on 17-inch wheels, it is not
possible to mount snow chains.
The use of rims and wheel bolts
that do not meet the specifications
of the original factory-installed equipment will affect the safe operation of
your vehicle and may cause an accident
and personal injury.
Never mix tires of different design, such
as steel-belted radials with radial biasbelted or bias-ply tires, etc. Mixing tire
types will adversely affect roadholding
and can lead to loss of vehicle control.<
To avoid injuries, be sure that the
travel path of the hood is clear
when it is closed, as with all closing
procedures.
If it is determined that the hood is not
completely closed while driving, stop
immediately and close it securely.<
Controls
Car care
Allow the hood to fall from a height
of about 12 inches (30 cm) so that it
audibly engages.
Technology Repairs
To close
Data
pen
he release handle and open the
Index
390de375
Overview
143n
8i
Index
Data
Technology Repairs
Car care
Controls
Overview
28i
145n
0i
Index
Data
Technology Repairs
Car care
Controls
Overview
40i
147n
ve-action washer
oir*
y approx. 1.1 US quarts
).
intensive-action washer fluid.
s freezing to approx. -177
and is available from your
ed BMW center.
tifreeze agents or intensivetion washer fluids for the
systems are highly flammable.
reason, keep them away from
of flame and store them only in
ginal containers. Store them so
y are inaccessible to children.
with the instructions on the
ers.<
Washer nozzles
Windshield washer
Windshield:
The spray from the nozzles should
be directed so as to ensure effective
cleaning, even at high speeds. Use
a needle to adjust the nozzles as
required, or have them adjusted at your
authorized BMW center.
Rear window:
Have this system adjusted by your
BMW center as required.
Headlamp washer system
Have the nozzles adjusted by your
BMW center as required.
Car care
Controls
Overview
BMW engines are designed to operate without oil additives; the use
of additives could lead to damage in
some cases. This is also true for the
manual transmission, the automatic
transmission, the differential, and the
power steering system.<
Technology Repairs
Wait until the level has dropped to just
above the lower mark before adding oil.
However, do not wait until the oil level
drops below the lower mark.
Data
390de077
To add oil
Index
il volume between the two marks
e dipstick corresponds to approx.
S quarts (1 liter). Do not fill beyond
pper mark on the dipstick. Excess
l damage the engine.
149n
ity ratings
y is the oil flow rating as estabn SAE classes.
ection of the correct SAE class
s on the climatic conditions in
a where you typically drive your
proved oils are in SAE classes
W-30 and SAE 5W-40.<
530us050
ils may be used for driving in all
temperatures.
olant
The coolant level is correct when the
end of the red float is aligned with the
upper edge of the filler opening (refer
to the arrow in the illustration), or max.
0.8 in (2 cm) higher, for instance up
to the mark on the float (see also the
schematic diagram next to the cap).
Car care
Controls
Overview
Unscrew the cap from the expansion
tank.
Technology Repairs
Correct coolant level when the engine
is cold (approx. 687/206):
Data
Comply with the applicable envionmental laws regulating the disof extended-duty antifreeze with
sion inhibitor.<
Checking coolant level
Index
eeze and anticorrosion agents are
dous to health. You should always
them in their original container
n a location which is inaccessible
dren.
ded-duty antifreeze with corrosion
or contains the flammable sube ethylene glycol. For this reason,
t spill antifreeze with corrosion inr on hot engine parts. It could
fire and cause serious burns.<
380de081
Do not add coolant to the cooling
system when the engine is hot. If
ttempt to do so, escaping coolant
ause burns.
oid the possibility of damage later
ever use anything other than facpproved, nitrite and amino-free
ded-duty antifreeze with corrosion
or. Your authorized BMW center
iliar with the official specifica-
151n
e fluid
f the indicator lamp for the
brake hydraulic system appears
or if the "CHECK BRAKE FLUID"
warning appears in the Check
Control: The brake fluid level is
oo low in the reservoir.
ke fluid reservoir is located
he microfilter housing on the
side of the car. Should you dethat the brake fluid is low, refer
blem to your BMW center, who
e and rectify any sources of
when refilling the reservoir.
MW center is familiar with the
ations for approved brake fluids
.
uid loss results in extended
avel. For this situation, refer to
es on page 130.
Brake fluid is hygroscopic, that is,
it absorbs moisture from the air
over time.
In order to ensure the safety and
reliability of the brake system, have the
brake fluid changed every two years by
an authorized BMW center. Refer also
to the Service and Warranty Information
Booklet (US models) or to the Warranty
and Service Guide Booklet (Canadian
models).
Brake fluid is toxic and damages the
vehicle's paint. You should always store
it in its original container and in a location which is out of reach of children.
Do not spill the fluid and do not fill the
brake fluid reservoir beyond the "MAX"
mark. The brake fluid could ignite upon
contact with hot engine parts and cause
serious burns.<
Comply with the applicable
environmental laws regulating the
disposal of brake fluid.<
Index
Data
Technology Repairs
Car care
Controls
Overview
153n
mileage can be accumulated in
erent ways.
e point of view of maintenance,
miles (100,000 km) accumulated
-distance urban driving are not
valent of the same distance
at moderate speeds in longe highway travel.
onse to this fact, the BMW MainSystem monitors operating
ns as the basis for determining
mum service intervals for your
al vehicle.
W Maintenance System inhe Engine Oil Service and Inns I and II.
ning the maintenance intervals
ng to the actual loads on the car
every kind of operating situation.
r, even those who drive only
stances – significantly less than
miles (10,000 km) annually –
have the engine oil changed at
ery 2 years since oil deteriorates
e, regardless of use.
Service and Warranty Information
Booklet (US models) or Warranty
and Service Guide Booklet (Canadian models)
Please refer to the Service and Warranty Information Booklet (US models)
or to the Warranty and Service Guide
Booklet (Canadian models) for additional information on maintenance intervals and procedures.
As a precaution against rust, it might be
a good idea to have the body checked
for damage from rocks or gravel at the
same time, depending upon operating
conditions.
Have your BMW center do the
maintenance and repair.
Your BMW center is always informed on
the latest maintenance work and repair
techniques and equipped with the required special tools. In addition, checking parts known from experience to be
subject to wear is a permanent part of
the maintenance specifications.
Be sure that all maintenance work is
confirmed in the Service and Warranty
Information Booklet (US models) or in
the Warranty and Service Guide Booklet (Canadian models).
These entries will constitute your proof
that the vehicle has received regular
maintenance. They are also required in
the event of a warranty claim.<
After washing the car, apply the
brakes briefly to dry them. Braking
winter months, it is especially imnt to ensure that the car is washed efficiency might otherwise be reduced
by the moisture, and the brake rotors
egular basis. Large quantities of
nd road salt are difficult to remove, could also be corroded.<
hey also cause damage to the ve-
f spray wands or high-pressure
washers are used, be sure to
ain an adequate distance between
pray source and the vehicle's surnadequate distance and excesressure can damage or weaken
ish, making it more susceptible to
quent attack. In addition, moisould penetrate to vehicle compo, leading to long-term damage.<
Overview
Controls
Car care
Technology Repairs
of the car which are inaccessible
automatic washer – such as door
door and hood edges, etc. –
d be cleaned by hand.
Data
Turn the rain sensor off in automatic car washes. If you do not,
ge may occur if the wipers switch
intentionally.<
When cleaning the headlamps,
please observe the following:
> Do not clean by wiping with a dry
cloth (scratches). Never use abrasives or strong solvents to clean the
covers
> Remove dirt and contamination
(such as insects) by soaking with
BMW Car Shampoo and then rinsing
with plenty of water
> Always use a deicer spray to remove
accumulated ice and snow – never
use an ice scraper.<
Index
es with rain sensor*:
the windshield regularly. Wax
automatic car washes or insects,
ample, can cause malfunctions in
nction of the rain sensor.
155n
ing upon material and type of
perforation of paint layer), physsses from sand, road salt,
etc., can cause corrosion to
ending beneath the finish, starte point of impact.
rt, tar spots, dead insects, anippings (strong alkali effect) and
retions (resins and pollen) all
substances capable of causing
when allowed to remain on the
your car for any period of time
etching, flaking, separation in
coat).
trial areas, deposits from fly
e, oil deposits, sulfur-dioxide in
ation (acid rain) and other envital pollutants will all damage the
of the car unless adequate pros provided.
In coastal regions, high levels of
atmospheric salt and humidity promote
corrosion.
In tropical zones, temperatures of over
1057 (406) in the shade prevail, in
addition to heavy ultraviolet radiation
and high humidity. Under those circumstances, light exterior finishes reach
temperatures of up to 1757 (806)
and dark finishes up to 2507 (120 6).
an use a glass cleaner to remove
ax or silicone that may have been
n the windows during waxing.
Use cleaning and car-care
products that you can obtain
ur BMW center.<
The paint color code for your car is provided on a sticker located on the right
hand side under the hood and on the
first page of your Service and Warranty
Information Booklet.
Damage caused by flying stones,
scratches, etc., must be touched up
without delay to prevent rust from forming.
If corrosion has started to form in an
area with paint damage, remove all rust
and clean the area. Then prime the area
with a BMW Primer Stick. Finally, apply
the finish coat. After a few days, polish
and protect the touched-in areas.
More extensive paint damage should be
repaired professionally in accordance
with the manufacturer's instructions.
Your BMW center uses original BMW
finish materials in accordance with approved repair procedures.
Controls
est way to determine when the
needs to be waxed is by noting
water stops beading on the sur-
Car care
You can touch up small areas of damage with BMW spray paint or a BMW
touch-up stick.
Technology Repairs
ct the finish using carnauba or
etic-based waxes only.
Data
Paint damage
Index
ng your car
Overview
157n
for other vehicle
nents and materials
oy wheels should be treated
oy wheel cleaner, especially durwinter months. However, do not
ressive products containing acng alkalis or abrasives. Do not
am cleaners operating at temes above 1407 (606). Follow
ufacturer's instructions.
ehicle has chrome parts* such
ow moldings, door handles or
ems, clean these parts carefully
ple clean water, especially if
ve an accumulation of road salt.
hrome polish for an additional
nt.
components, vinyl upholstery,
ers, lamp lenses, the clear cover
strument panel and compoith a sprayed dull black surface
cleaned with water (add plastic
as required). Do not allow moissoak through the seats or headever use solvents such as lacnner, heavy-duty grease
r, fuels, etc.
Rubber components should be cleaned
with water only; a rubber treatment or
silicone spray may also be applied.
The safety belts should be cleaned with
a mild soap and water solution without
being removed from the car. Never attempt chemical or dry cleaning, as
damage to the belt fabric could result.
After cleaning, never allow the inertia
reel to retract the belts until they are
completely dry. Dirty safety belts prevent the inertia reel mechanism from
retracting the strap properly, and thus
constitute a safety hazard.
Heavily soiled floor carpets and mats*
can be cleaned with an interior cleaner.
The floor mats can be removed from the
vehicle for cleaning.
Please use only a damp cloth to clean
wooden fascia panels and components.
Follow up by drying with a soft cloth.
Use cleaning and car-care
products that you can obtain
at your BMW center.<
Use cleaning and car-care
products that you can obtain
ur BMW center.<
Cleaning agents can contain substances that are dangerous or
health risks. Therefore, always
ly with the warnings and danger
es on the package.
the doors or windows on your vebefore cleaning the interior. Never
your vehicle with cleaning agents
lvents) not specifically intended
s purpose.<
Overview
Controls
Car care
upholstery is to be exposed to insunlight or if the vehicle is to be
d for an extended period, cover all
r surfaces (or, better yet, the winto prevent fading.
Technology Repairs
should be wiped up immediately.
ve grease and oil stains without
ng, but rather by dabbing with
emover.
Data
commend that you perform this
dure twice a year on leather exd to normal use.
Index
otection against dampness or
ure, treat the leather with a BMW
gnating agent.
159n
ations may not be made on eiwiring or the individual compothe airbag system. These ine padded steering wheel hub,
ument panel, the side trim pane front or rear doors and the
ars or the sides of the headliner.
pply adhesive materials to these
nents or cover or modify them in
y. Do not attempt to remove or
le the steering wheel.
re compliance with official
egulations, entrust disposal of
generators to an authorized
enter.
ssional attempts to service the
could lead to failure in an emerr undesired airbag activation,
f which could result in personal
Vehicle storage
Consult your BMW center regarding the
required special procedures if you intend to store the vehicle for longer than
three months.
Overview
Controls
Car care
Technology Repairs
o not remove the protective lens
d avoid staring directly at the
d beam for extended periods
hours), as inflammation of the
d result.<
Data
mitting diodes installed behind
ent lenses serve as the light
or many of the controls and disyour vehicle. The concept beir operation is related to that
ed for lasers, and they are offiesignated as Class 1 light-emitdes.
Index
Emitting Diodes (LEDs)
161n
An illuminated Service Engine
amp informs you of the need for
service, not of the need to stop
he vehicle. However, the sysems should be checked by your
BMW center at the earliest posportunity.
ertain conditions, the indicator
k or flash. This indicates a rather
evel of engine misfire. When
urs, you should reduce speed
sult the nearest BMW center as
possible. Severe engine misfire
y a short period of time can sedamage emission control com, especially the catalytic con-
When the filler cap is not properly
tightened, the OBD system can
detect the vapor leak and the indicator
will light up. If the filler cap is subsequently tightened, the indicator should
extinguish within a few days.<
Index
Data
Technology Repairs
Car care
Controls
Overview
163n
Overview
Controls
Car care
Operation, care
and maintenance
Owner service procedures
Advanced technology
Technology Repairs
sistance, giving and
eiving:
mp-starting 182
wing the vehicle 183
Controls and features
Technical data
Data
case of electrical
lfunction:
el filler door 180
ding/Tilt sunroof 180
lgate 181
Overview
Index
Index
placement procedures:
board tool kit 166
per blades 166
mps and bulbs 167
anging tires 173
tery 176
ses 178
165n
he wiper arm up slightly and
t firmly.
back the release (arrow) and
he wiper blade back toward the
of the wiper arm.
the new blade and slide the
se back into position.
392de173
r blades
Rear*
1 Hold the wiper blade on the window
and remove/unclip the wiper arm at
the articulated joint (arrow).
2 Insert a new wiper blade and press it
on/clip it into the wiper arm.
Use only wiper blades approved
by BMW.<
1 Turn the bulb holder to the left (arrow)
and remove.
2 Remove and replace the bulb.
Car care
Technology Repairs
Data
1 Turn the bulb holder to the left and
remove.
2 Disconnect the plug.
3 Connect the new bulb holder with
bulb to the plug. Be sure that it is
securely engaged.
4 Install in the opposite order of work.
Controls
High beams:
When cleaning the headlamps,
please observe the following:
> Do not clean by wiping with a dry
cloth (scratches). Never use abrasives or strong solvents to clean the
covers
w beams
> Remove dirt and contamination
lb, 55 watts
(such as insects) by soaking with
BMW Car Shampoo and then rinsing
h beams
with plenty of water
bulb, 60 watts
> Always use a deicer spray to remove
accumulated ice and snow – never
The H7 bulb is pressurized. Thereuse a scraper.<
ore, wear safety glasses and proe gloves. Failure to comply with
recaution could lead to injury if the
s accidentally damaged during rement.<
For checking and adjusting headamp aim, please contact your
center.<
Overview
Low beams:
Index
ustration shows the right-hand
e compartment.
167n
g lamp
ulb
he bulb holder to the left (arrow)
emove.
ve and replace the bulb.
390de100
Turn signals/Parking lamps (side
marker lamps), front
Dual-filament bulb, 28/8 watts
1 Press the tabs (arrow) together and
extract the bulb holder.
2 Press gently on the bulb, turn it to the
left and remove.
3 After replacing the bulb insert the
holder (note lug positions) and snap it
back into place.
Overview
Controls
Tail lamp: 5 watt bulbs
Remaining bulbs: 21 watts
The bulb is pressurized. Thereore, wear safety glasses and proe gloves. Failure to comply with
recaution could lead to injury if the
s accidentally damaged during rement.<
1 Turn signal
the cover panel next to the
dlamp forward to remove.
sen both screws (arrows) and
vel out the lamp assembly.
ease the spring on the back of the
p and turn the cover to the left.
ease the clamp, remove the
tact base and replace the bulb.
In the event of a failure of both
lamps of a rear lamp assembly,
the brake lamp assumes the function of
the tail lamps.<
2 Tail lamp/Side marker lamp,
reflector
3 Backup lamp
4 Brake lamp
yellow
red
white
red
Technology Repairs
Car care
394us102
Tail lamps – sedan
Data
lb, 55 watts
Index
t fog lamps
169n
392de170
mps – sport wagon
Lamps in the rear apron panel:
p: 5 watt bulbs
ng bulbs: 21 watts
signal
amps/Side marker
s
up lamp
lamps, reflector
yellow
red
white
red
the event of a failure of both
mps of a rear lamp assembly,
ke lamp assumes the function of
amps.<
1 Open the cover in the side panel.
2 Turn the quick-release fastener and
remove the trim panel in front of the
bulb holder.
3 Open the quick-release fastener
(arrow) and remove the bulb holder.
4 Apply gentle pressure to the bulb
while turning it to the left to remove.
If a subwoofer* is installed behind the
right-hand panel, unscrew the T-screw
and swing the subwoofer to the side.
en the luggage compartment lid/
1 Insert a screwdriver into the slot and
gate.
press to the right (arrow); this disenclip the cover panel (on the undergages the lamp.
e of the package tray) with a
2 Remove the lamp and replace the
ewdriver (arrow).
bulb.
n the bulb holder to the left and
ove.
ply gentle pressure to the bulb
le turning it to the left to remove.
wagon: LED strip in the tailgate.
e contact a BMW center in case of
unction.
Controls
Car care
5 watt bulb
Technology Repairs
License plate lamps
tt bulb
Data
er (high-mount) brake lamp
Index
394de105
Overview
171n
port wagon
Luggage compartment lamps
lamp: 5 watt bulbs
Lamp on the underside of the rear
parcel tray: 10 watt halogen lamp
screwdriver to pry out the lamp
above.
ve the lens.
ce the bulb.
lamp (10 watt bulb) with
lamp (6 watt bulb)
a screwdriver, press the lamp
o the button out to the side.
ve the lens.
ce the bulb.
Lamp in luggage compartment:
10 watt bulb
1 Apply a screwdriver to the recess to
pry the lamp out.
2 Remove the reflector.
3 Replace the bulb.
Luggage compartment lamps
Headliner lamps: 10 watt bulbs
ulb
1 Use a screwdriver to push the lens to
the side.
2 Replace the bulbs.
screwdriver to press the lens
the side.
ce the bulb.
Lamps on the apron of the luggage
compartment lid/tailgate:
10 watt bulb
ell lamps
compartment lamp
ulb
a screwdriver to the recess to
e lamp out.
ve the reflector.
ce the bulb.
1 Use a screwdriver to pry out the lamp
at the upper edge.
2 Remove the reflector.
3 Replace the bulb.
Car care
Controls
Overview
> Car jack
sedan: Fold back the luggage compartment floor mat for access, then
unscrew the wingnut to release the
jack (arrow).
sport wagon: Raise the floor panel
and spare tire cover (refer to
page 118).
When you have completed work,
screw the jack all the way back down.
Fold the handle back and insert it in
its holder
> Wedge (wheel chock)
Located next to the jack. Loosen the
wing nut to remove it
Technology Repairs
In order to avoid rattling noises later,
note the position of the tools when you
remove them and return them to their
original position when you are through
using them.
Data
What you will need
Index
394de090
on the jack on a firm support
ce.
t place wooden blocks or similar
ts under the jack. If this is done,
ck might not be able to reach its
pport capacity because of the
d height.
t lie under the vehicle or start the
e when the vehicle is supported
e jack – risk of fatal injury.<
173n
dure
d carefully and comply with the
ty precautions on the previous
e.
ure the vehicle against rolling:
e the wedge against the rear
ace of the front tire on the side
osite the side being raised. If
vehicle is parked on a downd slope, place the wedge sely in front of the tire. If the
el must be changed on a surwith a more severe slope, take
tional precautions to secure the
cle from rolling.
eels with full wheel covers*:
ch into the ventilation openings
pull the cover off.
eels with adapter*: Position the
bolt adapter on the lug bolt
er. Then apply the lug wrench
turn it to the left (refer to the
tration).
390de350
5 Wheels with hub cover*: Pry the
hub cover off with the screwdriver in
the slot.
6 Loosen the lug bolts 1/2-turn.
7 Position the jack at the jacking point
closest to the flat tire so that the
jack base is vertically below the
jacking point and the entire surface
of the head of the jack will move
into the square recess of the jacking
point (refer to the illustration detail)
when the jack is cranked.
8 Jack the car up until the wheel you
are changing is raised from the
ground.
9 Unscrew the lug bolts and remove
the wheel.
10 Remove accumulations of mud or
dirt from the mounting surfaces of
If light-alloy wheels other than original
BMW light-alloy wheels have been
mounted, it may be necessary to use
different lug bolts for those wheels.
Replace the defective tire as soon as
possible and have the new wheel/tire
balanced.
Overview
Controls
Car care
Technology Repairs
When storing the wheel, take care to
ensure that you do not damage the
retaining pin in the spare tire recess.
Data
heels with hub covers:
osition the hub cover and press it
n tightly.
equipped with lug bolt covers:
ign the arrow on the cover with
e line in the wheel and press the
over into place.
heck and correct the air pressure
the earliest opportunity.
or vehicles with Tire Pressure Conol (RDC)*:
ter mounting the spare tire or corcting the inflation pressure, reactite the system. Refer to page 92.
The vehicle jack is designed for
changing tires only. Do not
attempt to raise another vehicle model
with it or to raise any load of any kind.
To do so could cause accidents and
personal injury.
To ensure continued safety, have the
lug bolts checked with a calibrated
torque wrench [torque specification
72 lb-ft (100 Nm)] at the earliest
opportunity.<
Index
e factory. Other wheel covers may
securely.<
175n
ery
ation location
tery is located behind the rightde trim panel in the luggage
tment.
e trim panel down with the
at the top. On the sport wagon,
e button.
woofer* is installed on the sport
loosen the T-screw and swing
woofer to the side.
e upper surface of the battery
clean.
Symbols
You will find the following symbols on
your car battery. To avoid injury, please
comply with the corresponding precautions whenever you work with or near
the battery.
Please read the following information before working with the
battery.
Wear eye protection. Do not allow particles containing battery
acid or lead to come into contact with your eyes, your skin, or your
clothing.
Battery acid is extremely corrosive. Wear eye protection and
protective gloves. Do not tip the
battery. Battery acid can leak from the
ventilation openings.
Be sure that children keep well
away from batteries and battery
acid.
Never allow sparks or open
flame near the battery. Do not
smoke in the vicinity of the
battery. Avoid sparks from electrical
cables or electrical equipment. Turn the
key to position 0 in the steering lock
during the disconnection or connection
of the battery. Never short-circuit the
battery terminals. There is a danger of
injury from powerful sparks.
If you plan to store the vehicle for more
than four weeks, disconnect the battery
from the vehicle electrical system by
disconnecting the cable at the negative
terminal and then recharge using a suitable charging device.
If you intend to store your car for longer
than 12 weeks: Remove the battery,
charge it and store it in a cool (but frostand dust-free) room. Everv three
months and before reinstalling the battery, have it recharged. If it is not
The projected service life of the
battery can only be reached if the recharged, it will not be serviceable.
Every time the battery is discharged,
y is fully-charged at all times.
k the charge condition of the bat- especially over extended periods, its
equently if the vehicle is used pri- service life is reduced.
for driving short distances.<
Overview
Controls
Car care
Before performing any work on
the electrical system, disconnect
the cable from the negative terminal. If
you do not, short circuits can create the
risk of fire or personal injury.<
Technology Repairs
en: Adequate charge
ck: Not charged adequately.
battery must be recharged.
ase contact your BMW center
ow: Replace the battery.
If the battery is charged in the vehicle:
Do not charge the battery with the
engine running.
Data
an read the charge condition
battery with the "Magic Eye*"
rometer):
Charging the battery
Index
ge condition
177n
hen installing a battery, be sure
at it is mounted properly. Install
ure the protective bar. If the
s not mounted and fastened
y, it will not be adequately
in case of an accident.<
turn used batteries to a recyng point or your authorized
enter. Maintain the battery in an
position for transport and storcure the battery against tilting in
<
390de085
emoving the battery, first disthe negative terminal, then the
terminal. Remove the protec(1) and unscrew the threaded
ion of the battery bracket (2).
stalling the battery, connect the
terminal first, then connect the
e terminal.
Fuses
When an electrical accessory fails to
operate, switch it off and inspect the
fuse.
In glove compartment
1 Open the glove compartment and
turn the two white quick-release
knobs to the left. Spare fuses and
plastic tweezers are located on the
fuse holder.
2 Use the plastic tweezers to remove
the fuse for the accessory or equipment that has stopped working.
3 If the fuse is burned through (the
metal strip will have melted and separated), replace it with a new fuse of
the same ampere rating (color code).
If a subwoofer* is installed, loosen the
T-screw and swing the subwoofer to
the side.
Controls
Overview
A list of the fuses, their respective ampere ratings and the equipment in their
circuits is provided on the rear of the
side trim panel.
Car care
392de172
Open the right access door by pressing
the button and pull the trim panel to the
side.
Technology Repairs
of the fuses, their respective amatings and the equipment in their
s is provided on the rear of the
rim.
In the luggage compartment –
sport wagon
Data
he handle to pull down the trim on
ght wall.
Index
e luggage compartment
179n
l release – sport wagon
se the right-hand panel in the
ge compartment with the button
old the panel down.
he knob with the fuel pump
ol (arrow).
woofer* is installed, loosen the
w and swing the subwoofer to
.
390de376
Sliding/Tilt sunroof
Manual operation
1 Remove the interior lamp (refer to
page 171), reach into the opening
and push out the panel.
2 Use the Allen key from the vehicle
tool kit to turn the sliding/tilt sunroof
in the desired direction (refer to
page 166).
Overview
Controls
Car care
Technology Repairs
Data
Index
ease the two quick-release
eners of the cover for the onboard
kit in the tailgate. Raise the
er.
move the plastic plugs (arrow) and
toward the interior. The tailgate
be released.
en the tailgate. Press the plugs
k into place and close the cover
h the quick-release fasteners.
ition the two side covers and
se them.
181n
390de146
by connecting the jumper cable 5 Then connect the negative terminals.
he positive terminal of the supAttach the cable to either the support
ehicle to the positive terminal
vehicle's negative battery terminal,
ector located in your BMW's enor to a suitable ground on its engine
compartment. The cover of the
or bodywork. Then connect the other
ary terminal for jump starting is
end of the cable to a ground on the
ed with a "+" sign (refer to the
engine or body of the vehicle which is
ation). Remove the cover by
to be started. There is a special nut
g tab. The illustration shows the
on the strut dome of your BMW; refer
nal start support point of the
to the arrow in the illustration.
528i. For the BMW 540i, refer
ngine compartment" on
Follow the same sequence for
146.
connecting the jumper cables if
you assist in jump-starting another vehicle. If you do not, there is a risk of injury caused by spark generation at the
battery.<
wing the vehicle
pressure to the arrow symbol on
over panel to remove.
Car care
Controls
Overview
Use only a nylon towing strap to tow the
vehicle, since the inherent resilience of
this material helps protect both vehicles
from sudden jerking movements.
Technology Repairs
394de088
Screw the tow fitting in until it bottoms firmly. If this is not done, the
threads could be damaged.
Never attach tie-down hooks, chains,
straps, or tow hooks to tie rods, control
arms, or any other part of the vehicle
suspension, as severe damage to these
components will occur, leading to possible accidents.<
Data
ss to tow sockets
Rear:
Apply pressure to the arrow symbol on
the cover panel to remove.
Index
fitting
crew-in tow fitting is stored in the
ard tool kit; be sure that it remains
vehicle at all times. This fitting
igned for installation in the tow
ts located at the front and rear of
hicle, and is intended for towing
oper road surfaces only.
uld not be used to pull a vehicle
deep snow, mud, sand, etc. Alobserve all applicable towing laws
egulations.
183n
g a vehicle with automatic
ission
ake sure that the ignition key
mains in position 1 even when
trical system has failed to presteering lock from engaging.
ering and brakes are without
ssist when the engine is off.
ans that increased effort is
d for steering and braking.<
380us124
the selector lever in position N
ng speed:
45 mph (70 km/h)
ng distance:
95 miles (150 km)
e the ignition key at position 1 to
e that the brake lamps, turn sighorn and windshield wipers reoperative, and to prevent the
ng lock detent from engaging.
h on the hazard-warning system Towing with a commercial
tow truck
rve country-specific regula.
> Do not tow with sling-type equipment
me means of identifying the ve- > Use a wheel lift or flat bed carrier
> Please comply with applicable towing
tow, for instance, place a sign
laws.
ng triangle in the rear window.
Never allow passengers to ride in
a towed vehicle for any reason.<
Index
Data
Technology Repairs
Car care
Controls
Overview
185n
Operation, care
and maintenance
Overview
Controls
Controls and features
Car care
Overview
Advanced technology
Technology Repairs
Owner service procedures
Data
Technical data
Index
Index
bags 188
aptive Transmission Control
ATC) 188
omatic Stability Control plus
raction (ASC+T)/Dynamic
tability Control (DSC) 189
dio reception 190
W active seat 190
ety belt tensioner 191
P sound system 191
erior rearview mirror with
utomatic dimmer 192
n sensor 193
e Pressure Control (RDC) 194
egrated rear suspension 194
vel control system 195
non lamps 195
187n
ATC*
bags located under the marked
nflate and unfold in a matter of a
iseconds. In this process they
ough the rated breaking points
pholstered covers or press them
re process is completed within
s of a second.
ATC
390de334
e the inflation process must be
instantaneous, it is necessarily
anied by a certain amount of
and inflation noise. The gas
he system employs to inflate the
s not dangerous. Smoke
as the gas dissipates.
On vehicles with automatic transmission, Adaptive Transmission Control
(ATC) uses a number of factors to calculate the gear which provides the
maximum efficiency. In this process it
monitors your personal driving style, the
situation in which you are driving, the
condition of the road and the traffic
conditions.
ATC recognizes your personal driving
style from the positions and movements
of the accelerator pedal, deceleration
when braking and lateral acceleration
through curves. Four different shift
characteristics – from comfort-oriented
to performance-oriented – are available
for selection by ATC.
may need some time to become
tomed to this system intervention.
ver, it guarantees optimum drive
and driving stability.
raking intervention may be
mpanied by a certain degree of
Overview
Controls
Car care
system detects an instability in the
e's condition, the braking action
so be directed to help the front
s by the DSC in order to help stathe vehicle.
Technology Repairs
erences in the wheel speeds
, the system counteracts the danwheelspin by reducing torque. If
sary, the system also responds
dditional applications of the
s at the rear wheels.
Data
sion sensors monitor the number
olutions of the wheels. When
ped with DSC, they also monitor
ng angle, lateral acceleration,
pressure and the movement of
hicle around its vertical axis.
189n
Index
C+T/DSC*
BMW active seat*
ersity Antenna system employs
FM antennas integrated within
window to provide three separces for receiving broadcast
An integral processor automatiects the antenna with the best
eption quality at any given time.
e the ongoing antenna selection
is completed within milli-secremains inaudible to the radio
380de676
h numerous factors combine
se inherent limitations on the
on quality available from mobile
specially designed systems can
oyed to minimize their effects:
BMW seats are configured for your
orthopedic well-being. The active seat
is an engineering enhancement of
BMW's seats, designed to ensure less
fatigue during extended trips while
sitting with little movement. The seat is
no longer a passive element between
the road, the running gear and the passenger. Instead, it creates minor and
imperceptible shifts in your weight by
an active change in the contour of the
seat surface. The basic seat position is
not changed as this occurs.
Fluid cushions are located below the
surface of the seat in the seat's
upholstery on the left and right. The
fluid is circulated slowly back and forth
between the two cushions by means of
a pump. This causes a movement of the
spinal column which is nearly unnotice-
Overview
Controls
Car care
Technology Repairs
Data
afety belt tensioner responds to
e frontal collisions by tightening
elts to ensure that occupants
n firmly positioned in their seats.
-pressure system retracts the
e assembly to tension the shoulnd lap belts within fractions of a
d. This reduces the tendency to
under the lap belt.
191n
Index
ety belt tensioner
or rearview mirror with automatic dimmer*
rior rearview mirror with automming feature reduces glare
owing traffic by adapting the inof the reflected images to correo levels of light registered by the
ensors. The mirror reverts to its
ed setting as soon as the light
disappears. One of these senmounted on the front of the mirsing and is designed to monitor
els in the area immediately forthe vehicle. The second sensor
ated within the mirror's glass.
ctronic control system operates
paring the respective levels of
s intensity in front of and behind
The difference provides the bameter used to modulate an
al current and induce chemical
s in a semisolid layer incorpothe lens.
The semisolid reacts chemically to this
electrical current, thus providing infinitely-variable dimming of the mirror
(electrochromic technology).
As a result, it is no longer necessary
to dim the mirror manually, and the
driver can maintain full concentration on
traffic.
Overview
Controls
Car care
Technology Repairs
Data
Index
the system is set to the "Intermitwiper speed, the wipers react
diately – if water is splashed onto
ndshield by vehicles traveling
d of you, for example. As a result,
in sensor provides a contribution
ving safety and comfort.
193n
Integrated rear suspension
ery wheel, there are antennas in
y which receive the signals from
wheels. A central electronics
evaluates the quadruple signals
wards any changes.
390de114
C provides an important contrio driving safety.
The control arms on the patented integrated aluminum rear axle assembly are
not mounted directly on the body. They
are mounted elastically on a chassis
sub-frame which is joined in turn with
elasticity to the vehicle body. The resulting double elastic suspension system
effectively absorbs the forces resulting
from bumps and road surface irregularities.
The compliance rates of the integrated
rear axle assembly's control arm mounts
have been precisely calibrated to help
provide supplementary adjustment in
the tracking angle of the rear wheels
(programmed self-steer effect). The ultimate result is enhanced safety and control under all conditions.
The illustration shows the rear axle of the
sedan. With the lightweight, compact
rear axle of the sport wagon, the shock
absorbers are positioned at an angle.
Xenon lamps make a significant contribution to highway safety since other
highway users, or bicyclists and motorcyclists in the right lane, and pedestrians are more easily detected.
Overview
Controls
Car care
Vehicles with xenon lamps are
equipped with automatic headlamp
range control. As a result, the highway
is always optimally lighted, regardless
of load conditions, and drivers in oncoming traffic are not blinded.
Technology Repairs
enon lamp, an electric arc
ces the filament in order to genertense illumination. A gas mixture
uartz glass tube with metal vapor
ted by a high electric voltage. The
at is generated is then sustained
ower voltage. When the lamp is
d on, a brief period is needed for
ll beam strength to build up. Maxibrightness is attained in approx.
conds.
Xenon lamps provide significantlyimproved visibility, especially during
adverse weather conditions and driving
situations (driving at night in heavy rain
or through road repair areas where
there are no lane markers, for instance).
Data
enon lamps light up the side and
areas of the vehicle with signifimore brightness and uniformity
he traditional halogen lamps.
195n
Index
on lamps*
Operation, care
and maintenance
Overview
Controls
Controls and features
Car care
Overview
Advanced technology
Technology Repairs
Owner service procedures
Data
Technical data
Index
Index
gine specifications 198
mensions – sedan 199
mensions – sport wagon 200
ights – sedan 201
ights – sport wagon 202
pacities 203
ctrical system 204
ve belts 204
197n
BMW 528i/sport wagon
BMW 540i/sport wagon
170.4 (2,793)
6
268.4 (4,398)
8
193
5,500
282
5,400
206 (280)
3,500
324 (440)
3,600
10.2
10.0
3.31 (84.0)
3.31 (84.0)
3.26 (82.7)
3.62 (92.0)
Digital electronic Engine-Management System
Overview
Controls
Car care
Technology Repairs
Data
Index
n inches (mm).
MW 528i 37.1 ft (11.3 m), BMW 540i 37.4 ft (11.4 m)
199n
.
.
.
inches (mm).
W 528i 37.1 ft (11.3 m), BMW 540i 37.4 ft (11.4 m)
4,762 (2,160)
4,817 (2,185)
lbs. (kg)
2,138 (970)
2,381 (1,080)
lbs. (kg)
2,579 (1,170)
2,635 (1,195)
lbs. (kg)
220 (100)
e weight may not be exceeded.
cu ft (l)
16.2 (460)
220 (100)
16.2 (460)
Controls
4,508 (2,045)
4,563 (2,070)
Car care
lbs. (kg)
lbs. (kg)
Technology Repairs
3,748 (1,700)
3,803 (1,725)
Data
on, full tank of fuel, options not included)
lbs. (kg)
3,495 (1,585)
lbs. (kg)
3,549 (1,610)
BMW 540i
Index
BMW 528i
Overview
201n
BMW 528i
n, full tank of fuel, options not included)
lbs. (kg)
3,726 (1,690)
lbs. (kg)
3,781 (1,715)
BMW 540i
–
4,056 (1,840)
lbs. (kg)
lbs. (kg)
4,817 (2,185)
4,872 (2,210)
–
5,093 (2,310)
lbs. (kg)
2,160 (980)
2,381 (1,080)
lbs. (kg)
2,844 (1,290)
2,910 (1,320)
lbs. (kg)
220 (100)
weight may not be exceeded.
cu ft (l)
220 (100)
14.5 – 53.9 (410 –1,525) 14.5 – 53.9 (410 –1,525)
11.1 (10.5)
12.7 (12.0)
– BMW 528i
– BMW 540i
For details: Refer to page 151
6.9 (6.5)
7.9 (7.5)
– BMW 528i
– BMW 540i
"High Performance Synthetic Oil"
for gasoline engines.
Specifications: Refer to page 150
–
Lifetime fluid, no fluid change
required
Controls
For details: Refer to page 148
Car care
(approx. 3.5)
(approx. 6.0)
(approx. 1.0)
Technology Repairs
approx. 3.7
approx. 6.3
approx. 1.1
Data
approx. 18.5 (approx. 70)
Fuel specification: Refer to
approx. 2.1 (approx. 8)
– BMW 528i page 29
approx. 2.6 (approx. 10) – BMW 540i
Index
Notes
Overview
203n
belts
28i:
ump – Alternator –
steering
K x 1555
mpressor
K x 906
40i:
ump – Alternator –
steering
K x 1635
mpressor
K x 1004
You can obtain Original BMW
Parts and Accessories, as well as
professional advice from your authorized BMW center.<
Index
Data
Technology Repairs
Car care
Controls
Overview
205n
Operation, care
and maintenance
Controls
Controls and features
Car care
Overview
Overview
207n
Advanced technology
Technology Repairs
Owner service procedures
Data
Technical data
Index
Index
91, 189
B
Backup lamps 70
Bulb replacement 169
nsmission Battery 176, 204
8
Capacity 204
aner 111
Charging 177
circulatedDischarged 182
Removal and
hes 155
installation 178
control 98 Belts 59
ontrol 80 Beverage holder 109
onitor 56
Blower 101
g, interior
BMW active seat 53, 190
55
BMW comfort seat 51
ndow
BMW sports seat 52
BMW Universal
ated-air
Transmitter 105
01
Bore 198
y Control
Brake system 124
namic
Brake faults 130
(ASC+T)/
Brake fluid 152
89
Brake lamps, bulb
g wheel
replacement 169
Brake pads 23
ssion 71
Breaking-in the
ssion with
brakes 124
Disc brakes 124, 128
ssion, oil
Parking brake 23, 69
Brake-in procedure 124
Brakes, refer to Brake
8
system
8
Breaking in the vehicle 124
Break-resistant security
glass, care 158
Bulb replacement 167
C
Car jack 173
Car keys 35
Car Memory 58
Car phones and telephones,
refer to the seperate
Owner's Manual
Car radio
reception 133, 190
Car telephone 109
Car wash 155
Care, vehicle exterior 156
Care, vehicle interior 158
Cargo loading 120
Caring for the vehicle
finish 157
Catalytic converter 126
Cellular phone 133
Center (high-mount) brake
lamp, bulb
replacement 171
Central locking system,
button 40
Changing a tire 173
Charging the battery 177
Check air pressure 30
Check Control 85
Check engine oil level 149
Child restraint systems 59
Child's seat 59
Child-safety locks 66
Cigarette lighter 110
e 130
lease 36
tion 36
d locking 36
25
water 125
Stability
1, 189
Control
9
y Control
189
Overview
Controls
Car care
Technology Repairs
at
F
Failure of an electrical
accessorry 180
Failure warnings 85
Filler cap cover 28
Filling capacities 203
First-aid kit 27
Fittings, tow-starting and
towing 183
Flashlight 108
Flat tire 134
Footbrake
Footwell lamps 96
Forward/Back adjustment,
seat 50, 52
Front fog lamps 95, 169
bulb replacement 169
Front seat adjustment 50
Frost protection,
radiator 151
Fuel 29
Capacity 203
Consumption indicator 83
Gauge 83
Quality 29
Reserve 203
Fuel filler door release after
electrical fault 180
Fuel tank, capacity 203
Fuses 178
Data
g 90
a
E
Electric power seat 50
Electric power windows 47
Electrical defect
Fuel filler door 180
Sliding/Tilt sunroof 180
Tailgate 181
Electrical heating exterior
mirror 55
Electrical steering wheel
adjustment 54
Elements of operation 16
Emergency operation
Doors 36
Fuel filler door 180
Luggage compartment lid/
Tailgate 41, 181
Sliding/Tilt sunroof 180
Energy Control 83
Engine
Compartment 144
Coolant 151
Specifications 198
Engine oil
Capacity 203
Consumption 149
Grades 150
Level 23
Pressure 23
Error indicators 85
Exterior finish 156
Exterior mirror 54
Electrical heating 55
Index
elds 101
ocessor 192
9
oil 149
4, 128
battery 178
98
94
209n
ssistant,
, 129
ber of the
137
Interior lamps 96
Remote control 38
Interior mirror 55
automatic dimming
feature 55
Interior motion sensor 46
Deactivation 46
Interior rearview mirror
with automatic dimming
feature 55, 192
Interlock 67
Intermittent wiper switch 77
ation 104
2
30, 134
194
18, 20
94
20
witch 77
e 194
c cleaning
on 136
tors 85
J
Jack 173
Jump-starting 182
K
Key Memory 58
Keys 35
Kickdown 72, 75
L
Lashing eye 44, 120
Leather care 159
Length 199
Level control
system 24, 132, 195
Light switch 94
Light-alloy wheels 138, 140
Lighter 110
Lights-on warning 94
Load-securing devices 120
Locking and unlocking the
doors 36, 37
Low beams 94
Bulb replacement 167
Low beams, bulb
replacement 167
Low-fuel warning lamp 83
Lug bolts 174
Lug wrench 174
Luggage compartment
Capacity 201
Lamps 96
Net 44
Luggage compartment lid/
Tailgate 44
Emergency actuation 41
Opening separately 41
Remote control 39
Luggage space 44
Luggage straps 44
Lumbar support 51
M
M Multifunction steering
wheel (MFL) 26
M+S tires 138
Magic Eye 177
Maintenance 84, 154
R
149
val, see the
arranty
ooklet (US
rranty and
Booklet
dels)
or lamp 23
ine 203
77
ter 88
88
d 88
88
erature 88
166
Paint blemishes 156
Paint, care 156
Paintwork, minor
repairs 157
Paintwork, waxing 157
Park Distance Control
(PDC) 90
Parking brake 23, 69
Parking help 90
Parking lamps 95
Bulb replacement 168
Parking, Winter 132
PDC (Park Distance
Control) 90
Playing cassettes
Refer to the Radio Owner's
Manual
Playing CDs
Refer to the Radio Owner's
Manual
Pocket light 108
Controls
Radio reception 133, 190
Radio, refer to the separate
Owner's Manual
Radios 133
Rain sensor 155
RDC (Tire Pressure
Control) 92, 194
Reading lamps 96
Rear view mirror 54
Rear window blind 104
Rear window
defrosting 79, 102
Rear window wiper 79
Rear-seat backrest,
removable 112
Recirculated-air control 101
Reclining seat 50
Refueling 28
Remote control 37
Removable rear-seat
backrest 112
Car care
P
Technology Repairs
162
Pollen filter 103
Power output 198
Power steering 132
Power windows 47
Safety switch 48
Power-slip control
Refer to ASC+T/DSC 91
Pressure, tire 30, 134
Monitoring 92, 194
Data
pment 110
Open luggage compartment
lid/tailgate from
interior 41
Opening and closing
From the inside 38
From the outside 36
Operating range 88
Outside temperature 88
Outside temperature
display 82
Index
em, refer to
Owner's
Overview
211n
nty
klet
4
51
gine 69
Protection
rt
f 48
ctrical
n 180
1
139
2
4
Speaker 109
Special oils 150
Specifications for engine
oil 150
Speed control 80
Speedometer 18, 20
sport wagon
Compartments in the
luggage
compartment 117
Folding down the rear
backrest 116
Lashing eyes 120
Load-securing
devices 120
Luggage
compartment 116
Luggage compartment
lamps, bulb
replacement 172
Opening the rear
window 42
Rear window wiper 79
Rear window wiper, wiper
blade replacement 166
Roll-up cover 116
Securing a load 120
Separation net 116
Ski bag 115
Tail lamp assembly, bulb
replacement 170
Tailgate, manual release
after electrical fault 180
Sports seat 52
Start the engine 68
Starting help 182
Steering 132
Steering wheel heating 103
Steering wheel lock 67
Steering wheel memory 56
Storage 108
Stroke 198
Summer tires 137
Sun visors 55
Symbols 4
T
Tachometer 82
Tail lamps 170
Tail lamps,
bulb replacement 169
Tailgate 44, 181
Convenience opening
mode 38
Manual release after
electrical fault 181
Taillamps 170
Technical Data 198
Technical
modifications 6, 161
Telephone hookup 109
Temperature display, engine
coolant 84
Temperature gauge, outside
temperature 82
Tensioning straps 44
ter 105
76
ior 156
or 158
on
56
om
60
2
ear 102
arked 104
ee 102
are 158
2
ice Guide
an
voir
Washing your car 155
Water on the roads 125
Waxing, paintwork 157
Weights 201
Wheelbase 199
Wheels and tires 137
Width 199
Windows
Convenience
operation 36
Windows, convenience
operating mode 36, 37
Windshield washer fluid
reservoir, capacity 203
Windshield washer nozzle
adjustment 148
Windshield washer reservoir,
filling 148
Windshield wipers 77
Winter driving 130
Winter operation 130
Winter tires 138
Wiper blade
replacement 166
Wiper/Washer system 77
Work in the engine
compartment 143
X
Xenon lamps 94, 168, 195
terior
38
t sensor
8, 46
s 101
132
n 36
Fog lamp, replace the
bulb 169
Footwell lamps, bulb
replacement 172
Fuel filler door release after
electrical fault 180
Fuses 179
G
Glove compartment lamp,
bulb replacement 172
180
oof 180
ion
180
oof 180
50
H
Hazard warning flashers 27
Hazard warning triangle 27
Headlamp covers,
care 155, 167
Help with jump starting 182
High beams, bulb
replacement 167
Hood release 143
I
85
ng and
Indicator lamps 22
Bulb replacement 169
J
Jack 173
Jump starting 182
L
Level control system,
inactive 132
License plate lamp, bulb
replacement 171
Low beams, bulb
replacement 167
Lug wrench 174
Luggage compartment
lamps, bulb
replacement 172
Luggage compartment lid/
Tailgate, unlock in case of
electrical fault 41
M
Maintenance 84, 154
Malfunction displays 85
Manual operation
Doors 36
Fuel filler door 180
Sliding/Tilt sunroof 180
Tailgate 181
O
Oil specifications 150
Onboard tool kit 166
126, 182
ne 67
170
an electrical
p, bulb
171
3
Overview
Controls
Car care
ailgate after
efect 181
mbly, bulb
170
W
Warning lamps 22
Warning messages 85
Work in the engine
compartment 143
Technology Repairs
wiper, wiper
ment 166
fuel filler
electrical
215n
Index
3
b
169
Data
134
ueling
nation
Minimum
or rated performance
or enhanced performance
ne oil
y
pace between the two marks on
pstick corresponds to approx.
S quarts (1 liter).
nflation pressures
sons
sons or 4 plus luggage
Summer
Front
Rear
Winter
Front
Rear
01 41 0 155 012 US En
ble
The Ultimate Driving Machine