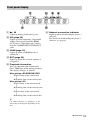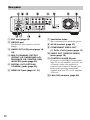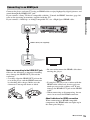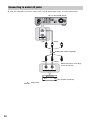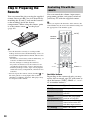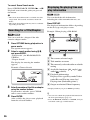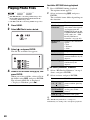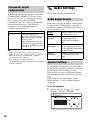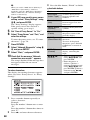
1
4-116-400-11(1) To find out useful hints, tips and information about Sony products and services please visit : www.sony-europe.com/myproduct Operating Instructions Blu-ray Disc / DVD Player BDP-S5000ES 4-116-400-11(1) © 2008 Sony Corporation WARNING To reduce the risk of fire or electric shock, do not expose this apparatus to rain or moisture. To avoid electrical shock, do not open the cabinet. Refer servicing to qualified personnel only. Batteries or batteries installed apparatus shall not be exposed to excessive heat such as sunshine, fire or the like. Keep the external memory away from children. If swallowed, promptly see a doctor. Notice for customers in the United Kingdom and Republic of Ireland A molded plug complying with BS1363 is fitted to this equipment for your safety and convenience. Should the fuse in the plug supplied need to be replaced, a 10 AMP fuse approved by ASTA or BSI to BS1362, (i.e., marked with or mark) must be used. If the plug supplied with this equipment has a detachable fuse cover, be sure to attach the fuse cover after you change the fuse. Never use the plug without the fuse cover. If you should lose the fuse cover, please contact your nearest Sony service station. CAUTION The use of optical instruments with this product will increase eye hazard. As the laser beam used in this Blu-ray Disc/DVD player is harmful to eyes, do not attempt to disassemble the cabinet. Refer servicing to qualified personnel only. This label is located on the laser protective housing inside the enclosure. This appliance is classified as a CLASS 1 LASER product. The CLASS 1 LASER PRODUCT MARKING is located on the laser protective housing inside the enclosure. 2 Disposal of Old Electrical & Electronic Equipment (Applicable in the European Union and other European countries with separate collection systems) This symbol on the product or on its packaging indicates that this product shall not be treated as household waste. Instead it shall be handed over to the applicable collection point for the recycling of electrical and electronic equipment. By ensuring this product is disposed of correctly, you will help prevent potential negative consequences for the environment and human health, which could otherwise be caused by inappropriate waste handling of this product. The recycling of materials will help to conserve natural resources. For more detailed information about recycling of this product, please contact your local Civic Office, your household waste disposal service or the shop where you purchased the product. Disposal of waste batteries (applicable in the European Union and other European countries with separate collection systems) This symbol on the battery or on the packaging indicates that the battery provided with this product shall not be treated as household waste. By ensuring these batteries are disposed of correctly, you will help prevent potentially negative consequences for the environment and human health which could otherwise be caused by inappropriate waste handling of the battery. The recycling of the materials will help to conserve natural resources. In case of products that for safety, performance or data integrity reasons require a permanent connection with an incorporated battery, this battery should be replaced by qualified service staff only. To ensure that the battery will be treated properly, hand over the product at end-of-life to the applicable collection point for the recycling of electrical and electronic equipment. For all other batteries, please view the section on how to remove the battery from the product safely. Hand the battery over to the applicable collection point for the recycling of waste batteries. For more detailed information about recycling of this product or battery, please contact your local Civic Office, your household waste disposal service or the shop where you purchased the product. The manufacturer of this product is Sony Corporation, 1-7-1 Konan Minato-ku Tokyo, 108-0075 Japan. The Authorized Representative for EMC and product safety is Sony Deutschland GmbH, Hedelfinger Strasse 61, 70327 Stuttgart, Germany. For any service or guarantee matters please refer to the addresses given in separate service or guarantee documents. Precautions • This unit operates on 220 V – 240 V AC, 50 Hz/60 Hz. Check that the unit’s operating voltage is identical with your local power supply. • To prevent fire or shock hazard, do not place objects filled with liquids, such as vases, on the apparatus. • Install this unit so that the mains lead can be unplugged from the wall socket immediately in the event of trouble. Notes About the Discs • To keep the disc clean, handle the disc by its edge. Do not touch the surface. Dust, fingerprints, or scratches on the disc may cause it to malfunction. • Do not expose the disc to direct sunlight or heat sources such as hot air ducts, or leave it in a car parked in direct sunlight as the temperature may rise considerably inside the car. • After playing, store the disc in its case. • Clean the disc with a cleaning cloth. Wipe the disc from the centre out. Precautions On safety • Do not use solvents such as benzine, thinner, commercially available disc/ lens cleaners, or anti-static spray intended for vinyl LPs. • If you have printed the disc’s label, dry the label before playing. • Do not use the following discs. – A lens cleaning disc. – A disc that has a nonstandard shape (e.g., card, heart). – A disc with a label or sticker on it. – A disc that has cellophane tape or sticker adhesive on it. • Do not resurface the playing side of a disc to remove surface scratches. • To prevent fire or shock hazard, do not place objects filled with liquids, such as vases, on the player, or place the player near water, such as near a bathtub or shower room. Should any solid object or liquid fall into the cabinet, unplug the player and have it checked by qualified personnel before operating it any further. • Do not touch the AC power cord (mains lead) with wet hands. Doing so may cause an electric shock. On placement • Place the player in a location with adequate ventilation to prevent heat build-up in the player. • Do not place the player on a soft surface such as a rug that might block the ventilation holes. • Do not install this player in a confined space, such as a bookshelf or similar unit. • Do not place the player in a location near heat sources, or in a place subject to direct sunlight, excessive dust, or mechanical shock. • If the player is brought directly from a cold to a warm location, or is placed in a very damp room, moisture may condense on the lenses inside the player. Should this occur, the player may not operate properly. In this case, remove the disc and leave the player turned on for about half an hour until the moisture evaporates. • Do not install the player in an inclined position. It is designed to be operated in a horizontal position only. • Keep the player and the discs away from equipment with strong magnets, such as microwave ovens, or large loudspeakers. ,continued 3 • Do not place heavy or unstable objects on the player. • Do not place any objects other than discs on the disc tray. Doing so may cause damage to the player or the object. • When you move the player, take out any discs. If you don’t, the disc may be damaged. • When you move the player, disconnect the AC power cord (mains lead) and all other cables from the player. On power sources • The player is not disconnected from the AC power source (mains) as long as it is connected to the wall outlet, even if the player itself has been turned off. • If you are not going to use the player for a long time, be sure to disconnect the player from the wall outlet. To disconnect the AC power cord (mains lead), grasp the plug itself; never pull the cord. • Observe following points to prevent the AC power cord (mains lead) being damaged. Do not use the AC power cord (mains lead) if it is damaged, as doing so may result in an electric shock or fire. – Do not pinch the AC power cord (mains lead) between the player and wall, shelf, etc. – Do not put anything heavy on the AC power cord (mains lead) or pull on the AC power cord (mains lead) itself. On adjusting volume Do not turn up the volume while listening to a section with very low level inputs or no audio signals. If you do, the speakers may be damaged when a peak level section is played. On cleaning Clean the cabinet, panel, and controls with a soft cloth slightly moistened with a mild detergent solution. Do not use any type of abrasive pad, scouring powder or solvent such as alcohol or benzine. On cleaning discs, disc/ lens cleaners Do not use cleaning discs or disc/lens cleaners (including wet or spray types). These may cause the apparatus to malfunction. On replacement of parts In the events that this player is repaired, repaired parts may be collected for reuse or recycling purposes. Copyrights and Trademarks • This product incorporates copyright protection technology that is protected by U.S. patents and other intellectual property rights. Use of this copyright protection technology must be authorized by Macrovision, and is intended for home and other limited viewing uses only unless otherwise authorized by Macrovision. Reverse engineering or disassembly is prohibited. • “AVCHD” and the “AVCHD” logo are trademarks of Matsushita Electric Industrial Co., Ltd. and Sony Corporation. • Java and all Java-based trademarks and logos are trademarks or registered trademarks of Sun Microsystems, Inc. • , “XMB,” and “xross media bar” are trademarks of Sony Corporation and Sony Computer Entertainment Inc. • This product incorporates High-Definition Multimedia Interface (HDMI™) technology. HDMI, the HDMI logo and High-Definition Multimedia Interface are trademarks or registered trademarks of HDMI Licensing LLC. • “Blu-ray Disc” is a trademark. • “Blu-ray Disc,” “DVD+RW,” “DVD-RW,” “DVD+R,” “DVD-R,” “DVD VIDEO,” and “CD” logos are trademarks. • “BD-Live” and “BonusView” are trademarks of Blu-ray Disc Association. • “x.v.Colour” and “x.v.Colour” logo are trademarks of Sony Corporation. • “BRAVIA Sync” is a trademark of Sony Corporation. • “PhotoTV HD” and the “PhotoTV HD” logo are trademarks of Sony Corporation. • Other system and product names are generally trademarks or registered trademarks of the manufacturers. ™ and ® marks are not indicated in this document. IMPORTANT NOTICE Caution: This player is capable of holding a still video image or on-screen display image on your television screen indefinitely. If you leave the still video image or onscreen display image displayed on your TV for an extended period of time you risk permanent damage to your television screen. Plasma display panel televisions and projection televisions are susceptible to this. If you have any questions or problems concerning your player, please consult your nearest Sony dealer. 4 About this manual • In this manual, “disc” is used as a general reference for the BDs, DVDs, or CDs unless otherwise specified by the text or illustrations. • Icons, such as BD , listed at the top of each explanation indicate what kind of media can be used with the function being explained. For details, see “Playable Discs” (page 65). • Instructions in this manual describe the controls on the remote. You can also use the controls on the player if they have the similar symbols as those on the remote. • The on-screen display illustrations used in this manual may not match the graphics displayed on your TV screen. • NEED-to-know information (to prevent incorrect operation) is listed under the b icon. NICE-to-know information (tips and other useful information) is listed under the z icon. 5 Table of Contents WARNING . . . . . . . . . . . . . . . . . . . . . . . . . . . . . . . . . . . . . . . . . . . . . . . . . . . . 2 Precautions . . . . . . . . . . . . . . . . . . . . . . . . . . . . . . . . . . . . . . . . . . . . . . . . . . . 3 Guide to Parts and Controls . . . . . . . . . . . . . . . . . . . . . . . . . . . . . . . . . . . . . . 8 Hookups and Settings Hooking Up the Player . . . . . . . . . . . . . . . . . . . . . . . . . . . . . . . . . . . . . . . . . 13 Step 1: Connecting to Your TV . . . . . . . . . . . . . . . . . . . . . . . . . . . . . . . . . . . 14 Connecting to an HDMI jack . . . . . . . . . . . . . . . . . . . . . . . . . . . . . . . . . 15 About the BRAVIA Sync features (for HDMI connections only) . . . . . . 16 Connecting to component video jacks (Y, Pb/Cb, Pr/Cr) . . . . . . . . . . . 17 Connecting to an audio/video or S VIDEO jack . . . . . . . . . . . . . . . . . . 18 Step 2: Connecting to Your AV Amplifier (Receiver) . . . . . . . . . . . . . . . . . . . 19 Connecting to an HDMI jack . . . . . . . . . . . . . . . . . . . . . . . . . . . . . . . . . 21 Connecting to digital jacks (OPTICAL/COAXIAL) . . . . . . . . . . . . . . . . . 22 Connecting to 7.1 channel jacks . . . . . . . . . . . . . . . . . . . . . . . . . . . . . . 23 Connecting to audio L/R jacks . . . . . . . . . . . . . . . . . . . . . . . . . . . . . . . 24 Step 3: Inserting the External Memory . . . . . . . . . . . . . . . . . . . . . . . . . . . . . 25 Step 4: Connecting to the Network . . . . . . . . . . . . . . . . . . . . . . . . . . . . . . . . 26 When connecting to a broadband router directly . . . . . . . . . . . . . . . . . 26 When connecting via a wireless LAN router . . . . . . . . . . . . . . . . . . . . . 27 Step 5: Connecting the Mains Lead . . . . . . . . . . . . . . . . . . . . . . . . . . . . . . . 27 Step 6: Preparing the Remote . . . . . . . . . . . . . . . . . . . . . . . . . . . . . . . . . . . . 28 Controlling TVs with the remote . . . . . . . . . . . . . . . . . . . . . . . . . . . . . . 28 Step 7: Easy Setup . . . . . . . . . . . . . . . . . . . . . . . . . . . . . . . . . . . . . . . . . . . . 29 Playback Playing BDs/DVDs . . . . . . . . . . . . . . . . . . . . . . . . . . . . . . . . . . . . . . . . . . . . 32 Using the BD’s or DVD’s menu . . . . . . . . . . . . . . . . . . . . . . . . . . . . . . . 34 Enjoying BonusView/BD-Live . . . . . . . . . . . . . . . . . . . . . . . . . . . . . . . . 35 Searching for a scene quickly (Scene Search) . . . . . . . . . . . . . . . . . . . 35 Searching for a Title/Chapter . . . . . . . . . . . . . . . . . . . . . . . . . . . . . . . . 36 Displaying the playing time and play information . . . . . . . . . . . . . . . . . 36 Adjusting pictures and sound for videos . . . . . . . . . . . . . . . . . . . . . . . . 37 Playing CDs . . . . . . . . . . . . . . . . . . . . . . . . . . . . . . . . . . . . . . . . . . . . . . . . . . 39 Playing Photo Files . . . . . . . . . . . . . . . . . . . . . . . . . . . . . . . . . . . . . . . . . . . . 40 Settings and Adjustments Using the Settings Displays . . . . . . . . . . . . . . . . . . . . . . . . . . . . . . . . . . . . . . 42 Network Update . . . . . . . . . . . . . . . . . . . . . . . . . . . . . . . . . . . . . . . . . . . . . . . 43 Video Settings . . . . . . . . . . . . . . . . . . . . . . . . . . . . . . . . . . . . . . . . . . . . . . . . 44 Audio Settings . . . . . . . . . . . . . . . . . . . . . . . . . . . . . . . . . . . . . . . . . . . . . . . . 48 BD/DVD Viewing Settings . . . . . . . . . . . . . . . . . . . . . . . . . . . . . . . . . . . . . . . 53 Photo Settings . . . . . . . . . . . . . . . . . . . . . . . . . . . . . . . . . . . . . . . . . . . . . . . . 55 System Settings . . . . . . . . . . . . . . . . . . . . . . . . . . . . . . . . . . . . . . . . . . . . . . 56 Network Settings . . . . . . . . . . . . . . . . . . . . . . . . . . . . . . . . . . . . . . . . . . . . . . 57 Easy Setup . . . . . . . . . . . . . . . . . . . . . . . . . . . . . . . . . . . . . . . . . . . . . . . . . . 59 Resetting . . . . . . . . . . . . . . . . . . . . . . . . . . . . . . . . . . . . . . . . . . . . . . . . . . . . 59 6 Additional Information Troubleshooting . . . . . . . . . . . . . . . . . . . . . . . . . . . . . . . . . . . . . . . . . . . . . . . 60 Self-Diagnosis Function . . . . . . . . . . . . . . . . . . . . . . . . . . . . . . . . . . . . . . . . . 64 Playable Discs . . . . . . . . . . . . . . . . . . . . . . . . . . . . . . . . . . . . . . . . . . . . . . . . 65 Video Output Resolution . . . . . . . . . . . . . . . . . . . . . . . . . . . . . . . . . . . . . . . . 68 Audio Output Signals . . . . . . . . . . . . . . . . . . . . . . . . . . . . . . . . . . . . . . . . . . . 69 Specifications . . . . . . . . . . . . . . . . . . . . . . . . . . . . . . . . . . . . . . . . . . . . . . . . . 70 Language Code List . . . . . . . . . . . . . . . . . . . . . . . . . . . . . . . . . . . . . . . . . . . . 71 Parental Control/Area Code . . . . . . . . . . . . . . . . . . . . . . . . . . . . . . . . . . . . . . 71 Terms and Conditions of Use and End User License Agreement . . . . . . . . . 72 Glossary . . . . . . . . . . . . . . . . . . . . . . . . . . . . . . . . . . . . . . . . . . . . . . . . . . . . . 74 Index . . . . . . . . . . . . . . . . . . . . . . . . . . . . . . . . . . . . . . . . . . . . . . . . . . . . . . . 77 Before operating the player, please read “Terms and Conditions of Use and End User License Agreement” (page 72). 7 A Z (open/close) (page 32) Guide to Parts and Controls For more information, see the pages in parentheses. Remote Opens or closes the disc tray. THEATRE (page 16) Switches to the optimum video mode for watching movies automatically. When connected with an AV amplifier (receiver) using the HDMI cable, the speaker output also switches automatically. Press the button again to return to the original setting. When connected with a Theatre Modecompatible TV using the HDMI cable, the TV’s video mode switches to Theatre Mode. b The THEATRE button functions only when connected to a Theatre Mode-compatible TV. TV [/1 (on/standby) (page 28) Turns on the TV, or sets to standby mode. [/1 (on/standby) (page 29) Turns on the player, or sets to standby mode. B Number buttons (page 36, 58) Enters the title/chapter numbers, etc. CLEAR Clears the entry field. C TIME (page 11) Displays the elapsed/remaining playback time in the front panel display. Each time you press the button, the display switches between elapsed playback time and remaining playback time. AUDIO (page 53) Selects the language track when multilingual tracks are recorded on BDROMs/DVD VIDEOs. Selects the sound track on CDs. SUBTITLE (page 53) Selects the subtitle language when multilingual subtitles are recorded on BDROMs/DVD VIDEOs. ANGLE Number 5, AUDIO, PROG +, and N buttons have a tactile dot. Use the tactile dot as a reference when operating the player. 8 Switches to other viewing angles when multi-angles are recorded on BD-ROMs/ DVD VIDEOs. DISPLAY (page 36) Displays the playback information on the screen. D Colour buttons (red/green/ yellow/blue) Short cut keys for selecting items on some BD’s menus (can also be used for BD’s Java interactive operations). E TOP MENU (page 34) When you press and hold the button, fast forward/fast reverse continues at the selected speed until you release the button. * Search speed does not change when playing CDs. Speed multiple values are approximate. Opens or closes the BD’s or DVD’s Top Menu. – To resume normal playback, press N. POP UP/MENU (page 34) Starts or re-starts playback. Resumes playback from the point where you press x (Resume Play). Plays a slideshow when a disc containing JPEG image files is inserted. Opens or closes the BD-ROM’s Pop-up Menu, or the DVD’s menu. OPTIONS (page 34, 40) The options menu that can be selected appears on the screen. HOME (page 42) Enters the player’s home menu. Exits the home menu when a CD is inserted. N (play) (page 32) SCENE SEARCH (page 35) Switches to Scene Search mode that lets you move quickly between scenes within the title currently being played back. X (pause) RETURN Pauses or re-starts playback. Returns to the previous display. x (stop) </M/m/, Stops playback and remembers the stop point (resume point) (page 33, 39). The resume point for a title/track is the last point you played or the last photo for a photo folder. Moves the highlight to select a displayed item. Centre button (ENTER) Enters the selected item. F ./> (previous/next) Skips to the previous/next chapter, track, or file. To go to the beginning of the previous track, press . twice. G For TVs operable with the following buttons, see page 28. % (muting) Mutes the TV sound. 2 (volume) +/– / (instant replay/instant advance) Adjusts the TV volume. Replays the scene/briefly fast forwards the scene. Selects the TV channels up and down. m/M (fast reverse/fast forward) Switches between TV and other input sources. Fast reverses/fast forwards the disc when pressed during playback. Each time you press the button, search speed changes as follows*: Playback direction M1 (×10) t M2 (×30) t M3 (×120) Reverse direction n (×1) t m1 (×10) t m2 (×30) t m3 (×120) PROG (programme) +/– t (input select) (light) Lights up the 5 and 6 buttons (except </M/m/, and ENTER) and is useful for operation in the dark. ,continued 9 Front panel A [/1 (on/standby) (page 29) Turns on the player, or sets to standby mode. B 24P indicator (page 46) Lights up when outputting 1080p/24 Hz video signals of BD-ROMs. HD AUDIO indicator Lights up in the following cases when a BD is inserted. – when the audio codec of the title being played is Dolby Digital Plus, Dolby TrueHD, DTS-HD High Resolution, or DTS-HD Master Audio. – when the audio codec of the title being played is LPCM 2ch 192 kHz or LPCM 3ch or higher. SBM (Super Bit Mapping) indicator Lights up when “SBM” is set to “On” (default) in the “Video Settings” setup and video signal is output from the HDMI OUT jack (page 47). C Remote sensor (page 28) D Disc tray (page 32) E Blu-ray Disc indicator Lights up when a BD is recognised. z When the player is turned on for the first time, the Blu-ray Disc indicator lights up, then turns off when Easy Setup is complete. 10 F Front panel display (page 11) G A (open/close) (page 32) Opens or closes the disc tray. H N (play) (page 32) Starts playback. The indicator lights up during playback. I X (pause) (page 32) Pauses playback. The indicator lights up during pause. J x (stop) (page 32) Stops playback. To lock the disc tray (Child Lock) You can lock the disc tray to prevent it being opened by mistake. When the player is turned on, hold down X on the player for more than 10 seconds until “LOCKED” appears in the front panel display. The disc tray is locked. To unlock the disc tray, hold down X on the player until “UNLOCK” appears in the front panel display. Front panel display A N, X Lights up during playback or pause. B HD (page 45) Lights up when outputting 720p/1080i/ 1080p video signals from the HDMI OUT jack or 720p/1080i video signals from the COMPONENT VIDEO OUT jacks. F Network connection indicator Lights up when downloading the player’s software. For details on downloading the player’s software, see page 43. C HDMI (page 15) Lights up when an HDMI device is connected. D EXT (page 25) Lights up when the external memory is recognised. E Playback information You can check the time information. Press TIME repeatedly during playback. The display changes as follows. When playing a BD-ROM/DVD VIDEO Elapsed time of the current title r Remaining time of the current title When playing a CD Elapsed time of the current track r Remaining time of the current track r Elapsed time of the current disc r Remaining time of the current disc z “T” (Title or Track), “C” (Chapter), or “D” (Disc) may be displayed depending on the disc. ,continued 11 Rear panel A EXT slot (page 25) B RS232C port The RS232C port cannot be used in Europe. C AUDIO OUT (L/R) jacks (page 18, 24) D MULTI CHANNEL OUTPUT (FRONT L/R, SURROUND L/R, SUR BACK L/R, CENTER, SUB WOOFER) jacks (page 23) E DIGITAL OUT (OPTICAL/ COAXIAL) jacks (page 22) F HDMI OUT jack (page 15, 21) G Ventilation holes The ventilation fan is inside the player. H AC IN terminal (page 27) I COMPONENT VIDEO OUT (Y, PB/CB, PR/CR) jacks (page 17) J VIDEO OUT (VIDEO/S VIDEO) jacks (page 18) K CONTROL S IN/IR IN jack If you have a CONTROL S-compatible Sony TV or AV amplifier (receiver), use a Control S cable (not supplied) to connect to the Control S (output) jack. Refer to the operating instructions supplied with your TV or AV amplifier (receiver). L LAN (100) terminal (page 26) 12 Hooking Up the Player Follow steps 1 through 7 to hook up and adjust the settings of the player. Do not connect the mains lead until you reach “Step 5: Connecting the Mains Lead” (page 27). Hookups and Settings Check that you have the following items. • Audio/video cable (phono plug ×3) (1) • Mains lead (1) • External memory (1) • Remote commander (remote) (1) • R6 (size AA) batteries (2) Hookups and Settings 13 Step 1: Connecting to Your TV About video/HDMI OUT jacks The player has the following video jacks. Connect the player to your TV according to the input jack on your TV. When connecting the player to your TV using the HDMI cable, you can enjoy high quality digital pictures and sound through the HDMI OUT jack. Jack type High quality Video resolution Hookup Digital High Definition: See “Connecting to an 1080/24p, 1080p, HDMI jack” (page 15). 1080i, 720p Standard Definition: 576p/480p, 576i/ 480i Analogue High Definition: 1080i, 720p Standard Definition: 576p/480p, 576i/ 480i See “Connecting to component video jacks (Y, Pb/Cb, Pr/Cr)” (page 17). Standard Definition: See “Connecting to an 576i/480i audio/video or S VIDEO jack” (page 18). Standard Definition: See “Connecting to an 576i/480i audio/video or S VIDEO jack” (page 18). Standard quality 14 b To connect to a TV with DVI input • Plug in cables securely to prevent unwanted noise. • Refer to the instructions supplied with the components to be connected. • You cannot connect this player to a TV that does not have a video input jack. • Do not apply too much pressure on the connecting cables. Pushing against the cabinet wall, etc., may damage the cable. Use an HDMI-DVI converter cable (not supplied). The DVI jack will not accept any audio signals, so you have to use another audio connection in addition to this connection (page 19). Furthermore, you cannot connect the HDMI OUT jack to DVI jacks that are not HDCP compliant (e.g., DVI jacks on PC displays). Connecting to an HDMI jack Blu-ray Disc/DVD player Hookups and Settings Connect the player and your TV using an HDMI cable to enjoy high quality digital pictures and sound through the HDMI OUT jack. If you connect a Sony TV that is compatible with the “Control for HDMI” function (page 16), refer to the operating instructions supplied with the TV. If you connect a 1080/24p- or 1080p-compatible TV, use a High Speed HDMI cable. HDMI cable (not supplied) TV Notes on connecting to the HDMI OUT jack Observe the following as improper handling may damage the HDMI OUT jack and the connector. • Carefully align the HDMI OUT jack on the rear of the player and the HDMI connector by checking their shapes. Make sure the connector is not upside down or tilted. • Be sure to disconnect the HDMI cable when moving the player. • If you place the player on a cabinet with the HDMI cable connected, do not apply too much pressure to the cabinet wall. It may damage the HDMI OUT jack or the HDMI cable. • When connecting or disconnecting, do not screw in or rotate the HDMI connector. About indicators for HDMI connection When connecting an HDMI compatible component, the HDMI indicator lights up in the front panel display. ,continued 15 b • Not all high definition television sets are fully compatible with this product and may cause artifacts to be displayed in the picture. In the case of 480i/576i/480p/576p/720p/1080i/1080p scan picture problems, it is recommended that the user switch the connection to the VIDEO OUT VIDEO or S VIDEO jack. If there are questions regarding our TV set compatibility with this model 480i/576i/480p/576p/720p/1080i/1080p Blu-ray Disc/DVD player, please contact our customer service centre. • If the picture is not clear, not natural or not to your satisfaction, change the video output resolution in step 3 of “Output Video Format” under the “Video Settings” setup (page 45). • Be sure to use only an HDMI cable that bears the HDMI logo. About the BRAVIA Sync features (for HDMI connections only) By connecting Sony components that are compatible with the “Control for HDMI” function with an HDMI cable (not supplied), operation is simplified as below: • One-Touch Play With one touch of the following buttons, the connected TV turns on and the input selector on the TV is switched to the player automatically. – [/1 – HOME: The home menu appears automatically (page 42). – N: Playback starts automatically (page 33). • System Power-Off When you turn off the TV using the power button on the TV’s remote, the player and HDMI-compatible components turn off automatically. • Theatre When you press THEATRE, the player automatically switches to the optimum video mode for watching movies. When connected with an AV amplifier (receiver) using the HDMI cable, the speaker output also switches automatically. When connected with a Theatre Mode-compatible TV using the HDMI cable, the TV’s video mode switches to Theatre Mode. Press the button again to return to the original setting. 16 • Language Follow When you change the language for the onscreen display on your TV, the player’s language for the on-screen display is also changed after turning the player off and on. To prepare for the BRAVIA Sync features Set “Control for HDMI” to “On” in the “System Settings” setup (page 56). For details on settings of your TV or other connected components, refer to the operating instructions supplied with the TV or components. z • When connecting the Sony TV that is compatible with the “Control for HDMI” Easy Setting function using the HDMI cable, the “Control for HDMI” setting of the player automatically switches to “On” if the “Control for HDMI” setting on the connected TV is set to “On.” Refer to the operating instructions supplied with the TV. • When connecting the Sony TV that is compatible with the BRAVIA Sync features using the HDMI cable, you can control the basic functions of the player with the TV’s remote if the “Control for HDMI” setting on the connected TV is set to “On.” Refer to the operating instructions supplied with the TV. b Depending on the connected component, the “Control for HDMI” function may not work. Refer to the operating instructions supplied with the component. Connecting to component video jacks (Y, PB/CB, PR/CR) Connect the COMPONENT VIDEO OUT jacks of the player and your TV using a component video cable or three video cables (not supplied) of the same kind and length. You can enjoy high-quality pictures. Be sure to connect to the AUDIO OUT (L/R) jacks using the audio/video cable. (green) (red) (blue) (red) (white) Audio/video cable (supplied) (red) Hookups and Settings Blu-ray Disc/DVD player (white) Component video cable (not supplied) (green) (blue) (red) Match the colour of the plug to that of the jack. Match the colour of the plug to that of the jack. TV : Signal flow b When you connect the player and TV using a component video cable, disconnect the video plug (yellow) of the audio/video cable. ,continued 17 Connecting to an audio/video or S VIDEO jack Connect the VIDEO OUT (VIDEO) jack and AUDIO OUT (L/R) jacks of the player and your TV using the audio/video cable. You can enjoy standard quality pictures and sound. Blu-ray Disc/DVD player (red) (white) (yellow) or Audio/video cable (supplied) (red) (white) S-video cable (not supplied) (yellow) Match the colour of the plug to that of the jack. TV : Signal flow b When you connect the player and TV using an Svideo cable, disconnect the video plug (yellow) of the audio/video cable. 18 Step 2: Connecting to Your AV Amplifier (Receiver) To enjoy Source AV amplifier (receiver) Cable (hookup) 7.1 channel audio Dolby TrueHD Dolby TrueHD*1compatible AV amplifier (receiver) HDMI cable*3 (page 21) or 7.1 channel audio cable*4 (page 23) Dolby Digital Plus Dolby Digital Plus*1compatible AV amplifier (receiver) Hookups and Settings AV amplifier (receiver) and cable requirements differ as follows, depending on the source. To enjoy BD high quality sound, set “BD Audio Setting” to “Direct” in the “Audio Settings” setup (page 51). To enjoy secondary audio and interactive audio, set “BD Audio Setting” to “Mix” in the “Audio Settings” setup (page 51). DTS-HD (DTS- DTS-HD*2-compatible AV amplifier HD High Resolution and (receiver) DTS-HD Master Audio) 5.1 channel audio LPCM 7.1 channel LPCM*2compatible AV amplifier (receiver) Dolby Digital Dolby Digital*1compatible AV amplifier (receiver) DTS DTS*2-compatible AV amplifier (receiver) Stereo audio — Stereo audiocompatible AV amplifier (receiver) *4 *1 *2 *3 When “BD Audio Setting” is set to “Direct” in the “Audio Settings” setup, audio signals decoded by the AV amplifier (receiver) are output. HDMI cable (page 21), Optical/coaxial digital cable (page 22), or 7.1 channel audio cable (page 23) Stereo audio cable (page 24) When “BD Audio Setting” is set to “Direct” in the “Audio Settings” setup, the HD Audio (Dolby Digital Plus, Dolby TrueHD, DTS-HD High Resolution Audio, and DTS-HD Master Audio) signal decoded by the player is output. When “BD Audio Setting” is set to “Mix” in the “Audio Settings” setup, the DTS-HD audio is output as 5.1 channel DTS-decoded audio. z • The supported audio formats of BDs/DVDs are specified on the back of each package. • For details on audio output signals, see “Audio Output Signals” on page 69. ,continued 19 b • When you connect the player to your AV amplifier (receiver) using an HDMI cable, do one of the following: – Connect your AV amplifier (receiver) to your TV using an HDMI cable, or – Connect the player to your TV using a video cable other than an HDMI cable (component video cable, S-video cable, or audio/video cable). • If you connect a component that does not conform to the selected audio signal, a loud noise (or no sound) will come from the speakers, which could damage your ears or the speakers. 20 Connecting to an HDMI jack If your AV amplifier (receiver) has an HDMI input, you can enjoy surround sound. If you connect a Sony AV amplifier (receiver) that is compatible with the “Control for HDMI” function (page 16), refer to the operating instructions supplied with the AV amplifier (receiver). Hookups and Settings Blu-ray Disc/DVD player HDMI cable (not supplied) AV amplifier (receiver) HDMI cable (not supplied) TV z Set the following settings and you can enjoy higher quality sound from the connected AV amplifier (receiver). – Set “Audio Output Priority” to “HDMI” in the “Audio Settings” setup (page 48). – Set “Audio (HDMI)” to “Auto” in the “Audio Settings” setup (page 51). – Set “BD Audio Setting” to “Direct” in the “Audio Settings” setup (page 51). b Not all HDMI-compatible AV amplifiers (receivers) accept 8ch Linear PCM signals. Refer as well to instructions supplied with the connected AV amplifier (receiver). ,continued 21 Connecting to digital jacks (OPTICAL/COAXIAL) If your AV amplifier (receiver) has a Dolby*1 Digital, Dolby Pro Logic, or DTS*2 decoder and a digital input jack, you can enjoy Dolby Digital (5.1ch), Dolby Pro Logic (4.0ch), or DTS (5.1ch) surround effects. Blu-ray Disc/DVD player or Coaxial digital cable (not supplied) Optical digital cable (not supplied) AV amplifier (receiver) : Signal flow 1 Connect the digital jack of the player and your AV amplifier (receiver). 2 Set “Audio Output Priority” to “Coaxial/Optical” in the “Audio Settings” setup (page 48). 3 Make the appropriate settings in “Dolby Digital” and “DTS” under the “Audio Settings” setup (page 51). Otherwise, no sound or a loud noise will come from your speakers. 22 Connecting to 7.1 channel jacks If your AV amplifier (receiver) has 7.1 channel inputs, you can enjoy multi channel surround sound. Blu-ray Disc/DVD player Hookups and Settings Stereo audio cable (not supplied) Stereo audio cable (not supplied) Stereo audio cable (not supplied) Monaural audio cable (not supplied) Monaural audio cable (not supplied) AV amplifier (receiver) : Signal flow 1 Connect the 7.1 channel jacks of the player and your AV amplifier (receiver). 2 Set “Audio Output Priority” to “Multi Channel Analogue” in the “Audio Settings” setup (page 48). 3 Make the appropriate settings in “Speaker Settings” under the “Audio Settings” setup (page 48). ,continued 23 Connecting to audio L/R jacks If your AV amplifier (receiver) only has L and R audio input jacks, use this connection. Blu-ray Disc/DVD player (red) (white) Audio/video cable (supplied) (red) (white) Match the colour of the plug to that of the jack. AV amplifier (receiver) : Signal flow 24 b Step 3: Inserting the External Memory Insert the external memory in the V direction into the EXT slot as far as it will go. Check that the EXT indicator lights up in the front panel display when turning the player on. Rear of the player External memory (supplied) With the terminal side up Hookups and Settings To enjoy additional content (such as BonusView/BD-Live) on certain Blu-ray Disc titles, you will need to use the supplied external memory. Insert the external memory device (1 GB or larger USB flash memory, such as Sony USM1GH) into the EXT slot as your local storage. • Do not connect anything other than a USB flash memory, such as an HDD, etc., to the EXT slot. • Insert the external memory straight. If you force the external memory into the slot, this will cause damage to both the external memory and the player. • Keep the external memory away from small children to prevent them from accidentally swallowing the external memory. • Do not apply too much pressure to the external memory in the slot, as it may cause a malfunction. • We recommend use of the Sony USM1GH available as of April 2008. • Other USB flash devices may support this function. However we cannot guarantee compatibility with all USB flash memories. • When inserting a USB flash memory other than Sony USM1GH, check the insertion direction before inserting it. • Depending on the USB flash memory, it may stick out from the EXT slot. Do not force into the slot or apply pressure to the protruding portion of the USB flash memory. • To avoid data corruption or damage to the external memory, turn the player off when inserting or removing the external memory. • When the EXT indicator does not light up, turn the player off, remove and re-insert the external memory, then turn the player on again. • Do not insert the external memory that contains photo or music files to avoid corrupting the external memory data. To remove the external memory 1 2 Press [/1 to turn the player off. Pull out the external memory from the EXT slot. 25 Step 4: Connecting to the Network When connecting to a broadband router directly Blu-ray Disc/DVD player Connect the LAN (100) terminal of the player to your Internet source using a network cable to update the player’s software. You can also enjoy the BD-Live function (page 35). 1 Connect the LAN (100) terminal of the player to your Internet source. Methods to connect to your Internet source include: • Connecting to a broadband router directly • Connecting via a wireless LAN router Refer also to the instructions supplied with the broadband router or the wireless LAN router. 2 Make the appropriate settings in “Internet Settings” under the “Network Settings” setup (page 57). To update the player’s software using the network See “Network Update” (page 43) and “Software Update Notification” (page 56). b Do not connect a phone line to the LAN (100) terminal, as it may cause a malfunction. Network cable (not supplied) Broadband router To PC Network cable (not supplied) ADSL modem/ Cable modem To enjoy the BD-Live function See “Enjoying BonusView/BD-Live” (page 35). b To enjoy the BD-Live function, we recommend using an Internet connection with an effective speed of 1 Mbps or greater, depending on your connection environment and network condition. Internet About network (LAN) cables Depending on the modem or router, the type of network (LAN) cable, straight or crossing, differs. For details on the network (LAN) cables, refer to the operating instructions supplied with the modem or router. Using a shielded interface cable (network cable), straight or crossing, is recommended. 26 When connecting via a wireless LAN router Blu-ray Disc/DVD player Step 5: Connecting the Mains Lead 1 to AC IN Hookups and Settings After all of the other connections are complete, connect the supplied mains lead to the AC IN terminal of the player. Then plug the player and TV mains leads (AC power cords) into the mains. 2 to mains Network cable (not supplied) Ethernet/wireless LAN media converter To PC Wireless LAN router (access point) Network cable (not supplied) ADSL modem/ Cable modem Internet b Do not connect the LAN terminal of the player to the LAN terminal of the PC. 27 Step 6: Preparing the Remote You can control the player using the supplied remote. Insert two R6 (size AA) batteries by matching the 3 and # ends on the batteries to the markings inside the battery compartment. When using the remote, point it at the remote sensor on the player (page 10). Controlling TVs with the remote You can control the volume, input source, programme position, and power switch of your Sony TV with the supplied remote. b When you replace the batteries of the remote, the code number may be reset to the default setting. Set the appropriate code number again. TV [/1 Number buttons b • Use the batteries correctly to avoid possible leakage and corrosion. Should leakage occur, do not touch the liquid with bare hands. Observe the following: – Do not use a new battery with an old battery, or batteries of different manufacturers. – Do not attempt to recharge the batteries. – If you do not intend to use the remote for an extended period of time, remove the batteries. – If battery leakage occurs, wipe out any liquid inside the battery compartment, and insert new batteries. • Do not expose the remote sensor (marked on the front panel) to strong light, such as direct sunlight or a lighting apparatus. The player may not respond to the remote. t % 2 +/– PROG +/– Available buttons Depending on the connected unit, you may not be able to control your TV with some or all of the buttons (TV [/1, PROG +/–, 2 +/–, %, or number buttons). Buttons Operations TV [/1 Turns your TV on or off. 2 (volume) +/– Adjusts the volume of your TV. PROG Selects the programme (programme) +/– position on your TV. t (input select) Switches your TV’s input source between the TV and other input sources. % (muting) 28 Mutes the sound. To control other TVs with the remote You can control the volume, input source, programme position, and power switch of non-Sony TVs as well. If your TV is listed in the table below, set the appropriate manufacturer’s code. If you enter a new code number, the code number previously entered will be erased. 1 While holding down TV [/1, enter the TV’s manufacturer code using the number buttons. For instance, to enter “09,” press “0” then “9.” Follow the steps below to make the minimum number of basic adjustments for using the player. If you do not complete Easy Setup, it will appear each time you turn on your player. Make the settings below in the following order. When turned on for the first time Wait for a short while before the player turns on and starts Easy Setup. Hookups and Settings b Step 7: Easy Setup Code numbers of controllable TVs If more than one code number is listed, try entering them one at a time until you find the one that works with your TV. 2 Manufacturer Code number Sony 01 (default) Grundig 11 Hitachi 24 ITT 15, 16 JVC 33 LG/Goldstar 76 Loewe 45 Nokia 15, 16, 69, 73 Panasonic 17, 49 Philips 06, 07, 08, 72 Saba 12, 13, 74 Samsung 22, 23, 71 Sanyo 25 Sharp 29 Telefunken 36 Thomsom 43, 75 Toshiba 38 Release TV [/1. [/1 TV [/1 RETURN </M/m/,, ENTER HOME 1 2 Turn on the TV. Press [/1 to turn on the player. The player turns on after a moment. 3 Switch the input selector on your TV so that the signal from the player appears on your TV screen. The display for OSD language selection appears. • If the display for OSD language selection does not appear Press HOME, and select “Easy Setup” in the “Setup” setup (page 59). Then, select “Start,” and press ENTER. ,continued 29 4 Select a language for the on-screen displays using M/m, and press ENTER. 7 Select a video output resolution for the connected TV, and press ENTER. For details about the video output resolution, see page 46. When you select “HDMI” in step 6 The initial settings message appears. 5 Select “Start,” and press ENTER. 6 Select the cable type used to connect the player and your TV, and press ENTER. Select “HDMI” when connecting your TV using the HDMI cable, and go to step 7. b When connecting the HDMI OUT jack and other video output jacks at the same time, select “Component Video.” Select “Component Video” when connecting your TV using the component video cable, and go to step 7. Select “Video or S Video” when connecting your TV using the video cable or S-video cable, and go to step 8. 30 Select from “Auto,” “480i/576i,” “480p/ 576p,” “720p,” “1080i,” or “1080p.” When connecting the HDMI OUT jack and other video output jacks at the same time, video signals may not output from the jacks, other than from the HDMI OUT jack, when “Auto” or “1080p” is selected. When connecting other equipment at the same time, press RETURN to return to step 6 and change the “TV Connection Method” setting. When you select “Component Video” in step 6 Select from “480i/576i,” “480p/576p,” “720p,” or “1080i.” When you change the video output resolution, a picture is displayed in the selected resolution for about 30 seconds, then the display asks for confirmation. Follow the on-screen instructions and go to the next step. b 8 Select an aspect ratio that matches your TV, and press ENTER. 10 Select “Allow” to allow Internet connections from BD contents, and press ENTER. Select “Do not allow” to not allow Internet connections from BD contents. 11 Set “Quick Start Mode” to “On” or Hookups and Settings If the picture is distorted or no picture appears, wait for about 30 seconds without pressing any buttons. The display returns to the resolution setting screen. If the selected video output resolution is incorrect, no picture will appear on the screen when you press any button within that 30 seconds. In this case, press x on the player for more than 10 seconds to reset the video output resolution to the lowest resolution. To change the video output resolution, set “Output Video Format” in the “Video Settings” setup (page 45). “Off,” and press ENTER. Select “16:9” when connecting to a widescreen TV or a TV with a wide mode function. Select “4:3” when connecting to a 4:3 screen TV without a wide mode function. 9 For details about “Quick Start Mode,” see page 56. 12 Select “Finish,” and press ENTER. (Only when connecting your TV using the HDMI cable) Set the “Control for HDMI” function to “On” or “Off,” and press ENTER. Select “On” to use the “Control for HDMI” function when connecting Sony components that are compatible with the “Control for HDMI” function (page 16). If you do not use the “Control for HDMI” function, select “Off.” z • You can reset settings to their factory settings (page 59). • You can run “Easy Setup” again from “Easy Setup” in “Setup” (page 59). 31 Playing BDs/DVDs BD DVD Z Number buttons </M/m/,, ENTER OPTIONS HOME N X Playback x 1 Switch the input selector on your TV so that the signal from the player appears on your TV screen. 2 Press Z, and place a disc on the disc tray. Playing side facing down 3 Press Z to close the disc tray. • When you insert a commercially available BD-ROM or DVD VIDEO, playback automatically starts depending on the disc. b Playback does not start by pressing N while the disc tray is open. 32 4 5 6 Press HOME. Select “Video” using </,. Select using M/m, and press N or ENTER. b • The point where you stopped playing is cleared from memory when: – you open the disc tray, – you play another title, – you change the settings on the player, or – you remove the external memory (for BDROMs). • The player may not resume playback depending on the disc or stop point. For commercially available BD-ROMs or DVD VIDEOs, playback starts. For BDs or DVDs recorded on other equipment, the title list appears. Select a title using M/m, and press N or ENTER. Playback starts. To stop playback When you play a restricted BD, change the “BD Parental Control” setting in the “BD/ DVD Viewing Settings” setup (page 53). When you play a restricted DVD, the display for entering your password appears on the screen. Enter your four-digit password using the number buttons, and press ENTER. Playback starts. Playback To play restricted BDs or DVDs (Parental Control) To register or change the password, see “Password” (page 54). Press x. To pause playback Press X. z In the title list, “PL” (Playlist) is displayed next to the name of titles that are created and edited from their originals. To play restricted BD-REs or BD-Rs (Disc Lock) When you play a BD-RE or BD-R restricted by the Disc Lock function, the display for entering your password appears on the screen. 1 Enter the four-digit password that has been registered when creating the disc using the number buttons, and press ENTER. 2 Select a title, and press N or ENTER. Playback starts. b • Depending on the disc you may not be able to do some of the playback operations. Refer to the instruction manual supplied with the disc. • Depending on BDs or DVDs recorded on other equipment, title lists or title names may not be displayed. To resume playback from the point where you stopped (Resume Play) After stopping playback, select using M/ m, and press N or ENTER. The player resumes playback from the point where you pressed x. To start from the beginning, press OPTIONS to select “Play from start,” and press ENTER. Playback starts from the beginning of the title. One-Touch Play (for HDMI connection only) Press N. The player and the connected TV turn on and the input selector on the TV is switched to the player, then playback starts automatically. b • When using the HDMI connection, there may be a delay before the playback picture appears on the screen, and the beginning portion of the playback picture may not be displayed. • To use the One-Touch Play function, set “Control for HDMI” to “On” in the “System Settings” setup (page 56). ,continued 33 Available OPTIONS 1 Press OPTIONS. The options menu appears. 2 Select an item using M/m, and press ENTER. The available items differ depending on the disc type or player situation. Items Details A/V Settings Adjusts settings for picture and sound. • Video Settings (page 37) • Audio Settings (page 38) Title List Displays the title list. Play Plays the title from the point where you pressed x. Play from start Plays the title from the beginning. 34 Top Menu Displays the disc’s Top Menu (page 34). Menu/Popup Menu Displays the BDROM’s Pop-up Menu or DVD’s menu (page 34). Stop Stops playback. Title Search Searches for a title and starts playback from the beginning (page 36). Chapter Search Searches for a chapter and starts playback from the beginning (page 36). Using the BD’s or DVD’s menu BD DVD To display Top Menu When you play a BD or DVD, you can display the Top Menu. 1 Press TOP MENU during playback. The Top Menu appears. 2 Select an item using </M/m/,. To display Pop-up Menus Some BD-ROMs contain Pop-up Menus that appear without interrupting playback. 1 Press POP UP/MENU during playback. The Pop-up Menu appears. 2 Select an item using </M/m/,, colour buttons, or the number buttons, and follow the on-screen instructions. Enjoying BonusView/BD-Live BD Some BD-ROMs have bonus contents and other data that can be downloaded to the external memory (local storage) for enjoyment. Turn the player off. Insert the external memory (supplied) into the EXT slot on the rear of the player. The external memory is used as the local storage. Make sure that the external memory is properly inserted into the player (page 25). 3 Connect the player to a network (page 26). 4 5 Turn the player on. 6 Insert a BD-ROM with BonusView/BDLive. Set “BD Internet Connection” to “Allow” in the “BD/DVD Viewing Settings” setup (page 54). b Depending on the BD-ROM, the disc name may not be displayed. Searching for a scene quickly (Scene Search) BD Playback 1 2 z • To delete all data in the external memory at once, select “Erase All” in step 5. • Press ENTER instead of OPTIONS in step 4 to skip step 5. DVD You can move quickly between scenes within the title currently being played back. 1 Press SCENE SEARCH during playback or in pause mode. Playback pauses and a bar with a scene indicator (square-shaped – indicates the current point) appears at the bottom of the screen. 2 Move the scene indicator to the scene you are searching for using </, or m/M. Scene indicator The operation method differs depending on the disc. Refer to the instruction manual supplied with the disc. To delete data in the external memory You can delete unnecessary data. 1 2 3 Press HOME. 4 Select the disc name, and press OPTIONS. 5 6 Select “Erase,” and press ENTER. The current point Select “Video” using </,. Select “BD Data” using M/m, and press ENTER. Select “OK,” and press ENTER. The data of the selected disc will be deleted. The scene indicator on the bar is displayed around the playing point. 3 Release the button at the point you want to watch. The scene at which you released the button is displayed in pause mode. To search for a scene again, move the scene indicator using </, or m/ M. 4 Press SCENE SEARCH, ENTER, N, or X. Playback starts. ,continued 35 To cancel Scene Search mode Press SCENE SEARCH, ENTER, N, or X. Playback starts from the point you pressed the button. Displaying the playing time and play information BD b • The Scene Search function is available for titles longer than 100 seconds and shorter than 100 hours. • The Scene Search function may not be available depending on the disc. Searching for a Title/Chapter BD DVD You can check the title information, including the video transmission rate, etc. Press DISPLAY. The displayed information differs depending on the disc type and player status. Example: When playing a BD-ROM DVD You can search for a chapter if the title contains chapter marks. 1 Press OPTIONS during playback or in pause mode. The options menu appears. 2 Select a search method using M/m, and press ENTER. “Title Search” (for BD-ROMs/DVD VIDEOs) “Chapter Search” A The current selected angle The display for entering the number appears. Example: Chapter Search C The currently selected audio or subtitle setting B Title number or name D Available functions ( audio/ subtitle) angle/ E Playback information Displays Disc type/Play mode/Video codec/Bit rate/Playing status bar/ Playing time (Remaining time*) F Output resolution/Video frequency 3 Enter the number of the title or chapter using the number buttons. If you make a mistake, press CLEAR, and re-enter another number. 4 Press ENTER. After a while, the player starts playback from the selected number. 36 * Displayed when you press TIME repeatedly. z • You can also check the playback information in the front panel display (page 11). • Press SUBTITLE, AUDIO, or ANGLE, and you can check each type of information. Adjusting pictures and sound for videos BD 5 Select or adjust the settings using </M/ m/,, and press ENTER. To adjust any other items, repeat steps 4 and 5. DVD To adjust the picture Press OPTIONS during playback. The options menu appears. 2 Select “A/V Settings” using M/m, and press ENTER. 3 Select “Video Settings” using M/m, and press ENTER. The “Video Settings” screen appears. b • Set the picture setting of your TV to ‘Standard’ before changing the “Picture Quality Mode” settings. • “Video Settings” is not available when the connected TV is set to Theatre Mode (page 16). • Depending on the disc or the scene being played, “FNR,” “BNR” or “MNR” effects may be hard to discern. Playback 1 z The “HD Reality Enhancer” settings are individually set during video and photo playback. “Video Equaliser” elements 1 Select “Video Equaliser” in step 4 above, and press ENTER. 2 Select an item, and press ENTER. Items 4 Select an item using M/m, and press ENTER. The default settings are underlined. Items Details Picture Quality Selects the picture Mode settings for different (Standard/ lighting environments. Brighter Room/ Theatre Room/ Memory) Video Equaliser HD Reality Enhancer NR (Noise Reduction) This setting is selectable when “Picture Quality Mode” is set to “Memory” (see ““Video Equaliser” elements” on page 37). This setting is available only when video signals are output from the HDMI OUT jack or the COMPONENT VIDEO OUT jacks (see ““HD Reality Enhancer” elements” on page 37). Reduces the noise in the picture (see ““NR” elements” on page 38). Details Contrast Changes the contrast. ((weak) –3 ~ 0 ~ 3 (strong)) Brightness ((dark) –3 ~ 0 ~ 3 (bright)) Changes the overall brightness. Chroma ((light) –3 ~ 0 ~ 3 (deep)) Deepens deep colours, or lightens light colours. Hue ((red) –3 ~0~3 (green)) Changes overall colour balance. Gamma Adjusts the picture balance between light and dark areas. “HD Reality Enhancer” elements 1 Select “HD Reality Enhancer” in step 4 above, and press ENTER. 2 Select an item, and press ENTER. Items Details Enhance (–3 ~ 0 ~ 3) Enhances the scene picture outline pixel by pixel. Smoothing Smooths the gradation (Off/Standard/ on flat parts of the High) picture. FGR (0 ~ 3) Reduces film grain. ,continued 37 To adjust the audio characteristics “NR” elements 1 Select “NR” in step 4 above, and press ENTER. 1 Press OPTIONS during playback. The options menu appears. 2 Select an item, and press ENTER. 2 Select “A/V Settings” using M/m, and press ENTER. 3 Select “Audio Settings” using M/m, and press ENTER. The “Audio Settings” screen appears. 4 Select an item using M/m, and press ENTER. The default settings are underlined. Items Details FNR (Off/Auto) Reduces random noise appearing in the picture. BNR (Off/Auto) Reduces mosaic-like block noise in the picture. MNR (Off/Auto) Reduces minor noise around the picture outlines (mosquito noise). To use the Playback Memory function When you play BDs*1/DVDs*2, the player stores picture settings for each disc, letting you play the same disc with the same settings later. The player can store picture settings for up to 50 discs. When the settings exceed 50, the player automatically erases the oldest setting. *1 *2 BD-ROMs and BD-REs/BD-Rs in BDMV mode DVD VIDEOs and DVD-RWs/DVD-Rs/ DVD+RWs/DVD+Rs in video mode Set “Playback Memory” to “On” (page 55). z The player can store picture settings during video playback but not during photo playback. b When connected with a Theatre Mode-compatible Sony TV using the HDMI cable, set the TV’s video mode to a mode other than Theatre. 5 Items Details AV SYNC (short) 0 ~ 20 ~ 120 msec (long) Adjusts the gap between picture and sound, by delaying the sound output in relation to the picture output (0 to 120 milliseconds). Audio Filter (for analogue audio signals only) • Sharp: Provides a wide frequency range and spatial feeling. Normally select this. • Slow: Provides smooth and warm sound. Select or adjust the settings using </M/ m/,, and press ENTER. To adjust any other items, repeat steps 4 and 5. b • The “Audio Filter” function does not work for digital audio signals output from the HDMI OUT/ DIGITAL OUT (OPTICAL/COAXIAL) jacks. • There may be little effect by changing the “Audio Filter” setting depending on the disc or playback environment. 38 Various music playback operations Playing CDs Operations N Starts playback from the point where you pressed x. Insert a CD. x Stops playback. The Music Player screen appears. X Pauses playback. Press N. ./> Skips to the beginning of the current or next track. To go to the previous track press . twice. m/M Fast reverse/fast forwards when pressed during playback. TIME Switches time information on the screen and the front panel display (page 11). CD 1 2 Playback starts. Playback Buttons b The point where you stopped playing (resume point) is cleared from memory when: – you open the disc tray, or – you turn off the player. To select a track 1 2 3 Press HOME. 4 Select a track using M/m. To play the selected track, press N or ENTER. Select (Music) using </,. Select , and press ENTER. The music list appears. Available OPTIONS 1 Press OPTIONS. The options menu appears. 2 Select an item using M/m, and press ENTER. The available items differ depending on the situation. Items Details Play Plays the selected track. Play from start Plays the current track from the beginning. Stop Stops playing the track. 39 Available OPTIONS during playback Playing Photo Files BD *1 DATA DVD *2 DATA CD *3 1 Press OPTIONS during playback. The options menu appears. 2 Select an item using M/m, and press ENTER. The available items differ depending on the situation. *1 *2 BD-REs/BD-Rs containing JPEG image files DVD+RWs/DVD+Rs/DVD-RWs/DVD-Rs containing JPEG image files *3 CD-RWs/CD-Rs containing JPEG image files 1 2 3 Press HOME. Select Select (Photo) using </,. Items Details HD Reality Enhancer This setting is available only when video signals are output from the HDMI OUT jack or the COMPONENT VIDEO OUT jacks (see ““HD Reality Enhancer” elements” on page 40). Slideshow Speed Changes the slideshow speed. • Fast • Normal • Slow Stop Stops a slideshow. Rotate Left Rotates the photo counterclockwise by 90 degrees. Rotate Right Rotates the photo clockwise by 90 degrees. , and press ENTER. The file list or folder list appears. “HD Reality Enhancer” elements 4 Select a file or folder using M/m, and press ENTER. When you select a folder, select a file in the folder using M/m, and press ENTER. The selected photo file is displayed. • To play a slideshow, press N. 1 Select “HD Reality Enhancer” in step 2 above, and press ENTER. 2 Select an item, and press ENTER. Items Details Enhance (–3 ~ 0 ~ 3) Enhances the scene picture outline pixel by pixel. Smoothing Smooths the gradation (Off/Standard/ on flat parts of the High) picture. FGR (0 ~ 3) Reduces film grain. z The “HD Reality Enhancer” settings are individually set during video and photo playback. 40 Various photo playback operations Operations x RETURN Stops a slideshow. X Pauses a slideshow. ./> </, Displays the previous or next photo. DISPLAY Displays the file information. b • When you attempt to play the following photo files, the mark appears on the screen and they cannot be played. – photo files larger than 8,192 pixels (width or height) – photo files smaller than 15 pixels (width or height) – photo files exceeding 32 MB – photo files with extreme aspect ratios (greater than 50:1 or 1:50) – photo files in Progressive JPEG format – photo files that have a “.jpeg” or “.jpg” extension, but not in JPEG format – photo files that have an extremely long name • The following photo files cannot be played. – photo files recorded on BD-Rs in any format other than UDF (Universal Disk Format) 2.6 – photo files recorded on BD-REs in any format other than UDF (Universal Disk Format) 2.5 • The following photo files or folders cannot be displayed in the file list or folder list. – photo files that have an extension other than “.jpeg” or “.jpg” – photo files that have an extremely long name – photo files in the 5th tree or lower – 501th or more folders when the total number of folders and files in a single tree exceeds 500 • Photo files edited on a PC may not be played. • Thumbnail images of some photo files may not be displayed. • Large photo files may take some time to display or to start a slideshow. If you have a Sony TV compatible with “PhotoTV HD,” you can enjoy best quality images by the following connection and setting. 1 Connect the player to the TV using an HDMI cable (not supplied). 2 Set “HDMI Resolution” of “Output Video Format” to “Auto,” “1080i,” or “1080p” in the “Video Settings” setup (page 46). 3 Set the TV’s video setting to [VIDEO-A] mode. For details on [VIDEO-A], refer to the operating instructions supplied with the TV. Playback Buttons To view best quality images 41 Using the Settings Displays Select (Setup) on the home menu when you need to change the settings of the player. 1 2 Press HOME. 3 Select the setup category icon to change using M/m, and press ENTER. (Setup) using </,. For details on setting options and setup category icons, see “Setting list” (page 43). Example: Video Settings Settings and Adjustments 4 42 Select Set the options. Setting list Network Update You can setup the following options. Icon Explanation Network Update (page 43) Updates the software of the player. Video Settings (page 44) Makes the video settings according to the type of connecting jacks. BD/DVD Viewing Settings (page 53) Makes detailed settings for BD/ DVD playback. 1 The player connects to the network, and the display asks for confirmation. 2 Network Settings (page 57) Makes detailed settings for Internet and network. Easy Setup (page 59) Re-runs the Easy Setup to make the basic settings. Resetting (page 59) Resets the player to the factory settings. Select “OK” using </,, and press ENTER. The player starts downloading, then updating the software automatically. When updating finishes, “FINISH” appears for 5 seconds in the front panel display, then the player automatically turns off. Photo Settings (page 55) Makes the photo-related settings. System Settings (page 56) Makes the player-related settings. Select “Network Update” using M/m, and press ENTER. 3 Settings and Adjustments Audio Settings (page 48) Makes the audio settings according to the type of connecting jacks. You can update and improve the functions of the player. For information about update functions, refer to the following website; http://support.sony-europe.com/ Press [/1 to turn on the player. The player starts up with the updated software. z • The “VUP */9” counter (“*” indicates update step) in the front panel display also shows progress of the update. • You can check the current software version by selecting “System Information” in the “System Settings” setup (page 57). • The “Setup” settings remain after updating. • The player informs you of newer software version information when “Software Update Notification” is set to “On” (default) (page 56). b • Do not disconnect the mains lead or network cable while downloading or updating software. • Any operations, including opening the disc tray, are not available while updating. • Downloading times may differ depending on the server provider or line status. • When error messages on network connections appear, check the network settings (see “Internet Settings” on page 57). ,continued 43 To update the software using an update disc You can update and improve the functions of the player using an update disc provided by Sony dealer or local authorised Sony service facility. 1 Insert the update disc. The display asks for confirmation. 2 Select “OK,” and press ENTER. Software update starts. When updating finishes, “FINISH” appears for 5 seconds in the front panel display, then the disc tray automatically opens. 3 Remove the disc. The player automatically turns off. 4 Press [/1 to turn the player on. The player starts up with the updated software. z • The “VUP */9” counter (“*” indicates update step) in the front panel display also shows progress of the update. • You can check the current software version by selecting “System Information” in the “System Settings” setup (page 57). • The “Setup” settings remain after updating. • For information about other software update methods, refer to the following website or consult your nearest Sony dealer or local authorised Sony Service facility; http://support.sony-europe.com/ b • Do not disconnect the mains lead while updating. • Any operations, including opening the disc tray, are not available while updating. 44 Video Settings The default settings are underlined. TV Type Selects your TV type. 16:9 Select this when connecting to a wide-screen TV or a TV with a wide mode function. 4:3 Select this when connecting to a 4:3 screen TV without a wide mode function. Screen Format Selects the display configuration for a 4:3 screen picture on a 16:9 wide screen TV. Original Select this when connecting to a TV with a wide mode function. Displays a 4:3 screen picture in 16:9 aspect ratio even on a wide-screen TV. Fixed Aspect Ratio Changes the picture size to fit the screen size with the original picture aspect ratio. DVD Aspect Ratio Selects the display configuration for playback of 16:9 screen pictures on a 4:3 screen TV (selectable when “TV Type” is set to “4:3” and “Screen Format” is set to “Fixed Aspect Ratio”). Letter Box Pan & Scan Displays a wide picture with black bands on the top and bottom. Output Video Format Selects the jack type to output video signals (“TV Connection Method”) and output resolution (“HDMI Resolution”/“Component Resolution”). 1 Select “Output Video Format” in “Video Settings,” and press ENTER. 2 Select the jack type to output video signals using M/m, and press ENTER. b When connecting the HDMI OUT jack and other video output jacks at the same time, select “Component Video.” Letter Box TV Connection Method HDMI Outputs signals from the HDMI OUT jack according to the “HDMI Resolution” setting below. Component Video Outputs signals from the COMPONENT VIDEO OUT jacks according to the “Component Resolution” setting below. Video or S Video Outputs signals from the VIDEO OUT VIDEO or S VIDEO jack. Pan & Scan b Depending on the DVD, “Letter Box” may be selected automatically instead of “Pan & Scan” or vice versa. Cinema Conversion Mode Sets the video conversion method for 480p/ 576p, 720p, 1080i, or 1080p* signals from the HDMI OUT jack or the COMPONENT VIDEO OUT jacks. * HDMI only Auto Normally select this. The player automatically detects whether the material is video-based or film-based, and switches to the appropriate conversion method. Video The conversion method suited for video-based material will always be selected regardless of the material. 3 Settings and Adjustments Displays a full-height picture on the entire screen, with trimmed sides. (When you select “HDMI” or “Component Video” only) Select the signal type for the HDMI OUT jack or COMPONENT VIDEO OUT jacks using M/m, and press ENTER. When you change the video output resolution, a picture is displayed in the selected resolution for about 30 seconds, then the display asks for confirmation. Follow the on-screen instructions. The HD indicator lights up when outputting 720p/1080i/1080p video signals. ,continued 45 b • If the picture is distorted or no picture appears, wait for about 30 seconds without pressing any buttons. The display returns to the resolution setting screen. If the selected video output resolution is incorrect, no picture will appear on the screen when you press any button within that 30 seconds. In this case, press x on the player for more than 10 seconds to reset the video output resolution to the lowest resolution. • When connecting the HDMI OUT jack and other video output jacks at the same time, video signals may not output from the jacks, other than from the HDMI OUT jack, when “Auto” or “1080p” is selected. When connecting other equipment at the same time, press RETURN to return to step 2 and change the “TV Connection Method” setting. BD-ROM 1080/24p Output Sets to output 1920 × 1080p/24 Hz video signals when playing film-based materials on BD-ROMs (720p/24 Hz or 1080p/24 Hz). 1920 × 1080p/24 Hz video signals can be output when all of the following conditions are met. – You connect a 1080/24p-compatible TV using the HDMI OUT jack, – “Output Video Format” is set to “HDMI,” and – “HDMI Resolution” is set to “Auto” or “1080p.” The 24P indicator lights up when outputting 1920 × 1080p/24 Hz video signals. Auto Outputs 1920 × 1080p/ 24 Hz video signals only when connecting a 1080/ 24p-compatible TV using the HDMI OUT jack. On Outputs 1920 × 1080p/ 24 Hz video signals regardless of the connected TV type. Off Select this when your TV is not compatible with 1080/ 24p video signals. HDMI Resolution/Component Resolution Auto (HDMI only) 46 Normally select this. The player outputs signals starting from the highest resolution acceptable to the TV: 1080p > 1080i > 720p > 480p > 480i If the resulting image format is undesirable, try another setting that suits your TV. 480i/576i Outputs 480i/576i video signals. 480p/576p Outputs 480p/576p video signals. 720p Outputs 720p video signals. 1080i Outputs 1080i video signals. 1080p (HDMI only) Outputs 1080p video signals. b No BD-ROM picture appears when the connected TV is non-compatible with 1080/24p and “BDROM 1080/24p Output” is set to “On.” In this case, press HOME to display the home menu, and change the “BD-ROM 1080/24p Output” setting. YCbCr/RGB (HDMI) Sets the colour setting for video signals output from the HDMI OUT jack. Select the setting that matches the connected TV type. Auto Automatically detects the connected TV type, and switches to the matching colour setting. SBM Sets whether to use the Super Bit Mapping (only for video signals output from the HDMI OUT jack). On Smooths reproduction of the video signal. Normally select this. Off Turns off the function. YCbCr (4:2:2) Outputs YCbCr 4:2:2 video signals. RGB (16-235) Select this when connecting to a device that only supports RGB limited range. RGB (0-255) Select this when connecting to an RGB (0-255) device. HDMI Deep Colour Output Sets the Deep Colour (colour depth) setting for video signals output from the HDMI OUT jack. The colour depth is indicated by the number of bits, and more colours can be reproduced as the value increases. The player supports a colour depth of up to 12 bits. Connecting the player and a TV that supports Deep Colour allows more accurate colour reproduction than when connecting it to a TV that does not support Deep Colour. Auto Normally select this. 12bit Outputs 12bit video signals. 10bit Outputs 10bit video signals. Off Select this when the picture is unstable or colours appear unnatural. x.v.Colour Output Sets whether to send xvYCC information to the connected TV. Combining xvYCC-compatible video with a TV that supports x.v.Colour display makes it possible to more accurately reproduce object colours present in the natural world. Auto Normally select this. Off Select this when the picture is unstable or colours appear unnatural. Settings and Adjustments YCbCr (4:4:4) Outputs YCbCr 4:4:4 video signals. Pause Mode Sets the picture mode for DVD playback pause status. For BD-ROMs or discs containing AVCHD files, “Pause Mode” automatically switches to “Auto.” Auto Normally select this. Dynamic moving pictures appear without blurring. Frame Displays static pictures at high resolution. ,continued 47 Component output compensation If the video coaxial cable used to connect the COMPONENT VIDEO OUT jacks of the player and your TV is too long, the 1080i/ 720p signals are weakened during transmission over the cable (high frequency transmission cable loss). This function compensates for such high frequency transmission cable loss. Off Turns off the function. 1~7 Select the appropriate numeric value depending on the length of the connected coaxial cable. The compensation amount increases by approximately 0.4 dB (at 30 MHz) for each step increase. b • Performance and features are not guaranteed. • If the type of your connecting cable or connector differs from those recommended, optimum values may not be achieved. • If the settings are higher than those recommended, the fine details on the screen may become too harsh. Audio Settings The default settings are underlined. Audio Output Priority Selects the jack type to output audio signals. 2-channel linear PCM signals are output at 48 kHz maximum from output jacks other than the priority jacks. HDMI Outputs audio signals from the HDMI OUT jack. Coaxial/ Optical Outputs audio signals from the DIGITAL OUT (OPTICAL/COAXIAL) jack. Multi Channel Select this when connecting Analogue an AV amplifier (receiver) via the MULTI CHANNEL OUTPUT jacks. Stereo Analogue Outputs audio signals from the AUDIO OUT (L/R) jacks. Speaker Settings To obtain the best possible surround sound, set the speakers you have connected and their distance from your listening position. Then use the test tone to adjust the volume and the balance of the speakers to the same level. This setting is selectable when “Audio Output Priority” is set to “Multi Channel Analogue.” To set the speakers 1 48 Select “Speaker Settings” in “Audio Settings,” and press ENTER. 2 Select “Size,” “Distance,” and press ENTER. 3 Select a setup item using M/m, and press ENTER. 4 Select or set a setting using M/m, and press ENTER. Size Selects the size of the speakers. • Front Normally select this position. Small Select this when the speakers cannot reproduce adequate low frequencies. • Centre Large Normally select this position. Small Select this when the speaker cannot reproduce adequate low frequencies. None Select this if you do not connect a centre speaker. • Surround Large Normally select this position. Small Select this when the speakers cannot reproduce adequate low frequencies. None Select this if you do not connect surround speakers. Yes Select this if you connect a subwoofer to output the LFE (low frequency effect) signals from the subwoofer. None Select this if you do not connect a subwoofer. b • Depending on the settings of other speakers, the subwoofer may output excessive sound. • When you play a BD or DVD that does not have subwoofer output recorded, no sound is produced from the subwoofer, even if “Subwoofer” is set to “Yes.” • Since subwoofer use is set as the player default setting, “Subwoofer” cannot be set to “None” when “Front” is set to “Small.” • When connecting the front speakers that cannot reproduce adequate low frequencies and a subwoofer is not connected, set “Front” to “Large,” and “Subwoofer” to “None.” Settings and Adjustments Large • Subwoofer Distance Sets the distance from your listening position to the speakers. Set the distance to your front speakers in “Front” first (A = 1.0 m to 15.0 m). Then adjust the values in “Centre” (centre speaker B), “Surround” (surround speakers C), “Surround Back” (surround back speakers D), and “Subwoofer” (E) to reflect the actual distance to your centre speaker, surround speakers, surround back speakers, and subwoofer. • Surround Back Large Normally select this position. Small Select this when the speakers cannot reproduce adequate low frequencies. None Select this if you do not connect surround back speakers. ,continued 49 Change the “Distance” setting each time you move the speakers. Start from the front speakers. Front Set this between 1.0 metre and 15.0 metres in 0.2 metre increments. (1.0 ~ 3.0 ~ 15.0 [m]) Centre Set this within –1.6 metres and +0.6 metre of the “Front” setting in 0.2 metre increments. For example, if “Front” is set to 1.6 metres, “Centre” can be set between 0 metre and 2.2 metres. (0 ~ 3.0 ~ 15.6 [m]) Surround Surround Back Subwoofer 50 Set this within –5.0 metres and +0.6 metre of the “Front” setting in 0.2 metre increments. For example, if “Front” is set to 5.0 metres, “Surround” can be set between 0 metre and 5.6 metres. (0 ~ 3.0 ~ 15.6 [m]) Set this within –5.0 metres and +0.6 metre of the “Front” setting in 0.2 metre increments. For example, if “Front” is set to 5.0 metres, “Surround Back” can be set between 0 metre and 5.6 metres. (0 ~ 3.0 ~ 15.6 [m]) Set this within –1.6 metres and +0.6 metre of the “Front” setting in 0.2 metre increments. For example, if “Front” is set to 1.6 metres, “Subwoofer” can be set between 0 metre and 2.2 metres. (0 ~ 3.0 ~ 15.6 [m]) To adjust the speaker level 1 Select “Speaker Settings” in “Audio Settings,” and press ENTER. 2 Select “Test Tone” using M/m, and press ENTER. 3 Select “On” using M/m, and press ENTER. You will hear the test tone from each speaker in sequence. 4 From your listening position, adjust the value of “Level” using </M/m/,. The test tone is emitted from the selected speaker. 5 6 Press ENTER when you finish adjusting. 7 Select “Off” using M/m, and press ENTER. Select “Test Tone” using M/m, and press ENTER. z To adjust the level without listening to the test tone, select “Level” in step 2 and press ENTER, then adjust the level using M/m, and press ENTER. Level You can vary the level of each speaker as follows. Be sure to set “Test Tone” to “On” for easy adjustment. Front Left Front Right Adjust the level of the front speakers (–12 dB to 0 dB, 0.5 dB increments). (0 [dB]) Centre Adjust the level of the centre speaker (–12 dB to 0 dB, 0.5 dB increments). (0 [dB]) Surround Left Surround Right Adjust the level of the surround speakers (–12 dB to 0 dB, 0.5 dB increments). (0 [dB]) Surround Back Left Surround Back Right Adjust the level of the surround back speakers (–12 dB to 0 dB, 0.5 dB increments). (0 [dB]) Subwoofer Adjust the level of the subwoofer (–12 dB to 0 dB, 0.5 dB increments). (0 [dB]) Test Tone On Off The player emits a test tone in sequence from the MULTI CHANNEL OUTPUT jacks to adjust the sound level from each speaker. When you select one of the “Speaker Settings” items, the test tone is emitted from the selected speaker. The test tone is not emitted from the speakers. Selects the signal type for the HDMI OUT jack. Auto 2ch PCM Normally select this. Outputs audio signals according to the status of the connected HDMI device. Downmixes to 2-channel Linear PCM signals before outputting from the HDMI OUT jack. Lowers the audio output level to prevent sound distortion. On Enables Audio Attenuation. Off Disables Audio Attenuation. b “Audio ATT” does not affect the output from the HDMI OUT jack and the DIGITAL OUT (OPTICAL/COAXIAL) jack. Dolby Digital Selects the audio signals output when playing Dolby Digital discs. This setting affects the output from the DIGITAL OUT (COAXIAL/OPTICAL) jack. Downmix PCM Converts to output Linear PCM signals. Select this when connecting an audio device without a built-in Dolby Digital decoder. Dolby Digital Select this when connecting an audio device with a builtin Dolby Digital decoder. b Select “2ch PCM” when connecting a TV or an AV amplifier (receiver) that does not support Dolby Digital or DTS, otherwise noise or no sound may result. BD Audio Setting Selects whether to mix or not mix interactive audio and secondary audio (commentary) when playing a BD that contains such audio. Mix Outputs the audio obtained by mixing the interactive audio and secondary audio to the primary audio. Direct Outputs the primary audio only. Settings and Adjustments Audio (HDMI) Audio ATT DTS Selects the audio signals output when playing DTS discs. This setting affects the output from the DIGITAL OUT (COAXIAL/ OPTICAL) jack. Downmix PCM Converts to output Linear PCM signals. Select this when connecting to an audio device without a built-in DTS decoder. DTS Select this when connecting to an audio device with a built-in DTS decoder. b PCM 96 kHz and PCM 192 kHz audio signals are output as PCM 48 kHz audio signals when “BD Audio Setting” is set to “Mix.” ,continued 51 b 48kHz/96kHz PCM Selects the maximum sampling frequency for the PCM signals output from the DIGITAL OUT (OPTICAL/COAXIAL) jack. 48kHz/16bit Outputs audio signals of 96 kHz sampling as 48 kHz/ 16 bit. 96kHz/24bit Outputs audio signals of 96 kHz sampling as 96 kHz/ 24 bit. However, the signals will be output as 48 kHz/ 16 bit if the source is copyprotected. • “Audio DRC” is effective only when playing Dolby Digital, Dolby Digital Plus, and Dolby TrueHD audio signals. • When “Dolby Digital” is set to “Dolby Digital” in the “Audio Settings” setup (page 51), “Audio DRC” has no effect on the audio output from the DIGITAL OUT (OPTICAL/COAXIAL) jack. However, this excludes the following cases. – when “BD Audio Setting” is set to “Mix” when playing a BD. – when “Audio Output Priority” is set to “HDMI,” “Multi Channel Analogue,” or “Stereo Analogue.” Downmix b • If you select “96kHz/24bit” when an AV amplifier (receiver) that does not support 96 kHz is connected, no sound or a loud sound may result. • “48kHz/96kHz PCM” is not effective when “Audio Output Priority” is set to “HDMI,” “Multi Channel Analogue,” or “Stereo Analogue.” Audio DRC Sets the downmix method of multi-channel to two-channel sound. Dolby Surround Outputs the Dolby Surround (Pro Logic) signals in 2 channels. Select this when connecting an audio device that supports Dolby Surround (Pro Logic). Normal Outputs audio signals without Dolby Surround (Pro Logic) effect. Select this when connecting an audio device that does not support Dolby Surround (Pro Logic). Selects the dynamic range (compression level of the sound) setting when playing a BD or DVD that conforms to “Audio DRC.” Auto 52 Performs playback at the dynamic range specified by the disc (BD-ROM only). Other discs are played back at the “Standard” level. Standard Performs playback at a compression level between “TV Mode” and “Wide Range.” TV Mode Sounds are compressed heavily. Low sounds are easier to hear. Wide Range No compression works. A more dynamic sound is produced. b “Downmix” has no effect on the bitstream audio output from the DIGITAL OUT (OPTICAL/ COAXIAL)/HDMI OUT jack. BD/DVD Viewing Settings 4 The lower the value, the stricter the limitation. If you select “Select Age Restriction,” you can enter the age from “0” to “255” using </M/m/, or the number buttons. • To cancel the Parental Control setting, select “No Restrictions.” The default settings are underlined. BD/DVD Menu Audio Selects the default track language for BDROMs or DVD VIDEOs. When you select “Original,” the language given priority in the disc is selected. When you select “Select Language Code,” the display for entering the language code appears. Enter the code for your language by referring to “Language Code List” (page 71). Subtitle Selects the default subtitle language for BDROMs or DVD VIDEOs. When you select “Select Language Code,” the display for entering the language code appears. Enter the code for your language by referring to “Language Code List” (page 71). BD Parental Control Playback of some BD-ROMs can be limited according to the age of the users. Scenes may be blocked or replaced with different scenes. 1 Select “BD Parental Control” in “BD/ DVD Viewing Settings,” and press ENTER. 2 Enter your four-digit password using the number buttons. 3 Select “OK,” and press ENTER. z You can change the password (see “Password” on page 54). b • If you forget the password, reset the player (page 59) and set a new password (see “Password” on page 54). • When you play discs which do not have the Parental Control function, playback cannot be limited on this player. • Depending on the disc, you may be asked to change the Parental Control level while playing the disc. In this case, enter your password, then change the level. • When “255” is selected in “Select Age Restriction,” the Parental Control setting is cancelled. Settings and Adjustments Selects the default menu language for BDROMs or DVD VIDEOs. When you select “Select Language Code,” the display for entering the language code appears. Enter the code for your language by referring to “Language Code List” (page 71). Select the age restriction, and press ENTER. DVD Parental Control Playback of some DVD VIDEOs can be limited according to the age of the users. Scenes may be blocked or replaced with different scenes. 1 Select “DVD Parental Control” in “BD/ DVD Viewing Settings,” and press ENTER. 2 Enter your four-digit password using the number buttons. 3 4 Select “OK,” and press ENTER. Select a level, and press ENTER. The lower the value, the stricter the limitation. • To cancel the Parental Control setting, select “No Restrictions.” ,continued 53 z You can change the password (see “Password” on page 54). b • If you forget the password, reset the player (page 59) and set a new password (see “Password” on page 54). • When you play discs which do not have the Parental Control function, playback cannot be limited on this player. • Depending on the disc, you may be asked to change the Parental Control level while playing the disc. In this case, enter your password, then change the level. Parental Control Region Code Playback of some BD-ROMs or DVD VIDEOs can be limited according to the geographic area. Scenes may be blocked or replaced with different scenes. 1 Select “Parental Control Region Code” in “BD/DVD Viewing Settings,” and press ENTER. 2 Enter your four-digit password using the number buttons. 3 4 Select “OK,” and press ENTER. Select the area restriction, and press ENTER. When you select “Select Region Code,” the display for entering the region code appears. Enter the code for the area restriction by referring to “Parental Control/Area Code” (page 71). z You can change the password (see “Password” on page 54). b • If you forget the password, reset the player (page 59) and set a new password (see “Password” on page 54). • When you play discs which do not have the Parental Control function, playback cannot be limited on this player. • Depending on the disc, you may be asked to change the Parental Control level while playing the disc. In this case, enter your password, then change the level. 54 Password Sets or changes the password for the Parental Control function. A password allows you to set a restriction on BD-ROM or DVD VIDEO playback. If necessary, you can differentiate the restriction levels for BDROMs and DVD VIDEOs. 1 Select “Password” in “BD/DVD Viewing Settings,” and press ENTER. 2 Enter your four-digit password using the number buttons. 3 Select “OK,” and press ENTER. To change the password 1 After step 3, enter a new password using the number buttons. 2 Select “OK,” and press ENTER. Hybrid Disc Playback Layer Selects the layer priority when playing a Hybrid Disc. To change the setting, turn the player off and on again. BD Plays BD layer. DVD/CD Plays DVD or CD layer. BD Internet Connection Sets whether to allow Internet connections from the contents of a BD (in BDMV mode) being played. Network connections and settings are required when using this function (page 57). Allow Normally select this. Do not allow Prohibits Internet connection. Playback Memory *1 Photo Settings *2 When you play BDs /DVDs , the player stores picture settings for each disc, letting you play the same disc with the same settings later. The player can store picture settings for up to 50 discs. *1 *2 BD-ROMs and BD-REs/BD-Rs in BDMV mode DVD VIDEOs and DVD-RWs/DVD-Rs/ DVD+RWs/DVD+Rs in video mode Stores picture settings for each disc. Off Turns off the function. b • When the settings exceed 50, the player automatically erases the oldest settings. • When connected with a Theatre Modecompatible Sony TV using the HDMI cable, set the TV’s video mode to a mode other than Theatre. Slideshow Speed Changes the slideshow speed. Fast Photos change rapidly. Normal Photos change at normal speed. Slow Photos change slowly. Settings and Adjustments On The default setting is underlined. 55 System Settings The default settings are underlined. OSD Selects your language for the player onscreen displays. Dimmer Auto Power Off The player automatically turns off if you do not press any of the buttons on the player or remote for more than 30 minutes, unless you are playing BDs/DVDs/CDs/photo files or are updating software. On Turns on the “Auto Power Off” function. Off Turns off the function. Auto Display Adjusts the lighting of the front panel display. Bright Bright lighting. Dark Low lighting. Off Turns off the lighting during playback. Low lighting other than during playback. On Automatically displays information on the screen when changing the viewing titles, picture modes, audio signals, etc. Off Displays information only when you press DISPLAY. Control for HDMI Screen Saver On Off Allows you to use the “Control for HDMI” function (page 16). Turns off the function. Quick Start Mode The screen saver image appears when you do not use the player for more than 15 minutes while an on-screen display, such as the home menu, is displayed on your TV screen. The screen saver image helps prevent your display device from becoming damaged (ghosting). On Shortens the startup time when turning on the player. On Turns on the screen saver function. Off The default setting. Off Turns off the function. b When “Quick Start Mode” is set to “On,” – power consumption will be higher than when “Quick Start Mode” is set to “Off” and – the ventilation fan may turn on depending on the surrounding temperature. 56 Software Update Notification Informs you of newer software version information. Network connections and settings are required when using this function (page 57). On Sets the player to inform you of newer software version information (page 43). Off Turns off the function. System Information Displays the player’s software version information and the MAC address. Network Settings Internet Settings 1 Select “Internet Settings” in “Network Settings,” and press ENTER. 2 Select “IP Address Acquisition,” and press ENTER. 3 Select an item, and press ENTER. Use DHCP Select this when DHCP (Dynamic Host Configuration Protocol) server settings are available from your Internet service provider. The network settings necessary for the player will be assigned automatically. Use Static IP Address Set the IP address manually according to your network environment. Settings and Adjustments These items are necessary when you connect to the Internet via a network cable. Enter the respective (alphanumeric) values for your broadband router or Wireless LAN router. The items that need to be set may differ, depending on the Internet service provider or the router. For details, refer to the instruction manuals that have been provided by your Internet service provider or supplied with the router. • When you select “Use DHCP” If you set “DNS Server Auto Acquisition” to “Off,” set the following item: – DNS Server (Primary)/DNS Server (Secondary) • When you select “Use Static IP Address” Set the following items: – IP Address – Subnet Mask – Default Gateway – DNS Server (Primary)/DNS Server (Secondary) ,continued 57 b When you set the “DNS Server (Primary)”/ “DNS Server (Secondary)” addresses manually, enter the “DNS Server (Primary)” address. Otherwise, the “Internet Settings” will be set incorrectly. 4 If your ISP has a specific proxy server setting, select “Proxy Settings” using M/m, and press ENTER. The “Proxy Settings” display appears. If the proxy server does not have a specific setting, go to step 8. 5 6 Set “Use of Proxy Server” to “On.” Select “Proxy Server” and “Port,” and enter the settings. To enter the proxy server, see “To enter characters” (page 58). 7 8 Press RETURN. Select “Network Diagnostic” using M/ m, and press ENTER. 9 Select “Start,” and press ENTER. 10 Check that the message “Network connections are correct.” appears. The setup is finished. If the message does not appear, follow the on-screen messages. To enter characters The display for entering characters appears when you select “Proxy Server” in “Proxy Settings.” 58 1 Press a number button repeatedly to select a character. Example: Press the number 3 button once to enter “D.” Press the number 3 button three times to enter “F.” 2 Press ,, and enter the next character. 3 Press the blue button (“Finish”) to finish. Available buttons Buttons Details Red button (Letter Type) Switches the keyboard between alphabet and numbers. Green button (A/a) Switches the keyboard between upper case and lower case. Yellow button (Symbol) Displays the keyboard for symbols. Blue button (Finish) The input is entered, and the player returns to the previous display. CLEAR Erases the selected (Clear/Clear All) character. To erase all displayed characters, press and hold CLEAR for 2 seconds or more. RETURN (Cancel) Returns to the previous display, cancelling the input. </M/m/,, ENTER • Select an input function using </M/m/,, and press ENTER. • Enter characters as follows: 1Select a character selection panel using </M/m/,, and press ENTER. 2Select a character using </,, and press ENTER. Easy Setup Re-runs the Easy Setup to make the basic settings. Resetting You can reset the player settings to the factory default by selecting the group of settings. All the settings within the group will be reset. 1 Select “Easy Setup,” and press ENTER. 2 Select “Start” using </,, and press ENTER. 1 2 Select “Resetting,” and press ENTER. 3 Follow the instructions for “Step 7: Easy Setup” (page 29) from step 4. 3 Select the settings you want to reset to default, and press ENTER. Select “Reset to Factory Default Settings,” and press ENTER. 4 Settings and Adjustments The display asks for confirmation. You can reset the following settings: – Video Settings – Audio Settings – BD/DVD Viewing Settings – Photo Settings – System Settings – Network Settings – All Settings Select “Start” using </,, and press ENTER. b When “All Settings” is selected in step 3, – the Blu-ray Disc indicator lights up, then turns off when Easy Setup is complete. – all settings within (Setup) are reset. – “A/V Settings” that can be adjusted by pressing OPTIONS during playback (page 37) are not reset. 59 Troubleshooting If you experience any of the following difficulties while using the player, use this troubleshooting guide to help remedy the problem before requesting repairs. Should any problem persist, consult your nearest Sony dealer. Power The power does not turn on. , Check that the mains lead is connected securely. , It takes a short while before the player turns on. The message “A new software version has been found on the network. Perform update under "Network Update."” appears on the screen when turning the player on. Additional Information , See “Network Update” (page 43) to update the player to a newer software version. Disc The disc does not play. , The disc is dirty. , The disc is upside down. Insert the disc with the playback side facing down. , The disc is skewed. , You are attempting to play a disc with a format that cannot be played back by this player (page 66). , The region code on the BD or DVD does not match the player. , The player cannot play a recorded disc that is not correctly finalised (page 66). 60 Picture See also “Connecting to an HDMI jack” (page 15) when connecting equipment using the HDMI cable. There is no picture/picture noise appears. No picture appears when the video output resolution selected in “Output Video Format” is incorrect. , Press x on the player for more than 10 seconds to reset the video output resolution to the lowest resolution. The picture does not fill the screen, even though the aspect ratio is set in “DVD Aspect Ratio” under “Video Settings.” , The aspect ratio of the disc is fixed on your DVD (page 45). , Check the “BD-ROM 1080/24p Output” setting in the “Video Settings” setup (page 46). Sound See also “Connecting to an HDMI jack” (page 21) when connecting equipment using the HDMI cable. There is no sound. , Check that all the connecting cables are securely connected. , Check whether the connecting cables are damaged. , Check the connection to your AV amplifier (receiver) (page 19) and switch the input selector on your AV amplifier (receiver) so that the audio signals of the player are output from your AV amplifier (receiver). , The player is in scan mode. , If the audio signal does not come through the DIGITAL OUT (OPTICAL/ COAXIAL)/HDMI OUT jack, check the audio settings (page 48). Additional Information , Check that all the connecting cables are securely connected. , Check whether the connecting cables are damaged. , Check the connection to your TV (page 14) and switch the input selector on your TV so that the signal from the player appears on the TV screen. , When playing a double-layer BD/DVD, the video and audio may be momentarily interrupted at the point where the layers switch. No BD-ROM picture appears. The sound is not output correctly. , Check the “Audio Output Priority” setting in the “Audio Settings” setup (page 48). , Check the speaker settings (page 48). The sound volume is low. Video signals are not output from the jacks, other than from the HDMI OUT jack, when connecting the HDMI OUT jack and other video output jacks at the same time. , Set “Output Video Format” to “Component Video” in the “Video Settings” setup (page 45). The dark area of the picture is too dark/the bright area is too bright or unnatural. , Set “Picture Quality Mode” to “Standard” (default) (see “Adjusting pictures and sound for videos” on page 37). The picture is not output correctly. , Check the “Output Video Format” settings in the “Video Settings” setup (page 45). , The sound volume is low on some BDs or DVDs. , Try setting “Audio DRC” to “TV Mode” in the “Audio Settings” setup (page 52). , Set “Audio ATT” to “Off” in the “Audio Settings” setup (page 51). The HD Audio (Dolby Digital Plus, Dolby TrueHD, DTS-HD High Resolution Audio, and DTS-HD Master Audio) is not output by bitstream. , Set “BD Audio Setting” to “Direct” in the “Audio Settings” setup (page 51). , Check that the connected AV amplifier (receiver) is compatible with each HD Audio format. ,continued 61 The interactive audio is not output. , Set “BD Audio Setting” to “Mix” in the “Audio Settings” setup (page 51). HDMI There is no picture or no sound when connected to the HDMI OUT jack. , Try the following: 1Turn the player off and on again. 2Turn the connected equipment off and on again. 3Disconnect and then reconnect the HDMI cable. There is no picture or picture noise appears when connected to the HDMI OUT jack. , The HDMI OUT jack is connected to a DVI device that does not support copyright protection technology. , If the HDMI OUT jack is used for video output, changing the video output resolution may solve the problem (page 45). No sound is output from the HDMI OUT jack. , The HDMI OUT jack is connected to a DVI device (DVI jacks do not accept audio signals). The sound is not output correctly when connected to the HDMI OUT jack. , The device connected to the HDMI OUT jack does not support the audio format of the player. Check the audio settings (page 48). The display language on the screen switches automatically when connected to the HDMI OUT jack. , When “Control for HDMI” is set to “On” (page 56), the display language on the screen automatically switches according to the language setting of the connected TV (if you change the setting on your TV, etc.). The “Control for HDMI” function does not work (BRAVIA Sync). , Check that the mains lead of the connected component is securely connected. 62 , If the HDMI indicator does not appear in the front panel display, check the HDMI connection (page 15, 21). , Set “Control for HDMI” to “On” (page 56). , Make sure that the connected component is compatible with the “Control for HDMI” function. For details, refer to the operating instructions supplied with the component. , Check the connected component’s setting for the “Control for HDMI” function. For details, refer to the operating instructions supplied with the component. , If you change the HDMI connection, turn the player off and on again. , If power failure occurs, set “Control for HDMI” to “Off,” then set “Control for HDMI” to “On” (page 56). , For details on the “Control for HDMI” function, see “About the BRAVIA Sync features (for HDMI connections only)” (page 16). , If you connect the player to a TV through an AV amplifier (receiver) that is not compatible with the “Control for HDMI” function, you may be unable to control the TV from the player. External memory (local storage) The external memory is not recognised. , Try the following: 1Turn the player off. 2Align the V mark of the EXT slot with the V mark on the external memory, and insert the external memory (page 25). 3Turn the player on. 4Check that the EXT indicator lights up in the front panel display. Bonus contents or other data that are contained in a BD-ROM cannot be played. , Try the following: 1Remove the disc. 2Turn the player off. 3Remove and reinsert the external memory (page 25). 4Turn the player on. 5Check that the EXT indicator lights up in the front panel display. 6Insert the BD-ROM with BonusView/BD-Live. A message indicating that the local storage does not have enough space appears on the screen. The disc tray does not open and “LOCKED” or “TLK ON” appears in the front panel display. , Delete unnecessary data in the external memory (page 35). , When “LOCKED” appears, the player is locked. To cancel the Child Lock, hold down X on the player until “UNLOCK” appears in the front panel display (page 10). , When “TLK ON” appears, contact your Sony dealer or local authorized Sony service facility. Operation The remote does not function. The file name is not correctly displayed. , The player can only display ISO 8859-1compliant character formats. Other character formats may be displayed differently. , Depending on the writing software used, the input characters may be displayed differently. The disc does not start playing from the beginning. , Resume Play is on (page 33). Some functions such as Stop or Search cannot be performed. , Depending on the disc, you may not be able to do some of the operations above. Refer to the operating manual supplied with the disc. The disc tray does not open and you cannot remove the disc even after you press A. , Try the following: 1Turn the player off, and disconnect the mains lead. 2Reconnect the mains lead while pressing down A on the player. 3Keep pressing down A on the player until the tray opens. 4Remove the disc. 5When “WAIT” appears in the front panel display, hold down [/1 on the player for more than 10 seconds until the player turns on again. Additional Information , The batteries in the remote are weak (page 28). , The distance between the remote and the player is too far. , The remote is not pointed at the remote sensor on the player. The player does not respond to any button. , Moisture has condensed inside the player (page 3). , Hold down [/1 on the player for more than 10 seconds until the indicators in the front panel display turn off. If the player still does not respond to any button, disconnect then reconnect the mains lead. The language for the soundtrack/subtitle or angles cannot be changed. , Try using the BD’s or DVD’s menu instead of the direct selection button on the remote (page 34). , Multi-lingual tracks/subtitles or multiangles are not recorded on the BD or DVD being played. , The BD or DVD prohibits the changing of the language for the sound track/subtitle or angles. 63 Self-Diagnosis Function When the self-diagnosis function is activated to prevent the player from malfunctioning, an error code appears in the front panel display, or just appears without any messages on the entire screen. In these cases, check the following. When an error code appears in the front panel display Error code Corrective action Exxxx SYS ERR Contact your nearest Sony dealer or local authorised Sony service facility and give the error code. FAN ERR • Check that the ventilation holes on the rear of the player are not blocked. • Place the player in a location with adequate ventilation to prevent heat build-up in the player. When just appears without any messages on the entire screen Contact your nearest Sony dealer or local authorised Sony service facility. 64 Playable Discs Type Disc Logo Icon used in this manual Characteristics BD-ROMs and BD-REs/BD-Rs in BDMV and BDAV mode, including 8 cm discs (single layer) and DL discs BD DVD VIDEO DVD Discs such as movies that can be purchased or rented DVD DVD+RWs/DVD+Rs in +VR mode or DVD-RWs/DVD-Rs in video and VR mode, including 8 cm discs (single layer) and DVD+R DL/DVD-R DL discs DATA DVD DVD+RWs/DVD+Rs/DVD-RWs/ DVD-Rs containing JPEG* image files CD Music CDs or CD-Rs/CD-RWs in music CD format DVD DATA DVD CD DATA CD — DATA CD * JPEG format conforming to UDF (Universal Disk Format). Additional Information Blu-ray Disc CD-Rs/CD-RWs containing JPEG* image files Notes about BD-ROM compatibility Since the Blu-ray Disc specifications are new and evolving, some discs may not be playable depending on the disc type and the version. The audio output differs depending on the source, connected output jack, and selected audio settings. For details, see page 69. ,continued 65 Discs that cannot be played b • • • • • • • • • • • • Notes about BD-REs/BD-Rs, DVD+RWs/ DVD+Rs, DVD-RWs/DVD-Rs, or CD-Rs/ CD-RWs Some BD-REs/BD-Rs, DVD+RWs/DVD+Rs, DVD-RWs/DVD-Rs, or CD-Rs/CD-RWs cannot be played on this player due to the recording quality or physical condition of the disc, or the characteristics of the recording device and authoring software. A CD or DVD disc will not play if it has not been correctly finalised. For more information, refer to the operating instructions supplied with the recording device. Note that some playback functions may not work with some DVD+RWs/ DVD+Rs, even if they have been correctly finalised. In this case, view the disc using normal playback. • Music discs encoded with copyright protection technologies This product is designed to play back discs that conform to the Compact Disc (CD) standard. Various music discs encoded with copyright protection technologies are being marketed by some record companies. Please be aware that among those discs, there are some that do not conform to the CD standard and may not be playable by this product. • Note on DualDiscs A DualDisc is a two sided disc product which mates DVD recorded material on one side with digital audio material on the other side. However, since the audio material side does not conform to the Compact Disc (CD) standard, playback on this product is not guaranteed. • Note about double-layer BDs/DVDs The playback pictures and sound may be momentarily interrupted when the layers switch. • Note about 8 cm BD-REs/8 cm BD-Rs Some 8 cm BD-REs/8 cm BD-Rs cannot be played on this player. • Note about BD-REs/BD-Rs This player supports Ver. 2.1 BD-RE and Ver. 1.1 and 1.2 BD-R including organic pigment type BD-R (LTH type). • Note about DTS 5.1 MUSIC DISCs This player can play DTS 5.1 MUSIC DISCs. Audio signals are output in the formats specified under the “Audio Output Signals” table on page 69. BDs with cartridge DVD-RAMs HD DVDs DivX discs DVD Audio discs PHOTO CDs Data part of CD-Extras VCDs/Super VCDs HD layer on Super Audio CDs Audio material side on DualDiscs BD-ROMs/DVD VIDEOs with a different region code (page 66). Note on playback operations of BDs/DVDs Some playback operations of BDs/DVDs may be intentionally set by software producers. Since this player plays BDs/ DVDs according to the disc contents the software producers designed, some playback features may not be available. Refer to the instructions supplied with the BDs/DVDs. Region code (BD-ROM/DVD VIDEO only) Your player has a region code printed on the rear of the unit and will only play BD-ROMs/ DVD VIDEOs (playback only) labelled with identical region codes. This system is used to protect copyrights. DVD VIDEOs labelled ALL will also play on this player. Depending on the BD-ROM/DVD VIDEO, no region code may be indicated even though playing the BD-ROM/DVD VIDEO is prohibited by area restrictions. Region code 66 About playback of discs recorded in AVCHD format This player can play AVCHD format discs. TM What is the AVCHD format? *1 A high-definition specification which utilizes 1080 effective scanning lines and the interlace system. *2 A high-definition specification which utilizes 720 effective scanning lines and the progressive system. Additional Information The AVCHD format is a high-definition digital video camera format used to record SD (standard definition) or HD (high definition) signals of either the 1080i specification*1 or the 720p specification*2 on DVDs, using efficient data compression coding technology. The MPEG-4 AVC/H.264 format is adopted to compress video data, and the Dolby Digital or Linear PCM system is used to compress audio data. The MPEG-4 AVC/ H.264 format is capable of compressing images at higher efficiency than that of the conventional image compressing format. The MPEG-4 AVC/ H.264 format enables a high definition (HD) video signal shot on a digital video camera recorder to be recorded on DVD discs, in the same way as it would be for a standard definition (SD) television signal. b • Some AVCHD format discs may not play, depending on the recording condition. • The AVCHD format disc will not play if it has not been correctly finalised. 67 Video Output Resolution Output resolution differs depending on the “Output Video Format” setting in the “Video Settings” setup (page 44). When “Output Video Format” is set to “HDMI” When “Output Video Format” is set to “Component Video” VIDEO OUT VIDEO/ S VIDEO jack COMPONENT VIDEO jack HDMI OUT jack VIDEO OUT VIDEO/ S VIDEO jack 480i/576i 480i/576i 480i/576i 480i/576i 480i/576i 480i/576i 480i/576i 480p/576p 480i/576i 480i/576i 480p/576p 480i/576i 480p/576p 480p/576p 720p 480i/576i 480i/576i 720p 480i/576i 720p*1 720p*1 1080i 480i/576i 480i/576i 1080i 480i/576i 1080i*1 1080i*1 Resolution setting 1080p *2 480i/576i *2 480i/576i 1080p *1 Protected contents on DVDs are output at 480p/ 576p resolution. Protected contents on BDs are output at 576p resolution. *2 No picture appears when outputting at 1080/24p resolution. When “Output Video Format” is set to “Video or S Video” 480i/576i video signals are output from the VIDEO OUT VIDEO/S VIDEO or COMPONENT VIDEO jack, and 480p/576p video signals are output from the HDMI OUT jack. 68 COMPONENT VIDEO jack HDMI OUT jack unselectable unselectable unselectable Audio Output Signals The audio output differs as follows, depending on the source, output jack, and the selected settings. Jacks/ settings*1 Digital Analogue Auto*3 2ch PCM*3 BD LPCM 2ch LPCM 2ch LPCM 2ch LPCM 2ch LPCM 2ch 2ch 2ch LPCM 5.1ch LPCM 5.1ch LPCM 2ch LPCM 2ch LPCM 2ch 5.1ch 2ch LPCM 7.1ch LPCM 7.1ch LPCM 2ch LPCM 2ch LPCM 2ch 7.1ch 2ch Dolby Digital LPCM 5.1ch*5 LPCM 2ch Dolby Digital/ LPCM 2ch LPCM 2ch*6 5.1ch 2ch Dolby Digital Plus LPCM 7.1ch*5 LPCM 2ch Dolby Digital/ LPCM 2ch LPCM 2ch*6 7.1ch 2ch Dolby TrueHD LPCM 7.1ch*5 LPCM 2ch Dolby Digital/ LPCM 2ch LPCM 2ch*6 7.1ch 2ch DTS LPCM 5.1ch*5 LPCM 2ch DTS/ LPCM 2ch*6 LPCM 2ch 5.1ch 2ch DTS-HD High Resolution Audio LPCM 7.1ch*5 LPCM 2ch DTS/ LPCM 2ch*6 LPCM 2ch 7.1ch 2ch DTS-HD LPCM Master Audio 7.1ch*5 LPCM 2ch DTS/ LPCM 2ch*6 LPCM 2ch 7.1ch 2ch LPCM LPCM 2ch LPCM 2ch LPCM 2ch LPCM 2ch 2ch 2ch Dolby Digital Dolby Digital LPCM 2ch Dolby Digital LPCM 2ch 5.1ch 2ch DTS DTS LPCM 2ch DTS LPCM 2ch 5.1ch 2ch MPEG LPCM 2ch LPCM 2ch LPCM 2ch LPCM 2ch 2ch 2ch LPCM LPCM LPCM 2ch LPCM 2ch LPCM 2ch 2ch 2ch LPCM 2ch DTS LPCM 2ch 5.1ch 2ch DVD CD HDMI OUT DTS 5.1 MUSIC DISC DTS *1 *2 *3 *4 *5 When “Audio Output Priority” is set to “Stereo Analogue,” LPCM 2ch signals are output from each jack. When “Audio Output Priority” is set to “HDMI,” “Coaxial/Optical” or “Multi Channel Analogue,” LPCM 2ch signals are output from jacks other than the selected jack. Auto: when “Audio (HDMI)” is set to “Auto” in the “Audio Settings” setup (page 51). 2ch PCM: when “Audio (HDMI)” is set to “2ch PCM” in the “Audio Settings” setup (page 51). Bitstream: when “Dolby Digital” is set to “Dolby Digital” or “DTS” is set to “DTS” in the “Audio Settings” setup (page 48). When “BD Audio Setting” is set to “Direct,” audio recorded by the source is output by bitstream. However, this audio may be output as follows depending on the audio formats supported by the AV amplifier (receiver). Additional Information Disc/source DIGITAL OUT (OPTICAL/ MULTI AUDIO COAXIAL) jacks*2 CHANNEL OUT (L/R) OUTPUT *4 jacks *2 Bitstream PCM jacks jack*2 – When the AV amplifier (receiver) does not support HD Audio (Dolby Digital Plus, Dolby TrueHD, DTS-HD High Resolution Audio and DTS-HD Master Audio) but supports Multi-ch LPCM, up to LPCM 7.1ch is output. – When the AV amplifier (receiver) does not support HD Audio or Multi-ch LPCM but supports Dolby Digital/DTS, a Dolby Digital or DTS bitstream is output. – When the AV amplifier (receiver) does not support HD Audio, Multi-ch LPCM or Dolby Digital/DTS, LPCM 2ch is output. *6 The 2-channel or less-channel primary/ secondary audio signals are output as LPCM 2ch signals. b When outputting 480i/576i or 480p/576p video signals from the HDMI OUT jack, Dolby TrueHD and DTS-HD Master Audio are output as LPCM, Dolby Digital, or DTS bitstream signals even if “BD Audio Setting” is set to “Direct” in the “Audio Settings” setup (page 51). 69 General Specifications System Laser: Semiconductor laser Inputs and outputs (Jack name: Jack type/Output level/Load impedance) AUDIO OUT L/R: Phono jack/2 Vrms/10 kilohms DIGITAL OUT (OPTICAL): Optical output jack/–18 dBm (wave length 660 nm) DIGITAL OUT (COAXIAL): Phono jack/0.5 Vp-p/75 ohms MULTI CHANNEL OUTPUT: Phono jack/2 Vrms/10 kilohms HDMI OUT: HDMI 19-pin standard connector COMPONENT VIDEO OUT (Y, PB/CB, PR/CR): Phono jack/Y: 1.0 Vp-p/ PB/CB, PR/CR: 0.7 Vp-p/75 ohms VIDEO OUT VIDEO: Phono jack/1.0 Vp-p/75 ohms VIDEO OUT S VIDEO: 4-pin mini DIN/ Y: 1.0 Vp-p, C: 0.3 Vp-p/75 ohms LAN (100): 100BASE-TX Terminal EXT: External memory slot (For connecting the external memory) DC output: 5 V 500 mA Max CONTROL S IN/IR IN: Mini jack RS-232C port: D-sub 9-pin 70 Power requirements: 220–240 V AC, 50/60 Hz Power consumption: 42 W Dimensions (approx.): 430 mm × 365 mm × 125 mm (width/depth/height) incl. projecting parts Mass (approx.): 10 kg Operating temperature: 5 ºC to 35 ºC Operating humidity: 25 % to 80 % Supplied accessories See page 13. Specifications and design are subject to change without notice. Language Code List For details, see page 53. The language spellings conform to the ISO 639: 1988 (E/F) standard. Number, Language (BD Language Code/DVD Language Code) Additional Information not specified Parental Control/Area Code For details, see page 53. Number, Area (Code) 2044, Argentina (ar) 2047, Australia (au) 2046, Austria (at) 2057, Belgium (be) 2070, Brazil (br) 2079, Canada (ca) 2090, Chile (cl) 2092, China (cn) 2093, Colombia (co) 2115, Denmark (dk) 2165, Finland (fi) 2174, France (fr) 2109, Germany (de) 2200, Greece (gr) 2219, Hong Kong (hk) 2248, India (in) 2238, Indonesia (id) 2239, Ireland (ie) 2254, Italy (it) 2276, Japan (jp) 2304, Korea (kr) 2333, Luxembourg (lu) 2363, Malaysia (my) 2362, Mexico (mx) 2376, Netherlands (nl) 2390, New Zealand (nz) 2379, Norway (no) 2427, Pakistan (pk) 2424, Philippines (ph) 2428, Poland (pl) 2436, Portugal (pt) 2489, Russia (ru) 2501, Singapore (sg) 2149, Spain (es) 2499, Sweden (se) 2086, Switzerland (ch) 2543, Taiwan (tw) 2528, Thailand (th) 2184, United Kingdom (gb) 71 3. Automatic Update Terms and Conditions of Use and End User License Agreement The Sony Blu-ray Disc player (“Product”) and associated software (“Software”) are provided and maintained by Sony Corporation and its affiliates (“Sony”). Sony also provides and maintains associated service (the “Service”), including any subsite accessible through the Service’s Internet homepage (the “Site”). The Software includes software embedded in the Product; stored on any media, bundled with the Product or otherwise provided by Sony; downloaded from the Site or otherwise made accessible or provided by Sony; any such media and any printed or “on-line” or electronic documentation associated with the Product and all updates and upgrades thereto. WHEN YOU ACCESS, BROWSE, OR USE THE SERVICE, PRODUCT, SOFTWARE, AND/OR SITE, YOU ACCEPT, WITHOUT LIMITATION OR QUALIFICATION, THE TERMS AND CONDITIONS SET FORTH HEREIN, SONY’S PRIVACY POLICY POSTED ON THE SITE, AND ANY ADDITIONAL TERMS AND CONDITIONS OF USE SET FORTH IN ANY PORTION OF THE SERVICE AND SITE (COLLECTIVELY THE “AGREEMENT”). IF YOU DO NOT AGREE WITH THE TERMS AND CONDITIONS OF THIS AGREEMENT, SONY DOES NOT GRANT THE LIMITED RIGHTS HEREIN, AND PLEASE DO NOT USE THE SERVICE, PRODUCT, SOFTWARE, AND/OR SITE. 1. Ownership The Software and all materials on the Service and/or Site, including but not limited to images, software and text (the “Content”) are protected by copyright under copyright law and international conventions. You cannot use the Software, Service, Product, Content, and Site except as specified herein. There may be proprietary logos, service marks, and trademarks found on this Service or Site. By making them available on the Service and/or Site, Sony is not granting you any license to utilize those proprietary logos, service marks, or trademarks. Any unauthorized use of the Service, Site, Content or Software may violate copyright laws, trademark laws, the laws of privacy and publicity, and civil and criminal statutes. All title and copyright in and to the Software or materials on the Service/Site and any copies of the Software, are owned by Sony, its licensors, or suppliers. All rights not specifically granted under this Agreement are reserved by Sony, its licensors, and suppliers. 2. Your Rights & Limited License The Service, Site, Software, Content, and Product are only for your personal use. You are responsible for all your activities hereunder, including all legal liability incurred from your use of the Service or others who use the Service via your Product. You may use the Service, Site, Software, Content and Product for lawful purposes only. You may not distribute, exchange, modify, sell, or transmit anything you may copy from the Service or Site, including but not limited to any text, images, audio, and video, for any business, commercial, or public purpose. As long as you comply with the terms of this Agreement, Sony grants you a non-exclusive, non-transferable, limited right to enter, display, and use the Service, Site, and Software as set forth in this Agreement. You agree not to interrupt/disrupt or attempt to interrupt/disrupt the operation of this Service, Site or Software in any way. The Software contains a functionality by which it is updated automatically when the Product is connected to a server belonging to Sony or to a third party designated by Sony. When you specify your intention not to use this automatic update functionality, or when the setting asking whether you wish to update automatically is activated and you decline to execute updates, it is assumed that you agree that the security functionality improvements, error corrections, other functional updates or any other changes offered by Sony through such updates would not be made to the Software and that your current and further use of the Software may be affected thereby. When the automatic update functionality described in the previous paragraph is activated, it is assumed that you agree (a) that the Software will be automatically updated as necessary to improve security functionality, to correct errors, to improve update functionality, or for other purposes, and (b) that this updating of the Software may be accompanied by the augmenting, modifying, or removing of functionality of the Software. 4. Additional Terms Governing Product Software You may use the Software solely in conjunction with the Product that accompanied the Software. The Software is licensed, not sold. In addition to the terms set forth in other portions of this Agreement, the Software is subject to the following: Use of Software. You may use the Software in conjunction with the Product for personal use. Limitation on Reverse Engineering, Decompilation and Disassembly. You may not modify, reverse engineer, decompile, or disassemble the Software in whole or in part. Separation of Components. The Software is licensed as a single product. Its component parts may not be separated for use on more than one device unless expressly authorized by Sony. Data Files. The Software may create data files automatically for use with the Software. Any such data files will be deemed as part of the Software. Rental. You may not rent or lease the Software. Software Transfer. You may permanently transfer all of your rights under this Agreement only as part of a sale or transfer of Software accompanying the sale or transfer of your Product, provided you retain no copies, transfer all of the Software (including all copies, component parts, the media and printed materials, all versions and any upgrades of the Software and this Agreement), and the recipient agrees to the terms of this Agreement. Dependent Software. The software, network services or other products other than Software upon which the Software’s performance depends on might be interrupted or discontinued at the discretion of the suppliers (software suppliers, service providers or Sony). High Risk Activities. The Software is not fault-tolerant and is not designed, manufactured or intended for use or resale as online control equipment in hazardous environments requiring failsafe performance, such as in the operation of nuclear facilities, aircraft navigation or communication systems, air traffic control, direct life support machines, or weapons systems, in which the failure of the Software could lead to death, personal injury, or severe physical or environmental damage (“High Risk Activities”). Sony and its suppliers specifically disclaim any express or implied warranty of fitness for High Risk Activities. GNU General Public, Lesser General Public, & Other Licenses. Notwithstanding terms in this Agreement, certain portions of the Software are governed by the GNU Lesser General Public License, Version 2.1 (LGPL), GNU General Public License Version 2 (GPL), and other open source code licenses (“Open Source Licenses”), copies of which are attached hereto and incorporated herein. For such portions of the Software, to the extent there is any conflict between this Agreement and the Open Source Licenses, the Open Source Licenses shall govern as applicable. Certain Source Code Availability. Sony is making available the source code of certain portions of the SOFTWARE per the GPL/ LGPL LICENSES. Please see http://www.sony.com/linux for access to and instructions on obtaining such source code. 72 5. Changes to Service Sony reserves the right to discontinue one, some, or all of the features of the Service you receive at any time at its discretion. Sony may, at its discretion and from time to time change, add or remove features and functionality, upgrade or modify the Service, Site and/or Software without notice. You may, at Sony’s discretion, receive messages regarding these changes and new features/functionality. Any new text, content, file, data, product, services, information, software, software tool or other feature provided by Sony (through the network or by CD-ROM or other means)(including, but not limited to, any update to Software provided to you automatically pursuant to Section 3 of this Agreement) will be subject to this Agreement; provided that, if separate terms and conditions applicable to such feature are provided to you, such terms and conditions shall apply to such feature in priority to this Agreement. 6. Confidentiality You shall maintain the confidentiality of any information with regard to the Product and Documentation that is provided under this Agreement and is not publicly known. You agree not to disclose such information to any third party without the prior written consent. You agree not to export from anywhere the Software or thereof provided to you except in compliance with, and with all licences and approvals required under, applicable export laws, rules and regulations. 8. Sony’s Right to Terminate or Modify Terms or Conditions of this Agreement Sony may add to, change, or remove any part, term, or condition of this Agreement at any time, without prior notice. Any changes to this Agreement or any terms posted on the Service and/or Site apply as soon as they are posted. By continuing to use the Service, Product, Software and/or Site after any changes are posted, you are indicating your acceptance of those changes. SONY MAY ADD, CHANGE, DISCONTINUE, REMOVE, OR SUSPEND ANY OTHER CONTENT POSTED ON THE SERVICE AND/OR SITE, INCLUDING FEATURES AND SPECIFICATIONS OF PRODUCTS DESCRIBED OR DEPICTED ON THE SERVICE AND/OR SITE, TEMPORARILY OR PERMANENTLY, AT ANY TIME, WITHOUT NOTICE AND WITHOUT LIABILITY. WITHOUT PREJUDICE TO ANY OTHER RIGHTS, SONY MAY SUSPEND OR TERMINATE THIS AGREEMENT IMMEDIATELY UPON NOTICE IF YOU FAIL TO COMPLY WITH THE TERMS AND CONDITIONS OF THIS AGREEMENT. Upon termination, you shall destroy the Software within fourteen (14) days after the date of such termination, and upon Sony’s request, provide Sony with the certification of such destruction. Sony may take any legal and technical remedies to prevent the violation of and/or to enforce this Agreement, including without limitation, immediate termination of your access to the Service if we believe in our discretion you are violating this Agreement. 9. Indemnification You agree to indemnify, defend, and hold Sony and all of its agents, directors, employees, information providers, licensors and licensees, affiliates, content providers, officers, and parent (collectively, “Indemnified Parties”), harmless from and against any and all liability and costs (including, without limitation, attorneys’ fees and costs), incurred by the Indemnified Parties in connection with any claim arising out of (i) any breach or alleged breach by you of this Agreement in any manner, (ii) any information you submit to Sony hereunder, (iii) any breach or alleged breach by you of a third party’s rights or (iv) any damage caused by or alleged to have been caused by you to the Service. You will cooperate as fully as reasonably required in Indemnified Party(s) defense of any claim. Sony and/or Indemnified Parties reserve the right, at its own expense, to assume the exclusive defense and control of any matter otherwise subject to indemnification by you and you shall not in any event settle any matter without the written consent of Sony and/or Indemnified Parties. YOU UNDERSTAND THAT USAGE OF THE PRODUCT AND SERVICE REQUIRES INTERNET SERVICE PROVIDED BY YOU, FOR WHICH YOU ARE SOLELY RESPONSIBLE. OPERATION OF THE PRODUCT AND/OR SERVICE MAY BE LIMITED OR RESTRICTED DEPENDING UPON THE CAPABILITIES OR TECHNICAL LIMITATIONS OF YOUR INTERNET SERVICE. YOUR USE OF THE SOFTWARE, SERVICE, PRODUCT, CONTENT AND/OR SITE IS AT YOUR OWN RISK. THE SOFTWARE, SERVICE, CONTENT AND SITE ARE PROVIDED “AS IS” AND, TO THE FULLEST EXTENT PERMISSIBLE BY LAW, SONY MAKES NO REPRESENTATIONS OR WARRANTIES OF ANY KIND WHATSOEVER (1) FOR THE ACCURACY, MERCHANTABILITY, FITNESS FOR A PARTICULAR PURPOSE, OR NON-INFRINGEMENT ASSOCIATED WITH THE SERVICE, SITE, AND/OR SOFTWARE; (2) THAT THE SERVER(S) THAT MAKES THE SERVICE, SOFTWARE, AND/OR SITE AVAILABLE ARE FREE OF VIRUSES OR OTHER COMPONENTS THAT MAY INFECT, HARM, OR CAUSE DAMAGE TO YOUR COMPUTER, TELEVISION, OTHER EQUIPMENT, OR ANY OTHER PROPERTY. FURTHERMORE, SONY DOES NOT WARRANT OR MAKE ANY REPRESENTATIONS REGARDING THE USE OR THE RESULTS OF THE USE OF THE SOFTWARE, SERVICE, AND/OR SITE IN TERMS OF ITS CORRECTNESS, ACCURACY, RELIABILITY, OR OTHERWISE. NO ORAL OR WRITTEN INFORMATION OR ADVICE GIVEN BY SONY OR A SONY AUTHORIZED REPRESENTATIVE SHALL CREATE A WARRANTY OR IN ANY WAY INCREASE THE SCOPE OF THIS WARRANTY. SHOULD THE SOFTWARE, SERVICE, AND/ OR SITE PROVE DEFECTIVE YOU (AND NOT SONY OR A SONY AUTHORIZED REPRESENTATIVE) ASSUME THE ENTIRE COST OF ALL NECESSARY SERVICING, REPAIR OR CORRECTION. Additional Information 7. Export Control 10. DISCLAIMER OF WARRANTIES AND DAMAGES; LIMITATION OF LIABILITY UNDER NO CIRCUMSTANCES, INCLUDING BUT NOT LIMITED TO SONY’S NEGLIGENCE OR ISSUES RELATED TO THIRD PARTY CONTENT PROVIDERS, SHALL SONY BE LIABLE FOR ANY CONSEQUENTIAL, DIRECT, INCIDENTAL, INDIRECT, PUNITIVE, OR SPECIAL DAMAGES RELATED TO (A) THE USE OF, (B) THE INABILITY TO USE, OR (C) ERRORS OR OMISSIONS IN THE SOFTWARE, SERVICE, PRODUCT, AND/OR SITE, EVEN IF SONY OR AN AUTHORIZED REPRESENTATIVE THEREOF HAS BEEN ADVISED OF THE POSSIBILITY OF SUCH DAMAGES. SOME STATES DO NOT ALLOW THE EXCLUSION OR LIMITATION OF CONSEQUENTIAL OR INCIDENTAL DAMAGES, SO THE ABOVE LIMITATION OR EXCLUSION MAY NOT APPLY TO YOU. IN NO EVENT SHALL SONY’S TOTAL LIABILITY TO YOU FOR ALL DAMAGES, LOSSES, AND CAUSES OF ACTION (WHETHER IN CONTRACT OR TORT, INCLUDING, BUT NOT LIMITED TO, NEGLIGENCE OR OTHERWISE) EXCEED THE AMOUNT PAID FOR THE PRODUCT. SOME STATES, TERRITORIES AND COUNTRIES DO NOT ALLOW CERTAIN WARRANTY EXCLUSIONS, SO TO THAT EXTENT THE ABOVE DISCLAIMER AND LIMITATION OF LIABILITY MAY NOT APPLY TO YOU. THE TERMS OF THIS DISCLAIMER DO NOT AFFECT OR PREJUDICE YOUR STATUTORY RIGHTS AS CONSUMER, NEITHER DO THEY LIMIT OR EXCLUDE ANY LIABILITY FOR DEATH OR PERSONAL INJURY CAUSED BY THE NEGLIGENCE OF SONY OR ANY OTHER LIABILITY IF AND TO THE EXTENT THAT IT CANNOT BE LIMITED OR EXCLUDED BY APPLICABLE LAW . ,continued 73 11. General Provisions This Agreement, the limited warranty accompanying the Product, plus any additional terms posted on the Service or Site, together constitute the entire agreement between Sony and you with respect to your use of the Product, Service, Site, Content, and Software. Any notice by Sony hereunder may be made by letter, email, or posting on the Service or Site. Any cause of action you may have with respect to your use of this Site must be commenced within one (1) year after the claim or cause of action arises. If for any reason a court of competent jurisdiction finds any provision of this Agreement, or portion thereof, to be unenforceable, that provision shall be enforced to the maximum extent permissible so as to affect the intent of this Agreement, and the remaining terms and conditions of the Agreement shall continue in full force and effect. This Agreement shall be governed by and construed in accordance with the laws of Japan. Glossary AACS “Advanced Access Content System” is a specification for managing digital entertainment contents stored on the next generation of prerecorded and recorded optical media. The specification enables consumers to enjoy digital entertainment content, including high-definition content. AVCHD (page 67) The AVCHD format is a high definition digital video camera format used to record SD (standard definition) or HD (high definition) signals of either the 1080i specification*1 or the 720p specification*2 on DVDs, using efficient data compression coding technology. The MPEG-4 AVC/ H.264 format is adopted to compress video data, and the Dolby Digital or Linear PCM is used to compress audio data. The MPEG-4 AVC/H.264 format is capable of compressing images at higher efficiency than that of the conventional image compression format. The MPEG-4 AVC/H.264 format enables a high definition (HD) video signal shot on a digital video camera recorder to be recorded on DVDs in the same way as for a standard definition (SD) television signal. *1 A high definition specification that utilises 1080 effective scanning lines and the interlace format. *2 A high definition specification that utilises 720 effective scanning lines and the progressive format. BD-J application The BD-ROM format supports Java for interactive functions. “BD-J” offers content providers almost unlimited functionality when creating interactive BD-ROM titles. BD-R (page 65) BD-R (Blu-ray Disc Recordable) is a recordable, write-once Blu-ray Disc, available in the same capacities as the BD below. Since contents can be recorded and cannot be overwritten, a BD-R can be used to archive valuable data or storing and distributing video material. 74 BD-RE (page 65) DTS-HD High Resolution Audio (page 69) BD-RE (Blu-ray Disc Rewritable) is a recordable and rewritable Blu-ray Disc, available in the same capacities as the BD below. The re-recordable feature makes extensive editing and time-shifting applications possible. Developed as an extension to DTS Digital Surround format. It supports a maximum sampling frequency of 96 kHz, and 7.1 multichannel surround. DTS-HD High Resolution Audio has a maximum transmission rate of 6 Mbps, with lossy compression (Lossy). BD-ROM (page 65) Blu-ray Disc (BD) (page 65) A disc format developed for recording/ playing high-definition (HD) video (for HDTV, etc.), and for storing large amounts of data. A single layer Blu-ray Disc holds up to 25 GB, and a dual-layer Blu-ray Disc holds up to 50 GB of data. Deep Colour (page 47) These are video signals for which the colour depth of signals passing through an HDMI jack have been enhanced. With a Non-Deep Colour-compatible player, the number of colours 1 pixel can express is 24 bits (16,777,216 colours). However, with a Deep Colour-compatible player, 1 pixel can express more bits, such as 36 bits. With more bits, the gradation of colour depth can be expressed more finely, and continuous colour changes will be displayed more smoothly. DTS-HD Master Audio (page 69) DTS-HD Master Audio has a maximum transmission rate of 24.5 Mbps, and uses lossless compression (Lossless), and DTSHD Master Audio corresponds to a maximum sampling frequency of 192 kHz, and maximum of 7.1ch. HDMI (High-Definition Multimedia Interface) (page 15) HDMI is an interface that supports both video and audio on a single digital connection. The HDMI connection carries standard- to highdefinition video signals and multi-channel audio signals to AV components such as HDMI equipped TVs, in digital form without degradation. The HDMI specification supports HDCP (High-bandwidth Digital Contents Protection), a copy protection technology for digital entertainment contents for HDMI. Additional Information BD-ROMs (Blu-ray Disc Read-Only Memory) are commercially produced discs and are available in the same capacities as the BD below. Other than conventional movie and video contents, these discs have enhanced features such as interactive content, menu operations using pop-up menus, selection of subtitle display, and slideshow. Although a BD-ROM may contain any form of data, most BD-ROM discs will contain movies in High Definition format, for playback on Blu-ray Disc/DVD players. HD Reality Enhancer (page 37, 40) Sony-developed technology provides realtime parsing pixel-by-pixel, performs optimum smoothing, clarifies details, removes noise and achieves smoother gradation in video signals during playback. LTH (Low to High) (page 66) LTH is a recording system that supports organic pigment type BD-R. PhotoTV HD (page 41) Dolby Digital Plus (page 69) Developed as an extension to Dolby Digital, the audio coding technology supports 7.1 multi-channel surround sound. Dolby TrueHD (page 69) Dolby TrueHD is a lossless coding technology that supports up to 8 channels of multi-channel surround sound for the next generation optical discs. The reproduced sound is true to the original source bit-for-bit. “PhotoTV HD” allows for a highly-detailed pictures, and photo-like expression of subtle textures and colours. By connecting Sony “PhotoTV HD” compatible devices using an HDMI cable, whole new world of photos can be enjoyed in breathtaking Full HD quality. For instance, the delicate texture of the human skin, flowers, sand and waves can now be displayed on a large screen in beautiful photo-like quality. ,continued 75 Pop-up menu (page 34) An enhanced menu operation available on BD-ROMs. The pop-up menu appears when POP UP/MENU is pressed during playback, and can be operated while playback is in progress. Super Bit Mapping (page 10, 47) It is possible to achieve smoother gradation by putting 14 bits of information into an 8-bit video signal. This Sony-developed technology takes into account human vision characteristics. x.v.Colour (page 47) x.v.Colour is a familiar term for the xvYCC standard proposed by Sony. xvYCC is an international standard for Colour space in video. This standard can express a wider colour range than the currently used broadcast standard. 24p True Cinema (page 46) Movies shot with a film camera consist of 24 frames per second. Since conventional televisions (both CRT and flat panels) display frames either at 1/60 or 1/50 second intervals, the 24 frames do not appear at an even pace. When connected to a TV with 24p capabilities, the player displays each frame at 1/24 second intervals — the same interval originally shot with the film camera, thus faithfully reproducing the original cinema image. 76 Index Words in quotations appear in the on-screen displays. Numerics 24p True Cinema 76 A “A/V Settings” 37 AACS 74 ANGLE 8 AUDIO 8 “Audio Output Priority” 48 Audio output signals 69 “Audio Settings” 38, 48 “Auto Power Off” 56 AVCHD 67, 74 D O Deep Colour 47, 75 “Dimmer” 56 Disc information 36 Disc Lock 33 DISPLAY 8 Dolby Digital 22, 51 Dolby Digital Plus 69, 75 Dolby TrueHD 69, 75 DTS 22, 51 DTS-HD 69, 75 DVD 65 One-Touch Play 16, 33 OPTIONS 9, 34, 39, 40 “OSD” 56 Parental Control 33, 53 “Photo” 40 “Photo Settings” 55 PhotoTV HD 41, 75 Playable discs 65 POP UP/MENU 9, 34 E Q Easy Setup 29, 59 Enter characters 58 External memory 25, 35, 62 F Front panel display 11 B Batteries 28 “BD/DVD Viewing Settings” 53 “BD Data” 35, 63 BD-Live 25, 35 BD-R 65, 74 BD-RE 65, 75 Bitstream 69 Blu-ray Disc 65, 75 BonusView 35 BRAVIA Sync 16, 62 C CD 65 Chapter 36 Child Lock 10, 63 Colour buttons 9 Connecting AV amplifier (receiver) 19 TV 14 “Control for HDMI” 16, 33, 56, 62 H HDMI 15, 21, 30, 45, 47, 48, 51, 62, 75 “HD Reality Enhancer” 37, 40, 75 HOME 9 Home menu 39, 40, 42 L Language Follow 16 Local storage 25, 35, 62 LTH 75 M MULTI CHANNEL OUTPUT 23, 48 “Music” 39 N “Network Diagnostic” 58 “Network Settings” 57 “Network Update” 26, 43 P “Quick Start Mode” 56 R Region code 66 Remote 8, 28, 29 “Resetting” 59 Resetting the player 59 Resume 9, 33, 39 S SCENE SEARCH 9 Searching 35, 36 Self-diagnosis function 64 “Setup” 42 Slideshow 40 Software update 26, 43, 56 “Speaker Settings” 48 SUBTITLE 8 Super Bit Mapping 10, 47, 76 System Power-Off 16 “System Settings” 56 T THEATRE 8, 16 Title 36 TOP MENU 9 Troubleshooting 60 “TV Type” 44 U Update 26, 43 ,continued 77 V “Video” 32 Video output resolution 68 “Video Settings” 37, 44 X x.v.Colour 47, 76 78 79