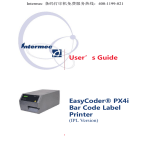
Download User's Guide EasyCoder PF4i Bar Code Label Printer
Transcript
Intermec 条码打印机免费服务热线:400-1166-021
User’s Guide
EasyCoder PF4i
Bar Code Label
Printer
(IPL Version)
User’s Guide
EasyCoder PF4i
Bar Code Label
Printer
(IPL Version)
IntermecTechnologiesCorporation
WorldwideHeadquarters
600136thAve.W.
Everett,WA98203
U.S.A.
www.intermec.com
Theinformationcontainedhereinisprovidedsolelyforthepurposeofallowingcustomersto
operateandserviceIntermec-manufacturedequipmentandisnottobereleased,reproduced,or
usedforanyotherpurposewithoutwrittenpermissionofIntermecTechnologiesCorporation.
Informationandspecificationscontainedinthisdocumentaresubjecttochangewithoutprior
noticedanddonotrepresentacommitmentonthepartofIntermecTechnologiesCorporation.
©2003-2008byIntermecTechnologiesCorporation.Allrightsreserved.
ThewordIntermec,theIntermeclogo,Norand,ArciTech,CrossBar,DataCollectionBrowser,
dcBrowser,Duratherm,EasyCoder,EasyLAN,EnterpriseWirelessLAN,EZBuilder,
Fingerprint,i-gistics,INCA(underlicense),InterDriver,IntermecPrinterNetworkManager,
IRL,JANUS,LabelShop,MobileFramework,MobileLAN,Nor*Ware,Pen*Key,PrecisionPrint,
PrintSet,RoutePower,TE2000,TrakkerAntares,UAP,UniversalAccessPoint,andVirtual
WedgeareeithertrademarksorregisteredtrademarksofIntermecTechnologiesCorporation.
ThereareU.S.andforeignpatentsaswellasU.S.andforeignpatentspending.
Throughoutthismanual,trademarkednamesmaybeused.Ratherthanputatrademark(™or®)
symbolineveryoccurrenceofatrademarkedname,westatethatweareusingthenamesonlyin
aneditorialfashion,andtothebenefitofthetrademarkowner,withnointentionof
infringement.
KimduraisaregisteredtrademarkofKimberlyClark.
MicrosoftisaregisteredtrademarkofMicrosoftCorporation.
ValeronisaregisteredtrademarkofValéronStrengthFilms,anITWCompany.
WindowsisatrademarkofMicrosoftCorporation.
ii
Document Change Record
Thispagerecordschangestothisdocument.Thedocumentwas
originallyreleasedas1-960586-00.
Version
Number
934-027-00102/2008Updatedstyles,updatedMediaSensitivity
Numberinformation,changedprintedsize
to8.5x7”.
-02
-01
-00
iii
iv
EasyCoder PF4i User’s Guide (IPL Version)
Contents
BeforeYouBegin....................................................xi
SafetySummary.............................................xi
Donotrepairoradjustalone............................xi
Firstaid............................................xi
Resuscitation........................................xi
Energizedequipment..................................xi
SafetyIcons................................................xii
GlobalServicesandSupport....................................xii
ServiceLocationSupport.....................................xiii
WhoShouldReadThisManual.................................xiv
RelatedDocuments..........................................xiv
1 Introduction
DescriptionofEasyCoderPF4iPrinter....................................2
SafetySummary.....................................................3
ProductIdentification.................................................3
2 Installation
.......................................................5
FrontView.........................................................6
RearView..........................................................7
MediaCompartment.................................................8
MediaSupplyRollPost........................................9
MediaSupplyPositions........................................10
PrintMechanism....................................................11
Connections.......................................................12
ControlsandIndicators..............................................13
IndicatorLamps.............................................13
Display....................................................14
Keyboard..................................................14
KeyboardColorCode.................................15
Beeper.............................................15
SwitchingOnthePrinter.............................................15
EasyCoder PF4i User’s Guide (IPL Version)
Contents
3 Media Load
Tear-Off(Straight-Through)..........................................18
Tear-OffwithQuick-Load(StraightThrough)..........................23
Cut-Off..........................................................26
Peel-Off(Self-Strip).................................................32
ExternalSupply(Fan-Fold)...........................................38
4 Ribbon Load for Thermal Transfer Printing
RibbonLoad......................................................42
5 Setting Up the Printer
Description.......................................................50
DefaultSetup......................................................50
SetupParameters...................................................
SerialCommunication........................................
BaudRate..........................................
DataBits...........................................
Parity.............................................
StopBits...........................................
Protocol...........................................
Test/Service................................................
Testprint...........................................
DataDump........................................
MemoryReset.......................................
Media....................................................
MediaType........................................
PaperType.........................................
LabelLengthDots...................................
Sensitivity(MediaSensitivityNumber)....................
Darkness...........................................
LabelRestPoint.....................................
FormAdjDotsX....................................
vi
Contents
FormAdjDotsY.....................................57
Configuration...............................................57
EmulationMode.....................................57
PrintSpeed.........................................57
Cutter(optional).....................................58
LabelTakenSensor(optional)...........................58
ReturningtoFactoryDefaultSetup.....................................58
6 Setup Mode
NavigatinginSetupMode............................................62
SetupModes.......................................................63
SerialCommunications.......................................63
Network(Optional)..........................................63
Test/Service................................................64
Media.....................................................65
Configuration...............................................65
7 Options
Overview.........................................................68
DTPModel.......................................................68
SideDoorsandMegatop..............................................69
PaperCutter.......................................................69
IntegralLinerTakeupKit.............................................70
MediaSupplyHub..................................................70
3-inchAdapter.....................................................70
LabelTakenSensor..................................................71
ThickMediaPrinthead...............................................71
InterfaceBoards....................................................71
EasyCoder PF4i User’s Guide (IPL Version)
Contents
8 Troubleshooting
IntermecReady-to-WorkIndicator.....................................74
Troubleshooting....................................................76
9 Maintenance
PrintheadCleaning.................................................82
ExternalCleaning..................................................87
CleaningtheMediaGuides...........................................89
PrintheadReplacement..............................................91
MediaJams.......................................................96
10 Adjustments
AdjustingforNarrowMedia..........................................98
AdjustingPrintheadPressure..........................................99
AdjustingtheLabelStopSensor.......................................101
AdjustingtheRibbonBreakShaft.....................................102
InstallingtheQuick-LoadGuides.....................................103
A Technical Data
B Media Specifications
...............................................105
........................................109
MediaRollSize...................................................110
Core....................................................110
Media...................................................110
Media..........................................................111
Self-AdhesiveStrip(ContinuousStock)..........................111
Self-AdhesiveLabels(GapStock)...............................112
viii
Contents
Non-AdhesiveStrip(ContinuousStock)..........................113
TicketsWithGaps(GapStock)................................114
TicketsWithBlackMark(MarkStock)..........................115
C Interfaces
RS-232Interface...................................................118
ProtocolForTheDefaultSetup................................118
InterfaceCable.............................................119
OptionalInterfaces.................................................119
D Media Sensitivity Number
AbouttheMediaSensitivityNumber(MSN).............................122
DeterminingtheCurrentMediaSensitivitySetting.........................122
ChangingtheCurrentMediaSensitivitySetting...........................122
DeterminingtheMSNforIntermec-ApprovedMediaandRibbons............123
DeterminingtheMSNforOtherMediaandRibbons......................123
MediaSensitivityNumbersforIntermec-ApprovedMediaandRibbons.........124
EasyCoder PF4i User’s Guide (IPL Version)
Contents
x
Before You Begin
Before You Begin
Thissectionprovidesyouwithsafetyinformation,technical
supportinformation,andsourcesforadditionalproduct
information.
Safety Summary
Yoursafetyisextremelyimportant.Readandfollowall
warningsandcautionsinthisdocumentbeforehandling
andoperatingIntermecequipment.Youcanbeseriously
injured,andequipmentanddatacanbedamagedifyoudo
notfollowthesafetywarningsandcautions.
Do not repair or adjust alone
Donotrepairoradjustenergizedequipmentaloneunder
anycircumstances.Someonecapableofprovidingfirstaid
mustalwaysbepresentforyoursafety.
First aid
Alwaysobtainfirstaidormedicalattentionimmediately
afteraninjury.Neverneglectaninjury,nomatterhow
slightitseems.
Resuscitation
Beginresuscitationimmediatelyifsomeoneisinjuredand
stopsbreathing.Anydelaycouldresultindeath.Towork
onornearhighvoltage,youshouldbefamiliarwith
approvedindustrialfirstaidmethods.
Energized equipment
Neverworkonenergizedequipmentunlessauthorizedbya
responsibleauthority.Energizedelectricalequipmentis
dangerous.Electricalshockfromenergizedequipmentcan
causedeath.Ifyoumustperformauthorizedemergency
workonenergizedequipment,besurethatyoucomply
strictlywithapprovedsafetyregulations.
EasyCoder PF4i User’s Guide (IPL Version)
Before You Begin
Safety Icons
Thissectionexplainshowtoidentifyandunderstandthe
warnings,cautions,andnotesthatareinthisdocument.
YoumayalsoseeiconsthattellyouwhentofollowESD
procedures.
Awarningalertsyouofanoperatingprocedure,practice,
condition,orstatementthatmustbestrictlyobservedtoavoid
deathorseriousinjurytothepersonsworkingonthe
equipment.
Acautionalertsyoutoanoperatingprocedure,practice,
condition,orstatementthatmustbestrictlyobservedto
preventequipmentdamageordestruction,orcorruptionor
lossofdata.
Thisiconappearsatthebeginningofanyprocedureinthis
manualthatcouldcauseyoutotouchcomponents(suchas
printedcircuitboards)thataresusceptibletodamagefrom
electrostaticdischarge(ESD).Whenyouseethisicon,youmust
followstandardESDguidelinestoavoiddamagingthe
equipmentyouareservicing
Note:Noteseitherprovideextrainformationaboutatopicor
containspecialinstructionsforhandlingaparticularconditionor
setofcircumstances.
Global Services and Support
Warranty Information
TounderstandthewarrantyforyourIntermecproduct,visit
theIntermecwebsiteatwww.intermec.comandclick
Service&Support.TheIntermecGlobalSales&Service
pageappears.FromtheService&Supportmenu,move
yourpointeroverSupport,andthenclickWarranty.
Disclaimerofwarranties:Thesamplecodeincludedinthis
documentispresentedforreferenceonlyanddoesnot
necessarilyrepresentcomplete,testedprograms.Thecodeis
xii
Before You Begin
provided“asiswithallfaults.”Allwarrantiesareexpressly
disclaimed,includingtheimpliedwarrantiesof
merchantabilityandfitnessforaparticularpurpose.
Telephone Support
TheseservicesareavailablefromIntermecTechnologies
Corporation.
Service
OrderIntermec
products
OrderIntermecmediaOrderprinterlabelsandribbons.
Orderspareparts
TechnicalSupport
Service
Servicecontracts
·Renewacontract.
·Inquireaboutrepairbillingor
otherserviceinvoicing
questions.
OutsidetheU.S.A.andCanada,contactyourlocal
Intermecrepresentative.Tosearchforyourlocal
representative,fromtheIntermecwebsite,clickAboutUs
>ContactUs.
Service Location Support
Forthemostcurrentlistingofservicelocations,onthe
Intermecwebsite,clickSupport>ReturnsandRepairs>
RepairLocations.
xiii
Before You Begin
FortechnicalsupportinSouthKorea,usetheafterservice
locationslistedbelow:
AWOOSystems
102-1304SKVentium
522Dangjung-dong
Gunpo-si,Gyeonggi-doKorea,South435-776
Contact:Mr.SinbumKang
Telephone:+82-31-436-1191
E-mail:mjyun@awoo.co.kr
INInformationSystemPTDLTD
6thFloor
DaeguVentureCenterBldg95
Shinchun3Dong
Donggu,DaeguCity,Korea
E-mail:jmyou@idif.co.krorkorlim@gw.idif.co.kr
OutsidetheU.S.A.andCanada,contactyourlocal
Intermecrepresentative.Tofindyourlocalrepresentative,
fromtheIntermecwebsite,clickContact.
Who Should Read This Manual
ThisUser’sGuideprovidesyouwithinformationaboutthe
featuresoftheEasyCoderPF4iprinterandhowtoinstall,
configure,operate,maintain,andtroubleshootit.
Related Documents
TheIntermecwebsiteatwww.intermec.comcontainsour
documents(asPDFfiles)thatyoucandownloadforfree.
1Todownloaddocuments
2VisittheIntermecwebsiteatwww.intermec.com.
3ClickSupport>Manuals.
4IntheSelectaProductfield,choosetheproductthatyou
wanttodownloaddocumentationfor.
ToorderprintedversionsoftheIntermecmanuals,contact
yourlocalIntermecrepresentativeordistributor.
xiv
1
Introduction
ThischapterintroducestheEasyCoderPF4iprinterandcovers
thefollowingtopics:
·DescriptionofEasyCoderPF4iprinter
·Safetysummary
·Productidentification
EasyCoder PF4i User ’s Guide1
(IPL Version)
Chapter 1 — Introduction
Description of EasyCoder PF4i Printer
TheEasyCoderPF4iprinterisamedium-dutydirectthermal/
thermaltransferprinterwithaprintheadresolutionof8dots/
mm(203dots/inch)andamaximumprintwidthis104mm(4
inches).
TheEasyCoderPF4iprinteroffersalargenumberofuseful
features:
·FlashmemorySIMMsforfirmware,fonts,barcodes,and
applicationprograms
·Built-inCompactFlashmemorycardadapterforfirmware
upgrading
·Built-inRS-232interface
·Provisionforextrainterfaceboardsincludingwiredand
wirelessEasyLANconnections
·Keyboardanddisplaywithbacklightforimproveduser
interface.s
Alargenumberoffactory-installedorfield-installableoptionsare
available,sotheprintercanbeconfiguredforawiderangeof
applications.SeeChapter7,“Options”onpage67formore
information.
TheEasyCoderPF4iprinterdescribedinthismanualsupports
theIntermecProgrammingLanguage(IPL)v2.30orlater.The
EasyCoderPF4iprinterthatsupportsIntermecFingerprintis
describedinitsownUser’sGuide.
2
Chapter 1 — Introduction
Safety Summary
IntermecassumesnoresponsibilityregardingtheCEDirectiveif
theprinterishandled,modified,orinstalledinanywayother
thanthatdescribedinIntermec’smanuals.
·Readthismanualcarefullybeforeconnectingtheprinter.
·Movingpartsareexposedwhenthesidedoorsareopen,so
ensurethatthedoorsareclosedbeforeyouoperatetheprinter.
·Donotremovetheleft-handcover.Dangerousvoltage!
·Donotremovethebottomplate.Dangerousvoltage!
·Donotputyourfingersinsidetheprintmechanismwhenthe
powerison.
·Placetheprinteronanevensurfacewhichcansupportits
weightofapproximately7to8kg(15.5to17.7pounds)plus
supplies.
·Donotspraytheprinterwithwater.Ifyouareusingahoseto
cleanthepremisesinanindustrialenvironment,removethe
printerorprotectitcarefullyfromsprayandmoisture.
·Carefullyreadthewarningtextontheenvelopebeforeusinga
cleaningcard.
Product Identification
Themachinelabelisattachedtotheprinter’srearplateand
containsinformationontype,model,andserialnumberaswell
asACvoltage.Italsocontainsregulatoryagencymarkings
indicatingcompliancewithorapprovalbyspecificagency
regulations,ifany.
EasyCoder PF4i User’s Guide (IPL Version)
Chapter 1 — Introduction
4
2
Installation
ThischapterexplainshowtoinstalltheEasyCoderPF4iprinter
andalsodescribestheprinter’svariouspartsindetail.Itcoversthe
followingtopics:
·Partsontheprinter’sfront
·Partsontheprinter’srearplate
·Partsinthemediacompartment
·Partsintheprintmechanism
·Connectingtotheprinter
·Usingthecontrolsandunderstandingtheindicators
·Switchingontheprinter
EasyCoder PF4i User ’s Guide5
(IPL Version)
Chapter 2 — Installation
Front View
Atthefrontoftheprinterarethedisplaywindow,theindicator
lamps,andthekeyboard.Thesefeaturesallowtheoperatorto
controlandsetuptheprintermanually.Printedlabels,tickets,or
tagsarepresentedatthefrontoftheprintmechanism.Referto
Chapter7,“Options”onpage67,forinformationonpossible
optionaldevicesthatcanbefittedontheprinter’sfront.
Indicator lamps
Display window
Keyboard
Feed/Pause button
Print mechanism
Front View of Printer
6
Chapter 2 — Installation
Rear View
TherearplatecontainstheOn/Offswitch,theACpowercord
socket,andvariousinterfaceconnectorsandslots.
Provision for EasyLAN
ethernet connection
(option)
Memory card slot
(firmware upgrading only)
Provivion for IEEE 1284
parallel interface board
On/Off switch
AC power cord socket
RS-232 serial interface
Machine label
Rear View of Printer
EasyCoder PF4i User’s Guide (IPL Version)
Chapter 2 — Installation
Media Compartment
Themediacompartmentiscoveredbyalongsidedoorthat
completelyenclosestheprintmechanismandmedia
compartment,orashortsidedoorthatonlycoverstheprint
mechanismandgiveseasyaccesstothemediastock.Thedooris
heldbyamagneticlock.Itcanbeopened180°toprovidefull
accesstothemediacompartment.
Media supply
roll post with
Thermal transfer mechanism
Print mechanism
Optional integral
Long side door
Media Compartment
Themediacanbesuppliedfromarotatinghuborfroman
externalsupplyoffan-foldedmediabehindtheprinter.Thereis
alsoanoptionalrotatingmediasupplyhub.Formore
information,seeChapter7,“Options”onpage67.
8
Chapter 2 — Installation
Media Supply Roll Post
TheEasyCoderPF4iusesamediasupplyrollpostthatcanbe
fittedinthreedifferentpositionsinsidethemediacompartment.
Thepositiondependsonthetypeofsidedoor(longorshort)and
whetherornottheprinterisfittedwithanintegrallinertakeup.
Alternatively,anexternalmediasupply(forexampleaboxoffanfoldedtickets)behindtheprintercanbeused.Arotatingmedia
supplyhubisalsoavailableasanoption,seeChapter7,
“Options”onpage67.
Tomovetheposttoadifferentslot;removethescrew,twistthe
postaquarterofaturn,andpullitout.
Tofitthepost;rotateitaquarterofaturn,insertitintothe
appropriateslotinthecentersection(seenextpage),andtwist
backsothelipsengagethecutoutsinthesidesoftheslot.Move
itup(largecore)ordown(smallcore)asfarasitgoesandsecure
itwiththescrew.
Themediasupplyrollpostfitsboth38-40mm(1.5inches)and
76mm(3.0inches)coressinceitcanbemovedverticallyinthe
slotinthecentersection.Thebottompositionisintendedfor
smallcoresandthetoppositionisforlargecores.Thepostis
lockedbyastraight-slotscrewandhasamoveableedgeguideto
fitvariousmediawidths.
m
ch
E
m
(1.5
Note:Makesuretoadjustthepositionofthepostaccordingto
thesizeofthemediarollcore.Whenthepostisfittedinthetop
position,theheadofthescrewwillinterferewithsmall(38mm/
1.5inches)cores,causingmediamisalignment.
EasyCoder PF4i User’s Guide (IPL Version)
Chapter 2 — Installation
Media Supply Positions
Therearefoursetsofslotsandthreadedholesintheprinter’s
centersectionforthemediasupplyrollpostorrotatinghub
(optional).Theseslotsallowthelargestpossiblerollsizetofit,
giventhelimitationsofanylinertakeupunitand/orthefull
enclosureprovidedbythelongsidedoororMegatop.The
positionsareindicatedbynumbersengravedinthecenter
section.Theprintercanalsouseanexternalmediasupplylocated
behindtheprinter,unlessithasanoptional8-inchMegatop
·Position1:Themediacompartmentisfullyenclosedbyalong
sidedoor,regardlessoftheexistenceofanyintegrallinertakeup
unit.Maximumrollsizeis152mm(6inches).
·Position2:Theshortsidedooronlyenclosestheprint
mechanismanddoesnothaveanintegrallinertakeupunit.
Maximumrollsizeis203mm(8.00inches).
·Position3L:Theshortsidedoorandanintegrallinertakeup
unit.Thispositionisalsousedwiththeoptional8-inch
Megatop.Formoreinformation,seeChapter7,“Options”on
page67.Maximumrollsizeis213mm(8.38inches).
·Position4isnotused.
2
4
Position 1
Position 4
(not used)
Media Supply Positions
10
Chapter 2 — Installation
Print Mechanism
Theprintmechanismfeaturesahigh-performancethermal
printheadwithquick-mountfittingstofacilitatereplacement.
Thethermaltransferribbonmechanismisomittedindedicated
directthermalprintingmodels.
Ribbon rewind hub
Thermal
printhead
Pressure arm
Tear bar
Platen roller
Label stop sensor
position adjustment
(bottom sensor hidden)
Print mechanism
EasyCoder PF4i User’s Guide (IPL Version)
Chapter 2 — Installation
Connections
Beforeyoucanusetheserialinterface,youmayneedtosetupthe
communicationparameters,suchasbaudrate,parity,etc.as
describedinChapter5,“SettingUpthePrinter”onpage49.
Severaltypesofoptionalinterfaceandnetworkboardsare
available.Formoreinformation,seeChapter7,“Options”on
page67.RefertoChapter5,“SettingUpthePrinter”on
page49,Chapter6“SetupMode”onpage61,andAppendixC,
“Interfaces”onpage117forconnectionandsetupinstructions.
To connect the printer to power
1Placetheprinteronalevelsurface,nearanACoutlet.You
shouldbeabletoeasilyaccesstheprintertoloadmediaandto
removetheprintout.
2Checkandensurethattheprinterisswitchedoff.
3Connectthepowercordfromthesocketontherearplateto
anelectricaloutlet(90to265VAC).
To connect the printer to a computer
·TheEasycoderPF4iCompactIndustrialisfittedwithone9pinD-stylesubminiature(DB9)socketfortheRS-232serial
interfaceport.Formoreinformation,seeAppendixC,
“Interfaces”onpage117.
12
Chapter 2 — Installation
Controls and Indicators
TheEasyCoderPF4ihasseveralwaysofcommunicatingdirectly
withitsoperator:threecoloredindicatorlamps,adisplay
window,amembrane-switchkeyboardwith7keys,alargeFeed/
Pausebuttonontheprinter’sfront,andabeeper.
Indicator Lamps
TheindicatorsarecoloredLEDs(LightEmittingDiodes)andare
usedforthefollowingpurposes:
·Power(solidgreen)indicatesthatthepowerison.
·Status(solidgreen)indicatesthattheprinterisreadyforuse.
·Status(flashinggreen)indicatesthattheprinteris
communicating.
·Status(solidred)indicatesanerrorcondition.Formore
information,seeChapter8,“Troubleshooting”onpage73.
·
asolution.Formoreinformation,seeChapter8,
EasyCoder PF4i User’s Guide (IPL Version)
Chapter 2 — Installation
Display
ThedisplaywindowcontainsanLCD(LiquidCrystalDisplay)
withbackgroundilluminationandtwolinesoftext,eachwith16
characters.Itshowsamessagewhencertainerrorsoccurand
guidestheoperatorthroughupgrading,startup,andsetup.The
followingerrorsarereported:
Error Messages and Conditions
Message Displayed
PAUSE
PAPEROUT
RIBBONOUT
PRINTHEADUP/PRESS
FEED
OPEN&SHUTCUTTER
RIBBONFITTED
PAPERFAULT
Keyboard
Thekeyboardisofthemembrane-switchtypeandhassevenkeys,
plusonelarge“Feed/Pause”button.Somekeyshavehard-coded
functionsinStartupandSetupmodes.
14
Chapter 2 — Installation
Keyboard Color Code
Yellow:Operationoftheprinter(operatorlevel)
Green:Setuporservice(siteorservicetechnicianlevel)
White:Datainputtoprinter(operatorortechnicianlevel)
Beeper
Thebeeperacknowledgesthatakeyhasbeenpressed.Optionally,
anaudiblealarmcanbeenabledusinganIPLcommandthatwill
startbeepingatpaperoutandribbonoutandcontinueuntilthe
startofreload.
Switching On the Printer
Beforeswitchingontheprinter,makethenecessaryconnections,
andcheckthattheprintheadisengaged.
SwitchonthepowerusingtheOn/Offswitchontherearplate.
The“Power”controllamponthefrontpanellightsupwhenthe
powerison.Waitforafewmomentswhiletheprinterloadsthe
programandrunssomeself-diagnostictests.
Afterashorttime,theprinterisinitialized.Theprogressofthe
initializationisindicatedbyanincreasingnumberofcolonson
thelowerlineinthedisplay.
Whentheinitializationiscompleted,alabelisfedout.The
followingmessage,whichistheIPLversionnumber,appearsin
theDisplayWindow,indicatingthattheprinterisreadyfor
operation.
EasyCoder PF4i User’s Guide (IPL Version)
Chapter 2 — Installation
16
3
Media Load
Thischapterexplainshowtoloadtheprinterwithvariouskinds
ofcontinuous,gap,ormarkstockforthefollowingmodesof
operation:
·Tear-Off(straight-through)
·Tear-OffwithQuickLoad(straightthrough)
·Cut-Off(requiresoptionalcutter)
·Peel-Off(self-adhesivestrip),requiresoptionalintegralselfstripunitwithlinertakeup
·ExternalSupply(fan-foldedstock)
EasyCoder PF4i User ’s Guide17
(IPL Version)
Chapter 3 — Media Load
Tear-Off (Straight-Through)
TheEasyCoderPF4iprintercanprintonlabels,tickets,tags,and
continuousstockinvariousforms.Thissectiondescribesthecase
whenthemediaistornoffmanuallyagainsttheprinter’stearbar.
Thismethodisalsoknownas“straight-throughprinting.”
Tear-offcanbeusedfor:
·Non-adhesivecontinuousstock
·Self-adhesivecontinuousstockwithliner
·Self-adhesivelabelswithliner(gaporcontinuousstock)
·Ticketswithgaps(gapstock),withorwithoutperforations
·Ticketswithblackmarks(markstock),withorwithout
perforations
Anoptionallabeltakensensorcanholdtheprintingofthenext
copyinthebatchuntilthepresentcopyhasbeenremoved.For
moreinformation,see“LabelTakenSensor”onpage71.
To load media for tear-off operation:
1Openthesidedoor.
18
Chapter 3 — Media Load
2Turntheprintheadliftleverclockwisetoraisetheprinthead.
3Removeanyemptycorefromthemediasupplyhub.
3
2
1
4
bw
fw
EasyCoder PF4i User’s Guide (IPL Version)
Chapter 3 — Media Load
4Fitanewrollofmediaontothemediasupplyhubandadjust
theedgeguidesothattherollbecomesflushwiththecenter
section.
3
2
1
4
bw
fw
5Routethemediaunderneaththeslackabsorberandforward
towardstheprintmechanism.Theslackabsorbercanbe
rotatedforbetteraccessandthensnap-lockedinopen
position.Routethemediathroughtheprintunitandpushit
inwardsasfarasitwillgo.
20
Chapter 3 — Media Load
6Thisdiagramshowsthepaththemediawilltakethroughthe
printer.
7Turntheprintheadliftlevercounter-clockwisetothe“closed”
positiontoengagetheprinthead.
8Adjustthepositionofthegreenedgeguidessothatthemedia
isguidedwithaminimumofplay.
EasyCoder PF4i User’s Guide (IPL Version)
Chapter 3 — Media Load
9Closethesidedoor.
10PresstheFeed/Pausekeytoadvancethemediaandadjustthe
mediafeed.
22
Chapter 3 — Media Load
11Tearoffthemediabygrabbingtheouteredgeandpulling
downwards.
Tear-Off with Quick-Load (Straight Through)
Inadditiontothemedialoadprocedurefortear-off(straightthrough)operationdescribedearlierinthischapter,the
EasyCoderPF4icanoptionallybefittedwithasetofQuick-Load
guidesthatmakesmedialoadmucheasierandquicker,especially
iftheprinterhasashortsidedoor.SeeChapter10,
“Adjustments”onpage97forinstallationinstructions.
Quick-Loadcannotbecombinedwithpeel-off(self-strip)
operation.
Anoptionallabeltakensensorcanholdtheprintingofthenext
copyinthebatchuntilthepresentcopyhasbeenremoved,see
“LabelTakenSensor”onpage71.
EasyCoder PF4i User’s Guide (IPL Version)
Chapter 3 — Media Load
To load media for Tear-Off with Quick-Load operation
1Removeanyemptycorefromthemediasupplyrollpost.
2Fitanewrollofmediaonthesupplypostandadjusttheedge
guidesotherollbecomesflushwiththecentersection.
24
Chapter 3 — Media Load
3Ifnecessary,adjusttheouterQuick-Loadguidetofitthe
widthofthemedia.
4Insertthemediabetweentheguidesandfeeditforwarduntil
themediareachestheplatenrollerandcannotbeinsertedany
further.
5KeeppushingthemediaforwardwhilepressingtheFeed/
Pausebutton.
EasyCoder PF4i User’s Guide (IPL Version)
Chapter 3 — Media Load
6Totearoffthemedia,grabtheouteredgeandpull
downwards.
Cut-Off
TheEasyCoderPF4iprintercanprintonlabels,tickets,tags,and
continuousstockinvariousforms.Thissectiondescribesthecase
whenthemediaistobecutoffbyanautomaticpapercutter
(optional).
Cut-offcanbeusedfor:
·Non-adhesivecontinuousstock
·Self-adhesivelabelswithliner(cutonlylinerbetweenlabels)
Thecutterisdesignedtocutthroughpaper-basedmediawitha
thicknessbetween60and175μm,whichroughlycorrespondsto
apaperweightof60to175grams/m2(basisweight40to120
lb.).Thecuttershouldnotbeusedtocutthroughlabelsbecause
theadhesivewillsticktotheshears,whichcandamagethecutter.
Theoptionallabeltakensensorcannotbeusedwiththecutter.
Thepapercuttercanbeusedwithbothastandardedgeguideor
Quick-Loadguidesandwithanytypeofsidedoor.Inthis
chapter,aprinterwithastandardedgeguideandalongsidedoor
isillustrated.
26
Chapter 3 — Media Load
To load media for cut-off operation
1Switchoffthepower.Openthecutterandthesidedoor.
2Turntheprintheadliftleverclockwisetoraisetheprinthead.
EasyCoder PF4i User’s Guide (IPL Version)
Chapter 3 — Media Load
3Removeanyemptycorefromthemediasupplyrollpost.
3
2
1
4
bw
fw
4Fitanewrollofmediaonthesupplypostandadjusttheedge
guidesotherollbecomesflushwiththecentersection.
3
2
1
4
bw
fw
28
Chapter 3 — Media Load
5Routethemediathroughtheprintmechanismandcutter.
Thenpushittowardsthecentersectionasfarasitwillgo.
6Thisdiagramshowsthemediapath.
7Turntheprintheadliftlevercounterclockwisetoengagethe
printhead.
EasyCoder PF4i User’s Guide (IPL Version)
Chapter 3 — Media Load
8Adjustthepositionofthegreenedgeguidesothemediais
guidedwithaminimumofplay.
9Closethesidedoor.
30
Chapter 3 — Media Load
10Closethecutterwhilepullingonthemedia.
11Anoptionaltraycanbeattachedtothecuttertocollectthe
cutofflabels,tickets,ortags.
12PresstheFeed/Pausebuttononthecuttertoadvancethe
mediaandadjustthemediafeed.
EasyCoder PF4i User’s Guide (IPL Version)
Chapter 3 — Media Load
Peel-Off (Self-Strip)
TheEasyCoderPF4iprintercanprintonlabels,tickets,tags,and
continuousstockinvariousforms.
Thissectiondescribesthecasewhenself-adhesivelabelsare
separatedfromthelinerimmediatelyafterprinting,which
requiresanoptionalinternallinertakeupunit.Formore
information,see“IntegralLinerTakeupKit”onpage70.Thisis
alsoknownas“Self-strip”operation.
Peel-offcanonlybeusedforself-adhesivelabelswithliner.
Anoptionallabel-takensensorcanholdtheprintingofthenext
labelinabatchuntilthepresentlabelhasbeenremoved.For
moreinformation,see“LabelTakenSensor”onpage71.
Note:Peel-offoperationsetshighdemandsonthemediafor
properlabelstiffness,releasecharacteristicsoftheadhesiveand
liner,resistanceagainstelectrostaticcharge,andsoon.Ifthese
specificrequirementsarenotmet,thelabelswillnotdispense
properly.Consultyourmediasupplierortestthemediatomake
sureitissuitableforyourapplication.
To load media for peel-off operation:
1Openthesidedoor.
32
Chapter 3 — Media Load
2Turntheprintheadliftleverclockwisetoraisetheprinthead.
3Pulloutthehandletocollapsethetakeuphubandthen
removeanyremainingliner.
EasyCoder PF4i User’s Guide (IPL Version)
Chapter 3 — Media Load
4Removeanyemptycorefromthemediasupplyrollpost.
2
1
4
bw
fw
5Fitanewrollofmediaontothemediasupplypostandadjust
theedgeguidessothatthelabelrollbecomesflushwiththe
centersection.
2
1
4
bw
fw
34
Chapter 3 — Media Load
6Pulloutapproximately50cm(20inches)oflabelsand
removethelabelsfromtheliner.Routethelinerthroughthe
printmechanismandpushitinwards.
7Routethelineraroundthetearbarandlinerdriverollerand
backundertheprintmechanismandguideshaft.
EasyCoder PF4i User’s Guide (IPL Version)
Chapter 3 — Media Load
8Insertthestartofthelinerunderthelipofthetakeuphub
andthenrotatethehubcounterclockwiseafewturnstowind
upsomeoftheliner.
9Thisdiagramshowsthepaththemediaandlinerwilltake
throughtheprinter.
10Turntheprintheadliftlevercounterclockwisetoengagethe
printhead.
36
Chapter 3 — Media Load
11Adjustthepositionofthegreenedgeguidessothatthemedia
isguidedwithaminimumofplay.
12Closethesidedoor.
EasyCoder PF4i User’s Guide (IPL Version)
Chapter 3 — Media Load
13PresstheFeed/Pausekeytoadvancethemediaandadjustthe
mediafeed.
External Supply (Fan-Fold)
Thissectiondescribesthesetupwhenanexternalmediasupplyis
usedsuchasastackoffan-foldedtickets.Externalsupplycanbe
usedwithtear-off(straight-through)printing,andpreferably
usingtheQuickLoadguides.
Externalsupplycanbeusedwitheitherthsshortorlongside
doorsandthereisnoneedtoremovethemediasupplypost.
Whenusinganexternalmediasupply,takecaretoprotectthe
mediafromdust,dirt,andotherforeignparticlesthatcanimpair
theprintoutqualityorcauseunnecessaryweartotheprinthead.
Dependingonbrandandquality,alldirectthermalmediaare
moreorlesssensitivetoheat,directsunlight,moisture,oil,
plasticizers,fat,andothersubstances.Protectthemedia
accordingly.
38
Chapter 3 — Media Load
Thisdiagramshowsthemediapathfromanexternalsupply.If
usingthestandardedgeguide(asopposedtoQuick-Load
guides),turnittoverticalposition.
EasyCoder PF4i User’s Guide (IPL Version)
Chapter 3 — Media Load
40
4
Ribbon Load for Thermal
Transfer Printing
Thischapterexplainshowtoloadtheprinterwithribbonfor
thermaltransferprinting.
EasyCoder PF4i User ’s Guide41
(IPL Version)
Chapter 4 — Ribbon Load for Thermal Transfer Printing
Ribbon Load
TheEasyCoderPF4iprintercanprintonlabels,tickets,tags,and
continuousstockusingeitherdirectthermalprintingonspecial
heat-sensitivemediaorthermaltransferprintingusingaspecial
ink-coatedribbon.Mosttransferribbonsdonotsmearatroom
temperature.
Thermaltransferprintingmakesitpossibletouseawiderangeof
receivingfacematerialsandgivesadurableprintoutless
vulnerabletofat,chemicals,heat,orsunlightthandirectthermal
printing.Makesuretoselectatypeofribbonthatmatchesthe
typeofreceivingfacematerialandsetuptheprinter
appropriately.
TheEasyCoderPF4iprintercanusetransferribbonrollswound
withtheink-coatedsidefacingeitheroutwardorinward.
Illustrationsinthismanualshowtheink-coatedsidefacing
inward.
Ribbonisusuallyloadedinconnectionwithmedia
replenishment,butloadedmediaisnotshownintheillustrations
inthischapterinordertogiveaclearerviewoftheribbonpath.
Formedialoadinstructions,seeChapter3,“MediaLoad”on
page17.
To load ribbon for thermal transfer operation:
1Openthesidedoor.
42
Chapter 4 — Ribbon Load for Thermal Transfer Printing
2Turntheprintheadliftleverclockwisetoraisetheprinthead.
3Ifyouarereloading,removeanyusedribbonandempty
ribboncore.
EasyCoder PF4i User’s Guide (IPL Version)
Chapter 4 — Ribbon Load for Thermal Transfer Printing
4Slidetheribbonrollontothesupplyhubsotheink-coated
sidefacesdownwhentheribbonisroutedthroughtheprint
mechanism.
5Routetheribbonthroughtheprintmechanismandpullout
approximately20cm(8inches)ofribbon.
44
Chapter 4 — Ribbon Load for Thermal Transfer Printing
6Withoutreleasingtheribbon,turntheprintheadliftlever
counterclockwisetoengagetheprintheadandlockthe
ribbon.
7Slidetheemptycardboardcoreontotheribbonrewindhub
sotheribboniswoundupwhenthehubrotatescounterclockwise.
EasyCoder PF4i User’s Guide (IPL Version)
Chapter 4 — Ribbon Load for Thermal Transfer Printing
8Turntheprintheadliftleverclockwisetoraisetheprinthead
andreleasetheribbon.
9Manuallyadvancetheribbonuntilallofthetransparent
leaderhaspassedtheprintheadandtheribbonbecomestight.
46
Chapter 4 — Ribbon Load for Thermal Transfer Printing
10Turntheprintheadliftknobcounterclockwisetoengagethe
printhead.
11Closethesidedoor.
EasyCoder PF4i User’s Guide (IPL Version)
Chapter 4 — Ribbon Load for Thermal Transfer Printing
48
5
Setting Up the Printer
Thischapterdescribesthevariousparametersthatareused
duringSetupmodeorinthevariousapplicationprogramsto
configuretheprinterfortheuser’sspecificrequirements.Itcovers
thefollowingtopics:
·Description
·Defaultsetup
·Setupparametersforcommunication,test/service,media,and
configuration.
FormoreinformationonSetupMode,seeChapter6,“Setup
Mode”onpage61.
EasyCoder PF4i User ’s Guide49
(IPL Version)
Chapter 5 — Setting Up the Printer
Description
Setupdefinestheprinter’sserialcommunication,testandservice
operations,andspecifieswhichtypesofmediaandribbonare
loadedintheprinter.Iftheprinter’sdefaultsetupdoesnotmeet
yourrequirements,followtheinstructionsin“SetupMode”on
page61tochangethesetup.
Default Setup
Thislistdoesnotincludeoptions.
Ser-Com
50
EasyCoder PF4i User’s Guide (IPL Version)
Chapter 5 — Setting Up the Printer
Setup Parameters
Serial Communication
Theserialcommunicationparameterscontrolthe
communicationbetweentheprinterandtheconnectedcomputer
orotherdevicesontheserialport.
Note:Theserialcommunicationparametershavenoeffecton
parallelorEasyLANcommunications.
Makesuretheprinter’scommunicationparametersmatchthe
parameterssetupontheconnecteddeviceandviceversa.Ifthe
printerandhostsetupsdonotmatch,theresponsefromthe
printertohostwillbegarbled.
Baud Rate
Thebaudrateisthetransmissionspeedinbitspersecond.There
are8options:
·1200
·2400
·4800
·9600(default)
·19200
·38400
·57600
·115200
Data Bits
Databitsspecifiesthenumberofbitsthatwilldefineacharacter.
·7CharactersASCII000to127decimal
·8CharactersASCII000to255decimal(default)
Parity
Theparitydecideshowthefirmwarewillcheckfortransmission
errors.Therearefouroptions:None(default),Even,Odd,and
Space.
EasyCoder PF4i User’s Guide (IPL Version)
Chapter 5 — Setting Up the Printer
Stop Bits
Thenumberofstopbitsspecifieshowmanybitswilldefinethe
endofacharacter.Therearetwooptions:1(default),2.
Protocol
XON/XOFF (default)
IntheXON/XOFFprotocol,dataflowcontrolisachievedby
usingXON(DC1)andXOFF(DC3)characters.Messageblocks
arenotrequiredtobebracketedbytheStartofText(STX)and
EndofText(ETX)characters.However,atpoweruporaftera
resetallcharactersexceptENQorVTwillbeignoreduntilan
STXisdetected.Themessagelengthinthisprotocolis
unrestricted.Thatis,theprinterprocessesinformationasitis
beingdownloadedandstopswhenthereisnomoreinformation.
XON/XOFFprotocolconformstogenerallyacceptedindustry
standards.Noend-of-messageresponseissenttothehostother
thanXOFF.AnXONwillbesentonpowerup.
SinceDC1andDC3areusedfordataflowcontrol,theprinter
statuscharactersaredifferentthanthoseoftheStandard
Protocol.Ifthehostignorestheprinter’sXOFF,theprinterwill
resendanXOFFafterreceivingevery15charactersfromthehost.
52
Chapter 5 — Setting Up the Printer
Intermec Standard Protocol
TheIntermecPrinterStandardProtocolisahalf-duplexprotocol.
Alldatatransmissionstotheprinterconsistofstatusinquiry
(ENQ),statusdump(VT),ormessageblocks.Eachmessage
blockstartswiththeStartofText(STX)characterandendswith
theEndofText(ETX)character.Eachmessageblockmustbe
255charactersorless,includingtheSTXandETXcharacters.
Theprinterrespondstoeachstatusinquiryormessageblock
withtheprinterstatus.Thehostshouldchecktheprinterstatus
beforedownloadingamessageblocktotheprinter.ENQcauses
theprintertotransmititshighestprioritystatus,whileVT
instructstheprintertotransmitallstatusthatappliesintheorder
oftheirpriority.Thepossibleprinterstatus,indescending
priority,is:
Condition
Bufferalreadyfull
Printheadraised
Ribbonfault
Nolabelstock
Buffernowfull
Printheadhot
Labelatstrippin
Labelskipping
Ready
Printing
Test/Service
Testprint
ThispartoftheSetupModeallowsyoutoprintvarioustypesof
testlabels.GotothedesiredoptionandpressEnter.Theprinter
willstartprintingthetestlabelorlabels.PresstheFeed/Pause
buttontoholdtheprintingtemporarily.Toresumeprinting,
presstheFeed/Pausebuttonagain.Thefollowingoptionsare
available:
EasyCoder PF4i User’s Guide (IPL Version)
Chapter 5 — Setting Up the Printer
Configuration
Choosesoftware(SW),hardware(HW),ornetwork.
TheSoftwareConfigurationLabelcontains:
·Currentconfigurationparametersstoredintheprinter’s
memory
·Definedpages
·Definedformats
·Definedgraphics
·Definedfonts
·Anyinstalledprinteroptions
TheHardwareConfigurationLabelcontains:
·Printermemoryinformation
·Printermileage
·Printheadsettings
·Firmwarechecksum,program,andversionnumber
TheNetworkConfigurationLabelcontains:
·WINSName
·MACAddress
·IPSelection
·IPAddress
·Netmask
·DefaultRouter
·NameServer
·MailServer
·PrimaryWINSServer
·SecondaryWINSServer
·NetworkStatistics
54
Chapter 5 — Setting Up the Printer
Format Label
TheFormatLabelcontainsasingleformatthatyoucanuseto
evaluatetheprintqualityofaparticularformat.Thisoption
printslabelsforalltheformatsstoredintheprinter’smemory.
Page Label
ThePageLabelteststheabilityoftheprintertoreceiveandprint
singleormultiplepagesoflabeldatathatissentfromthehost.
Thisoptionprintslabelsforallthepagesstoredintheprinter’s
memory.
UDC Label
TheUDCLabelteststheabilityoftheprintertoreceiveand
printsingleormultipleuser-definedcharacters(bitmapgraphics)
thataresentfromthehost.Thisoptionprintslabelsforallthe
UDCsstoredintheprinter’smemory.
Font Label
TheFontLabelcontainsallthecharactersinasinglefont.This
optionprintslabelsforalltheuser-definedfonts(UDF)storedin
theprinter’smemory.
Data Dump
Ifdatadumpisenabledbyselectingthe“Yes”option,theprinter
printsalldataandprotocolcharactersreceivedontheserialport.
AnASCIIandhexadecimalrepresentationofeachcharacteris
printed.
Memory Reset
Therearetwooptions.Thememorywillberesettofactory
defaultassoonasanoptionhasbeenselectedand<Enter>is
pressed.Selectbetween“All”,whichresetstheentirememory,
and“Configuration”,whichjustresetstheconfigurationpartof
thememory.
Media
Themediaparameterstellthefirmwarethecharacteristicsofthe
mediathatwillbeusedsothattheprintoutwillbepositioned
correctlyforthebestpossiblequality.
EasyCoder PF4i User’s Guide (IPL Version)
Chapter 5 — Setting Up the Printer
Media Type
TheMediaTypeparameterscontrolhowthelabelstopsensor
(LSS)andthemediafeedwork.Therearethreemediatype
options:
·Gapisusedforadhesivelabelsmountedonliner(backing
paper)orcontinuouspaperstockwithdetectionslots.Thisis
thedefault.
·Markisusedforlabels,tickets,orstripprovidedwithblack
marksattheback.
·Continuousisusedforcontinuousstockwithoutany
detectionslotsorblackmarks.
Paper Type
ThePaperTypeparameterscontrolhowthetransferribbon
mechanismandtheribbonsensorwork.Therearetwopaper
typeoptions:
·DT(DirectThermal)isusedforheat-sensitivemediawithout
anyneedforathermaltransferribbon.Thisisthedefault.
·TTR(ThermalTransfer)isusedfornonheat-sensitive
receivingfacematerialsincombinationwithathermal
transferribbon.
Label Length Dots
TheLabelLengthsetupspecifiesthelengthindotsofeachcopy
alongthemediafeeddirection(X-coordinate).Thisisusedfor
“label-out”detection.Aselectionofvaluesispresentedasaloop.
Selectthevaluethatisclosesttotheactuallength.Defaultis
1200dots.
Sensitivity (Media Sensitivity Number)
Thissetupparameterspecifiesthecharacteristicsofthedirect
thermalmediaorcombinationofreceivingfacematerialand
thermaltransferribbon,sotheprinter’sfirmwarecanoptimize
theheatingoftheprintheadandtheprintspeed.Themedia
sensitivitynumbercanbechangedusingPrintSet,third-party
software,oranIPLcommand(<SI>gn[,m]).SeeAppendixD,
“MediaSensitivityNumber”onpage121formoreinformation
regardingthemediasensitivitynumber.
56
Chapter 5 — Setting Up the Printer
Darkness
Usethisparametertomakeminoradjustmentsoftheblackness
intheprintout,forexampletoadapttheprintertovariationsin
qualitybetweendifferentbatchesofthesamemedia.Thevalue
canbesetwithintherange-10%to+10%where-10isthe
lightestand10isthedarkest.Defaultvalueis0.
Label Rest Point
Specifieswherelabelsstopforremoval.Usethisforpeel-off(selfstrip)applications.Thevalidrangeis-30(furthestback)to30
(furthestforward).Defaultis0.AlsoavailableasanIPL
command(<SI>fn).
Form Adj Dots X
SpecifieswheretheX-positionoftheoriginshouldbeplacedon
thelabel.Thevalidrangeis-30(closesttotheleadingedge)to30
(furthestfromtheleadingedge).Defaultis0.
Form Adj Dots Y
SpecifieswheretheY-positionoftheoriginshouldbeplacedon
thelabel.Thevalidrangeis-30(closesttothecentersection)to
30(furthestfromthecentersection).Defaultis0.
Configuration
Emulation Mode
Theemulationmodeletsyouprintbarcodelabelsthatwere
originallydesignedonan86XXprinterinmultiplesof10or15
mil.Whentheprinterisworkinginemulationmode,notallIPL
commandsaresupported.Foracompletelistofcommands
availableduringemulationmode,seethelatestversionoftheIPL
ProgrammingReferenceManual(P/N066396-xxx).
Toexitemulationmode,selectemulation“None”.Thisisthe
default.
Print Speed
Youcanselecttheprintspeedfrom4in/sec(100mm/sec)to8in/
sec(200mm/sec)withanintervalof1in/sec.Thehigherthe
printspeed,themorewearontheprinthead,sodonotusea
higherprintspeedthannecessary.Somedirectthermalmediaor
ribbon/mediacombinationsmaynotallowthehighest
alternativeswithouttheprintoutqualitybeingadverselyaffected.
EasyCoder PF4i User’s Guide (IPL Version)
Chapter 5 — Setting Up the Printer
Cutter (optional)
Bydefault,“NotInstalled”isdisplayed.Ifacutterisinstalled,
youmustmanuallyindicatethatconditiontothefirmwareby
selectingeither“Enable”or“Disable.”Onceyouhavedonethat,
youcanalsouseIPLcommandstoenableordisablethecutter:
<STX>R<ETX>enterprint/configurationmode
<STX>c0<ETX>Disablecutter
<STX>c1<ETX>Enablecutter
Label Taken Sensor (optional)
Tomaketheprinterworkinself-stripmode,whichmeansit
waitsforalabeltoberemovedbeforethenextlabelisprinted,the
self-stripmodemustbeenabled.Thiscanalsobedoneby
executingthefollowingcommands:
<STX>R<ETX>enterprint/configurationmode
<STX><SI>t0<ETX>Disableself-strip
<STX><SI>t1<ETX>Enableself-strip
Ifthelabeltakensensordoesnotworkproperly,thesensitivity
canbecalibratedusingSetupMode.Select“LTSCalibration”
andfollowtheinstructionsinthedisplay.Makesurethatno
directsunlightorinteriorlightinginterfereswiththelabeltaken
sensor.
Returning to Factory Default Setup
Therearethreewaystoreturntothefactorydefaultsetupofthe
printer:
·InsertaspecialCompactFlashmemorycardandrestartthe
printer.
·UsetheMemoryResetoptionintheTest/Servicepartofthe
SetupMode.
·Usetheprinter’sbuilt-inkeyboard.
58
Chapter 5 — Setting Up the Printer
To return to factory default setup using the keyboard
1Lifttheprinthead.
2Switchonthepowertotheprinterandpressthe<i>keyand
waituntiltheprinterbeeps.
3Swiftlypressthefollowingkeys.
4Thefollowingmessagewillbedisplayed:
5Within10seconds,pressEntertoresettheprintertofactory
default.Theparameterswillberesetandtheprinterwill
continuethenormalstartup.
Ifyoupressorwaituntilthe10secondstime-out
haspassed,thenormalstartupprocesswillcontinuewithout
anyresetbeingperformed.
Note:Resettingtothefactorydefaultwillresetallfilesusedto
storesettings,butitdoesnotaffectsettingsthatwerealready
loadedbeforethefileswereremoved.Thismeansthat,for
example,EasyLANWirelesssettings(SSID,keys,etc.)retain
theirvaluesuntilthenextreboot.Toreloadallsettings,resetthe
printertothefactorydefaultsandthenrebootit.
EasyCoder PF4i User’s Guide (IPL Version)
Chapter 5 — Setting Up the Printer
60
6
Setup Mode
ThischapterdescribeshowtonavigateSetupModeandprovides
overviewsofSetupMode.
EasyCoder PF4i User ’s Guide61
(IPL Version)
Chapter 6 — Setup Mode
Navigating in Setup Mode
EntertheSetupModebypressingtheSetupkeyontheprinter’s
frontpanel.Textinthedisplayguideyouthroughthesetup
procedure.Usetheprinter’skeyboardtonavigatemenus,
acknowledgedisplayedvalues,orselectorenternewvalues.
Moveonestepbackonthesamelevel.
Moveuponelevelwithoutchangingthesetting.
Moveforwardonthesamelevel.
Movedownonelevel.
Acknowledgeandmovetonextmenu.
ExitSetupMode.CanbeusedanywhereinSetupMode.
SetupModeisorganizedasanendlessloopwithanumberof
sub-categories.Atstartup,thefirmwaredeterminesifan
EasyLANinterfaceboardisinstalledintheprinter.Ifso,the
NetworksetupmenusareshownintheSetupMode.
Thediagrambelowshowstheoptionsinthemainloop.Detailed
overviewsareshownonthefollowingpages.
62
Chapter 6 — Setup Mode
Setup Modes
AlldiagramsassumeIntermecFingerprintLanguage(IPL)
version2.30orlater.Dottedboxesandlinesindicateoptions.
Thickboxesindicatedefaultoptions.Valuesinsidebrackets
indicatedefaultsettings.
Serial Communications
Continued on
the next page
Scroll forward
Scroll back
Network (Optional)
SETUP:
NETWORK
NETWORK:
IP SELECTION
IP SELECTION:
DHCP+BOOTP
PARITY :
MANUAL PARITY:
DHCP PARITY:
BOOTP
EasyCoder PF4i User’s Guide (IPL Version)
Chapter 6 — Setup Mode
Test/Service
Continued from
the previous page
TESTPRINT:
CONFIG
CONFIG:
SWCONFIG:
HWCONFIG:
NETWORK
TEST
Scroll forward
Scroll back
TESTPRINT:
UDC
UDC:
ALL
ALL:
PRINT UDC
TE ST/SE RVICE :
DATA DUMP
DATA DUMP:
NOCONFIG:
YES
AL
Scroll forward
Scroll back
64
Chapter 6 — Setup Mode
Media
Continued from
the previous page
MEDIA :
MEDIA TYPE
MEDIA TYPE:
GAP CONFIG:
MARK CONFIG:
CONTINUOUS
Scroll forward
Scroll back
Scroll forward
Scroll back
MEDIA :
LB L RES T PO IN T
LBL REST POIN T:
0
0/2/4/6/8/10/15/20/25/ 0/2/4/6/8/10/15/20/25/
30/-30/-25/-20/-15/-10/ 30/-30/-25/-20/-15/-10/
-8/-6/-4/-2
Scroll forward
Scroll back
Configuration
Continued from
the previous page
CO NF IGU RA TIO N:
PWR UP EMU LAT ION
PWRUP EMUL ATI ON:
NONECONFIG:
86XX-10MIL
CONFIG :
86XX-15MIL
Scroll forward
Scroll back
PRINT
PRINT
PRINT
PRINT
NO T C ON F I G:
ENABLE
PRINT
PRINT
10 P R I N T
1 PRINT
Scroll back
EasyCoder PF4i User’s Guide (IPL Version)
Chapter 6 — Setup Mode
66
7
Options
ThischapterdescribestheoptionsavailablefortheEasyCoder
PF4iprinter.Theoptionscanbefactoryinstalled,field-installed
byanauthorizedservicetechnician,orinsomecasesinstalledby
theoperator.
EasyCoder PF4i User ’s Guide67
(IPL Version)
Chapter 7 — Options
Overview
TheEasyCoderPF4iprinterprovidesahighdegreeofflexibility
becauseithasamodulardesign.Byaddingoptionstothebasic
printer,theEasyCoderPF4iprintercanbeadaptedforavariety
ofapplications.Someoptionsshouldbeinstalledbyan
authorizedservicetechnicianorareonlyavailableasfactoryinstalledoptions.
Covers
Printhead spring
Interface board
(various types)
Media supply
Label taken sensor
1.5inch rotating
supply hub
Paper cutter
Short side door
Cutter tray
Long side door
printhead
DTP Model
Inthededicateddirectthermalprinting(DTP)model,the
thermaltransferribbonmechanismisomitted.Theprinter’s
defaultsetupchangestodirectthermalprintingandsetup
parametersforthermaltransferprintingarenotdisplayed.
68
Chapter 7 — Options
Side Doors and Megatop
TheEasyCoderPF4icomeswitheitherashortsidedoor,which
onlycoverstheprintmechanismorwithoneoftwotypesoflong
sidedoors,whichenclosetheentiremediacompartment.The
standardlongsidedoorhasaflattopandaslotforexternal
mediasupply.The8-inchMegatopversionhasahinged
transparentcanopythatenclosesamediarollwithadiameterof
upto213mm(8.38inches).Thelongsidedoorisgenerally
illustratedthroughoutthismanual,butpicturesoftheshortside
doorcanbefoundatthestartofthischapterandinChapter3,
“MediaLoad”onpage17.
Paper Cutter
Thepapercutterisavailablebothasafactory-installedoption
andasaoperator-installablekit.Theoptionalpapercutteris
designedtocutoffcontinuousfeedpaper-basedstockorliner
betweenlabels.Maximumthicknessfornormalpaper-based
materialsis175μm(˜175grams/m2).Thecut-offtags,tickets,
orlabelscanbecollectedinanoptionaltray.
Thepapercutterincreasestheprinter’stotalweightby
approximately1.0kg(2.2pounds)anditslengthby28mm(1.1
inches).
Thepapercutterisintendedtocutthroughcontinuousnonadhesivepaper-basedmediaorthroughthelinerbetweenlabels.
Itmustnotcutthroughanyadhesive,whichwouldsticktothe
cuttingpartsandrapidlyrenderthecutterinoperableand
possiblyalsocausedamagetotheelectricmotor.Ifyoucut
throughadhesive,youmayhavetocleanthecuttingparts.Tilt
thecutterunitdownandwipeitusingapieceoftissuemoistened
withisopropylalcohol.
Formedialoadinstructions,see“Cut-Off”onpage26.
Thecuttingedgewillrotatewhenthepowerisswitchedon
andwhentheprinterisre-booted.Alwayskeepthecutterin
closedpositionduringoperation.Switchoffthepoweror
disconnectthecutterbeforecleaning.Keepyourfingersaway
fromcuttingedges!
EasyCoder PF4i User’s Guide (IPL Version)
Chapter 7 — Options
Note:ThecuttermustbeenabledduringConfigurationinSetup
Mode.Formoreinformation,see“Cutter”onpage50and
“PaperCutter”onpage69.
Integral Liner Takeup Kit
Theintegrallinertakeupunitisanoptionaldeviceforpeel-off
(self-strip)operation,whichmeansthelabelsareseparatedfroma
liner(backingpaper)afterprintingandthelineriswoundupon
aninternalhub.Theunitalsoincludesaguideshaft.Peel-off
operationcannotbecombinedwithQuick-Loadguides.
Thisisafactory-installedoptiononlyandisusedtoseparate
labelsfromthelinerandwindupthespentlinerinsidethe
printer’smediacompartment.Labels,tickets,tags,etc.canbe
woundupinsidethemediacompartmentafterprintingbyfitting
aspecialguidetothefrontoftheprintunit.
Thekitconsistsofasteppermotorthatdrivesthelinerdrive
rollerintheprintunit(fittedasstandard)andatakeuphubin
themediacompartment.Aguideshaftisfittedtothecenter
sectionimmediatelybehindtheslackabsorber.Aguideplateis
fittedattherearofthemediacompartmentandcanbeusedto
replacethestandardtearbarontheprintunitforbatchtakeup
operation.
OperationandmedialoadaredescribedinChapter3,“Media
Load”onpage17.
Media Supply Hub
Therotatingmediasupplyhubisdesignedtofitmediarollcores
withaninternaldiameterof38-40mm(1.5inch).Thehubcan
befittedinthesamepositionsasthesupplyrollpost,seeChapter
2.Beingfactoryinstalled,thepositionofthemediasupplyhubis
notintendedtobechangedbytheoperator.
3-inch Adapter
The3-inch/76mmadapterisincludedinthepackageandmakes
itpossibletousemediarollswith3inch/76mminnerdiameter
cardboardcores.
70
Chapter 7 — Options
Theadapterispressedontothemediasupplyhubandheldin
placebyascrew.Whenfittingtheadapters,makesurethatthe
screwhitsaroundedplasticsurface,notametalleafspring.Not
usedwithamediasupplyrollpost.
Label Taken Sensor
TheLabelTakenSensor(LTS)isaphotoelectricsensorfittedto
thecentersectioninsidethefrontdoor.Itallowstheprinter’s
firmwaretodetectifthelatestprintedlabel,ticket,ortaghas
beenremovedbeforeprintinganothercopy.
Thelabeltakensensorisusuallyfactory-fitted,butisalso
availableasakitforinstallationbyanauthorizedservice
technician.Itcannotbefittedincombinationwithapaper
cutter.
Thick Media Printhead
Inadditiontothestandardprinthead,whichisdesignedfora
maximummediathicknessof175μm(7mils)thereisan
optionalprintheadforthickmedia(170to220μm/6.6to8.7
mils).Theprintheadcaneasilybereplacedorexchangedbythe
operatorasdescribedinChapter9,“Maintenance”onpage81.
Interface Boards
Anumberofinterfaceboardsareavailableforusewiththe
EasyCoderPF4iprinter.Theinterfaceboardsareeitherfactoryfittedorcaneasilybefittedbyanauthorizedservicetechnician.
TheEasyCoderPF4iprintercanaccommodateoneEasyLAN
interfaceboardplusoneotherinterfaceboard.
EasyLANboards:
·EasyLANEthernetinterface
·EasyLANWirelessinterface
Othercommunicationboards:
·ParallelInterfaceBoard(IEEE1284)
EasyCoder PF4i User’s Guide (IPL Version)
Chapter 7 — Options
72
8
Troubleshooting
ThischapterdescribeshowtheIntermecReady-to-Work
Indicatorandotherindicatorswork.Italsolistsvariouspossible
casesofinferiorprintoutquality,describespossiblecauses,and
suggestsremedies.
EasyCoder PF4i User ’s Guide73
(IPL Version)
Chapter 8 — Troubleshooting
Intermec Ready-to-Work Indicator
Thereadinessoftheprinter,individuallyorasapartofa
solution,isindicatedbytheblueIntermecReady-to-Work
Indicator(RTW).
IftheRTWblinksorisswitchedoff,theprinterisnotready.
Furtherinformationcanbeobtainedinthedisplaywindowby
pressingtheikey.Incaseofseveralerrorsorsimilarconditions
occurringsimultaneously,onlythemostsignificanterroris
displayed.Oncethiserrorhasbeencleared,nextremainingerror
isdisplayed.
Providedtheprinterisconnectedtoanetwork,allconditions
thatpreventsprintingarereportedtotheEasyADCConsole.
TheEasyADCConsoleisaPC-basedsoftwarewhichallowsa
supervisortomonitorallconnecteddevicesthathavean
IntermecReady-to-WorkIndicator,includinghandheld
computers,accesspoints,andprinters.
Displayed Error Messages and LED Indicators
Error/Event
Operational
Outofpaper
Outoftransferribbon
Transferribbonis
installed
Headlifted
Cuttererror1
Cuttererror2
Cuttererror3
Lsstoohigh
Lsstoolow
Testfeednotdone
Pressfeednotdone
Notanerror.
74
Chapter 8 — Troubleshooting
Displayed Error Messages and LED Indicators (continued)
Error/Event
Pausemodeentered
Setupmodeentered
IPlinkerror
IPconfigurationerror
Printheadnotfound
Rebooted
Initializing
Printercrash
Printerturnedoff
Maintenance
Powersupplyover
temperature
Printheadhot
Note1:Thisisonlyapplicableforprintersequippedwithan
EasyLANinterface.
Note2:AprinterthatisequippedwithanEasyLANinterface,
butisnotconnectedtoanetwork,willhaveablinkingRTW.To
avoidthis,set“IPSELECTION”to“MANUAL”and“IP
ADDRESS”to“0.0.0.0”.Thiswillindicatethatthelackof
networkconnectionisnotanerror.
Note3:Notrapcanbesentwhenthiserror/eventoccurs.
Note4:Thiserrorindicatesthattheprinterhasnotreceivedan
IPaddress.ItisonlyapplicableforprinterswithIP
SELECTIONsettoDHCPand/orBOOTP.
EasyCoder PF4i User’s Guide (IPL Version)
Chapter 8 — Troubleshooting
Note5:Atmost,butnotall,printercrashes,theconsoleisreset.
ThiswillmaketheRTWgooff.
Note6:Iftheprintheadtemperaturerisesabove100°C(212°F),
anerroroccursandtheprintingwillbepauseduntilthe
printheadhascooledoff.Meanwhile,theprinterisabletoreceive
commandsanddatauntilthebufferisfilled.Theprintingis
automaticallyresumedwhentheprintheadtemperaturehas
reached85°C(185°F).
Troubleshooting
Overall Weak Printout
Possible Cause
Wrongmediagrade
Contrastvaluetoolow
Printheadpressuretoolow
Wornprinthead
Wrongprintheadvoltage
Printout Weaker On One Side
Possible Cause
Unevenprintheadpressure
Weak Spots
Possible Cause
Foreignparticlesonmedia
Media/ribbondon’tmatch
PoormediaorribbonqualitySelectabetter
brandofmedia/
ribbon
Wornprinthead
Wornplatenroller
76
Chapter 8 — Troubleshooting
Overall Dark Printout
Possible Cause
Wrongmediagrade
Contrastvaluetoohigh
Printheadpressuretoohigh
Wrongprintheadvoltage
Excessive Bleeding
Possible Cause
Wrongmediagrade
Contrastvaluetoohigh
Printheadpressuretoohigh
Faultyenergycontrol
Dark Lines Along Media Path
Possible Cause
Foreignobjectsonprinthead
White Vertical Lines
Possible Cause
Printheaddirty
Missingprinthead
Large Part Of Dot Line Missing
Possible Cause
Failingprinthead
Failingstrobesignal
EasyCoder PF4i User’s Guide (IPL Version)
Chapter 8 — Troubleshooting
Printout Missing Along Inner Edge
Possible Cause
Badmediaalignment
Usingsmallcorewithsupply
postinupperposition.
X-startparametervaluetoolowIncreasevalue
Transfer Ribbon Breaks
Possible Cause
Ribbonnotfittedcorrectly
Wrongmediagrade
cleanprinthead
Badenergycontrol
Transfer Ribbon Wrinkles
Possible Cause
FaultyribbonbreakshaftadjustmentAdjustshaft.
Incorrectedgeguideadjustment
Printheadpressuretoostrong
No Thermal Transfer Printout
Possible Cause
Ink-coatedsideofribbonisnotfacing
media
Media Feed Not Working Properly
Possible Cause
Changedmediacharacteristics
Wrong label rest dots parameterCheck/change
WrongMediaTypeparameter
WrongLSSposition
78
Chapter 8 — Troubleshooting
Media Feed Not Working Properly (continued)
Possible Cause
Dirtysensors
Faultysensors
Compressed Text Or Bar Code
Possible Cause
ToohighprintspeedforlargemediaReduceprintspeedChapter5
roll
EasyCoder PF4i User’s Guide (IPL Version)
Chapter 8 — Troubleshooting
80
9
Maintenance
Thischapterdescribeshowtheoperatorcanmaintaintheprinter.
Regularmaintenanceisimportantfortheprintoutqualityand
forthelifeoftheprinthead.Thechaptercoversthefollowing
topics:
·Printheadcleaning
·Externalcleaning
·Cleaningthelabelstopsensor
·Printheadreplacement
·Mediajams
Whencleaningorreplacingtheprinthead,takeample
precautionstoavoidelectrostaticdischarges.
EasyCoder PF4i User ’s Guide81
(IPL Version)
Chapter 9 — Maintenance
Printhead Cleaning
Cleaningtheprintheadonaregularbasisisimportantforthelife
oftheprintheadandfortheprintoutquality.Youshouldclean
theprintheadeachtimeyoureplacethemedia.Thissection
describeshowtocleantheprintheadusingcleaningcards.If
additionalcleaningisrequired,forexampleremovingadhesive
residuefromtheplatenrollerortearbar,useacottonswab
moistenedwithisopropylalcohol.
Isopropylalcohol[(CH-3)2CHOH;CAS67-63-0]isahighly
flammable,moderatelytoxic,andmildlyirritatingsubstance.
To clean the printhead
1Openthesidedoor.
82
Chapter 9 — Maintenance
2Turntheprintheadliftlevercounterclockwisetoraisethe
printhead.
3Removeanymediaandtransferribbon.
EasyCoder PF4i User’s Guide (IPL Version)
Chapter 9 — Maintenance
4Openthecleaningcardenvelopeandpulloutthecleaning
card.Readthewarningtext.
5Insertmostofthecleaningcardundertheprinthead(1).
Engagetheprinthead(2).
84
Chapter 9 — Maintenance
6Pulloutthecleaningcard(1)andraisetheprinthead(2).
7Waitforapproximately30secondstoallowthecleaningfluid
todissolvetheresidue.
EasyCoder PF4i User’s Guide (IPL Version)
Chapter 9 — Maintenance
8Insertmostofthecleaningcardundertheprintheadagain
(1).Engagetheprinthead(2).
9Pulloutthecleaningcard.Ifnecessary,repeattheprocesswith
afreshcleaningcard.
86
Chapter 9 — Maintenance
10Allowthecleanedpartstodrycompletelybeforeloadingany
mediaorribbon.
External Cleaning
To clean the exterior of the printer
1Alwaysremovethepowercordbeforecleaning!
EasyCoder PF4i User’s Guide (IPL Version)
Chapter 9 — Maintenance
2Wipeexternalsurfaceswithasoftclothslightlymoistened
withwateroramilddetergent.
3Neverspraytheprinter.Protectitfromwaterwhencleaning
thepremises.
4Neveruseanysharptoolsforremovingstucklabels.The
printheadandrollersaredelicate.
88
Chapter 9 — Maintenance
Cleaning the Media Guides
Thelabelstopsensor,whichcontrolsthemediafeed,ispartially
enclosedbytwoplasticguides.Lightpassesthroughslots
betweentheupperandlowerpartofthesensor.Iftheseareasare
notclean,stucklabelsorotherobjectsmayblockthelightbeam
andthelabelstopsensorwillnotfunction.
Iftheprinterstartstofeedoutlabelsinanunexpectedway,
removetheguidesasdescribedbelowandcheckforanything
blockingthebeamoflight,suchasdust,stucklabels,oradhesive
residue.Ifnecessary,cleantheguidesusingacleaningcardora
softclothsoakedwithisopropylalcohol.Donotuseanyother
typeofchemicals.
Isopropylalcohol[(CH-3)2CHOH;CAS67-63-0]isahighly
flammable,moderatelytoxic,andmildlyirritatingsubstance.
To clean the Media Guides
1Pulltheupperguidestraightout.(Upperpartofprintunit
omittedforbetterview.)
EasyCoder PF4i User’s Guide (IPL Version)
Chapter 9 — Maintenance
2Pressthesnap-lock,lifttheouterendofthelowerguideand
pullitout.
3Checkforanythingblockingthebeamoflight,suchasdust,
stucklabels,oradhesiveresidue.Ifnecessary,cleantheguides
usingacleaningcardorasoftclothsoakedwithisopropyl
alcohol.Donotuseanyothertypeofchemical.
Isopropylalcohol[(CH-3)2CHOH;CAS67-63-0]isahighly
flammable,moderatelytoxic,andmildlyirritatingsubstance.
4Aftercleaning,reassembleinreverseorder.
90
Chapter 9 — Maintenance
Printhead Replacement
Theprintheadissubjecttowearbothfromthedirectthermal
mediaortransferribbonandfromtherapidheatingandcooling
processduringprinting.Thismeansthattheprintheadwill
requireperiodicreplacement.
Timebetweenprintheadreplacementsdependsontheprint
images,thetypeofdirectthermalmediaorribboninuse,the
amountofenergytotheprinthead,theprintspeed,theambient
temperature,andseveralotherfactors.
Whilereplacingtheprinthead,thepowermustbeoff.The
firmwarewillnotdetectthenewprintheadresistanceand
densityuntiltheprinterhasbeenrestarted.
To replace the printhead
1Openthesidedoor.
EasyCoder PF4i User’s Guide (IPL Version)
Chapter 9 — Maintenance
2Turntheprintheadliftlevercounter-clockwisetoraisethe
printhead.
3Removeanymediaandtransferribbon.
92
Chapter 9 — Maintenance
4Pulltheprintheadbracketawayfromthemagnetinthe
pressurearm.
5Disconnectthehookedprintheadbracketfingersfromthe
shaftandpullouttheprintheadasfarasthecablesallow.
EasyCoder PF4i User’s Guide (IPL Version)
Chapter 9 — Maintenance
6Disconnectthecablesfromtheprinthead.Notethesnap-lock
ontheinnerconnector.Pullontheconnectors,notonthe
cables.
7Connectthetwocablestothereplacementprinthead.
94
Chapter 9 — Maintenance
8Fitthehooksoftheprintheadbracketfingersontothe
headliftshaft.Makesurethatthecablesdonotpreventthe
bracketfingersfrombeingproperlyseated.
9Closetheprintheadsothemagnetengagestheprinthead
bracket.
10Loadanewsupplyofmediaandribbonasdescribedearlierin
thismanual.
EasyCoder PF4i User’s Guide (IPL Version)
Chapter 9 — Maintenance
Media Jams
Shouldamediajamoccurintheprintmechanism,proceedthis
waytoclearit.
To clear a media jam
1Alwaysswitchoffthepowerbeforestartingtoclearthe
jammedmedia.
2Raisetheprintheadandpulloutthemedia.
3Ifthemediahasbeenwounduponorhasstucktotheplaten
roller,carefullyremoveitbyhandwithoutusinganysharp
toolsthatcandamagethedelicateplatenrollerorprinthead.
Avoidrotatingtheplatenroller.
Ifyoumustpullawaythemediabyforcecausingthe
platenrollertorotate,itisveryimportantthatthepower
hasbeenoffforaminuteormore.Ifnot,theelectronics
canbedamagedbeyondrepair.
4Cutoffanydamagedorwrinkledpart.
5Checkifthereisanyadhesivesomewhereintheprint
mechanism.Ifthereis,removeitusingacleaningcardora
cottonswabsoakedinisopropylalcohol.
Isopropylalcohol[(CH-3)2CHOH;CAS67-63-0]isa
highlyflammable,moderatelytoxic,andmildlyirritating
substance.
6ReloadthemediaasdescribedinChapter3.
7Switchonthepower.
8Readjustthemediafeedbyraisingandclosingtheprinthead
andthenpressingtheFeed/Pausekey.
96
10
Adjustments
Thischapterdescribeshowtheoperatorcanadjusttheprinter.
Thechaptercoversthefollowingtopics:
·Narrowmediaadjustment
·Labelstopsensoradjustment
·Printheadpressureadjustment
·RibbonBreakshaftadjustment
·Quick-Loadguidesinstallation
EasyCoder PF4i User ’s Guide97
(IPL Version)
Chapter 10 — Adjustments
Adjusting for Narrow Media
Theprinterisfactory-adjustedforfullsizemediawidth.When
usingnarrowermedia,adjustthepressurearmsoitremains
centeredonthemediaandappliespressureevenly.
Apoorlyadjustedpressurearmmaybedetectedbyaweaker
printoutoneithersideofthemediapath.
Screw
Center of media
Pressure arm
A dedicated direct thermal EasyCode PF4i Printer
To adjust the pressure arm for narrow media
1Removetheribbon,ifany.
2Loosentheknobthatholdsthepressurearm.
98
Chapter 10 — Adjustments
3Movethearminwardsoroutwardsuntilthearrowonthetip
ofthearmbecomescenteredonthemediastock.Pushatthe
partwheretheknobissituated,notatthetip.Ifthearmis
hardtomove,lifttheprintheadandpulltheprinthead
bracketfreefromthemagnetinthearm.
4Lockthearminthenew,centeredpositionbytighteningthe
knob.
5Re-adjusttheedgeguides.
6Reloadtheribbon,ifany.
Adjusting Printhead Pressure
Thepressureofthethermalprintheadagainsttheribbonor
directthermalmediaisfactoryadjusted.However,theuseof
thickerorthinnermediathannormalcouldrequiretheprinthead
pressuretobereadjusted.
Usingastraight-slotscrewdriver,turntheadjustmentscrew
clockwiseformorepressure(+)orcounterclockwiseforless
pressure(-).Printafewlabels,preferablyTestlabels,andcheck
theprintout.Forhelpprintingtestlabels,see“Testprint”on
page53.Increasedpressuregenerallygivesadarkerprintoutand
viceversa.Repeatuntilthedesiredresultisobtained.
Donotuseahigherprintheadpressurethannecessary.
Unnecessarypressuremayincreasethewearoftheprinthead
andshortenitslife.
EasyCoder PF4i User’s Guide (IPL Version)
Chapter 10 — Adjustments
Toreturntothefactorysetting,tightenthescrew(+)asfarasit
goesandthenloosenit(-)fourfullturns.Testwithapieceof
mediaundertheprinthead.Youshouldbeabletopullitout
withoutmorethanjustalittleresistance.
Adjustment screw
Printhead Pressure Adjustment Screw
100
Chapter 10 — Adjustments
Adjusting the Label Stop Sensor
Thelabelstopsensor(LSS)isaphotoelectricsensorthatcontrols
theprinter’smediafeedbydetectinggapsbetweenlabelsorslots
orblackmarksincontinuousstock,dependingontheprinter’s
setupinregardofmediatype.TheLSSshouldbealignedwith
thegaps,slots,orblackmarks.Ifusingirregularlyshapedlabels,
aligntheLSSwiththefronttipsofthelabels.
TheLSScanbemovedlaterallybetween5fixedpositions.There
isonepartofthesensorontopoftheuppermediaguideand
anotherpartunderneaththelowerguide.Thesemustbeadjusted
individuallytothesameposition.Usingasmallscrewdriver,push
theminwardsasfarastheygoandthenpullthemoutoneatthe
timewhilecountingtheclicksfromthesnap-locks.Aholeinthe
bottomplatefacilitatesadjustmentofthelowersensorpackage.
Thevariousdetectionpointsofthesensorinrelationtotheinner
edgeofthemediaareasfollows:
Oneclickout
Twoclicksout
Threeclicksout
Fourclicksout
Fiveclicksout
One diode +
One sensor
Upper part of LSS
Lower part of LSS
One diode +
One sensor
Label Stop Sensor Parts and Location
EasyCoder PF4i User’s Guide (IPL Version)
Chapter 10 — Adjustments
Adjusting the Ribbon Break Shaft
Ifribbonwrinklingoccurs,youmayneedtoadjustthealignment
ofthefrontribbonbreakshaftsothatitrunsparalleltothe
printheadandtheribbonsupplyandrewindhubs.The
adjustmentisdoneusingastraightslotscrewthatislocated
immediatelybehindthefrontribbonbreakshaft.
Beforereadjustingthebreakshaft,makesurethatthereisno
othercauseforthewrinklingoftheribbon.(SeeChapter8,
“Troubleshooting”onpage73.)
·Iftheribbontendstoslideoutwards,turnthescrewcarefully
clockwise(forwards)tomovetheouterendofthebreakshaft
forward.
·Iftheribbontendstoslideinwards,turnthescrewcarefully
counterclockwise(backwards)tomovetheouterendofthe
breakshaftbackward.
Adjustment screw
Ribbon break shaft
Ribbon Break Shaft Adjustment Screw
102
Chapter 10 — Adjustments
Installing the Quick-Load Guides
TheQuick-Loadguidesmay,dependingonmodel,befactoryinstalledorbeenclosedintheboxforoptionalinstallationbythe
user.Theyreplacethestandardedgeguide.
TherearetwotypesofQuick-LoadGuide.Thenarrowtypeis
usedwithmediathatis40-114.3mm(1.57-4.5inches)wide,
andthewidetypeisusedformediabetween80and114.3mm
(3.15-4.5inches).Theinnerguideshouldbefittedflushtothe
centersection,whereastheouteroftheguideisadjustablefor
variousmediawidths.
TheQuick-Loadguidesfacilitatemedialoadfrombehindthe
printmechanismandhelpguidingthemediawhenusingan
externalsupply.RefertoChapter3,“Tear-OffwithQuick-Load
(StraightThrough)”onpage23forloadinginstructions.
Quick-Loadguidescannotbeusedforpeel-offoperation.The
standardring-shapededgeguideisusedwhenyouwanttoload
themediafromthesideratherthanfrombehindandisalsoused
forpeel-offoperation.
To install the Quick-Load Guides
1Liftuptheuppermediaguideandpulloutthegreenedge
guide.Donotdiscardtheedgeguide.
EasyCoder PF4i User’s Guide (IPL Version)
Chapter 10 — Adjustments
2PressthewideornarrowQuick-Loadguidesontotheshaftas
illustrated,makingsurethatthenotchesfittherailattherear
ofthelowermediaguide.
104
A
Technical Data
Thisappendixliststhetechnicaldatafortheprinter.Pleasenote
thatIntermecreservestherighttochangethisinformation
withoutpriornoticeandthatthisinformationdoesnotrepresent
acommitmentonthepartofIntermec.
EasyCoder PF4i User ’s Guide105
(IPL Version)
Chapter A — Technical Data
Printing
PrintTechnique
PrintheadResolution
PrintSpeed(variable)
PrintWidth(max)
PrintLength(max)
MediaWidth(min/max)
StandardEdgeGuides
MediaWidth(min/max)
Quick-LoadGuides
MediaRollDiameter(max)
MediaRollCoreDiameter
RibbonWidth(min/max)
RibbonRollDiameter(outer),
max.
RibbonRollCoreDiameter
(inner)
PrintDirections
Modes of Operation
Tear-Off(Straight-through)
Cut-Off
Peel-Off(Self-strip)
Firmware
OperatingSystem
SmoothFonts
Built-inbarcodesymbologies38
106
Chapter A — Technical Data
Physical Measurements
Dimensions(W×L×H)
Withlongsidedoor
Dimensions(W×L×H)
Withpapercutterinstalled
Dimensions(W×L×H)
With8-inchMegatopinstalled
Weight(excludingmedia)
AmbientOperatingTemperature
Humidity
Electronics
Microprocessor
On-boardFlashSIMMs
On-boardSDRAMSIMM
Standard8MB
Power Supply
ACVoltage
PFCRegulation
PowerConsumption
Sensors
LabelGap/BlackMark/OutofMediaYes
Fivefixedpositions.
PrintheadLifted
RibbonEnd/RibbonLow
Thermaltransfermodelonly.
Controls
IndicatorLamps
Display
EasyCoder PF4i User ’s Guide (IPL Version)
Chapter A — Technical Data
Controls
Keyboard
Feed/Pausebutton
Beeper
Data Interfaces
Serial
ConnectionforOptional
InterfaceBoards
MemoryCardAdapter
Accessories and Options
ThickMediaPrinthead
IntegralSelf-stripUnitwithLiner
Takeup
RotatingMediaSupplyHub
3-inchAdapterforMediaSupplyHub
Cutter
ShortSideDoor
LongSideDoor
LongSideDoorwith8-inchMegatop
LabelTakenSensorOption
RS-232CableOption
ParallelInterfaceCable
ParallelInterfaceBoardOption
EasyLANEthernetInterface
EasyLANWirelessInterface
CompactFlashCards
Note1:Themaximumprintlengthisalsorestrictedbythe
amountoffreeSDRAMmemory.
Note2:Dependingonmodel,theprintermaybedeliveredwith
oneofthreetypesofdoors.
108
B
Media Specifications
Thisappendixspecifiesthephysicalmeasuresforvarioustypesof
media.
EasyCoder PF4i User ’s Guide109
(IPL Version)
Chapter B — Media Specifications
Media Roll Size
Core
Diameter(A),standard:38-40mm(1.5inches),withadapter:
76.2mm(3inches)
Width:Mustnotprotrudeoutsidethemedia.
Themediamustbewounduponthecoreinsuchawaythatthe
printercanpulltheendfree.
Media
Diameter:
·Position1
·Position2
·Position3
Maximum:114.3mm/4.50inches
Minimum(standard):25mm/1.00inches
Minimum(Quick-Load):40mm/1.57inches
110
Chapter B — Media Specifications
Therecommendedmediathicknessis175μm(7mils)withthe
standardprintheador220μm(8.7mils)withthespecialthick
mediaprinthead.Ifthickermediaisused,printqualitymaybe
reduced.Mediastiffnessmustbebalancedagainstthicknessto
maintainprintquality.Mediarollstobeloadedinsidetheprinter
shouldbewoundwiththeprintablesidefacingoutwards.
Themediasupplymustnotbeexposedtodust,sand,orgrit.Any
hardparticles,howeversmall,candamagetheprinthead.
Media
Self-Adhesive Strip (Continuous Stock)
(a)ExternalMediaWidth
(includingliner)
Maximum:114.3mm(4.5
inches)
Minimum(standard):25mm
(1.00inches)
Minimum(narrowQuickLoad):40mm(1.57inches)
Minimum(wideQuick-Load):
SELF-ADHESIVE
STRIP
(b)LinerWidth
Thelinermustnotextendmore
thanatotalof1.6mm(0.06
inch)pasttheedgeoftheface
materialandshouldprotrude
equallyonbothsides.
(c)InternalMediaWidth(excludingbacking)
Maximum:112.7mm(4.43inches)
Minimum:23.8mm(0.94inches)
MediaTypeSetup:ContinuousStock
EasyCoder PF4i User’s Guide (IPL Version)
Chapter B — Media Specifications
Self-Adhesive Labels (Gap Stock)
a
c
d
SELF-ADHESIVE
LABELS
Quick-Load):
80mm(3.15inches)
(b)LinerWidth
Thelinermustnotextend
b
(d)LabelLength
Minimum:8mm(0.32inches)
Maximum:6,143mm(241inches),providedthatthereisa
sufficientamountoffreeSDRAMmemory
Underidealcircumstances,aminimumlabellengthof4mm
(0.16inches)couldbeused.Itrequiresthatthesumofthelabel
length(d)andthelabelgap(e)islargerthan7mm(0.28inches),
thatbatchprintingisused,andthatnopullbackofthemediais
performed.Intermecdoesnotguaranteethatsuchshortlabels
willwork;itisuptotheusertotestit.
112
Chapter B — Media Specifications
(e)LabelGap
Recommended:3.0mm(0.12inches)
Minimum:1.20mm(0.05inches)
Maximum:21.3mm(0.83inches)
TheLabelStopSensormustbeabletodetecttheextremefront
edgesofthelabels.Formoreinformation,see“Adjustingthe
LabelStopSensor”onpage101.
MediaTypeSetup:GapStock
Non-Adhesive Strip (Continuous Stock)
(a)MediaWidth
Maximum:114.3mm(4.5inches)
Minimum(standard):25mm(1.00
inches)
Minimum(narrowQuick-Load):40
mm(1.57inches)
Minimum(wideQuick-Load):80
mm(3.15inches)
NON-ADHESIVE
STRIP
MediaTypeSetup:ContinuousStock
EasyCoder PF4i User’s Guide (IPL Version)
Chapter B — Media Specifications
Tickets With Gaps (Gap Stock)
a
c
willwork;itisuptotheusertotestit.
(c)LSSDetectionPosition:Fivepositions,see“LabelTaken
Sensor”onpage71.
(d)DetectionLength
Thelengthofthedetectionslit(excludingcornerradii)mustbea
minimumof2.5mm(0.10inches)toeitherside(rightorleft)of
thelabelstopsensordetectionposition.
(e)DetectionHeight
Recommended:1.6mm(0.06inches)
Minimum:1.27mm(0.05inches)
Maximum:21.3mm(0.83inches)
114
Chapter B — Media Specifications
MediaTypeSetup:GapStock
Note:Handleperforatedmediacarefullytoavoidripsorbreaksalong
theperforations.Brokenorrippedperforations,particularlyatthe
edges,maycausethemediatobreakormisfeedduringprinting.
Tickets With Black Mark (Mark Stock)
Note:Preprintthatmayinterferewiththedetectionoftheblackmark
shouldbeavoided.
Note:Theblackmarkshouldbenon-reflectivecarbonblackona
whitishbackground.
a
c
Minimum:20.0mm(0.8inches)
TICKETS
WITH MARKS
FEED
DIRECTION
(e)BlackMarkLength
Common:12.5mm(0.5inches)
Minimum:5.0mm(0.20inches)
Maximum:21.3mm(0.83inches)
EasyCoder PF4i User’s Guide (IPL Version)
Chapter B — Media Specifications
(f)BlackMarkY-Position
Theblackmarkshouldbeasclosetothefrontedgeoftheticket
aspossible,eitheronthetoporonthebackofthemedia.
MediaTypeSetup:MarkStock
Note:Handleperforatedmediacarefullytoavoidripsorbreaksalong
theperforations.Brokenorrippedperforations,particularlyatthe
edges,maycausethemediatobreakormisfeedduringprinting.
116
C
Interfaces
Thisappendixdescribestheinterfaceconnectorsfoundonthe
printer’srearplate.Itcoversthefollowingtopics:
·RS-232interface
·Optionalinterfaces
EasyCoder PF4i User ’s Guide117
(IPL Version)
Chapter C — Interfaces
RS-232 Interface
Protocol For The Default Setup
Tochangetheinterfacesettings,seeChapter5,“SettingUpthe
Printer”onpage49
Baudrate:9600
Characterlength:8bits
Parity:None
Stopbits:1
RTS/CTS:Disabled
ENQ/ACK:Disabled
XON/XOFF:Disabled(bothways)
NewLine:CR/LF
RS-232
SIgnals On Printer’s Serial Port
DB-9
1
2
3
4
5
6
7
8
9
118
Chapter C — Interfaces
*Theexternal+5Vislimitedto500mAandisautomatically
switchedoffatoverload.
Interface Cable
Computerend:Dependsoncomputermodel
Printerend:DB-9plug
Optional Interfaces
TheprintercanoptionallybefittedwithanIEEE1284Parallel
InterfaceBoardattheright-handsideoftheprinter’srearplate.
TheprintercanalsobefittedwithoneofthefollowingEasyLAN
interfaceboardsforconnectiontoaLocalAreaNetwork(LAN).
·EasyLANEthernetInterface
·EasyLANWirelessInterface
IEEE 1284 Parallel Interface Board
Parallel interface connector
EasyLAN Ethernet Interface
RJ-45 EasyLAN connector
EasyCoder PF4i User’s Guide (IPL Version)
Chapter C — Interfaces
EasyLAN Wireless Interface
EasyLAN antenna
120
D
Media Sensitivity Number
ThisappendixdescribeshowtodeterminethecorrectMedia
SensitivityNumber(MSN)forvarioustypesofdirectthermal
mediaorthermaltransferribbon.Italsoincludesinstructionson
howtodeterminetheprinter’scurrentmediasensitivitysetting
andhowtoadjustit.
EasyCoder PF4i User ’s Guide121
(IPL Version)
Chapter D — Media Sensitivity Number
About the Media Sensitivity Number (MSN)
Themediasensitivitynumber(MSN)specifiestheamountof
heattheprintheadneedstoimagealabel.Theamountofheat
requiredisuniqueduetodifferentchemistriesand
manufacturingprocesses.Settingthemediasensitivitycorrectly
optimizesbothprintqualityandprintspeed.
IntermechasdeterminedMSNsthatproducethehighestpossible
printqualityforIntermecmediaandribboncombinationson
Intermecprinters.
Determining
Setting
the
Current
Media
Sensitivity
YoucanuseSetupmodetoprintoutaconfigurationlabelthat
includestheprinter’scurrentmediasensitivitysetting.For
instructions,see“Test/Service”onpage64.
Bydefault,theMSNfordirectthermalmediais420and567for
thermaltransfermedia.
Changing the Current Media Sensitivity Setting
UsetheSetupMode,PrintSet,third-partysoftware,orthe
Intermecprinterlanguage(IPL)commandsettochangethe
printer’smediasensitivitynumber.Thefollowingexamplesets
theMSNto567usingtheIPLcommandset.
To set the sensitivity rating
1Findthethree-digitsensitivityrating.
2AttheDOSprompt,typethefollowingcommandandpress
Enter:
MODE COM1 96,E,7,1,N
3TypethefollowingcommandlinesandpressEnter:
COPY CON COM1
<STX><SI>g1,567<ETX>^Z
EasyCoder PF4i User’s Guide (IPL Version)
Chapter D — Media Sensitivity Number
Determining the MSN for Intermec-Approved Media
and
Ribbons
Todetermineanexactmediasensitivitynumber,obtainthepart
numberofyourmediaand/orribbonandcall1-800-755-5505,
press1andthen1.Thepartnumbermaybeprintedonthe
outsideoftheboxcarton.
Boththethermaltransfermediaandribbonhaveasensitivity
number.TodeterminetheMSN,combinethedigits.Notethat
“combine”doesnotmean“add”.
Media or Ribbon
Thermaltransfermedia56*
Thermaltransferribbon5*7
567
number.
Determining the MSN for Other Media and
Ribbons
IfyouarenotusingIntermec-approvedmediaandribbon,you
canstillachievegoodprintqualitybysettinganapproximate
mediasensitivitynumber.
Ifyourmediaisnotlistedinthetablebelow,butasimilarmedia
is,usetheapproximatesensitivitylevellistedinthefirstcolumn
toachieveacceptableprintquality.Forexample:800,700,100.
Ifyoucannotdetermineanapproximatesensitivitylevel,start
withthehighestsetting(800forthermaltransferand700for
directthermal)andworkyourwaydownuntilyouachieve
acceptableprintquality.YoucanalsousePrintSet’sPrintQuality
Wizardtohelpachieveacceptableprintquality.
123
Chapter D — Media Sensitivity Number
Media Sensitivity Numbers for Intermec-Approved
Media
and Ribbons
MSNsforpopularIntermec-approvedmediaandribbons.
Direct Thermal Media Sensitivity Settings
Sensitivity Level
400SeriesMediumSensitivity
100SeriesLowSensitivity
Thermal Transfer Media and Ribbon Sensitivity Settings
Sensitivity Level
800SeriesHighSensitivity(Paper)864
600SeriesMediumSensitivity
(Synthetic)
500SeriesMediumSensitivity
(Paper)
300SeriesLowSensitivity
(Synthetic)
124
Worldwide Headquarters
6001 36th Avenue West
Everett, Washington 98203
U.S.A.
tel 425.348.2600
fax 425.355.9551
www.intermec.com
EasyCoder PF4i Bar Code Label Printer
*934-027-001*
P/N 934-027-001


