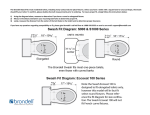
1
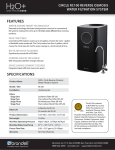
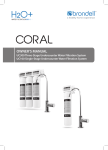
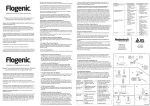
Owner’s Manual FS-10/FreshSpa
Table of Contents
Product Features. . . . . . . . . . . . . . . . Page 2
Parts List. . . . . . . . . . . . . . . . . . . . . . . . Page 3
Configuration. . . . . . . . . . . . . . . . . . . Page 4
Installation . . . . . . . . . . . . . . . . . . . . . Page 5
Operation . . . . . . . . . . . . . . . . . . . . . . Page 9
Maintenance. . . . . . . . . . . . . . . . . . . . Page 10
Warranty . . . . . . . . . . . . . . . . . . . . . . . Page 11
Contact. . . . . . . . . . . . . . . . . . . . . . . . . Page 13
FreshSpa Feature List:
Parts List
Hygienic retractable nozzle
Self cleaning nozzle feature
Ambient temperature bidet wash
Nozzle positioning (3 settings)
Adjustable water pressure
All brass internal valve
Bidet attachment
with turn dial control
Adjustable brackets
T-valve connector
Bidet hose
2 ea large rubber washer
2 ea small rubber washer
All brass 3/8” T-valve
High quality braided PVC hose
Anti-bacterial ABS material with full body panel
Backflow prevention valve
No electricity or batteries required
Easy installation and adjustable toilet fit
All accessories included for standard installation
1 year warranty
2
3
Configuration
Installation
Check the size of the connection at your water supply shut off
valve. It needs to be a 3/8” connector for our T-valve to install
between the supply line and the shut off valve. Note: if you have
a 1/2” water supply connection at the wall, you will need to
purchase the following reducing adapter available online and at
many plumbing hardware stores: Reducing Adapter, 1/2” Female
NPT X 3/8” Male Compression.
Check the water supply line that connects the toilet tank to the
water shut off valve at the wall. If it is a rigid pipe, you will need
to purchase a flexible water supply hose to replace it before
installing the FreshSpa. The length of the hose will vary, the
top connection size should be 7/8” ballcock to connect to your
fill valve under the toilet tank and the bottom connection size
should be 3/8” female compression to connect to the FreshSpa
brass T-valve.
1) Remove existing toilet seat
a. Lift hinge covers and use flathead or Phillips head screwdriver
to remove the mounting bolts. Alternatively, you may need to
loosen mounting bolts underneath the seat.
b. Remove the toilet seat and set the seat, mounting bolts and
hardware aside.
4
5
Installation
Installation
2) Turn off water supply valve and flush toilet
4) Connect the Bidet Hose to the T-valve
a. Connect one end of the bidet hose to
the remaining open side of the T-valve.
a. Turn off water supply at the wall to
stop flow of water.
5) Install Bidet Attachment on Toilet
a. Place large rubber washers over the
open bolt holes in the toilet fixture.
b. Flush toilet and hold down handle
to completely empty toilet tank.
c. Disconnect water supply hose from
water shut off valve. You may have
to use a 3/8’’ compatible wrench or a
similar tool if the connection is tight
(not supplied).
3) Connect T-valve to supply line
Note: Do not connect FreshSpa to
hot water line. Only connect to a cold
water pipe.
Step 2a
Step 2c
a. Install the T-valve and the small
rubber washer onto the water shut
off valve coming out of the wall.
b. Connect the water supply line to
the open end of the T-valve using the
second small rubber washer (if needed).
6
Step 3a & 3b
Step 4a
b. Place bidet attachment over
washers so the nozzle is as close to
the back of the toilet bowl as it will go.
This will vary by toilet.
c. Make sure the adjustable brackets
line up with the holes in the toilet
fixture. You may need to move the
adjustable brackets accordingly to
line up properly.
d. Replace the toilet seat on top of
bidet attachment and secure using
original toilet seat hardware. Make
sure to tighten so that the bidet
attachment and seat do not move.
Step 5
7
Installation
Operation
6) Connect Bidet Hose to Bidet Attachment
a. Connect open end of bidet hose to the
brass connection on the bottom side of
the bidet attachment.
Using the FreshSpa
To clean the bidet nozzle, turn the control dial towards the “Nozzle
Cleaning” position and water should wash over the nozzle.
Step 6a
7) Turn on Water Supply & Check for Leaks
a. Open the main water supply valve slowly and check for
leaks.
b. Wait 5-10 minutes, check again and if there are no leaks
continue.
Note: if there is any leaking, check all rubber washers and make
sure all water connections are tight and secure. If necessary,
you can use plumbers tape for any leaking connections.
8
For the general bidet wash function, turn the dial towards the
“Wash” position.
• The further the dial is turned, the higher the water pressure will be.
• To lower the water pressure, turn the nozzle back towards the center.
For a front wash function, women may need to tilt & bend forward
slightly in order for the spray to hit the appropriate areas.
Nozzle positioning
There are 3 different nozzle
positions that you can easily
adjust by gently pulling the
end of the nozzle forward
or backwards. Once desired
position is set, the nozzle will
remain in that position until
manually moved.
3
2
1
9
Maintenance
Warranty
To clean the nozzle, gently pull down on the head of the nozzle, and
use a toothbrush or soft cloth and mild detergent (such as dish soap)
to clean the nozzles. You may also unscrew the nozzle tip cap for a
more thorough cleaning or use a toothpick if any nozzle holes are
plugged with hard water buildup.
Brondell products are backed by some of the most comprehensive warranties
in the industry. Brondell warrants that the FreshSpa shall be free from defects
in material and workmanship under normal use and service.
To clean the bidet, use a mild cleaner such as Simple Green or Windex
spray to clean the FreshSpa. Do not scrub or use harsh, abrasive
products to clean the FreshSpa, which may scratch the product.
Exclusions and Limitations
1. BRONDELL warrants its products to be free from manufacturing defects under
normal use and service. This warranty is extended only to the ORIGINAL PURCHASER.
FreshSpa One-Year Limited Warranty
100% Coverage of all parts and labor for the entire product for the first year
from original date of purchase
2. BRONDELL’s obligations under this warranty are limited to repairs or replacement,
at BRONDELL’s option, of products or parts found to be defective, provided that
such products were properly installed and used in accordance with instructions.
BRONDELL reserves the right to make such inspections as may be necessary in order
to determine the cause of the defect. BRONDELL will not charge for labor or parts in
connection with warranty repairs for the first full year from date of purchase on all
products except those that may be subject to commercial use limitations.
3. BRONDELL is not responsible for the cost of removal, return (shipping) and/or
reinstallation of products. This warranty does NOT apply to:
Damage or loss which occurs during shipment.
Damage or loss sustained through any natural or manmade causes beyond the
control of BRONDELL, including but not limited to fire, earthquake, floods, etc.
Damage or loss resulting from sediments or foreign matter contained in a water system.
Damage or loss resulting from negligent or improper installation including
installation of a unit in a harsh or hazardous environment.
Damage or loss resulting from removal, improper repair, modification of the
product, or improper maintenance including damage caused by chlorine or
chlorine related products.
Damage or loss resulting from acts which are not the fault of Brondell or which
the Product is not specified to tolerate.
10
11
Warranty
Contact
4. This warranty gives you specific legal rights. You may have other rights which vary
from state to state.
Brondell, Inc.
PO Box 470085
San Francisco, CA 94147-0085
THIS WRITTEN WARRANTY IS THE ONLY WARRANTY MADE BY BRONDELL. REPAIR
OR REPLACEMENT AS PROVIDED UNDER THIS WARRANTY SHALL BE THE EXCLUSIVE
REMEDY AVAILABLE TO THE PURCHASER. BRONDELL SHALL NOT BE RESPONSIBLE
FOR LOSS OF USE OF THE PRODUCT OR FOR OTHER INCIDENTAL, SPECIAL, FOR
CONSEQUENTIAL DAMAGES OR EXPENSES INCURRED BY THE PURCHASER OR FOR
LABOR OR OTHER COSTS DUE TO INSTALLATION OR REMOVAL OR COSTS OF REPAIRS
BY OTHERS, OR FOR ANY OTHER EXPENSE NOT SPECIFICALLY STATED ABOVE. EXCEPT
TO THE EXTENT PROHIBITED BY APPLICABLE LAW, ANY IMPLIED WARRANTIES,
INCLUDING THAT OF MERCHANTABILITY, ARE EXPRESSLY LIMITED TO THE DURATION
OF THIS WARRANTY. SOME STATES DO NOT ALLOW LIMITATIONS, SO THE ABOVE
LIMITATION AND EXCLUSION MAY NOT APPLY TO YOU.
Phone: 1-888-542-3355
Email: support@brondell.com
Web: www.brondell.com
For questions, contact
Brondell Customer Service:
1-888-542-3355
How to Obtain Service
To obtain repair service under this warranty, you must contact an authorized
BRONDELL Service Center to obtain an RMA (Return Merchandise Authorization)
number. Proof of purchase in the form of a copy of your original receipt must
accompany the returned unit for the warranty to be valid. Take or ship the unit prepaid to the closest Brondell authorized service center along with your RMA number
and proof of purchase.
To obtain your RMA number and locate the BRONDELL Service Center location
nearest you, call 1-888-542-3355.
12
13