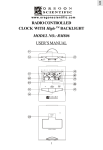
Download Oregon Scientific Higlo RM832A User's Manual
Transcript
RADIO CONTROLLED
TM
TRAVEL CLOCK WITH Higlo
BACKLIGHT
MODEL : RM832A
Thank you for purchasing the RM832A Radio Controlled Travel Alarm Clock
with HiGlo TM backlight! Your RM832A is an always-accurate Radio
Controlled clock combining form and fun ction in a small compact
take-everywhere size.
Your RM832A features a daily alarm, calendar, day-of-the-week display,
electroluminescent HiGloTM backlight, snooze alarm, automatic adjustment
for Daylight Savings Time and ExactSetTM technology.
Radio Controlled clocks receive signals from the U.S. Atomic Clock, one of
the world’s most accurate timepieces.For information about the National
Institute of Standards and Technology and the U.S. Atomic Clock, visit the
NIST website: www.nist.gov.
1. ACTIVATING THE CLOCK
The RM832A requires 2 “AAA” size batteries .The RM832A will seek the
signal from the US Atomic Clock once the batteries are activated. (See Signal
Reception) To activate the batteries:
R A D I O
C O N T R O L L E D
1. To open the battery compartment, A slide the compartment door towards the
bottom of the clock.
2. Remove the two protective plastic strips from the batteries and slide the
battery compartment door back into place over the battery compartment.
MOD E
DATE/ ALARM
ON/OFF
3. Slide the B Lock to the unlocked position.
IMPORTANT: To set user-selections and settings the RM832A must be in the
unlocked position. Locking is recommended during transit to prevent settings
from being accidently changed.
NOTE: The RM832A features a low battery warning icon. This icon [
]
will appear when batteries need replacing.To replace batteries: remove the
battery compartment door, remove the old batteries, insert fresh batteries into
the compartment with the polarities in the direction as shown inside the
compartment, and slide the battery compartment door back into place.
2. SIGNAL RECEPTION ICON AND TIME ZONE
ZONE
LOCK
With reception of the US Atomic Clock signal, an icon designating the
C strength of signal reception will be displayed. (See Signal Reception) With
the successful reception of the signal, the RM832A will automatically select
the correct US time zone and the corresponding time and date. To view or
manually select another time zone and corresponding time and date after
initial setting by the US Atomic Clock:
1. Using a single-press method, press D [ZONE] to advance through the
zones. Zones are identified by the letters: “P” Pacific; “M” Mountain; “C”
Central and “E” Eastern.
2. The letter representing the time zone selected will be displayed immediately
under the signal strength icon.
3. ALARM FUNCTIONS
Setting the Alarm:
1. Press and hold E [DATE/ALARM] until the “hour” segment begins to
flash. While the “hour” is flashing, press the F[I] to set the desired hour.
NOTE: There are AM and PM designations.
2. When the desired hour is reached, press E [DATE/ALARM] again, and
the “minutes” segment will begin to flash. Press the F[I] to set the desired
minutes.
3. Press E [DATE/ALARM] once more to exit the alarm setting mode.
Turning the Alarm ON and OFF:
1. Pressing the G [ON/OFF] activates and disables the daily alarm.
2. When the alarm is active, the bell icon H [
] will be displayed.
3. To turn the alarm off, press the G [ON/OFF]. When the alarm is disabled,
no bell icon will show.
4. To temporarily deactivate the alarm, press E [DATE/ALARM]. The alarm
remain active and will sound again in 24-hours.When this feature is
activated, I [(( • ))] will be displayed.
Snooze and Backlight Features:
S w in g-u p Ta b le S ta nd
1. Pressing J [
] while the alarm is sounding will
T O U C H
activate the 8-minute snooze feature . After 8-minutes the alarm will sound
again.
2. Pressing [
T O UC H
] will also activate the backlight for
5-seconds.
4 USER SELECTIONS
Manually Setting: time, year, month, date & Language
NOTE: It is highly unlikely you should ever have the desire (or need) to
manually set the clock time, year, month or date of RM832A Travel Clock.
However, in the event this becomes necessary please review the following.
Setting the Time
1) Press and hold K [MODE] button for at least three seconds. The “Hour”
segment of the clock time will begin flashing
2) While the “hour” segment is flashing press the E [DATE/ALARM] button
to set the desired hour time (Please note the AM/PM designation)
3) When the desired hour times reached press the K [MODE] button again.
The “Minutes” segment of the clock time will begin flashing.
4) While the “Minuted” segment is flashing press the F [I] button to set the
desired minutes time.
5) When the desired minutes time is reached. Briefly press the K [MODE]
button five more times to exit the clock time set mode.
Important: As soon as any manual change in the clock time is made, there
is a loss of the signal strength indicator from the display.
Setting the Year Month and Date
1) Press and hold K [MODE] button for at least three seconds. The
“Hour”segment of the clock time will begin flashing.
2) Briefly press the MODE button and the “Minutes” segment will begin flashing.
3) Briefly press the K [MODE] button once more. The clock time will disappear
and be replaced by a flashing year (Ex. 1995). This is the year set mode.
4) While the “Year” segment is flashing press the F [I] button to set the
desired year.
5) When the desired year is reached briefly press the K [MODE] button and
the "Month" digit will start flashing.
6) Press F [I] button until the desired month appears on the display.
7) Press the K [MODE] button to confirm the "month" and the "date"
digits will flash
8) Press F [I] until the desired date appears on the display.
9) Press Mode button to confirm the "Date" and the Language display will flash".
10) Press F [I] button until the desired language indicator appears on the
display (“E” for English, “F” for French and “S” for Spanish).
11) Press K [MODE] button one more time to exit the set mode and resume
normal time keeping.
WARRANTY
This product is warranted to be free of manufacturing defects for a period of
3 months from date of retail purchase. Defective product should be directed
to the place of retail purchase for exchange. Should this not be possible,
contact our customer care department for assistance and a return material
authorization. No returns may be made without a return authorization. Please
retain your retail receipt as you may be asked to provide a copy of it for proof
of date purchased.
This warranty does not cover product subjected to abuse, misuse, accidental
damage or tampering.
Upon return of the defective product, Oregon Scientific will at its discretion,
replace the product with either a new or a tested reconditioned product. Should
the product be out of warranty, the consumer may purchase directly from
Oregon Scientific a replacement at reasonable cost plus shipping and handling.
SPECIFICATIONS
Reset Button:
To clear all user-selected settings and to cause the settings to default to their
original values, press M [ RESET ]. The reset button is located under the
battery compartment door.
- Integrated radio receiver for reception of time signal 10KW transmitter
WVB: at 60kHz
- Operating temperature: 35 - 120° F
- Average time for clock to receive initializing signal: 3 - 7 minutes
RADIO CONTROLLED CLOCK:
- Automatic signal-reception activation: six times every 24-hours
The RM832A will automatically synchronize current time and date with the
signal broadcast by the US Atomic Clock when the product is in reception
range of the signal. When the unit is new and just out of the box, synchronization
with the U.S. atomic clock can take upto 72 hours. The unit will receive the
most dependable and interference free signal automatically between Midnight
and 4 AM. When the unit is receiving radio signal, the reception icon will start
to blink. The reception icon will show either strong, weak or no signal depending
on the strength of the radio signal. A complete reception generally takes
about 2 to 5 minutes. When the reception is completed the reception icon will
stop blinking. The reception icon will show [I] for no Reception or [MODE]
for successful reception. For best signal reception, place the RM832A away
from other equipment that emit RF or microwave signals such as TV's, radios,
PC's or microwave ovens. Other causes for signal interference include
electrical power transmission towers, steel reinfoced concrete construction,
and/or metal siding. You may need to reposition the clock for maximum
reception. Radio Frequency appliances and radios, such as the Radio
Controlled Alarm Clock, perform best when placed near a window. After
receiving the initial signal, updates are accomplished with greater ease. Even
though there are areas that may have more difficulty in receiving a signal, the
RM832A Alarm Clock contains very accurate quartz movement and will
retain precise time even if a signal is missed on a rare occasion.
The signal strength indicator icon is displayed immediately to the left of the
time display.
- HiGlo™ backlighting source: Electroluminescence
Symbol on
the Display
Indicating
The last signal reception was poor and
repositioning of the clock is recommended.
The displayed time has been manually set and
clock is not synchronized with the US Atomic
Clock.
Radio signal is disabled and clock is receive
signal until clock is reactivated.
TROUBLESHOOTING GUIDE
Problem
No Display
Remedy
• Check battery compartment.
• Verify that batteries are inserted properly and
are of good quality.
• If the clock is new and just out of the box,
Did Not
Receive
A Signal
allow up to 72 hours for the clock to receive the
initial signal
• May be caused from too much interference.
Reposition clock to near a window.
• Verify that the low battery icon is not
displayed.
Loss of
Signal
Other
Problems
NOTE ON COMPLIANCE
This device complies with Part 15 of the FCC Rules. Operation is subject to the
following two conditions: (1) This device may not cause harmful interference,
and (2) This device must accept any interference received, including
interference that may cause undesired operations.
Warning: Changes or modifications to this unit not expressly approved by the
party responsible for compliance could void the user’s authority to operate the
equipment.
FCC :
NOTE: This equipment has been tested and found to comply with the limits for
a Class B digital device, pursuant to Part 15 of the FCC Rules. These limits are
designed to provide reasonable protection against harmful interference in a
residential installation. This equipment generates, uses and can radiate radio
frequency energy and, if not installed and used in accordance with the
instructions, may cause harmful interference to radio communications.
However, there is no guarantee that interference will not occur in a particular
installation. If this equipment does cause harmful interference to radio or
television reception, which can be determined by turning the equipment off
and on, the user is encouraged to try to correct the interference by one or more
of the following measures:
- Reorient or relocate the receiving antenna.
- Increase the separation between the equipment and receiver.
The last signal reception was successful and time
synchronization with the US Atomic Clock was
completed.
No Icon
- Battery type: 2 AAA-size (included)
• May be caused from too much interference.
Reposition clock to near a window.
• Please contact Customer Service at
541-868-8205 or via email at:
helpme@oscientific.com. Instructions on how
to manually set the RM-832A available upon
request.
- Connect the equipment into an outlet on a circuit different
from that to which the receiver is connected.
- Consult the dealer of an experienced radio/TV technician
Company Name: Oregon Scientific, Inc.
Address: 19861 SW 95th Place, Tualatin, Oregon 97062, USA
CUSTOMER ASSISTANCE
Should you require assistance regarding this product and its operation, please
contact our customer care department at 541-868-8205 or via email at
helpme@oscientific.com.
CAUTION
— The content of this manual is subject to change without further
notice.
— Due to printing limitation, the displays shown in this manual may
differ from the actual display.
— The contents of this manual may not be reproduced without the
permission of the manufacturer.


