1
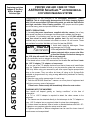
ASTROVID
SolarCam
Capturing real-time
images of the Sun,
White, H-alpha &
Calcium light.
PROPER USE AND CARE OF YOUR
ASTROVID SolarCam™ ASTRONOMICAL
CCD VIDEO IMAGING SYSTEM
Congratulations on the purchase of the ASTROVID SolarCam™ VIDEO
CAMERA! This is a high quality Astronomical CCD Video Imaging System
with 2/3 inch monochrome CCD that will provide you with the best full disk
and high resolution Solar Viewing possible. With proper care this system
should last many years and provide excellent images!
SAFETY PRECAUTIONS:
1. Use only the power transformer supplied with the camera. Use of any
other power transformer will damage the camera and invalidate the Warranty.
2. A portable 12 volt battery pack can be used if there is a 0.5 (500 milliamp)
amp fuse wired in series with the positive lead. We also found that an
excellent way to use the cameras in the field is to use a 110 volt inverter. These
are available from either Wal-Mart or K-mart for less than $50.00.
3. Avoid static electricity discharges. These
may damage the CCD chip.
4. Do not point the CCD towards the Sun
unless protected with a proper solar filter
or Herschel Wedge. Permanent damage to
the CCD chip will result if the CCD is not protected.
5. Do not directly touch or attempt to clean the CCD chip.
6.The thread mount on the CCD camera has fine threads. Do not force it onto
the 1.25"-C adapter, T-C adapter, or lens mount.
7. In our use of the T-C adapter we have found that at times small metal flakes
from the T-adapter threads will end up on the protective glass that covers the
CCD chip. When using your camera they will show up as irregular opaque black
dots on the screen. They can either be blown off using an Air Syringe Bulb
available at drugs stores or by using a very soft artist’s paintbrush to carefully
dust them off.
8. Keep the cover on the camera when it is not in use.
9. Treat the ASTROVID SolarCam™ camera as a fine piece of equipment and
it will give you many years of enjoyment.
Please note: Camera setup will immediately follow the next section.
PLUGGING INTO THE UNIVERSE:
Your results will depend greatly on “seeing conditions” at the time of
observation.
1. A T-C or 1.25"-C adaptor is required to attach the video camera to the
telescope.
2. The camera can be attached directly to the telescope via the T-C adapter or
via a 1.25"-C adapter into an eyepiece holder for prime focus videography.
3. If closer views are desired, either a barlow or stacked barlows with the 1.25"C adaptor or an eyepiece projection setup must be used.
4. Eyepiece projection or Barlow enlargement can be used for closer views of
prominences and sunspot detail.
ASTROVID
SolarCam™ CCD VIDEO CAMERA
5. Eyepieces with focal lengths from 7-40mm work well with eyepiece projection
depending upon the focal length of your telescope. It is best to experiment to find the
eyepiece than gives you the most detailed image combined with your seeing
conditions.
6. Orthoscopic eyepieces work well because they tend to have less internal reflection
(less ghosting) and also have fairly flat fields of view. Barlow lenses are the BEST way
to enlarge images. There are no internal reflections and they can be stacked to
increase magnification further. You will need the 1.25"-C adapter for Barlows Lens
use.
7. The ASTROVID SolarCam™ video camera has greatly increased sensitivity to
infrared radiation to approximately 1100nm. This should not be an issue with
narrowband H-alpha and Calcium filters. These filters to be safe for visual use, must
block out IR radiation.
8. For white light observations, we highly recommend the Baader Planetarium Solar
Continuum Filter and also the Baader Planetarium Neutral Density filters. A Wratten
green #56 or green #58 filter can also be substituted. These filters will greatly increase
the contrast of fine solar surface detail.
9. Other filters such as the greens, blues and neutral density filter can
also be used with H-alpha and Calcium Solar filters to get the light to
The ASTROVID SolarCam™
acceptable levels to show fine solar surface structure and
can also be used for full
prominences.
lunar disk studies and for
10.The SolarCam™ has manual controls that should accommodate
the planets!
any solar imaging Situation including white light and narrowband..
11. The compact size of the SolarCam™ will allow it to adapt to any
size telescope.
The above information is just a guideline to get you started.
We invite your comments and feedback and look forward to exploring this new facet of
Amateur Astronomy with you. We will publish images sent to us on our web page.
Credit will be given for all items used.
ADIRONDACK ASTRONOMY
72 Harrison Ave
Hudson Falls, NY 12839
Order Line: 1-877-348-8433
Fax: 518-747-4422
Info Line: 518-747-4141 www.astrovid.com
e-mail: astrovid@adelphia.net
-2-
ASTROVID
SolarCam™ CCD VIDEO CAMERA
CAMERA CONNECTIONS:
***The power supply is to be connected last to prevent any damage to the camera.***
1. This camera cannot be hooked directly to a television for a picture as it only supplies Baseband or
Composite Video.
2. Most newer televisions have separate Video In jacks that can be used with this camera.
3. Look at the back of the Astrovid SolarCam™ camera.
4. On the back is a 12 pin female jack labeled DC IN. The round male metal jack on the black power cord
goes into the ASTROVID SolarCam™. It attaches to the back of the camera’s DC IN jack. Line up the pins
to match the connector, be careful in doing this so as not to bend any of the pins within the connector. Push
in the power cord to lock. DO NOT force this connection . Not plug in the wall transformer until all of
your connections are made.
5. Plug in the mini-phono plug from the wall transformer power supply into the power cord that is now
attached to the DC IN.
6. Connect the white Composite video cable’s Male BNC connector to the back of the SolarCam™ camera’s
female BNC connector labeled Video.
7.The other end of the white video cable has a Male RCA Adapter that can be plugged into a VIDEO IN
jack for a television, camcorder, or VCR. (please note set VCR or TV to line in or video in)
10. Our monitors come with the same BNC jacks as the camera. So if you are using our monitor you will
need 1 BNC to F-adapter. The RG-59 cable can then be screwed into the VIDEO INPUT JACK on the
monitor. There is another BNC jack on the monitor for VIDEO OUTPUT. From here using another cable with
a BNC on one end and an RCA adapter on the other end, you can plug
With total manual control
into a VCR or Camcorder to simultaneously watch and record your
and
l a rg e
2/3
inch
observations. Using this configuration with one of our 850 line high
monochrome
CCD
the
resolution monitors will give the best results from the ASTROVID
AST ROVID
Sola rCam™
StellaCam™.
provides
the
most
flexibility
11. Once all of the cables and adapters are plugged in, you may
and largest field of view
plug the power supply in.
possible!
ASTROVID SolarCam™ Camera
Controls
The use of the separate camera controls will enable the image to gain fine adjustment of the final image. It
will allow the user to view both solar surface detail and prominences. The use of a monochrome 2/3 inch
format video CCD will give the largest field of view possible. This will enable full disk viewing on many more
telescopes. See also the separate specification sheet for parameters of each camera control function.
The following controls on the camera are detailed as follows:
Manual Shutter Speed Dial: Round dial labeled 0-9on back upper left corner of the camera. Use the
mini screwdriver provided to change the shutter speeds. Shutter speeds go from 1/60 second to 1/10000
second. Position 0-7. Position 8 Filed integration 1/60 second or Frame Integration 1/30 second. Position
9—no use.
.
Internal External Sync Switch: Horizontal switch labeled INT EXT. Just to the right of the Shutter
Speed Dial. Not really used for Solar Imaging. Leave switch to the left on internal.
Gamma On Off Switch: Vertical switch labeled V ON OFF. Just to right of Internal external sync switch.
This will control the gamma, which relates closely to the contrast of the image. In the off position the gain is
adjusted to the normal daylight conditions (gamma 1.0) . In the ON position the gamma is increased. This
will give a higher contrast image and is useful for solar surface detail. You may want to experiment in both
positions as the use of various neutral density and colored filters i.e. blue and green will also affect the
contrast.
ASTROVID SolarCam™
CCD VIDEO CAMERA
DC IN Plug: This is the 12 pin hi-rose connector on the upper right of the camera. This is where the DC
power plug goes into the camera.
Mini Dip Switch Panel: Center left of camera. Rectangular box containing six dip switches. All six dip
switches should be in the up position for proper operation of the camera. You do not need to change the
position of these dip switches.
GAIN Dial: Dial next to mini dip panel labeled GAIN A, F, M. This three position dial allows you to
change the gain settings. Gains relates to the strength of the video signal. An increase in gain also
increases the noise in the background of the image. The goal of the gain control is to manually adjust it to
keep it as low as possible. The adjustment of the gain in done in conjunction with the adjustment of the
shutter speeds. It is preferred to use as high a shutter speed as possible so as to overcome some of the
atmospheric seeing or turbulence of the atmosphere.
The three gain settings are A – Auto Gain varies from 0 dB to 20 dB depending on the light conditions.
F—Fixed Gain—with the gain set at 13 dB
M—Manual Gain The gain is manually adjusted from 0-20 db. You do this by placing the dial in the M
position with the mini screwdriver. Once this is done you will use the yellow pot labeled M.GAIN (manual
gain) in the lower right corner of the camera to manually adjust the gain. Rotating clockwise will increase
the gain. Rotating counterclockwise will decrease the gain.
75 OHM On/OFF Switch: Vertical Switch on bottom left hand side of camera labeled 75 ohm ON/OFF.
VIEW AND RECORD YOUR
IMAGES AT THE SAME TIME!
SHOW THE WONDERS OF
THE SUN TO LARGE GROUPS
AT ONE TIME!
Should be left in the OFF position for most imaging. You may turn
it on if you are passing through a monitor and going to a recording
device or if you are running very long distances of video cable. You
can experiment turning the switch on and off once you have your
image on the screen.
Trigger Switch: This is the vertical switch at the bottom labeled
TRIG + - Used for external triggering of the camera. Not generally used for Solar Imaging. Leave in the position.
VIDEO BNC Connector: Round Female Video BNC Connector labeled VIDEO. This is the EIA
monochrome video output for the camera. It goes to any TV, Monitor, VCR, Recorder, Frame Grabber etc.
Manual Gain: Yellow Dial labeled M.GAIN. Used when making manual gain adjustments. Use after
setting the gain dial to M for manual. See above please.
USING YOUR ASTROVID SolarCam™ ( Part 1) :
Because solar imaging is a little more involved than other planetary and lunar imaging. It is
recommend that once you achieve your best images, you make note of your setup. i.e. camera
settings , gain, shutter, gamma, filters used etc.
1. Make all of your camera connections and plug in the power.
2. Mae sure you have you telescope setup with proper solar protection for both your eyes an the
SolarCam™.
3. Attach the camera to the telescope via the 1.25 inch adapter.
4. Adjust the shutter speed to the position labeled 0. This is the 1/60 second shutter speed.
5. Put the Gain A,F,M button to the manual position. Rotate the M. Gain button clockwise to the full 20dB
position
©AVA ASTRO CORP 2001
ASTROVID SolarCam™
CCD VIDEO CAMERA
-3-
USING YOUR ASTROVID SolarCam™ (Part 2 Solar Surface Detail):
1. Point your telescope towards the Sun. The easiest way to begin is to find your focus by finding the edge of
the sun.
2. By initially adjusting the settings as discussed in part 1, the sun should appear overexposed and bright
3.
4.
5.
6.
7.
8.
9.
white. Once you know the sun is on the screen, turn the gain down by rotating the M.GAIN button counterclockwise. You may have to move the telescope until you find the edge of the sun. Once you think you
have the edge of the sun you can check it by increasing the shutter speeds. This will act to dim the image.
This is done by rotating the shutter speeds from positions 0-7.
It is very easy to overexpose the sun using such sensitive cameras. So often what looks like the edge of
the sun is actually an overexposed over-flowing image. By decreasing the gain and/or increasing the shutter speeds you should be able to find the edge of the sun.
Once you have the edge of the sun in focus, you can re-center the disk of the sun by moving your telescope.
When the disk of the sun is on the screen you can start to make adjustments to your image. The three adjustments you will make will be the Gain (manual), Shutter speed and Gamma.
Start by adjusting the gain and shutter speeds. The goal here is to keep the gain as low as possible and to
keep the shutter speed as high as possible. This is often going to be a slight compromise.
Once you have adjusted the gain and shutter speed you can then adjust the gamma. You can go from low
contrast to high contrast. Increasing the contrast will show more solar surface detail.
You can also adjust the impedance to see if it improves the image ore not. This is the vertical switch labeled 75 ON / OFF.
To further enhance the image you can see below the section on using filters.
USING FILTERS TO ENHACE SOLAR SURFACE DETAIL:
We tested several filter combinations to achieve the best solar surface detail. We recommend the following.
White Light Surface Detail:
1. We recommend using the Baader 1.25 inch contrast booster that is mated with the Baader 1.25 inch UVIR
blocker.
2. You may also use the Baader Solar continuum filter with the Baader UVIR blocker. The Baader Solar continuum filter also works very well visually.
3. You can also use neutral density filters.
Hydrogen Alpha and Calcium Light Surface Detail:
1. We recommend using the Baader 1.25 inch contrast booster that is mated with the Baader 1.25 inch UVIR
blocker.
2. You may also use the Baader Solar continuum filter with the Baader UVIR blocker. The Baader solar continuum filter also works very well visually.
3. You can also use Blue and Green filters if you have them as they will act as Neutral Density filters in Halpha light.
4. For Calcium light you can use red and green filters as these will act as Neutral Density filters.
5. If you have a set of imaging filters you can use the colored filters from these sets. Some of the sets have
built-in IR blocking and others do not.
ASTROVID SolarCam™
CCD VIDEO CAMERA
USING YOUR ASTROVID SolarCam™ (Part 3 Hydrogen-alpha Prominence Detail):
-5-
1. Solar prominences are imaged in Hydrogen alpha light. Solar prominences are much dimmer than the
surface detail found on the sun.
2. The majority of observed solar prominences do not change in appearance very quickly. However, you
may be able to find one of the changes morphology in rapid time.
3. Gain becomes the more important parameter in imaging solar prominences. An increase of gain will
boost the signal bringing out the much fainter prominences. This is done by increasing the manual
gain.
4. Increase the manual gain until you see a prominence.
5. You also want to decrease the shutter speed as you make your initial adjustments to allow the prominences to come into view.
6. Once a prominence appears on screen you can start to make adjustments to your image.
7. You can see that if the gain is increased you start to lose some of the fine detail (burning it out) but
bring out the fainter structures
8. The goal is to adjust the gain so that the most amount of detail can be imaged in the prominence.
9. Again, you will find that you need a balance between gain and shutter speeds. However, this time the
gain will be set higher and the shutter speeds will most likely be lower.
10. The Solar Hydrogen -alpha line is a very narrow wavelength in a more atmospheric stable part of the
spectrum. The use of slower shutter speeds will not always decrease the resolution of the prominences.
11. The human eye has an incredible response to light in terms of dynamic range. The eye can look at objects going from black to bright white in the same image. A camera cannot do that. Cameras have a
more limited dynamic range. So often with H-alpha imaging you will not see the prominences and solar surface detail at the same time.
12. To better view Solar prominences it is often desirable to increase your image scale. This involves using
a Barlow lens or Powermate from TeleVue. A Powermate is a better choice as it is more corrected and
will not change your focal point. The only drawback here is that in some of the wide field h-alpha telescopes apply a Barlow is not always beneficial. However, on Solar scopes with already longer focal
lengths using a Powermate or Barlow lens is generally beneficial.
USING FILTERS FOR H-ALPHA PROMINENCES
1. The main filters used for prominences are neutral density filters. However, in long focal lengths they
would be less likely to be used than in short wide field telescopes.
2. Again, for neutral density filters you can use a green or blue filter on wide-field telescopes.
3. Because the setups for solar imaging vary so much, some experimentation is need here to determine
whether a filter is needed or not for your particular setup.
4. Keeping notes of your results will help in saving time for setup and will lead you to the best possible
images.
Enjoy Your Astrovid SolarCam™!!!!
Be sure to try it on the Moon and Planets Also!!!
© AVA Astro Corp 08/09/2005 jec