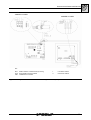
Download Robur GA Line ACF Series User`s guide


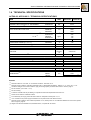


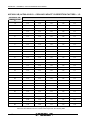


Transcript
Installation, use and
maintenance manual
GA Line ACF Series
Gas fired absorption chiller
for cooling medium-large areas
Natural gas/LPG fired
EDITION: 04/2012
Revision: H
Code: D-LBR357
This manual has been drawn up and printed by Robur S.p.A.; whole or partial
reproduction of this manual is prohibited.
The original is filed at Robur S.p.A.
Any use of this manual other than for personal consultation must be previously authorised
by Robur S.p.A.
The rights of those who have legitimately filed the registered trademarks contained within
this publication are not affected.
With the aim of continuously improving the quality of its products, Robur S.p.A. reserves
the right to modify the data and contents of this manual without prior notice.
Foreward
FOREWARD
This manual is designed to be an installation and user’s guide for the Robur series
ACF60-00 absorption chiller.
This manual especially applies to the plumbing and electrical installers for the hook-up of
the ACF and the initial configuration, and also for the end user regarding its use.
This manual also has a section regarding the operations that must be done before the first
start-up and the primary maintenance operations.
References
If the appliance is to be connected to a Direct Digital Controller (DDC), refer to the
following documentation with which it is supplied:
Installation technician manual - book 1: for installation and service technicians.
Final user manual - book 2: for the user of the DDC.
Definitions, terms and icons
Appliance: this term indicates the gas chiller with absorption cooling cycle and air
condenser/absorber - serie: ACF, line: GA.
DDC: digital control panel (Direct Digital Controller).
CAT (or TAC): Technical Assistance Centre (authorised by Robur S.p.A.).
Icon Definitions
The icons present in the margins of the manual have the following meanings.
Danger
Warning
Note
Begin operational procedure
Reference to another part of the manual or to a different
manual/booklet
Table 1 – Descriptive Icons
Ed. 04/2012
I
Table of contents
TABLE OF CONTENTS
SECTION 1 GENERAL INFORMATION AND TECHNICAL SPECIFICATIONS ..............3
1.1
1.2
1.3
1.4
1.5
SAFETY WARNINGS .........................................................................................................................3
GENERAL INFORMATION.................................................................................................................5
OPERATION OF THE ACF60-00 .......................................................................................................8
TECHNICAL SPECIFICATIONS.......................................................................................................11
ACF DIMENSIONS AND SERVICE PANELS ..................................................................................26
SECTION 2 END USER ..................................................................................................29
2.1
2.2
2.3
2.4
2.5
2.6
COMMISSIONING (AND SHUTDOWN) OF THE ACF ....................................................................29
ON-BOARD ELECTRONICS ............................................................................................................30
SETTING OF OPERATING PARAMETERS ....................................................................................35
RESETTING......................................................................................................................................35
WARNING AND ERROR CODES ....................................................................................................37
PROLONGED INACTIVITY ..............................................................................................................38
SECTION 3 PLUMBING INSTALLER.............................................................................39
3.1
3.2
3.3
3.4
3.5
3.6
GENERAL INSTALLATION PRINCIPLES ........................................................................................39
POSITIONING OF THE ACF60-00 ...................................................................................................40
WATER CONNECTIONS..................................................................................................................42
GAS SUPPLY SYSTEM....................................................................................................................47
FILLING OF THE WATER CIRCUIT.................................................................................................48
SETTING OF THE WATER PARAMETERS ....................................................................................50
SECTION 4 ELECTRICAL INSTALLER .........................................................................53
4.1
4.2
4.3
4.4
4.5
OPERATION WITH CONTROL SWITCH.........................................................................................53
APPLIANCE PUMP CONTROL ........................................................................................................55
PUMP AND ELECTRICAL WIRING DIAGRAMS .............................................................................56
USE OF A DIRECT DIGITAL CONTROLLER (DDC) .......................................................................60
HOW TO RESET THE FLAME CONTROLLER FROM REMOTE ...................................................72
SECTION 5 INITIAL STARTUP AND MAINTENANCE ..................................................73
5.1 INITIAL STARTUP AND ADJUSTING ..............................................................................................73
5.2 GAS CONVERSION..........................................................................................................................76
5.3 MAINTENANCE ................................................................................................................................79
SECTION 6 ACCESSORIES...........................................................................................81
APPENDIX
.................................................................................................................87
DECLARATION OF CONFORMITY.........................................................................................................87
APPENDIX....................................................................................................................... 83
WARNINGS AND ERRORS............................................................................................................................83
TABLE OF OPERATING CODES ...................................................................................................................83
Ed. 04/2012
1
ACF60-00 – Installation, User’s and Maintenance Manual
2
Ed. 04/2012
Section GENERAL INFORMATION AND TECHNICAL SPECIFICATIONS
SECTION 1
GENERAL INFORMATION AND TECHNICAL
SPECIFICATIONS
In this section you will find the general instructions to follow for the installation of the ACF,
and outlines on the running of the unit, constructive characteristics and the technical data.
1.1 SAFETY WARNINGS
Packing items (plastic bags, polystyrene foam, nails, etc.) must be kept out of the
reach of children, as they are potentially dangerous.
The appliance must only be used for the purposes for which it has been designed.
Any other use is considered inappropriate and therefore dangerous. The
manufacturer does not accept any contractual or extra-contractual liability for any
damage caused by improper use of the appliance.
The unit uses a water/ammoniac absorption cycle for cold water production. The
ammoniac is in water solution inside a sealed circuit tested for tightness by the
manufacturer. In case of coolant leaks, switch off the electrical power and gas
supplies only if this can be done in total safety. Contact your Authorised Service
Centre.
Frequent topping up of the plumbing circuit with water can result in damage due to
scale and corrosion, depending on the quality of the water being used. Make sure
the system is hermetically sealed and that the expansion tank is operational.
Concentrations of chlorides or free chlorine in the circuit above the values given in
Table 20 page 43 will damage the unit's water/ammoniac exchanger.
Close the gas supply cock before working on the gas circuit. On completing work
on the gas circuit, run a seal test as required by established regulations.
Do not operate the appliance if dangerous conditions exist: odour of gas in the grid
or near the appliance problems with the electrical/gas grid or hydraulic circuitparts
of the appliance submerged in water or otherwise damagedcontrols or safety
components by passed or defective. In these cases, ask for assistance to
professionally qualified personnel.
Ed. 04/2012
3
ACF60-00 – Installation, User’s and Maintenance Manual
If you smell gas:
•
•
•
•
do not use electrical devices such as telephones, multimeters or other
equipment that can cause sparks next to the appliance;
shut off gas supply closing the isolation valve;
cut off electrical power opening the main breaker upstream of the appliance (to
be provided by the electrical installer in an appropriate panel);
ask for assistance to professionally qualified personnel from a telephone distant
from the appliance.
Moving parts, also during the unit's on/off cycles. Do not remove guards. Make sure
the appliance cannot be started up inadvertently.
POISONING HAZARD
Make sure the combusted gas circuit components are tight and constructed in
conformity with established regulations. On conclusion of any work on these parts,
make sure the seal is tight.
BURN HAZARD
The appliance contains numerous hot parts. If necessary, contact your Authorised
Service Centre.
The appliance has a sealed circuit classified as pressure equipment, i.e. with
internal pressure higher than atmospheric pressure. The fluids contained in the
sealed circuits are harmful if swallowed or inhaled, or if they come into contact with
the skin. Do not carry out any operation on the sealed circuit or on its valves.
ELECTROCUTION HAZARD
•
•
•
Use only regulatory components for the electrical hookup, as specified by the
manufacturer.
Disconnect the electrical power supply before working on the appliance's
internal electrical equipment (safety devices, PCB's, motors, etc.).
Make sure the appliance cannot be started up inadvertently.
The electrical safety of the appliance is guaranteed only when it is correctly
connected to an efficient grounding system, executed in accordance with current
safety regulations.
DAMAGE TO THE SYSTEM DUE TO AGGRESSIVE SUBSTANCES IN THE AIR
SUPPLY
Hydrogenated hydrocarbons, which contain chlorine and fluorine compounds, will
increase the corrosion of the unit.
Make sure the air supply is free of aggressive substances.
4
Ed. 04/2012
Section GENERAL INFORMATION AND TECHNICAL SPECIFICATIONS
EXPLOSIVE/FLAMMABLE MATERIALS HAZARD
Do not use or store flammable materials (paper, solvents, paint, etc.) in the vicinity
of the appliance.
SUGGESTIONS FOR THE CLIENT
Stipulate a maintenance contract with an authorised specialist contractor for the
annual inspection of the appliance and maintenance when needed.
Maintenance and repairs may only be done a contractor legally authorised to work
on gas appliances and equipment.
Only accept and use original spare parts.
1.2 GENERAL INFORMATION
Conformity to CE standards
This manual is an integral and essential part of the product and must be given to the end
user along with the ACF.
The ACF is certified according to EU standards and conforms to the basic requirements of
the following regulations:
Gas directive:
90/936/CEE
Electromagnetic compatibility directive
89/336/CEE
Low voltage directive
73/23/CEE
Pressurized Equipment Directive (PED)
97/23/CEE
The operational conditions and authorized areas of use are reported in paragraph 1.4
TECHNICAL SPECIFICATIONS on page 11.
Installation and regulatory references
When the appliance arrives at the installation site, before beginning the stages requi-red
to move it in order to position it on the site, perform a visual check to ascertain that there
are no evident signs of breakage or damage to the packaging or to the external panels,
which would be signs that damage occurred during transport.
Packing materials must be removed only after the appliance has been positioned
on site. After removing the packing materials, ensure that the appliance is intact
and complete.
Installation of the appliance may only be carried out by firms that are qualified in
ac-cordance with current legislation in the country of installation, i.e. by professionally
qualified personnel.
“Professionally qualified personnel” means personnel with specific technical
compe-tence in the sector of heating/cooling plants and gas appliances.
Installation of the appliance must be carried out in compliance with current local and
national regulations regarding the design, installation and maintenance of heating and
cooling plants in accordance with the manufacturer's instructions.
In particular, the following current laws must be respected with regard to:
Ed. 04/2012
5
ACF60-00 – Installation, User’s and Maintenance Manual
Natural gas equipment
Electrically powered equipment
Any other standard that regulates the installation of air conditioning devices with gaseous
fuel.
It excludes the manufacturer from any contractual and non contractual obligations
for damages caused to people, animals, or things due to incorrect installation and
improper use of the ACF and also by not observing the indications and instructions
provided by the manufacturer.
Once the appliance is installed
The installer must provide the owner with a Declaration stating that the installation has
been completed in compliance with state-of-the-art practices, current national and local
regulations, and recommendations by the manufacturer.
Before contacting your authorised Robur Technical Assistance Centre (TAC) for the ini-tial
activation, the firm must ensure that:
•
•
•
•
•
that the electric and gas supply ratings are the same as those on the data plate
the gas supply system and the water distribution system are sealed
the gas supplied to the appliance is of the type for which it is designed
the pressure of the gas supplied falls within the range of values specified by the
manufacturer
the gas and electricity supply systems are correctly rated for the capacity required by
the appliance and that they are equipped with all safety and control devices
prescribed by current regulations.
Check that no safety and control devices are excluded, by-passed or not properly
working.
First start-up procedure
The entire procedure for the first activation of the appliance must be carried out
exclu-sively by an authorized Robur Technical Assistance Centre (TAC) and according to
the instructions supplied by the manufacturer.
To carry out entire procedure correctly, follow the instructions in Paragraph “INITIAL
STARTUP AND ADJUSTING” page 73.
Contact your local Authorised Robur Technical Assistance Centre (TAC). To find
out who your local TAC is, contact Robur S.p.A. (tel. +39 035 888.111). The
guarantee could be voided if the initial activation is not carried out (and
validated) by a Robur TAC.
6
Ed. 04/2012
Section GENERAL INFORMATION AND TECHNICAL SPECIFICATIONS
Operation and maintenance of the appliance
To ensure the correct operation of the appliance and to avoid failures, control of the
switching on and off of the appliance must be carried out exclusively via a switch located
on the on/off command circuit.
If the appliance is to be connected to a Direct Digital Controller (DDC, available as an
accessory), control of activating and deactivating the appliance must be performed
exclusively through the DDC itself.
The appliance must never normally be switched on and off by shutting off the
power supply upstream of the Controle Device (DDC or consent switch) before
having used the latter first and waited for the shutdown cycle to end (approximately
7 minutes).
If the appliance fails to operate correctly, with the consequent indication of the Machine
code, follow the instructions of APPENDIX page 83.
In the event of failure of the appliance and/or breakage of any component, do not
attempt to repair and/or restore operation; proceed as follows:
- shut off the appliance immediately (if possible and if no dangerous condition
exists) through the controls (DDC or permissive switch) and wait for the end of
the cooling down cycle (around 7 minutes);
- remove electrical power by shutting off the main power switch and close the gas
valve
If it is decided not to use the appliance for a prolonged period, disconnect the appliance
following the instructions provided in Paragraph PROLONGED INACTIVITY page 38.
Correct routine maintenance ensures the efficiency and good operation of the appliance
over time.
Carry out maintenance operations according to the instructions supplied by the
manufacturer.
Trust the maintenance of the internal components of the ACF to a Qualified Service
Engineer, who will perform the operations following the manufacturer’s instructions.
Any repair of the appliance must be carried out by an authorised Robur Technical
Assistance Centre (TAC), using only original parts.
Failure to observe the indications above may compromise the operation and safety
of the appliance, and may invalidate warranty.
If the appliance is to be disposed of, contact Robur S.p.A. for its correct disposal.
If the appliance is to be sold or transferred to another owner, ensure that this
“Installation, user and maintenance manual” is handed over to the new owner and
installation technician.
Ed. 04/2012
7
ACF60-00 – Installation, User’s and Maintenance Manual
1.3 OPERATION OF THE ACF60-00
The ACF60-00 is a gas chiller with absorption cooling cycle and air condenser/absorber.
The liquid coolant is ammonia; the cooling cycle is run by thermal energy supplied by the
combustion of natural gas, and is therefore characterized as having a limited need for
electrical energy.
The ACF runs on either natural gas or LPG and requires an electrical power supply of 230
V 1N – 50 Hz.
The evacuating of combustion products is done using the exhaust cooling air exiting the
condenser by means of a fan.
Constructive Characteristics
The ACF chiller is available in 5 versions:
ACF60-00, for air conditioning/refrigeration applications in civil-commercial and industrial
environments. It has a nominal cooling capacity of 17.72 kW. Data Table: Table 2, page
11.
ACF60-00 TK, “Technological version”. Designed for air-conditioning/refrigeration in
process applications and systems; it is specifically designed to run without interruption 24
hours a day. It has a nominal cooling capacity of 17.72 kW. Data Table: Table 4, page 13.
ACF60-00 HT, “High Temperature air”. Designed to operate in locations that have high
ambient temperatures. It has a nominal cooling capacity of 17.12 kW. Data Table: Table
6, page 15.
ACF60-00 LB, “Low temperature”. Designed to provide refrigerated water down to -10°C.
It has a nominal cooling capacity of 13.30 kW. Data Table: Table 8, page 17.
ACF60-00 HR, “Heat Recovery”. This is an ACF60-00 with a heat recovery system able to
provide 17.72 kW of nominal cooling capacity when operating without the heat recovery
system. With the heat recovery system, it can obtain a cooling capacity of 17.93 kW, at
the same time providing 25.3 kW of heating capacity. Data Table: Table 11, page 20.
The indicated tables only provide some of the main technical data, for coefficients
and other information refer to paragraph 1.4 TECHNICAL SPECIFICATIONS, on
page 11.
All versions can be supplied with Robur grey or stainless steel panelling (for stainless
steel versions the symbol is “I”, ex. ACF60-00 TK I), with standard or silenced fan (for
silenced versions the symbol is “S”, ex. ACF60-00 TK S). The silent fan has a specially
designed nozzle, motor and impeller for less noise emission (See 1.4 TECHNICAL
SPECIFICATIONS, page 11), and is also available as a replacement.
For information on replacement parts contact Robur S.p.A. at +39 035 888 111.
Safety and Control Devices
The ACF is controlled by the electronic circuit board with an S61 microprocessor, located
in the electrical panel. This also functions as a monitor which displays messages and
8
Ed. 04/2012
Section GENERAL INFORMATION AND TECHNICAL SPECIFICATIONS
machine codes during operation, see “ON-BOARD ELECTRONICS” on page 30, and
“TABLE OF OPERATING CODES “ on page 83.
A
C
B
KEY
A 4 digit DISPLAY for the visualization of the data and operational codes
B KNOB (encoder) for navigating and selecting of operational data
C CAN PORT for the connection of the CAN-BUS network cable
Figure 1
–
The S61 electronic circuit board. The Display, Encoder and CAN-BUS Port
Programming, control and monitoring of the ACF are done through the display and the
circuit board encoder; the encoder is the knob shown in Figure 1, letter ”B”, which can be
turned or pushed.
For its use, go to the “Display and Knob (encoder)” on page 32. The CAN BUS port allows
one or more ACF’s to be connected to a Direct Digital Controller (DDC).
The DDC, available as an option, monitors and controls each ACF in a more precise
manner, and can support and manage up to 16 chillers on a water circuit, regulating startup in relation to the requested need.
Figure 2
– Direct Digital Controller (DDC)
For the connection of a DDC to the ACF, go to the “APPLIANCE PUMP CONTROL”
paragraph on page 55.
The ACF’s include the following:
•
•
cooling circuit in steel, treated on the outside with epoxy paint;
multigas pre-mixing burner equipped with ignition and flame detection managed by
an electronic control unit;
Ed. 04/2012
9
ACF60-00 – Installation, User’s and Maintenance Manual
air-based heat exchanger with single-position finned coil, manufactured in steel
tubing and aluminium fins;
• water-based exchanger of the shell-and-tube type in titanium alloyed stainless steel,
externally insulated;
• variable-flow microprocessor-controlled axial fan;
• control and safety devices:
- S61 electronic board with integrated microprocessor, LCD display and encoder
(in Figure 1);
- plant water flow switch;
- manually resettable generator limit thermostat;
- differential exhaust gas pressure switch on the combustion circuit;
- automatically resettable exhaust gas thermostat;
- pressure safety valve on the sealed circuit;
- by-pass valve, between the high and low pressure circuits;
- plant water antifreeze function;
- ionisation-based flame control unit;
- gas electrovalve with double shutter;
- heat recovery circulator pump relay (only for HR model)
•
10
Ed. 04/2012
Section GENERAL INFORMATION AND TECHNICAL SPECIFICATIONS
1.4 TECHNICAL SPECIFICATIONS
ACF60-00, ACF60-00 S - TECHNICAL SPECIFICATIONS
UNIT
SIZE
ACF60-00 ACF60-00 S
OPERATIONAL CHARACTERISTICS
NOMINAL HEAT CAPACITY AT THE BURNER
COOLING CAPACITY
(1)
(2)
25.30
25.03
17.72
2770
2500
3200
kW
kW
CHILLED WATER FLOW RATE
GAS CONSUMPTION
NAT. GAS
L.P.G.
NOISE LEVEL
NOMINAL
EFFECTIVE
(5) (6)
(3)
(4)
at 10 meters
FUNCTIONAL RANGE (TOUTSIDE AIR)
ACF INTAKE WATER TEMPERATURE
(7)
OUTLET WATER TEMPERATURE
NOMINAL
MINIMUM
MAXIMUM
NOMINAL
EFFECTIVE
NOMINAL
EFFECTIVE
MAXIMUM
MINIMUM
MAXIMUM
MAXIMUM
MINIMUM
L/hr
3
m /h
2.68
2.65
1.96
1.94
kg/hr
dB(A)
54
49
0
+45
+45
+3
°C
°C
°C
ELECTRICAL CHARACTERISTICS
V, phases,
Neutral,
Hz
W
VOLTAGE
TOTAL ELECTRICAL LOAD
(8)
230 1N 50
820
870
WATER CONNECTIONS
WATER DELIVERY AND RETURN
GAS
(9)
ACF INTERNAL PRESSURE DROP
MAXIMUM WORKING PRESSURE
MAXIMUM FILLING PRESSURE
NOMINAL
“
“
bar
bar
bar
1 ¼ “F
¾ “F
0,29
4
3
PHYSICAL SPECIFICATIONS
OPERATIONAL WEIGHT
INTERNAL WATER CAPACITY OF ACF
WIDTH
DEPTH
HEIGHT
ACF60-00 and ACF60-00 S Technical Specifications
DIMENSIONS
Table 2
–
(10)
kg
L
340
360
3
850
1230
mm
1290
1540
(9)
Remarks
(1)
(2)
(3)
(4)
(5)
(6)
(7)
(8)
(9)
(10)
Nominal conditions: 1013 mbar, 15 °C; Effective conditions: 1000 mbar, 20 °C
Nominal running conditions: external air temperature 35°C; chilled water temperature - delivery 7.2 °C – return 12.7 °C. For
conditions other than the nominal conditions, apply the cooling capacity correction factors seen in Table 3, page 12.
PCI 34.02 MJ/m3 (1013 mbar – 15 °C).
PCI 46.34 MJ/kg
A reduction in RPM of the fan (air delivery) is required for external air temperatures less than 33°C.
Sound source rested on a reflective surface.
To be eventually set only by personnel Robur. Minimum Temperature Factory Set = 4,5°C.
±10% in relation to the power supply and tolerance on the power draw of the electrical motors.
Nominal running conditions: return water temperature 12.7°C; delivery 2700 L/hr. For deliveries different from the nominal, please
refer to Figure 4, page 24.
Height of the silenced ventilation ACF, Standard version, complete with fan nozzle.
Ed. 04/2012
11
ACF60-00 – Installation, User’s and Maintenance Manual
ACF60-00, ACF60-00 S – COOLING CAPACITY CORRECTION FACTORS
EXTERNAL AIR
TEMPERATURE
°C
3.0
5.0
7.0
9.0
0
0.98
0.99
1.01
1.03
5
0.98
0.99
1.01
1.03
10
0.98
0.99
1.01
1.03
15
0.98
0.99
1.01
1.03
20
0.98
0.99
1.01
1.03
25
0.97
0.99
1.01
1.03
30
0.90
0.98
1.01
1.03
35
0.67
0.87
1.00
1.02
40
—
—
0.88
0.93
45
—
—
0.67
0.78
Table 3
12
–
WATER DELIVERY TEMPERATURE °C
ACF60-00, ACF60-00 S – Cooling capacity multiplication correctional factors for external air
temperatures and water flow rates different from the nominal values reported in the table.
Ed. 04/2012
Section GENERAL INFORMATION AND TECHNICAL SPECIFICATIONS
ACF60-00 TK, ACF60-00 TK S - TECHNICAL SPECIFICATIONS
UNIT
SIZE
ACF60-00
TK
ACF60-00
TK S
OPERATIONAL CHARACTERISTICS
NOMINAL HEAT CAPACITY AT THE BURNER
COOLING CAPACITY
(1)
(2)
25.30
25.03
17.72
2770
2500
3200
kW
kW
CHILLED WATER FLOW RATE
GAS CONSUMPTION
NAT. GAS
L.P.G.
NOISE LEVEL
NOMINAL
EFFECTIVE
(5) (6)
(3)
(4)
at 10 meters
FUNCTIONAL RANGE (TOUTSIDE AIR)
ACF INTAKE WATER TEMPERATURE
(7)
OUTLET WATER TEMPERATURE
NOMINAL
MINIMUM
MAXIMUM
NOMINAL
EFFECTIVE
NOMINAL
EFFECTIVE
MAXIMUM
MINIMUM
MAXIMUM
MAXIMUM
MINIMUM
L/hr
3
m /h
2.68
2.65
1.96
1.94
kg/hr
dB(A)
54
49
-12
+45
+45
+3
°C
°C
°C
ELECTRICAL CHARACTERISTICS
V, phases,
Neutral, Hz
W
VOLTAGE
TOTAL ELECTRICAL LOAD
(8)
230 1N 50
900
930
WATER CONNECTIONS
WATER DELIVERY AND RETURN
GAS
(9)
ACF INTERNAL PRESSURE DROP
MAXIMUM WORKING PRESSURE
MAXIMUM FILLING PRESSURE
NOMINAL
“
“
bar
bar
bar
1 ¼ “F
¾ “F
0.29
4
3
PHYSICAL SPECIFICATIONS
OPERATIONAL WEIGHT
INTERNAL WATER CAPACITY OF ACF
WIDTH
DEPTH
HEIGHT
ACF60-00 TK and ACF60-00 TK S Technical Specifications
DIMENSIONS
Table 4
–
(10)
kg
L
350
380
3
850
1230
mm
1290
1540
(9)
Remarks
(1)
(2)
(3)
(4)
(5)
(6)
(7)
(8)
(9)
(10)
Nominal conditions: 1013 mbar, 15 °C; Effective conditions: 1000 mbar, 20 °C
Nominal running conditions: external air temperature 35°C; chilled water temperature - delivery 7.2 °C – return 12.7 °C. For
conditions other than the nominal conditions, apply the cooling capacity correction factors seen in Table 5, page 14.
PCI 34.02 MJ/m3 (1013 mbar – 15 °C).
PCI 46.34 MJ/kg
A reduction in RPM of the fan (air delivery) is required for external air temperatures less than 33°C.
Sound source rested on a reflective surface.
To be eventually set only by personnel Robur. Minimum Temperature Factory Set = 4,5°C
±10% in relation to the power supply and tolerance on the power draw of the electrical motors.
Nominal running conditions: return water temperature 12.7°C; delivery 2770 L/hr. For deliveries different from the nominal, please
refer to Figure 4, page 24.
Height of the silenced ventilation, ACF TK version, complete with fan nozzle.
Ed. 04/2012
13
ACF60-00 – Installation, User’s and Maintenance Manual
ACF60-00 TK, ACF60-00 TK S – COOLING CAPACITY CORRECTION FACTORS
EXTERNAL AIR
TEMPERATURE
°C
3.0
5.0
7.0
9.0
-12
1.18
1.18
1.19
1.20
-10
1.18
1.18
1.18
1.19
-8
1.17
1.17
1.18
1.19
-6
1.16
1.16
1.17
1.18
-4
1.16
1.16
1.16
1.18
-2
1.15
1.15
1.16
1.17
0
1.15
1.15
1.15
1.16
2
1.14
1.14
1.15
1.16
4
1.14
1.14
1.14
1.15
6
1.13
1.13
1.14
1.15
8
1.12
1.13
1.13
1.14
10
1.12
1.12
1.12
1.13
12
1.12
1.12
1.12
1.13
14
1.11
1.11
1.11
1.12
16
1.11
1.11
1.12
1.12
18
1.10
1.10
1.11
1.11
20
1.09
1.09
1.11
1.11
22
1.08
1.08
1.10
1.10
24
1.06
1.06
1.10
1.10
26
1.03
1.05
1.09
1.09
28
0.98
1.02
1.08
1.08
30
0.92
0.99
1.06
1.07
32
0.85
0.95
1.04
1.06
34
0.75
0.90
1.02
1.04
35
0.69
0.87
1.00
1.03
36
—
0.84
0.98
1.02
38
—
—
0.94
0.99
40
—
—
0.89
0.95
42
—
—
0.83
0.91
44
—
—
—
0.85
45
—
—
—
0.82
Table 5
14
–
WATER DELIVERY TEMPERATURE °C
ACF60-00 TK, ACF60-00 TK S – Cooling capacity multiplication correctional factors for external air
temperatures and water flow rates different from the nominal values reported in the table.
Ed. 04/2012
Section GENERAL INFORMATION AND TECHNICAL SPECIFICATIONS
ACF60-00 HT, ACF60-00 HT S - TECHNICAL SPECIFICATIONS
UNIT
SIZE
ACF60-00
HT
ACF60-00
HT S
OPERATIONAL CHARACTERISTICS
NOMINAL HEAT CAPACITY AT THE BURNER
COOLING CAPACITY
(1)
(2)
25.30
25.03
17.12
2675
2500
3200
kW
kW
CHILLED WATER FLOW RATE
GAS CONSUMPTION
NAT. GAS
L.P.G.
NOISE LEVEL
NOMINAL
EFFECTIVE
(5) (6)
(3)
(4)
at 10 meters
FUNCTIONAL RANGE (TOUTSIDE AIR)
ACF INTAKE WATER TEMPERATURE
OUTLET WATER TEMPERATURE
NOMINAL
MINIMUM
MAXIMUM
NOMINAL
EFFECTIVE
NOMINAL
EFFECTIVE
MAXIMUM
MINIMUM
MAXIMUM
MAXIMUM
MINIMUM
L/hr
3
m /h
2.68
2.65
1.96
1.94
kg/hr
dB(A)
54
49
0
+50
+45
+5
°C
°C
°C
ELECTRICAL CHARACTERISTICS
V, phases,
Neutral, Hz
W
VOLTAGE
TOTAL ELECTRICAL LOAD
(7)
230 1N 50
900
930
WATER CONNECTIONS
WATER DELIVERY AND RETURN
GAS
(8)
ACF INTERNAL PRESSURE DROP
MAXIMUM WORKING PRESSURE
MAXIMUM FILLING PRESSURE
NOMINAL
“
“
bar
bar
bar
1 ¼ “F
¾ “F
0.27
4
3
PHYSICAL SPECIFICATIONS
OPERATIONAL WEIGHT
INTERNAL WATER CAPACITY OF ACF
WIDTH
DEPTH
HEIGHT
ACF60-00 HT and ACF60-00 HT S Technical Specifications
DIMENSIONS
Table 6
–
(9)
kg
L
350
380
3
850
1230
mm
1290
1540
(9)
Remarks
(1)
(2)
(3)
(4)
(5)
(6)
(7)
(8)
(9)
Nominal conditions: 1013 mbar, 15 °C; Effective conditions: 1000 mbar, 20 °C
Nominal running conditions: external air temperature 35°C; chilled water temperature - delivery 7.2 °C – return 12.7 °C. For
conditions other than the nominal conditions, apply the cooling capacity correction factors seen in Table 7, page 16.
PCI 34.02 MJ/m3 (1013 mbar – 15 °C).
PCI 46.34 MJ/kg
A reduction in RPM of the fan (air delivery) is required for external air temperatures less than 33°C.
Sound source rested on a reflective surface.
±10% in relation to the power supply and tolerance on the power draw of the electrical motors.
Nominal running conditions: return water temperature 12.7°C; delivery 2675 L/hr. For deliveries different from the nominal, please
refer to Figure 4, page 24.
Height of the silenced ventilation, ACF HT version, complete with fan nozzle.
Ed. 04/2012
15
ACF60-00 – Installation, User’s and Maintenance Manual
ACF60-00 HT, ACF60-00 HT S – COOLING CAPACITY CORRECTION FACTORS
EXTERNAL AIR
TEMPERATURE
°C
5.0
7.0
10.0
12.5
14.0
0
1.02
1.02
1.02
1.02
1.03
2
1.02
1.02
1.02
1.02
1.03
4
1.02
1.02
1.02
1.02
1.03
6
1.02
1.02
1.02
1.02
1.03
8
1.02
1.02
1.02
1.02
1.03
10
1.02
1.02
1.02
1.02
1.03
12
1.02
1.02
1.02
1.02
1.03
14
1.02
1.02
1.02
1.02
1.03
16
1.02
1.02
1.02
1.02
1.03
18
1.02
1.02
1.02
1.02
1.03
20
1.02
1.02
1.02
1.02
1.03
22
1.02
1.02
1.02
1.02
1.03
24
1.02
1.02
1.02
1.02
1.03
26
1.01
1.02
1.02
1.02
1.03
28
1.01
1.02
1.02
1.02
1.03
30
1.01
1.02
1.02
1.02
1.03
32
0.99
1.02
1.02
1.02
1.03
34
0.96
1.01
1.01
1.01
1.02
35
0.94
1.00
1.00
1.01
1.02
36
0.92
0.99
1.00
1.00
1.02
38
0.87
0.97
0.99
0.99
1.01
40
0.82
0.93
0.97
0.98
1.00
42
—
0.88
0.94
0.97
0.99
44
—
0.82
0.91
0.95
0.97
46
—
—
0.86
0.92
0.95
48
—
—
0.80
0.87
0.91
50
—
—
—
0.81
0.86
Table 7
16
–
WATER DELIVERY TEMPERATURE °C
ACF60-00 HT, ACF60-00 HT S – Cooling capacity multiplication correctional factors for external air
temperatures and water flow rates different from the nominal values reported in the table.
Ed. 04/2012
Section GENERAL INFORMATION AND TECHNICAL SPECIFICATIONS
ACF60-00 LB, ACF60-00 LB S - TECHNICAL SPECIFICATIONS
UNIT
SIZE
ACF60-00
LB
ACF60-00
LB S
OPERATIONAL CHARACTERISTICS
NOMINAL HEAT CAPACITY AT THE BURNER
COOLING CAPACITY
(1)
(2)
25.30
25.03
13.30
2600
2300
2900
kW
kW
CHILLED WATER FLOW RATE
GAS CONSUMPTION
NAT. GAS
L.P.G.
NOISE LEVEL
NOMINAL
EFFECTIVE
(5) (6)
(3)
(4)
at 10 meters
FUNCTIONAL RANGE (TOUTSIDE AIR)
ACF INTAKE WATER TEMPERATURE
OUTLET WATER TEMPERATURE
NOMINAL
MINIMUM
MAXIMUM
NOMINAL
EFFECTIVE
NOMINAL
EFFECTIVE
MAXIMUM
MINIMUM
MAXIMUM
MAXIMUM
MINIMUM
L/hr
3
m /h
2.68
2.65
1.96
1.94
kg/hr
dB(A)
54
49
0
+45
+45
-10
°C
°C
°C
ELECTRICAL CHARACTERISTICS
V, phases,
Neutral, Hz
W
VOLTAGE
TOTAL ELECTRICAL LOAD
(7)
230 1N 50
900
930
WATER CONNECTIONS
WATER DELIVERY AND RETURN
GAS
(8)
ACF INTERNAL PRESSURE DROP
MAXIMUM WORKING PRESSURE
MAXIMUM FILLING PRESSURE
NOMINAL
“
“
bar
bar
bar
1 ¼ “F
¾ “F
0.42
4
3
PHYSICAL SPECIFICATIONS
OPERATIONAL WEIGHT
INTERNAL WATER CAPACITY OF ACF
WIDTH
DEPTH
HEIGHT
ACF60-00 LB and ACF60-00LB S Technical Specifications
DIMENSIONS
Table 8
–
(9)
kg
L
350
380
3
850
1230
mm
1290
1540
(9)
Remarks
(1)
(2)
(3)
(4)
(5)
(6)
(7)
(8)
(9)
Nominal conditions: 1013 mbar, 15 °C; Actual conditions: 1000 mbar, 20 °C
Nominal running conditions: external air temperature 35°C; chilled water temperature with addition of glycol at 40% - delivery 5.0°C – return 0 °C. For conditions other than the nominal conditions, apply the cooling capacity correction factors seen in Table 9
and Table 10, pages 18 and 19.
PCI 34.02 MJ/m3 (1013 mbar – 15 °C).
PCI 46.34 MJ/kg
A reduction in RPM of the fan (air delivery) is required for external air temperatures less than 33°C.
Sound source rested on a reflective surface.
±10% in relation to the power supply and tolerance on the power draw of the electrical motors.
Nominal running conditions: return water temperature 0°C; delivery 2600 L/hr. For deliveries different from the nominal, please refer
to Figure 3, page 23.
Height of the silenced ventilation, ACF LB version, complete with fan nozzle.
Ed. 04/2012
17
ACF60-00 – Installation, User’s and Maintenance Manual
ACF60-00 LB, ACF60-00 LB S – COOLING CAPACITY CORRECTION FACTORS – 1/2
EXTERNAL AIR
TEMPERATURE
°C
-10,0
-7,0
-5,0
-2,0
0
-5
1.14
1.15
1.15
1.16
1.17
-4
1.14
1.15
1.15
1.16
1.17
-3
1.14
1.15
1.15
1.16
1.17
-2
1.14
1.15
1.15
1.16
1.17
-1
1.14
1.15
1.15
1.16
1.17
0
1.14
1.15
1.15
1.16
1.17
1
1.14
1.15
1.15
1.16
1.17
2
1.14
1.15
1.15
1.16
1.17
3
1.14
1.15
1.15
1.16
1.17
4
1.14
1.15
1.15
1.16
1.17
5
1.14
1.15
1.15
1.16
1.17
6
1.14
1.15
1.15
1.16
1.17
7
1.14
1.15
1.15
1.16
1.17
8
1.14
1.15
1.15
1.16
1.17
9
1.14
1.15
1.15
1.16
1.17
10
1.14
1.15
1.15
1.16
1.17
11
1.14
1.15
1.15
1.16
1.17
12
1.14
1.15
1.15
1.16
1.17
13
1.14
1.15
1.15
1.16
1.17
14
1.14
1.14
1.15
1.16
1.17
15
1.14
1.14
1.15
1.16
1.17
16
1.13
1.14
1.15
1.16
1.17
17
1.13
1.14
1.15
1.16
1.17
18
1.12
1.13
1.15
1.16
1.17
19
1.12
1.13
1.14
1.16
1.17
20
1.11
1.13
1.14
1.16
1.17
21
1.10
1.12
1.14
1.15
1.17
22
1.10
1.11
1.13
1.15
1.17
23
1.09
1.11
1.13
1.15
1.17
24
1.08
1.10
1.12
1.14
1.17
25
1.06
1.09
1.12
1.14
1.16
26
1.05
1.08
1.11
1.13
1.16
Table 9
18
–
WATER DELIVERY TEMPERATURE °C
ACF60-00 LB, ACF60-00 LB S – Cooling capacity correction factors for external air temperatures and
water flow rates different from the nominal values reported in the following table.
Ed. 04/2012
Section GENERAL INFORMATION AND TECHNICAL SPECIFICATIONS
ACF60-00 LB, ACF60-00 LB S – COOLING CAPACITY CORRECTION FACTORS – 2/2
EXTERNAL AIR
TEMPERATURE
°C
-10.0
-7.0
-5.0
-2.0
0
27
1.04
1.07
1.10
1.13
1.15
28
1.02
1.06
1.09
1.12
1.15
29
1.01
1.05
1.08
1.11
1.14
30
0.99
1.03
1.07
1.10
1.14
31
0.97
1.02
1.06
1.09
1.13
32
0.95
1.00
1.05
1.08
1.12
33
0.93
0.98
1.03
1.07
1.11
34
0.90
0.96
1.02
1.06
1.10
35
0.88
0.94
1.00
1.04
1.08
36
0.85
0.92
0.98
1.02
1.07
37
0.82
0.89
0.96
1.01
1.05
38
0.79
0.87
0.94
0.99
1.04
39
0.76
0.84
0.92
0.97
1.02
40
0.72
0.81
0.89
0.95
1.00
41
0.69
0.78
0.87
0.92
0.98
42
0.65
0.74
0.84
0.90
0.95
43
0.61
0.71
0.81
0.87
0.93
44
0.57
0.67
0.78
0.84
0.90
45
0.52
0.63
0.75
0.81
0.87
Table 10
–
WATER DELIVERY TEMPERATURE °C
ACF60-00 LB, ACF60-00 LB S – 2/2 - Cooling capacity correctional multiplication factors for external air
temperatures and water flow rates different from the nominal values reported in the table.
Ed. 04/2012
19
ACF60-00 – Installation, User’s and Maintenance Manual
ACF60-00 HR, ACF60-00 HR S - TECHNICAL SPECIFICATIONS
UNIT
SIZE
ACF60-00
HR
ACF60-00
HR S
OPERATIONAL CHARACTERISTICS
NOMINAL HEAT CAPACITY AT THE BURNER
(1)
NOMINAL
EFFECTIVE
COOLING CAPACITY
(2)
(AIR CONDITIONING ONLY – NO RECOVERY)
COOLING CAPACITY
(3)
(AIR CONDITIONING + RECOVERY)
CHILLED WATER FLOW RATE
GAS CONSUMPTION
NAT. GAS
L.P.G.
NOISE LEVEL
(6) (7)
(4)
(5)
at 10 meters
FUNCTIONAL RANGE (TOUTSIDE AIR)
ACF INTAKE WATER TEMPERATURE
OUTLET WATER TEMPERATURE
NOMINAL
MINIMUM
MAXIMUM
NOMINAL
EFFECTIVE
NOMINAL
EFFECTIVE
MAXIMUM
MINIMUM
MAXIMUM
MAXIMUM
MINIMUM
kW
25.30
25.03
kW
17.72
kW
17.93
L/hr
2770
2500
3200
3
m /h
2.68
2.65
1.96
1.94
kg/hr
dB(A)
54
49
°C
°C
0
+45
+45
+3
kW
L/hr
mCA
bar
21
1000
1.3
0.12
°C
HEAT RECOVERY SYSTEM SPECIFICATIONS
(8)
HEAT CAPACITY
(8)
RECOVERY SYSTEM HOT WATER FLOW RATE (∆T=18°C )
PRESSURE DROP INSIDE RECOVERY SYSTEM
NOMINAL
ELECTRICAL CHARACTERISTICS
V, phases,
Neutral, Hz
W
VOLTAGE
TOTAL ELECTRICAL LOAD
(9)
230 1N 50
820
870
WATER CONNECTIONS
CHILLED WATER DELIVERY AND RETURN
RECOVERY WATER DELIVERY AND RETURN
GAS
(10)
ACF INTERNAL PRESSURE DROP (cooling circuit )
(11)
PRESSURE DROP (heat recovery circuit)
MAXIMUM WORKING PRESSURE
MAXIMUM FILLING PRESSURE
NOMINAL
“
“
“
bar
bar
bar
1 ¼ “F
1 ¼ “F
¾ “F
0.29
See Figure 5 page 24
4
3
PHYSICAL SPECIFICATIONS
OPERATIONAL WEIGHT
WATER CAPACITY OF ACF CHILLER ONLY
WATER CAPACITY OF HEAT RECOVERY SYS.
WIDTH
DEPTH
HEIGHT
ACF60-00 HR and ACF60-00 HR S Technical Specifications
DIMENSIONS
Table 11
20
–
kg
L
L
370
390
3
3
850
1230
mm
1290
1540
(12)
Ed. 04/2012
Section GENERAL INFORMATION AND TECHNICAL SPECIFICATIONS
Remarks
(1)
(2)
(3)
(4)
(5)
(6)
(7)
(8)
(9)
(10)
(11)
(12)
Nominal conditions: 1013 mbar, 15 °C; Actual conditions: 1000 mbar, 20 °C
Nominal running conditions: external air temperature 35°C; chilled water temperature - delivery 7.2 °C – return 12.7 °C. For
conditions other than the nominal conditions, apply the cooling capacity correction factors seen in Table 12, page 21.
Nominal running conditions: external air temperature 35°C; chilled water temperature - delivery 7.2 °C – return 12.8 °C; heat
recovery system water temperature - delivery 58.0 °C – return 40.0 °C. For conditions other than the nominal conditions, apply the
cooling capacity correction factors seen in Table 13, page 22.
PCI 34.02 MJ/m3 (1013 mbar – 15 °C).
PCI 46.34 MJ/kg
A reduction in RPM of the fan (air delivery) is required for external air temperatures less than 33°C.
Sound source rested on a reflective surface.
Nominal running conditions: external air temperature 35°C; chilled water temperature - delivery 7.2 °C – return 12.8 °C; heat
recovery system water temperature - delivery 58.0 °C – return 40.0 °C. For conditions other than the nominal conditions, apply the
cooling capacity correction factors seen in Table 14, Table 15, page 22 and page 23.
±10% in relation to the power supply and tolerance on the power draw of the electrical motors.
Nominal running conditions: return water temperature 12.7°C; chilled water flow rate 2700 L/hr. For deliveries different from the
nominal, please refer to Figure 4, page 24.
For deliveries different from the nominal, please refer to Figure 5, page 24
Height of the silenced version ACF, complete with fan nozzle.
ACF60-00 HR, ACF60-00 HR S – COOLING CAPACITY CORRECTION FACTORS
OPERATIONAL MODE: AIR CONDITIONING ONLY
EXTERNAL AIR
TEMPERATURE
°C
3.0
5.0
7.0
9.0
0
0.98
0.99
1.01
1.03
5
0.98
0.99
1.01
1.03
10
0.98
0.99
1.01
1.03
15
0.98
0.99
1.01
1.03
20
0.98
0.99
1.01
1.03
25
0.97
0.99
1.01
1.03
30
0.90
0.98
1.01
1.03
35
0.67
0.87
1.00
1.02
40
—
—
0.88
0.93
45
—
—
0.67
0.78
Table 12
–
WATER DELIVERY TEMPERATURE °C
ACF60-00 HR, ACF60-00 HR S – Cooling capacity multiplication correctional factors in air conditioning
mode (no recovery) for external air temperatures and water flow rates different from the nominal values
reported in the table.
Ed. 04/2012
21
ACF60-00 – Installation, User’s and Maintenance Manual
OPERATIONAL MODE: AIR CONDITIONING + HEAT RECOVERY
EXTERNAL AIR
TEMPERATURE
°C
3.0
5.0
7.0
9.0
0
0.97
0.98
1.00
1.02
5
0.97
0.98
1.00
1.02
10
0.97
0.98
1.00
1.02
15
0.97
0.98
1.00
1.02
20
0.97
0.98
1.00
1.02
25
0.96
0.98
1.00
1.02
30
0.89
0.97
1.00
1.02
35
0.73
0.91
1.00
1.02
40
—
0.89
0.95
0.96
45
—
—
0.80
0.85
Table 13
–
WATER DELIVERY TEMPERATURE °C
ACF60-00 HR, ACF60-00 HR S – Cooling capacity multiplication correctional factors in air conditioning +
heat recovery mode for external air temperatures and water flow rates different from the nominal values
reported in the table.
ACF60-00 HR, ACF60-00 HR S – HEATING CAPACITY OF THE HEAT RECOVERY
UNIT in kW (chilled water delivery temperature 7.2 °C, output AT THE HEAT
RECOVERY UNIT variable)
HEAT CAPACITY kW (Output = 500 L/hr)
RECOVERY
SYSTEM HOT
WATER RETURN
TEMPERATURE
°C
15
20
25
30
35
40
45
10
27.00
27.20
27.43
27.50
27.90
28.20
28.50
20
21.30
22.00
22.54
23.00
23.48
24.40
25.00
30
15.41
16.30
17.15
18.05
19.08
20.08
21.15
40
10.50
11.50
12.30
13.49
14.92
16.30
18.01
50
6.40
7.10
8.01
9.30
11.00
12.80
14.88
60
2.80
3.58
4.50
5.50
7.33
9.20
12.00
2.40
2.63
4.05
6.15
8.90
70
Table 14
22
EXTERNAL AIR TEMPERATURE
°C
–
Heat capacity of the heat recovery unit in relation to the temperature (T) of the water returning to the heat
recovery unit and the T of the external air. Temperature values for chilled water delivery = 7.2°C, output =
500 L/hr. Empty grey boxes: outside operational range
Ed. 04/2012
Section GENERAL INFORMATION AND TECHNICAL SPECIFICATIONS
HEAT CAPACITY kW (Output = 1000 L/hr)
RECOVERY
SYSTEM HOT
WATER RETURN
TEMPERATURE
°C
EXTERNAL AIR TEMPERATURE
°C
15
20
25
30
35
20
27.00
29.00
30.10
31.30
32.00
30
21.00
22.90
24.48
25.11
40
14.05
16.00
18.00
50
8.13
9.98
60
3.00
4.70
70
40
45
26.22
28.00
30.00
19.08
21.00
23.00
25.06
12.13
13.22
15.52
17.53
19.22
6.28
7.52
10.00
11.80
13.50
2.50
3.50
5.66
7.00
9.10
Table 15 - Heat capacity of the heat recovery unit in relation to the temperature (T) of the water returning to the heat
recovery unit and the external air temperature. Temperature values for chilled water delivery = 7.2°C, output
= 1000 L/hr. Empty grey boxes: outside operational range
ACF60-00 LB (also silenced version) PRESSURE DROP with glycolated water at
40%, nominal conditions
0.5
PRESSURE DROP bar
0.5
ACF60-00 LB
0.4
0.4
0.3
0.3
2000 2100 2200 2300 2400 2500 2600 2700 2800 2900 3000 3100 3200
Figure 3
–
Pressure drop ACF60-00 LB, also silenced version
In case of glicole use see also Table 22 at pag.49.
Ed. 04/2012
23
ACF60-00 – Installation, User’s and Maintenance Manual
ACF60-00, TK, HT, HR (also silenced version) PRESSURE DROP under nominal
conditions
0.38
ACF60-00,
PRESSURE DROP bar
0.36
TK, HT, HR
0.34
0.32
0.30
0.28
0.26
0.22
2500
2600
2700
2770
0.24
2800
2900
3000
3100
3200
WATER FLOW RATE L/hr
Figure 4
–
Pressure drop ACF60-00, TK, HT, HR, also silenced versions
In case of glicole use see also Table 22 at pag.49.
HEAT RECOVERY UNIT PRESSURE DROP - ACF60-HR (also silenced version)
(ACF operation with heat recovery unit, hot water return 20°C)
PRESSURE DROP bar
0,160
0,140
0,120
0,100
0,080
0,060
0,040
0,020
0,000
0
250
500
750
1000
1250
1500
1750
2000
2250
RECOVERY UNIT WATER FLOW L/hr
Figure 5
24
–
Heat recovery unit pressure drop ACF60-00 HR, also silenced version
In case of glicole use see also Table 22 at pag.49.
Ed. 04/2012
2500
Section GENERAL INFORMATION AND TECHNICAL SPECIFICATIONS
PED Characteristics
The ACF60-00 chiller has a pressurized hermetic circuit and is therefore subject to the to
the Pressurized Equipment Directive (PED).
The corresponding parameters and value are reported in the following table:
PARAMETERS
ACF60-00 ACF60-00 HR ACF60-00 TK ACF60-00 HT ACF60-00 LB
FLUID CONTENT CHARACTERISTICS
FLUID CONTENT
kgH2O
kgNH3
CHARGE
10
7.5
10
7.5
FLUID GROUP
H2O + NH3
10
8.5
1°
10.5
7.5
10.5
7.2
PRESSURE
MAXIMUM
ALLOWABLE
PRESSURE
SAFETY VALVE
CALIBRATION
PRESSURE
TEST PRESSURE
(in air)
bar
35
bar
35
bar
55
VOLUME
GENERATOR
LEVELING
CHAMBER
SOLUTION PUMP
SCA
EVAPORATOR
RECOVERY UNIT
COOLANT
VOLUME
VARIATOR
litres
litres
18.6
litres
litres
litres
litres
3.3
6.3
3.7
11.5
3.7
4.5
litres
TARE AND FILLING RATIO
TARE kg
FILLING RATIO
Table 16
–
kg
kg(NH3)/
L
220
0.173
230
0.159
0.177
0.157
0.150
PED characteristics of the ACF’s hermetic circuit. Empty grey boxes: element not available.
Ed. 04/2012
25
ACF60-00 – Installation, User’s and Maintenance Manual
1.5 ACF DIMENSIONS AND SERVICE PANELS
100
1290
ACF (Standard, TK, HT and LB versions) with standard ventilation
(dimensions in mm)
Figure 6
–
975 (*)
700 (*)
1230
850
Dimensions of the ACF (Standard, TK, HT and LB versions). See Figure 9 on page 28 for the
measurements of the service panels.
100
1290
ACF (HR version) with standard ventilation
(dimensions in mm)
975 (*)
1230
Figure 7
26
–
( *)
700 (*)
850
( *)
Dimensions of the ACF60-00 HR. For the measurements of the HR service panels, see Figure 10 on
page 28.
Ed. 04/2012
Section GENERAL INFORMATION AND TECHNICAL SPECIFICATIONS
100
1280
1540
(260)
ACF (all versions) with silenced ventilation
(dimensions in mm)
Figure 8
–
975
700
1230
850
Dimensions of the ACF60-00, TK, HT, LB, HR, silenced ventilation. The measurements of the service
panels do not vary. According to the ACF type see Figure 9 or Figure 10, page 28. NOTE: the service
panel represented does not pertain to the ACF HR; For this chiller see Figure 10, page 28
Ed. 04/2012
27
ACF60-00 – Installation, User’s and Maintenance Manual
Service panel for the ACF60-00, TK, HT, LB. The indicated measurements are
expressed in mm, and are also valid for the corresponding silenced versions.
KEY
G
A – WATER DELIVERY TO APPLIANCE Ø 1-¼” F
B
Ø 1-¼” F
G – GAS SUPPLY
Ø ¾” F
150
200
305
A
B – WATER RETURN TO UNIT
108
164
181
Figure 9
–
Dimensions of the service panel for the ACF60-00, TK, HT, LB and corresponding silenced versions.
Some details have been removed for clarification purposes.
ACF60-00 HR Service panel. The indicated measurements are expressed in mm,
and are also valid for the corresponding silenced version.
303
170
KEY
79
Chiller – CHILLED WATER
G
59
B
A
D - WATER DELIVERY TO APPLIANCE
Ø 1-¼” F
C - WATER RETURN TO UNIT
Ø 1-¼” F
G - GAS SUPPLY
Ø ¾” F
Recovery unit – HOT WATER
D
A - WATER DELIVERY TO APPLIANCE
Ø 1-¼” F
B - WATER RETURN TO UNIT
Ø 1-¼” F
150
200
250
C
108
181
Figure 10 –
28
Dimensions of the service panel for the ACF60-00 HR and ACF60-00 HR S. Some details have been
removed for clarification purposes.
Ed. 04/2012
Section END USER
SECTION 2
END USER
This section illustrates the commissioning of the ACF, its adjustments and the operation
control by the circuit board in the electrical panel.
2.1 COMMISSIONING (AND SHUTDOWN) OF THE ACF
Efficient functioning and the longevity of the ACF greatly depend on its correct use!
If the ACF60-00 is connected to a Direct Digital Controller (DDC), its ignition and
control are done exclusively through the DDC. In this case, refer to the manual
supplied with the DDC.
If the ACF is not connected to a DDC, it can be turned on and shut down only through a
control switch put on by the installer.
According to the demand, this switch can be an on/off button, a room thermostat, a
programmable timer, or one or more clean contacts controlled by another process. Ask
the electrician who installed the system for details regarding the type of control switch
installed.
Commissioning
The control switch in needed.
Do not turn on or shut off the ACF by supplying or removing electrical power
directly from the main power switch, in that this could be dangerous and also
damage the ACF and the systems connected to it.
Before turning on the ACF, check that:
The gas valve is open;
The ACF has electrical power: the main power switch must in the “ON” position.
The installer has ensured electrical power to the hydraulic system under the correct
conditions.
If these conditions have been met, start-up the ACF by means of the control switch. This
switch is also used to shut down the ACF; from the opening of the switch, the shutdown
cycle will last approximately 7 minutes.
Errors during the start-up phase of the ACF
If the ACF remains inactive for a long period of time, it is possible that air may be present
in the gas lines. In this case, start-up will fail, a warning will appear on the display (W12 –
temporary arrest of flame control unit, see “TABLE OF OPERATING CODES “ on page
83) and after a brief interval, another ignition sequence will automatically begin. If the
problem persists, after 3 warnings and successive ignition attempts of the ACF, the flame
control unit will be blocked, showing an error on the display (E12 – flame control unit
Ed. 04/2012
29
ACF60-00 – Installation, User’s and Maintenance Manual
arrest, see “TABLE OF OPERATING CODES “ on page 83). In this case, resetting does
not occur automatically.
To restart the ACF, reset the flame control unit from menu 2 of the electrical circuit board:
the procedure is shown in paragraph 2.4, page 35. After resetting, the ACF will attempt
another ignition.
If the ACF arrests numerous times, contact a Robur Authorized Technical Service Centre
by calling the toll free number provided with the ACF or by calling Robur S.p.A. directly at
+39 035 888 111.
Once the ACF has been started, it is controlled by the electronic circuit board inside the
electrical panel, as explained in the next paragraph.
2.2 ON-BOARD ELECTRONICS
The descriptions reported below make reference to the electrical circuit board with
version 3.021 firmware.
If the ACF60-00 is connected to a Direct Digital Controller (DDC), its ignition and
control are done exclusively through the DDC. In this case, refer to the manual
supplied with the it; If not, please make reference to that reported below.
The S61 electronic circuit board
The ACF60-00 is equipped with an S61 electrical circuit board with microprocessor,
located inside the electrical panel. this controls the ACF and displays data, messages and
codes while operating. Here is the S61 and its main component:
30
Ed. 04/2012
Section END USER
A
C
B
KEY
A 4 digit DISPLAY for the visualization of the data and operational codes
B KNOB (encoder) for navigating and selecting of operational data
C CAN PORT for the connection of the CAN-BUS network cable
Figure 11 –
The S61 electronic circuit board. The Display, Encoder and CAN-BUS Port
Programming, control and monitoring of the ACF are done through the display and the
circuit board encoder. The CAN BUS port allows one or more ACF’s to be connected to a
Direct Digital Controller (DDC). To connect a DDC to the ACF, go to the “USE OF A
DIRECT DIGITAL CONTROLLER (DDC)” section on page 60.
S61 menu description
The parameters and settings of the ACF are separated into menus on the electrical circuit
board:
MENU
MENU DESCRIPTION
Menu 0
DISPLAY OF DATA (TEMPERATURE, VOLTAGE, PUMP SPEED)
Menu 1
DISPLAY OF ALL THE ACF PARAMETERS
Menu 2
FLAME CONTROL UNIT RESET AND ERROR RESET
Menu 3
END USER SETTINGS (THERMOSTAT SETTING, SET POINT, T. DIFFERENTIAL)
Menu 4
INSTALLER SETTINGS
Menu 5
SERVICE CENTER SETTINGS
Menu 6
SERVICE CENTER SETTINGS (MACHINE TYPE)
Menu 7
DISPLAY OF DIGITAL INPUTS
Menu 8
(MENU NOT USED)
Table 17
–
ON THE
DISPLAY
S61 menus
Ed. 04/2012
31
ACF60-00 – Installation, User’s and Maintenance Manual
Menu’s 0, 1 and 7 are Display-Only Menu’s: information is only displayed and cannot be
modified. Real-time data coming from the circuit board regarding the functioning of the
ACF can be seen from menu 0; the characteristic operational parameters of the ACF and
their current values can be seen on menu 1.
Menu 7 displays information of use to Robur S.p.A. Authorized Service Centres,
see above.
To display the information of these menu’s, proceed as illustrated in paragraph “Access to
the circuit board menu’sAccess to the circuit board menu’s”, page 34.
Menu 2 is an Executional Menu: It is used to reset the flame control unit as well as for the
resetting of errors. If this procedure must be performed, go to the “RESETTING”
paragraph on page 35.
Menu 3 is a Settings Menu: It allows the values of the displayed parameters to be set. The
ideal parameter values for the best running of the ACF with the system to which it is
connected are preset at installation. But to set new parameter values, go to paragraph 3.6
on page 50.
Menu’s 4, 5, 6 and 7 only pertain to the installer and to Robur Authorized Technical
Service Centres.
Menu 8 can be selected, but is not used.
Display and Knob (encoder)
The display of the S61 circuit board can be seen from the opening in the front panel of the
ACF.
At start-up all the LED's on the display light up for approximately 3 seconds, then the
circuit board name will appear, S61. If the control switch is in the ON position, the ACF
with then begin operating.
When functioning properly, the display will alternately show the return water temperature,
the delivery water temperature and the temperature difference between the two. The
following table gives an example of what is shown of the display of an ACF60-00 in
operation:
ACF OPERATIONAL DATA
SEEN ON THE DISPLAY
T. RETURN WATER
DELIVERY WATER TEMP.
WATER RETURN TEMP. - WATER DELIVERY TEMP.
Table 18
–
Sample display of temperature and temperature differential
If there are functional problems, the warning codes or the error codes corresponding to
the problem will sequentially appear on the display. A list of these codes with their
description and procedure to follow to reset the ACF are reported in the TABLE OF
OPERATING CODES on page 83
The knob is used to navigate through the menu’s and parameters and to set these
parameters when possible.
32
Ed. 04/2012
Section END USER
Requirements: Installed and running ACF.
To use the knob:
1.
Remove the front panel by unscrewing the fastening screws.
2.
Remove the special wrench from the tube above the electrical panel.
3.
Remove the plug from the electrical panel to access the knob.
4.
Through the hole, turn the knob using the special wrench.
The knob on the electrical circuit board can be turned using the special wrench without
opening the cover of the electrical panel, so that one can work safely without being
exposed to the electrical components.
When the necessary settings have been made, put the special wrench back where
it came from, replace the plug in the electrical panel and remount the front cover of
the ACF chiller.
Ed. 04/2012
33
ACF60-00 – Installation, User’s and Maintenance Manual
To access the menu’s mentioned in Table 17 (seen on page 31) while the ACF is
functioning, just press the knob once.
Requirements: Accessibility to the electrical panel (see previous procedure).
To navigate using the knob:
1.
Run through the display elements by turning the knob in either direction, clockwise to
see the next menu item and counter clockwise for the previous item.
2.
Select an item by pressing the knob. This is how access is gained to the menu’s and
to the menu parameters, or if the letter E appears, to return to the previous item
(exit).
Access to the display-only menu’s (menu 0, menu 1, menu 7) is described in the
next paragraph, “Access to the circuit board menu’s”.
Access to the operational menu’s for the running of the ACF (menu 3, setting) and
for error and flame control unit resetting (menu 2, executional) is described in
paragraph 3.6, page 50 and in paragraph 2.4 on page 35
Access to the circuit board menu’s
The following procedure indicates how to access the circuit board menu's. The
information given is used to access display-only menu’s 0, 1 and 7; to access the
other menu’s (if authorized) additional information is needed which can be found in
the dedicated paragraphs, see paragraph “S61 menu description” on page 31.
To access the menu’s and see the current parameter values:
1.
Push the knob: the first menu can be seen on the display: menu0:
2.
Push the knob again: access is granted to menu 0; the menu number and the first
menu parameter will appear on the display:
3.
Turn the knob to navigate to the other parameters of this menu. All the menu
parameters are seen on the display; the letter E is the last menu item to be shown:
; to exit the current menu, press the knob when the E is shown.
4.
Press the knob to access a parameter. For example, to access parameter 7
(electrical voltage of the circuit board), turn the knob until that parameter appears,
, then press to access.
The current value of the parameter is shown on the display, for example:
By pressing the knob again, you will return to the current parameter. To exit from the
menu, follow the instructions given in point 3.
5.
To access the other display-only menu’s, proceed as described in the previous
points.
34
Ed. 04/2012
Section END USER
2.3 SETTING OF OPERATING PARAMETERS
The operations described require the basic knowledge of both the installed
appliance and the S61 electronic circuit board mounted on the ACF; You must be
familiar with this information before proceeding, which can be found in paragraph
2.2 ON-BOARD ELECTRONICS on page 30.
During the installation process, the ACF is configured by the installer to operate in
the most efficient manner for the type of system used. The operating parameters
can be changed after installation, but is not recommended if the operator does not
posses the necessary knowledge and experience. To set new operating
parameters for the ACF60-00, go to paragraph 3.6 on page 50.
2.4 RESETTING
Errors may occur on the ACF60-00 which could cause the arrest of the unit for different
reasons; the error does not necessarily mean that there is a breakdown or that the ACF
has malfunctioned. The cause of the error could be temporary: air in the gas line or
temporary electrical blackout are some examples; in these situations, go to menu 2 of the
electronic circuit board to reset the ACF, returning it to normal operation.
The two reset options available in menu 2 are 0 and 1; Select E to exit the menu:
MENU OPTION
FOR RESETTING DUE TO:
0
ARREST OF FLAME CONTROL UNIT
1
OTHER ERRORS
E
(EXIT FROM MENU)
Table 19
–
SEEN ON THE DISPLAY
Menu for resetting operations
Option 0: reset the blocked flame control unit; this is also used to turn on the ACF for the
first time, see paragraph 2.1, page 29; or after a long shutdown period, see paragraph
“PROLONGED INACTIVITY”, page 38.
Requirements: Accessibility to the electrical panel , see “Display and Knob
(encoder)”, page 32.
To reset the flame control unit, go to menu 2, as indicated in Access to the circuit board
menu’s on page 34, then:
Ed. 04/2012
35
ACF60-00 – Installation, User’s and Maintenance Manual
1.
appears on the display: press the knob to access the menu. The display
shows option 0 first,
.
2.
Press the knob and the reset request will begin flashing:
3.
Press the knob again to reset the flame control unit: The reset request stops flashing
will again appear on the display. The resetting operation is now
and
finished.
4.
appears, then
To exit the menu, turn the knob in a clockwise direction until
press the knob to return to the selection menu:
5.
.
.
To exit the selection menu and return to the normal displaying of the ACF
appears, then
parameters, turn the knob in a clockwise direction until
press the knob to exit.
Option 1: resetting of other ACF errors; this is used to reset any warnings or errors that
may arise during ACF operation.
Requirements: Accessibility to the electrical panel , see “Display and Knob
(encoder)”, page 32.
To reset circuit board errors, go to menu 2 as described in “Access to the circuit board
menu’s” on page 34, then:
1.
appears on the display: press the knob to access the menu. The display
shows option 0 first,
.
2.
Turn the knob in a clockwise direction until option 1 appears,
3.
Press the knob and the reset request will begin flashing:
4.
Press the knob again to reset the circuit board errors. The reset request stops
flashing and
now finished.
5.
.
will again appear on the display. The resetting operation is
To exit the menu, turn the knob in a clockwise direction until
press the knob to return to the selection menu:
6.
.
appears, then
.
To exit the selection menu and return to the normal displaying of the ACF
parameters, turn the knob in a clockwise direction until
press the knob to exit.
36
appears, then
Ed. 04/2012
Section END USER
2.5 WARNING AND ERROR CODES
•
•
•
•
If the ACF does not function correctly, before contacting a Robur authorized
Technical Service Centre, perform the following simple checks:
Check that the control switch (see “COMMISSIONING (AND SHUTDOWN) OF THE
ACF” on page 29) is in the ON position;
Check that the main power switch is in the ON position, or rather the position where
the contacts are closed;
Check that the gas valve is open.
Check what appears on the display of the Electronic Circuit Board;
If the chiller still does not function properly after these checks, of if it is off and won’t start,
do not perform any other operations.
Record the error codes shown on the ACF display and contact a Robur Authorized
Technical Service Centre by calling the toll free number provided with the ACF or by
calling Robur S.p.A. directly at +39 035 888 111.
Displayed Codes
The electronic circuit board monitors the running of the ACF through probes and sensors.
The electronic circuit board display shows the operational machine codes, which can be of
two types:
a) WARNING event
(identified by the green flashing letter “U”).
b) ERROR event
(identified by the green flashing letter “E”).
c) In the case of a WARNING event (“U”), the flashing letter “U” will appear on the
display followed by a number which corresponds to the nature of the event; when the
warning event has been corrected, the warning reported on the circuit board display
will be reset.
d) In the case of an ERROR event (“E”), the flashing letter “E” will appear on the display
followed by a number which corresponds to the nature of the event; The ERRORS do
not automatically reset and must be manually reset from menu 2 (see “RESETTING”
on page 35) or by cutting electrical power to the ACF (for more information see the
“TABLE OF OPERATING CODES“ on page 83.
For a list of these codes with their brief description and resetting procedure, go to the
TABLE OF OPERATING CODES on page 83.
These warning and error codes are flashing on the display. no other data is
displayed until resetting has occurred.
Ed. 04/2012
37
ACF60-00 – Installation, User’s and Maintenance Manual
2.6 PROLONGED INACTIVITY
When the ACF is expected to be inactive for a long period of time, it is best to
follow the shutdown and eventual start-up indications reported below.
Shutdown for extended period of time
Requirements: The ACF must be powered and running.
To shut down the ACF for a long period of inactivity, proceed as follows:
1.
2.
3.
4.
Turn off the ACF from the control switch and not from the main power switch.
Wait for the shutdown cycle to complete (approximately 7 minutes).
Shut off the ACF through the main power switch.
Close the gas supply valve.
In case of winter saesonal switch-off or long period of stopping, we suggest to not
empty the hydraulic circuit: in that case possible oxidation process can occur.This
oxidation process could damage both the hydraulic system and also the Robur heat
pump.It’s important to verify that no leakages occur in the hydraulic circuit that may
empty part of the system. The above recommendation is necessary in order to
avoid to fill continuously with water that may imply the additional introduction of
oxygen and the consequent dilution of the used inhibitor, for ex glycol. In case of
precence of glycol, Robur advices to use inhibited glycol. Galvanized pipes are not
recommended, as they are not compatible with glycol.
ACF start-up after an extended period of inactivity
Requirements: The ACF must be off, with no supply of gas or electricity.
To start up the ACF after a long period of inactivity (i.e. after winter), proceed as follows:
1.
2.
3.
4.
5.
Warning: before beginning any start-up operations on the ACF, make sure that the
water system is completely filled, and that the water contains the correct
percentage of antifreeze according to the model and climatic zone of where the
appliance is installed, as described in Table 22 on page 49.
Pressurize the appliance, adjusting the water pressure so that it is between 1 and 2
bar. If you are unsure of how to perform this operation, contact the plumber who
installed the unit.
Power up the ACF by closing the contacts on the main power switch (ON).
Open the gas supply valve.
Check that the water system has the correct flow rate and pressure.
Turn on the ACF from the control switch.
For further information about the control switch, go to “COMMISSIONING (AND
SHUTDOWN) OF THE ACF” on page 29.
38
Ed. 04/2012
Section PLUMBING INSTALLER
SECTION 3
PLUMBING INSTALLER
This section describes the operations to be performed for the correct plumbing installation
of the ACF60-00. The plumber must consult with the electrician to determine the correct
sequence of operations to follow.
WARNING: An incorrect installation could cause harm to people, animals or
objects: before installation, carefully read the “SAFETY WARNINGS” found on
page 3.
3.1 GENERAL INSTALLATION PRINCIPLES
The installation of the ACF60-00 must be done in conformance with the current
regulations and the local norms regarding the design, installation and maintenance of
thermal-cooling systems, and must be performed by Qualified Service Engineers following
the manufacturers instructions.
A “Qualified Service Engineer” is defined as someone having specific technical
proficiency in the air conditioning sector for and with appliances supplied by natural
gas.
During installation, the indications below should be followed:
The ACF60-00 must be installed outside the buildings, in an area having a natural
circulation of air and does not require any special protection from the elements.
In no case should the ACF60-00 be installed indoors.
The flow of air exiting the upper portion of the ACF must not be obstructed in any way.
Do not install the ACF near the exhaust flue, chimneys of other similar elements, in order
to avoid the intake of hot or polluted air by the fan to the condenser. Clean air must be
used for the ACF60-00 to function properly.
The front (side with burner panels and electric panel) and rear parts of the ACF must be
kept 800 mm and 600 mm respectively from flammable surfaces, walls or other
fabrications; this is for safety reasons as well as to facilitate any maintenance
interventions. Maintain a distance of 450 mm for the other sides, enough to ensure the
flow of cooling air needed by the condenser. A diagram of the required distances for
installation is seen in Figure 13 on page 41.
Check that the supply and the distribution network for the natural gas is in conformance
with that indicated by the manufacturer; see “GAS SUPPLY SYSTEM ” on page 47 for the
correct supply pressures.
A shut-off valve is required on the gas supply line.
Install flexible connectors on the water circuit so that ACF vibrations are not transmitted to
the water circuit. See “ACCESSORIES” on page 81.
Ed. 04/2012
39
ACF60-00 – Installation, User’s and Maintenance Manual
3.2 POSITIONING OF THE ACF60-00
Keep the ACF60-00 in its packaging in which it was delivered throughout all the
moving stages. The packaging is only removed at the time of final installation.
Lifting the ACF
If the ACF must be lifted, connect cables to the openings on the supports at the base of
the ACF, and use support bars and spacers so that the cables don’t damage the ACF
panels while moving (see Figure 12).
The lifting crane and all the accessories (cables, tethers, bars) must be appropriate
for the job. See the “TECHNICAL SPECIFICATIONS” paragraph on page 11 for the
weight of the ACF. Robur S. p. A. cannot be held responsible for any damage that
may occur during the commissioning of the ACF.
RIGHT SIDE VIEW
Figure 12 –
FRONT VIEW
Example of bar and cables in the correct position for the lifting of the ACF60-00
ACF positioning and required clearances
The ACF must be installed outside the buildings and in an area with a good circulation of
air.
Installation inside a room of any type is not allowed.
The ACF can be installed at ground level, on a platform or on a roof, if the roof is able to
sustain the weight. The weight of the ACF can be found in the “TECHNICAL
SPECIFICATIONS” section on page 11.
The noise produced by the ACF during operation is mostly created by the condenser fan.
Even though the noise level is not high with respect to other electrical appliances of
similar power, the ACF should not be installed near rooms or surroundings that require
silence, such as bedrooms, meeting rooms and the like.
40
Ed. 04/2012
Section PLUMBING INSTALLER
600
600
Also avoid installing the unit in corners to avoid the amplification of the noise due to
reverberation.
Position the appliance so as to maintain minimum clearances from combustible
surfaces, walls or other appliances, as illustrated in Figure 13.
Minimum clearances are are required to make maintenance possible
Do not install any cover or obstruction to the evacuation of the air issuing from the fan.
When deciding on the installation position, especially if multiple units are used, consider
that each unit requires 11,000 m3/h of air for heat exchange with the finned battery. Make
sure that the installation and position allow for sufficient flow of air to the batteries and
prevent the air issuing from the fans recirculating, which would reduce the efficiency of the
units and force them to switch off.
Install the ACF away from water falling from rain gutters or similar.
If the ACF is installed on a terrace or on a roof, it must be done so that the exhaust from
the fans does not exit near the external air intakes of the building. in any case, avoid the
intake of contaminated or hot air coming from flues, chimneys, vents and others by the
ACF.
FRONT
800
450
Figure 13 –
FRONT
800
FRONT
450
450
450
450
Minimum distances to respect for the correct functioning of the ACF.
Ed. 04/2012
41
ACF60-00 – Installation, User’s and Maintenance Manual
Ground installation
Place the ACF on a flat, level surface (support base) made of fireproof material.
If a horizontal support base is not available, a flat and level base made of cement must be
made that is slightly larger than the base of the ACF: at least 100-150 mm per side; the
dimensions of the ACF are reported in the “TECHNICAL SPECIFICATIONS” paragraph
on page 11.
Roof or terrace installation
Place the ACF on a flat, level surface (support base) made of fireproof material.
The ACF must rest upon a base that can support its weight (the weight of the ACF is
reported in paragraph 1.4 TECHNICAL SPECIFICATIONS, page 11). The building
structure must be able to support the weight of the ACF along with the weight of the
support base.
If necessary, a gangway can be made around the ACF for future maintenance
interventions.
Avoid installing the ACF in quiet areas or in areas where silence is requested.
Even though the ACF only creates modest vibrations, the use of anti-vibration brackets
(available as an accessory, see “ACCESSORIES” on page 81) is especially
recommended in all cases where reverberations are confirmed, such as on rooftops or on
a terrace; use flexible connections (anti-vibrational connectors) between the machine and
the water and gas piping.
Supports and levelling
The ACF must be correctly levelled. This is checked by placing a level on the upper part
of the machine.
If necessary, metal shims can be placed in the appropriate positions below the ACF until it
is level; do not use wood shims, as they degrade quickly.
3.3 WATER CONNECTIONS
General instructions
•
•
•
•
The water system piping can be made of stainless steel, black steel, copper or cross
linked polyethylene suitable for air conditioning and refrigeration systems. All the
water tubing and connections must be heat insulated in accordance with current
regulations, to avoid the dispersion of heat and the forming of condensation.
To prevent the water from freezing during the winter, glycol should be used as an
antifreeze (see Table 22 on page 49). DO NOT USE glycol in galvanized tubing,
which will cause corrosion in the presence of glycol.
Use a minimum amount of 10% glycol antifreeze to also prevent ice from forming in
the evaporator during normal summertime operation of the ACF.
If using rigid tubing, flexible connections should be used for the intake and delivery of
chiller water to prevent the transmission of vibrations (see “ACCESSORIES”, page
81).
42
Ed. 04/2012
Section PLUMBING INSTALLER
As other hydronic appliances, Robur heating and cooling systems operate with grid-water
of good quality. In order to prevent any possible problem of operation or reliability caused
by filling or top-up water, please refer to codes and norms about water treatment for
thermo-hydraulic installations in civil or industrial applications. Parameters indicated in
Table 20 must be complied with.
Table 20
- Chemical and physical parameters of water.
Water quality can be measured through parameters like acidity, hardness, conductivity,
chlorides content, chlorine content, iron content and the like.
The presence of free chlorine in the water, in particular, can jeopardize parts of the
installation and Robur units. Therefore, please make sure that free chlorine content
and total hardness are compliant with the allowable ranges reported in Table 20.
The way the installation is operated can be the cause of possible degradation of water
quality.
Moreover, abnormally massive water top-up or reintegration can cause a drift of chemical
or physical above-mentioned parameters. Reintegration should not exceed 5% per year of
the total amount of water. It is advised to check regularly the water quality, especially in
case of automatic or periodic top-up.
In case water treatment is needed, this operation should be carried out by a professional
or competent person, following strictly the instructions by the manufacturer or supplier of
the chemical substances for the treatment, since dangers could arise for health, for the
environment and for Robur appliances.
Several products for water treatment are available on the market.
Robur does not perform detailed market surveys. Therefore Robur suggests to contact
Companies which are specialized in water treatments. They will be able to suggest the
best way how to proceed according to the type of installation
In case washing of the pipes is needed, this operation should be carried out by a
professional or competent person, following strictly the instructions by the manufacturer or
supplier of the chemical substances for the washing, avoiding the use of substances
aggressive for stainless steel or containing/releasing free chlorine.
Please make sure the pipes are properly rinsed in order to remove any residue of
chemical substances from the pipes.
Ed. 04/2012
43
ACF60-00 – Installation, User’s and Maintenance Manual
Robur is not liable for ensuring that water quality is always compliant with what reported in
Table 20 is not’s. Non-compliance with indications above may jeopardize the proper
operation, integrity and reliability of Robur appliances, invalidating the warranty.
For any further detail, please contact directly Robur S.p.A. (tel.+39 035.888.111).
Examples of typical water system layouts with the required components for the ACF can
be seen in Figure 15, Figure 14 and Figure 16 starting on page 46; which are:
FLEXIBLE CONNECTORS for the ACF water and gas connections;
PRESSURE GAUGES installed on the delivery and return tubing;
FLOW CONTROL VALVE, balanced slide valves or intermediate slide valves can be
used;
WATER FILTER installed on the ACF return tubing;
BALL VALVES for the blocking of the water and gas piping of the appliance;
WATER SYSTEM CIRCULATION PUMP, connected to the water return piping for the
pumping of water to the ACF (see “ACCESSORIES”, page 81 for the pump, and Figure 14
on page 45 for the plant diagram), chosen for the characteristics of the plant;
SAFETY VALVE - 3 bar (eventual);
PLANT FILLING system. If an automatic filling system is used, the percentage of
monoethylene glycol in the plant should be checked every season.
DRAIN VALVE (approximately ؽ”) to be installed on the piping to facilitate emptying
when necessary;
Devices for the RELEASE OF AIR in the tubes.
EXPANSION VESSEL of appropriate volume for the requirements of the plant.
The ACF60-00 is not equipped with an expansion vessel: it must therefore be
installed on the plant by a plumber. The size of the expansion vessel (closed type)
should be suitable for the maximum temperature range and the maximum
operational water pressure of the plant.
A suitable temperature control system must be installed on the ACF60-00, which acts as a
control switch.
A Direct Digital Controlleris available as an accessory, see SECTION 6, page 81
There must ALWAYS be a constant circulation of water inside the ACF chillers: so
that the required flow of water is constant and always guaranteed, both while
running and during shutdown periods. If the water pump is directly connected to the
electronic circuit board (clean contact N.O. CIRC), the pump must continue the
circulation of water for an additional 7 minutes after shutdown of the ACF.
44
Ed. 04/2012
Section PLUMBING INSTALLER
The figure below is a diagram of the ACF60-00 water connections:
9
IF USED
®
GAS
P
DELIVERY
RETURN
P
ACF60-00
1
2
3
4
5
6
7
8
KEY
1
FLEXIBLE CONNECTORS
6
PUMP
2
PRESSURE GAUGES
7
EXPANSION VESSEL
3
FLOW CONTROL VALVE
8
ACCUMULATION TANK
4
WATER FILTER
9
DIRECT DIGITAL CONTROLLER
5
SHUT-OFF VALVE
Figure 14 –
(available as an accessory)
Water system diagram for one ACF60-00
Accumulation Tank
The configuration of the plant requires a constant circulating of water in the ACF; if
needed, a water tank can be used between the primary and secondary circuits, as
shown for example in Figure 15, page. 46 and “ACCESSORIES” on page 81.
If antifreeze is not used during normal summertime operation, a volume of 70 litres
of water must be used in plant or the primary water circuit for each ACF used. In
this case the diameter of the tubing must be adapted or otherwise an accumulation
tank must be used, as shown in Figure 15 on page 46. This tank must have the
capacity to hold the minimum amount of water required, as mentioned in the note
below.
If more than one ACF is used, add the minimum contents required for each ACF.
The size of the pump and the tubing must be sufficient to supply the nominal water flow
needed for the correct functioning of the ACF. To calculate the internal pressure drop of
the ACF, refer to the “TECHNICAL SPECIFICATIONS” paragraph on page 11.
The use of an accumulation tank on the water circuit is not required for the operation of
the ACF60-00.
Ed. 04/2012
45
ACF60-00 – Installation, User’s and Maintenance Manual
However, the use of an accumulation tank is an ideal solution to compensate for
sudden pressure changes, especially when the water circuit contains less than 70
litres of water for each ACF installed.
Figure 15 shows 2 examples with the use of accumulation tanks: as in-line
accumulation and as primary and secondary division of the circuit.
GAS
®
P
DELIVERY
P
EXPANSION VESSEL
FLEX. CONN.
ACC. TANK
GAS
®
P
DELIVERY
P
PUMP
ACCUMULATION TANK WITH
PRIMARY/SECONDARY DIVISIONS
Figure 15 –
Example of accumulation tank uses: as in-line accumulation (above) and division of the system into
primary and secondary circuits (below).
Connection of more than one ACF60-00
ACF60-00 chillers are designed both for individual operation and for use in a many-unit
system, when a higher heat capacity is required than the output of just one ACF.
The figure below is the connection diagram between ACF60-00’s.
46
Ed. 04/2012
Section PLUMBING INSTALLER
DDC
GAS
9
®
®
1
P
P
2
P
P
3
4
5
8
7
6
KEY
1
FLEXIBLE CONNECTORS
6
PUMP
2
PRESSURE GAUGES
7
EXPANSION VESSEL
3
FLOW CONTROL VALVE
8
ACCUMULATION TANK
(needed for each ACF with plant water content
less than 70 litres)
4
WATER FILTER
9
DIRECT DIGITAL CONTROLLER (available as an
accessory
5
SHUT-OFF VALVE
Figure 16 –
Connection diagram between ACF60-00’s
3.4 GAS SUPPLY SYSTEM
The ACF60-00 is designed to run on either natural gas or L.P.G.
The supply pressure from the distribution network must be between:
17 and 25 mbar for natural gas (G20);
25 and 35 mbar for L.P.G. (G30);
Supplying gas to the ACF at pressures higher than the recommended pressures
could damage the gas valve, creating a dangerous situation.
The installation of gas supply tubes must be done in conformance with the UNI-CIG
regulations as well as any other regulations in force.
For the ACF to run on L.P.G., a primary pressure reducer must be installed near the LP
tank to reduce the pressure to 1.5 bar. A secondary pressure reducer must be installed
near the ACF to lower the pressure from 1.5 bar to 0.03 bar before intake into the valve.
Ed. 04/2012
47
ACF60-00 – Installation, User’s and Maintenance Manual
LPG can have corrosive effects. The pipe connections must be done using
materials that resistant to this corrosive action.
The vertical gas pipes must have a siphon and a condensation trap due to the formation
of condensation in the pipes during the colder months. The gas pipes may need to be
thermally insulated to prevent the excessive formation of condensation.
In any case, a shut-off valve must be installed on the gas supply line, so that the
ACF can be excluded in needed.
Table 21
GAS PRESSURE
NATURAL GAS (G20)
L.P.G. (G30 / G31)
GAS MAINS SUPPLY
between the values: 17 – 25 (mbar)
between the values: 25 – 35 (mbar)
- Gas supply pressures
The gas consumption of the ACF can be found in the “TECHNICAL SPECIFICATIONS”
section on page 11.
3.5 FILLING OF THE WATER CIRCUIT
Before installation, carefully clean the inside of all the tubing and any other
component used both for the water circuit and for the gas supply line, in order to
remove any residue which could effect the functioning of the chillers.
After all the water, gas and electrical supply connections have been made (contact an
electrician for the electrical connections), with water circuit can then be filled.
Requirements: All the electrical and water connections on the ACF must already
be connected.
The filling of the water circuit must be done respecting the following stages:
Activate the automatic air release valves on the plant;
Fill the water circuit (see Figure 14, page 45), adding monoethylene glycol to purified
water in an amount proportional to the minimum winter temperature of the zone in which
the ACF is installed and according to its specific use (see Table 22, page 49).
Bring the plant to the correct pressure, making sure that the pressure of the water in the
plant is not less than 1 bar and not over 2 bar.
Use of monoethylene glycol (antifreeze)
The ACF60-00 must be installed outside, therefore the water in the water circuit during the
winter may be at risk of freezing.
To avoid this phenomenon, it is important add monoethylene glycol to the water in the
appliance in an amount proportional to the minimum winter temperatures for the zone in
48
Ed. 04/2012
Section PLUMBING INSTALLER
which the ACF is installed and to the specific usage requirements in relation to the ACF
model installed (see paragraph 1.4 TECHNICAL SPECIFICATIONS, page 11).
Antifreeze must also be used to prevent the formation of ice in the ACF’s evaporator
during normal operation, which could cause damage if the volume of water in the
appliance or in the primary circuit is less than 70 litres for each ACF.
But if the ACF is expected to be operated in an area that has an outside air temperature
below +10°C (Data Processing Centres, technological use), monoethylene glycol must be
added to the water at a minimum concentration of 10% the volume of the water in the
appliance, even if the amount of water is equal to or greater than 70 litres.
The addition of monoethylene glycol modifies the thermal characteristics of the
water in the appliance and in particular, the density, viscosity and the average
specific heat. Always check the technical specifications of the antifreeze used as
well as the degradation data of the product, which can be obtained from the supplier.
Table 22 on page 49 reports the freezing temperatures of water and the resulting pressure
drop incrementation of the ACF60-00 and the circuit in relation to the percentage of
monoethylene glycol used in the appliance.
This table is useful in determining the size of the tubing and the circulation pump.
If automatic filling systems are used, the percentage of monoethylene glycol in the
appliance should be checked every season.
% MONOETHYLENE
GLYCOL
FREEZING TEMPERATURE
OF THE WATER
PRESSURE DROP
INCREMENT
PRODUCTIVITY LOSS OF
(1)
THE ACF
Table 22
(1)
–
10
15
20
25
30
35
40
-3°C
-5°C
-8°C
-12°C
-15°C
-20°C
-25°C
—
6%
8%
10%
12%
14%
16%
—
0.5%
1%
2%
2.5%
3%
4%
The influence of the percentage of monoethylene glycol on the functioning of the ACF
For version ACF60-00 LB see remark (2) on Table 8, page 17.
Ed. 04/2012
49
ACF60-00 – Installation, User’s and Maintenance Manual
3.6 SETTING OF THE WATER PARAMETERS
The operations described in this paragraph are only necessary if the ACF is not
connected to a Direct Digital Controller (DDC). If the ACF is connected to a DDC,
refer to the manual provided with the DDC.
This paragraph describes the hydraulic parameter settings on the S61 circuit board
of the ACF. If you are not familiar with basic usage procedures of the circuit board,
refer to paragraph 2.2 ON-BOARD ELECTRONICS on page 30.
Go to menu 3 of the circuit board to configure the ACF.
There are three parameters that can be set for the hydraulic configuration; select the letter
E to return to the previous menu.
ACF HYDRAULIC PARAMETER
SEEN ON THE DISPLAY
SELECTION OF WATER DELIVERY/RETURN
THERMOSTAT
WATER SET-POINT
WATER TEMPERATURE DIFFERENTIAL
(RETURN TO PREVIOUS MENU)
Table 23
–
ACF hydraulic configuration parameters, set from menu 3.
Parameter descriptions:
Selection of water delivery/return thermostat, parameter 73: this parameter can be either 0
or 1.
• 0:
the temperature that controls ignition/shutdown of the ACF is detected
by the ACF’s RETURN water sensor.
• 1:
the temperature that controls ignition/shutdown of the ACF is detected
by the ACF’s DELIVERY water sensor.
Water set-point, parameter 75: this parameter sets the water temperature at which the
ACF turns off.
Water differential, parameter 76: this parameter is the number of degrees added to the
set-point which determines the ignition temperature of the ACF.
The ACF will chill the water until the Set-Point temperature is reached. At this point it will
turn off. The water temperature will rise to the Set-Point + Differential temperature; when
reached, the ACF will turn on.
Example:
Water delivery/return thermostat: reading from water delivery sensor.
Set-Point:
+7.0°C
Differential:
2.0°C
50
Ed. 04/2012
Section PLUMBING INSTALLER
•
•
•
•
The ACF is running: the water is chilled until the Set-Point temperature of +7°C is
reached.
The ACF turns off: the temperature of the water increases until 9°C is reached (7°C +
2°C).
The ACF turns on: the water is again chilled.
The cycle repeats itself.
The following procedure details how to configure the parameters of the electronic circuit
board on the ACF.
If you are unfamiliar with the procedure for accessing the knob and the menu’s, go
to paragraphs “Display and Knob (encoder)” and “Access to the circuit board
menu’s”, starting on page 32.
To set the parameters in menu 3:
Requirements: ACF access and accessibility to the electrical panel, see “Display
and Knob (encoder)”, page 32.
Enter menu 3. The number 73 will appear in the display as the first parameter:
1.
Turn the knob clockwise to scroll through the parameters:
; the last parameter seen is the letter E,
,
.
,
;
2.
Press the knob when the desired parameter appears, or select E to exit the menu;
3.
For example, to modify parameter 75 (water Set-Point), proceed as follows:
•
•
Select the parameter: turn the knob until
appears on the display;
Press the knob to access the parameter value; the previously set value will be
flashing on the display, for example
4.
;
;
•
Turn the knob to change the value, to 8.5°C for example:
•
Press the knob again to confirm the new value; the current parameter,
will again appear on the display; The new value for this parameter is now set.
If you would like to change other menu parameters, proceed as described above,
then turn the knob to the letter E
and exit by pressing the knob.
To exit the menu’s, turn the knob clockwise until
appears, then press to confirm.
For more detailed information on the codes that appear during normal operation of the
ACF, go to paragraph “Display and Knob (encoder)” on page 32.
Ed. 04/2012
51
ACF60-00 – Installation, User’s and Maintenance Manual
52
Ed. 04/2012
Section ELECTRICAL INSTALLER
SECTION 4
ELECTRICAL INSTALLER
This section explains the procedures to follow for the correct electrical hook-up of the
ACF60-00, and also gives the wiring diagrams which may be useful for any maintenance
interventions.
The electrical connections must be done by a Qualified Service Engineer in
conformance with EU regulations and in accordance with local norms and
regulations.
An incorrect installation or an installation that is not compliant with the regulations
of the law could cause harm to people, animals and objects; Robur S.p.A. is not
responsible to damages relating to incorrect installation or installation that does not
conform to the regulations of the law.
Operational control of the ACF can be done in one of the following ways:
1.
By means of an ON/OFF control switch. The control switch could be an ON-OFF
switch, an ambient thermostat, programming clock, etc.
2.
By means of the Direct Digital Controller (DDC) available as an accessory
(see”ACCESSORIES” on page 81).
The wiring diagrams for ACF60-00 connection can be found in paragraph 4.3
PUMP AND ELECTRICAL WIRING DIAGRAMS on page 56.
The wiring diagrams for HR circulator pump connection can be found “Heat recovery
circulator pump control (only for HR model))” on page 55.
If you would like to hook up a DDC to the ACF60-00, see also the wiring diagrams in
paragraph USE OF A DIRECT DIGITAL CONTROLLER (DDC) on page60.
4.1 OPERATION WITH CONTROL SWITCH
Before making any electrical connections, make sure that there are no live parts.
General instructions
Check that the power supply is 230 V 1N 50 Hz.
Perform the electrical hook-ups following the wiring diagrams seen in Figure 19 and
Figure 20 on page 56 as well as Figure 24 on page 60.
Make the electrical connections so that the ground cable is longer than the power cables.
It should be the last cable to disconnect if the power cable is accidentally pulled out,
ensuring ground connection.
The electrical safety of the appliance can only be guaranteed when it is correctly
connected to a proper ground, done in conformance with current safety regulations.
Do not use the gas tubes as a ground for electrical appliances.
Ed. 04/2012
53
ACF60-00 – Installation, User’s and Maintenance Manual
ACF Hook-up
Requirements: The ACF must be positioned in its final location.
To connect the ACF to the electrical power supply line and to connect a control switch:
1.
Obtain a FG7(O)R 3Gx1,5 type cable for the electrical power supply of the ACF.
2.
Connect the ACF to the power supply line using the indicated cable and also install
either a bipolar isolating switch with 2 5A T-type fuses or a 10A thermomagnetic
switch near the cable (see detail GS on Figure 17).
3.
Connect the control switch to the R and Y connection terminals of the ACF control
circuit (see detail IC of Figure 18 on page 54).
For the ACF to function properly, a control switch must ALWAYS be installed. The
ACF must not be turned on and shut off using the main power switch of the
electrical power line.
4.
Finish the installation by connecting the pump as indicated in the “APPLIANCE
PUMP CONTROL” paragraph on page 55.
KEY
IC
KEY
L
N
GS
CONTROL SWITCH (ON-OFF SWITCH, THERMOSTAT,
PROGRAMMING CLOCK, OR OTHER)
PHASE
NEUTRAL
MAIN POWER SWITCH (not
supplied
Figure 17 –
54
Main power switch connection
Figure 18 –
Control switch connection
Ed. 04/2012
Section ELECTRICAL INSTALLER
4.2 APPLIANCE PUMP CONTROL
The primary circulation pump/s must be controlled by the S61 board, or
directly (via “N.O. contact” contacts) or indirectly (“OR” use of said contacts
by BMS type external systems). Otherwise, the primary circulation pump/s
must be running permanently.
Controlling the pump by means of the ACF circuit board
The controlling of the water circulation pump by the ACF60-00 electronic circuit board
depends on the power of the pump itself. There are 2 different cases:
•
•
Direct control of the electronic circuit board with a pump power draw of less than
700W.
In the case in which the power draw of the pump is less than 700W, perform the
connection as shown in Figure 19 on page 56 and make sure the Jumper (J10,
located at the lower left of the electronic circuit board, above the “NO CONTACT”
contacts) is CLOSED as seen in the “Jumper Closed” detail.
Direct control of the electronic circuit board with a pump that draws more than 700W.
In the case in which the power draw of the pump is equal to or higher than 700W,
perform the connection as shown in Figure 20 on page 56 using a control relay.
In this case the Jumper (J10, located at the lower left of the electronic circuit board,
above the “NO CONTACT” contacts) needs to be OPEN by positioning it as shown in
the “Jumper open” detail of the same figure.
Heat recovery circulator pump control (only for HR model))
The control of the water circulator pump of the hot water coming from the recovery circuit
is carried out through a relay wired in parallel to the solution pump. This allow the heat
recovery system to be activated only when the unit is ON.
Ed. 04/2012
55
ACF60-00 – Installation, User’s and Maintenance Manual
4.3 PUMP AND ELECTRICAL WIRING DIAGRAMS
Connection of the water circulation pump
Pump controlled by the ACF, power draw <700W
KEY
SCH1
CIRCUIT BOARD
J10
CLOSED JUMPER
NO CONCTAT N.O. VOLTAGE FREE CONTACTS
MA
UNIT TERMINAL BLOCK
L
PHASE
N
NEUTRAL
Components NOT SUPPLIED
PM
WATER PUMP <700W
Figure 19 –
Pump wiring with draw < 700W, controlled directly by circuit board. For the pump connections, see Figure
14 on page 45
Pump controlled by the ACF with control relay, power draw ≥ 700W
KEY
SCH1
CIRCUIT BOARD
J10
OPEN JUMPER
NO CONCTAT N.O. VOLTAGE FREE CONTACTS
MA
UNIT TERMINAL BLOCK
L
PHASE
N
NEUTRAL
Components NOT SUPPLIED
PM
WATER PUMP >700W
KP
PUMP REALY
Figure 20 –
56
Pump wiring with draw ≥ 700W, controlled by circuit board through a relay. For the pump connections,
see Figure 14 on page 45
Ed. 04/2012
Section ELECTRICAL INSTALLER
Heat recovery circulator pump connection (ONLY for HR model)
Pump connection for a single ACF - HR
KEY
SCH1
MA
KP
KPt
KPS
CIRCUIT BOARD
UNIT TERMINAL BLOCK
UNIT RELAY FOR HEAT RECOVERY CIRCULATOR PUMP PERMISSIVE
DHW TANK THERMOSTAT (not supplied)
DHW TANK THERMOSTAT SET AT 35°C WITH CAPILLARY PUT ON THE LOWER TANK REGION (not
supplied) [to be install in case the heating recovery water flow is higher than the nominal of 1000 l/h]
IP
BIPOLAR DISCONNECTING DEVICE FOR HEAT RECOVERY POWER SUPPLY PUMP (not supplyed)
KPc BIPOLAR RELAY HEAT RECOVERY CIRCULATOR PUMP (not supplied)
PMR1 HEAT RECOVERY PUMP (not supplied)
Figure 21 - Electrical Wiring for heat recovery pump connection (single ACF – HR)
Ed. 04/2012
57
ACF60-00 – Installation, User’s and Maintenance Manual
Pump connection for n.2 ACF - HR
Under Insaller Responisibility
KEY
SCH1 CIRCUIT BOARD
MA
UNIT TERMINAL BLOCK
KP1-2 UNIT RELAYS FOR HEAT RECOVERY COMMON CIRCULATOR PUMP PERMISSIVE
KPt
DHW TANK THERMOSTAT (not supplied)
KPs
DHW TANK THERMOSTAT SET AT 35°C WITH CAPILLARY PUT ON THE LOWER TANK REGION
(not supplied) [to be install in case the heating recovery water flow is higher than the nominal of 1000
l/h]
IP
BIPOLAR DISCONNECTING DEVICE FOR HEAT RECOVERY POWER COMMON PUMP SUPPLY
(not supplyed)
KPc
BIPOLAR RELAY HEAT RECOVERY COMMOMN CIRCULATOR PUMP (not supplied)
PMR1 HEAT RECOVERY COMMOMN CIRCULATOR PUMP (not supplied)
PTR
AUXILIARY SAFETY TRANSFORMER (not supplied)
Figure 22 - Electrical Wiring for heat recovery common pump connection (N. 2 ACF – HR)
58
Ed. 04/2012
Section ELECTRICAL INSTALLER
Independent Pump connection for several ACF - HR
Under Insaller Responisibility
KEY
SCH1
MA
KP1-2
KPt
KPs
CIRCUIT BOARD
UNIT TERMINAL BLOCK
UNIT RELAYS FOR HEAT RECOVERY COMMON CIRCULATOR PUMP PERMISSIVE
DHW TANK THERMOSTAT (not supplied)
DHW TANK THERMOSTAT SET AT 35°C WITH CAPILLARY PUT ON THE LOWER TANK REGION (not supplied)
[to be install in case the heating recovery water flow is higher than the nominal of 1000 l/h]
IP
BIPOLAR DISCONNECTING DEVICE FOR HEAT RECOVERY POWER COMMON PUMP SUPPLY (not supplyed)
KPc 1-2 BIPOLAR RELAYS HEAT RECOVERY COMMOMN CIRCULATOR PUMP (not supplied)
PMR1 HEAT RECOVERY COMMOMN CIRCULATOR PUMP (not supplied)
PTR
AUXILIARY SAFETY TRANSFORMER (not supplied)
Figure 23 - Electrical Wiring for heat recovery independent pumps connection (for several ACF – HR)
Ed. 04/2012
59
Figure 24 –
60
GAS SOLENOID VALVE
GV
IGNITION ELECTRODES
DETECTION ELECTRODES
FAN MOTOR
GAS VALVE OPEN
MANUALLY RESETTING TEMP. LIMIT SWITCH
EXHAUST TEMP. THERMOSTAT
AIR PRESSURE GAUGE
IGN
FLS
FAN
LS
TL
TFA
PSW
ASPIRATOR MOTOR
CONDENSER
FLAME CONTROL UNIT
CNT BOX
BLW
C
CIRCUIT BOARD
SCH1
KEY
Ed. 04/2012
ACF60-00 HR internal wiring
4.4 USE OF A DIRECT DIGITAL CONTROLLER (DDC)
This paragraph describes the operations to be performed when connecting one or
more ACF60-00’s to a Direct Digital Controller (DDC). For specific information about
the DDC, refer to the manual provided with it.
ACF60-00 and DDC communicate through a CAN BUS network.
The CAN BUS network is a series of elements (ACF or DDC) called nodes, connected to
each other by a 3 wire cable. There are terminal and intermediate nodes.
The terminal nodes are ACF or DDC that are connected to only one other element.
KP
MA
TER
N.O. Contact
IGNTR
PMP
PWRTR
THMF
THRF
TG
UNIT RELAY FOR HEAT RECOVERY PUMP
PERMISSIVE (ONLY FOR ACF HR)
UNIT TERMINAL BLOCK
ELECTRIC SUPPLY TERMINAL
PUMP CONTROL SWITCH
IGNITION TRANSFORMER
HYDRAULIC OIL PUMP
TRASFORMER 230/24-0-24 V AC
WATER DELIVERY TEMP. PROBE
RETURN WATER TEMP. PROBE
CONDENSER OUTPUT TEMPERATURE
PROBE
CONDENSER INTAKE TEMPERATURE PROBE
TA
TCN
WATER FLOW GAUGE
AMBIENT AIR TEMPERATURE PROBE
FL
ACF60-00 – Installation, User’s and Maintenance Manual
Section ELECTRICAL INSTALLER
The intermediate nodes are ACF or DDC that are connected to two other elements.
This concept is illustrated in the following diagram.
a)
b)
®
®
DDC
1
2
CAN-BUS CABLE
(NOT SUPPLIED)
SEE Table 24,
PAG. 61.
A
Figure 25 –
3
2nd SEGMENT CANBUS CABLE
(NOT SUPPLIED)
SEE Table 24,
PAG. 61.
B
Examples of CAN BUS networks with: a) 2 nodes = 1 ACF + 1 DDC
®
DDC
1
A
2
1st SEGMENT CANBUS CABLE
(NOT SUPPLIED)
SEE Table 24, PAG. 61.
b) 3 nodes = 2 ACF + 1 DDC
The diagram shows 2 setup types in a CAN BUS network:
a) 1 ACF60-00 is connected to one DDC. The two elements, ACF and DDC, are terminal
nodes of the network because they both are only connected to one other element.
b) 2 ACF60-00’s are both connected to one DDC. The ACF “B” and the DDC are terminal
nodes, while the ACF “A” is an intermediate node because it is connected to 2
elements, which are the ACF “B” and the DDC.
The DDC can be located anywhere in the CAN BUS network: AFC and DDC can
be either terminal and intermediate nodes.
One DDC can control and monitor up to 16 ACF’s. If there are more than 16 ACF’s
in the network, additional DDC’s must be connected, up to a maximum of 3.
CAN BUS cable
The CAN-BUS cable must correspond to the Honeywell SDS standard.
The table below mentions a few types of CAN BUS cable, combined together based on
the maximum distance covered for each individual type.
TYPE and MODEL
COLOR and SIGNAL
CABLE
ROBUR NETBUS
BLACK = H
WHITE = L
BROWN = GND
Honeywell SDS 1620
BELDEN 3086A
BLACK = H
WHITE = L
BROWN = GND
TURCK type 530
DeviceNet Mid Cable
TURCK type 5711
BLUE = H
WHITE = L
BLACK = GND
Honeywell SDS 2022
TURCK type 531
BLACK = H
WHITE = L
BROWN = GND
Table 24 – Cable types and models for the wiring of a CAN BUS network
Ed. 04/2012
COVERAGE MAX. DISTANCE
m
450
450
450
200
61
ACF60-00 – Installation, User’s and Maintenance Manual
For a total distance of ≤ 200 m and a network with a maximum of 6 nodes (typical
example: up to 5 ACF60-00’s + 1 DDC) a simple 3x0.75 mm shielded cable can be
used.
Calculate the length necessary for the current installation, then purchase the correct
cable.
As seen in the table, the CAN connection requires a 3 wire CAN BUS cable. If the cable
being used has more than 3 coloured wires, choose the colours to be used and cut the
unnecessary wires.
The ROBUR NETBUS cable is available as an accessory, see “ACCESSORIES” on page
81.
Connection of the CAN BUS cable to the ACF
Requirements: The ACF (or ACF's) must be positioned in its final location.
To connect a CAN BUS cable to an ACF:
The CAN BUS cable is connected to the appropriate connector on the S61 electronic
circuit board on the ACF, see Figure 11, page 31 as well as the figure below. Proceed as
indicted below.
KEY
A Protective isolating tape
B Shielding of CAN BUS cable
(pre-wired to last unit)
C Cable bracket (the CAN
BUS cables of an
intermediate node are
present)
D CAN BUS/circuit board
connector
E Wires (6) of the CAN BUS
cable (intermediate node)
B
A
D
C
E
Figure 26 –
62
A
Connection example of CAN BUS cable
Ed. 04/2012
Section ELECTRICAL INSTALLER
Before working on the electric panel of the ACF, ensure that the electrical power
supply is disconnected.
1.
Remove the front panel of the ACF and the cover of the electrical panel.
2.
Cut the ideal length of cable for the installation so that it will not undergo bending.
3.
Having chosen one end of the length of cable, remove the sheath from a length of
approximately 70-80 mm, taking care not to cut the shielding (metallic shield and/or
aluminium sheet and, if present, the bare connector in contact with the shield) and
the wires contained within.
4.
If the diameter of the cable used is not large enough to be blocked inside the cable
clamp (letter C of Figure 26 on page 62), make it larger by wrapping electrical tape
over the protective outer covering in the area adjacent to the unsheathed part
(approximate diameter required: 12-13 mm).
5.
Pull back the shielding in the sheathe; apply electrician’s tape to the end of the
shielding as pulled back (letter A of Figure 26, page 62).
6.
If the appliance is a terminal node of the network connect the three coloured wires
to the orange connector, as shown in detail A; of Figure 27 on page 64. Respect the
correct indications L, H, GND provided in Table 24 on page 61, on the figure and on
the diagram at the base of the connector.
7.
If the appliance is an intermediate node repeat the operations from step 3 to step 6
for the other length of cable required (so to will have two cable lengths everyone
without the sheath). To interlace between they the threads with the same color and
to connect them to the orange connector, as shown in detail B; of Figure 27 on page
64.
8.
Fix the CAN bus cable (or two cables, according to the type of node being
connected) to the cable fixing bracket in the upper part of the inside of the electrical
panel so that the rolled-back sheathing makes solid contact with the metal bracket.
The cables must be held firmly in place by the bracket if pulled..
Requirements: Access to the electronic circuit board.
To position the jumpers on the circuit board for the type of node being configured:
If the appliance is a terminal node on the network (i.e. 3 wires are inserted in the orange
connector on the board): set the jumpers as shown in detail A of Figure 27.
If the appliance is an intermediate node on the network (i.e. 6 wires are inserted in the
orange connector on the board); set the jumpers as shown in detail B of Figure 27.
Ed. 04/2012
63
ACF60-00 – Installation, User’s and Maintenance Manual
KEY
SCH
GNDL
H
J1
A
B
P8
Elettronic circuit board
Common data
LOW signal data
HIGHT signal data
Board CAN BUS Jumper
Detail for “ terminal node” (3 wires; J1 = jumpers “closed”)
Detail for “ intermediate node” (6 wires; J1 = jumpers “opened)
CAN PORT/connector
Figure 27 –
Connection CAN PORT S61 electronic board
After all the operations have been performed, close the electrical panel and remount the
front cover of the ACF.
64
Ed. 04/2012
Section ELECTRICAL INSTALLER
Connection of the CAN BUS cable to the DDC
The CAN BUS cable is connected to the special orange connector supplied with the DDC,
seen in Figure 28.
Figure 28 –
Orange connector supplied with the DDC for connecting the wires of the CAN BUS cable.
Before working on the DDC, make sure that it is off. The DDC, just as the electronic
circuit board of the ACF, has jumpers that need to be positioned for either an
intermediate or a terminal node. The configuration of the jumpers on a new DDC is
CLOSED, as seen in Figure 29:
D
B
C
B
A
D
KEY
GND
L
H
J21
Figure 29 –
common data
LOW signal data
HIGH signal data
jumpers (CLOSED)
A
B
C
D
Electrical tape to protect CAN BUS cable shielding
CAN BUS cable wires
CAN BUS CABLE wire shielding
Eyelet terminal and fastening screw bottom DDC
Direct Digital Controller (DDC) – wiring diagram and partial rear view.
Ed. 04/2012
65
ACF60-00 – Installation, User’s and Maintenance Manual
Requirements: Accessibility to the rear cover of the DDC.
To connect a CAN BUS cable to a DDC:
1.
Position the jumpers on the DDC according to the type of node being configured: If
necessary, open the rear cover of the DDC by loosening the 4 screws; after the
jumpers have been correctly configured, close the cover and tighten the 4 screws.
The jumper positions are shown in the two figures below:
If the DDC is an intermediate node on the network (there are 6 wires attached to the
orange connector): position the jumpers on the DDC as shown in Figure 30: OPEN.
CAN BUS CABLE WIRES
L
DDC
Figure 30 –
common data
LOW signal data
HIGH signal data
P8
jumpers: OPEN
GND
L
H
common data
LOW signal data
HIGH signal data
GND
J21
H
GND
L
H
Connecting 2 CAN BUS cables to the DDC: THE DDC IS AN INTERMEDIATE NODE. Note the position
of the wires of the CAN BUS cable and the jumpers: OPEN
If the DDC is a terminal node on the network (there are 3 wires attached to the orange
connector): position the jumpers on the DDC as shown in Figure 31: CLOSED.
CAN BUS CABLE WIRES
L
GND
J21
H
GND
L
H
common data
LOW signal data
HIGH signal data
P8
jumpers: CLOSED
DDC
Figure 31 –
Connection of 1 CAN BUS cable to the DDC: THE DDC IS A TERMINAL NODE. Note the position of the
wires of the CAN BUS cable and the jumpers: CLOSED
2.
Remove the orange CAN BUS connector from its bag.
3.
Cut the ideal length of cable for the installation so that it is not subject to bending.
66
Ed. 04/2012
Section ELECTRICAL INSTALLER
4.
Choose one end of the cable and remove about 70-80 mm of the protective outer
covering being careful not to cut the shielding (metallic screen and/or aluminium foil,
and if present, the raw connector in contact with the screen) and the wires inside.
5.
Pull back the shielding and connect it to a 4mm eyelet, as seen in Figure 29 on page
65, letters C and D. Then proceed as follows:
6.
Connect the three coloured wires to the orange connector, following the diagram
seen in Figure 31, page 66.
Observe the correct L, H, GND indications given in Table 24 on page 61, in Figure
31 and on the circuit board of the DDC at the base of the connector.
If the DDC is an intermediate node on the network (see Figure 25 on page 61) also
perform point 6.
But if the DDC is a terminal node on the network, skip point 6 and go directly to point 8.
7.
Only for intermediate nodes: Repeat the operations from point 1 to point 4 for the
remaining section of CAN BUS cable. Also perform point 5, but refer to Figure 30 on
page 66 for connecting the cable to the connector.
8.
Pass the wires attached to the appropriate connection terminals on the orange
connector through the cover of the DDC, then insert it into the proper plug on the
DDC, making sure that it is correctly attached.
9.
Use the fastening screws from the rear cover near the CAN BUS outlet to block the 4
mm eyelet or eyelets (letter D, Figure 29 page 65).
Connection of the DDC to the electrical power supply
The DDC requires low tension power (24 V) with a 230/24 V AC, 50-60Hz safety
transformer; the minimum power supply needed is 20 VA.
Use a minimum 2x0.75mm2 cable for connection.
Connect the DDC to the transformer using a 4 pole connector, as seen in the diagram in
Figure 32. Pass the cable through the opening in the cover before attaching the wires to
the connector.
Ed. 04/2012
67
ACF60-00 – Installation, User’s and Maintenance Manual
OBLIGATORY GROUND
Respect polarity
Figure 32 –
Electrical power supply hook-up of the DDC to the 4 pole connector.
As seen in the figure, the connections to the 4 pole connection terminals are:
CONNECTION TERMINAL 1:
24V
CONNECTION TERMINAL 2:
0V (NOTE: connected internally to connection terminal
3, therefore connected to ground; if the transformer being use already has a wire
connected to ground, it must absolutely be connected to this connection terminal).
CONNECTION TERMINAL 3:
GROUND: connect to a ground, r ≤ 0,1Ω
CONNECTION TERMINAL 4:
Not used.
The DDC has a backup battery used to keep the data in memory even when there is the
lack of electrical power. The backup battery has a life of approximately 7 years; contact a
Robur S.p.A. Authorized Technical Service Centre for a replacement.
Close the rear cover of the DDC after all of the operations have been performed. Tighten
the 4 screws, being careful when tightening the lower right screw for the eyelet (or
eyelets) of the CAN BUS cable shielding, as seen in Figure 29 on page 65.
Connection of the pump
To connect the pump to a single ACF, refer to paragraph 4.1 on page 54.
If two or more ACF’s are connected to the circulation pump, it must be done as shown in
paragraph 4.1 on page 70.
68
Ed. 04/2012
Section ELECTRICAL INSTALLER
JUMPER CLOSED
JUMPER CLOSED
KEY
DDC DIRECT DIGITAL CONTROLLER (accessory)
SCH1 ELECTRONIC CIRCUIT BOARD
GND COMMON DATA SIGNAL
Figure 33 –
L
H
LOW DATA SIGNAL
HIGH DATA SIGNAL
Diagram of one ACF connected to a Direct Digital Controller (DDC).
Ed. 04/2012
69
JUMPER CLOSED
JUMPER OPEN
JUMPER CLOSED
ACF60-00 – Installation, User’s and Maintenance Manual
Figure 34 –
70
Diagram of two ACF60's connected to a Direct Digital Controller (DDC).
Ed. 04/2012
Section ELECTRICAL INSTALLER
KEY
SCH1
J10
NO CONTACT
MA
L
N
CIRCUIT BOARD
OPEN JUMPER
N.O VOLTAGE FREE CONTACTS
UNIT TERMINAL BLOCK’
PHASE
NEUTRAL
Components NOT SUPPLIED
PM
KP
PTR
IP
Figure 35 –
WATER PUMP
PUMP RELAY
SELV SAFETY TRANSFORMER
BIPOLAR PUMP SWITCH
Example of pump/appliance electrical connection with 230 Vac pump, controlled directly by the appliance
through a relay and a SELV safety transformer
Ed. 04/2012
71
ACF60-00 – Installation, User’s and Maintenance Manual
4.5 HOW TO RESET THE FLAME CONTROLLER FROM REMOTE
The flame controller reset can be controlled remotely by installing a button (not supplied)
to the flame controller inside the unit’s electrical panel.
Connect the button as instructed below:
1.
The cable required to connect the reset button must be 3x0,75mm2.
2.
Cut a suitable length of cable.
3.
Connect the cable to the blind terminals A (see Figure 36).
The blind terminals are hidden on the rightinside the cable tray. To extract them,
remove the cover of the tray, slide the cables out of the provided slots, and carefully
close the tray again.
The cable may not be longer than 20 metres.
Incorrect wiring of the reset button may damage the component irreparably. Check the
cabling carefully before powering the unit.
KEY
1
2
3
4
5
67
Figure 36 –
72
WHITE
GREY
ORANGE
GREEN
YELLOW/BLACK
BLACK
YELLOW/GREEN
(GROUND)
8
9
10
11
12
PLS
A
BROWN
BLUE
YELLOW
VIOLET
PINK
RESET BUTTON
BLIND TERMINALS
Button connection for flame controller reset
Ed. 04/2012
Section INITIAL STARTUP AND MAINTENANCE
SECTION 5
INITIAL STARTUP AND MAINTENANCE
This section describes the initial start-up and maintenance operations.
5.1 INITIAL STARTUP AND ADJUSTING
Initial start-up
The initial start-up of the ACF should by done by a Robur S.p.A. Authorized
Technical Service Centre. .
Before starting up the ACF, read paragraph 1.1 on page 3 and also paragraph 2.1
on page 29.
If the ACF is connected to a DDC, perform the start-up only as described in the
manual provided with the DDC.
Before start-up of the ACF, check that:
The gas valve is open.
The ACF has electrical power: the main power switch must in the “ON” position.
the pressure and flow of the water circuit have been correctly set by the installer.
If these conditions have been satisfied, the initial start-up of the ACF may begin.
If there is an error in the start-up of the ACF, a corresponding code will appear on
the circuit board display which can be seen through the window in the front panel.
See the “TABLE OF OPERATING CODES” on page 83 for a list of these codes.
If an IRREGULAR or DANGEROUS situation occurs during the initial start-up (see below)
due to a NON-COMPLIANT installation of the appliance, the Robur authorized Technical
Service Centre will NOT intervene to perform the initial start-up.
In this case, a plumber or an electrician will perform the interventions indicated by the
Robur S.p.A. Authorized Technical Service Centre, who will then reperform the initial startup.
A successful initial start-up does NOT CERTITY that the appliance is compliant
with the current regulations, but only indicates that the ACF and the DDC (if
installed) function properly.
Ed. 04/2012
73
ACF60-00 – Installation, User’s and Maintenance Manual
DANGEROUS SITUATIONS TO PEOPLE AND THE ACF:
The ACF is installed in a closed room.
The ACF is installed at an insufficient distance from flammable surfaces, or installed in a
manner that does not permit maintenance operations to be carried out safely.
Controlling ACF ignition and shutdown through the main power switch (and not using the
control switch)
Situations attributable to defects or faults of the ACF due to damage caused during
transportation or installation.
IRREGULAR PLANT SETUP:
Non-compliant installation with the current regulations or that dictated by the
manufacturer.
Installations that could cause the ACF to function irregularly.
Gas flow adjustment
The adjustment of the gas flow on the ACF must only be done by a Robur S.p.A.
Authorized Technical Service Centre. . The end users and installers are NOT
authorized to regulate the gas flow on the ACF.
The ACF60-00’s are pre-adjusted by the manufacturer for the requested gas type.
The gas type for which the ACF is setup is noted on the adhesive label located on the
electrical panel.
The front panel of the ACF must be removed to access the gas valve.
At the initial start-up, the Robur S.p.A. Authorized Technical Service Centre will check that
the regulation of the gas flow is in accordance with the parameters reported in Table 25
on page 75, by performing the operations seen below.
Requirements: The ACF must be off with the gas valve closed; Access to the gas
valve, with the front panel of the ACF removed.
To check the static gas pressure of the network:
1.
Loosen the sealing screw on the intake gas pressure jack, letter B in Figure 37 on
page 76.
2.
Connect the pressure gauge to the intake gas pressure jack (network pressure).
3.
Open the gas supply valve.
74
Ed. 04/2012
Section INITIAL STARTUP AND MAINTENANCE
4.
Read the static pressure value of the network on the pressure gauge and check that
it is within the required pressure limits (see "GAS SUPPLY SYSTEM” on page 47).
5.
Close the gas supply valve.
6.
Disconnect the pressure gauge and replace the seal screw of the gas pressure jack.
To adjust the gas flow on the ACF:
1.
With the gas valve closed, loosen the sealing screw on the gas pressure outflow
jack, letter C in Figure 37 on page 76.
2.
Connect the pressure gauge to the gas pressure outflow jack.
3.
Open the gas supply valve and turn on the ACF.
4.
Start-up the ACF using the control switch commands (on/off, programming clock,
etc.) or by means of the Direct Digital Controller(if present).
5.
Wait for the burner to ignite. If it doesn't ignite at the first attempt, the flame control
unit will make another 3 attempts. If the burner does not ignite after the fourth
attempt, the flame control unit will arrest. In this situation, the flame control unit must
be reset by following the indications given in paragraph 2.4 on page 35 (or through
the Direct Digital Controllerif present) until the burner ignites.
6.
After the burner is lit, check that the pressure shown on the pressure gauge is in
conformance with that reported in Table 25 on page 75.
7.
If the gas pressure need to be adjusted, keep the burner on and the pressure gauge
connected, turn, (raising the upper part of the left lateral panel and previously
removing the protective plug), screw A on the gas valve (letter A in Figure 37 on
page 76), turning it clockwise to increase the pressure and counter clockwise to
reduce it, until obtaining the pressure indicated in Table 25 on page 75; when the
operation is finished, replace the protective plug for screw A.
8.
Shut down the ACF through the control switch commands (on/off, programming
clock, etc.) or by means of the Direct Digital Controller(if present).
9.
Close the gas supply valve.
10. Disconnect the pressure gauge and replace the seal screw of the gas pressure jack
C on Figure 37, page 76.
11. Open the gas supply valve.
12. Use a soap solution to check for any leaks coming from the gas connections.
TYPE OF GAS
NATURAL GAS
(G20)
LPG (G30)
LPG (G31)
PRESSURE AT THE BURNER
6.2 mbar
11.1 mbar
14.0 mbar
AIR DIAPHRAGM
31.5 mm;
29.8 mm;
29.8 mm;
NOZZLE DIAMETERS
5.3 mm;
3.3 mm;
3.3 mm;
Table 25
–
Gas pressure at the burner, air diaphragm and nozzle diameters.
Ed. 04/2012
75
ACF60-00 – Installation, User’s and Maintenance Manual
B
C
A BURNER PRESSURE REGULATION
SCREW
B INCOMING PRESSURE JACK
C OUTGOING PRESSURE JACK
A
Figure 37 –
GAS valve (SIT 830) of the ACF60-00
Setting of the Water Parameters
The adjustment of the temperature, set-point and differential of chilled water is
done from menu 3 of the electronic circuit board; the procedure is shown in
paragraph 3.6 on page 50.
5.2 GAS CONVERSION
This operation must be carried out exclusively by an authorised Robur Technical
Assistance Centre (TAC).
If the appliance is to operate with a type of gas (methane or L.P.G.) different from that
indicated on the sticker located on the internal electrical panel of the appliance, it is
necessary to switch off the appliance, remove the electrical and gas supplies and operate
on appliance as follows (see Figure 38, page 78):
You will need: the appliance switched off and disconnected from the gas/electricity
supplies
1.
2.
3.
4.
5.
6.
remove the front and left side panel of the appliance;
unscrew the fixing screw of the gas supply pipe above the electrical panel of the
appliance (see detail A);
unscrew the hexagonal nut that connects the brass nozzle mount to the air/gas
mixer, taking care not to damage the circular seal (see details B and C); use a
number 36 spanner for this purpose;
unscrew and replace the removed nozzle with one of a diameter suitable for the type
of gas to be used (see details E and F), repositioning the o-ring joining the
electrovalve and the nozzle holder joint; use a number 34 spanner for this purpose;
remove the combustion air suction inlet from the aspirator (see detail G). For this
operation, unscrew the three screws that fix the nozzle to the to the exhaust fan. Use
a Phillips screwdriver;
remove the diaphragm by unscrewing the three screws that fix it to the air suction
inlet (see detail G) and replace it with the diaphragm supplied with the gas change
76
Ed. 04/2012
Section INITIAL STARTUP AND MAINTENANCE
7.
8.
9.
10.
11.
12.
13.
kit, taking care to centre the manostat pipe with the hole present on the top edge of
the diaphragm itself (see detail H);
refit the exhaust air extractor nozzle to the exhaust fan, taking care to position the
new gasket (supplied) correctly: during this operation, rotate the nozzle so that the
crescent-shaped shield is repositioned in the top half (i.e. as prior to disassembly,
see detail F);
reconnect the brass nozzle mount to the mixer, retightening the hexagonal nut,
taking care to replace the previously removed circular seal correctly, supplied as
standard with the kit;
retighten the fixing screw of the gas supply pipe above the electrical panel of the
appliance;
supply gas and electricity to the appliance, and restart it;
regulate the appliance to the pressure indicated in Table 25 on page 75 for the type
of gas to be used, following the instructions provided in Gas flow adjustment
paragraph on page 74; then replace the adhesive label indicating the type of gas for
which the appliance was originally set up with one indicating the type of gas used;
complete the change of gas type by checking that all gas connections are sealed,
including those not directly affected by this operation (using soapy water or another
suitable method).
refit the left side panel and front panel of the appliance.
Ed. 04/2012
77
ACF60-00 – Installation, User’s and Maintenance Manual
DETAIL B
DETAIL A
DETAIL D
DETAIL F
Figure 38 –
78
DETAIL C
DETAIL E
DETAIL G
DETAIL H
Gas conversion operations.
Ed. 04/2012
Section INITIAL STARTUP AND MAINTENANCE
5.3 MAINTENANCE
Proper maintenance prevents problems, guarantees maximum operational efficiency of
the ACF and reduces operating costs.
Before starting any work on the ACF, turn it off from the control switch that was
installed by the electrician: Allow the ACF to complete the shutdown cycle, then
shut off the electrical power supply from the main power switch and close the gas
valve.
Any operation pertaining to the internal components of the ACF must only by done
a Robur S.p.A. Authorized Technical Service Centre, following the instructions
provided by the manufacturer.
Regularly planned maintenance
Perform the operations described below at least once a year. If the ACF is subject to
heavy use (for example, if used in process plants or other situations where it runs
constantly), the frequency of the maintenance operations must be increased
proportionately.
Maintenance operations to be done by the end user:
•
Cleaning of the condenser coil; The ACF takes in air through the condenser coil and
delivers the warmer air through the fan on the cover. After a certain amount of time in
operation, dust and dirt present in the air can collect in the cracks between the fins of
the condenser coil. For areas that are particularly dusty, a coil filter can be used, see
“ACCESSORIES”, page 81.
Requirements: The coil of the ACF that needs to be cleaned, with accumulated
dirt and dust between the fins of the coil.
To clean the coil:
13. Turn off the ACF through the control switch, as described in paragraph 2.1, page 29.
14. After the shutdown cycle has completed, shut off the electrical power supply from the
main power switch and close the gas valve. Before beginning, make sure that the
ACF is not under tension and that the gas valve is closed!
15. Using a brush, remove the dirt and dust that has accumulated on the outside of the
condenser coil, being careful not to break the fins.
16. Check that all of the dirt has been removed, then restart the ACF as described in
paragraph 2.1 on page 29.
Ed. 04/2012
79
ACF60-00 – Installation, User’s and Maintenance Manual
Maintenance operations NOT to be performed by the end user, but by a Robur S.p.A.
Authorized Technical Service Centre. .
Functionality check of the combustion system:
cleaning of the generator and the burner
check of the ignition system and flame detector
• Functionality check of the hydraulic oil pump
checking of the oil level
check of the drive belt (replacement every 5 years or after 10,000 hours of operation)
Special maintenance
The operations described in this paragraph must be performed when necessary.
•
Addition of water and antifreeze to the water circuit.
If water needs to be added to the water circuit, ALWAYS ADD and adequate
percentage of antifreeze based on the minimum winter temperatures of the zone in
which the ACF is installed (see Table 22, page 49) and based on the specific
requirements of each individual model (see the “TECHNICAL SPECIFICATIONS”
paragraph on page 11).
For filling, follow the indications given in “FILLING OF THE WATER CIRCUIT” on page
48.
Then pressurize the appliance, adjusting the water pressure so that it is between 1 and 2
bar.
80
Ed. 04/2012
Section ACCESSORIES
SECTION 6
ACCESSORIES
This section gives a list of the available accessories for the ACF60-00. To order any of
these accessories, contact Robur S.p.A. by calling +39 035 888 111.
ACF60-00 Accessories
ACCESSORIES FOR THE WATER SYSTEM INSTALLER
Name
Description
Code
CONDENSOR COIL FILTER KIT
Filters the impurities in the air taken
in by the coil and makes cleaning
easier.
O-FLT004
ANTI-VIBRATIONAL SUPPORT kit
Kit of 4 anti-vibrational feet, to be
installed in the appropriate holes
under the support brackets.
O-NTV003
SYSTEM PUMP
Centrifugal pump for the circulation of
water in the water system.
R-PCR000
HYDRAULIC SEPARATOR
Separator to equilibrate the water
systems; with automatic air release,
exhaust valve and insulation; For
installation, go to the “WATER
CONNECTIONS” section on page 42.
O-SPR000
GLYCOL ANTIFREEZE
Glycol antifreeze for hot/cold
hydraulic plants
O-GLC001
ACCESSORIES FOR THE ELECTRICAL INSTALLER
Name
Description
Code
Direct Digital Controller (DDC)
The DDC can remotely control one or
more ACF's (up to a max. of 16). It
has the following functions: startup/shutdown, timed programming,
error reporting and resetting.
O-CRM007
CAN BUS “NETBUS” cable
Cable for data communication
networks: for network connection
between DDC and appliance.
O-CVO008
Table 26
–
ACF60-00 Accessories
Ed. 04/2012
81
ACF60-00 – Installation, User’s and Maintenance Manual
82
Ed. 04/2012
APPENDIX
APPENDIX
WARNINGS AND ERRORS
If the ACF is connected to a DDC, the warnings and errors will be displayed by the
DDC and also by the electronic circuit board; for further information see the
documentation regarding this issue.
Warnings and Errors
Two types of machine codes appear on the ACF60-00’s electronic circuit board display:
a) Warnings: identified by the green flashing letter “u” on the display, followed by the
code of the warning that is occurring.
b) Errors: identified by the green flashing letter “E” on the display, followed by the code of
the error that is occurring.
a) In the case of a WARNING event (“U”), the flashing letter “U” will appear on the
display followed by a number with corresponds to the nature of the event; when the
warning event has been corrected, the warning reported on the circuit board display
will be reset.
b) In the case of an ERROR event (“E”), the flashing letter “E” will appear on the display
followed by a number with corresponds to the nature of the event; The ERRORS do
not automatically reset and must be manually reset from menu 2 (see “RESETTING”
on page 35) or by cutting electrical power to the ACF (for more information see the
“TABLE OF OPERATING CODES“ reported below).
TABLE OF OPERATING CODES GENERATED BY THE ELECTRONIC
BOARD (version 3.021 firmware.)
E0
CODE GENERATED BY:
RESET METHOD:
FAULT ON RESET CIRCUIT OF FLAME CONTROL UNIT
Fault on reset circuit of flame control unit.
Contact authorised Robur TAC.
CODE GENERATED BY:
RESET METHOD:
U1
MANUAL RESET OF THERMOSTAT, GENERATOR LIMIT TEMPERATURE
High temperature detected by limit thermostat on body of generator
Reset limit thermostat manually: ACF operation will be restored automatically when the cause ceases.
CODE GENERATED BY:
RESET METHOD:
MANUAL RESET OF THERMOSTAT, GENERATOR LIMIT TEMPERATURE
U 1 code active for 1 hour, or U 601 code generated 3 times in 2 hours of operation.
Contact authorised Robur TAC.
CODE GENERATED BY:
RESET METHOD:
U 2
EXHAUST FUMES THERMOSTAT
High temperature detected by exhaust fumes thermostat
Reset occurs automatically when the condition that generated the code ceases.
E1
E2
CODE GENERATED BY:
RESET METHOD:
Ed. 04/2012
EXHAUST FUMES THERMOSTAT
U 2 code active for 1 hour, or U 602 code generated 3 times in 2 hours of operation.
Reset may be performed from the DDC (or from the S61 board via menu 2, parameter 1. If codes U 2
and/or E 2 occur again, contact authorised Robur TAC.
83
ACF60-00 – Installation, User’s and Maintenance Manual
CODE GENERATED BY:
RESET METHOD:
U 3
COLD WATER ANTIFREEZE THERMOSTAT
Low temperature detected by cold outlet water sensor.
Reset occurs automatically when the condition that generated the code ceases.
CODE GENERATED BY:
RESET METHOD:
INADEQUATE VENTILATION / CONDENSER OVERHEATING
(TCN - TA) values > limit set.
Reset occurs automatically 20 minutes after the code is generated.
U
4
E4
CODE GENERATED BY:
RESET METHOD:
INADEQUATE VENTILATION / CONDENSER OVERHEATING
U 604 code generated twice in 2 hours of operation.
Carry out appropriate checks. Reset may be performed from the DDC (or from the S61 board via menu 2,
parameter 1). If the code persists, contact authorised Robur TAC.
E5
CODE GENERATED BY:
RESET METHOD:
HIGH AMBIENT TEMPERATURE
HIGH temperature detected by ambient temperature sensor.
Reset occurs automatically when the condition that generated the code ceases.
CODE GENERATED BY:
RESET METHOD:
LOW AMBIENT TEMPERATURE
LOW temperature detected by ambient temperature sensor.
Reset occurs automatically when the condition that generated the code ceases.
CODE GENERATED BY:
RESET METHOD:
U 7
HIGH CONSENSER INLET TEMPERATURE
High temperature detected by condenser inlet temperature sensor.
Reset occurs automatically when the condition that generated the code ceases.
E6
E7
CODE GENERATED BY:
RESET METHOD:
HIGH CONSENSER INLET TEMPERATURE
U 7 code active for 2 hours, or U 7 code generated 12 times in 2 hours of operation.
Carry out appropriate checks. Reset may be performed via DDC (or S61 board via menu 2, parameter 1).
If the code persists, contact authorised Robur TAC.
CODE GENERATED BY:
RESET METHOD:
FLAME CONTROL UNIT ERROR
E 12 on Appliance and condenser inlet temperature increasing by over 10 °C within 1 hour.
Carry out appropriate checks. Reset may be performed via DDC (or S61 board via menu 2, parameter 1).
If the code persists, contact authorised Robur TAC.
E8
U
CODE GENERATED BY:
RESET METHOD:
10
WATER FLOWMETER: Insufficient water flow
Insufficient water flow.
Reset occurs automatically when correct water flow is restored.
E 10
CODE GENERATED BY:
RESET METHOD:
CODE GENERATED BY:
RESET METHOD:
WATER FLOWMETER: Insufficient water flow
Code U 10 is generated 5 times since appliance was powered, or code U 10 is active for 1 hours.
Reset may be performed via DDC (or S61 board via menu 2, parameter 1). If the code persists, contact
authorised Robur TAC.
U 11
INSUFFICIENT ROTATION OF OIL PRESSURE PUMP
Insufficient rotation of oil pressure pump.
Reset occurs automatically 20 minutes after the code is generated.
E 11
CODE GENERATED BY:
RESET METHOD:
84
INSUFFICIENT ROTATION OF OIL PRESSURE PUMP
U 11 code generated twice in 2 hours of operation.
Reset may be performed via DDC (or S61 board via menu 2, parameter 1). If the code persists, contact
authorised Robur TAC.
Ed. 04/2012
APPENDIX
CODE GENERATED BY:
RESET METHOD:
U 12
FLAME CONTROL UNIT ARREST
Failure to ignite burner.
Reset occurs automatically when the electrovalve opens again (new attempt at ignition), or after code is
active for 5 minutes.
E 12
FLAME CONTROL UNIT ARREST
CODE GENERATED BY:
RESET METHOD:
Flame arrest signal.
Reset may be performed via DDC (or S61 board via menu 2, parameter 0). If the code persists, contact
authorised Robur TAC.
E 16
CODE GENERATED BY:
RESET METHOD:
OUTLET WATER TEMPERATURE SENSOR DEFECTIVE
Fault (interruption or short circuit) on outlet water temperature sensor.
Reset may be performed via DDC (or S61 board via menu 2, parameter 1). If the code persists, contact
authorised Robur TAC.
CODE GENERATED BY:
RESET METHOD:
COLD INLET WATER TEMPERATURE SENSOR DEFECTIVE
Fault (interruption or short circuit) on condenser outlet temperature sensor.
Reset may be performed via DDC (or S61 board via menu 2, parameter 1). If the code persists, contact
authorised Robur TAC.
CODE GENERATED BY:
RESET METHOD:
CONDENSER OUTLET TEMPERATURE SENSOR DEFECTIVE
Fault (interruption or short circuit) on condenser inlet temperature sensor.
Reset may be performed via DDC (or S61 board via menu 2, parameter 1). If the code persists, contact
authorised Robur TAC.
CODE GENERATED BY:
RESET METHOD:
CONDENSER INLET TEMPERATURE SENSOR DEFECTIVE
Fault (interruption or short circuit) on condenser inlet temperature sensor.
Reset may be performed via DDC (or S61 board via menu 2, parameter 1). If the code persists, contact
authorised Robur TAC
E 17
E 18
E 20
E 28
CODE GENERATED BY:
RESET METHOD:
GAS ELECTROVALVE ON IN CASE OF FLAME CONTROL UNIT ARREST
Flame control box is in arrest mode (E12) and the gas electrovalve is ON. In this condition the flame
control box is switched in OFF (E12 enabled).
The reset can be done via DDC (or S61 electronic board menu 2, parameter 1). If the code error persist
contact Robur personnel.
U
29
CODE GENERATED WHEN:
RESET METHOD:
GAS ELECTROVALVE WITHOUT ELECTRICAL POWER
Gas electrovalve is off for 5 seconds (with central flame control unit on).
Reset occurs automatically if the gas electrovalve switches on again within 10 minutes (with central flame
control unit on).
CODE GENERATED WHEN:
RESET METHOD:
GAS ELECTROVALVE WITHOUT ELECTRICAL POWER
Code U 29 is active for more than 10 minutes (with central flame control unit on).
Carry out appropriate checks. Reset may be performed via DDC (or S61 board via menu 2, parameter 1).
If the code persists, contact ROBUR TAC.
E 29
U 51
ANTIFREEZE FUNCTION ACTIVATED – COOLING MODULE
Activation takes place only if the circulator is off and the antifreeze function is enabled (see menu 1, parameter 77).
CODE GENERATED WHEN:
Inlet or outlet water temperature of the cold module falls below 4°C (the code generated signals that the
antifreeze function has been activated).
In this case the antifreeze function activates the plant water circulator.
RESET METHOD:
Reset (deactivation of antifreeze function) occurs automatically when, with only the circulator on, the inlet
and outlet water temperatures return to over 5°C (in this case the circulator switches off), or if the function
itself is disabled.
Ed. 04/2012
85
ACF60-00 – Installation, User’s and Maintenance Manual
MODALITA’ DI RIARMO:
U 77
FLOWMETER ON WITH PLANT IN HEATING MODE
The flowmeter of the cold circuit detects the presence of water in the circuit, when (and only in this
situation) the appliance is configured as a 2-pipe hot-cold system and the plant is operating at that
moment in heating mode.
The code (U 77) does not intervene when you have the antifreeze function.
Reset is automatic and occurs when the condition that generated it ceases to apply.
CODE GENERATED BY:
RESET METHOD:
INCOMPLETE PARAMETERS
Incomplete parameters.
The code remains until operating parameters are entered and completed. Contact authorised Robur TAC.
CODE GENERATED WHEN:
U
80
NB: If the board is replaced, the Code E 80 may appear, meaning that the ACF characterisation parameters have not been set..
E 80
CODE GENERATED BY:
RESET METHOD:
CODE GENERATED BY:
RESET METHOD:
INVALID PARAMETERS
Invalid parameters or damage to parameter memory.
Reset occurs automatically when correct parameters are entered.
If the code persists, contact authorised Robur TAC. If the parameters are incorrect, it is necessary to enter
and complete the unit operating and characterisation parameters. If the memory is damaged, it is
necessary to replace the board.
U 81 - U 82
INVALID BANK 1 DATA - INVALID BANK 2 DATA
Invalid Bank 1 data - Invalid Bank 2 data.
Reset occurs automatically 5 seconds after the code is generated.
E 81 - E 82
CODE GENERATED BY:
RESET METHOD:
INVALID BANK 1 DATA - INVALID BANK 2 DATA
Invalid Bank 1 data - Invalid Bank 2 data.
Reset may be performed via the board, menu 2, parameter 1. If the code persists, contact authorised
Robur TAC.
E 84
CODE GENERATED BY:
RESET METHOD:
FAULTY CONNECTION TRANSFORMER OR FUSES 24 Vac
Damage to one of the 2 24-0-24 Vac transformer fuses, or one of 24-0-24 Vac wires to the board not
supplying current.
Check fuses and 24-0-24 Vac electrical power connections on the board. Reset may be carried out via
DDC (or via the S61 board, parameter 1). If the code persists or occurs again, contact authorised Robur
TAC.
E 85
CODE GENERATED BY:
RESET METHOD:
INCORRECT MODULE TYPES (from menu 6)
The module type set (from menu 6) does not correspond to the one managed by the board.
Reset occurs automatically when the correct parameters are entered.
If the code persists, contact authorised Robur TAC.
E 86 - E 87 - E 88 - E 89
CODE GENERATED BY:
RESET METHOD:
MEMORY TEST UNSUCCESSFUL
Processor error.
Contact authorised Robur TAC.
E 90
CODE GENERATED BY:
RESET METHOD:
AMBIENT TEMPERATURE SENSOR DEFECTIVE
Interruption or short circuit of ambient temperature sensor.
Reset may be performed via DDC (or S61 board via menu 2, parameter 1). If the code persists, contact
authorised Robur TAC.
E 91
CODE GENERATED WHEN:
RESET METHOD:
Table 27
86
–
BOARD DEFECTIVE
One of the following is absent: serial number of board, hardware version code or encryption key written
during board test.
Contact ROBUR TAC.
Operating codes generated by S61 electronic board of the units
(viewable also on the DDC display)
Ed. 04/2012
APPENDIX
APPENDIX
DECLARATION OF CONFORMITY
Ed. 04/2012
87
ACF60-00 – Installation, User’s and Maintenance Manual
88
Ed. 04/2012
APPENDIX
Ed. 04/2012
89
ACF60-00 – Installation, User’s and Maintenance Manual
90
Ed. 04/2012
30/04/2012
Codice: D-LBR357 rev.H 12MCM SDC 008
Robur is dedicated to dynamic progression
in research, development and promotion
of safe, environmentally-friendly, energy-efficiency products,
through the commitment and caring
of its employees and partners.
Robur Mission
Robur Spa
advanced heating
and cooling technologies
Via Parigi 4/6
24040 Verdellino/Zingonia (Bg) Italy
T +39 035 888111 F +39 035 4821334
www.robur.com
export@robur.it