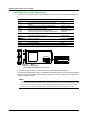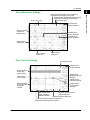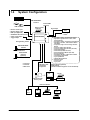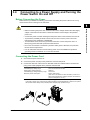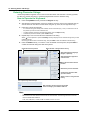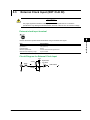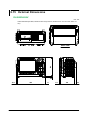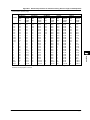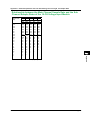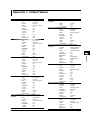
1
User’s
Manual
DL850/DL850V
ScopeCorder
Getting Started Guide
IM DL850-03EN
2nd Edition
Product Registration
Thank you for purchasing YOKOGAWA products.
YOKOGAWA provides registered users with a variety of information and
services.
Please allow us to serve you best by completing the product registration
form accessible from our homepage.
http://tmi.yokogawa.com/
PIM 103-03E
Thank you for purchasing the DL850 ScopeCorder or DL850V ScopeCorder Vehicle Edition (hereinafter,
“DL850/DL850V” will refer to both of these products).
This getting started guide primarily explains the handling precautions and basic operations of the
DL850/DL850V. To ensure correct use, please read this manual thoroughly before operation.
Keep this manual in a safe place for quick reference in the event that a question arises.
This manual is one of four DL850/DL850V manuals. Please read all manuals.
Manual Title
Manual No.
DL850/DL850V ScopeCorder Features IM DL850-01EN
Guide
DL850/DL850V ScopeCorder User’s
Manual
IM DL850-02EN
DL850/DL850V ScopeCorder Getting IM DL850-03EN
Started Guide
DL850/DL850V ScopeCorder
IM DL850-17EN
Communication Interface User’s
Manual
Description
The supplied CD contains the PDF file of this manual.
This manual explains all the DL850/DL850V features
other than the communication interface features.
The supplied CD contains the PDF file of this manual.
The manual explains how to operate the DL850/
DL850V.
This manual. This guide explains the handling
precautions and basic operations of the DL850/DL850V.
The supplied CD contains the PDF file of this manual.
The manual explains the DL850/DL850V communication
interface features and instructions on how to use them.
Notes
• The contents of this manual are subject to change without prior notice as a result of continuing
improvements to the instrument’s performance and functions. The figures given in this manual may
differ from those that actually appear on your screen.
• Every effort has been made in the preparation of this manual to ensure the accuracy of its
contents. However, should you have any questions or find any errors, please contact your nearest
YOKOGAWA dealer.
• Copying or reproducing all or any part of the contents of this manual without the permission of
Yokogawa Electric Corporation is strictly prohibited.
• The TCP/IP software of this product and the documents concerning it have been developed/created
by YOKOGAWA based on the BSD Networking Software, Release 1 that has been licensed from
the Regents of the University of California.
Trademark Acknowledgements
• Microsoft, Internet Explorer, MS-DOS, Windows, Windows NT, and Windows XP are either
registered trademarks or trademarks of Microsoft Corporation in the United States and/or other
countries.
• Adobe, Acrobat, and PostScript are trademarks of Adobe Systems Incorporated.
• PIEZOTRON is a registered Trademark of Kistler Instrumente AG.
• PCB and ICP are registered trademarks of PCB Group, Inc.
• Isotron is a registered trademark of Meggitt Group, PLC.
• VJE is a registered trademark of Yahoo Japan Corporation.
• GIGAZoom ENGINE is a registered trademark of YOKOGAWA Electric Corporation.
• In this manual, the TM and ® symbols do not accompany their respective registered trademark or
trademark names.
• Other company and product names are trademarks or registered trademarks of their respective
companies.
Revisions
• 1st Edition:
• 2nd Edition:
June 2010
September 2010
2nd Edition: September 2010 (YK)
All Rights Reserved, Copyright © 2010 Yokogawa Meters & Instruments Corporation
IM DL850-03EN
i
Checking the Contents of the Package
Unpack the box, and check the contents before operating the instrument. If the wrong items have been
delivered, if items are missing, or if there is a problem with the appearance of the items, contact your
nearest YOKOGAWA dealer.
DL850/DL850V
Check that the product that you received is what you ordered by referring to the model name and suffix
code given on the name plate on the left side panel.
Made in Japan
Made in Japan
MODEL
Suffix Code
DL850/DL850V
Power cord
-D
-F
-Q
-R
-H
Language
Options
1
2
3
4
-HJ
-HE
-HC
-HK
-HG
-HF
-HL
-HS
/B5
/M1
/M2
/HD0
/HD1
/C1
/C20
/G2
/P4
Description
Main device, 8 slots, 250 Mpoint memory
UL/CSA Standard power cord (Part No.: A1006WD)
[Maximum rated voltage: 125 V]
VDE Standard Power Cord (Part No.: A1009WD)
[Maximum rated voltage: 250 V]
BS Standard Power Cord (Part No.: A1054WD)
[Maximum rated voltage: 250 V]
AS Standard Power Cord (Part No.: A1024WD)
[Maximum rated voltage: 250 V]
GB Standard Power Cord (Part No.: A1064WD)
[Maximum rated voltage: 250 V]
Japanese
English
Chinese
Korean
German
French
Italian
Spanish
Built-in printer1
Memory expansion to 1 Gpoint2
Memory expansion to 2 Gpoint2
External HDD interface3
160 GB internal HDD3
GP-IB interface4
GP-IB interface + IRIG4
User-defined computation
Probe power supply, four outputs
Includes one roll of paper (B9988AE)
The /M1 and /M2 options cannot be installed on the same instrument.
The /HD0 and /HD1 options cannot be installed on the same instrument.
The /C1 and /C20 options cannot be installed on the same instrument.
No. (Instrument Number)
When contacting the dealer from which you purchased the instrument, please give them the instrument
number.
ii
IM DL850-03EN
Checking the Contents of the Package
Standard Accessories
The standard accessories below are supplied with the instrument. Check that all contents are present
and undamaged.
Power Cord (one of the following power cords
is supplied according to the instrument’s suffix codes)
UL/CSA Standard
A1006WD
D
Front-panel
protection cover
B8074EA
Cover panels
B8073CY,
8 panels
1
VDE Standard
A1009WD
BS Standard
A1054WD
F
Soft case
B8059GG
Rubber stoppers
B9989EX,
4 stoppers
(1 sheet)
AS Standard
A1024WD
GB Standard
A1064WD
R
H
Q
paper1
Printer roll
B9988AE, 1 roll
One of the following
panel sheets:
B8074EH (Japanese; -HJ)
B8074EJ (Chinese; -HC)
B8074EK (Korean; -HK)
B8074EL (German; -HG)
B8074EM (French; -HF)
B8074EN (Italian; -HL)
B8074EP (Spanish; -HS)
One set of manuals
Only included with models that have a built-in printer (/B5)
How to Use the CD-ROM (User’s Manuals)
The CD-ROM contains PDF files of the following manuals.
• DL850/DL850V ScopeCorder Features Guide
IM DL850-01EN
• DL850/DL850V ScopeCorder User’s Manual
IM DL850-02EN
• DL850/DL850V ScopeCorder Communication Interface User’s Manual
IM DL850-17EN
To view the above manuals, you need Adobe Reader 5.0 or later.
WARNING
Never play this CD-ROM on an audio CD player. Doing so may cause loss of hearing or
speaker damage due to the large sounds that may be produced.
IM DL850-03EN
iii
Checking the Contents of the Package
Input Modules (Sold Separately)
To make sure that an input module is the module that you ordered, check the module name written on
it.
MODEL
701250
701251
Name
Abbreviation
High-Speed 10 MS/s, 12-Bit Isolation Module
HS10M12
High-Speed High-Resolution 1 MS/s, 16-Bit Isolation
HS1M16
Module
701255
High-Speed 10 MS/s, 12-Bit Non-Isolation Module
NONISO_10M12
701260
High-Voltage 100 kS/s, 16-Bit Isolation Module (with RMS) HV (with RMS)
701261
Universal (Voltage/Temp.) Module
UNIVERSAL
701262
Universal (Voltage/Temp.) Module (with AAF)
UNIVERSAL(AAF)
701265
Temperature, High Precision Voltage Isolation Module
TEMP/HPV
701270
Strain Module (NDIS)
STRAIN_NDIS
701271
Strain Module (DSUB, Shunt-Cal)
STRAIN_DSUB
701275
Acceleration/Voltage Module (with AAF)
ACCL/VOLT
701280
Frequency Module
FREQ
720210
High-Speed 100 MS/s, 12-Bit Isolation Module
HS100M12
720220
16-CH Voltage Input Module
16CH VOLT
720230
Logic Input Module
LOGIC
720240
CAN Bus Monitor Module*
CAN MONITOR
* The CAN bus monitor module can be used on the DL850V. It cannot be used on the DL850.
701250
HS10M12
MODEL
SUFFIX
MODEL
SUFFIX
NO.
Made in Japan
NO.
Made in Japan
Top line:
Model
Bottom line: Abbreviation
The location varies depending on the module.
In this manual, input modules are referred to by their model names and abbreviations.
For example, the High-Speed 10 MS/s, 12-Bit Isolation Module is referred to as the 701250 (HS10M12).
However, if a module has already been referred to previously, it may be referred to only by its model
name (for example, 701250).
Note
To use the DL850/DL850V with 701250 and 701255 modules shipped between August 2006 and June 2007,
you must update the module firmware. If error code 916 appears when you turn on the DL850/DL850V, it may
be necessary to update the firmware of the aforementioned modules. Prepare the module serial numbers,
and contact your nearest YOKOGAWA dealer. The dealer will update the module firmware for a fee.
iv
IM DL850-03EN
Checking the Contents of the Package
Optional Accessories (Sold Separately)
The optional accessories below are available for purchase separately. Check that all contents
are present and undamaged. For information about ordering accessories, contact your nearest
YOKOGAWA dealer.
Model
700929
Safety standard1
1000 Vrms CAT II
701947
1000 Vrms CAT II
701933
300 Vrms CAT I
701930
300 Vrms CAT III
701931
300 Vrms CAT III
Differential probe
700924
1000 Vrms CAT III2
10:1 passive probe
701940
—
1:1 BNC safety adapter lead
701901
1000 Vrms CAT II
Alligator clip (dolphin type)
Safety mini-clip (hook type)
Alligator clip adapter
Alligator clip adapter
Fork terminal adapter
Cable3
Banana–alligator clip cable
701954
701959
758922
758929
758921
366926
366961
1000 Vrms CAT III
1000 Vrms CAT II
300 Vrms CAT II
1000 Vrms CAT II
1000 Vrms CAT II
—
—
High-speed logic probe
Isolated logic probe
700986
700987
—
250 Vrms CAT II
1 m logic probe
3 m logic probe
Isolated logic measuring lead
702911
702912
758917
8 bits, non-isolated
8 bits, non-isolated
1000 Vrms CAT II
External I/O cable
1 m safety BNC cable
2 m safety BNC cable
Safety BNC-to-banana adapter
Probe power supply
720911
701902
701903
758924
701934
—
1000 Vrms CAT II
1000 Vrms CAT II
500 Vrms CAT II
—
Shunt resistor
438920
438921
438922
701955
701956
701957
701958
701963
—
—
—
—
—
—
—
Name
Isolated probe
Current probe
Bridgehead
Soft carrying case
Note
10:1 safety probe for the 701250, 701251, 701260, and
720210
100:1 safety probe for the 701250, 701251, 701260, and
720210
30 Arms, DC to 50 MHz. Used by connecting to a probe
power terminal (/P4 option) or a probe power supply
(701934; sold separately).
150 Arms, DC to 10 MHz. Used by connecting to a probe
power terminal (/P4 option) or a probe power supply
(701934; sold separately).
500 Arms, DC to 2 MHz. Used by connecting to a probe
power terminal (/P4 option) or a probe power supply
(701934; sold separately).
Switchable between 1000:1 and 100:1
Measurable voltage: 1400 Vpeak (1000 Vrms)
For non-isolated input on the 701255: 600 V or less
For isolated input other than above: 42 V or less
For use with the 701250, 701251, 701260, and 720210.
Used with the following items (which are sold separately):
the 701954, 701959, 758922, 758929, or 758921.
Two pieces in one set (red/black)
Two pieces in one set (red/black)
Two pieces in one set
Two pieces in one set
Two pieces in one set (red/black). For 4 mm screws.
For measuring low voltage of less than or equal to 42 V
For measuring low voltage of less than or equal to 42 V for
the 701261, 701262, or 701265
42 V or less, 8 bits, non-isolated, response speed of 1 μs
8 bits, each channel isolated, response speed of 20 ms (for
AC)
—
—
Two pieces in one set. Used with the 758922 or 758929
adapter. The adapters are sold separately.
For external I/O
—
—
For the 701250, 701251, 701255, 701260, and 720210
High current output power supply for external probes (four
outputs)
250 Ω ± 0.1%
100 Ω ± 0.1%
10 Ω ± 0.1%
NDIS, bridge resistance: 120 Ω
NDIS, bridge resistance: 350 Ω
DSUB, bridge resistance: 120 Ω, shunt-cal support
DSUB, bridge resistance: 350 Ω, shunt-cal support
Has three pockets
Sold individually.
1 The actual voltage that can be used is the lowest voltage of the DL850/DL850V and cable
specifications.
2 Be sure to connect the GND lead provided with the 700924 to the functional ground terminal of the
DL850/DL850V. The connection of the GND lead makes 1400 Vpeak measurement possible.
3 Use cables (366926) that YOKOGAWA has been shipping since February 4, 1998. Cables (366926)
shipped before this date cannot be used in combination with the DL850/DL850V input modules.
IM DL850-03EN
v
Checking the Contents of the Package
Isolated probe
701947
Differential probe
700924
10:1 passive probe
701940
1:1 BNC safety
adapter lead
701901*
Alligator clip adapter Alligator clip adapter
(rated 300 V)
(rated 1000 V)
758922
758929
High-speed logic probe
700986
External I/O cable
720911
Fork terminal
adapter
758921
Isolated logic probe
700987
Safety BNC cable
(1 m) 701902
Current probe
701931
Current probe
701930
Current probe
701933
Isolated probe
700929
Cable
366926
Banana–alligator
clip cable
366961
Isolated logic
measuring lead
758917*
Logic probes
702911 (1 m)/702912 (3 m)
Safety BNC cable
(2 m) 701903
Safety miniclip
(hook type)
701959
Alligator clip
(dolphin type)
701954
Probe power supply
701934
Safety
BNC-to-banana
adapter
758924
POW
PRO
BE
Bridgehead
26. Bridgehead
Bridgehead
701955 (NDIS, 120 Ω) 701956 (NDIS, 350 Ω) 701957 (DSUB, 120 Ω)
1
PRO
BE
ER
SUP
PLY
OUT
PUT
2
PRO
BE
3
PRO
BE
4
Bridgehead
701958 (DSUB, 350 Ω)
Soft carrying case
701963
* The 1:1 BNC safety adapter lead (701901) must be used with one of the following accessories
(which are sold separately): alligator clip (dolphin type: 701954), safety miniclip (hook type:
701959), alligator adapter (758922 or 758929), or fork terminal adapter (758921).
Spare Parts (Sold Separately)
The spare parts below are available for purchase separately. Check that all contents are present and
undamaged.
For information about ordering spare parts, contact your nearest YOKOGAWA dealer.
Name
Printer roll paper
Terminal block
vi
Part No.
B9988AE
A1800JD
Minimum Q’ty
10
1
Note
Thermo-sensitive paper, 111 mm × 10 m
For the 720220 input module
IM DL850-03EN
Safety Precautions
This instrument is an IEC safety class I instrument (provided with a terminal for protective earth
grounding).
The general safety precautions described herein must be observed during all phases of operation.
If the instrument is used in a manner not specified in this manual, the protection provided by the
instrument may be impaired. Yokogawa Electric Corporation assumes no liability for the customer’s
failure to comply with these requirements.
The Following Symbols Are Used on This Instrument.
Warning: handle with care. Refer to the user’s manual or service manual. This symbol appears
on dangerous locations on the instrument which require special instructions for proper handling
or use. The same symbol appears in the corresponding place in the manual to identify those
instructions.
Protective ground terminal
Ground or the functional ground terminal (do not use as the protective earth ground terminal)
Alternating current
ON (power)
OFF (power)
IM DL850-03EN
vii
Safety Precautions
Make sure to comply with the precautions below. Not complying
might result in injury or death.
WARNING
Use the Correct Power Supply
Before connecting the power cord, ensure that the source voltage matches the rated supply
voltage of the DL850/DL850V and that it is within the maximum rated voltage of the provided
power cord.
Use the Correct Power Cord and Plug
To prevent the possibility of electric shock or fire, be sure to use the power cord supplied by
YOKOGAWA. The main power plug must be plugged into an outlet with a protective earth
terminal. Do not invalidate this protection by using an extension cord without protective earth
grounding.
Also, do not use the power cord that came with the instrument on any other device.
Connect the Protective Grounding Terminal
Make sure to connect the protective earth to prevent electric shock before turning ON the
power. The power cord that comes with the instrument is a three-pin type power cord. Connect
the power cord to a properly grounded three-pin outlet.
Do Not Impair the Protective Grounding
Never cut off the internal or external protective earth wire or disconnect the wiring of the
protective earth terminal. Doing so poses a potential shock hazard.
Do Not Operate with Defective Protective Grounding or Fuse
Do not operate the instrument if the protective earth or fuse might be defective. Make sure to
check them before operation.
Do Not Operate in an Explosive Atmosphere
Do not operate the instrument in the presence of flammable liquids or vapors. Operation in
such an environment constitutes a safety hazard.
Do Not Remove Covers
The cover should be removed by YOKOGAWA’s qualified personnel only. Opening the cover
is dangerous, because some areas inside the instrument have high voltages.
Ground the Instrument before Making External Connections
Securely connect the protective grounding before connecting to the item under measurement
or an external control unit. If you are going to touch the circuit, make sure to turn OFF the
circuit and check that no voltage is present.
Precautions to Be Taken When Using the Modules
• Do not apply input voltage exceeding the maximum input voltage, withstand voltage, or
allowable surge voltage.
• To prevent the possibility of electric shock, be sure to furnish protective earth grounding of
the DL850/DL850V.
• To prevent the possibility of electric shock, be sure to fasten the module screws. Otherwise,
the electrical protection function and the mechanical protection function will not be
activated.
• Do not leave the modules connected to the instrument in environments in which a voltage
that exceeds the allowable surge voltage may occur.
viii
IM DL850-03EN
Safety Precautions
Precautions to Be Taken When Using the Probes
• When measuring high voltages using the 701250 (HS10M12) or 701251 (HS1M16), use an
isolated probe (the 700929 or 701947), 1:1 safety cable (a combination of the 701901 and
701954), or differential probe (700924).
• Be sure to connect the GND lead of the differential probe (the 700924) to the functional
ground terminal of the DL850/DL850V. High voltage may appear at the BNC connector of
the differential probe. Also, be sure to connect the GND lead to the DL850/DL850V before
you connect to the device under measurement.
• When using the 701255 (NONISO_10M12), be sure to fasten the module screws.
Fastening the module screws activates the protection function and the non-isolation
function. It is extremely dangerous if you do not fasten the screws. Also, when you measure
high voltages above 42 V, be sure to use the passive probe (the 701940).
• The BNC portion of the passive probe (701940) is metal, so if you use it with isolated input
(the 701250 (HS10M12), 701251 (HS1M16), 701260 (HV (with RMS)), etc.), for safety, be
sure to only use it with voltages at or below 42 V.(Do not connect voltage above 42 V to
both the High and Low sides.)
For non-isolated inputs (701255 (NONISO_10M12), etc.), fasten the module screws as
described before.
• When you apply high voltages to the 701260 (HV (with RMS)), use a 1:1 safety cable (a
combination of the 701901 and 701954) or isolated probe (the 700929 or 701947).
• The measurement category of the 701260 (HV (with RMS)) is 400V-CATII on the low side
and 700V-CATII on the high side. Use caution because the overvoltage tolerance differs
between the low and high sides.
Operating Environment Limitations
CAUTION
This product is a Class A (for industrial environments) product. Operation of this product in a
residential area may cause radio interference in which case the user will be required to correct
the interference.
IM DL850-03EN
ix
Waste Electrical and Electronic Equipment
Waste Electrical and Electronic Equipment (WEEE), Directive 2002/96/EC
(This directive is only valid in the EU.)
This product complies with the WEEE Directive (2002/96/EC) marking requirement. This
marking indicates that you must not discard this electrical/electronic product in domestic
household waste.
Product Category
With reference to the equipment types in the WEEE directive Annex 1, this product is classified
as a “Monitoring and Control instrumentation” product.
When disposing products in the EU, contact your local Yokogawa Europe B. V. office. D o n o t
dispose in domestic household waste.
x
IM DL850-03EN
Symbols and Notation Used in This Manual
Unit
k: Denotes 1000.
K: Denotes 1024.
Example: 100 kS/s (sample rate)
Example: 720 KB (file size)
Displayed Characters
Bold characters in procedural explanations are used to indicate panel keys and soft keys that are used
in the procedure and menu items that appear on the screen.
Notes and Cautions
The notes and cautions in this manual are categorized using the following symbols.
Improper handling or use can lead to injury to the user or damage to the
instrument. This symbol appears on the instrument to indicate that the user must
refer to the user’s manual for special instructions. The same symbol appears
in the corresponding place in the user’s manual to identify those instructions.
In the manual, the symbol is used in conjunction with the word “WARNING” or
“CAUTION.”
WARNING
Calls attention to actions or conditions that could cause serious or fatal injury to
the user, and precautions that can be taken to prevent such occurrences.
CAUTION
Calls attentions to actions or conditions that could cause light injury to the user
or damage to the instrument or user’s data, and precautions that can be taken to
prevent such occurrences.
Note
IM DL850-03EN
Calls attention to information that is important for proper operation of the
instrument.
xi
Contents
Checking the Contents of the Package............................................................................................. ii
Safety Precautions .......................................................................................................................... vii
Waste Electrical and Electronic Equipment ......................................................................................x
Symbols and Notation Used in This Manual .................................................................................... xi
Chapter 1
Names and Functions of Parts
Chapter 2
Main Features
Chapter 3
Making Preparations for Measurements
Chapter 4
Common Operations
xii
1.1
1.2
1.3
1.4
2.1
2.2
2.3
2.4
2.5
3.1
3.2
3.3
3.4
3.5
3.6
3.7
3.8
3.9
3.10
3.11
3.12
3.13
3.14
3.15
4.1
4.2
4.3
4.4
4.5
4.6
4.7
4.8
4.9
Top Panel, Front Panel, Right Side Panel, and Left Side Panel....................................... 1-1
Panel Keys and Knobs ..................................................................................................... 1-6
Screens .......................................................................................................................... 1-10
System Configuration ..................................................................................................... 1-12
Vertical and Horizontal Axes............................................................................................. 2-1
Triggering ......................................................................................................................... 2-4
Waveform Acquisition ....................................................................................................... 2-7
Waveform Display ............................................................................................................ 2-9
Waveform Computation and Analysis............................................................................. 2-10
Handling Precautions ....................................................................................................... 3-1
Installing the Instrument ................................................................................................... 3-3
Installing Input Modules .................................................................................................... 3-5
Connecting to a Power Supply and Turning the Power Switch On and Off ...................... 3-9
Connecting Probes ......................................................................................................... 3-12
Correcting the Probe Phase ........................................................................................... 3-18
Connecting Measuring Leads......................................................................................... 3-20
Connecting Thermocouples............................................................................................ 3-21
Connecting Bridgeheads ................................................................................................ 3-22
Connecting a Logic Probe to the Logic Input Module..................................................... 3-25
Connecting an Acceleration Sensor ............................................................................... 3-27
Connecting Sensors to the Frequency Module .............................................................. 3-29
Connecting Wires to the 16-CH Voltage Input Module ................................................... 3-30
Connecting a Cable to the CAN Bus Monitor Module .................................................... 3-32
Attaching the Panel Sheet .............................................................................................. 3-33
Key and Jog Shuttle Operations....................................................................................... 4-1
Entering Values and Strings ............................................................................................. 4-3
Using USB Keyboards and Mouse Devices ..................................................................... 4-5
Synchronizing the Clock ................................................................................................. 4-10
Performing Auto Setup ....................................................................................................4-11
Initializing Settings .......................................................................................................... 4-13
Calibrating the DL850/DL850V....................................................................................... 4-14
Starting and Stopping Waveform Acquisition ................................................................. 4-15
Displaying Help .............................................................................................................. 4-16
IM DL850-03EN
Contents
Chapter 5
Chapter 6
Appendix
IM DL850-03EN
External Signal I/O
5.1
5.2
5.3
5.4
5.5
5.6
External Trigger Input (TRIGGER IN) ............................................................................... 5-1
Trigger Output (TRIGGER OUT) ...................................................................................... 5-2
External Clock Input (EXT CLK IN) .................................................................................. 5-3
Video Signal Output (VIDEO OUT (XGA)) ....................................................................... 5-4
GO/NO-GO Determination I/O and External Start/Stop Input (EXT I/O) .......................... 5-5
IRIG Signal Input (IRIG option) ........................................................................................ 5-8
Signal Input Section ......................................................................................................... 6-1
Triggering Section ............................................................................................................ 6-1
Time Axis .......................................................................................................................... 6-2
Display .............................................................................................................................. 6-3
Features ........................................................................................................................... 6-3
FFT ................................................................................................................................... 6-6
Built-in Printer ................................................................................................................... 6-6
Storage ............................................................................................................................. 6-7
USB for Peripherals .......................................................................................................... 6-7
Auxiliary I/O Section ......................................................................................................... 6-8
Computer Interface ........................................................................................................... 6-9
General Specifications ....................................................................................................6-11
Module Specifications .................................................................................................... 6-15
Logic Probe Specifications ............................................................................................. 6-43
External Dimensions ...................................................................................................... 6-44
Appendix 1
Appendix 2
Appendix 3
Appendix 4
Appendix 5
2
3
Specifications
6.1
6.2
6.3
6.4
6.5
6.6
6.7
6.8
6.9
6.10
6.11
6.12
6.13
6.14
6.15
1
Relationship between the Time Axis Setting, Record Length, and Sample Rate ..... App-1
Relationship between the Record Length and the Acquisition Mode ............... App-15
Default Values .................................................................................................. App-17
USB Keyboard Key Assignments ..................................................................... App-21
Block Diagrams ................................................................................................ App-23
xiii
4
5
6
App
Index
Chapter 1
1.1
Names and Functions of Parts
Top Panel, Front Panel, Right Side Panel, and
Left Side Panel
Names and Functions of Parts
Top Panel
1
2
Handle
3
WARNING
Do not operate without reading the safety precautions.
CAUTION
4
Protect the instrument from vibration or shock when power is ON
(especially for internal hard disk type).
Make sure to screw input modules firmly into place.
Switch power OFF before removing input modules.
To prevent injury, do not put your hand inside the slots.
Complies with 21 CFR 1040.10 and 1040.11
Yokogawa Electric Corporation
2-9-32 Nakacho, Musashino-shi
Tokyo, 180-8750, Japan
5
6
Vent
Built-in printer (optional)
You can print the display.
App
Index
IM DL850-03EN
1-1
1.1 Top Panel, Front Panel, Right Side Panel, and Left Side Panel
Front Panel
Soft keys
Use to select items on the soft key menus that
appear during configuration.
ESC key
LCD
Use to clear soft key menus and pop-up menus.
Description of the displayed
contents → Section 1.3
Jog shuttle
RESET
SET
ESC
START / STOP
SETUP
DISPLAY
CAL
X-Y
VERTICAL 7
CH 1
CH
5
CH
9
CH 13
2
ACQUIRE
CH
6
DUAL CAPTURE
8
2
3
CH
7
CH 11
CH14
SCALE
CH
5
CH 10
0
FILE
MENU
CH
4
1
SAVE
9
3
TRIG’D
MODE
4
CH
8
CH16
EXP
k
m
CH12
CH15
ENTER
POSITION
Setup and execution keys and knobs
Explanation → Section 1.2
PUSH
O DIV
NUM LOCK
TIME / DIV
CH
6
ALL CH
HORIZONTAL
Use to change values and move cursors.
Turn the shuttle ring to vary the rate at
which values change. The rate is based on
the shuttle ring angle.
TRIGGER
POSITION / DELAY
ACTION
MANUAL TRIG
MATH
HISTORY
MEASURE
HELP
PRINT
PRINT MENU
MENU
DUAL CAPTURE
SNAP SHOT
HDD RECORDING
CLEAR TRACE
CURSOR
GO / NO-GO
FFT
POSITION
ZOOM
MAG
KEY PROTECT
SIMPLE / ENHANCED
UTILTY
CLR
SHIFT
SEARCH
PUSH
Z 1
Z 2
PUSH
COMP
Setup and execution keys
Explanation → Section 1.2
KEY PROTECT key
Locks the keys. → Section 1.2
Probe compensation signal output terminal
(1 kHz/1 Vp-p)
Transmits correction signals for probes.
Probe correction procedure → Section 3.6
Functional ground terminal
Connect a ground wire to this terminal when
performing probe correction.
1-2
IM DL850-03EN
1.1 Top Panel, Front Panel, Right Side Panel, and Left Side Panel
1
Right Side Panel
There are a total of eight slots.
Input module insertion and removal
method → Section 3.3
Input channel
arrangement
Names and Functions of Parts
Input module installation slot
2
CH1 CH3 CH5 CH7
CH2 CH4 CH6 CH8
3
CH9 CH11 CH13 CH15
Functional ground
terminal
CH10 CH12 CH14 CH16
Use to connect the ground wire
of a high-voltage differential
probe or enhance the grounding
of the measurement equipment.
Probe connection method
→ Section 3.5
4
Stand
Setup method → Section 3.2
5
Probe power supply
terminal
(optional)
Empty-slot protection cover
Attach to slots that do not have
input modules installed.
Use to supply power (±12 V)
to current probes.
Probe connection method
→ Section 3.5
6
App
Input Modules
The following 15 input modules are available.
High-Speed High-Resolution
1 MS/s, 16-Bit Isolation Module
HS1M16 (model: 701251)
High-Speed 10 MS/s,
12-Bit Isolation Module
HS10M12 (model: 701250)
Signal input
terminal
(2ch)
High-Voltage 100 kS/s,
16-Bit Isolation Module
(with RMS)
HV (with RMS) (model: 701260)
Signal input
terminal
(2ch)
Signal input
terminal
(2ch)
Universal (Voltage/Temp.) Module Universal (Voltage/Temp.)
UNIVERSAL (model: 701261)
Module (with AAF)
UNIVERSAL (AAF) (model: 701262)
Signal input
terminal
(2ch)
IM DL850-03EN
Index
High-Speed 10 MS/s,
12-Bit Non-Isolation Module
NONISO_10M12 (model: 701255)
H input terminal
L input terminal
(2ch)
H input terminal
L input terminal
(2ch)
1-3
1.1 Top Panel, Front Panel, Right Side Panel, and Left Side Panel
Temperature, High Precision
Voltage Isolation Module
TEMP/HPV (model: 701265)
Strain Module (NDIS)
STRAIN_NDIS (model: 701270)
H input terminal
L input terminal
(2ch)
Acceleration/Voltage Module
(with AAF)
ACCL/VOLT (model: 701275)
Frequency Module
FREQ (model: 701280)
Signal input
terminal
(2ch)
16-CH Voltage Input Module
16CH VOLT (model: 720220)
Logic Input Module
LOGIC (model: 720230)
Signal input terminal
(16ch)
1-4
Strain Module (DSUB, Shunt-Cal)
STRAIN_DSUB (model: 701271)
Signal input
terminal
(2ch)
Signal input
terminal
(2ch)
High-Speed 100 MS/s,
12-Bit Isolation Module
HS100M12 (model: 720210)
Signal input
terminal
(2ch)
Signal input
terminal
(2ch)
CAN Bus Monitor Module
CAN MONITOR (model: 720240)
Logic input terminal
CAN bus signal
input terminal
IM DL850-03EN
1.1 Top Panel, Front Panel, Right Side Panel, and Left Side Panel
1
Left Side Panel
GP-IB connector (optional)
You can output the displayed image in an
XGA RGB signal.
Explanation about how to use → Section 5.4
Use to communicate with the DL850
/DL850V through the GP-IB interface.
For information about the DL’s
communication features, see the
communications interface user’s
manual.
GO/NO-GO and external
start/stop I/O connector
Transmits GO/NO-GO determination
I/O signals.
Can also be used to start and stop
the DL850/DL850V through external control.
Explanation about how to use
→ Section 5.5
GP-IB
(IEEE488)
Use to connect an external hard disk.
Explanation about how to use
→ User’s manual
Use when applying an
external clock signal.
Explanation about how to use
→ Section 5.3
Main power switch
Turning the power on and off
→ Section 3.4
IRIG
100-120/220-240 V AC
200 VA MAX 50/60 Hz
SD
POWER
ON
IN
OUT
Made in Japan
Trigger output terminal
Use to transmit trigger signals.
Explanation about how to use
→ Section 5.2
IM DL850-03EN
VIDEO OUT
(XGA)
TRIGGER
Name plate
Use when applying an external
trigger signal.
Explanation about how to use
→ Section 5.1
EXT CLKIN
OFF
Power connection
→ Section 3.4
SD memory card slot
EXT HDD
EXT I/O
Power inlet
Trigger input terminal
Use when applying an external
synchronization signal (IRIG signal).
Explanation about how to use
→ Section 5.6
External HDD connector
(optional)
External-clock
input terminal
ETHERNET
1000BASE-T
2
3
IRIG input terminal (optional)
Vent
Names and Functions of Parts
Video signal output terminal
Use to connect an SD memory card.
Explanation about how to use
→ User’s manual
USB port for PCs
Use to connect the DL850/DL850V
to a PC that has a USB port.
Explanation about how to use
→ Communication interface user’s
manual
4
5
6
App
Index
USB ports for peripherals
Use to connect a USB keyboard,
mouse, or storage device.
Explanation about how to use
→ Section 4.3 and User’s manual
Ethernet port (100BASE-TX)
Use to connect the DL850/DL850V
to a LAN. Explanation about how to use
→ Feature’s guide and communication
interface user’s manual
1-5
1.2
Panel Keys and Knobs
Vertical Axis
CH1 to CH16 Keys
These keys display menus for turning the display of each channel on and off and configuring settings
such as display label settings, input coupling settings, the probe attenuation or the current-to-voltage
conversion ratio, the bandwidth limit, the vertical position, vertical zoom settings, the offset value,
and linear scaling. Also, you can press a key to select the channel that the SCALE knob will control.
Channel keys illuminate when their corresponding channel is on.
After you press NUM LOCK (see below), you can press a channel key to enter the number displayed
to the upper right of the key in white.
ALL CH Key
Press this key to display a window in which you can configure all the settings from the menus that
appear when you press CH1 to CH16. The settings appear in a list.
NUM LOCK Key
Press this key to use the CH1 to CH16 keys to enter numbers.
SCALE Knob
Use this knob to set the vertical scale. Before you turn this knob, select the target waveform by
pressing a key from CH1 to CH16. If you change the scale while waveform acquisition is stopped, the
setting actually takes effect when you restart waveform acquisition.
POSITION Knob (Vertical POSITION Knob)
Use this knob to adjust the vertical display position (vertical position) of an input waveform. Before you
turn this knob, select the target waveform by pressing a key from CH1 to CH16. This knob has a push
switch. You can press the knob to reset the position to 0.00 div.
VERTICAL 7
CH 1
CH
CH
5
9
CH 13
CH
2
CH
6
4
1
0
SCALE
CH 10
8
CH
3
CH
7
5
2
CH14
CH 11
9
4
CH
8
6
3
ALL CH
CH16
EXP
k
m
CH12
CH15
NUM LOCK
CH
ENTER
POSITION
PUSH
O DIV
Horizontal Axis
TIME/DIV knob
Use this knob to set the time-axis scale. If you change the scale while waveform acquisition is stopped,
the scale change actually takes effect when you restart waveform acquisition.
HORIZONTAL
TIME / DIV
1-6
IM DL850-03EN
1.2 Panel Keys and Knobs
1
TRIGGER Group Keys
Names and Functions of Parts
(SHIFT+) MODE Key
Displays a menu for selecting the trigger mode. Press SHIFT and then MODE to display a menu for
configuring action-on-trigger and action-on-stop settings.
2
POSITION/DELAY Key
Press this key to set the trigger position and the trigger delay.
MANUAL TRIG Key
3
Press this key to make the DL850/DL850V trigger regardless of the trigger settings.
SIMPLE/ENHANCED Key
Displays a trigger setup menu.
TRIG’D
MODE
4
TRIGGER
POSITION / DELAY
ACTION
MANUAL TRIG
SIMPLE / ENHANCED
5
Other Keys
(SHIFT+) MATH Key
6
Displays a menu for waveform computation. Press SHIFT and then MATH to display a menu for
configuring FFT computation.
HISTORY Key
App
Displays a menu for using the history feature to recall data.
(SHIFT+) MEASURE
Displays a menu for automated measurement of waveform parameters. Press SHIFT and then
MEASURE to display a menu for GO/NO-GO determination.
Index
CURSOR Key
Displays a menu used when performing cursor measurements.
(SHIFT+) ZOOM Key
Displays a waveform zoom display menu. Press SHIFT and then ZOOM to display a menu for data
searching (the search & zoom function).
MAG Knob
Use this knob to set the zoom factors for the Zoom1 and Zoom2 zoom boxes. This knob has a push
switch. Press the MAG knob to switch the zoom box whose zoom factor is set by it.
◄POSITION► Knob (Zoom POSITION knob)
Use this knob to set the zoom position. This knob has a push switch. Press the POSITION knob to
switch the zoom box whose zoom position is set by it.
MATH
HISTORY
MEASURE
POSITION
ZOOM
MAG
CURSOR
GO / NO-GO
FFT
SEARCH
PUSH
IM DL850-03EN
Z 1
Z 2
PUSH
1-7
1.2 Panel Keys and Knobs
RESET Key
Resets the value to its default value.
SET Key
Press this key to select the menu item that you have moved the cursor to using the jog shuttle. You
can also press the SET key to start entering a value or characters.
Arrow Keys (▲▼►◄ keys)
Use the ►◄ keys to move the cursor between numeric digits. Use the ▲▼ keys to increment or
decrement the value of a digit. You can also use the ▲▼ keys to select setup items.
START/STOP Key
Starts and stops waveform acquisition according to the trigger mode. The key is illuminated while the
DL850/DL850V is acquiring waveforms.
(SHIFT+) SETUP Key
Displays a menu for initializing the settings to their factory defaults; performing auto setup, which
automatically sets the DL850/DL850V according to the input signal; storing and recalling setup
information; and so on. Press SHIFT and then SETUP to display a calibration menu.
(SHIFT+) DISPLAY Key
Use this key to configure the display. Press SHIFT and then DISPLAY to display an X-Y display menu.
(SHIFT+) SAVE Key
Press this key to save waveform or screen capture data to a storage medium. Press SHIFT and then
SAVE to display a menu for configuring the save operation.
FILE Key
Press this key to save or load data from a storage medium or to display a menu for file manipulation.
(SHIFT+) ACQUIRE Key
Displays a menu used to set the waveform acquisition mode. Press SHIFT and then ACQUIRE to
display a menu for configuring the dual capture feature.
RESET
SET
START / STOP
1-8
SETUP
DISPLAY
CAL
X-Y
FILE
MENU
ACQUIRE
DUAL CAPTURE
IM DL850-03EN
1.2 Panel Keys and Knobs
1
KEY PROTECT Key
HELP Key
2
Turns on and off the help window, which explains various features.
PRINT Key
Use this key to save and print screen capture data.
3
PRINT MENU Key
Displays a menu for printing screen captures to the built-in printer or a network printer or displays a
menu for saving screen capture data to a storage medium.
KEY PROTECT
HELP
PRINT
Names and Functions of Parts
When you press this key, it illuminates, and the keys on the front panel are locked. Press the key again
to unlock the keys.
4
PRINT MENU
MENU
SNAP SHOT Key
Retains the currently displayed waveforms on the screen in white. Snapshot waveforms can be saved
and loaded.
CLEAR TRACE Key
5
6
Clears the waveform acquired using the snap shot function and accumulated waveforms.
UTILITY Key
Displays a menu for configuring system, communication, network, and environment settings; for
performing self tests; and for displaying system information (information about installed modules,
installed options, and the firmware version).
App
SHIFT Key
Press this key once to access the features that are written in purple below each key. The shift key
illuminates when the keys are shifted. Pressing the key again clears the shifted condition.
SNAP SHOT CLEAR TRACE
CLR
Index
UTILTY
SHIFT
Note
Press SHIFT and then CLEAR TRACE to switch from remote mode to local mode. For details, see the
communication interface user’s manual.
Notes about Using of Knobs
The vertical POSITION, ZOOM MAG, and ZOOM POSITION knobs have push switches. Push the
knobs straight. If you push a knob at an angle, it may not operate properly. If this happens, push the
knob straight one more time.
CAUTION
Do not push the knob sideways with strong force. Doing so may break the knobs.
IM DL850-03EN
1-9
1.3
Screens
Normal Waveform Display
The setup channel
and its vertical scale
and position
Display record length
Voltage-axis scale value
Sample rate
Trigger position
Channel number of
the display range
Acquisition mode
(See the explanation below.)
TIME/DIV
Channel number of the
displayed waveform
Trigger level
Vertical position
Soft key
menu
Ground level
The display is
inverted when
Invert is set to ON.
Time from the
trigger position
Waveform acquisition
count
Comment
Trigger mode
Trigger setting
Screen capture output
destination
Level indicator
Waveform acquisition condition
Stopped
Pre... :Acquiring pre data
Running
Post... :Acquiring post data
Waiting for trigger
HD out:
Continuous writing to hard disk
Acquisition Mode Indication
Normal
Env
Avg
BoxAvg
:
:
:
:
Normal mode
Envelope mode
Average mode
Box average mode
Note
The DL850/DL850V LCD may include a few defective pixels. For details, see section 6.4, “Display.”
1-10
IM DL850-03EN
1.3 Screens
Zoom Waveform Display
1
Display position of the Zoom2 zoom waveform
with respect to the display record length
Zoom1 zoom range
Zoom2 zoom range
Time/div for the
normal waveforms
Normal waveform
display area
(Main window)
Time/div for the
Zoom1 waveforms
Time/div for the
Zoom2 waveforms
Names and Functions of Parts
Display position of the Zoom1 zoom waveform
with respect to the display record length
2
3
4
5
Zoom window
display area
6
Zoom1 window
display area
App
Zoom2 window
display area
Dual Capture Display
Index
Time reference mark
Time/div for the
normal waveform
Normal waveform
display area
(Main window)
Number of the
captured waveform
to display
Time from the
reference point
Time/div for the
captured waveform
Waveform display
area for the zoom
and capture
windows
Trigger position
of the captured
waveform
Date and time of the
trigger point of the
captured waveform
Time-axis scale value of the
captured waveform
Captured waveform display area
Number of captured waveform acquisitions
Stop date and time of the main waveform
IM DL850-03EN
1-11
1.4
System Configuration
USB keyboard
USB PERIPHERAL
interface
USB mouse
Internal HDD
(optional)
Built-in printer
(optional)
• External clock input
• External trigger input
• IRIG input (optional)
• GO/NO-GO determination I/O
• Video signal output
• Trigger output
Signal input
DUT
• Module1
• Probe2
DL850/DL850V
1 • High-Speed 10 MS/s, 12-Bit Isolation Module
• High-Speed High-Resolution 1 MS/s, 16-Bit
Isolation Module
• High-Speed 10 MS/s, 12-Bit Non-Isolation Module
• High-Voltage 100 kS/s, 16-Bit Isolation Module
(with RMS)
• Temperature, High Precision Voltage Isolation
Module
• Universal (Voltage/Temp.) Module
• Universal (Voltage/Temp.) Module (with AAF)
• Strain Module (NDIS)
• Strain Module (DSUB, Shunt-Cal)
• Acceleration/Voltage Module (with AAF)
• Frequency Module
• High-Speed 100 MS/s, 12-Bit Isolation Module
• 16-CH Voltage Input Module
• Logic Input Module
• CAN Bus Monitor Module
2 • Differential probe
• Current probe
• Logic probe
Saving/loading of data
USB PERIPHERAL
interface
External USB device
External HDD
interface
(optional)
HDD
• FTP server
• FTP client
• Web server
• GP-IB interface (optional)
• USB interface
(remote control through the use of commands)
• Waveform data
• Setup data
• Image data
PC
Printer
USB memory/SD
memory card
Ethernet interface
FTP
server
Print
server
PC
Network printer
Printer
1-12
IM DL850-03EN
Chapter 2
2.1
Main Features
Vertical and Horizontal Axes
1
2
Vertical Axis
DL850/DL850V Measurement Items
When the DL850/DL850V is equipped with the modules listed below, it can monitor CAN bus signals
and measure voltage, temperature, strain, acceleration, frequency, logic, and so on.
Main Features
This section explains how to configure the signal input settings and the amplitude-direction display
settings. The items that can be set vary depending on the installed modules. The channel menu that
corresponds to the key you pressed (CH1 to CH16) appears. You can set the various vertical axis
settings for each channel. Press ALL CH to display a screen in which you can configure the settings of
all channels while viewing the settings in a list.
3
4
5
Voltage
701250 (HS10M12), 701251 (HS1M16), 701255 (NONISO_10M12), 701260 (HV (with RMS)),
720210 (HS100M12), 701261 (UNIVERSAL), 701262 (UNIVERSAL (AAF)), 701265 (TEMP/HPV),
701275 (ACCL/VOLT)
6
Voltage (For the 16-CH Voltage Input Module)
720220 (16CH VOLT)
App
Temperature
701261 (UNIVERSAL), 701262 (UNIVERSAL (AAF)), 701265 (TEMP/HPV)
Strain
Index
701270 (STRAIN_NDIS), 701271 (STRAIN_DSUB)
Acceleration
701275 (ACCL/VOLT)
Frequency
701280 (FREQ)
Logic
720230 (LOGIC)
CAN Bus Signal Monitoring
720240(CAN MONITOR)
This module can only be used with the DL850V.
Vertical Scale
The vertical scale is used to adjust the displayed waveform amplitude so that you can easily view
signals. You can set the vertical scale to determine the value per grid square (1 div) displayed on the
screen and to set the measurement range.
Use the SCALE knob to set the vertical scale for each channel.
Vertical Position
Because the DL850/DL850V can display many waveforms, the waveforms may overlap and be difficult
to view. If this happens, you can adjust the vertical display position to make waveforms easier to view
(vertical position).
Use the POSITION knob to set the vertical position for each channel.
IM DL850-03EN
2-1
2.1 Vertical and Horizontal Axes
Input Coupling
You can change the input coupling setting to match the signal that you are measuring. By changing the
setting, you can choose how the vertical-axis (voltage-axis) control circuit is coupled to the input signal.
The following types of input coupling are available: DC, AC, GND, TC, DC-RMS, AC-RMS, ACCEL,
and OFF.*Set the appropriate input coupling for each input module.
*
You can only select OFF for sub channels on the 16-CH Voltage Input Module. Sub channels set to OFF are
not measured.
Vertical Zoom
You can zoom the waveform vertically. You can zoom the waveform by setting the vertical magnification
or by setting upper and lower display limits.
Linear Scaling
Linear scaling is a function that converts measured values into physical values and reads them directly.
There two types of linear scaling:
AX + B
Using scaling coefficient A and offset B, the DL850/DL850V scales values according to the equation
below.
Y= AX + B (where X is the measured value and Y is the physical value)
P1-P2
The DL850/DL850V determines the scale conversion equation (y = ax + b) using four values that
you specify: two measured values (P1:X, P2:X) and the value that each one should be converted to
(P1:Y, P2:Y).
The DL850/DL850V scales values using the scale conversion equation that it determines.
Physical values
(scaled values)
P2
P2:Y
P1:Y
y = ax + b
P1
P1:X
P2:X
Measured values
Measurement range
2-2
IM DL850-03EN
2.1 Vertical and Horizontal Axes
1
Horizontal Axis (Time Axis)
Time Axis Setting
*
When the 720210 (HS100M12) module is installed, the scale range starts at 100 ns/div; when it is not
installed, the scale range starts at 1 μs/div.
3
Internal and External Clocks (Time base selection)
Under the initial settings, the DL850/DL850V samples the measured signal using the internal clock
signal produced by its internal time-base circuit.
You can also use an external clock signal to control sampling. Apply the external clock signal to the
external clock input terminal. This external clock input is useful for synchronizing to the clock signal of
the waveform that is being measured.
Relationship between the Time Axis Setting, Record Length, and
Sample Rate
If you change the time axis setting, the sample rate and the acquisition-memory record length also
change. For details, see appendix 1.
4
5
6
App
Sample Rate
If you change the time axis setting, the sample rate also changes. The sample rate is the number
of samples-per-second (S/s). When the sample rate is low compared to the frequency of the input
signal, the high-frequency components of the waveform are misread as low-frequency components.
To prevent the high-frequency components from being misread, sample the signal at the highest
sample rate possible, or set the waveform acquisition mode to Envelope.
Roll Mode Display
When the trigger mode is Auto, Auto Level, Single, or On Start and the time axis setting is 100 ms/
div or longer, instead of updating waveforms through triggering (update mode), the DL850/DL850V
displays the waveforms in roll mode. In roll mode, waveforms scroll from right to left as new data is
captured and the oldest values are deleted from the screen.
IM DL850-03EN
2
Main Features
Normally, under the initial settings, the time axis scale is set as a length of time per grid division (1 div).
The selectable range is 100 ns/div to 3 days/div. As you adjust the value, the unit changes between
seconds, minutes, hours, and days automatically. Because the horizontal display range is 10 div, the
amount of time on the waveform that is displayed is equal to the time axis setting × 10.
2-3
Index
2.2
Triggering
A trigger is a cue used to display the waveform on the screen. A trigger occurs when the specified
trigger condition is met, and a waveform is displayed on the screen.
Trigger Modes
The trigger mode determines the conditions for updating the displayed waveforms. There are six
trigger modes: Auto, Auto Level, Normal, Single, N Single, and On Start. The trigger mode setting
applies to all trigger types.
Trigger Types
Triggers can be broadly divided into “simple triggers” and “enhanced triggers.”
Simple Triggers
Input Signal Trigger
The DL850/DL850V triggers when the trigger source passes through the specified trigger level in
the specified way (rising edge, falling edge, or rising or falling edge).
Time Trigger
The DL850/DL850V triggers at the specified date and time and at specified intervals afterwards.
External Signal Trigger
The DL850/DL850V triggers when the signal applied to the TRIG IN terminal passes through the
specified trigger level in the specified way (rising or falling edge).
Power Line Signal Trigger
The DL850/DL850V triggers on the rising edge of the power supply signal that it is receiving. This
trigger enables you to observe waveforms in synchronization with the power supply frequency.
Enhanced Triggers
A→B(N) Trigger
After state condition A is met, the DL850/DL850V triggers when state condition B is met N times.
Met
A
Met N times
B B
B
Trigger
A Delay B Trigger
After state condition A is met and the specified amount of time elapses, the DL850/DL850V triggers
when state condition B is first met.
Met
A
2-4
Delay time
passes
Met
B
Trigger
IM DL850-03EN
2.2 Triggering
1
Edge On A Trigger (Enhanced)
While state condition A is met, the DL850/DL850V triggers on the OR of multiple trigger source
edges.
Condition A is being met
2
Trigger
Main Features
Edge detection
3
OR Trigger
The DL850/DL850V triggers on the OR of multiple trigger source edges.
AND Trigger
The DL850/DL850V triggers on the AND of multiple trigger source conditions. The DL850/DL850V
triggers when all the specified conditions are met at a single point.
5
Period Trigger
The DL850/DL850V triggers on a specified period of occurrence of state condition B. The DL850/
DL850V triggers when state condition B occurs again.
Met
B
Reference time T
Met
B
App
The DL850/DL850V triggers according to the relationship between the state condition B
achievement time and the specified reference times (Time or T1 and T2).
Achievement time
Index
Trigger
Wave Window Trigger
The DL850/DL850V creates real-time templates (Wave Window) using a number of cycles directly
preceding the current waveforms. The DL850/DL850V compares the current waveforms to the realtime templates and triggers if one of the current waveforms falls outside of its real-time template.
Reference cycles
(example: the waveforms for the four previous cycles)
Current
waveform
Measured waveform
Average of 1, 2, or
4 cycles
Real-time template
Trigger
Tolerance width
Average waveform
+ tolerance width
IM DL850-03EN
6
Trigger
Pulse Width Trigger
B
4
The DL850/DL850V compares the
current waveform to the real-time
template and triggers if the current
waveform falls outside of the
real-time template.
2-5
2.2 Triggering
Trigger Source
Trigger source refers to the signal that is used to check the specified trigger conditions. You can set
the trigger source to an analog signal, logic signal, time, external signal, or power line signal. Select
the appropriate trigger source for the trigger type.
Trigger Level
Trigger level refers to the signal level used as a reference for detecting a signal’s rising and falling
edges or high and low states. With simple triggers such as the edge trigger, the DL850/DL850V
triggers when the trigger source level passes through the specified trigger level. The range and
resolutions that you can use to set the trigger level vary depending on the type of signal being
measured.
Trigger Slope
Slope refers to the movement of the signal from a low level to a high level (rising edge) or from a high
level to a low level (falling edge). When a slope is used as one of the trigger conditions, it is called a
trigger slope.
Trigger Hysteresis
When the trigger source is an analog signal, you can set a width (hysteresis) to the trigger level so that
the DL850/DL850V does not detect edges when the signal level changes within the specified width.
You can set the hysteresis around the trigger level for each type of measured signal.
Trigger Hold-off
The trigger hold-off feature temporarily stops the detection of the next trigger once a trigger has
occurred. This feature is useful in cases when you want to change the waveform acquisition interval,
such as when you are observing a PCM (pulse code modulation) code or other pulse train signal or
when you are using the history feature.
Trigger Position
When you move the trigger position, the ratio of the displayed data before the trigger point (pre-data)
to the data after the trigger point (post-data) changes. When the trigger delay is 0 s, the trigger point
and trigger positions coincide.
Trigger Delay
The DL850/DL850V normally displays waveforms before and after the trigger point. You can set a
trigger delay to display waveforms at a specified amount of time after the trigger occurrence.
2-6
IM DL850-03EN
2.3
Waveform Acquisition
1
Record Length
Record length refers to the number of data points that are stored to the acquisition memory for each
channel. Display record length refers to the data points from the data stored in the acquisition memory
that are displayed on the screen. Normally, the acquisition-memory record length and display record
length are the same, but the time axis setting may cause them to differ. When you change the time
axis setting, the sample rate and record length also change.
On the standard model of the DL850/DL850V, you can set the record length to a value between 1
kpoint and 250 Mpoint. Depending on the model, you can set the record length to a value of up to 2
Gpoint.
2
Main Features
Based on the data that has been stored in the acquisition memory, the DL850/DL850V performs
various operations, such as displaying waveforms on the screen, computing, measuring cursors, and
automatically measuring waveform parameters.
You can set the number of data points to store in the acquisition memory (the record length), enable or
disable the sample data averaging feature, and so on.
3
4
5
6
Acquisition Mode
Specify how the DL850/DL850V processes the sampled data, stores it in the acquisition memory, and
uses it to display waveforms. There are four acquisition modes: Normal, Envelope, Averaging, and
BoxAverage.
Hard Disk Recording
When measurement starts, you can record data to an external hard disk that supports eSATA (external
Serial ATA; /HD0 option) or to an internal hard disk (/HD1 option).* The recorded data is saved to files
automatically. You can load the saved data using the DL850/DL850V and convert it to a format that
you can analyze on a PC (ASCII or floating point).
*
Models with the /HD0 option are equipped with eSATA connectors. You need to purchase a hard disk that
supports eSATA separately.
Hard disk recording
Input signal
External hard disk that supports eSATA
(/HD0 option)
or
an internal hard disk
(/HD1 option)
Loading of
waveform data
Normal measurement
IM DL850-03EN
Acquisition
memory
Saving and loading of waveform data
2-7
App
Index
2.3 Waveform Acquisition
History
When waveforms are being measured, the waveform data stored in the acquisition memory as a result
of a trigger occurrence is displayed as a waveform on the DL850/DL850V screen and can be viewed.
When waveform acquisition is being triggered in succession and an abnormal waveform appears, it
is impossible to stop acquisition before a new waveform appears on the screen. Normally, it would be
impossible to view the abnormal waveform. However, with the history feature, you can view the past
waveform data (history waveforms) stored in the acquisition memory when waveform acquisition is
stopped. You can select specific history waveforms and display them.
You can also search through the history waveforms for waveforms that meet specified conditions.
• Zone Search
The DL850/DL850V searches for history waveforms that passed (or did not pass) through a
specified search zone.
• Waveform Parameter Search
The DL850/DL850V searches for waveforms whose measured waveform parameter values meet (or
do not meet) specified conditions.
Zone Search
History Waveforms
(up to 5000 waveforms)
Waveforms that pass
through the specified
Specified zone zone are detected.
Selected Record –25
Selected Record 0
Waveform parameter search
History Waveforms
(up to 5000 waveforms)
Waveforms that do not
meet the specified
search parameter
conditions are detected.
P-P
Selected Record –28
Selected Record 0
Dual Capturing
You can use dual capturing to simultaneously record a trend at a low sampling speed in roll mode and
at a high sampling rate. This is useful for capturing fast phenomenon while observing a trend over a
long period of time.
Main waveform (low-speed sampling)
Roll mode display
Captured waveforms (high-speed sampling)
Update mode display
Sample rate:
Faster than that of
the main waveform
Sample rate:
100 kS/s or less
Events
The points where triggering
occurred during dual capturing
are displayed as events.
Main waveform
Because there is not
enough sampled data, the
shape of the waveform may
not be displayed correctly.
2-8
Zoomed waveform
(zoomed along the
time axis)
Captured
waveform
Because the data is sampled at
a high speed, the correct shape
of the waveform is displayed.
IM DL850-03EN
2.4
Waveform Display
1
Zooming along the Time Axis (GIGAZoom)
You can magnify displayed waveforms along the time axis. The zoomed waveforms of two locations
can be displayed simultaneously (the dual zoom feature). This feature is useful when you set a long
acquisition time and want to observe a portion of the waveform closely.
2
Main Features
The DL850/DL850V has a main window for displaying normal time-domain waveforms, zoom windows
for displaying zoomed time-axis waveforms, and X-Y windows for displaying X-Y waveforms. In
addition, you can split screens and change the sizes of waveform display areas so that waveforms and
measured values are easier to see and display an FFT window that shows the results of FFT analysis.
3
4
Main window (normal time-domain waveform)
Zoom box 1
5
Zoom box 2
6
Zoom1 window
Zoom2 window
App
You can display the zoomed waveforms
(Zoom1 and Zoom2) of two locations.
Index
Displaying X-Y Waveforms
You can observe the correlation between two waveform signal levels by displaying one signal level
on the X-axis (horizontal axis) and a second signal level on the Y-axis (vertical axis). You can display
X-Y waveforms at the same time as normal T-Y (time and signal level) waveforms. You can display up
to four overlapping X-Y waveforms in both Window1 and Window2. Because multiple X-Y waveforms
can be displayed, it is easy to compare the relationships between phases. You can use this feature to
evaluate DC motors using Lissajous waveforms.
Snapshot
You can continue displaying a waveform on the screen as a snapshot waveform after the screen
has been updated and the waveform has been cleared in update mode or after the waveform has
left the screen in roll mode. Snapshot waveforms appear in white. You can compare them with new
waveforms. You can also save and print snapshot waveforms as screen captures.
Snapshot waveform
Displayed in white
Updated waveform
IM DL850-03EN
2-9
2.5
Waveform Computation and Analysis
Waveform Computation
You can perform basic arithmetic, binarization, FFT (power spectrum), and phase shifting (display
the waveform with its phase shifted). On models with the /G2 option, you can use a rich variety of
functions (square root, trigonometric functions, differentiation, integration, digital filtering, six types of
FFT functions, and so on) to define up to eight equations.
The expression that
you enter appears.
Expression configuration dialog box
Use the soft keyboard on the screen to
enter an expression.
Cursor Measurement
There are cursors for T-Y (time-axis), X-Y, and FFT waveforms. You can position a cursor over a
waveform to view the various measured values at the intersection of the cursor and the waveform.
Automated Measurement of Waveform Parameters
You can use this feature to automatically measure waveform levels, maximum values, frequencies,
and other values. For up to 100 Mpoint of waveform data, you can measure 29 waveform parameters
(including the delay between channels) that relate to the voltage axis, time axis, and waveform area.
• You can display a total of 32 measured values for all the waveforms.
• You can save a total of 64000 items of data for all the waveforms.
• You can also perform computations on measured waveform parameter values.
• You can display the following statistics for the specified waveform parameter.
The maximum value (Maximum), minimum value (Minimum), average value (Average), standard
deviation (SDev), and number of measured values used to calculate statistics (Count)
Setup Dialog Box
Example of Displayed Statistical Values
Measurement
range
Measured items that the DL850/DL850V
is calculating the statistics of
and the values of those items
Maximum: Maximum value Minimum: Minimum value
Average: Average value
SDev:
Standard deviation
Count:
Number of measured values used to calculate statistics
2-10
IM DL850-03EN
2.5 Waveform Computation and Analysis
1
2
Main Features
There are three statistical processing methods:
• Normal statistical processing
While acquiring waveforms, the DL850/DL850V measures the measurement items and calculates
the statistics of the waveforms that it has acquired so far.
• Cyclic statistical processing (measurement and statistical processing are performed for each period)
The DL850/DL850V divides the waveform into periods starting at the left side of the screen (the
oldest waveform) and moving to the right side of the screen, measures the selected measurement
items within each period, and performs statistical processing on the measurement items.
• Statistical processing of history waveforms
The DL850/DL850V measures the measurement items and calculates the statistics of history
waveforms. Measurement and statistical processing begin with the oldest waveform.
3
4
GO/NO-GO Determination
This feature is useful for signal testing on production lines and for tracking down abnormal phenomena.
The DL850/DL850V determines whether the waveform enters the specified range. When the DL850/
DL850V returns a GO (or NO-GO) result, specified actions are performed.
5
Determination Methods
• Waveform Zone
The DL850/DL850V returns GO/NO-GO results based on whether waveforms leave or enter the
zone that you create using a base waveform.
6
The DL850/DL850V returns a GO or NO-GO
judgment according to the determination
condition.
Specified zone
App
Determination
area
Index
• Waveform Parameter
Set the upper and lower limits for automated measurement values of waveform parameters. The
DL850/DL850V performs GO/NO-GO determination based on whether the values are within or
outside of the limits.
Actions Performed according to Determination Results
The DL850/DL850V can print and save screen captures, save waveform data, beep, and send
e-mails according to the results of GO/NO-GO determination.
IM DL850-03EN
2-11
Chapter 3
3.1
Making Preparations for Measurements
Handling Precautions
1
2
Safety Precautions
If you are using this instrument for the first time, make sure to thoroughly read the safety precautions
given on page viii.
3
Do Not Remove the Case
Unplug If Abnormal Behavior Occurs
If you notice smoke or unusual odors coming from the instrument, immediately turn off the power and
unplug the power cord. If such an irregularity occurs, contact your dealer.
Do Not Damage the Power Cord
Nothing should be placed on the power cord. The cord should be kept away from any heat sources.
When unplugging the power cord from the outlet, never pull by the cord itself. Always hold and pull by
the plug. If the power cord is damaged, contact your dealer for replacement. Refer to page iv for the
part number to use when placing an order.
Making Preparations for Measurements
Do not remove the case from the instrument. Some sections inside the instrument have high
voltages and are extremely dangerous. For internal inspection and adjustment, contact your nearest
YOKOGAWA dealer.
4
5
6
App
General Handling Precautions
Do Not Place Objects on Top of the Instrument
Index
Never place other instruments or objects containing water on top of the instrument, otherwise a
breakdown may occur.
Do Not Apply Shock or Vibration
Do not apply shock or vibration. Doing so may damage the instrument. Extra caution is needed for
the optional internal hard disk, because it is sensitive to vibration and shock. Shocks to the input
connectors or probes may turn into electrical noise and enter the instrument via the signal lines.
Do Not Damage the LCD
Since the LCD screen is very vulnerable and can be easily scratched, do not allow any sharp objects
near it. Also it should not be exposed to vibrations and shocks.
Unplug during Extended Non-Use
Unplug the power cord from the outlet.
IM DL850-03EN
3-1
3.1 Handling Precautions
When Carrying the Instrument
Remove the power cord and connecting cables. When moving the instrument, use the handle as
shown below, or carry it with both hands.
Cleaning
When cleaning the case or the operation panel, first remove the power cord from the AC outlet. Then,
wipe with a dry, soft, clean cloth Do not use chemical such as benzene or thinner. These can cause
discoloring and deformation.
3-2
IM DL850-03EN
3.2
Installing the Instrument
1
2
Installation Conditions
Install the instrument in a place that meets the following conditions.
Flat, Even Surface
Well-Ventilated Location
There are inlet holes on the bottom side of the instrument. There are also vent holes for the cooling
fan on the left side panel and the top panel. To prevent internal overheating, allow for enough space
around the instrument (see the figure below) and do not block the inlet and exhaust holes.
3
Making Preparations for Measurements
Install the instrument in the correct orientation (see page 3-4) in a safe place, with no tilting from front
to back or left to right (when you install the instrument with the rear panel facing down, you can tilt it
on its stand). The recording quality of the printer may be hindered when the instrument is placed in an
unstable or inclined place.
4
5
6
App
Index
10 cm or more
10 cm or
more
10 cm or
more
5 cm or
more
When connecting cables and opening and closing the cover of the built-in printer, provide extra
operating space in addition to the space in the figure shown above.
Ambient Temperature and Humidity
Ambient temperature: 5 to 40°C
Ambient humidity:
20 to 85% RH (when the printer is not used; no condensation)
35 to 85% RH (when the printer is used)
Note
•
•
IM DL850-03EN
To ensure high measurement accuracy, operate the instrument in the 23 ±5°C temperature range and 20
to 80% RH.
Condensation may occur if the instrument is moved to another place where the ambient temperature
is higher, or if the temperature changes rapidly. In such cases, allow the instrument adjust to the new
environment for at least an hour before using the instrument.
3-3
3.2 Installing the Instrument
Do not install the instrument in the following places.
•
•
•
•
•
•
In direct sunlight or near heat sources.
Where an excessive amount of soot, steam, dust, or corrosive gas is present.
Near strong magnetic field sources.
Near high voltage equipment or power lines.
Where the level of mechanical vibration is high.
On an unstable surface.
Installation Position
Install the instrument so that it is flat or with the rear panel facing down. When using the stand as
shown in the bottom right figure, push it out until it locks into place. Push the stand back in when you
store the instrument.
Rubber Stoppers
If the instrument is installed so that it is flat as shown in the above figure, rubber stoppers can be
attached to the feet to prevent the instrument from sliding. One set of rubber stoppers (four stoppers)
are included in the package.
3-4
IM DL850-03EN
3.3
Installing Input Modules
1
2
WARNING
• To prevent electric shock and damage to the instrument, be sure to turn the power off
before you install or remove input modules.
• Check that the input cable is not connected to the input terminals before installing or
removing the input module.
• To prevent electric shock and to satisfy the specifications, make sure to put the accessory
cover plate on the slots that are not being used.
Using the instrument without the cover plate allows the dust to enter the instrument and
may cause malfunction due to the rise in temperature inside the instrument.
• If the input module happens to come out of the slot while it is in use, it may cause electric
shock or cause damage to the instrument as well as the input module. Make sure to screw
the input module in place at the two locations (top and bottom).
• There are protrusions in the slot. Do not put your hand in the slot. If you put your hand in the
slot, the protrusions may cut your hand.
3
5
Precautions to Be Taken When Using the Modules
• Do not apply input voltage exceeding the maximum input voltage, withstand voltage, or
allowable surge voltage.
• To avoid electric shock, be sure to ground the instrument.
• To prevent the possibility of electric shock, be sure to fasten the module screws. Failing to
do so is extremely dangerous, because the electrical and mechanical protection functions
will not be activated.
• Do not leave the instrument connected to devices in an environment that may be subject to
voltage surges.
• When measuring high voltages using the 720210 (HS100M12), 701250 (HS10M12), or
701251 (HS1M16), use an isolated probe (the 700929 or 701947), 1:1 safety cable (a
combination of the 701901 and 701954), or differential probe (700924).
• Be sure to connect the GND lead of the differential probe (the 700924) to the functional
ground terminal of the DL850/DL850V before you connect to the device under
measurement. High voltage may appear at the BNC connector of the differential probe.
• The protection functions and non-isolation functions of the 701255 (NONISO_10M12) are
enabled when the module screws are tightened. It is extremely dangerous if you do not
fasten the screws. Also, when you measure high voltages above 42 V, be sure to use the
passive probe for the DL850/DL850V (the 701940).
• The BNC portion of the 10 MHz passive probe (701940) is metal, so if you use it with
isolated input (the 720210 (HS100M12), 701250 (HS10M12), 701251 (HS1M16), 701260
(HV (with RMS)), 701275 (ACCL/VOLT), or 701280(FREQ)), for safety, be sure to only use
it with voltages at or below 42 V. (Do not connect voltage above 42 V to both the High and
Low sides.)
• When you apply high voltages to the 701260 (HV (with RMS)), use a 1:1 safety cable (a
combination of the 701901 and 701954) or isolated probe (the 700929 or 701947).
• The measurement category of the 701260 (HV (with RMS)) is 400V-CATII on the low side
and 700V-CATII on the high side. Use caution because the overvoltage tolerance differs
between the low and high sides.
• When you apply high voltages to the 701280 (FREQ), use an isolated probe (the 700929 or
701947).
• The protection functions and non-isolation functions of the 720230 (LOGIC) are enabled
when the module screws are tightened. It is extremely dangerous if you do not fasten
the screws. Also, be sure to only use a recommended YOKOGAWA logic probe (700986,
700987, 702911, or 702912) with the logic module.
IM DL850-03EN
Making Preparations for Measurements
4
3-5
6
App
Index
3.3 Installing Input Modules
Types of Input Modules
The following 14 types of input modules are available.
High-Speed 100 MS/s, 12-Bit Isolation Module
720210 (HS100M12)
High-Speed 10 MS/s, 12-Bit Isolation Module
701250 (HS10M12)
High-Speed High-Resolution 1 MS/s, 16-Bit Isolation Module: 701251 (HS1M16)
High-Speed 10 MS/s, 12-Bit Non-Isolation Module
701255 (NONISO_10M12)
High-Voltage 100 kS/s, 16-Bit Isolation Module (with RMS)
701260 (HV (with RMS))
Universal (Voltage/Temp.) Module
701261 (UNIVERSAL)
Universal (Voltage/Temp.) Module (with AAF)
701262 (UNIVERSAL (AAF))
Temperature, High Precision Voltage Isolation Module
701265 (TEMP/HPV)
Strain Module (NDIS)
701270 (STRAIN_NDIS)
Strain Module (DSUB, Shunt-Cal)
701271 (STRAIN_DSUB)
Acceleration/Voltage Module (with AAF)
701275 (ACCL/VOLT)
Frequency Module
701280 (FREQ)
16-CH Voltage Input Module
720220 (16CH VOLT)
Logic Input Module
720230 (LOGIC)
CAN Bus Monitor Module*
720240 (CAN MONITOR)
* The CAN bus monitor module can be used on the DL850V. It cannot be used on the DL850.
Precautions to Be Taken When Installing or Removing Input
Modules
If you replace one installed input module with another, the settings for the channel will be reset to their
defaults when the power is turned on. If you want to keep the settings, specify a save destination and
save them.
Installation Procedure of Modules
1. Make sure that the power switch on the left side panel of the instrument is turned off.
2. Check the channel number displayed above the input module installation slot on the right side
panel of the instrument, and then install the input module along the guide.
Holding the handles on the top and bottom of the input module, press hard until it clicks in
place. If there is a cover plate on the slot in which to install the module, remove the cover plate,
first.
3. Firmly fasten the screws that came with the instrument in two places: the top and bottom of the
input module. (screw tightening torque: 0.6 N•m)
4. Turn the instrument’s power switch on.
5. In the overview screen, check that the name of the module that you installed is displayed
correctly at the appropriate channel number. If it is not correct, remove the module according
to the steps in “Removal” shown below, and reinstall the module according to steps 1 to 3
shown above. To display the overview screen, see section 19.4, “Viewing System Information
(Overview),” in the user’s manual.
Guide
Note
You can install up to four of the High-Speed 100 MS/s, 12-Bit Isolation Modules (HS100M12). You can only
install them in the top slots.
3-6
IM DL850-03EN
3.3 Installing Input Modules
1
Removal
1. Make sure that the instrument’s power switch is off.
2. Loosen the two screws that are fastened to the input module.
2
3. Hold the two handles at the top and bottom of the input module, and pull it out.
About the High-speed, 100 MS/s, 12-bit Isolated Module
3
Safety Precautions for Laser Products
High-Speed 100 MS/s, 12-Bit Isolation Module (720210 (HS100M12))
The following information is printed on the side.
Making Preparations for Measurements
The High-Speed 100 MS/s, 12-Bit Isolation Module (720210 (HS100M12)) uses an internal laser light
source. The 720210 (HS100M12) is a class 1 laser product as defined by IEC60825-1: Safety of Laser
Products—Part1: Equipment Classification.
4
5
6
DL850/DL850V
The following information is printed on the top.
App
Index
Laser Specifications
Center wavelength: 850 nm
Pulse width:
≤ 10 ms (100 MHz), ≤ 2.5 ns (2 GHz)
Output:
≤ 1 mW
If the instrument is used in a manner not specified in this manual, the protection provided by the
instrument may be impaired. YOKOGAWA assumes no liability for the customer’s failure to comply
with these warnings and requirements.
IM DL850-03EN
3-7
3.3 Installing Input Modules
LEDs on the Frequency Module
On the front panel of the frequency module (701280 (FREQ)) are LEDs for each channel. These LEDs
allow you to check the input condition of the pulse.
ACT
OVER
LED
Green:
Red:
ACT
OVER
Off:
Pulses are being received.
The input voltage range has
been exceeded.
Pulses are not being received.
701280 (FREQ)
Note
•
•
The LEDs on the frequency module illuminates in green when pulse is applied and red when the input
voltage level is over range. It is independent of the start/stop condition of waveform acquisition of the
DL850/DL850V.
When the preset of the frequency module is set to EM Pickup (electromagnetic pickup), the LED will not
illuminate in red when the range is exceeded.
For information about presets, see section 1.6, “Configuring Frequency, Revolution, Period, Duty Cycle,
Power Supply Frequency, Pulse Width, Pulse Integration, and Velocity Measurements,” in the user’s
manual.
3-8
IM DL850-03EN
3.4
Connecting to a Power Supply and Turning the
Power Switch On and Off
1
2
Before Connecting the Power
Make sure that you observe the following points before connecting the power. Failure to do so may
cause electric shock or damage to the instrument.
3
• Before connecting the power cord, ensure that the source voltage matches the rated supply
voltage of the instrument and that it is within the maximum rated voltage of the provided
power cord.
• Connect the power cord after checking that the power switch of the instrument is turned off.
• To prevent the possibility of electric shock or fire, be sure to use the power cord for the
instrument that was supplied by YOKOGAWA.
• To avoid electric shock, be sure to ground the instrument. Connect the power cord to a
three-prong power outlet with a protective earth terminal.
• Do not use an extension cord without a protective earth ground. Otherwise, the protection
function will be compromised.
• If an AC outlet that conforms to the accessory power cord is unavailable and protective
grounding cannot be furnished, do not use the instrument.
Making Preparations for Measurements
WARNING
4
5
6
App
Connecting the Power Cord
1. Check that the power switch is off.
Index
2. Connect the power cord plug to the power inlet on the left side panel.
3. Connect the other end of the cord to an outlet that meets the conditions below. Use the threeprong power outlet equipped with a protective earth terminal.
Rated supply voltage*
Permitted supply voltage range
Rated supply voltage frequency
Permitted supply voltage frequency range
Maximum power consumption
*
IM DL850-03EN
100 to 120 VAC/200 to 240 VAC
90 to 132 VAC/180 to 264 VAC
50/60 Hz
48 to 63 Hz
Approx. 200 VA max.
(This value is for reference. When the built-in printer is not
being used and there are 16 active channels, the maximum
power consumption is 135 VA.)
The instrument can use a 100 V or a 200 V power supply. The maximum rated voltage differs according
to the type of power cord. Check that the voltage supplied to the DL850/DL850V is less than or equal to
the maximum rated voltage of the provided power cord (see page iii) before using it.
3-9
3.4 Connecting to a Power Supply and Turning the Power Switch On and Off
Turning the Power Switch On and Off
Before Turning On the Power, Check That:
• The instrument is installed properly (see section 3.2, “Installing the Instrument”).
• The power cord is connected properly (see the previous page).
Turning the Power Switch On and Off
Flip the power switch on the left side panel to ON (|) to turn the instrument on, and to OFF (○) to turn
the instrument off.
Operations Performed When the Power Is Turned On
When the power switch is turned on, self testing and calibration start automatically. This lasts for
approximately 30 seconds. If testing and calibration finish normally, the waveform display screen
appears.
Note
•
•
•
•
3-10
After turning the power off, wait at least 10 seconds before you turn it on again.
If the instrument does not perform the operations described above after the power is turned on, turn the
power off, and check:
• That the power cord is plugged in properly.
• That the correct voltage is coming to the power outlet (see the previous page).
After checking the above, try turning on the power switch while holding down the RESET key to initialize
the settings (reset them to their factory defaults). For details about initializing the settings, see section 4.6,
“Initializing Settings.”
If the instrument still does not work properly, contact your nearest YOKOGAWA dealer for repairs.
It takes several seconds for the startup screen to appear.
IM DL850-03EN
3.4 Connecting to a Power Supply and Turning the Power Switch On and Off
1
To Make Accurate Measurements
• After turning on the power switch, wait at least 30 minutes to allow the instrument to warm up.
• Perform calibration after the instrument has warmed up (see section 4.7 for details). If auto
calibration is turned on, auto calibration is executed when you change the Time/div setting or start
waveform acquisition.
Operations Performed When the Power Is Turned Off
Note
The instrument stores the settings using an internal lithium battery. The battery lasts for approximately five
years when the ambient temperature is 23°C. When the lithium battery voltage falls below a specified value
and you turn on the power, a message (error 907) appears on the screen. If this message appears frequently,
you need to replace the battery soon. Do not try to replace the battery yourself. Contact your nearest
YOKOGAWA dealer to have the battery replaced.
3
Making Preparations for Measurements
When the power switch is turned off (or the power plug is removed), the instrument stores the current
settings in its memory. This means that if you turn the power switch on and begin measurement, the
instrument will perform measurements using the settings from immediately before the instrument was
last turned off.
2
4
5
6
App
Index
IM DL850-03EN
3-11
3.5
Connecting Probes
Connecting Probes
Connect the probes (or other input cables such as BNC cables) to any of the input terminals of the
following modules. The input impedance is 1 MΩ ± 1 % and approximately 35 pF.
• High-Speed 100 MS/s, 12-Bit Isolation Module:
720210 (HS100M12)
• High-Speed 10 MS/s, 12-Bit Isolation Module:
701250(HS10M12)
• High-Speed High-Resolution 1 MS/s, 16-Bit Isolation Module: 701251 (HS1M16)
• High-Speed 10 MS/s, 12-Bit Non-Isolation Module:
701255 (NONISO_10M12)
• High-Voltage 100 kS/s, 16-Bit Isolation Module (with RMS):
701260 (HV(with RMS))
• Acceleration/Voltage Module (with AAF):
701275 (ACCL/VOLT)
• Frequency Module:
701280 (FREQ)
WARNING
• When connecting a device under measurement to the instrument, be sure to turn off the
device. It is extremely dangerous to connect or remove measuring leads while the device
under measurement is on.
Precautions to Be Taken When Using the Modules
• Do not apply input voltage exceeding the maximum input voltage, withstand voltage, or
allowable surge voltage.
• To avoid electric shock, be sure to ground the instrument.
• To prevent the possibility of electric shock, be sure to fasten the module screws. Otherwise,
the electrical protection function and the mechanical protection function will not be
activated.
• Do not leave the instrument connected to devices in an environment that may be subject to
voltage surges.
• Use only specified cables. It is extremely dangerous to use cables that do not meet the
safety standards. (Especially when you are handling high voltages of 42 V or more.)
• When measuring high voltages using the 720210 (HS100M12), 701250 (HS10M12), or
701251 (HS1M16), use an isolated probe (the 700929 or 701947), 1:1 safety cable (a
combination of the 701901 and 701954), or differential probe (700924).
• When you apply high voltages to the 701260 (HV (with RMS)), use a 1:1 safety cable (a
combination of the 701901 and 701954) or isolated probe (the 700929 or 701947).
• The BNC portion of the 10 MHz passive probe (701940) is metal, so if you use it with
isolated input (the 720210 (HS100M12), 701250 (HS10M12), 701251 (HS1M16), 701260
(HV (with RMS)), 701275 (ACCL/VOLT), or 701280(FREQ)), for safety, be sure to only use
it with voltages at or below 42 V. (Do not connect voltage above 42 V to both the High and
Low sides.)For non-isolated inputs (701255 (NONISO_10M12), etc.), fasten the module
screws.
• The measurement category of the 701260 (HV (with RMS)) is 400V-CATII on the low side
and 700V-CATII on the high side. Use caution because the overvoltage tolerance differs
between the low and high sides.
• When you apply high voltages to the 701280 (FREQ), use an isolated probe (the 700929 or
701947).
3-12
IM DL850-03EN
3.5 Connecting Probes
1
In Using the High Voltage Differential Probes
Be sure to connect the GND lead of a differential probe (the 700924 or 700925) to the
functional ground terminal on the right side panel of the instrument. Otherwise, high voltage
may appear at the BNC connector making it dangerous.
• High-Speed 10 MS/s, 12-Bit Isolation Module (701250)
Maximum input voltage (at a frequency of 1 kHz or less)
• When used with the 700929 (10:1) isolated probe or the 701947 (100:1) isolated
probe.1
600 V (DC + ACpeak)
• Safety cable (1:1) (combined with 701901+701954)5 or direct input9
250 V (DC+ACpeak)
Maximum allowable common mode voltage (at a frequency of 1 kHz or less)
• When used with the 700929 (10:1) isolated probe or the 701947 (100:1) isolated
probe.2
Or when used with the safety cable (1:1; a combination of the 701901 and 701954).8
400 Vrms (CAT I), 300 Vrms (CAT II)
• Direct input10
42 V (DC + ACpeak, CAT I and CAT II, 30 Vrms)
3
4
5
6
App
Index
• High-Speed High-Resolution 1 MS/s, 16-Bit Isolation Module (701251)
Maximum input voltage (at a frequency of 1 kHz or less)
• When used with the 700929 (10:1) isolated probe or the 701947 (100:1) isolated
probe.1
600 V (DC+ACpeak)
• Safety cable (1:1) (combined with 701901+701954)5 or direct input9
140 V (DC+ACpeak)
Maximum allowable common mode voltage (at a frequency of 1 kHz or less)
• When used with the 700929 (10:1) isolated probe or the 701947 (100:1) isolated
probe.2
Or when used with the safety cable (1:1; a combination of the 701901 and +701954).8
400 Vrms (CAT I), 300 Vrms (CAT II)
• Direct input10
42 V (DC+ACpeak, CAT I and CAT II, 30 Vrms)
• High-Speed 10 MS/s, 12-Bit Non-Isolation Module (701255)
This module is non-isolated. Be sure to fasten the module screws when measuring a
voltage above 42 V on this module. In addition, use the dedicated non-isolated passive
probe (10:1) (701940).
Maximum input voltage (at a frequency of 1 kHz or less)
• Combined with the passive probe (701940) (10:1)
600 V (DC+ACpeak)
• Direct input9
250 V (DC+ACpeak)
IM DL850-03EN
2
Making Preparations for Measurements
Maximum Input Voltages and Maximum Allowable Common Mode Voltages for the
Modules
Applying a voltage exceeding the value indicated below may damage the input section. If the
frequency is above 1 kHz, damage may occur even when the voltage is below this value.
• For the 720210 (HS100M12)
Maximum input voltage (at a frequency of 1 kHz or less)
• When used with the 700929 (10:1) isolated probe or the 701947 (100:1) isolated
probe.1
1000 V (DC + ACpeak)
• With the safety cable (1:1; a combination of the 701901 and 701954)5 or direct input9
200 V (DC + ACpeak)
Maximum allowable common mode voltage (at a frequency of 1 kHz or less)
• When used with the 700929 (10:1) isolated probe or the 701947 (100:1) isolated
probe.2
Or when used with the safety cable (1:1; a combination of the 701901 and 701954).8
1000 Vrms (CAT II)
• Direct input10
42V (DC + ACpeak, CAT I and CAT II, 30 Vrms)
3-13
3.5 Connecting Probes
• High-Voltage 100 kS/s, 16-Bit Isolation Module (with RMS) (701260)
Maximum input voltage (at a frequency of 1 kHz or less)
• When used with the 700929 (10:1) isolated probe or the 701947 (100:1) isolated
probe.1
1000 V (DC+ACpeak)
• Safety cable (1:1) (combined with 701901+701954)5 or direct input9
850 V (DC+ACpeak)
Maximum allowable common mode voltage (at a frequency of 1 kHz or less)
• When used with the 700929 (10:1) isolated probe or the 701947 (100:1) isolated probe.
1000 Vrms (CAT II) on the H side,3 400 Vrms (CAT II)4 on the L side
• Safety cable (1:1) (combined with 701901+701954)
700 Vrms (CAT II) on the H side,6 400 Vrms (CAT II) on the L side7
• Direct input10
42 V (DC+ACpeak, CAT I and CAT II, 30 Vrms)
• 701275 (ACCL/VOLT)
Maximum input voltage (at a frequency of 1 kHz or less)
• Combined with the passive probe (701940) (10:1)11 or direct input9
42 V (DC+ACpeak)
Maximum allowable common mode voltage (at a frequency of 1 kHz or less)
• Combined with the passive probe (701940) (10:1)12 or direct input10
42 V (DC+ACpeak, CAT I and CAT II, 30 Vrms)
• 701280 (FREQ)
Maximum input voltage (at a frequency of 1 kHz or less)
• When used with the 700929 (10:1) isolated probe or the 701947 (100:1) isolated
probe.1
420 V (DC + ACpeak)
• Safety cable (1:1) (combined with 701901+701954)5 or direct input9
42 V (DC + ACpeak)
Maximum allowable common mode voltage (at a frequency of 1 kHz or less)
• When used with the 700929 (10:1) isolated probe or the 701947 (100:1) isolated
probe.2
400 Vrms (CAT I), 300 Vrms (CAT II)
• Safety cable (1:1) (combined with 701901+701954)8 or direct input10
42 V (DC+ACpeak, CAT I and CAT II, 30 Vrms)
With the 700929 or 701947
With the 701901 and 701954
H
700929/701947
1
3
L
4
Direct input (cable that does not comply
with the safety standards)
701901
H
701954
5
2
9
L
3-14
8
7
With the 10:1 passive probe (701940)
H
BNC
6
L
H
10
11
L
12
IM DL850-03EN
3.5 Connecting Probes
1
Precautions to Be Taken When Connecting Probes
Connecting Current Probes
When using current probes made by YOKOGAWA,* use the probe power supply (optional) on the right
side panel of the DL850/DL850V.
*
YOKOGAWA current probes: the 700937, 701930, 701931, and 701933
2
3
Making Preparations for Measurements
• When connecting a probe to the instrument for the first time, perform phase correction of the probe
as described in section 3.7, “Compensating the Probe (Phase Correction).” Failure to do so will
cause unstable gain across different frequencies, thereby preventing correct measurement. Make
the phase correction on each channel to which the probe is to be connected.
• You cannot perform phase correction of the probe on the frequency module (701280(FREQ)).
When connecting a probe to the 701280 (FREQ), first perform phase correction on the probe using
another module.
• If the object to be measured is connected to the instrument directly, without using a probe, a correct
measurement cannot be performed due to the input impedance. Please be aware of this.
• Please be aware that if you use a voltage probe that is not an isolated probe (the 700929 or
701947) and whose attenuation is not 1:1, 10:1, 100:1, or 1000:1, the correct measured values
cannot be displayed.
• Follow the instructions given in section 5.6, “Setting the Probe Type” to set the probe attenuation
(type) to match the actual value using the soft key menu. If they do not match, measured values
cannot be read correctly.
4
5
6
App
For details on the connection procedure, see the manual that came with the current probe.
Index
CAUTION
Do not use the probe power supply terminals (optional) on the right side panel of the DL850/
DL850V for purposes other than supplying power to the current probes. Also, be sure to use
only the number of probes allowed. Otherwise, the DL850/DL850V or the devices connected
to them may get damaged.
IM DL850-03EN
3-15
3.5 Connecting Probes
Precautions to Be Taken When Using Current Probes
When connecting the current probe to the probe power supply terminal on the right side panel,
make sure that the current does not exceed the range shown below. Otherwise, the DL850/DL850V
operation may become unstable due to the activation of the excessive current protection circuit of the
power supply.
A
If the terminals are named A through D
B
(Total current consumption for A through D) ≤ 1 A
PROBE
POWER
(±12V DC )
C
D
Specifications of the Probe Power Supply Terminals (Optional)
Item
Number of probes that can be used
Probes that can be used
Number of current probes that can be used
4
Current probe (700937, 701930, 701931, and 701933)
700937 (15 A): Up to 4
701930 (150 A): Up to 2
701931 (500 A): Up to 1
701933 (30 A): Up to 2
±12 V, two outputs (up to 1 A total current)
Supply voltage
When using the current probe, the number of probes that can be used is limited by the current
generated by the device under measurement (current measured by the current probe). The measured
versus consumed current characteristics of current probes that can be connected to the instrument are
indicated below.
150
Positive
current
100
50
0
-50
Negative
current
-100
-150
-200
-250
-15
-10
-5
0
Current probe (701931)
Current consumption (mA)
5
10
Measured current (A)
500
DC
AC (f = 50 Hz)
400
300
Positive
current
200
100
0
-100
Negative
current
-200
-300
400
300
200
Positive
current
100
0
Negative
current
-100
-200
-300
-400
-150
15
-100
-50
0
50
100
150
Measured current (A)
DC
AC (f = 50 Hz)
Current probe (701933)
Current consumption (mA)
Current consumption (mA)
250
200
DC
AC (f = 50 Hz)
Current probe (701930)
Current consumption (mA)
DC
AC (f = 50 Hz)
Current probe (700937)
600
500
400
300
Positive
current
200
100
0
–100
Negative
current
–200
–300
–400
-400
–500
-500
-500 -400 -300 –200 –100
0
100 200 300 400
Measured current (A)
500
–600
–50
–40
–30
–20
–10
0
10
20
30
40
50
Measured current (A)
For details about each current probe, contact your nearest YOKOGAWA dealer.
3-16
IM DL850-03EN
3.5 Connecting Probes
1
Connecting Differential Probes (700924)
When using differential probes (700924) made by YOKOGAWA, connect the BNC output connector
to the input terminal of the oscilloscope. Also, be sure to connect the GND lead to the functional
ground terminal of the DL850/DL850V. If necessary, use the auxiliary grounding lead extension. A
measurement of 1400 Vpeak is possible by connecting the GND lead to the DL850/DL850V.
For details on the connection procedure, see the manual that came with the differential probe.
2
3
Making Preparations for Measurements
Functional ground terminal
4
5
GND lead
6
WARNING
App
In Using the High Voltage Differential Probes
Be sure to connect the GND lead of a differential probe (the 700924 or 700925) to the
functional ground terminal on the right side panel of the DL850/DL850V. Otherwise, high
voltage may appear at the BNC connector making it dangerous. Also, be sure to connect the
GND lead to the DL850/DL850V before you connect to the device under measurement.
IM DL850-03EN
Index
3-17
3.6
Correcting the Probe Phase
For the following modules, always correct the probe phase before you use a probe for measurement.
• High-Speed 100 MS/s, 12-Bit Isolation Module:
720210 (HS100M12)
• High-Speed 10 MS/s, 12-Bit Isolation Module:
701250 (HS10M12)
• High-Speed High-Resolution 1 MS/s, 16-Bit Isolation Module: 701251 (HS1M16)
• High-Speed 10 MS/s, 12-Bit Non-Isolation Module:
701255 (NONISO_10M12)
• High-Voltage 100 kS/s, 16-Bit Isolation Module (with RMS):
701260 (HV (with RMS))
• Acceleration/Voltage Module (with AAF):
701275 (ACCL/VOLT)
• Frequency Module:
701280 (FREQ)
CAUTION
Do not apply external voltage to the probe compensation output terminal. This may cause
damage to the internal circuitry.
1. Turn on the power switch.
2. Connect the probe to a signal input terminal (the terminal that you will actually apply the signal
to measure to).
3. Connect the tip of the probe to the probe compensation output terminal on the front panel of the
instrument, and connect the ground wire to the functional ground terminal.
4. Follow the instructions in section 4.5, “Performing Auto Setup,” to perform auto setup on the
probe.
5. Insert a screwdriver into the phase adjustment knob, and turn the variable capacitor so that the
displayed waveform is an appropriate square wave.
Functional
ground terminal
Probe compensation
output terminal
Phase adjustment
knob
Necessity of Phase Correction of the Probe
If the probe’s input capacitance is not within the appropriate range, the gain will not be steady in
relation to the frequency, and waveforms will not be displayed correctly. Also, because the input
capacitance is not the same for each probe, the probe’s have variable capacitors (trimmers) that need
to be adjusted. This adjustment is referred to as phase correction.
Always correct the phase of a probe that you are using for the first time.
Also, because the appropriate input capacitance range is different for each channel, you need to
perform phase correction when you change the channel that a probe is connected to.
3-18
IM DL850-03EN
3.6 Correcting the Probe Phase
1
Phase Compensation Signal
The instrument generates the following square wave signal from the COMP signal output terminal.
Frequency: 1 kHz ± 1%
Computation: 1 V ± 10 %
2
Differences in the Waveform due to the Phase Correction of the
Probe
Correct waveform
Not enough adjustment
(reduced gain in the high
frequency band)
3
Making Preparations for Measurements
Too much adjustment
(increased gain in the high
frequency band)
4
5
Notes about Using Probes with the Frequency Module (701280
(FREQ))
6
You cannot perform phase correction on a probe connected to the frequency module. To use a probe
with the frequency module, first perform phase correction on the probe using another module.
App
Index
IM DL850-03EN
3-19
3.7
Connecting Measuring Leads
Connecting Measuring Leads
When you measure voltage using the 701261 (UNIVERSAL), 701262 (UNIVERSAL (AAF)), or 701265
(TEMP/HPV), connect the measuring leads of a bipolar banana plug terminal like the one shown in the
figure below to the input terminal (binding post terminal).
H (red)
L (black)
WARNING
• When connecting a device under measurement to the instrument, be sure to turn off the
device. It is extremely dangerous to connect or remove measuring leads while the device
under measurement is on.
• To prevent the possibility of electric shock, always connect measuring leads that match
the voltage range that you are measuring to the signal input terminals of the 701261
(UNIVERSAL), 701262 (UNIVERSAL (AAF)), and 701265 (TEMP/HPV).
• Applying a voltage exceeding the value indicated below may damage the input section.
If the frequency is above 1 kHz, damage may occur even when the voltage is below this
value.
For 701261, 701262, or 701265
• Maximum input voltage (across the input terminals, H and L,1 at a frequency of 1 kHz or
less)
42 V (DC+ACpeak)
• Maximum allowable common mode voltage (across the input terminals, H or L, and
earth,2 at a frequency of 1 kHz or less)
42 V (DC + ACpeak, CAT I and CAT II, 30 Vrms)
• Do not connect a plug-in type terminal with exposed conducting parts to the input terminal
to be used as a measuring lead. It is very dangerous, if the connector comes loose.
Input terminal of the H
701261, 701262,
and 701265
L
1
2
Ground
3-20
IM DL850-03EN
3.8
Connecting Thermocouples
1
2
Connecting Thermocouples
If you are connecting the compensation lead of the thermocouple to the input terminal (binding post
terminal) of the 701261 (UNIVERSAL), 701262 (UNIVERSAL (AAF)), or 701265 (TEMP/HPV), loosen
the terminal knob, pass the lead through the terminal, and tighten the knob.
L
Making Preparations for Measurements
H
3
4
Positive lead
Negative lead
5
Extension wires
(or bare thermocouple wires)
To the thermocouple
6
CAUTION
• The 701261 (UNIVERSAL), 701262 (UNIVERSAL (AAF)), or 701265 (TEMP/HPV) is
isolated from the DL850/DL850V. However, applying a voltage exceeding the value below
may damage the input section. If the frequency is above 1 kHz, damage may occur even
when the voltage is below this value.
Maximum input voltage (across the input terminals, H and L, at a frequency of 1 kHz or
less)
42 V (DC + ACpeak)
Maximum allowable common mode voltage (across the input terminal L and earth at a
frequency of 1 kHz or less)
42 V (DC + ACpeak, CAT I and CAT II, 30 Vrms)
• Correct measurements cannot be obtained when the positive and negative thermocouple
leads are connected in reverse.
• Immediately after connecting the thermocouple, the heat balance may be disturbed at
the input terminal section and may cause measurement errors. Therefore, wait about ten
minutes before making a measurement.
• In an environment where the air from the air conditioning is directly applied to the input
terminals or where there are effects from a heat source, the heat balance may be disturbed
at the input terminal section and cause measurement errors.
When making measurements in this type of environment, take preventive measures such
as changing the position.
IM DL850-03EN
3-21
App
Index
3.9
Connecting Bridgeheads
Strain is measured by connecting a strain gauge bridge (bridge head) or a strain gauge transducer to
the strain module.
This section will mainly describe the procedures and precautions related to the connection of the
bridge head (Model 701955/701956/701957/701958). For the connection of other strain gauge bridges
or strain gauge transducers, see the respective manuals.
CAUTION
Only connect a strain gauge bridge (bridge head) or a strain gauge transducer to the strain
module. Connecting other devices or applying a voltage that exceeds the values indicated
below to the strain module may damage the input section.
• Maximum input voltage (between Input+ and Input–)
10 V (DC + ACpeak)
• Maximum allowable common mode voltage (between each terminal and earth ground)
42 V (DC + ACpeak, CAT I and CAT II, 30 Vrms)
Connecting the Strain Gauge
The bridge head (701955/701956/701957/701958) supports six types of connection methods:
single-gauge method, single-gauge three-wire method, adjacent-side two-gauge method, oppositeside two-gauge method, opposite-side two-gauge three-wire method, and four-gauge method. For
details, see the manual that came with the bridge head (701955/701956/701957/701958).
If you are using a strain gauge bridge or a strain gauge transducer other than the bridge head (7019
55/701956/701957/701958), see the respective manuals.
Connecting the Strain Module and the Bridge Head
When Using the Strain Module (701270) and the Bridge Head (701955/701956)
Using the cable that came with the bridge head (701955/701956), connect the Strain Module
(701270) and the bridge head.
Strain Module 701270
(STRAIN_NDIS)
Cable
Bridgehead
701955/701956
When Using the Strain Module (701271) and the Bridge Head (701957/701958)
Using the cable that came with the bridge head (701957/701958), connect the Strain Module
(701271) and the bridge head.
Strain Module 701271
(STRAIN_DSUB)
3-22
Cable
Bridgehead
701957/701958
IM DL850-03EN
3.9 Connecting Bridgeheads
When Using a Bridge Head with a MIL Standard (MIL-C-26482) Connector Wiring
*
The connector on the Strain Module (701270) is a NDIS connector. Use a connector adapter
cable (700935) by YOKOGAWA to make a MIL-NDIS conversion and connect to the Strain Module
(701270).
*
Connector recommended by JSNDI (Japanese Society for Non-Destructive Inspection)
Bridgehead with MIL standard
connector wiring
Connector adapter cable
(700935) 1.5 m long
Strain Module 701270
(STRAIN_NDIS)
1
2
3
Making Preparations for Measurements
4
NDIS connector pinout
F
E
D
G
A
B
C
MIL standard connector pinout
A: Bridge+
(positive bridge voltage)
B: Input–
(negative measurement signal)
C: Bridge–
(negative bridge voltage)
D: Input+
(positive measurement signal)
E: Floating common
F: Sense+
(positive bridge voltage sensing)
G: Sense–
(negative bridge voltage sensing)
A
F
B
E
C
D
Corresponding
A: Signal+
terminals
B: Signal–
C: Excitation+
NDIS
MIL
D: Excitation–
A
C
E: NC
B
B
(no connection)
C
D
F: NC
D
A
(no connection)
5
6
App
When Using the A1002JC Connector by YOKOGAWA
You can create your own cable by using the YOKOGAWA A1002JC connector that is compatible
with the strain module and use the cable to connect a strain gauge bridge or a strain gage
transducer to the strain module.
A1002JC NDIS connector
(two in a set)
Pinouts as viewed in the
direction of arrow 1
A: Bridge+ (positive bridge voltage)
B: Input– (negative measurement signal)
A
F
C: Bridge– (negative bridge voltage)
G
D: Input+ (positive measurement signal)
E
B
E: Floating common
D
C
F: Sense+ (positive bridge voltage sensing)
G: Sense– (negative bridge voltage sensing)
1
Note
•
•
•
The connector shell is connected to the case potential of the DL850/DL850V.
Each of the signals from A to G is isolated within the module.
When creating your own cable, we recommend that you use a shielded cable in order to shut out external
noise.
CAUTION
Take extra care when wiring the connectors. If the wiring is shorted or incorrect, it can damage
the DL850/DL850V or other instruments that are connected to the DL850/DL850V.
IM DL850-03EN
3-23
Index
3.9 Connecting Bridgeheads
Pinout of the D-Sub Connector
As viewed in the direction of arrow 1
1
D-Sub 9-pin
connector
Cable
Connector shell
3
2
6
7
5
4
8
9
1: Floating common
2: Sense– (negative bridge voltage sensing)
3: Shuntcal– (negative shunt signal)
4: Shuntcal+ (positive shunt signal)
5: Sense+ (positive bridge voltage sensing)
6: Bridge– (negative bridge voltage)
7: Input– (negative measurement signal)
8: Input+ (positive measurement signal)
9: Bridge+ (positive bridge voltage)
1
3-24
IM DL850-03EN
3.10 Connecting a Logic Probe to the Logic Input
Module
To measure logic signals, connect a logic probe (the 702911, 702912, 700986, or 700987) to a logic
input module (the 720230).
CAUTION
About the Logic Probe
Types of Logic Probes
YOKOGAWA provides the following four types of probes (as accessories) for connecting to the logic
signal input connector of the DL850/DL850V.
• High-Speed Logic Probe (700986)
• Isolated Logic Probe (700987)
• 1 m Logic Probe (702911)
• 3 m Logic Probe (702912)
Types of Measuring Leads That Can Be Used
Use the following leads to connect to the point of measurement.
Connecting Leads That Can Be Used with Logic Probes 702911, 702912, and 700986
IM DL850-03EN
The following two types are available.
• Connecting lead (alligator clip, parts No. B9879PX)
This lead is primarily for connecting to contact circuits. The lead consists of 8 signal lines (red)
and 8 earth lines (black).
• Connecting lead (IC clip, parts No. B9879KX)
This lead is primarily for connecting to electronic circuits. The lead consists of 8 signal lines (red)
and 2 earth lines (black).
3-25
2
3
Making Preparations for Measurements
• Applying a voltage greater than the limits listed below may damage the logic probe or the
instrument. For frequencies above 1 kHz, damage may occur even if the voltage is less
than the limits listed below.
Maximum input voltage (at a frequency of 1 kHz or less)
• Logic probes 702911 and 702912: 35 V
• High-speed logic probe 700986: 42 V (DC + ACpeak)
• 700987 isolated logic probe: 250 Vrms (however, ACpeak must be less than 350 V, and
DC must be less than 250 V)
• For logic probes 702911 and 702912 and high-speed logic probe 700986, the eight input
lines of a single pod share the same ground. Also, the instrument’s ground and the grounds
of each pod are connected. Do not apply signals with different common voltages to each
input line. Doing so may damage the instrument, connected logic probes, and connected
devices.
• The input terminals of an isolated logic probe are isolated from each other and from the
DL850/DL850V.
• Turn off the DL850/DL850V before you connect or remove a 26-pin connector from the
logic signal input connector.
• Do not stack the isolated logic probes during use. Also, allow enough space around the
probes to avoid a temperature increase inside the probes.
• Do not use the YOKOGAWA 700985 logic probe with the DL850/DL850V. The 700985
is shaped so that it can be connected to the logic signal input connector of the DL850/
DL850V, but it is not electrically compatible with the DL850/DL850V, so connecting the two
could damage the DL850/DL850V or the 700985.
1
4
5
6
App
Index
3.10 Connecting Logic Probes
Types of Measuring Leads That Can Be Used on the Isolated Logic Probe (700987)
Use the following measuring lead.
• For measuring voltages of 42 V or more: Measuring lead for isolation logic (758917)
An alligator adapter (758922), alligator adapter (758929), or alligator clip (dolphin type, 701954)
is needed to make measurements.
Note
Do not modify the connecting leads. Doing so may degrade their specifications.
Connecting Logic Probes
Connecting Logic Probes 702911, 702912, and 700986
1. Attach the connecting lead (IC clip or alligator clip) that came with the logic probe, and push
the logic probe levers inwards to lock the connector into place. To remove the connecting leads
from the logic probe, push both of the levers outwards. Proceed to step 3.
Connecting the Isolated Logic Probe (700987)
1. Connect the measuring leads to the logic probe’s input terminal.
2. Set the input switch. When you set it to AC, the threshold levels are 50 VAC ± 50% (Hi: 80 to
250 VAC, Lo: 0 to 20 VAC); when you set it to DC, the threshold levels are 6 V ± 50% (Hi: 10 to
250 VDC, Lo: 0 to 3 VDC).
Connecting the Logic Probe to a Logic Input Module
3. Turn the instrument’s power switch off.
4. Connect to the logic signal input connector of the logic input module (720230) the end of the
logic probe’s 26-pin connector that has a clamp filter (ferrite core; part number: A1190MN).
5. Turn on the DL850/DL850V.
To the logic signal input connector
of the logic input module
Note
•
•
•
3-26
When a logic probe is not connected to the DL850/DL850V, each bit is indicated as being at the high
level.
For the logic probe specifications, see section 6.14, “Logic Probe Specifications.”
The logic input display is turned off by default. For information about turning the display on and off, see
chapter 1, “Vertical and Horizontal Control,” in the user’s manual.
IM DL850-03EN
3.11 Connecting an Acceleration Sensor
1
An acceleration sensor is connected when measuring acceleration on the 701275 (ACCL/VOLT). For a
details on acceleration sensors, see the respective manuals.
3
CAUTION
When Connecting Built-in Amplifier Type Acceleration Sensors
The DL850/DL850V allows built-in amplifier type (low impedance) acceleration sensors to be directly
connected. To connect built-in amplifier type acceleration sensors, use BNC cables. Use cables that
are appropriate for the acceleration sensors being used.
Connect the acceleration sensors with the bias current turned off. After connection, turn on the supply
current to the acceleration sensors for making measurements.
When Connecting Charge Output Type Acceleration Sensors
Since the charge output type (high impedance) acceleration sensors do not have built-in amplifier
circuit, they cannot be directly connected to the DL850/DL850V. Use either of the following two
methods to connect the sensors.
Using the Charge Amplifier
Connect a charge-output-type acceleration sensor to the charge amplifier using a high-insulation,
low-noise cable. The acceleration signal (charge signal) that has been converted to a voltage
signal by the charge amplifier is input to the DL850/DL850V using a normal coaxial cable. The
DL850/DL850V measures the signal in the voltage measurement mode. The measured data can be
converted to acceleration values using the scale conversion function of the DL850/DL850V.
DL850/DL850V
IM DL850-03EN
Normal coaxial
cable
Charge amp
4
5
6
Connecting Acceleration Sensors
Charge-output-type
acceleration sensor
Making Preparations for Measurements
• Applying a voltage that exceeds the values indicated below to the 701275 (ACCL/VOLT)
may damage the input section.
Maximum input voltage: 42 V (DC+ACpeak)
• When connecting acceleration sensors, do it without the bias current being supplied to the
sensor. Otherwise, damage to the internal circuitry of the acceleration sensors may result.
• The DL850/DL850V only supports acceleration sensors that are driven by constant current
with driving current of 4 mA and driving voltage of 22 V.
High-insulation,
low-noise cable
2
701275(ACCL/VOLT)
(voltage measurement)
3-27
App
Index
3.11 Connecting an Acceleration Sensor
When using the charge converter
Connect a charge-output-type acceleration sensor to the charge converter using a high-insulation,
low-noise cable. By driving the charge converter using a constant current from the DL850/DL850V,
voltage signals similar to those of the built-in amplifier type acceleration sensor can be obtained.
The DL850/DL850V measures the signals in the acceleration measurement mode and supplies
bias current to the charge converter. Set the input sensitivity of the DL850/DL850V according to the
charge converter gain and the sensitivity of the charge output type acceleration sensor.
The DL850/DL850V only supports charge converters that are driven by constant current with driving
current of 4 mA and driving voltage of 22 V.
DL850/DL850V
High-insulation,
low-noise cable
Charge-output-type
acceleration sensor
Normal coaxial
cable
Charge
converter
701275(ACCL/VOLT)
(acceleration measurement)
Note
The unit of measurement of acceleration on the DL850/DL850V is m/s2. If the sensitivity is indicated in mV/G
for the acceleration sensor that you are using, convert it to m/s2. (1 G = 9.81 m/s2)
Precautions
• Do not apply shock outside the specifications (see the manual for the acceleration sensor) to the
acceleration sensors. Doing so can damage the sensors.
• Do not impose drastic temperature changes on the acceleration sensors. Temperature changes
may affect the output value of the acceleration sensors.
• By default, the bias current on the acceleration sensors is turned off. Be sure to turn it on before
using the acceleration sensors. Bias current is valid only when measuring acceleration. When
measuring other parameters, it is automatically turned off. The bias current on/off setting is saved
when the DL850/DL850V is turned off.
3-28
IM DL850-03EN
3.12 Connecting Sensors to the Frequency Module
1
Sensors and Signal Output Sources That Can Be Connected
2
The table below shows the sensor and signal output source that can be connected. Appropriate input
presets are provided for each sensor and signal output source. For information about presets, see
Input Setup in section 1.6, “Configuring Frequency, Revolution, Period, Duty Cycle, Power Supply
Frequency, Pulse Width, Pulse Integration, and Velocity Measurements,” in the user’s manual.
Precautions to Be Taken When Connecting to Sensors or Signal
Output Sources
Making Preparations for Measurements
Sensor and Signal Output Source
Preset Name
5-V logic signal, 5-V output sensor, and sensor with TTL output
Logic 5V
3-V logic signal and 3-V output sensor
Logic 3V
12-V driven relay/sequence circuit and 12-V driven sensor
Logic 12V
24-V driven relay/sequence circuit and 24-V driven sensor
Logic 24V
Sensor/Encoder that outputs positive and negative voltages and sensor that outputs sine waves ZeroCross
100-VAC power supply (connected via the isolated probe (700929))
AC100V
200-VAC power supply (connected via the isolated probe (700929))
AC200V
Power-generating electromagnetic pickup
EM Pickup
Open collector (0 to 5 V) output sensor, contact output
Pull-up 5V*
* For the internal equivalent circuit when the preset setting is Pull-up 5V, see the “Frequency Measurement”
section in chapter 2, “Vertical Axis” in the feature’s guide (IM DL850-01EN).
3
4
5
6
App
CAUTION
• The maximum input voltage for direct input is indicated below. Applying a voltage exceeding
this value can damage the input section. When applying a high voltage of 42 V or more, be
sure to use an isolated probe (the 700929 or 701947).
Maximum input voltage:
(CAT I and CAT II)
42 V (DC + ACpeak)
• The minimum input voltage is 0.2 Vpp. At voltage amplitude less than 0.2 Vpp, the
measured values may be unstable.
• Attach/Remove the sensors after confirming that the rotating object to be measured is
stopped.
• Set the preset to electromagnetic pickup (EM Pickup) only when using the electromagnetic
pickup.
Connecting the Electromagnetic Pickup
• The DL850/DL850V allows power-generating electromagnetic pickup to be connected directly. The
DL850/DL850V does not support electromagnetic pickups that require external power supply or
those that require a terminator at the output.
• To connect electromagnetic pickups, use BNC cables. Use cables that are appropriate for the
electromagnetic pickups being used.
• When the input is set to electromagnetic pickup, determination is not made on whether the input
voltage level exceeds the specified input voltage range. Therefore, the LEDs (see page 3-7) do not
illuminate eve when the input voltage level is over range.
DL850/DL850V
Rotating object under
measurement
BNC connector
Power-generating
electromagnetic pickup
IM DL850-03EN
701280 (FREQ)
3-29
Index
3.13 Connecting Wires to the 16-CH Voltage Input
Module
To measure voltages with the 720220 (16CH VOLT), connect wires to the terminal block.
WARNING
• When connecting a device under measurement to the instrument, be sure to turn off the
device. It is extremely dangerous to connect or remove wires while the device under
measurement is on.
Precautions to Be Taken When Using the Modules
• Do not apply input voltage exceeding the maximum input voltage, withstand voltage, or
allowable surge voltage.
• To avoid electric shock, be sure to ground the instrument.
• To prevent the possibility of electric shock, be sure to fasten the module screws. Otherwise,
the electrical protection function and the mechanical protection function will not be
activated.
• Do not leave the instrument connected to devices in an environment that may be subject to
voltage surges.
• To prevent electric shock, connect wires to the terminal block that match the voltage range
that you are measuring.
• Applying a voltage exceeding the value indicated below may damage the input section.
If the frequency is above 1 kHz, damage may occur even when the voltage is below this
value.
Maximum input voltage (across the input terminals, H and L,1 at a frequency of 1 kHz or
less)
42 V (DC + ACpeak)
Maximum allowable common mode voltage (across the input terminals, H or L, and earth,2
at a frequency of 1 kHz or less)
42 V (DC + ACpeak, CAT I and CAT II, 30 Vrms)
• Wire the L input terminals for all of the sub channels on the same module to the same
potential. The L input terminals of the sub channels are all common. Because the L
input terminals are electrically connected inside the DL850/DL850V, connecting different
potentials to them could result in short circuiting and damage to the 16-CH Voltage Input
Module.
Terminal block
L H Sub channel
1
2
H
The L input terminals are
Input terminal
electrically connected
L
inside the instrument
(same potential).
Ground
16
*1
*2
Wire insertion hole Screwdriver insertion hole
• When you release or lock the terminal block release levers, be careful not to injure yourself
on the levers’ protrusions.
CAUTION
When you attach the terminal block, if you try to attach it upside down, you may damage the
terminal block and the module. Check the vertical orientation of the block before you install it.
3-30
IM DL850-03EN
3.13 Connecting Wires to the 16-CH Voltage Input Module
What to Prepare
1
Wiring
Remove approximately 7 mm of the insulation from the ends of the wires.
Electrical wire: 0.20 mm2 to 1.00 mm2 recommended (solid wire or thin stranded wire). AWG
size: 24-18.
2
Approx. 7 mm
Flat-blade Screwdriver
Tip size:
Shape:
3
0.4 mm (thickness) × 2.5 mm (width)
DIN5264-A (Use a straight driver.)
First, turn off the DL850/DL850V. Make sure that the other end of the wire that you are connecting to
the terminal block is not connected to the device under measurement, or make sure that the device
under measurement that you are going to connect to is turned off.
1. Insert the flat-blade screwdriver into the screwdriver insertion hole right next to the wire
Making Preparations for Measurements
Connecting Wires to the Terminal Block
4
5
insertion hole.
If you do not insert the flat-blade screwdriver into the hole firmly, the wire insertion hole will not open.
2. Insert the wire that you prepared into the wire insertion hole.
Insert the wire until it reaches the back of the wire insertion hole.
6
3. Pull the flat-blade screwdriver out of the screwdriver insertion hole.
When you pull out the flat-blade screwdriver, hold the wire in place so that it does not come out with the
screwdriver.
4. Pull lightly on the wire to make sure that it doesn’t come out.
App
After you have finished connecting the wires, turn on the DL850/DL850V and the device under
measurement.
Wire insertion hole
Terminal block
Screwdriver
insertion hole
Module: 720220 (16CH VOLT)
Wire
Flat-blade screwdriver
Note
Removing and Attaching the Terminal Block
It is normally not necessary to remove the terminal block, but it is possible to do so.
Removal
Push terminal block release levers 1 and 2 to their release positions, and pull out the terminal block.
Attachment
Push terminal block release levers 1 and 2 to their lock positions, and insert the terminal block. Push the
terminal block firmly all the way to the back. However, the terminal block will not go all the way to the back
if it is upside down. Do not try to force the terminal block all the way to the back.
Removing
Release
Release lever 1
Attaching
Hold
Release lever 2
IM DL850-03EN
3-31
Index
3.14 Connecting a Cable to the CAN Bus Monitor
Module
To monitor CAN bus signals, connect a cable to the CAN bus monitor module’s D-sub connector.
Connector Pinout
The pinout of the D-sub connector (9 pin, male) is shown below.
Pinout
5
9
1
6
Pin No.
1
2
3
4
5
6
7
8
9
Signal
(NC)
CAN_L
GND
(NC)
(NC)
GND
CAN_H
(NC)
(NC)
Function
Not used (can not be connected to)
CAN low signal
Ground
Not used (can not be connected to)
Not used (can not be connected to)
Ground
CAN high signal
Not used (can not be connected to)
Not used (can not be connected to)
* One-inch screws (number 4-40 UNC) are used.
Note
The connector shell is connected to GND. Additionally, GND and the connector shell are isolated from the
electric potential of the DL850/DL850V case (earth).
CAUTION
Applying a voltage greater than the maximum input voltage may damage the input section.
Connecting the Cable (Signal wires)
When you connect a cable to the D-sub connector, be sure to tighten the screws to ensure that the
cable is connected securely.
CAN bus monitor module
720240 (CAN MONITOR)
Cable
Screws
3-32
IM DL850-03EN
3.15 Attaching the Panel Sheet
1
Depending on the suffix code, attach the supplied front panel sheet if necessary. You can attach the
panel sheet over the panel sheet that was attached when the DL850/DL850V was shipped from the
factory.
2
3
Attaching the Panel Sheet
Making Preparations for Measurements
There are three panel sheet attachment hooks on both the left and right sides of the front panel.
Hook the panel sheet onto the three hooks on the left side.
Then, bend the panel sheet slightly, and hook it onto the three hooks on the right side.
4
5
6
Panel sheet attachment hook
App
Index
IM DL850-03EN
3-33
Chapter 4
4.1
Common Operations
Key and Jog Shuttle Operations
1
2
Key Operations
How to Use Setup Menus That Appear When Keys Are Pressed
The operation after you press a key varies depending on the key that you press.
HISTORY menu
FFT menu
3
MODE menu
E
B
F
B
G
H
4
Common Operations
A
5
F
6
C
App
D
A: Press the soft key to display a selection menu.
Press the soft key that corresponds to the appropriate setting.
B: Press the soft key to use the jog shuttle to configure this setting. Use the jog shuttle or the arrow
keys to set the value or select an item.
To set a value, press NUM LOCK, and then use the CH1 to CH16 keys.
C: A related setup menu appears when you press the soft key.
D: Press the soft key to execute the specified feature.
E: Selects which item to configure when configuring a feature that consists of two items that operate
with different settings, such as the FFT1 and FFT2 features.
F: The selected setting switches each time you press the soft key.
G: Displays a dialog box or a keyboard.
Use the jog shuttle, SET key, and arrow keys to configure the settings in the dialog box or
operate the keyboard.
H: Pressing a key sets the item to the setting that corresponds to that key.
How to Display the Setup Menus That Are Written in Purple below the Keys
In the explanations in this manual, “SHIFT+key name (written in purple)” is used to indicate the
following operation.
1. Press SHIFT. The SHIFT key illuminates to indicate that the keys are shifted.
Now you can select the setup menus written in purple below the keys.
2. Press the key that you want to display the setup menu of.
ESC Key Operation
If you press the ESC key when a setup menu or available settings are displayed, the screen returns
to the menu level above the current one. If you press the ESC key when the highest level menu is
displayed, the setup menu disappears.
IM DL850-03EN
4-1
Index
4.1 Key and Jog Shuttle Operations
RESET Key Operation
If you press RESET when you are using the jog shuttle to set a value or select an item, the setting
is reset to its default value (depending on the operating state of the DL850/DL850V, the setting may
not be reset).
SET Key Operations
The operation varies as indicated below depending on what you are setting.
• For a soft key menu that has two values that you use the jog shuttle to adjust
Press SET to switch the value that the jog shuttle adjusts.
• For a menu that has the jog shuttle + SET mark (
Press SET to confirm the selected item.
+ SET
) displayed on it.
Arrow Key Operations
The operation varies depending on what you are setting.
• When setting a value
Up and down arrow keys: Increases and decreases the value
Left and right arrow keys: Changes which digit to set
• When selecting the item to set
You can use the up and down arrow keys.
How to Enter Values in Setup Dialog Boxes
1. Use the keys to display the appropriate setup dialog box.
2. Use the jog shuttle or the arrow keys to move the cursor to the setting that you want to set.
3. Press SET. The operation varies as indicated below depending on what you are setting.
•
•
•
•
A selection menu appears.
A check box is selected or cleared.
An item is selected.
A table of settings is selected.
Displaying a Selection Menu and Selecting an Item
Displays the selection menu
Select Time or Freq.
After selecting an item with the jog
shuttle, press SET to confirm it.
Setting Items in a Table
After moving the cursor to the table, press SET
to select the setting the you want to change.
Press SET to select
a table entry.
How to Clear Setup Dialog Boxes
Press ESC to clear the setup dialog box from the screen.
4-2
IM DL850-03EN
4.2
Entering Values and Strings
1
2
Entering Values
Using Dedicated Knobs
You can use the following dedicated knobs to enter values directly.
• Vertical POSITION knob
• SCALE knob
• TIME/DIV knob
• ZOOM magnification knob (MAG)
• Zoom POSITION knob (for scrolling zoom waveforms)
3
4
Select the appropriate item using the soft keys, and change the value using the jog shuttle, the SET
key, and the arrow keys. This manual sometimes describes this operation simply as “using the jog
shuttle.”
Using the Keypad
Common Operations
Using the Jog Shuttle
5
6
Press NUM LOCK to illuminate the NUM LOCK key, and use the CH1 to CH16 keys to enter a
value. After you enter the value, press ENTER to confirm it.
App
Index
Use the keypad to enter the value.
Note
Some items that you can set using the jog shuttle are reset to their default values when you press the RESET
key.
IM DL850-03EN
4-3
4.2 Entering Values and Strings
Entering Character Strings
Use the keyboard that appears on the screen to enter file names and comments. Use the jog shuttle,
the SET key, and the arrow keys to operate the keyboard and enter a character string.
How to Operate the Keyboard
1. Press the InputMode soft key and then the English soft key.
2. After bringing up the keyboard, use the jog shuttle to move the cursor to the character that you
want to enter. You can also move the cursor using the up, down, left, and right arrow keys.
3. Press SET to enter the character.
•
If a character string has already been entered, use the arrow soft keys (< and >) to move the cursor to
the position you want to insert characters into.
To switch between uppercase and lowercase letters, press the Caps soft key.
To delete the previous character, press the BS soft key.
•
•
4. Repeat steps 1 and 3 to enter all of the characters in the string.
Select
on the keyboard or press the History soft key to display a list of character strings that you have
entered previously.
Use the jog shuttle to select a character string, and press SET to enter the selected character string.
5. Press the ENTER soft key, or move the cursor to ENTER on the keyboard, and press SET to
confirm the character string and clear the keyboard.
Character insertion position
Select to enter a string from the history.
Select the keyboard language
(English, Japanese).
Switches between uppercase
and lowercase
Moves the character insertion
position
Deletes the previous character
Confirms the characters that
you have entered
Select to enter a string from the
history.
List of previously entered strings
After selecting an item using the jog shuttle
or the arrow keys, press SET to confirm it.
Note
•
•
4-4
@ cannot be entered consecutively.
File names are not case-sensitive. Comments are case-sensitive. The following file names cannot be
used due to MS-DOS limitations:
AUX, CON, PRN, NUL, CLOCK, COM1 to COM9, and LPT1 to LPT9
IM DL850-03EN
4.3
Using USB Keyboards and Mouse Devices
1
2
Connecting a USB Keyboard
You can connect a USB keyboard and use it to enter file names, comments, and other items.
Usable Keyboards
3
You can use the following keyboards that conform to USB Human Interface Devices (HID) Class
Ver. 1.1.
• When the USB keyboard language is English:
104 keyboards
• When the USB keyboard language is Japanese: 109 keyboards
4
•
•
•
Common Operations
Note
Do not connect incompatible keyboards.
The operation of USB keyboards that have USB hubs or mouse connectors is not guaranteed.
For USB keyboards that have been tested for compatibility, contact your nearest YOKOGAWA dealer.
5
USB Ports for Peripherals
6
Connect a USB keyboard to the USB port for peripherals on the left side panel.
Connection Procedure
Connect a USB keyboard directly to the DL850/DL850V using a USB cable. You can connect or
remove the USB cable regardless of whether the DL850/DL850V power switch is turned on (hotplug support). Connect the type A connector of the USB cable to the DL850/DL850V, and connect
the type B connector to the keyboard. When the power switch is on, the keyboard is detected and
enabled approximately 6 seconds after it is connected.
Note
•
•
•
•
Only connect a compatible USB keyboard, mouse, printer, or storage device to the USB port for
peripherals.
Do not connect multiple keyboards. You can connect one keyboard, one mouse, and one printer to the
DL850/DL850V.
Do not connect and disconnect multiple USB devices repetitively. Wait for at least 10 seconds after you
connect or remove one USB device before you connect or remove another USB device.
Do not remove USB cables during the time from when the DL850/DL850V is turned on until key operation
becomes available (approximately 20 to 30 seconds).
Entering File Names, Comments, and Other Items
When a keyboard is displayed on the screen, you can enter file names, comments, and other items
using the USB keyboard.
Entering Values from a USB Keyboard
You can use a USB keyboard to enter the values of items with 123 marks on the menu screens by
pressing CTRL+N on the USB keyboard to put the DL850/DL850V in the NUM LOCK state.
IM DL850-03EN
4-5
App
Index
4.3 Using USB Keyboards and Mouse Devices
Using a USB Mouse
You can connect a USB mouse and use it to perform the same operations that you can perform with
the DL850/DL850V keys. Also, by clicking a menu item, you can perform the same operation that
you can perform by pressing the menu item’s soft key or selecting the menu item and pressing the
SET key.
USB Ports for Peripherals
Connect a USB mouse to a USB port for peripherals on the front or rear panel of the DL850/
DL850V.
Usable USB Mouse Devices
You can use mouse devices (with wheels) that are compliant with USB HID Class Version 1.1.
Note
•
•
For USB mouse devices that have been tested for compatibility, contact your nearest YOKOGAWA dealer.
Some settings cannot be configured by a mouse without a wheel.
Connection Procedure
To connect a USB mouse to the DL850/DL850V, use one of the USB ports for peripherals. You
can connect or disconnect the USB mouse at any time regardless of whether the DL850/DL850V
is on or off (hot-plugging is supported). When the power switch is on, the mouse is detected
approximately 6 seconds after it is connected, and the mouse pointer ( ) appears.
Note
•
•
4-6
Only connect a compatible USB keyboard, mouse, printer, or storage device to the USB port for
peripherals.
Even though there are two USB ports for peripherals, do not connect two mouse devices to the DL850/
DL850V.
IM DL850-03EN
4.3 Using USB Keyboards and Mouse Devices
1
Operating the DL850/DL850V Using a USB Mouse
• Operations That Correspond to the Front Panel Keys (Top Menu)
Displaying the Top Menu
2
Right-click on the display. A menu of the DL850/DL850V front panel keys appears.
Selecting an Item from the Top Menu
Click on the item that you want to select. A setup menu that corresponds to the item that you
selected appears at the bottom of the display. The top menu disappears.
To display an item’s submenu, point to the item. To select an item on a submenu, click on it, just
as you would to select an item on the top menu.
Top Menu
Right-click to display the top menu.
3
4
Common Operations
Submenu
Submenus appear for items that have them.
5
Pointer
6
The setup menu that you select
using the mouse appears.
App
Index
Note
•
IM DL850-03EN
The following keys are not displayed in the top menu:
ESC, RESET, and SET
4-7
4.3 Using USB Keyboards and Mouse Devices
• Setup Menu Operations (Same as soft key operations)
Selecting a Setup Menu Item
Click the setup menu item that you want to select.
If a selection menu appears after you select an item, click the selection menu item that you want
to choose.
If an item such as ON or OFF appears, click on the item to change its setting.
For menu items that are usually selected using the job shuttle and the SET key, clicking on the
item that you want to select will confirm your selection and close the dialog box.
Click in this area to display a selection menu.
Clicking the selection menu item that you want to select will
confirm your selection.
Click in this area to display a menu for selecting items using the
jog shuttle and SET.
Clicking the menu item that you want to select will confirm your
selection.
Click in this area to change the selected item.
Clearing the Menu
To clear the menu, click outside of it.
• Specifying Values
The following description explains how to specify values for menu items that have a
to them.
123
icon next
• If there are two 123 icons next to a single menu item, click on the item to select an item to
configure.
• To increase a value, rotate the mouse wheel back.
• To decrease a value, rotate the mouse wheel forward.
• To increase a value, move the pointer above the value so that the pointer becomes a , and
then click the left mouse button.
• To decrease a value, move the pointer below the value so that the pointer becomes a , and
then click the left mouse button.
• To move the decimal place, point to the left or right of the value you want to set so that the
pointer becomes a
or a
, and then click the left mouse button. The decimal place will
move one place to the right or left each time you click the left mouse button.
Change the value by clicking and using the mouse wheel.
Click within this area to select the item that you want to set.
4-8
IM DL850-03EN
4.3 Using USB Keyboards and Mouse Devices
1
• Selecting Check Boxes
To select a check box, click it. To clear a check box, click it again.
2
Click the item that you want to select.
Note
3
• Selecting a File, Folder, or Media Drive from the File List Window
4
To close a dialog box, click outside of it.
Common Operations
Click on a file, folder, or media drive to select it.
Rotate the mouse wheel to scroll through the file list.
To cancel your selection, click outside of the File List window. The File List window will close
when you cancel your selection.
5
6
App
Click on the file, folder, or
media drive that you want
to select.
Index
Scroll bar
Click on the item that you want to select.
• Setting V/DIV and TIME/DIV
Setting V/DIV
Move the pointer close to the V/DIV value in the upper left of the display. The pointer becomes
. Rotate the mouse wheel forward to increase the V/DIV value, and rotate it back to
a
decrease the value.
Setting TIME/DIV
Move the pointer close to the TIME/DIV value in the upper right of the display. The pointer
. Rotate the mouse wheel forward to increase the TIME/DIV value, and rotate it
becomes a
back to decrease the value.
V/DIV setting
IM DL850-03EN
TIME/DIV setting
4-9
4.4
Synchronizing the Clock
This section explains how to set the DL850/DL850V clock, which is used to generate timestamps for
measured data and files. The DL850/DL850V is factory shipped with a set date and time. You must set
the clock before you start measurements.
UTILITY System Config Menu
Press UTILITY, the System Config soft key, and then the Date/Time soft key to display the following
screen.
Turns the display of the date
and time on and off
Set the display format.
Set the date and time.
Set the time difference from
Greenwich Mean Time.
Setting the Display Format (Format)
You can display the date in one of the following formats.
2008/09/30 (year/numeric month/day)
30/09/2008 (day/numeric month/year)
30-Sep-08 (day-English abbreviation of the month-last two digits of the year)
30 Sep 2008 (day month (English abbreviation) year)
Setting the Time Difference from Greenwich Mean Time (Time Diff.
GMT)
Set the time difference between the region where you are using the DL850/DL850V and Greenwich
Mean Time.
Selectable range: -12 hours 00 minutes to 13 hours 00 minutes
For example, Japan standard time is ahead of GMT by 9 hours. In this case, set Time Hour to 9 and
Minute to 00.
Checking the Standard Time
Using one of the methods below, check the standard time of the region where you are using the
DL850/DL850V.
• Check the Date, Time, Language, Regional Options on your PC.
• Check the standard time at the following URL:http://www.worldtimeserver.com/
Note
•
•
•
4-10
The DL850/DL850V does not support Daylight Saving Time. To set the time to Daylight Saving Time, reset
the time difference from Greenwich Mean Time.
Date and time settings are backed up using an internal lithium battery. They are retained even if the power
is turned off.
The DL850/DL850V has leap-year information.
IM DL850-03EN
4.5
Performing Auto Setup
1
The auto setup feature automatically sets the V/div, Time/div, trigger level, and other settings to the
most suitable values for the input signals.
SETUP Menu
2
3
Press SETUP to display the following menu.
4
Common Operations
Executes auto setup
5
Undoes auto setup
6
App
Index
Center Position after the Execution of Auto Setup
The center position after you execute auto setup will be 0 V.
Applicable Modules
Auto setup is performed on the following modules.
701250(HS10M12), 701251(HS1M16), 701255(NONISO_10M12), 701260(HV(with RMS)),
701261(UNIVERSAL), 701262(UNIVERSAL(AAF)), 701275(ACCL/VOLT), 720210(HS100M12),
720220(16CH VOLT)
Channels That Auto Setup Is Performed On
Auto setup is performed on all channels except logic channels.
Logic waveforms are displayed with the same settings as before you executed auto setup.
Waveforms Displayed before the Execution of Auto Setup
When you perform auto setup, the data in the acquisition memory is overwritten, and the waveforms
that were displayed before you executed auto setup are cleared.
Undoing Auto Setup
You can press the Undo soft key to revert to the settings that were in effect before you executed auto
setup. You cannot undo auto setup if you switch to a different setup menu or clear the SETUP menu
using the ESC key.
IM DL850-03EN
4-11
4.5 Performing Auto Setup
Signals That Auto Setup Can Be Applied To
Frequency:
Absolute input voltage:
Type:
Approx. 50 Hz or higher
Signals whose maximum value is at least approx. 20 mV (at 1:1 setting)
Simple, repeating signals
Note
The auto setup feature may not work properly for signals that include a DC component or high-frequency
components.
Settings after the Execution of Auto Setup
Waveform Acquisition and Display Settings
START/STOP
Acquisition mode
Acquisition count
Record length
Time base
Real-time HD recording
Dual capturing
Accumulation
Vertical axis settings
START
Normal
Infinite
10 k
Int.
Off
Off
Off
V/Div
The value that causes the absolute values of the input
waveform to be between 1.6 and 4.5 div
0V
DC
FULL
Channels whose absolute input voltage values reach or
exceed 20 mV (1:1) are displayed (except for Scan).
The displays of modules that are not affected by auto
setup do not change.
DIV
0.00 div
×1
The waveform with the shortest period out of the
waveforms affected by auto setup is used to set T/div.
T/div is set to the value at which 1.6 to 4 periods of the
waveform can be displayed.
Offset voltage
Coupling
Bandwidth limit
Display on/off
DIV/Scale
Position
V Zoom
T/div
Trigger Settings
Trigger mode
Trigger type
Trigger source
Trigger level/slope
Hysteresis
Hold-off
Trigger position
Trigger delay
Computation Settings
Math
Auto
SIMPLE
The channel with the longest period out of the channels
whose amplitude is 1 div or greater
The level between the maximum and minimum values/
rising
Low
0.0 nsec
50%
0.0 μsec
Off
The values of settings not listed here do not change.
4-12
IM DL850-03EN
4.6
Initializing Settings
1
You can reset the DL850/DL850V settings to their factory default values. This feature is useful when
you want to cancel all of the settings that you have entered or when you want to redo measurement
from scratch.
2
3
SETUP Menu
Press SETUP to display the following menu.
4
Initializes the settings
Common Operations
5
Undoes initialization
6
App
Index
Settings That Cannot Be Reset to Their Factory Default Values
• Date and time settings
• Communication settings
• Language setting (English or Japanese)
Undoing the Reset Operation
If you reset the settings by mistake, you can press the Undo soft key to revert to the previous settings.
However, you cannot undo the reset operation if you switch to a different setup menu or clear the
SETUP menu by pressing the ESC key.
To Reset All Settings to Their Factory Default Settings
While holding down the RESET key, turn the power switch on. All settings except the date and time
settings (display on/off setting will be reset) and the setup data stored in internal memory will be reset
to their factory default values.
IM DL850-03EN
4-13
4.7
Calibrating the DL850/DL850V
CAL Menu
Press SHIFT+SETUP (CAL) to display the following menu.
Executes calibration
Turns auto calibration on and off
Calibration
The following items are calibrated. Execute calibration when you want to make accurate
measurements.
• Vertical axis ground level and gain
• Trigger threshold level
• Measured time value for repetitive sampling
Note
Calibration is performed automatically when the power switch is turned on.
Notes about Calibration
• Allow the DL850/DL850V to warm up for at least 30 minutes before you execute calibration. If you
execute calibration immediately after power-on, the calibrated values may drift due to temperature
changes or other environmental changes.
• Execute calibration in an environment with a stable temperature ranging from 5 to 40°C (23 ± 5°C
recommended).
• Do not apply signals when calibrating. Calibration may not be executed properly when input signals
are being applied to the DL850/DL850V.
Auto Calibration (Auto Cal)
Auto calibration is executed when you start signal acquisition if you have changed Time/div and any of
the time periods listed below has elapsed since the power was turned on.
• 3 minutes
• 10 minutes
• 30 minutes
• One hour and every hour thereafter
If calibration is executed while signals are being applied to the DL850/DL850V, we recommend that
you recalibrate the DL850/DL850V without any signals being applied to it.
4-14
IM DL850-03EN
4.8
Starting and Stopping Waveform Acquisition
1
2
Starting and Stopping Waveform Acquisition.
Press START/STOP to start or stop waveform acquisition.
The key is illuminated while the DL850/DL850V is acquiring waveforms.
3
Waveform Acquisition and Indicators
• When the START/STOP key is illuminated, the DL850/DL850V is acquiring waveforms. “Running”
appears in the lower left of the screen.
• When the START/STOP key is not illuminated, waveform acquisition is stopped. “Stopped” appears
in the lower left of the screen.
4
Common Operations
DL850/DL850V Operation When the Acquisition Mode Is Set to
Averaging
5
• Averaging stops when you stop waveform acquisition.
• If you restart waveform acquisition again, averaging starts from the beginning.
6
START and STOP Operations during Accumulation
• Accumulation stops when you stop acquisition.
• If you restart waveform acquisition, past waveforms are cleared, and accumulation starts over.
App
Note
You can use the snapshot feature to retain the displayed waveform on the screen. This feature allows you to
retain a waveform on the screen while the DL850/DL850V continues signal acquisition.
IM DL850-03EN
4-15
Index
4.9
Displaying Help
Displaying Help
Press the help key ( ? ) to display help.
The table of contents and index appear in the left frame, and text appears in the right frame.
Switching between Frames
To switch to the frame that you want to control, use the left and right arrow keys.
Moving Cursors and Scrolling
To scroll through the screen or to move the cursor in the table of contents or index, turn the jog shuttle.
Moving to the Link Destination
To move to a description that relates to blue text or to move from the table of contents or index to the
corresponding description, move the cursor to the appropriate blue text or item, and press SET.
Displaying Panel Key Descriptions
With help displayed, press a panel key to display an explanation of it.
Returning to the Previous Screen
To return to the previous screen, press RESET.
Hiding Help
Press the help key ( ? ) to clear help.
4-16
IM DL850-03EN
Chapter 5
5.1
External Signal I/O
External Trigger Input (TRIGGER IN)
1
2
CAUTION
Only apply signals that meet the following specifications. Signals that do not meet the
specifications may damage the DL850/DL850V, because of factors such as excessive voltage.
External Trigger Input Terminal
3
4
TRIGGER
IN
5
OUT
External Signal I/O
This terminal is used when an external signal is used as the trigger source.
Item
Connector type
Input level
Minimum pulse width
Logic
Trigger delay time
Externally synchronized operation
6
Specifications
BNC
TTL (0 to 5 V)
100 ns
Rising and falling edges
Within 100 ns + 1 sample period
Possible (through the connection of the TRIG IN and TRIG OUT
terminals of two DL850/DL850Vs)
App
Index
Circuit Diagram and Timing Chart for External Trigger Input
+5 V
Minimum pulse width
Equivalent
to LCX14
4.7 kΩ
100 Ω
TRIG IN
(When set to
)
100 pF
Trigger delay time
Internal trigger
Note
You can synchronize the operation of two DL850/DL850Vs by using the trigger output function.
No. 1
TRIG
OUT
IM DL850-03EN
DL850/
DL850V
No. 2
TRIG
IN
DL850/
DL850V
5-1
5.2
Trigger Output (TRIGGER OUT)
CAUTION
Do not short the TRIG OUT terminal or apply external voltage to it. Doing so may damage the
instrument.
External Trigger Output Terminal
TRIGGER
IN
OUT
When a trigger occurs, the DL850/DL850V produces a CMOS level signal. You can set the output
mode to normal or pulse. The signal level is normally high. It becomes low when a trigger occurs.
Item
Connector type
Output level
Output formats
Logic
Specifications
BNC
CMOS level (0 to 5 V)
Normal mode and pulse mode
Normal mode
Low when a trigger occurs and high after acquisition is
completed
Pulse mode
Low when a trigger occurs and high after a specified period
of time has passed.
Normal mode
Within 100 ns + 1 sample period
Pulse mode
Within 100 ns + 1 sample period
Normal mode
100 ns or more
Pulse mode
1 ms, 50 ms, 100 ms, or 500 ms
Output delay
Output hold time
Circuit Diagram and Timing Chart for Trigger Output
Equivalent to HC245
100 Ω
EXT TRIG OUT
• Normal mode
Trigger occurrence
(the time at the trigger position)
• Pulse mode
Trigger occurrence
(the time at the trigger position)
Internal trigger
Internal trigger
Output delay
Output delay
Trigger output
Trigger output
Output hold time
Output hold time
Low Level and High Level Hold Times (In normal mode)
Trigger occurrence
Trigger output
Trigger occurrence
H
L
Post-trigger time
Waveform acquisition
5-2
Trigger
Post
Pre
Pre
Trigger
Post
IM DL850-03EN
5.3
External Clock Input (EXT CLK IN)
1
2
CAUTION
Only apply signals that meet the following specifications. Signals that do not meet the
specifications may damage the DL850/DL850V, because of factors such as excessive voltage.
External-clock input terminal
4
EXT CLKIN
5
Use this terminal to operate the DL850/DL850V using an external clock signal.
External Signal I/O
Item
Connector type
Input level
Detected edge
Minimum pulse width
External clock frequency range
3
Specifications
BNC
TTL (0 to 5 V)
Rising
50 ns or more for both high and low
Up to 9.5 MHz
6
App
Circuit Diagram for External Clock Input
+5 V
100 Ω
4.7 kΩ
Index
Equivalent
to LCX14
EXT CLK IN
100 pF
IM DL850-03EN
5-3
5.4
Video Signal Output (VIDEO OUT (XGA))
CAUTION
• Only connect the DL850/DL850V to a monitor after turning both the DL850/DL850V and
the monitor off.
• Do not short the VIDEO OUT terminal or apply external voltage to it. Doing so may damage
the DL850/DL850V.
Video Signal Output Terminal
VIDEO OUT
(XGA)
You can use video signal output to display the DL850/DL850V screen on a monitor. Any multisync
monitor that supports XGA can be connected.
Item
Connector type
Output format
Output resolution
Specifications
D-sub 15-pin
Analog RGB output
XGA output, 1024 × 768 dots, approx. 60 Hz Vsync
10
15
5
11
1
6
D-Sub 15-pin receptacle
Pin No.
1
2
3
4
5
6
7
8
9
10
11
12
13
14
15
Signal
Red
Green
Blue
—
—
GND
GND
GND
—
GND
—
—
Horizontal sync signal
Vertical sync signal
—
Specifications
0.7 VP-P
0.7 VP-P
0.7 VP-P
Approx. 36.4 kHz, TTL positive logic
Approx. 60 Hz, TTL positive logic
Connecting to a Monitor
1. Turn off the DL850/DL850V and the monitor.
2. Connect the DL850/DL850V and the monitor using an RGB cable.
3. Turn on the DL850/DL850V and the monitor.
5-4
IM DL850-03EN
5.5
GO/NO-GO Determination I/O and External
Start/Stop Input (EXT I/O)
1
2
Connecting to Other Instruments
CAUTION
3
• Do not apply external voltage to the NO-GO OUT and GO OUT output pins. Doing so may
damage the instrument.
• When connecting the GO/NO-GO determination signal output to another device, do not
connect the wrong signal pin. Doing so may damage the DL850/DL850V or the connected
instrument.
• Do not connect a USB cable to the GO/NO-GO output terminal. Doing so may damage the
instrument.
4
5
External Signal I/O
About the External I/O Cable (720911; sold separately)
• Do not use the cable for anything other than the DL850/DL850V external I/O.
• Refer to the following figure to connect the cable to an external device.
6
Approx. 1.5 m
6
Pin no.
1
2
3
4
5
App
1
Process the wires at the
end of the stripped cable
as necessary.
Wire color
Red
Yellow
White
Green
Blue
To the DL850/DL850V
RJ-11 connector
Index
Signal
Logic
EXT EVENT IN Negative logic
START IN
Negative logic
GO OUT
Negative logic
NOGO OUT
Negative logic
GND
GO/NO-GO Determination I/O
You can apply an external signal to the DL850/DL850V’s GO/NO-GO I/O terminal and perform GO/
NO-GO determination, and you can output the results of GO/NO-GO determination from the GO/NOGO I/O terminal.
GO/NO-GO I/O Connector
Type
The connector uses an RJ-11 modular jack. Use the external I/O cable accessory (720911; sold
separately). If you are using a commercially sold cable (four-conductor modular telephone cable),
wire the pins according to the above figure.
I/O Level
Within 0 to 5 V, threshold level: TTL
Pinout
EXT I/O
6
1
Connector on
the DL850
IM DL850-03EN
Pin no.
1
2
3
4
5
6
Signal
EXT EVENT IN
START IN
GO OUT
NOGO OUT
GND
NC (no connection)
IN
IN
OUT
OUT
Manual event. Event input occurs on low edge.
Starts on low edge
Active low (GO)
Active low (NO-GO)
5-5
5.5 GO/NO-GO Determination I/O and External Start/Stop Input (EXT I/O)
Input Signal
START IN (Negative logic)
Use this signal to perform GO/NO-GO determination by synchronizing to an external input signal.
The signal is only valid when on the GO/NO-GO menu, Remote is set to ON. If Remote is set to
OFF, GO/NO-GO determination is performed regardless of the external signal input (the GO/ NOGO determination result is output).
See the next page for the timing chart.
Signal Input Circuit
5V
Equivalent to
LCX14
4.7 kΩ
START IN
120 Ω
HIGH
LOW
100 pF
START
Output Signal
NOGO OUT (Negative logic)
When the determination result is NO-GO (fail), the output signal level temporarily changes from high
(H) to low (L).
GO OUT (Negative logic)
When the determination result is GO, the output signal level temporarily changes from high (H) to
low (L).
Signal Output Circuit
5V
4.7 kΩ
100 pF
GO OUT
NO-GO OUT
120 Ω
GO/NO-GO I/O Timing
100 ms or more
50 ms
or more
START IN
Acquisition
Acquisition
Judgment
NOGO OUT
0 ms
or more
Result
Judgment
Result
GO OUT
START IN is not referenced when Remote
is set to OFF; GO OUT and NO-GO OUT
are output according to internal
GO/NO-GO determination.
5-6
The signal remains low until the DL850/DL850V
is ready to accept the next measurement.
The duration is longer during output to a built-in
printer or internal storage medium.
IM DL850-03EN
5.5 GO/NO-GO Determination I/O and External Start/Stop Input (EXT I/O)
1
External Start/Stop Input (EXT I/O)
You can use an external signal to start and stop the DL850/DL850V.
2
External Start/Stop Input Terminal
The External Start/Stop Input terminal and the GO/NO-GO I/O terminal are the same terminal. This
terminal is used as an external start/stop input when the GO/NO-GO determination I/O function is not
used (when on the GO/NO-GO menu, Mode is set to OFF).
3
Specifications
The connector uses an RJ-11 modular jack. Connect the separately sold 720911 cable to the
connector.
6
1
Connector on
the DL850/DL850V
Signal
EXT EVENT IN Manual event. Event input occurs on low edge.
Starts on low edge, stops on high
START IN
NC (no connection)
NC (no connection)
GND
NC (no connection)
5
External Signal I/O
Pin no.
1
2
3
4
5
6
EXT I/O
4
6
Input level: TTL (0 to 5 V)
Circuit Diagram for External Start/Stop Input
App
+5 V
4.7 kΩ
LCX14
120 Ω
2
(pin no.)
Low
100 pF
• Contact input is possible
STOP
High
Index
START
+5 V
4.7 kΩ
LCX14
120 Ω
2
100 pF
Close to start,
open to stop
5
Note
•
•
IM DL850-03EN
Low and high edges are used to detect starts and stops.
You can select whether to ignore high edges (stops) in the external start/stop signal. For information about
how to do so, see section 18.8, “Configuring the Environment Settings,” in the user’s manual.
5-7
5.6
IRIG Signal Input (IRIG option)
CAUTION
Only apply signals that meet the following specifications. Signals that do not meet the
specifications may damage the DL850/DL850V, because of factors such as excessive voltage.
IRIG Signal Input Terminal
IRIG
You can use an IRIG (Inter Range Instrumentation Group) signal to set the time on the DL850/DL850V.
Item
Input connector
Number of input connectors
Supported IRIG signals
Input impedance
Maximum input voltage
Used for
Clock sync range
Post-sync accuracy
5-8
Specifications
BNC
1
A002, B002, A132, and B122
You can switch between 50 Ω and 5 kΩ.
±8 V
Synchronizing the DL850/DL850V time
Synchronizing the sample clock
±80 ppm
No drift from the input signal
IM DL850-03EN
Chapter 6
6.1
Specifications
Signal Input Section
Item
Type
Number of slots
Maximum number of input
channels
Maximum record length
6.2
Specifications
Plug-in input unit
8
16 channels per slot, 128 channels per unit (when a 16-CH Voltage Input Module is installed in
each slot)
The maximum length when all channels are being used depends on the number of channels in
each module.
The maximum values when the entire memory is used are listed below.
Standard
250 Mpoint when 1 channel is being used. 10 Mpoint per channel when 16
channels are being used.
/M1 option
1 Gpoint when 1 channel is being used. 50 Mpoint per channel when 16
channels are being used.
/M2 option
2 Gpoint when 1 channel is being used. 100 Mpoint per channel when 16
channels are being used.
2
3
4
5
Triggering Section
Selectable trigger position
range
Selectable trigger delay
range
Selectable hold-off time
range
Manual trigger key
Simple trigger
Trigger source
Trigger slope
Time trigger
Enhanced trigger
Trigger source
Trigger type
6
Specifications
Auto, Auto Level, Normal, Single, N Single, or On Start
0 ± 10 div
Specifications
Item
Trigger mode
Selectable trigger level
range
Trigger hysteresis
IM DL850-03EN
1
When measuring Select from ±0.1 div, ±0.5 div, and ±1 div.
voltage:
When measuring Select from ±0.5°C, ±1.0°C, and ±2.0°C.
temperature:
When measuring Select from ±2.5%, ±12.5%, and ±25%.
strain:
When measuring Select from ±0.1 div, ±0.5 div, and ±1 div.
acceleration:
When measuring Select from ±0.01 div, ±0.5 div, and ±1 div.
frequency:
0 to 100% (of the display record length; resolution: 0.1%)
App
Index
0 to 10 s (resolution: 10 ns)
0 to 10 s (resolution: 10 ns)
A dedicated manual trigger key can be used.
CHn (select an input channel), EXT, LINE, or Time
Rising, falling, or rising or falling
Date (year, month, and day), time (hour and minute), and time interval (10 seconds to 24 hours)
CHn (select an input channel)
A → B(N):
After the trigger A conditions are met, the DL850/DL850V triggers when the
trigger B conditions are met N times.
Count:
1 to 10000
Condition A:
Enter/Exit
Condition B:
Enter/Exit
A Delay B:
After the specified amount of time elapses after the trigger A conditions are met,
the DL850/DL850V triggers when the trigger B conditions are first met.
Time:
0 to 10 s (resolution: 10 ns)
Condition A:
Enter/Exit
Condition B:
Enter/Exit
Edge on A:
While the trigger A conditions are met, the DL850/DL850V triggers on the OR of
multiple trigger source edges.
Condition A:
True/False
AND:
The DL850/DL850V triggers on the AND of multiple state conditions.
OR:
The DL850/DL850V triggers on the OR of multiple trigger source edges or
states (or Window triggers)
Pulse Width
B>Time:
The DL850/DL850V triggers when the time from when the trigger B conditions
are met to when they change from being met to not being met is greater than
the specified time.
Time:
20 ns to 10 s (resolution: 10 ns)
6-1
6.2 Triggering Section
Item
6.3
Specifications
B<Time:
The DL850/DL850V triggers when the time from when the trigger B conditions
are met to when they change from being met to not being met is less than the
specified time.
Time:
20 ns to 10 s (resolution: 10 ns)
B Time Out:
The DL850/DL850V triggers when the trigger B conditions continue to be met
for the specified period of time.
Time:
20 ns to 10 s (resolution: 10 ns)
B Between
The DL850/DL850V triggers when the period during which the trigger B
conditions continue to be met is within the specified time range.
Time
T1: 10 ns to 9.99999999 s
T2: 20 ns to 10 s (resolution: 10 ns)
Period:
The DL850/DL850V triggers when the period meets one of the following
conditions.
T>Time:
The DL850/DL850V triggers when the period of the trigger T conditions is longer
than the specified time.
Time:
20 ns to 10 s (resolution: 10 ns)
T<Time:
The DL850/DL850V triggers when the period of the trigger T conditions is less
than the specified time.
Time:
20 ns to 10 s (resolution: 10 ns)
T1<T<T2:
The DL850/DL850V triggers when the period of the trigger T conditions is within
the specified time range.
Time:
T1: 20 ns to 10 s (resolution: 10 ns)
T2: 30 ns to 10 s (resolution: 10 ns)
T<T1, T2<T:
The DL850/DL850V triggers when the period of the trigger T conditions is
outside of the specified time range.
Time:
T1: 20 ns to 10 s (resolution: 10 ns)
T2: 30 ns to 10 s (resolution: 10 ns)
Window:
The DL850/DL850V triggers when the trigger source enters or exits the range of
two specified levels.
The DL850/DL850V can trigger on the OR of the window triggers of multiple
channels.
Wave Window:
This trigger is for monitoring power supplies.
The DL850/DL850V creates templates in real time by comparing 1, 2, or 4
cycles directly preceding the current waveforms using a tolerance value,
compares the current waveforms to the real-time templates, and triggers if one
of the current waveforms falls outside of its real-time template.
•The trigger A and B conditions can be set to High, Low, or Don’t Care for each channel. The AND
of the conditions (the parallel pattern) is used to determine the result.
• For OR and AND, the condition can be set to High, Low, IN, OUT, or Don’t Care for each channel.
Time Axis
Item
Specifications
Selectable time scale range The display of minutes per div, hours per div, and days per div is also possible.
100 ns/div1 to 1 s/div (in 1-2-5 steps), 2 s/div, 3 s/div, 4 s/div, 5 s/div, 6 s/div, 8 s/div, 10 s/div, 20
s/div, 30 s/div, 1 min/div to 10 min/div (in 1 min steps), 12 min/div, 15 min/div, 30 min/div, 1 h/div to
10 h/div (in 1 h steps), 12 h/div, 1 day/div, 2 days/div, 3 days/div
Time accuracy2
±0.005%
External clock input
Connector type: BNC
Input level:
TTL level
Detected edge: Rising
Frequency
Up to 9.5 MHz
range:
Minimum pulse 50 ns or more for both High and Low
width:
1
2
6-2
1 μs/div when the High-Speed 100 MS/s, 12-Bit Isolation Module (720210) is not installed
Under standard operating conditions after the warm-up time has passed
IM DL850-03EN
6.4
Display
Item
Display
Display screen size
Display resolution*
Resolution of the waveform
display
Display format
*
1
2
Specifications
10.4-inch TFT LCD
210.4 mm × 157.8 mm
1024 × 768 (XGA)
801 × 656 (normal) or 1001 × 656 (wide)
Divisions:
Up to three screen divisions can be displayed at the same time.
Each division can contain one of the following windows: TY, ZOOM1, ZOOM2, XY1,
XY2, FFT1, or FFT2.
4
The LCD may include a few defective pixels (within 5 ppm over the total number of pixels including RGB). The LCD may
contain some pixels that are always illuminated or that never light. Please be aware that these are not defects.
6.5
Features
5
Waveform Acquisition and Display
Record length
Zoom
Display format
Maximum number of
displayed traces
Display interpolation
Graticule
Auxiliary display on/off
X-Y display
Accumulation
Snapshot
Clear trace
Dual capturing
Main waveform
Captured waveform
Hard disk recording
(when the /HD0 or /HD1
option is installed)
*
6
Specifications
Normal:
Envelope:
Normal waveform acquisition
The peak values are held at the maximum sample rate regardless of the
Time/div setting.
Averaging:
The number of times to average can be set to 2 to 65536 in 2n steps.
Box average:
Increases the A/D resolution by up to 4 bits (16 bits max.).
1 kpoint, 2.5 kpoint, 5 kpoint, 10 kpoint, 25 kpoint, 50 kpoint, 100 kpoint, 250 kpoint, 500 kpoint,
1 Mpoint, 2.5 Mpoint, 5 Mpoint, 10 Mpoint, 25 Mpoint, 50 Mpoint, 100 Mpoint, 250 Mpoint, 500
Mpoint(on models with the /M1 or /M2 option), 1000 Mpoint(on models with the /M1 or /M2 option),
2000 Mpoint(on models with the /M2 option)
The displayed waveform is expanded along the time axis (up to two locations can be zoomed at
separate zoom factors).
Auto scrolling:
The DL850/DL850V automatically scrolls to the zoom position.
1, 2, 3, 4, 6, 8, 12, 16 analog waveform windows
64 traces per display group. You can switch between four display groups.
Sampled points can be displayed through the use of dots (OFF), sine interpolation, linear
interpolation, or pulse interpolation.
Three graticule types to choose from
Scale values, waveform labels, the extra window, the level indicator, and the numeric display can
be turned on and off.
The X and Y axes can be selected from CHn and MATHn (Max. four traces × two windows).
Persistence mode
The currently displayed waveforms can be retained on the screen.
Snapshot waveforms can be saved and loaded.
The displayed waveform is cleared.
The data of a single waveform can be acquired at two different sample rates.
Maximum sample rate: 100 kS/s (roll mode area)
Maximum sample rate: 100 MS/s*
Record length:
5 kpoint, 10 kpoint, 25 kpoint, 50 kpoint, 100 kpoint, 250 kpoint, 500
kpoint
Maximum sample rate: Depends on the number of channels being used. 1 MS/s when 1 channel
is being used. 100 kS/s when 16 channels are being used.
Capacity:
Depends on the amount of free space on the HDD
Operation overview:
When waveform acquisition occurs according to the specified trigger
mode, the DL850/DL850V stores the data to an internal hard disk or an
external hard disk that supports eSATA.
10 MS/s when the High-Speed 100 MS/s, 12-Bit Isolation Module (720210) is not installed
IM DL850-03EN
6-3
Specifications
Item
Acquisition mode
3
App
Index
6.5 Features
Vertical and Horizontal Control
Item
Channel on/off
ALL CH menu
Vertical axis zooming
Vertical position setting
Linear scaling
Roll mode
Specifications
CHn and MATHn can be turned on and off separately.
You configure the settings of all channels while displaying waveforms.
You can use a USB keyboard or mouse.
×0.1 to ×100 (varies depending on the module)
You set the scale using upper and lower limits or switch between different scales.
Waveforms can be moved in the range of ±5 div from the center of the waveform display frame.
The linear scaling mode can be set separately for each channel (only for voltage, stress, and
frequency). It can be set to AX+B or P1-P2.
Roll mode is enabled automatically when the trigger mode is set to Auto, Auto Level, Single, or On
Start, and the time axis setting is greater than or equal to 100 ms/div.
Analysis
Item
Zooming and searching
History search feature
Cursor measurement
Automated measurement
of waveform parameters
Statistical processing
Normal statistical
processing
Cyclic statistical
processing
Statistical processing of
the history data
Computation
User-defined computation
(/ G2 option)
Phase shifting
GO/NO-GO determination
6-4
Specifications
You can search for and then expand and display a portion of the displayed waveform.
You can choose from the following search methods.
Edge:
The DL850/DL850V counts the number of rising or falling edges
Logic pattern
The DL850/DL850V counts the number of times a logic pattern
is detected.
Event
The DL850/DL850V searches for an event number.
Time
The DL850/DL850V searches for a date and time.
You can search through history waveforms for specified conditions.
Zone search:
The DL850/DL850V displays waveforms that pass through or do
not pass through a specified area on the screen.
Parameter search:
The DL850/DL850V displays a waveform when the results of the
automated measurement of its parameters meet the specified
conditions.
Horizontal, Vertical, H&V, Degree (only during T-Y waveform display) and Marker
Automated measurement of waveform parameters
Up to 24 items can be displayed.
P-P, Amp, Max, Min, High, Low, Avg, Mid, Rms, Sdev, +OvrShoot, -OvrShoot, Rise, Fall, Freq,
Period, +Width, -Width, Duty, Pulse, Burst1, Burst2, AvgFreq, AvgPeriod, Int1TY, Int2TY, Int1XY,
Int2XY, Delay(between channels)
Applicable items:
Automated measurement values of waveform parameters
Statistical items:
Max, Min, Avg, Sdv, and Cnt
Maximum number of cycles:
64000 cycles (when the number of parameters is 1)
Maximum total number of
64000
parameters:
Maximum measurement range: 100 Mpoint
Statistical processing is performed while waveforms are acquired.
The DL850/DL850V automatically measures the waveform parameters of the data in the acquisition
memory and performs statistical processing on the parameters once per period.
The DL850/DL850V automatically measures the waveform parameters of each history waveform
and performs statistical processing on the parameters.
Operators:
+, −, ×, ÷, binary computation, phase shift, and power spectrum
Expressions can be created through the combination of the following operators and constants.
ABS, SQRT, LOG, EXP, NEG, SIN, COS, TAN, ATAN, PH, DIF, DDIF, INTG, IINTG, BIN, P2, P3,
F1, F2, FV, PWHH, PWHL, PWLH, PWLL, PWXX, DUTYH, DUTYL, FILT1, FILT2, HLBT, MEAN,
LS-, PS-, PSD-, CS-, TF-, CH-, MAG, LOGMAG, PHASE, REAL, IMAG
You can monitor the waveform of a specified channel with its phase shifted
The following two types of GO/NO-GO determination are available:
• Determination using zones on the screen
• Determination using the automated measurement values of waveform parameters.
The following operations can be performed at the time of determination:
Output of screen capture data, saving of waveform data (to binary, ASCII, or floating-point),
sounding of a notification buzzer, transfer of e-mail
IM DL850-03EN
6.5 Features
Screen Capture Data Output
1
Item
Built-in printer
(/B5 option)
External printer
File format
2
Specifications
A hard copy of the screen can be output.
Prints screen captures on an external printer connected over an Ethernet.
PNG, JPEG, or BMP
3
Data Storage
Item
History memory
Internal HDD and external
storage media
Specifications
Automatically holds up to 5000 pages of waveforms (depending on the record length)
Waveform data, setup data, automated measurement values, and the results of statistical
processing can be saved.
4
Other Features
Item
Initialization
Auto setup
Action-on-trigger
Overview
Self tests
Help feature
PROTECT key
NUM key
Japanese string input
IM DL850-03EN
6-5
5
6
Specifications
E-mail transmission
Calibration
System settings
Specifications
Resets settings to the factory default (excluding the date and time setting, communication interface
settings, language setting, and time difference from GMT setting). The reset can be undone.
Automatically sets the voltage axis, time axis, trigger, etc. The automatic settings can be undone.
Outputs screen capture data, saves waveform data (to binary, ASCII, or floating-point), sounds
a notification buzzer, transfers an e-mail, or performs some combination of the previous actions
whenever a trigger occurs
Sends e-mail using SMTP
Auto or manual
Screen color, date and time, message language, menu language, click sound on/off, and grid
thickness
The system specifications can be displayed.
Memory test, key test, printer test, and storage test
Displays a description of the settings
You can lock the keys to prevent unintentional operations.
You can enter numbers directly.
Compact-VJE Ver.3.0
App
Index
6.6
FFT
Item
Waveform to be computed
Number of channels
Computation range
Computed points
Time windows
Display window
6.7
Built-in Printer
Item
Print system
Sheet width
Effective print width
Dot density
Feeding direction resolution
Used for
6-6
Specifications
CHn or MATHn
1 (on models without the /G2 option), 2(on models with the /G2 option)
From the specified computation start point until the specified number of points have been computed
1 k, 2 k, 5 k, 10 k, 20 k, 50 k, or 100 k
Rect, Hanning, Hamming, FlatTop, and Exponential (on models with the /G2 option)
When the Exponential time window is selected, the following settings must be configured.
Damping rate:
The weight of the last data point, with the weight of the first data point in
the specified number of FFT points taken to be 100% (= 1).
Selectable range:
1 to 100%
Resolution:
1%
Force1:
Set the area over which computation is performed in terms of a
percentage from the first FFT point, taking the number of FFT points to
be 100%.
Selectable range:
1 to 100%
Resolution:
1%
Force2:
This setting applies to the output (response) signal (second parameter)
of a two-waveform FFT.
Selectable range:
1 to 100%
Resolution:
1%
The FFT computation results are displayed in a separate window independent from the normal
waveform display.
Display range:
Set the display range by setting Center and Sensitivity.
Specifications
Thermal line dot system
112 mm
104 mm (832 dots)
8 dot/mm
8 dot/mm
Producing a hard copy of the screen
IM DL850-03EN
6.8
Storage
1
SD Memory Card
Item
Number of slots
Maximum capacity
Supported cards
2
Specifications
1
16 GB
SD and SDHC compliant memory cards
3
Internal HDD (/HD1 option)
Item
Number of drives
Size
HDD capacity used
4
Specifications
1
2.5 in.
160 GB, FAT32
5
USB Ports for Peripherals
Specifications
Mass storage devices that are compliant with USB Mass Storage Class Ver. 1.1
6
Specifications
Item
Compatible USB storage
devices
App
External HDD Interface (/HD0 option)
Item
Connection interface
Number of drives
Usable HDD capacity
6.9
Index
USB for Peripherals
Item
Connector type
Electrical and mechanical
specifications
Supported transfer mode
Compatible devices
Number of ports
Power supply
IM DL850-03EN
Specifications
eSATA
1
1.5 TB, FAT32
Specifications
USB type A (receptacle)
USB Rev. 2.0 compliant
HS (High Speed; 480 Mbps), FS (Full Speed; 12 Mbps), LS (Low Speed; 1.5 Mbps)
Mass storage devices that are compliant with USB Mass Storage Class Ver. 1.1
104 or 109 keyboards that are compliant with USB HID Class Version 1.1
Mouse devices that are compliant with USB HID Class Version 1.1
2
5 V, 500 mA (for each port)
6-7
6.10 Auxiliary I/O Section
External Trigger Input (TRIGGER IN)
Item
Connector type
Input level
Minimum pulse width
Detected edge
Trigger delay time
Specifications
BNC
TTL
100 ns
Rising or falling
Within 100 ns + 1 sample
Trigger Output (TRIGGER OUT)
Item
Connector type
Output level
Logic
Output delay
Output hold time
Specifications
BNC
5 V CMOS
Low when a trigger occurs and high after acquisition is completed
Within 100 ns + 1 sample
100 ns or more
External Clock Input (EXT CLK IN)
Item
Connector type
Input level
Minimum pulse width
Detected edge
Sampling jitter
Specifications
BNC
TTL
50 ns
Rising
Within 100 ns + 1 sample
Video Signal Output (VIDEO OUT)
Item
Connector type
Output format
Output resolution
Specifications
D-sub 15 pin receptacle
Analog RGB
XGA-compliant output, 1024 × 768 dots
Approx. 60 Hz Vsync (dot clock frequency: 66 MHz)
GO/NO-GO Determination I/O
Item
Connector type
Input level
Output level
Specifications
RJ-11 modular jack
TTL or contact
5 V CMOS
External Start/Stop Input
Item
Connector type
Input level
6-8
Specifications
RJ-11 modular jack
TTL or contact
IM DL850-03EN
6.10 Auxiliary I/O Section
1
COMP Output (Probe-compensation-signal output terminal)
Item
Output signal frequency
Output amplitude
Specifications
1 kHz ± 1%
1 Vp-p ± 10%
2
Probe Power Output (/P4 Option)
Item
Number of output terminals
Output voltage
Output current
3
Specifications
4
±12 V
Up to 1 A
4
Time Sync Signal Input (IRIG; /C20 option)
Item
Input connector
Number of input connectors
Supported IRIG signals
Input impedance
Maximum input voltage
Used for
5
6
Specifications
Clock sync range
Post-sync accuracy
Specifications
BNC
1
A002, B002, A132, and B122
You can switch between 50 Ω and 5 kΩ.
±8 V
Synchronizing the DL850/DL850V time
Synchronizing the sample clock
±80 ppm
No drift from the input signal
App
6.11 Computer Interface
Index
USB-PC Connection
Item
Connector type
Electrical and mechanical
specifications
Supported transfer mode
Number of ports
Supported protocols
PC system requirements
Specifications
USB type B receptacle
USB Rev. 2.0 compliant
HS (High Speed; 480 Mbps) and FS (Full Speed; 12 Mbps)
1
USBTMC-USB488 (USB Test and Measurement Class Ver. 1.0)
A PC with a USB port, running the English or Japanese version of Windows 7 (32 bit), Windows
Vista (32 bit), or Windows XP (32 bit, SP2 or later)
Ethernet
Item
Connector type
Ports
Electrical and mechanical
specifications
Transmission system
Communication protocol
Supported services
IM DL850-03EN
Specifications
RJ-45 modular jack
1
IEEE802.3
Ethernet (1000BASE-T, 100BASE-TX, 10BASE-T)
TCP/IP
DHCP, DNS, SNTP client, SMTP client, FTP server and client, LPR, Web server, and VXI11
6-9
6.11 Computer Interface
GP-IB (/C1 or /C20 option)
Item
Connector type
Electrical specifications
Functional specifications
Protocol
Code
Mode
Address
Remote mode release
6-10
Specifications
24-pin connector
Complies with IEEE St’d 488-1978 (JIS C 1901-1987)
SH1, AH1, T6, L4, SR1, RL1, PP0, DC1, DT0, and C0
IEEE St’d 488.2-1992
ISO (ASCII)
Addressable mode
Talker and listener addresses can be specified from 0 to 30.
Remote mode can be cleared with the SHIFT+CLEAR TRACE key (except during Local Lockout).
IM DL850-03EN
6.12 General Specifications
Item
Standard operating
conditions
Recommended calibration
period
Warm-up time
Storage environment
Operating environment
Instrument cooling method
Battery backup
Backup battery life
Safety standard
IM DL850-03EN
Specifications
Ambient Temperature:
23 ± 5°C
Ambient humidity:
20 to 80% RH
Supply voltage and
Within ±1% of rating
frequency errors:
After the DL850/DL850V has been warmed up for 30 minutes and then calibration has been
performed
1 year
2
At least 30 minutes
Temperature:
Humidity:
Altitude:
Temperature:
Humidity:
4
3
−20 to 60°C
20 to 85% RH (no condensation)
3000 m or less
5 to 40°C
20 to 85% RH (when the printer is not being used)
35 to 85% RH (when the printer is used)
In both cases, no condensation
Altitude:
2000 m or less
100 to 120 VAC, 220 to 240 VAC (auto switching)
90 to 132 VAC, 198 to 264 VAC
5
6
Specifications
Rated supply voltage
Permitted supply voltage
range
Rated supply frequency
Permitted supply voltage
frequency range
Power fuse
Maximum power
consumption
Withstand voltage
Insulation resistance
External dimensions
Weight
1
50/60 Hz
48 to 63 Hz
App
Built in (not replaceable)
200 VA
1500 VAC for one minute between the power supply and case
10 MΩ or more for 500 VDC between the power supply and case
Approx. 355 mm (W) × 259 mm (H) × 180 mm (D), not including the handle and protrusions
Approx. 6.5 kg (weight of the DL850/DL850V only without paper and with the /M2, /HD1, /C1, and
/P4 options installed)
Forced air cooling. Exhaust on the left side and top panel.
The settings and clock are backed up with an internal lithium battery.
Approx. five years (at an ambient temperature of 25°C)
Compliant standards
EN61010-1, EN61010-031, EN 60825-1
• Overvoltage category (installation category) II1
• Measurement Category II2
• Pollution degree 23
Approved (DL850/DL850V, 701250, 701251, 701255, 701260, 701261, 701262, 701265,
701270, 701271, 701275, 701280, 720210, 720220, 720230, 720240, 700986, 700987,
701955, 701956, 701957, 701958, 702911, 702912)
• Bridgehead for the strain module
Use the 701955 or 701956 with the 701270, and use the 701957 or 701958 with the 701271.
6-11
Index
6.12 General Specifications
Item
Emissions
Specifications
Compliant standards
EN61326-1 ClassA, EN61326-2-1, C-Tick EN55011 ClassA, Group1
Approved (DL850/DL850V, 701250, 701251, 701255, 701260, 701261, 701262, 701265,
701270, 701271, 701275, 701280, 720210, 720220, 720230, 720240, 700986, 700987, 701955,
701956, 701957, 701958, 702911, 702912)
This product is a Class A (for industrial environments) product. Operation of this product in a
residential area may cause radio interference in which case the user is required to correct the
interference.
Test items
1. Power supply terminal noise
2. Radiation emission
3. Power supply harmonic regulation
4. Power supply voltage fluctuation and flicker
Cable conditions (DL850/DL850V)
Current probe
When connecting a current probe to the input terminal and probe power terminal of a module,
attach a single ferrite core4 to both cables on the side of the cables closest to the DL850/
DL850V.
GP-IB cable
Use a shielded cable that is 3 m or less in length.
USB cable
Use a shielded cable that is 3 m or less in length, and attach a ferrite core4 to the side of the
cable closest to the DL850/DL850V.
Ethernet cable
Use a shielded cable that is 3 m or less in length, and attach a ferrite core4 to the side of the
cable closest to the DL850/DL850V.
External clock input, external trigger input, external trigger output
Use a shielded cable that is 3 m or less in length, and attach a ferrite core4 to the side of the
cable closest to the DL850/DL850V.
IRIG cable
Use a shielded cable that is 3 m or less in length, and attach a ferrite core4 to the side of the
cable closest to the DL850/DL850V.
External HDD cable
Use a shielded cable that is 3 m or less in length.
Video signal output cable
Use a shielded cable that is 3 m or less in length, and attach a ferrite core5 to the side of the
cable closest to the DL850/DL850V.
External I/O cable
Use a shielded cable that is 3 m or less in length, and attach a ferrite core4 to the side of the
cable closest to the DL850/DL850V.
Probe power cable
Use the dedicated cable, and wrap it once around a ferrite core4 on the side of the cable
closest to the DL850/DL850V.
Example of wrapping the cable around once
Cable conditions (input module)
Isolated probe 700929 (for the 701250, 701251, 701255, 701260, 701275, and 720210)
Wrap the cable once around a ferrite core4 on the side of the cable closest to the DL850/
DL850V.
Twisted pair cable for the 701261, 701262, and 701265
Use a cable that is 3 m or less in length, and wrap the cable once around a ferrite core4 on
the side of the cable closest to the DL850/DL850V.
Twisted pair cable for the 720220
Use a cable that is 3 m or less in length, and wrap the cable once around a ferrite core6 on
the side of the cable closest to the DL850/DL850V.
D-sub 9-pin shielded cable (for the 720240)
Use a cable that is 3 m or less in length, and attach a ferrite core4 to the side of the cable
closest to the DL850/DL850V.
6-12
IM DL850-03EN
6.12 General Specifications
Item
Immunity
6-13
1
2
3
4
5
6
Specifications
IM DL850-03EN
Specifications
Bridgeheads 701955 and 701956 (for the 701270)
Use a cable that is 5 m or less in length, and attach a ferrite core4 to the side of the cable
closest to the DL850/DL850V.
Bridgeheads 701957 and 701958 (for the 701271)
Use a cable that is 5 m or less in length, and attach a ferrite core4 to the side of the cable
closest to the DL850/DL850V.
Logic probe input cables 700986, 700987, 702911, and 702912 (for the 720230)
Attach a ferrite core4 to the side of the cable closest to the DL850/DL850V.
Compliant standards
EN61326-1 Table 2 (for industrial locations), EN61326-2-1
Approved (DL850/DL850V, 701250, 701251, 701255, 701260, 701261, 701262, 701265,
701270, 701271, 701275, 701280, 720210, 720220, 720230, 720240, 700986, 700987,
701955, 701956, 701957, 701958, 702911, 702912)
Influence in the immunity environment (criteria A)
Noise increase
701250:
≤±20 mV (1:1 input, 5 mV/div conversion)
701251:
≤±3 mV (1:1 input, 1 mV/div conversion)
701255:
≤±25 mV (1:1 input, 5 mV/div conversion)
701260:
≤±30 mV (1:1 input, 20 mV/div conversion)
701261:
≤±3 mV (5 mV/div range conversion)
701262:
≤±3 mV (5 mV/div range conversion)
701265:
≤±0.05 mV (0.1 mV/div)
701270:
≤±100 μSTR (±500 μV range, gauge factor = 2)
701271:
≤±100 μSTR (±500 μV range, gauge factor = 2)
701275:
≤±6 mV (1:1 input, 5 mV/div range conversion)
701280:
≤±0.01 Hz (frequency, 0.1 Hz/div conversion)
720210:
≤±50 mV (1:1 input, 10 mV/div range conversion)
720220:
≤±20 mV (0.2 V/div range conversion)
720230:
No bit errors
720240
No erros
Test conditions
701250:
10 MS/s, envelope mode, 50 mV/div, no input filter, with the tip of the probe
(700929 (10:1)) shorted
701251:
1 MS/s, envelope mode, 10 mV/div, no input filter, with the tip of the probe
(700929 (10:1)) shorted
701255:
10 MS/s, envelope mode, 50 mV/div, no input filter, with the tip of the probe
(701940 (10:1)) shorted
701260:
100 kS/s, envelope mode, 0.2 V/div, no input filter, with the tip of the probe
(700929 (10:1)) shorted
701261:
100 kS/s, envelope mode, 5 mV/div, no input filter, with the end of the cable
shorted
701262:
100 kS/s, envelope mode, 5 mV/div, no input filter, with the end of the cable
shorted
701265:
500 S/s, envelope mode, 0.1 mV/div, no input filter, with the end of the cable
shorted
701270:
100 kS/s, envelope mode, 500 μSTR, gauge factor: 2.0, no input filter
701955 bridge voltage: 2 V
701956 bridge voltage: 10 V
701271:
100 kS/s, envelope mode, 500 μSTR, gauge factor: 2.0, no input filter
701957 bridge voltage: 2 V
701958 bridge voltage: 10 V
701275:
100 kS/s, envelope mode, 50 mV/div, no input filter, with the tip of the probe
(700929 (10:1)) shorted
701280:
25 kS/s, envelope mode, Frequency, no input filter, with the tip of the probe
shorted
720210:
100 M/s, envelope mode, 0.1 V/div, no input filter, with the tip of the probe
(700929 (10:1)) shorted
720220:
12.5 kS/s, envelope mode, 0.2 V/div, no input filter, with the end of the cable
shorted
720230:
Logic probes 700986, 700987, 702911, and 702912, with the tips of the logic
probes shorted
720240
Bit rate: 1 Msps, one shot operation
App
Index
6.12 General Specifications
Item
1
2
3
4
5
6
6-14
Specifications
Test items
1. Electrostatic discharge
Air discharge: ±8 kV. Contact discharge: ±4 kV. Criteria B.
2. Radiated immunity
80 M to 1 GHz, 10 V/m, 1.4 G to 2 GHz, 3 V/m, 2 GHz to 4.0 GHz, 3 V/m, criteria A
3. Conducted immunity
3 V, criteria A
4. Fast transient/burst
Power line: ±2 kV. Signal line: ±1 kV, criteria B
5. Power frequency magnetic field
Omitted, because the device does not exert considerable influence on the magnetic field
6. Surge immunity
±1 kV between lines, ±2 kV common, criteria B
7. Voltage dip and interruption
1 cycle, 100%, criteria B
Other tests, criteria C
Definitions of criteria
Criteria A: During testing, “influence in the immunity environment” described above is met.
Criteria B: The instrument continues to function and is controllable throughout testing. The
instrument does not change operation modes, and data changes do not persist.
Criteria C: Temporary losses of functionality (such as measurement stopping, etc.) are
recovered from through the intervention of the operator.
The overvoltage category (installation category) is a value used to define the transient overvoltage condition and includes
the rated impulse withstand voltage. Category I applies to electric equipment whose power is supplied from a circuit that
incorporates withstand voltage control. Category II applies to electrical equipment that is powered through a fixed installation,
such as a switchboard.
Measurement Category II (CAT II) applies to electrical equipment that is powered through a fixed installation, such as a wall
outlet wired to a distribution board, and to measurement performed on such wiring.
Pollution Degree applies to the degree of adhesion of a solid, liquid, or gas which deteriorates withstand voltage or surface
resistivity. Pollution degree 2 applies to normal indoor atmospheres (with only non-conductive pollution).
TDK: ZCAT2035-0930A, YOKOGAWA part number: A1190MN
TDK: ZCAT3035-1330, YOKOGAWA part number: A1179MN
TDK: ZCAT1325-0530A, YOKOGAWA part number: A1181MN
IM DL850-03EN
6.13 Module Specifications
1
High-Speed 10 MS/s, 12-Bit Isolation Module (701250) Specifications
Item
Standard operating conditions
1.
Value measured under standard operating conditions.
IM DL850-03EN
6-15
2
3
4
5
6
Specifications
Specifications
Temperature: 23°C±5°C
Humidity:
20% to 80%RH
After a 30-minute warm-up and after calibration
Effective measurement range
20 div (±10 div around 0 V, display range: 10 div, when Variable is OFF)
Number of input channels
2
Input coupling
AC, DC, and GND
Maximum sample rate
10 MS/s
Input format
Isolated unbalanced
Frequency characteristics1
(−3 dB point when sine wave of amplitude ±3 div is applied) DC to 3 MHz
Voltage-axis sensitivity setting
5 mV/div to 20 V/div (1-2-5 steps) (when using 1:1 probe attenuation)
Maximum input voltage
Combined with the 700929(10:1) or 701947(100:1):2
600 V (DC+ACpeak)
(at a frequency of 1 kHz or less) Combined with the 701901+701954 (1:1):4
250 V (DC+ACpeak)
Direct input or cable not complying with the safety standard:6
250 V (DC+ACpeak)
Maximum allowable common
Working voltage of safety standard
mode voltage
Combined with the 700929 (10:1) or 701947 (100:1)3 400 Vrms (CAT I) 300 Vrms (CAT II)
(at a frequency of 1 kHz or less) or combined with the 701901+701954 (1:1):5
42 V (DC+ACpeak) (CAT I and CAT II,
Direct input or cable not complying with the safety
30 Vrms)
standard:7
Vertical (voltage) axis accuracy 5 mV/div to 20 V/div:
±(0.5% of 10 div)
DC accuracy1
Input connector
BNC connector (isolated type)
Input impedance
1 MΩ ± 1%, approx. 35 pF
−3 dB point when AC coupled
10 Hz or less (1 Hz or less when using the 700929, 0.1 Hz or less when using the 701947)
low frequency attenuation point
Common mode rejection ratio
80 dB (50/60 Hz) or more (typical8)
Residual noise level
±400 µV or ±0.06 div whichever is greater (Typical8)
(Input section shorted)
Withstand voltage
1500 Vrms for 1 minute (across each terminal and earth) (60 Hz)
Allowable transient surge voltage ±2100 Vpeak (across each input terminal and earth)
(instantaneous)
Insulation resistance
500 VDC, 10 MΩ or more (across each input terminal and earth)
A/D conversion resolution
12 bit (150 LSB/div)
Temperature coefficient
Zero point:
5 mV/div to 20 V/div: ±(0.05% of 10 div)/°C(Typical8)
Gain:
±(0.02% of 10 div)/°C(Typical8)
Bandwidth limit
Select from OFF, 500 kHz, 50 kHz, 5 kHz, and 500 Hz
Cut-off characteristics:
−18 dB/OCT (Typical8)
Probe attenuation setting
Voltage probe: 1:1, 10:1, 100:1, 1000:1
Current probe: 10 A:1 V (for the 700937/701933), 100 A: 1 V (for the 701930/701931)
Compatible probes/cables
Voltage probe: Recommended
700929 (10:1 safety probe).20 to 45 pF: For measuring 600 Vpeak or less
701947 (100:1 probe).15 to 45 pF: For measuring 600 Vpeak or less
Current probe (power can be supplied from the DL850/DL850V. Option)
700937 (15 A), 701930 (150 A), 701931 (500 A), 701933 (30 A)
High voltage differential probe (connect the GND cable provided with the probe to the DL850/
DL850V case)
700924 (1000:1, 100:1/1400 Vpeak): For measuring 1400 Vpeak or less
Connection cable (for high voltage 1:1)
701901 (isolated type BNC-safety alligator clip adapter ×2: For measuring 250 Vpeak or
less), 701954 (alligator clip (dolphin type) red/black 2-piece set) is required separately
Connection cable (for low voltage 1:1)
366926 (non-isolated type BNC-alligator clip ×2: For measuring low voltage less than or
equal to 42 Vpeak)
App
Index
6.13 Module Specifications
Combined with the 700929 or 701947
Combined with the 701901+701954
H
700929
701947
2.
L
701901
H
701954
4.
L
3.
5.
Direct input (cable not complying with the safety standard)
H
BNC
6.
L
8.
7.
Withstand voltage: 1500 Vrms for 1 minute
Allowable transient surge voltage: ±2100 Vpeak
(between earth and input)
The typical value is a representative or standard value. It is not strictly warranted.
WARNING
• Do not apply input voltage exceeding the maximum input voltage, withstand voltage, or
allowable surge voltage.
• To prevent the possibility of electric shock, be sure to furnish protective earth grounding of
the DL850/DL850V.
• To prevent the possibility of electric shock, be sure to fasten the module screws. Otherwise,
the electrical and mechanical protection functions will not be activated.
• Avoid continuous connection under an environment in which the surge voltage may occur.
• To prevent the possibility of electric shock, be sure to connect the GND lead of the
differential probe (700924/700925) to the DL850/DL850V.
6-16
IM DL850-03EN
6.13 Module Specifications
High-Speed High-Resolution 1 MS/s, 16-Bit Isolation Module (701251)
Specifications
Item
Standard operating conditions
1.
Value measured under standard operating conditions.
IM DL850-03EN
6-17
2
3
4
5
6
Specifications
Specifications
Temperature: 23°C±5°C
Humidity:
20% to 80%RH
After a 30-minute warm-up and after calibration
Effective measurement range
20 div (±10 div around 0 V, display range: 10 div, when Variable is OFF)
Number of input channels
2
Input coupling
AC, DC, and GND
Maximum sample rate
1 MS/s
Input format
Isolated unbalanced
Frequency characteristics1
5 mV/div to 20 V/div:
DC to 300 kHz
(−3 dB point when a sine wave of 2 mV/div and 1mV/div:
DC to 200 kHz
amplitude ±3 div is applied)
Voltage-axis sensitivity setting
1 mV/div to 20 V/div (1-2-5 steps) (when using 1:1 probe attenuation)
Maximum input voltage
Combined with the 700929(10:1) or 701947(100:1):2
600 V (DC+ACpeak)
(at a frequency of 1 kHz or less) Combined with the 701901+701954 (1:1):4
140 V (DC+ACpeak)
Direct input or cable not complying with the safety standard:6
140 V (DC+ACpeak)
Maximum allowable common
Working voltage of safety standard
mode voltage
Combined with the 700929 (10:1) or 701947 (100:1)3 400 Vrms (CAT I), 300 Vrms (CAT II)
(at a frequency of 1 kHz or less) or combined with the 701901+701954 (1:1):5
Direct input or cable not complying with the safety
42 V (DC+ACpeak) (CAT I and CAT II,
standard:7
30 Vrms)
Vertical (voltage) axis accuracy
5 mV/div to 20 V/div:
±(0.25% of 10 div)
DC accuracy1
2 mV/div:
±(0.3% of 10 div)
1 mV/div:
±(0.5% of 10 div)
Input connector
BNC connector (isolated type)
Input impedance
1 MΩ ± 1%, approx. 35 pF
−3 dB point when AC coupled
1 Hz or less (0.1 Hz or less when using the 700929, 0.01 Hz or less when using the 701947)
low frequency attenuation point
Common mode rejection ratio
80 dB (50/60 Hz) or more (typical8)
Residual noise level
±100 µV or ±0.01 div whichever is greater (Typical8)
(Input section shorted)
Withstand voltage
1500 Vrms for 1 minute (across each terminal and earth) (60 Hz)
Allowable transient surge voltage ±2100 Vpeak (across each input terminal and earth)
(instantaneous)
Insulation resistance
500 VDC, 10 MΩ or more (across each input terminal and earth)
A/D conversion resolution
16 bit (2400 LSB/div)
Temperature coefficient
Zero point:
5 mV/div to 20 V/div:
±(0.02% of 10 div)/°C(Typical8)
2 mV/div:
±(0.05% of 10 div)/°C(Typical8)
1 mV/div:
±(0.10% of 10 div)/°C(Typical8)
Gain:
1 mV/div to 20 V/div:
±(0.02% of 10 div)/°C(Typical8)
Bandwidth limit
Select from OFF, 40 kHz, 4 kHz, and 400 Hz
Cut-off characteristics:
−12 dB/OCT (Typical8)
Probe attenuation setting
Voltage probe: 1:1, 10:1, 100:1, 1000:1
Current probe: 10 A:1 V (for the 700937/701933), 100 A: 1 V (for the 701930/701931)
Compatible probes/cables
Voltage probe: Recommended
700929 (10:1 safety probe).20 to 45 pF: For measuring 600 Vpeak or less
701947 (100:1 probe).15 to 45 pF: For measuring 600 Vpeak or less
Current probe (power can be supplied from the DL850/DL850V. Option)
700937 (15 A), 701930 (150 A), 701931 (500 A), 701933 (30 A)
High voltage differential probe (connect the GND cable provided with the probe to the DL850/
DL850V case)
700924 (1000:1, 100:1/1400 Vpeak): For measuring 1400 Vpeak or less
Connection cable (for high voltage 1:1)
701901 (isolated type BNC-safety alligator clip adapter ×2: For measuring 250 Vpeak or
less), 701954 (alligator clip (dolphin type) red/black 2-piece set) is required separately
Connection cable (for low voltage 1:1)
366926 (non-isolated type BNC-alligator clip ×2: For measuring low voltage less than or
equal to 42 Vpeak)
1
App
Index
6.13 Module Specifications
Combined with the 700929 or 701947
Combined with the 701901+701954
H
700929
701947
2.
L
701901
H
701954
4.
L
3.
5.
Direct input (cable not complying with the safety standard)
H
BNC
6.
L
8.
7.
Withstand voltage: 1500 Vrms for 1 minute
Allowable transient surge voltage: ±2100 Vpeak
(between earth and input)
The typical value is a representative or standard value. It is not strictly warranted.
WARNING
• Do not apply input voltage exceeding the maximum input voltage, withstand voltage, or
allowable surge voltage.
• To prevent the possibility of electric shock, be sure to furnish protective earth grounding of
the DL850/DL850V.
• To prevent the possibility of electric shock, be sure to fasten the module screws. Otherwise,
the electrical and mechanical protection functions will not be activated.
• Avoid continuous connection under an environment in which the surge voltage may occur.
• To prevent the possibility of electric shock, be sure to connect the GND lead of the
differential probe (700924/700925) to the DL850/DL850V.
6-18
IM DL850-03EN
6.13 Module Specifications
1
High-Speed 10 MS/s, 12-Bit Non-Isolation Module (701255)
Specifications
Item
Standard operating conditions
1.
Value measured under standard operating conditions.
Recommended:
Combined with the 10:1 passive probe
(701940)
2.
H
L
Direct input
(When a cable that does not comply with
the safety standard is connected)
701255
Input
terminal
GND
3.
GND
H
L
Earth
GND is connected to the case potential.
4.
GND is connected to the case potential.
The typical value is a representative or standard value. It is not strictly warranted.
IM DL850-03EN
6-19
2
3
4
5
6
Specifications
Specifications
Temperature: 23°C±5°C
Humidity:
20% to 80%RH
After a 30-minute warm-up and after calibration
Effective measurement range
20 div (±10 div around 0 V, display range: 10 div, when Variable is OFF)
Number of input channels
2
Input coupling
AC, DC, and GND
Maximum sample rate
10 MS/s
Input format
Non-isolated, unbalanced
Frequency characteristics1
(−3 dB point when sine wave of amplitude ±3 div is applied) DC to 3 MHz
Voltage-axis sensitivity setting
5 mV/div to 20 V/div (1-2-5 steps) (when using 1:1 probe attenuation)
Maximum input voltage
Combined with the 701940(10:1)2
600 V (DC+ACpeak)
(at a frequency of 1 kHz or less) Direct input(1:1)3
250 V (DC+ACpeak)
Vertical (voltage) axis accuracy 5 mV/div to 20 V/div:
±(0.5% of 10 div)
DC accuracy1
Input connector
BNC connector (metallic type)
Input impedance
1 MΩ ± 1%, approx. 35 pF
−3 dB point when AC coupled
10 Hz or less (1 Hz or less when using the 701940)
low frequency attenuation point
Residual noise level
±400 µV or ±0.06 div whichever is greater (Typical4)
(Input section shorted)
A/D conversion resolution
12 bit (150 LSB/div)
Temperature coefficient
Zero point:
5 mV/div to 20 V/div: ±(0.05% of 10 div)/°C(Typical4)
Gain:
±(0.02% of 10 div)/°C(Typical4)
Bandwidth limit
Select from OFF, 500 kHz, 50 kHz, 5 kHz, and 5400 Hz
Cut-off characteristics:
−18 dB/OCT (Typical4)
Probe attenuation setting
Voltage probe:
1:1, 10:1, 100:1, 1000:1
Current probe:
10 A:1 V (for the 700937/701933), 100 A: 1 V (for the 701930/701931)
Compatible probes/cables
Voltage probe (10:1 passive probe): Recommended
701940, 17 to 46 pF: For measuring 600 Vpeak or less
Current probe (power can be supplied from the DL850/DL850V. Option)
700937 (15 A), 701930 (150 A), 701931 (500 A), 701933 (30 A)
High voltage differential probe (connect the GND cable provided with the probe to the DL850/
DL850V case)
700924 (1000:1, 100:1/1400 Vpeak): For measuring 1400 Vpeak or less
Connection cable (for low voltage 1:1)
366926 (non-isolated type BNC-alligator clip ×2: For measuring low voltage less than or
equal to 42 Vpeak)
App
Index
6.13 Module Specifications
WARNING
• Do not apply input voltage exceeding the maximum input voltage, withstand voltage, or
allowable surge voltage.
• To prevent the possibility of electric shock, be sure to furnish protective earth grounding of
the DL850/DL850V.
• To prevent the possibility of electric shock, be sure to fasten the module screws.
• The module screws must be fastened for the module to function as a nonisolation module.
In addition, all electrical and mechanical protection functions are activated only when the
screws are fastened.
• The maximum input voltage of the module is valid only when all the screws are fastened,
and the protection path of the metal BNC is secured.
6-20
IM DL850-03EN
6.13 Module Specifications
High-Voltage 100 kS/s, 16-Bit Isolation Module (with RMS) (701260)
Specifications
Item
Standard operating
conditions
Vertical (voltage) axis
accuracy DC accuracy1
Input connector
Input impedance
−3 dB point when AC
coupled low frequency
attenuation point
Common mode rejection
ratio
Residual noise level
(Input section shorted)
Withstand voltage
Allowable transient surge
voltage (instantaneous)
Insulation resistance
A/D conversion resolution
Temperature coefficient
2
3
2
AC, DC, GND, AC-RMS, and DC-RMS
100 kS/s
Isolated unbalanced
Waveform observation mode:
DC to 40 kHz
RMS observation mode:
DC, 40 Hz to 10 kHz
4
20 mV/div to 200 V/div (1-2-5 steps) (when using 1:1 probe attenuation)
Combined with the 700929(10:1) or 701947 (100:1):2
1000 V (DC+ACpeak)
Combined with the 701901+701954 (1:1):5
850 V (DC+ACpeak)
Direct input or cable not complying with the safety standard:8
850 V (DC+ACpeak)
Working voltage of safety standard
Combined with the 700929 or 701947 (across probe tip H and earth3): 1000 Vrms (CAT II)
(across probe tip L and earth4): 400 Vrms (CAT II)
Combined with the 701901+701954 (1:1) (across tip H and earth6):
700 Vrms (CAT II)
(across tip L and earth7): 400 Vrms (CAT II)
Direct input or cable not complying with the safety standard:9 30 Vrms (42 VDC+ACpeak)
(across the input terminal, H or L, and earth)
Waveform observation mode
DC accuracy
±(0.25% of 10 div)
RMS observation mode
DC accuracy
±(1.0% of 10 div)
AC accuracy (when a sine wave is input)
±(1.5% of 10 div) At frequency of 40 Hz to 1 kH
AC accuracy (when the crest factor is 2 or less) ±(2.0% of 10 div) At frequency of 40 Hz to 1 kH
AC accuracy (when the crest factor is 3 or less) ±(3.0% of 10 div) At frequency of 40 Hz to 1 kH
BNC connector (isolated type)
1 MΩ ± 1%, approx. 35 pF
1 Hz or less (0.1 Hz or less when using the 700929, 0.01 Hz or less when using the 701947)
80 dB (50/60 Hz) or more (typical10)
±1 mV or ±0.02 div whichever is greater (Typical10)
3700 Vrms for 1 minute (across each terminal and earth) (60 Hz)
±5200 Vpeak (across each input terminal and earth)
500 VDC, 10 MΩ or more (across each input terminal and earth)
16 bit (2400 LSB/div)
Zero point:
±(0.02% of 10 div)/°C(Typical10)
Gain:
±(0.02% of 10 div)/°C(Typical10)
Response time (only when Rising (0 to 90% of 10 div):
100 ms (typical10)
observing RMS)
Falling (100 to 10% of 10 div): 250 ms (typical10)
Bandwidth limit
Select from OFF, 10 kHz,1 kHz, and 100 Hz
Cut-off characteristics: −12 dB/OCT (Typical10)
Probe attenuation setting Voltage probe: 1:1, 10:1, 100:1, 1000:1
Current probe: 10 A:1 V (for the 700937/701933), 100 A: 1 V (for the 701930/701931)
Compatible probes/
Connection cable (for high voltage 1:1): Recommended 1
cables
701901 (isolated type BNC-safety alligator clip adapter ×2: For measuring 850 V (DC+ACpeak) or
less), 701954 (alligator clip (dolphin type) red/black 2-piece set) is required separately
Voltage probe: Recommended 2
700929 (10:1 safety probe).20 to 45 pF: For measuring 1000 Vpeak or less
701947 (100:1 probe).15 to 45 pF: For measuring 1000 Vpeak or less
Current probe (power can be supplied from the DL850/DL850V. Option)
700937 (15 A), 701930 (150 A), 701931 (500 A), 701933 (30 A)
IM DL850-03EN
6-21
5
6
Specifications
Effective measurement
range
Number of input channels
Input coupling
Maximum sample rate
Input format
Frequency characteristics1
(−3 dB point when a sine
wave of amplitude ±3 div
is applied)
Voltage-axis sensitivity
setting
Maximum input voltage
(at a frequency of 1 kHz or
less)
Maximum allowable
common mode voltage
(at a frequency of 1 kHz or
less)
Specifications
Temperature: 23°C±5°C
Humidity:
20% to 80%RH
After a 30-minute warm-up and after calibration
20 div (±10 div around 0 V, display range: 10 div, when Variable is OFF)
1
App
Index
6.13 Module Specifications
1.
Value measured under standard operating conditions.
Combined with the 700929 or 701947
Combined with the 701901+701954
H
700929
701947
2.
L
3.
701901
H
701954
7.
4.
5.
6.
L
Direct input (cable not complying with the safety standard)
H
BNC
8.
L
9.
Withstand voltage: 3700 Vrms for 1 minute
Allowable transient surge voltage: ±5200 Vpeak
(between earth and input)
10. The typical value is a representative or standard value. It is not strictly warranted.
WARNING
• When applying high voltage using this module, use the 1:1 safety cable (combination of
701901 and 701954) or the isolated probe (700929 or 701947).
• The Measurement Category of the direct input of this module is 400 Vrms-CATII on the low
side and 700 Vrms-CAT II on the high side. Use caution because the overvoltage category
differs between the low and high sides.
• Do not apply input voltage exceeding the maximum input voltage, withstand voltage, or
allowable surge voltage.
• To prevent the possibility of electric shock, be sure to furnish protective earth grounding of
the DL850/DL850V.
• To prevent the possibility of electric shock, be sure to fasten the module screws. Otherwise,
the electrical and mechanical protection functions will not be activated.
• Avoid continuous connection under an environment in which the surge voltage may occur.
6-22
IM DL850-03EN
6.13 Module Specifications
Universal (Voltage/Temp.) Module (701261) /Universal (Voltage/Temp.)
Module (with AAF) (701262) Specifications
Item
Standard operating conditions
Specifications
Temperature: 23°C±5°C
Humidity:
20% to 80%RH
After a 30-minute warm-up and after calibration
Function
Temperature (thermocouple) or voltage measurement (switchable)
Effective measurement range
Voltage measurement:
20 div (display range: 10 div)
Number of input channels
2
Input coupling
TC, DC, AC, and GND
TC:
Temperature (thermocouple) measurement
DC:
Voltage measurement (DC coupling)
AC:
Voltage measurement (AC coupling)
Voltage measurement maximum 100 kS/s
sample rate
Temperature measurement data 500 Hz
update rate
Input format
Isolated unbalanced
Measurement range/accuracy1
[Voltage measurement]
Voltage sensitivity:
5 mV/div to 20 V/div (1-2-5 steps)
Voltage accuracy:
±(0.25% of 10 div)
[Temperature measurement]2
Maximum allowable common
mode voltage5
(at a frequency of 1 kHz or less)
Vertical resolution
−3 dB point when AC coupled
low frequency attenuation point
Input connector
Input impedance
Common mode rejection ratio
Residual noise level
(Input section shorted)
A/D conversion resolution
IM DL850-03EN
Measurement Range
−200 to 1300°C
−200 to 800°C
−200 to 1100°C
−200 to 400°C
−200 to 900°C
−200 to 400°C
0 to 1300°C
0 to 1700°C
0 to 1700°C
B
0 to 1800°C
W
Au7Fe3
0 to 2300°C
0 to 300K
[Voltage measurement]
[Temperature measurement]
2
3
4
5
6
Accuracy
±(0.1% of reading + 1.5°C)
Except ±(0.2% of reading + 1.5°C)
for −200°C to 0°C
Specifications
Frequency characteristics1
(−3 dB point when a sine wave
of amplitude ±3 div is applied)
Maximum input voltage4
(at a frequency of 1 kHz or less)
Type
K
E
J
T
L
U
N
R
S
1
App
±(0.1% of reading + 3°C)
Except, 0 to 200°C: ±8°C
200 to 800°C: ±5°C
±(0.1% of reading + 2°C)
Except, 400 to 700°C: ±8°C
Effective range is 400 to 1800°C
±(0.1% of reading + 3°C)
0 to 50K:
±4K
50 to 300K:
±2.5K
Index
DC to 40 kHz
DC to 100 Hz
Both temperature and voltage input:
42 V (DC + ACpeak) (as a value that meets the
safety standard)
150 V (DC + ACpeak) (maximum allowable voltage, as a value that does not damage the
instrument when applied)
Both temperature and voltage input: 42 V (DC+ACpeak) (CAT I and CAT II, 30 Vrms)
[Voltage measurement]
During voltage input:
[Temperature measurement] When measuring temperature:
[Voltage measurement] 0.5 Hz or less
2400 LSB/div
0.1°C
Binding post
Approx. 1 MΩ
[Voltage measurement]
[Temperature measurement]
[Voltage measurement]
80 dB (50/60 Hz) or more (typical6)
120 dB or more (50/60 Hz, with 2-Hz filter ON, signal
source resistance of 500 Ω or less) (typical6)
±100 µV or ±0.01 div, whichever is greater (typical6)
[Voltage measurement]
16 bits (2400 LSB/div)
6-23
6.13 Module Specifications
Item
Temperature coefficient
Specifications
[Voltage measurement]
Reference junction compensation
accuracy (when the input terminal
temperature is balanced)
Bandwidth limit
K, E, J, T, L, U, N: ±1°C
R, S, B, W:
±1.5°C
Au7Fe:
±1K
[Temperature measurement] (Digital filter + analog filter)
Select from OFF, 30 Hz, 8 Hz, and 2 Hz + 150 Hz secondary
analog filter
[Voltage measurement]
Select from OFF, AUTO, 4 kHz, 400 Hz, or 40 Hz.
Cutoff characteristics: −12 dB/OCT (typical,6 setting other than
AUTO)
Cutoff frequency (fc) when set to AUTO (701262 only)
Sample Rate
100 kS/s or higher
100 S/s to 50 kS/s
50 S/s or less
H
L
6.
±(0.01% of 10 div)/°C (typical6)
±(0.02% of 10 div)/°C (typical6)
Cutoff Frequency (fc)
40 kHz
40% of the sample rate
20 Hz
Cutoff characteristics for AUTO: −65 dB at 2 × fc (typical6)
When the filter is set to Auto, the anti-aliasing filter and low-pass filter are automatically set
according to the sample rate.
Table of cutoff frequency
characteristics of the
anti-aliasing filter (AAF)
1.
2.
3.
Zero point:
Gain:
Sample Rate
100 kS/s
50 kS/s
20 kS/s
10 kS/s
5 kS/s
2 kS/s
1 kS/s
500 S/s
200 S/s
100 S/s
50 S/s
20 S/s to 5 S/s
2 S/s or less
Ext sample
AAF
40 kHz
20 kHz
8 kHz
4 kHz
2 kHz
800 Hz
400 Hz
200 Hz
80 Hz
40 Hz
20 Hz
20 Hz
20 Hz
40 kHz
Low-Pass Filter
OFF
OFF
OFF
4 kHz
4 kHz
4 kHz
400 Hz
400 Hz
400 Hz
40 Hz
40 Hz
40 Hz
40 Hz
OFF
Value measured under standard operating conditions (section 19.11).
Does not include the reference junction temperature compensation accuracy.
This module supports Au7Fe with 0.07% metal content with respect to gold.
4.
5.
Typical value represents a typical or average value. It is not strictly warranted.
WARNING
• Do not apply input voltage exceeding the maximum input voltage or allowable common
mode input voltage.
• To prevent the possibility of electric shock, be sure to furnish protective earth grounding of
the DL850/DL850V.
• To prevent the possibility of electric shock, be sure to fasten the module screws.
Otherwise, the electrical and mechanical protection functions will not be activated.
6-24
IM DL850-03EN
6.13 Module Specifications
1
Temperature, High Precision Voltage Isolation Module (701265)
Specifications
Item
Standard operating conditions
Function
Effective measurement range
Number of input channels
Input coupling
Data update rate
Measurement range/accuracy1
−3 dB point when AC coupled
low frequency attenuation point
Input connector
Input impedance
Common mode rejection ratio
Residual noise level
(Input section shorted)
A/D conversion resolution
Temperature coefficient
Type
K
E
J
T
L
U
N
R
S
Measurement Range
−200 to 1300°C
−200 to 800°C
−200 to 1100°C
−200 to 400°C
−200 to 900°C
−200 to 400°C
0 to 1300°C
0 to 1700°C
0 to 1700°C
B
0 to 1800°C
W
Au7Fe3
0 to 2300°C
0 to 300K
[Voltage measurement]
[Temperature measurement]
±(0.1% of reading + 3°C)
Except, 0 to 200°C: ±8°C
200 to 800°C: ±5°C
±(0.1% of reading + 2°C)
Except, 400 to 700°C: ±8°C
Effective range is 400 to 1800°C
±(0.1% of reading + 3°C)
0 to 50K:
±4K
50 to 300K:
±2.5K
App
Index
DC to 100 Hz
DC to 100 Hz
Both temperature and voltage input:
42 V (DC+ACpeak) (CAT I and CAT II, 30 Vrms)
[Voltage measurement] During voltage input:
[Temperature measurement] When measuring temperature:
[Voltage measurement]
0.5 Hz or less
2400 LSB/div
0.1°C
80 dB (50/60 Hz) or more (typical6)
120 dB or more (50/60 Hz, with 2-Hz filter ON, signal source
resistance of 500 Ω or less) (typical6)
±4 µV or ±0.01 div, whichever is greater (typical6)
16 bits (2400 LSB/div)
Zero point: ±(0.01% of 10 div)/°C + 0.05µV/°C) (typical6)
Gain
±(0.02% of 10 div)/°C (typical6)
Reference junction compensation K, E, J, T, L, U, N:
±1°C
accuracy (when the input terminal R, S, B, W:
±1.5°C
temperature is balanced)
Au7Fe:
±1K
Bandwidth limit (digital filter)
Select from OFF, 30 Hz, 8 Hz, and 2 Hz
IM DL850-03EN
4
6
42 V (DC + ACpeak)
[Voltage measurement]
3
5
Accuracy
±(0.1% of reading + 1.5°C)
Except ±(0.2% of reading + 1.5°C)
for −200°C to 0°C
Both temperature and voltage input:
Binding post
Approx. 1 MΩ
[Voltage measurement]
[Temperature measurement]
2
Specifications
Frequency characteristics1
(−3 dB point when a sine wave
of amplitude ±3 div is applied)
Maximum input voltage4
(at a frequency of 1 kHz or less)
Maximum allowable common
mode voltage5
(at a frequency of 1 kHz or less)
Vertical resolution
Specifications
Temperature: 23°C±5°C
Humidity:
20% to 80%RH
After a 30-minute warm-up and after calibration
Temperature (thermocouple) or voltage measurement (switchable)
Voltage measurement:
20 div (display range: 10 div)
2
TC, DC, and GND
TC:
Temperature (thermocouple) measurement
DC:
Voltage measurement (DC coupling)
500 Hz
[Voltage measurement]
Voltage sensitivity:
100 μV/div to 10 V/div (1-2-5 steps)
Voltage accuracy:
±(0.08% of 10 div + 2 µV)
[Temperature measurement]2
[Voltage measurement]
[Voltage measurement]
6-25
6.13 Module Specifications
Item
Input bias current
1.
2.
3.
H
L
6.
Specifications
20 nA or less
The zero point appears to be offset when the input is open due to the effects of bias current
on this module. However, this is not a malfunction.
Connect the input to the object to be measured.
Value measured under standard operating conditions.
Does not include the reference junction temperature compensation accuracy.
This module supports Au7Fe with 0.07% metal content with respect to gold.
4.
5.
The typical value is a representative or standard value. It is not strictly warranted.
WARNING
• Do not apply input voltage exceeding the maximum input voltage or allowable common
mode input voltage.
• To prevent the possibility of electric shock, be sure to furnish protective earth grounding of
the DL850/DL850V.
• To prevent the possibility of electric shock, be sure to fasten the module screws.
Otherwise, the electrical and mechanical protection functions will not be activated.
6-26
IM DL850-03EN
6.13 Module Specifications
1
Strain Module (NDIS) (701270) Specifications
Item
Standard operating conditions
Effective measurementrange
Number of input channels
Maximum sample rate
Input format
Auto balance type
Auto balance range
Bridge voltage
Gauge resistance
Gauge factor
Frequency characteristics1
(−3 dB point when a sine wave
of amplitude ±3 div is applied)
mV/V range support
Measurement range (FS) and
measurement range
Specifications
Temperature: 23°C±5°C
Humidity:
20% to 80%RH
After a 30-minute warm-up and after calibration and auto balance
−FS to +FS (set using upper and lower limits)
2
100 kS/s
DC bridge (auto balancing), balanced differential input, and isolated
Electronic auto balance
±10000 µSTR (1 gauge method)
Select from 2 V, 5 V, and 10 V.
120 Ω to 1000 Ω (bridge voltage: 2 V)
350 Ω to 1000 Ω (bridge voltage: 2 V, 5 V, and 10 V)
1.90 to 2.20 (set in 0.01 steps)
DC to 20 kHz
2
3
4
5
Supports the strain gauge transducer unit system.
mV/V range = 0.5×(µSTR range/1000)
When using STR range
6
Measurement Range
−500 µSTR to +500 µSTR
−1000 µSTR to +1000 µSTR
−2000 µSTR to +2000 µSTR
−5000 µSTR to +5000 µSTR
−10000 µSTR to +10000 µSTR
−20000 µSTR to +20000 µSTR
Specifications
Measurement Range (FS)
500 µSTR
1000 µSTR
2000 µSTR
5000 µSTR
10000 µSTR
20000 µSTR
App
When using mV/V range
Measurement Range (FS)
0.25 mv/V
0.5 mV/V
1 mV/V
2.5 mV/V
5 mV/V
10 mV/V
DC accuracy1
Maximum input voltage
(at a frequency of 1 kHz or less)
Maximum allowable common
mode voltage
(at a frequency of 1 kHz or less)
Input connector
Common mode rejection ratio
A/D conversion resolution
Temperature coe
Bandwidth limit
Function
Standard accessories
Compatible accessories (sold
separately)
IM DL850-03EN
±(0.5% of FS + 5 µSTR)
Between Input+ and Input−
Between each terminal and earth
ground
Index
Measurement Range
−0.25 mV/V to +0.25 mV/V
−0.5 mV/V to +0.5 mV/V
−1 mV/V to +1 mV/V
−2.5 mV/V to +2.5 mV/V
−5 mV/V to +5 mV/V
−10 mV/V to +10 mV/V
10 V (DC+ACpeak)
42 V (DC+ACpeak) (CAT I and CAT II, 30 Vrms)
NDIS connector (Recommended by JSNDI (The Japanese Society for Non-destructive
Inspection)
80 dB (50/60 Hz) or more (Typical2 )
16 bit (4800 LSB/div: Upper = +FS, Lower = −FS)
Zero point:
±5 µSTR/°C(Typical2)
Gain:
±(0.02% of FS)/°C (Typical2)
Select from OFF, 1 kHz, 100 Hz, and 10 Hz
Cutoff characteristics:
−12 dB/OCT (Typical2)
mV/V support. Supports the strain gauge transducer unit system.
NDIS connector (for external connection: PRC03-12A10-7M10.5 by Tajimi) A1002JC: 2 pieces
Recommended bridge head 701955 (NDIS 120 Ω, enhanced shield version, comes with a
5-m cable)
Recommended bridge head 701956 (NDIS 350 Ω, enhanced shield version, comes with a
5-m cable))
6-27
6.13 Module Specifications
Item
Precautions
1.
2.
Specifications
• Highly sensitive measurements are made in the µV level in strain measurements. Therefore,
take measures against noise at the strain sensor perimeter, bridge head, and cable wiring.
• Depending on the noise environment, an error may result in the balance. Check the
influence before making measurements.
• The bridge head specified by YOKOGAWA has high noise resistance.
• Some of the strain gauge sensors and bridge heads made by other manufacturers
do not have sensing wires connected. (No such problems with bridge heads made by
YOKOGAWA.) If such products are used, an error may result in the bridge voltage leading
to measurement errors, because sensing does not work effectively. If possible, it is desirable
that sensing be done very close to the bridge. However, if this is not possible, use the NDIS
conversion cable (DV450-001) that is sold separately by YOKOGAWA.
Outline specifications of the DV450-001: Sensing cable, NDIS male-female, 30 cm in length,
insert it as close to the bridge as possible
• The connector shell is connected to the case potential.
• When a bridge head (701955 or 701956) is used, the connector shell, cable shield, and the
bridge head case are all connected to the case potential of the DL850/DL850V.
• When a bridge head (701955 or 701956) is used, the floating GND is connected to the
bridge head case inside the bridge head.
• Be sure to execute balancing again when you change the range or the bridge voltage.
Value measured under standard operating conditions.
The typical value is a representative or standard value. It is not strictly warranted.
Module front View
A
B
C
G
F
E
D
A: Bridge+ (positive bridge voltage)
B: Input- (negative measurement signal)
C: Bridge- (negative bridge voltage)
D: Input+ (positive measurement signal)
E: Floating common
F: Sense+ (positive bridge voltage sensing)
G: Sense- (positive bridge voltage sensing)
The connector shell is connected to the case potential.
WARNING
• Do not apply input voltage exceeding the maximum input voltage or allowable common
mode input voltage.
• To prevent the possibility of electric shock, be sure to furnish protective earth grounding of
the DL850/DL850V.
• To prevent the possibility of electric shock, be sure to fasten the module screws.
Otherwise, the electrical and mechanical protection functions will not be activated.
• Avoid continuous connection under an environment in which the surge voltage may occur.
6-28
IM DL850-03EN
6.13 Module Specifications
1
Strain Module (DSUB, Shunt-Cal) (701271) Specifications
Item
Standard operating conditions
Effective measurementrange
Number of input channels
Maximum sample rate
Input format
Auto balance type
Auto balance range
Bridge voltage
Gauge resistance
Gauge factor
Frequency characteristics1
(−3 dB point when a sine wave of
amplitude ±3 div is applied)
mV/V range support
Measurement range (FS) and
measurement range
Specifications
Temperature: 23°C±5°C
Humidity:
20% to 80%RH
After a 30-minute warm-up and after calibration and auto balance
−FS to +FS (set using upper and lower limits)
2
100 kS/s
DC bridge (auto balancing), balanced differential input, and isolated
Electronic auto balance
±10000 µSTR (1 gauge method)
Select from 2 V, 5 V, and 10 V.
120 Ω to 1000 Ω (bridge voltage: 2 V)
350 Ω to 1000 Ω (bridge voltage: 2 V, 5 V, and 10 V)
1.90 to 2.20 (set in 0.01 steps)
DC to 20 kHz
2
3
4
5
Supports the strain gauge transducer unit system.
mV/V range = 0.5×(µSTR range/1000)
When using STR range
6
Measurement Range
−500 µSTR to +500 µSTR
−1000 µSTR to +1000 µSTR
−2000 µSTR to +2000 µSTR
−5000 µSTR to +5000 µSTR
−10000 µSTR to +10000 µSTR
−20000 µSTR to +20000 µSTR
Specifications
Measurement Range (FS)
500 µSTR
1000 µSTR
2000 µSTR
5000 µSTR
10000 µSTR
20000 µSTR
App
When using mV/V range
Measurement Range (FS)
0.25 mv/V
0.5 mV/V
1 mV/V
2.5 mV/V
5 mV/V
10 mV/V
DC accuracy1
Maximum input voltage
(at a frequency of 1 kHz or less)
Maximum allowable common
mode voltage
(at a frequency of 1 kHz or less)
Input connector
Common mode rejection ratio
A/D conversion resolution
Temperature coe
Bandwidth limit
Function
Standard accessories
Compatible accessories (sold
separately)
IM DL850-03EN
±(0.5% of FS+5 µSTR)
Between Input+ and Input−
Between each terminal and
earth ground
Index
Measurement Range
−0.25 mV/V to +0.25 mV/V
−0.5 mV/V to +0.5 mV/V
−1 mV/V to +1 mV/V
−2.5 mV/V to +2.5 mV/V
−5 mV/V to +5 mV/V
−10 mV/V to +10 mV/V
10 V (DC+ACpeak)
42 V (DC+ACpeak) (CAT I and CAT II, 30 Vrms)
9-pin D-Sub connector (female)
80 dB (50/60 Hz) or more (Typical2 )
16 bit (4800 LSB/div: Upper = +FS, Lower = −FS)
Zero point: ±5 µSTR/°C(Typical2)
Gain:
±(0.02% of FS)/°C (Typical2)
Select from OFF, 1 kHz, 100 Hz, and 10 Hz
Cutoff characteristics:
−12 dB/OCT (Typical2)
mV/V support. Supports the strain gauge transducer unit system.
Shunt calibration support. Built-in shunt calibration relay (1 gauge method).
Connector shell set for soldering
A1520JD (9-pin D-Sub): 2 pieces, A1618JD (connector shell): 2 pieces
Recommended bridge head 701957 (D-Sub 120 Ω, shunt-Cal, comes with a 5-m cable)
Recommended bridge head 701958 (D-Sub 350 Ω, shunt-Cal, comes with a 5-m cable)
6-29
6.13 Module Specifications
Item
Precautions
1.
2.
Specifications
• Highly sensitive measurements are made in the µ V level in strain measurements.
Therefore, take measures against noise at the strain sensor perimeter, bridge head, and
cable wiring.
• Depending on the noise environment, an error may result in the balance. Check the
influence before making measurements.
• The bridge head specified by YOKOGAWA has high noise resistance.
• When executing shunt calibration, be sure to calculate the shunt resistance in advance,
and execute it in a range so that the measured values do not exceed the range even when
the shunt resistance is ON.
• Some of the strain gauge sensors and bridge heads made by other manufacturers
do not have sensing wires connected. (No such problems with bridge heads made by
YOKOGAWA.) If such products are used, an error may result in the bridge voltage leading
to measurement errors, because sensing does not work effectively. Perform sensing as
close to the bridge head as possible. (There is no conversion cable for sensing on D-Sub
connector types.)
• The connector shell is connected to the case potential.
• When a bridge head (701957 or 701958) is used, the connector shell, cable shield, and the
bridge head case are all connected to the case potential of the DL850/DL850V.
• When a bridge head (701957 or 701958) is used, the floating GND is connected to the
bridge head case inside the bridge head.
• Be sure to execute balancing again when you change the range or the bridge voltage.
Value measured under standard operating conditions.
The typical value is a representative or standard value. It is not strictly warranted.
Module front View
5
3
4
9
8
1
2
7
6
1: Floating common
2: Sense- (positive bridge voltage sensing)
3: Shuntcal- (negative shunt signal)
4: Shuntcal+ (positive shunt signal)
5: Sense+ (positive bridge voltage sensing)
6: Bridge- (negative bridge voltage)
7: Input- (negative measurement signal)
8: Input+ (positive measurement signal)
9: Bridge+ (positive bridge voltage)
WARNING
• Do not apply input voltage exceeding the maximum input voltage or allowable common
mode input voltage.
• To prevent the possibility of electric shock, be sure to furnish protective earth grounding of
the DL850/DL850V.
• To prevent the possibility of electric shock, be sure to fasten the module screws.
Otherwise, the electrical and mechanical protection functions will not be activated.
• Avoid continuous connection under an environment in which the surge voltage may occur.
6-30
IM DL850-03EN
6.13 Module Specifications
1
Acceleration/Voltage Module (with AAF) (701275) Specifications
Item
Standard operating conditions
Effective measurement range
Number of input channels
Input coupling
Maximum sample rate
Input format
Frequency characteristics1
(−3 dB point when a sine wave
of amplitude ±3 div is applied)
Voltage-axis sensitivity setting
Response time (only when
observing RMS)
Bandwidth limit
Probe attenuation setting
Sensor supply current (voltage)
Applicable acceleration sensor
IM DL850-03EN
2
3
4
5 mV/div to 10 V/div (1-2-5 steps) (when using 1:1 probe attenuation)
Acceleration (±5 V = ×1 range): ×0.1 to ×1 to ×100 (in 1-2-5 steps)
42 V (DC+Acpeak)2
5
Working voltage of safety standard
30 Vrms (CAT and CAT II)3
Waveform measurement mode DC accuracy:
±(0.25% of 10 div)
Acceleration measurement mode:
±(0.5% of 10 div) at 1 kHz
Metal BNC connector
1 MΩ±1%, approx. 35 pF
0.4 Hz or less (0.04 Hz or less when using the 701940) (Typical4)
6
80 dB (50/60 Hz) or more (Typical4)
±100 µV or ±0.01 div, whichever is greater (Typical4)
Specifications
Maximum input voltage
(at a frequency of 1 kHz or less)
Maximum allowable common
mode voltage
(at a frequency of 1 kHz or less)
Vertical (voltage) axis accuracy
DC accuracy1
Input connector
Input impedance
−3 dB point when AC coupled
low frequency attenuation point
Common mode rejection ratio
Residual noise level
(Input section shorted)
A/D conversion resolution
Temperature coefficient
Specifications
Temperature: 23°C±5°C
Humidity:
20% to 80%RH
After a 30-minute warm-up and after calibration
20 div (display range: 10 div)
2
AC, DC, GND, ACCL (acceleration), and GND
100 kS/s
Isolated unbalanced
Waveform observation mode:
DC to 40 kHz
Acceleration measurement mode:
0.4 Hz to 40 kHz
App
16 bits (2400LSB/div)
When in waveform measurement mode (excluding AUTO filter)
Zero point: ±(0.02% of 10 div)/°C (Typical4)
Gain:
±(0.02% of 10 div)/°C (Typical4)
Select from OFF, Auto, 4 KHz, 400 Hz, and 40 Hz
Cutoff characteristics:
−12 dB/OCT (typical4, excluding AUTO)
Cutoff frequency (fc) when set to AUTO
Sample rate of 100 kHz or higher:
fc = 40 kHz
Sample rate of 100 Hz to 50 kHz:
fc = 40% of the sampling rate
Sample rate of 50 Hz or less:
fc = 20 Hz
Cutoff characteristics when set to AUTO:
−65 dB at 2×fc (typical4)
Voltage probe
1:1, 10:1, 100:1, or 1000:1
Current probe
10 A:1 V (for the 700937/701933), 100 A:1 V (for the 701930/701931)
Connection cable (for low voltage 1:1)
366926 (non-isolated type BNC-alligator clip × 2: For measuring low voltage less than or
equal to 42 Vpeak)
Voltage probe (10:1 passive probe)
701940 17 to 46 pF: For measuring 600 V (DC+ACpeak) or less
Current probe (power can be supplied from the DL850/DL850V)
700937 (15 A), 701930 (150 A), 701931 (500 A), 701933 (30 A)
OFF/4 mA ± 10%(approx. 22 VDC)
Built-in amplifier type
Kistler Instrument Corporation: Piezotron, PCB Piezotronics Incorporated: ICP, ENDEVCO
Corporation: ISOTRON, etc.
6-31
Index
6.13 Module Specifications
Item
Table of Cutoff Frequency
Characteristics of the AntiAliasing Filter (AAF)
1.
Specifications
When the filter is set to Auto, the anti-aliasing filter and low-pass filter are automatically set
according to the sample rate.
Sample Rate
100 kS/s
50 kS/s
20 kS/s
10 kS/s
5 kS/s
2 kS/s
1 kS/s
500 S/s
200 S/s
100 S/s
50 S/s
20 S/s to 5 S/s
2 S/s or less
Ext sample
AAF
40 kHz
20 kHz
8 kHz
4 kHz
2 kHz
800 Hz
400 Hz
200 Hz
80 Hz
40 Hz
20 Hz
20 Hz
20 Hz
40 kHz
Low-pass filter
OFF
OFF
OFF
4 kHz
4 kHz
4 kHz
400 Hz
400 Hz
400 Hz
40 Hz
40 Hz
40 Hz
40 Hz
OFF
Value measured under standard operating conditions.
Combined with the 10:1 passive probe
(701940)
Direct input (cable not complying with
the safety standard)
H
2.
L
4.
H
BNC
3.
2.
L
3.
The typical value is a representative or standard value. It is not strictly warranted.
WARNING
• Do not apply input voltage exceeding the maximum input voltage or allowable common
mode input voltage.
• To prevent the possibility of electric shock, be sure to furnish protective earth grounding of
the DL850/DL850V.
• To prevent the possibility of electric shock, be sure to fasten the module screws.
Otherwise, the electrical and mechanical protection functions will not be activated.
• Avoid continuous connection under an environment in which the surge voltage may occur.
6-32
IM DL850-03EN
6.13 Module Specifications
1
Frequency Module (701280) Specifications
Item
Standard operating conditions
IM DL850-03EN
6-33
2
3
4
5
6
Specifications
Specifications
Temperature: 23°C±5°C
Humidity:
20% to 80%RH
After a 30-minute warm-up and after calibration
Measurement function
Frequency, RPMs, RPSs, period, duty cycle, power supply frequency, pulse width, pulse
integration, and velocity
Effective measurement range
20 div (display range: 10 div)
Number of input channels
2
Data update rate
25 kHz (40 µs)
Output delay time
Up to 2 computation periods
Input format
Isolated unbalanced
Input connector
Metal BNC connector
Maximum input voltage
Module only (when 1:1 cable is connected, across input terminals 42 V (DC+ACpeak)4
H and L):
Combined with the 700929(10:1) or 701947(100:1) (across the
420 V (DC+ACpeak)2
probe tips, H and L3):
Maximum allowable common
Working voltage of safety standard
mode voltage
Module only (when 1:1 cable is connected, across input terminal L and earth)
30 Vrms (CAT I and CAT II)5
Combined with the 700929 (10:1) or 701947 (100:1) (across probe tip H or L and earth)
300 Vrms (CAT I and CAT II)3
Insulation resistance
500 VDC, 10 MΩ or more (across each input terminal and earth))
Minimum measurement resolution 50 ns
Measured data resolution
16 bits (2400 LSB/div)
Measurement accuracy1
• When in frequency, RPM, RPS, or velocity measurement mode6
Measurement accuracy is specified according to the measurement range and input
frequency
[Definition of measurement accuracy]
v±(0.05% of 10 div + accuracy dependent on the input frequency)
[Accuracy dependent on the input frequency]
When input frequency is 2 kHz or less:
0.05% of the input frequency + 0.001 Hz
Input frequency of 2 kHz to 10 kHz:
0.1% of the input frequency
Input frequency of 10 kHz to 20 kHz:
0.3% of the input frequency
Input frequency of 20 kHz or higher:
0.5% of the input frequency
• When in power supply frequency mode7
When the center frequency is 50/60 Hz:
±0.03 Hz (0.01 Hz resolution)
When the center frequency is 400 Hz:
±0.3 Hz (0.01 Hz resolution)
(Input set to AC100 V or AC200 V with
sine wave input)
• When in period measurement mode6
Measurement accuracy is specified according to the measurement range and input period
[Definition of measurement accuracy]
±(0.05% of 10 div + accuracy dependent on the input period)
[Accuracy dependent on the input period]
Input period of 500 µs or greater:
0.05% of the input period
Input period of 100 µs to 500 µs:
0.1% of the input period
Input period of 50 µs to 100 µs:
0.3% of the input period
Input period of 50 µs or less:
0.5% of the input period + 0.1 µs
• When in duty cycle measurement mode8
Dependent on the input frequency
Input frequency of 1 kHz or less:
±0.1%
Input frequency of 1 kHz to 10 kHz:
±0.2%
Input frequency of 10 kHz to 50 kHz:
±1.0%
Input frequency of 50 kHz to 100 kHz:
±2.0%
Input frequency of 100 kHz to 200 kHz:
±4.0%
• When in pulse width measurement mode8
Measurement accuracy is specified according to the measurement range and input pulse width
[Definition of measurement accuracy]
±(0.05% of 10 div + accuracy dependent on the input pulse width)
[Accuracy dependent on the input pulse width]
Input pulse width of 500 µs or greater:
0.05% of the input pulse width
Input pulse width of 100 µs to 500 µs:
0.1% of the input pulse width
Input pulse width of 50 µs to 100 µs:
0.3% of the input pulse width
Input pulse width of 50 µs or less:
0.5% of the input pulse width + 0.1 µs
App
Index
6.13 Module Specifications
Item
Input voltage range (±FS)
Input impedance
Input coupling settings
Probe attenuation setting
Minimum voltage width for pulse
detection
Bandwidth limit
Threshold
Hysteresis
Preset function
Slope selection
Lower −3 dB point when AC
coupled
Chatter elimination function
Input status indication function
Compatible probes/cables
1
Specifications
When using 1:1 probe attenuation:
±1 V, ±2 V, ±5 V, ±10 V, ±20 V, ±50 V (±FS)
1 MΩ ± 1 approx. 35 pF
Pull-up function:
4.7 kΩ, approx. 5 V (pull-up can be turned ON only when the
input is set to Pull-Up 5 V)
AC, DC
10:1, 1:1
200 mVP-P
Select from Full, 100 kHz, 10 kHz, 1 kHz, and 100 Hz
Cutoff characteristics:
−12 dB/OCT (typical9)
Set within the FS of the voltage range. Set in units of 1% of the FS.
Select ±1%, ±2.5%, or ±5% of the FS of the voltage range
Logic (5 V/3 V/12 V/24 V), electromagnetic pickup, zero crossing, pull-up, AC100 V, AC200 V,
and user-defined
Select rising or falling
0.5 Hz or less (0.05 Hz or less when using the 700929, 0.005 Hz or less when using the
701947) (typical9)
OFF or 1 to 1000 ms (1 ms resolution)
Eliminates the chatter that occurs such when the contact input is turned ON/OFF.
Can discard the signal changes over the specified interval.
Input status indication through the LEDs of each channel function
When in operation:
Illuminates in green when pulse input is detected
When overdriven:
Illuminates in red when the input voltage exceeds the range
Connection cable (1:1): Recommended 1
366926
Voltage probe: Recommended 2
700929 (10:1 safety probe) .20 to 45 pF:
For measuring 1000 V (DC+ACpeak) or less
701947 (100:1 probe) .15 to 45 pF:
For measuring 1000 V (DC+ACpeak) or less
Value measured under standard operating conditions.
Combined with the 700929 or 701947
700929
701947
Direct input (cable not complying with the safety standard)
H
H
2.
L
3.
BNC
4.
L
5.
3.
Withstand voltage: 1500 Vrms for 1 minute
Allowable transient surge voltage (between earth and input): ±2100 Vpeak
6
7
8
9
Input waveform of 1 Vpp, rectangular wave, rise/fall time within 1 ms (input range: ±10 V, bandwidth limit: Full, and
hysteresis: ±1%)
Input waveform of 90 Vrms, sine wave (input range: AC100 V, bandwidth limit 100 kHz, and hysteresis: ±1%)
Input waveform of 1 Vpp, rectangular wave, rise/fall time within 5 ns (input range: ±10 V, bandwidth limit: Full, and hysteresis:
±1%)
Typical value represents a typical or average value. It is not strictly warranted.
WARNING
• Do not apply input voltage exceeding the maximum input voltage or allowable common
mode input voltage.
• To prevent the possibility of electric shock, be sure to furnish protective earth grounding of
the DL850/DL850V.
• To prevent the possibility of electric shock, be sure to fasten the module screws.
Otherwise, the electrical and mechanical protection functions will not be activated.
• Avoid continuous connection under an environment in which the surge voltage may occur.
6-34
IM DL850-03EN
6.13 Module Specifications
1
Specifications by Measurement Modes
Item
Frequency
Measurable frequency range
Selectable vertical axis
sensitivity
Minimum resolution
RPMs
Measurable RPMs range
Selectable vertical axis
sensitivity
Computing method
Selectable pulse/rotate range
RPSs
Measurable RPSs range
Selectable vertical axis
sensitivity
Computing method
Selectable vertical axis
sensitivity
Center frequency setting
Minimum resolution
Pulse width
Measurable pulse width
Selectable vertical axis
sensitivity
Measurement pulse selection
Minimum resolution
Pulse integration
Maximum pulse count
Selectable vertical axis
sensitivity
Frequency measuring range
Computation function
Selectable Unit/Pulse range
Counter reset
Velocity
Selectable vertical axis
sensitivity
Computing method
Selectable Distance/Pulse
range
IM DL850-03EN
0.01 Hz to 200 kHz
0.1 Hz/div to 50 kHz/div (1-2-5 steps)
0.001 Hz
2
0.01 rpm to 100000 rpm (where the input frequency is DC to 200 kHz).
0.1 rpm/div to 10 kpm/div (1-2-5 steps)
Computed from the frequency based on the number of pulses per rotation
RPMs = Frequency/(pulse/rotate value) × 60
1 to 99999
3
4
0.001 rps to 2000 rps (where the input frequency is DC to 200 kHz).
0.01 rps/div to 200 rps/div (1-2-5 steps)
Computed from the frequency based on the number of pulses per rotation
RPSs = Frequency/(pulse/rotate value)
1 to 99999
5
5 µs to 50 s (where the minimum pulse width is 2 µs)
10 µs/div to 5 s/div (1-2-5 steps)
0.1 µs
6
Specifications
Selectable pulse/rotate range
Period
Measurable period range
Selectable vertical axis
sensitivity
Minimum resolution
Duty cycle
Measurable duty cycle range
Selectable vertical axis
sensitivity
Measurable frequency range
Measurement pulse selection
Minimum resolution
Power supply frequency
Measurable frequency range
Specifications
0 to 100%
1 %/div to 20 %/div (1-2-5 steps)
0.1 Hz to 200 kHz
Select positive or negative pulse
0.01%
App
Index
30 Hz to 70 Hz (when the center frequency is 50 Hz), 40 Hz to 80 Hz (when the center
frequency is 60 Hz), 380 Hz to 420 Hz (when the center frequency is 400 Hz)
0.1 Hz/div to 2 Hz/div (0.01 Hz resolution)
Select 50 Hz, 60 Hz, or 400 Hz
0.01 Hz
2 µs to 50 s (where the input frequency is up to 200 kHz)
10 µs/div to 5 s/div (1-2-5 steps)
Select positive or negative pulse
0.1 µs
2×10⁹ pulses
500.0E+18 value/div to 10.00E−21 value/div (1-2-5 range: total of 123 ranges)
0.1 Hz to 200 kHz (where the minimum pulse width is 2 µs)
Set the physical amount per pulse and display by converting the values intophysical values
such as distance and flow rate.
−9.9999E+30 to +9.9999E+30
Manual reset and over-limit reset
500.0 E+18 value/div to 10.00 E-21 value/div (1-2-5 range: total of 123 ranges)
Set the amount of displacement per pulse and compute the velocity from the frequency
Automatic unit time conversion of s, min, and hour.
−9.9999E+30 to +9.9999E+30
6-35
6.13 Module Specifications
Functional Specifications
Item
Deceleration prediction
Stop prediction
Smoothing
Pulse average
Offset function
6-36
Specifications
Computes the deceleration condition in realtime when the pulse input is cut off.
Can be specified when measuring the frequency, RPMs, RPSs, period, and velocity
Sets the frequency to 0 after a certain time elapses after the pulse input is cut off.
Stop interval setting: Set in the range of 1.5 to 10 times (10 settings) the period of the pulse
measured last
Can be specified when measuring the frequency, RPMs, RPSs, period, and velocity
Computes the moving average of the measured data using the specified time
Specified time: 0.1 to 1000 ms (0.1 ms resolution)
Can be specified on all measurement parameters
Performs frequency measurement per specified number of pulses. When fluctuation exists
periodically in the pulse interval, the fluctuation can be eliminated.
Specified number of pulses: 1 to 4096
Can be specified when measuring the frequency, RPMs, RPSs, power supply frequency,
period, pulse integration, and velocity
Observe fluctuation with respect to the offset frequency
Offset range: Can be set up to 1000 times the maximum div value
• Frequency:
0 Hz to 200 kHz
• RPMs:
0 rpm to 50 krpm
• RPSs:
0 rps to 1000 rps
• Period:
0 s to 50 s
• Duty cycle:
0% to 100%
• Pulse width:
0 s to 50 s
• Pulse integration:
−1.0000×10²² to 1.0000×10²²
• Velocity:
−1.0000×10²² to 1.0000×10²²
IM DL850-03EN
6.13 Module Specifications
High-Speed 100 MS/s, 12-Bit Isolation Module (720210) Specifications
Item
Standard operating conditions
1
Value measured under standard operating conditions.
Combined with the 700929 or 701947
700929
701947
Direct input (cable not complying with the safety standard)
H
H
2.
L
3.
BNC
4.
L
5.
Withstand voltage: 1500 Vrms for 1 minute
Allowable transient surge voltage (between earth and input): ±2100 Vpeak
6
Typical value represents a typical or average value. It is not strictly warranted.
IM DL850-03EN
6-37
2
3
4
5
6
Specifications
Specifications
Temperature: 23°C±5°C
Humidity:
20% to 80%RH
After a 30-minute warm-up and after calibration
Effective measurement range
20 div (display range: 10 div)
Number of input channels
2
Input coupling
AC, DC, and GND
Maximum sample rate
100 MS/s
Input format
Isolated unbalanced
Frequency characteristics1
(−3 dB point when sine wave of amplitude ±3 div is applied) DC to 20 MHz
Voltage-axis sensitivity setting
10 mV/div to 20 V/div (1-2-5 steps) (when using 1:1 probe attenuation)
Maximum input voltage
Combined with the 700929(10:1) or 701947(100:1):2
1000 V (DC+ACpeak) CATII
(at a frequency of 1 kHz or less) Direct input or cable not complying with the safety standard:4
200 V (DC+ACpeak)
Maximum allowable common
Working voltage of safety standard
mode voltage
Combined with the 700929 (10:1) or 701947 (100:1):3
1000 Vrms (CAT II)
(at a frequency of 1 kHz or less) Direct input or cable not complying with the safety standard:5 42 V (DC+ACpeak) (CAT I
and CAT II, 30 Vrms)
Vertical (voltage) axis accuracy 10 mV/div to 20 V/div: ±(0.5% of 10 div)
DC accuracy1
Input connector
BNC connector (isolated type)
Input impedance
1 MΩ ± 1%, approx. 35 pF
−3 dB point when AC coupled
10 Hz or less (1 Hz or less when using the 700929, 0.1 Hz or less when using the 700929)
low frequency attenuation point
Common mode rejection ratio
80 dB (50/60 Hz) or more (typical6)
Residual noise level
±1.1 mV or ±0.15 /div whichever is greater (Typical6)
(Input section shorted)
Withstand voltage
1500 Vrms for 1 minute (across each terminal and earth) (60 Hz)
Insulation resistance
500 VDC, 10 MΩ or more (across each input terminal and earth)
A/D conversion resolution
12 bit (150 LSB/div)
Temperature coefficient
Zero point:
10 mV/div to 20 V/div: ±(0.1% of 10 div)/°C(Typical6)
Gain:
±(0.05% of 10 div)/°C(Typical6)
Bandwidth limit
Select from OFF, 2 MHz, 1.28 MHz, 640 kHz, 320 kHz, 160 kHz, 80 kHz, , 40 kHZ, 20 kHz,
and 10 kHz
Cut-off characteristics:
−12 dB/OCT (when 2 MHz, Typical6)
Probe attenuation setting
Voltage probe:
1:1, 10:1, 100:1, 1000:1
Current probe:
10 A:1 V (for the 700937/701933), 100 A: 1 V (for the 701930/701931)
1
App
Index
6.13 Module Specifications
WARNING
• Do not apply input voltage exceeding the maximum input voltage or allowable common
mode input voltage.
• To prevent the possibility of electric shock, be sure to furnish protective earth grounding of
the DL850/DL850V.
• To prevent the possibility of electric shock, be sure to fasten the module screws.
Otherwise, the electrical and mechanical protection functions will not be activated.
• Avoid continuous connection under an environment in which the surge voltage may occur.
6-38
IM DL850-03EN
6.13 Module Specifications
1
16-CH Voltage Input Module (720220) Specifications
Item
Standard operating conditions
Valid measurement range
Number of input channels
Input coupling settings
Maximum sample rate
Input format
Frequency characteristics1
(−3 dB point when a sine wave with an
amplitude of ±3 div is applied)
Selectable voltage sensitivity range
Max. measurement voltage range
Maximum input voltage
(at a frequency of 1 kHz or less)
Maximum allowable common mode voltage
(at a frequency of 1 kHz or less)
Bandwidth limit
Wiring
0.2 V/div to 2 V/div (in 1-2-5 steps)
±20 V
Direct input 42 V (DC + ACpeak)
3
4
5
The Working Voltage in the safety standards
Direct input
42 V (DC + ACpeak) (CAT I and CAT II, 30 Vrms)
± (0.3% of 10 div)
Spring terminal blocks. Each 8-channel unit is removable.
1 MΩ ± 1%
80 dB (50/60 Hz) or more (typical value)
±0.05 div
16 bits, 2400 LSB/div
Zero point: ±(0.02% of 10 div)/°C (typical value)
Gain:
±(0.02% of 10 div)/°C (typical value)
Can be turned off or set to 500 Hz on each sub channel
Recommended: 0.20 mm2 to 1.00 mm2. AWG size: 24-18.
6
App
Index
WARNING
• When connecting a device under measurement to the instrument, be sure to turn off the
device. It is extremely dangerous to connect or remove wires while the device under
measurement is on.
Avoid Electric Shock When Using the Modules
• Do not apply a voltage that exceeds the maximum input voltage, withstand voltage, or
allowable surge voltage.
• To avoid electric shock, be sure to ground the instrument.
• To prevent the possibility of electric shock, be sure to fasten the module screws. Otherwise,
the electrical and mechanical protection functions will not be activated.
• Do not leave the instrument connected to devices in an environment that may be subject to
voltage surges.
• To prevent electric shock, connect wires to the terminal block that match the voltage range
that you are measuring.
• Applying a voltage greater than the limits listed below may damage the input section. For
frequencies above 1 kHz, damage may occur even if the voltage is less than the limits
listed below.
Maximum input voltage between H and L input terminals when the frequency is 1 kHz or
less1
42 V (DC + ACpeak)
Maximum allowable common mode voltage between the H or L input terminal and the
ground when the frequency is 1 kHz or less2
42V (DC + ACpeak, CAT I and CAT II, 30 Vrms)
IM DL850-03EN
2
Specifications
DC vertical-axis (voltage-axis) accuracy
Input connector
Input impedance
Common mode rejection ratio
Residual noise level (input section shorted)
A/D converter resolution
Temperature coefficient
Specifications
Ambient temperature: 23 ± 5°C
Ambient humidity:
20 to 80% RH
After the DL850/DL850V has been warmed up for 30 minutes and then calibration
has been performed
20 div (0 V ± 10 div. Display range: 10 div. When Variable is set to OFF)
16
DC, GND, and OFF
200 kS/s for a single channel, 16 ch × 10 kS/s
All isolated unbalanced
DC to 5 kHz
6-39
6.13 Module Specifications
• Wire all the L input terminals for all the sub channels on the same module to the same
potential. The L input terminals of the sub channels are all connected. Because the L
input terminals are electrically connected inside the DL850/DL850V, connecting different
potentials to them could result in short circuiting and damage to the 16-CH Voltage Input
Module.
The L input terminals are
electrically connected
inside the instrument
(same potential).
Terminal block
L H Sub channel
1
2
H
Input
terminal
L
2.
Ground
16
Wire
insertion hole
1.
Screwdriver
insertion hole
• When you release or lock the terminal block release levers, be careful not to injure yourself
on the levers’ protrusions.
CAUTION
When you attach the terminal block, if you try to attach it upside down, you may damage the
terminal block and the module. Check the vertical orientation of the block before you install it.
6-40
IM DL850-03EN
6.13 Module Specifications
1
Logic Input Module (720230) Specifications
Item
Standard operating
conditions
Specifications
Ambient temperature: 23 ± 5°C
Number of input ports
Number of input bits
Maximum sample rate
Input format
Compatible probes
Chatter suppression time
settings
2
Ambient humidity: 20 to 80% RH
2
8 bits per port
10 MS/s
Use a non-isolated, dedicated probe (automatic detection)
700986 (non-isolated 8-bit input)
700987 (isolated 8-bit input)
702911 (non-isolated 8-bit input)
702912 (non-isolated 8-bit input)
Off, 5 ms, 10 ms, 20 ms, 50 ms, and 100 ms
3
4
5
CAUTION
IM DL850-03EN
6-41
6
Specifications
• Applying a voltage greater than the limits listed below may damage the logic probe or the
instrument. For frequencies above 1 kHz, damage may occur even if the voltage is less
than the limits listed below.
Maximum input voltage (at a frequency of 1 kHz or less)
• Logic probes 702911 and 702912: 35 V
• High-speed logic probe 700986: 42 V (DC + ACpeak)
• Isolated logic probe 700987: 250 Vrms (however, ACpeak must be less than 350 V, and
DC must be less than 250 V)
• For logic probes 702911, 702912, 700986, and the high-speed logic probe, the eight input
lines of a single pod share the same ground. Also, the instrument’s ground and the grounds
of each pod are connected. Do not apply signals with different common voltages to each
input line. Doing so may damage the instrument, connected logic probes, and connected
devices.
• The input terminals of an isolated logic probe are isolated from each other and from the
DL850/DL850V.
• Turn off the DL850/DL850V before you connect or remove a 26-pin connector from the
logic signal input connector.
• Do not stack isolated logic probes. Also, to prevent a probe’s internal temperature from
rising, provide a sufficient amount of space around it.
• Do not use the YOKOGAWA 700985 logic probe with the DL850/DL850V. The 700985
is shaped so that it can be connected to the logic signal input connector of the DL850/
DL850V, but it is not electrically compatible with the DL850/DL850V, so connecting the two
could damage the DL850/DL850V or the 700985.
App
Index
6.13 Module Specifications
CAN Bus Monitor Module (720240) Specification
Item
Standard operating
condition
Number of input ports
Maximum sample rate
Input format
Maximum input voltage
Maximum allowable
common mode voltage
Input connector
Terminator
Supported protocol
Supported bit rates1
LED display
Number of sub channels
One shot output
Terminator resistance
(when the terminator is
enabled)
A/D converter resolution
(when Value Type is set to
Float2)
1
2
6-42
Specifications
Ambient temperature: 23±5°C
Ambient humidity: 20 to 80%RH
2
100 kS/s
Isolated unbalanced
–3 to +10 V (between CAN_H and GND or CAN_L and GND)
30 Vrms (CAT I and II)
D-sub 9 pin (male)
Internal, can be enabled or disabled for each port
Physical layer: ISO-11898 (High Speed Communication)
10 kbps, 20 kbps, 33.3 kbps, 50 kbps, 62.5 kbps, 66.7 kbps, 83.3 kbps, 125 kbps, 250 kbps,
500 kbps, 800 kbps, 1 Mbps
Illuminates to indicate that the terminator is enabled
16 sub channels/ports (60 for firmware versions 1.2 and later)
Frames can be output in single shots
110 to 130 Ω
16 bits, 2400 LSB/div
Low-speed CAN at low-speed transceiver levels is not supported.
Applies to modules whose firmware version is 1.2 or later
IM DL850-03EN
6.14 Logic Probe Specifications
1
High-Speed Logic Probe (700986) Specifications
Item
Number of inputs
Input format
Maximum input voltage
Response time
Input impedance
Threshold level
2
Specifications
8
Non-isolated (all the bits share the same ground with the DL850/DL850V and each other)
42V (DC + ACpeak, CAT I and CAT II, 30 Vrms), between the probe tip and ground
(at a frequency of 1 kHz or less)
Within 1 μs
100 kΩ or more
Approx. 1.4 V
3
4
Isolated Logic Probe (700987) Specifications
Specifications
8
Isolated (all bits are isolated)
Safety terminal type (for banana plug) × 8
Each bit can be switched to AC or DC input.
The H/L state of each bit is indicated with LEDs (the LEDs illuminate to indicate H).
During DC input: H/L detection of 10 VDC to 250 VDC
During AC input: H/L detection of 80 VAC to 250 VAC at 50/60 Hz
Threshold level
During DC input: 6 V ± 50% (High level: 10 to 250 VDC, Low level: 0 to 3 VDC)
During AC input: 50 VAC ± 50% (High level: 80 to 250 VAC, Low level: 0 to 20 VAC)
Response time
During DC input: 1 ms or less
During AC input: 20 ms or less
Input impedance
Approx. 100 kΩ
Maximum input voltage
250 Vrms1 (CAT I and CAT II)
(between the H and L terminals of each bit)
Maximum allowable common
250 Vrms1 (CAT I and CAT II)
mode voltage
(between input terminal H or L and the ground)
Maximum allowable voltage
250 Vrms1 (CAT I and CAT II)
between bits
Withstand voltage
2000 VAC for 1 minute
(between the input terminals and the ground)
Insulation resistance
500 VDC, 10 MΩ or greater
(between the input terminals and the ground)
Fuse2
Location
Max. rated voltage Max. rated current Type
Standard
H side of input
250 V
50 mA
Time lag
VDE/SEMKO
terminal
approved
1
2
Make sure that the peak AC voltage does not exceed 350 V and that the DC voltage does not exceed 250 V when the
frequency is 1 kHz or less.
Because the fuses used by this instrument are all inside the case, you cannot replace them yourself. If you believe that the
fuse inside the case has blown, please contact your nearest YOKOGAWA dealer.
Logic Probe (702911 and 702912) Specifications
Item
Number of inputs
Input format
Maximum input voltage
Response time
Input impedance
Threshold level
Input methods
IM DL850-03EN
Specifications
8
Non-isolated (all the bits share the same ground with the DL850/DL850V and each other)
±35 V
Within 3 μs
10 kΩ or more
Approx. 1.4 V
TTL level or contact input (switchable). During contact input: Pulled up to 5 V
6-43
5
6
Specifications
Item
Number of inputs
Input format
Input connector
Input switching
Input signal display
Applicable input range
App
Index
6.15 External Dimensions
DL850/DL850V
Unit: mm
Unless otherwise specified, tolerances are ±3% (however, tolerances are ±0.3 mm when below 10
mm).
8
259
Rear view
16.5
6-44
355
11
11.7
180
23
IM DL850-03EN
Appendix
Appendix 1 Relationship between the Time Axis
Setting, Record Length, and Sample Rate
When the High-Speed 100 MS/s, 12-Bit Isolation Module Is Installed
When the Record Length Is 1 kpoint, 2.5 kpoint, 5 kpoint, 10 kpoint, or 25 kpoint
Time/div
100 M
100 M
100 M
100 M
50 M
20 M
10 M
5M
2M
1M
500 k
200 k
100 k
50 k
20 k
10 k
5k
2k
1k
500
200
100
50
20
20
20
10
10
10
5
Display
Record
Length
(Points)
100
200
500
1k
1k
1k
1k
1k
1k
1k
1k
1k
1k
1k
1k
1k
1k
1k
1k
1k
1k
1k
1k
600
800
1k
600
800
1k
1k
2.5 kpoint
Sample
Display
Rate
Record
(S/s)
Length
5 kpoint
Sample
Rate
(S/s)
Display
Record
Length
100 M
100 M
100 M
100 M
100 M
50 M
20 M
10 M
5M
2M
1M
500 k
200 k
100 k
50 k
20 k
10 k
5k
2k
1k
500
200
100
50
50
50
20
20
20
10
5
100 M
100 M
100 M
100 M
100 M
100 M
50 M
20 M
10 M
5M
2M
1M
500 k
200 k
100 k
50 k
20 k
10 k
5k
2k
1k
500
200
100
100
100
50
50
50
20
10
5
100
200
500
1k
2k
5k
5k
4k
5k
5k
4k
5k
5k
4k
5k
5k
4k
5k
5k
4k
5k
5k
4k
3k
4k
5k
3k
4k
5k
4k
3k
3k
(Points)
100
200
500
1k
2k
2.5 k
2k
2k
2.5 k
2k
2k
2.5 k
2k
2k
2.5 k
2k
2k
2.5 k
2k
2k
2.5 k
2k
2k
1.5 k
2k
2.5 k
1.2 k
1.6 k
2k
2k
1.5 k
(Points)
10 kpoint
Sample
Display
Rate
Record
(S/s)
Length
(Points)
100 M
100 M
100 M
100 M
100 M
100 M
100 M
50 M
20 M
10 M
5M
2M
1M
500 k
200 k
100 k
50 k
20 k
10 k
5k
2k
1k
500
200
200
200
100
100
100
50
20
10
5
5
100
200
500
1k
2k
5k
10 k
10 k
10 k
10 k
10 k
10 k
10 k
10 k
10 k
10 k
10 k
10 k
10 k
10 k
10 k
10 k
10 k
6k
8k
10 k
6k
8k
10 k
10 k
6k
6k
6k
9k
25 kpoint
Sample
Display
Rate
Record
(S/s)
Length
(Points)
100 M
100
100 M
200
100 M
500
100 M
1k
100 M
2k
100 M
5k
100 M
10 k
100 M
20 k
50 M
25 k
20 M
20 k
10 M
20 k
5M
25 k
2M
20 k
1M
20 k
500 k
25 k
200 k
20 k
100 k
20 k
50 k
25 k
20 k
20 k
10 k
20 k
5k
25 k
2k
20 k
1k
20 k
500
15 k
500
20 k
500
25 k
200
12 k
200
16 k
200
20 k
100
20 k
50
15 k
20
12 k
20
24 k
10
18 k
10
24 k
5
15 k
5
18 k
5
21 k
When the time axis setting is 100 ms or greater (the settings surrounded by bold lines) and the trigger mode is Auto or Auto Level,
waveforms are displayed in roll mode.
IM DL850-03EN
App-1
2
3
4
5
6
App
Appendix
100 ns
200 ns
500 ns
1 μs
2 μs
5 μs
10 μs
20 μs
50 μs
100 μs
200 μs
500 μs
1 ms
2 ms
5 ms
10 ms
20 ms
50 ms
100 ms
200 ms
500 ms
1s
2s
3s
4s
5s
6s
8s
10 s
20 s
30 s
1 min
2 min
3 min
4 min
5 min
6 min
7 min
Record
1 kpoint
Sample
Rate
(S/s)
1
Index
Appendix 1 Relationship between the Time Axis Setting, Record Length, and Sample Rate
When the Record Length Is 50 kpoint, 100 kpoint, 250 kpoint, 500 kpoint, or 1 Mpoint
Time/div
Record Length
50 kpoint
Sample
Display
Rate
Record
(S/s)
Length
(Points)
100 ns
200 ns
500 ns
1 μs
2 μs
5 μs
10 μs
20 μs
50 μs
100 μs
200 μs
500 μs
1 ms
2 ms
5 ms
10 ms
20 ms
50 ms
100 ms
200 ms
500 ms
1s
2s
3s
4s
5s
6s
8s
10 s
20 s
30 s
1 min
2 min
3 min
4 min
5 min
6 min
7 min
8 min
9 min
10 min
12 min
15 min
30 min
1h
2h
3h
4h
5h
100 M
100 M
100 M
100 M
100 M
100 M
100 M
100 M
100 M
50 M
20 M
10 M
5M
2M
1M
500 k
200 k
100 k
50 k
20 k
10 k
5k
2k
1k
1k
1k
500
500
500
200
100
50
20
20
20
10
10
10
10
5
5
5
5
100
200
500
1k
2k
5k
10 k
20 k
50 k
50 k
40 k
50 k
50 k
40 k
50 k
50 k
40 k
50 k
50 k
40 k
50 k
50 k
40 k
30 k
40 k
50 k
30 k
40 k
50 k
40 k
30 k
30 k
24 k
36 k
48 k
30 k
36 k
42 k
48 k
27 k
30 k
36 k
45 k
100 kpoint
Sample
Display
Rate
Record
(S/s)
Length
250 kpoint
Sample
Display
Rate
Record
(S/s)
Length
500 kpoint
Sample
Display
Rate
Record
(S/s)
Length
1 Mpoint
Sample
Rate
(S/s)
Display
Record
Length
100 M
100 M
100 M
100 M
100 M
100 M
100 M
100 M
100 M
100 M
50 M
20 M
10 M
5M
2M
1M
500 k
200 k
100 k
50 k
20 k
10 k
5k
2k
2k
2k
1k
1k
1k
500
200
100
50
50
20
20
20
20
20
10
10
10
10
5
100 M
100 M
100 M
100 M
100 M
100 M
100 M
100 M
100 M
100 M
100 M
50 M
20 M
10 M
5M
2M
1M
500 k
200 k
100 k
50 k
20 k
10 k
5k
5k
5k
2k
2k
2k
1k
500
200
200
100
100
50
50
50
50
20
20
20
20
10
5
100 M
100 M
100 M
100 M
100 M
100 M
100 M
100 M
100 M
100 M
100 M
100 M
50 M
20 M
10 M
5M
2M
1M
500 k
200 k
100 k
50 k
20 k
10 k
10 k
10 k
5k
5k
5k
2k
1k
500
200
200
200
100
100
100
100
50
50
50
50
20
10
5
100 M
100 M
100 M
100 M
100 M
100 M
100 M
100 M
100 M
100 M
100 M
100 M
100 M
50 M
20 M
10 M
5M
2M
1M
500 k
200 k
100 k
50 k
20 k
20 k
20 k
10 k
10 k
10 k
5k
2k
1k
500
500
200
200
200
200
200
100
100
100
100
50
20
10
5
5
5
100
200
500
1k
2k
5k
10 k
20 k
50 k
100 k
200 k
500 k
1M
1M
1M
1M
1M
1M
1M
1M
1M
1M
1M
600 k
800 k
1M
600 k
800 k
1M
1M
600 k
600 k
600 k
900 k
480 k
600 k
720 k
840 k
960 k
540 k
600 k
720 k
900 k
900 k
720 k
720 k
540 k
720 k
900 k
(Points)
100
200
500
1k
2k
5k
10 k
20 k
50 k
100 k
100 k
100 k
100 k
100 k
100 k
100 k
100 k
100 k
100 k
100 k
100 k
100 k
100 k
60 k
80 k
100 k
60 k
80 k
100 k
100 k
60 k
60 k
60 k
90 k
48 k
60 k
72 k
84 k
96 k
54 k
60 k
72 k
90 k
90 k
(Points)
100
200
500
1k
2k
5k
10 k
20 k
50 k
100 k
200 k
250 k
200 k
200 k
250 k
200 k
200 k
250 k
200 k
200 k
250 k
200 k
200 k
150 k
200 k
250 k
120 k
160 k
200 k
200 k
150 k
120 k
240 k
180 k
240 k
150 k
180 k
210 k
240 k
108 k
120 k
144 k
180 k
180 k
180 k
(Points)
100
200
500
1k
2k
5k
10 k
20 k
50 k
100 k
200 k
500 k
500 k
400 k
500 k
500 k
400 k
500 k
500 k
400 k
500 k
500 k
400 k
300 k
400 k
500 k
300 k
400 k
500 k
400 k
300 k
300 k
240 k
360 k
480 k
300 k
360 k
420 k
480 k
270 k
300 k
360 k
450 k
360 k
360 k
360 k
(Points)
When the time axis setting is 100 ms or greater (the settings surrounded by bold lines) and the trigger mode is Auto or Auto Level,
waveforms are displayed in roll mode.
App-2
IM DL850-03EN
Appendix 1 Relationship between the Time Axis Setting, Record Length, and Sample Rate
When the Record Length Is 2.5 Mpoint, 5 Mpoint, 10 Mpoint, 25 Mpoint, or 50 Mpoint
Time/div
Record Length
2.5 Mpoint
Sample
Display
Rate
Record
(S/s)
Length
5 Mpoint
Sample
Rate
(S/s)
Display
Record
Length
10 Mpoint
Sample
Display
Rate
Record
(S/s)
Length
25 Mpoint
Sample
Display
Rate
Record
(S/s)
Length
50 Mpoint
Sample
Display
Rate
Record
(S/s)
Length
100 ns
200 ns
500 ns
1 μs
2 μs
5 μs
10 μs
20 μs
50 μs
100 μs
200 μs
500 μs
1 ms
2 ms
5 ms
10 ms
20 ms
50 ms
100 ms
200 ms
500 ms
1s
2s
3s
4s
5s
6s
8s
10 s
20 s
30 s
1 min
2 min
3 min
4 min
5 min
6 min
7 min
8 min
9 min
10 min
12 min
15 min
30 min
1h
2h
3h
4h
5h
100 M
100 M
100 M
100 M
100 M
100 M
100 M
100 M
100 M
100 M
100 M
100 M
100 M
100 M
50 M
20 M
10 M
5M
2M
1M
500 k
200 k
100 k
50 k
50 k
50 k
20 k
20 k
20 k
10 k
5k
2k
2k
1k
1k
500
500
500
500
200
200
200
200
100
50
20
20
10
10
100 M
100 M
100 M
100 M
100 M
100 M
100 M
100 M
100 M
100 M
100 M
100 M
100 M
100 M
100 M
50 M
20 M
10 M
5M
2M
1M
500 k
200 k
100 k
100 k
100 k
50 k
50 k
50 k
20 k
10 k
5k
2k
2k
2k
1k
1k
1k
1k
500
500
500
500
200
100
50
20
20
20
100
200
500
1k
2k
5k
10 k
20 k
50 k
100 k
200 k
500 k
1M
2M
5M
5M
4M
5M
5M
4M
5M
5M
4M
3M
4M
5M
3M
4M
5M
4M
3M
3M
2.4 M
3.6 M
4.8 M
3M
3.6 M
4.2 M
4.8 M
2.7 M
3M
3.6 M
4.5 M
3.6 M
3.6 M
3.6 M
2.16 M
2.88 M
3.6 M
100 M
100 M
100 M
100 M
100 M
100 M
100 M
100 M
100 M
100 M
100 M
100 M
100 M
100 M
100 M
100 M
50 M
20 M
10 M
5M
2M
1M
500 k
200 k
200 k
200 k
100 k
100 k
100 k
50 k
20 k
10 k
5k
5k
2k
2k
2k
2k
2k
1k
1k
1k
1k
500
200
100
50
50
50
100 M
100 M
100 M
100 M
100 M
100 M
100 M
100 M
100 M
100 M
100 M
100 M
100 M
100 M
100 M
100 M
100 M
50 M
20 M
10 M
5M
2M
1M
500 k
500 k
500 k
200 k
200 k
200 k
100 k
50 k
20 k
20 k
10 k
10 k
5k
5k
5k
5k
2k
2k
2k
2k
1k
500
200
200
100
100
100 M
100 M
100 M
100 M
100 M
100 M
100 M
100 M
100 M
100 M
100 M
100 M
100 M
100 M
100 M
100 M
100 M
100 M
50 M
20 M
10 M
5M
2M
1M
1M
1M
500 k
500 k
500 k
200 k
100 k
50 k
20 k
20 k
20 k
10 k
10 k
10 k
10 k
5k
5k
5k
5k
2k
1k
500
200
200
200
(Points)
(Points)
(Points)
100
200
500
1k
2k
5k
10 k
20 k
50 k
100 k
200 k
500 k
1M
2M
5M
10 M
10 M
10 M
10 M
10 M
10 M
10 M
10 M
6M
8M
10 M
6M
8M
10 M
10 M
6M
6M
6M
9M
4.8 M
6M
7.2 M
8.4 M
9.6 M
5.4 M
6M
7.2 M
9M
9M
7.2 M
7.2 M
5.4 M
7.2 M
9M
(Points)
100
200
500
1k
2k
5k
10 k
20 k
50 k
100 k
200 k
500 k
1M
2M
5M
10 M
20 M
25 M
20 M
20 M
25 M
20 M
20 M
15 M
20 M
25 M
12 M
16 M
20 M
20 M
15 M
12 M
24 M
18 M
24 M
15 M
18 M
21 M
24 M
10.8 M
12 M
14.4 M
18 M
18 M
18 M
14.4 M
21.6 M
14.4 M
18 M
(Points)
100
200
500
1k
2k
5k
10 k
20 k
50 k
100 k
200 k
500 k
1M
2M
5M
10 M
20 M
50 M
50 M
40 M
50 M
50 M
40 M
30 M
40 M
50 M
30 M
40 M
50 M
40 M
30 M
30 M
24 M
36 M
48 M
30 M
36 M
42 M
48 M
27 M
30 M
36 M
45 M
36 M
36 M
36 M
21.6 M
28.8 M
36 M
When the time axis setting is 100 ms or greater (the settings surrounded by bold lines) and the trigger mode is Auto or Auto Level,
waveforms are displayed in roll mode.
(Continued on next page)
IM DL850-03EN
2
App-3
3
4
5
6
App
Appendix
100
200
500
1k
2k
5k
10 k
20 k
50 k
100 k
200 k
500 k
1M
2M
2.5 M
2M
2M
2.5 M
2M
2M
2.5 M
2M
2M
1.5 M
2M
2.5 M
1.2 M
1.6 M
2M
2M
1.5 M
1.2 M
2.4 M
1.8 M
2.4 M
1.5 M
1.8 M
2.1 M
2.4 M
1.08 M
1.2 M
1.44 M
1.8 M
1.8 M
1.8 M
1.44 M
2.16 M
1.44 M
1.8 M
1
Index
Appendix 1 Relationship between the Time Axis Setting, Record Length, and Sample Rate
(Continued from previous page)
Time/div
Record Length
2.5 Mpoint
Sample
Display
Rate
Record
(S/s)
Length
(Points)
6h
7h
8h
9h
10 h
12 h
1 day
2 days
3 days
10
5
5
5
5
5
2.16 M
1.26 M
1.44 M
1.62 M
1.8 M
2.16 M
5 Mpoint
Sample
Rate
(S/s)
Display
Record
Length
20
10
10
10
10
10
5
4.32 M
2.52 M
2.88 M
3.24 M
3.6 M
4.32 M
4.32 M
(Points)
10 Mpoint
Sample
Display
Rate
Record
(S/s)
Length
25 Mpoint
Sample
Display
Rate
Record
(S/s)
Length
50 Mpoint
Sample
Display
Rate
Record
(S/s)
Length
20
20
20
20
20
20
10
5
100
50
50
50
50
50
20
10
5
200
100
100
100
100
100
50
20
10
(Points)
4.32 M
5.04 M
5.76 M
6.48 M
7.2 M
8.64 M
8.64 M
8.64 M
(Points)
21.6 M
12.6 M
14.4 M
16.2 M
18 M
21.6 M
17.28 M
17.28 M
12.96 M
(Points)
43.2 M
25.2 M
28.8 M
32.4 M
36 M
43.2 M
43.2 M
34.56 M
25.92 M
When the time axis setting is 100 ms or greater (the settings surrounded by bold lines) and the trigger mode is Auto or Auto Level,
waveforms are displayed in roll mode.
When the Record Length Is 100 Mpoint, 250 Mpoint, 500 Mpoint, 1 Gpoint, or 2 Gpoint
Time/div
Record Length
100 Mpoint
Sample
Display
Rate
Record
(S/s)
Length
250 Mpoint
Sample
Display
Rate
Record
(S/s)
Length
500 Mpoint
Sample
Display
Rate
Record
(S/s)
Length
1 Gpoint
Sample
Rate
(S/s)
Display
Record
Length
2 Gpoint
Sample
Rate
(S/s)
Display
Record
Length
100 ns
200 ns
500 ns
1 μs
2 μs
5 μs
10 μs
20 μs
50 μs
100 μs
200 μs
500 μs
1 ms
2 ms
5 ms
10 ms
20 ms
50 ms
100 ms
200 ms
500 ms
1s
2s
3s
4s
5s
6s
8s
10 s
20 s
30 s
100 M
100 M
100 M
100 M
100 M
100 M
100 M
100 M
100 M
100 M
100 M
100 M
100 M
100 M
100 M
100 M
100 M
100 M
100 M
50 M
20 M
10 M
5M
2M
2M
2M
1M
1M
1M
500 k
200 k
100 M
100 M
100 M
100 M
100 M
100 M
100 M
100 M
100 M
100 M
100 M
100 M
100 M
100 M
100 M
100 M
100 M
100 M
100 M
100 M
50 M
20 M
10 M
5M
5M
5M
2M
2M
2M
1M
500 k
100 M
100 M
100 M
100 M
100 M
100 M
100 M
100 M
100 M
100 M
100 M
100 M
100 M
100 M
100 M
100 M
100 M
100 M
100 M
100 M
100 M
50 M
20 M
10 M
10 M
10 M
5M
5M
5M
2M
1M
100 M
100 M
100 M
100 M
100 M
100 M
100 M
100 M
100 M
100 M
100 M
100 M
100 M
100 M
100 M
100 M
100 M
100 M
100 M
100 M
100 M
100 M
50 M
20 M
20 M
20 M
10 M
10 M
10 M
5M
2M
100
200
500
1k
2k
5k
10 k
20 k
50 k
100 k
200 k
500 k
1M
2M
5M
10 M
20 M
50 M
100 M
200 M
500 M
1G
1G
600 M
800 M
1G
600 M
800 M
1G
1G
600 M
100 M
100 M
100 M
100 M
100 M
100 M
100 M
100 M
100 M
100 M
100 M
100 M
100 M
100 M
100 M
100 M
100 M
100 M
100 M
100 M
100 M
100 M
100 M
50 M
50 M
20 M
20 M
20 M
20 M
10 M
5M
100
200
500
1k
2k
5k
10 k
20 k
50 k
100 k
200 k
500 k
1M
2M
5M
10 M
20 M
50 M
100 M
200 M
500 M
1G
2G
1.5 G
2G
1G
1.2 G
1.6 G
2G
2G
1.5 G
(Points)
100
200
500
1k
2k
5k
10 k
20 k
50 k
100 k
200 k
500 k
1M
2M
5M
10 M
20 M
50 M
100 M
100 M
100 M
100 M
100 M
60 M
80 M
100 M
60 M
80 M
100 M
100 M
60 M
(Points)
100
200
500
1k
2k
5k
10 k
20 k
50 k
100 k
200 k
500 k
1M
2M
5M
10 M
20 M
50 M
100 M
200 M
250 M
200 M
200 M
150 M
200 M
250 M
120 M
160 M
200 M
200 M
150 M
(Points)
100
200
500
1k
2k
5k
10 k
20 k
50 k
100 k
200 k
500 k
1M
2M
5M
10 M
20 M
50 M
100 M
200 M
500 M
500 M
400 M
300 M
400 M
500 M
300 M
400 M
500 M
400 M
300 M
(Points)
(Points)
When the time axis setting is 100 ms or greater (the settings surrounded by bold lines) and the trigger mode is Auto or Auto Level,
waveforms are displayed in roll mode.
(Continued on next page)
App-4
IM DL850-03EN
Appendix 1 Relationship between the Time Axis Setting, Record Length, and Sample Rate
1
(Continued from previous page)
Time/div
Record Length
100 Mpoint
Sample
Display
Rate
Record
(S/s)
Length
250 Mpoint
Sample
Display
Rate
Record
(S/s)
Length
500 Mpoint
Sample
Display
Rate
Record
(S/s)
Length
1 Gpoint
Sample
Rate
(S/s)
Display
Record
Length
2 Gpoint
Sample
Rate
(S/s)
Display
Record
Length
1 min
2 min
3 min
4 min
5 min
6 min
7 min
8 min
9 min
10 min
12 min
15 min
30 min
1h
2h
3h
4h
5h
6h
7h
8h
9h
10 h
12 h
1 day
2 days
3 days
100 k
50 k
50 k
20 k
20 k
20 k
20 k
20 k
10 k
10 k
10 k
10 k
5k
2k
1k
500
500
500
200
200
200
200
200
200
100
50
20
200 k
200 k
100 k
100 k
50 k
50 k
50 k
50 k
20 k
20 k
20 k
20 k
10 k
5k
2k
2k
1k
1k
1k
500
500
500
500
500
200
100
50
500 k
200 k
200 k
200 k
100 k
100 k
100 k
100 k
50 k
50 k
50 k
50 k
20 k
10 k
5k
2k
2k
2k
2k
1k
1k
1k
1k
1k
500
200
100
1M
500 k
500 k
200 k
200 k
200 k
200 k
200 k
100 k
100 k
100 k
100 k
50 k
20 k
10 k
5k
5k
5k
2k
2k
2k
2k
2k
2k
1k
500
200
600 M
600 M
900 M
480 M
600 M
720 M
840 M
960 M
540 M
600 M
720 M
900 M
900 M
720 M
720 M
540 M
720 M
900 M
432 M
504 M
576 M
648 M
720 M
864 M
864 M
864 M
518.4 M
2M
1M
1M
500 k
500 k
500 k
200 k
200 k
200 k
200 k
200 k
200 k
100 k
50 k
20 k
10 k
10 k
10 k
5k
5k
5k
5k
5k
2k
2k
1k
500
1.2 G
1.2 G
1.8 G
1.2 G
1.5 G
1.8 G
840 M
960 M
1.08 G
1.2 G
1.44 G
1.8 G
1.8 G
1.8 G
1.44 G
1.08 G
1.44 G
1.8 G
1.08 G
1.26 G
1.44 G
1.62 G
1.8 G
864 M
1.728 G
1.728 G
1.296 G
(Points)
(Points)
120 M
240 M
180 M
240 M
150 M
180 M
210 M
240 M
108 M
120 M
144 M
180 M
180 M
180 M
144 M
216 M
144 M
180 M
216 M
126 M
144 M
162 M
180 M
216 M
172.8 M
172.8 M
129.6 M
(Points)
300 M
240 M
360 M
480 M
300 M
360 M
420 M
480 M
270 M
300 M
360 M
450 M
360 M
360 M
360 M
216 M
288 M
360 M
432 M
252 M
288 M
324 M
360 M
432 M
432 M
345.6 M
259.2 M
(Points)
(Points)
When the time axis setting is 100 ms or greater (the settings surrounded by bold lines) and the trigger mode is Auto or Auto Level,
waveforms are displayed in roll mode.
IM DL850-03EN
App-5
3
4
5
6
App
Appendix
60 M
60 M
90 M
48 M
60 M
72 M
84 M
96 M
54 M
60 M
72 M
90 M
90 M
72 M
72 M
54 M
72 M
90 M
43.2 M
50.4 M
57.6 M
64.8 M
72 M
86.4 M
86.4 M
86.4 M
51.84 M
2
Index
Appendix 1 Relationship between the Time Axis Setting, Record Length, and Sample Rate
When the Record Length Is 4 Gpoint, 5 Gpoint, 10 Gpoint, 20 Gpoint, or 50 Gpoint
Time/div
Record Length
4 Gpoint
Sample
Display
Rate
Record
(S/s)
Length
5 Gpoint
Sample
Rate
(S/s)
Display
Record
Length
10 Gpoint
Sample
Display
Rate
Record
(S/s)
Length
20 Gpoint
Sample
Display
Rate
Record
(S/s)
Length
50 Gpoint
Sample
Display
Rate
Record
(S/s)
Length
1M
1M
1M
500 k
500 k
500 k
500 k
500 k
200 k
200 k
100 k
50 k
20 k
20 k
20 k
1M
1M
1M
1M
500 k
500 k
500 k
500 k
200 k
100 k
50 k
20 k
20 k
20 k
3G
3.6 G
4.2 G
4.8 G
2.7 G
3G
3.6 G
4.5 G
3.6 G
3.6 G
3.6 G
2.16 G
2.88 G
3.6 G
1M
1M
1M
1M
500 k
200 k
100 k
50 k
50 k
50 k
1M
500 k
200 k
100 k
100 k
100 k
1M
500 k
200 k
200 k
200 k
(Points)
100 ns
200 ns
500 ns
1 μs
2 μs
5 μs
10 μs
20 μs
50 μs
100 μs
200 μs
500 μs
1 ms
2 ms
5 ms
10 ms
20 ms
50 ms
100 ms
200 ms
500 ms
1s
2s
3s
4s
5s
6s
8s
10 s
20 s
30 s
1 min
2 min
3 min
4 min
5 min
6 min
7 min
8 min
9 min
10 min
12 min
15 min
30 min
1h
2h
3h
4h
5h
2.4 G
3G
3.6 G
2.1 G
2.4 G
2.7 G
3G
3.6 G
1.8 G
3.6 G
3.6 G
3.6 G
2.16 G
2.88 G
3.6 G
(Points)
(Points)
5.4 G
6G
7.2 G
9G
9G
7.2 G
7.2 G
5.4 G
7.2 G
9G
(Points)
18 G
18 G
14.4 G
10.8 G
14.4 G
18 G
(Points)
36 G
36 G
21.6 G
28.8 G
36 G
When the time axis setting is 100 ms or greater (the settings surrounded by bold lines) and the trigger mode is Auto or Auto Level,
waveforms are displayed in roll mode.
(Continued on next page)
App-6
IM DL850-03EN
Appendix 1 Relationship between the Time Axis Setting, Record Length, and Sample Rate
1
(Continued from previous page)
Time/div
Record Length
4 Gpoint
Sample
Display
Rate
Record
(S/s)
Length
5 Gpoint
Sample
Rate
(S/s)
Display
Record
Length
10 Gpoint
Sample
Display
Rate
Record
(S/s)
Length
20 Gpoint
Sample
Display
Rate
Record
(S/s)
Length
50 Gpoint
Sample
Display
Rate
Record
(S/s)
Length
6h
7h
8h
9h
10 h
12 h
1 day
2 days
3 days
10 k
10 k
10 k
10 k
10 k
5k
2k
2k
1k
20 k
10 k
10 k
10 k
10 k
10 k
5k
2k
1k
4.32 G
2.52 G
2.88 G
3.24 G
3.6 G
4.32 G
4.32 G
3.456 G
2.592 G
20 k
20 k
20 k
20 k
20 k
20 k
10 k
5k
2k
50 k
50 k
50 k
50 k
50 k
20 k
20 k
10 k
5k
200 k
100 k
100 k
100 k
100 k
100 k
50 k
20 k
10 k
(Points)
2.16 G
2.52 G
2.88 G
3.24 G
3.6 G
2.16 G
1.728 G
3.456 G
2.592 G
(Points)
(Points)
4.32 G
5.04 G
5.76 G
6.48 G
7.2 G
8.64 G
8.64 G
8.64 G
5.184 G
(Points)
10.8 G
12.6 G
14.4 G
16.2 G
18 G
8.64 G
17.28 G
17.28 G
12.96 G
2
(Points)
43.2 G
25.2 G
28.8 G
32.4 G
36 G
43.2 G
43.2 G
34.56 G
25.9 G
When the time axis setting is 100 ms or greater (the settings surrounded by bold lines) and the trigger mode is Auto or Auto Level,
waveforms are displayed in roll mode.
3
4
5
6
App
Appendix
Index
IM DL850-03EN
App-7
Appendix 1 Relationship between the Time Axis Setting, Record Length, and Sample Rate
When the High-Speed 100 MS/s, 12-Bit Isolation Module Is Not
Installed
When the Record Length Is 1 kpoint, 2.5 kpoint, 5 kpoint, 10 kpoint, or 25 kpoint
Time/div
Record Length
1 kpoint
Sample
Display
Rate
Record
(S/s)
Length
(Points)
1 μs
2 μs
5 μs
10 μs
20 μs
50 μs
100 μs
200 μs
500 μs
1 ms
2 ms
5 ms
10 ms
20 ms
50 ms
100 ms
200 ms
500 ms
1s
2s
3s
4s
5s
6s
8s
10 s
20 s
30 s
1 min
2 min
3 min
4 min
5 min
6 min
7 min
10 M
10 M
10 M
10 M
5M
2M
1M
500 k
200 k
100 k
50 k
20 k
10 k
5k
2k
1k
500
200
100
50
20
20
20
10
10
10
5
100
200
500
1k
1k
1k
1k
1k
1k
1k
1k
1k
1k
1k
1k
1k
1k
1k
1k
1k
600
800
1k
600
800
1k
1k
2.5 kpoint
Sample
Display
Rate
Record
(S/s)
Length
5 kpoint
Sample
Rate
(S/s)
Display
Record
Length
10 M
10 M
10 M
10 M
10 M
5M
2M
1M
500 k
200 k
100 k
50 k
20 k
10 k
5k
2k
1k
500
200
100
50
50
50
20
20
20
10
5
10 M
10 M
10 M
10 M
10 M
10 M
5M
2M
1M
500 k
200 k
100 k
50 k
20 k
10 k
5k
2k
1k
500
200
100
100
100
50
50
50
20
10
5
100
200
500
1k
2k
5k
5k
4k
5k
5k
4k
5k
5k
4k
5k
5k
4k
5k
5k
4k
3k
4k
5k
3k
4k
5k
4k
3k
3k
(Points)
100
200
500
1k
2k
2.5 k
2k
2k
2.5 k
2k
2k
2.5 k
2k
2k
2.5 k
2k
2k
2.5 k
2k
2k
1.5 k
2k
2.5 k
1.2 k
1.6 k
2k
2k
1.5 k
(Points)
10 kpoint
Sample
Display
Rate
Record
(S/s)
Length
25 kpoint
Sample
Display
Rate
Record
(S/s)
Length
10 M
10 M
10 M
10 M
10 M
10 M
10 M
5M
2M
1M
500 k
200 k
100 k
50 k
20 k
10 k
5k
2k
1k
500
200
200
200
100
100
100
50
20
10
5
5
10 M
10 M
10 M
10 M
10 M
10 M
10 M
10 M
5M
2M
1M
500 k
200 k
100 k
50 k
20 k
10 k
5k
2k
1k
500
500
500
200
200
200
100
50
20
20
10
10
5
5
5
(Points)
100
200
500
1k
2k
5k
10 k
10 k
10 k
10 k
10 k
10 k
10 k
10 k
10 k
10 k
10 k
10 k
10 k
10 k
6k
8k
10 k
6k
8k
10 k
10 k
6k
6k
6k
9k
(Points)
100
200
500
1k
2k
5k
10 k
20 k
25 k
20 k
20 k
25 k
20 k
20 k
25 k
20 k
20 k
25 k
20 k
20 k
15 k
20 k
25 k
12 k
16 k
20 k
20 k
15 k
12 k
24 k
18 k
24 k
15 k
18 k
21 k
When the time axis setting is 100 ms or greater (the settings surrounded by bold lines) and the trigger mode is Auto or Auto Level,
waveforms are displayed in roll mode.
App-8
IM DL850-03EN
Appendix 1 Relationship between the Time Axis Setting, Record Length, and Sample Rate
When the Record Length Is 50 kpoint, 100 kpoint, 250 kpoint, 500 kpoint, or 1 Mpoint
Time/div
Record Length
50 kpoint
Sample
Display
Rate
Record
(S/s)
Length
(Points)
10 M
10 M
10 M
10 M
10 M
10 M
10 M
10 M
10 M
5M
2M
1M
500 k
200 k
100 k
50 k
20 k
10 k
5k
2k
1k
1k
1k
500
500
500
200
100
50
20
20
20
10
10
10
10
5
5
5
5
100
200
500
1k
2k
5k
10 k
20 k
50 k
50 k
40 k
50 k
50 k
40 k
50 k
50 k
40 k
50 k
50 k
40 k
30 k
40 k
50 k
30 k
40 k
50 k
40 k
30 k
30 k
24 k
36 k
48 k
30 k
36 k
42 k
48 k
27 k
30 k
36 k
45 k
250 kpoint
Sample
Display
Rate
Record
(S/s)
Length
500 kpoint
Sample
Display
Rate
Record
(S/s)
Length
1 Mpoint
Sample
Rate
(S/s)
Display
Record
Length
10 M
10 M
10 M
10 M
10 M
10 M
10 M
10 M
10 M
10 M
5M
2M
1M
500 k
200 k
100 k
50 k
20 k
10 k
5k
2k
2k
2k
1k
1k
1k
500
200
100
50
50
20
20
20
20
20
10
10
10
10
5
10 M
10 M
10 M
10 M
10 M
10 M
10 M
10 M
10 M
10 M
10 M
5M
2M
1M
500 k
200 k
100 k
50 k
20 k
10 k
5k
5k
5k
2k
2k
2k
1k
500
200
200
100
100
50
50
50
50
20
20
20
20
10
5
10 M
10 M
10 M
10 M
10 M
10 M
10 M
10 M
10 M
10 M
10 M
10 M
5M
2M
1M
500 k
200 k
100 k
50 k
20 k
10 k
10 k
10 k
5k
5k
5k
2k
1k
500
200
200
200
100
100
100
100
50
50
50
50
20
10
5
10 M
10 M
10 M
10 M
10 M
10 M
10 M
10 M
10 M
10 M
10 M
10 M
10 M
5M
2M
1M
500 k
200 k
100 k
50 k
20 k
20 k
20 k
10 k
10 k
10 k
5k
2k
1k
500
500
200
200
200
200
200
100
100
100
100
50
20
10
5
5
5
100
200
500
1k
2k
5k
10 k
20 k
50 k
100 k
200 k
500 k
1M
1M
1M
1M
1M
1M
1M
1M
600 k
800 k
1M
600 k
800 k
1M
1M
600 k
600 k
600 k
900 k
480 k
600 k
720 k
840 k
960 k
540 k
600 k
720 k
900 k
900 k
720 k
720 k
540 k
720 k
900 k
(Points)
100
200
500
1k
2k
5k
10 k
20 k
50 k
100 k
100 k
100 k
100 k
100 k
100 k
100 k
100 k
100 k
100 k
100 k
60 k
80 k
100 k
60 k
80 k
100 k
100 k
60 k
60 k
60 k
90 k
48 k
60 k
72 k
84 k
96 k
54 k
60 k
72 k
90 k
90 k
(Points)
100
200
500
1k
2k
5k
10 k
20 k
50 k
100 k
200 k
250 k
200 k
200 k
250 k
200 k
200 k
250 k
200 k
200 k
150 k
200 k
250 k
120 k
160 k
200 k
200 k
150 k
120 k
240 k
180 k
240 k
150 k
180 k
210 k
240 k
108 k
120 k
144 k
180 k
180 k
180 K
(Points)
100
200
500
1k
2k
5k
10 k
20 k
50 k
100 k
200 k
500 k
500 k
400 k
500 k
500 k
400 k
500 k
500 k
400 k
300 k
400 k
500 k
300 k
400 k
500 k
400 k
300 k
300 k
240 k
360 k
480 k
300 k
360 k
420 k
480 k
270 k
300 k
360 k
450 k
360 k
360 k
360 k
(Points)
When the time axis setting is 100 ms or greater (the settings surrounded by bold lines) and the trigger mode is Auto or Auto Level,
waveforms are displayed in roll mode.
IM DL850-03EN
2
App-9
3
4
5
6
App
Appendix
1 μs
2 μs
5 μs
10 μs
20 μs
50 μs
100 μs
200 μs
500 μs
1 ms
2 ms
5 ms
10 ms
20 ms
50 ms
100 ms
200 ms
500 ms
1s
2s
3s
4s
5s
6s
8s
10 s
20 s
30 s
1 min
2 min
3 min
4 min
5 min
6 min
7 min
8 min
9 min
10 min
12 min
15 min
30 min
1h
2h
3h
4h
5h
100 kpoint
Sample
Display
Rate
Record
(S/s)
Length
1
Index
Appendix 1 Relationship between the Time Axis Setting, Record Length, and Sample Rate
When the Record Length Is 2.5 Mpoint, 5 Mpoint, 10 Mpoint, 25 Mpoint, or 50 Mpoint
Time/div
1 μs
2 μs
5 μs
10 μs
20 μs
50 μs
100 μs
200 μs
500 μs
1 ms
2 ms
5 ms
10 ms
20 ms
50 ms
100 ms
200 ms
500 ms
1s
2s
3s
4s
5s
6s
8s
10 s
20 s
30 s
1 min
2 min
3 min
4 min
5 min
6 min
7 min
8 min
9 min
10 min
12 min
15 min
30 min
1h
2h
3h
4h
5h
6h
7h
8h
9h
10 h
12 h
1 day
2 days
3 days
Record Length
2.5 Mpoint
Sample
Display
Rate
Record
(S/s)
Length
10 M
10 M
10 M
10 M
10 M
10 M
10 M
10 M
10 M
10 M
10 M
10 M
10 M
10 M
5M
2M
1M
500 k
200 k
100 k
50 k
50 k
50 k
20 k
20 k
20 k
10 k
5k
2k
2k
1k
1k
500
500
500
500
200
200
200
200
100
50
20
20
10
10
10
5
5
5
5
5
(Points)
100
200
500
1k
2k
5k
10 k
20 k
50 k
100 k
200 k
500 k
1M
2M
2.5 M
2M
2M
2.5 M
2M
2M
1.5 M
2M
2.5 M
1.2 M
1.6 M
2M
2M
1.5 M
1.2 M
2.4 M
1.8 M
2.4 M
1.5 M
1.8 M
2.1 M
2.4 M
1.08 M
1.2 M
1.44 M
1.8 M
1.8 M
1.8 M
1.44 M
2.16 M
1.44 M
1.8 M
2.16 M
1.26 M
1.44 M
1.62 M
1.8 M
2.16 M
5 Mpoint
Sample
Rate
(S/s)
Display
Record
Length
10 M
10 M
10 M
10 M
10 M
10 M
10 M
10 M
10 M
10 M
10 M
10 M
10 M
10 M
10 M
5M
2M
1M
500 k
200 k
100 k
100 k
100 k
50 k
50 k
50 k
20 k
10 k
5k
2k
2k
2k
1k
1k
1k
1k
500
500
500
500
200
100
50
20
20
20
20
10
10
10
10
10
5
100
200
500
1k
2k
5k
10 k
20 k
50 k
100 k
200 k
500 k
1M
2M
5M
5M
4M
5M
5M
4M
3M
4M
5M
3M
4M
5M
4M
3M
3M
2.4 M
3.6 M
4.8 M
3M
3.6 M
4.2 M
4.8 M
2.7 M
3M
3.6 M
4.5 M
3.6 M
3.6 M
3.6 M
2.16 M
2.88 M
3.6 M
4.32 M
2.52 M
2.88 M
3.24 M
3.6 M
4.32 M
4.32 M
(Points)
10 Mpoint
Sample
Display
Rate
Record
(S/s)
Length
25 Mpoint
Sample
Display
Rate
Record
(S/s)
Length
50 Mpoint
Sample
Display
Rate
Record
(S/s)
Length
10 M
10 M
10 M
10 M
10 M
10 M
10 M
10 M
10 M
10 M
10 M
10 M
10 M
10 M
10 M
10 M
5M
2M
1M
500 k
200 k
200 k
200 k
100 k
100 k
100 k
50 k
20 k
10 k
5k
5k
2k
2k
2k
2k
2k
1k
1k
1k
1k
500
200
100
50
50
50
20
20
20
20
20
20
10
5
10 M
10 M
10 M
10 M
10 M
10 M
10 M
10 M
10 M
10 M
10 M
10 M
10 M
10 M
10 M
10 M
10 M
5M
2M
1M
500 k
500 k
500 k
200 k
200 k
200 k
100 k
50 k
20 k
20 k
10 k
10 k
5k
5k
5k
5k
2k
2k
2k
2k
1k
500
200
200
100
100
100
50
50
50
50
50
20
10
5
10 M
10 M
10 M
10 M
10 M
10 M
10 M
10 M
10 M
10 M
10 M
10 M
10 M
10 M
10 M
10 M
10 M
10 M
5M
2M
1M
1M
1M
500 k
500 k
500 k
200 k
100 k
50 k
20 k
20 k
20 k
10 k
10 k
10 k
10 k
5k
5k
5k
5k
2k
1k
500
200
200
200
200
100
100
100
100
100
50
20
10
(Points)
100
200
500
1k
2k
5k
10 k
20 k
50 k
100 k
200 k
500 k
1M
2M
5M
10 M
10 M
10 M
10 M
10 M
6M
8M
10 M
6M
8M
10 M
10 M
6M
6M
6M
9M
4.8 M
6M
7.2 M
8.4 M
9.6 M
5.4 M
6M
7.2 M
9M
9M
7.2 M
7.2 M
5.4 M
7.2 M
9M
4.32 M
5.04 M
5.76 M
6.48 M
7.2 M
8.64 M
8.64 M
8.64 M
(Points)
100
200
500
1k
2k
5k
10 k
20 k
50 k
100 k
200 k
500 k
1M
2M
5M
10 M
20 M
25 M
20 M
20 M
15 M
20 M
25 M
12 M
16 M
20 M
20 M
15 M
12 M
24 M
18 M
24 M
15 M
18 M
21 M
24 M
10.8 M
12 M
14.4 M
18 M
18 M
18 M
14.4 M
21.6 M
14.4 M
18 M
21.6 M
12.6 M
14.4 M
16.2 M
18 M
21.6 M
17.28 M
17.28 M
12.96 M
(Points)
100
200
500
1k
2k
5k
10 k
20 k
50 k
100 k
200 k
500 k
1M
2M
5M
10 M
20 M
50 M
50 M
40 M
30 M
40 M
50 M
30 M
40 M
50 M
40 M
30 M
30 M
24 M
36 M
48 M
30 M
36 M
42 M
48 M
27 M
30 M
36 M
45 M
36 M
36 M
36 M
21.6 M
28.8 M
36 M
43.2 M
25.2 M
28.8 M
32.4 M
36 M
43.2 M
43.2 M
34.56 M
25.92 M
When the time axis setting is 100 ms or greater (the settings surrounded by bold lines) and the trigger mode is Auto or Auto Level,
waveforms are displayed in roll mode.
App-10
IM DL850-03EN
Appendix 1 Relationship between the Time Axis Setting, Record Length, and Sample Rate
When the Record Length Is 100 Mpoint, 250 Mpoint, 500 Mpoint, 1 Gpoint, or 2 Gpoint
Time/div
Record Length
100 Mpoint
Sample
Display
Rate
Record
(S/s)
Length
250 Mpoint
Sample
Display
Rate
Record
(S/s)
Length
500 Mpoint
Sample
Display
Rate
Record
(S/s)
Length
1 Gpoint
Sample
Rate
(S/s)
Display
Record
Length
2 Gpoint
Sample
Rate
(S/s)
Display
Record
Length
1 μs
2 μs
5 μs
10 μs
20 μs
50 μs
100 μs
200 μs
500 μs
1 ms
2 ms
5 ms
10 ms
20 ms
50 ms
100 ms
200 ms
500 ms
1s
2s
3s
4s
5s
6s
8s
10 s
20 s
30 s
1 min
2 min
3 min
4 min
5 min
6 min
7 min
8 min
9 min
10 min
12 min
15 min
30 min
1h
2h
3h
4h
5h
6h
7h
8h
9h
10 h
12 h
1 day
2 days
3 days
10 M
10 M
10 M
10 M
10 M
10 M
10 M
10 M
10 M
10 M
10 M
10 M
10 M
10 M
10 M
10 M
10 M
10 M
10 M
5M
2M
2M
2M
1M
1M
1M
500 k
200 k
100 k
50 k
50 k
20 k
20 k
20 k
20 k
20 k
10 k
10 k
10 k
10 k
5k
2k
1k
500
500
500
200
200
200
200
200
200
100
50
20
10 M
10 M
10 M
10 M
10 M
10 M
10 M
10 M
10 M
10 M
10 M
10 M
10 M
10 M
10 M
10 M
10 M
10 M
10 M
10 M
5M
5M
5M
2M
2M
2M
1M
500 k
200 k
200 k
100 k
100 k
50 k
50 k
50 k
50 k
20 k
20 k
20 k
20 k
10 k
5k
2k
2k
1k
1k
1k
500
500
500
500
500
200
100
50
10 M
10 M
10 M
10 M
10 M
10 M
10 M
10 M
10 M
10 M
10 M
10 M
10 M
10 M
10 M
10 M
10 M
10 M
10 M
10 M
10 M
10 M
10 M
5M
5M
5M
2M
1M
500 k
200 k
200 k
200 k
100 k
100 k
100 k
100 k
50 k
50 k
50 k
50 k
20 k
10 k
5k
2k
2k
2k
2k
1k
1k
1k
1k
1k
500
200
100
10 M
10 M
10 M
10 M
10 M
10 M
10 M
10 M
10 M
10 M
10 M
10 M
10 M
10 M
10 M
10 M
10 M
10 M
10 M
10 M
10 M
10 M
10 M
10 M
10 M
10 M
5M
2M
1M
500 k
500 k
200 k
200 k
200 k
200 k
200 k
100 k
100 k
100 k
100 k
50 k
20 k
10 k
5k
5k
5k
2k
2k
2k
2k
2k
2k
1k
500
200
100
200
500
1k
2k
5k
10 k
20 k
50 k
100 k
200 k
500 k
1M
2M
5M
10 M
20 M
50 M
100 M
200 M
300 M
400 M
500 M
600 M
800 M
1G
1G
600 M
600 M
600 M
900 M
480 M
600 M
720 M
840 M
960 M
540 M
600 M
720 M
900 M
900 M
720 M
720 M
540 M
720 M
900 M
432 M
504 M
576 M
648 M
720 M
864 M
864 M
864 M
518.4 M
10 M
10 M
10 M
10 M
10 M
10 M
10 M
10 M
10 M
10 M
10 M
10 M
10 M
10 M
10 M
10 M
10 M
10 M
10 M
10 M
10 M
10 M
10 M
10 M
10 M
10 M
10 M
5M
2M
1M
1M
500 k
500 k
500 k
200 k
200 k
200 k
200 k
200 k
200 k
100 k
50 k
20 k
10 k
10 k
10 k
5k
5k
5k
5k
5k
2k
2k
1k
500
100
200
500
1k
2k
5k
10 k
20 k
50 k
100 k
200 k
500 k
1M
2M
5M
10 M
20 M
50 M
100 M
200 M
300 M
400 M
500 M
600 M
800 M
1G
2G
1.5 G
1.2 G
1.2 G
1.8 G
1.2 G
1.5 G
1.8 G
840 M
960 M
1.08 G
1.2 G
1.44 G
1.8 G
1.8 G
1.8 G
1.44 G
1.08 G
1.44 G
1.8 G
1.08 G
1.26 G
1.44 G
1.62 G
1.8 G
864 M
1.728 G
1.728 G
1.296 G
(Points)
(Points)
100
200
500
1k
2k
5k
10 k
20 k
50 k
100 k
200 k
500 k
1M
2M
5M
10 M
20 M
50 M
100 M
200 M
150 M
200 M
250 M
120 M
160 M
200 M
200 M
150 M
120 M
240 M
180 M
240 M
150 M
180 M
210 M
240 M
108 M
120 M
144 M
180 M
180 M
180 M
144 M
216 M
144 M
180 M
216 M
126 M
144 M
162 M
180 M
216 M
172.8 M
172.8 M
129.6 M
(Points)
100
200
500
1k
2k
5k
10 k
20 k
50 k
100 k
200 k
500 k
1M
2M
5M
10 M
20 M
50 M
100 M
200 M
300 M
400 M
500 M
300 M
400 M
500 M
400 M
300 M
300 M
240 M
360 M
480 M
300 M
360 M
420 M
480 M
270 M
300 M
360 M
450 M
360 M
360 M
360 M
216 M
288 M
360 M
432 M
252 M
288 M
324 M
360 M
432 M
432 M
345.6 M
259.2 M
(Points)
(Points)
When the time axis setting is 100 ms or greater (the settings surrounded by bold lines) and the trigger mode is Auto or Auto Level,
waveforms are displayed in roll mode.
IM DL850-03EN
2
App-11
3
4
5
6
App
Appendix
100
200
500
1k
2k
5k
10 k
20 k
50 k
100 k
200 k
500 k
1M
2M
5M
10 M
20 M
50 M
100 M
100 M
60 M
80 M
100 M
60 M
80 M
100 M
100 M
60 M
60 M
60 M
90 M
48 M
60 M
72 M
84 M
96 M
54 M
60 M
72 M
90 M
90 M
72 M
72 M
54 M
72 M
90 M
43.2 M
50.4 M
57.6 M
64.8 M
72 M
86.4 M
86.4 M
86.4 M
51.84 M
1
Index
Appendix 1 Relationship between the Time Axis Setting, Record Length, and Sample Rate
When the Record Length Is 4 Gpoint, 5 Gpoint, 10 Gpoint, 20 Gpoint, or 50 Gpoint
Time/div
1 μs
2 μs
5 μs
10 μs
20 μs
50 μs
100 μs
200 μs
500 μs
1 ms
2 ms
5 ms
10 ms
20 ms
50 ms
100 ms
200 ms
500 ms
1s
2s
3s
4s
5s
6s
8s
10 s
20 s
30 s
1 min
2 min
3 min
4 min
5 min
6 min
7 min
8 min
9 min
10 min
12 min
15 min
30 min
1h
2h
3h
4h
5h
6h
7h
8h
9h
10 h
12 h
1 day
2 days
3 days
Record Length
4 Gpoint
Sample
Display
Rate
Record
(S/s)
Length
5 Gpoint
Sample
Rate
(S/s)
Display
Record
Length
10 Gpoint
Sample
Display
Rate
Record
(S/s)
Length
20 Gpoint
Sample
Display
Rate
Record
(S/s)
Length
50 Gpoint
Sample
Display
Rate
Record
(S/s)
Length
1M
1M
1M
500 k
500 k
500 k
500 k
500 k
200 k
200 k
100 k
50 k
20 k
20 k
20 k
10 k
10 k
10 k
10 k
10 k
5k
2k
2k
1k
1M
1M
1M
1M
500 k
500 k
500 k
500 k
200 k
100 k
50 k
20 k
20 k
20 k
20 k
10 k
10 k
10 k
10 k
10 k
5k
2k
1k
3G
3.6 G
4.2 G
4.8 G
2.7 G
3G
3.6 G
4.5 G
3.6 G
3.6 G
3.6 G
2.16 G
2.88 G
3.6 G
4.32 G
2.52 G
2.88 G
3.24 G
3.6 G
4.32 G
4.32 G
3.456 G
2.592 G
1M
1M
1M
1M
500 k
200 k
100 k
50 k
50 k
50 k
20 k
20 k
20 k
20 k
20 k
20 k
10 k
5k
2k
1M
500 k
200 k
100 k
100 k
100 k
50 k
50 k
50 k
50 k
50 k
20 k
20 k
10 k
5k
1M
500 k
200 k
200 k
200 k
200 k
100 k
100 k
100 k
100 k
100 k
50 k
20 k
10 k
(Points)
2.4 G
3G
3.6 G
2.1 G
2.4 G
2.7 G
3G
3.6 G
1.8 G
3.6 G
3.6 G
3.6 G
2.16 G
2.88 G
3.6 G
2.16 G
2.52 G
2.88 G
3.24 G
3.6 G
2.16 G
1.728 G
3.456 G
2.592 G
(Points)
(Points)
5.4 G
6G
7.2 G
9G
9G
7.2 G
7.2 G
5.4 G
7.2 G
9G
4.32 G
5.04 G
5.76 G
6.48 G
7.2 G
8.64 G
8.64 G
8.64 G
5.184 G
(Points)
18 G
18 G
14.4 G
10.8 G
14.4 G
18 G
10.8 G
12.6 G
14.4 G
16.2 G
18 G
8.64 G
17.28 G
17.28 G
12.96 G
(Points)
36 G
36 G
21.6 G
28.8 G
36 G
43.2 G
25.2 G
28.8 G
32.4 G
36 G
43.2 G
43.2 G
34.56 G
25.9 G
When the time axis setting is 100 ms or greater (the settings surrounded by bold lines) and the trigger mode is Auto or Auto Level,
waveforms are displayed in roll mode.
App-12
IM DL850-03EN
Appendix 1 Relationship between the Time Axis Setting, Record Length, and Sample Rate
Relationship between the Main Channel Sample Rate and the Sub
Channel Sample Rates of the 16-CH Voltage Input Module
2
9 to 16
10 k
500 k
500 k
500 k
500 k
200 k
100 k
50 k
20 k
10 k
5k
2k
1k
500
200
100
50
20
10
5
2
1
-
3
4
5
6
App
Appendix
Main Channel Number of Sub Channels
Sample Rate 1
2
3 to 4 5 to 8
(S/s)
Maximum Sample Rate
200 k 100 k 50 k 20 k
100 M
500 k 500 k 500 k 500 k
50 M
500 k 500 k 500 k 500 k
20 M
500 k 500 k 500 k 500 k
10 M
500 k 500 k 500 k 500 k
5M
500 k 500 k 500 k 500 k
2M
500 k 500 k 500 k 200 k
1M
500 k 500 k 200 k 100 k
500 k
500 k 100 k 100 k 50 k
200 k
200 k 100 k 50 k 20 k
100 k
100 k 50 k 20 k 10 k
50 k
50 k 10 k 10 k 5 k
20 k
20 k 10 k 5 k
2k
10 k
10 k 5 k
2k
1k
5k
5k
1k
1k
500
2k
2k
1k
500
200
1k
1k
500
200
100
500
500
100
100
50
200
200
100
50
20
100
100
50
20
10
50
50
10
10
5
20
20
10
5
2
10
10
5
2
1
5
5
1
1
-
Index
The bold lines surround the actual sampling range.
IM DL850-03EN
1
App-13
Appendix 1 Relationship between the Time Axis Setting, Record Length, and Sample Rate
Relationship between the Main Channel Sample Rate and the Sub
Channel Sample Rates of the CAN Bus Monitor Module
Main Channel
Sample Rate
(S/s)
100 M
50 M
20 M
10 M
5M
2M
1M
500 k
200 k
100 k
50 k
20 k
10 k
5k
2k
1k
500
200
100
50
20
10
5
App-14
Number of Sub Channels
1
2
3 to 4 5 to 8
Maximum Sample Rate
100 k 100 k 100 k 100 k
100 k 100 k 100 k 100 k
100 k 100 k 100 k 100 k
100 k 100 k 100 k 100 k
100 k 100 k 100 k 100 k
100 k 100 k 100 k 100 k
100 k 100 k 100 k 100 k
100 k 100 k 100 k 100 k
100 k 100 k 100 k 50 k
100 k 100 k 50 k 20 k
100 k 50 k 20 k 10 k
50 k 10 k 10 k 5 k
20 k 10 k 5 k
2k
10 k 5 k
2k
1k
5k
1k
1k
500
2k
1k
500
200
1k
500
200
100
500 100
100
50
200 100
50
20
100 50
20
10
50
10
10
5
20
10
5
2
10
5
2
1
5
1
1
-
9 to 16
100 k
100 k
100 k
100 k
100 k
100 k
100 k
50 k
20 k
10 k
5k
2k
1k
500
200
100
50
20
10
5
2
1
-
IM DL850-03EN
Appendix 2 Relationship between the Record
Length and the Acquisition Mode
1
Maximum Record Length That Can Be Set
The maximum record length varies as indicated below for each model depending on the number of
displayed channels.
When Dual Capturing and Hard Disk Recording Are Off
Number of Displayed Channels
9 to 16 channels
5 to 8 channels
3 to 4 channels
2 channels
1 channel
Model
Standard
10 M
25 M
50 M
100 M
250 M
/M1 (1 G)
50 M
100 M
250 M
500 M
1G
2
3
/M2 (2 G)
100 M
250 M
500 M
1G
2G
4
Unit of record length: Point
5
When Dual Capturing Is Off and Hard Disk Recording Is On
Number of Displayed Channels
9 to 16 channels
5 to 8 channels
3 to 4 channels
2 channels
1 channel
Model
Standard
500 M
1G
2G
5G
10 G
/M1 (1 G)
5G
10 G
20 G
20 G
50 G
6
/M2 (2 G)
5G
10 G
20 G
20 G
50 G
App
Appendix
Unit of record length: Point
When Dual Capturing Is On and Hard Disk Recording Is Off
Number of Displayed Channels
9 to 16 channels
5 to 8 channels
3 to 4 channels
2 channels
1 channel
Model
Standard
5M
10 M
25 M
50 M
100 M
/M1 (1 G)
25 M
50 M
100 M
250 M
500 M
Index
/M2 (2 G)
50 M
100 M
250 M
500 M
1G
Unit of record length: Point
When Dual Capturing and Hard Disk Recording Are On
Number of Displayed Channels
9 to 16 channels
5 to 8 channels
3 to 4 channels
2 channels
1 channel
Model
Standard
500 M
1G
2G
5G
10 G
/M1 (1 G)
2G
5G
10 G
20 G
20 G
/M2 (2 G)
5G
10 G
20 G
20 G
50 G
Unit of record length: Point
IM DL850-03EN
App-15
Appendix 2 Relationship between the Record Length and the Acquisition Mode
Maximum Number of History Waveform Acquisitions
The maximum number of acquisitions varies for each module as indicated below.
Record Length
1k
2.5 k
5k
10 k
25 k
50 k
100 k
250 k
500 k
1M
2.5 M
5M
10 M
25 M
50 M
100 M
250 M
500 M
1G
2G
Model
Standard
5000
5000
2976
1487
593
295
144
57
28
13
4
1
1
1*1
1*2
1*3
1*4
0
0
0
/M1 (1 G)
5000
5000
5000
5000
2381
1189
583
236
116
54
22
10
4
1
1
1*1
1*2
1*3
1*4
0
/M2 (2 G)
5000
5000
5000
5000
5000
2381
1168
474
235
111
46
22
10
4
1
1
1*1
1*2
1*3
1*4
Unit of record length: Point
1 When there are eight displayed channels
2 When there are four displayed channels
3 When there are two displayed channels
4 When there is one displayed channel
Maximum Sample Rate at Which Hard Disk Recording Is Possible
The maximum sample rate varies as indicated below depending on the number of channels that are
recorded.
Maximum Number of Channels
16 channels
8 channels
3 channels
1 channel
App-16
Maximum Sample Rate
100 kS/s
200 kS/s
500 kS/s
1 MS/s
IM DL850-03EN
Appendix 3 Default Values
IM DL850-03EN
Operation Key
Soft Key
Setting
CH1 to 16 (UNIVERSAL (701261)/UNIVERSAL (AAF)
(701262))
Offset
0.000 V
InVert
OFF
Linear Scale
OFF
CH1 to 16 (TEMP/HPV (701265))
V/div
5.000 V/div
Position
0.00 div
Label
Channel number
Coupling
DC
BandWidth
Full
V Scale
DIV
V Zoom
×1
Offset
0.000 V
InVert
OFF
Linear Scale
OFF
CH1 to 16 (STRAIN_NDIS (701270)/STRAIN_DSUB
(701271))
Value/div
4000.0 µSTR/div
Range
±20000 µSTR
Label
Channel number
Excitation
2V
Gauge Factor
2.00
BandWidth
Full
Upper
20000 µSTR
Lower
–20000 µSTR
Range Unit
µSTR
InVert
OFF
Linear Scale
OFF
CH1 to 16 (ACCL/VOLT (701275))
V/div
50.0 V/div
Position
0.00 div
Label
Channel number
Coupling
DC
Probe
10:1
BandWidth
Full
V Scale
DIV
V Zoom
×1
Offset
0.00 V
InVert
OFF
Linear Scale
OFF
CH1 to 16 (FREQ (701280))
Value/div
1 kHz/div
Position
0.00 div
Label
Channel number
FV Setup
Frequency
Input Setup
User
V Scale
DIV
V Zoom
×1
Offset
0.000 Hz
Linear Scale
OFF
CH1 to 16 (HS100M12 (720210))
V/div
50.0 V/div
Position
0.00 div
Label
Channel number
Coupling
DC
Probe
10:1
BandWidth
Full
App-17
2
3
4
5
6
App
Appendix
Operation Key
Soft Key
Setting
CH1 to 16 (HS10M12 (701250))
V/div
50.0 V/div
Position
0.00 div
Label
Channel number
Coupling
DC
Probe
10:1
BandWidth
Full
V Scale
DIV
V Zoom
×1
Offset
0.0 V
InVert
OFF
Linear Scale
OFF
CH1 to 16 (HS1M16 (701251))
V/div
50.0 V/div
Position
0.00 div
Label
Channel number
Coupling
DC
Probe
10:1
BandWidth
Full
V Scale
DIV
V Zoom
×1
Offset
0.00 V
InVert
OFF
Linear Scale
OFF
CH1 to 16 (NONISO_10M12 (701255))
V/div
50.0 V/div
Position
0.00 div
Label
Channel number
Coupling
DC
Probe
10:1
BandWidth
Full
V Scale
DIV
V Zoom
×1
Offset
0.0 V
InVert
OFF
Linear Scale
OFF
CH1 to 16 (HV (with RMS) (701260))
V/div
5.000 V/div
Position
0.00 div
Label
Channel number
Coupling
DC
Probe
1:1
BandWidth
Full
V Scale
DIV
V Zoom
×1
Offset
0.000 V
InVert
OFF
Linear Scale
OFF
CH1 to 16 (UNIVERSAL (701261)/UNIVERSAL (AAF)
(701262))
V/div
5.000 V/div
Position
0.00 div
Label
Channel number
Coupling
DC
BandWidth
Full
V Scale
DIV
V Zoom
×1
1
Index
Appendix 3 Default Values
Operation Key
Soft Key
Setting
V Scale
DIV
V Zoom
×1
Offset
0.0 V
InVert
OFF
Linear Scale
OFF
CH1 to 16 (16CH VOLT (720220))
V/div
2.000 V/div
Position
0.00 div
Label
Channel number
Coupling
DC
BandWidth
Full
V Scale
DIV
V Zoom
×1
Offset
0 mV
InVert
OFF
Linear Scale
OFF
CH1 to 16 (LOGIC (720230))
Position
0.00 div
Label
Channel number
Bit Mapping
Auto
CH13 to 16 (CAN MONITOR (720240))
All SubChannels Setup
Input
OFF
Label
Channel number
Message Format STD
ID (Hex)
000
Byte Count
Auto
Start Bit
0
Bit Count
1
Byte Order
Big
Value Type
Unsigned
Factor
1.0000
Offset
0.0000
Port Setup
Bit Rate
500 Kbps
Sample Point
85%
Sync Jump Width 2
Bit Sample Num 1
Listen Only
OFF
Terminator
OFF
Scale
Auto
One Shot Out
Message Format STD
ID (Hex)
000
Frame
Data
DLC
0
Data (Hex)
00 00 00 00
00 00 00 00
START/STOP
STOP
TIME/DIV
1 ms/div
ACQUIRE
Record Length
10 k
Acquisition Mode
Normal
Trigger Mode
Auto
Acquisition Count
Infinite
HD Recording
OFF
Time Base
Int
DUAL CAPTURE
Mode
OFF
App-18
Operation Key
FILE
MENU
DISPLAY
X-Y
Soft Key
Capture Setup
Time/div
Capture Length
Capture Mode
Select Number
Mag
Position
Window
Main Ratio
Window Layout
Format
Event Display
Save_Waveform
Auto Naming
Data Type
Range
Save_Setup
Auto Naming
Save_Others
Auto Naming
Data Type
Format
Color
Data Save
Data Save Setup
Auto Naming
Data Type
Image Save
Image Save Setup
Auto Naming
Image Format
Color
Back Ground
100 µs/div
10 k
Auto
Current
100 µs/div
0.0 div
ON
50%
Side
Main
OFF
Numbering
Binary
Main
Numbering
Numbering
Screen Image
PNG
ON
OFF
Numbering
Binary
OFF
Numbering
PNG
ON
Normal
Format
Extra Window
Graticule
Scale Value
Setup
Allocation Mode
Trace Label
Dot Connect
Accumulate
Manual Event
Ch. Information
Auto
OFF
Line
OFF
OFF
Narrow
Window1/2
Display
Start Point
End Point
OFF
OFF
–5 div
5 div
MODE
POSITION/DELAY
Setting
Position
Delay
SIMPLE/ENHANCED
Setting
Source
Slope
LeVel
Quad
OFF
Grid
ON
Auto
50.0%
0.0 µs
Simple
CH1
Rising
0V
IM DL850-03EN
Appendix 3 Default Values
Operation Key
CURSOR
IM DL850-03EN
Setting
Hold Off
0.00 µs
Type
Horizontal
Trace
Cursor1
Cursor2
Vertical
Trace
Cursor1
Cursor2
Marker
Marker #
Trace
Position
Marker From
Degree
Trace
Cursor1
Cursor2
RefValue
Ref1
Ref2
H&V
Trace
V-Cursor1
V-Cursor2
H-Cursor1
H-Cursor2
OFF
Operation Key
GO/NO-GO
CH1
3.00 div
–3.00 div
CH1
–4.000 div
4.000 div
Marker1 X
CH1
–3.000 div
Mark
CH1
–4.000 div
4.000 div
360
–2.000 div
2.000 div
HISTORY
MATH
CH1
–4.000 div
4.000 div
3.00 div
–3.00 div
Mode
OFF
Distal/Mesial/Proximal
Mode
%
Distal
90.0%
Mesial
50.0%
Proximal
10.0%
High/Low
Auto
Delay Setup
Mode
OFF
Polarity
Rising
Edge Count
1
Reference
Trace
Range
Main
Time Range1
–5.00 div
Time Range2
5.00 div
(When Mode is set to ON, Statistics)
1-Cycle Mode
OFF
(When Mode is set to Cycle Statistics)
Cycle Trace
CH1
FFT
ZOOM
1
Soft Key
Setting
Mode
Logic
ActCondition
Sequence
Acquisition Count
Remote
Beep
Print Image
Save Data
Save Image
Send Mail
Time Range1
Time Range2
OFF
AND
Fail
Continue
Infinite
OFF
OFF
OFF
OFF
OFF
OFF
–5.00 div
5.00 div
Display Mode
Select Record
Start Record
End Record
Search Mode
1 Record
0
0
Oldest number
OFF
Mode
Select Math Trace
Opeartion:Math1
Opeartion:Math2
Opeartion:Math3
Opeartion:Math4
Opeartion:Math5
Opeartion:Math6
Opeartion:Math7
Opeartion:Math8
Scaling Mode
Start Point
End Point
FFT Points
Window
OFF
1
OFF
OFF
OFF
OFF
OFF
OFF
OFF
OFF
Auto
–5.00 div
5.00 div
1k
Hanning
Display
Trace
Start Point
FFT Points
Window
Vert. Scale Mode
Main Ratio
Window Layout
Horiz. Axis
OFF
CH1
–5.00 div
1k
Hanning
Auto
50%
Side
Log Hz
Display (Zoom1)
Display (Zoom2)
Position
Main Ratio
Window Layout
Format Zoom1
ON
OFF
0.00 div
50%
Side
Main
2
3
4
5
6
App
Appendix
MEASURE
Soft Key
Hysteresis
Index
App-19
Appendix 3 Default Values
Operation Key
SEARCH
Soft Key
Setting
Type
Edge
Trace
Level
Polarity
Hysteresis
Edge
CH1
0.0 V
Rising
Count
Result Window
Pattern No.
Event
Select Number
Result Window
Select Event
Logic Pattern
Trace
Bit Setting
Result Window
Pattern No.
Start Point
End Point
Time
Absolute Time
1
Zoom1
No Match
Print To
Builtin
1
Zoom1
Capture
Installation channel
X
Zoom1
No Match
–5.00 div
5.00 div
Current date and
time
Result Window Zoom1
PRINT MENU
UTILITY
App-20
System Config
Date/Time
Display
ON
Format
Year/Month/Day
Time Synchro
Time
OFF
Synchro
IRIG Format A
Modulation AM
Impedance 50
Language
Menu
English
Message
English
LCD
Auto OFF
OFF
Auto OFF
1 min
Time
Brightness 3
Storage Manager
Media
HD
USB Keyboard English
USB Function TMC
Remote Ctrl
Device
USB
USB Function TMC
Network
TCP/IP
DHCP
ON
DNS
Auto
FTP/Web Server
User Name anonymous
TimeOut(s) 1800
Operation Key
Soft Key
Setting
Mail
Attached
OFF
Image File
TimeOut (s) 15
Net Print
LPR Name PASSTHRU
TimeOut (s) 15
Net Drive
LoginName anonymous
Passive
OFF
TimeOut (s) 1800
SNTP
TimeOut (s) 3
Adjust at
OFF
PowerON
Preference
Power On Action
Start
OFF
Action
OFF
Logic Setup
Numerical
Bit
Format
Cursor
1 -> 8
Order
Bit Order
1 -> 8
Terminal Setup
Remote
On
Stop
Trigger Out Normal
Pulse Width 1 msec
Display Setup
Menu Font Large
Size
Base Color Blue
Scale Font Large
Size
Scale On
All
Item
Level
On
Indicator
Intensity
Grid
2
Cursor
8
Marker
8
Key/Knob Setup
Click Sound ON
START/
Quick
STOP
Response
Time
Key Protect
Type
All
Release
Key
Type
Self Test
Keyboard
IM DL850-03EN
Appendix 4 USB Keyboard Key Assignments
IM DL850-03EN
USB Keyboard
CTRL+A
CTRL+B
CTRL+C or PRINT SCREEN
CTRL+D
CTRL+F
CTRL+G
CTRL+H
CTRL+I
CTRL+J
CTRL+K
CTRL+L
CTRL+M
CTRL+N
CTRL+P
CTRL+Q
CTRL+R
CTRL+S
CTRL+T
CTRL+U
CTRL+W
CTRL+Z
CTRL+1
CTRL+2
CTRL+3
CTRL+4
CTRL+5
CTRL+6
CTRL+7
CTRL+8
CTRL+9
CTRL+0
CTRL+ENTER
CTRL+\
CTRL+/
CTRL+F1
CTRL+F2
CTRL+F3
CTRL+F4
CTRL+F5
CTRL+F6
CTRL+INSERT
CTRL+HOME
CTRL+DELETE
CTRL+END
CTRL+* or F12
CTRL+SHIFT+A
CTRL+SHIFT+B
CTRL+SHIFT+C
CTRL+SHIFT+D
CTRL+SHIFT+I
CTRL+SHIFT+M
CTRL+SHIFT+T
CTRL+SHIFT+Z
CTRL+SHIFT+\
E when NUM LOCK is illuminated on the DL850/DL850V
K when NUM LOCK is illuminated on the DL850/DL850V
M when NUM LOCK is illuminated on the DL850/DL850V
App-21
2
3
4
5
6
App
Appendix
DL850/DL850V
AQUIRE
MATH
Execute PRINT
DISPLAY
FILE
HELP
HISTORY
Execute SAVE
MANUALTRIG
KEY PROTECT
ALL CH
MEASURE
NUM LOCK
POSITION/DELAY
Execute CLEAR TRACE
Execute RESET
SHIFT
MODE (TRIGGER)
CURSOR
SIMPLE/ENHANCED
ZOOM
CH1
CH2
CH3
CH4
CH5
CH6
CH7
CH8
CH9
CH10
SET
SETUP
UTILITY
CH11
CH12
CH13
CH14
CH15
CH16
Turn ZOOM POSITION to the right
Turn VERTICAL POSITION to the right
Turn ZOOM POSITION to the left
Turn VERTICAL POSITION to the left
START/STOP
DUAL CAPTURE
FFT
PRINT MENU
X-Y
MENU
GO/NO-GO
ACTION
SEARCH
CAL
EXP (CH key)
k (CH key) + ENTER (CH key)
m (CH key) + ENTER (CH key)
1
Index
Appendix 4 USB Keyboard Key Assignments
DL850/DL850V
1 (CH key)
2 (CH key)
3 (CH key)
4 (CH key)
5 (CH key)
6 (CH key)
7 (CH key)
8 (CH key)
9 (CH key)
0 (CH key)
ENTER (CH key)
. (CH key)
– (CH key)
ESC
Select soft key 1
Select soft key 2
Select soft key 3
Select soft key 4
Select soft key 5
Select soft key 6
Select soft key 7
SNAP SHOT
Turn ZOOM MAG to the right
Turn VERTICAL SCALE to the right
Turn HORIZONTAL TIME/DIV to the right
Turn ZOOM MAG to the left
Turn VERTICAL SCALE to the left
Turn HORIZONTAL TIME/DIV to the left
Right arrow
Left arrow
Up arrow
Down arrow
App-22
USB Keyboard
1 when NUM LOCK is illuminated on the DL850/DL850V
2 when NUM LOCK is illuminated on the DL850/DL850V
3 when NUM LOCK is illuminated on the DL850/DL850V
4 when NUM LOCK is illuminated on the DL850/DL850V
5 when NUM LOCK is illuminated on the DL850/DL850V
6 when NUM LOCK is illuminated on the DL850/DL850V
7 when NUM LOCK is illuminated on the DL850/DL850V
8 when NUM LOCK is illuminated on the DL850/DL850V
9 when NUM LOCK is illuminated on the DL850/DL850V
0 when NUM LOCK is illuminated on the DL850/DL850V
ENTER when NUM LOCK is illuminated on the DL850/
DL850V
. when NUM LOCK is illuminated on the DL850/DL850V
– when NUM LOCK is illuminated on the DL850/DL850V
ESC or F8
F1
F2
F3
F4
F5
F6
F7
PAUSE
INSERT
HOME
PAGE UP
DELETE
End
PageDown
→
←
↑
↓
IM DL850-03EN
Appendix 5 Block Diagrams
1
2
Block Diagram of the DL850/DL850V
CPU Block Diagram
Acquisition Block Diagram
250 MW - 2000 MW
Main Memory
Printer
Controller
Plug-in
Module
CH1-CH16
3
CPU
ACQ Memory
4
Internal Thermal
Printer (100 mm width)
5
Graphic
Controller
GIGAZoom
Engine2
10.4 Color TFT
XGA 1024 × 768
VIDEO OUT(XGA)
(ACQ-ASIC)
6
SD Memory Card
eSATA
USB
GP-IB
HDD
1.5 GB
USB Port
App
GP-IB Port
GO/NO-GO Port
Ethernet
Appendix
GO/NO-GO
1000 BASE-LAN
Index
Ext. Clk In
Ext. trig In/out
Signal Flow of the DL850/DL850V
The input terminal signal flow varies for each model. In this example, we will explain the signal flow
for the High-Speed 10 MS/s, 12-Bit Isolation Module, 701250 (HS10M12). (For the signal flow of a
particular module, see the module’s block diagram.)
The input signal applied to the two input terminals is first processed by each module’s input section.
In the 701250 (HS10M12), the signal is attenuated and amplified by an attenuator (ATT) and
amplifier (AMP). Then, the signal’s bandwidth is limited by a filter (FLT). Next, the signal is sampled
at a rate of 10 MS/s (10,000,000 times a second) by an A/D converter and converted into digital
data. Then, the signal passes through an isolator and an ASIC to a waveform-processing ASIC
(ACQ-ASIC).
The 16 channel of digital data that is sent to the CPU board passes through the GIGAZoom
Engine2 and is stored to the acquisition memory (ACQ Memory). The digital data stored to the ACQ
memory is compressed quickly by the GIGAZoom Engine2 waveform processor, and then it passes
through a graphic controller and is shown on the XGA TFT color display.
IM DL850-03EN
App-23
Appendix 5 Block Diagrams
Plug-in Module Block Diagram
701275 (ACCL/VOLT)
701250 (HS10M12)
ATT
AMP
ATT
Current source
FLT
A/D
ATT
ASIC
FLT
AMP
12
A/D
ATT
Isolator
ATT
AMP
ATT
AMP
ATT
A/D
AMP
ATT
ATT
ATT
ASIC
A/D
ATT
H
ATT
A/D
CPU
16
A/D
16
AMP
FLT
A/D
AMP
CPU
ASIC
RJC
ATT
L
A/D
AMP
16
AMP
FLT
16 M
U
-
Isolation Block
Inst.
AMP
+
Bridge
Power
+
-
AMP
Inst.
AMP
+
-
Bridge
Power
Isolated logic probe
16
ASIC
Isolator
POD-B
8
8
CAN-L
CAN
Controller
Interface
CPU
FLT
CAN-L
AD
16
720240(CAN MONITOR)
CAN-H
CAN
Controller
Interface
FPGA
Isolator
16
DAC
AMP
A/D
X
Isolation Block
CAN-H
Isolator
701270 (STRAIN_NDIS)
701271 (STRAIN_DSUB)
+
Isolator
High-speed logic probe
16
L
H
A/D
12
POD-A
RJC
ATT
12
ASIC
FLT
701265 (TEMP/HPV)
H
A/D
720230 (LOGIC)
Isolator
Isolation Block
AMP
CH1-CH16
ASIC
FLT
AMP
L
Isolator
720220 (16CHVOLT)
L
RJC
COMP
Isolation Block
Isolator
FLT
AMP
ATT
16
701261 (UNIVERSAL)
701262 (UNIVERSAL (AAF))
RJC
AMP
ASIC
FLT
Isolation Block
16
Isolation Block
H
ASIC
COMP
720210 (HS100M12)
A/D
FLT
AMP
FLT
CPU
12
701251 (HS1M16)
701260 (HV (with RMS))
ATT
Isolator
AMP
ASIC
FLT
AD
AMP
16
701280 (FREQ)
12
A/D
FLT
ASIC
FLT
Isolation Block
701255 (NONISO_10M12)
FLT
16
AD
Current source
12
Isolation Block
FLT
AMP
ASIC
FLT
DAC
AD
16
Isolator
Isolation Block
App-24
IM DL850-03EN