1
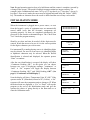
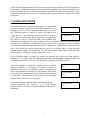
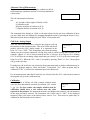
DICROMAT II & IIA SALT
ANALYZERS
USER’S MANUAL
The Noramar Company
P.O. Box 771
Chagrin Falls, OH
44022-0771
Phone: (440) 338-5740
Fax: (440) 247-3879
Note: DiCromat II, DiCromat IIA, and Noramar are trademarks of the
Noramar Company.
DiCromat II & IIA User's Manual*
Table of Contents................................................................................................................................................... Page
I.
II.
III.
IV.
V.
VI.
VII.
VIII.
IX.
X.
General Description............................................................................................................. 2
Installation........................................................................................................................... 2
•
Unpacking ............................................................................................................... 2
•
Power-On ................................................................................................................ 3
Operation............................................................................................................................. 3
•
General .................................................................................................................... 3
•
Initialization Mode .................................................................................................. 4
•
Calibration Mode..................................................................................................... 5
•
Run Mode................................................................................................................ 8
Probes ................................................................................................................................ 10
•
Dip-In .................................................................................................................... 10
•
Flow-Through........................................................................................................ 11
Sample Preparation and Titration Procedures ................................................................... 11
•
Recommended Procedures .................................................................................... 11
•
Titration Procedure................................................................................................ 13
Care and Maintenance ....................................................................................................... 14
Troubleshooting ................................................................................................................ 14
Optional Printer Hook-Up................................................................................................. 15
•
Back Panel Configuration ..................................................................................... 15
Appendix ........................................................................................................................... 16
•
Quick Start Card Facsimile ............................................................................. 16, 17
•
Parts Order Information......................................................................................... 18
•
Information for the User-FCC Compliance Statement.......................................... 18
Glossary....................................................................................................................... 19, 20
*DiCromat II is the six (6) set-point model, while DiCromat IIA is the twenty-four (24) set-point
model. In all other respects, the instruments are identical.
1
I. General Description
The DiCromat II Salt Analyzer measures and displays salt content in solutions by measuring
solution conductance and temperature. An internal microprocessor mathematically
compensates for changes in solution temperature and converts to salt concentration in various
units. A full range of salt concentration can be measured from less than 0.1% to over 26% by
weight without dilution and up to 100% salt with dilution. Compensation for temperatures
ranging from 0 °C to 100 °C is automatic.
A two-line, 16-character-per-line, alpha-numeric display is used to present data and for user
prompts to assist in calibration and use of the instrument. This display allows for easy visual
identification of the product being tested.
Several different probe types may be used with the DiCromat II. The primary probes available
from The Noramar Company include a flow-through contact probe or a dip-in non-contact
probe. Different probes are accommodated without electrical or mechanical changes to the
instrument. Data may be stored internally for six different products.
An RS-232C digital output is provided for connecting to a serial printer or computer. The data
rate is fixed at 300 Baud. The connection is through the 25-pin D connector on the rear of the
instrument.
A 0 to 10V DC analog output signal is provided through a two-conductor connector on the rear
of the instrument.
II. Installation
UNPACKING
Upon arrival, the shipping boxes for the DiCromat II should include one each of the following
items for each unit ordered:
•
•
•
•
DiCromat II Salt Analyzer
User’s Manual
The probe of your choice as selected at time of order (either the flow-through
contact probe or the dip-in non-contact probe)
Quick Start Card
Should any item be damaged in shipment, please notify The Noramar Company, 8501
Kinsman Road, Novelty, OH 44072. Phone (440) 338-5740, Fax (440) 247-3879.
2
POWER-ON
Unless otherwise indicated, the DiCromat II is shipped ready to plug into 115aV (50 or 60 Hz)
power. An internal switch can be factory set to 230V AC (50 or 6011z) when required. With its
modern solid state technology, the instrument may be left on continuously with no ill effects.
There is no power switch, so the unit must be unplugged to turn the unit off.
Just connect the probe (See section IV, p. 10.), or any other specified accessory to the appropriate
jack in the back of the unit by matching the notch on the cord with the groove in the jack. To use
the unit at this point you may refer to the Quick Start Card (See section IX, p. 16-17.), enclosed
with your unit. This card summarizes the basic operation of the unit. Additional details and
recommended use by the application are dealt with in the rest of the DiCromat II User's Manual.
Note: The unit should be in the off position when the probe is plugged in.
III. Operation
GENERAL
The DiCromat II has three distinct operating modes:
•
occurs when power is removed (unplugged) and then returned,
or from the Run mode when the instrument is “reset” by simultaneously pressing the
decimal point and "DEL" keys as designated by the (*) on those keys. In the
Initialization mode the instrument cycles through some self-checks and also requires
entry of certain information, which should require only infrequent changes.
•
Calibration, in
•
Initialization, which
which up to six different sets of data (referred to as “set-points”) can be
stored for different products, different salt ranges, different probes or combinations of
these variables.
Run, in which measurements are made and results are displayed. Data is presented in
one of two ways, “continuous” or “held”, selectable in the Initialization mode.
In the Initialization and Calibration modes, the operator will be required to interact with the
instrument. The operator will generally respond to a question by pressing either the “Yes” key or
the “No” key. The requirement to enter a number or alphabetic character will be indicated by the
appearance of a cursor. Characters of the alphabet are entered by first pressing the up (↑) key or
the down (↓) key to select the character shown on the upper or lower part of the key.
3
Note: Keypad operation requires keys to be held down until the contact is complete (as noted by
a change in the screen). This positive feedback response minimizes incorrect entries. For
example: in the Calibration mode enter CAT by up (↑) key then 8, up (↑) key then 7, down (↓)
key then 3. If an error is made, the cursor may be stepped backward using the “Delete” (DEL)
key. The number or character above the cursor is deleted and the correct entry can be made.
INITIALIZATION MODE
When the instrument is plugged into a power source, or reset
from the keypad, a series of equipment tests are automatically
started which verify that the electronic components are
operating properly. As these are completed satisfactorily, the
processor is also tested to a substantial degree. The “Check Sum
Test” checks the program memory.
Should a new date and time be needed, all the digits must be
entered. Watch the cursor to be sure it is in the correct position
for the digit or character you wish to enter.
For instrument ID, a number having one to six identifying digits
may be selected. For user ID, from one to six identifying digits
or alphabetic characters may be selected. When the desired
identification is selected and displayed, the operator presses
“Enter” to continue.
After the user identification is accepted, the display will show
“Continuous Reading, OK?” At this point you can choose
between two ways of displaying readings: “continuous” or
“held.” A “No” response will toggle the display between
“Continuous Reading, OK?” and “Held Reading, OK?” (See
page 8, “Continuous or Held Display.”)
Next the display will show “Temperature Units °C, OK?” If the
operator wants °F (Fahrenheit) instead of °C (Celsius), a “No”
response will cause the temperature units to change to °F. When
the desired units are displayed, a “Yes” or “Enter” will step the
program to the end of the Initialization mode and give the
operator the choice of going directly to the Run mode or to
enter the Calibration mode.
4
ABCDEFGHIJKLMNOP
ABCDEFGHIJKLMNOP
CHECK SUM TEST
CHECK SUM
DC 49
01/07/01
TIME OK?
08:40
INST ID#
OK?
USER ID#
OK?
CONTINUOUS
READING
OK?
HELD
READING
TEMP UNITS
OK?
OK?
°C
At the end of the Initialization mode, the user may go directly to the Run mode if the desired data
in one or more calibration set-points has been previously inputted. If not, the user should proceed
to the Calibration mode. The set-point information is retained in a non-volatile memory, so the
Calibration mode only has to be selected when new data is to be entered or a calibration is made
or checked.
CALIBRATION MODE
The Calibration mode is entered by answering “No” when asked
GO TO RUN MODE?
“Go To Run Mode?” at the end of the Initialization mode, or by
holding the “Go To Cal” key when in the Run mode. As soon as
the Calibration mode is entered, a cursor will appear after
“Calib Set-Pt #.” Set-points may be selected only by number,
CALIB SET-PT#___
even if they have been given names. Therefore, it is suggested a
log sheet be kept to record the name and pertinent data
(including exact probe used) for each set-point. A user may choose to enter the Calibration mode
to make a new calibration, a recalibration or just to review what is already stored in a set-point.
The following paragraphs detail the procedure for calibrating or recalibrating a set-point. At the
end of this section the special instructions are given for reviewing what is in the set-point
without making changes or recalibrating. See the section titled “Reviewing Current Set-Point
Data” on page 7 to make any changes during this review.
If the Calibration mode is selected by mistake, the operator may return to the Run mode by
holding the “Go To Run” key. The instrument steps backward through the calibration steps with
each depression of the up (↑) key or "Go To Run” key and ends with "Run Set-Pt #_."
After the set-point is selected by number and the material
named (if desired), a cell factor (C.F.) must be entered or
confirmed. This factor is essentially a probe or cell sensitivity
factor which depends on the probe or cell geometry. This factor
is specified by the manufacturer and is imprinted on the bottom
of each probe. The DiCromat II will accept one- to three-digit
numbers from .100 to 9.99 as a cell factor.
Selection of the proper dilution factor is determined during
sample preparation. (See section V, p. 10.) Only integer
numbers from 1 to 25 will be accepted as dilution factors by the
instrument.
5
MAT NAME
OK?
CELL FACTOR
OK?
DILUTION FAC
OK?
I
1
Alternate Units ofMeasurement
The instrument will measure and display conductivity (K) in
millisiemens per centimeter (mS/cm) or salt concentration in
various units.
SELECT UNITS
The salt concentration selections
are:
A% (weight of salt/weight of solution x 100)
S (salometer scale)
M (gram mole/liter of solution at 20 'Q
Cs (grams salt/liter of solution at 20 'Q
The instrument first displays A-%Salt, or the unit selected on the previous calibration if there
was one. Other units are displayed by stepping through the menu by pressing the down (↓) key.
When the desired units are displayed, press “Enter” to select that unit.
Full Scale Analog Output
After the unit of measurement is selected, the program will ask
10 V OUT= 0
the operator for the maximum value. This value is that which will
OK?
produce full-scale (10V) analog output. It is requested in the
form “10 V out = XXX.” This is important only when the analog
output (two-pin rear panel connector) is being used, such as with an analog chart recorder. As an
example, suppose A/o salt is being measured and the % salt may be as high as 10%. Making
10V=10 will provide an analog output signal that goes from 0V to 10V as the salt content goes
from 0% to 10%. When the 10V= value is accepted by pressing “Enter” or “Yes”, the program
will go to the next step.
If conductivity (K in mS/cm) was selected as the measurement unit, no further calibration may be
made. The program jumps to “More Set-Points?” If answered “Yes”, other set-points may be
calibrated. If “No” is selected, the instrument goes to the Run mode.
If a measurement unit other than K (mS/cm) was selected, after the 10V= value has been entered
the program will go to the calibration step.
Calibration
Insert the probe or fill the cell with a sample solution whose
MEAS’D
value has been determined accurately by titration. (See section
OK?
V, pg. 10.) For best results, the sample solution used for
calibration should have a salt content near the value
expected in the product. The instrument measures and displays the product's salt concentration
in the units previously selected. The instrument asks if this value is “OK?” If the displayed
measured value is the same as the titrated value, answer "Yes." Then more set points may be
calibrated or the Run mode can be entered.
6
If the measured value is not correct, the question “OK?” is
answered “NO.” The word “Actual” will appear followed by the
cursor. The titrated value is then to be entered. The corrected
value will then appear as “Adjusted .XXX” and confirmation is
requested by “OK?” A “Yes” response causes the instrument to
store the difference between the uncorrected measurement and
the “actual” for use in correcting the measurement made in this
set-point in the Run mode.
MEAS’D
ACTUAL
ADJUSTED
OK?
Multiple Set-Points
At this point, more set-points (up to either six (6) total or
twenty-four (24) total) can be calibrated or the Run mode may
be selected to begin routine measurements.
MORE SET-PTS?
Unless some data in the calibration set-point is changed, the
ADJUSTED
data and calibration for that set-point will be retained
OK?
indefinitely, even when power is removed from the instrument.
Conversely, as soon as anything stored in the set-point is changed, the calibration correction
(background compensation) is lost and the set-point must be recalibrated, or used in its basic or
uncorrected form.
Reviewing Current Set-Point Data
If an operator has not logged all the information contained in a set-point (such as cell factor or
dilution factor) and wishes to see what is stored, the Calibration mode may be entered and the
set-point of interest selected. The operator can step through the calibration program and view all
the parameters. As long as no changes are made (i.e., every inquiry is answered “Yes”), the
calibration will not be lost. The previous determination of background compensation will be
retained. However, if any inquiry is answered “No” before the “More Set-Points?” question is
reached or any change in data is attempted, the previous calibration (background compensation)
is lost and the set-point must be recalibrated or used uncalibrated (no background compensation).
Use of the up arrow key (↑) allows the user to scroll backward from the full scale analog output
to the starting point of the Calibration mode. If the set-point had been previously calibrated, and
the set-point calibration or data is only reviewed rather than changed, after the full scale analog
output (10V=, OK?) is confirmed with a “Yes”, the program will bypass the actual calibration
step and “More Set-Points?” is asked. The operator may then answer “Yes” to enter other setpoints for calibration or review, or “No” to go to the Run mode. If, after selecting or confirming
the full scale output (10V=, OK?) the message “Meas’d .XXX, OK?” appears, the operator
knows that the set-point is uncalibrated (has no background compensation).
7
RUN (MEASUREMENT) MODE
The Run mode is entered either from the Initialization mode or
GO TO RUN MODE?
the Calibration mode by appropriate responses at the end of
these modes or, in some special situations, when the
“Go To Run” key is held. When the Run mode is entered a
message “Run Set-Point #__ “ will appear. Select the desired
RUN SET-POINT #____
set-point by number (1 through 6, or 1 through 24) which has
been calibrated or set up for the product and probe being used.
If a set-point which has been calibrated with a probe type other than the one currently connected
is entered, the display will indicate “WRONG PROBE.”
The instrument will then measure conductance and temperature, correct for temperature, convert
the results to conductivity and then display salt concentration in the selected unit.
The name or number of the set-point being used, temperature,
salt concentration (or conductivity) value, and unit are
continuously displayed at all times while in the Run mode.
1 BRINE
20.0 C
0.000% SALT
Continuous or Held Display
In the Initialization mode, display of the measured results was
CONTINUOUS
selected to be either “continuous” or “held.”
In the
READING
OK?
“continuous” operation, the measured value and temperature are
continuously updated and displayed as they change. For
example, if the flow-through probe is being used, before the
HELD
liquid is poured in, the salt value will read at or near zero and
READING
OK?
the displayed temperature will be reading the probe wall or
ambient temperature. When the liquid is poured into the probe, the salt reading will quickly
stabilize and in a few seconds the temperature reading will approach the true solution
temperature. At that time the operator must note and record the readings. A short time later the
probe will begin to empty and the readings will no longer be valid for the sample tested.
In the “hold” or “held” operation, the instrument electronically selects the stable measured value.
The selected value is "held" on the display after approximately 22 seconds (a minimum of 125
ml is required) until updated by a subsequent sample test. In this manner, operators can view and
record each reading at their leisure.
Pouring subsequent samples into the probe will automatically rearm the unit to display the
current sample measurement. If a measurement does not occur, rinse the probe in distilled water.
Caution: The “held” operation may not work at very low salt concentrations. The actual
salt level should be higher than approximately 0.1% salt for the instrument to reliably
actuate a “hold.”
8
The first time the Run mode is entered after the selection of “held” operation, the display will
show the material (or set-point designation) on the first line and the message “Ready” on the
second line. This means the unit is ready to start running samples.
In the Run mode, the cursor is in the lower right part of the
display. It blinks with each measurement update that is
READY
____
displayed. Therefore, in "continuous" operation the cursor will
blink continuously. In "held" operation it will blink during the measurement period and will be
on without blinking while the reading is held.
The 0 to 10V analog output and the RS-232 C digital output have the same data as shown on the
display, whether “held” or “continuous.”
Important: When using “continuous” operation, upon insertion of the probe in solution, or the
introduction of a sample into the cell, allow a few seconds for the readings (temperature and
concentration) to stabilize before manually recording or printing the readings. Since the
instrument displays concentration in three digits to provide high resolution, the least significant
digit may not be completely stable. In that case, the operator can ignore that digit or visually
average its value.
Selecting Different Set-Points
While in the Run mode, another set-point can be selected either
to be run or calibrated. To run another set-point, hold the “Go
To Run” key. The message “Run Set-Point #__” will appear
and selection by number is then to be made. If while in a
set-point in the Run mode it is desired to recalibrate this or any
other set-point, the Calibration mode is called up by holding the
“Go To Cal” key until the message “Calib Set-Point #_”
appears.
RUN SET-POINT #____
CALIB SET-PT #____
Optional Printer Usage
If a printer is being used, the measurement results may be printed. When in the Run mode
(only), the displayed results will be sent to the printer by pressing the "Print" key. The following
print-out will occur each time a record is called for by pressing "Print":
Instrument ID# ___________________________
User ID# ________________________________
Date
Time
Product name
Temp
Value
Units
9
IV. Probes
DIP-IN PROBE
The dip-in non-contact probe can be immersed directly into the sample preparation beaker to
make a measurement.
The epoxy-encased probe eliminates any direct contact of the sensors to the fluid. The probe
cable and 18-pin male connector attach directly to the 18-pin female connector on the back of the
DiCromat II.
Look at the end of the male connector and identify the two small and one large plastic tabs.
Align these tabs in a straight row.
Notice the location of an indentation on the female connector that aligns with the large tab of the
male connector.
The male connector can now be pushed forward approximately 2/3". Turn the 1/2"-wide ring 1/4
turn to fully secure the connector to the unit.
Reversing this procedure allows the cable to be removed.
Each probe has a specified cell factor (C.F.) which is located on the body of the probe. This
number should be entered during the Calibration mode when setting up the DiCromat II. (Refer
to the section titled “Calibration Mode”, in the DiCromat II User's Manual or the Quick Start
Card.)
For proper operation, the entire body of the probe must be submerged, with at least 1/4" of liquid
over the top of the probe body. It is also recommended that the probe be positioned 1/2" to 1”
from the bottom of the beaker to obtain the highest reading during sample calibration and
measurement. A sample of 170 mls or more is required in a standard 250 ml beaker.
With undiluted samples above 5% NaCl by weight and diluted samples above 50% NaCl by
weight, it is recommended that the probe be positioned 1" from the bottom of the beaker and at
least 1" from the beaker's sidewalls to obtain the highest reading during sample calibration and
measurement. A sample of 700 mls or more of prepared sample is required in a 1000 ml beaker.
10
FLOW THROUGH PROBE
The flow-through probe and base-mounted stack allow for stationary sample testing. For proper
operation, a minimum volume of 75 ml is required in a standard 250 ml beaker.
The flow-through pipe uses 2 titanium circular electrodes located inside the pipe.
An 18-pin male connector and cable can be connected/disconnected in the same manner as the
dip-in probe.
Each probe has a specified cell factor (C.F.) which is located on the bottom of the base. This
number should be entered during the Calibration mode when setting up the DiCromat II. (Refer
to the section titled “Calibration Mode” in the DiCromat II User's Manual or the Quick Start
Card.)
V. Sample Preparation and Titration
Procedures
RECOMMENDED PROCEDURES
Select the sample preparation procedure listed which best matches the product to be tested. If
the DiCromat II has already been calibrated, and the dilution factor entered for this product,
prepare the sample using the appropriate procedure and test it in the Run mode. The dilution
factor does not need to be re-entered.
If the DiCromat II has not been calibrated for this product, prepare the sample as follows and
retain it for use in the titration procedure to determine the sample's percent salt.
Samples Requiring Filtration
This procedure is recommended for samples that need to be filtered. Products that can be tested
in this manner are: potato chips, cheese, meat, etc.
1. Set the dilution factor to 10.
2. Determine the sample weight based on the probe design.
DIP-IN PROBE
25.0 grams
FLOW-THROUGH PROBE
25.0 grams
11
The use of a balance accurate to +/- .01 grams is highly recommended. Use a 250 ml beaker to
contain the sample.
3. Determine the milliliters (ml) of distilled water to be used based on the probe design.
DIP-IN-PROBE
FLOW-THROUGH PROBE
250.0 ml
250.0 nil
Measure the distilled water into graduated cylinder and add to the sample beaker.
4. Process the sample in a 250 ml beaker.
A. DISSOLVING: Soak sample 5-7 minutes, stirring occasionally, filter if
necessary. (See step #5 for filter procedure.)
B. MAGNETIC STIRRING: Stir 5-7 minutes, slow speed, to avoid loss of
sample. Filter if necessary. (See step #5 for filter procedure.)
C. ELECTRIC BLENDER: Blend for 60 seconds at medium speed. Filter if
necessary. (See step #5 for filter procedure.)
5. Filtering: Pour the sample through a filter into a beaker, making sure you have a minimum of
75 ml of filtrate if you are using the flow-through probe, or 175 ml of filtrate if you are using
the dip-in probe. You may pick the filter up and squeeze the liquid through to speed up the
process (A minimum of 125 ml of filtrate if you use the pour-through and held feature).
Liquid Samples
This procedure is recommended for samples that are in liquid form and do not require filtering.
Products that can be tested in this manner are: salt brine, pickle brine, tomato juice, etc.
1. Set the dilution factor to 1.
2. Determine the amount of sample to be measured, based on the probe design.
DIP-IN PROBE
FLOW-THROUGH PROBE
200 ml
100 ml
Use a graduated cylinder to measure your sample.
Non-Filtered Samples
This procedure is recommended for samples that need to be diluted, but normally would not
require filtering. Products that can be tested in this manner are: ketchup, mayonnaise, salad
dressings, etc.
1. Set the dilution factor to 10.
12
2. Determine the sample weight based on the probe design.
DIP-IN PROBE
FLOW-THROUGH PROBE
25.0 grams
25.0 grams
The use of a balance accurate to +/- .0 1 grams is highly recommended. Use a 250 ml beaker
to contain the sample.
3. Determine the milliliters (ml) of distilled water to be measured based on the probe design.
DIP-IN PROBE
FLOW-THROUGH PROBE
230.0 ml
230.0 ml
Measure the distilled water into a graduated cylinder and add the sample to the beaker.
TITRATION PROCEDURE
The DiCromat Il should be initially calibrated for each product that will be routinely tested for
salt content. Unless a product sample with known salt content is available, a “Mohr Titration” or
equivalent method must be used to calibrate the DiCromat II. For example, results from the
“Mohr Titration” will be converted to percent salt as follows.
A. REAGENTS:
1. 0.100 normality silver nitrate (AgN03)
2. 5.0% potassium chromate (K2Cr04)
B. PROCEDURES:
1. Pipette 10.0 ml of the prepared liquid sample (obtained form one of the preparation
procedures listed above) into a clean 150 ml beaker.
2. Add 35-40 drops of 5% potassium chromate to sample.
3. Using a burette, titrate the sample by slowly dispensing .1 normality silver nitrate
one drop at a time into the sample beaker. Continue dispensing the silver nitrate
only until a light "red brick" color is obtained.
4. As soon as the light "red brick" color is reached, stop dispensing the silver nitrate
and record the milliliters used from the burette.
5. Calculate the percent salt of the original sample by using the applicable
calculation below.
C. CALCULATION:
Filtered and Non-Filtered Samples
% NaCl by weight = ml of. 1 normality silver nitrate used x 0.585
Liquid Samples
% NaCl by weight = ml of. I normality silver nitrate used x 0.0585
You have now determined the percent salt (NaCl) by weight; you are now ready to calibrate the
DiCromat II. (Refer to the section titled “Calibration Mode” in the DiCromat II User's Manual or
the Quick Start Card.)
13
VI. Care& Maintenance
Exterior Cleaning:
Use a damp cloth or paper towel. DO NOT USE ABRASIVES.
Flow-Through Pipe Cleaning:
A narrow bristle brush (5/8" to 3/4" bristle length) can be used to clean the inside of the pipe.
The brush should be wetted with water and an abrasive cleaner. (Recommended: Ajax.) The
black cap at the bottom can be removed by pulling straight down. The brush can then be inserted
into the pipe to clean the interior (20 to 25 strokes should be sufficient to clean the pipe).
Dip-In Probe Cleaning:
Rinse the probe with tap water after each use. Wipe dry with a paper towel. To clean any buildup
on the probe, soak in a mild detergent with warm water. Rinse well and wipe dry with a paper
towel.
VII. Troubleshooting
The following procedure is recommended to troubleshoot your DiCromat II Salt Analyzer.
Make up the following test solution.
1. Weigh out 20.0 grams of salt (sodium chloride), using a double beam balance. Place into a
1000 ml sealable container.
2. Measure out 980.0 mls of distilled water and mix well with 20.0 grams of salt until fully
dissolved.
3. Take out the necessary volume based on the probe being used.
4. To test the DiCromat II, use one of the set-points that has been previously calibrated for
brine. (Refer to the Applications section of the DiCromat II User's Manual and
Application Guide.) Follow the steps in the section titled “Liquid Samples”.
5. After calibrating your DiCromat II, go to the appropriate set-point number in the Run
mode.
6. Test the sample for percent salt. The readings should be 2.00% salt, +/- .04% at room
temperature.
7. If your readings vary more than the specified amount:
A. Make sure your probes are clean.
(Refer to the section titled “Care & Maintenance.”)
B. Be sure your unit is calibrated properly.
C. Call 1-(440) 338-5740 for technical assistance. Please have the DiCromat II
accessible during the phone call for prompt assistance.
14
VIII. Optional Printer Hook-Up
The DiCromat II has been designed so that it may output its reading to a printer. A 25-pin
female connector located on the back of the DiCromat II allows a cable connection to be
made to a 25-pin female connector on the rear of the printer. The cable required to make
this connection is available from The Noramar Company. Simply turn to the Appendix of
this manual for ordering information.
The Weigh-Tronix Model 3600 INW-24 Series printer is one printer that has been approved
for use with the DiCromat II Salt Analyzer. This printer uses an impact dot-matrix head
which prints on 2.25" wide paper. This printer is also available from The Noramar
Company. See the Appendix for details.
Back Panel Configuration
Power Cord
(Preconnected)
0-10V
Analog
Output
Probe
Input
15
25-pin D-Sub
Connector
(Printer)
IX. Appendix
Quick Start Card Facsimile
DiCromat II
CALIBRATION MODE
THIS MODE CAN BE ENTERED IN TWO WAYS:
• FROM INITIALIZATION MODE: Answer
“No” when asked “Go to Run mode?”
• FROM RUN MODE: Press “Go to Cal.”
1. Enter the desired Set Point #.
2. Confirm or enter the following:
•
•
•
3.
Name of the sample to test.
Cell factor of the probe - This number is
imprinted on the probe.
Dilution Factor
Select unit of measurement with “YES.” “NO” will scroll through
alternatives.
a. Percent Salt (A)
b. Degrees Salometer (S)
c. Conductivity (K)
d. Molar Concentration (M)
e. Concentration (Cs)
4.
Confirm / Enter full scale output value. (10V OUT). Enter “0” if not in
use.
• This is important only when the analog output is being utilized.
5.
Sample Calibration
• Test known sample by immersing dip-in probe or using pour-through
probe. (READING WILL FLASH UNTIL CONFIRMED)
• If reading is different from known value, answer “NO.”
• Enter actual titrated value.
• Confirm “OK” by entering “Yes.”
6.
Calibrate additional Set Points with “YES” answer. Answer “NO” to go to
RUN MODE.
The Noramar Company.
16
Quick Start Card Facsimile
DiCromat II
QUICK START CARD - Side 1
INITIALIZATION MODE
1.
The unit will automatically go through a series of internal tests upon
being plugged in.
2.
Confirm or enter the following data with a “YES” response. A “NO”
response allows for changes.
•
•
•
•
•
Date and Time
Instrument I.D. Number
User Name or I.D. Number
Select Continuous or Held Reading
Temperature Units: Select °C or °F
RUN MODE
3. Answer “YES” to go to RUN MODE (if sample has already been
calibrated). Select Set Point #1 - 6 or 1-24 and begin testing. Answer “NO”
to CALIBRATE or review sample Set Point (#1 – 6 or 1-24). SEE
REVERSE SIDE OF CARD.
4. To confirm or enter new data, return to INITIALIZATION MODE from
the RUN MODE only. To do this, depress both reset buttons as indicated
by the asterisks.
•
These keys are the decimal point and delete keys.
KEYPAD USAGE
NUMBERS: Enter these using the number keys followed by “YES”
or “ENTER.”
LETTERS: Enter letters by pressing the arrow keys (to indicate a letter on the
upper or lower portion of a key) and then the desired letter. This
must be repeated for each letter to be entered.
The Noramar Company.
17
PARTS ORDER INFORMATION
To order a component for your DiCromat II, call (440) 338-5740, for order placement, pricing or
technical assistance.
DiCromat II - Main unit with flow-through probe................................................................ 005000
DiCromat II - Main unit with dip-in non-contact probe ....................................................... 005001
DiCromat II - Dip-in non-contact probe only ...................................................................... 005002
DiCromat IIA - Main unit with flow through probe ..............................................................005003
DiCromat IIA - Main unit with dip-in non-contact probe..................................................... 005004
DiCromat IIA - Dip-in non-contact probe only…................................................................. 005005
Optional printer with cable and two rolls of paper ................................................................005006
Weigh-Tronix Model 3600 INT-24 Series printer
Printer Cable Only (may not be compatible with all printers) ...............................................005007
Twelve Replacement Paper Rolls for Printer...... ..................................................................005008
INFORMATION FOR THE USER
FCC COMPLIANCE STATEMENT
NOTE: This equipment has been tested and found to comply with the limits for a Class A digital
device, pursuant to Part 15 of the FCC Rules. These limits are designed to provide reasonable
protection against harmful interference when the equipment is operated in a commercial
environment. This equipment generates, uses and can radiate radio frequency and energy and, if
not installed and used in accordance with the instruction manual, may cause harmful interference
to radio communications. Operation of this equipment in a residential area is likely to cause
harmful interference in which case the user will be required to correct the interference at his own
expense.
18
X. Glossary
Analog Output:
A voltage output from the unit which is proportional to the measured value
as numerically shown on the display.
Background
Compensation:
A feature that takes into account the ambient or background environment
and offsets the reading to account for the prevailing conditions. This
feature allows for an accurate sodium chloride measurement with minimal
interference form other elements in the sample.
Calibration Mode:
This mode is entered to provide the DiCromat with a known standard by
which it can compare and compensate its reading. Once the actual salt
percentage of a sample is measured, this number is entered so the unit can
be calibrated for optimal performance.
Cell Chamber.
The chamber or volumetric area in which the conductance of a sample is
actually measured.
Cell Factor:
This specific number relates to the volumetric area in which the
conductance of a sample is actually measured. An incorrect cell factor an
result in errors I measurement. This factor differs for each probe
depending on the probe design and size. Each probe will arrive with its
Cell Factor (C.F.) as noted.
Check Sum:
These words first appear when the unit is plugged in. They represent the
system test that the unit undergoes each time at power-up. A successful
test will result in the same four alpha-numeric characters being displayed
briefly.
Conductance:
The ease with which and electrical current can move through a solution.
By determining this level of conductivity, the sodium chloride content can
be determined with adequate background compensation.
Cursor:
The flashing underline symbol that usually denotes a figure or character
that must be entered.
Digital Output:
Output from the unit that is in specific digits and is readable by a
computer
or printer with the appropriate software and hardware.
Dilution Factor:
A user-supplied number entered during the calibration mode used to
calculate the actual percent salt of a diluted sample.
Dip-In
Non-Contact
Probe:
A probe that can be immersed in solution. Its contacts are protected from
contact with the samples being tested by a layer of epoxy, and thus,
19
corrosion is reduced.
Flow-Through
Contact Probe:
Hold Feature:
A stand-alone probe through which samples are poured. This probe is
held within a tower platform with a place to hold the sample and room for
a beaker below the tower. The contacts of this probe are exposed and
come in direct contact with the sample for proper measurement.
After a set measurement period, this feature will lock in the reading on the
display until the unit is either cleaned or another sample is tested.
Initialization Mode:
This mode is entered to verify certain constants that the DiCromat II holds
in memory such as User ID, time, date, etc. Once completed with this
phase, the unit is ready for testing samples or to be calibrated.
Quick Start Card:
This card comes with the DiCromat II and briefly describes the unit's
operation. Side one deals with the Initialization and Run modes as well as
use of the keypad. The reverse side describes the Calibration mode.
Run Mode:
This mode is the actual testing mode. It is in this mode where samples can
be tested using parameters and calibration data stored in any one of six
set-points.
Set-Points:
The DiCromat II can be pre-set with probe and calibration information for
up to six different products/samples. These set-points numbered 1-6, or 124 can only be altered from the calibration mode.
Stabilization Time:
This is the time the DiCromat II takes before it will lock in a setting in the
hold mode. This time is approximately 22 seconds.
300 Baud:
This is the speed with which the DiCromat II can communicate through a
digital interface with either a printer or computer. This speed represents
300 bits of information a second.
20